The Ultimate Smart Home Automation Cookbook
The festive season calls for a special touch, and Outdoor Holiday Lighting Automation is the perfect solution to bring that festive cheer with ease. Rather than the daily routine of plugging in numerous lights around your home, let Outdoor Holiday Lighting Automation take the reins. This smart home feature is designed to simplify your holiday preparations, allowing you to enjoy the season without the hassle.
Outdoor Holiday Lighting Automation can be programmed to illuminate your home’s exterior at a scheduled time each evening, creating a warm, welcoming glow that captures the holiday spirit. No more braving the cold or rushing around at dusk to turn on your displays. With Outdoor Holiday Lighting Automation, your home will automatically become a festive wonderland as the sun sets.
Embrace the joy of the season with Outdoor Holiday Lighting Automation. It’s not only a smart way to manage your holiday lighting; it’s a brilliant strategy to enhance the beauty and security of your home during the most wonderful time of the year.
Automation Details
Required Devices
- Smart Plugs
Triggers:
- Sunset
- Midnight
Conditions:
- Not 12am
- Not December 25th
Actions:
- Turn Holiday Lights On
- Turn Holiday Lights Off
Warning: Every smart plug is different so be sure not to overload the maximum amps of yours.

Hubitat
Outdoor Holiday Lighting Automation
The Official Documentation for Rule Machine
Setting Up the Automation
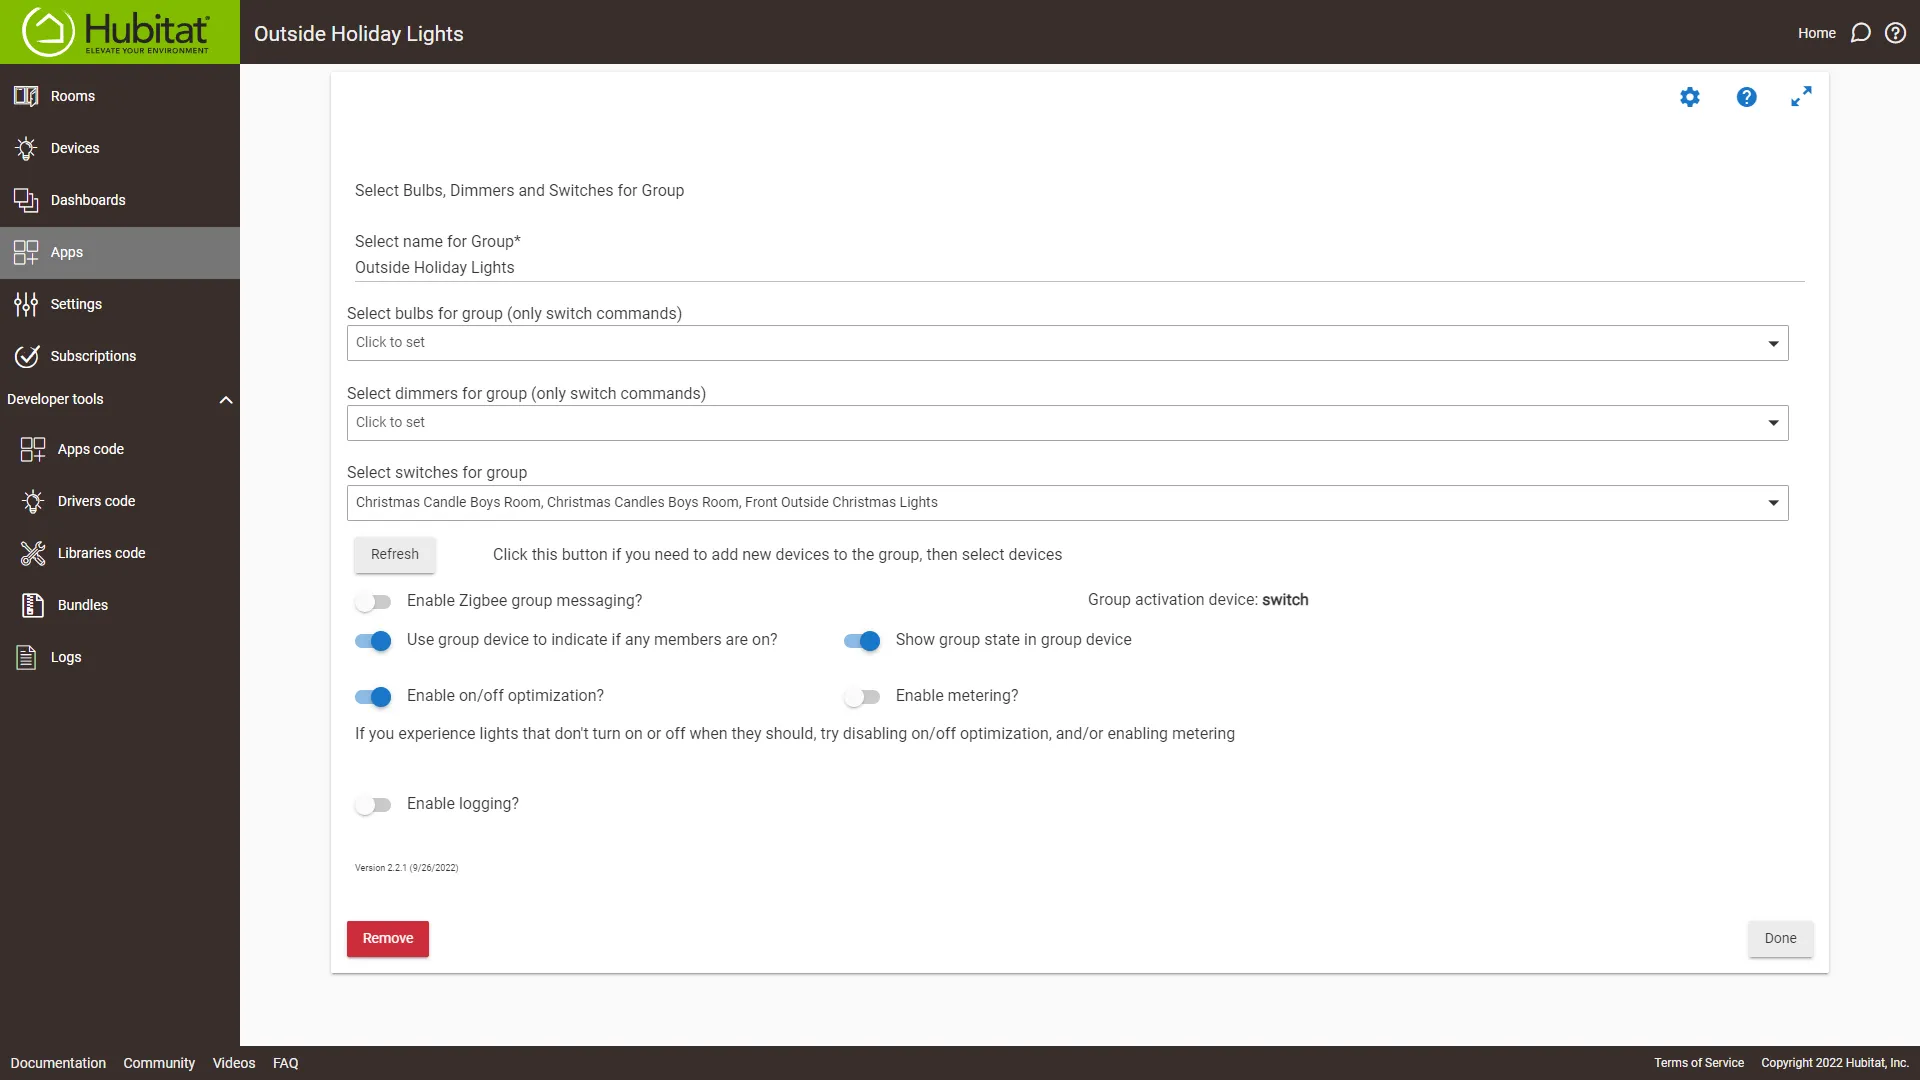
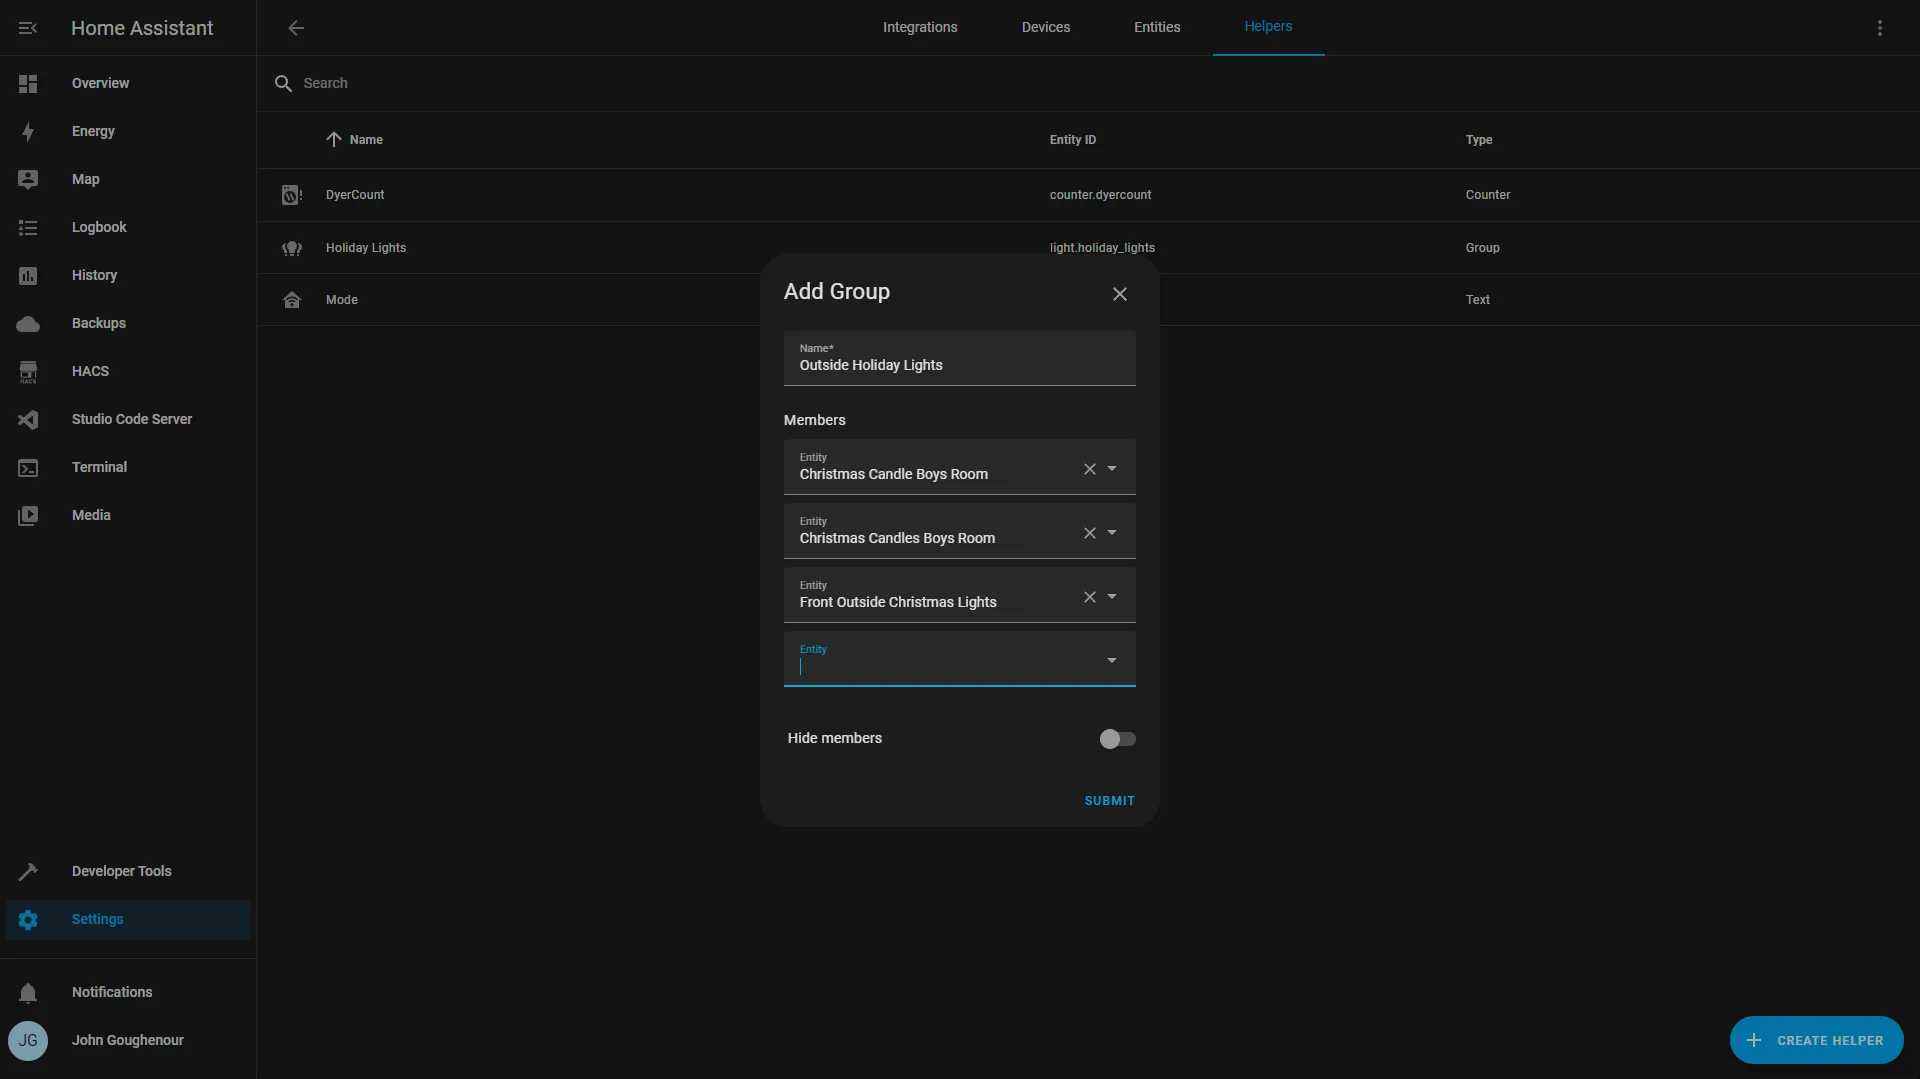
First, we need to create a new group to control all the smart plugs as one switch and share it with our voice assistant to enable voice control.
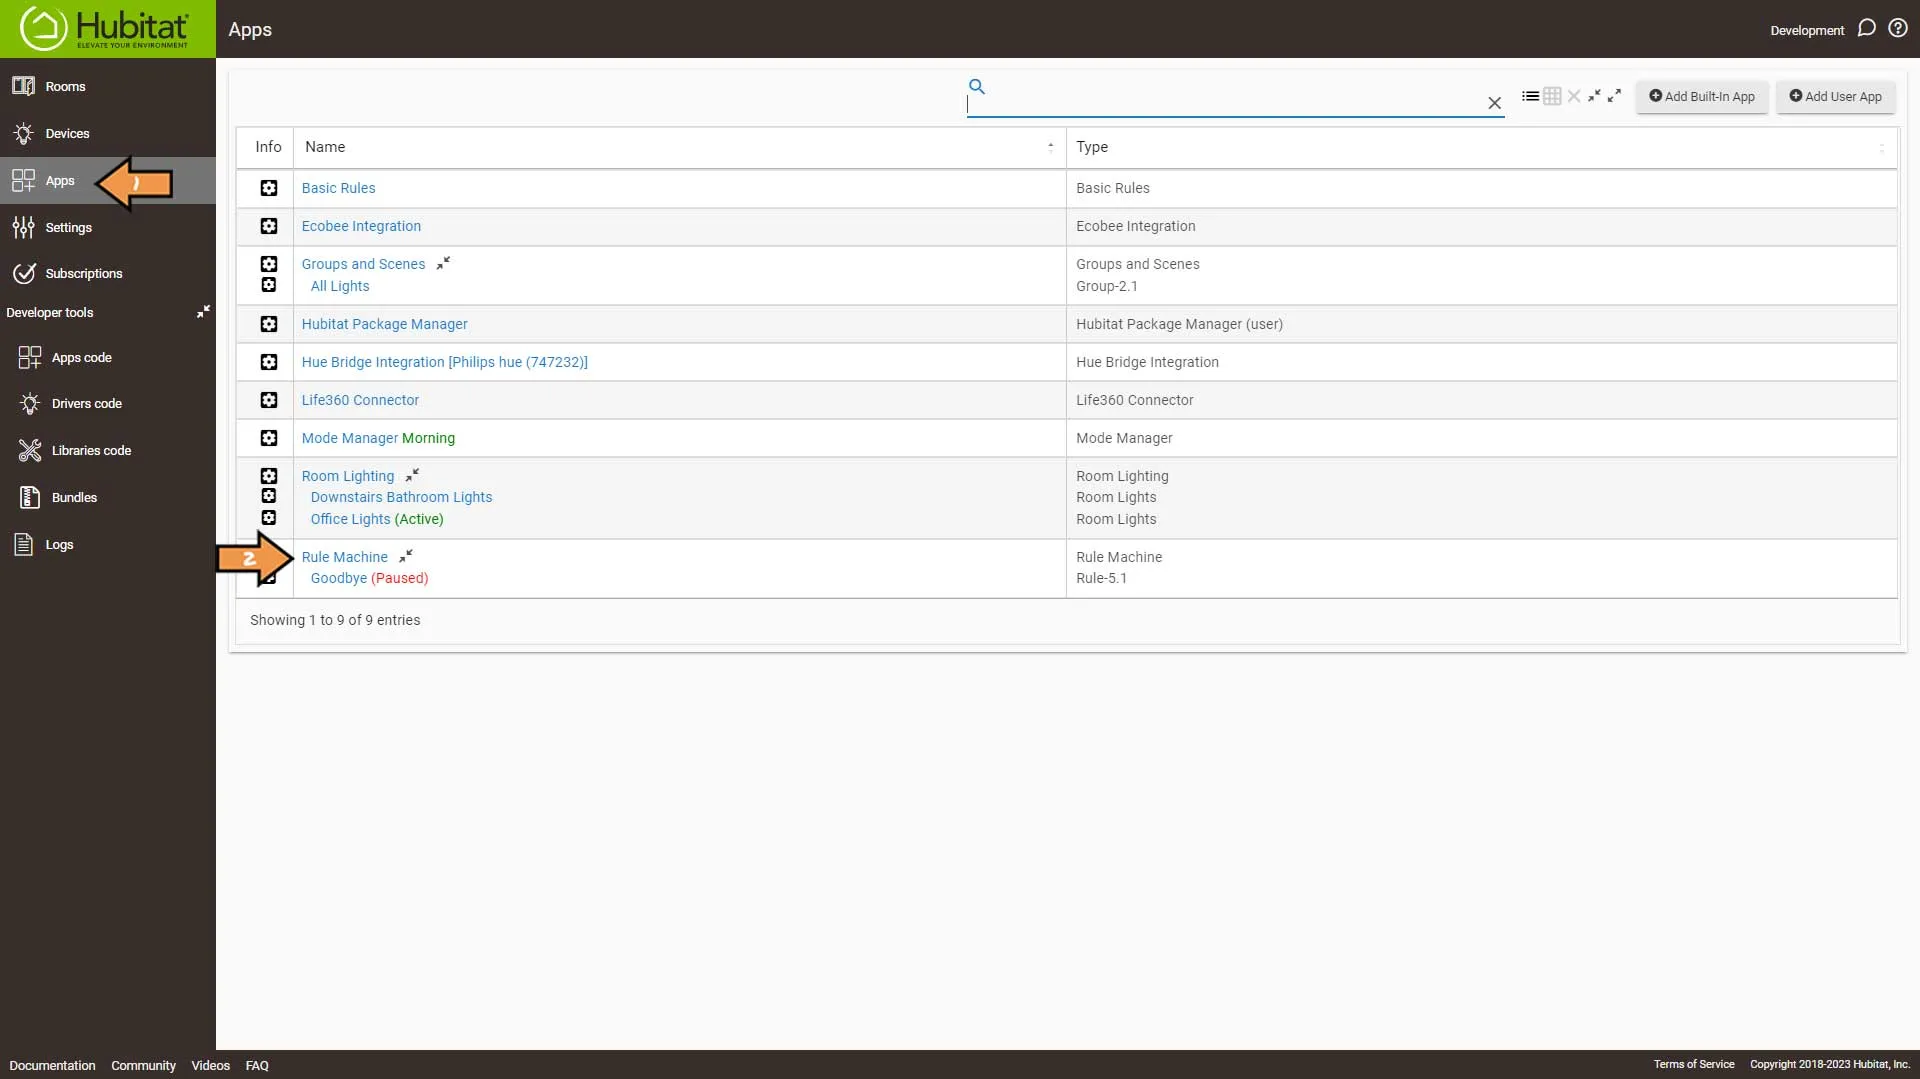
Next, go to Apps and click Rule Machine.
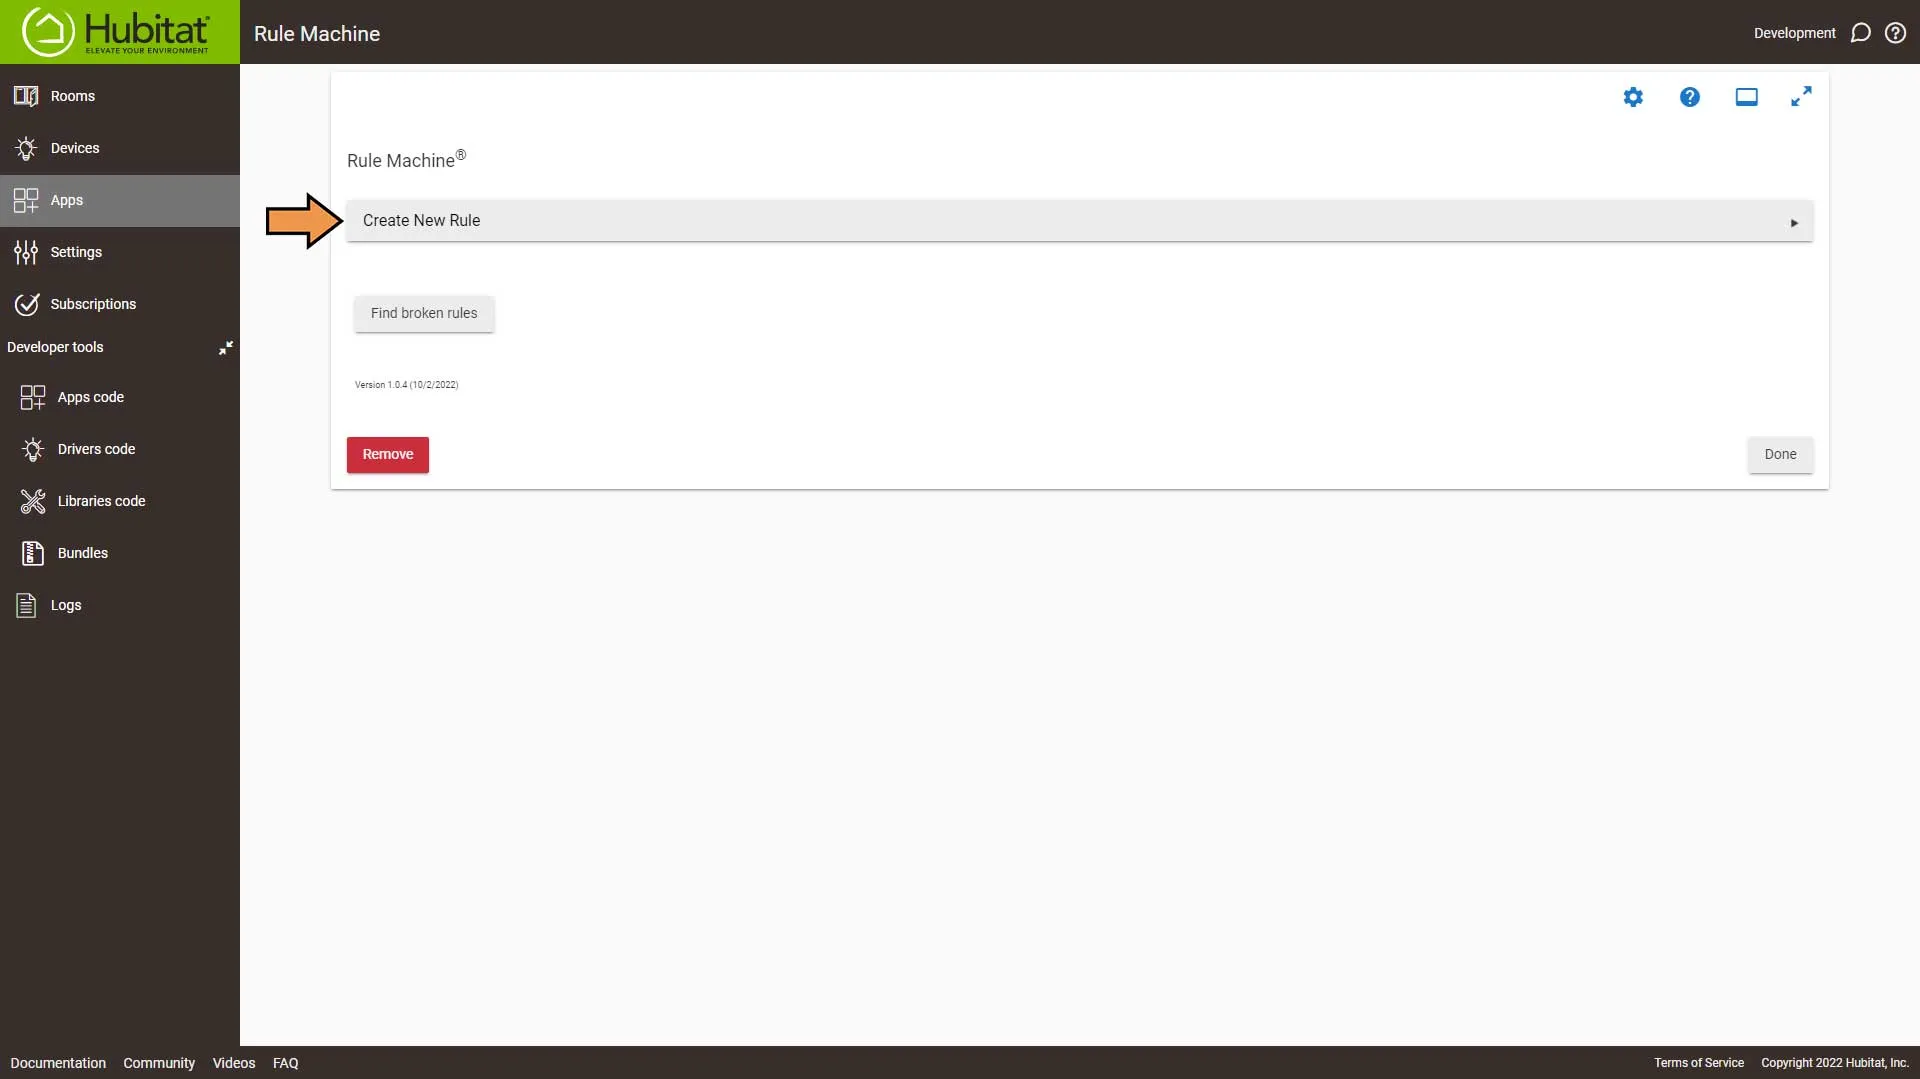
Select Create New Rule.
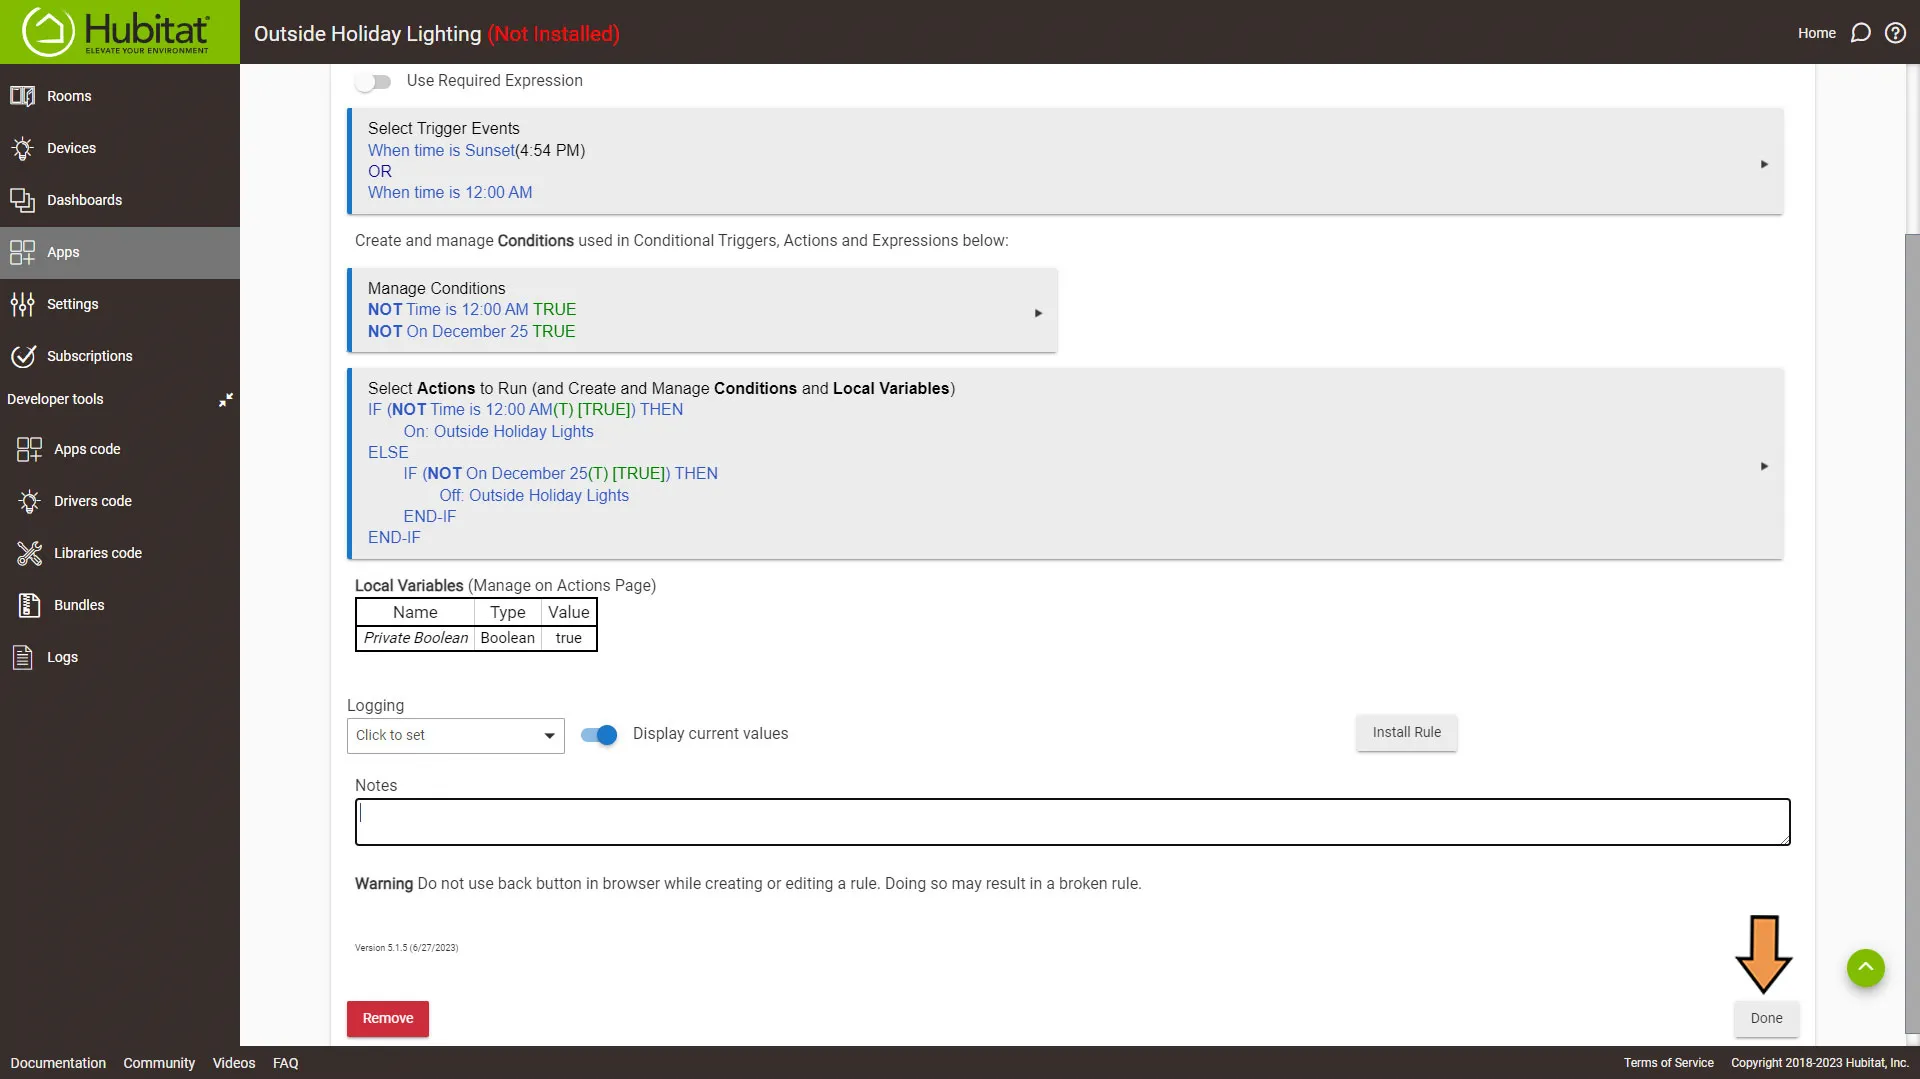
Enter a name for the Rule and hit Enter. I’m going to call it Outdoor Holiday Lighting.
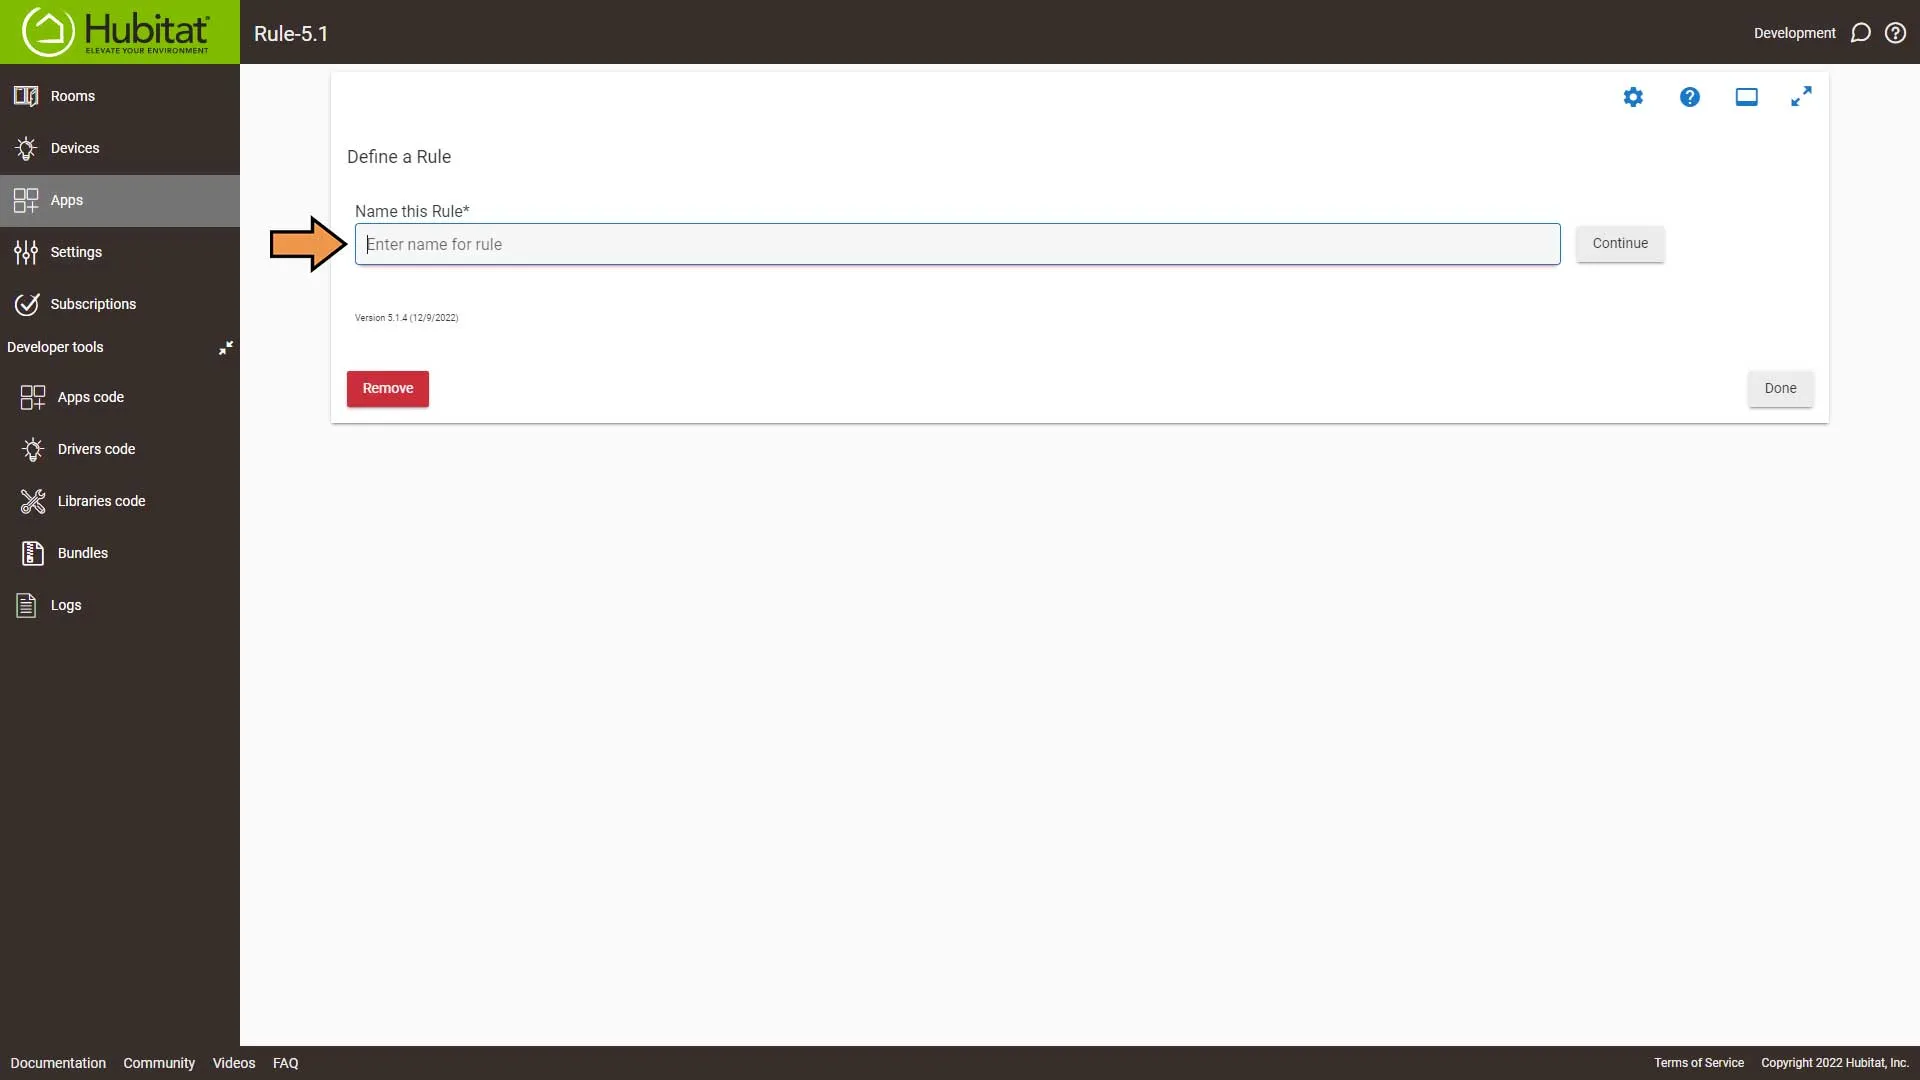
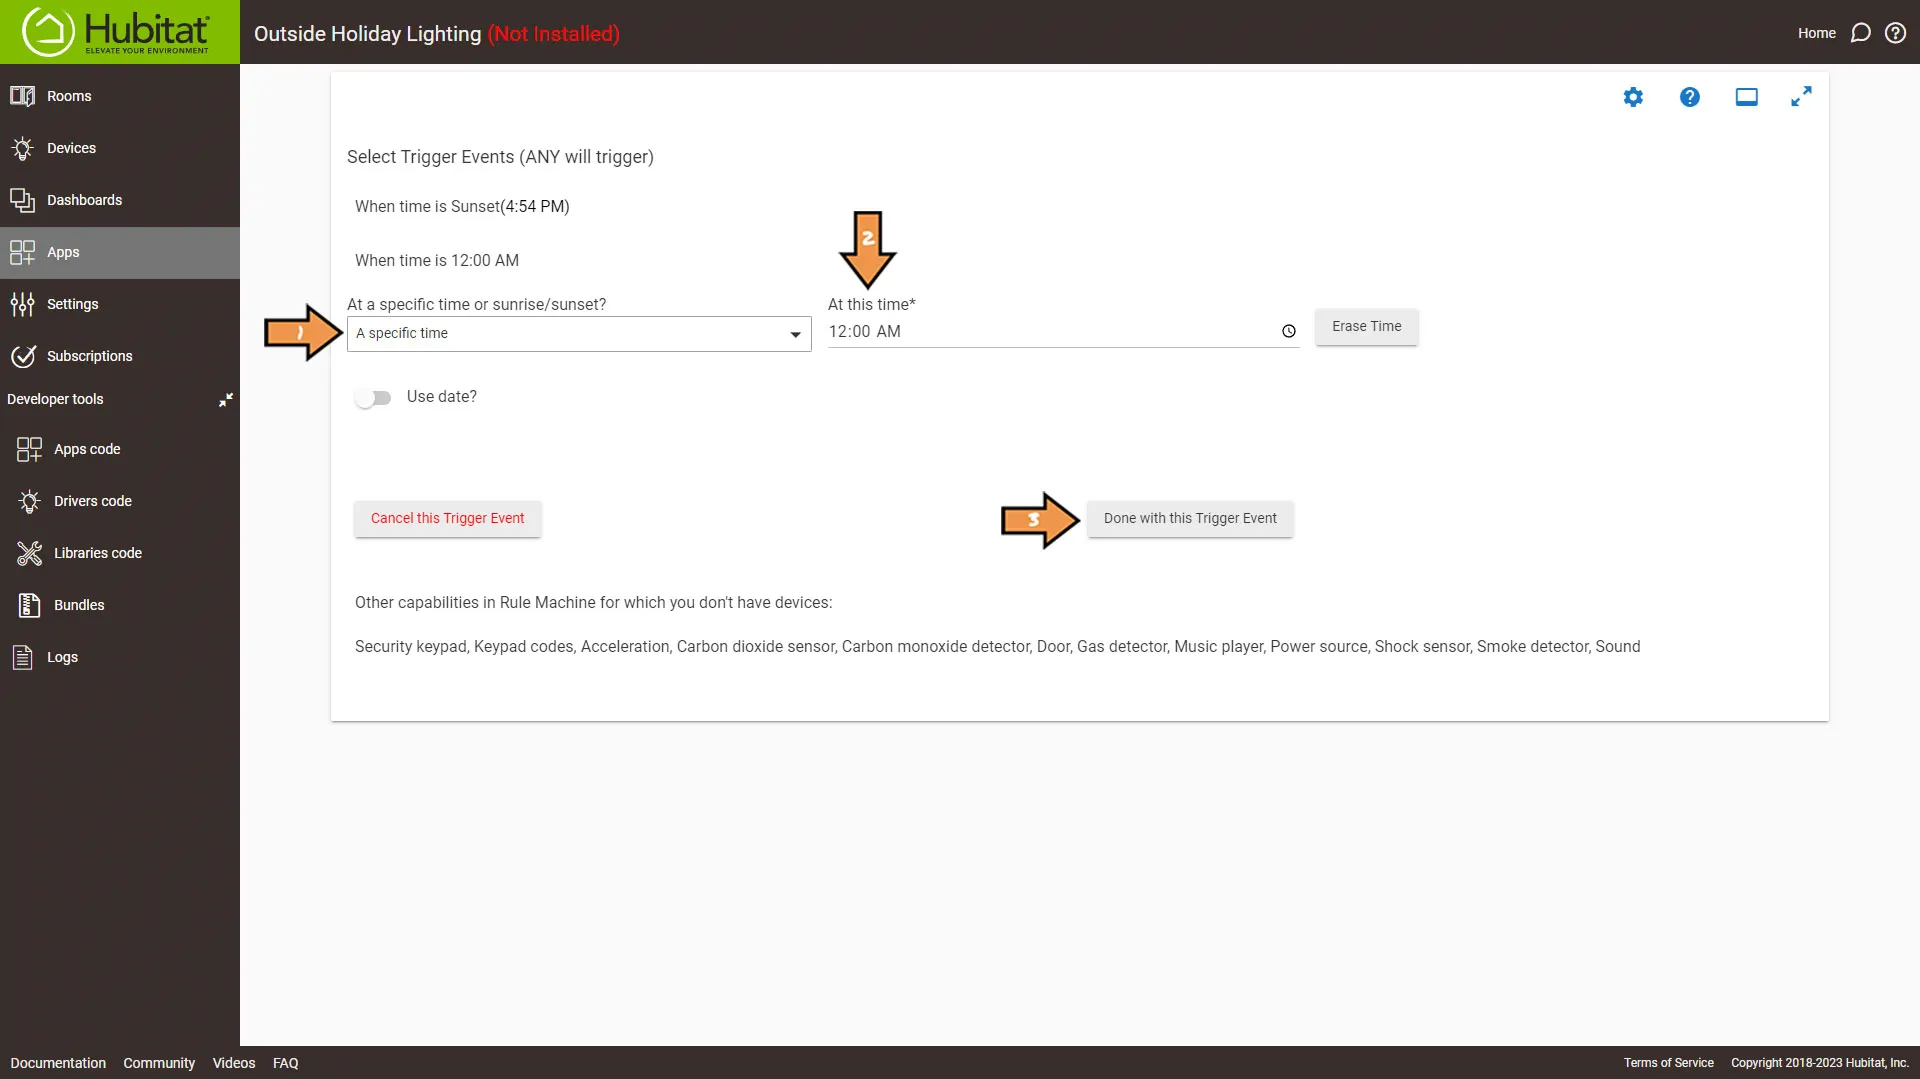
Select Trigger Event.
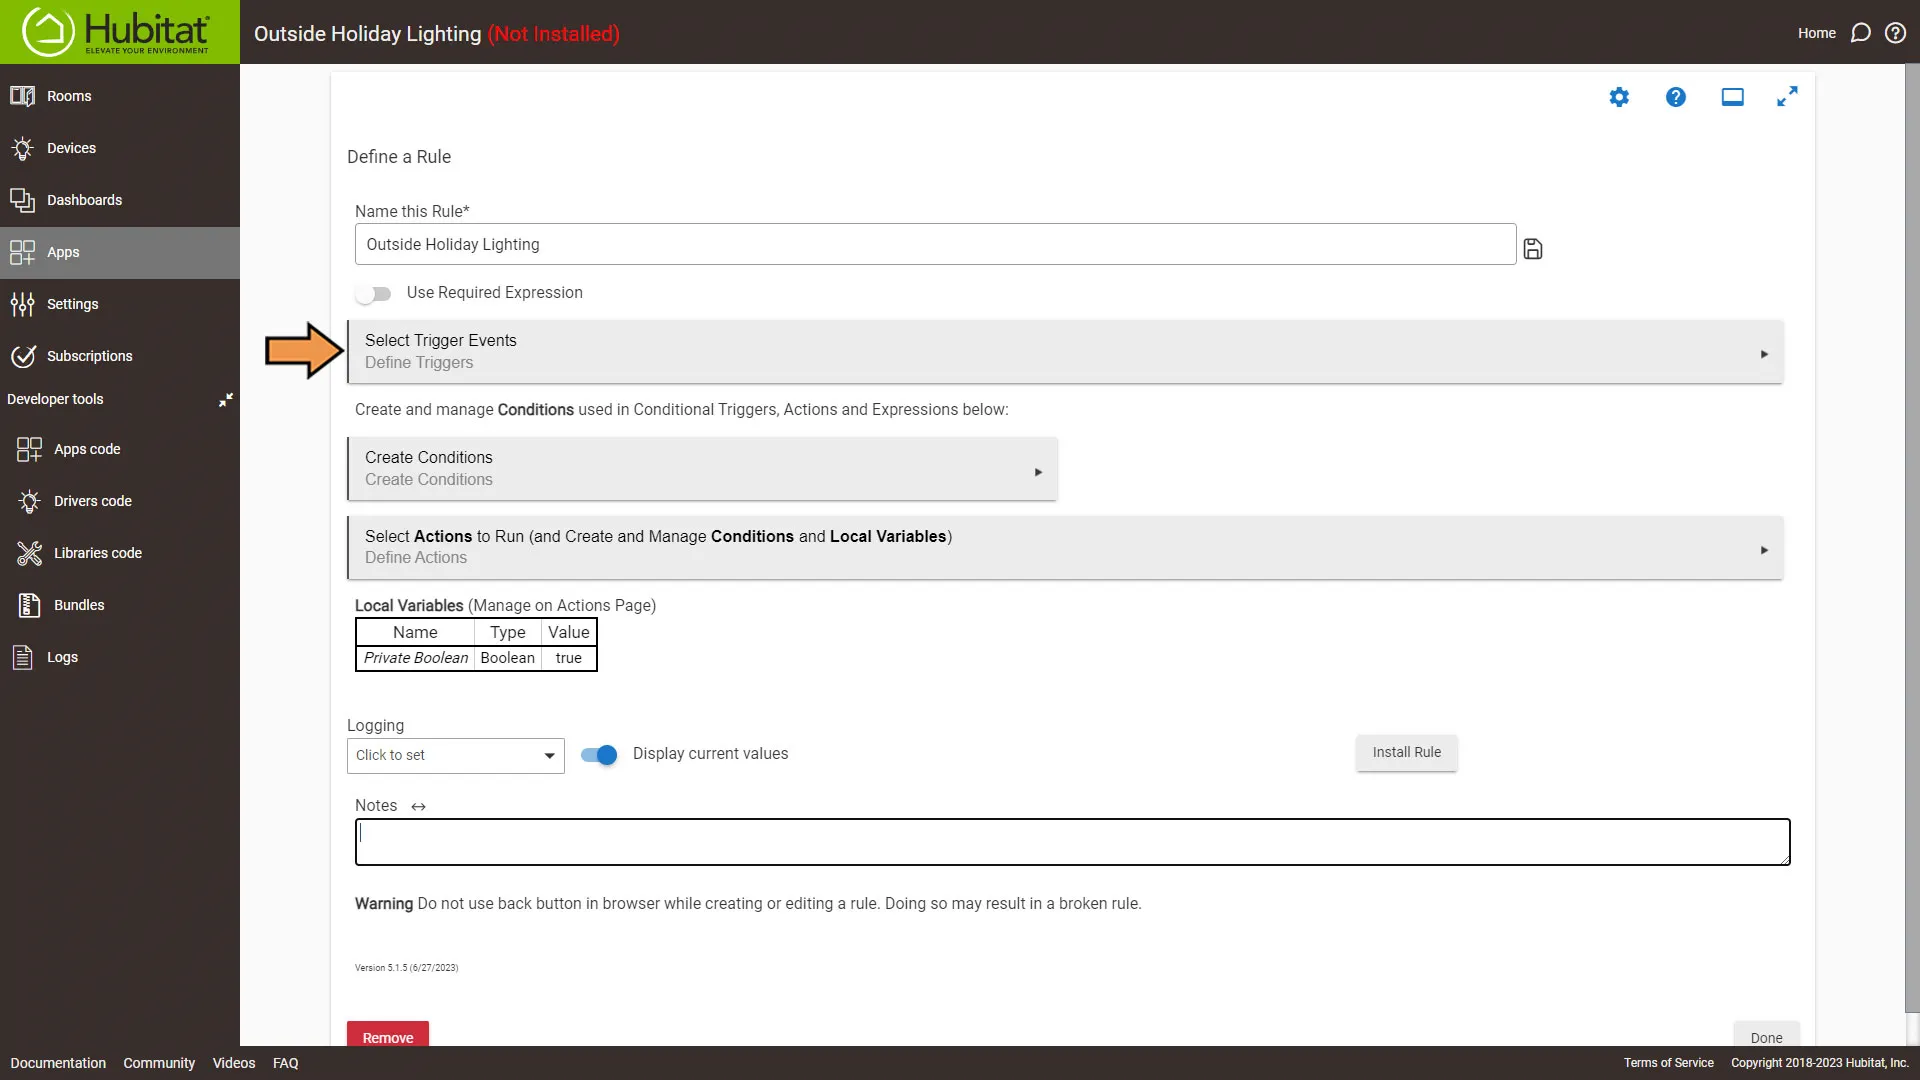
From the Capability drop-down, select Certain Time.
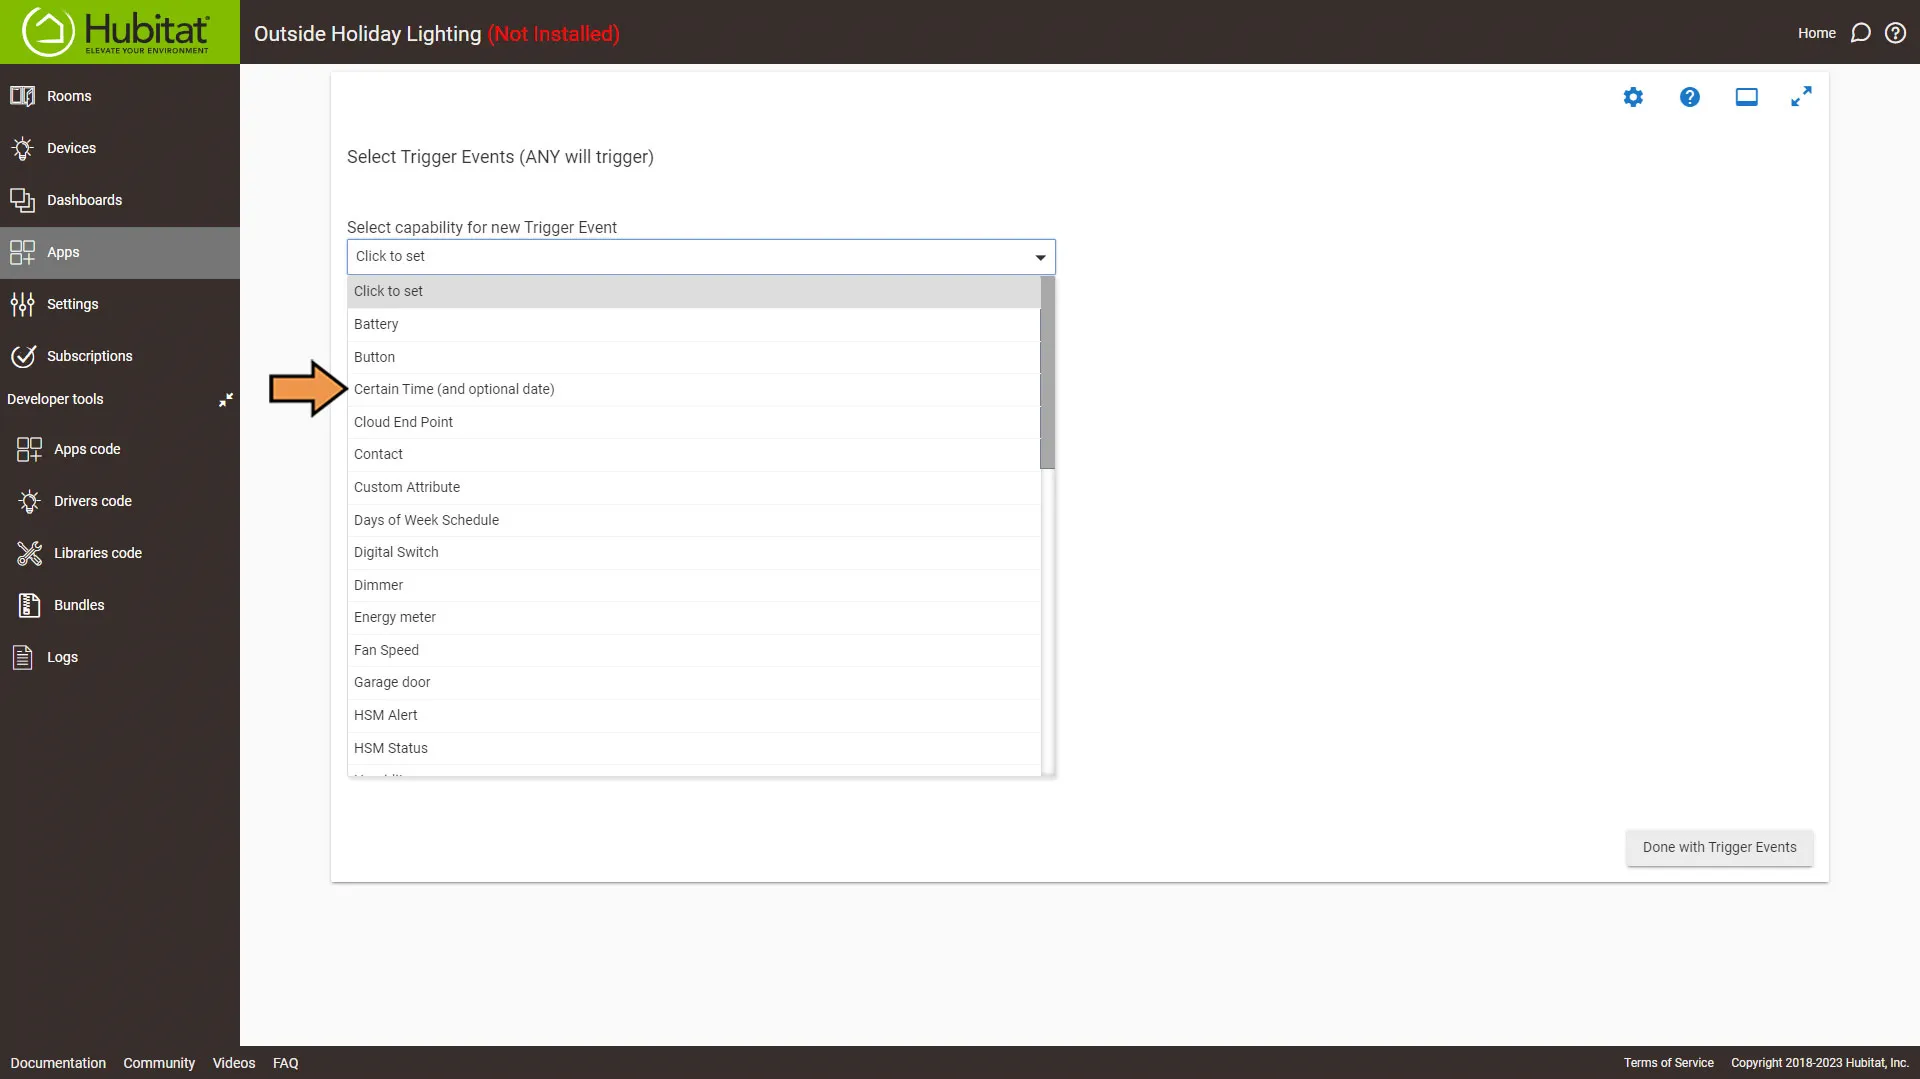
Set the Specific Time to Sunset and click the Done With this Trigger Event. Then we will add one more Certain Time Tigger.
Set the Trigger Event as:
- Set the Specific Time to A specific time.
- Set the time to 12 am.
- Next, click Done with this Trigger Event button and then click the Done with Tigger Events button.
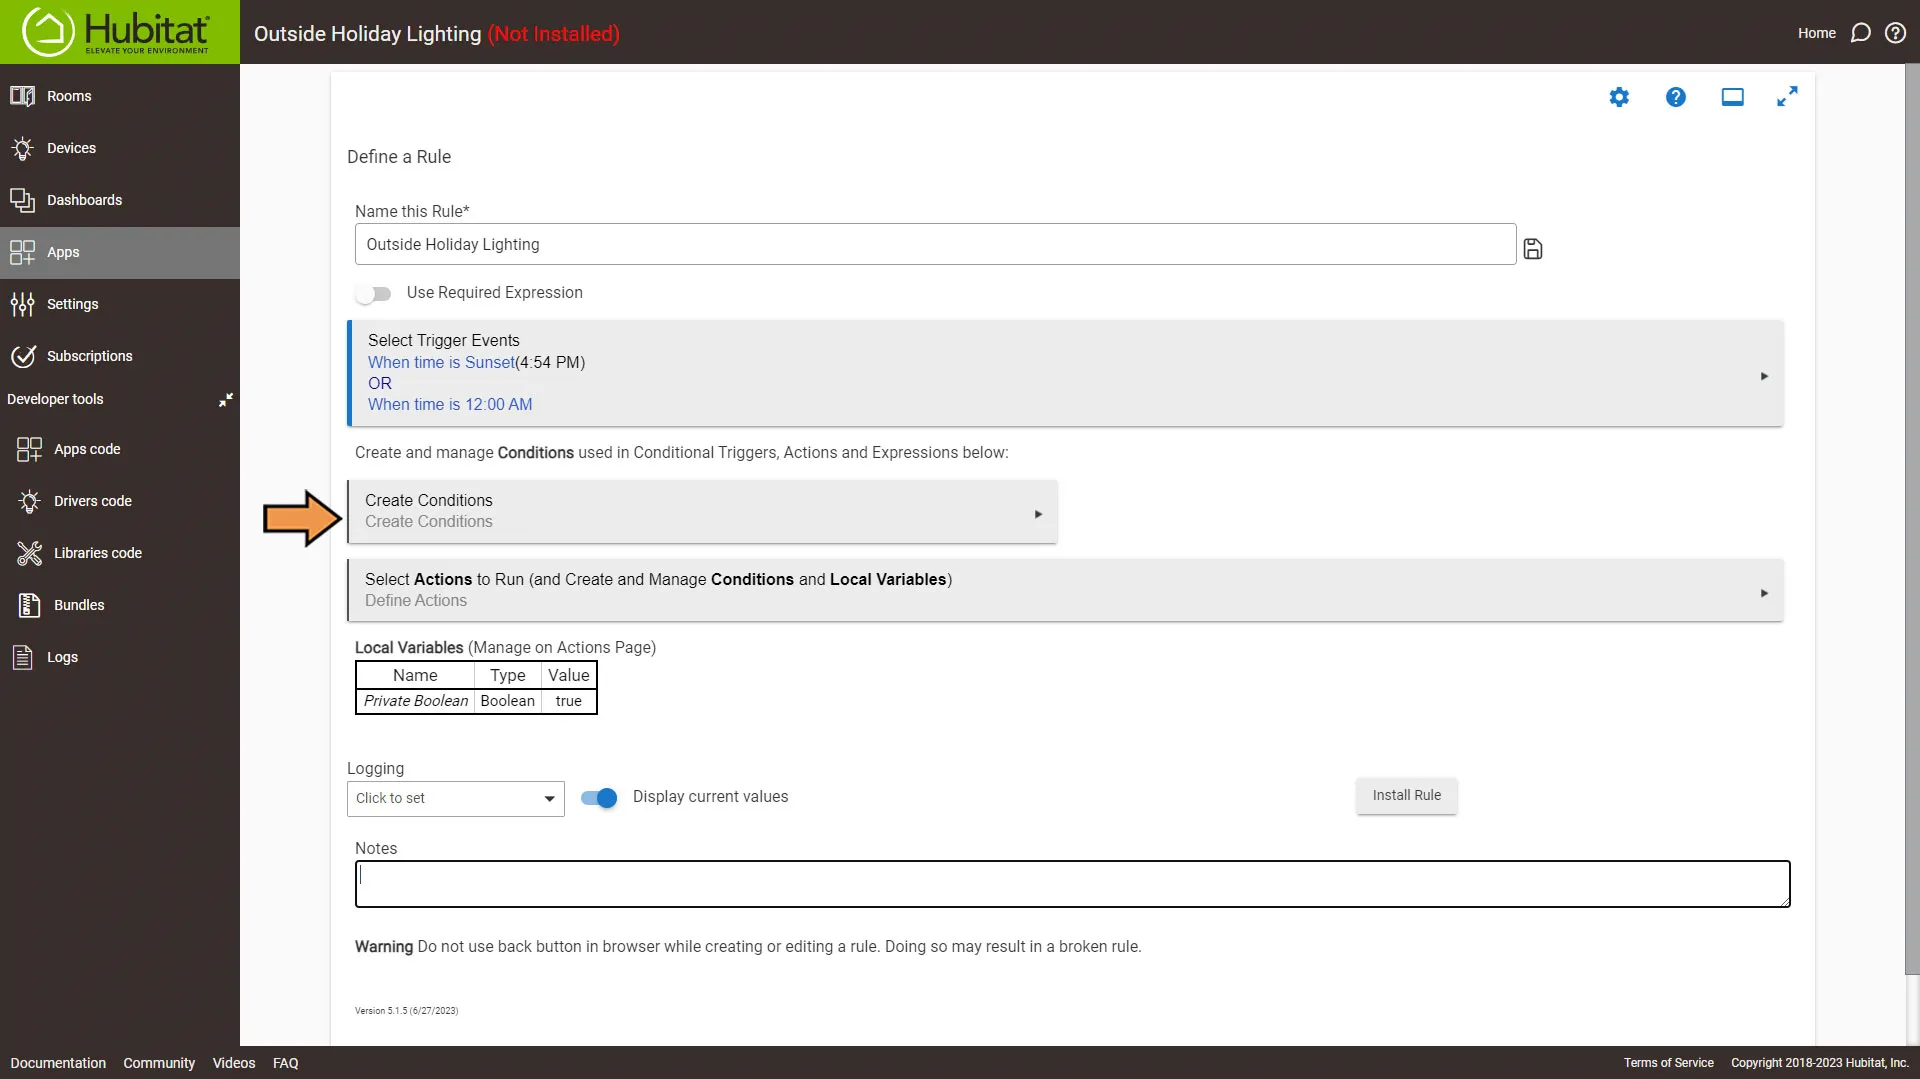
From the rule main menu screen, select Create Conditions.
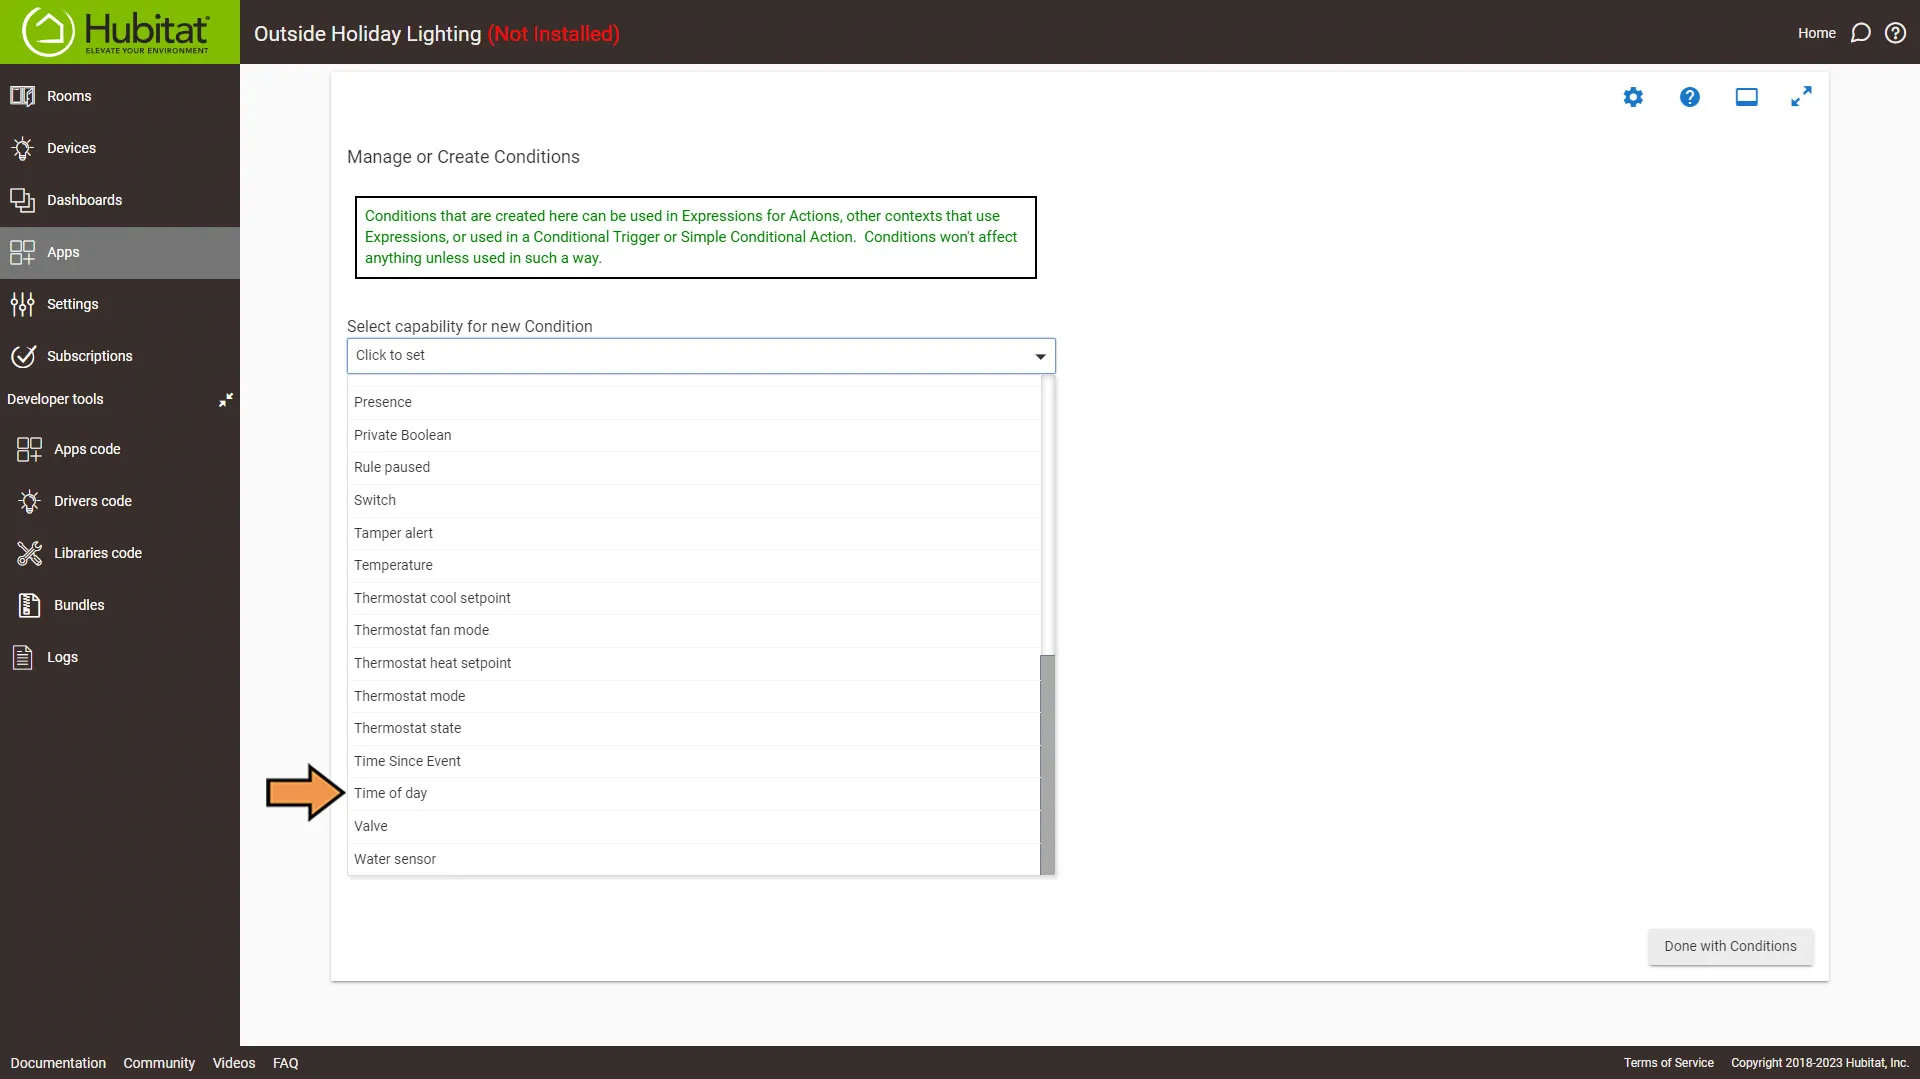
From the Capability drop-down, select Time of day.
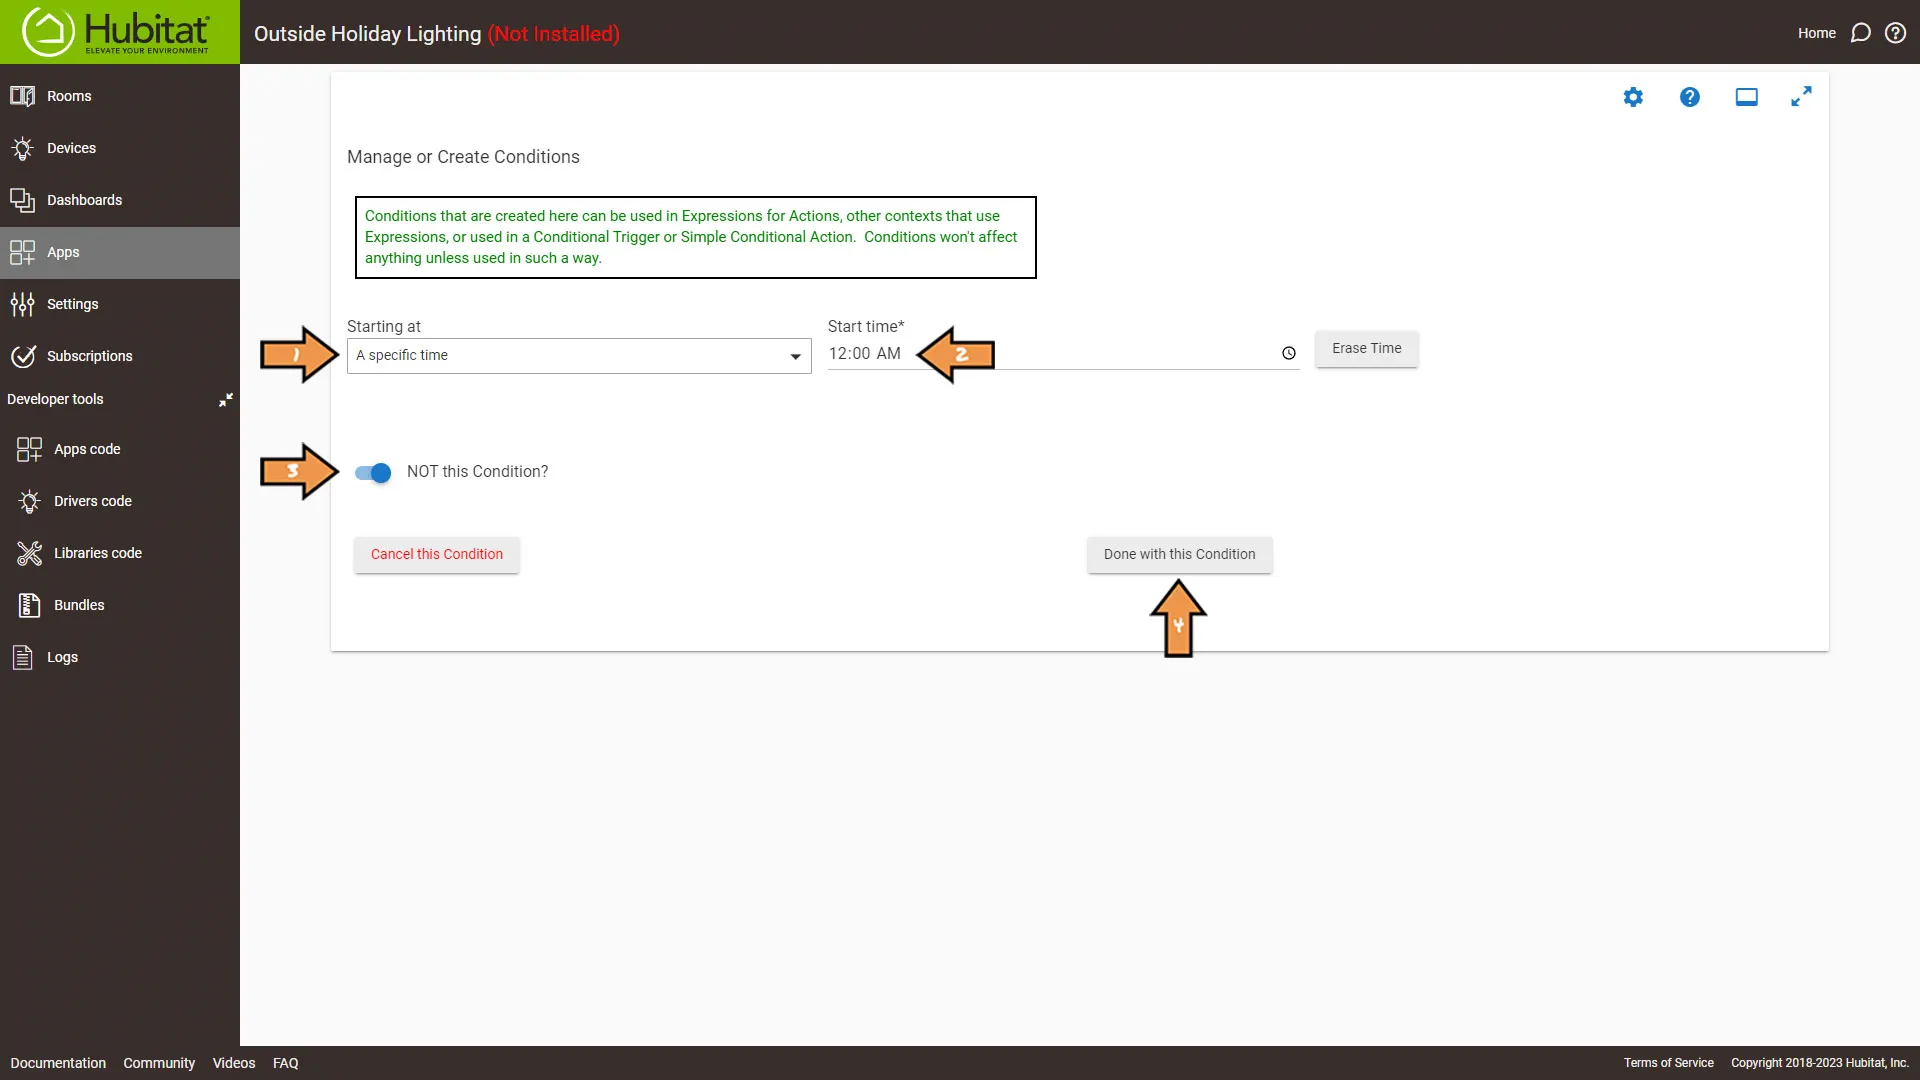
Create the condition with the following properties:
- Set the Starting at to A specific time.
- The start time to 12am.
- Turn on NOT this Condition.
- Then click the Done with this Condition button.
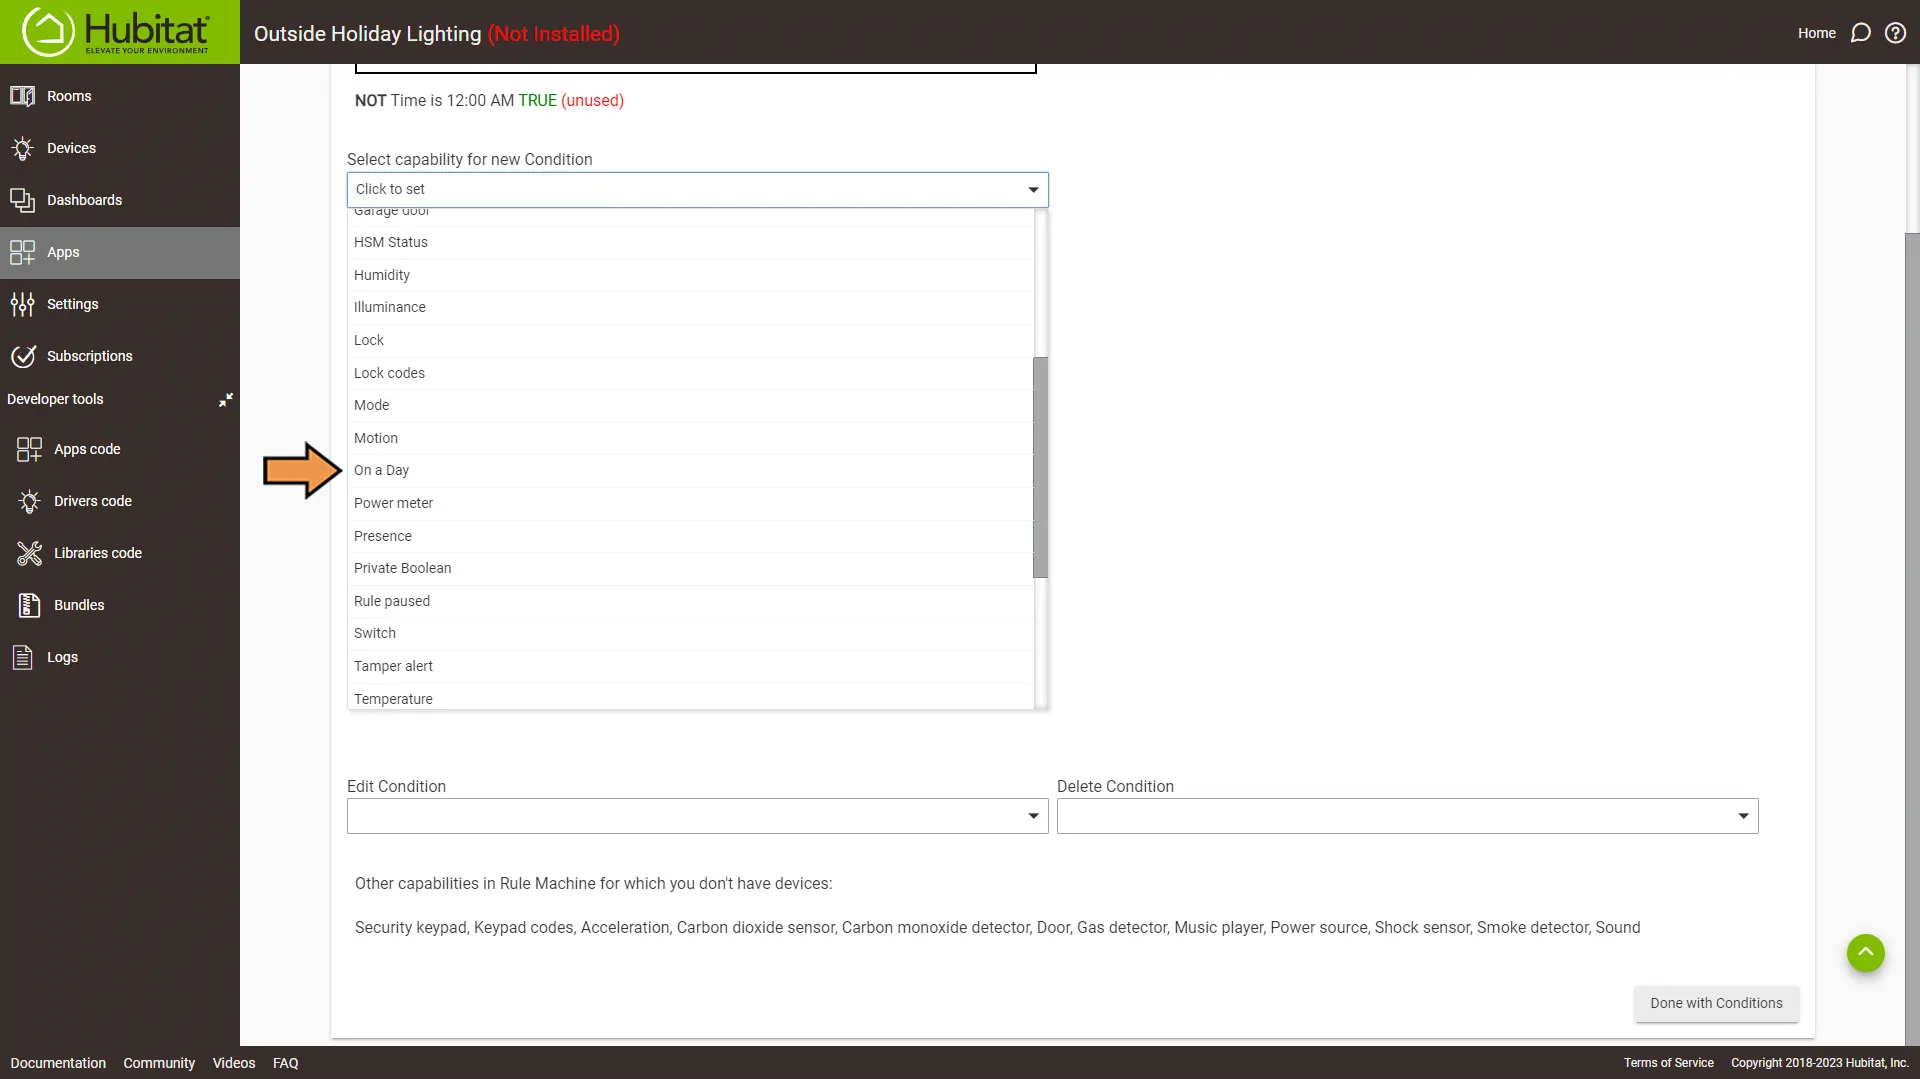
We are going to create one more condition. Select the On a day capability for the list.
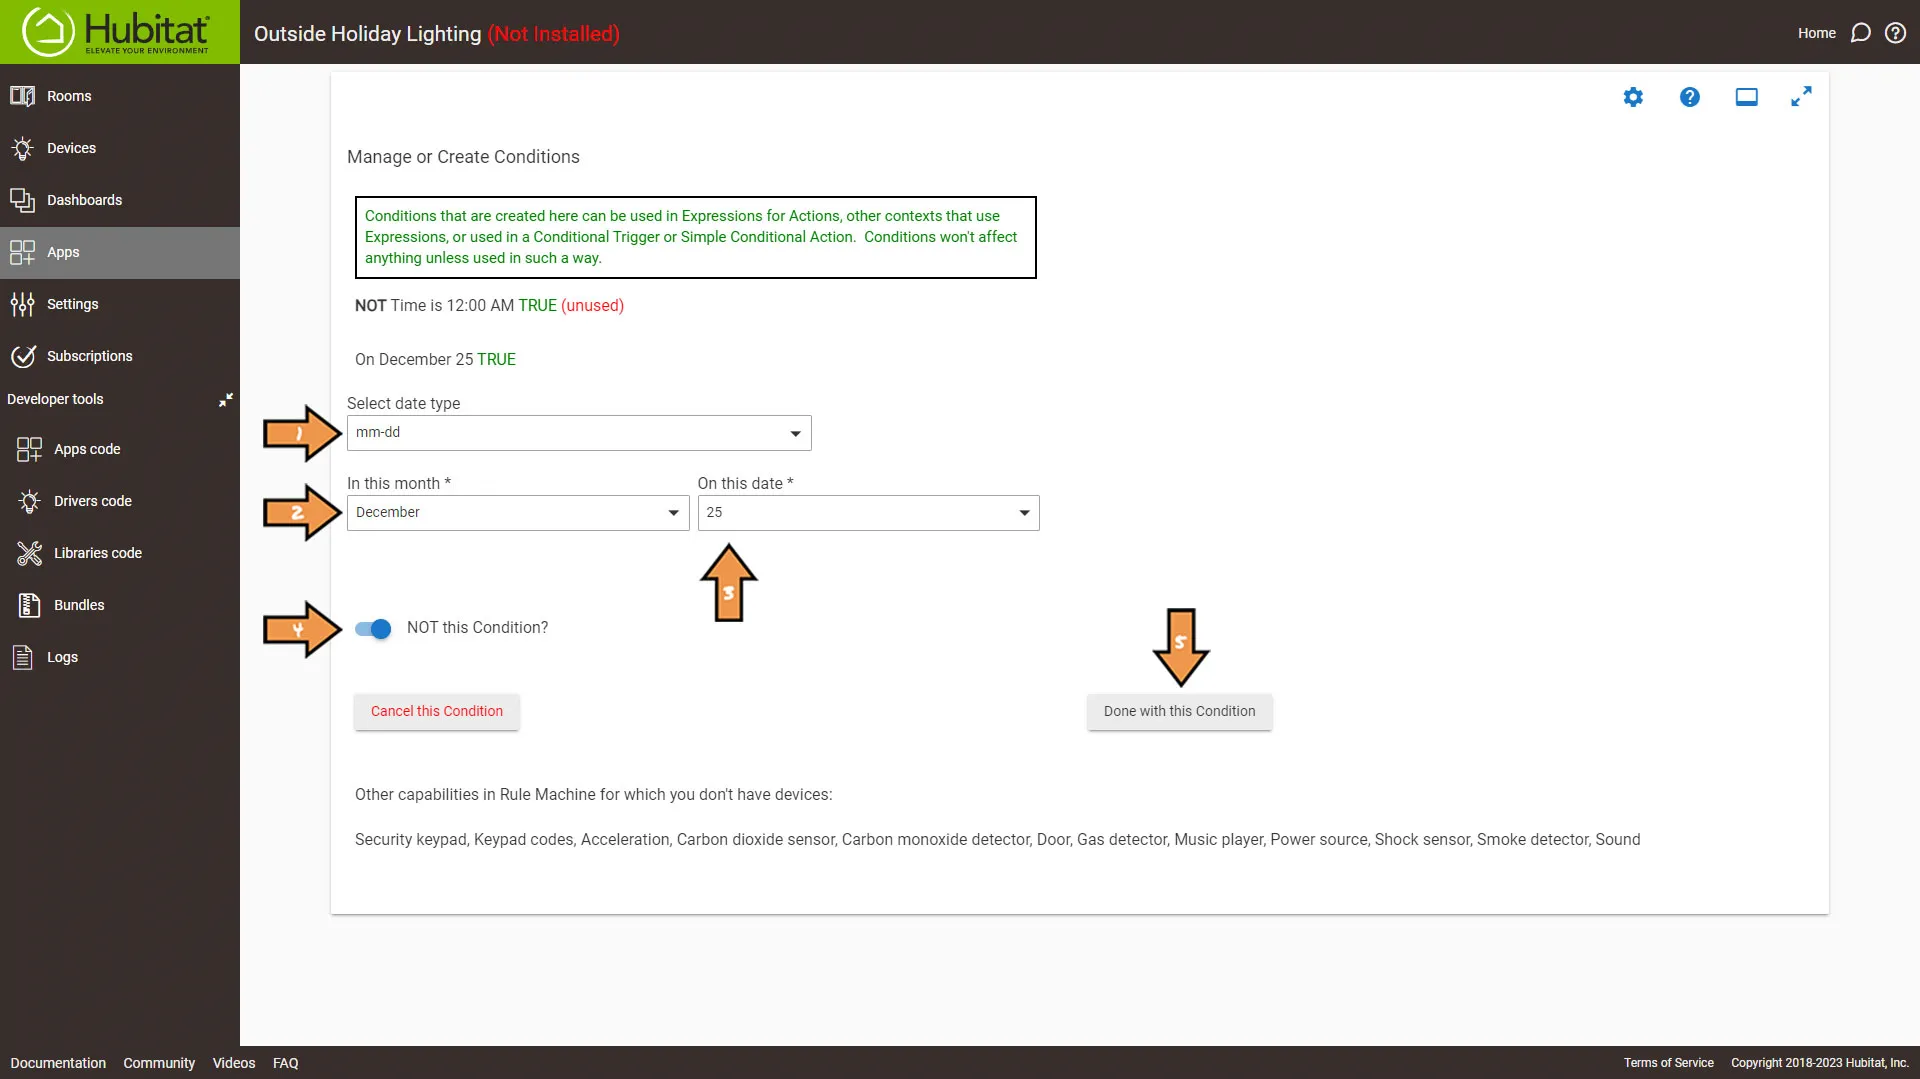
Create the condition with the following properties:
- On the Select date type, select mm-dd for Month-Day.
- In this Month set to December.
- On this date, set to 25.
- Turn on NOT this Condition.
- Then click the Done with this Condition button and then click on the Done with Conditions button.
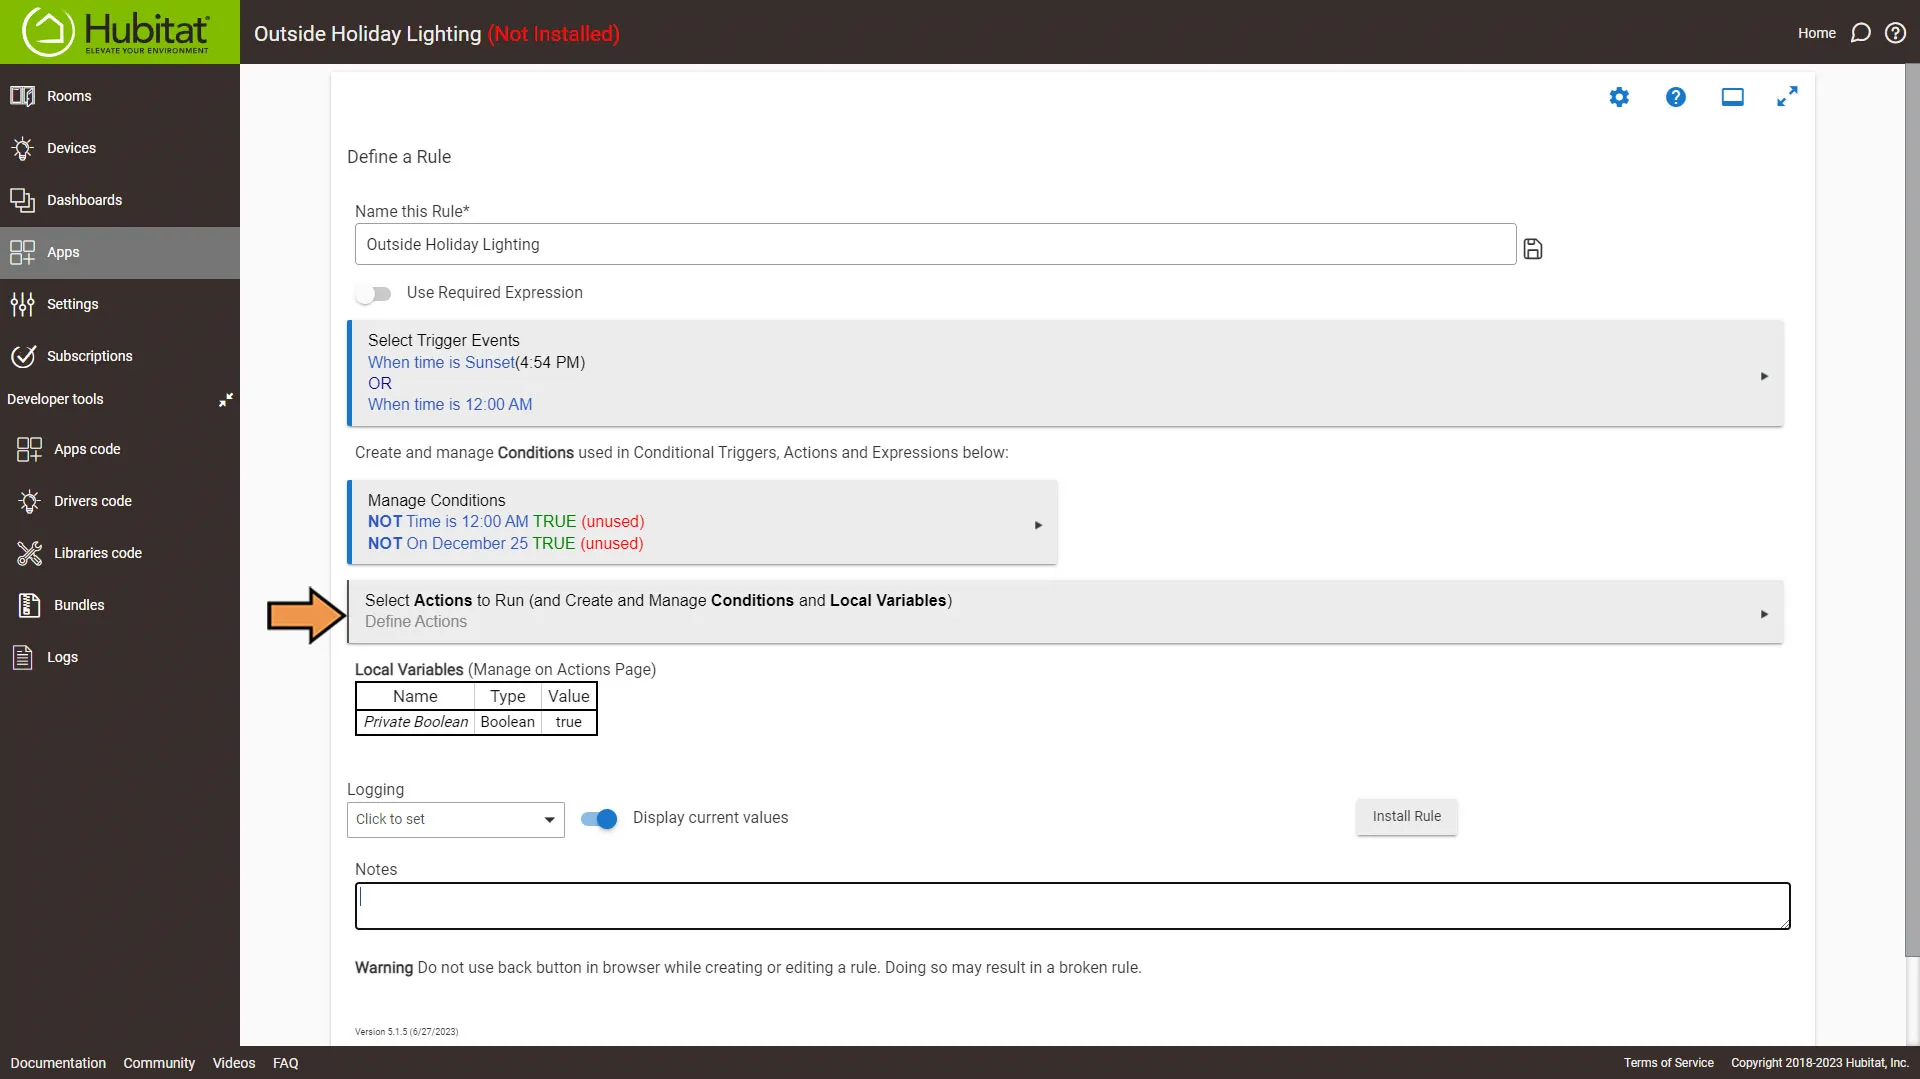
Next, Select Actions to Run.
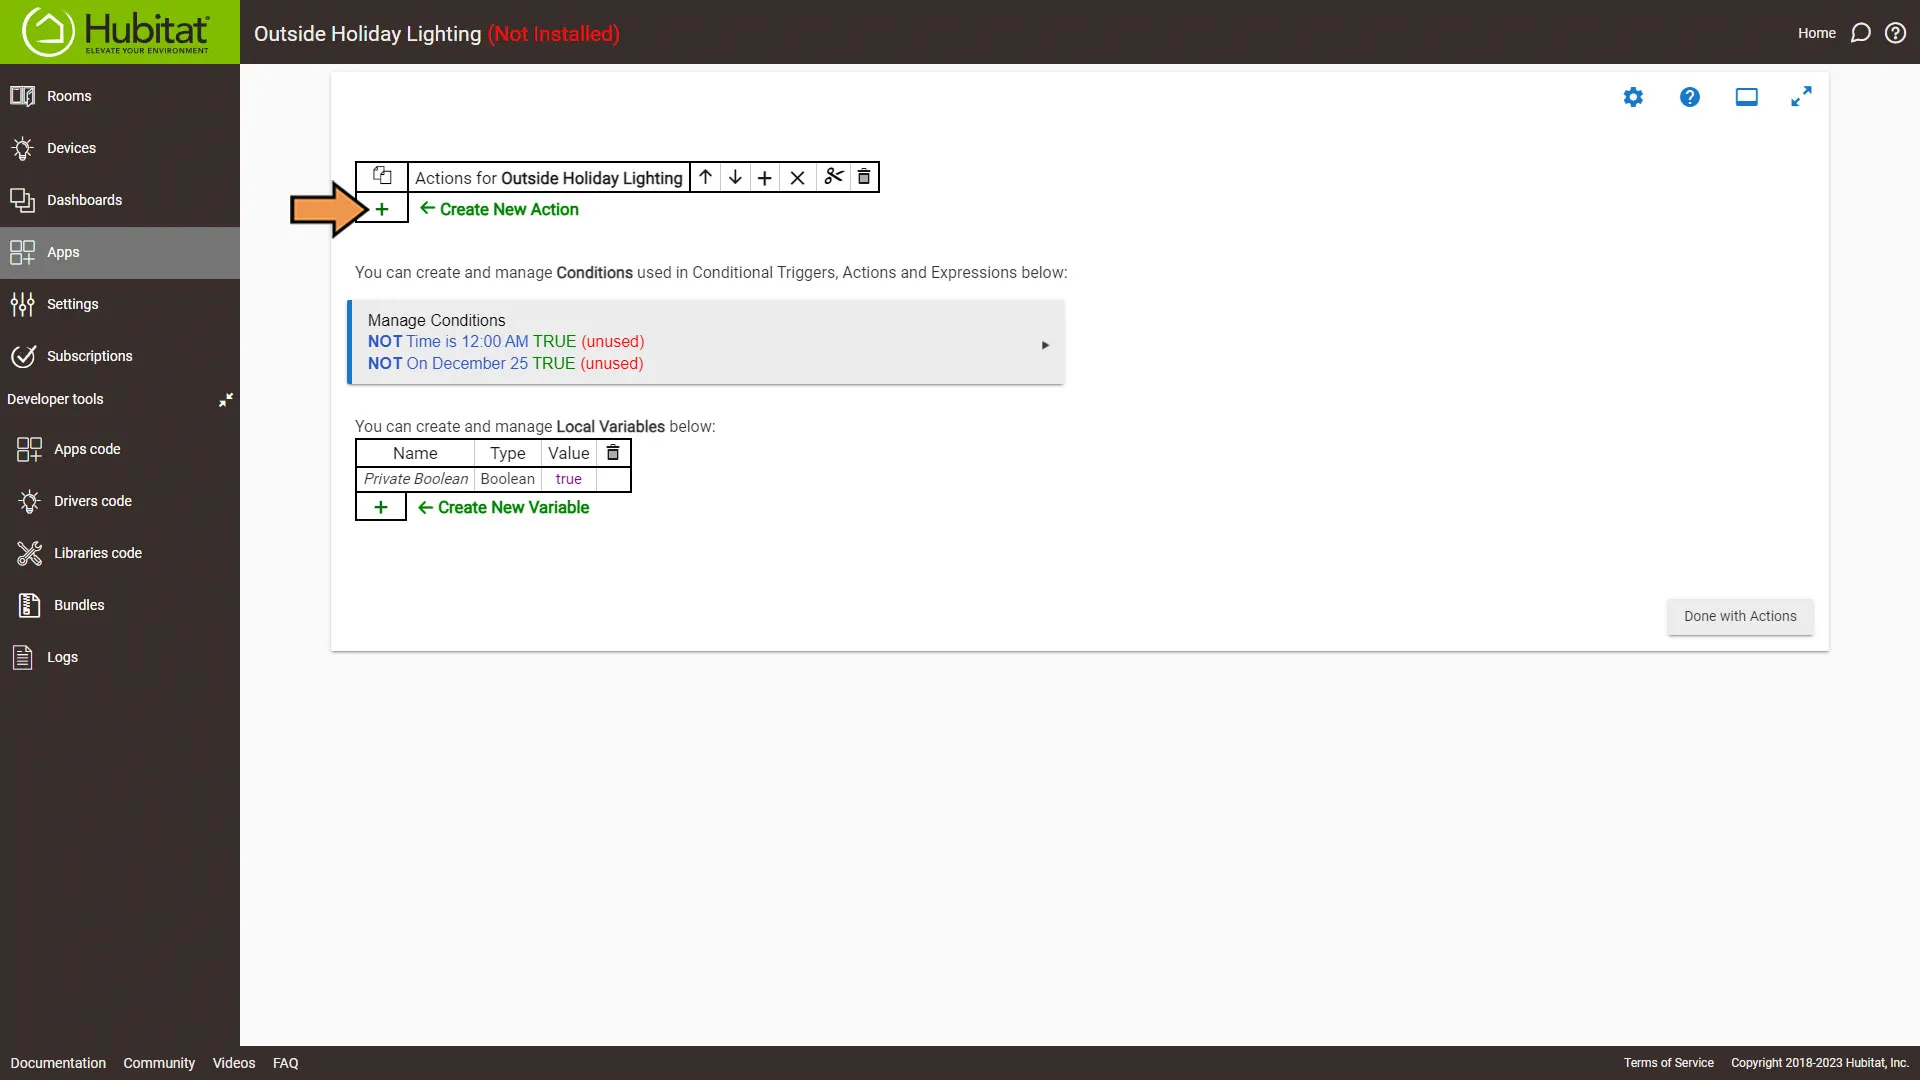
On the Actions screen click the plus sign to Create New Action.
Set the new action as follows:
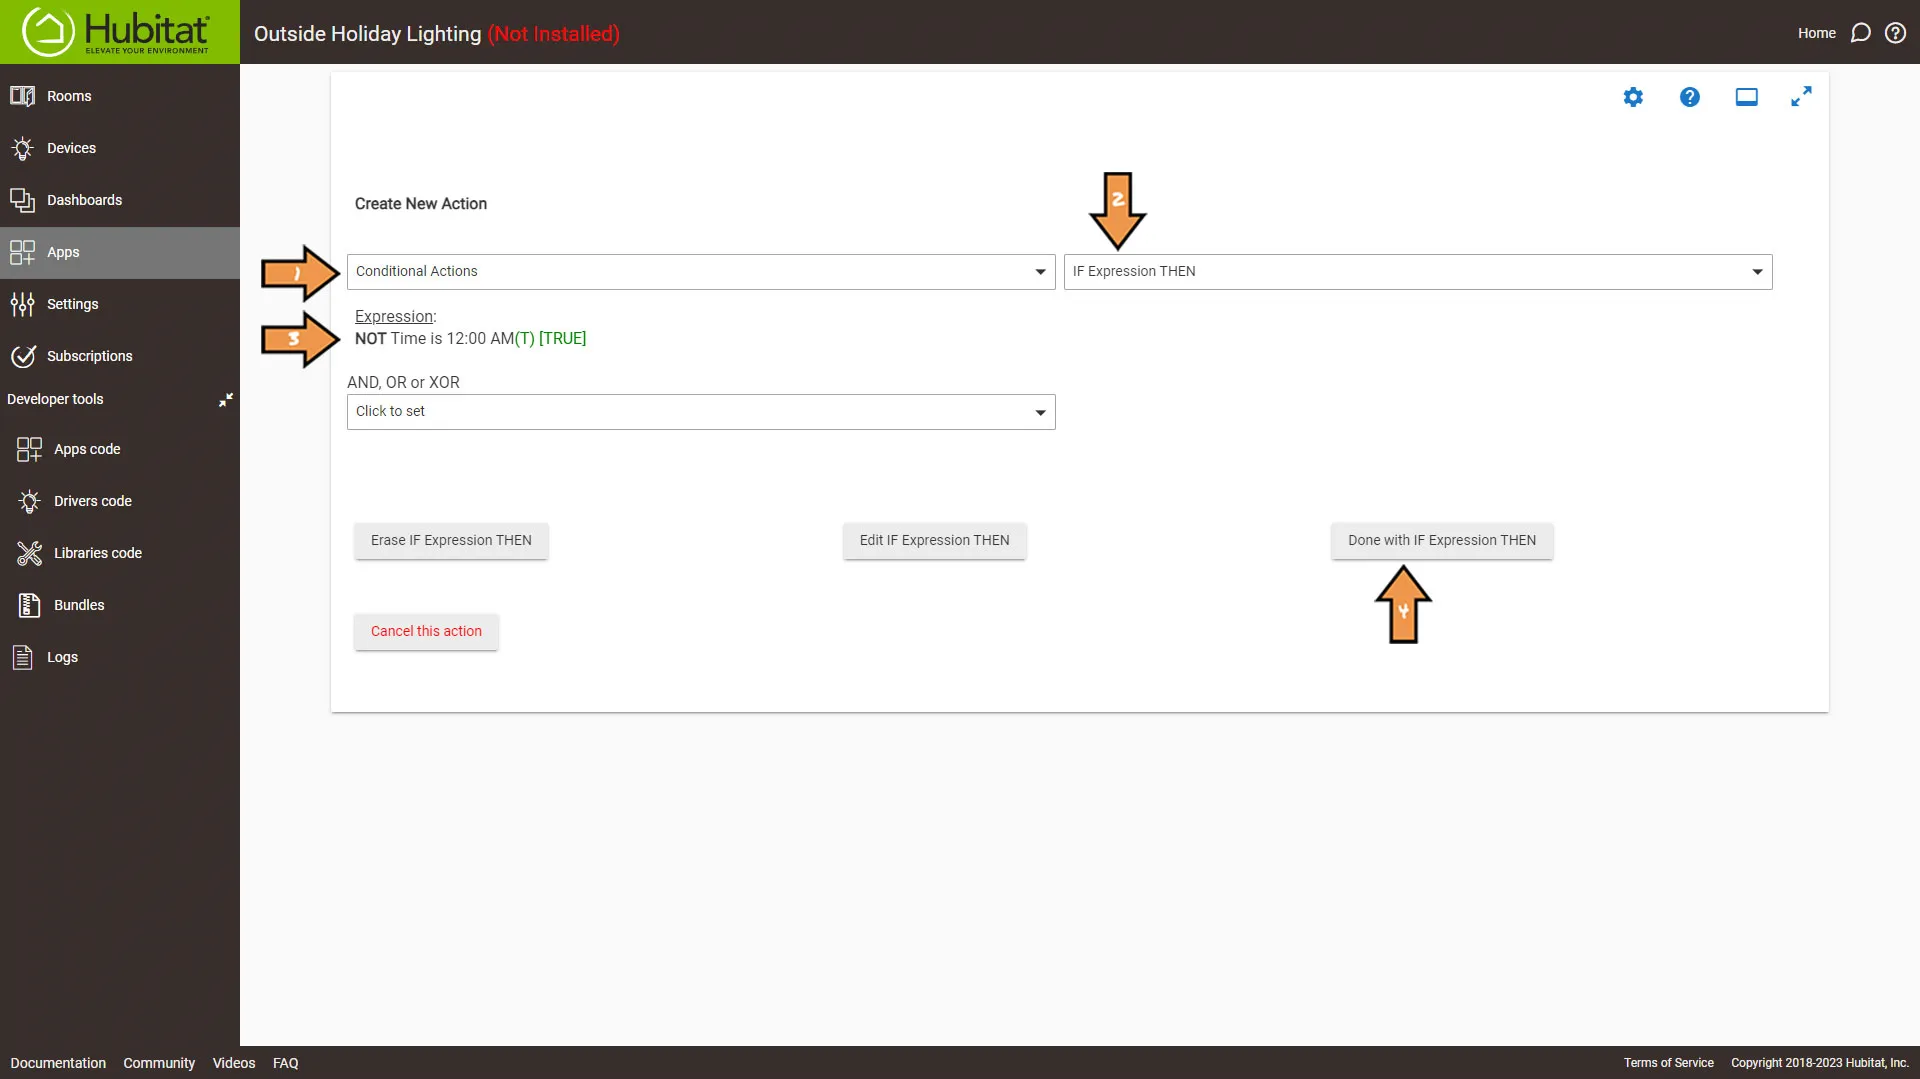
- Set Action Type to Conditional Actions.
- Set the Which Action to IF Expression THEN.
- Set the Expression Element to our NOT Time is 12am condition we created earlier.
- Then click the Done with IF Expression THEN button.
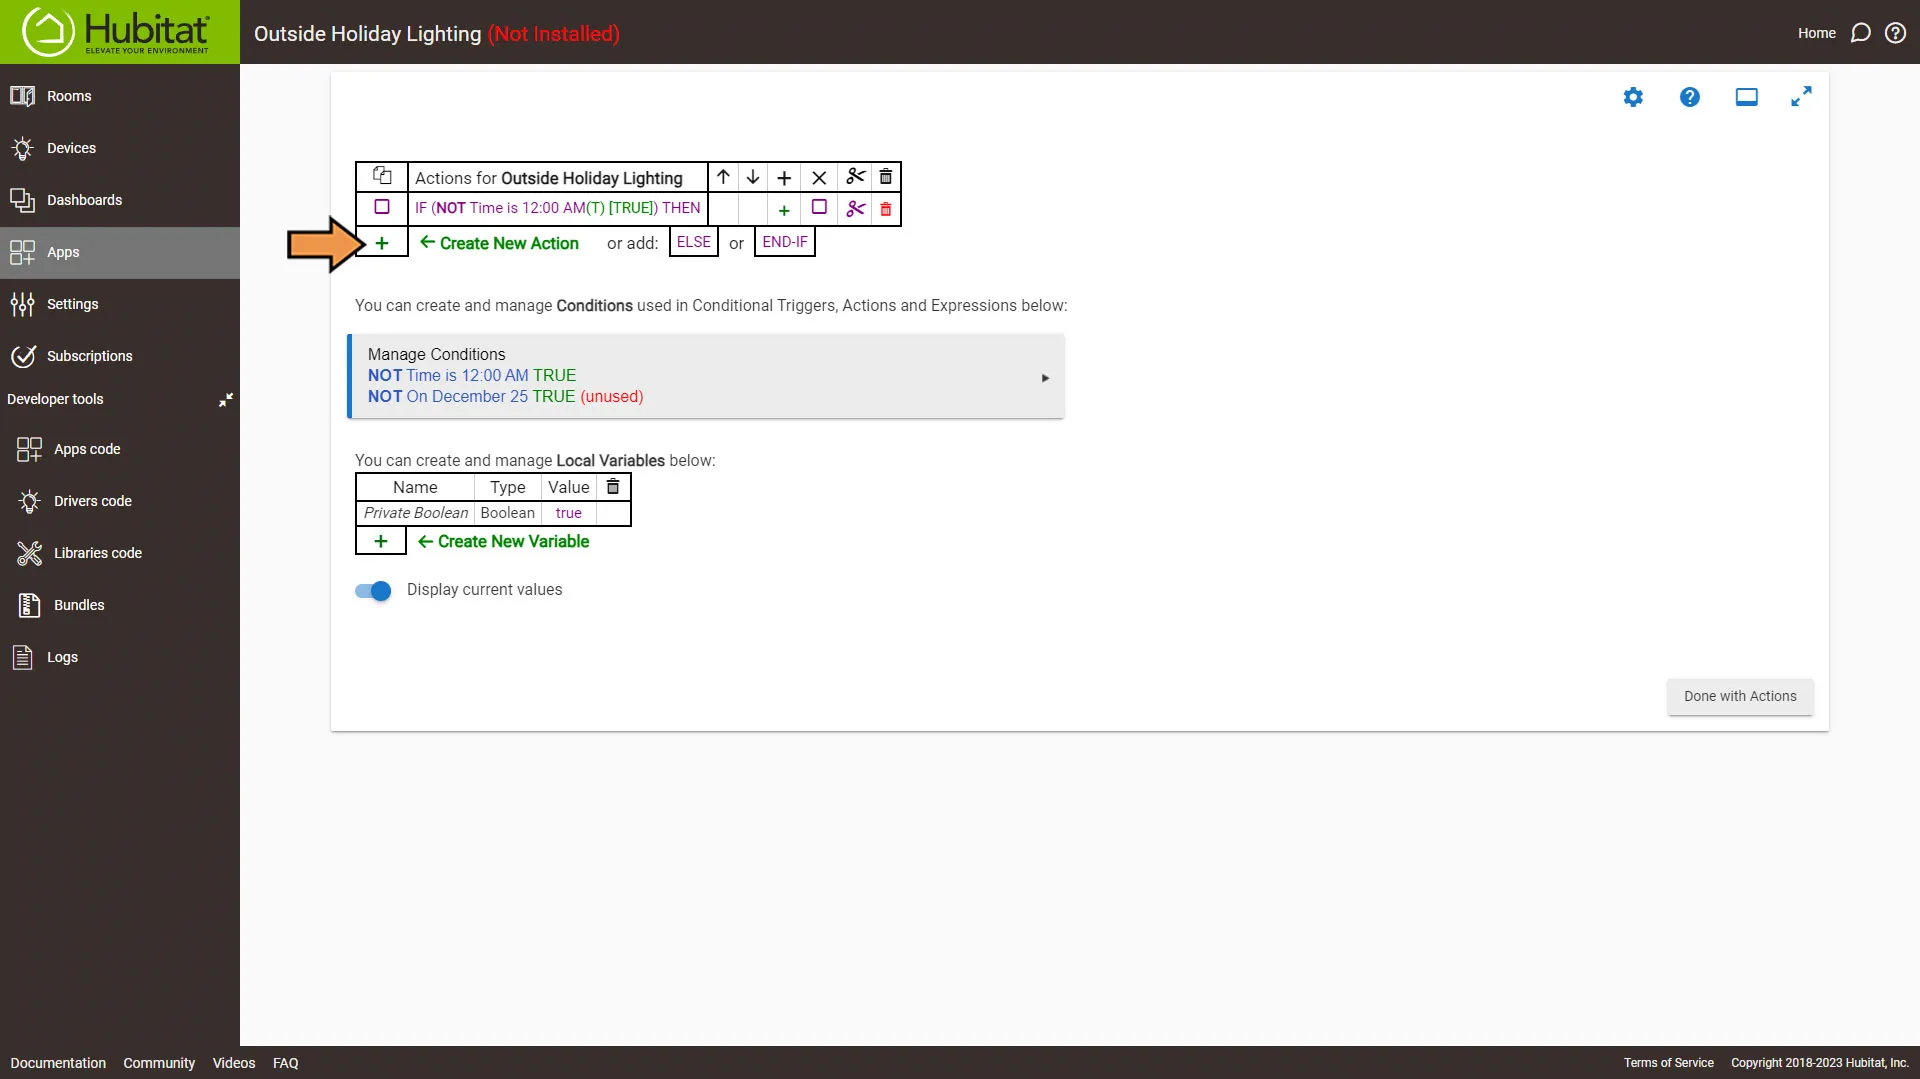
From the Action Screen, click the plus sign again to Create a New Action.
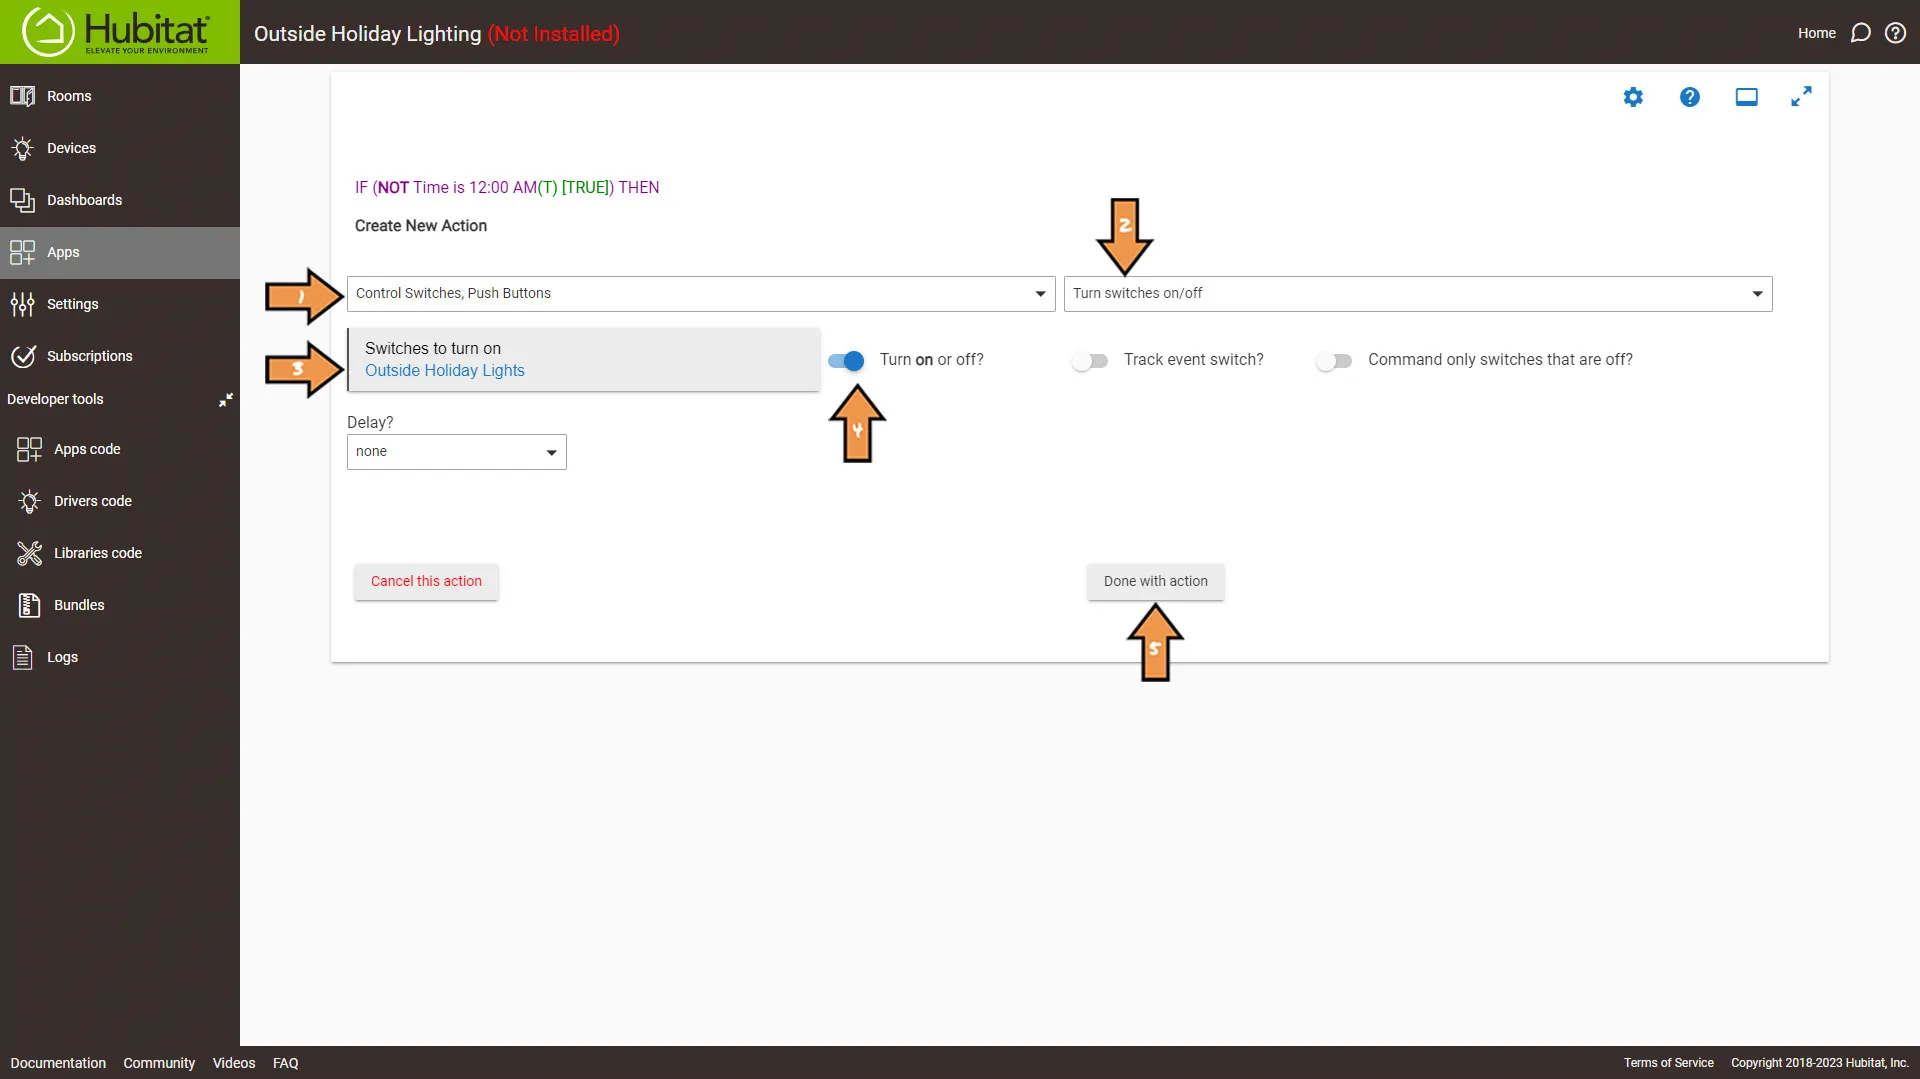
Set the following Action settings:
- In the Select Action Type drop-down, select Control Switches option.
- In the Select Which Action, select the Turn switches on/off option.
- Next, in the Switches to turn on drop-down, select our Outside Holiday Lights group.
- Make sure the Turn on or off switch is set to On.
- Then click the Done with Action button.
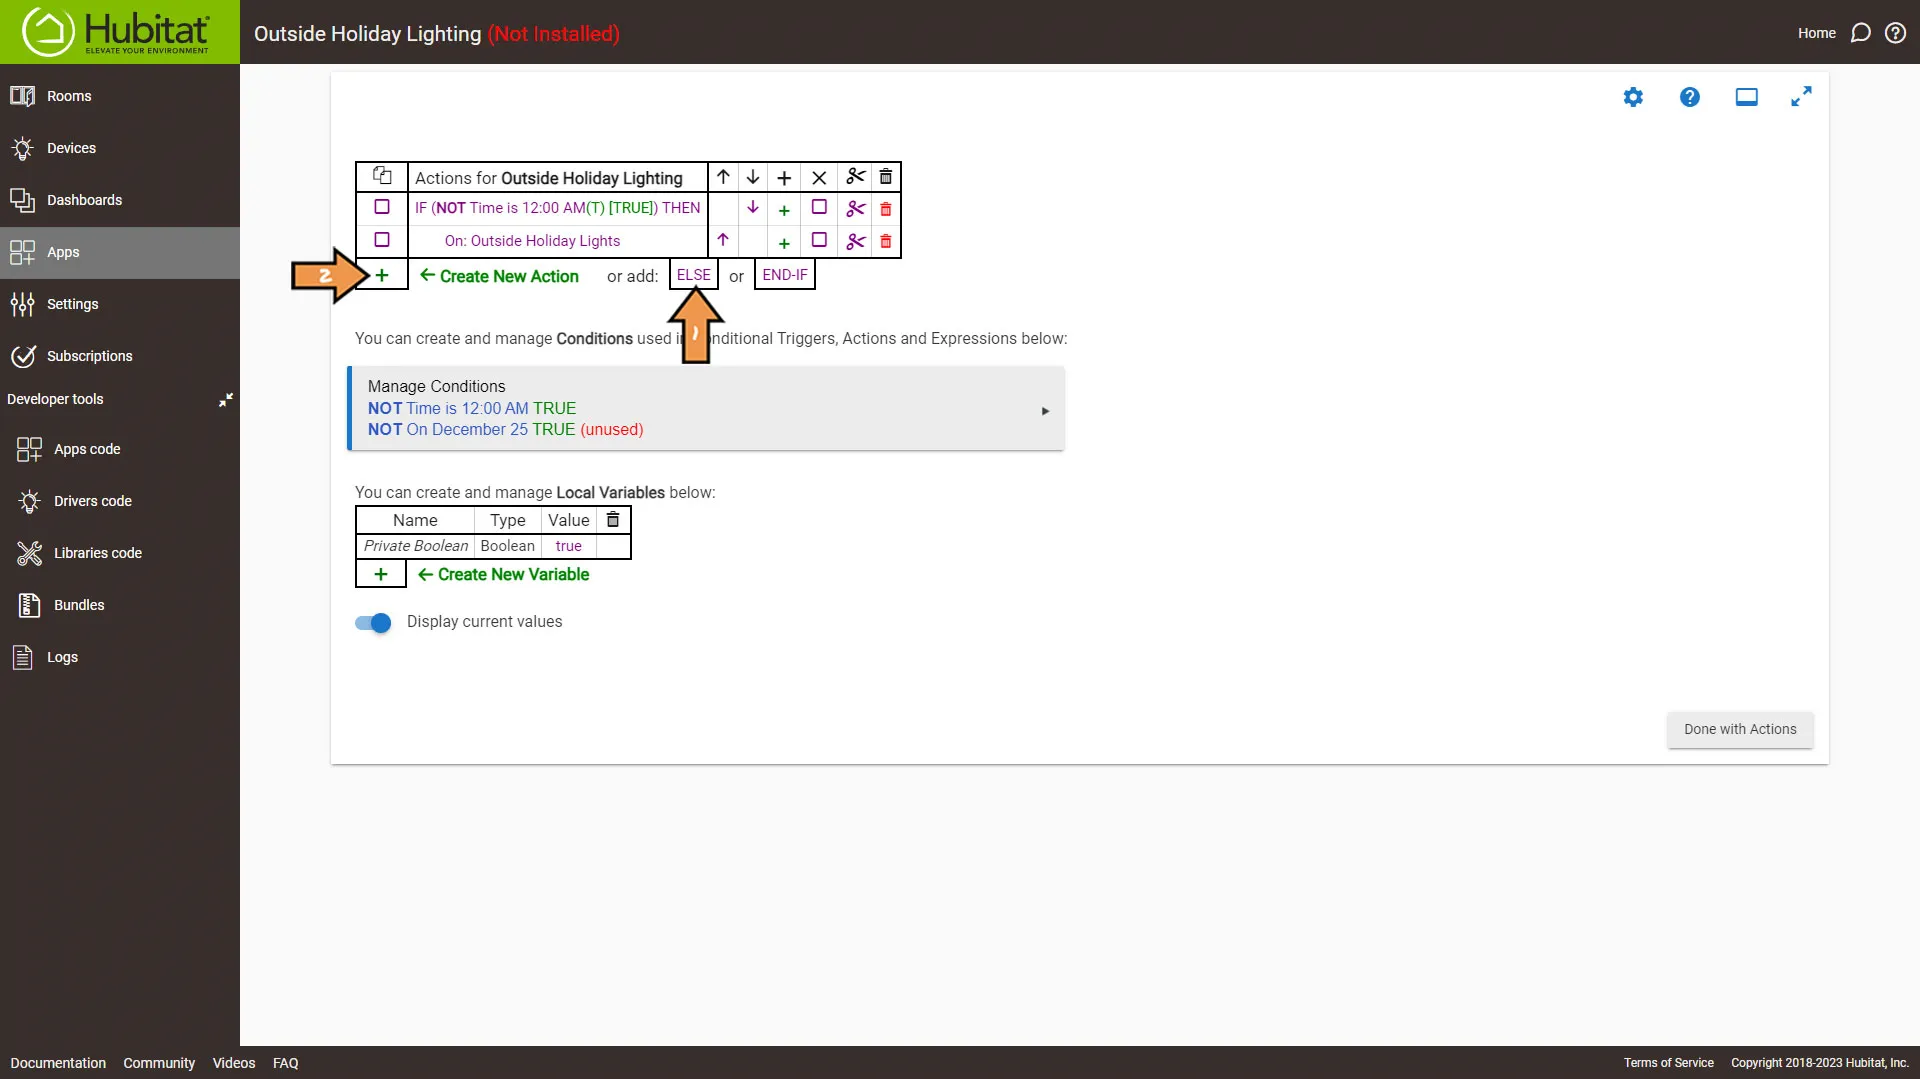
Back on the Action Screen, click else, and then the plus sign again to Create a New Action.
Set the new action as follows:
- Set Action Type to Conditional Actions.
- Set the Which Action to IF Expression THEN.
- Set the Expression Element to our NOT On December 25 condition we created earlier.
- Then click the Done with IF Expression THEN button.
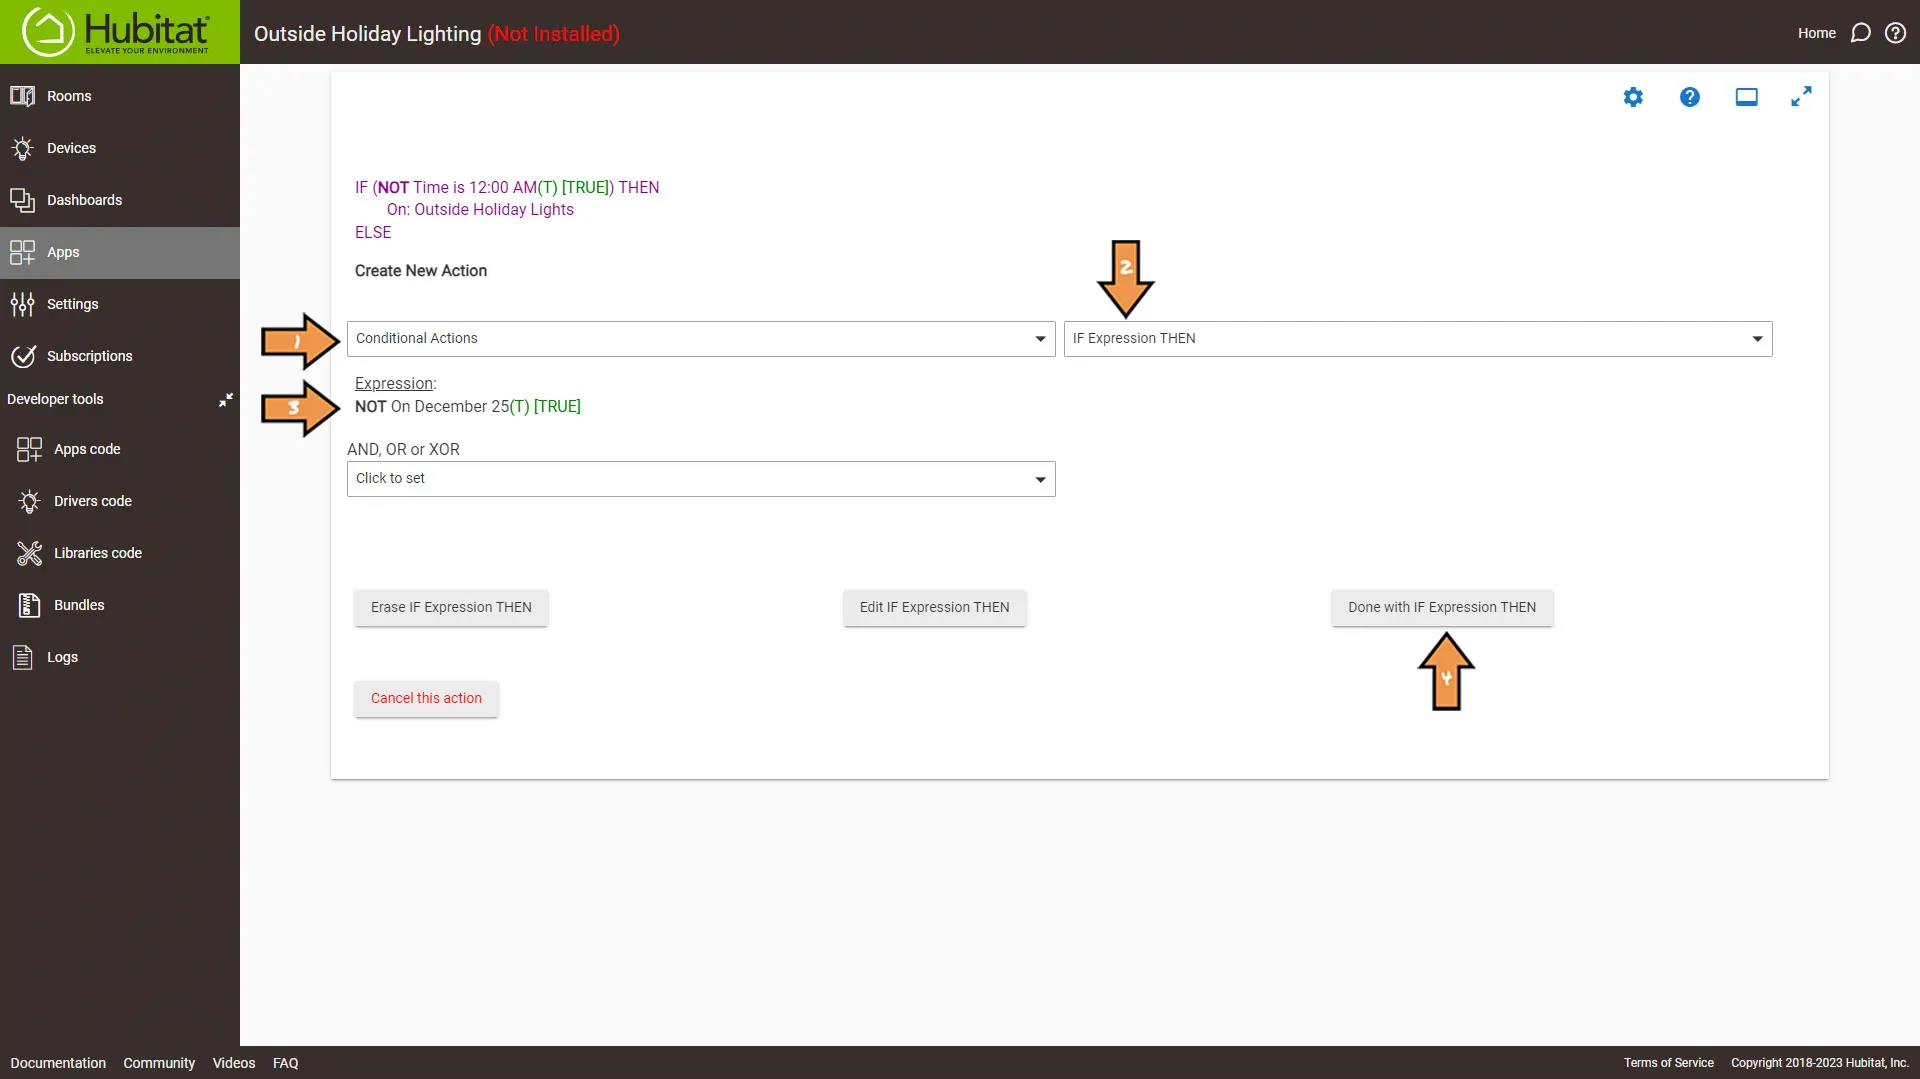
From the Action Screen, click the plus sign again to Create a New Action.
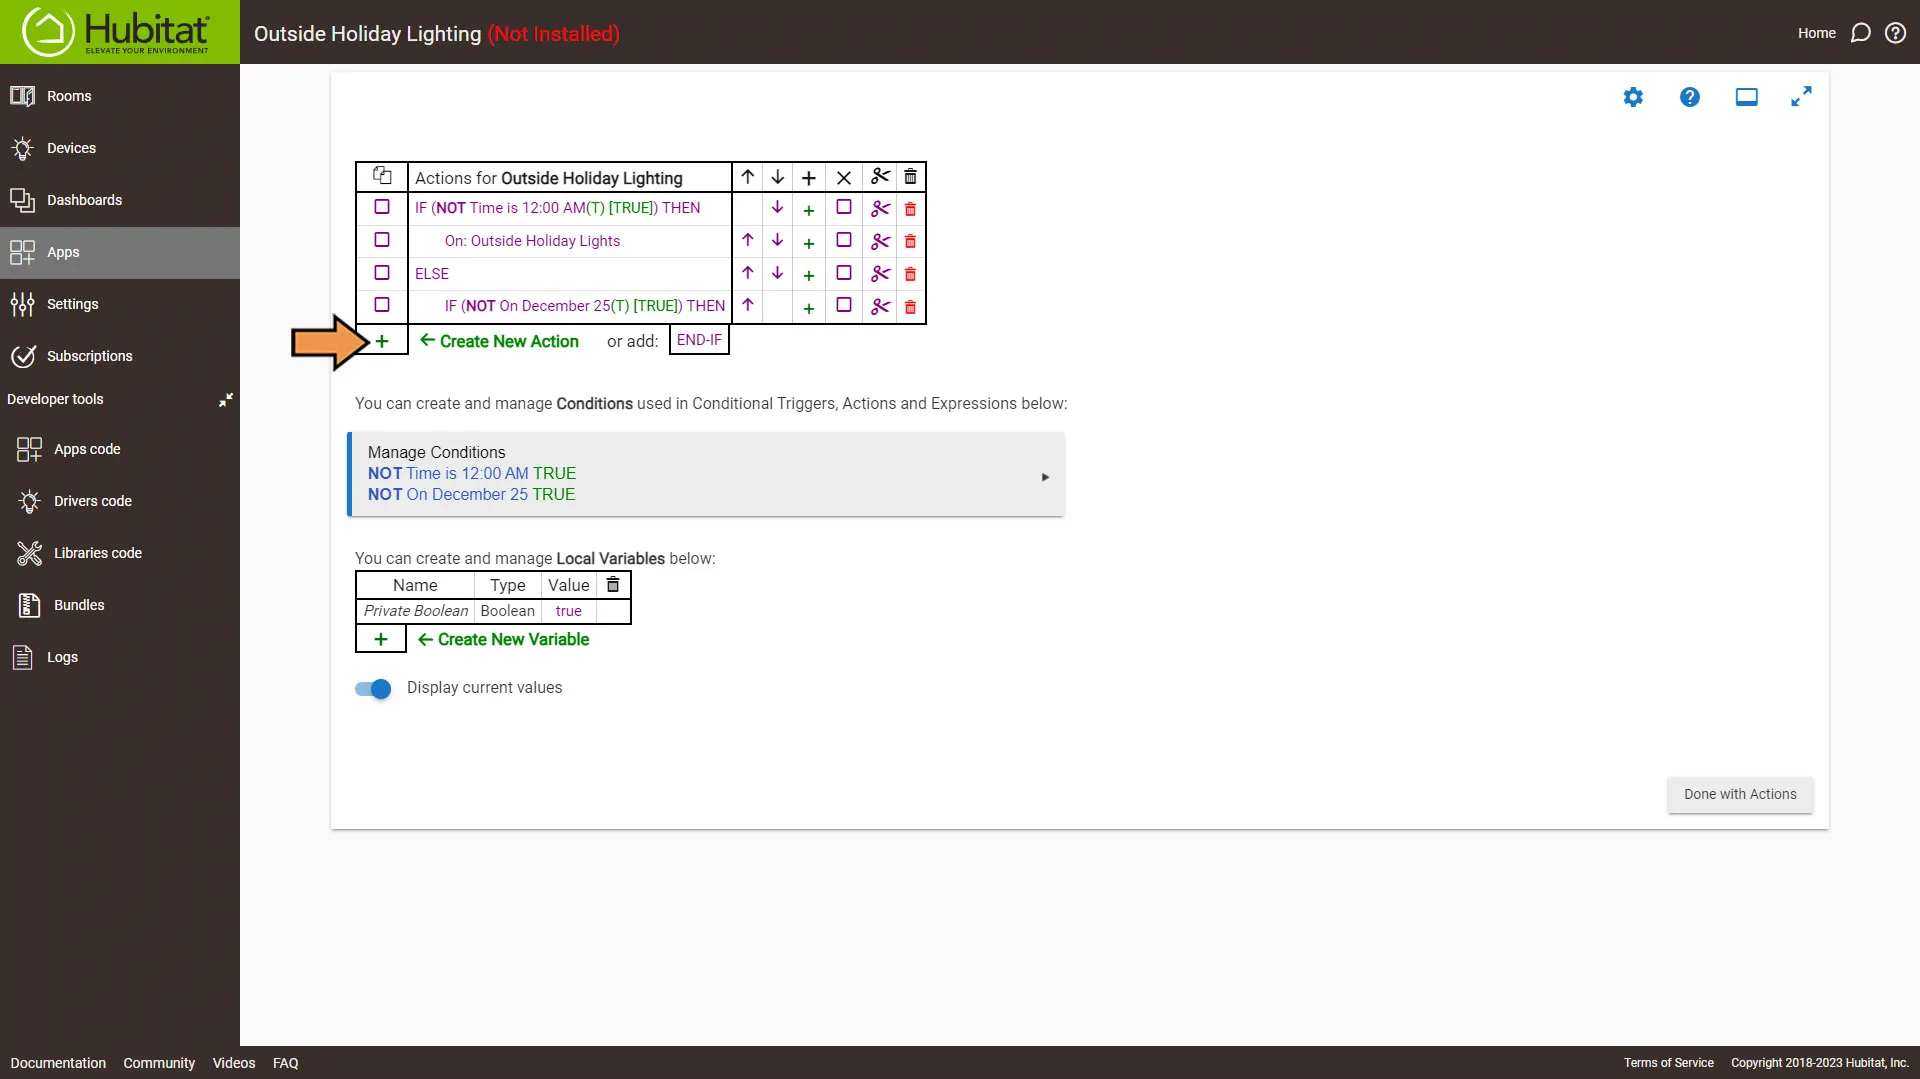
Set the following Action settings:
- Select the Control Switches option in the Select Action Type drop-down.
- Select the Turn switches on/off option in the Select Which Action.
- Next, in the Switches, to turn off drop-down, select our Outside Holiday Lights group.
- Ensure the Turn on or off switch is set to Off.
- Then click the Done with Action button.
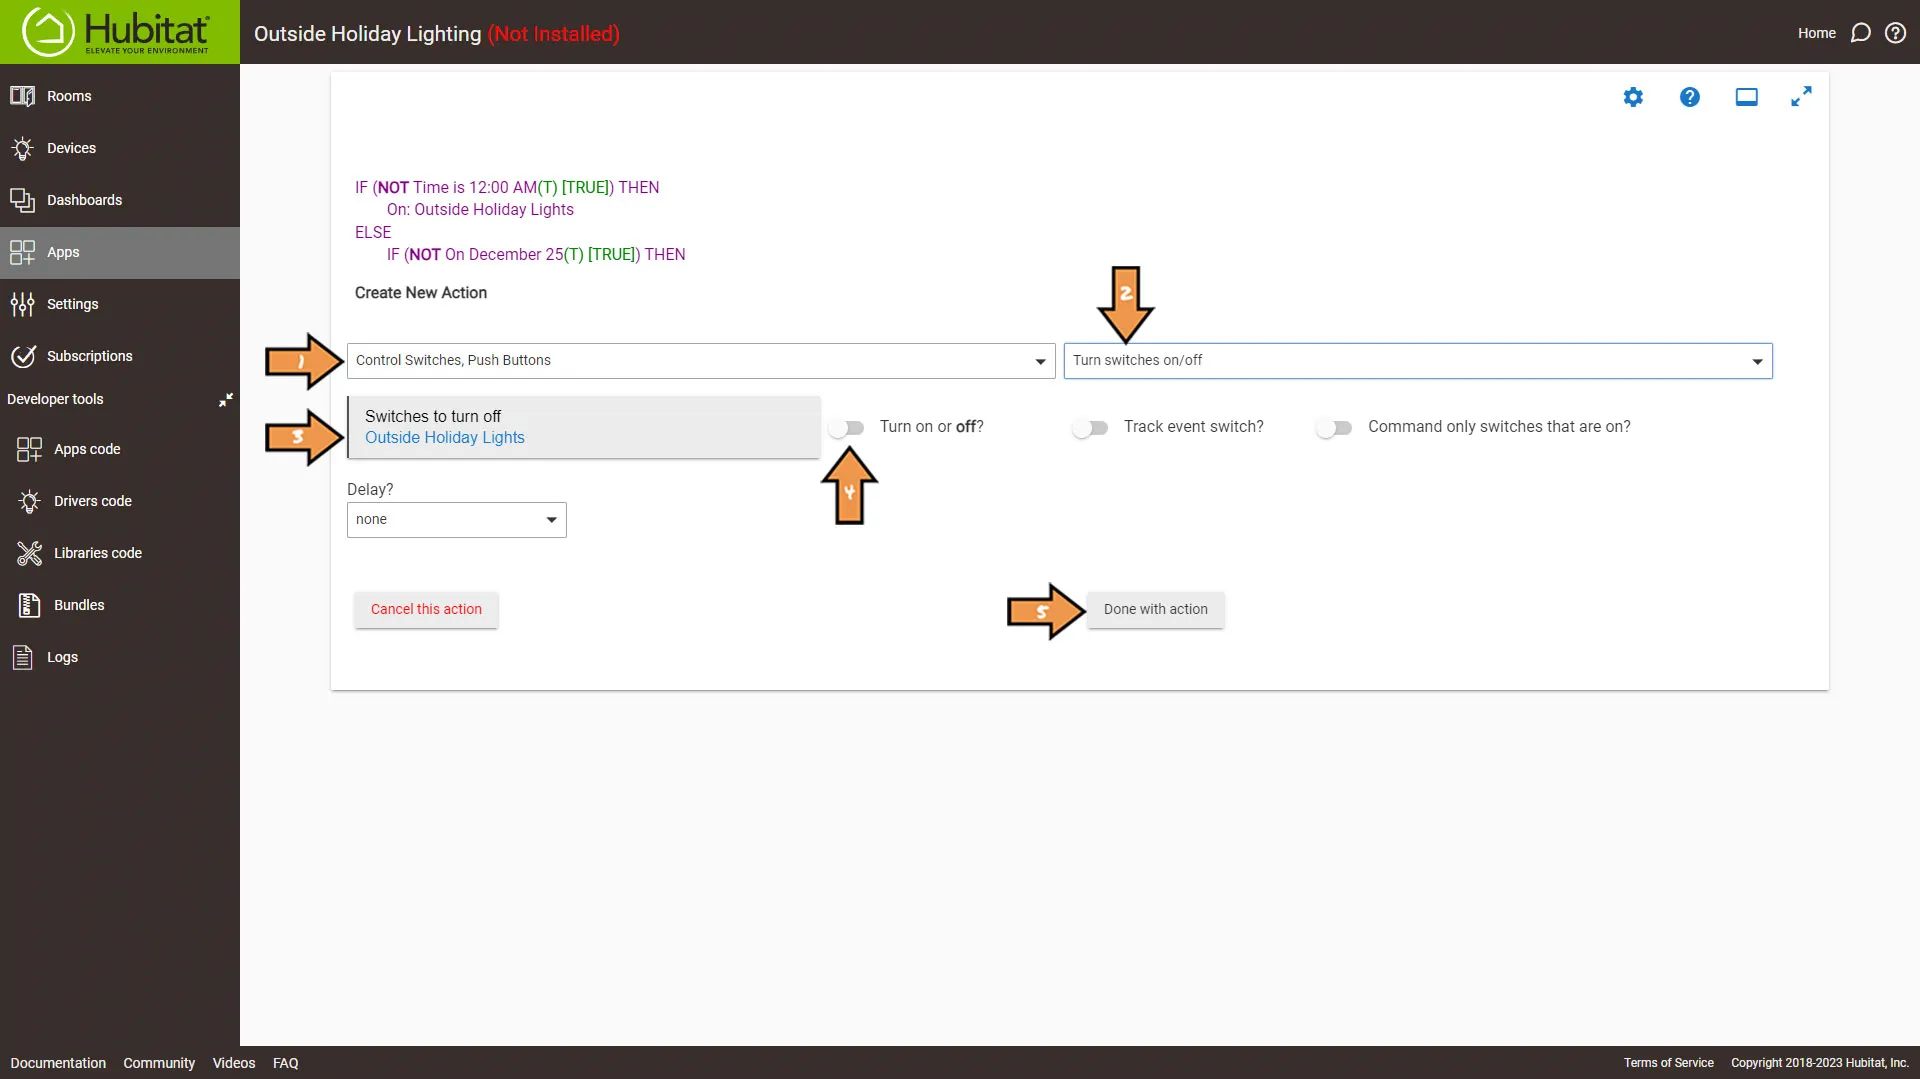
Back on the Actions Screen, Click END-IF twice to close out both conditional statements. Then click the Done with Actions button.
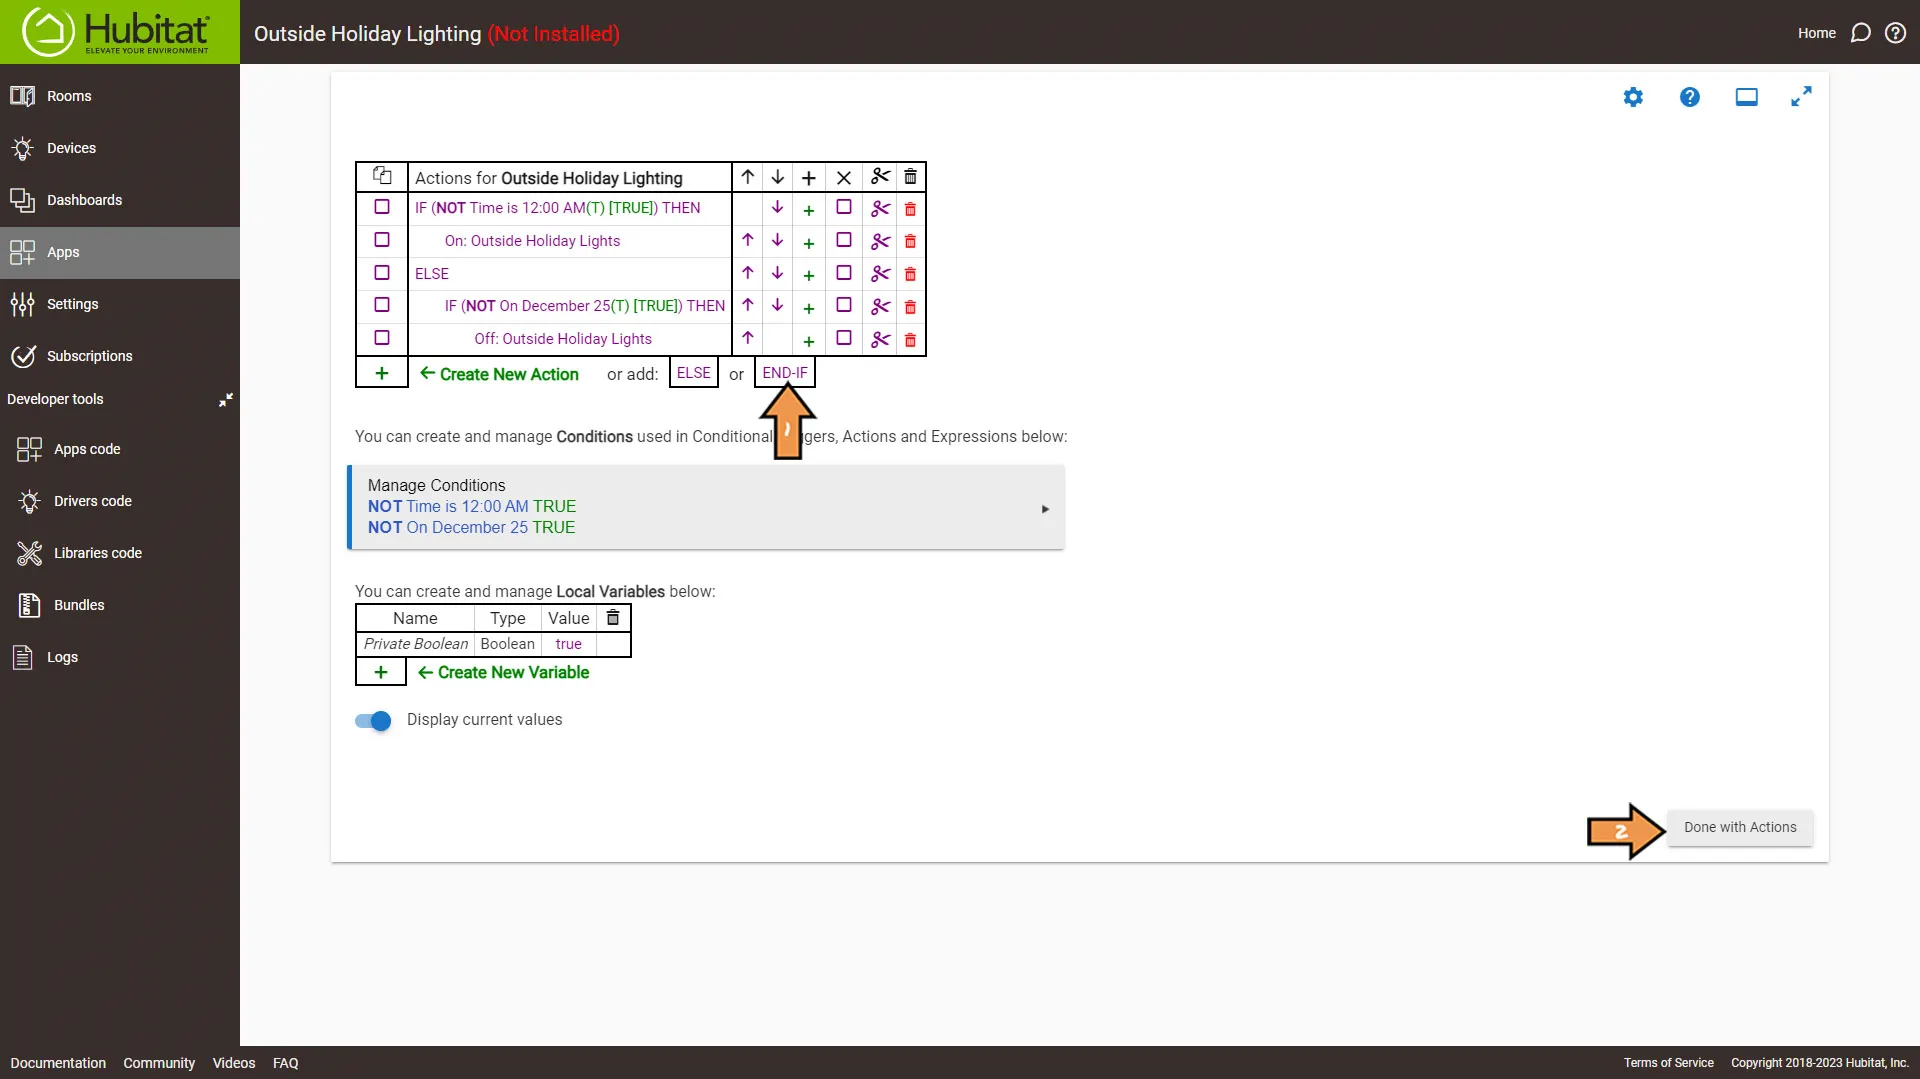
Finally, back on the Rule Main Menu click the Done button to finish up the rule.
Success: That’s It! You have successfully automated your outdoor holiday lights.
Home Assistant
Outdoor Holiday Lighting Automation
The Official Documentation for Automation editor
Setting Up the Automation
First, we need to create a new group to control all the smart plugs as one switch.
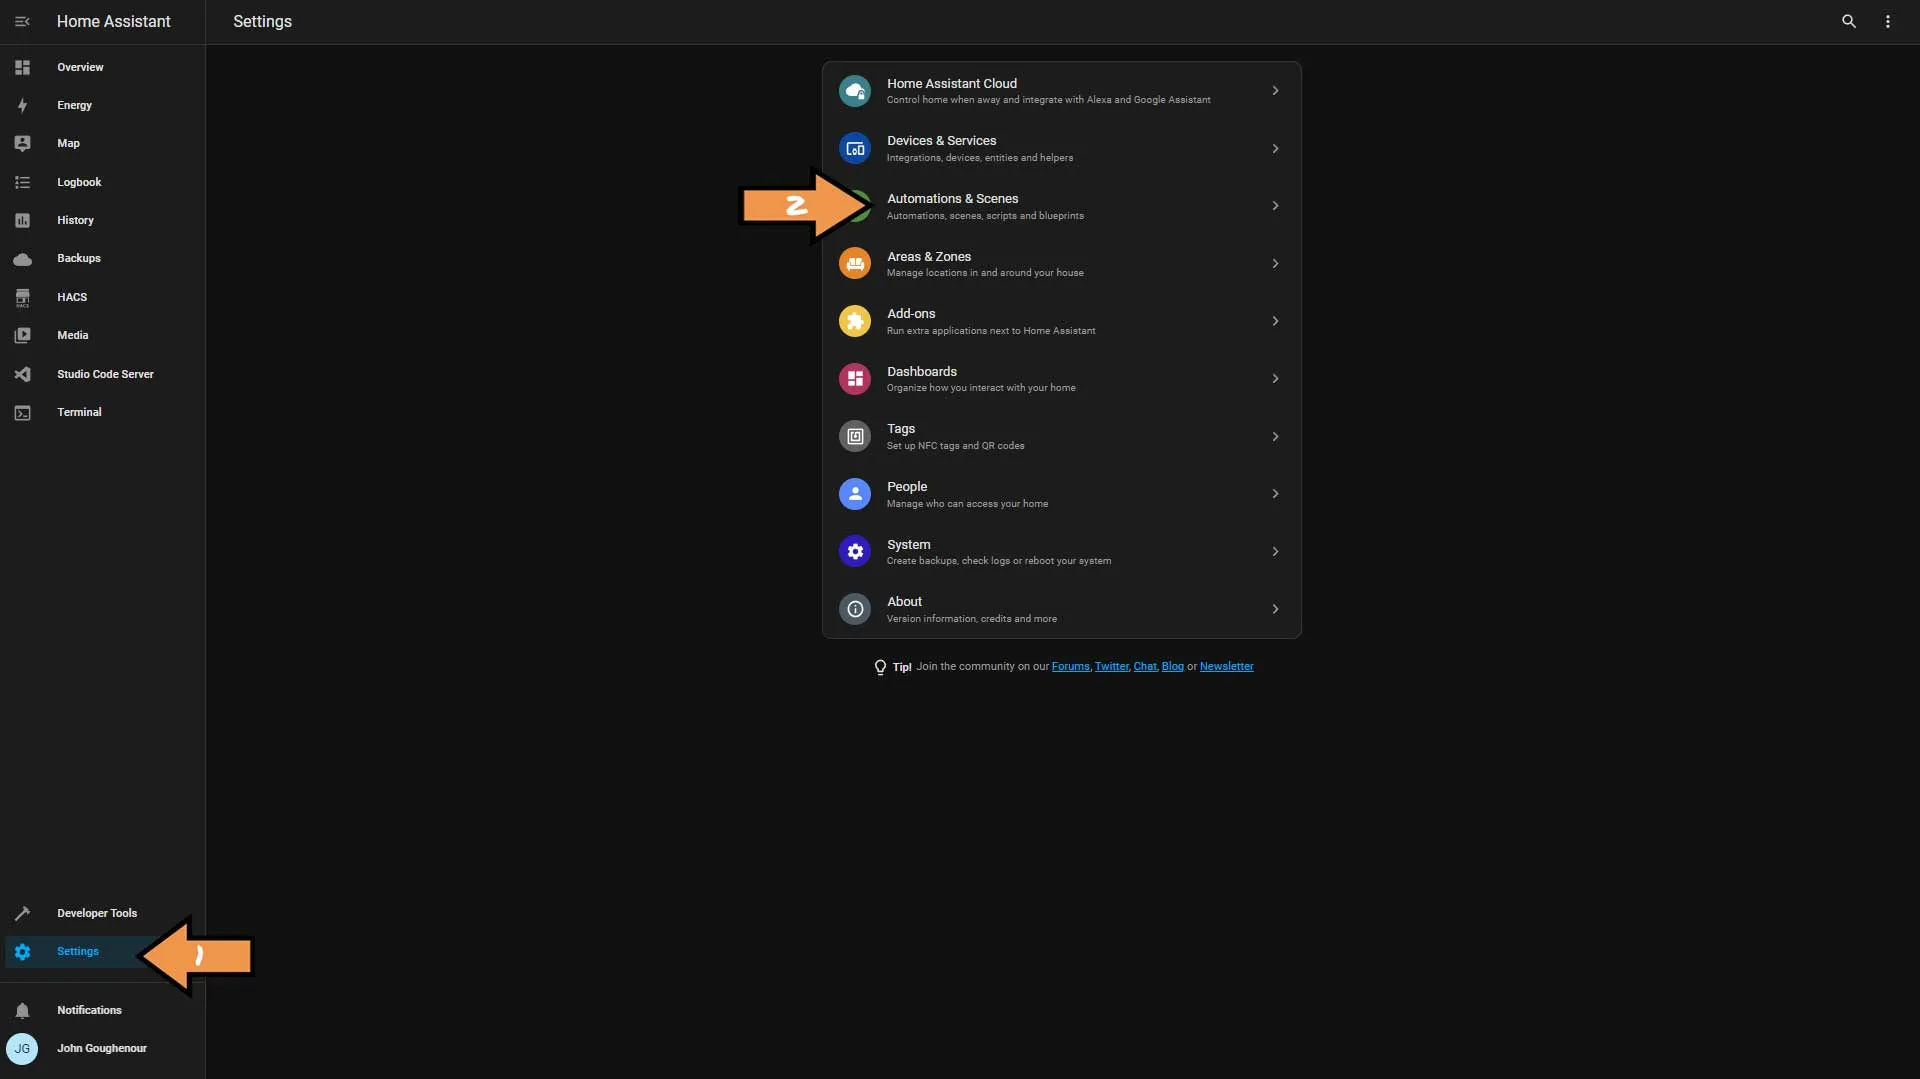
Next, we need to go to Settings and Automations & Scenes.
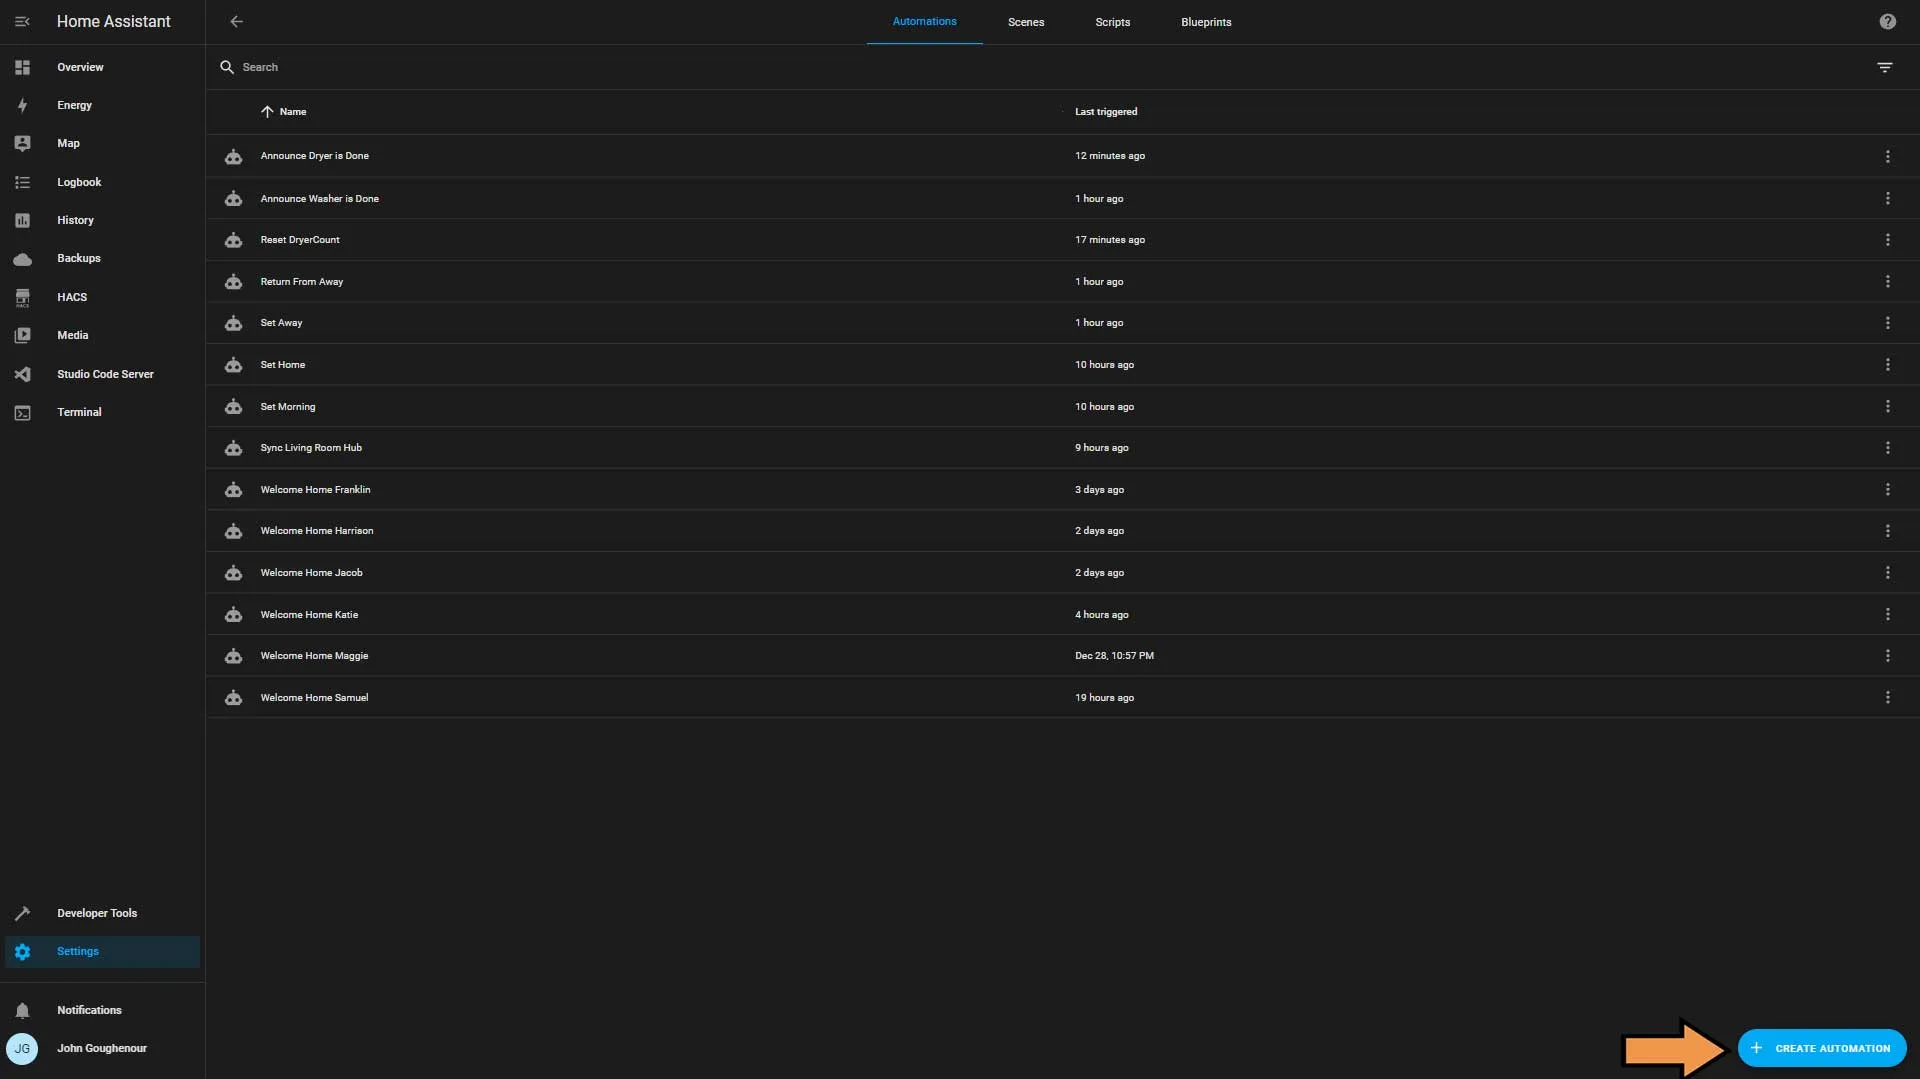
Click the blue Create Automation button.
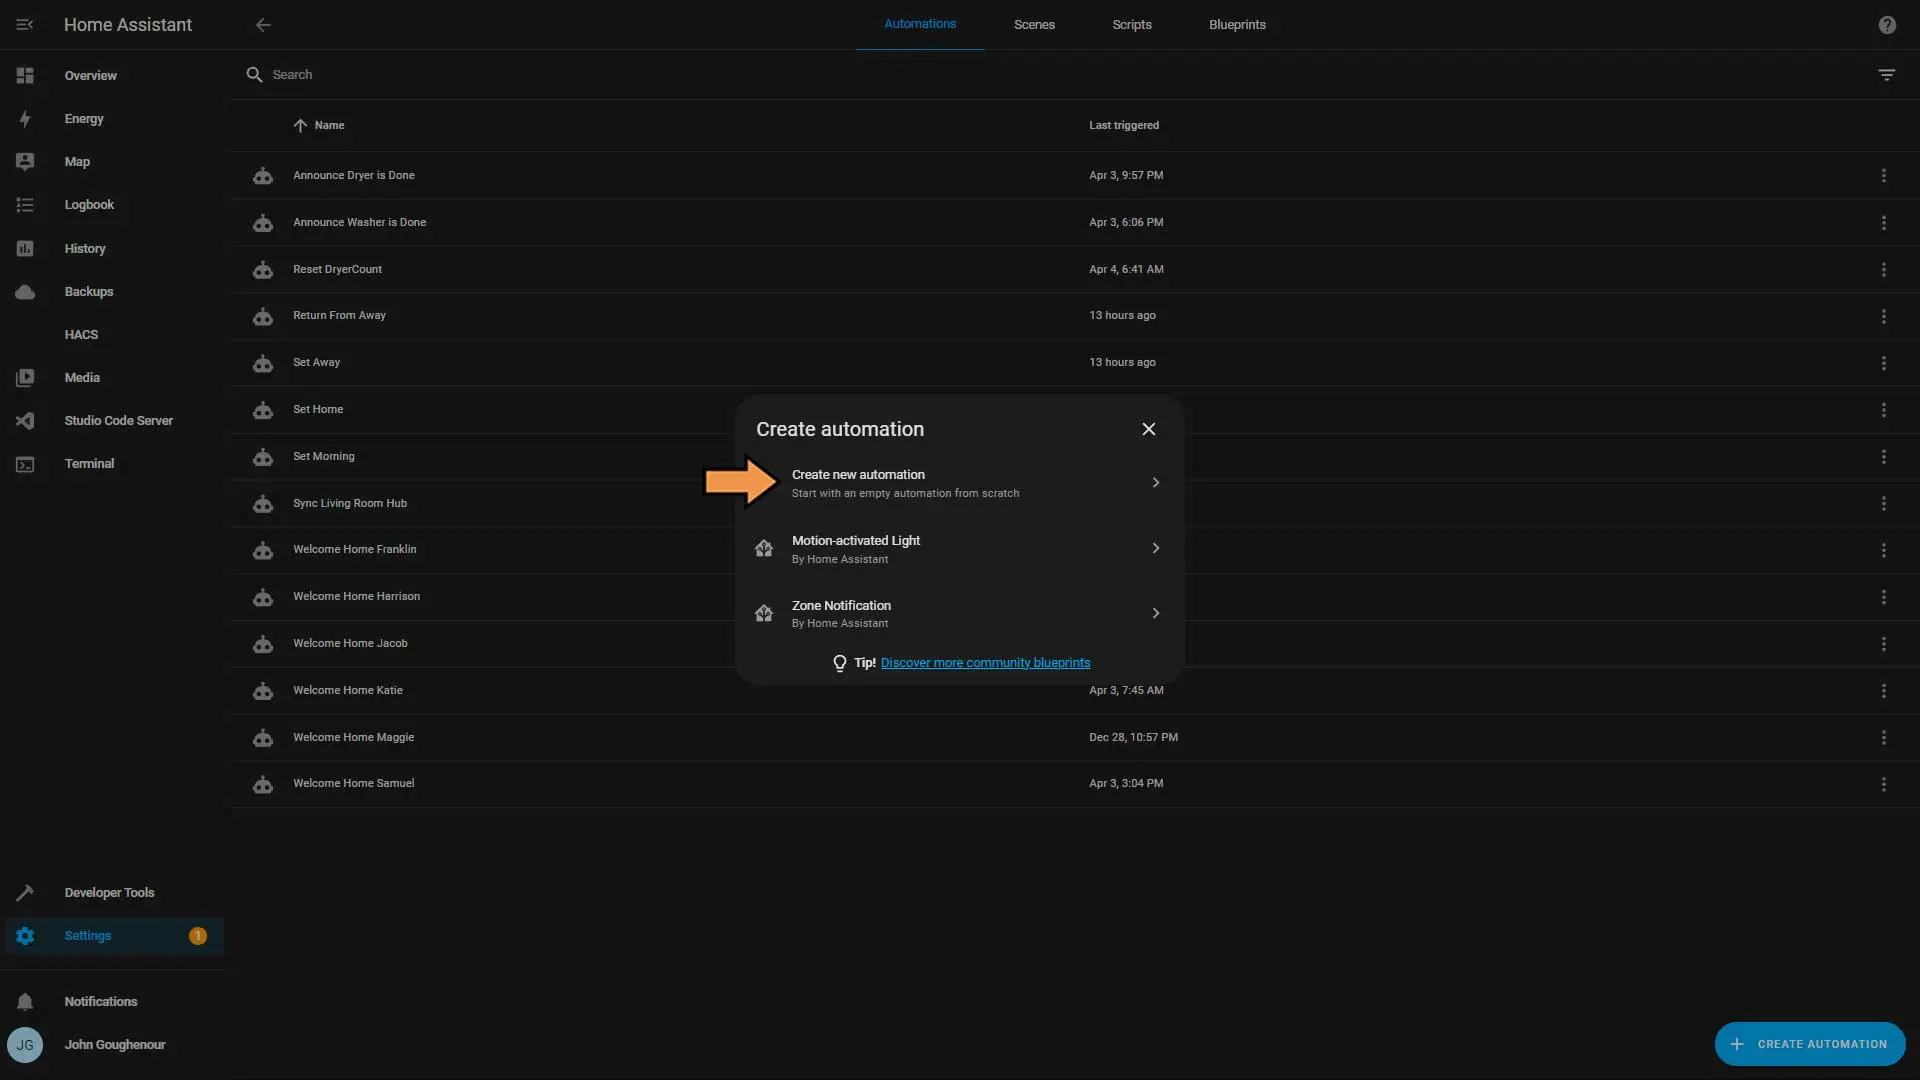
Choose Create new automation.
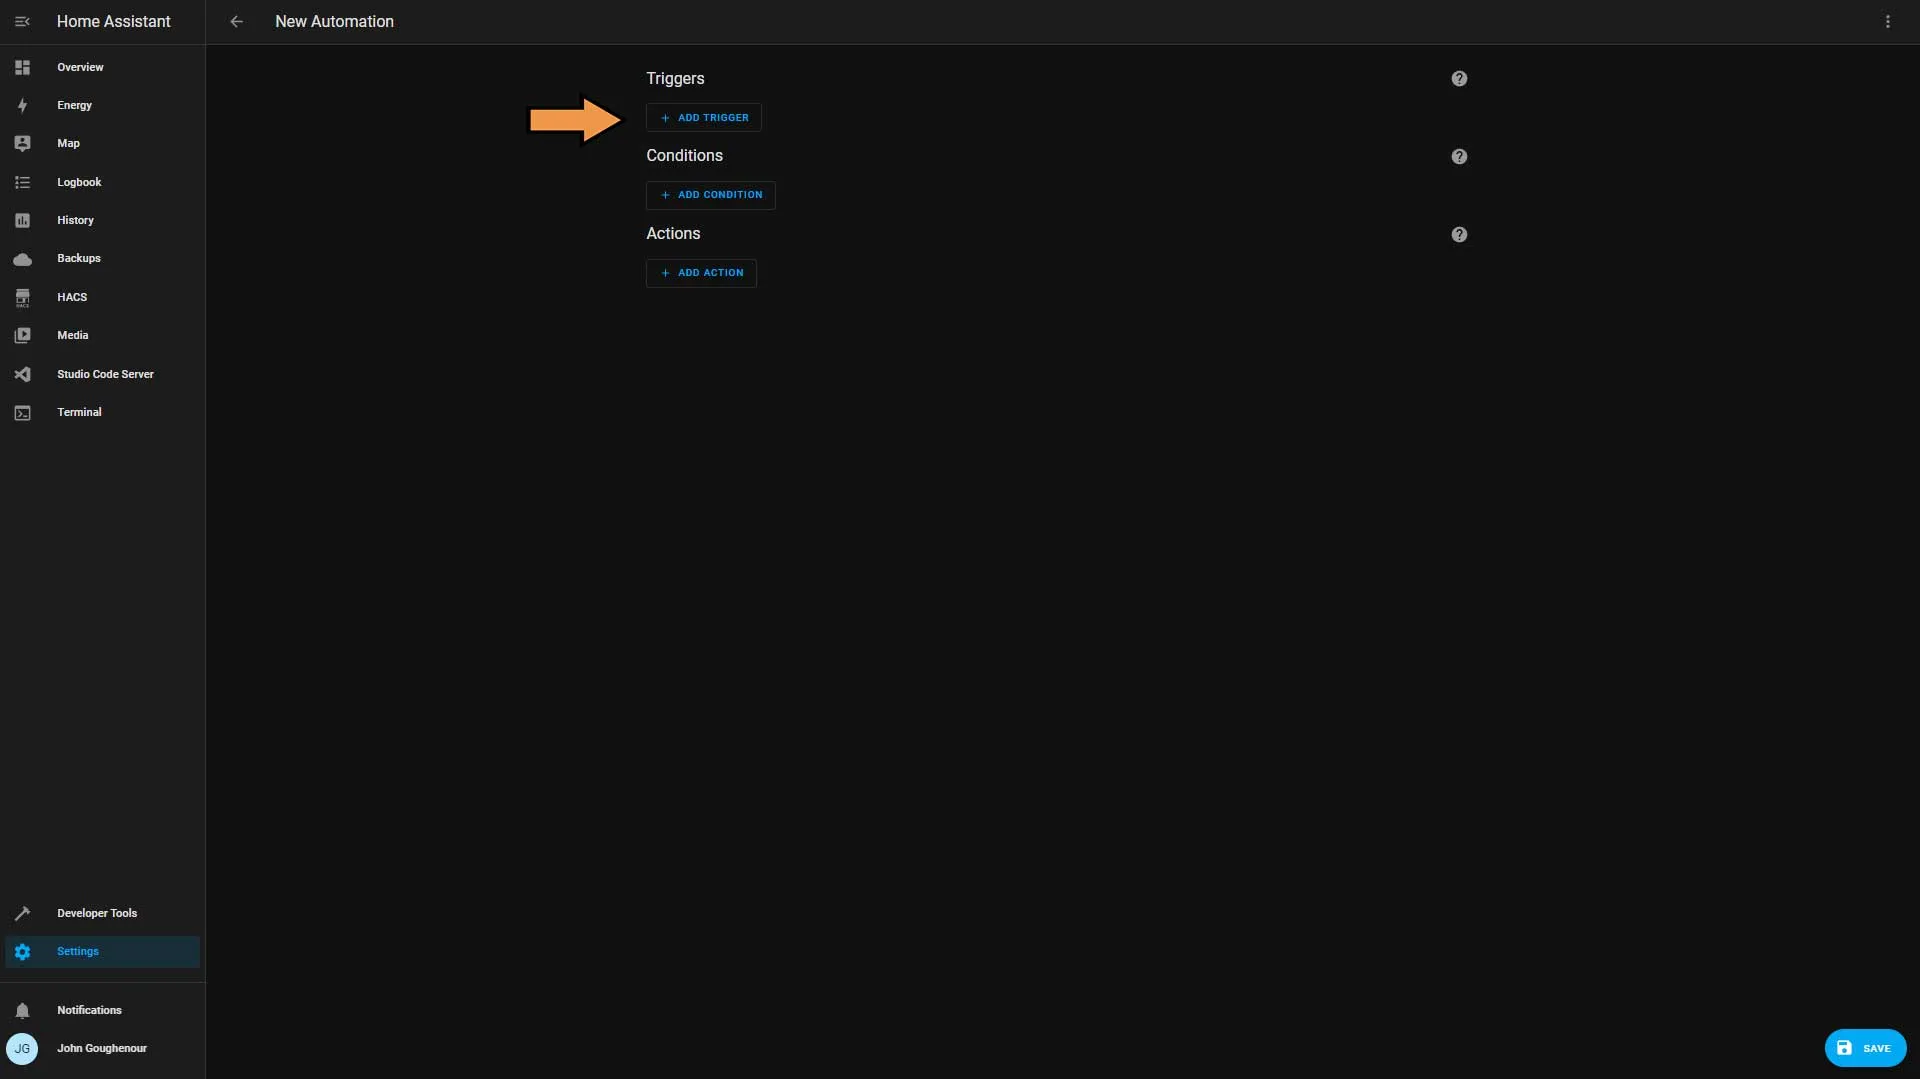
Click Add Trigger.
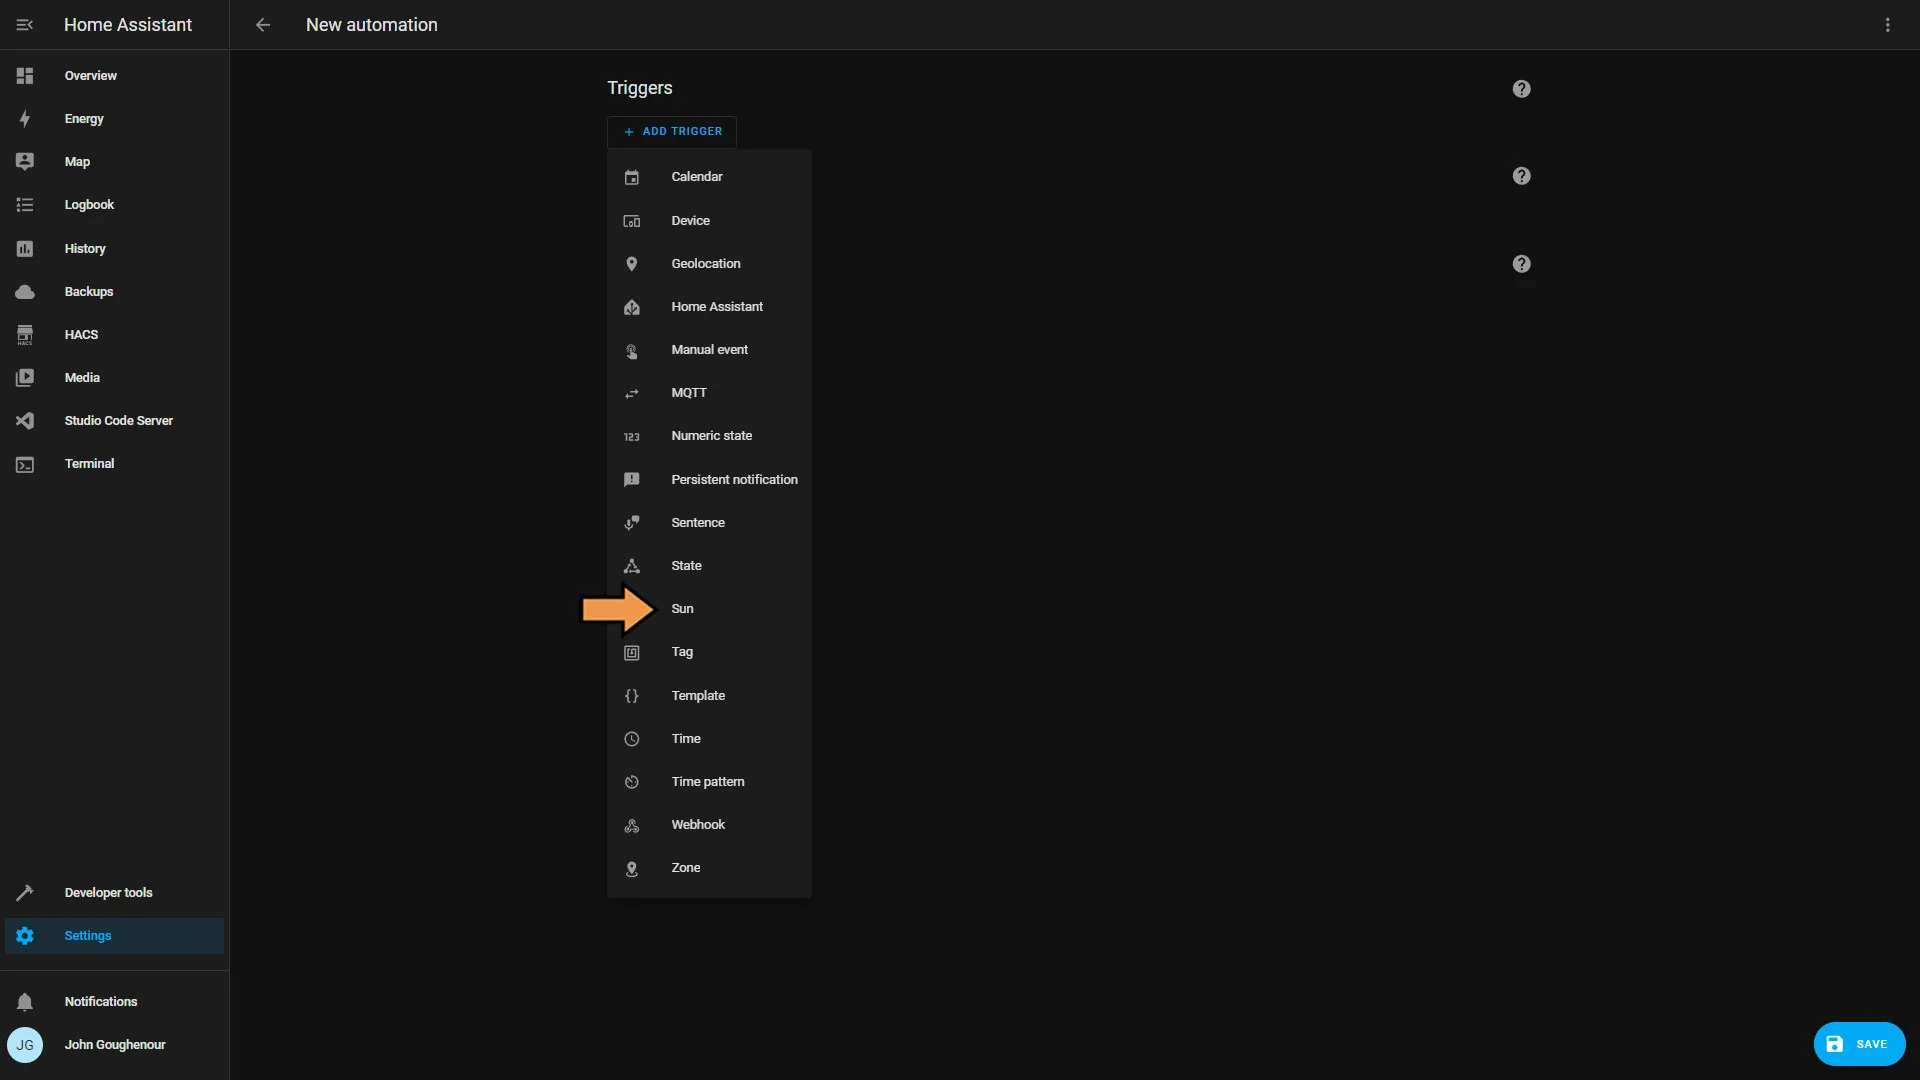
From the list, select Sun.
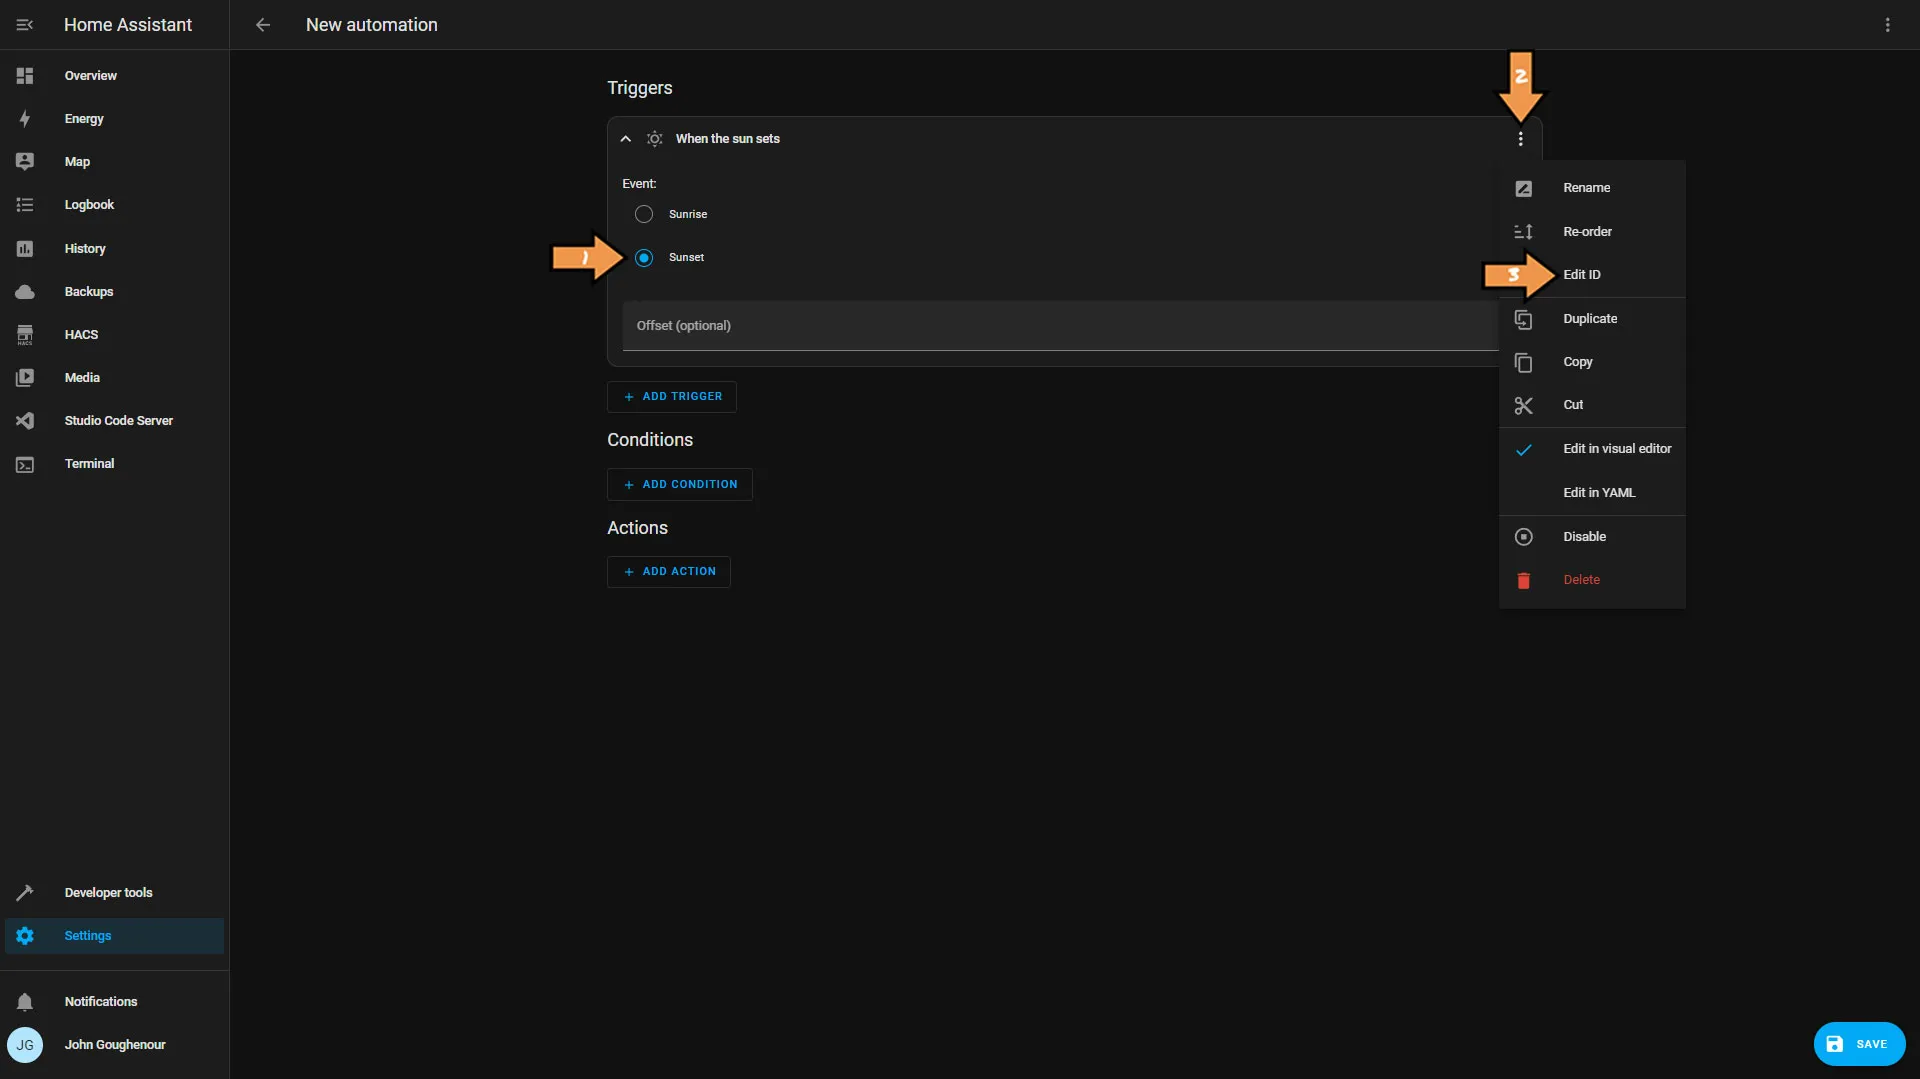
Select Sunset for the event, then click the vertical ellipsis and select Edit ID.
Set the Trigger ID to sunset.
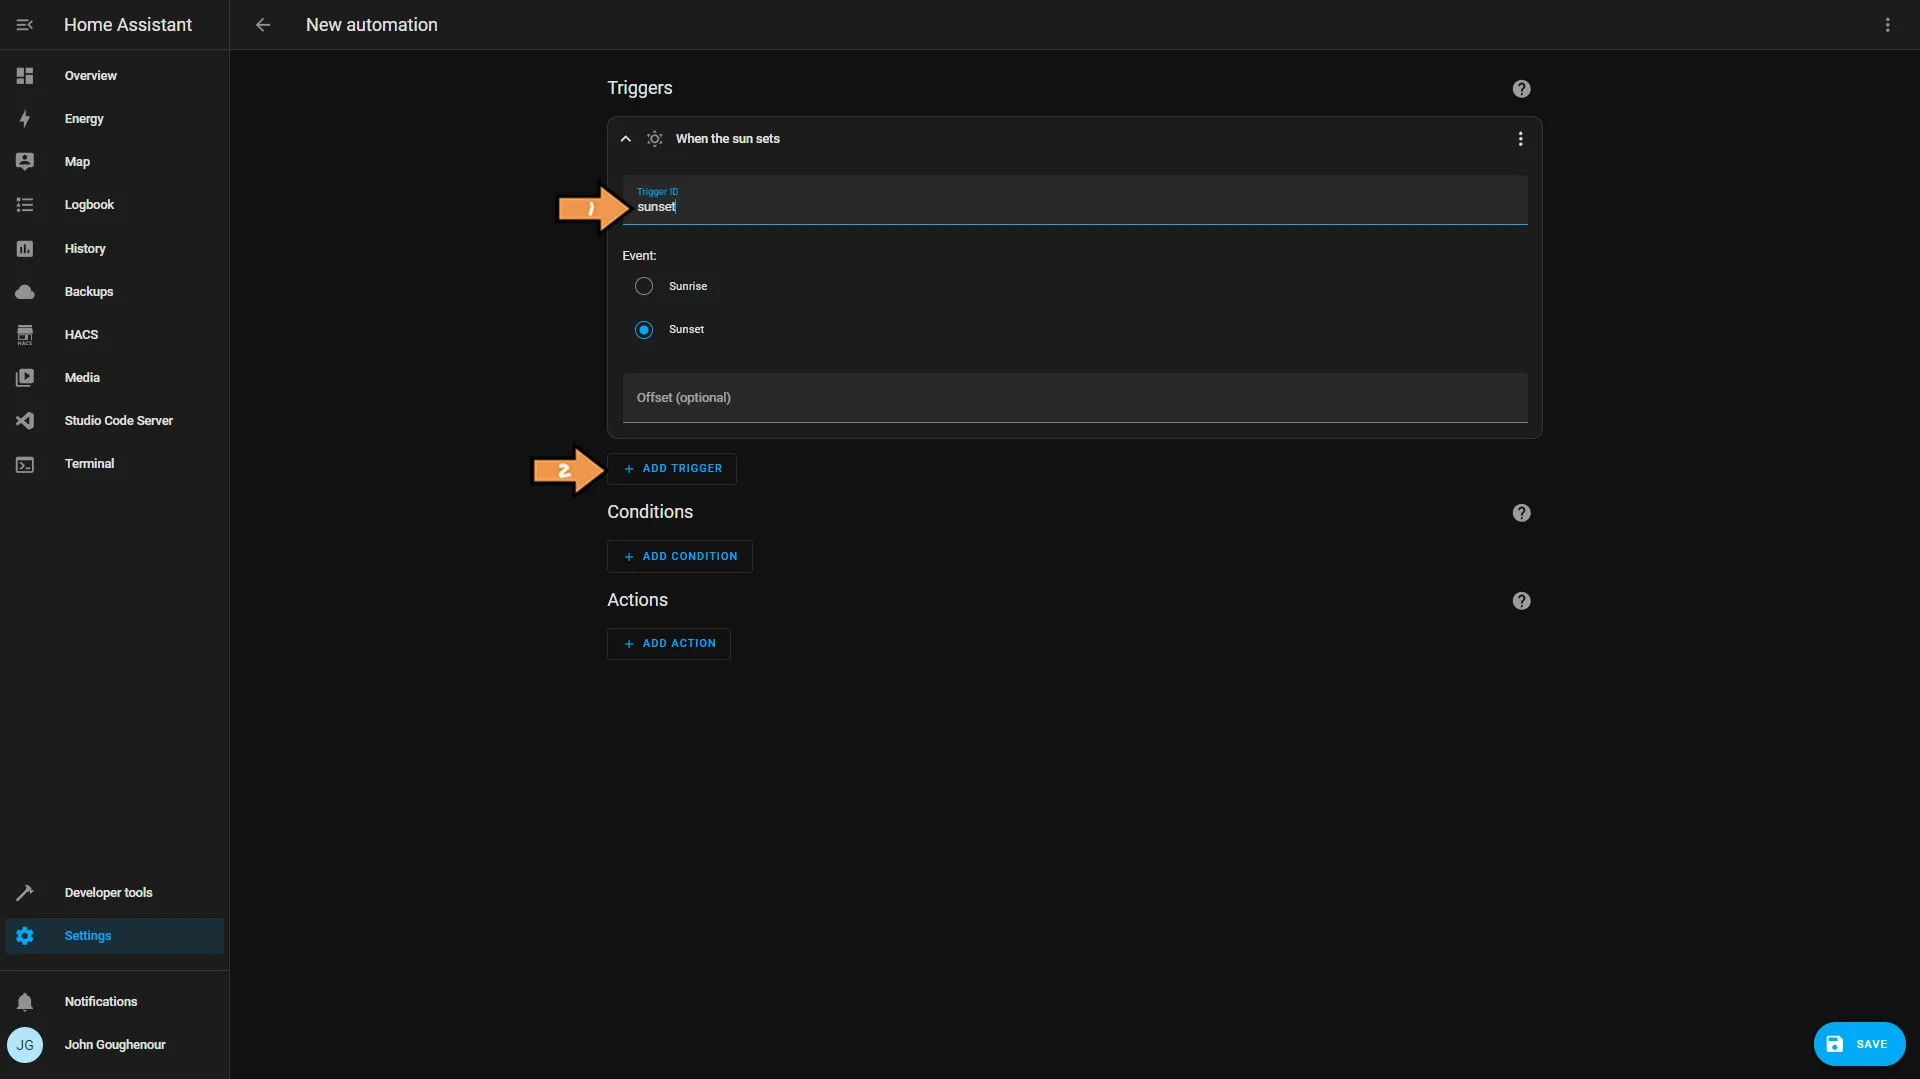
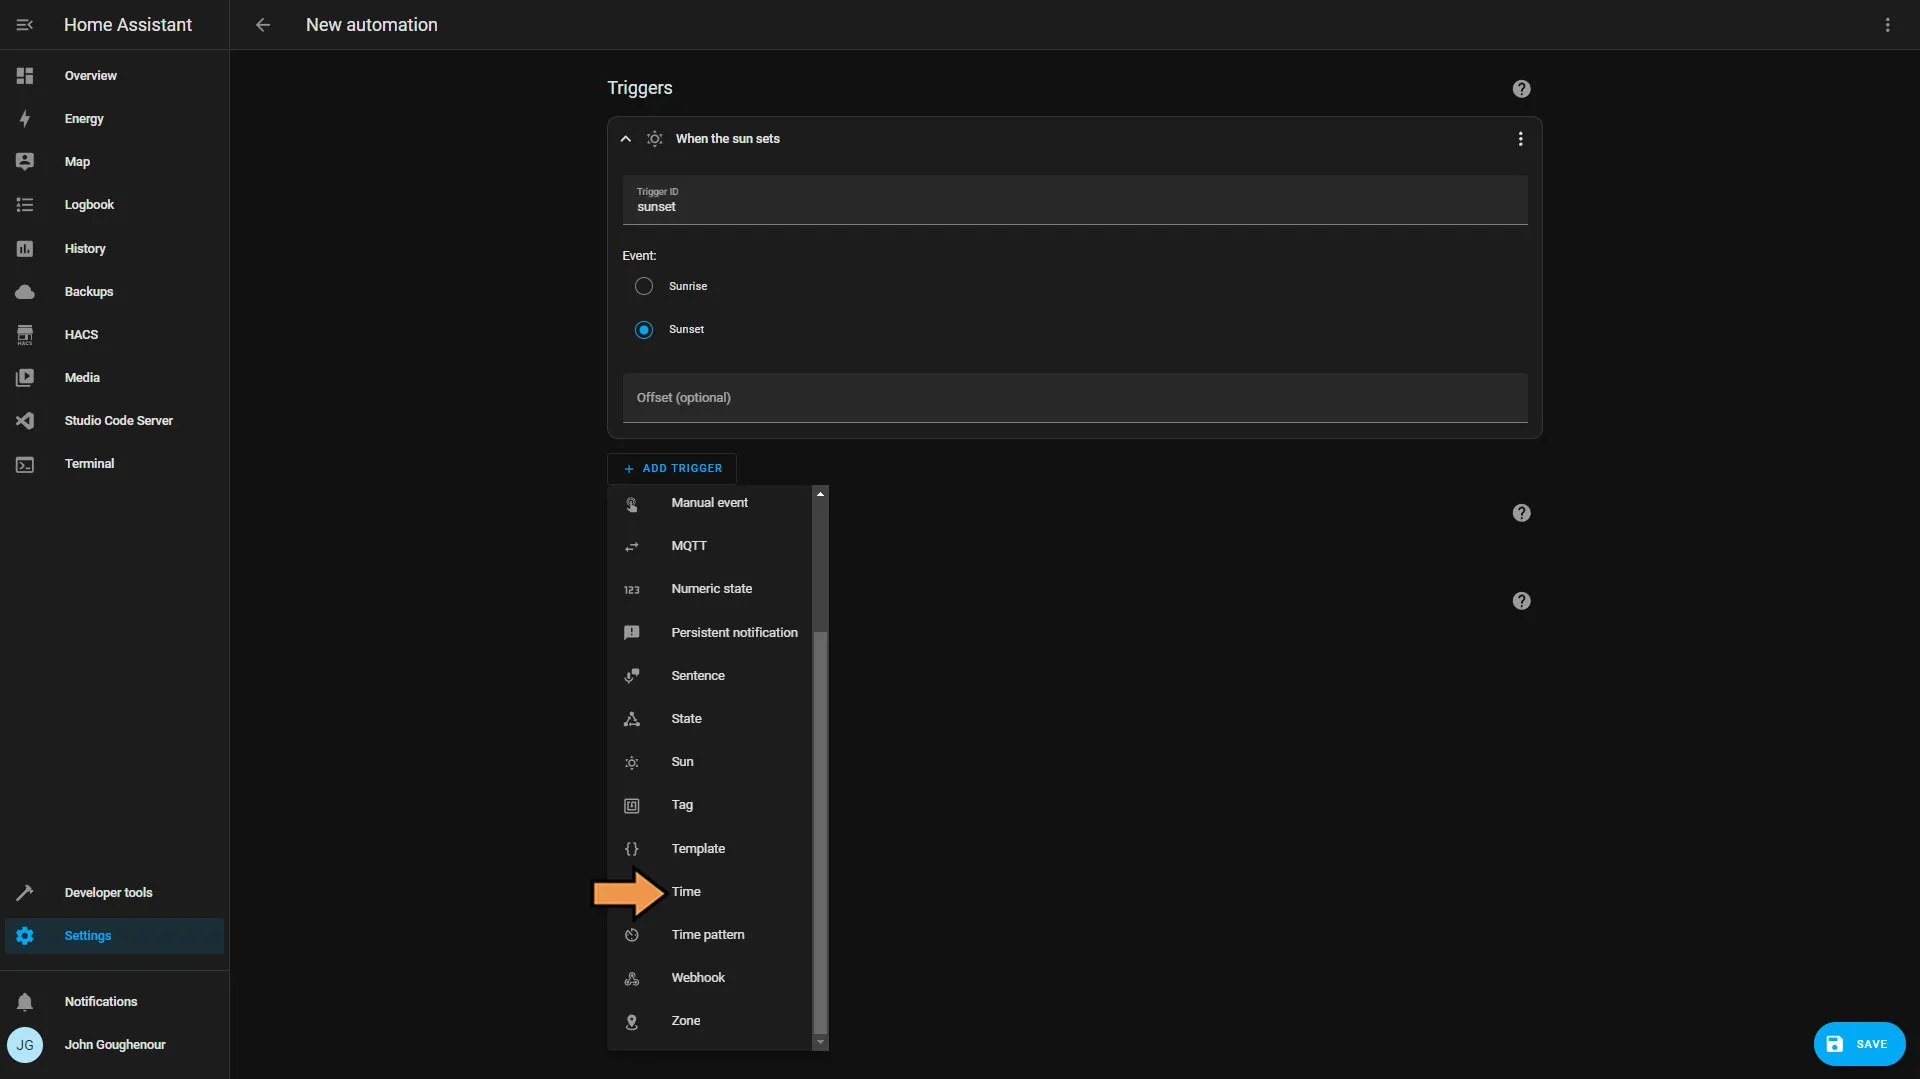
Select Time from the drop-down list.
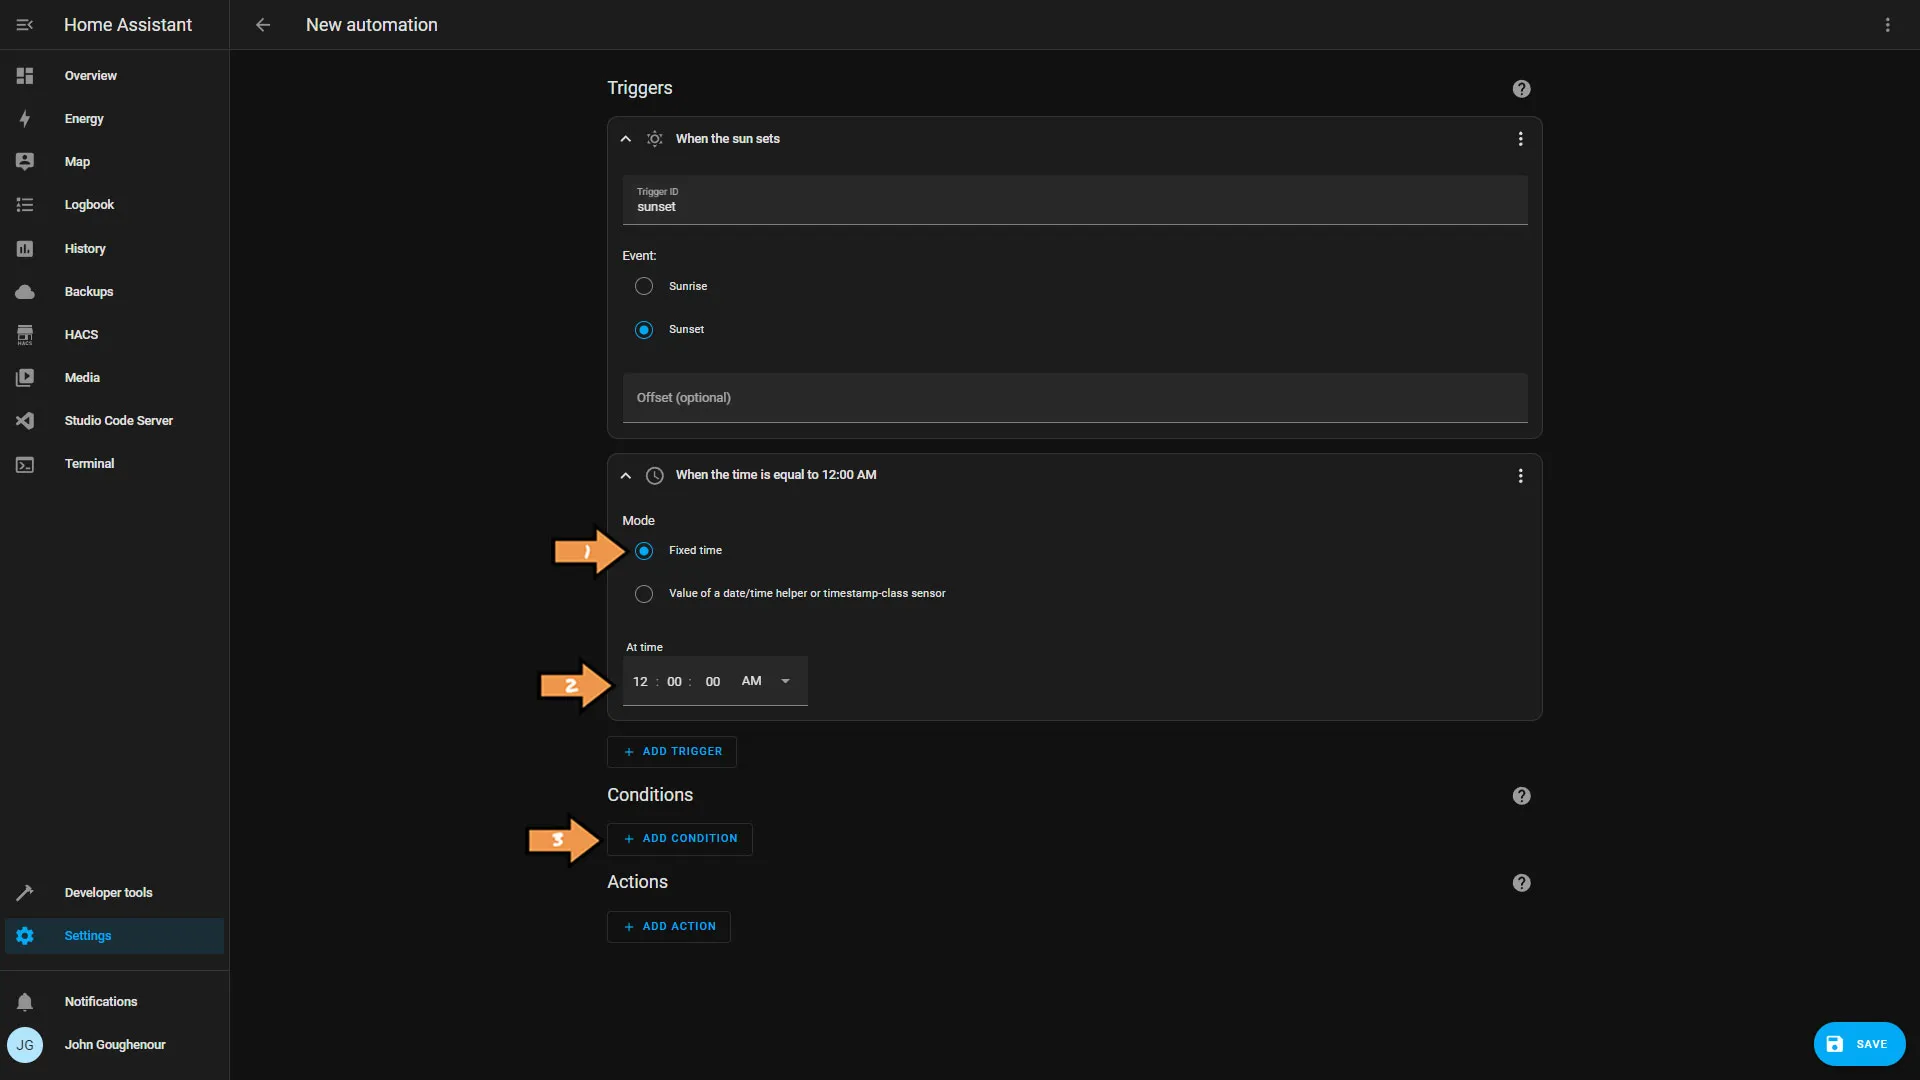
Keep the Mode set to Fixed time and set the At time to 12am. Then, click the Add Condition button.
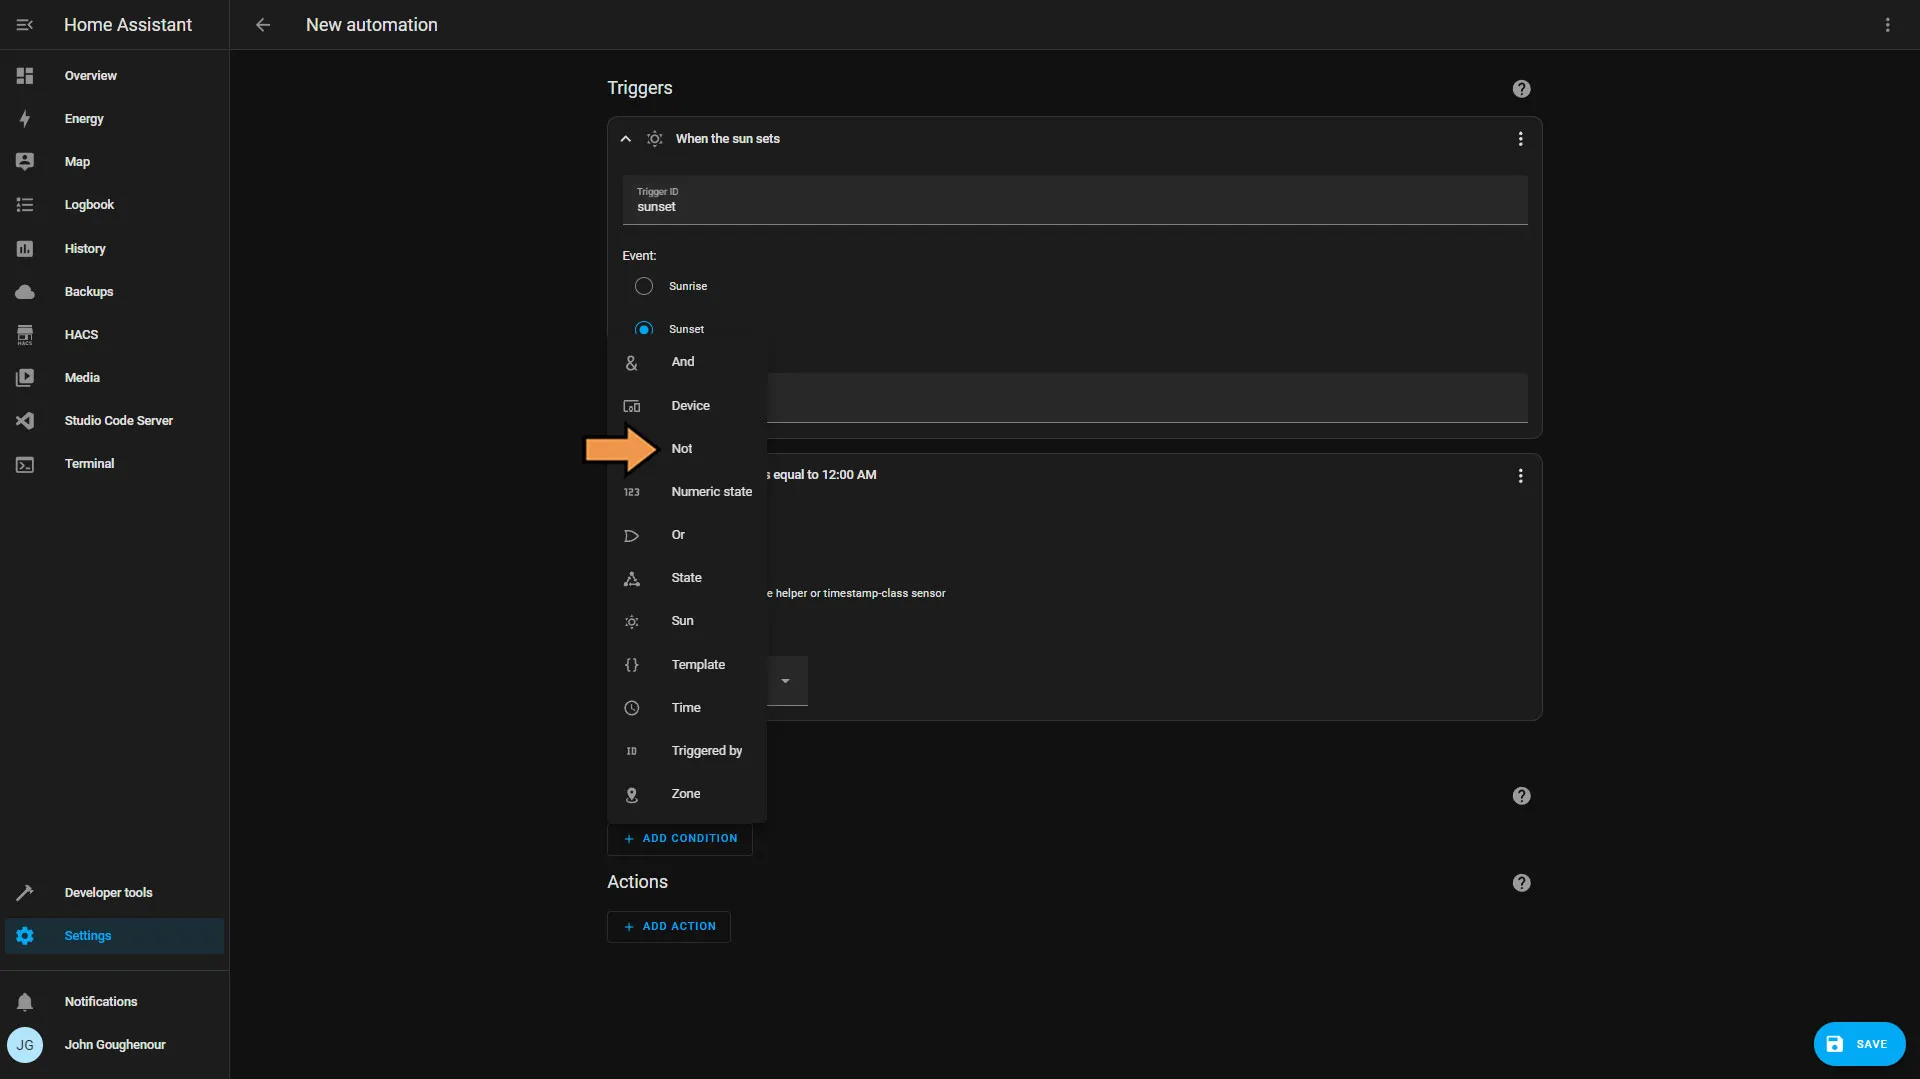
From the Condition drop-down, select Not.
Click the Add Condition button and select Template from the list in the Not Condition.
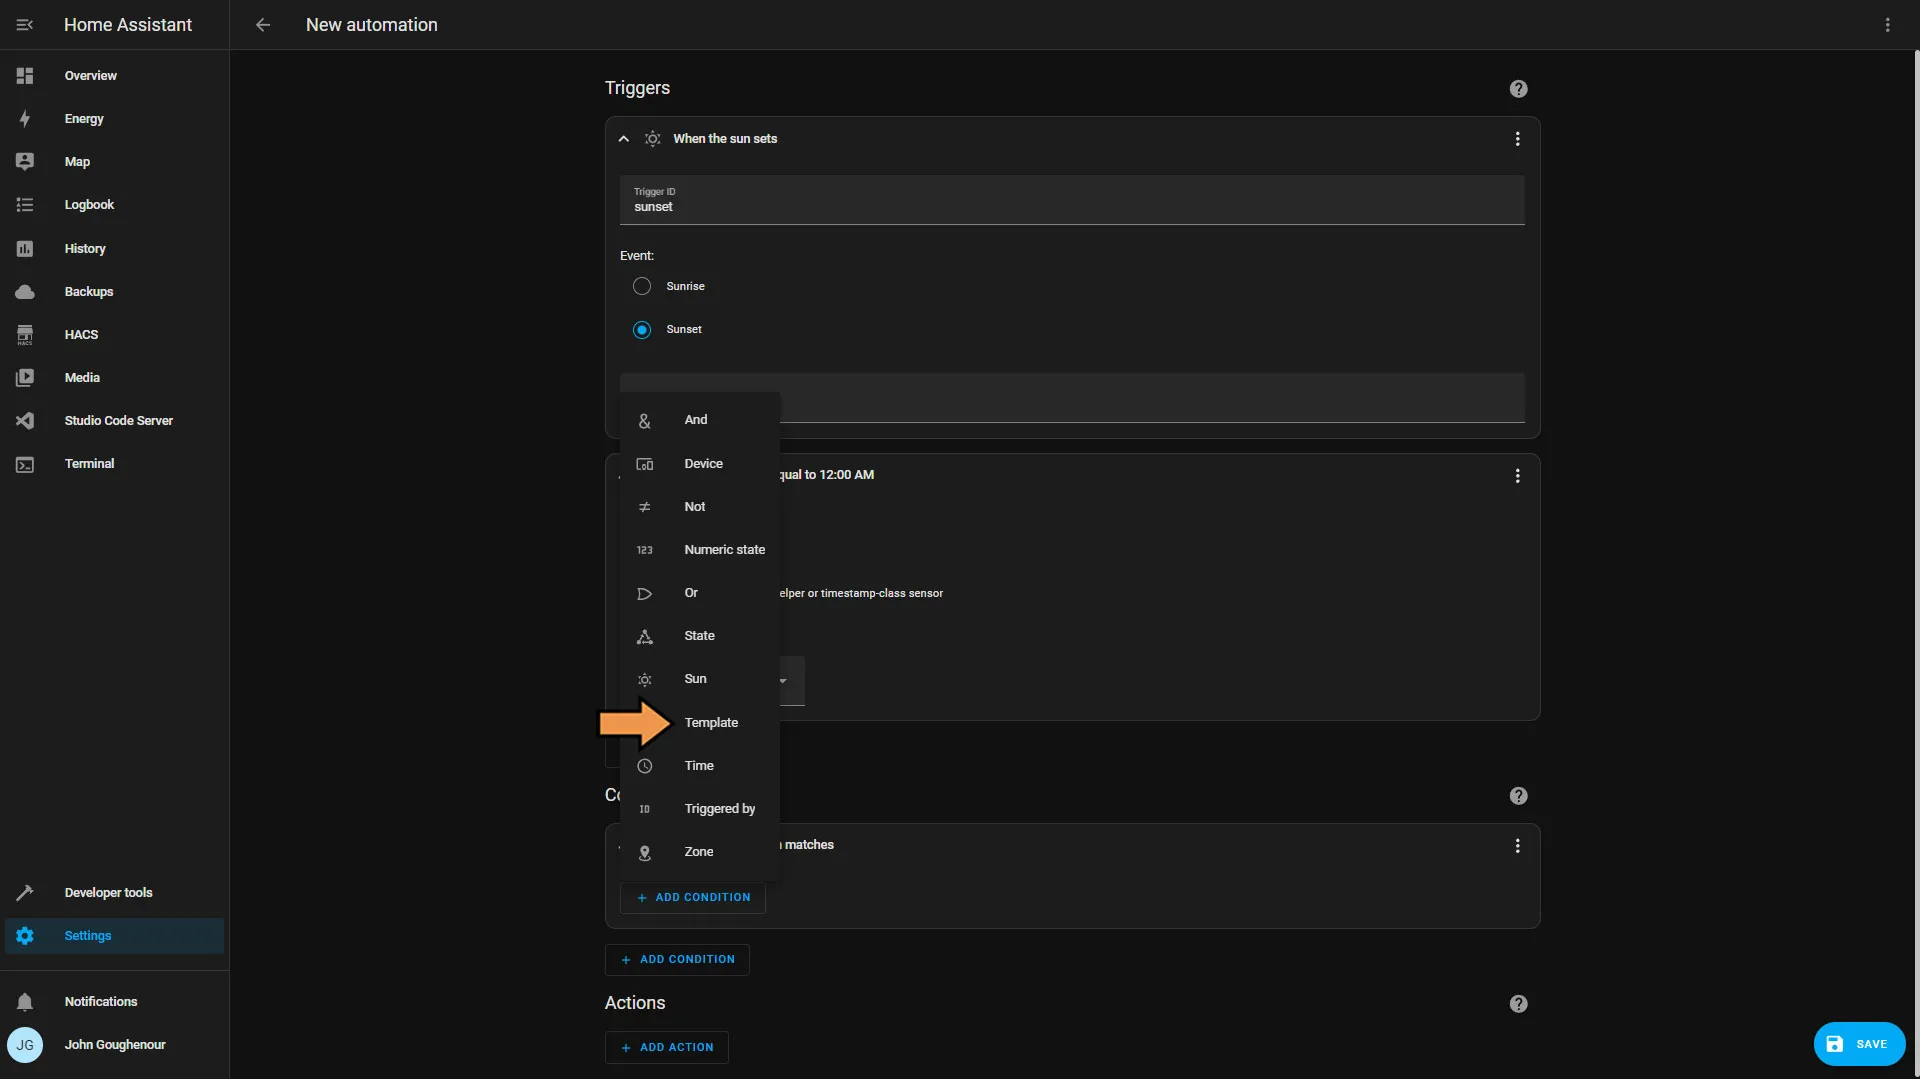
In the Value Template box paste
{{ (now().month, now().day) == (12, 25) }}.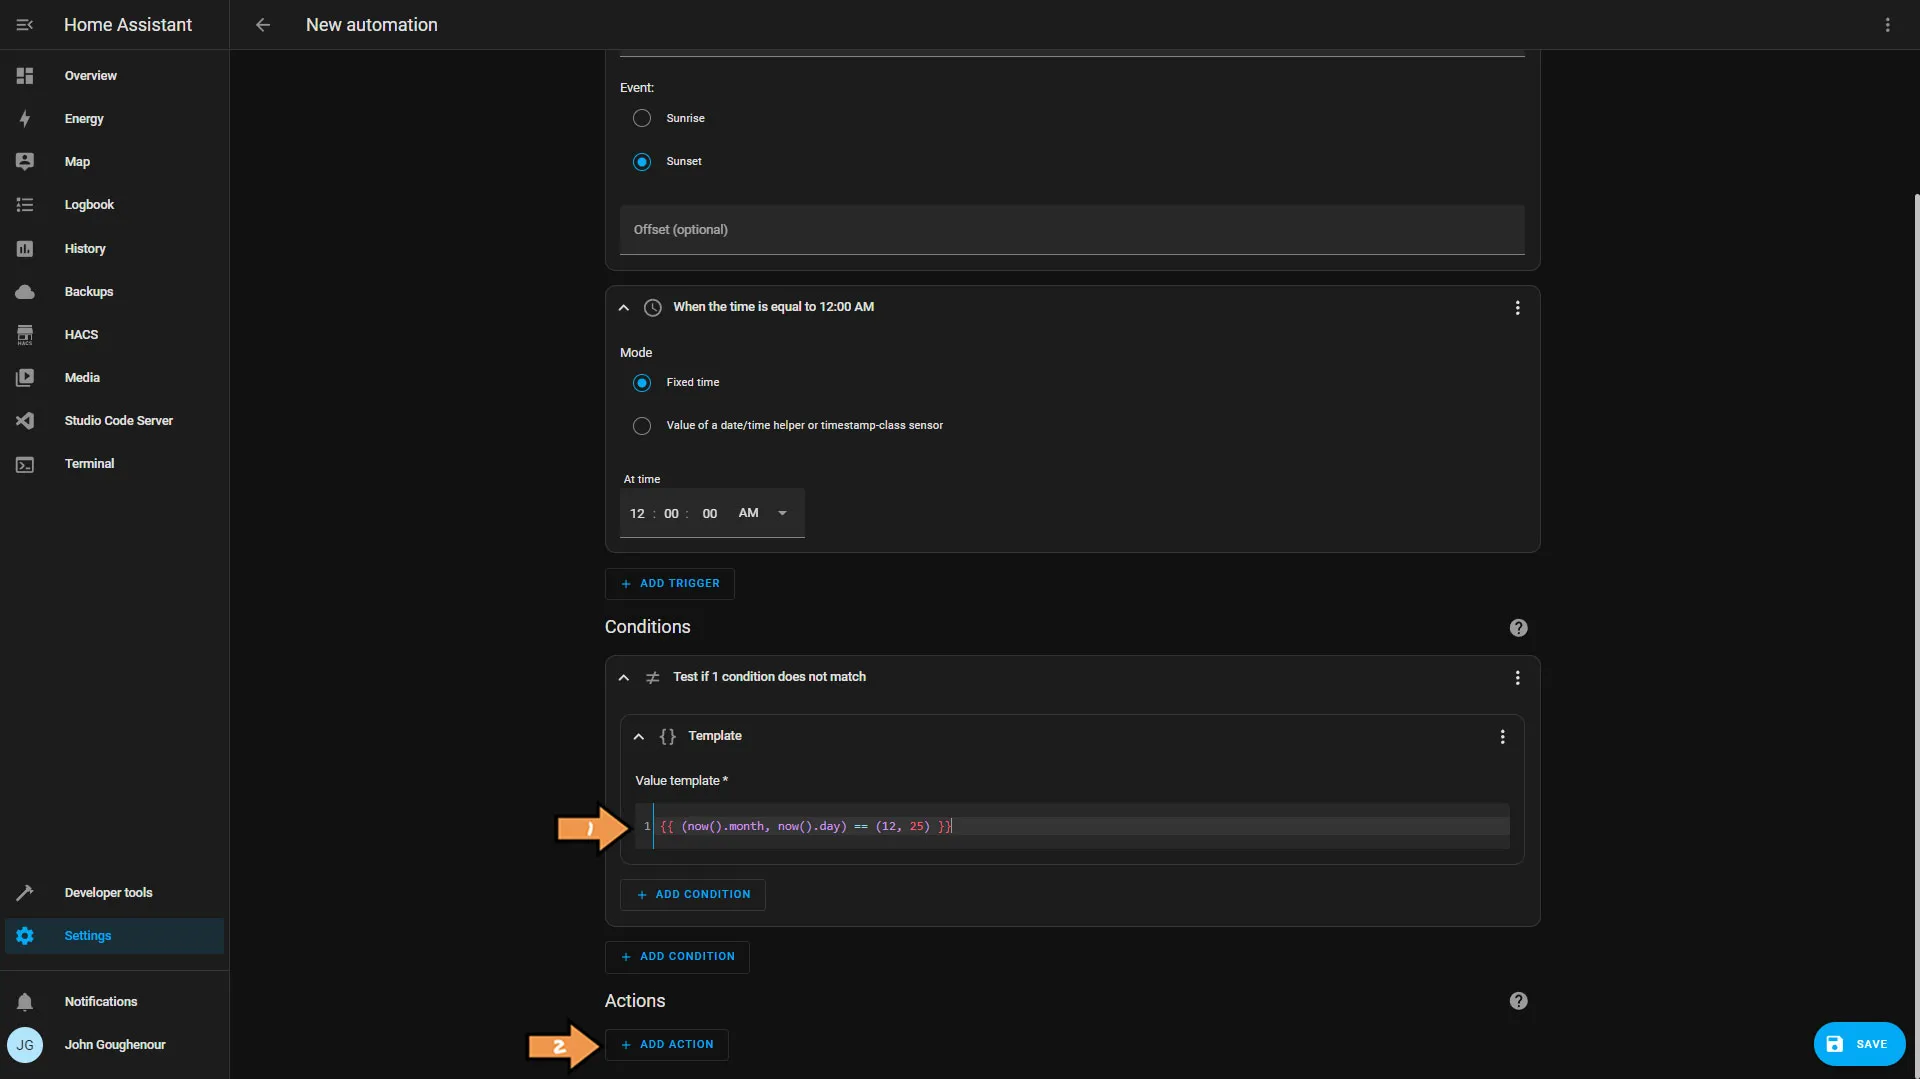
Select If-then from the add action list.
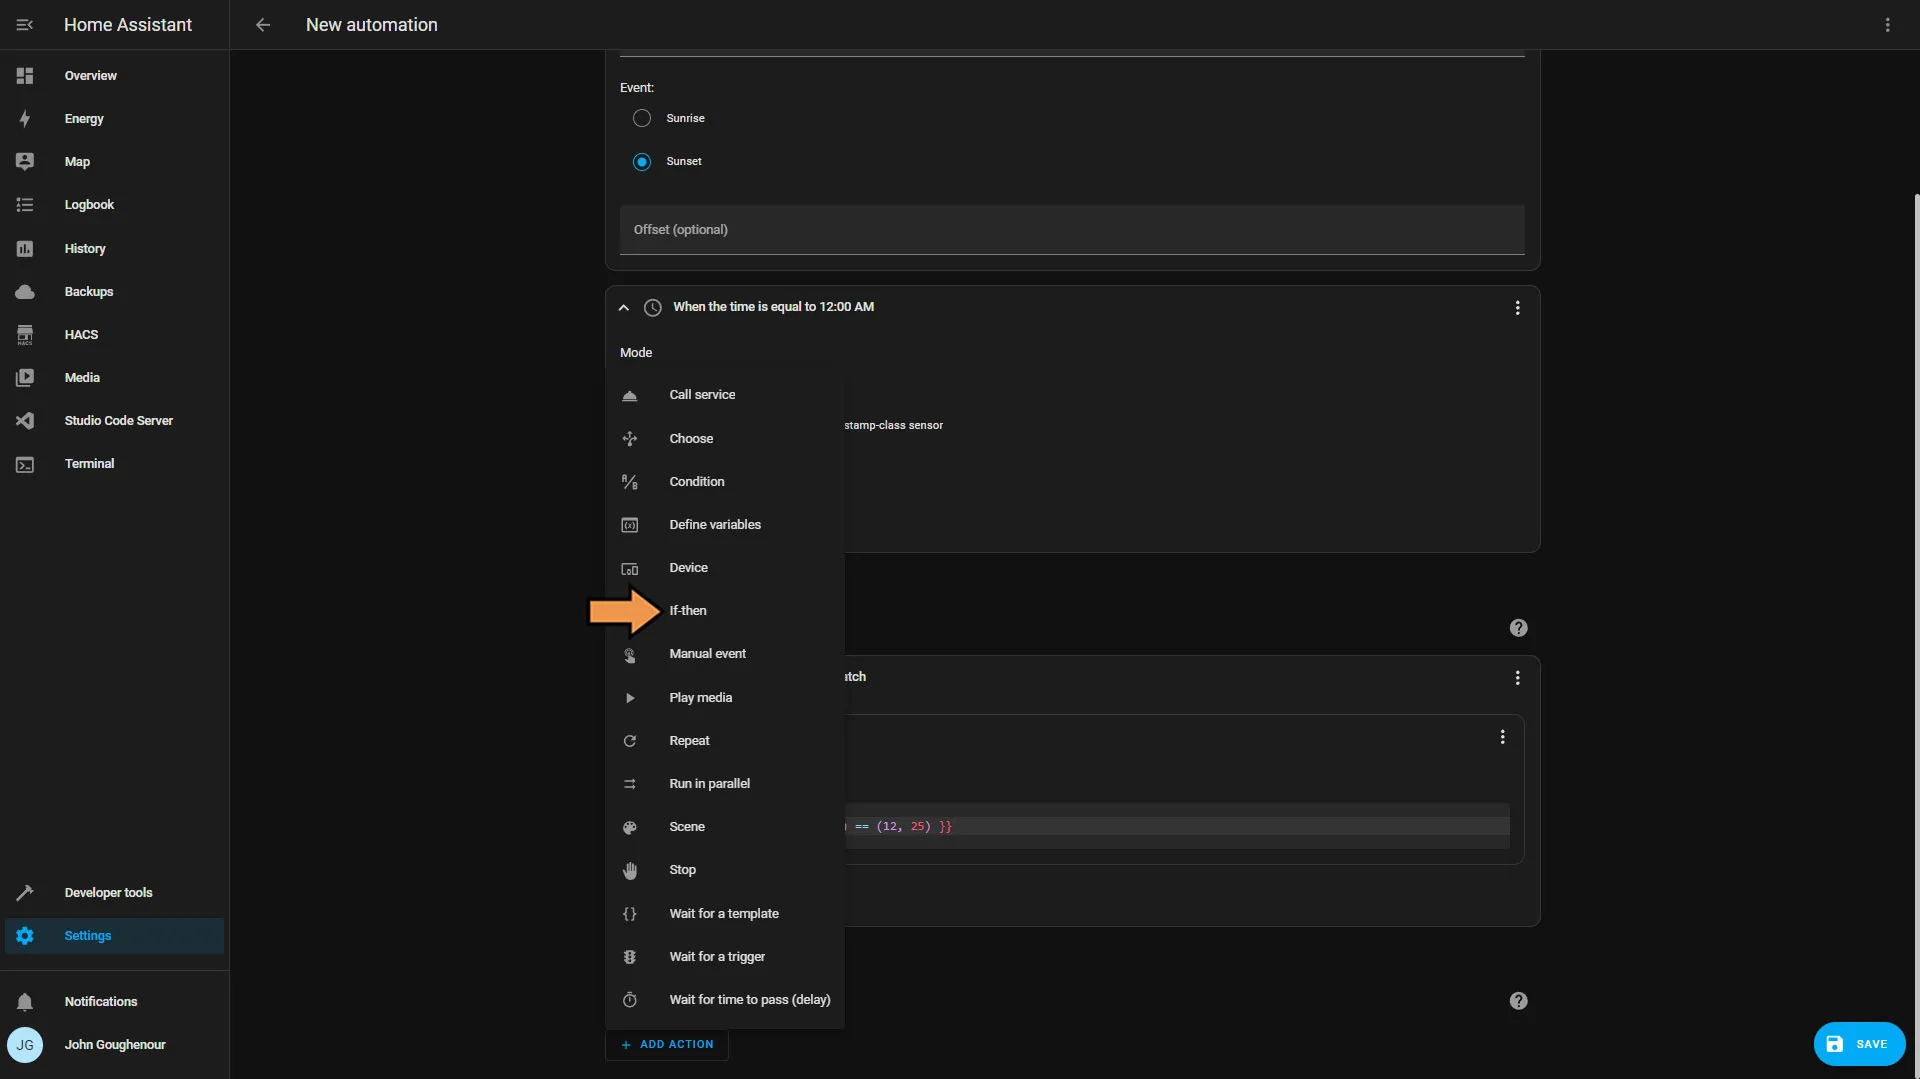
In the condition list, choose Triggered by.
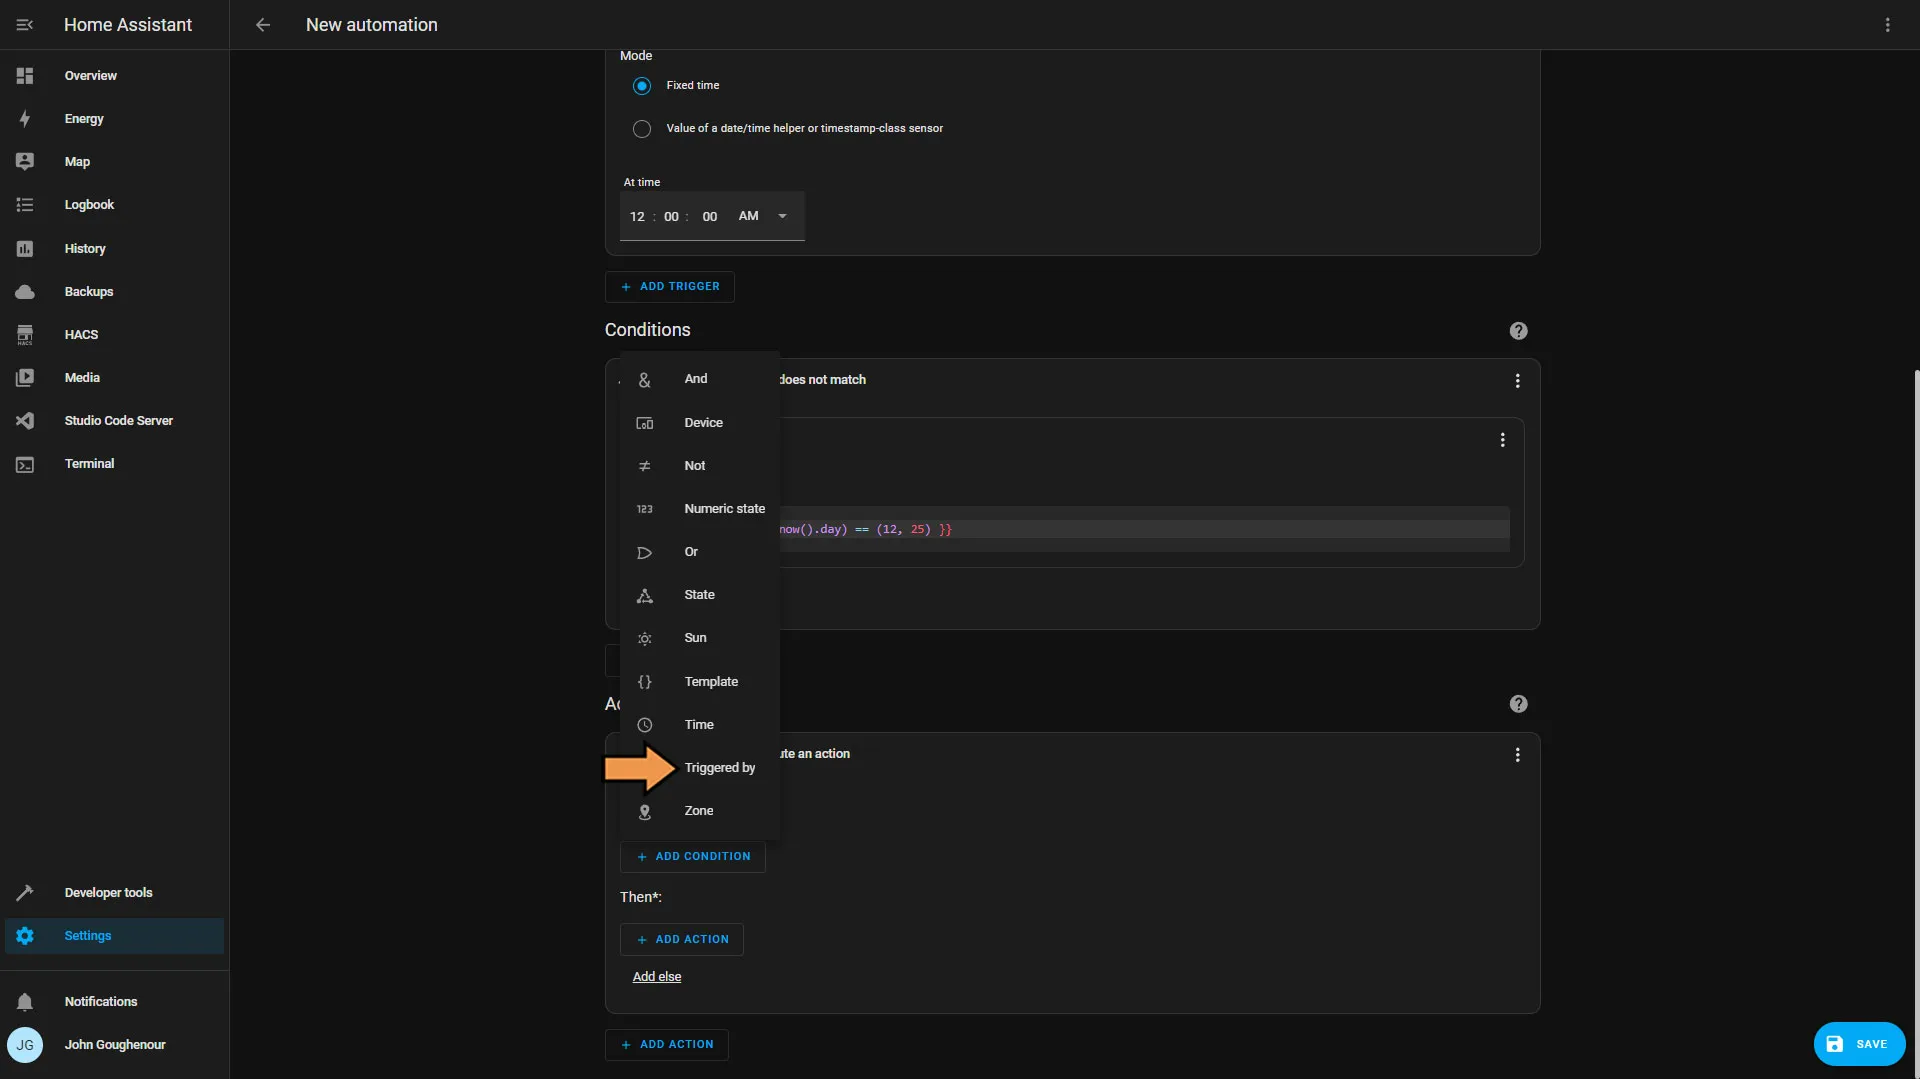
Select our sunset Trigger ID and then click the Add Action button.
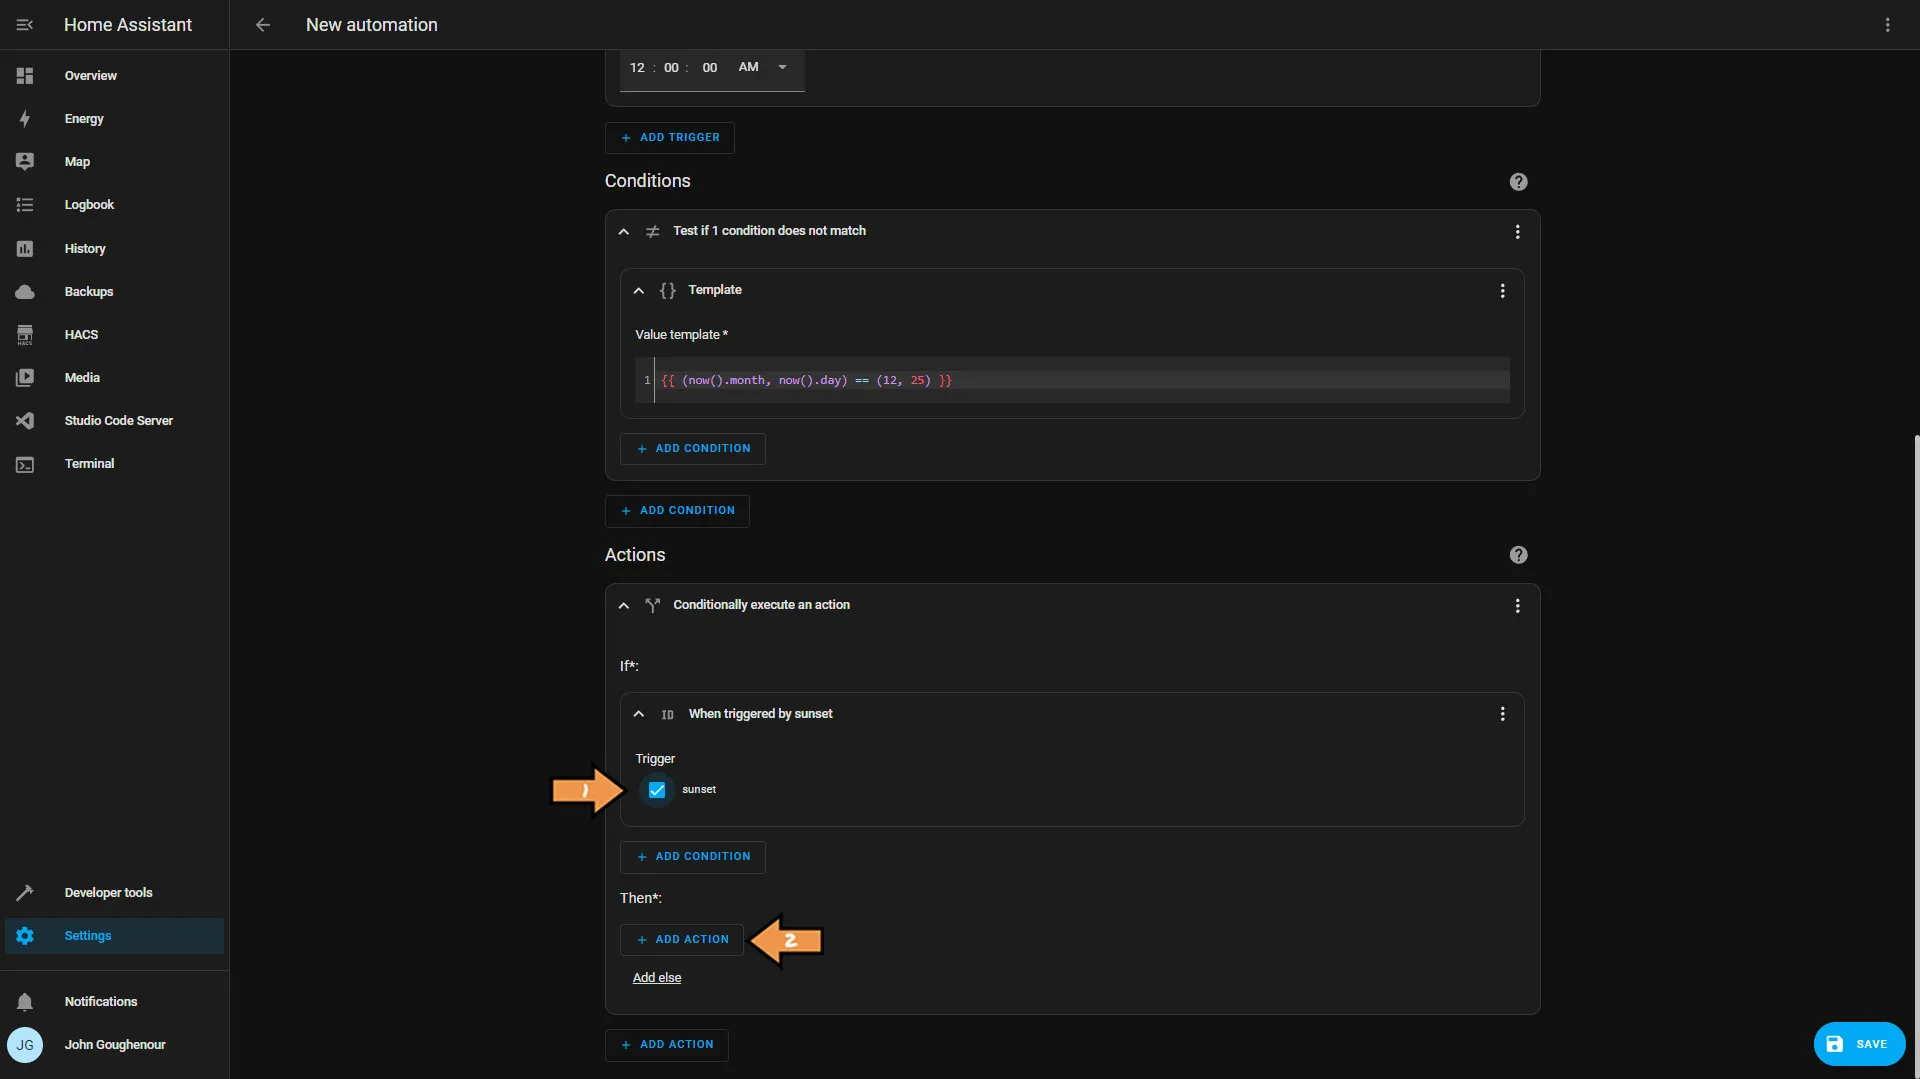
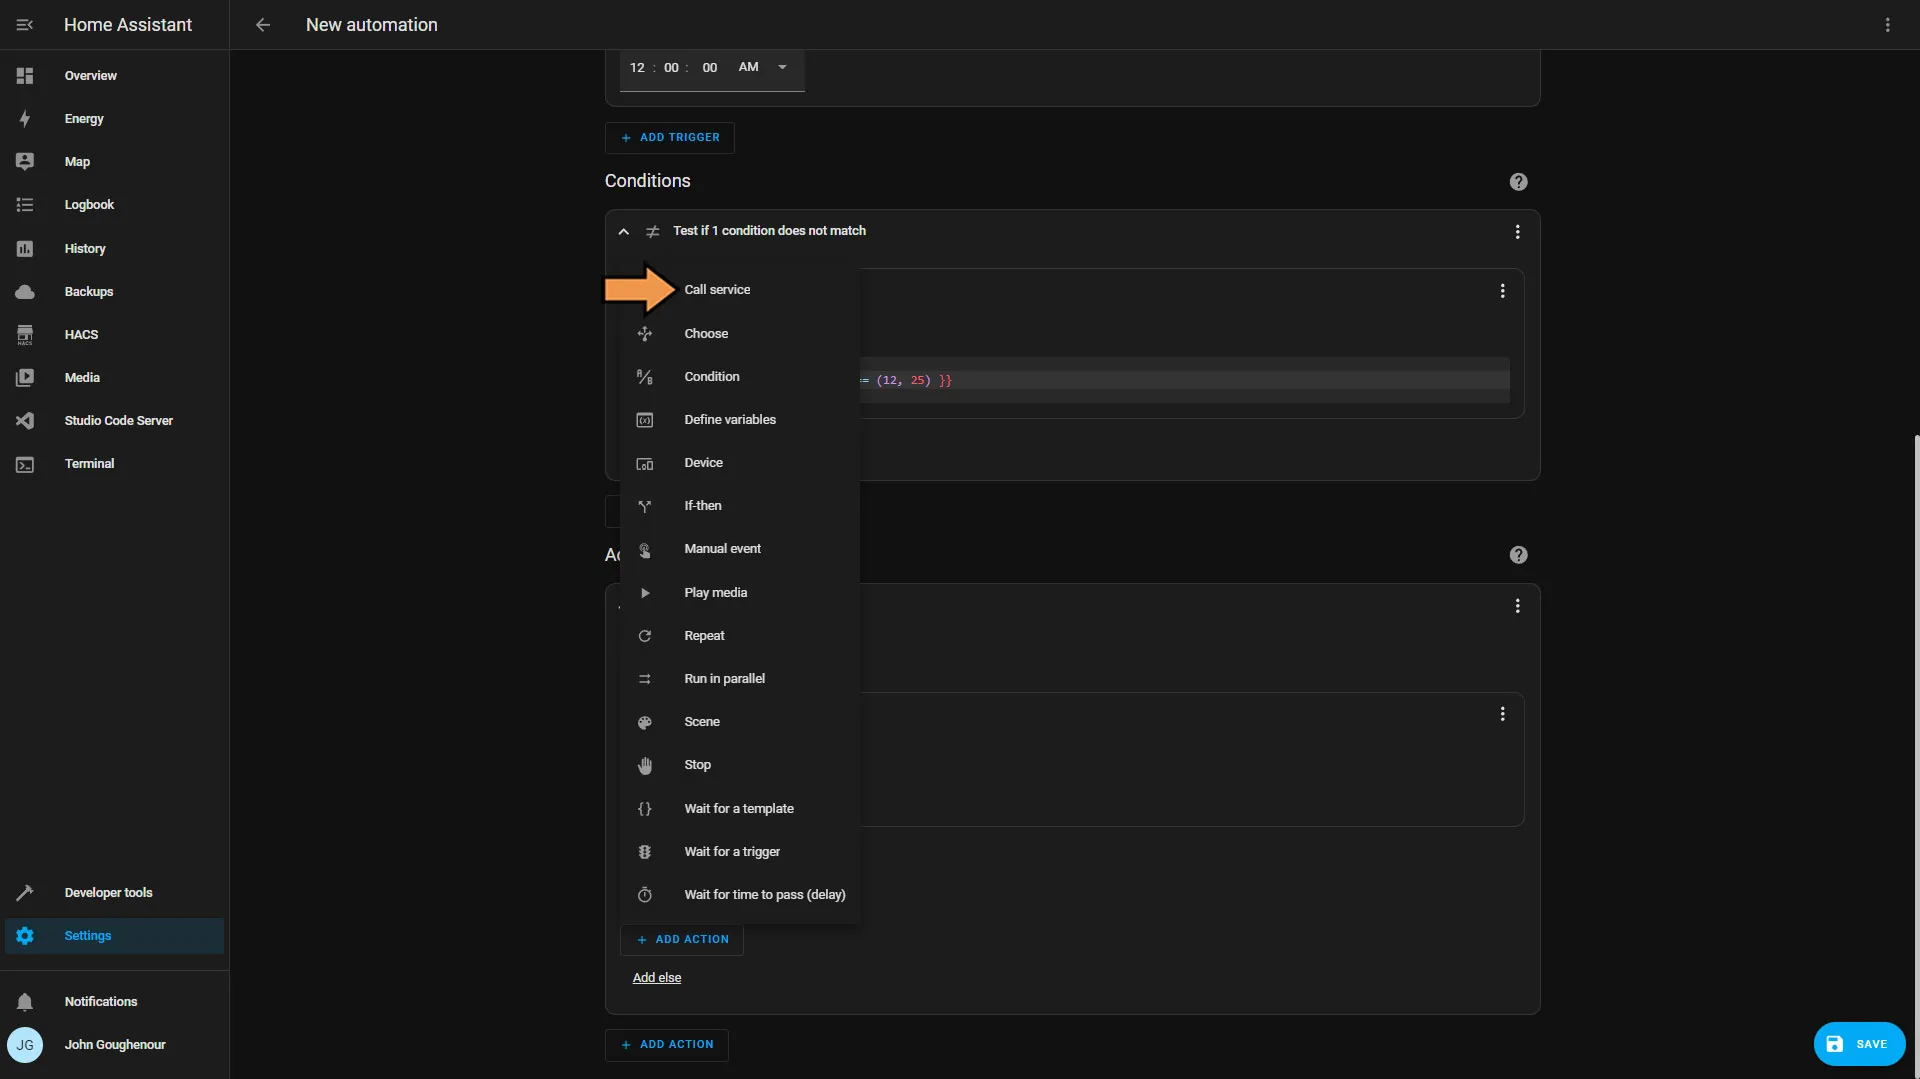
From the Add Action list, select Call service.
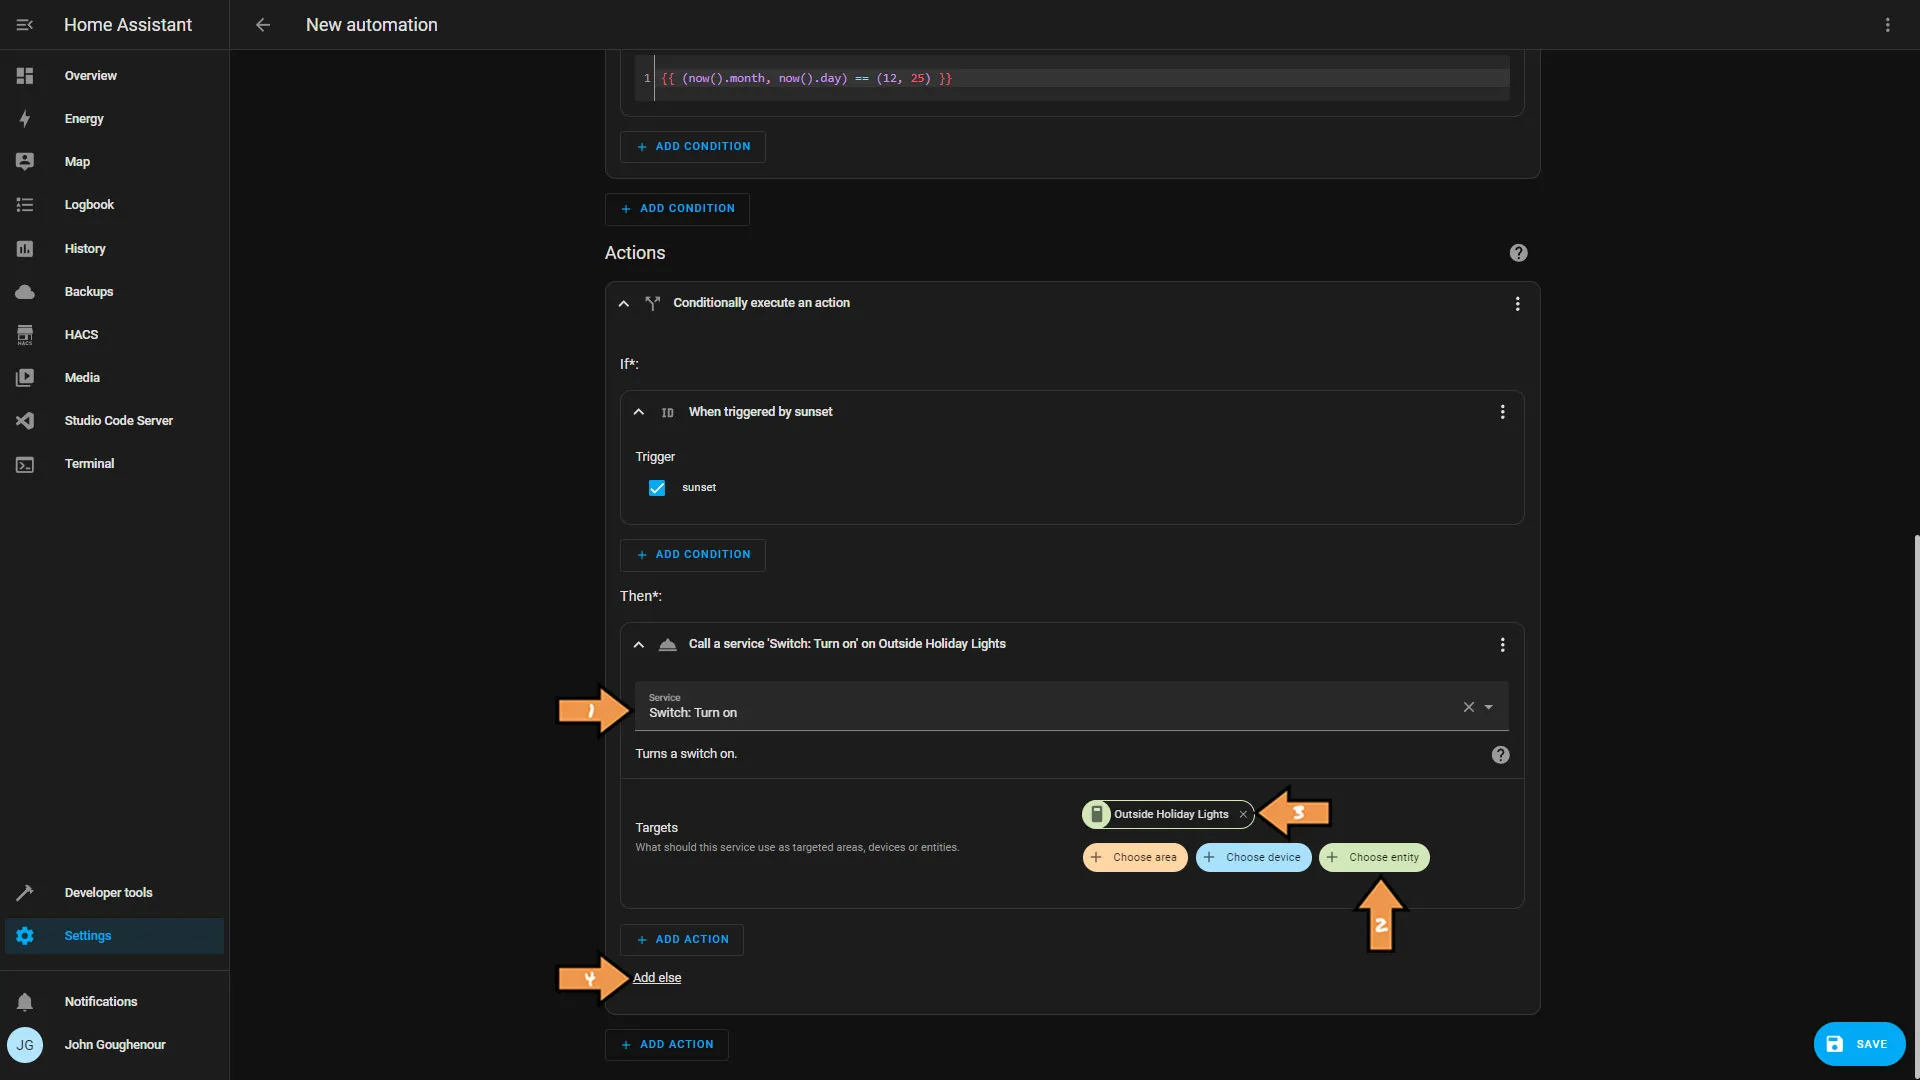
Set the service call as follows:
- Select Switch: Turn on for the service.
- Then click the Choose entity button.
- Next select our Outside Holiday Lights group from earlier.
- Then click add else. In the Add Action we are going to select another Call Service.
Finally, set the service call as follows:
- Select Switch: Turn off for the service.
- Then click the Choose entity button.
- Next select our Outside Holiday Lights group from earlier.
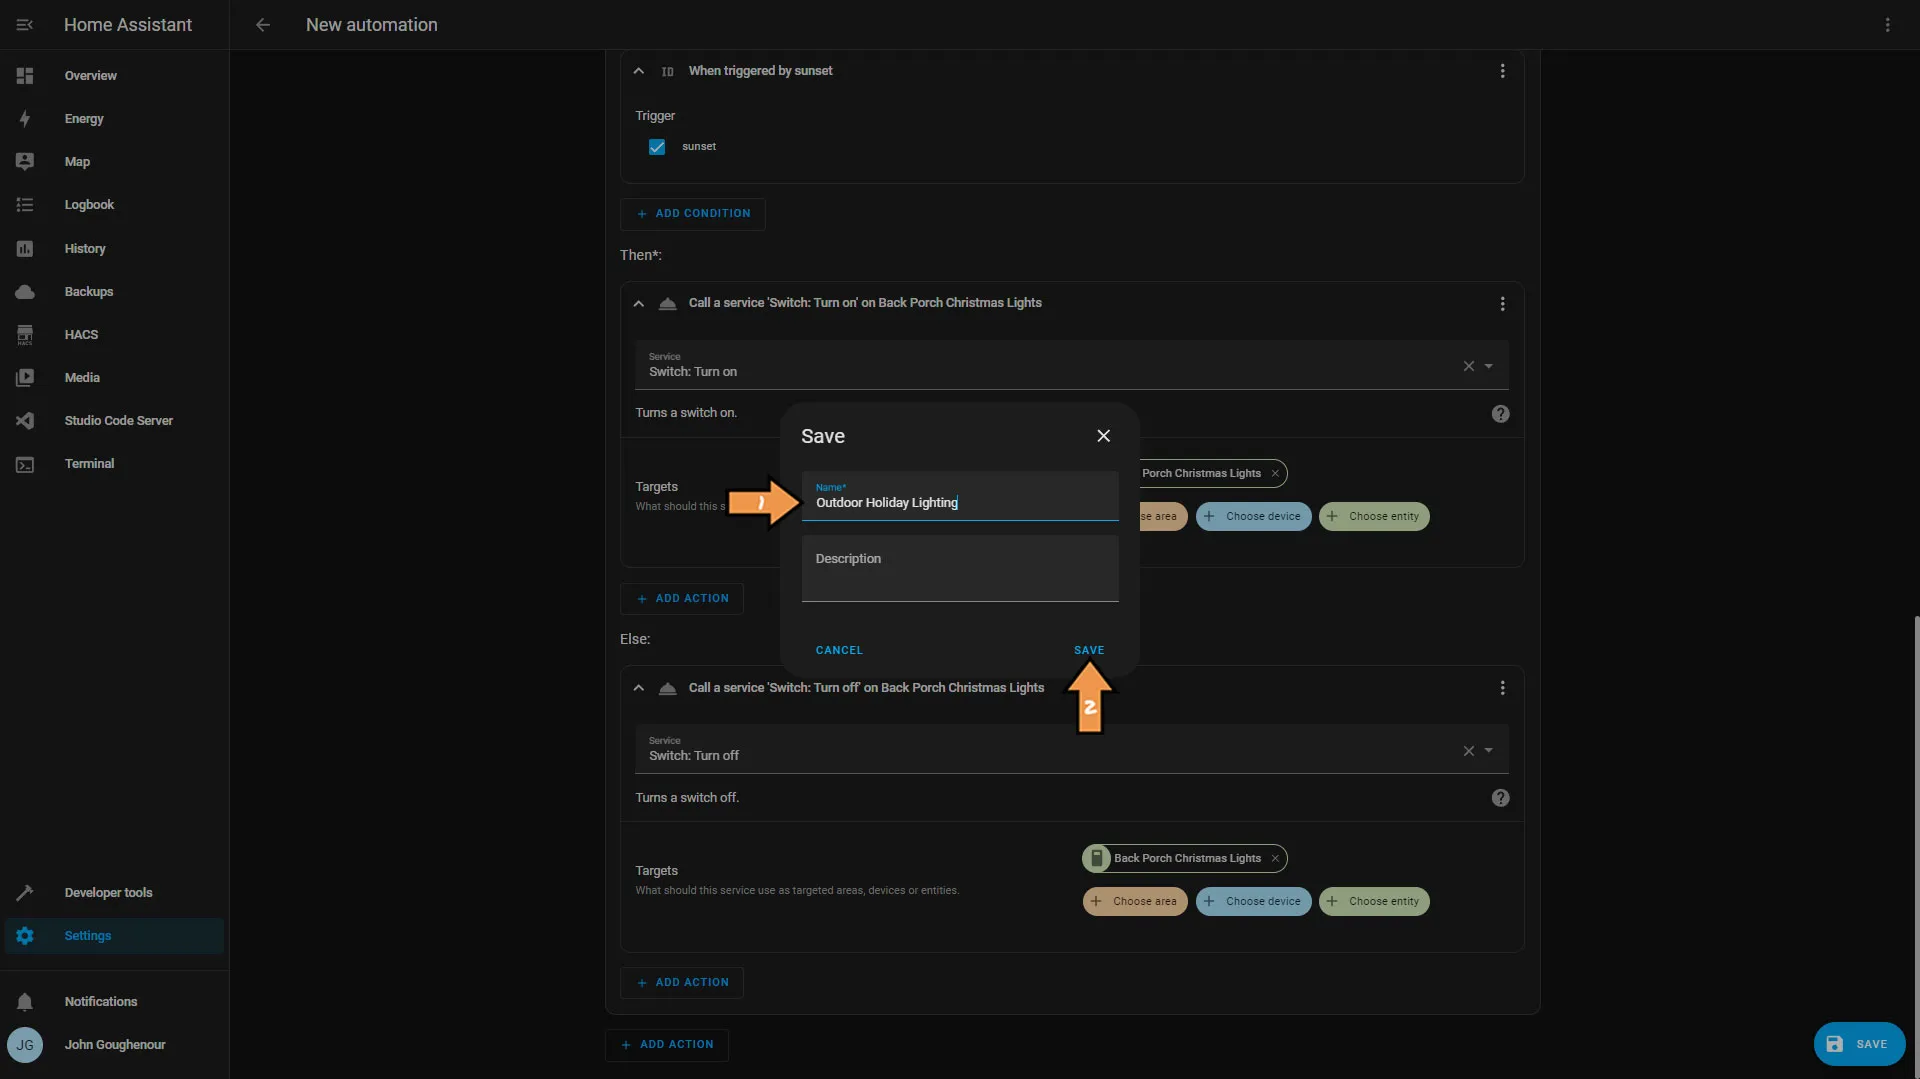
- Then click the Save button.
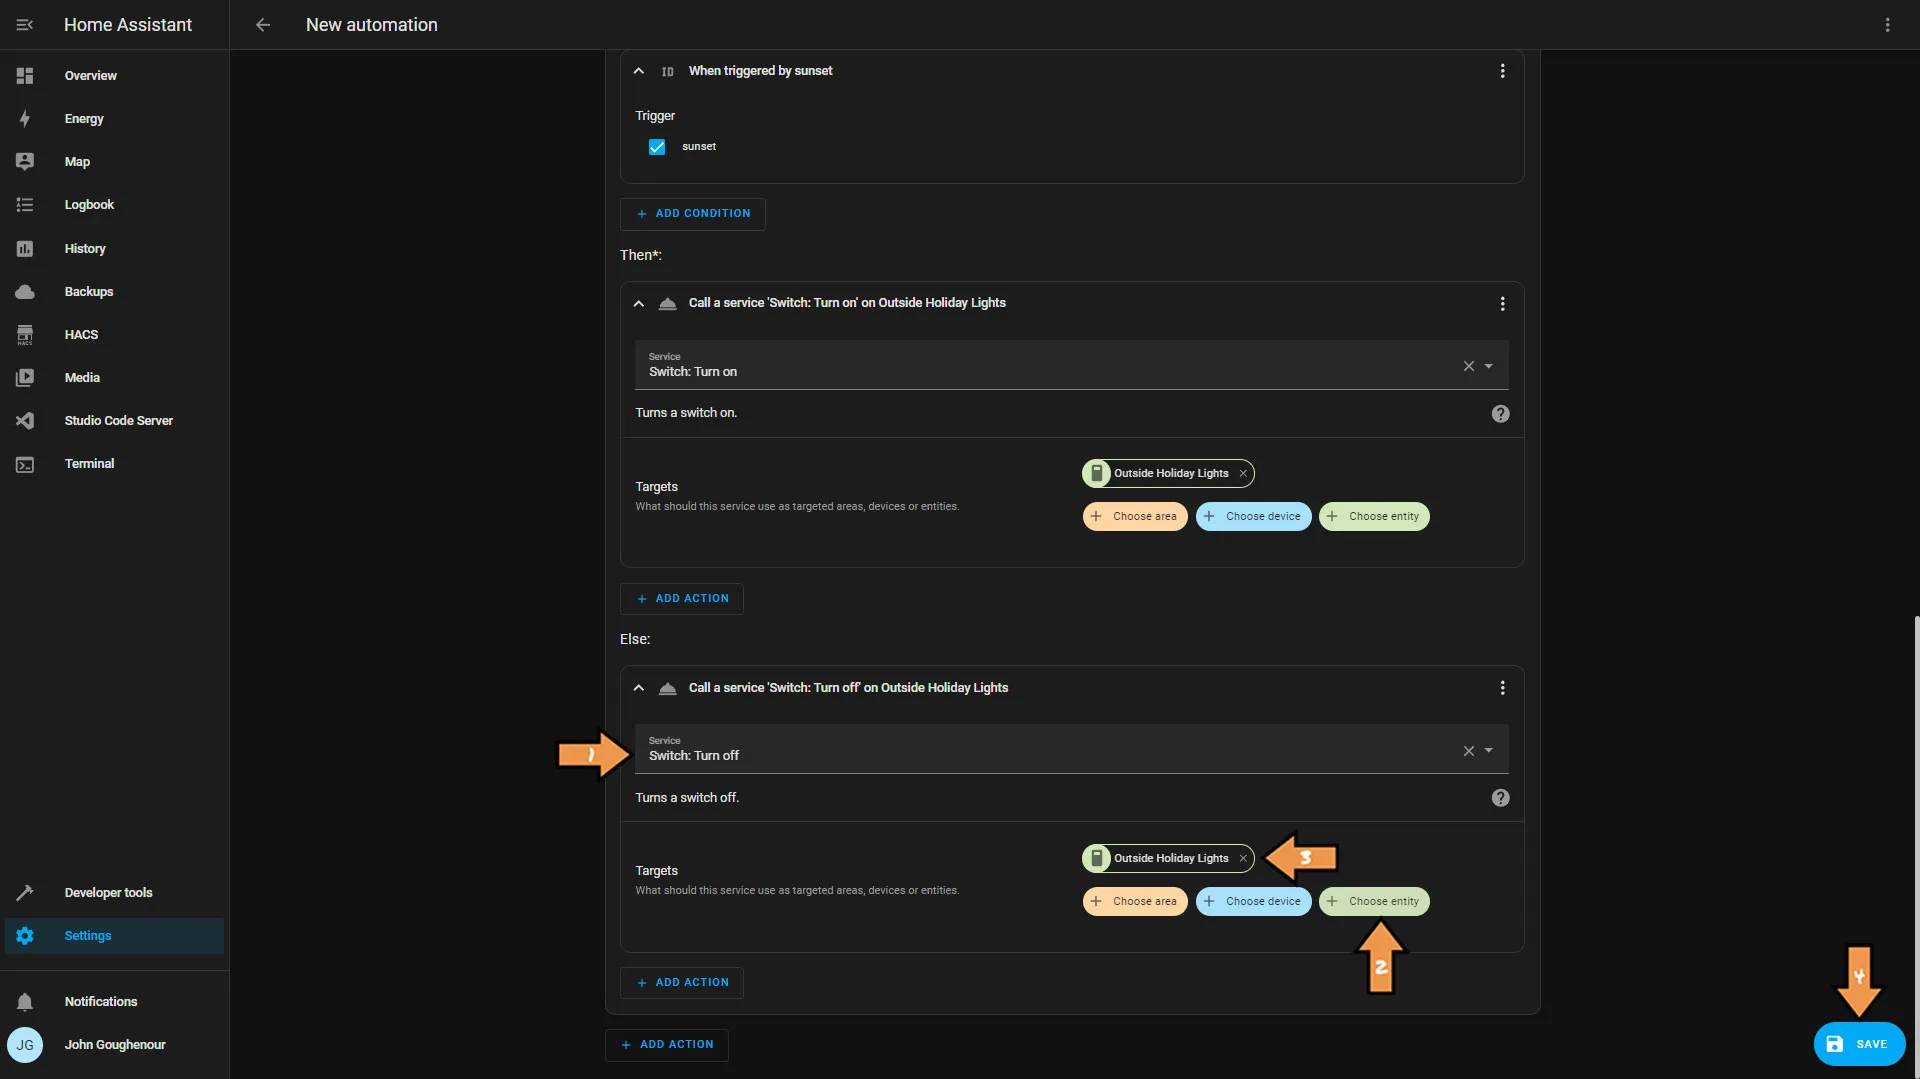
Give the automation a name, in this case, Outdoor Holiday Lighting.
Success: That’s It! You have successfully automated your outdoor holiday lights.
Amazon Alexa
Outdoor Holiday Lighting Automation
The Official Documentation for Alexa Routines
Alexa routines are basic. We have to setup 2 routines to handle on and off and their is no way to select a date.
Setting Up the Automation
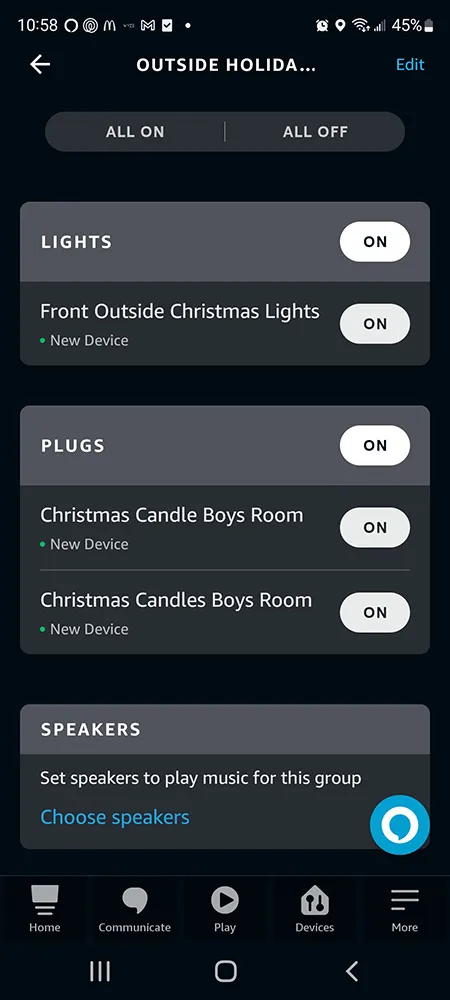
First, we need to create a new group to control all the smart plugs as one switch.
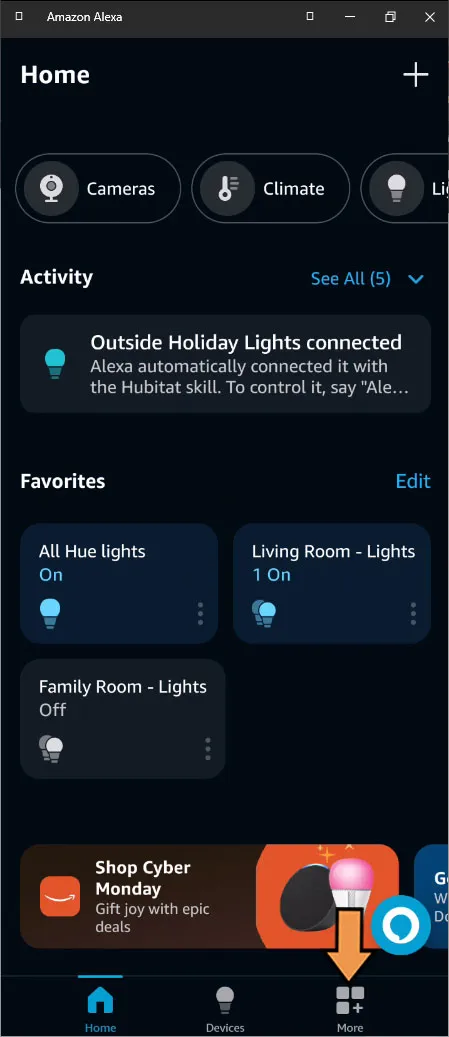
Next, Click the More button at the bottom right of the screen.
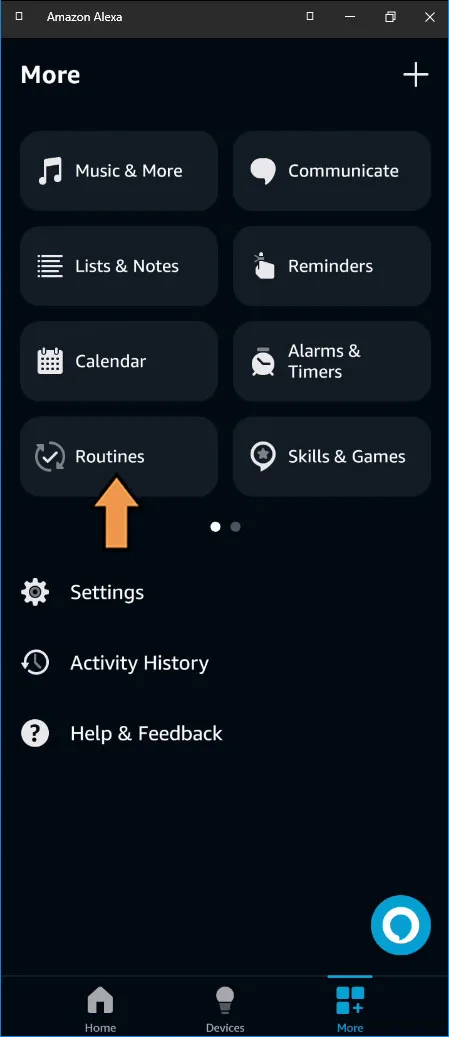
Click the Routines button.
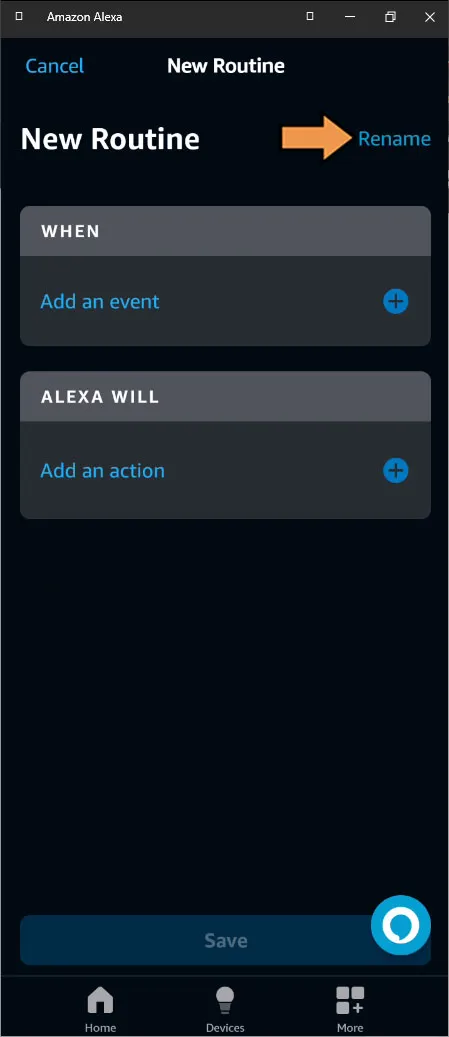
Click the plus sign to add a new routine.
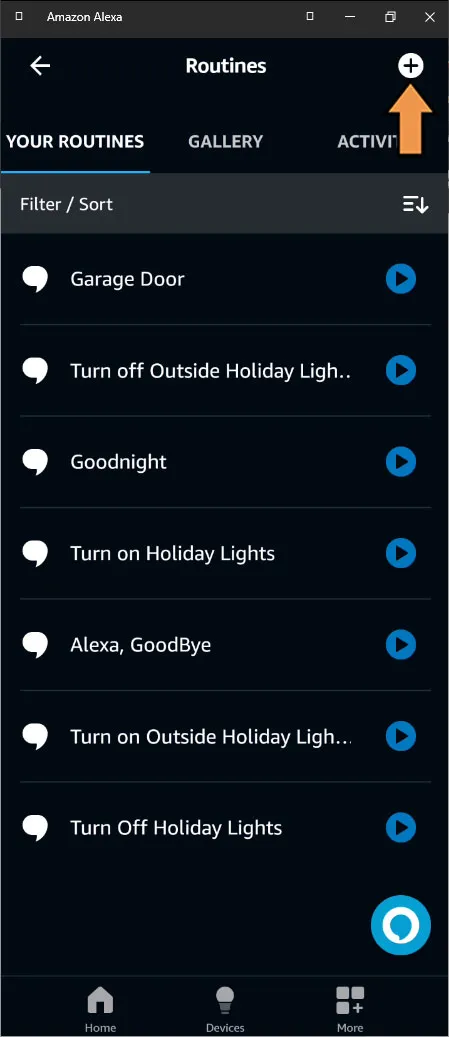
Click the plus sign by Enter routine name.
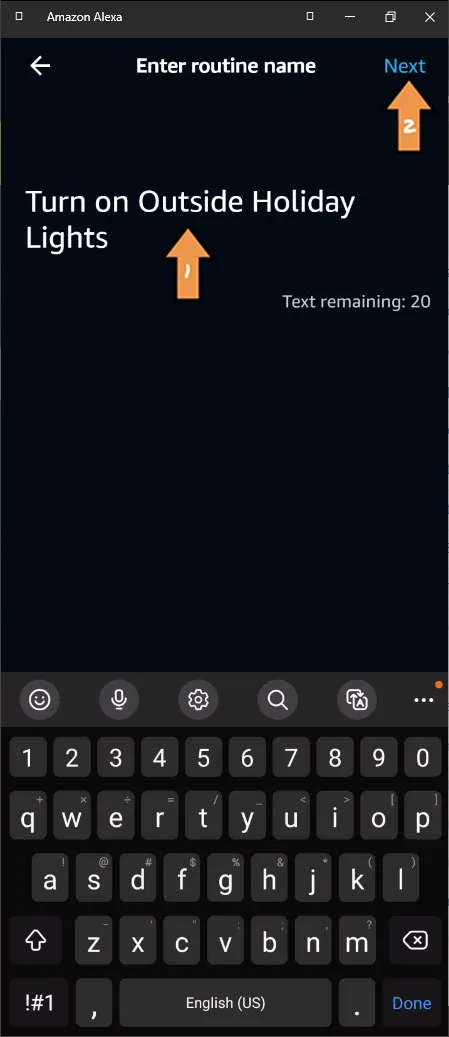
Give your Routine a name, and click Next.
Next, click Add an event.
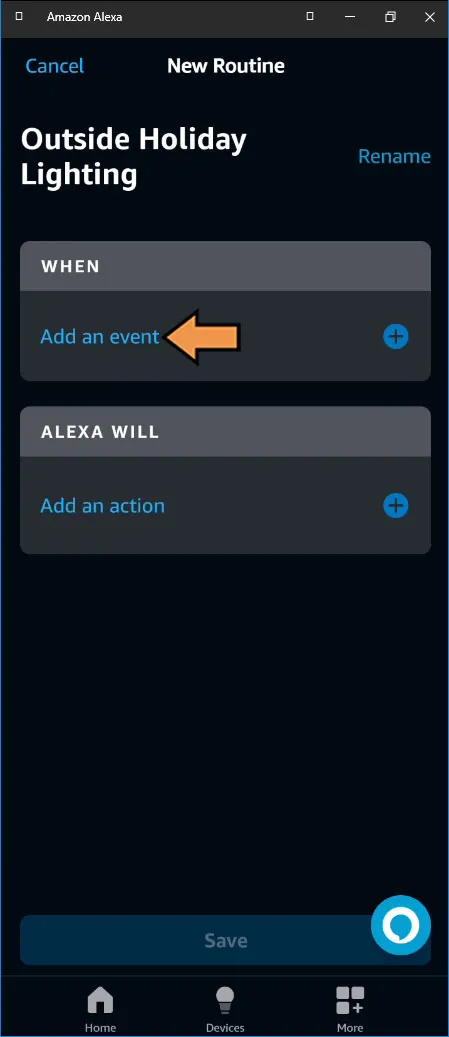
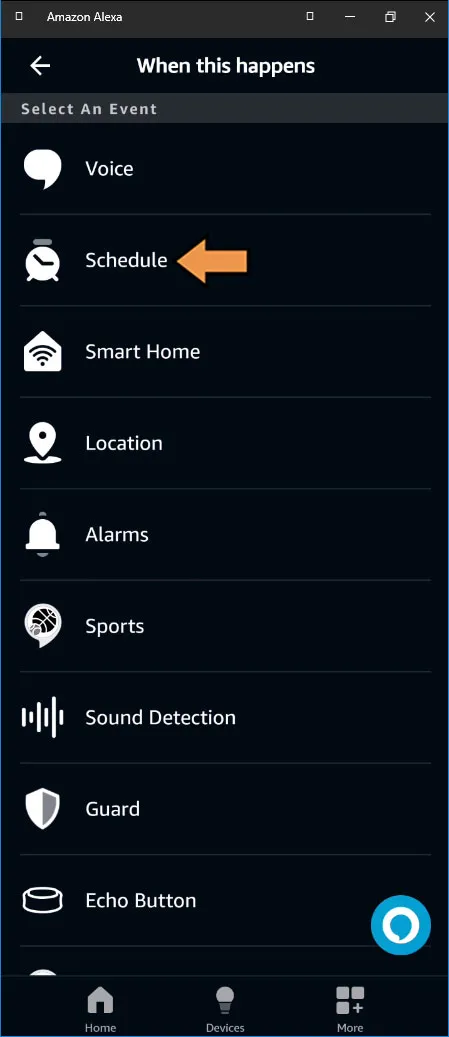
From the list of Events, select Schedule.
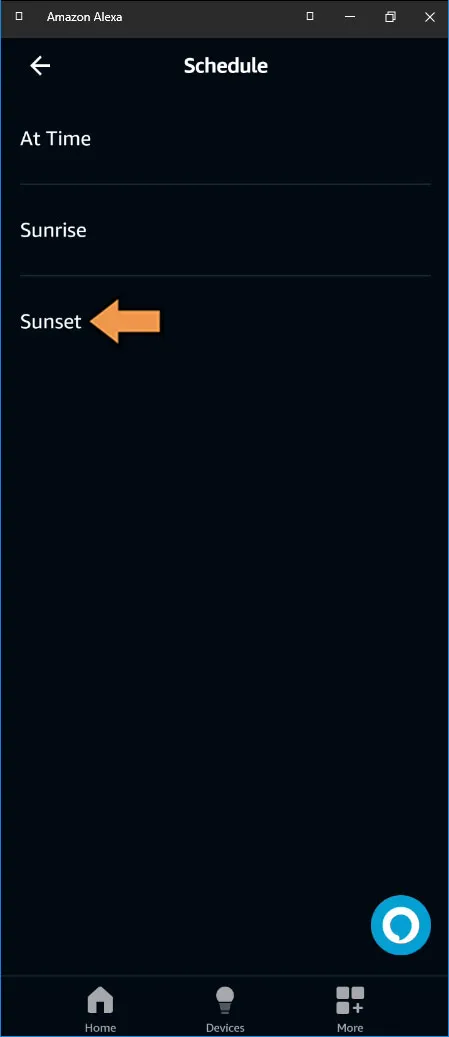
Select Sunset on the Event Schedule screen.
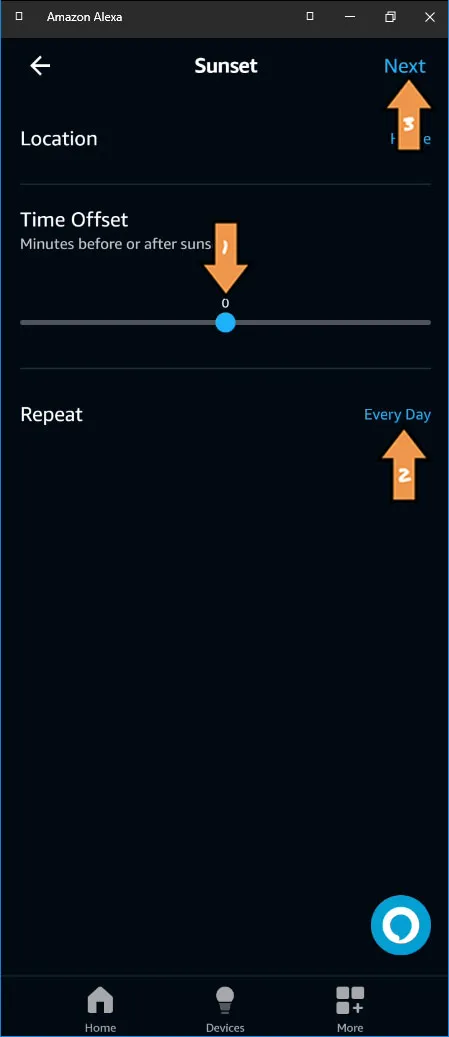
You could adjust the offset and the repeat values as you like. Then click Next.
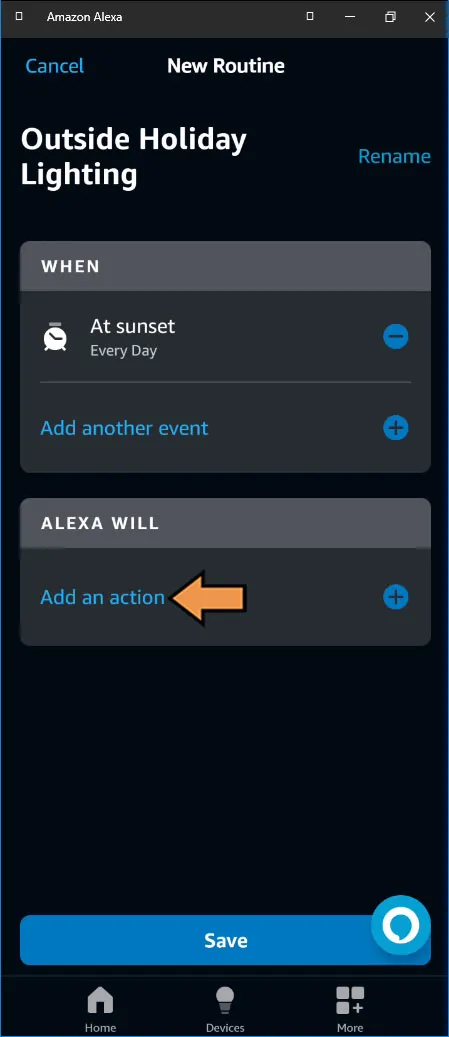
Next, click the Add an action link.
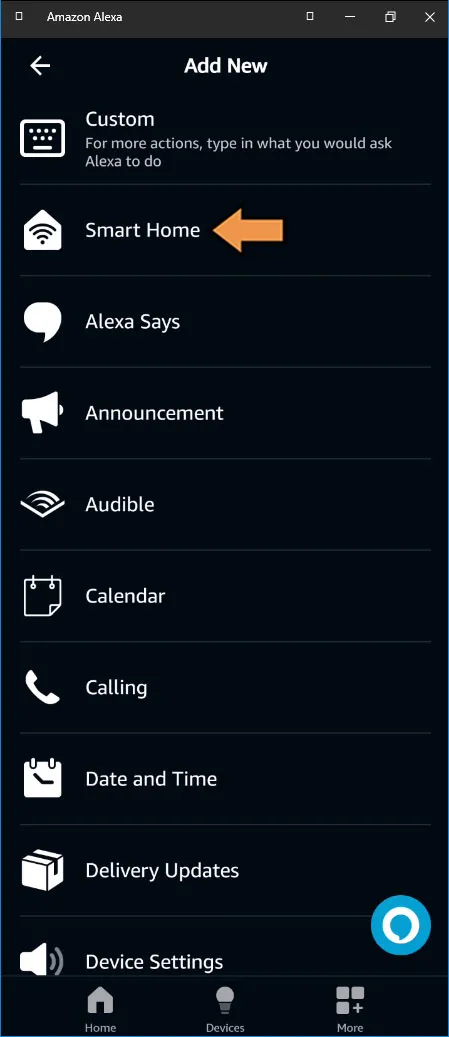
On the Add Action menu, select Smart Home.
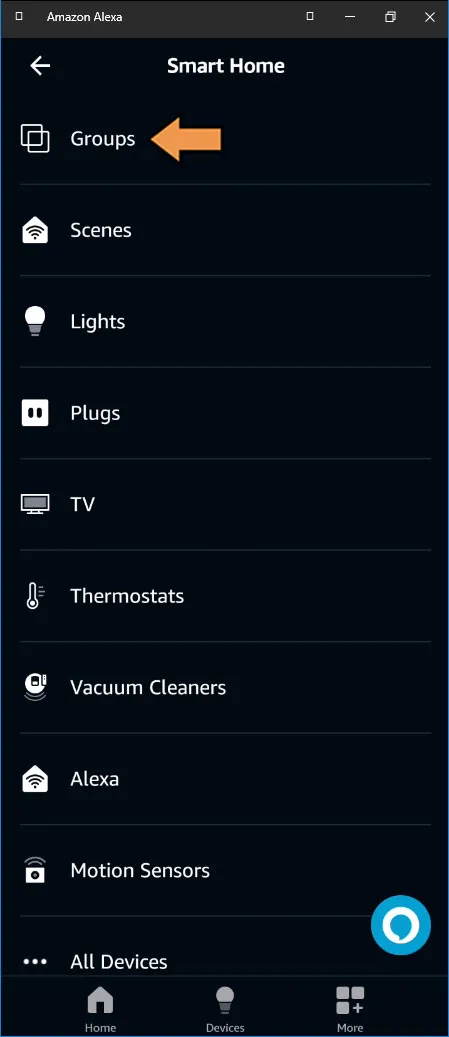
Then, select Groups from the Smart Home menu.
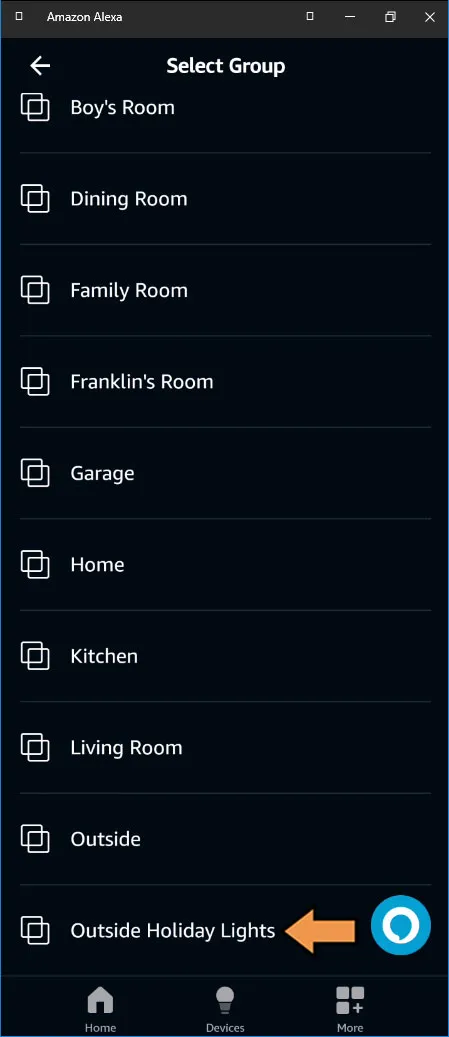
Next, select our Outside Holiday Lights group we created earlier.
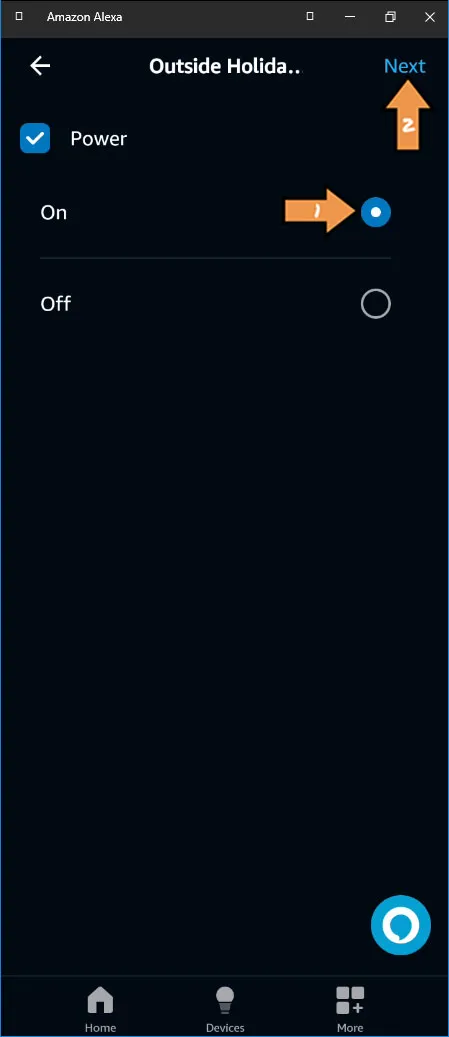
On the Outside Holiday Lights screen, select Power On and click Next.
Finally, click Save to finish the Routine.
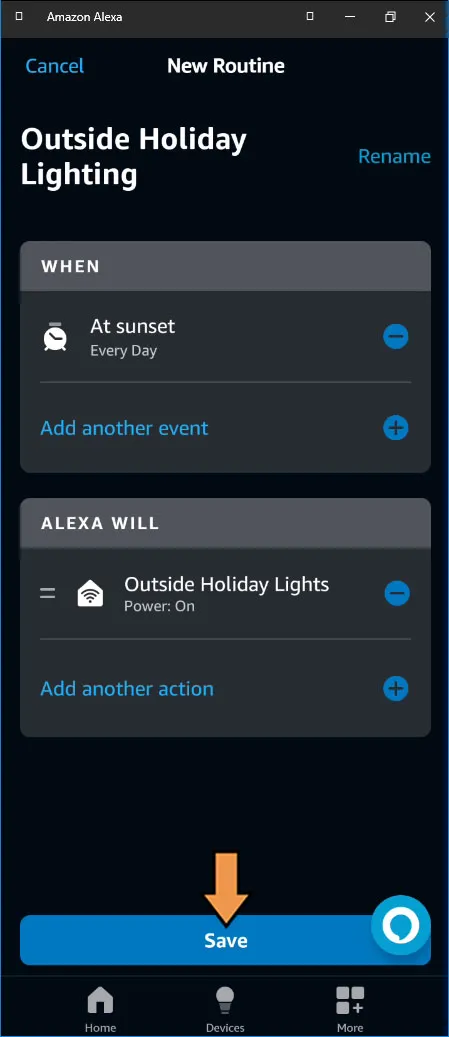
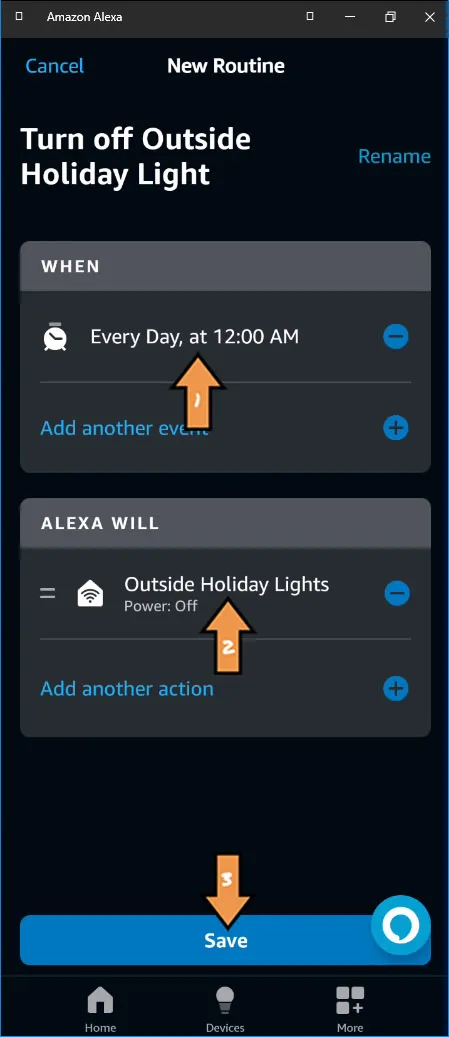
Since Alexa has no conditional logic, you will have to create another Routine to turn the lights off.
- Select Schedule and use time instead of sunset for the Event.
- Then, for the action, turn off the group.
Success: That’s It! You have successfully automated your outdoor holiday lights.
