The Ultimate Smart Home Automation Cookbook
The festive season is upon us, and Indoor Holiday Lighting Automation is the perfect way to add sparkle to your celebrations quickly. Instead of the daily routine of plugging in various light displays around your home, let Indoor Holiday Lighting Automation manage it all for you. This year, embrace the convenience and magic of having your smart home handle the illuminations.
Indoor Holiday Lighting Automation allows you to program your lights to turn on at specific times, ensuring your home is filled with festive cheer without any manual effort. Whether it’s the twinkling lights on the Christmas tree, the warm glow of string lights, or the festive lamps, Indoor Holiday Lighting Automation ensures everything is lit up at the right moment, enhancing the holiday ambiance.
Embracing Indoor Holiday Lighting Automation this holiday season means you can focus more on celebrating with loved ones and less on the logistics of lighting. It transforms your home into a festive sanctuary effortlessly and beautifully. Let Indoor Holiday Lighting Automation be a part of your holiday tradition, bringing ease, efficiency, and enchantment to your indoor decorations.
Automation Details
Required Devices
- Smart Plugs
Triggers:
- Sunset
- Arriving Home
Conditions:
- Between Sunset and Sunrise
- Mode is Home
Actions:
- Turn On Holiday Lights
Warning: Every smart plug is different so be sure not to overload the maximum amps of yours.
This automation will only handle turning lights on. Our Goodbye and Goodnight automations will handle turning the lights off.

Hubitat
Indoor Holiday Lighting
The Official Documentation for Rule Machine
This assumes you have setup your Modes on your hub and you have one for Home. If they are named differently then choose accordingly.
Setting Up the Automation
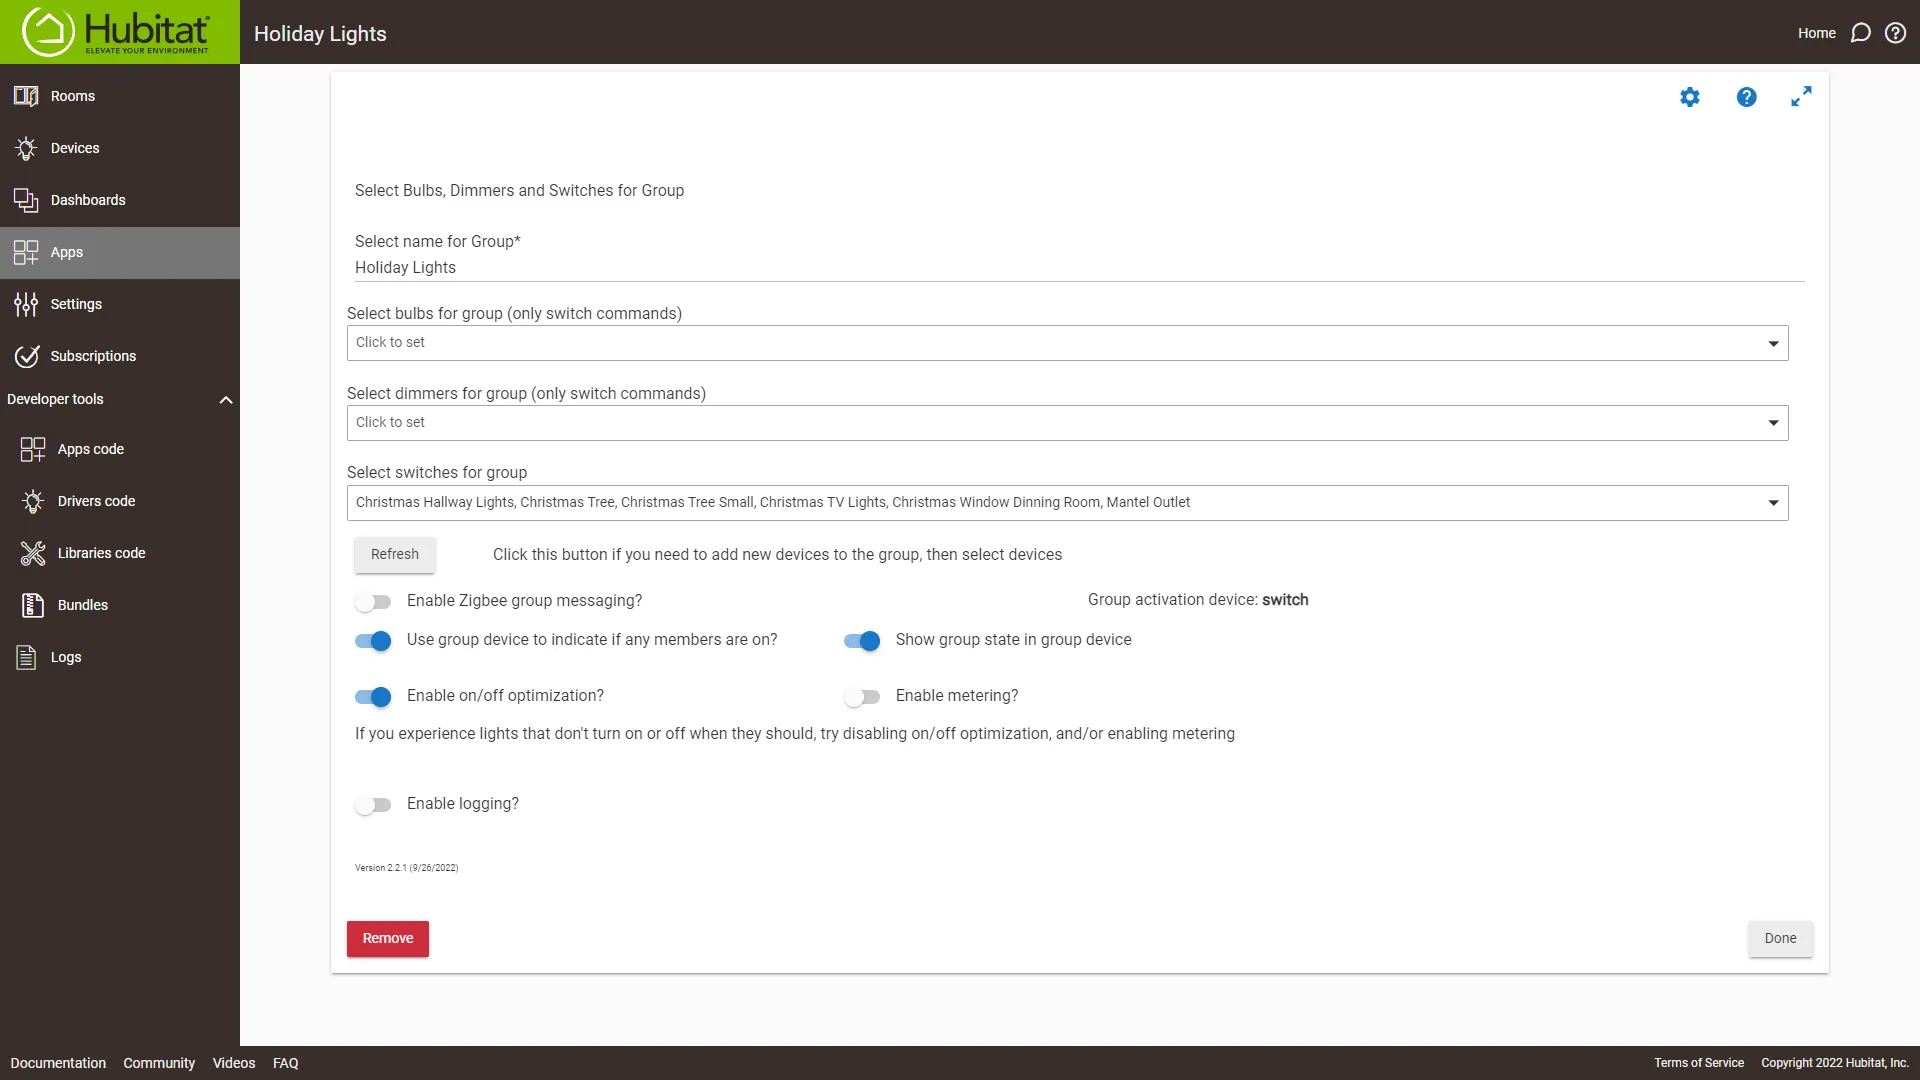
First, we need to create a new group to control all the smart plugs as one switch and share it with our voice assistant to enable voice control.
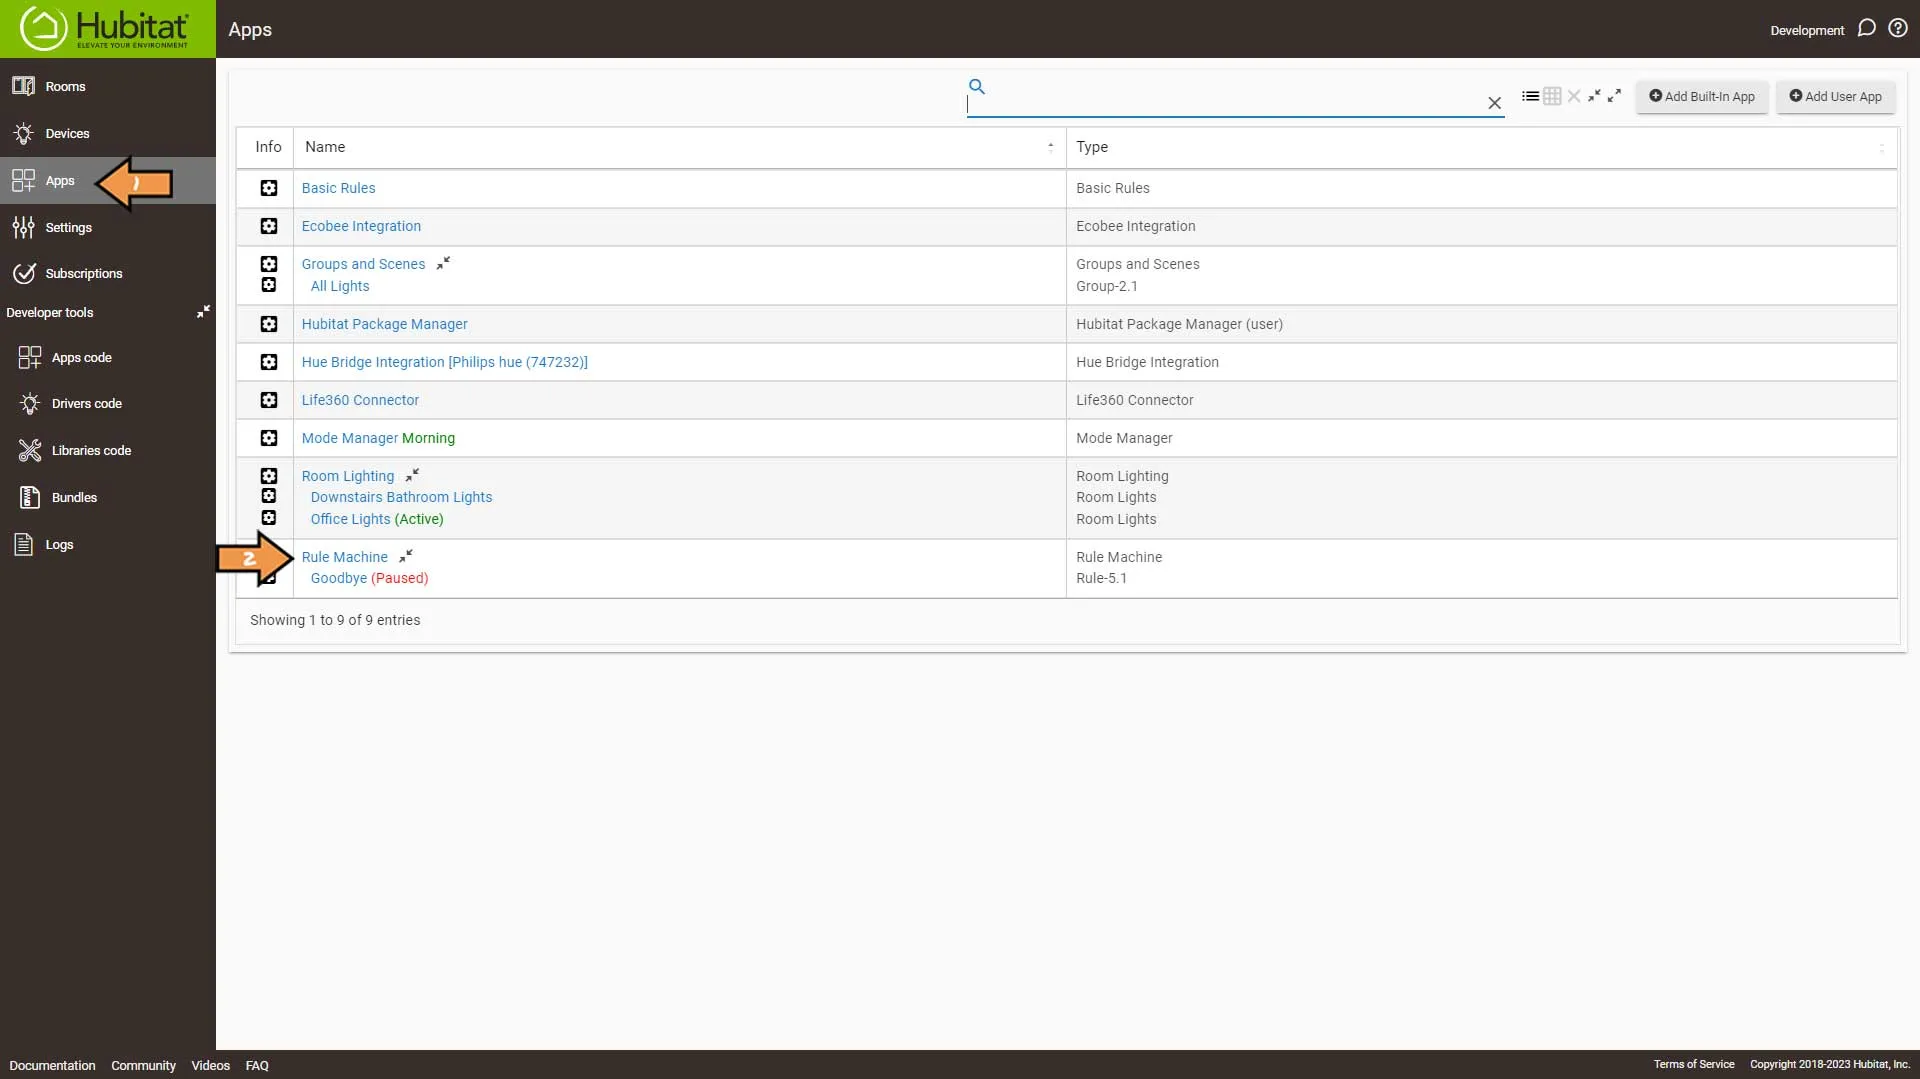
Next, go to Apps and click Rule Machine.
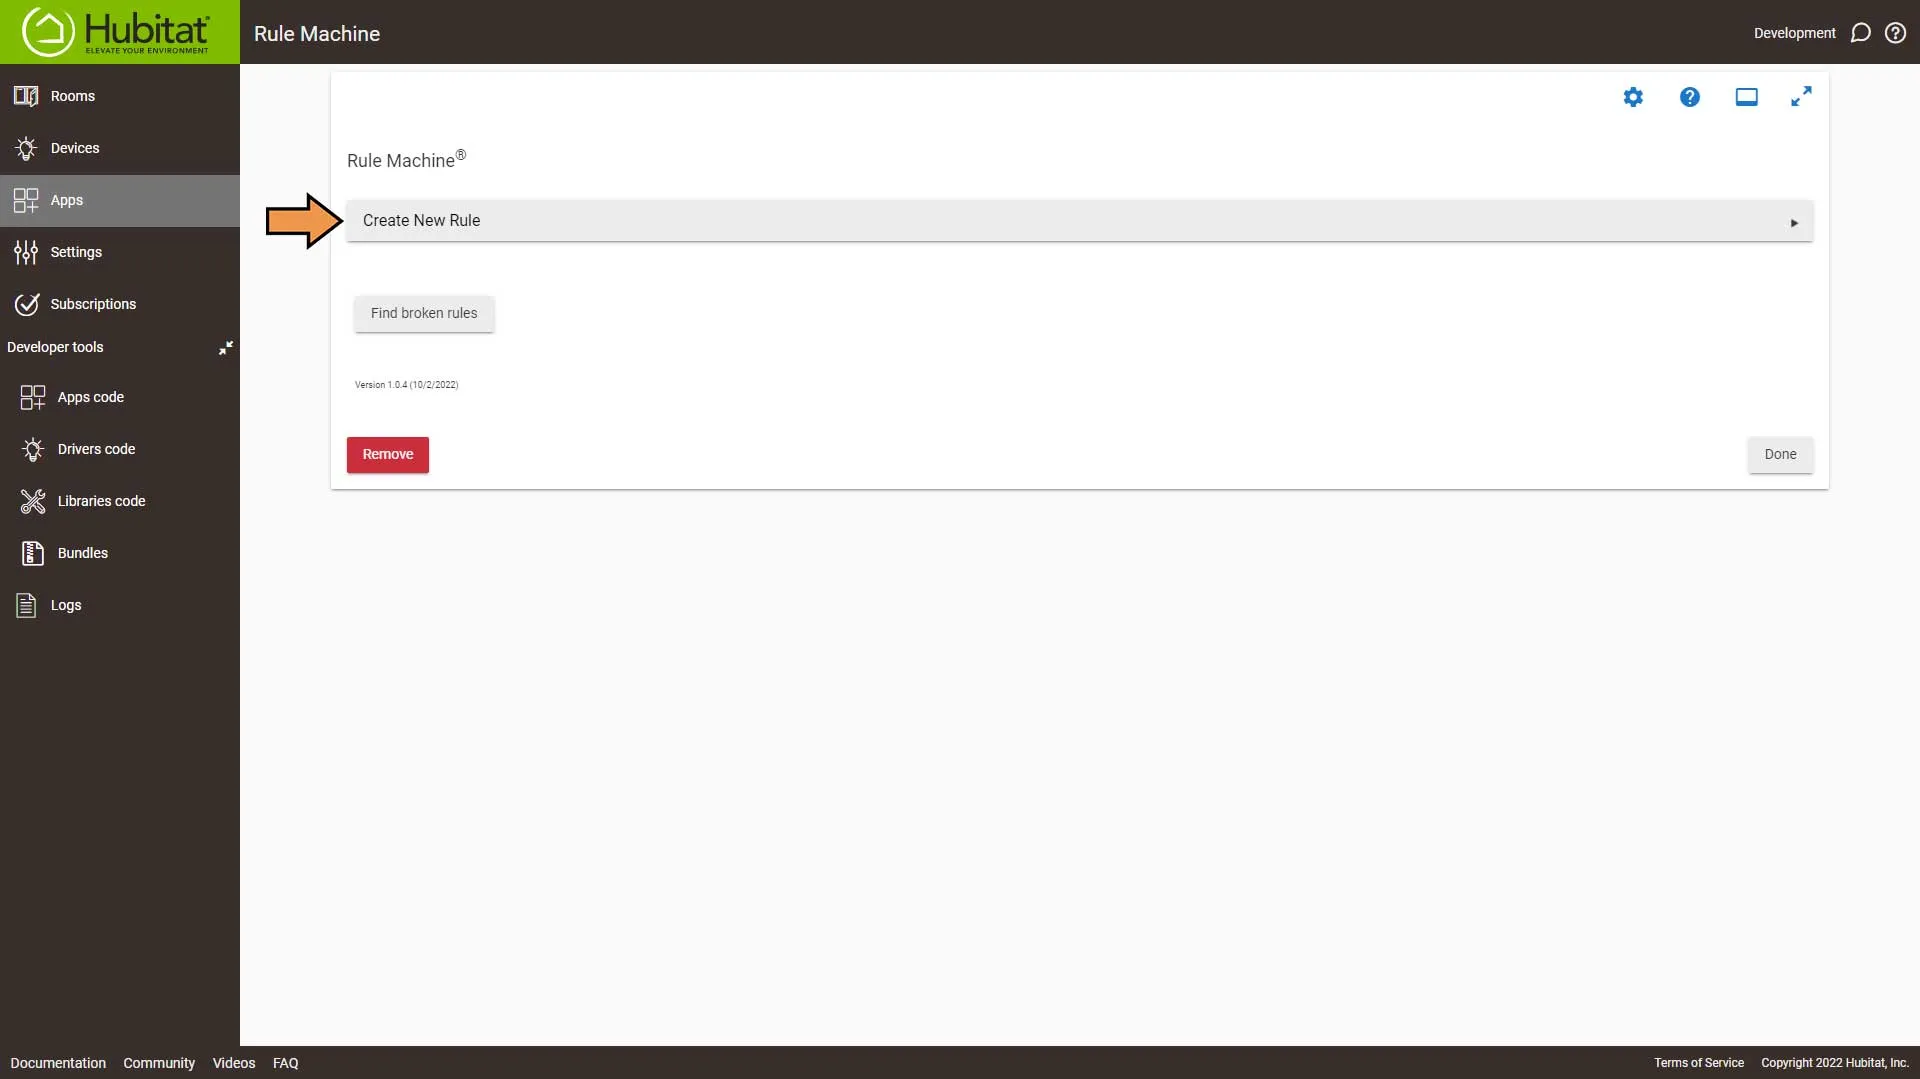
Select Create New Rule.
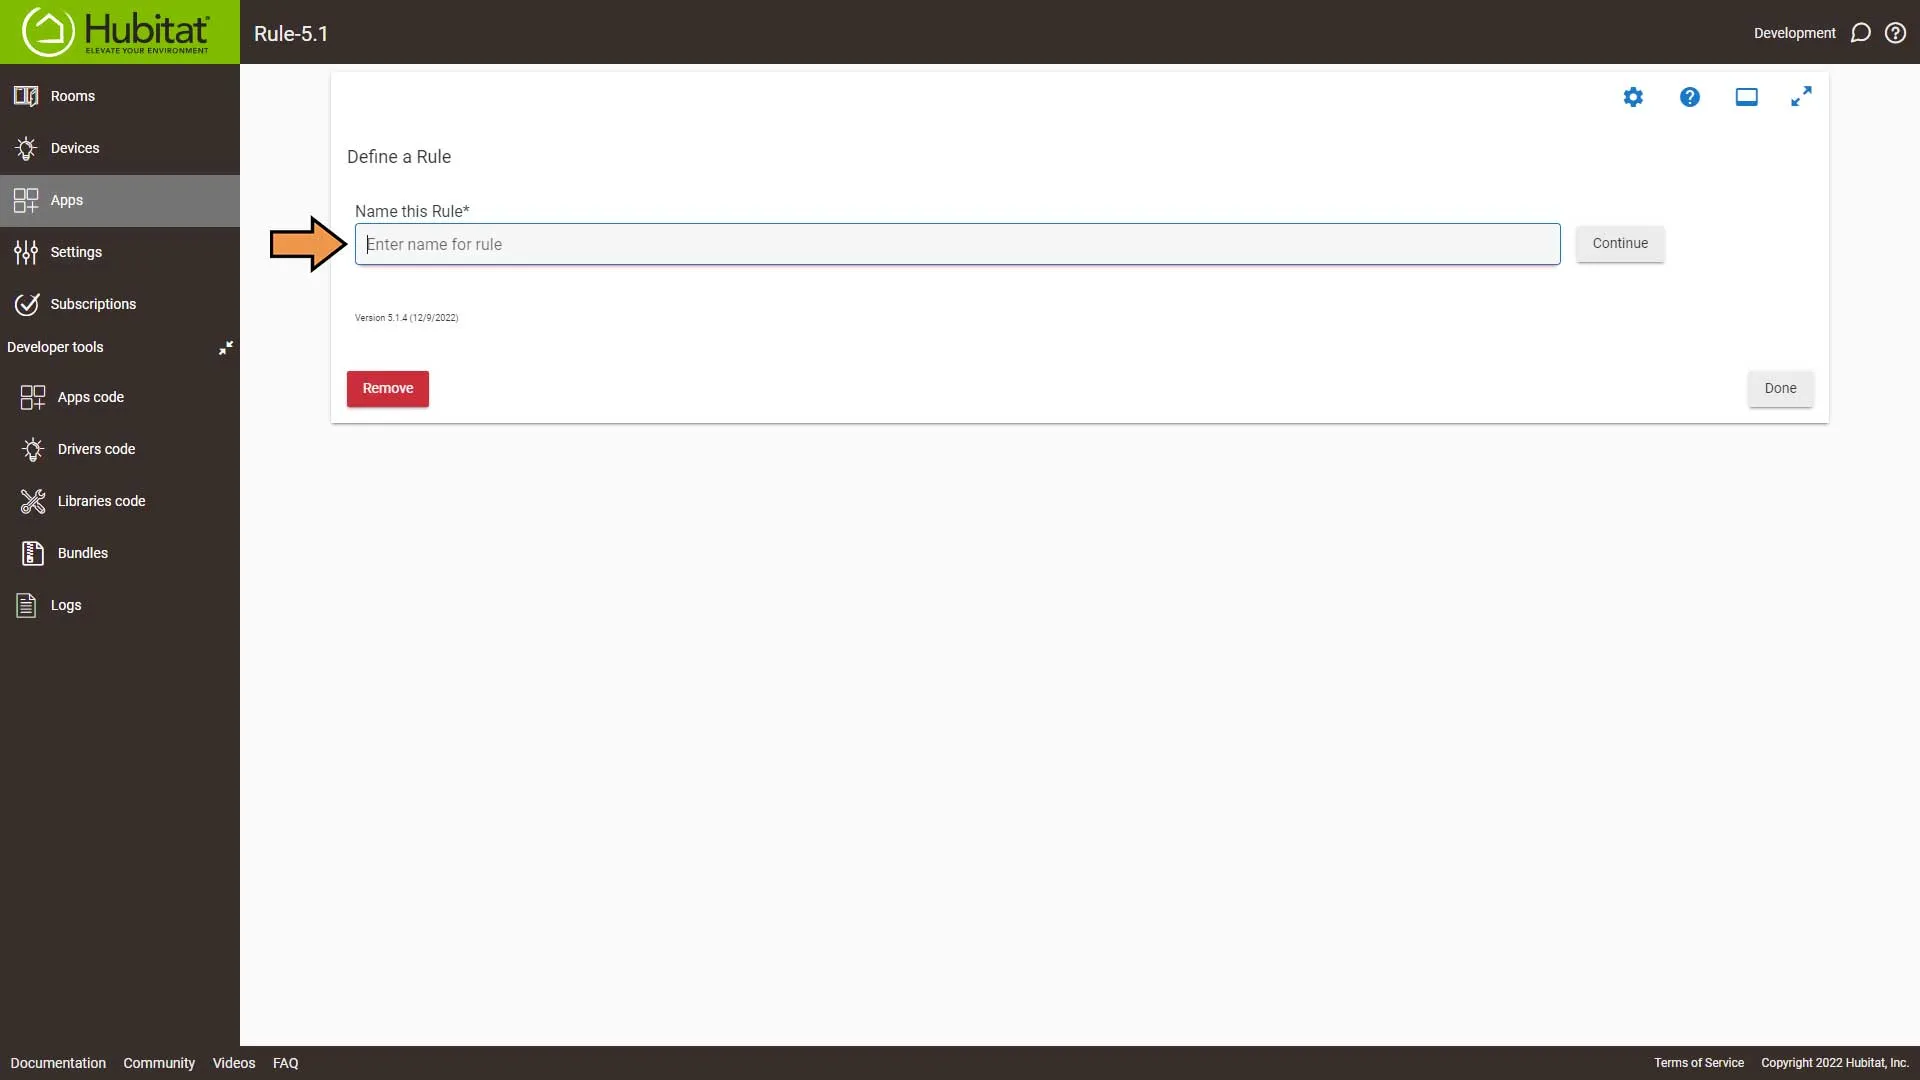
Enter a name for the Rule and hit Enter. I’m going to call it Outdoor Holiday Lighting.
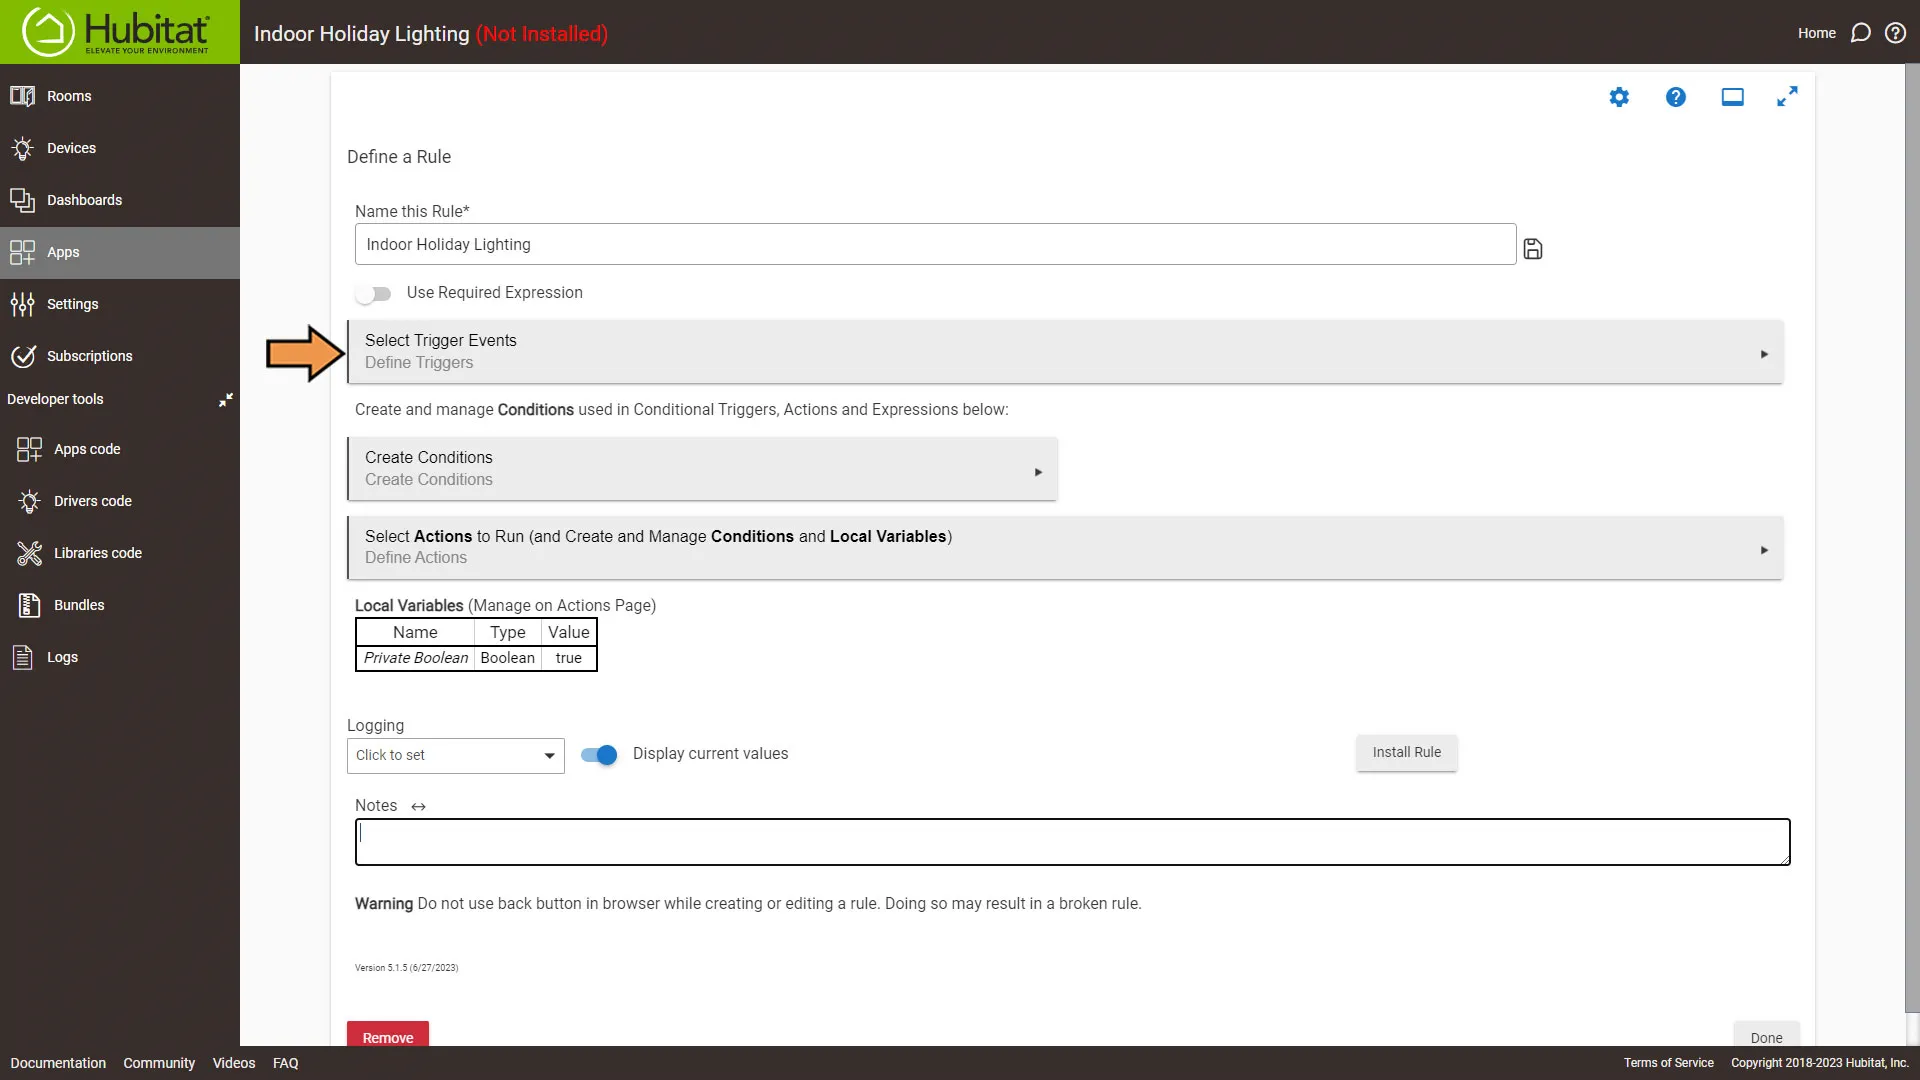
Select Trigger Event.
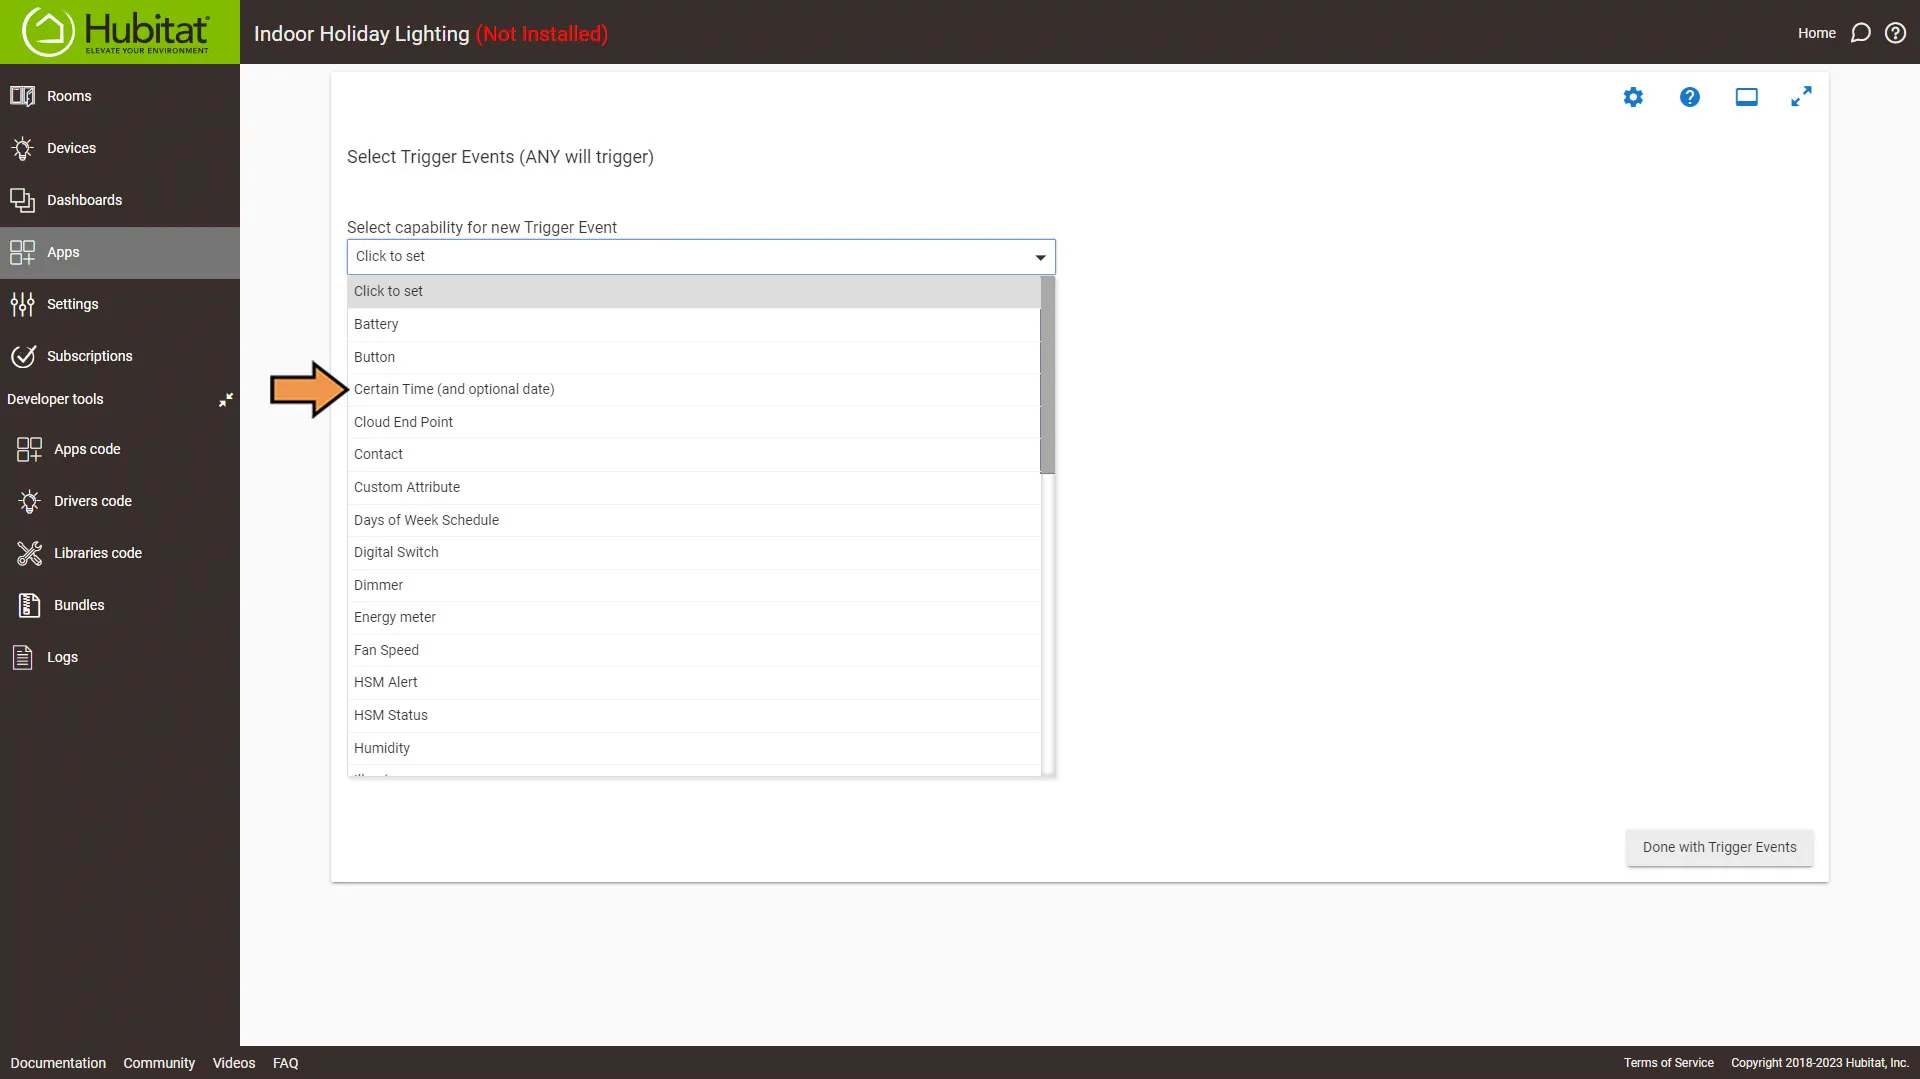
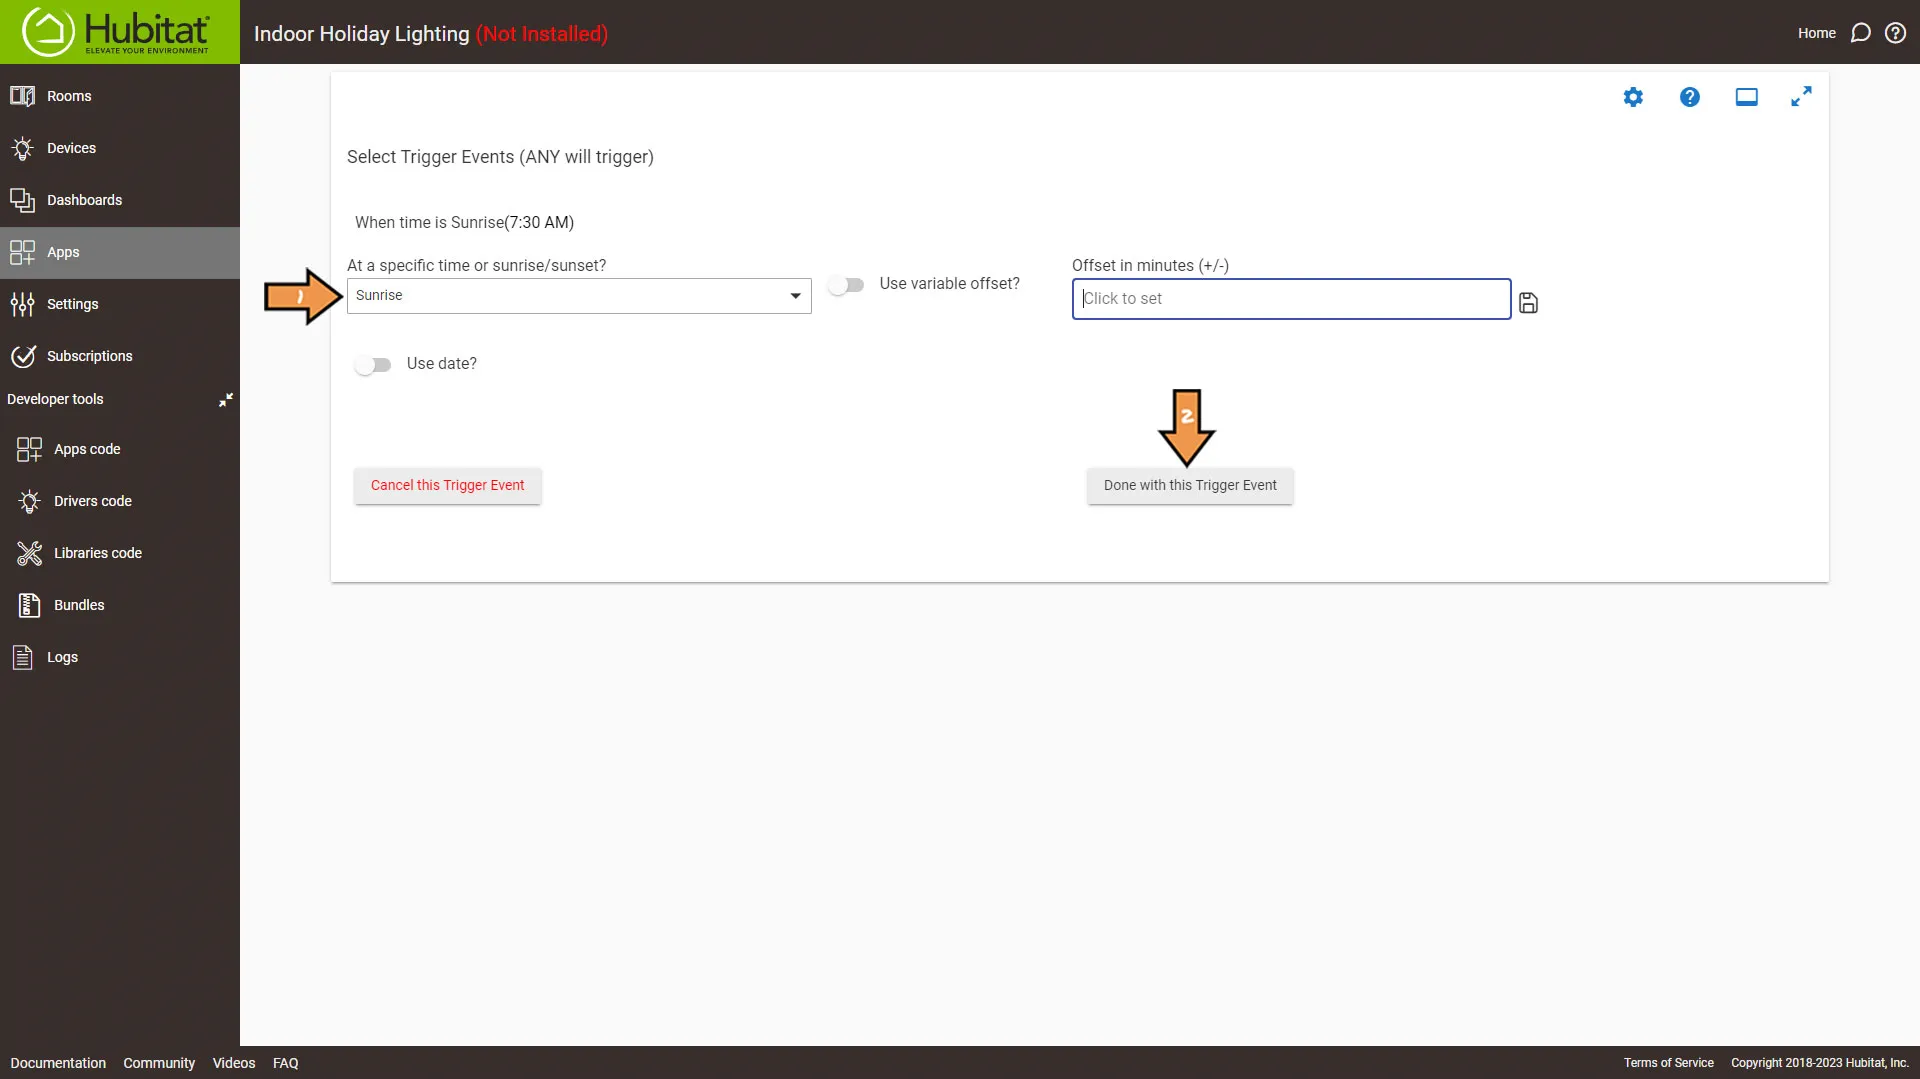
From the Capability drop-down, select Certain Time.
Set the Specific Time to Sunset and click the Done With this Trigger Event.
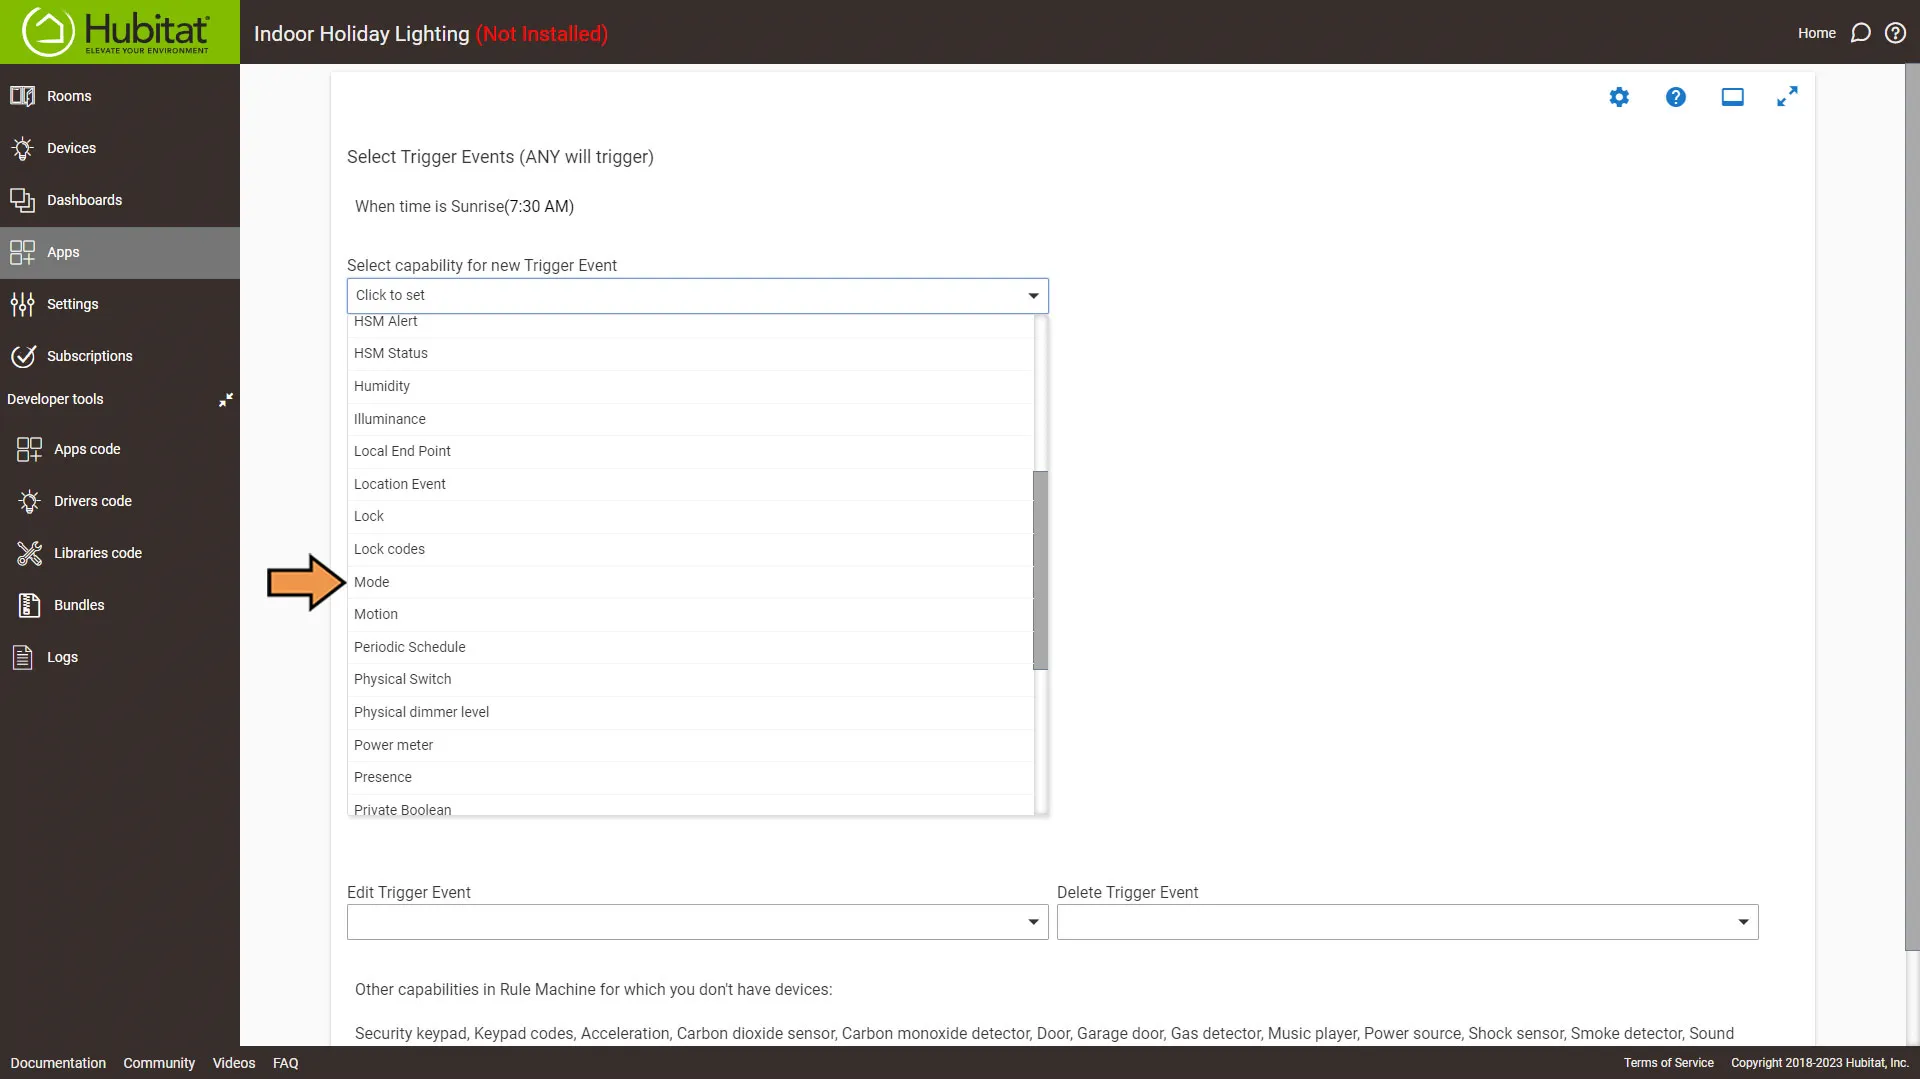
Then we need to add another trigger event, select Mode from the Capability drop-down list.
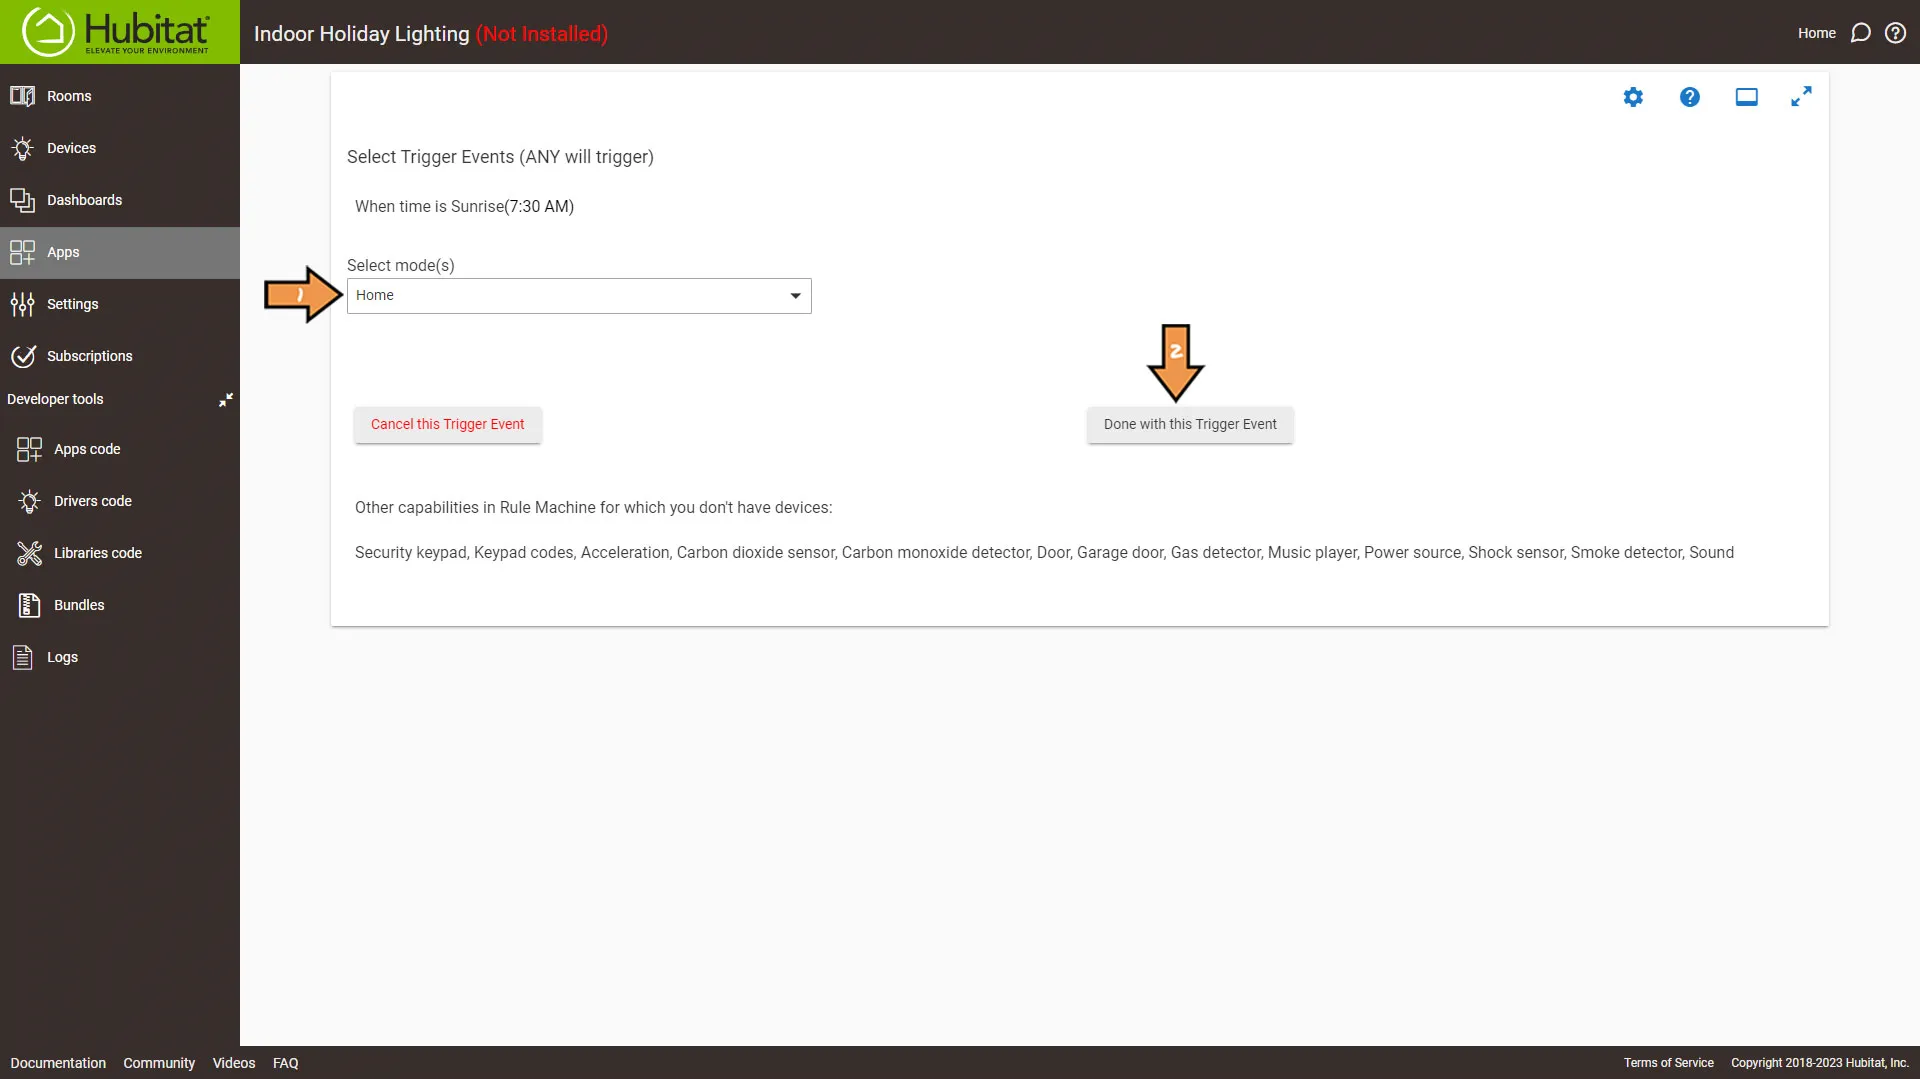
Select Home from the Select Mode dropdown, then click the Done with this Trigger Event button.
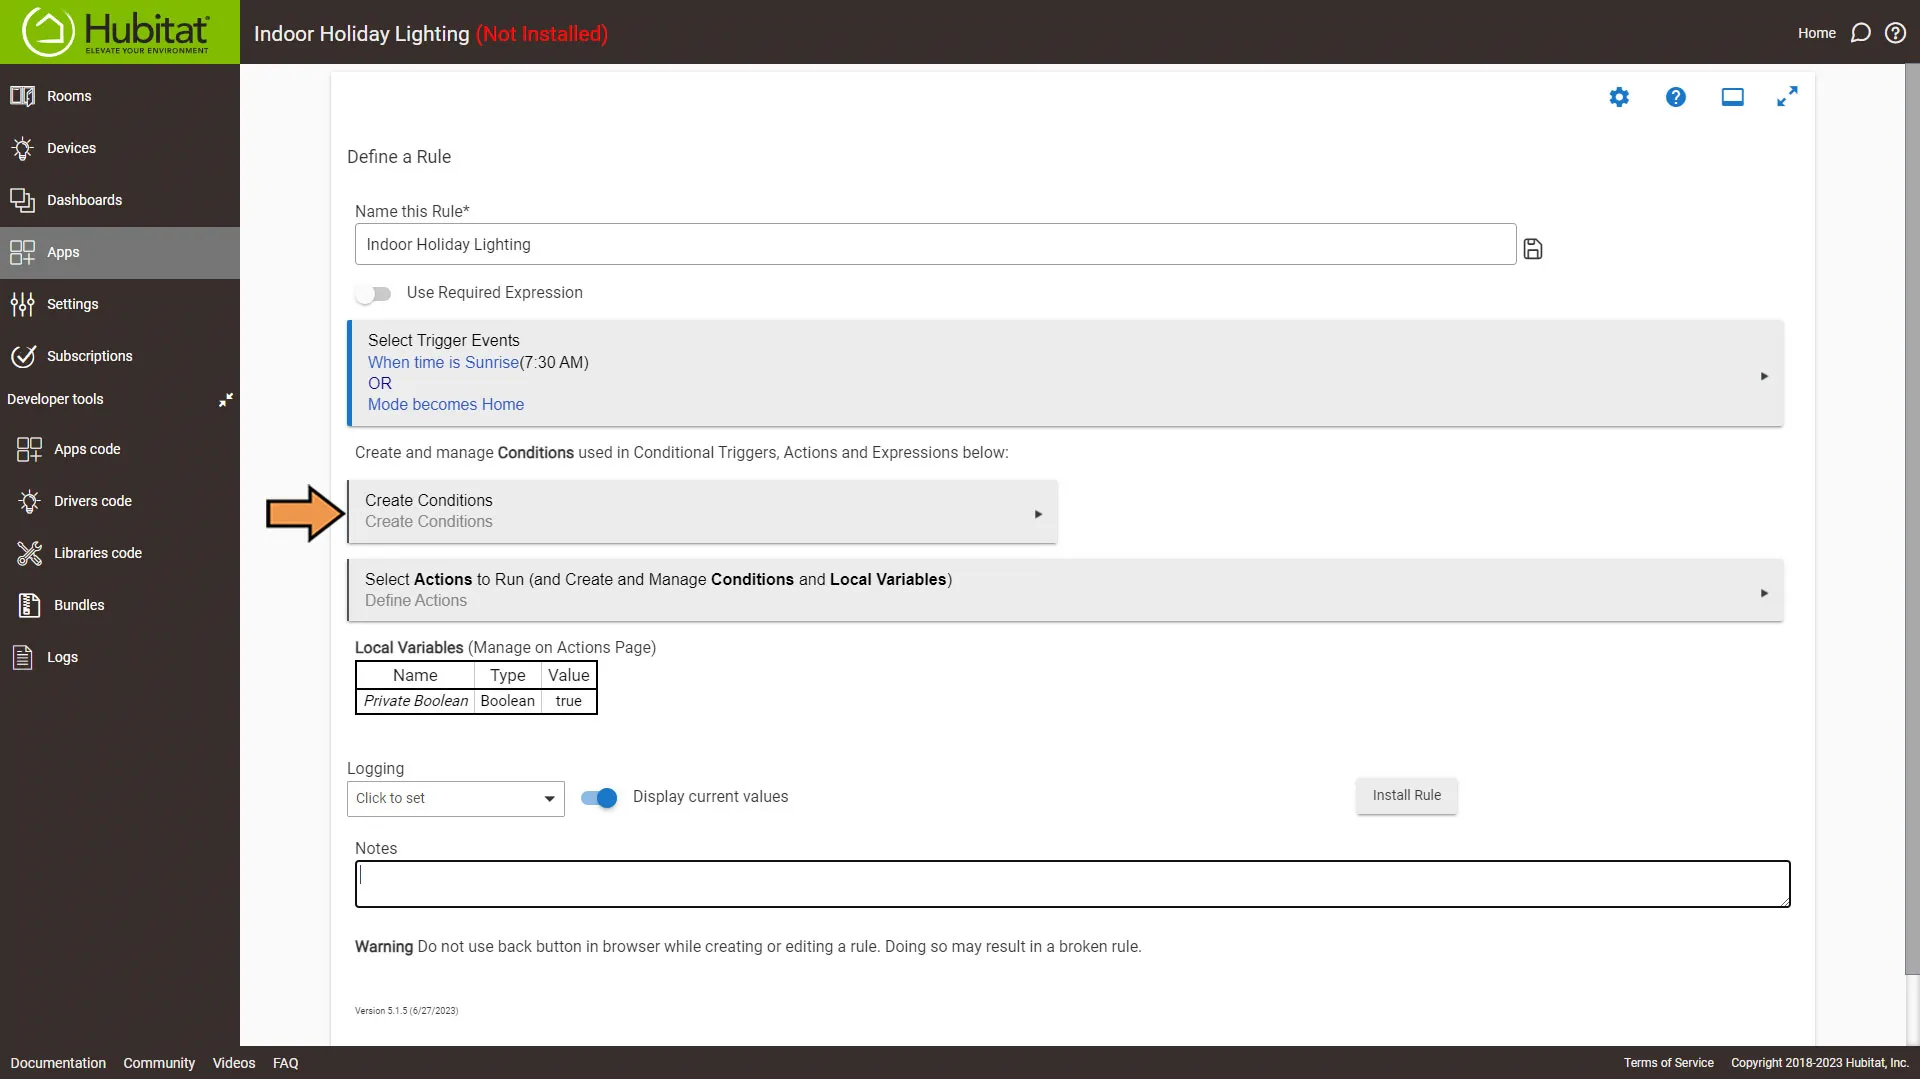
From the rule main menu screen, select Create Conditions.
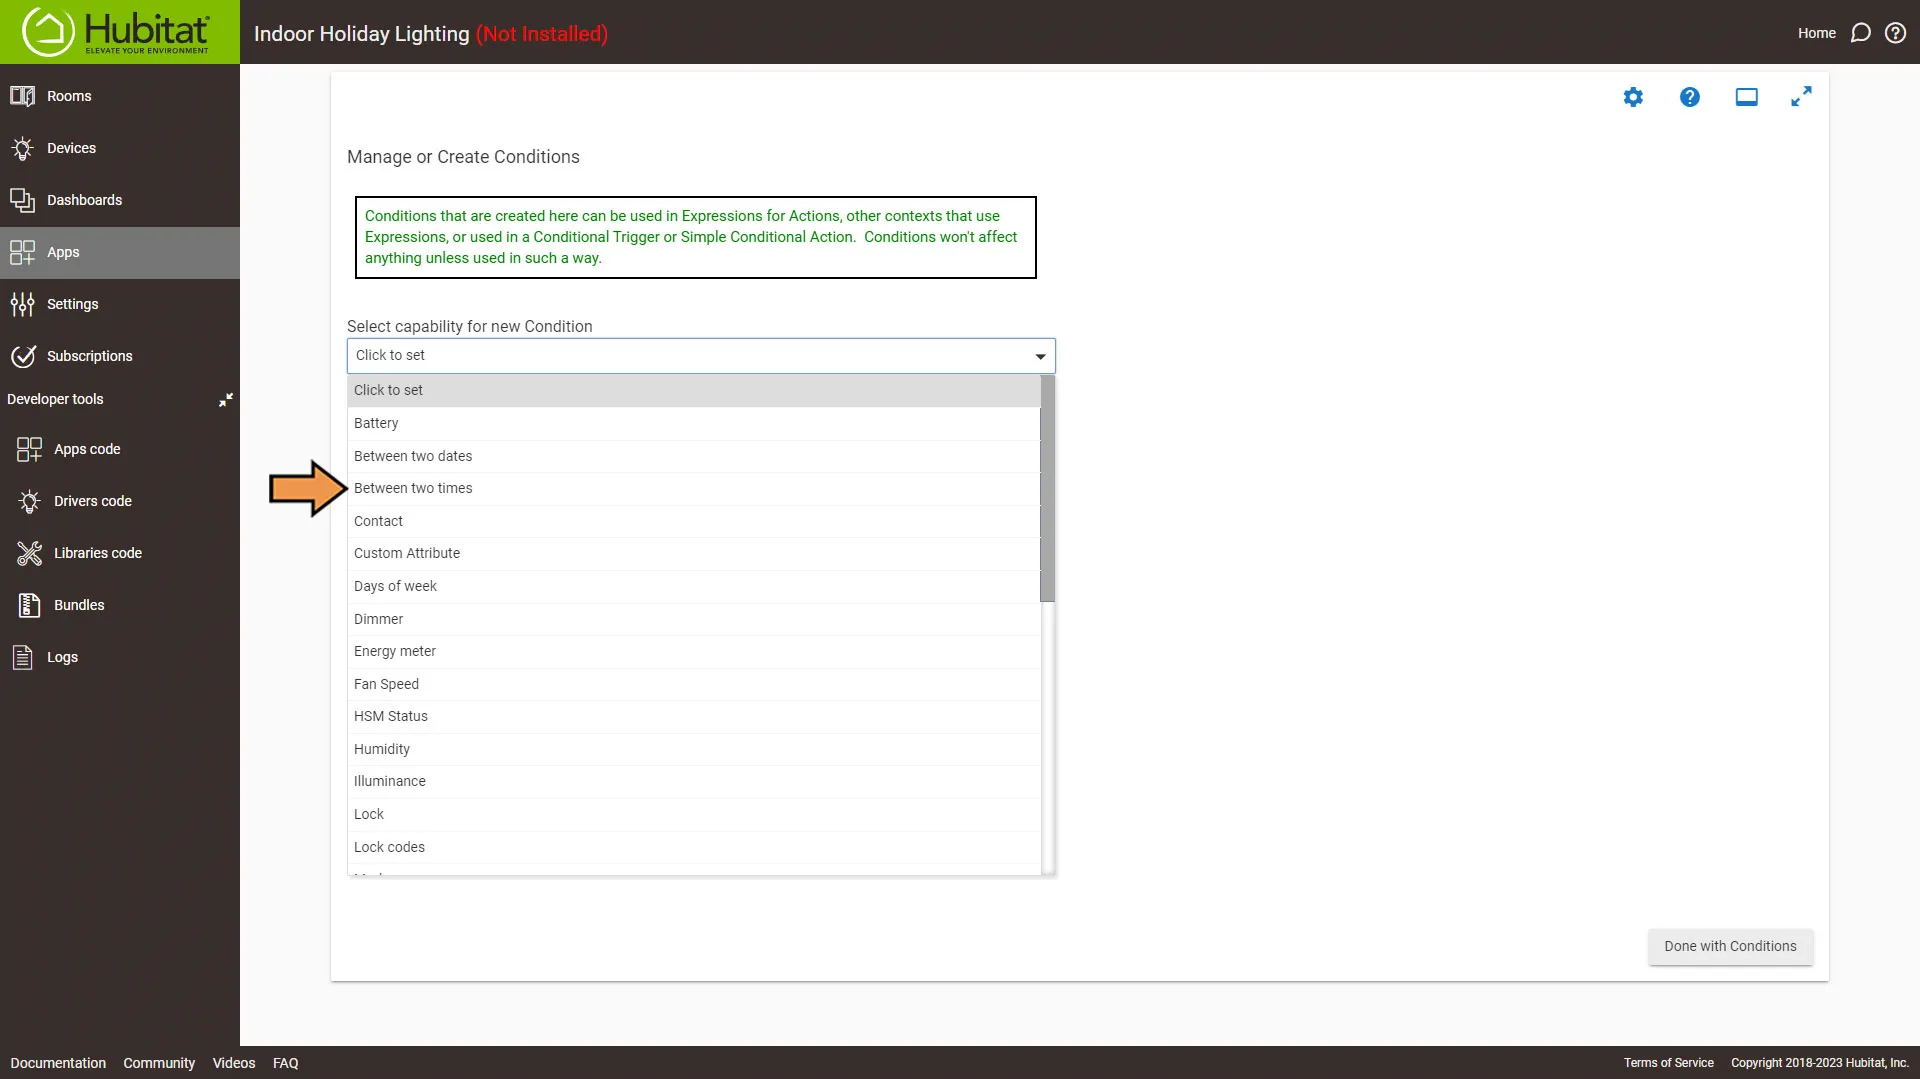
From the Capability drop-down, select Between two times.
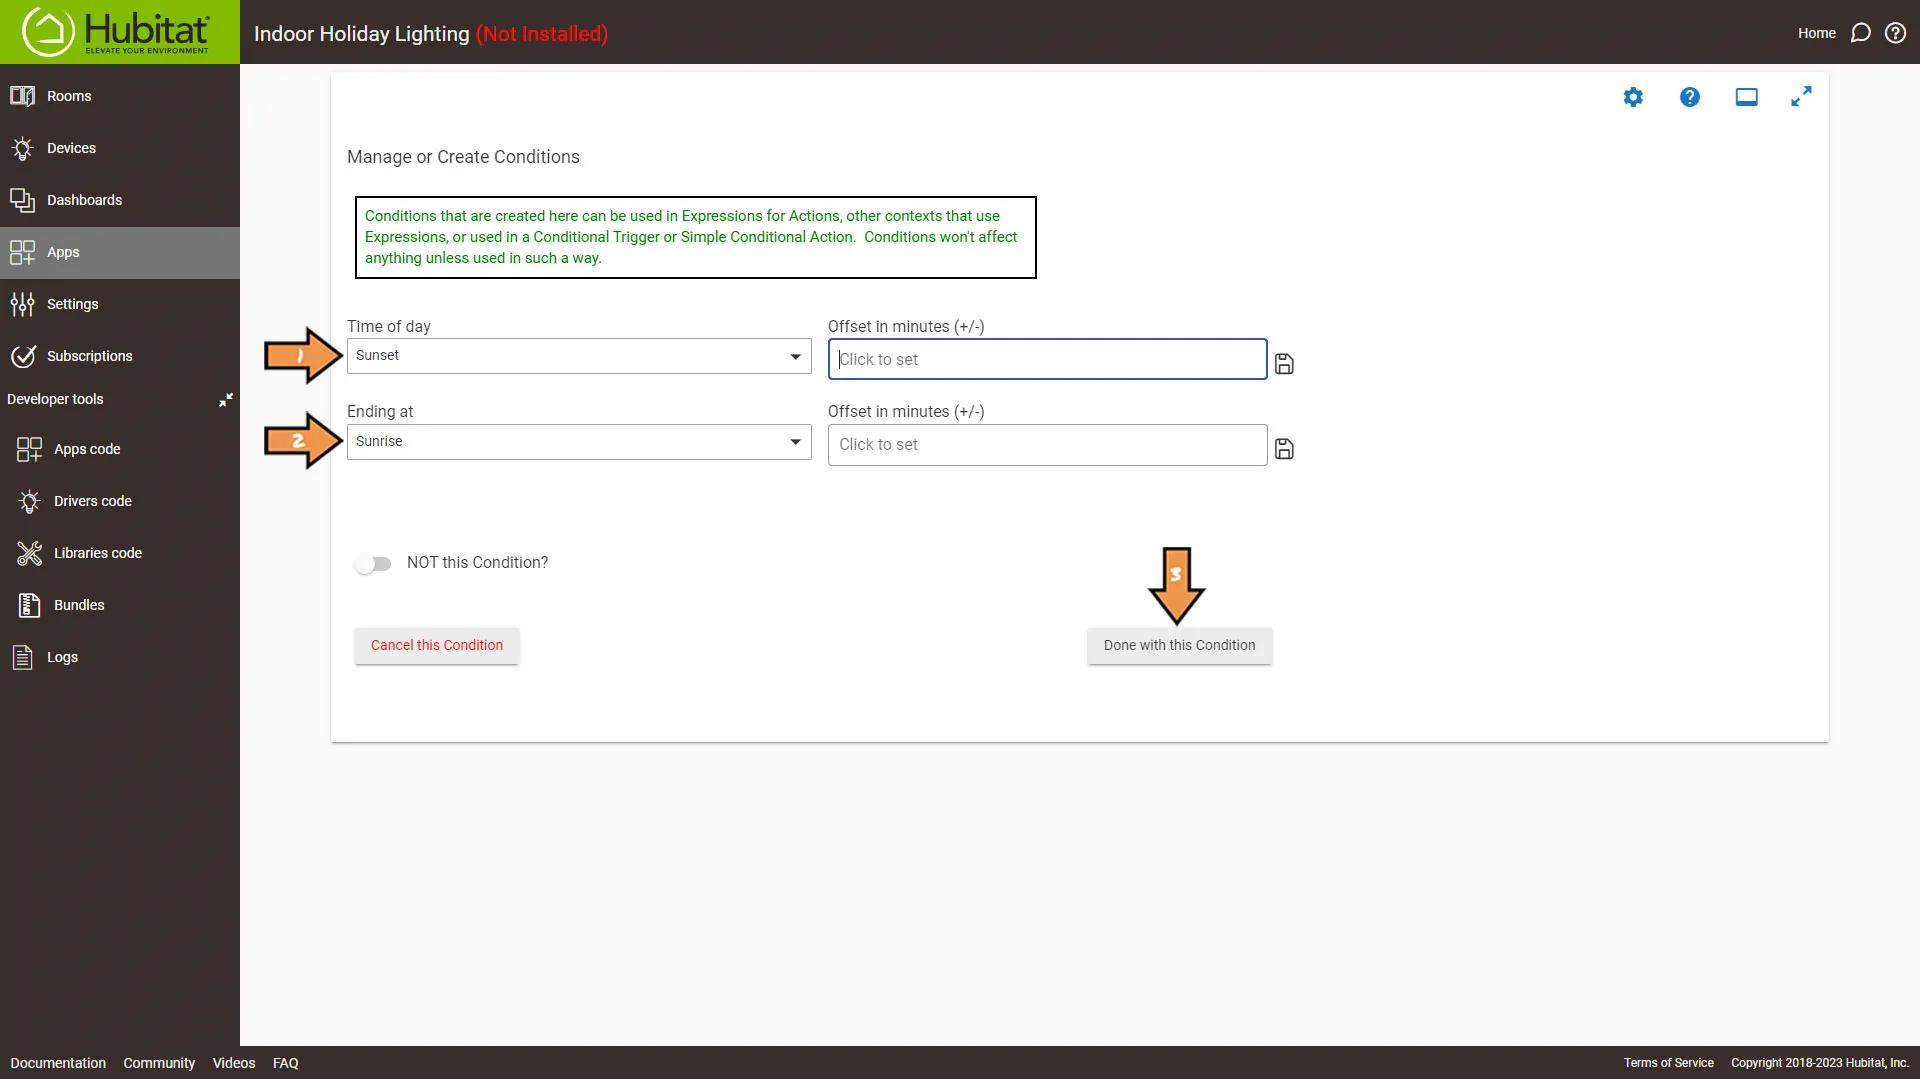
Select Sunset for the Time of Day and Sunrise for the Ending at. Then, click the Done with this Condition button.
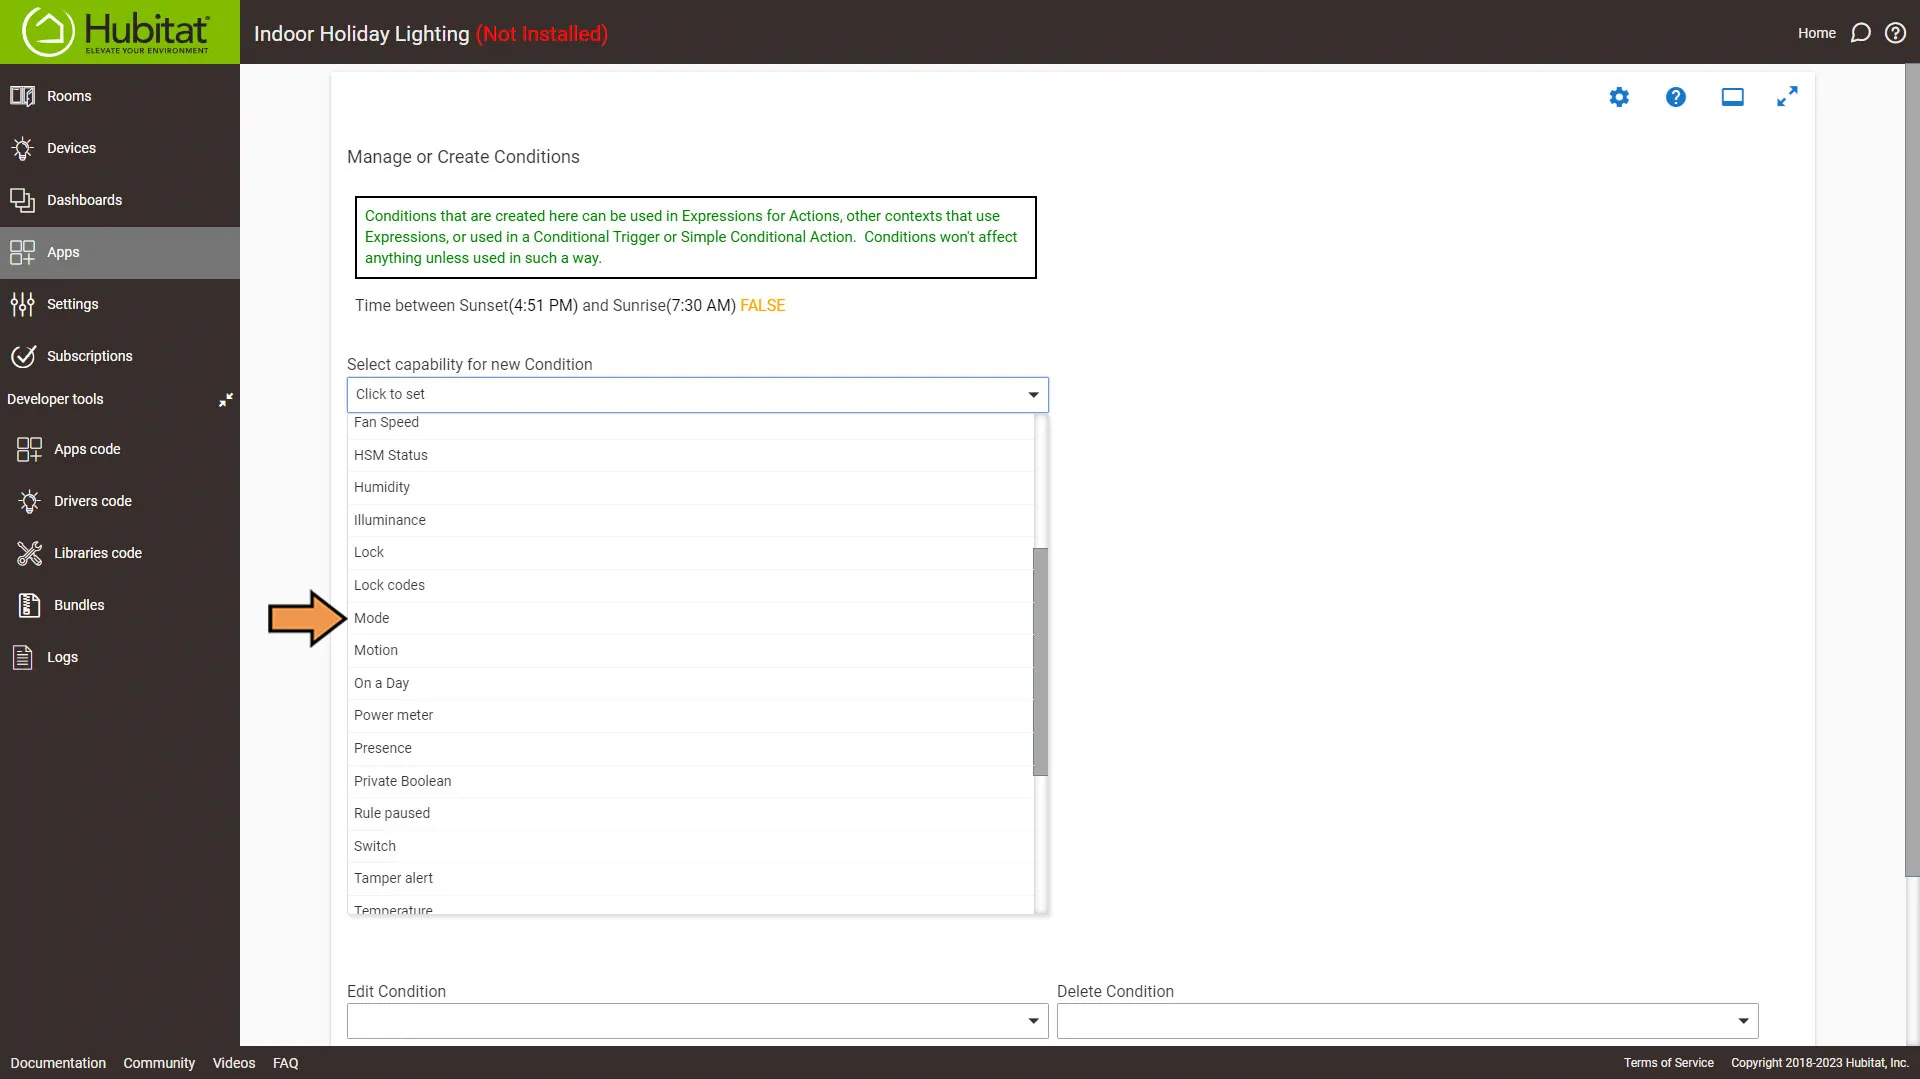
We’ll add another condition, so select Mode from the Capability drop-down.
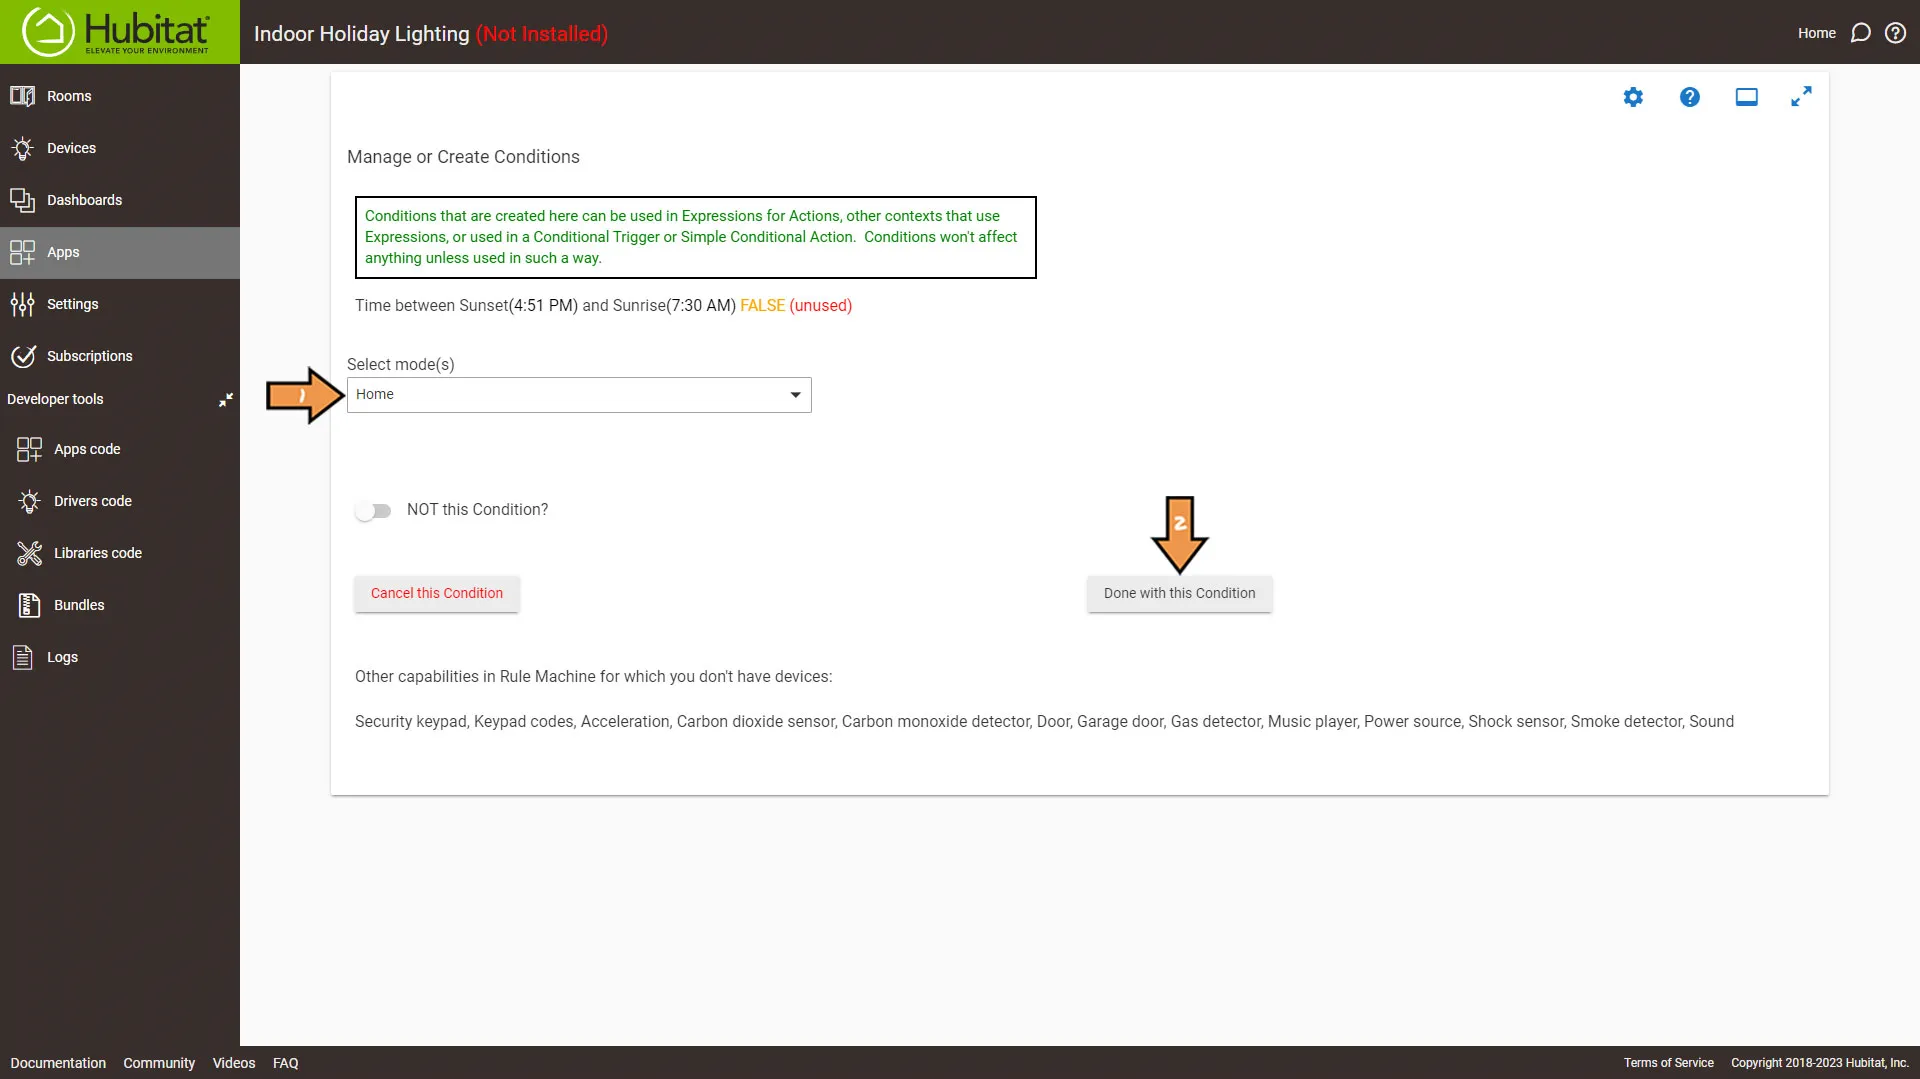
Select Home from the Select Mode dropdown, then click the Done with this Condition button and then click on the Done with Conditions button..
Next, Select Actions to Run.
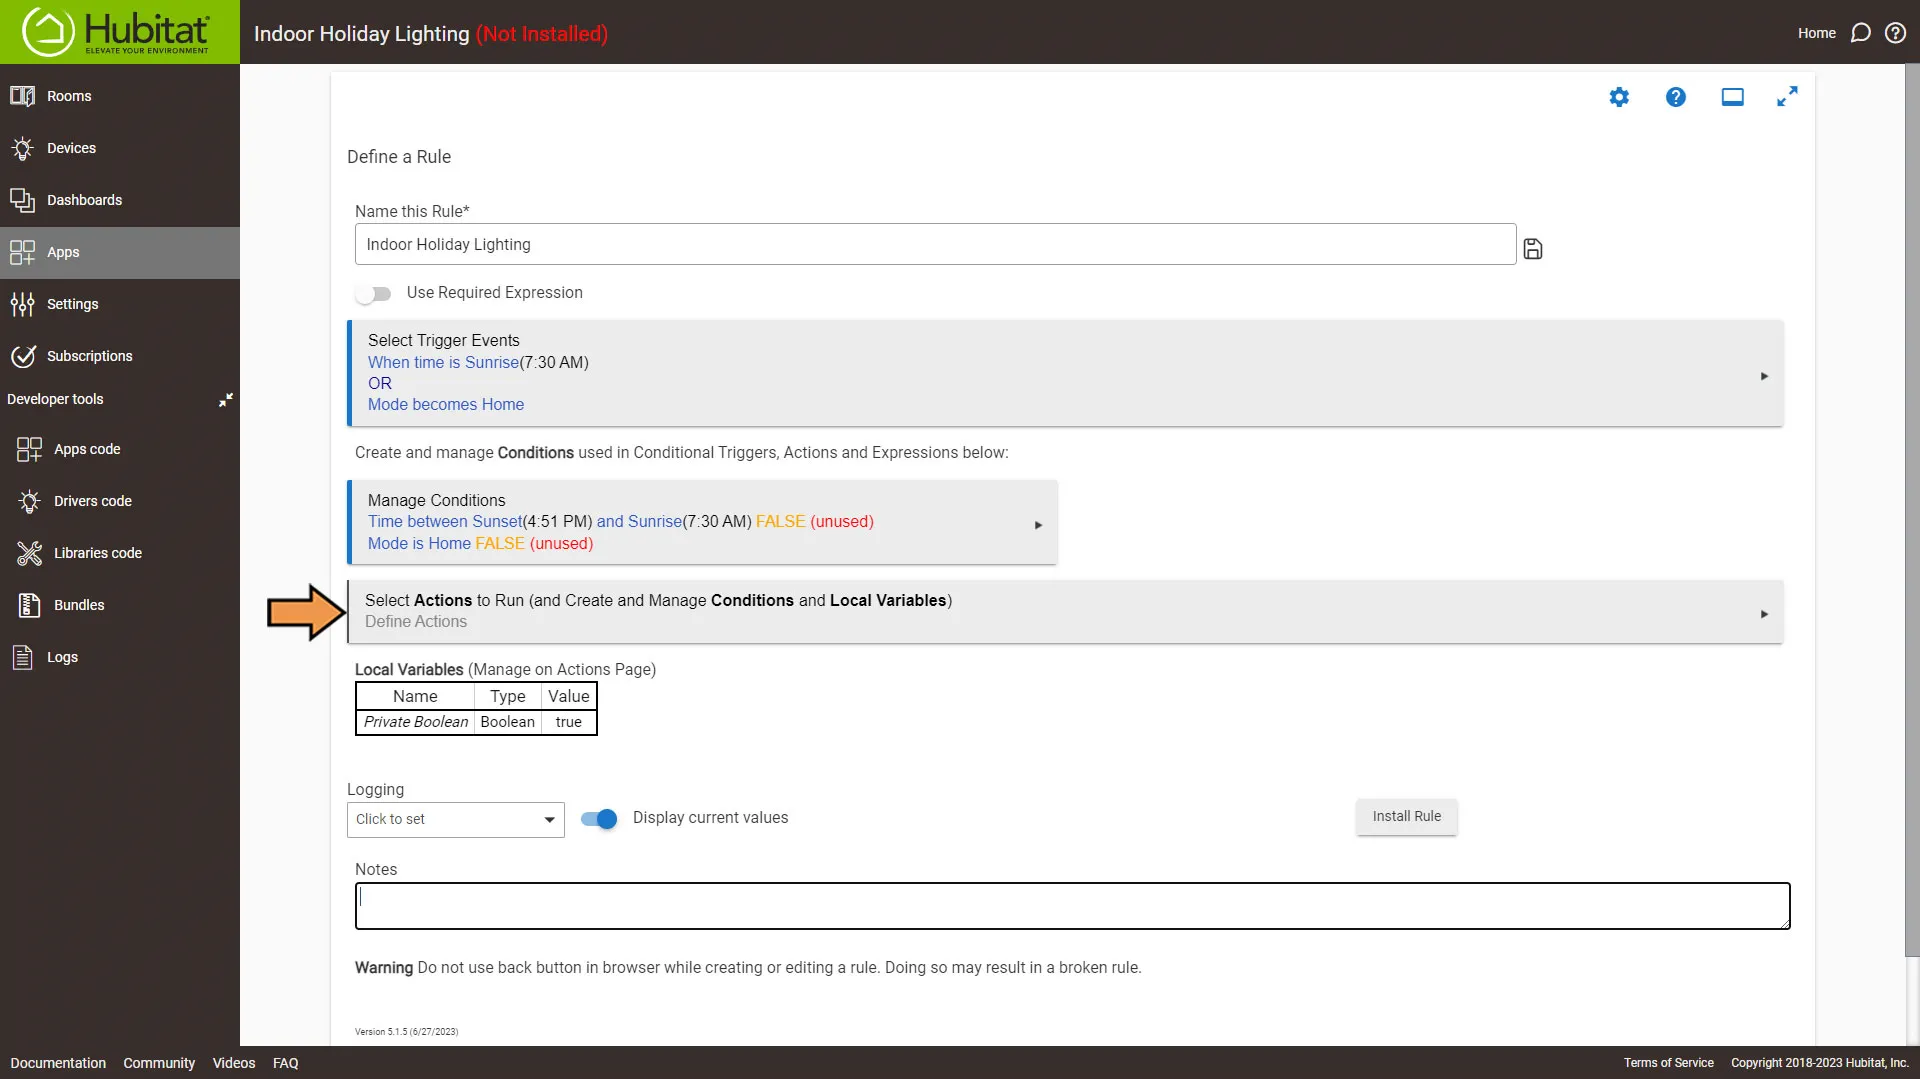
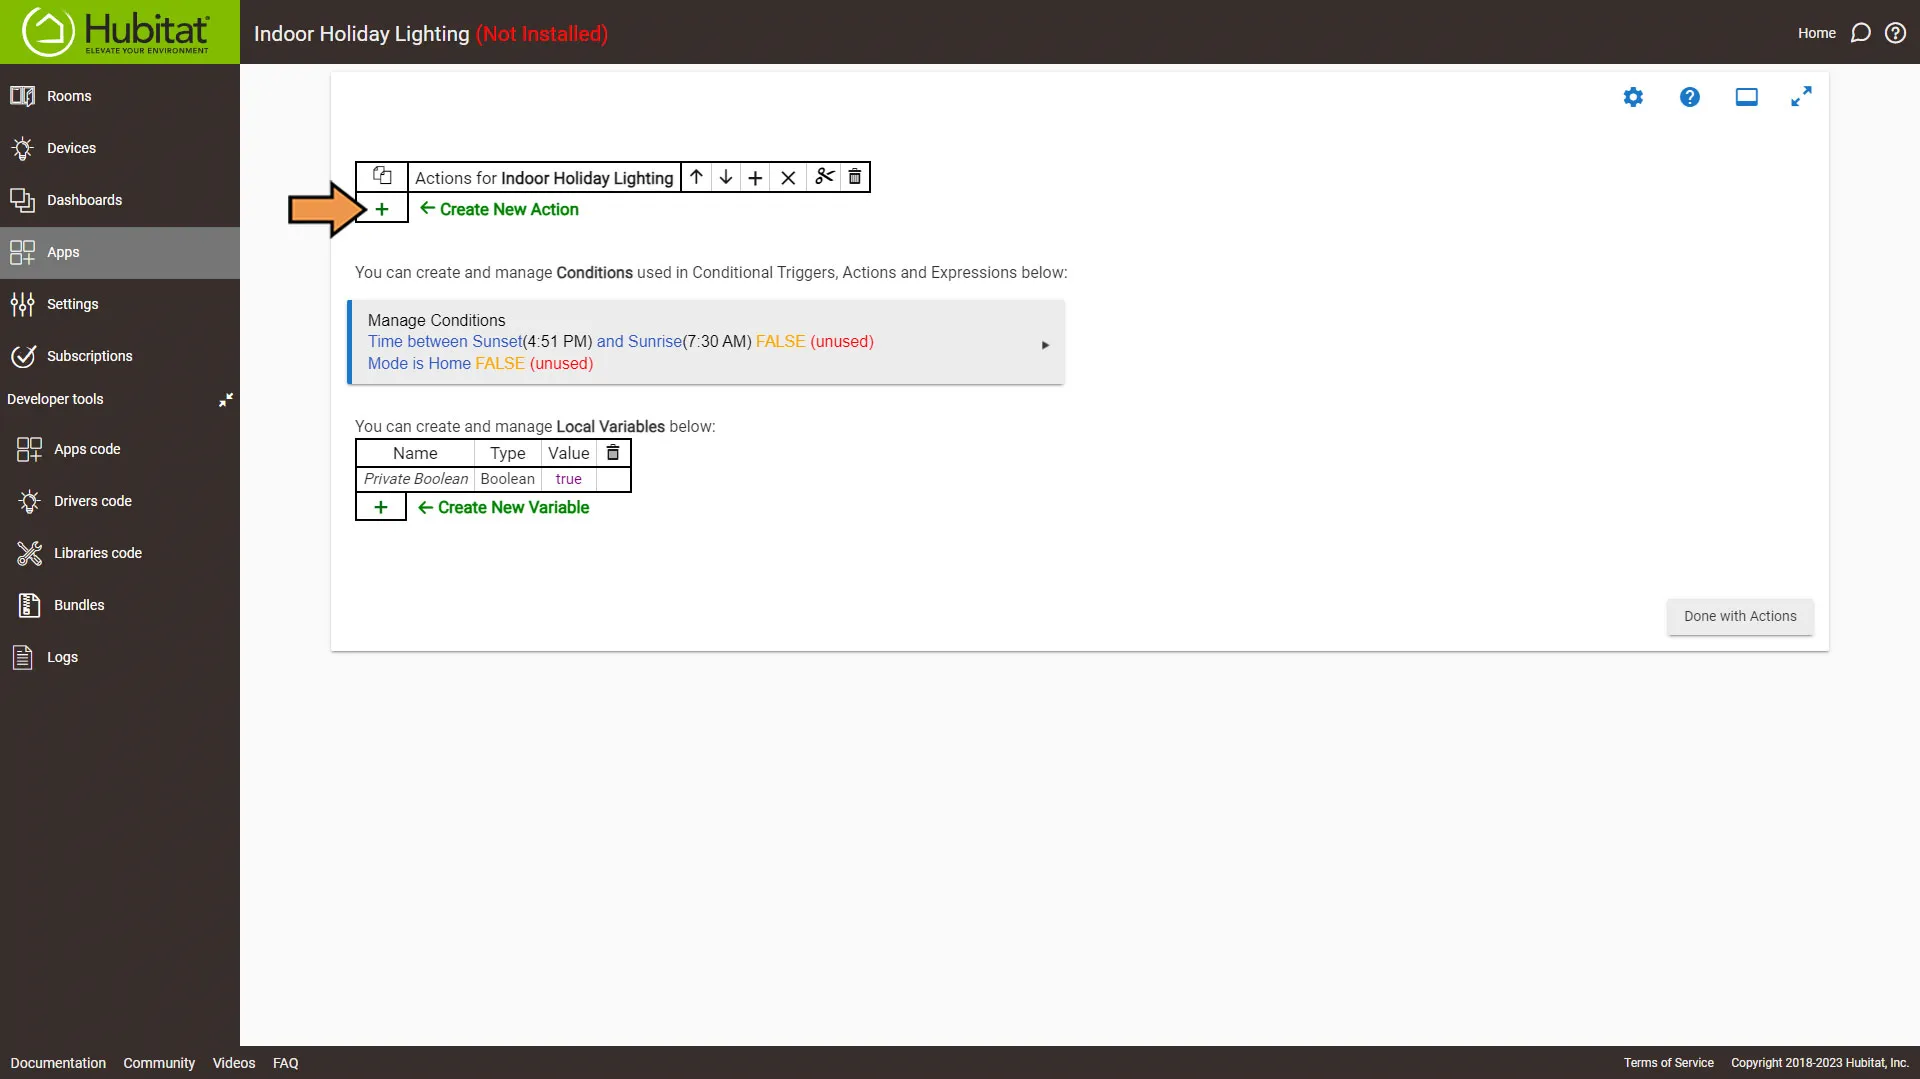
On the Actions screen click the plus sign to Create New Action.
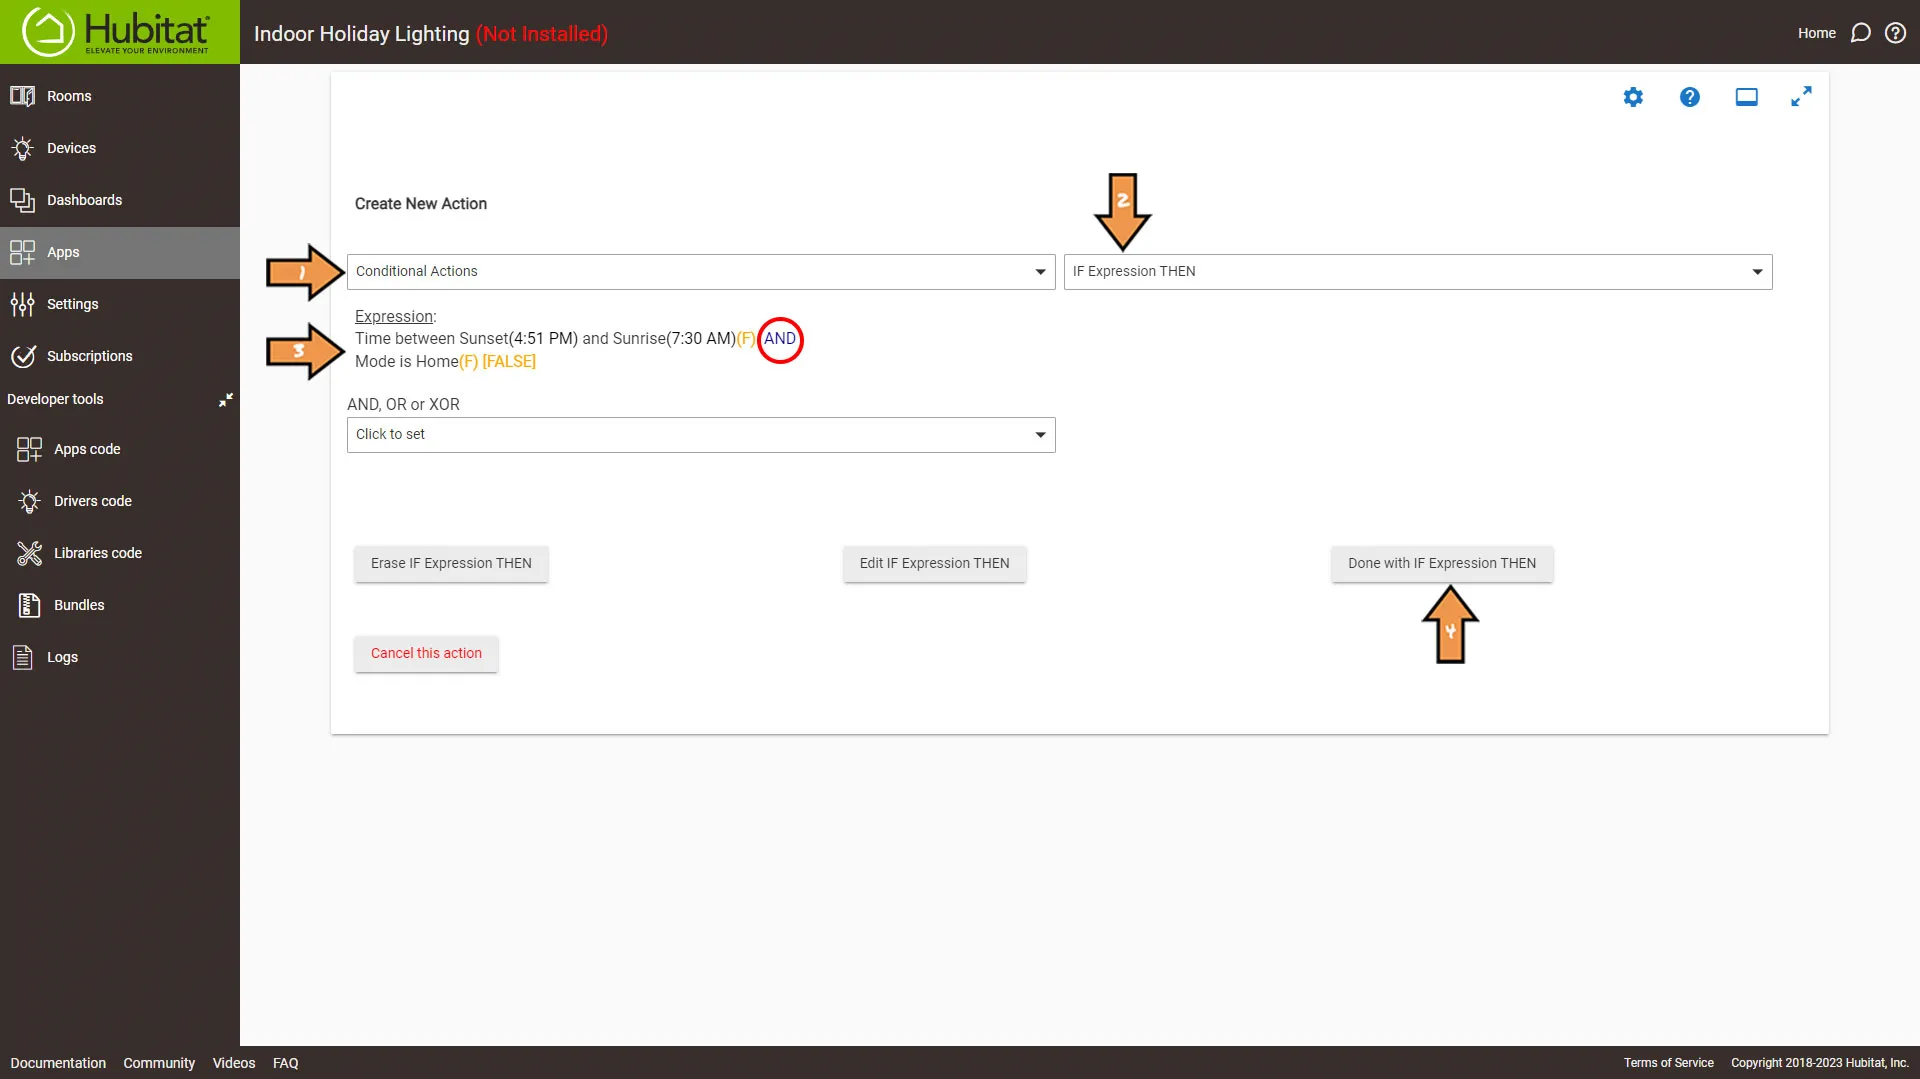
Set the new action as follows:
- Set Action Type to Conditional Actions.
- Set the Which Action to IF Expression THEN.
- Set the Expression Element to both our conditions we created earlier, making sure we use the AND operator.
- Then click the Done with IF Expression THEN button.
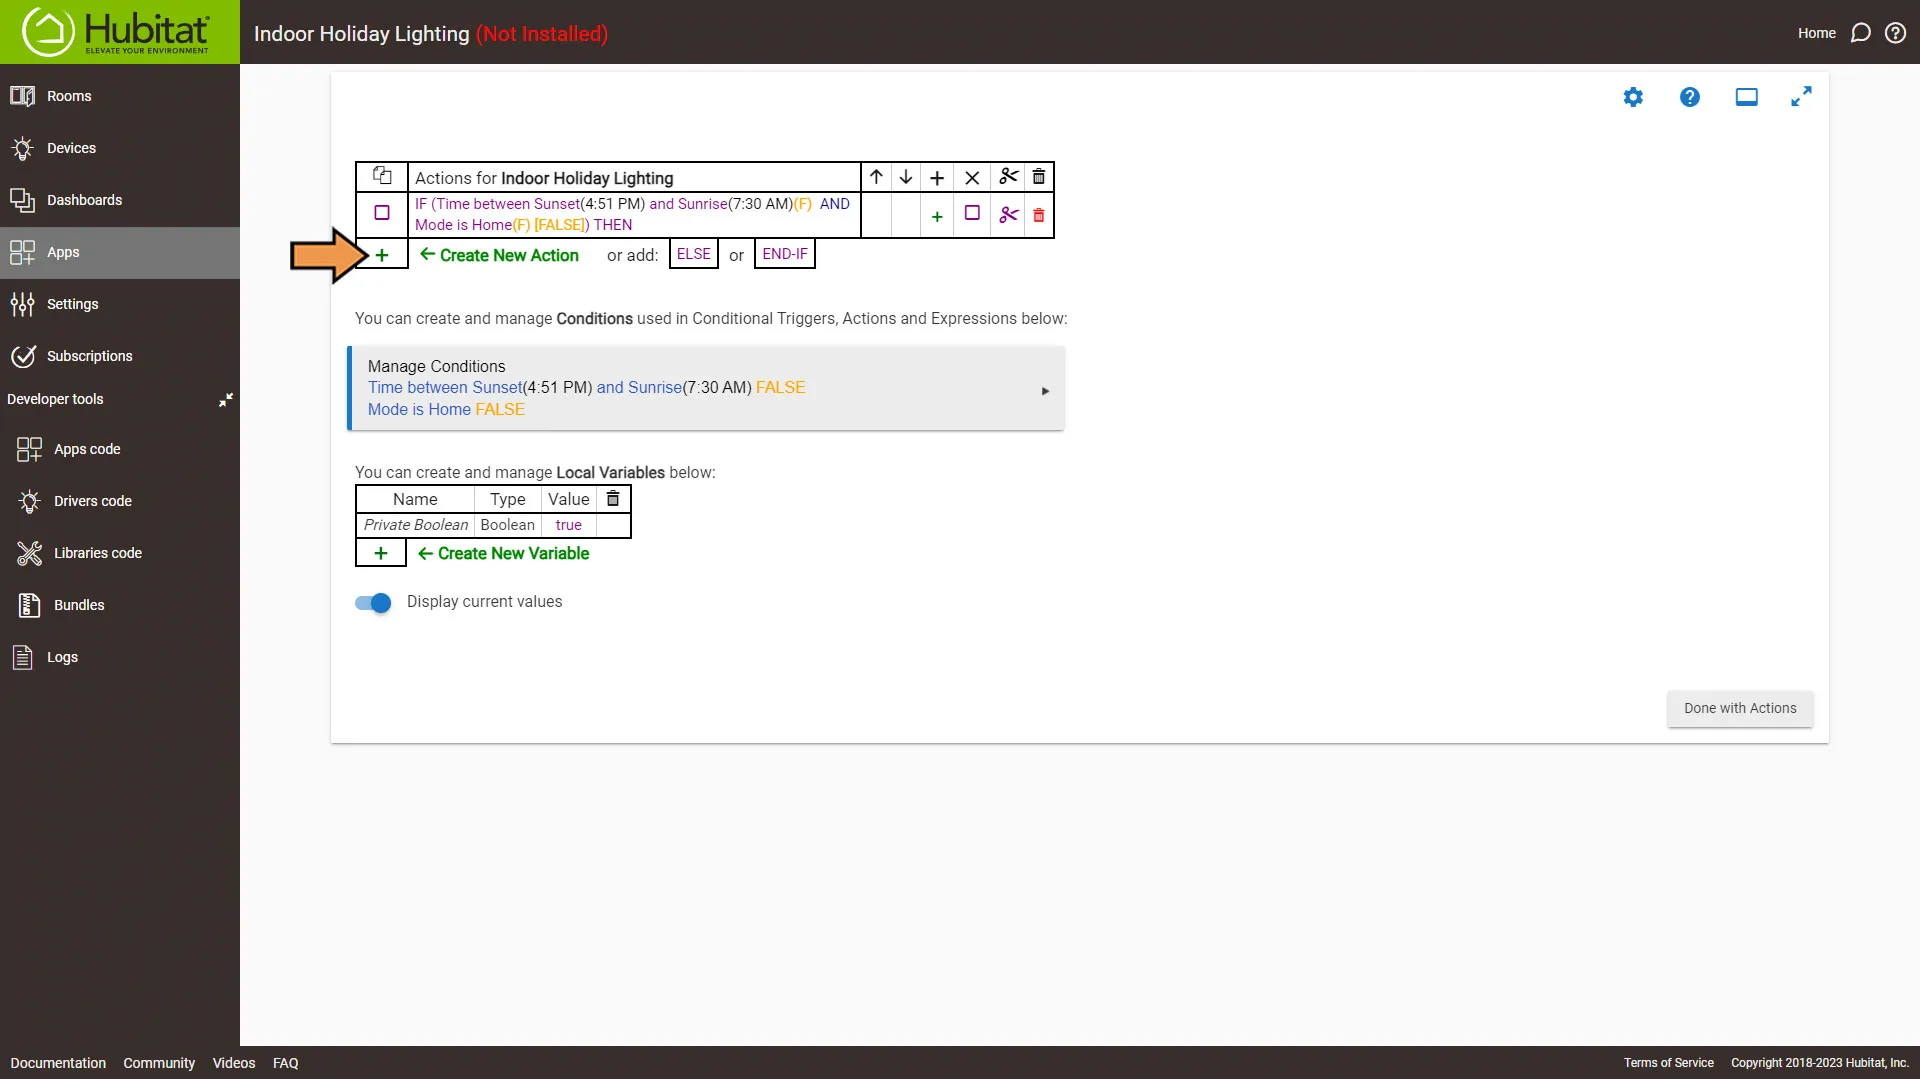
From the Action Screen, click the plus sign again to Create a New Action.
Set the following Action settings:
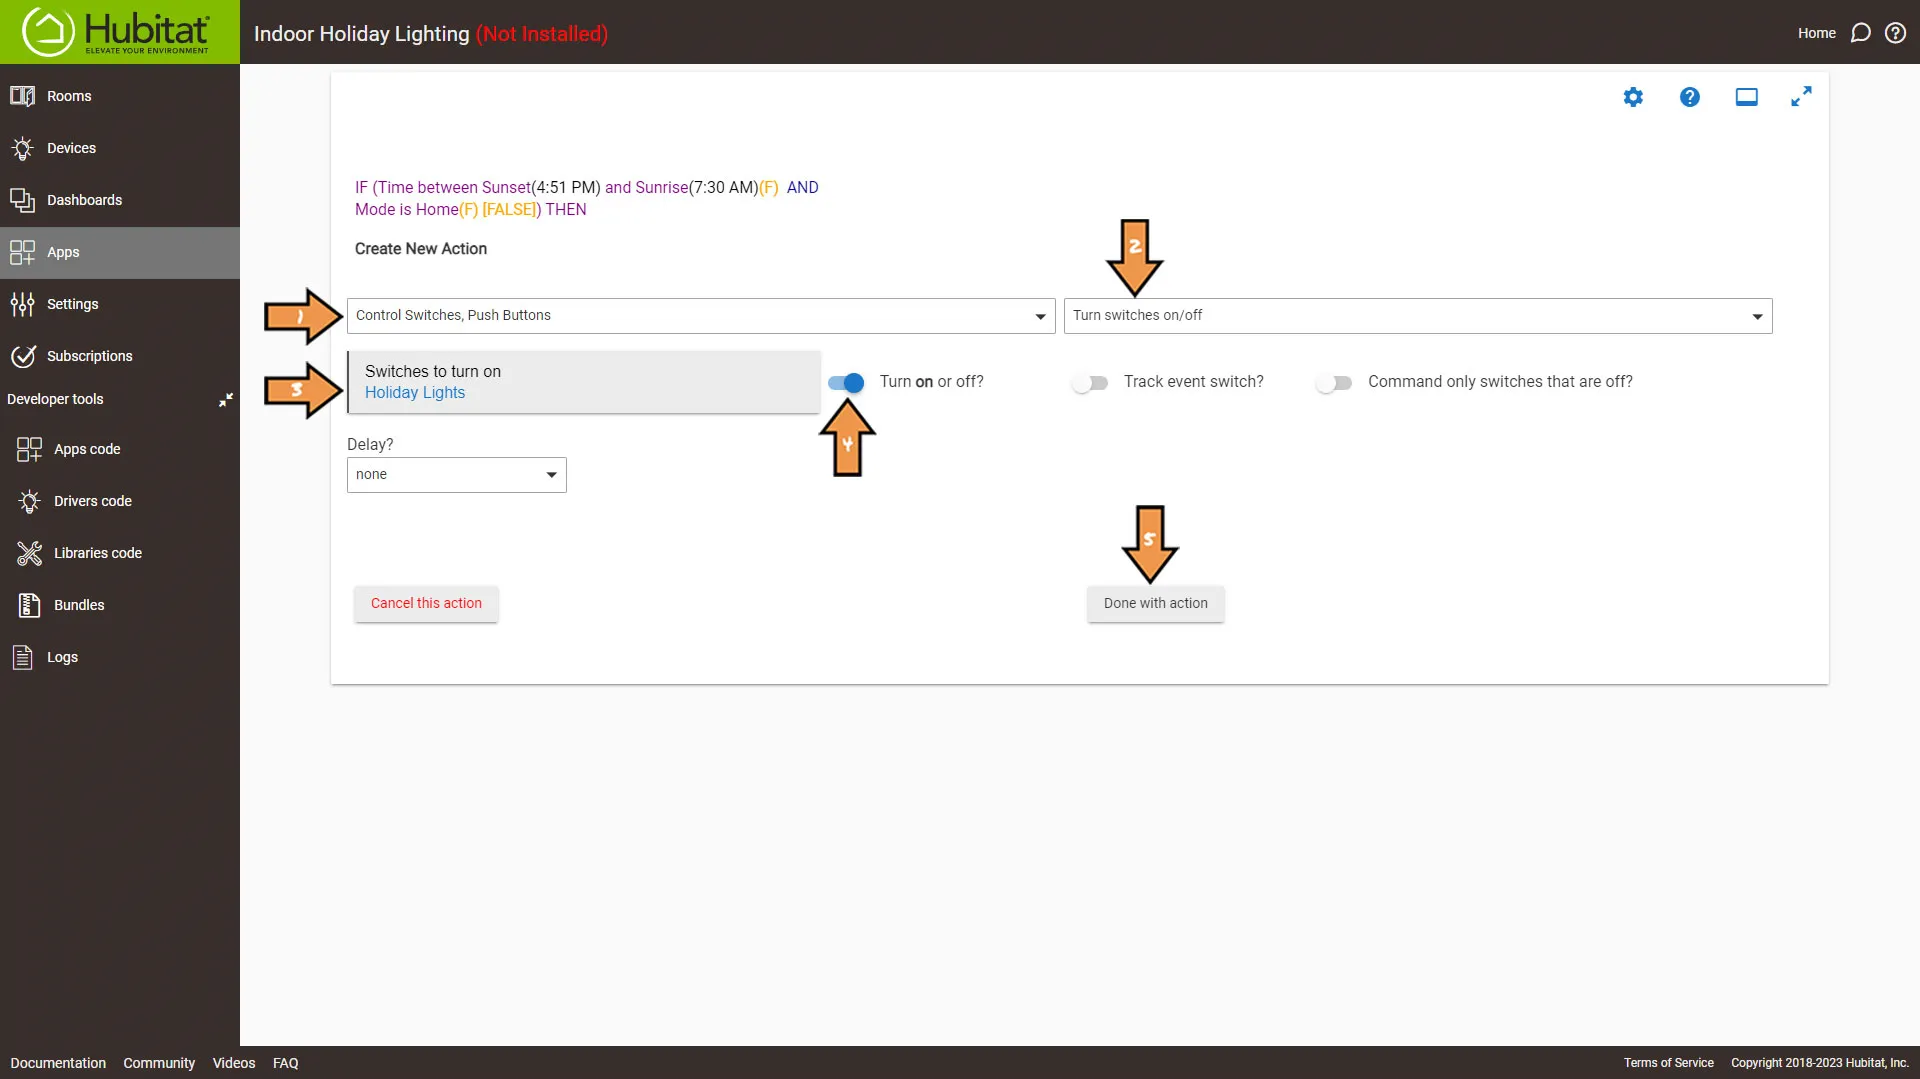
- In the Select Action Type drop-down, select Control Switches option.
- In the Select Which Action, select the Turn switches on/off option.
- Next, in the Switches to turn on drop-down, select our Holiday Lights group.
- Make sure the Turn on or off switch is set to On.
- Then click the Done with Action button.
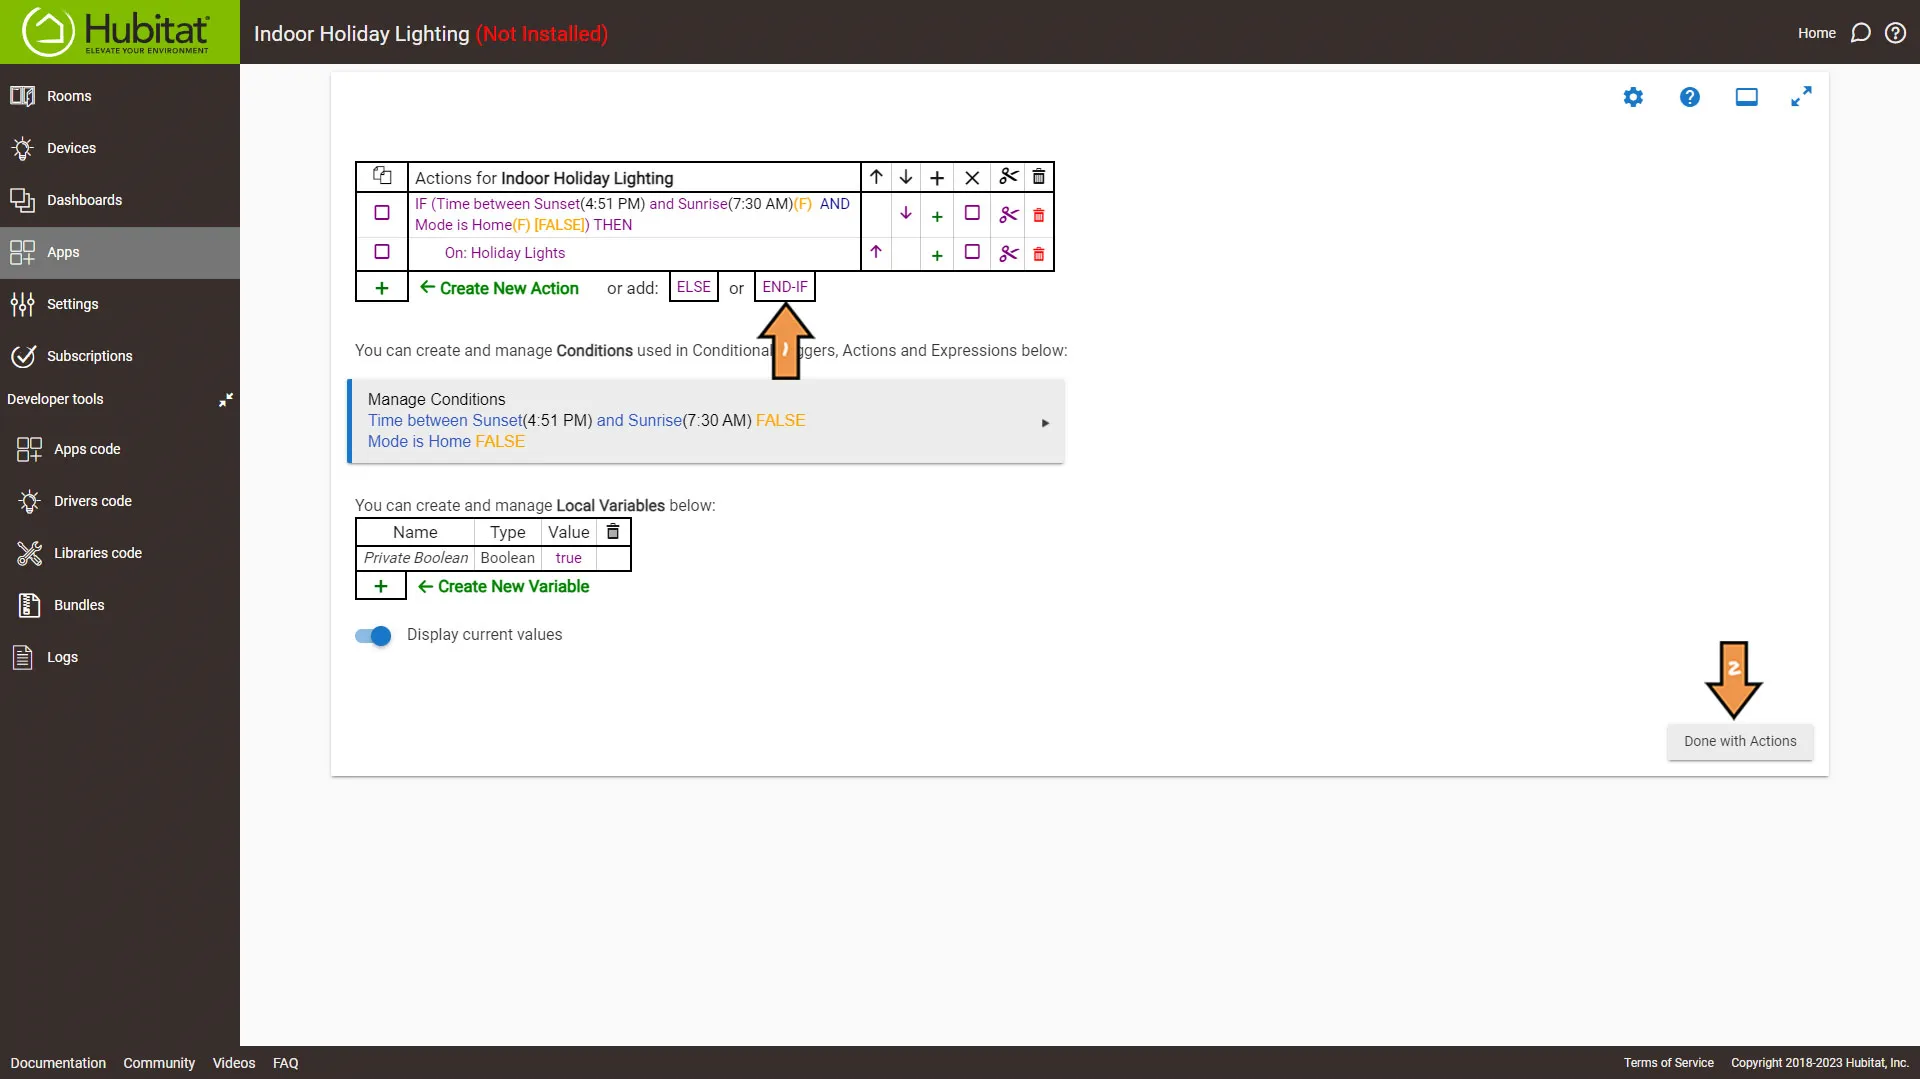
Back on the Actions Screen, Click END-IF to close out conditional statements. Then click the Done with Actions button.
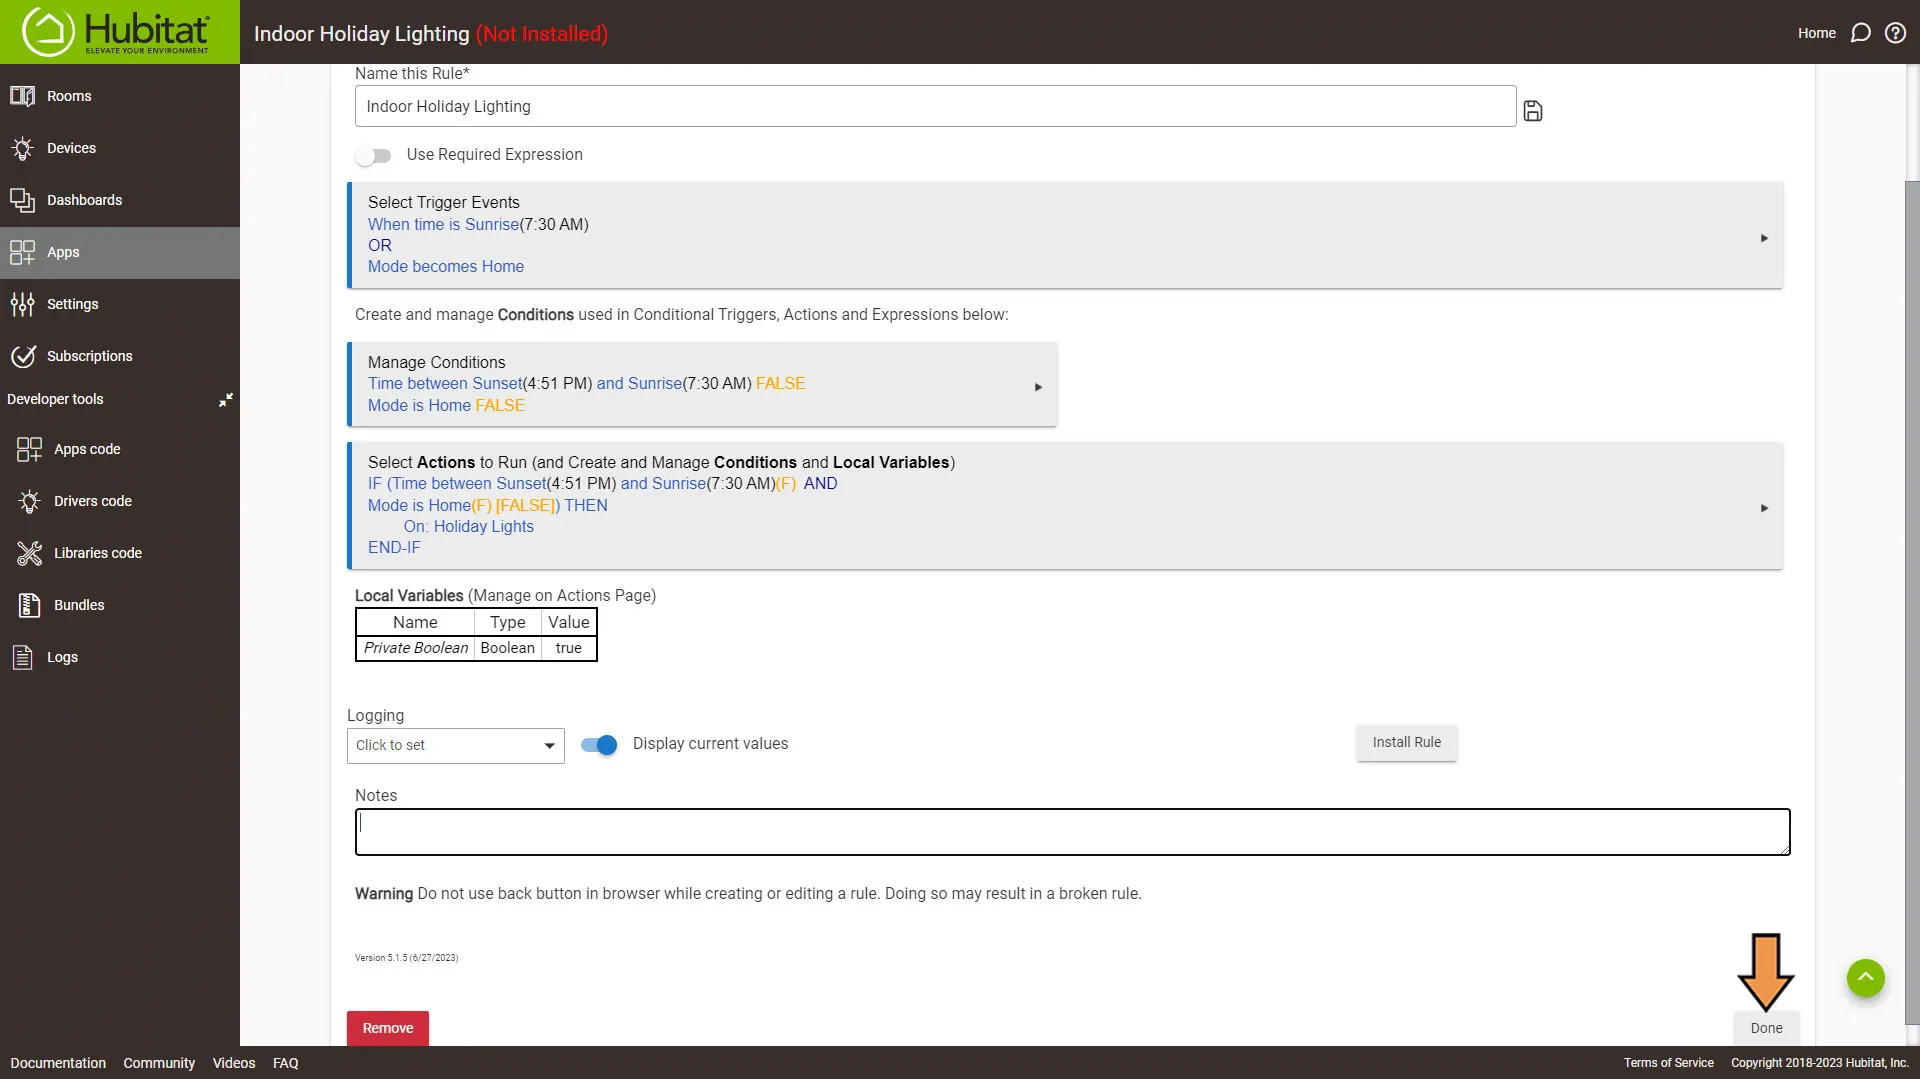
Finally, back on the Rule Main Menu click the Done button to finish up the rule.
Success: That’s It! You have successfully automated your indoor holiday lights.
Home Assistant
Indoor Holiday Lighting
The Official Documentation for Automation editor
Home Assistant does not have Modes as a feature, but you can get it to work with Helpers or you can share it from Hubitat Connect.
Setting Up the Automation
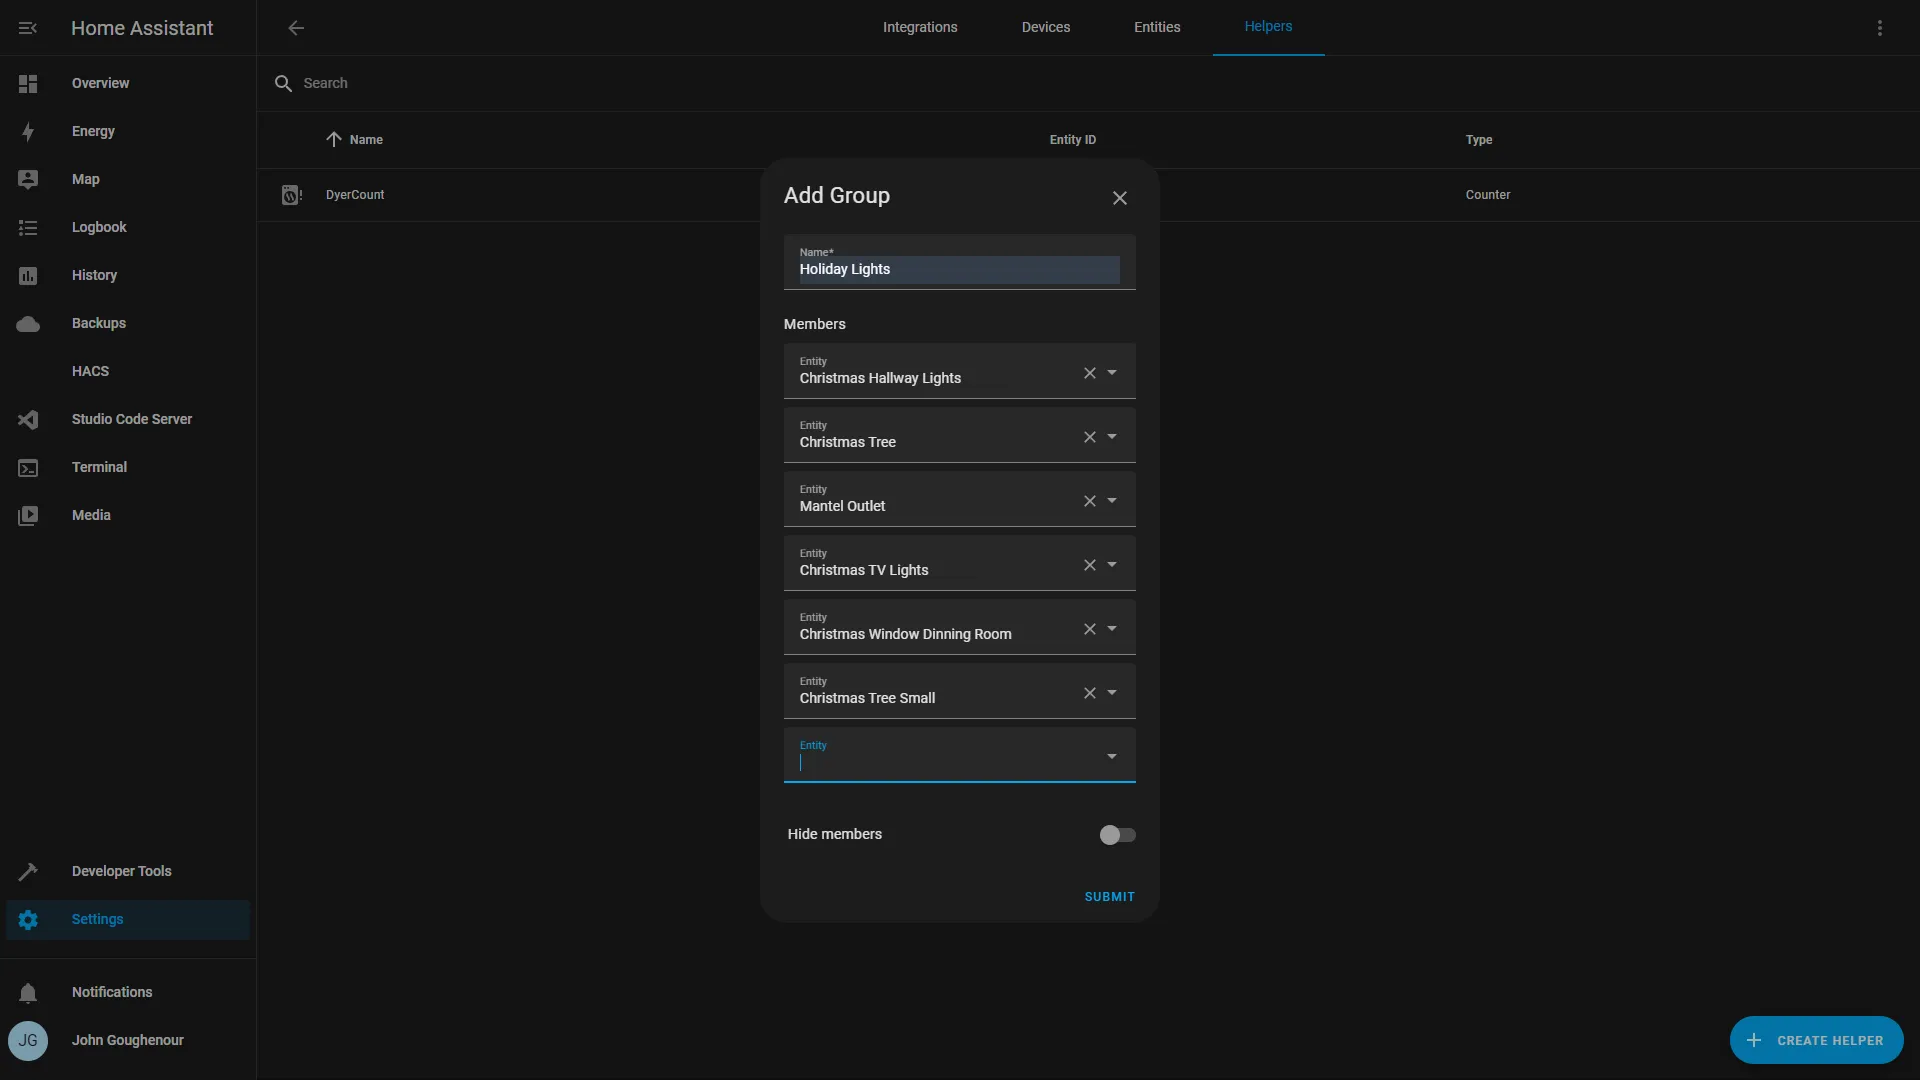
First, we need to create a new group to control all the smart plugs as one switch.
Next, we need to go to Settings and Automations & Scenes.
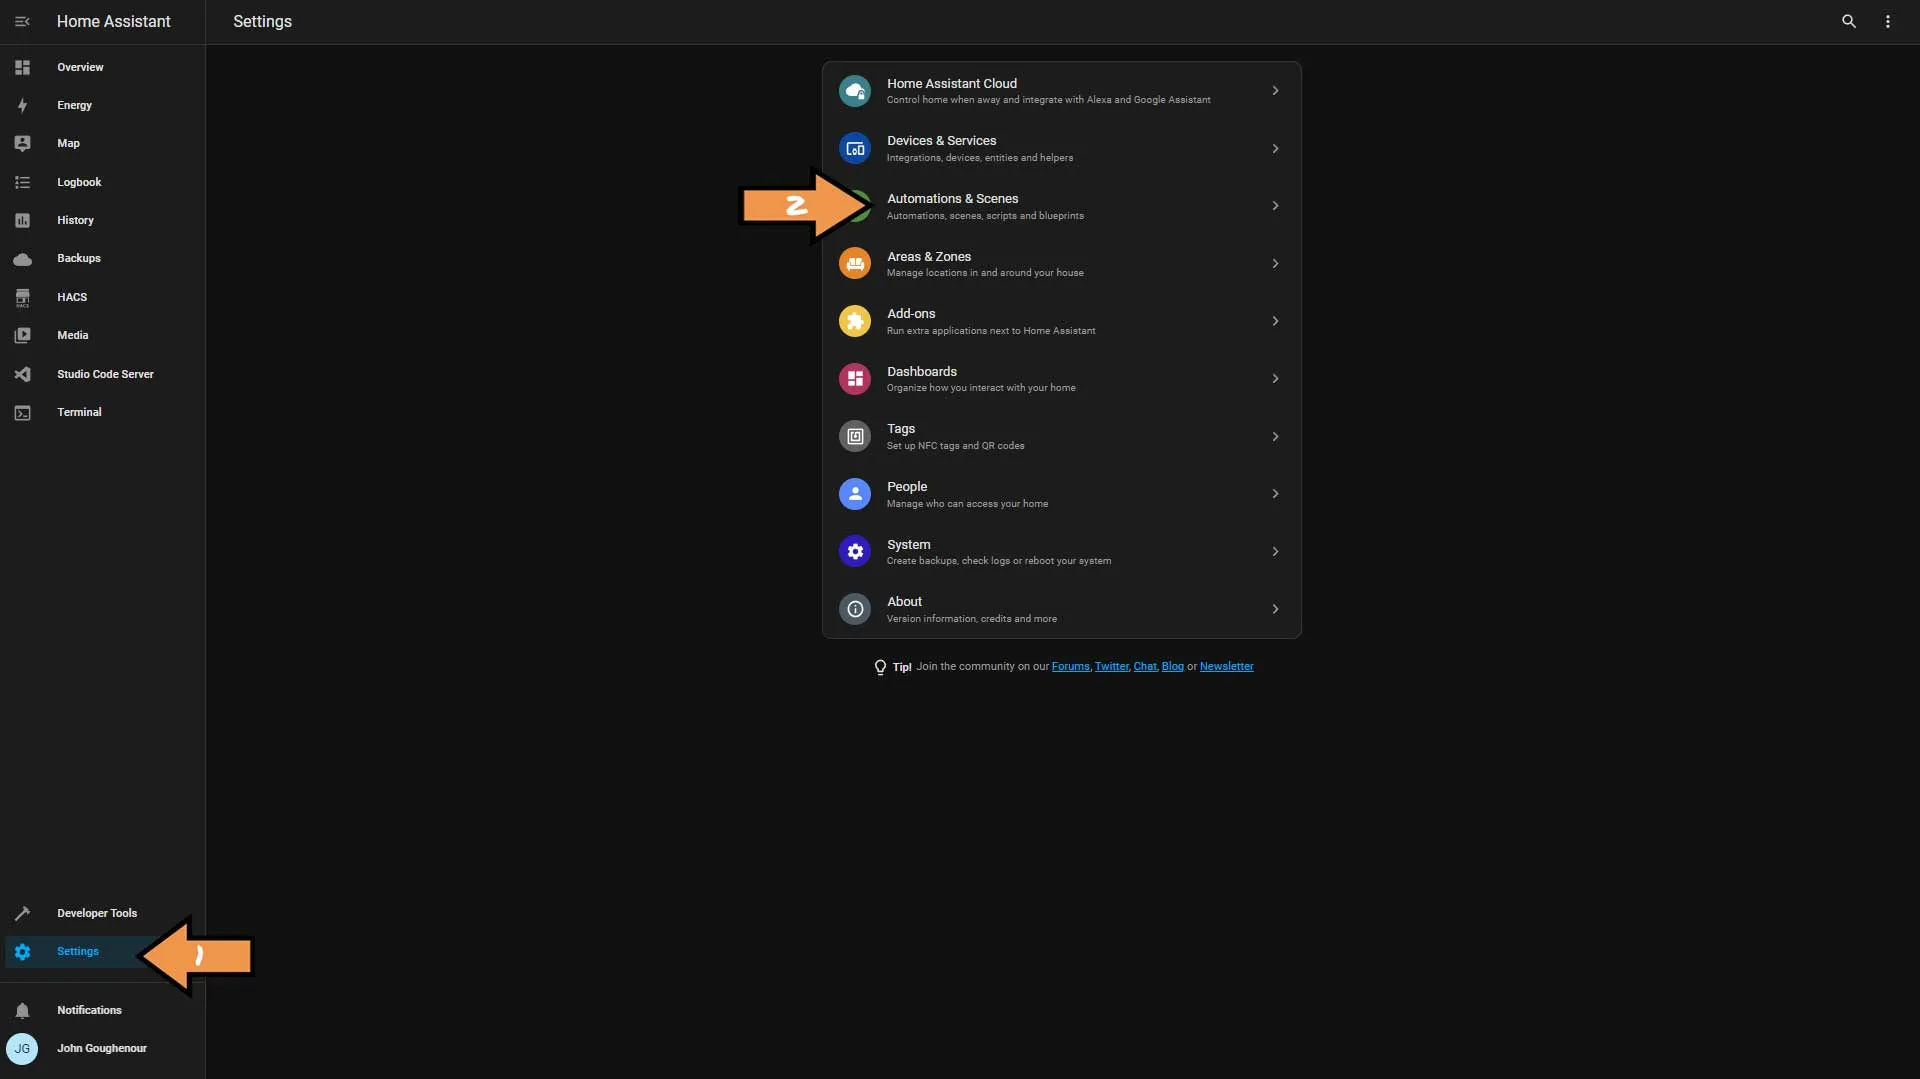
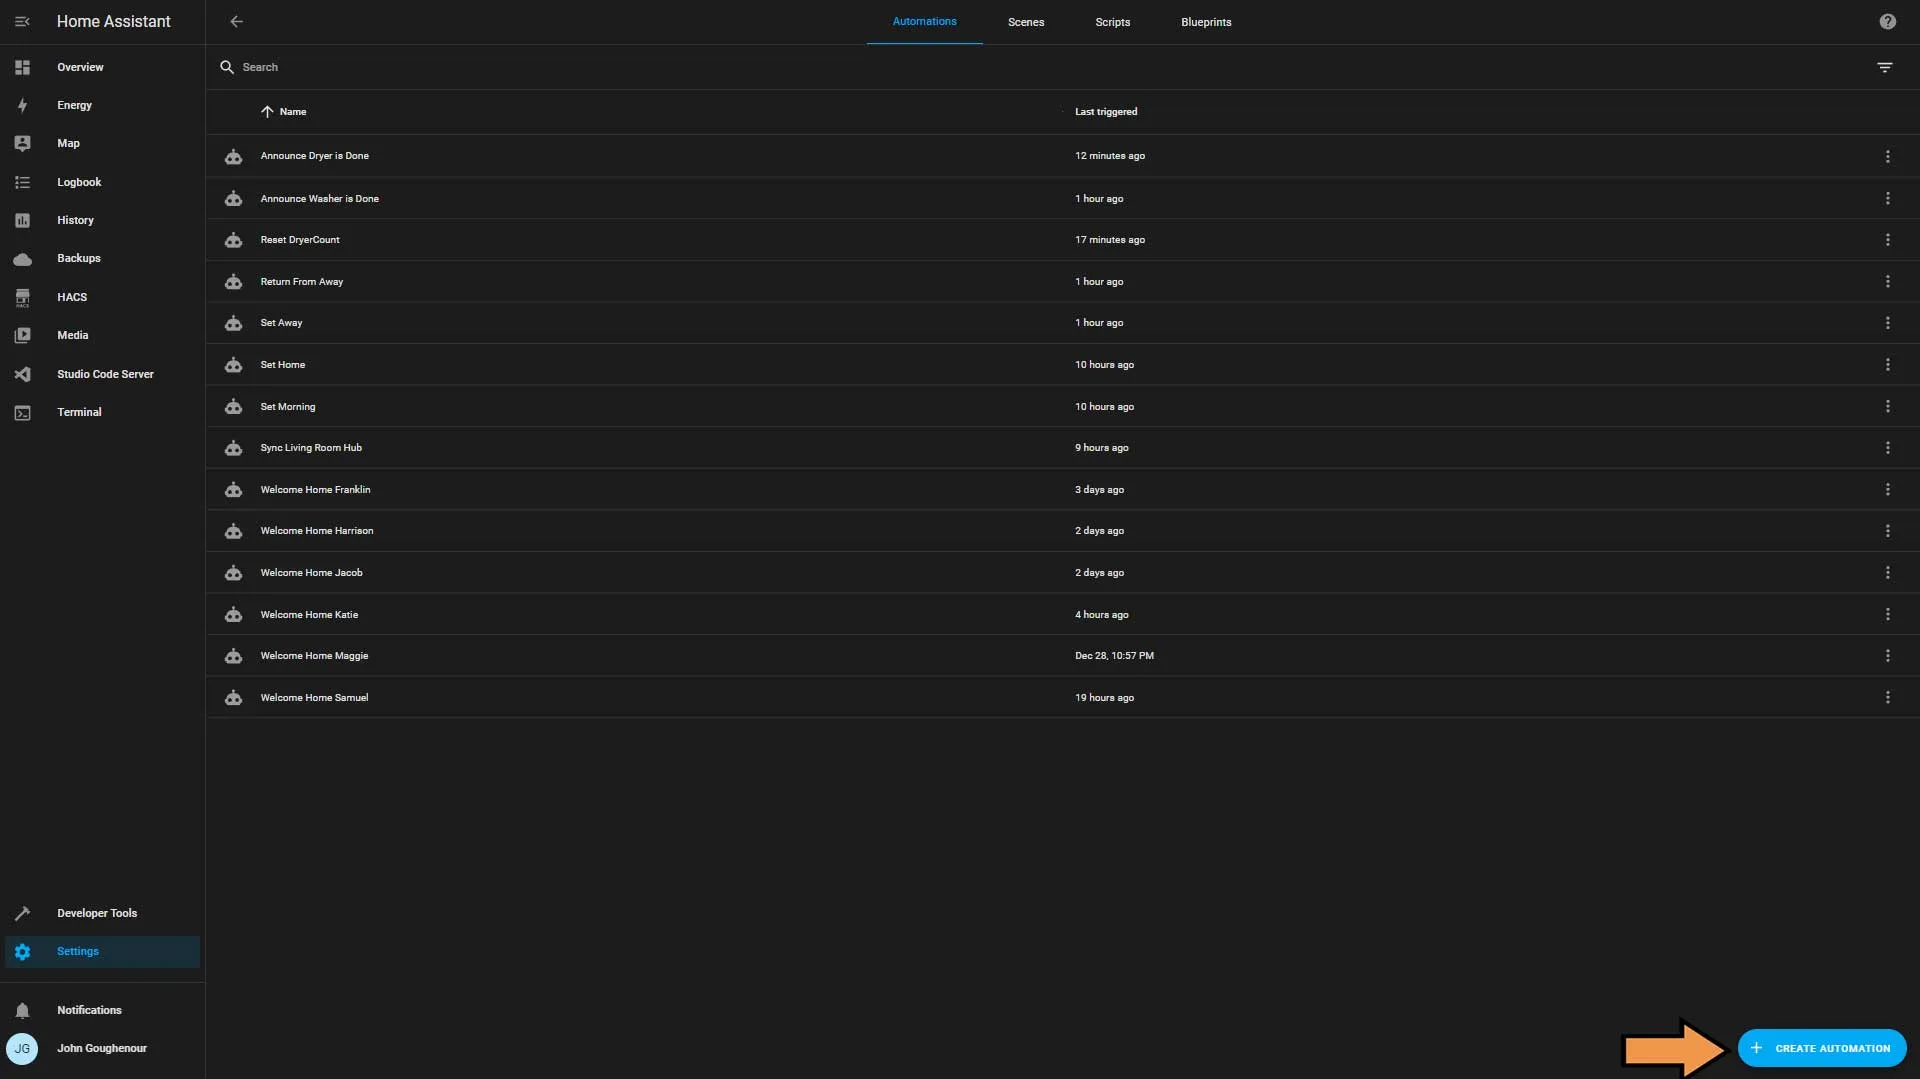
Click the blue Create Automation button.
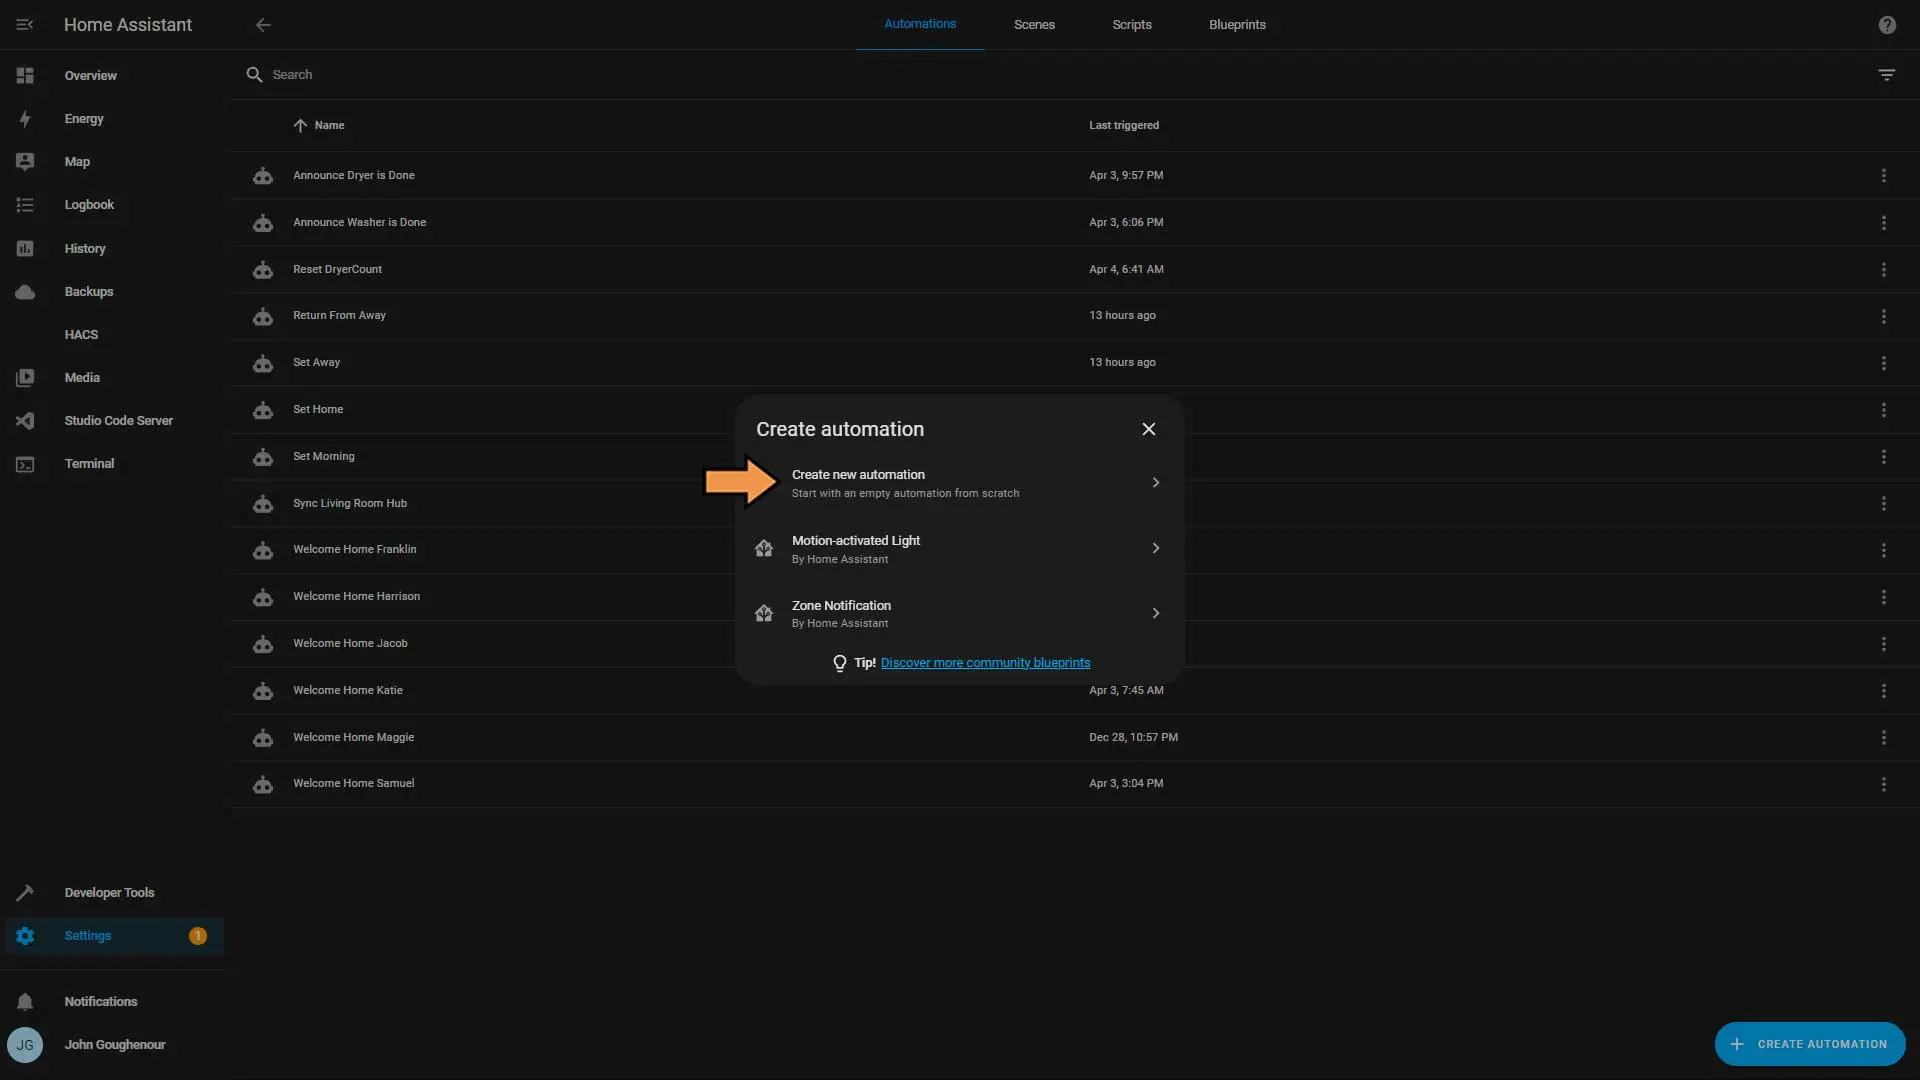
Choose Create new automation.
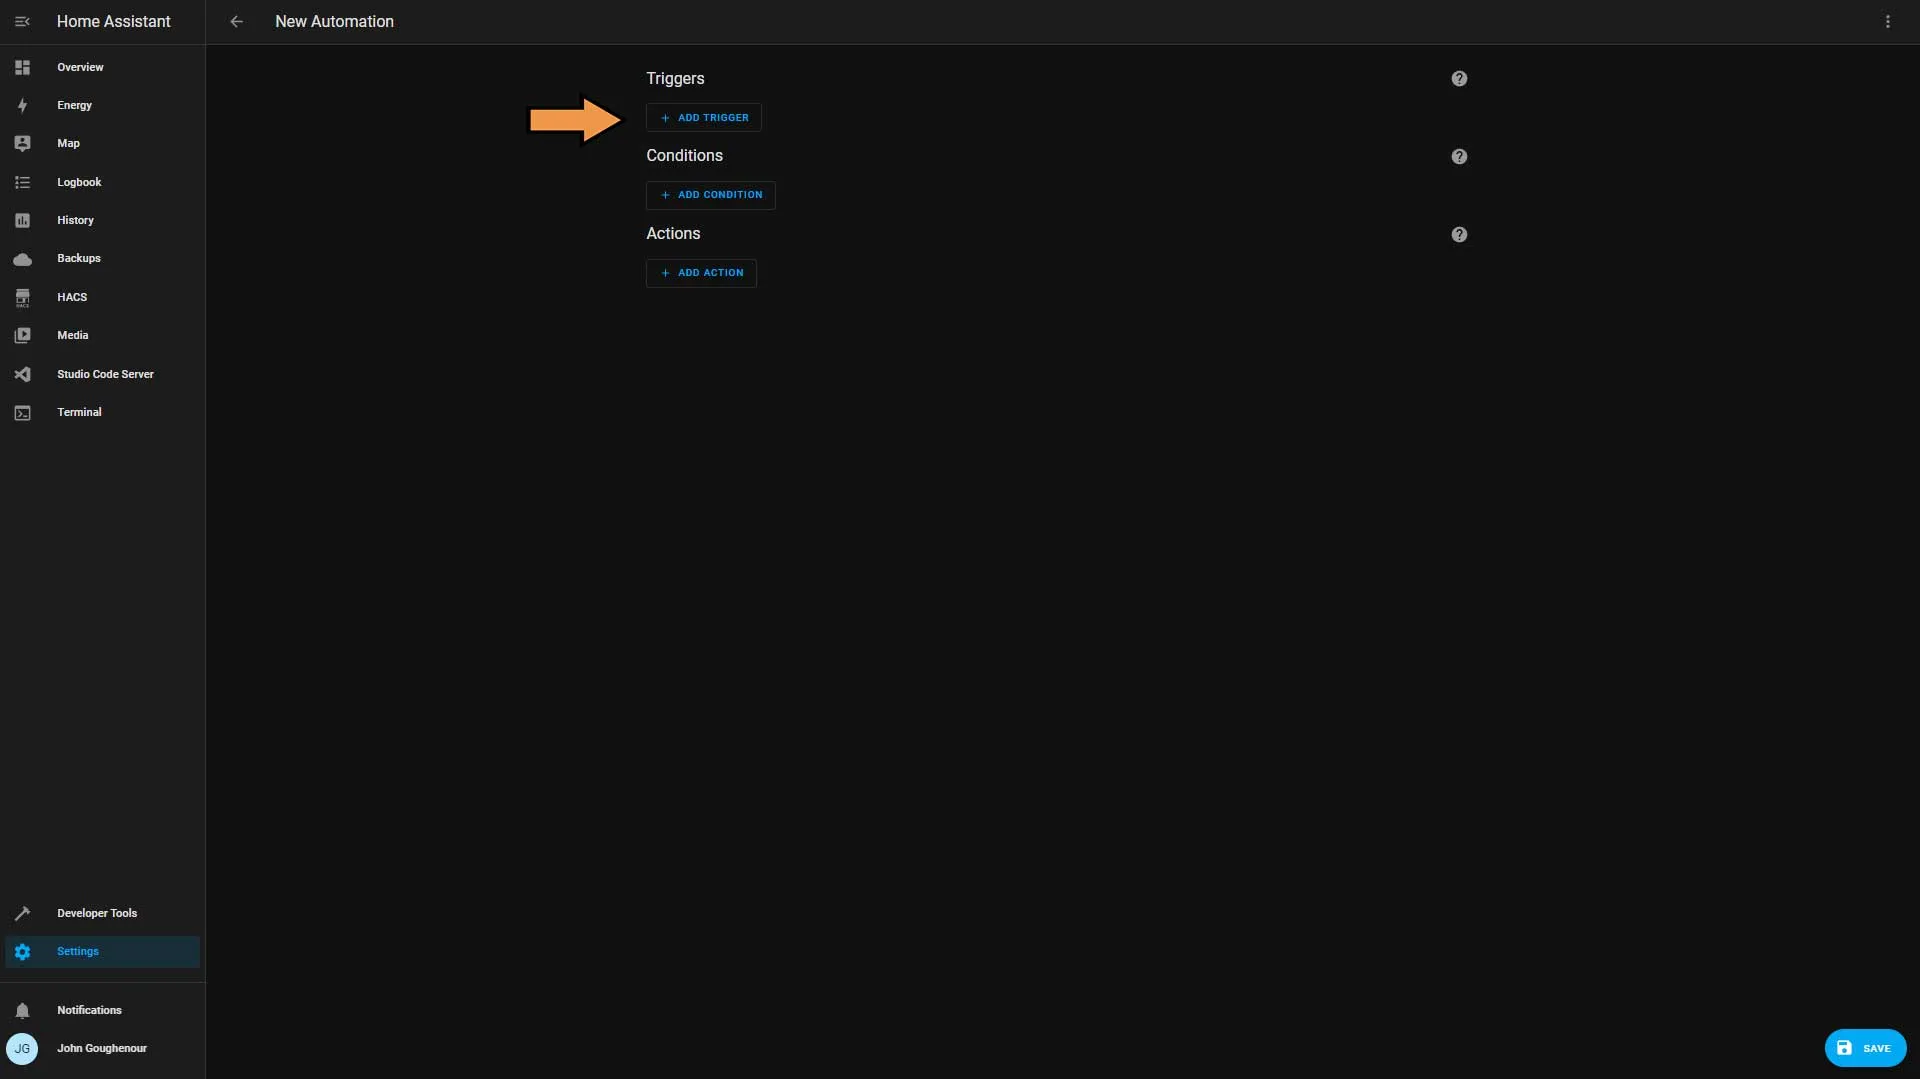
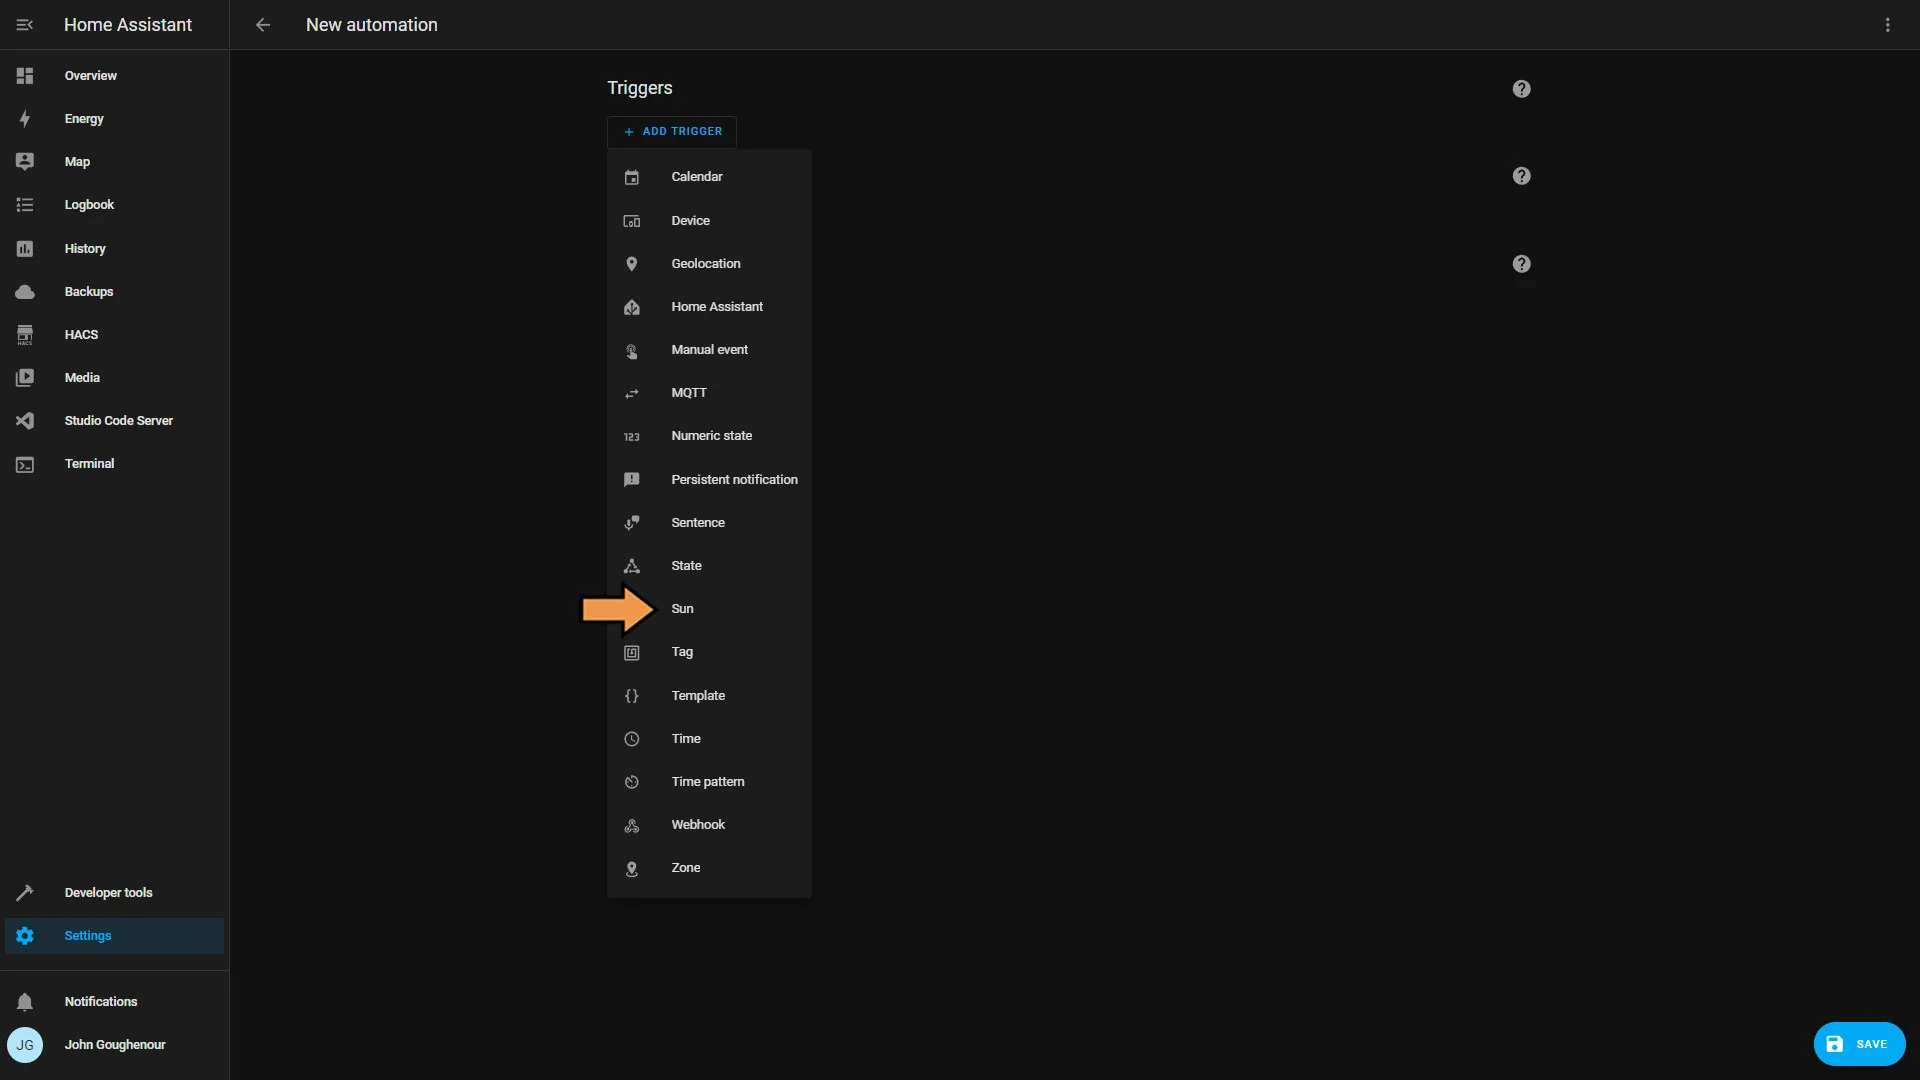
Click Add Trigger.
From the list, select Sun.
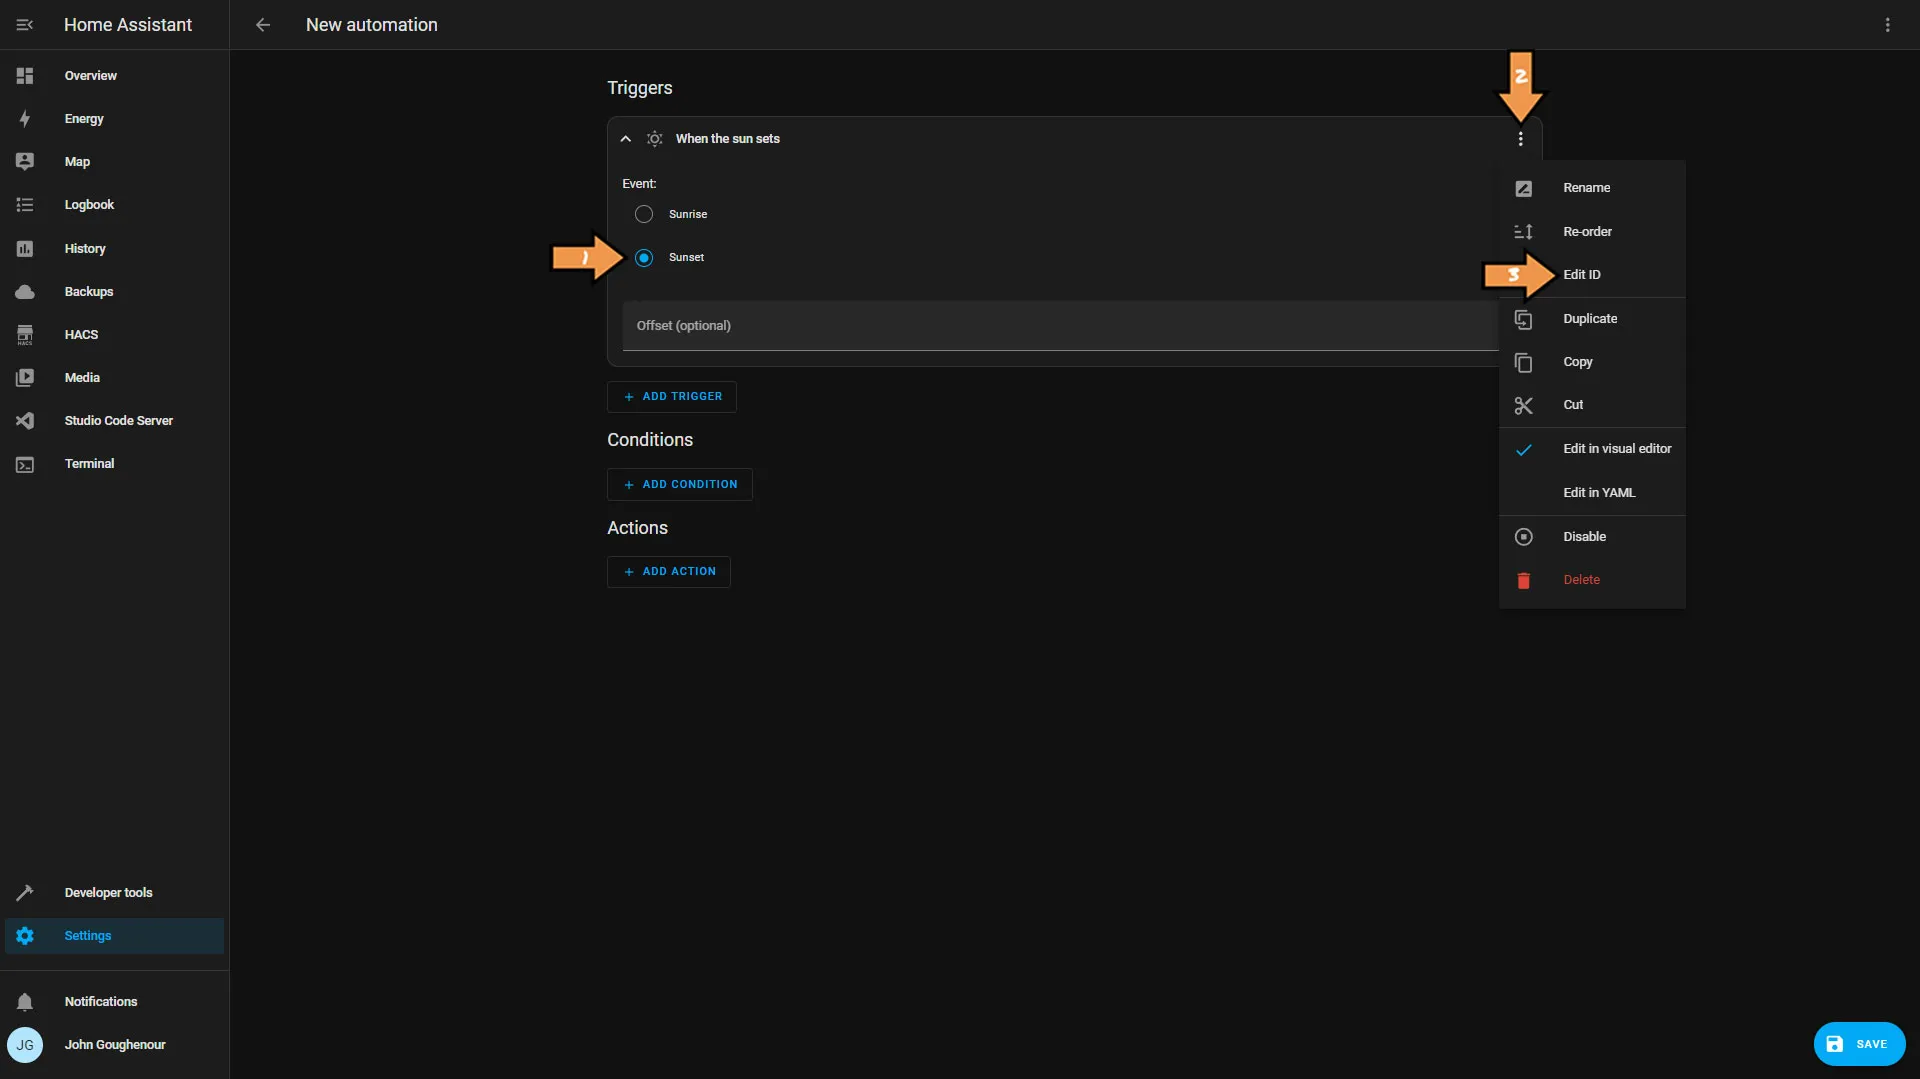
Select Sunset for the event, then click the vertical ellipsis and select Edit ID.
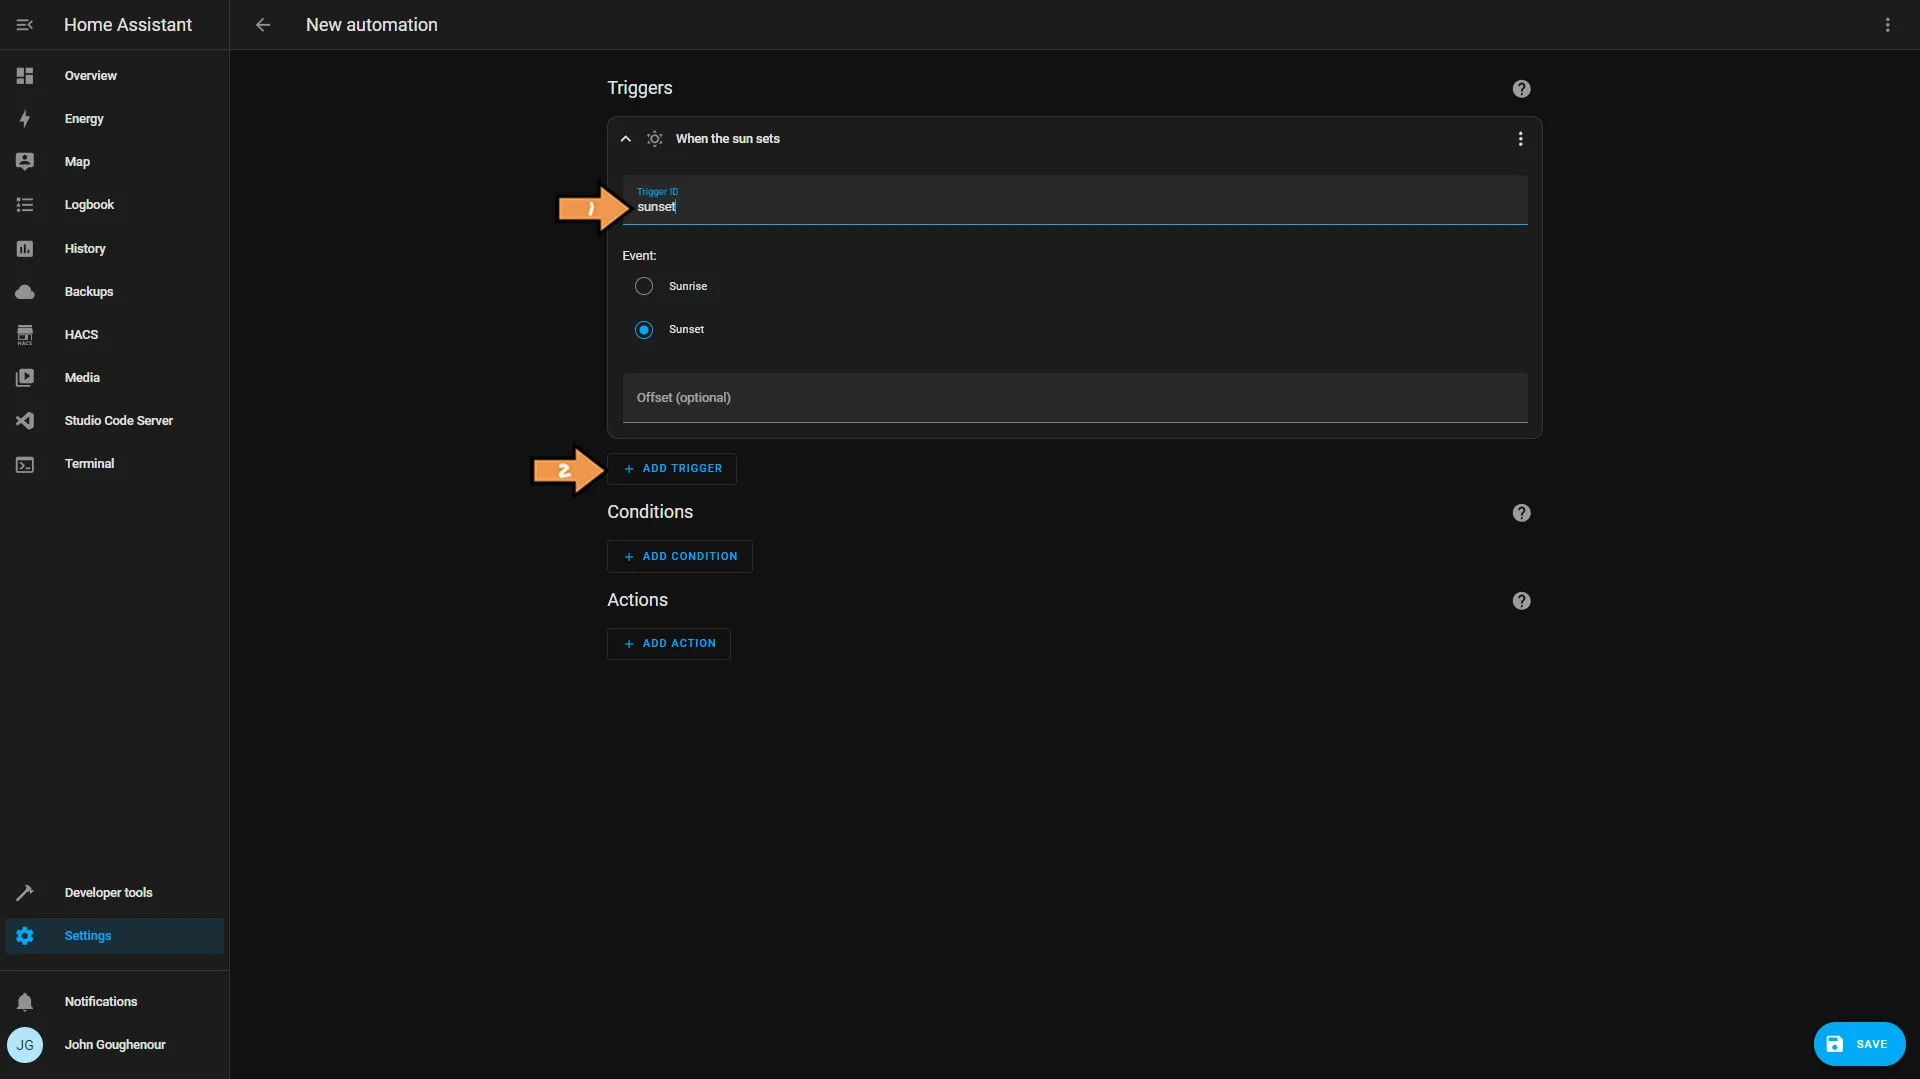
Set the Trigger ID to sunset, then click the Add Trigger button.
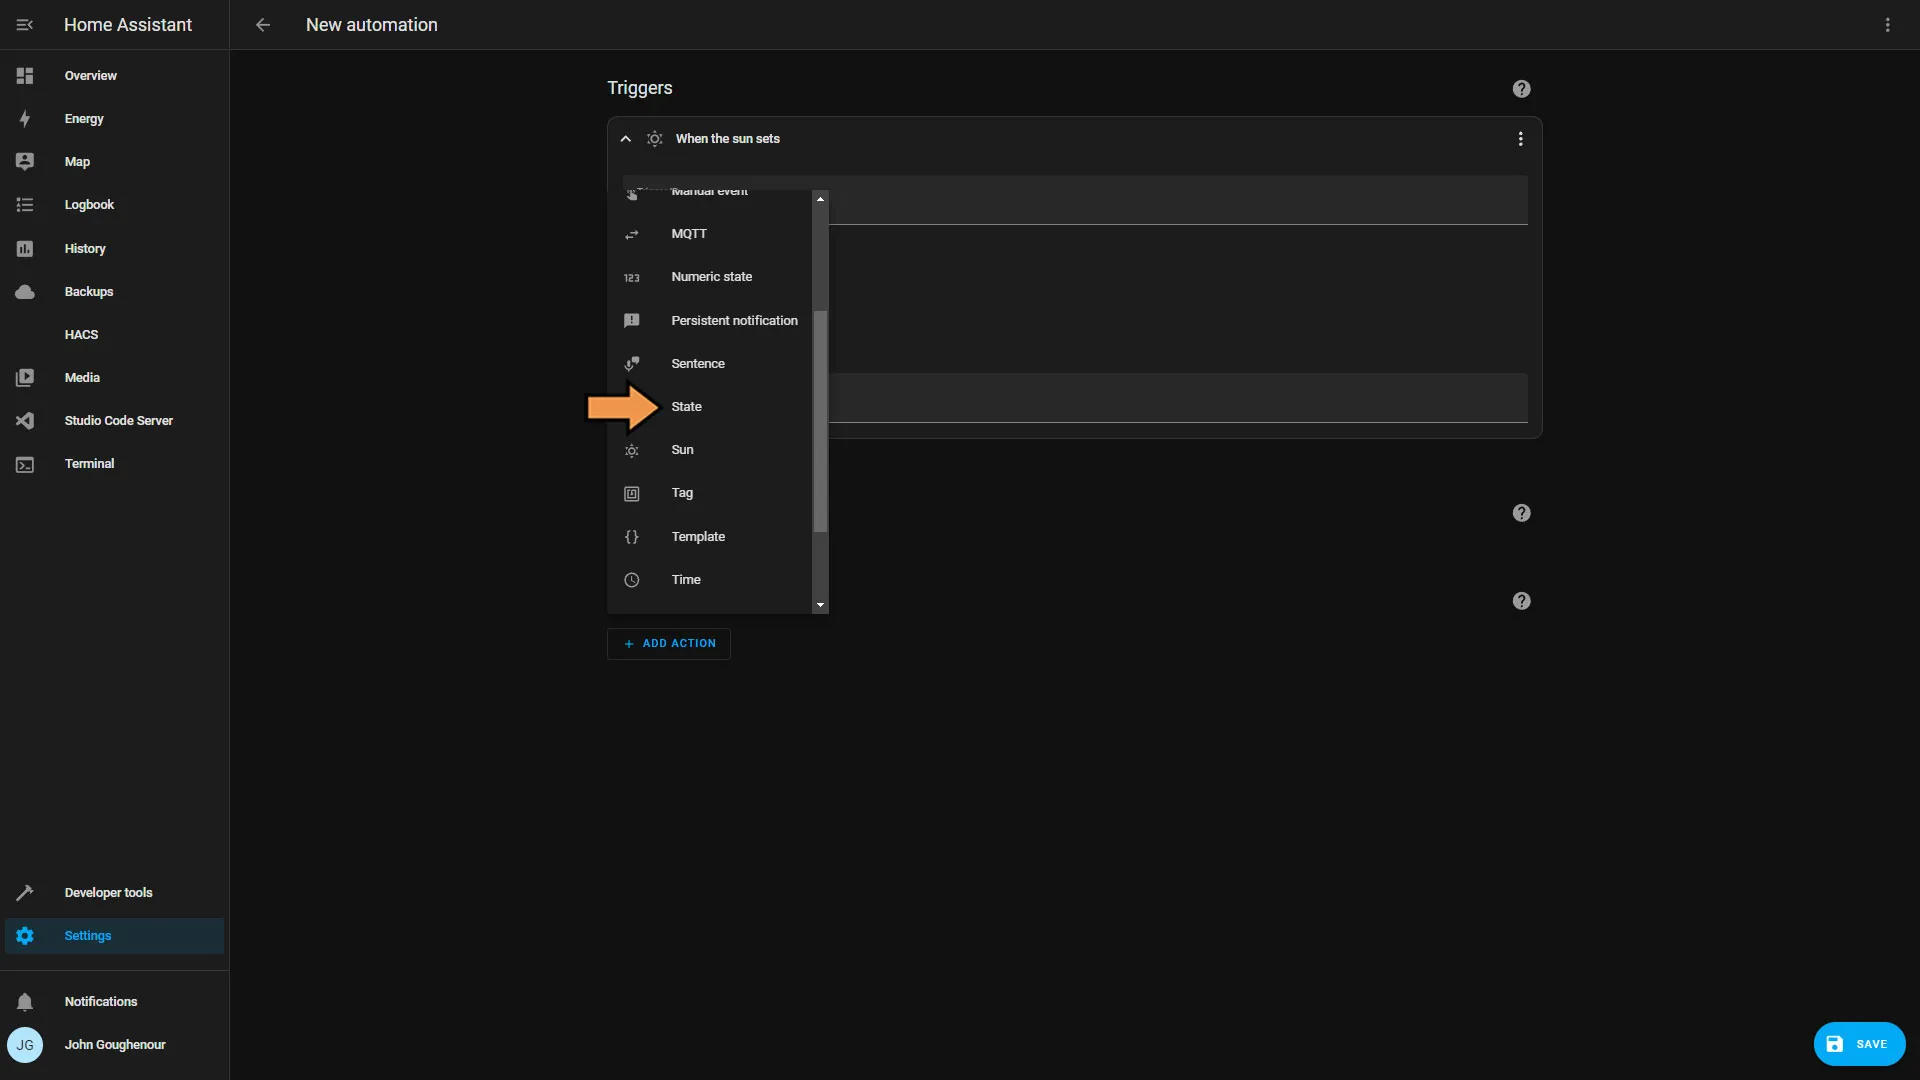
Select State from the drop-down list.
In the Entity dropdown, select Hub Mode and set the From to Away and the To to Home. Then Click the Add Condition button.
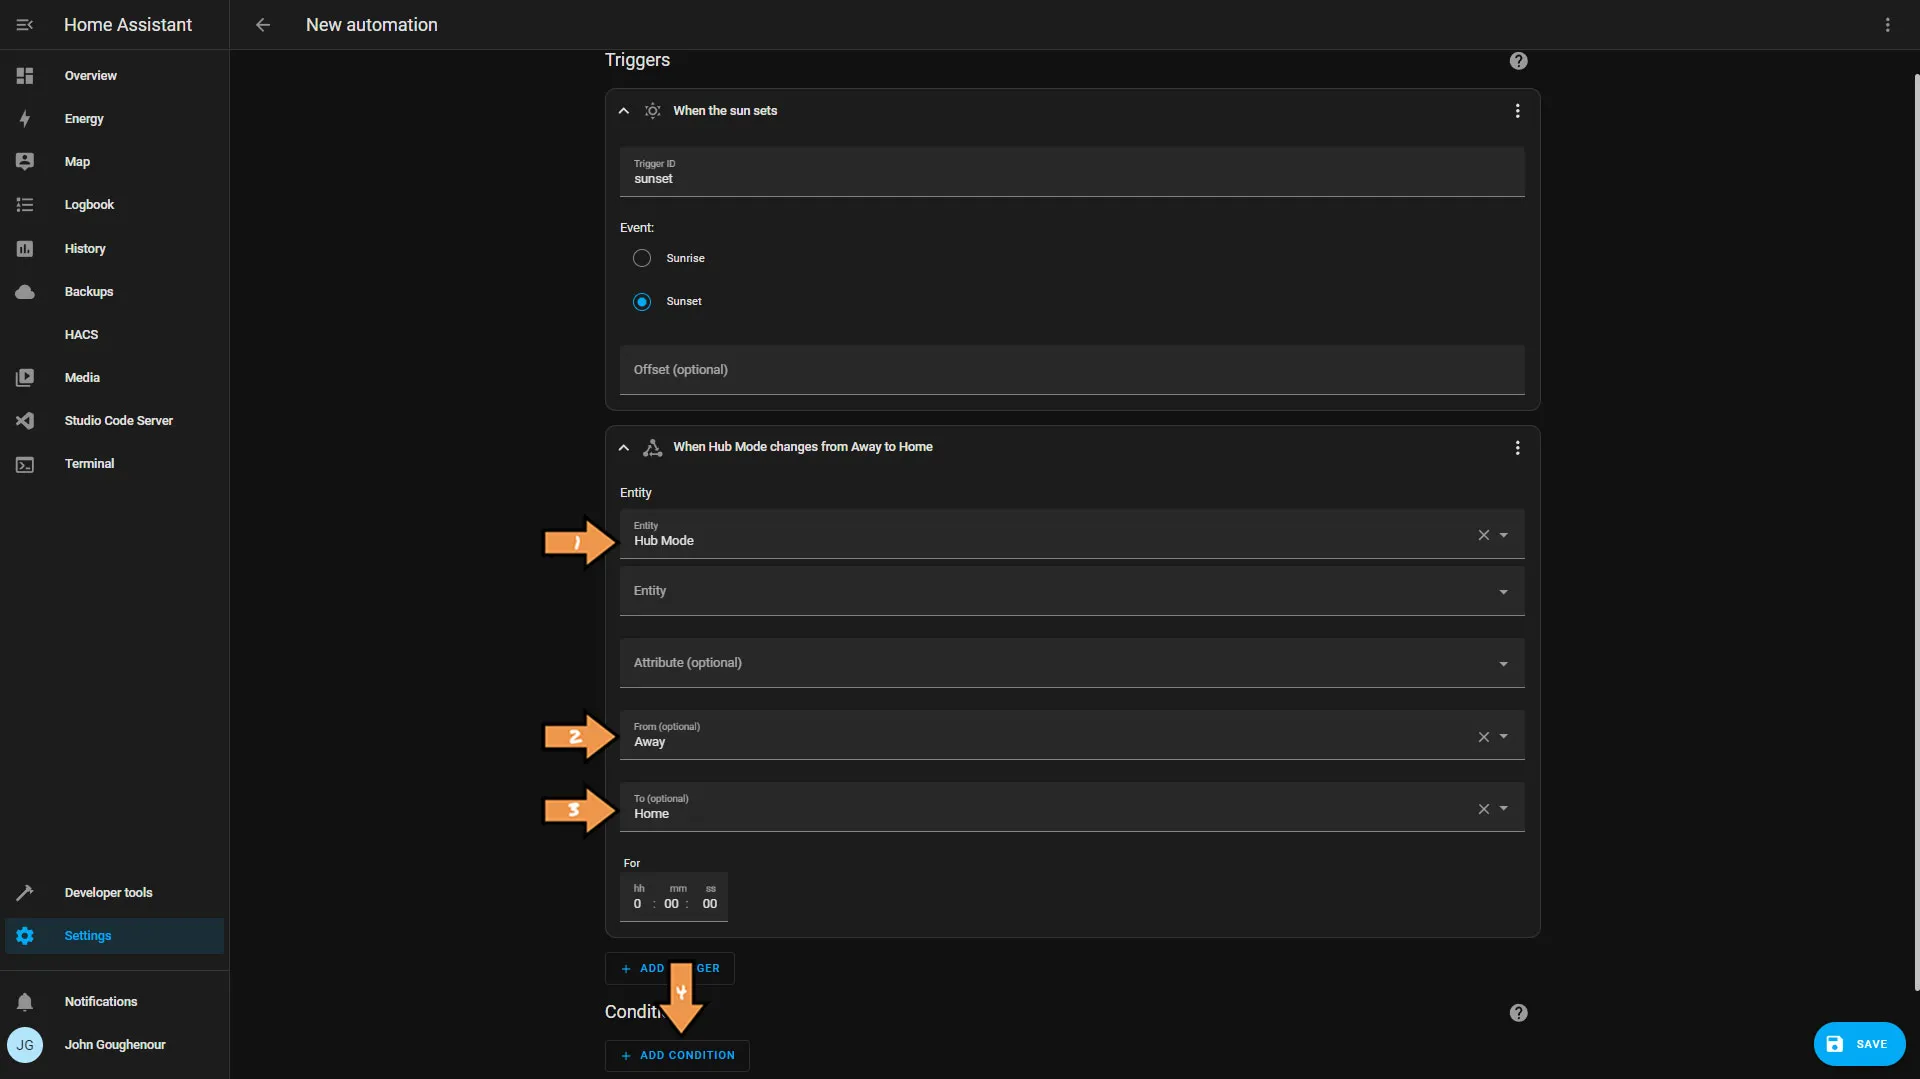
From the Condition drop-down, select And. Then click the Add Condition within the AND box and select Sun.
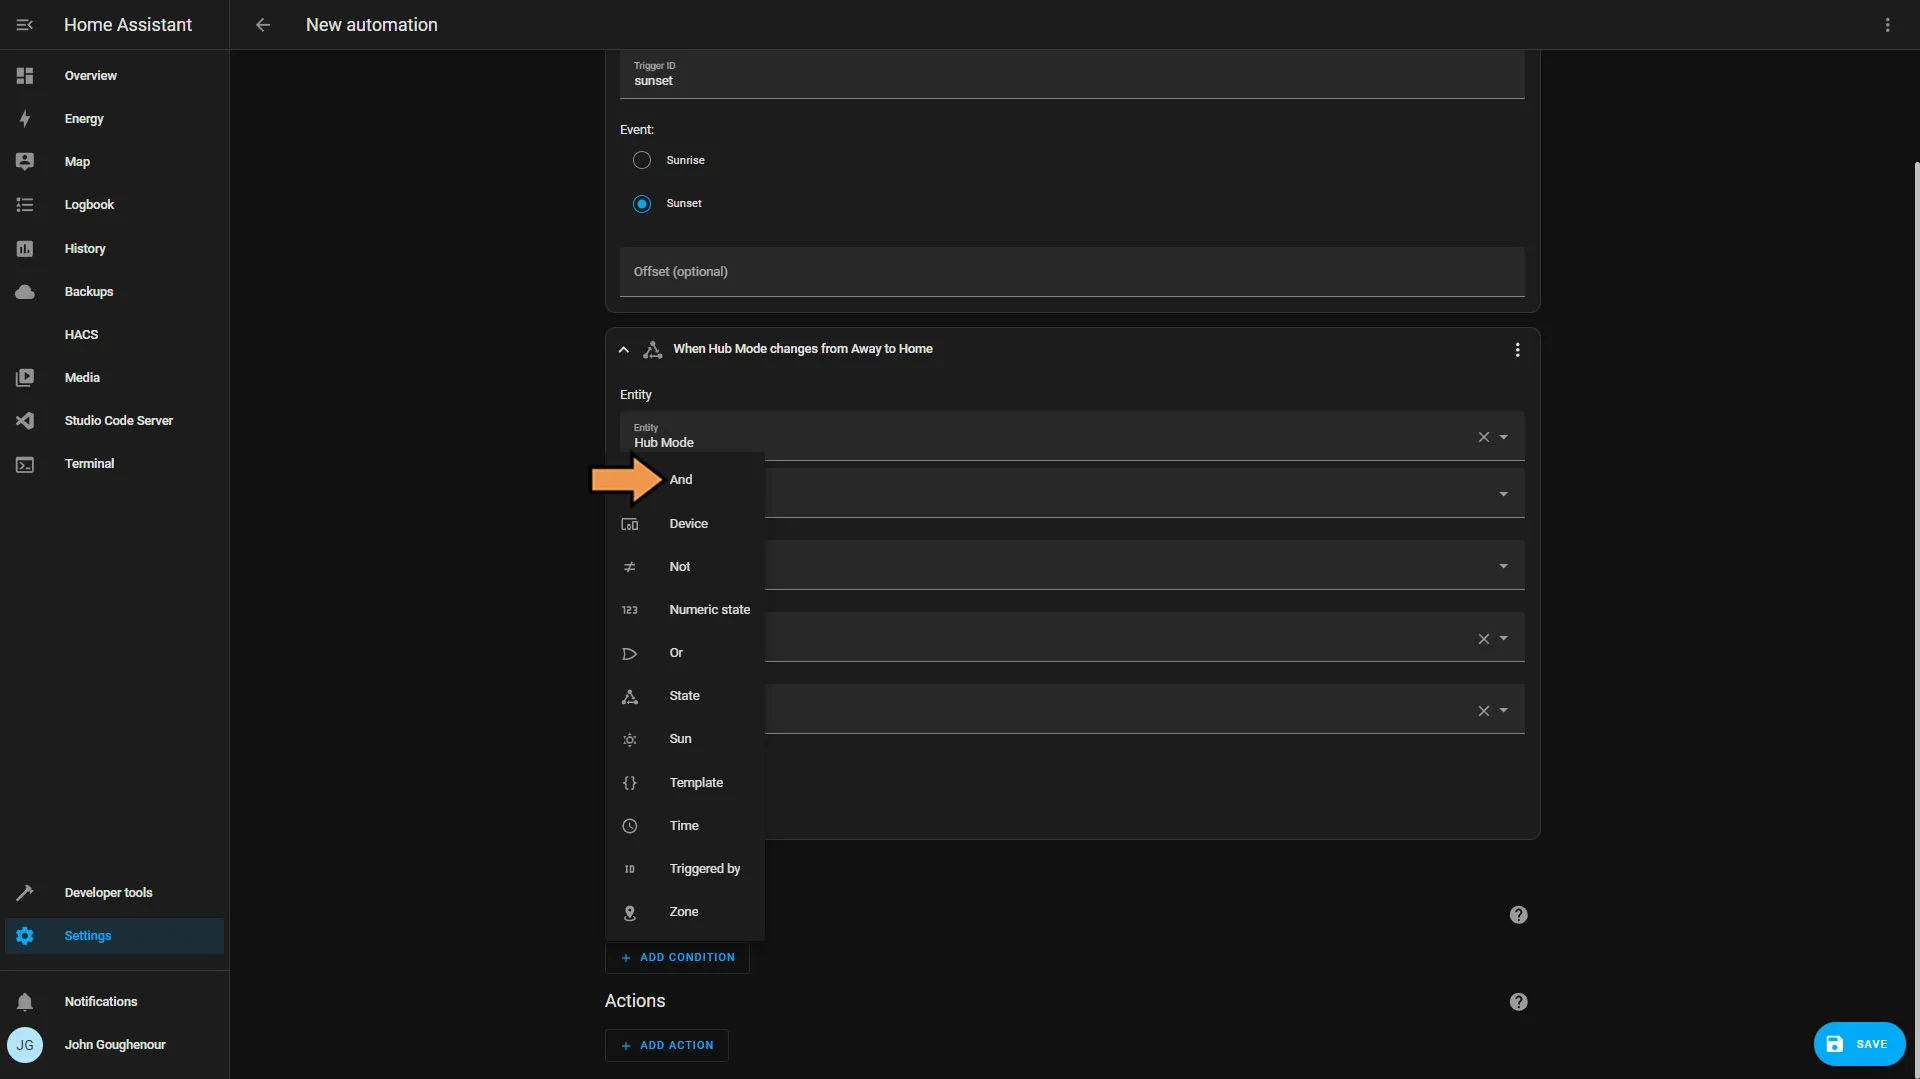
Now set the Before to Sunrise and the After to Sunset. Then click the Add Condition button and select State from the Condition drop-down.
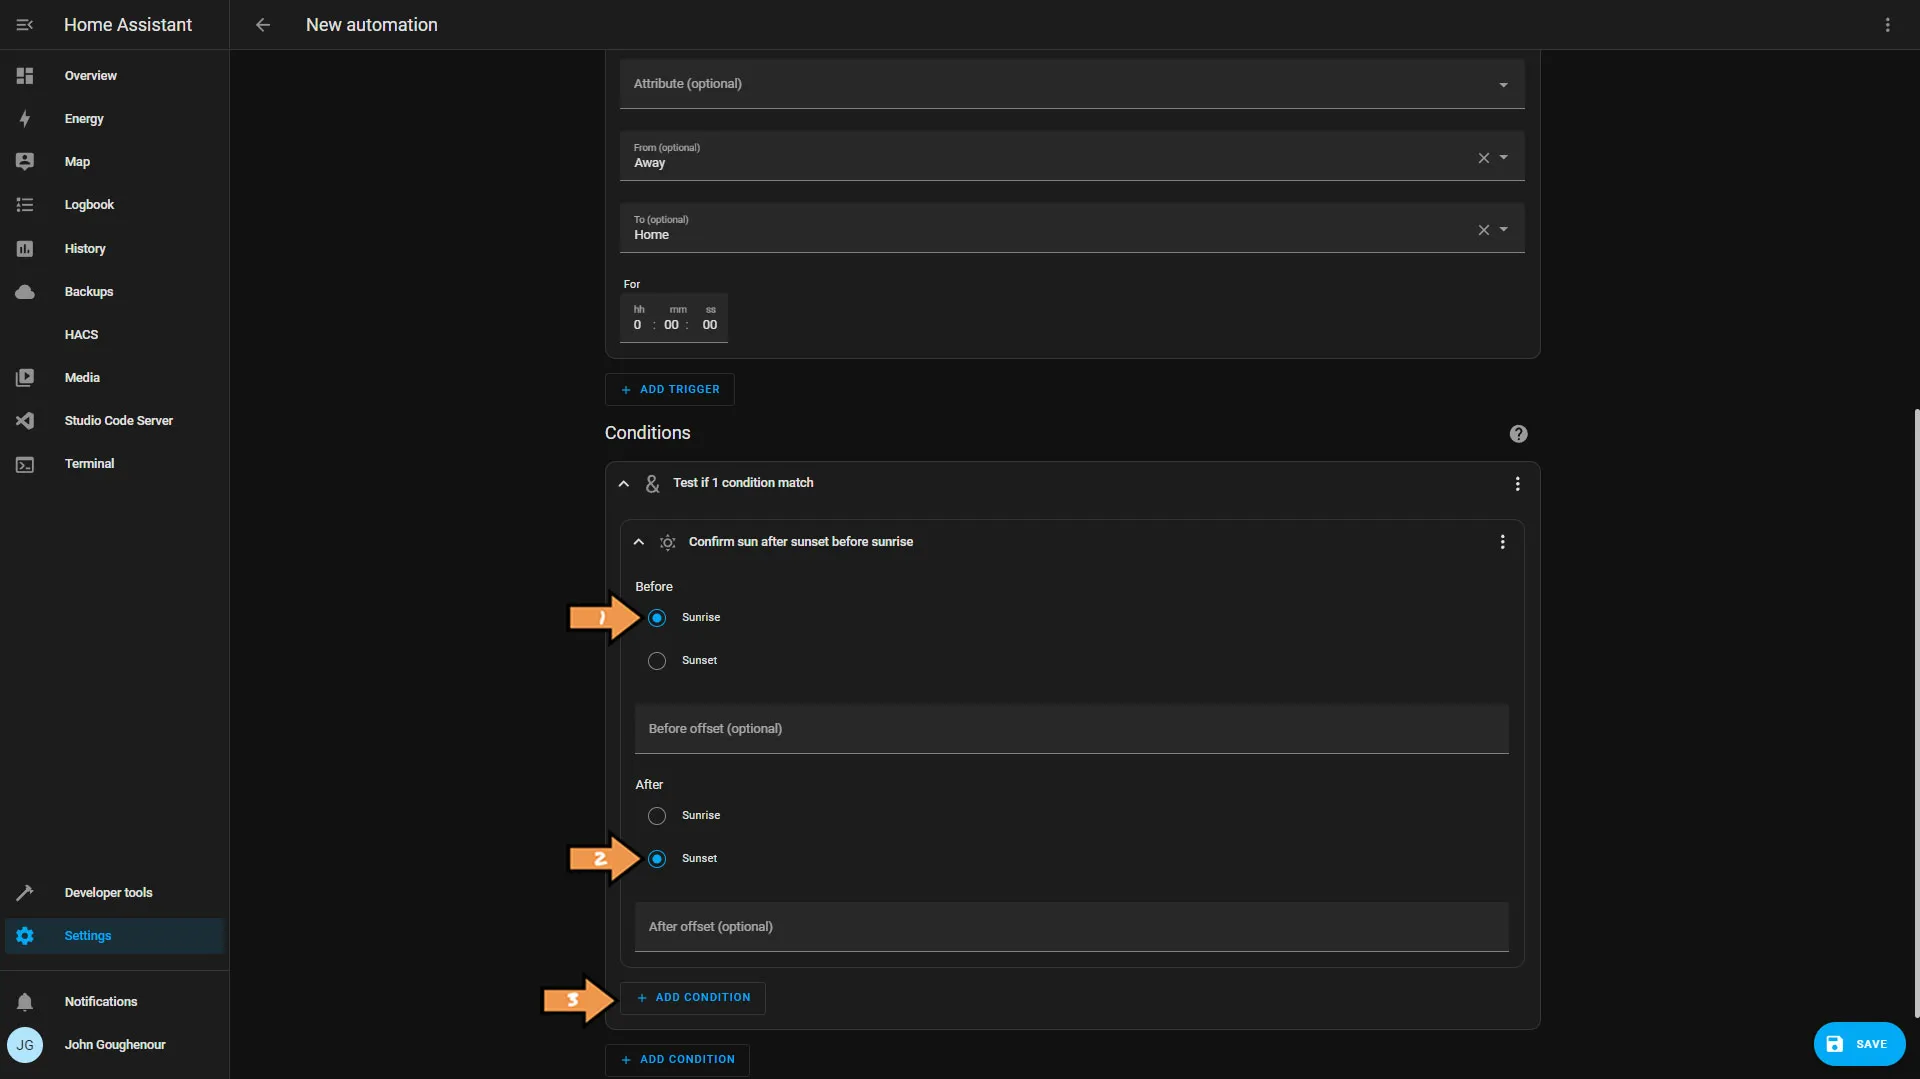
Next set the Entity to Hub Mode and the State to Home. Then click the Add Action button.
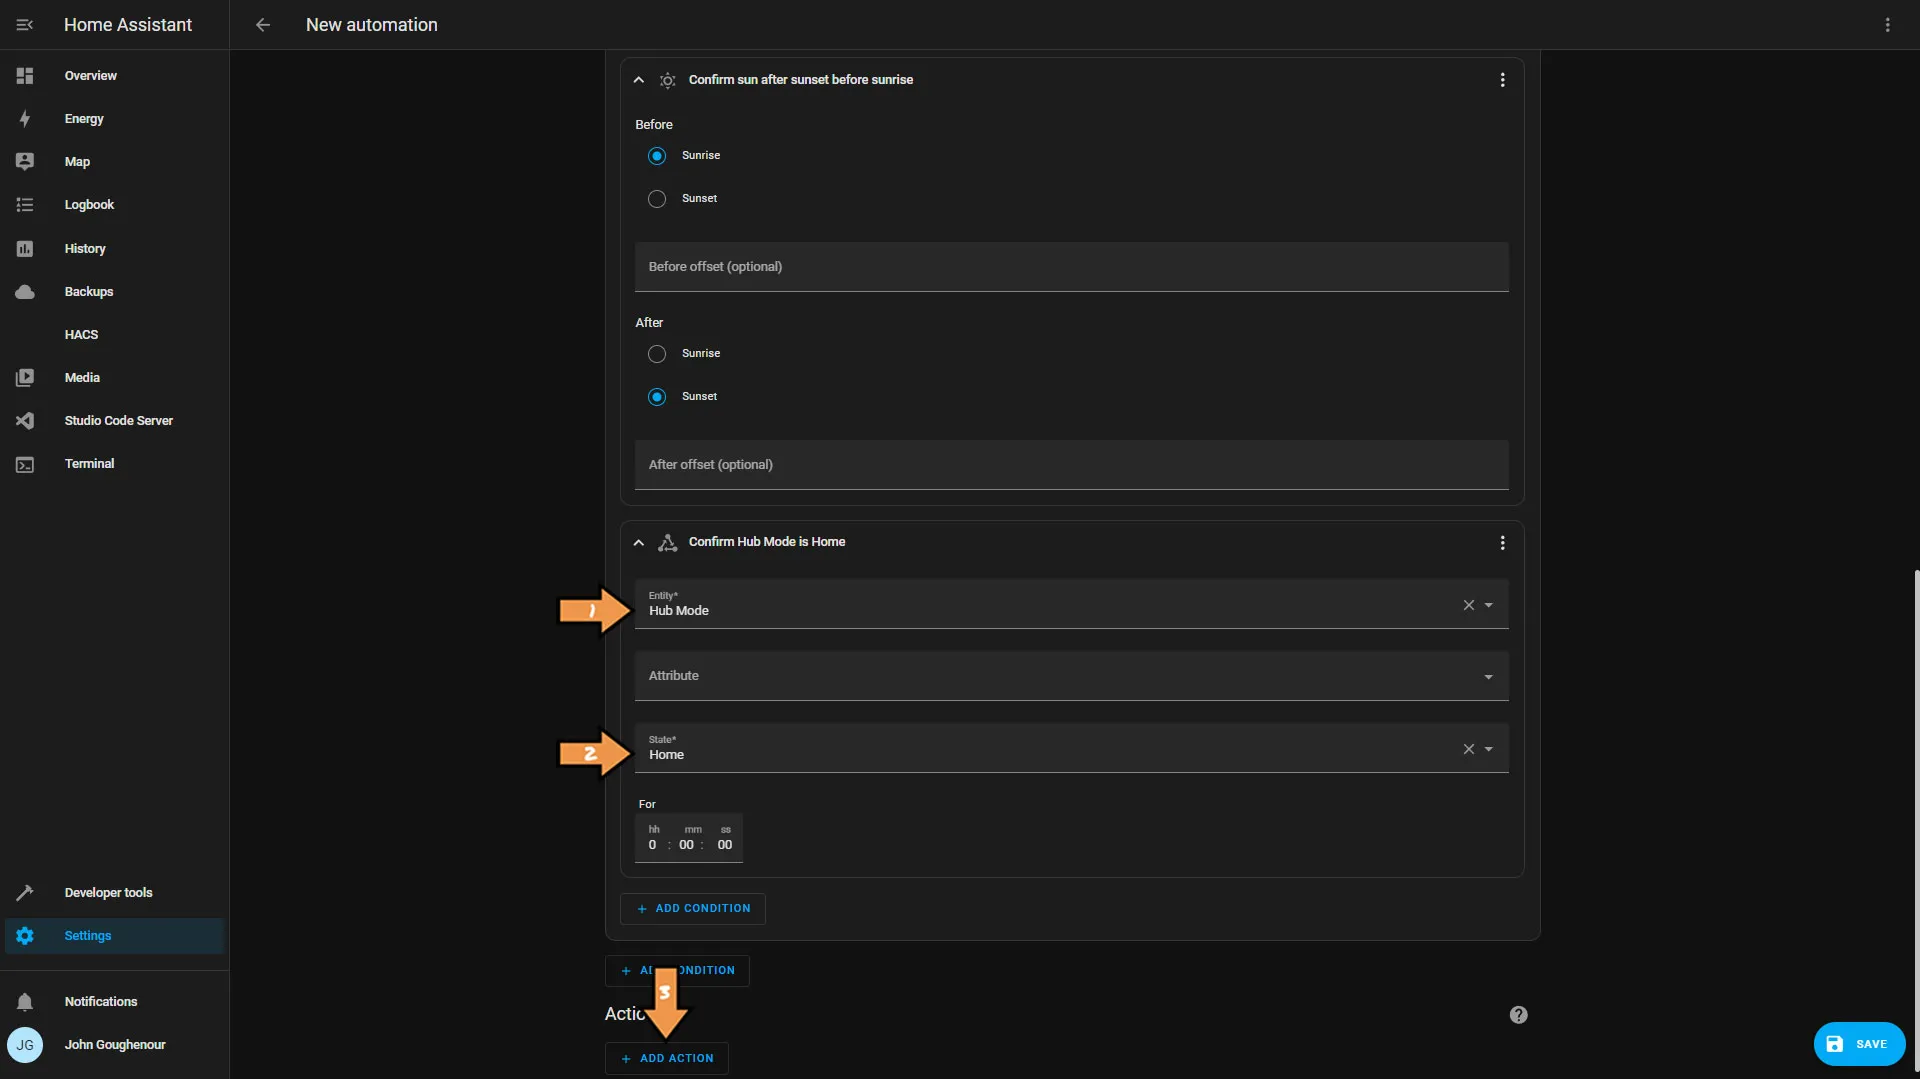
From the Add Action list, select Call service.
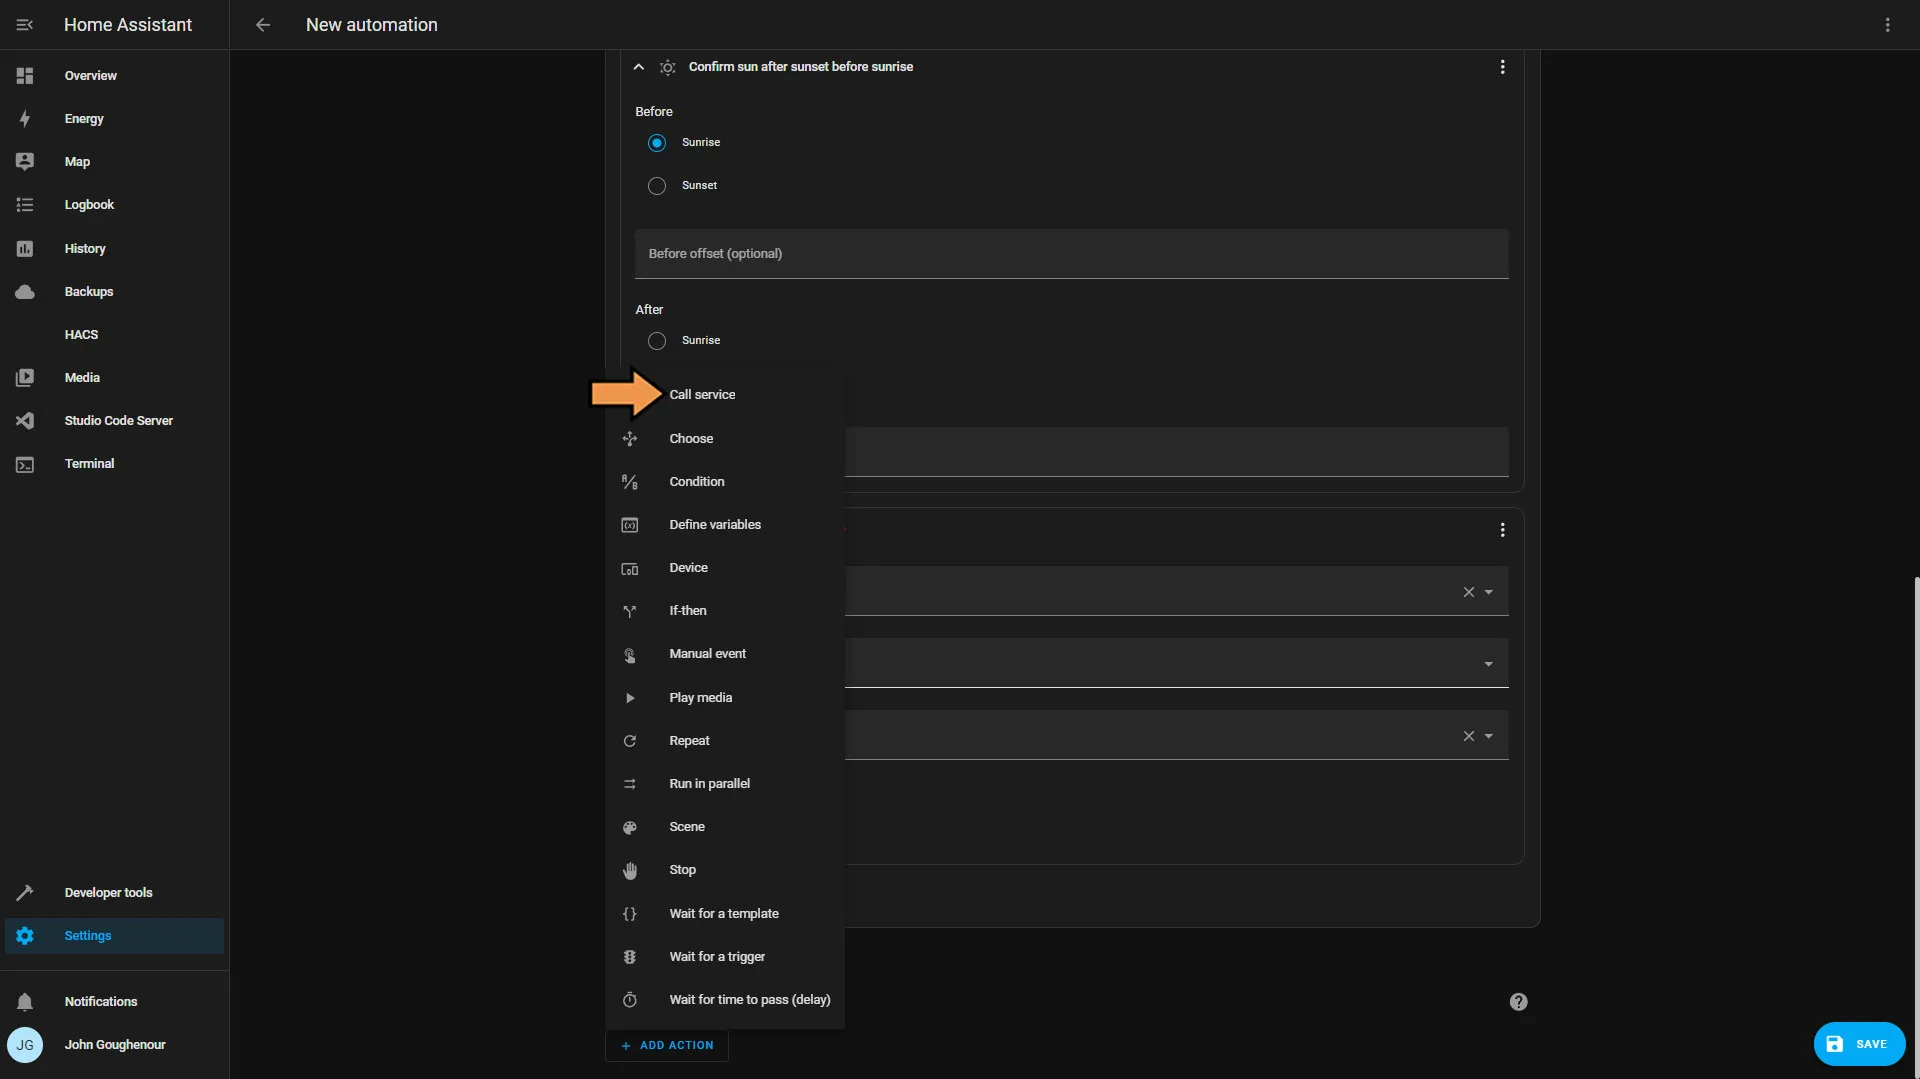
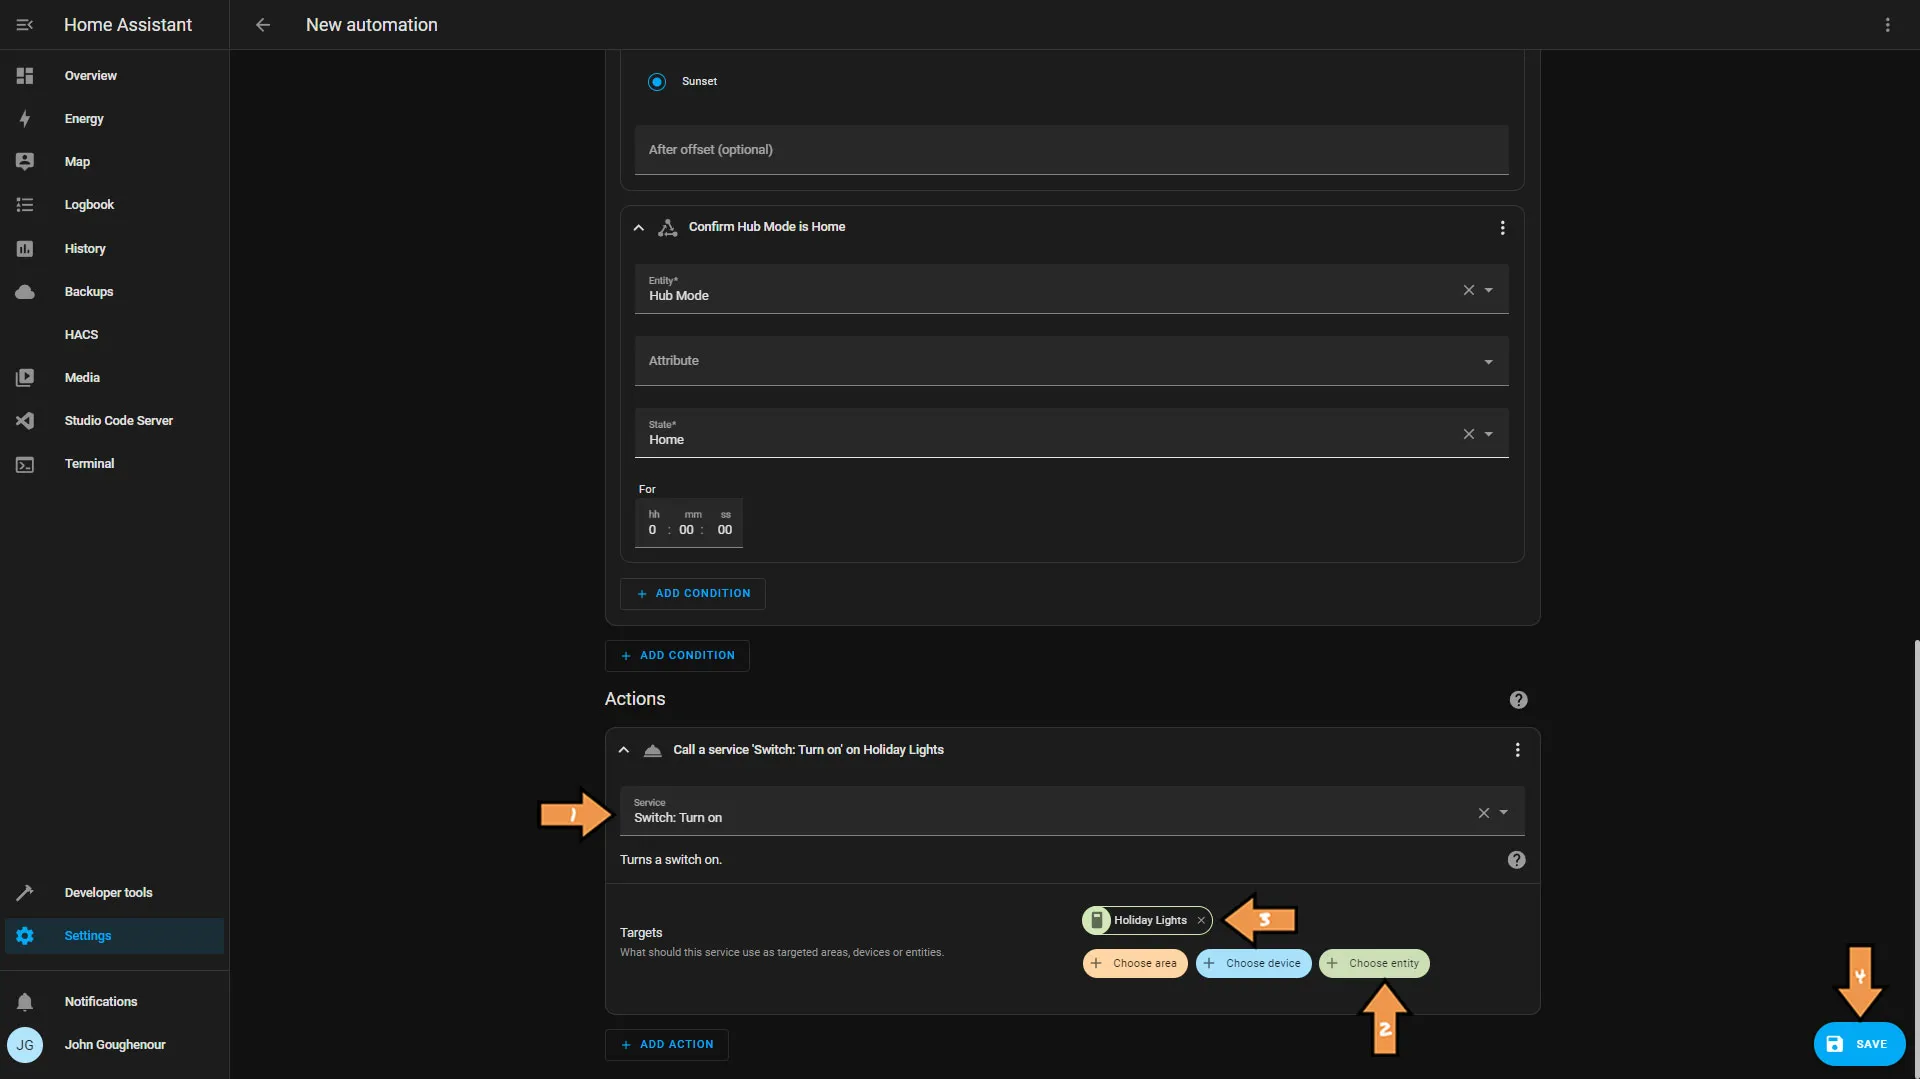
Set the service call as follows:
- Select Switch: Turn on for the service.
- Then click the Choose entity button.
- Next select our Holiday Lights group from earlier.
- Then click Save button.
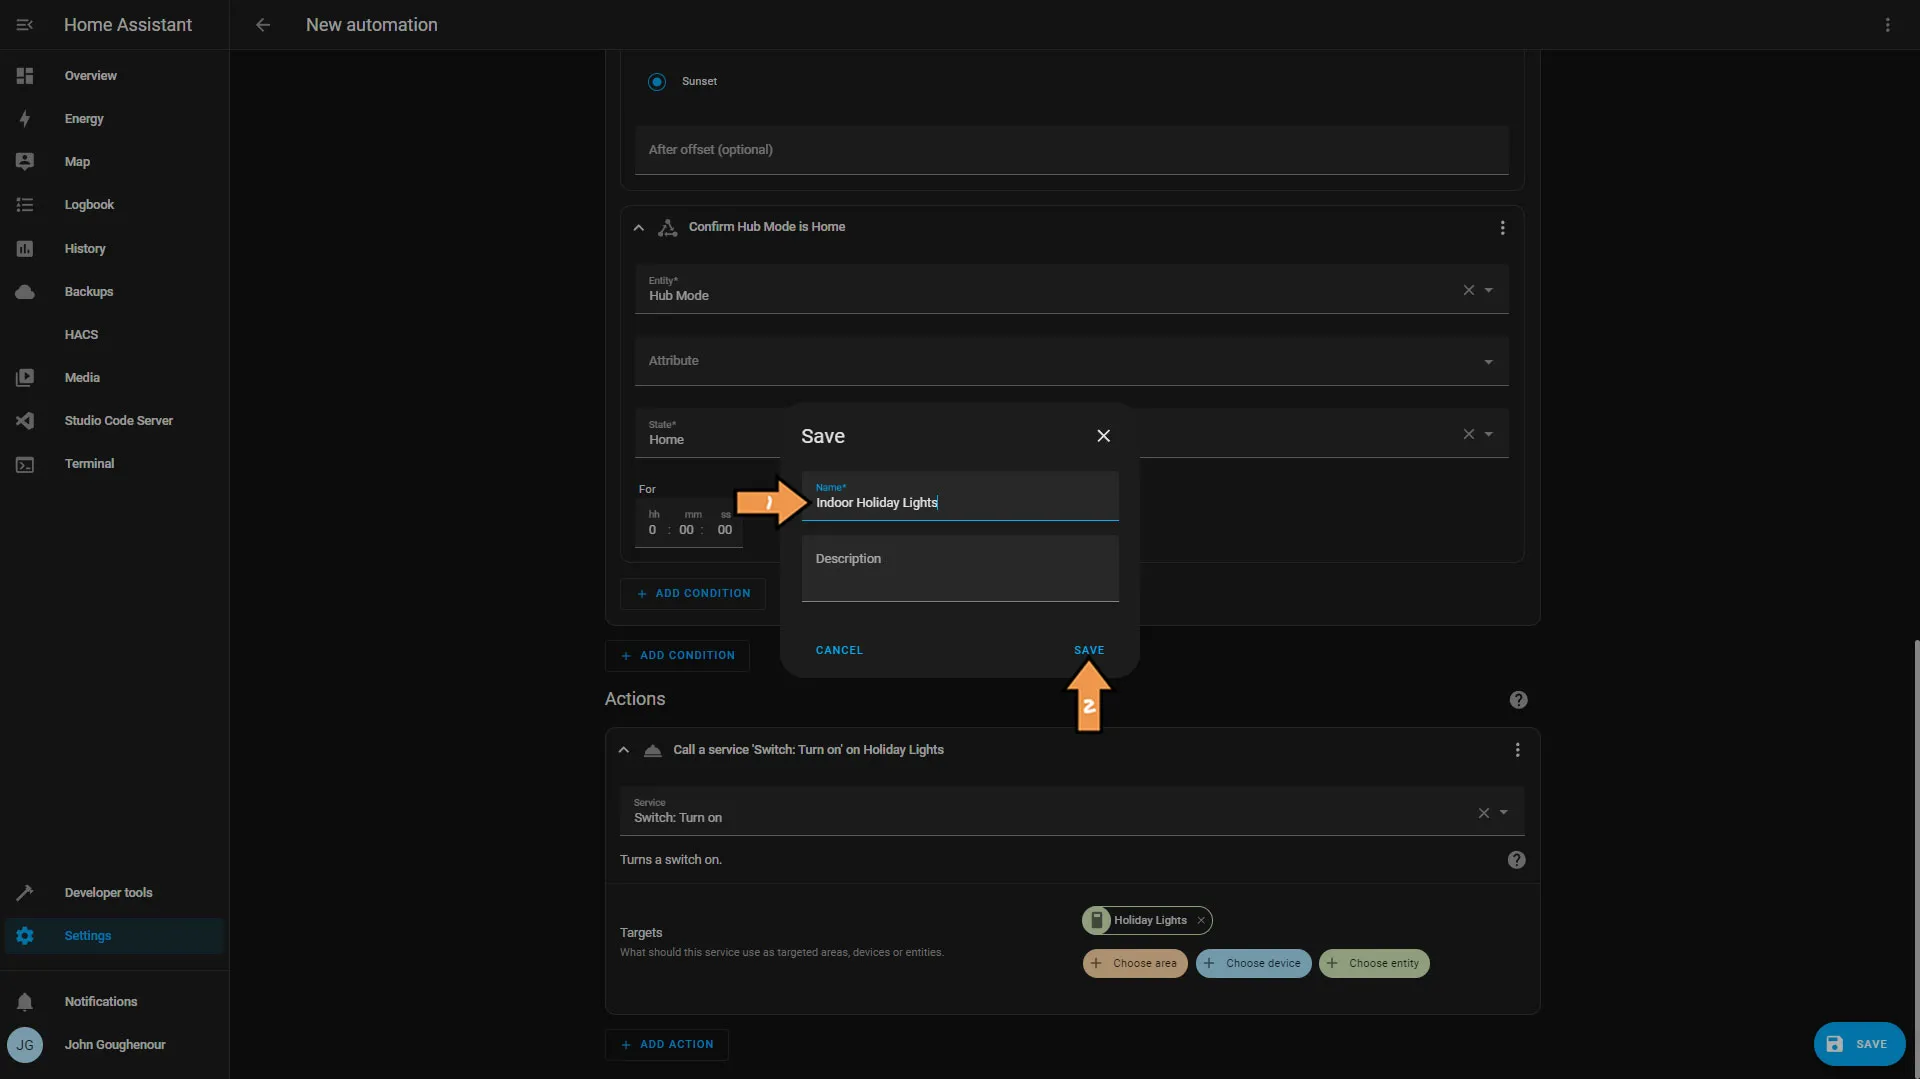
Give the automation a name, in this case, Indoor Holiday Lighting.
Success: That’s It! You have successfully automated your indoor holiday lights.
Amazon Alexa
Indoor Holiday Lighting
The Official Documentation for Alexa Routines
Alexa routines are basic and there is no way to include a condition for Hub Mode.
Setting Up the Automation
First, we need to create a new group to control all the smart plugs as one switch.
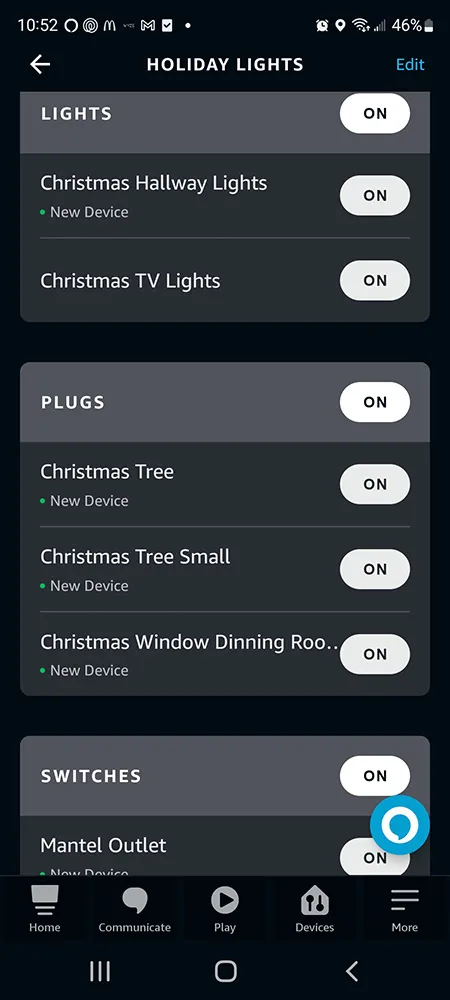
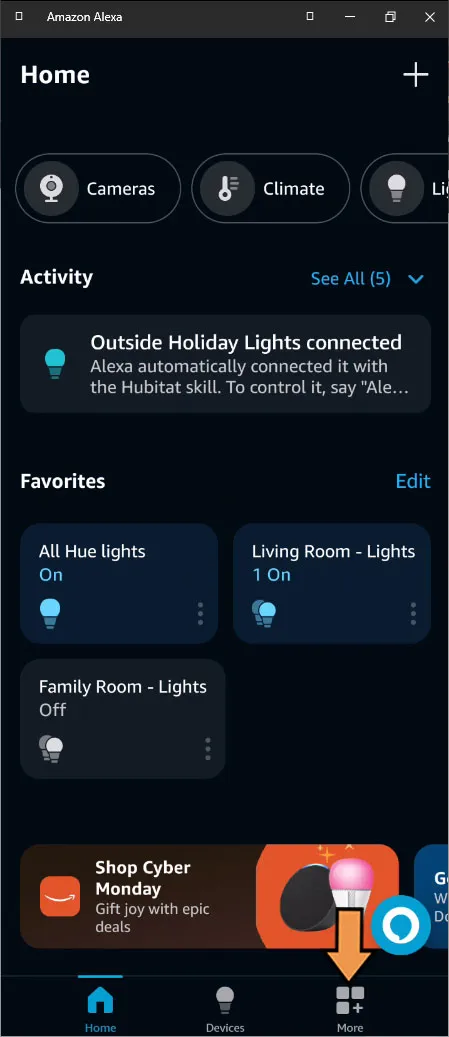
Next, Click the More button at the bottom right of the screen.
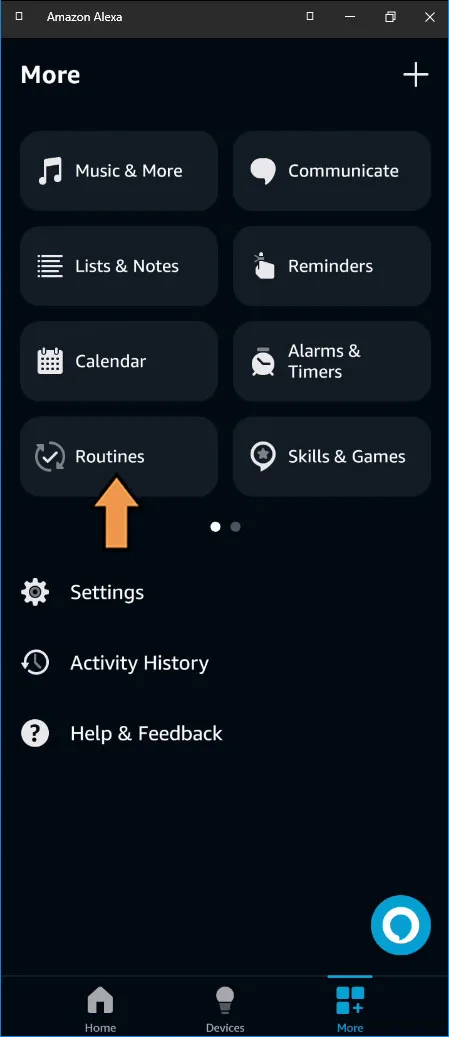
Click the Routines button.
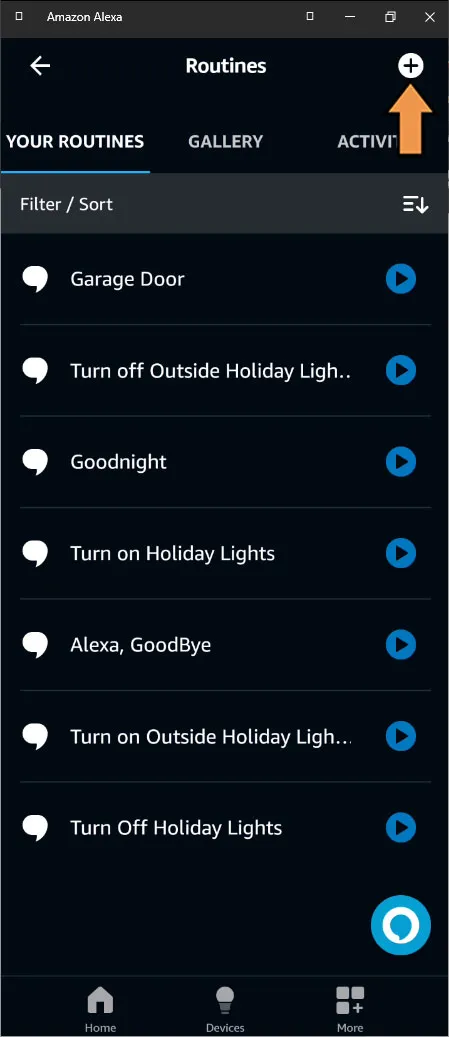
Click the plus sign to add a new routine.
Click the plus sign by Enter routine name.
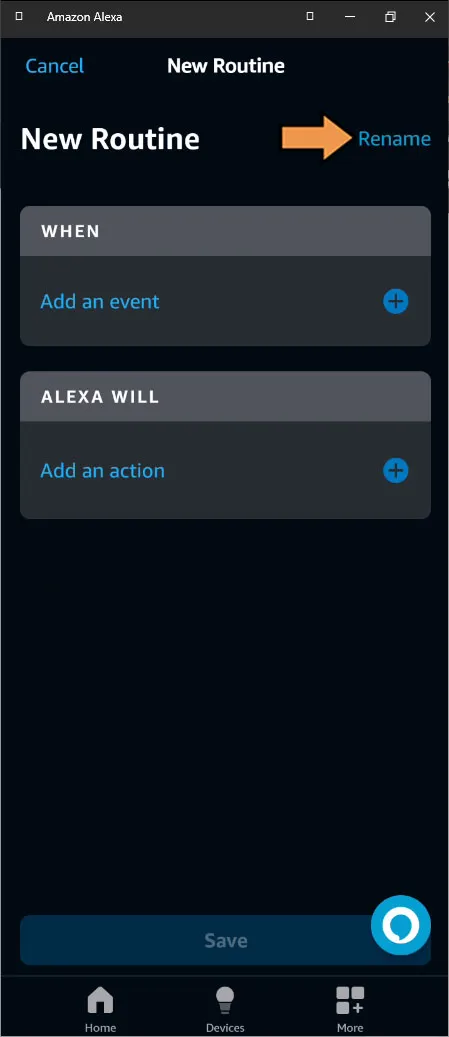
Give your Routine a name, and click Next.
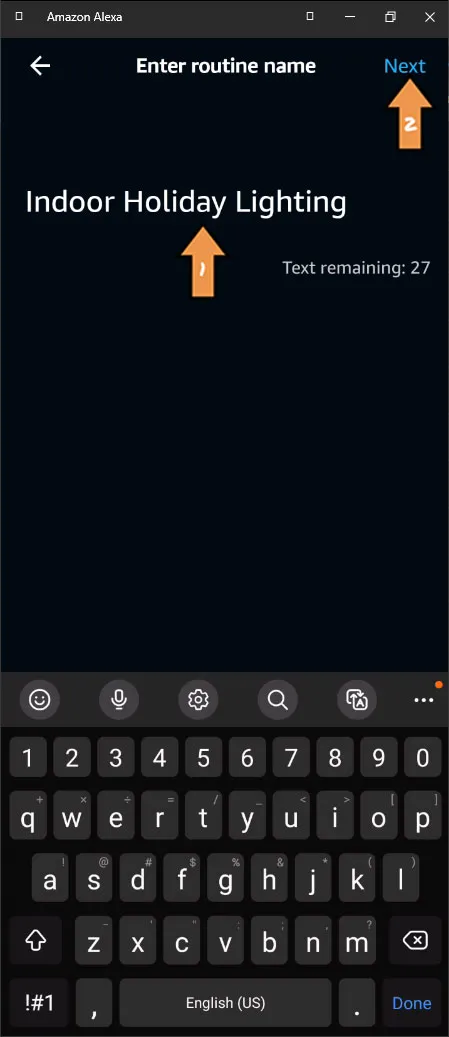
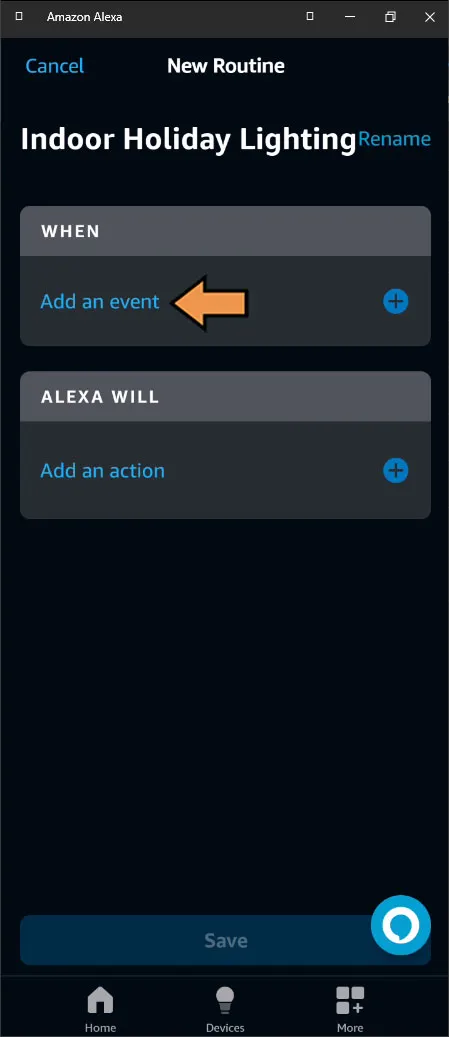
Next, click Add an event.
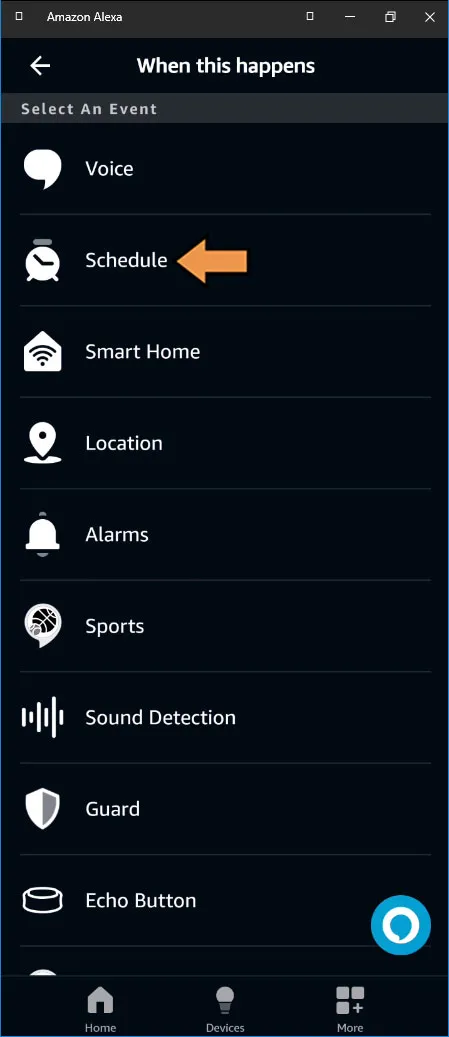
From the list of Events, select Schedule.
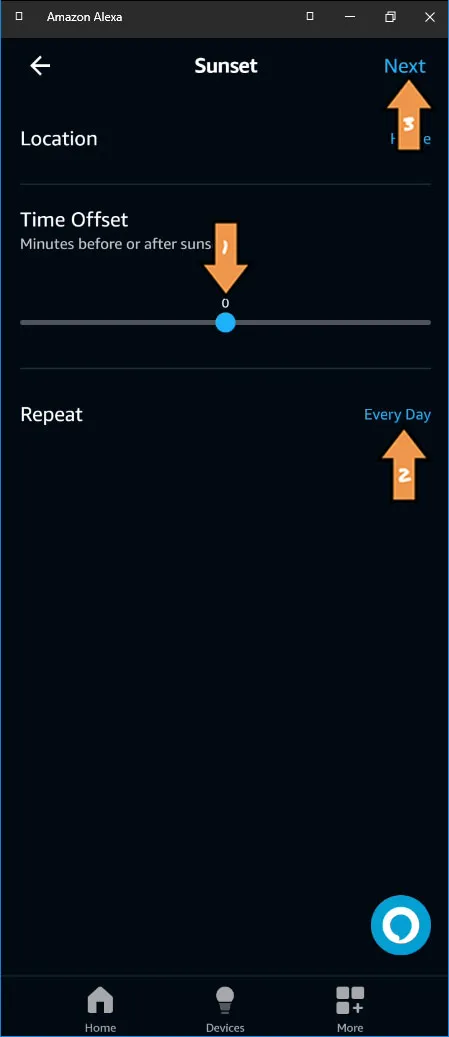
Select Sunset on the Event Schedule screen.
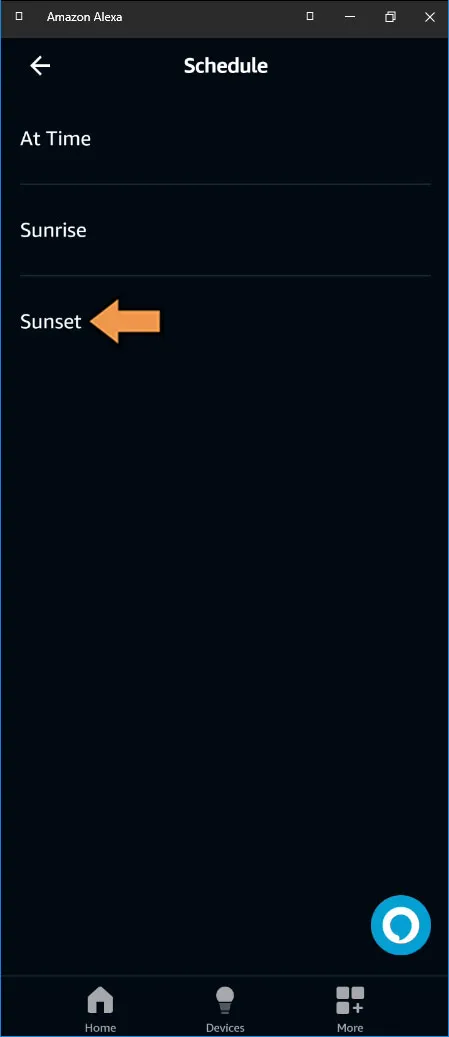
You could adjust the offset and the repeat values as you like. Then click Next.
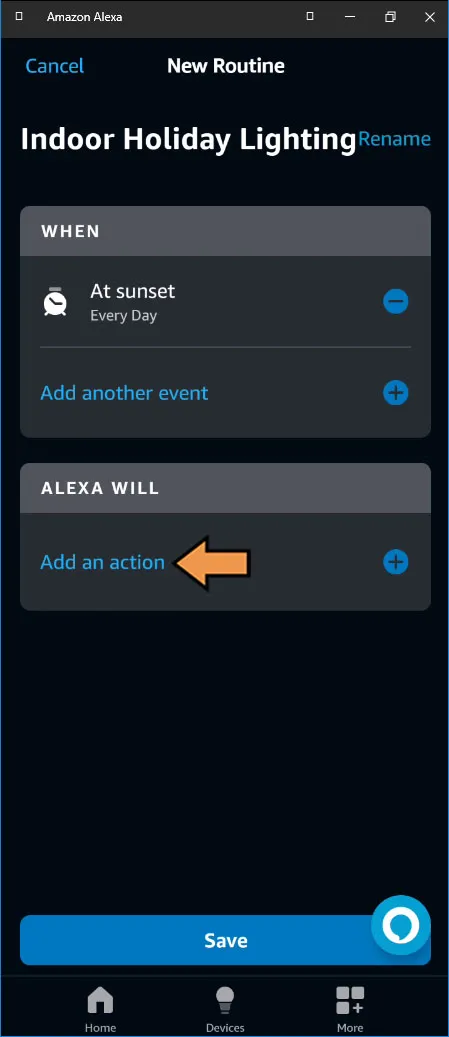
Next, click the Add an action link.
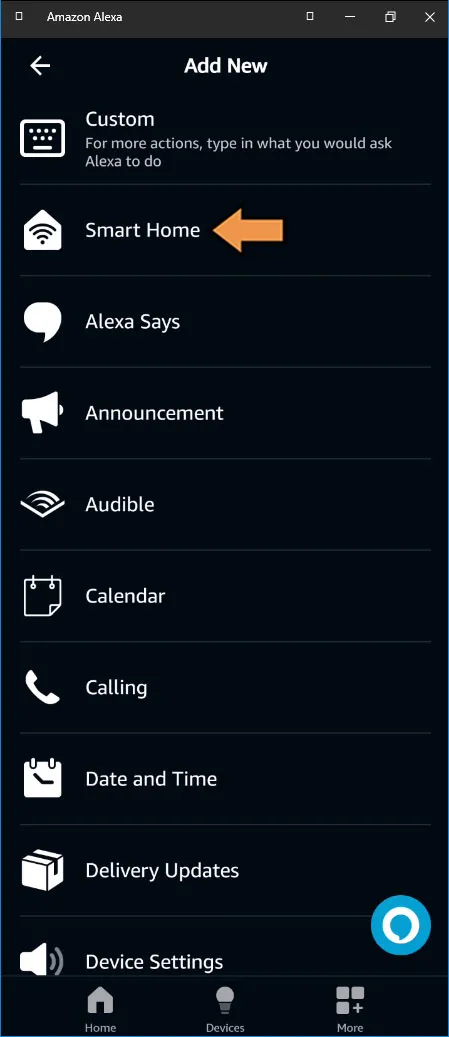
On the Add Action menu, select Smart Home.
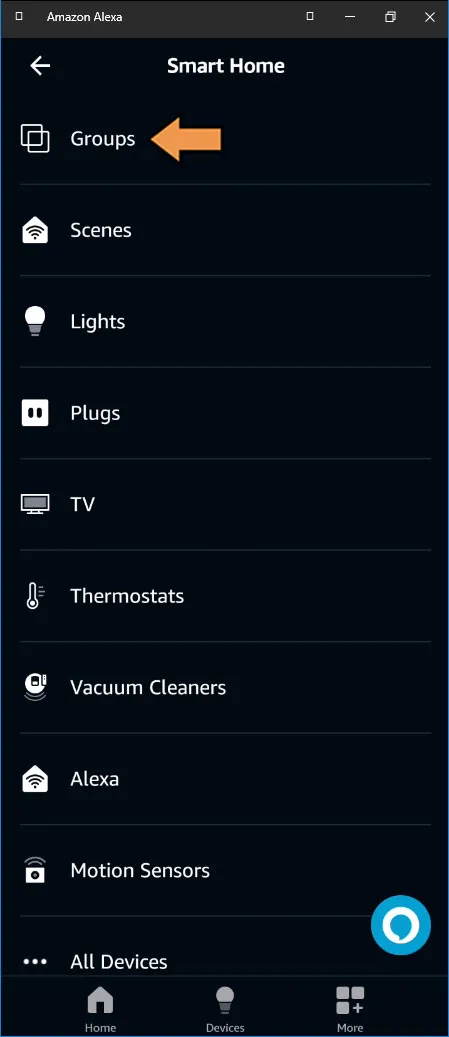
Then, select Groups from the Smart Home menu.
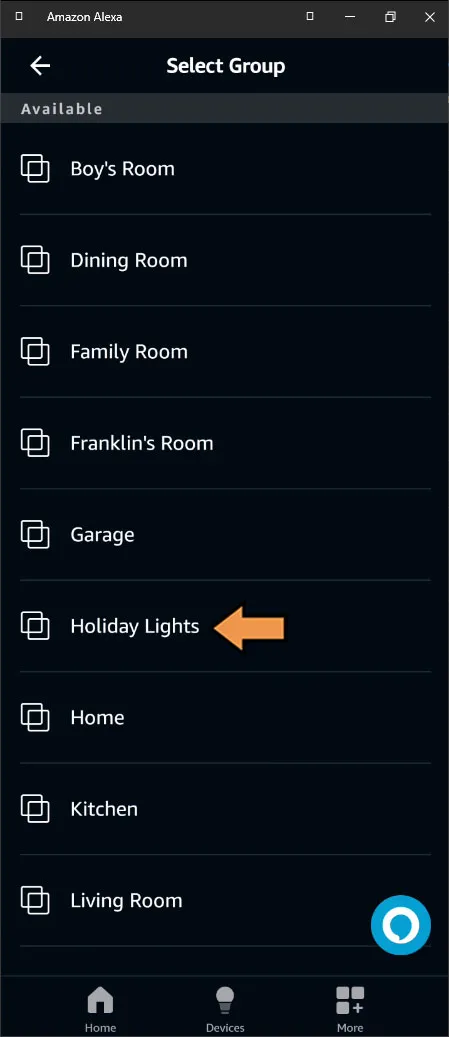
Next, select our Holiday Lights group we created earlier.
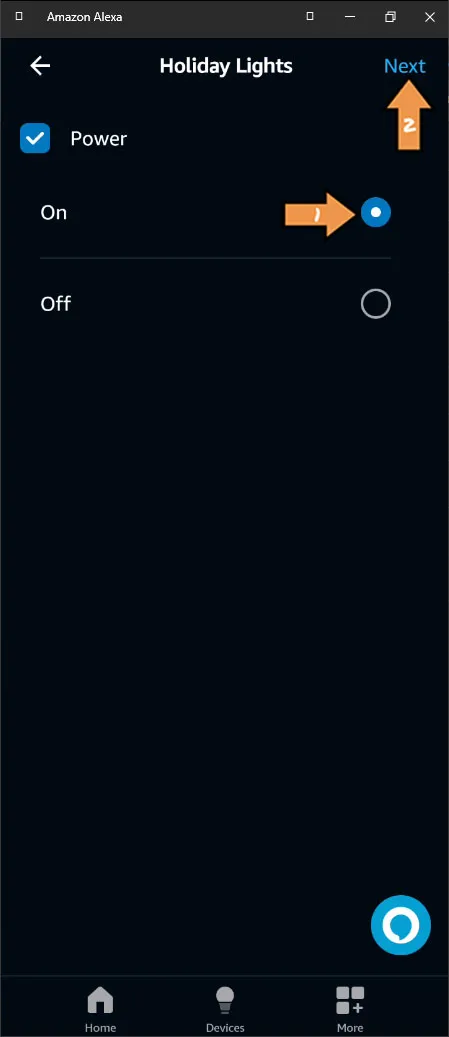
On the Holiday Lights screen, select Power On and click Next.
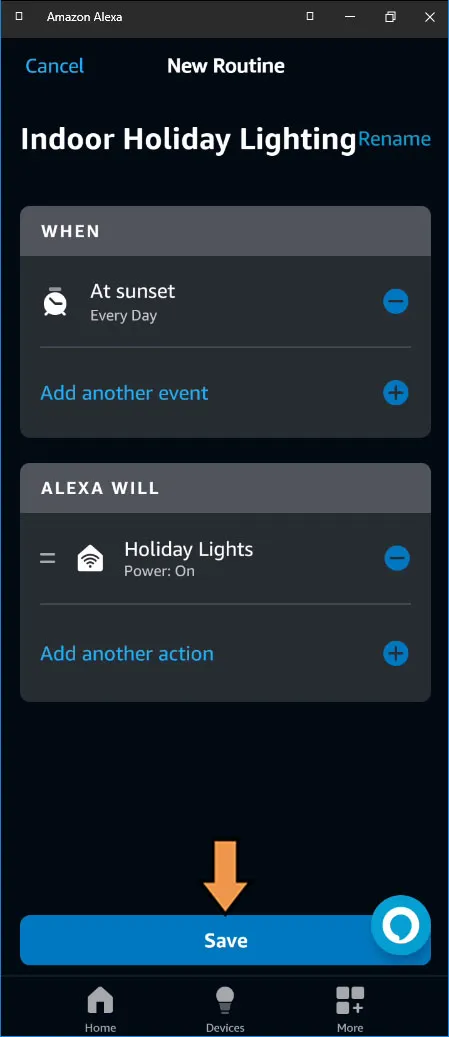
Finally, click Save to finish the Routine.
Success: That’s It! You have successfully automated your indoor holiday lights.
