The Ultimate Smart Home Automation Cookbook
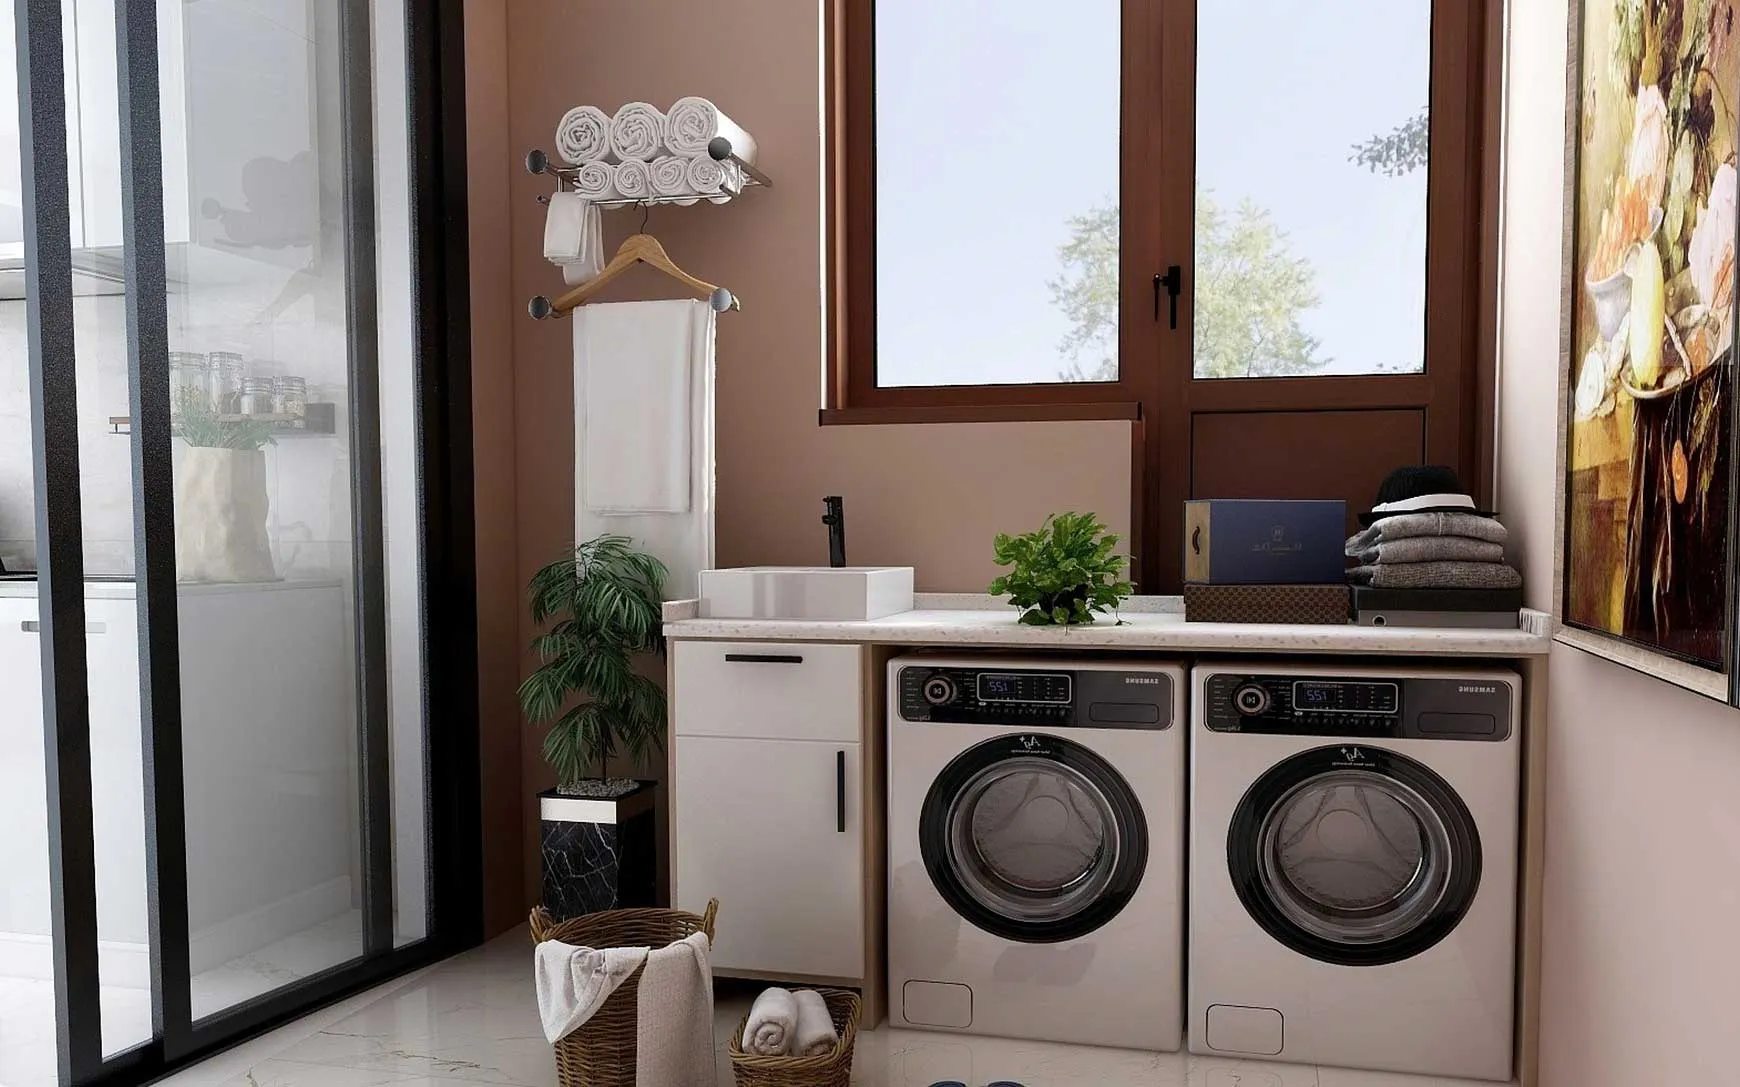
“Announce Washer is Done Automation” marks a revolutionary step in smart home technology. By utilizing a power-monitoring smart plug, it effortlessly upgrades a regular washing machine into an intelligent appliance. In the world of smart home devices, where prices can be steep, “Announce Washer is Done Automation” emerges as a budget-friendly game changer. Instead of shelling out for expensive smart appliances, a mere $25 smart plug through “Announce Washer is Done Automation” brings all the benefits of a high-end smart washing machine. This innovation not only saves you money but also brings a new level of convenience to your household chores.
Integrating “Announce Washer is Done Automation” with a voice assistant like Alexa or Google Home elevates the entire experience, making your home truly futuristic. This integration allows you to receive updates and notifications about your laundry without having to be physically present in the laundry room. The ease and efficiency brought by “Announce Washer is Done Automation” means no more forgotten wet laundry or repeated trips to check if the cycle is complete. The automation ensures you’re always in the know, effortlessly blending technology with daily life to transform your home into an advanced smart home. With “Announce Washer is Done Automation”, managing your laundry becomes a seamless, stress-free task, making it an indispensable part of modern living.
Automation Details
Required Devices
- Smart Plugs
- Voice Assistant
Triggers:
- Washer Finishes
Conditions:
- Don't Announce if Mode is Night
Actions:
- Announce Washer is Done
Important: Smart Plug must have Power Monitoring.
While the values in this automation work for my washing machine, you may need to adjust them for yours. You will have to wash a few loads and watch the logs to get an idea of what the values need to be.
Hubitat
Announce Washer is Done Automation
The Official Documentation for Rule Machine
Option One
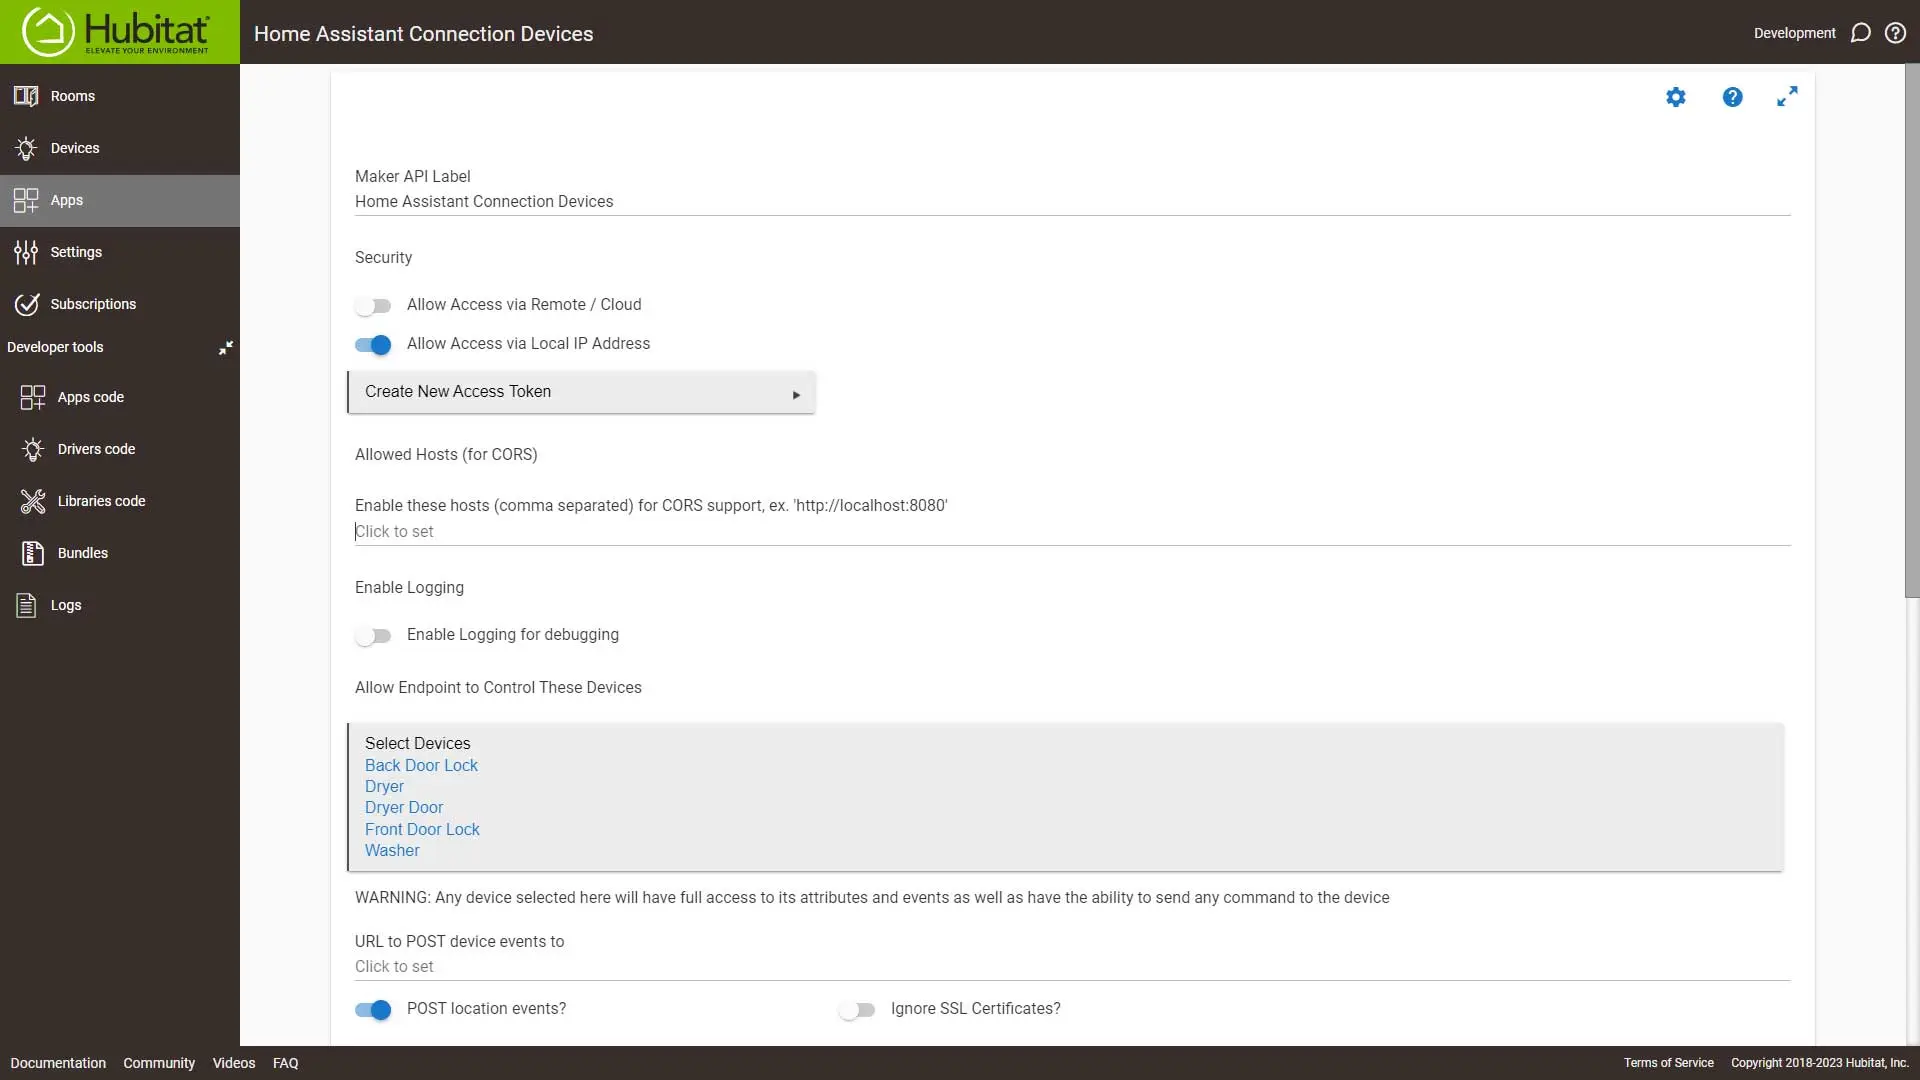
Share your devices with Home Assistant using Hubitat Connect. Then create an automation in Home Assistant using the Alexa Speaks integration outlined under the Home Assistant tab.
- Share your smart plug with Home Assistant.
Option Two
Create and share a virtual switch with Alexa using Alexa Speaks: Shared Devices. Then create an automation as outlined in Option Three.
Option Three
We’ll use an MQTT Notification device using Alexa Speaks integration.
Setting Up the Automation
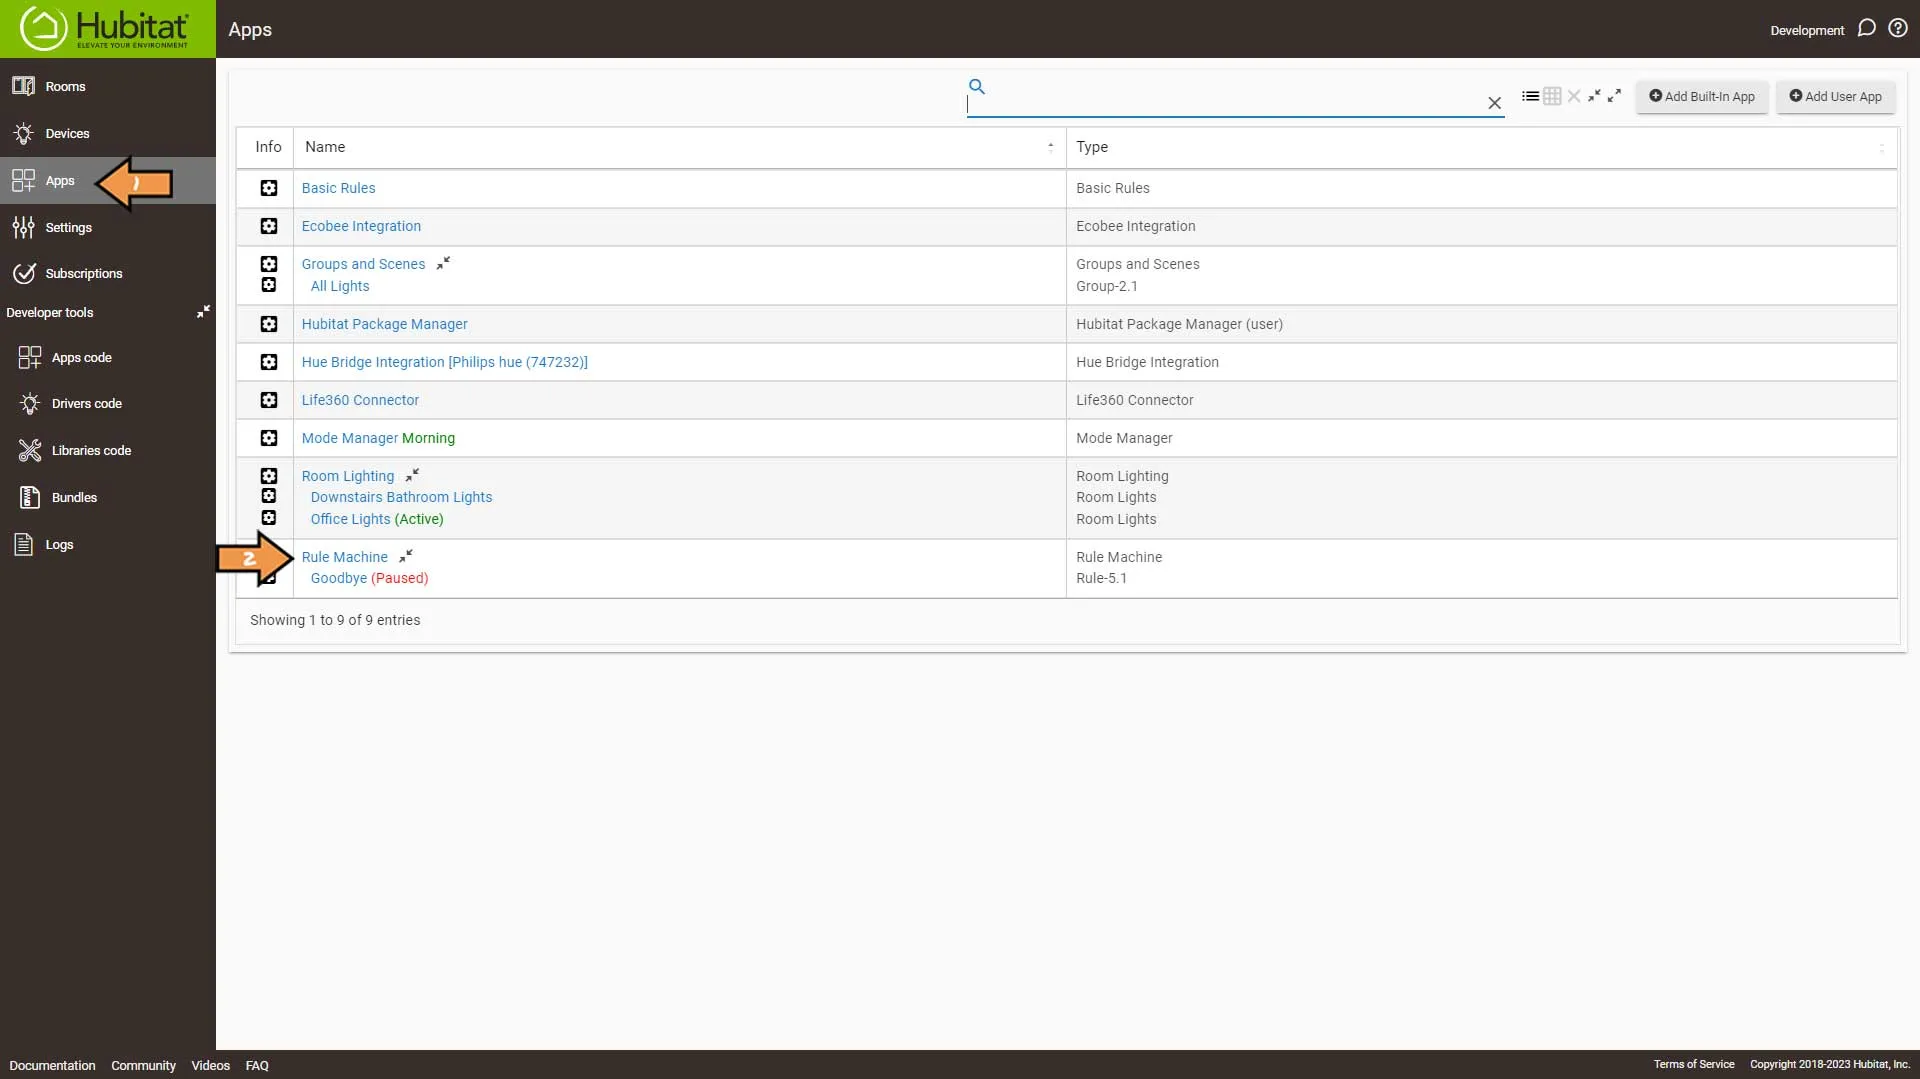
First, go to Apps and click Rule Machine.
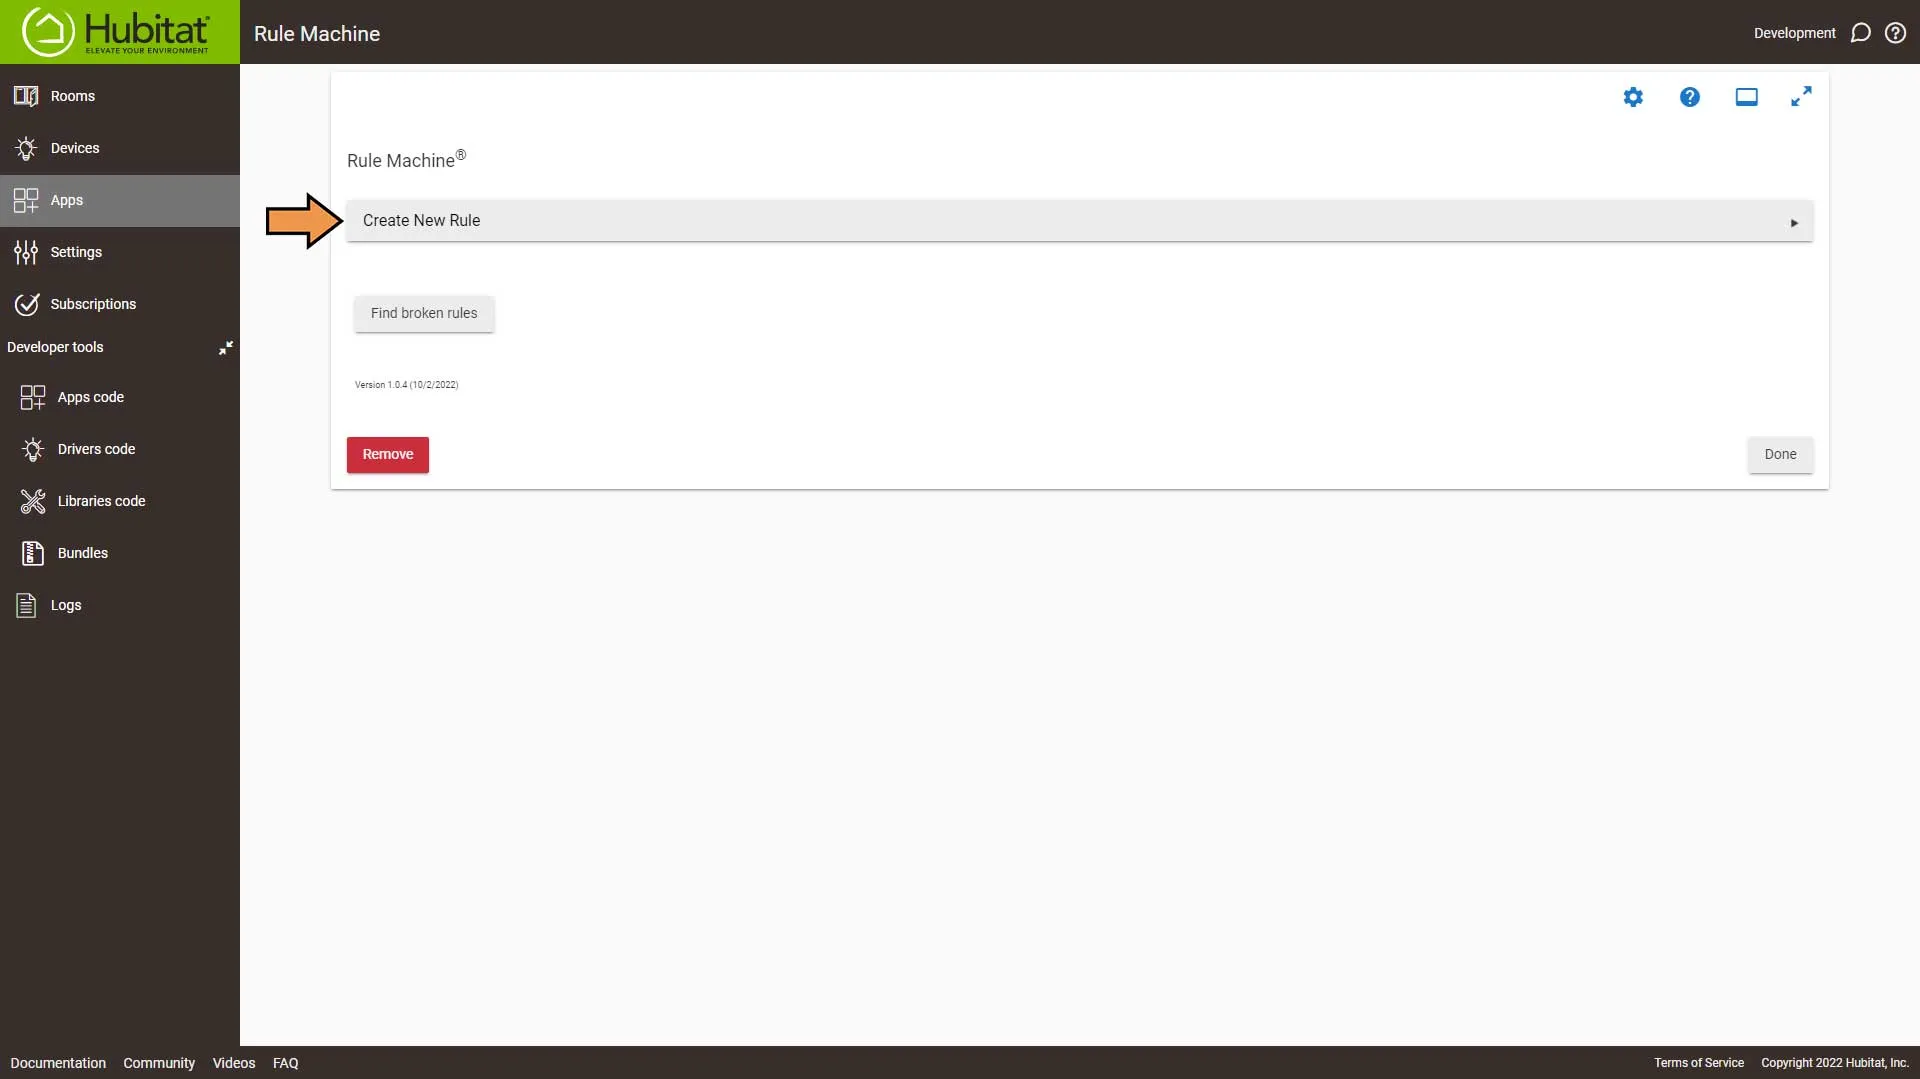
Select Create New Rule.
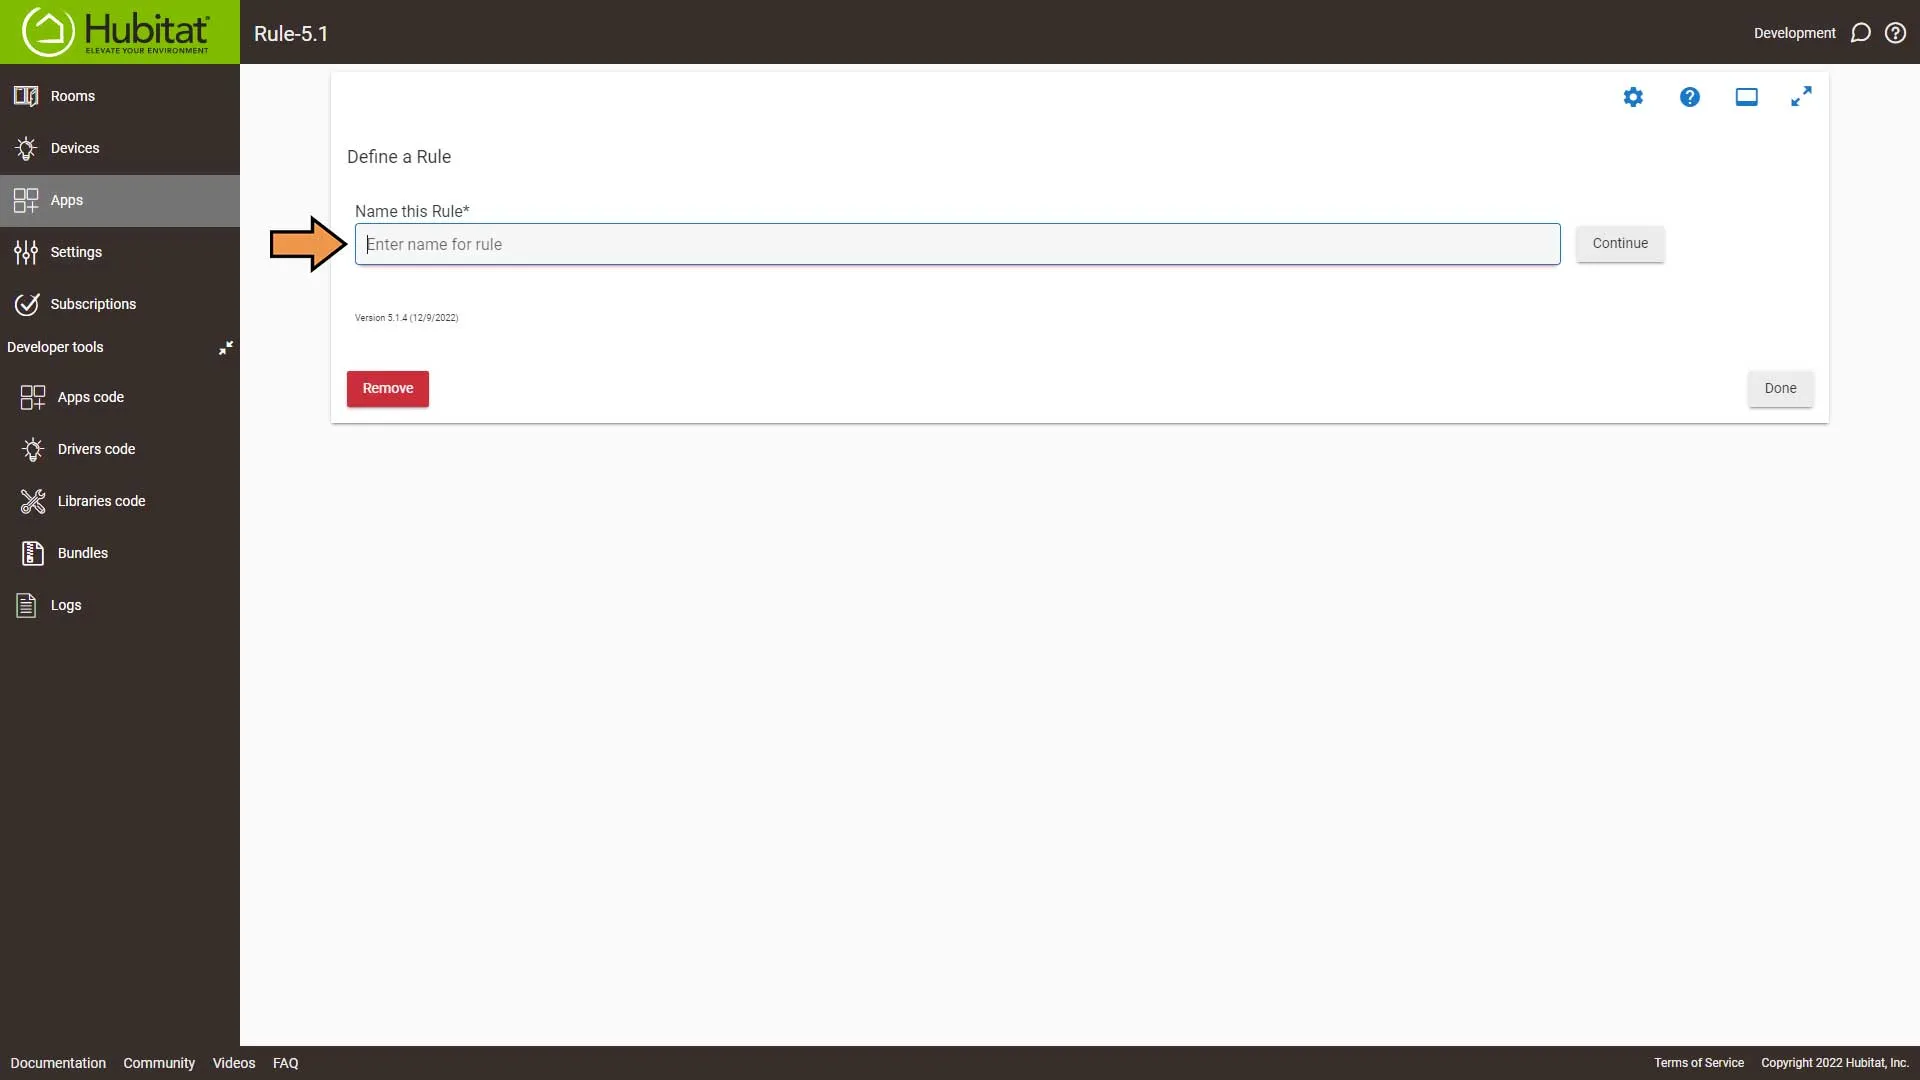
Enter a name for the Rule and hit Enter.
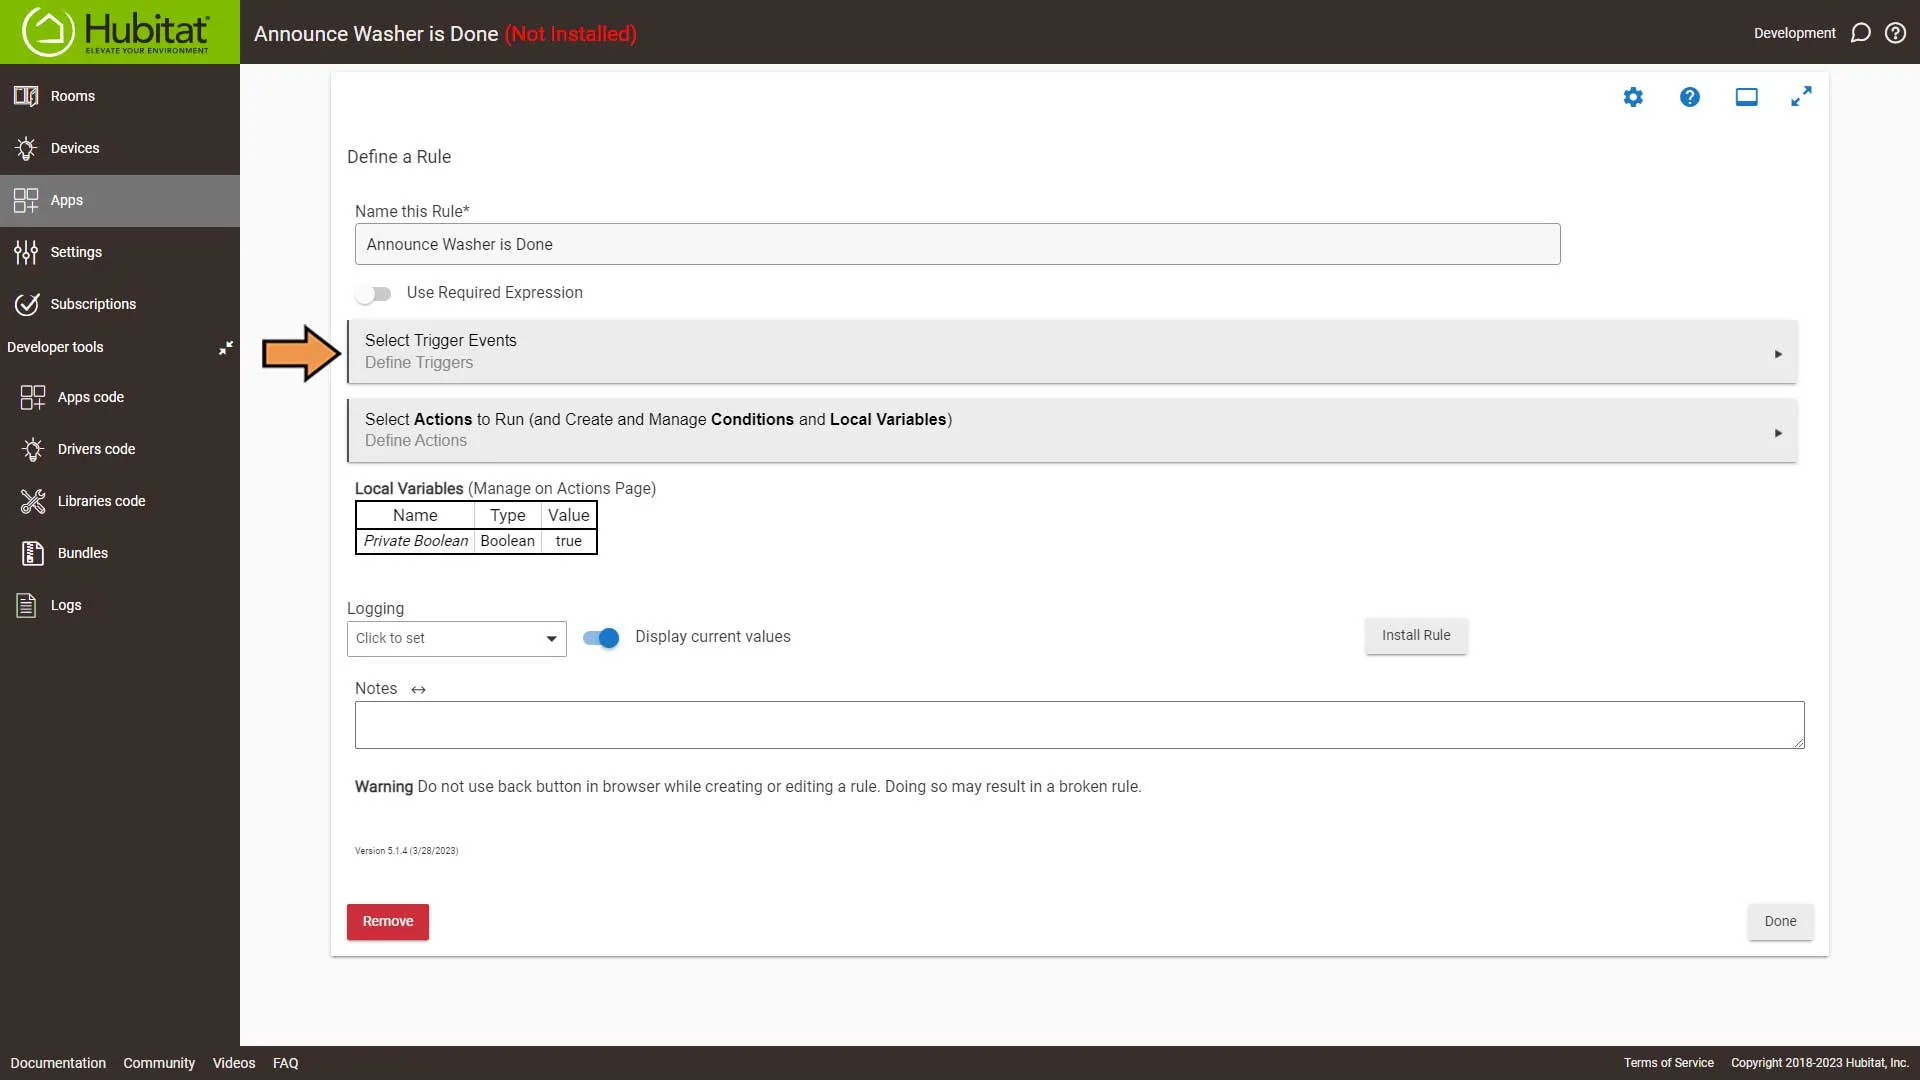
Select Trigger Event.
From the Capability drop-down, select Power meter.
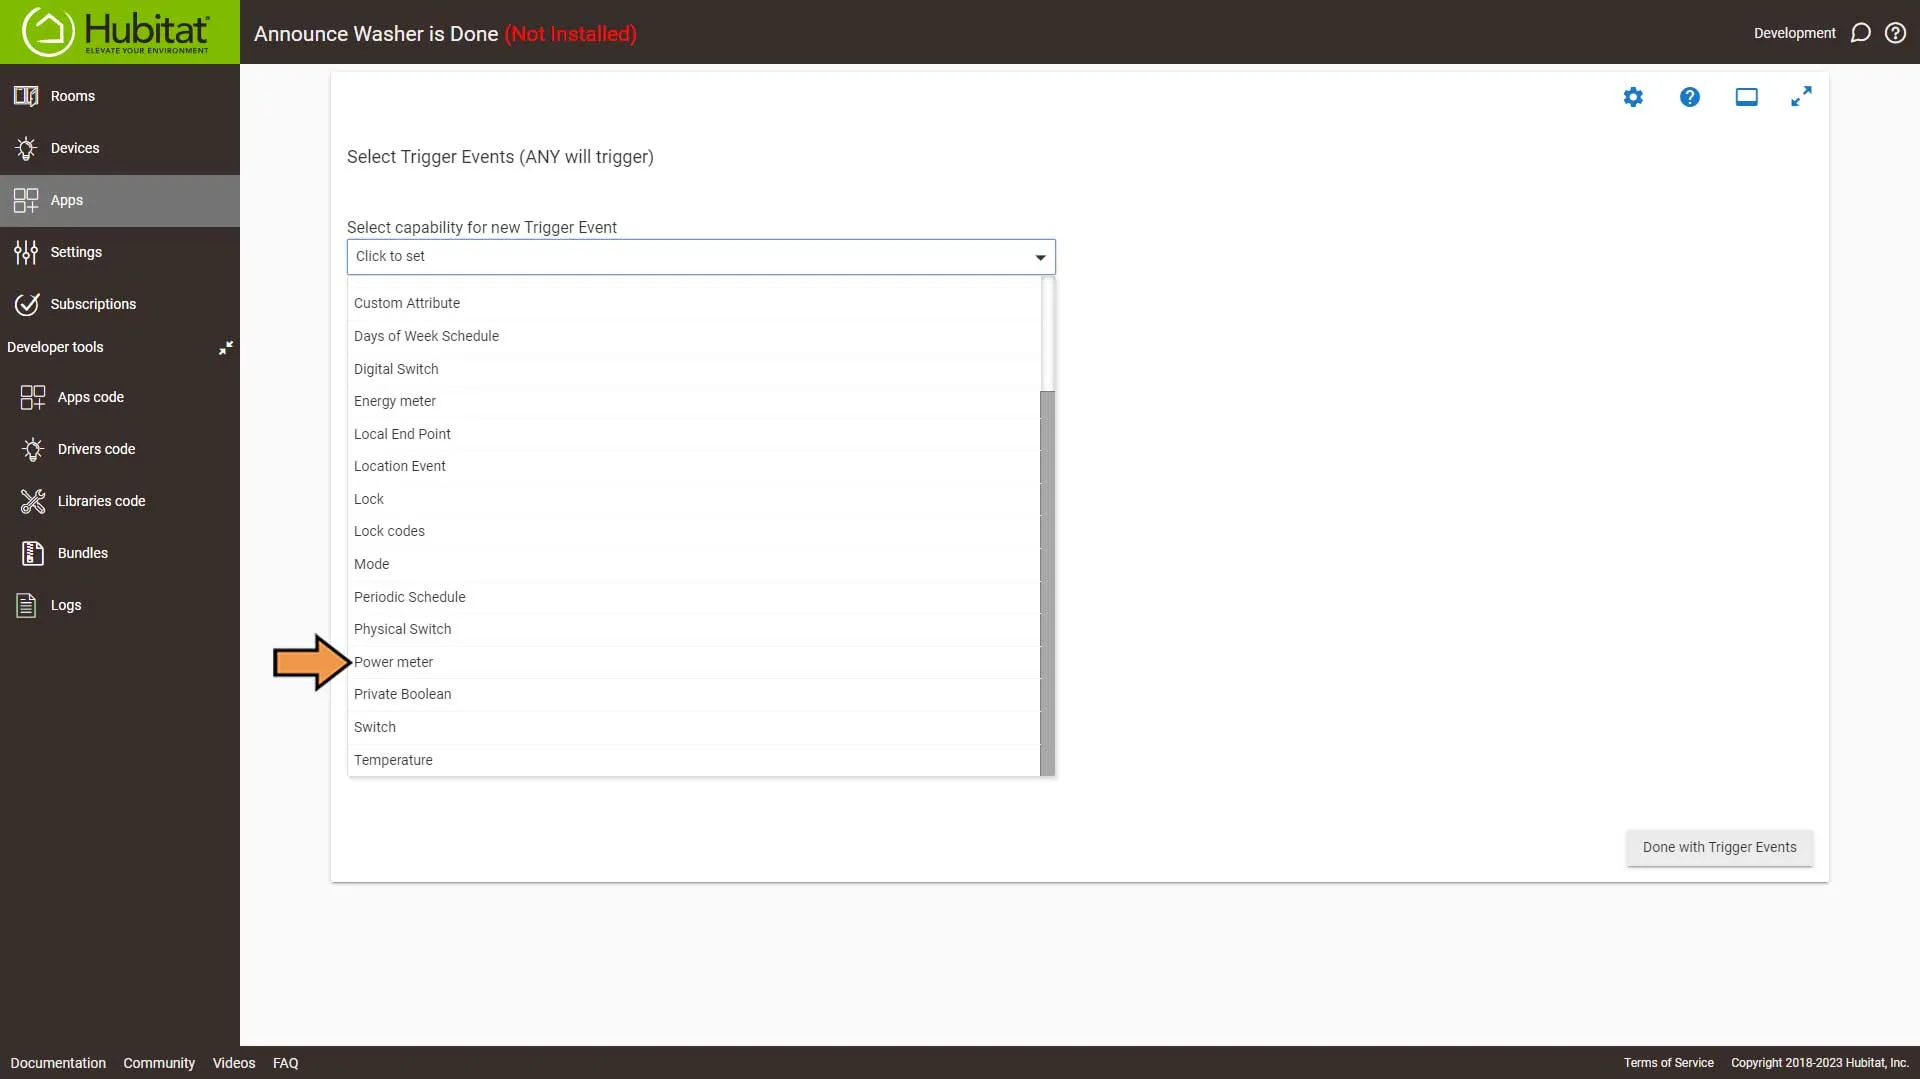
Set the Trigger event as follows:
- Select our smart plug
- Set the comparison to Greater Than
- Set the Power level to 10
- Then click the Done with this Trigger Event button
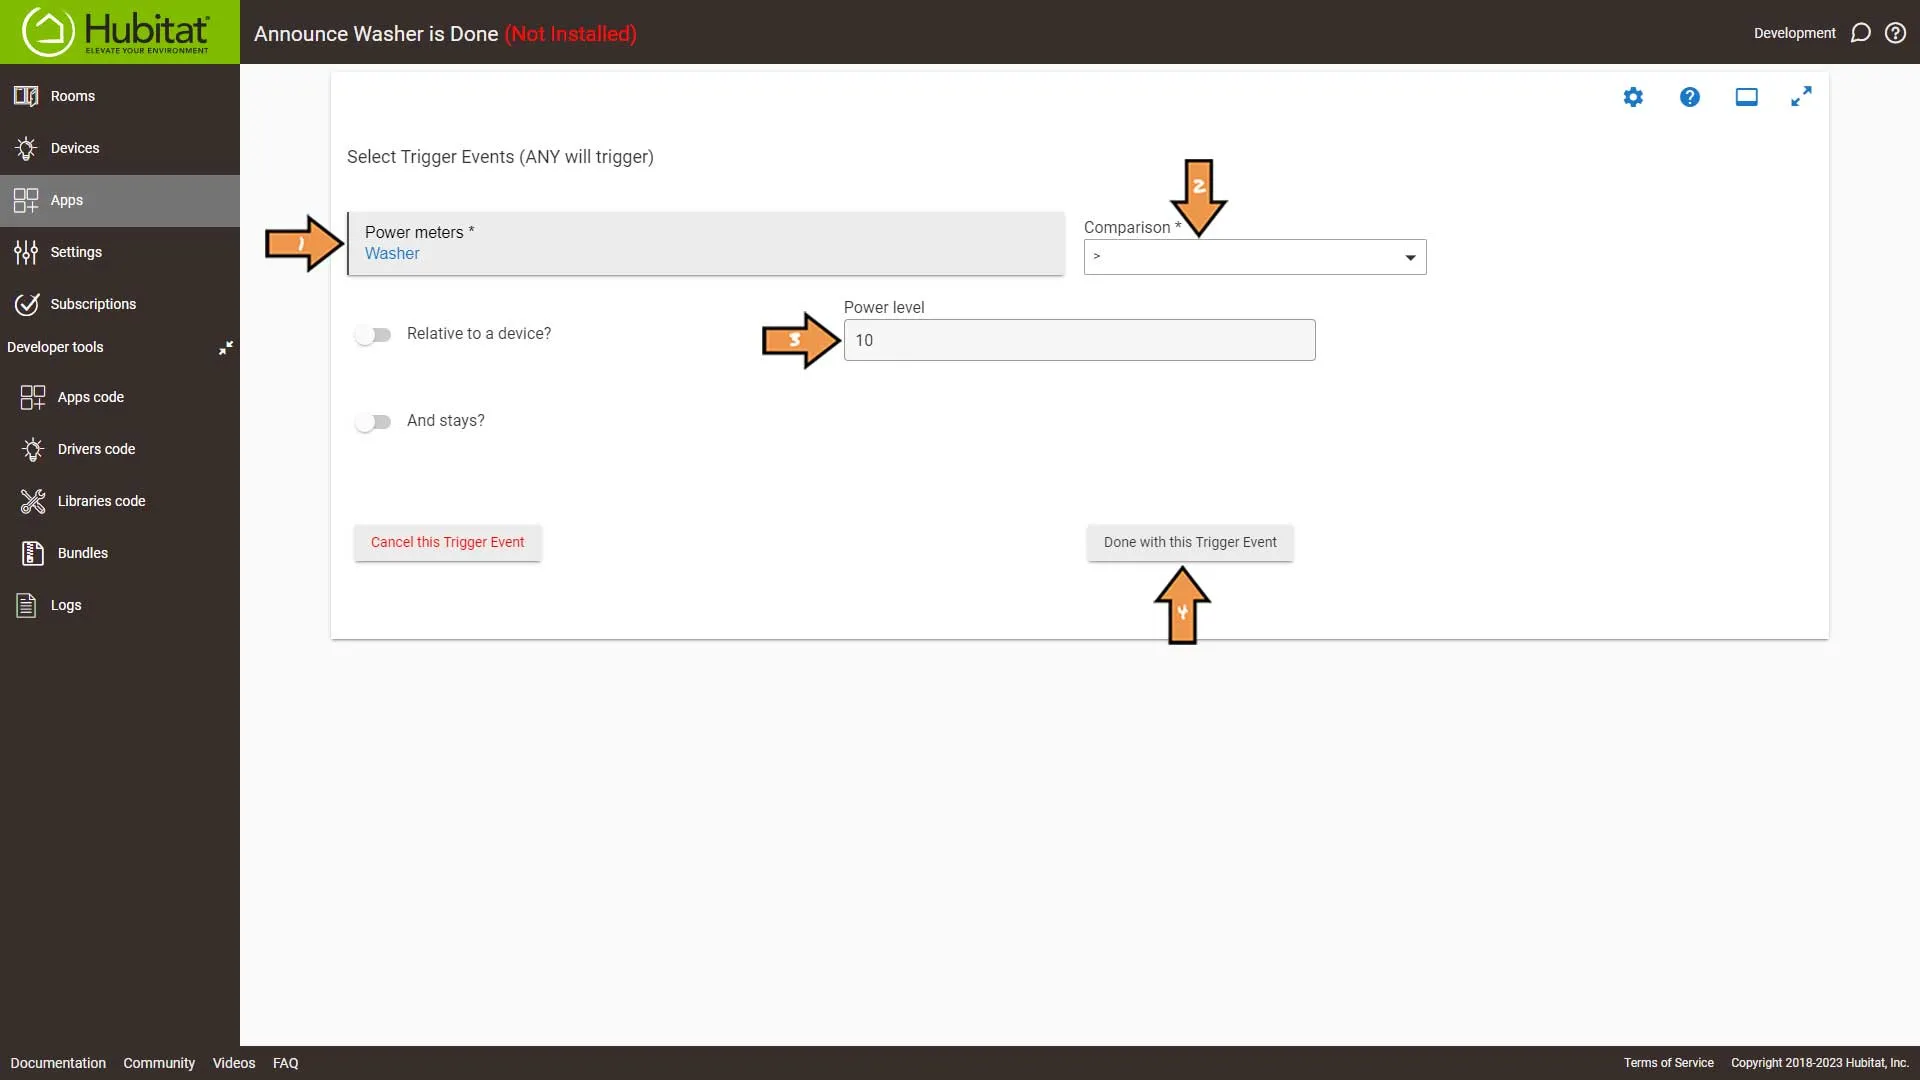
Next, Click the Done with Trigger Events button.
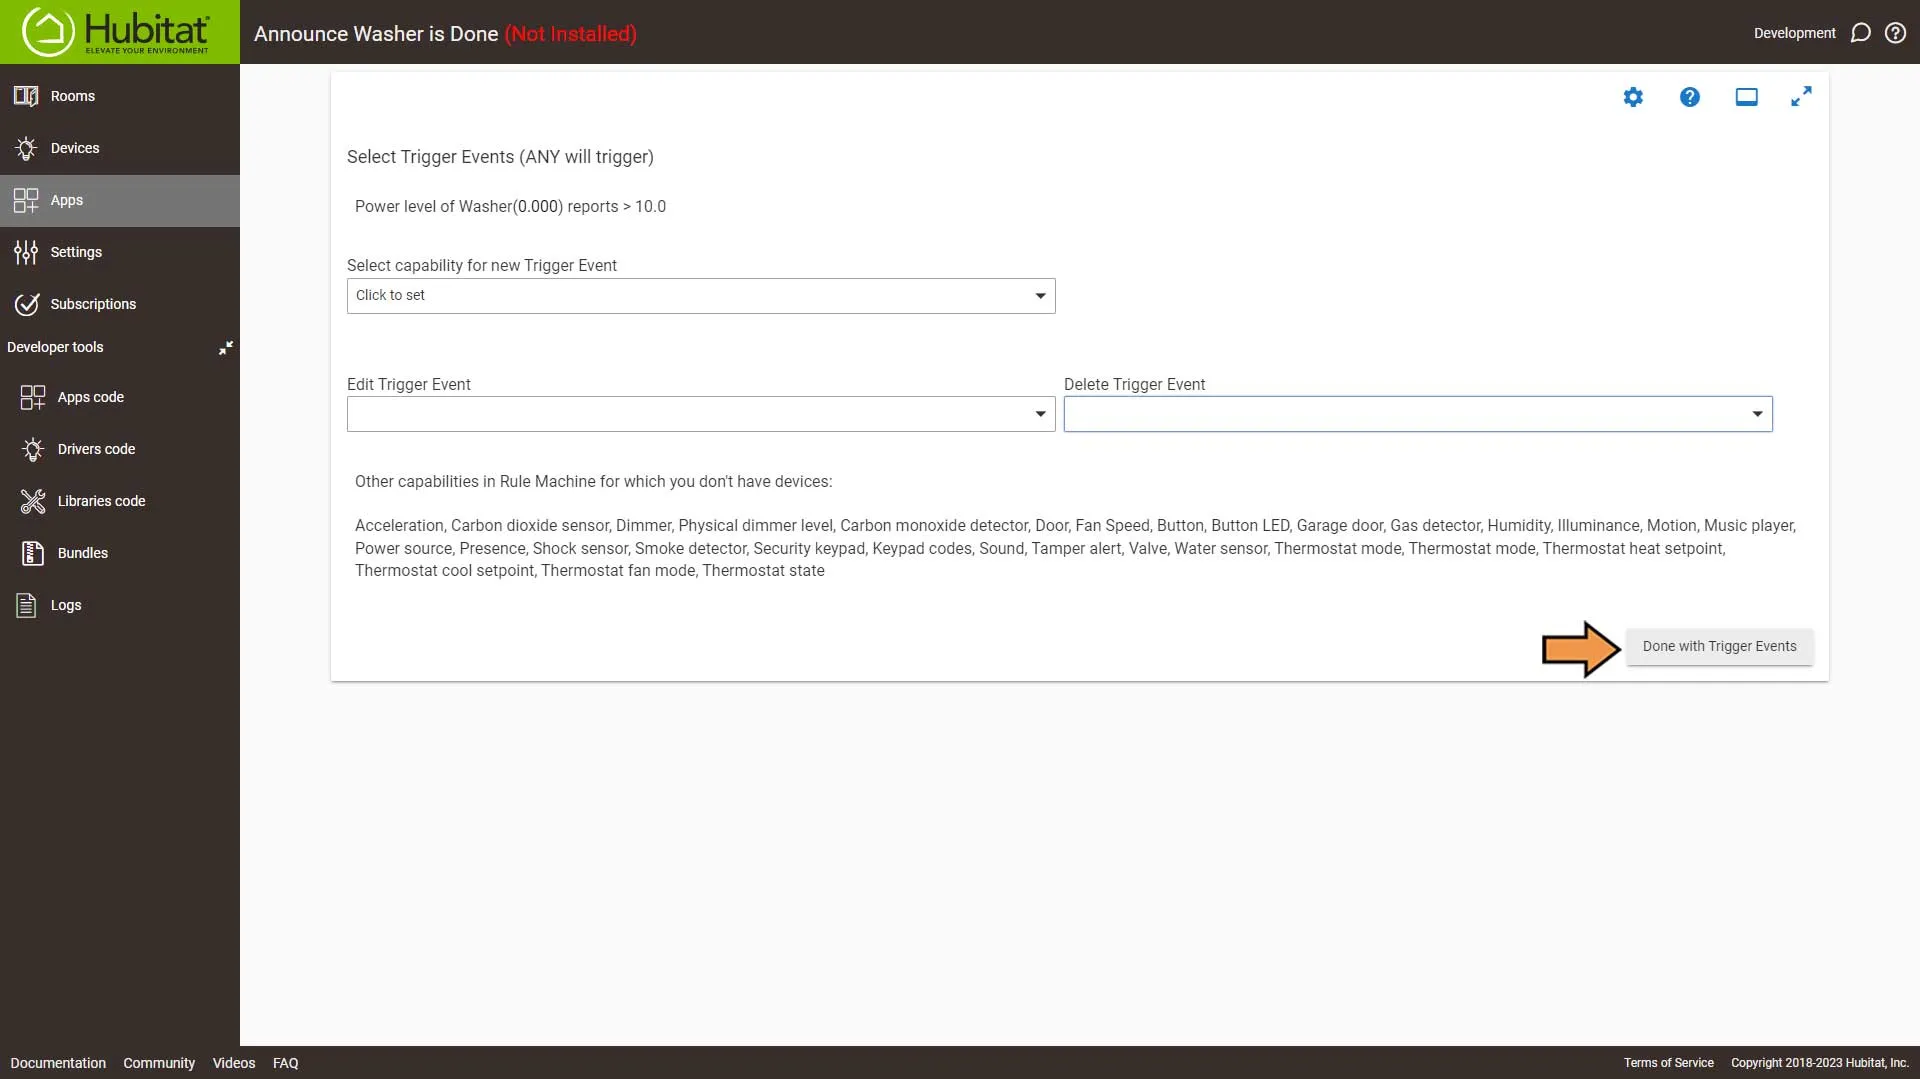
Select Actions to Run.
Select Create Conditions
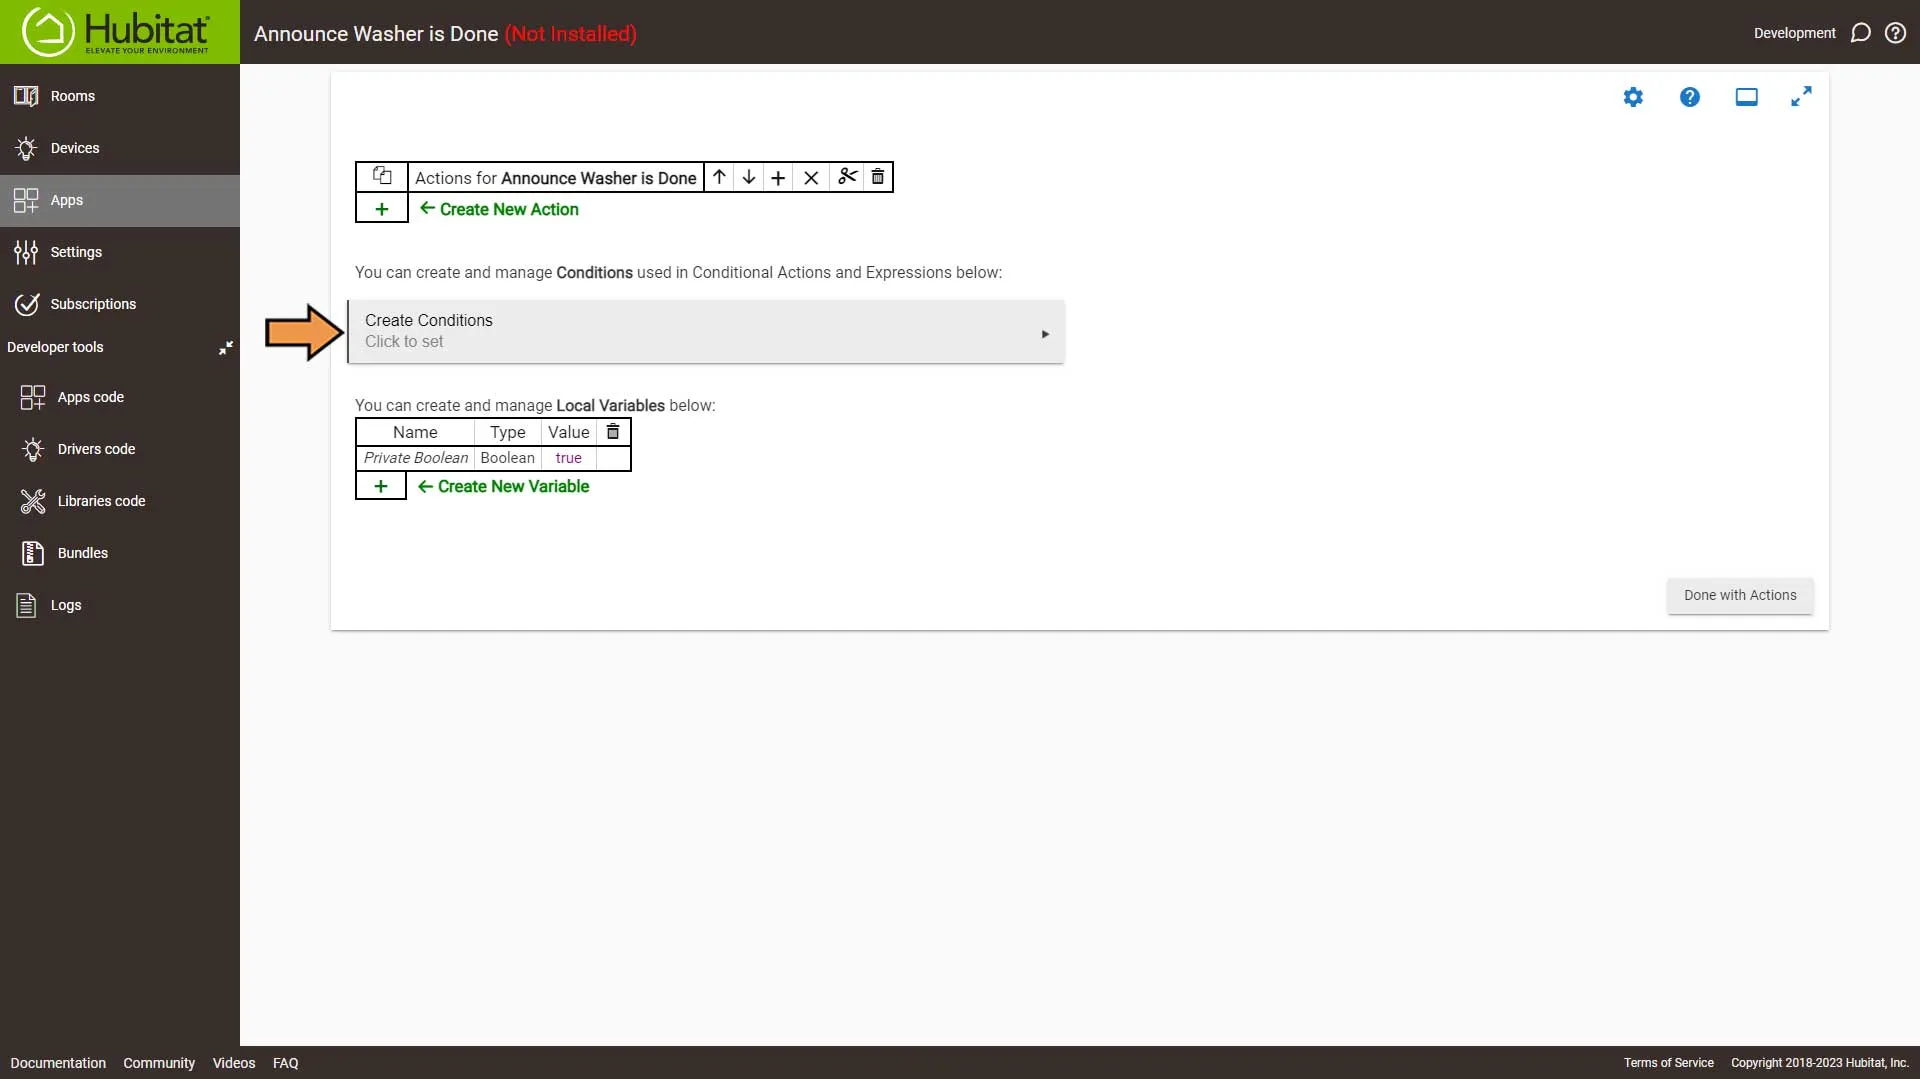
From the Capability drop-down, select Mode.
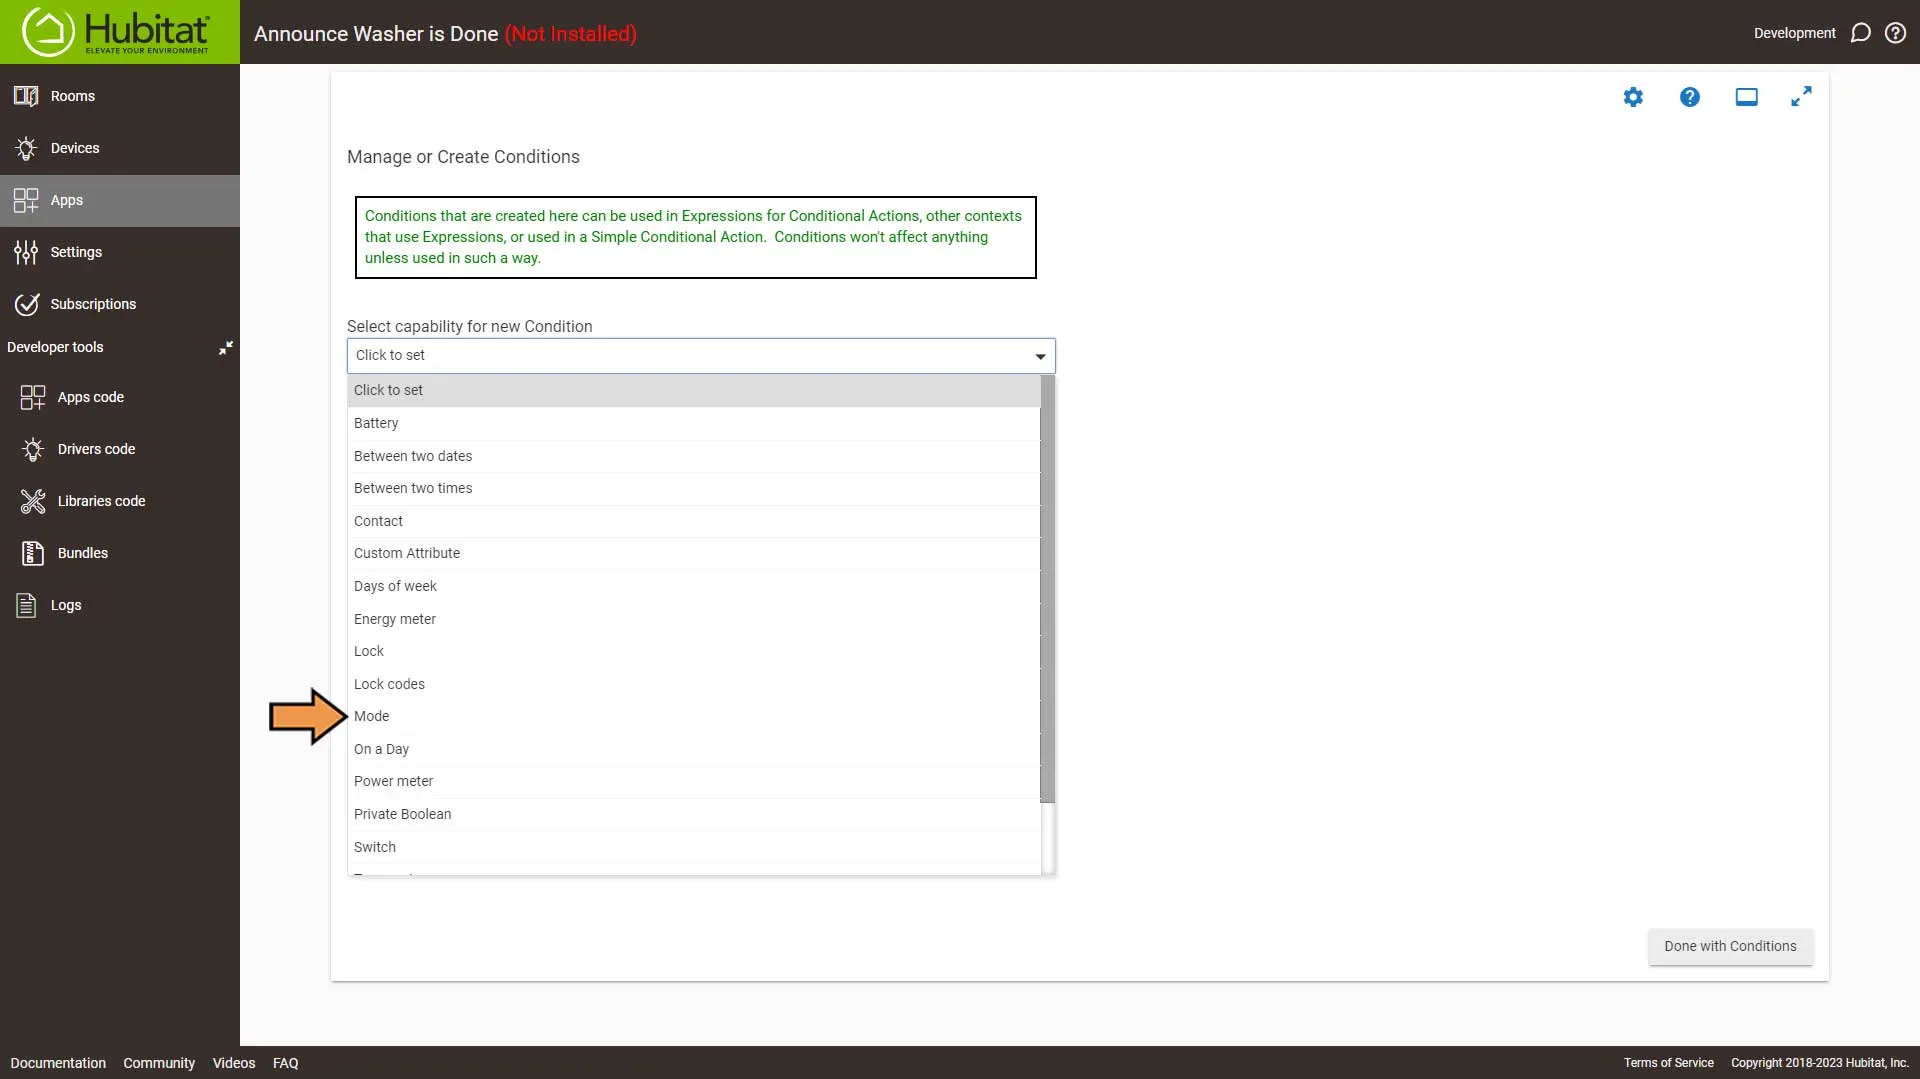
Select Night from the Modes dropdown box. Next, select NOT this Condition and click the Done with this Condition button.
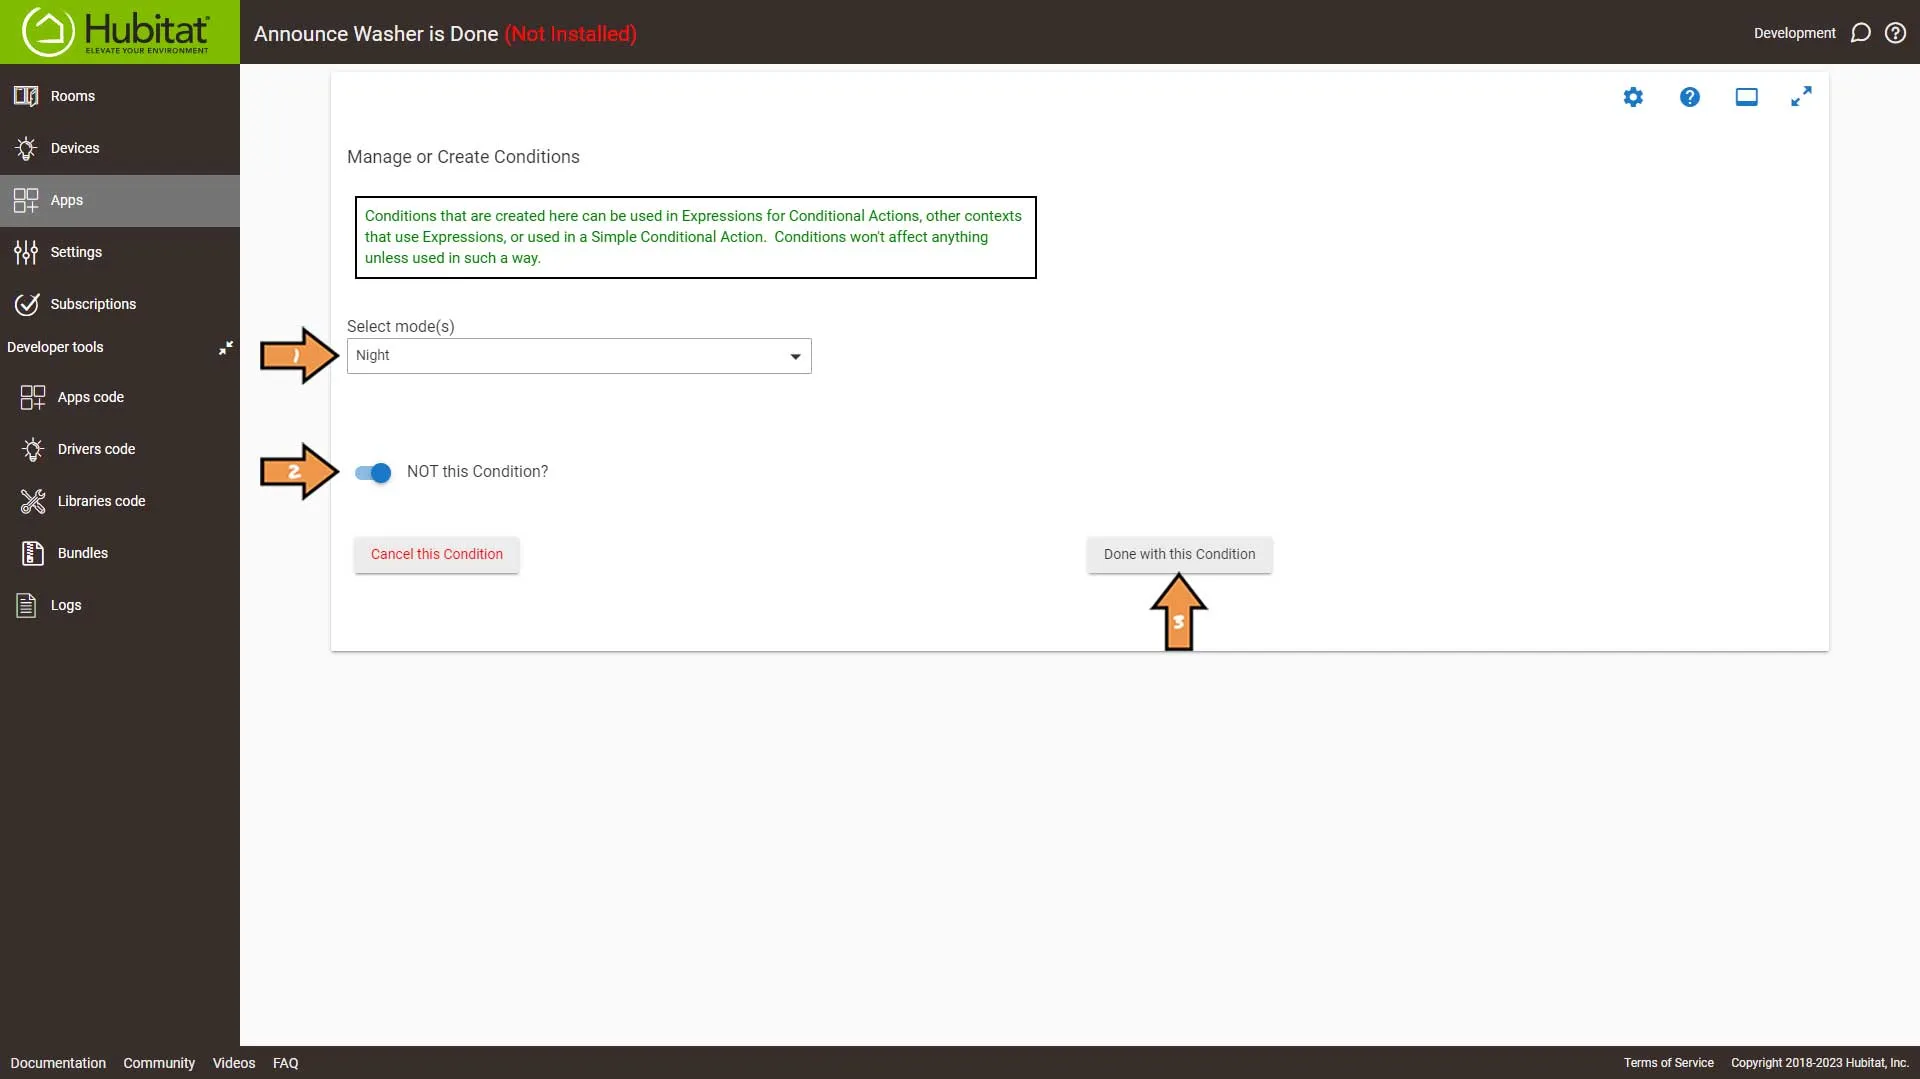
Then, Click the Done with Conditions button.
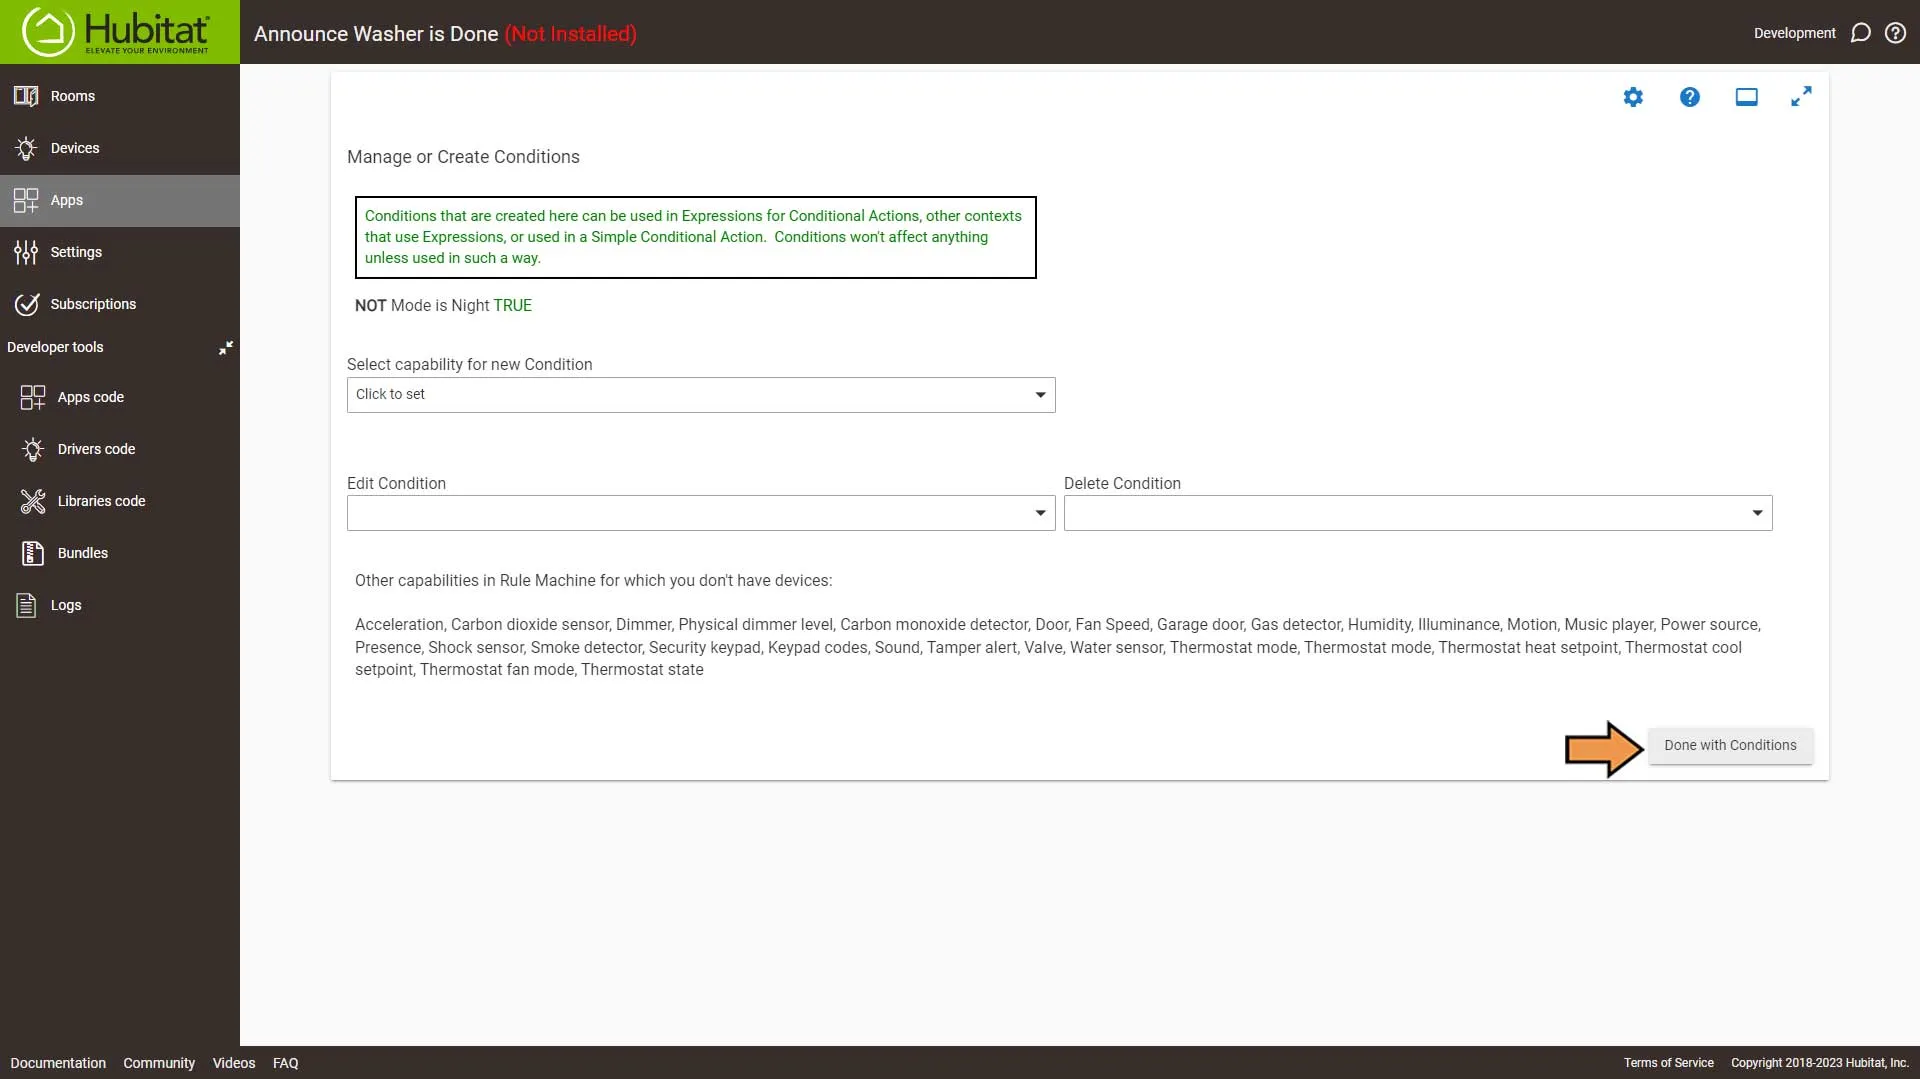
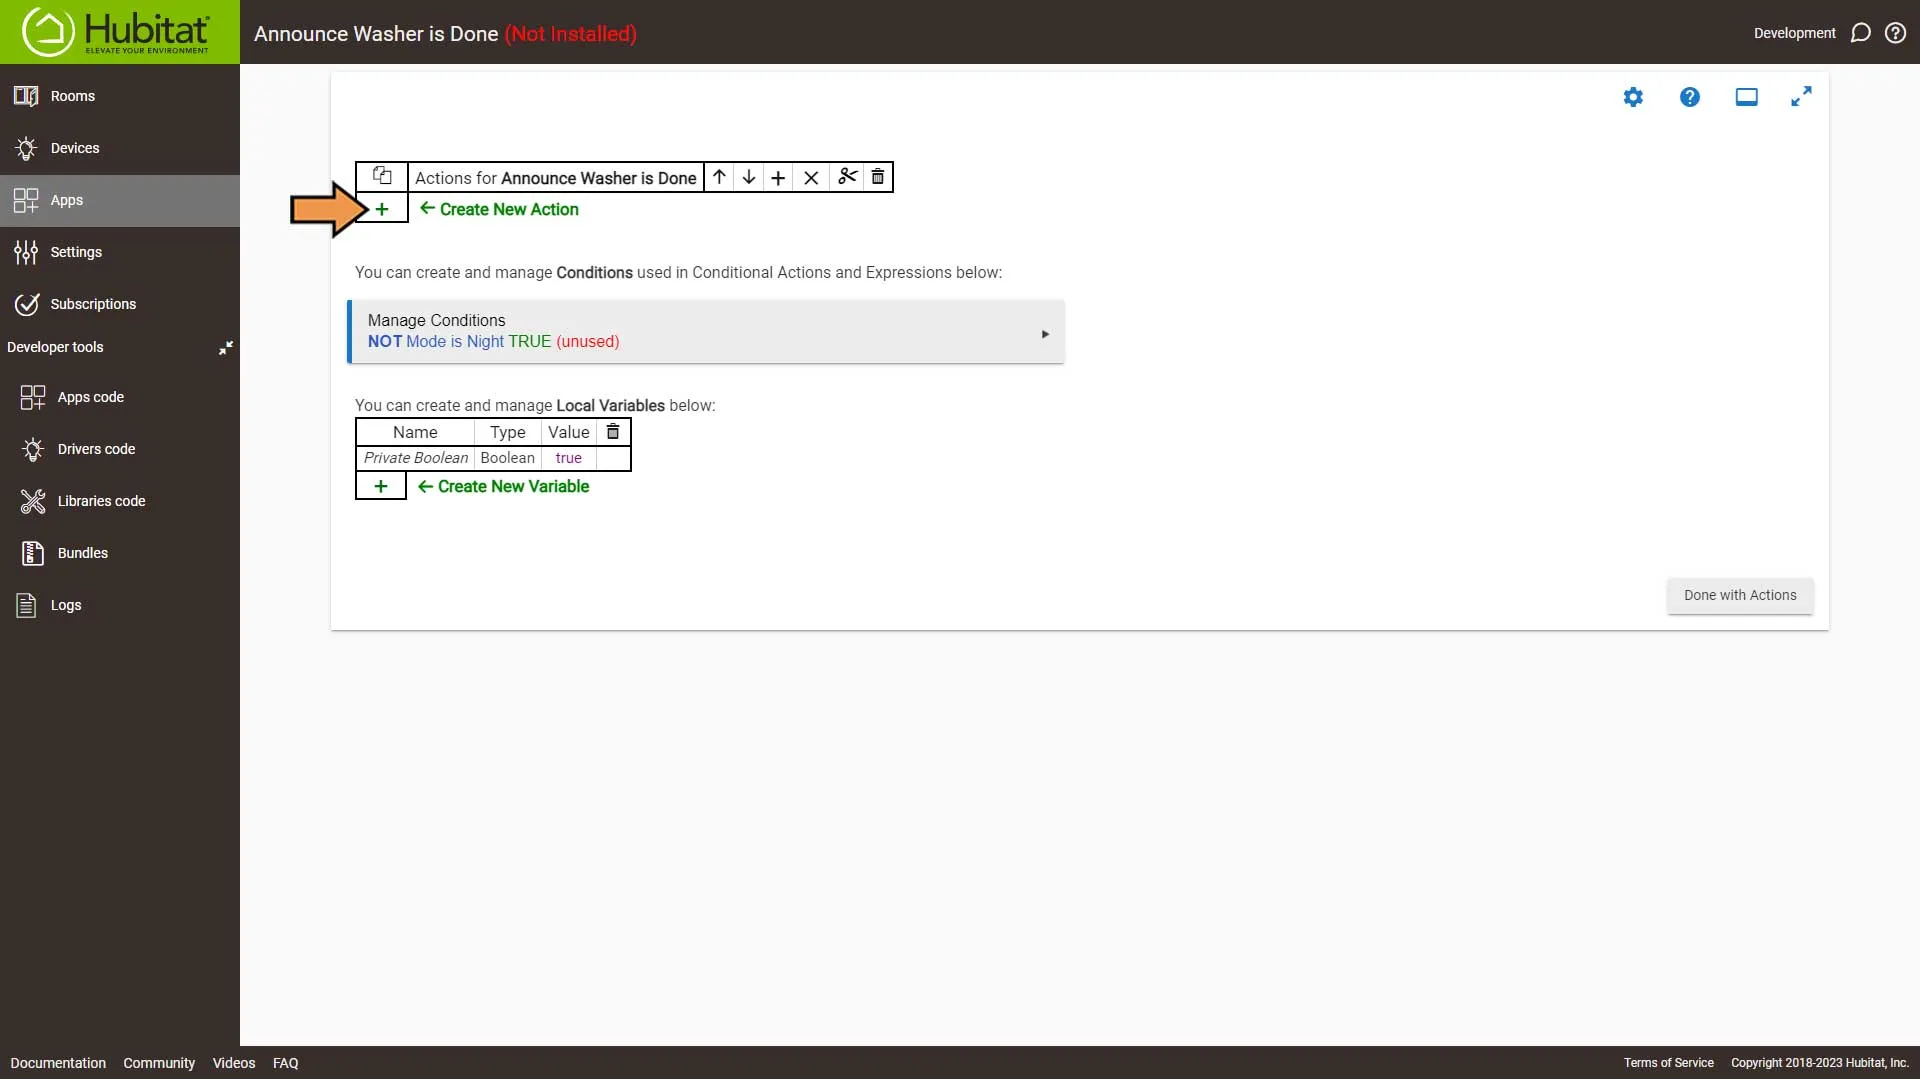
Select the Green Plus Sign to Add New Action.
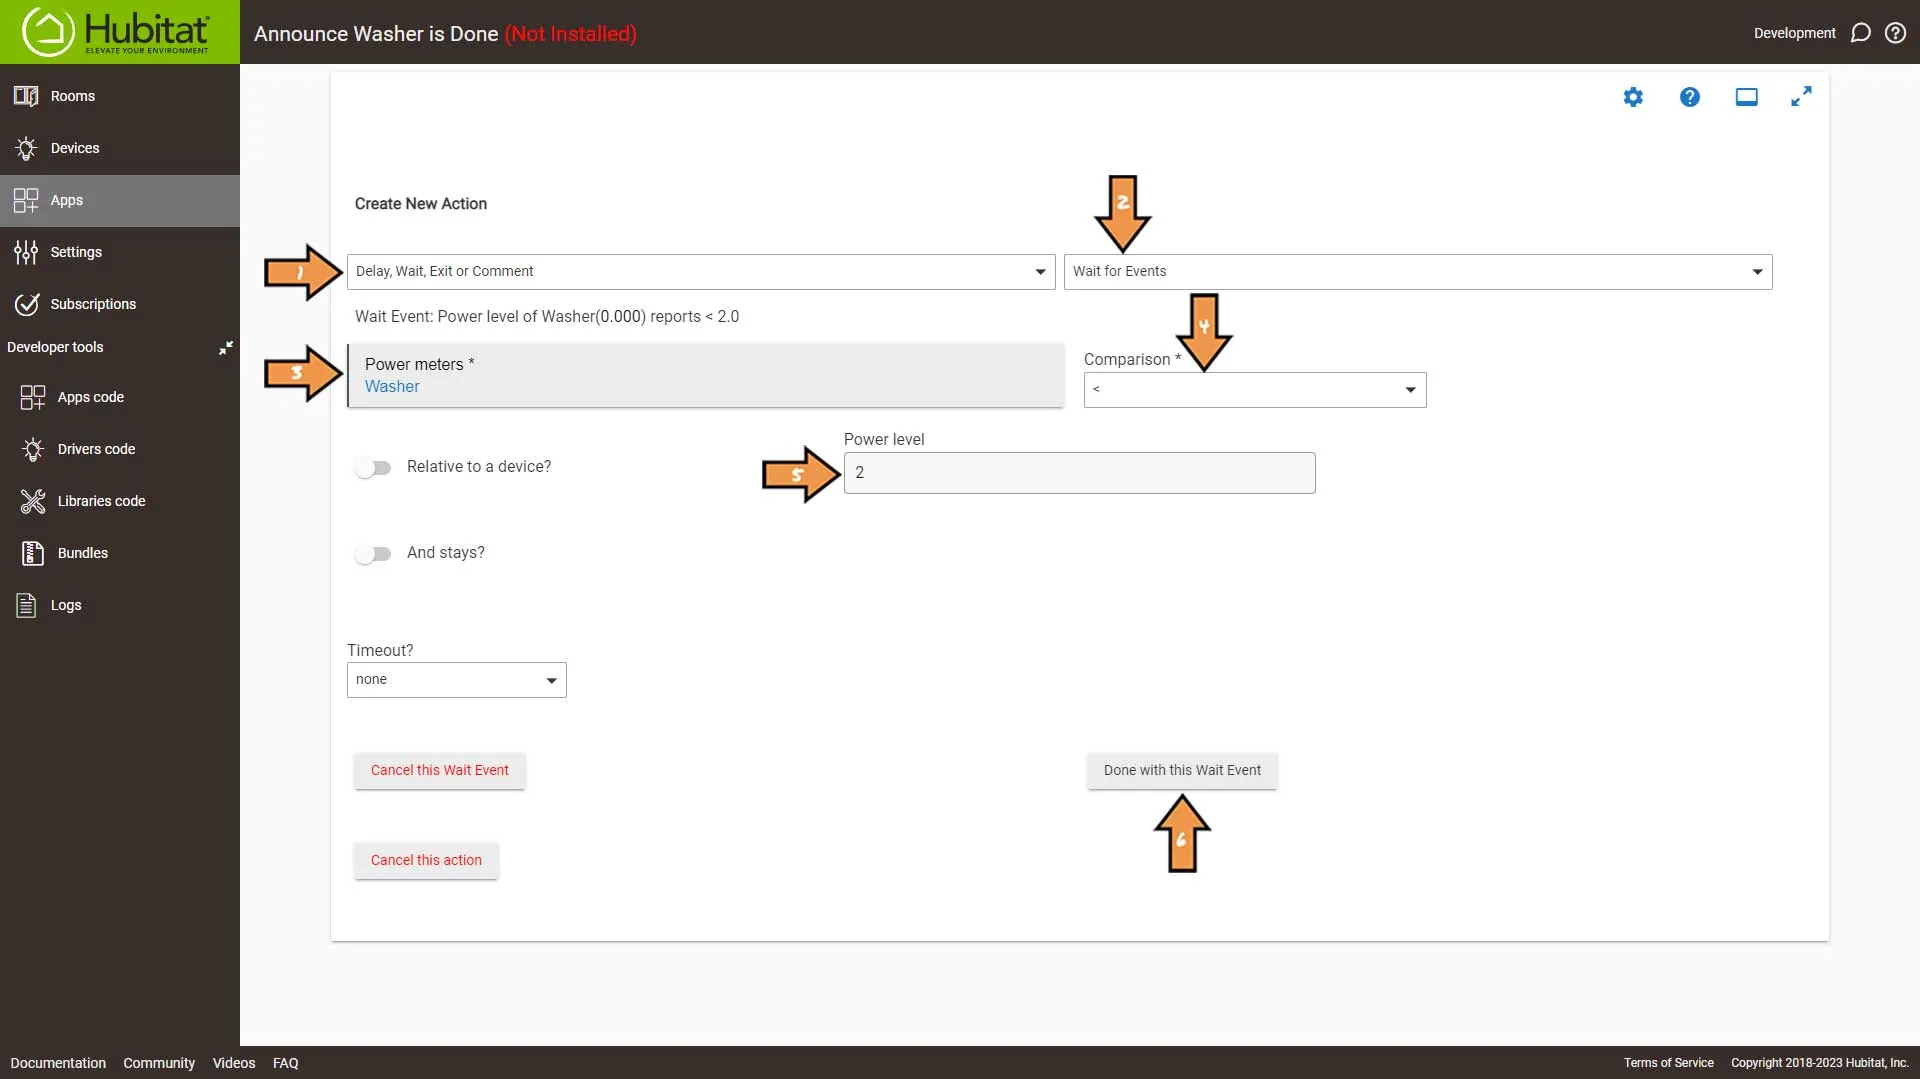
Configure the New Action as follows:
- From the first dropdown, select Delay, Wait, Exit, or Comment
- From the following dropdown, select Wait for Events
- Then select Power meter and select our smart plug
- Set the Comparison to less than
- Set the Power level to 2
- Then, click the Done with this Wait Event button.
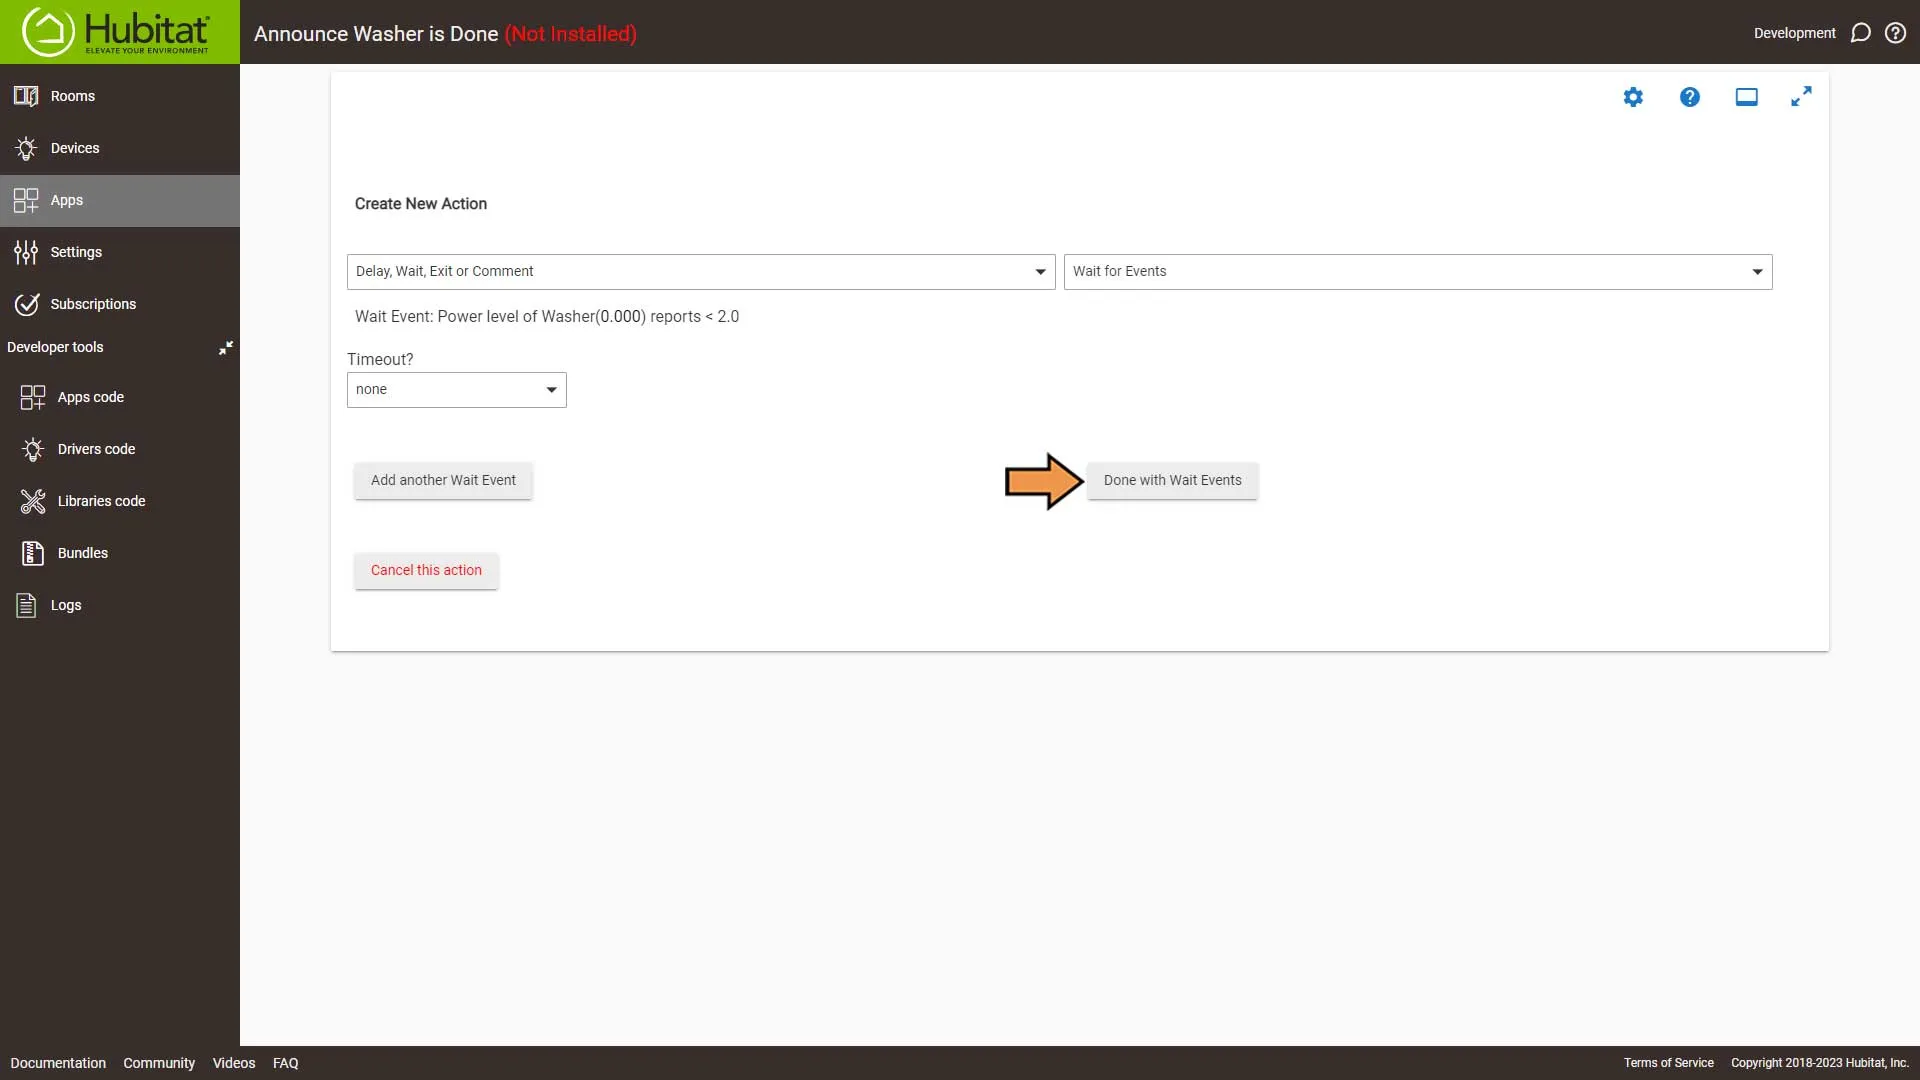
Next, click the Done with Wait Events button.
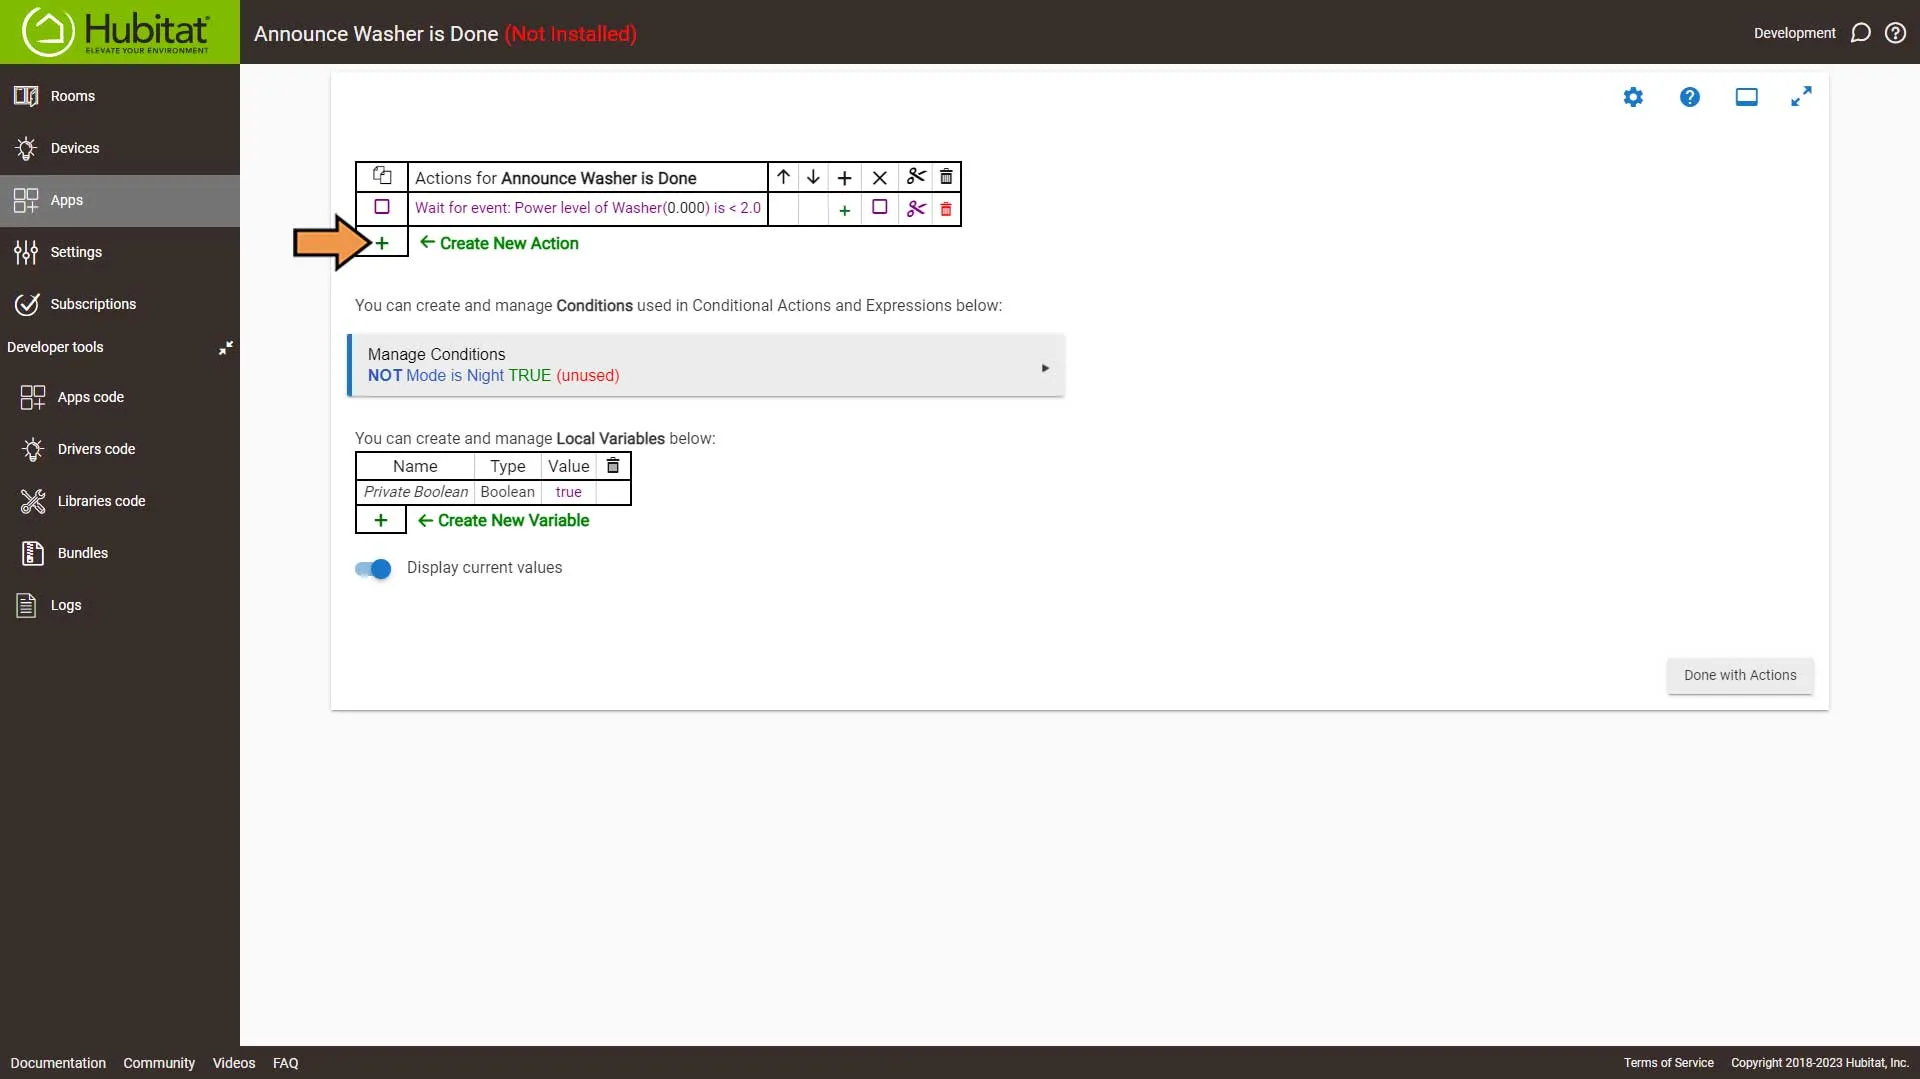
Select the Green Plus Sign to Add New Action.
Configure the New Action as follows:
- From the first dropdown, select Delay, Wait, Exit, or Comment
- From the following dropdown, select Wait for Events
- Then select Elapsed Time from the dropdown and select the time format
- Set the Elapsed time to 1 minute
- Then, click the Done with this Wait Event button.
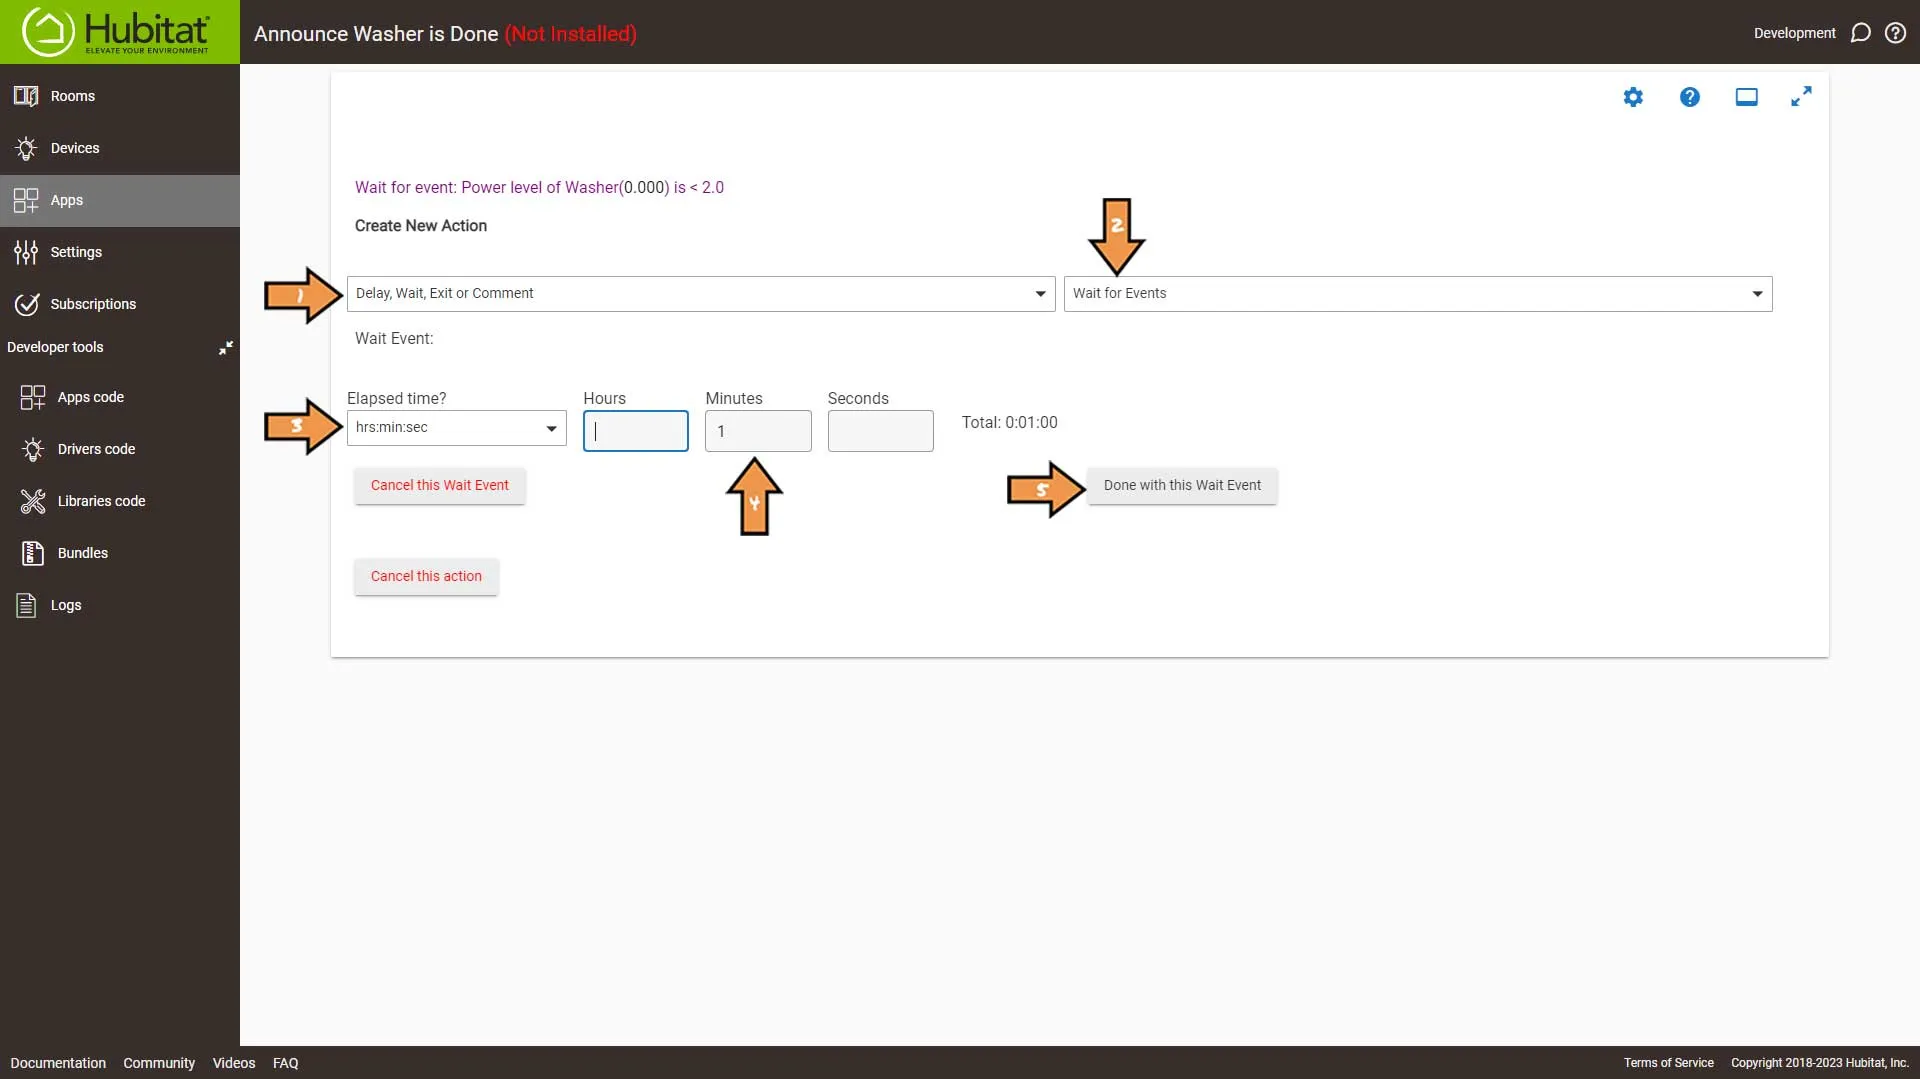
Select the Green Plus Sign to Add New Action.
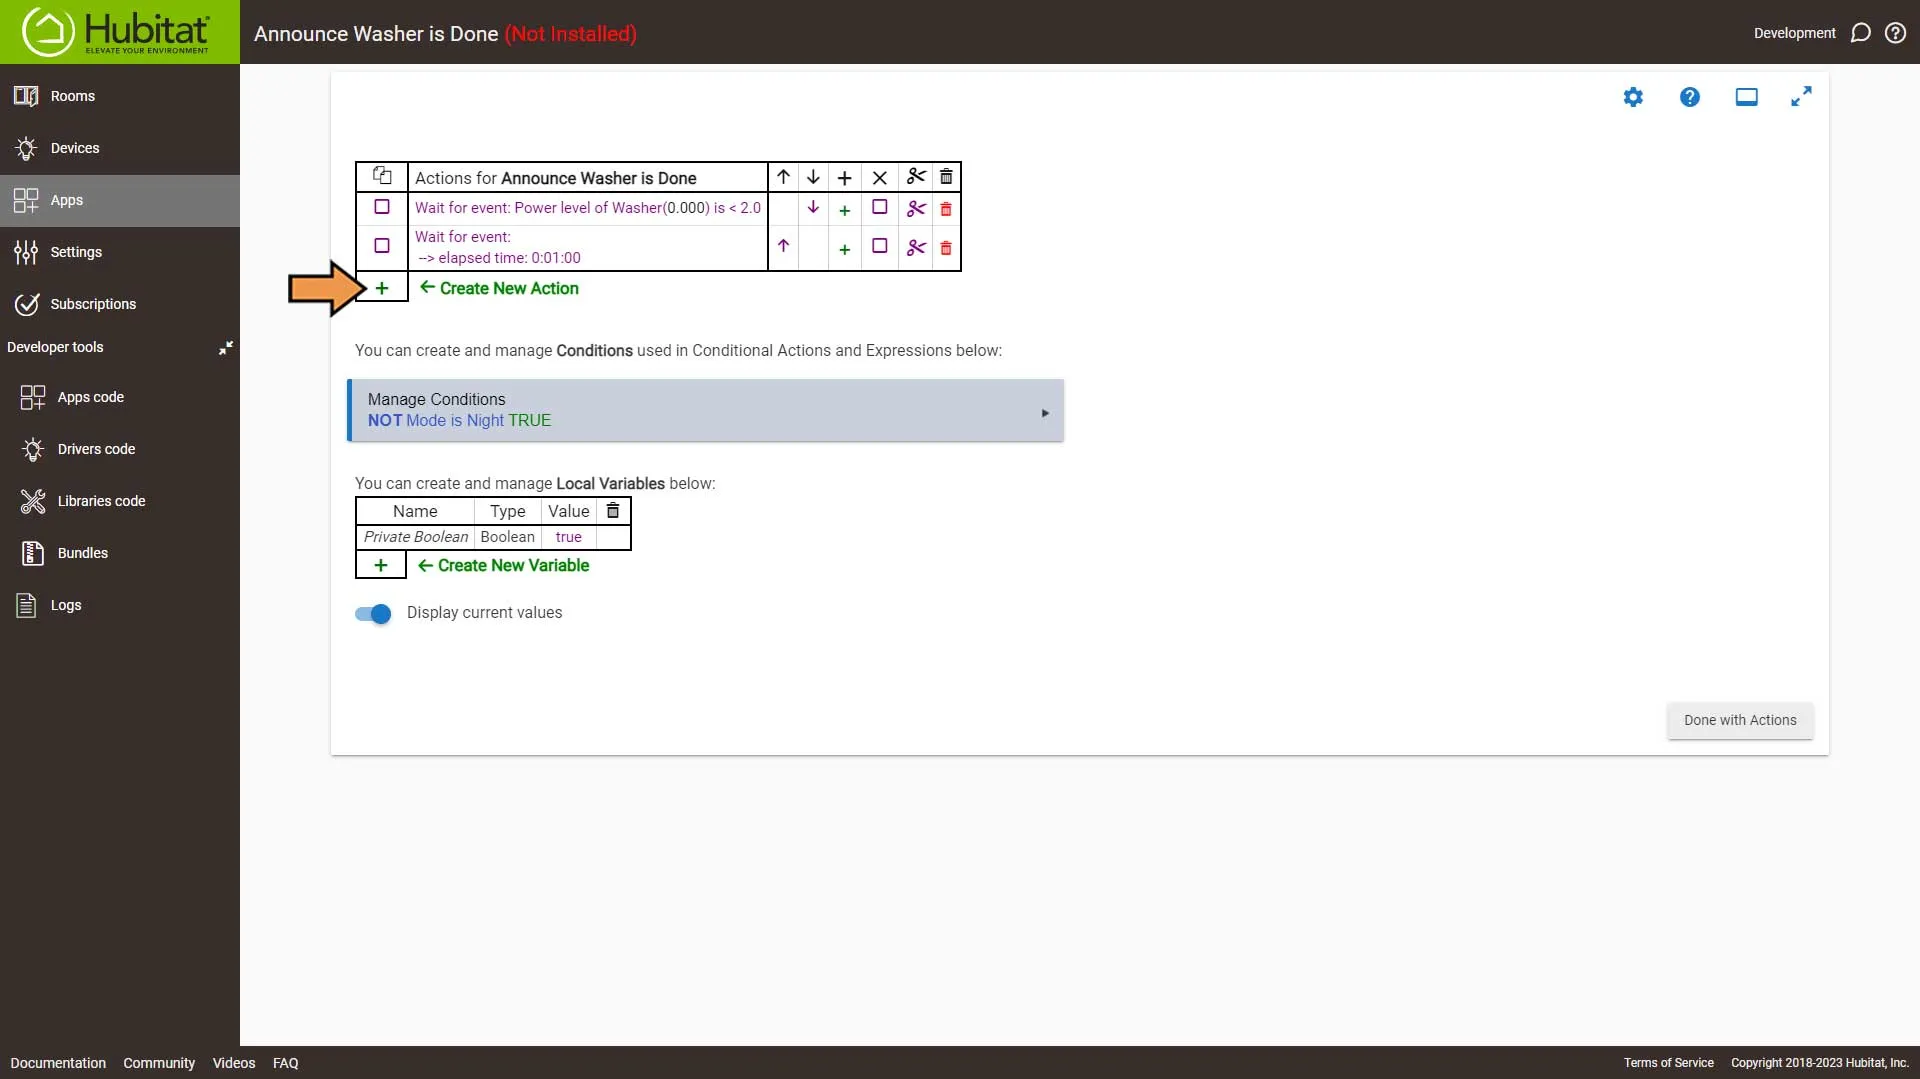
Configure the New Action as follows:
- From the first dropdown, select Conditional Actions
- Then, select the If Expression THEN from the list in the following dropdown.
- Select the condition we created earlier
- Then, click the Done with IF Expression THEN button.
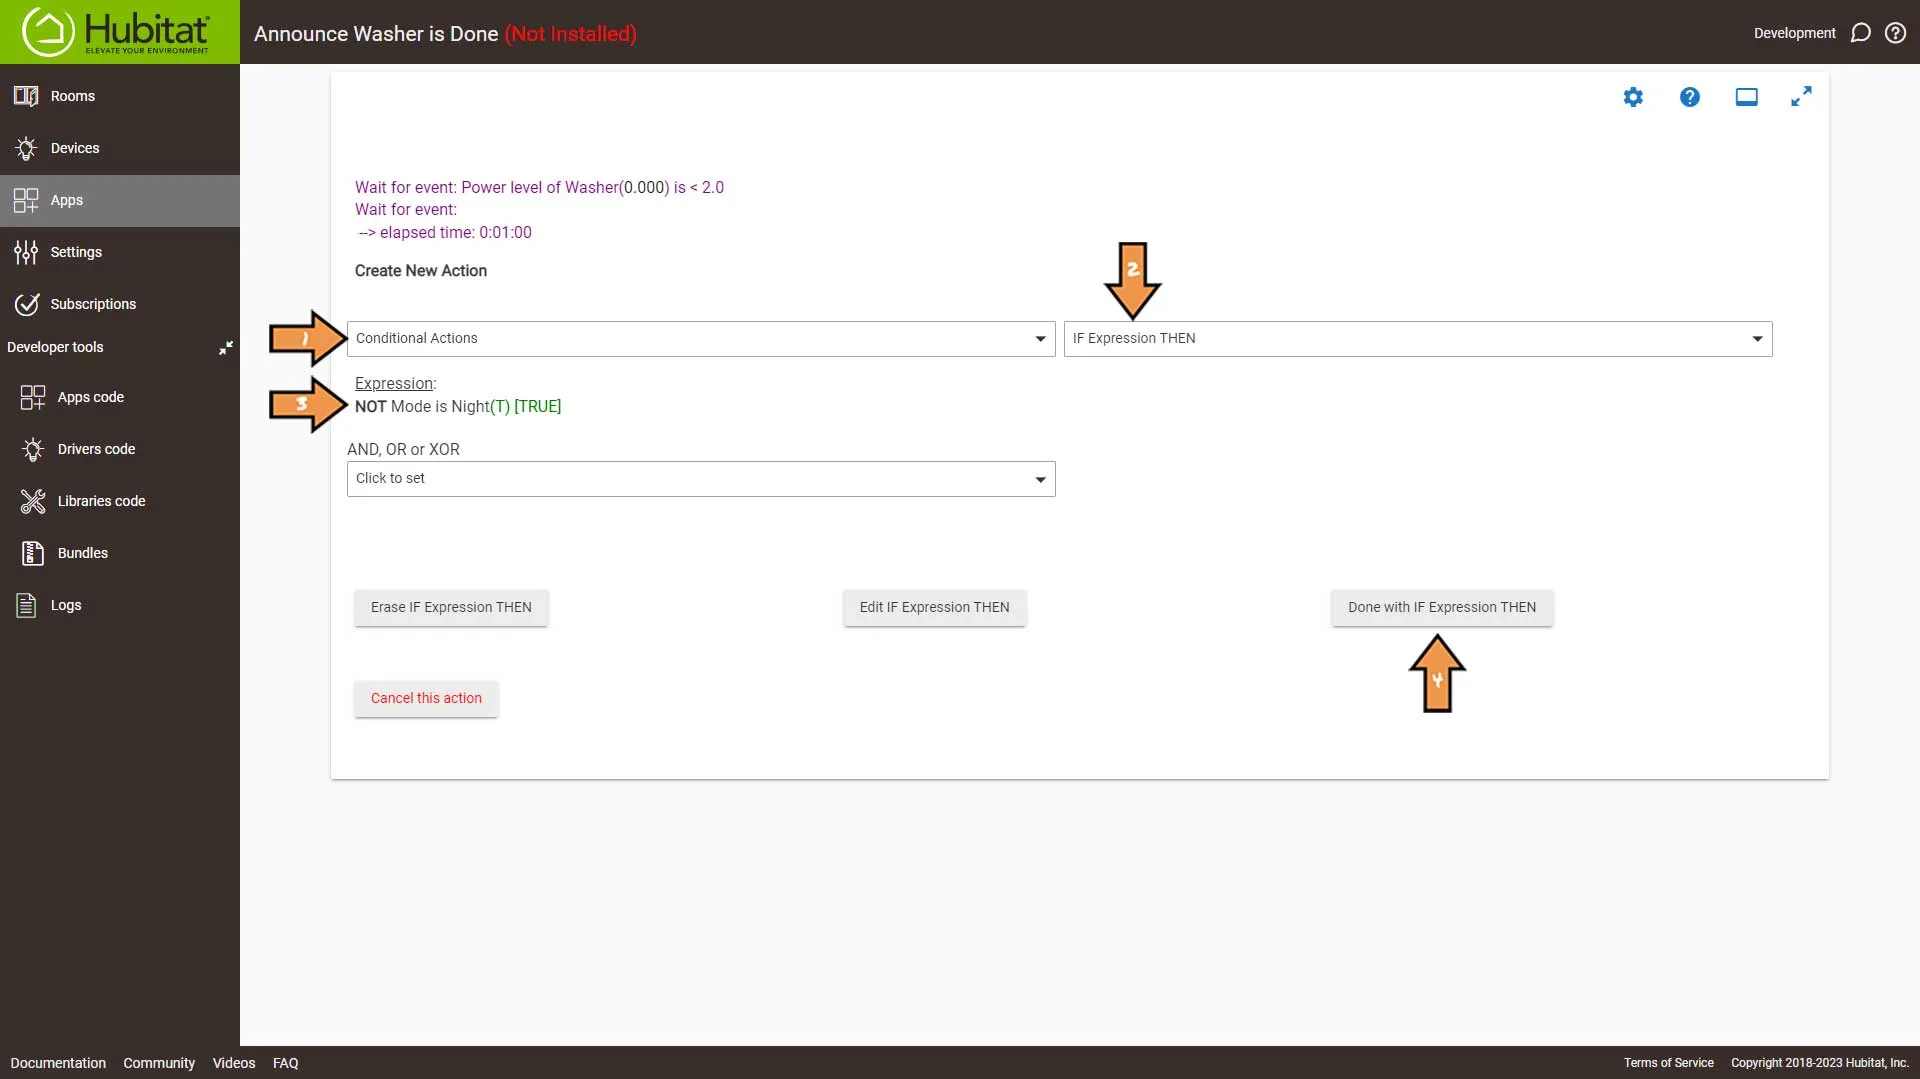
Select the Green Plus Sign to Add New Action.
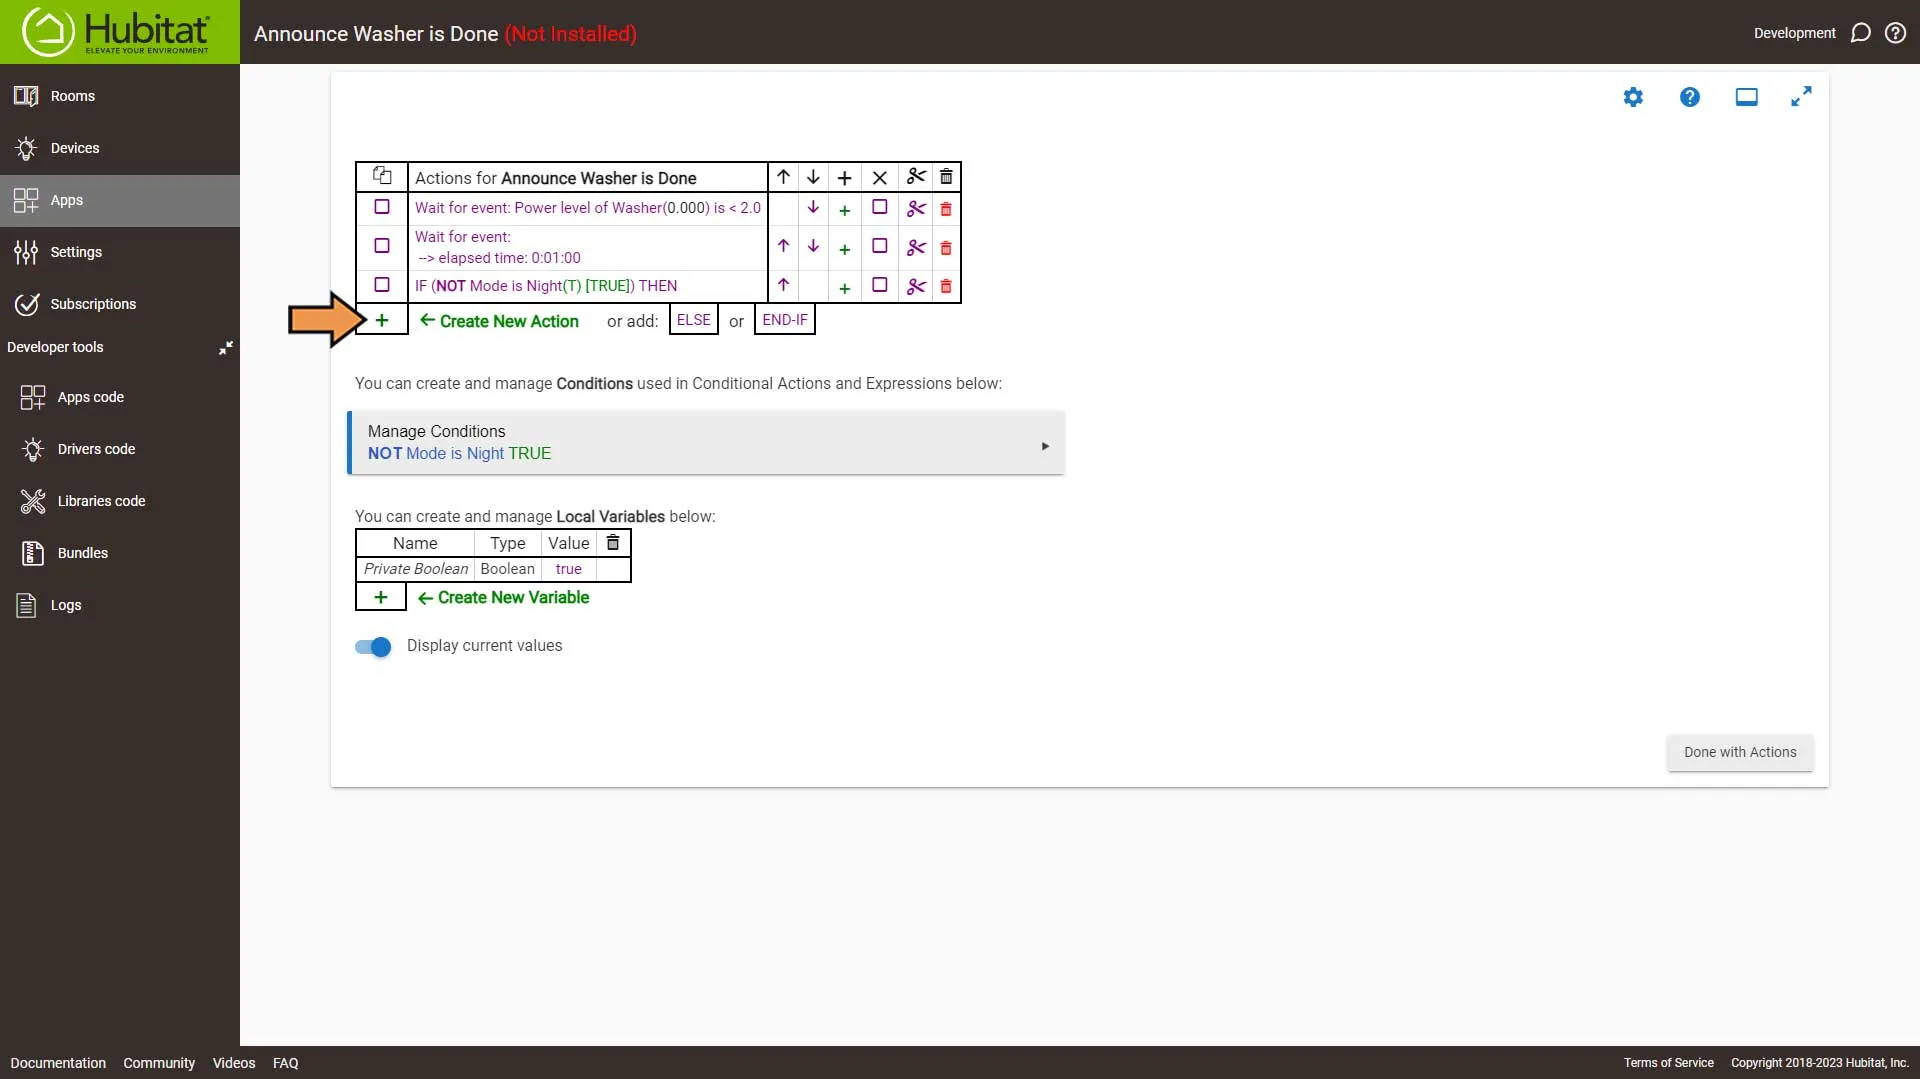
On the Create New Action screen we have a decision to make.
Option two:
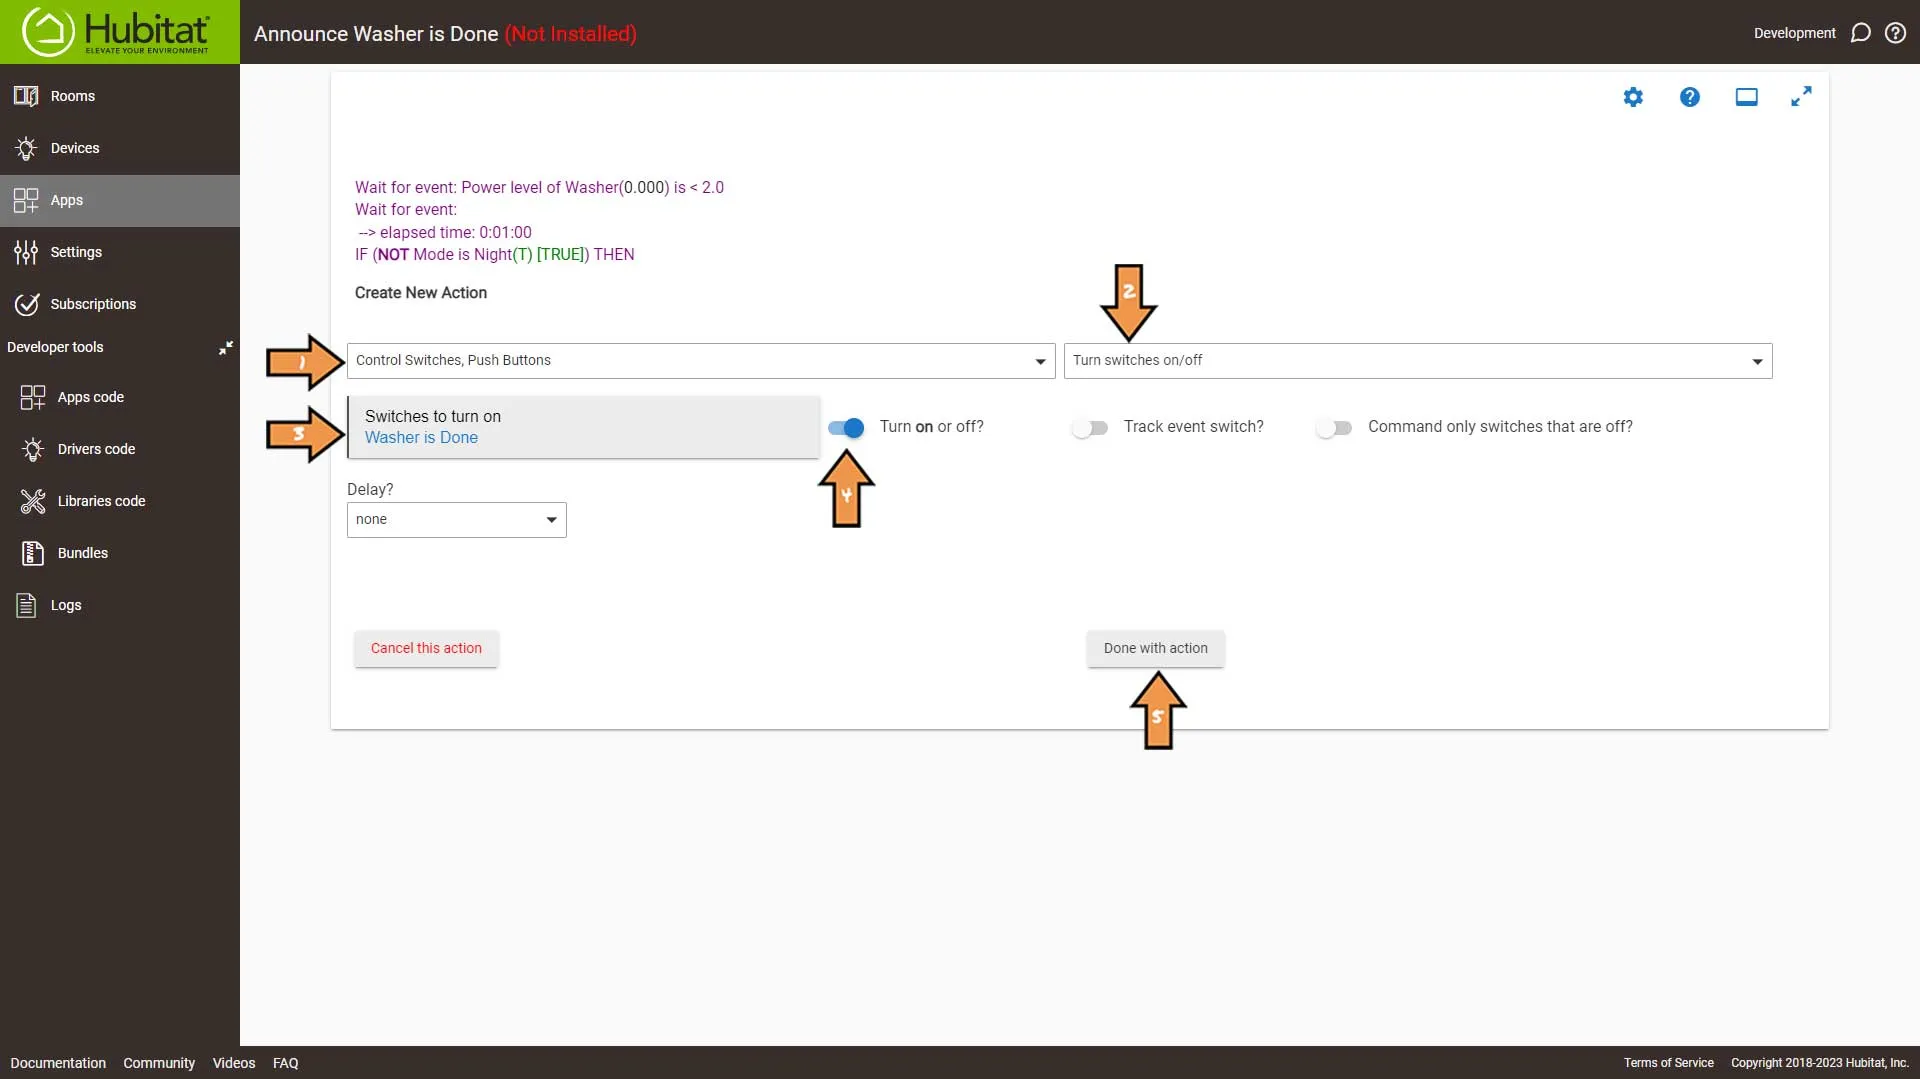
Configure the New Action as follows:
- From the first dropdown, select Control Switches, Push Buttons
- Then, select the Turn switches on/off from the list in the following dropdown.
- Select the virtual switch we create earlier.
- Make sure it’s set to on.
- Then, click the Done with action button.
Option Three:
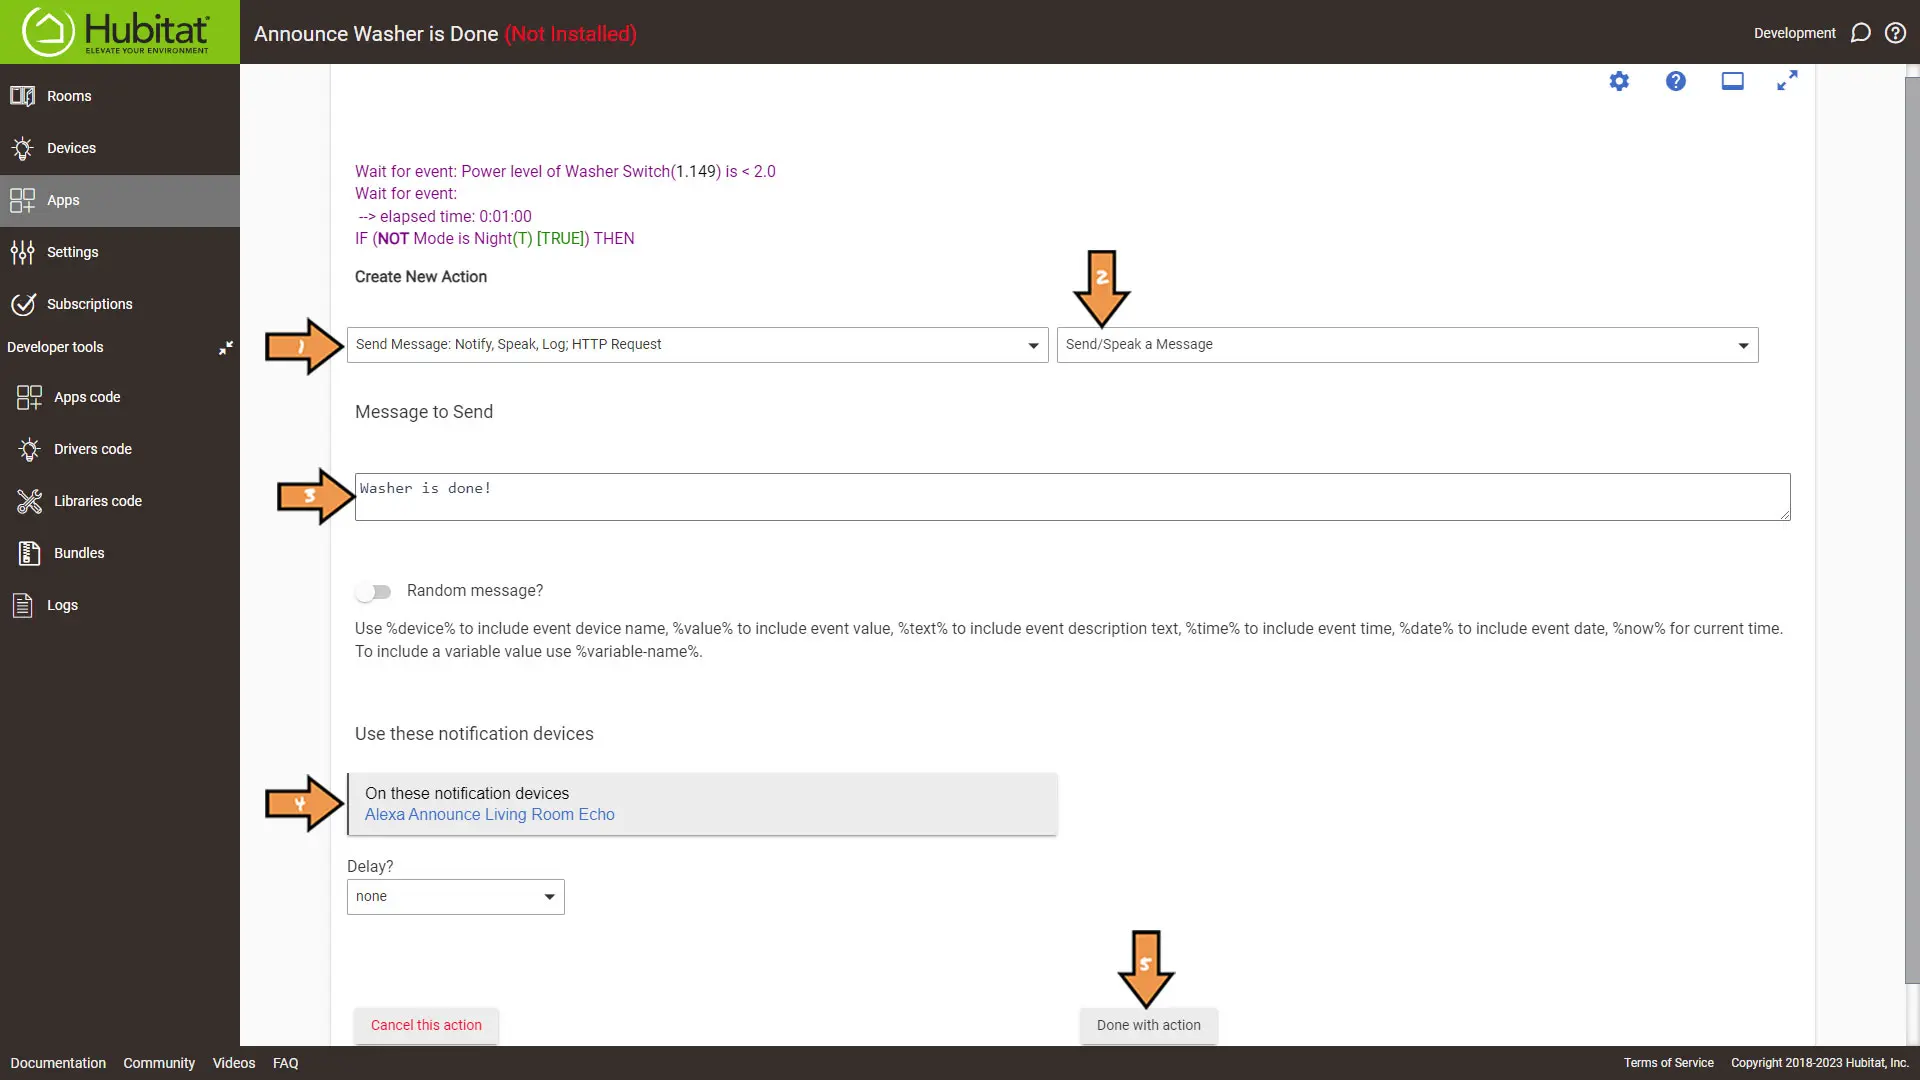
Configure the New Action as follows:
- Select Send Message: Notify, Speak, Log, HTTP Request from the list for the first dropdown.
- Then Select Send/Speak a message.
- Type your message.
- Select your MQTT Notification device.
- Then, click the Done with action button.
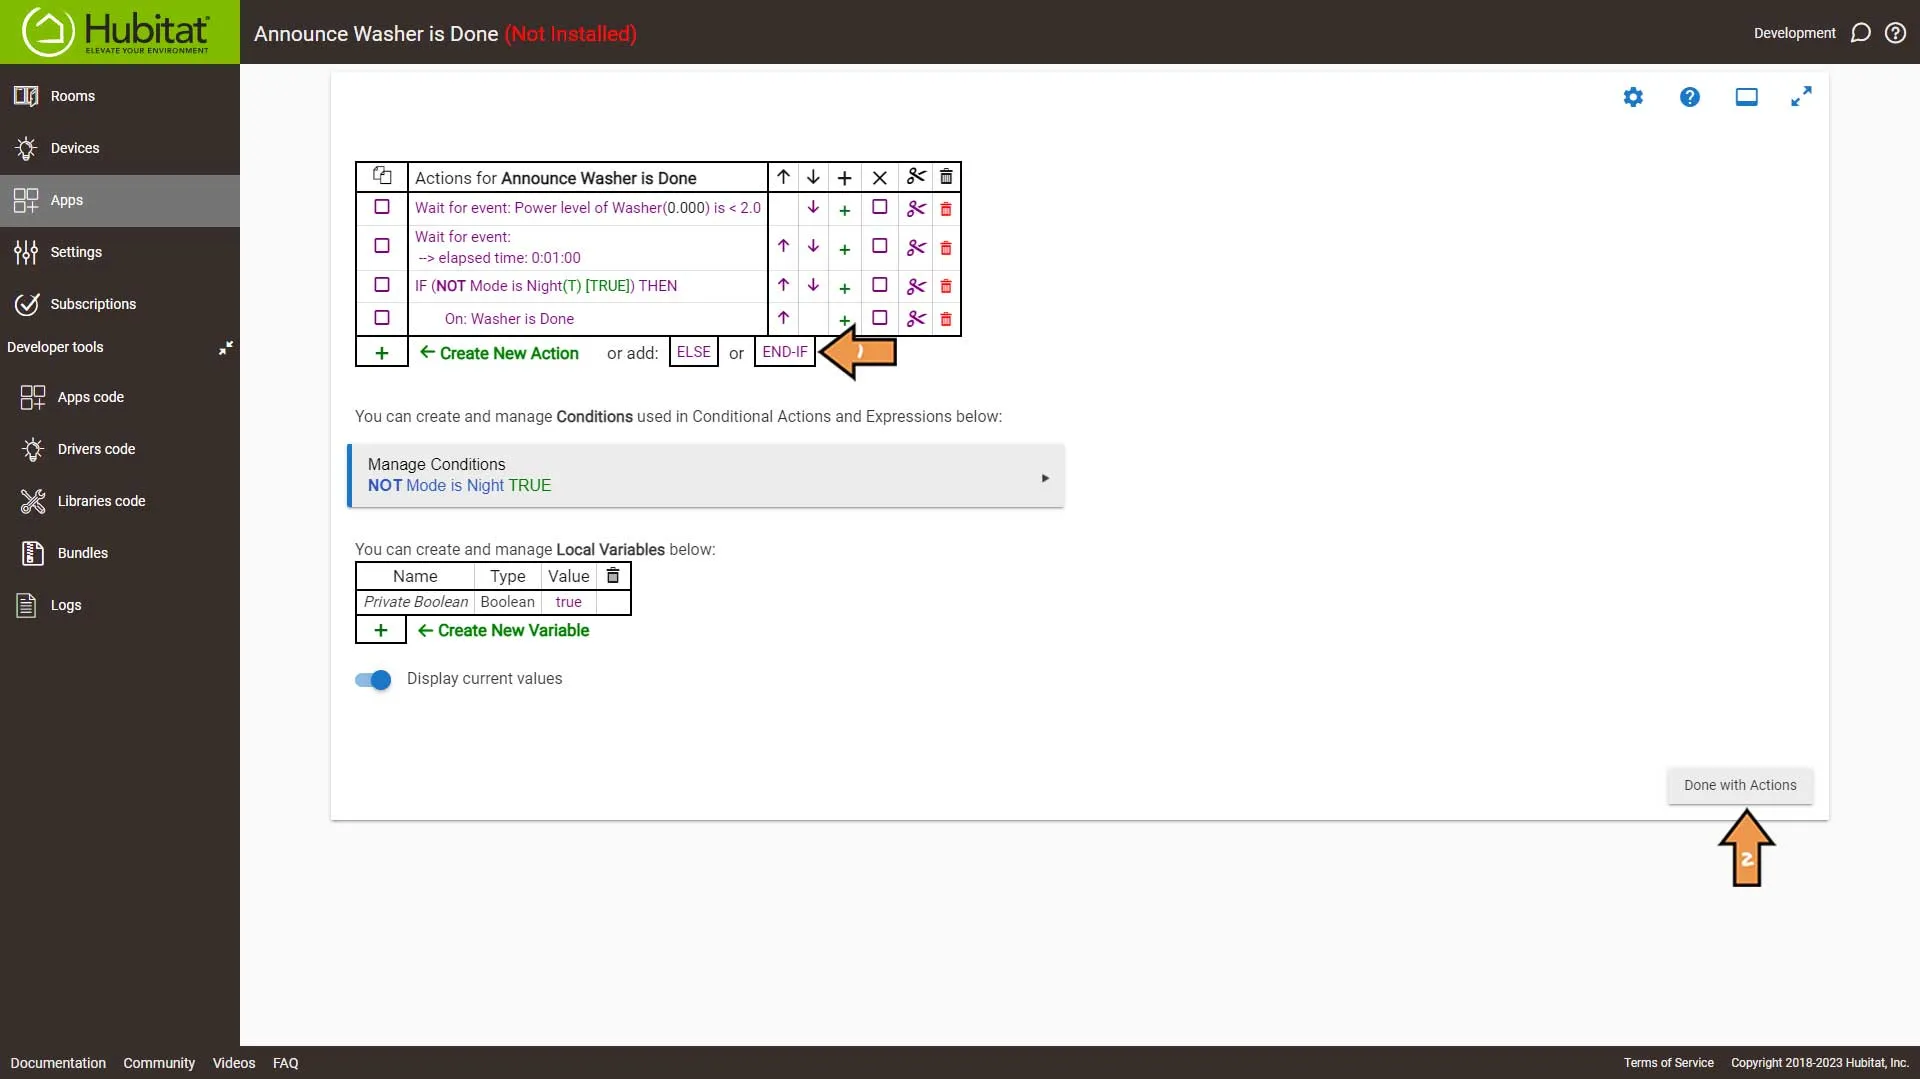
Click the END-IF button, then click the Done with Actions button.
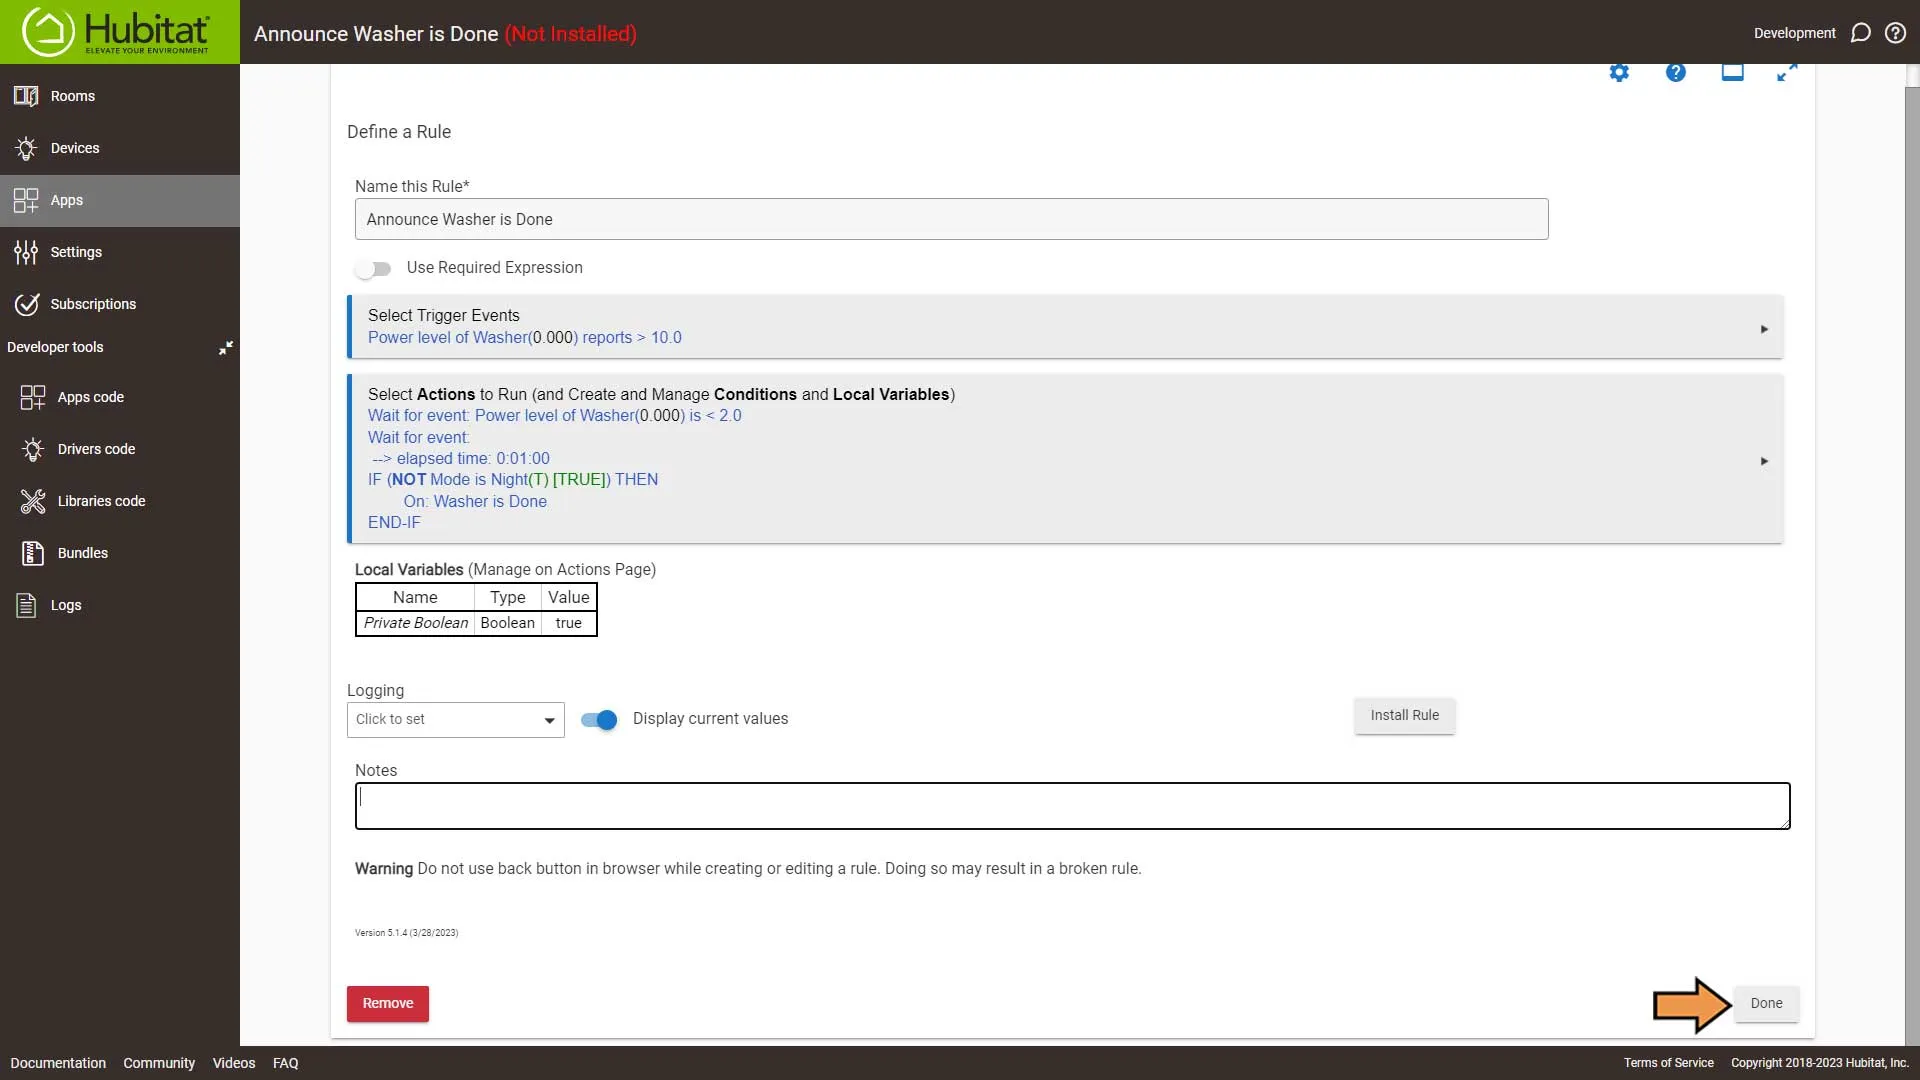
Click the Done button to complete the automation.
Success: That’s It! Now move on to the Amazon Alexa Tab if your are using Option Two
Home Assistant
Important: This automation requires Alexa Speaks Integration.
Setting Up the Automation
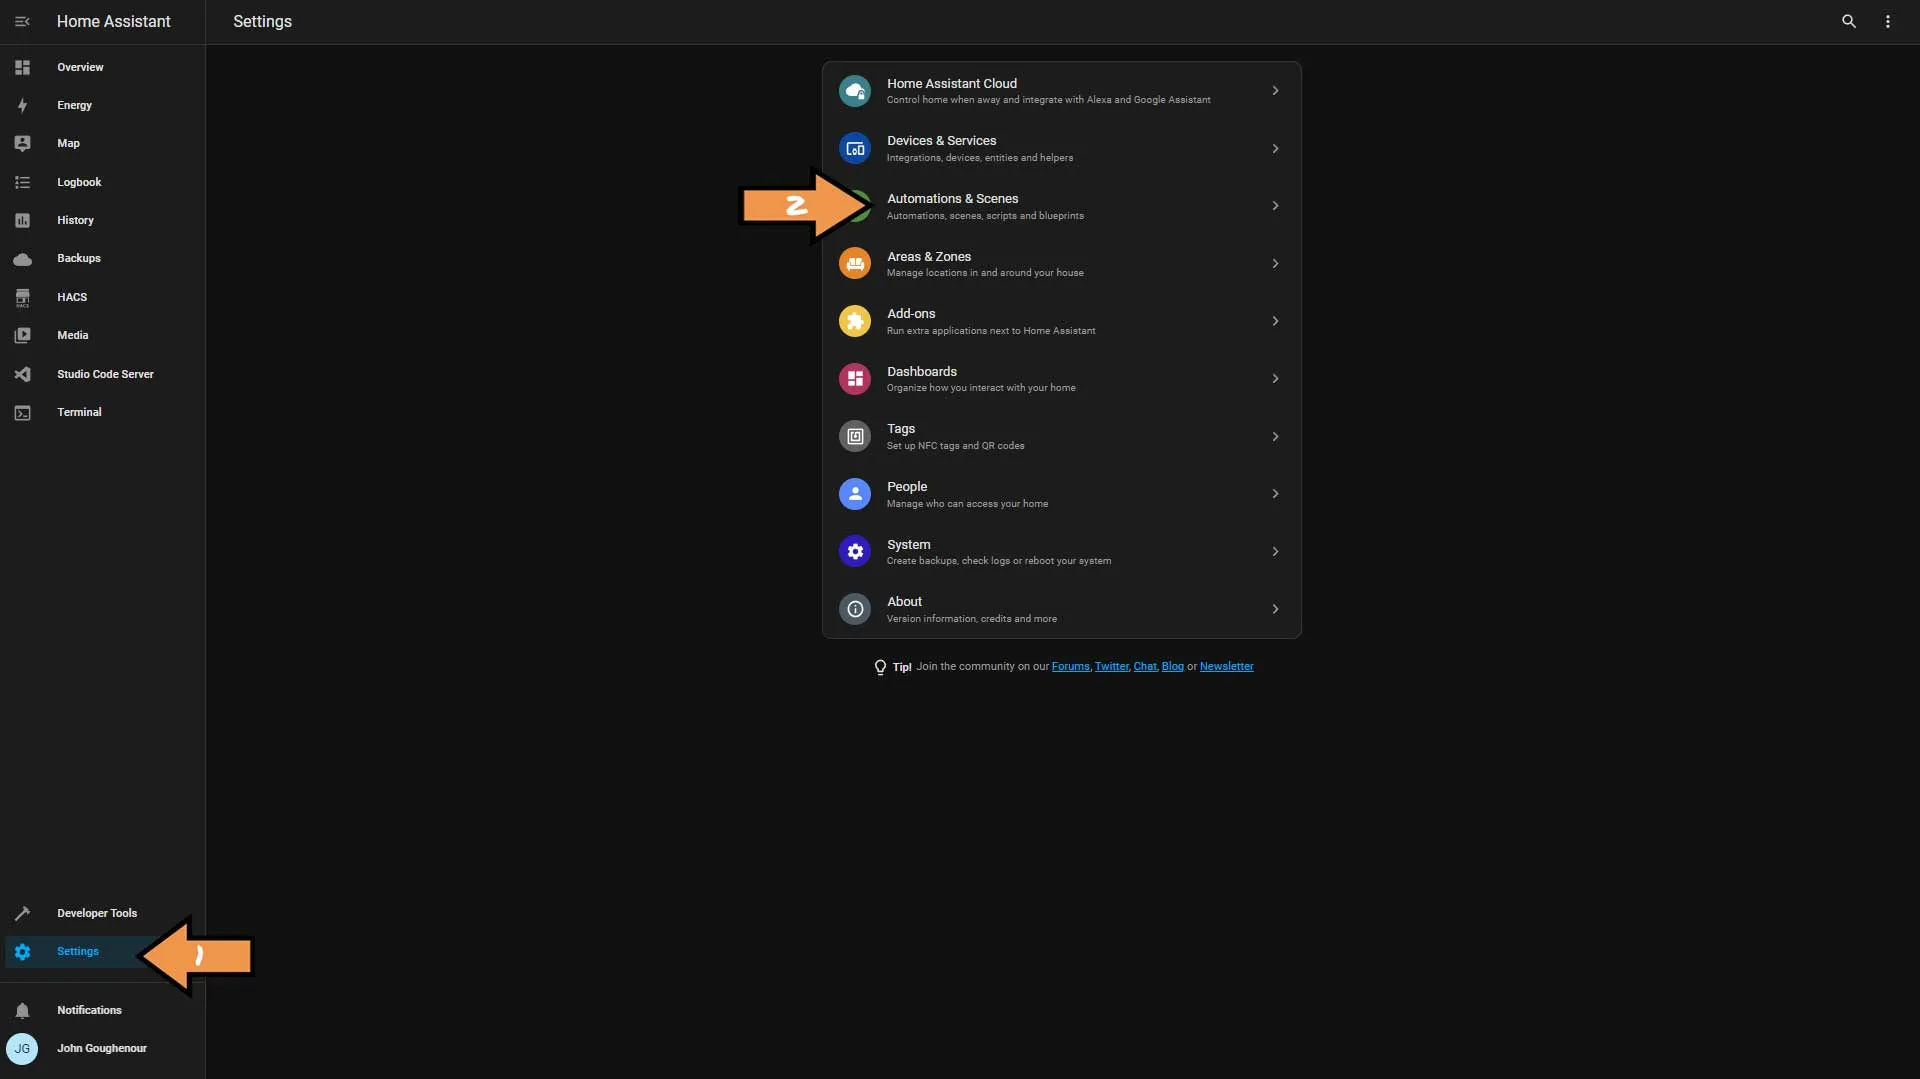
First, we need to go to Settings and Automations & Scenes.
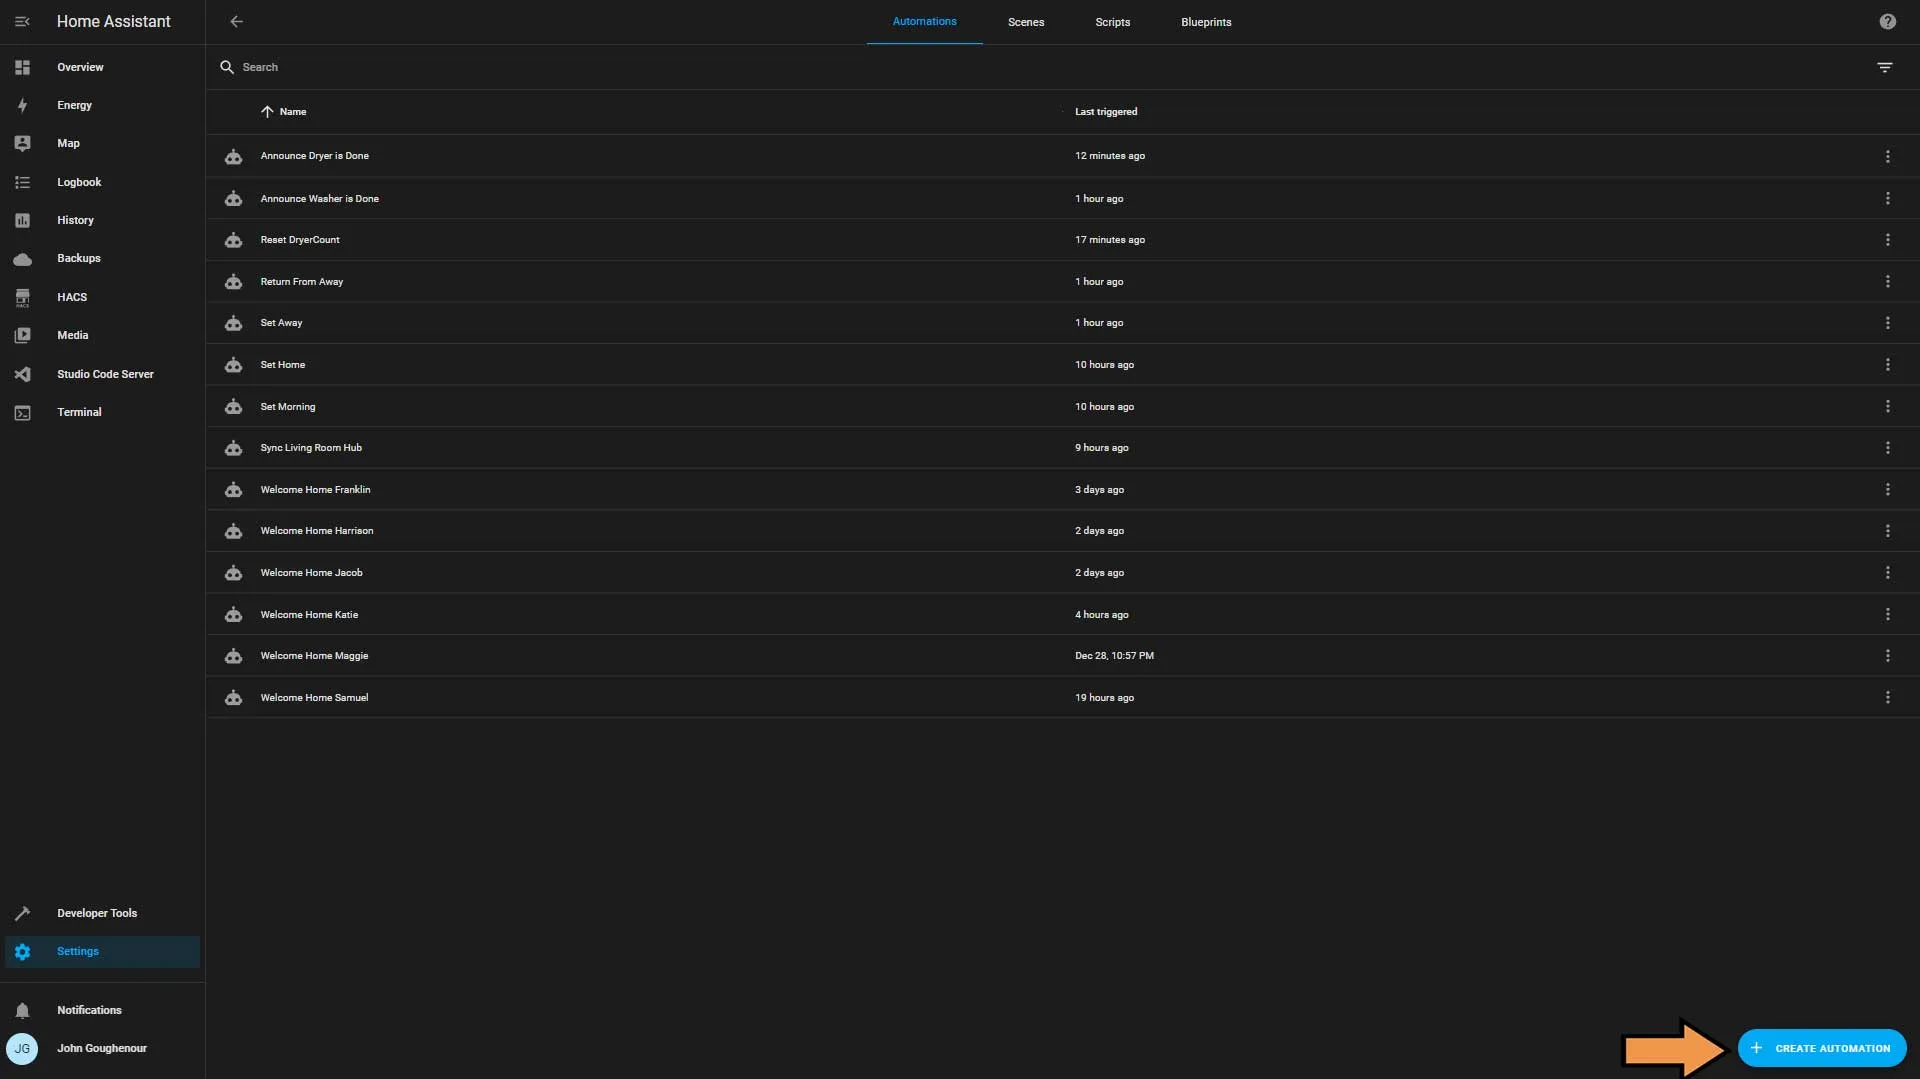
Click the blue Create Automation button.
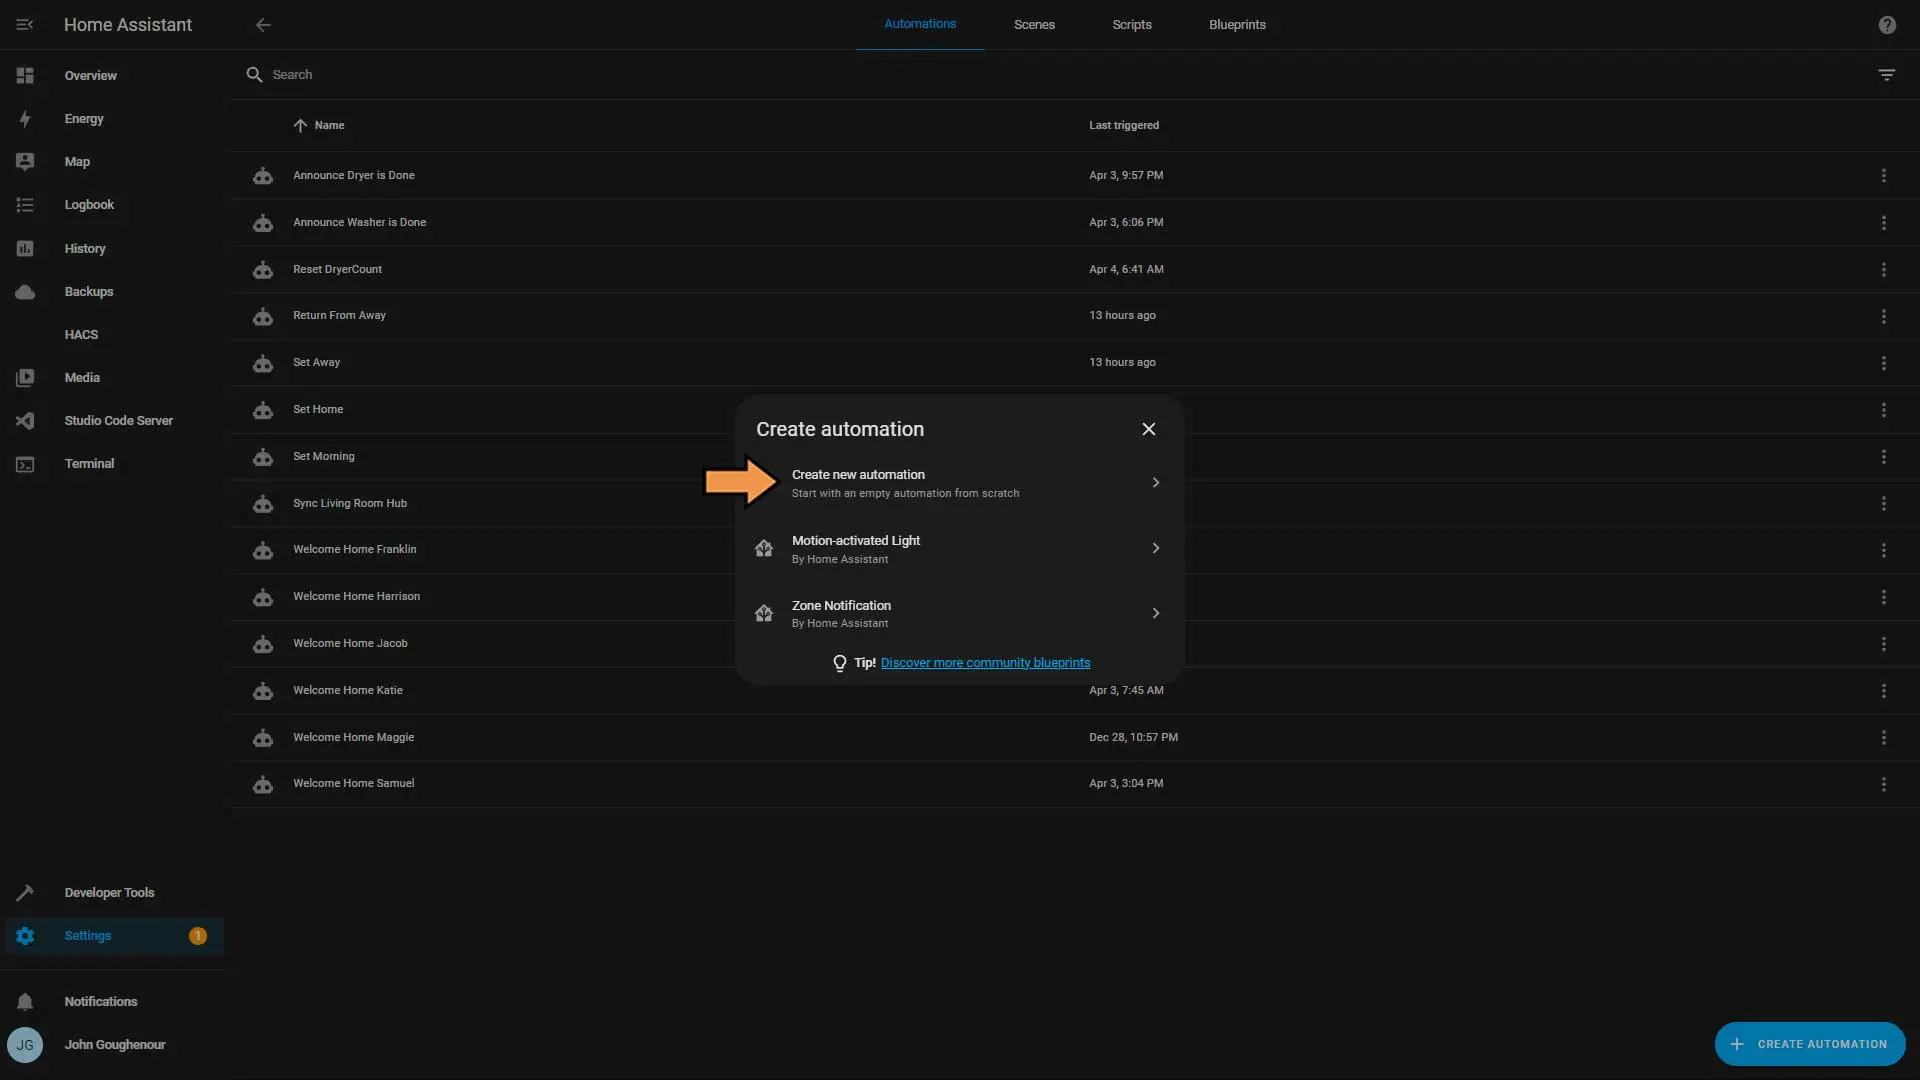
Choose Create new automation.
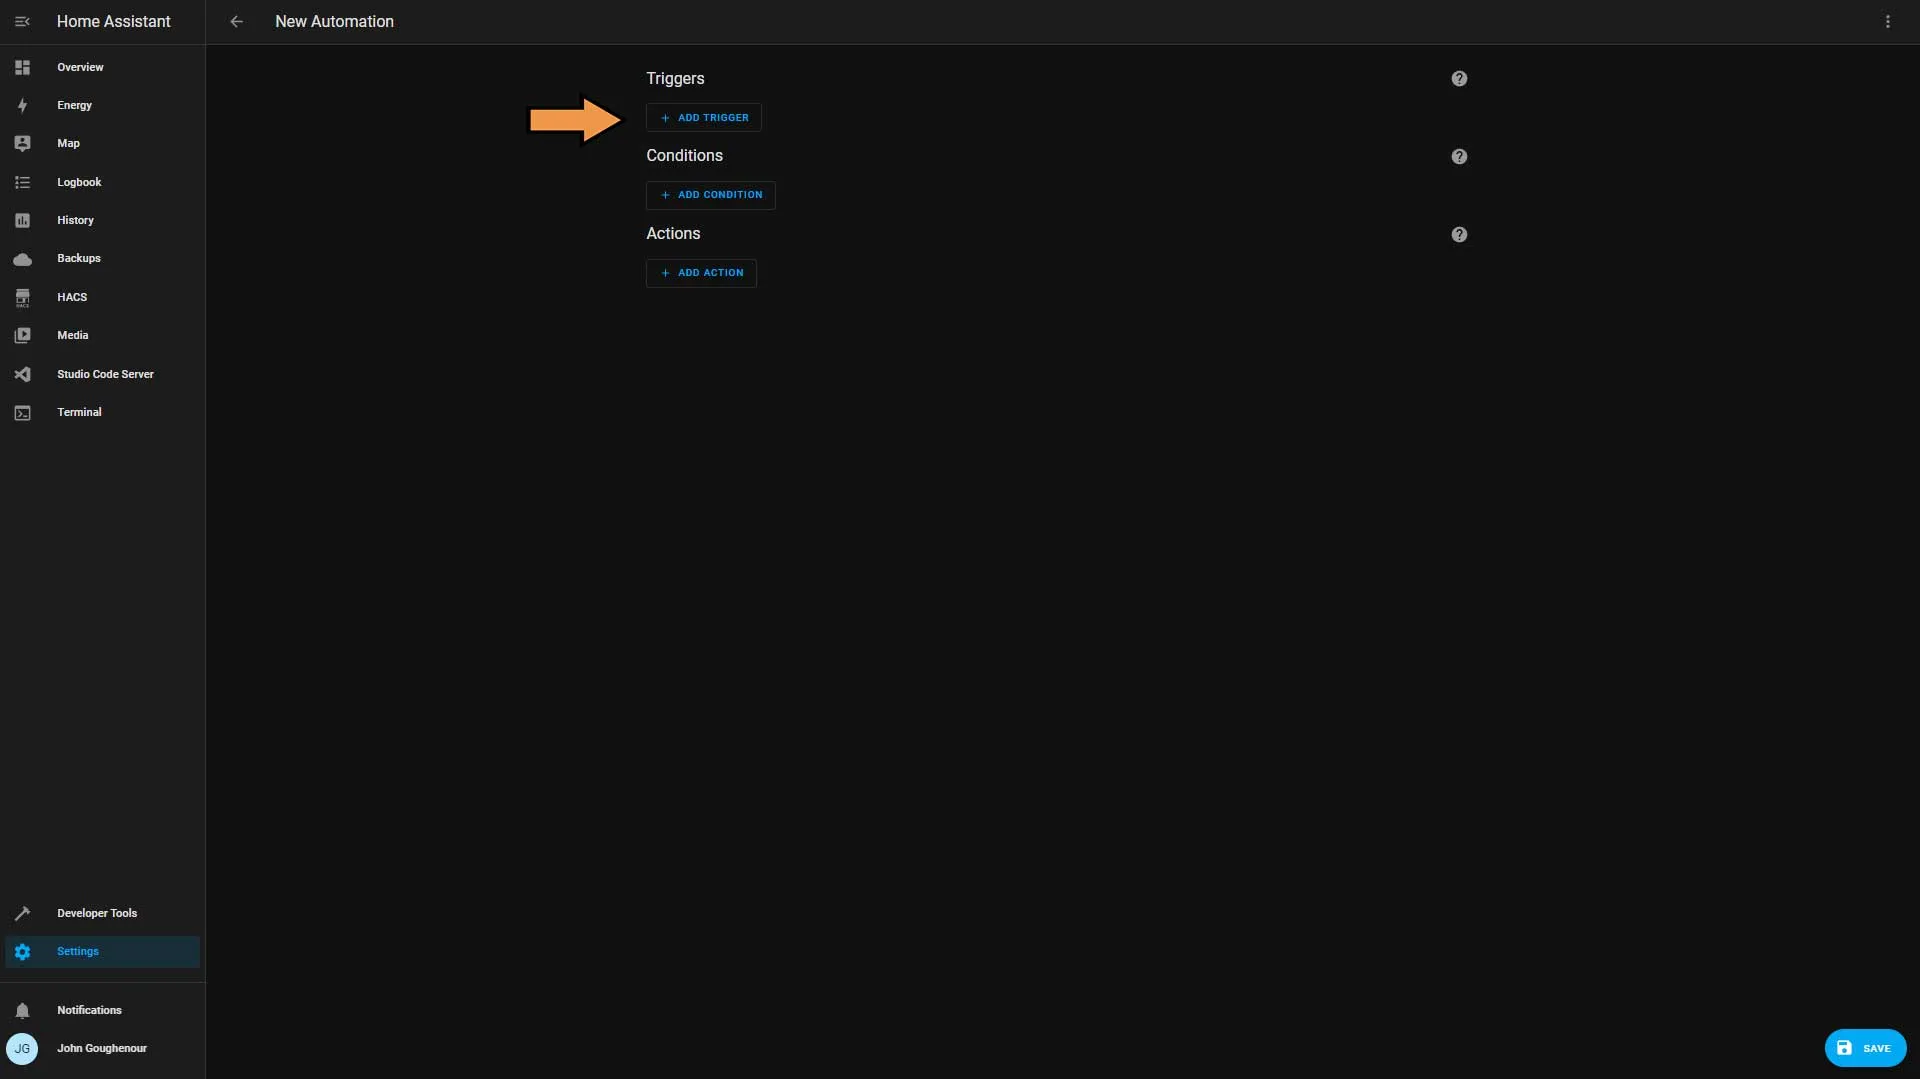
Click Add Trigger.
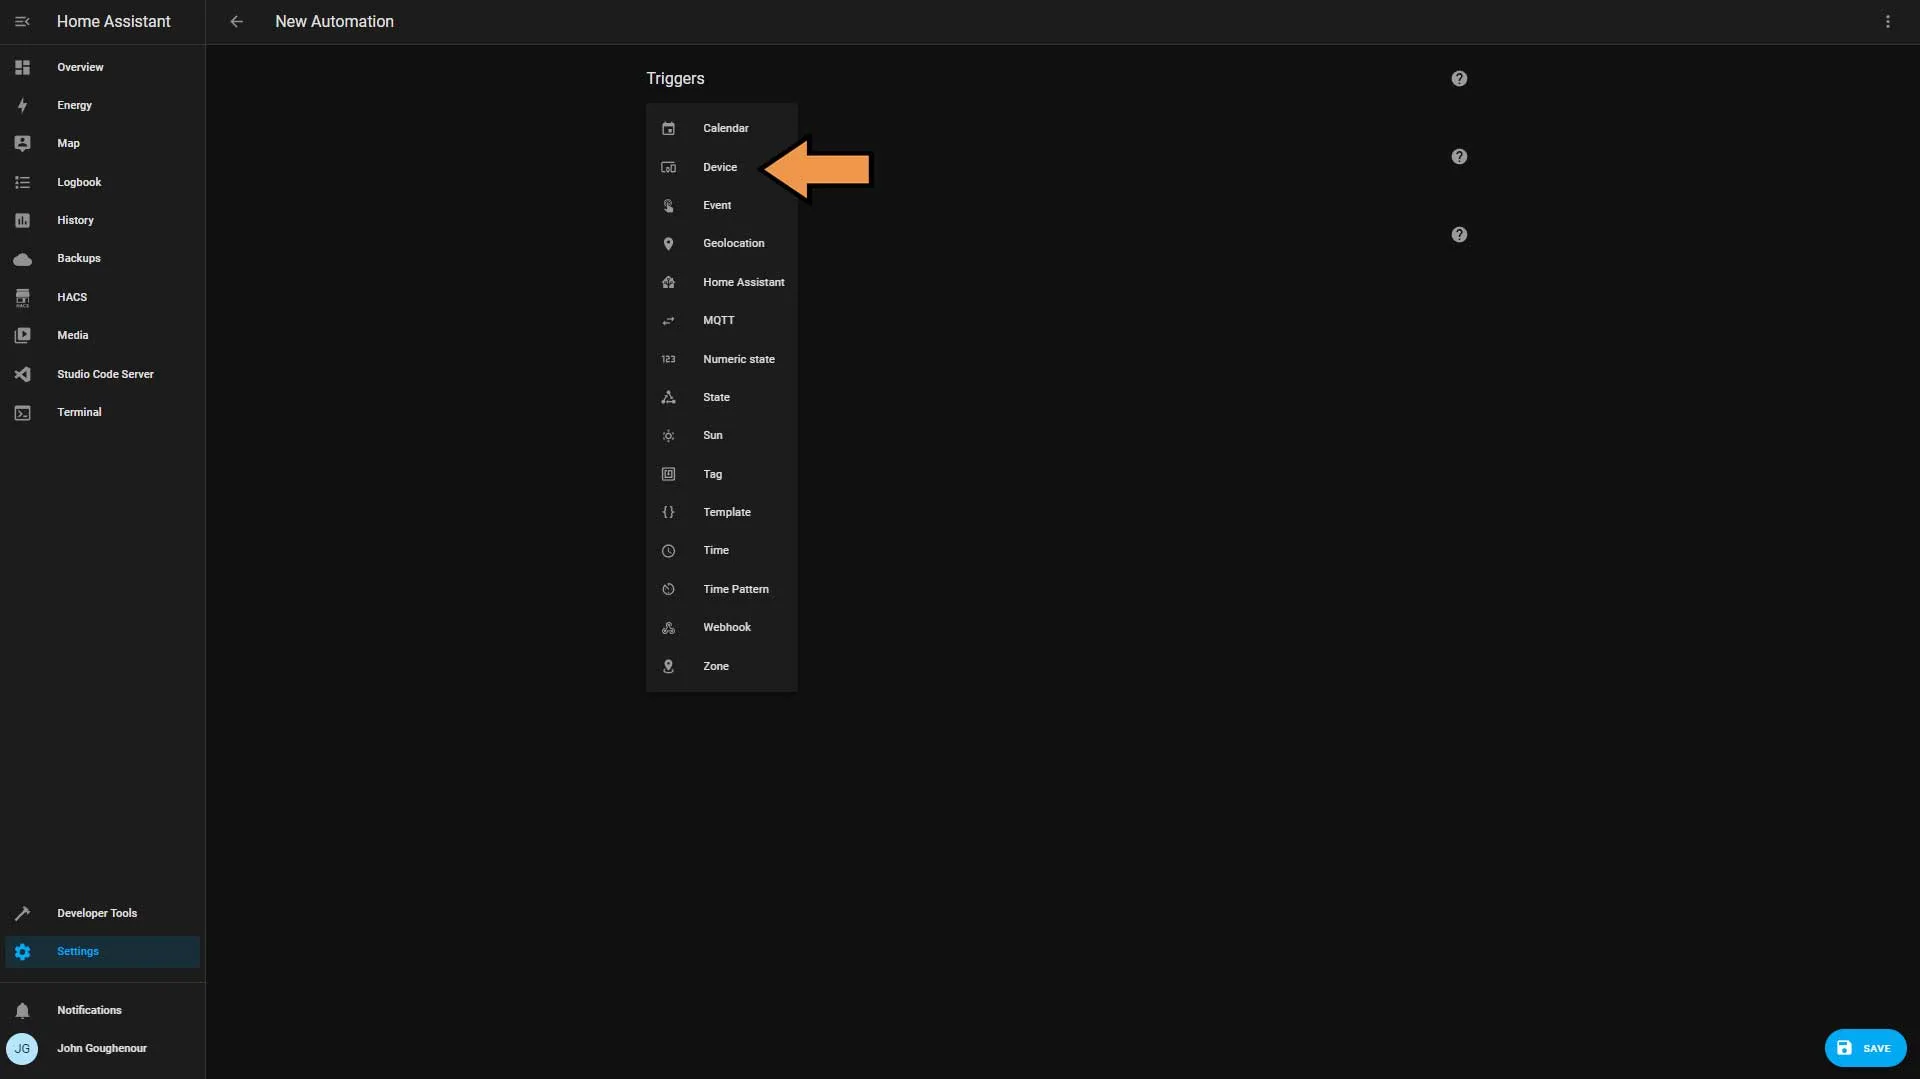
From the list, select Device.
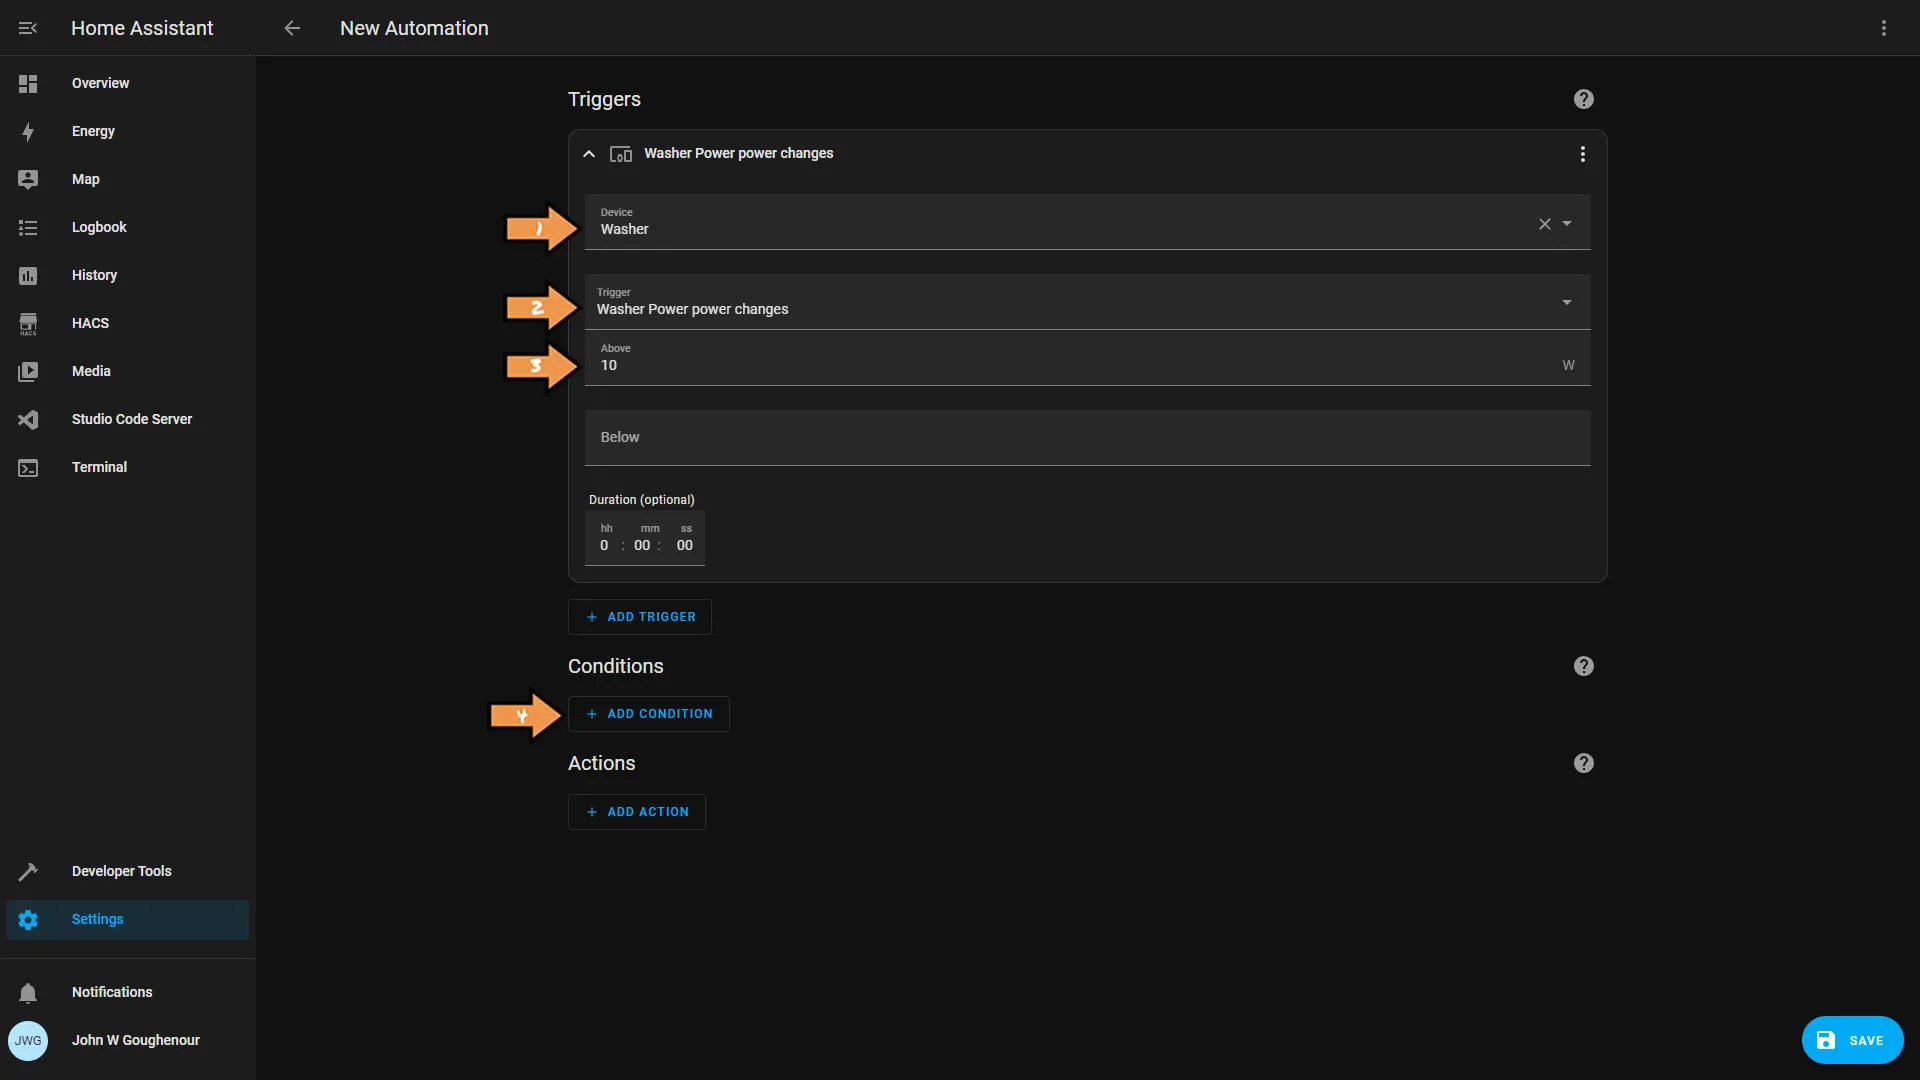
Select the smart plug and set the trigger to power changes. Then, set the value to above ten, and click the Add Condition button.
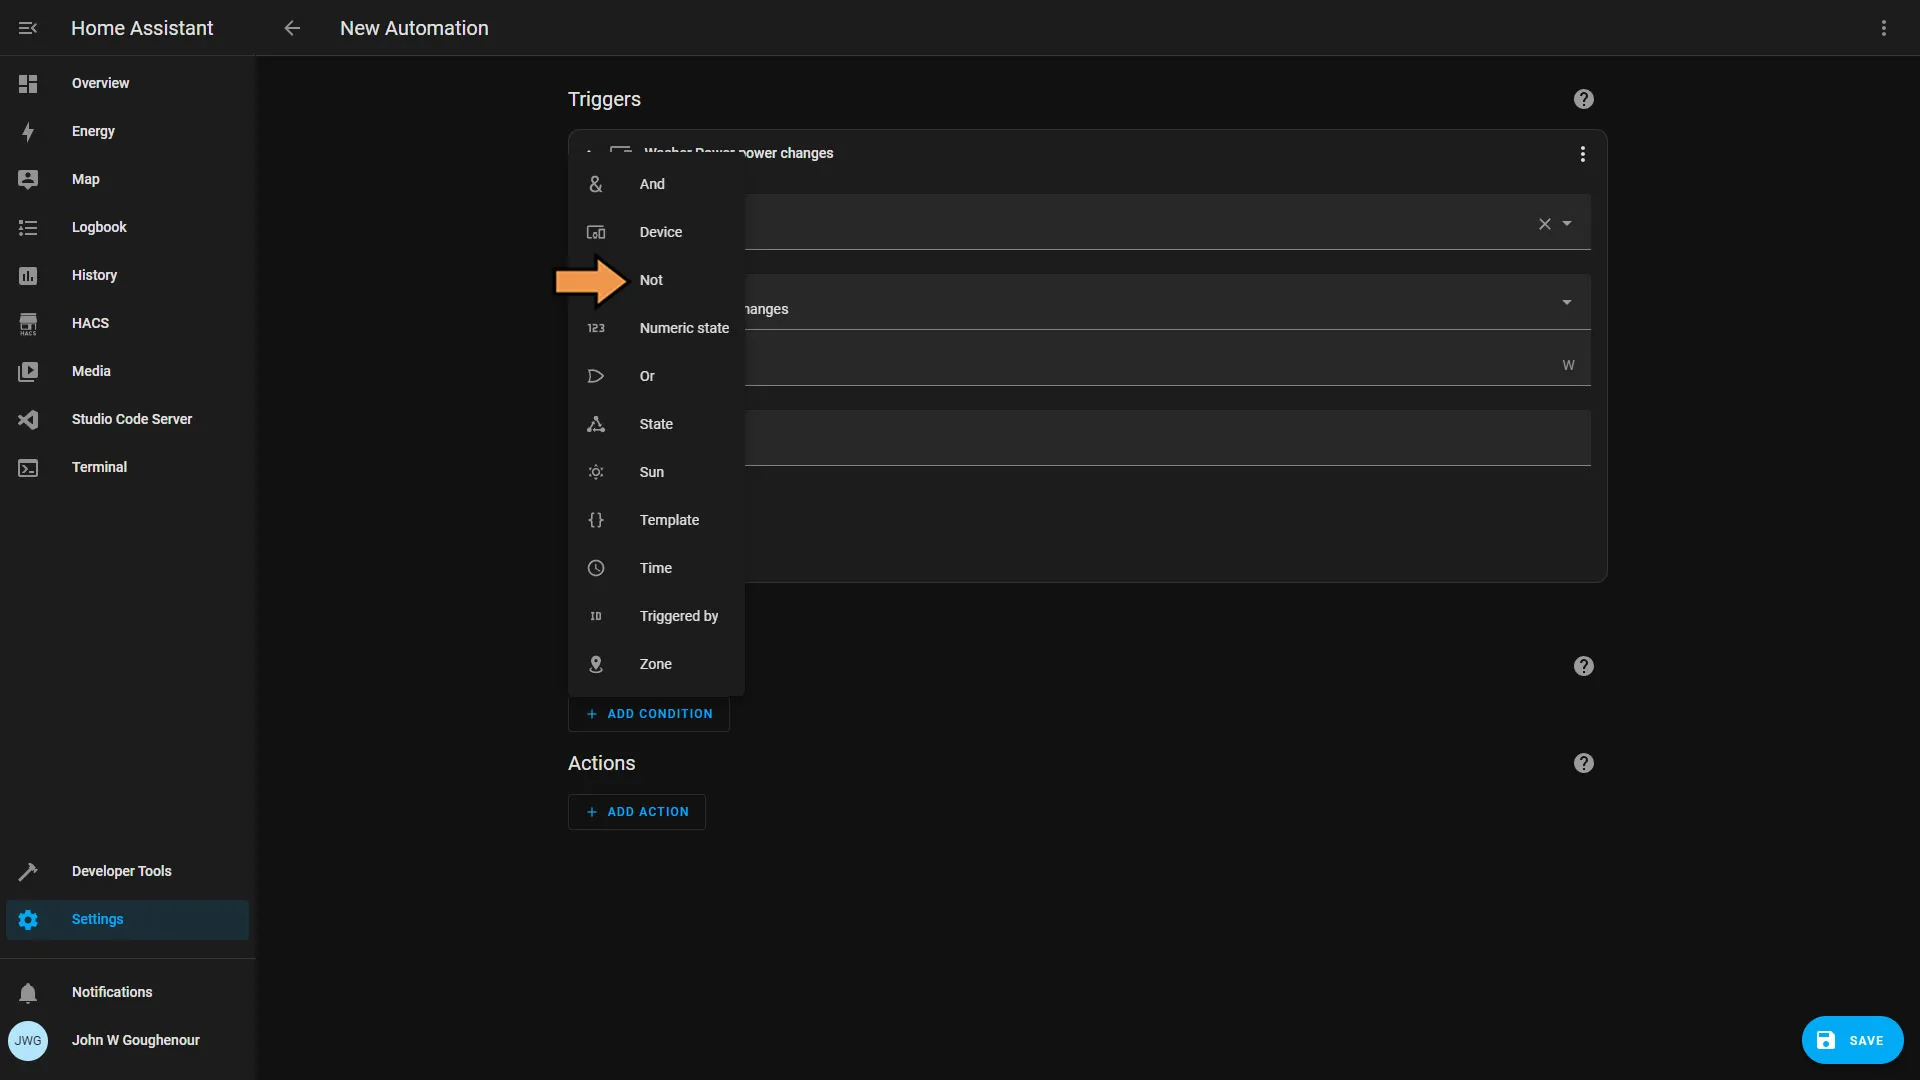
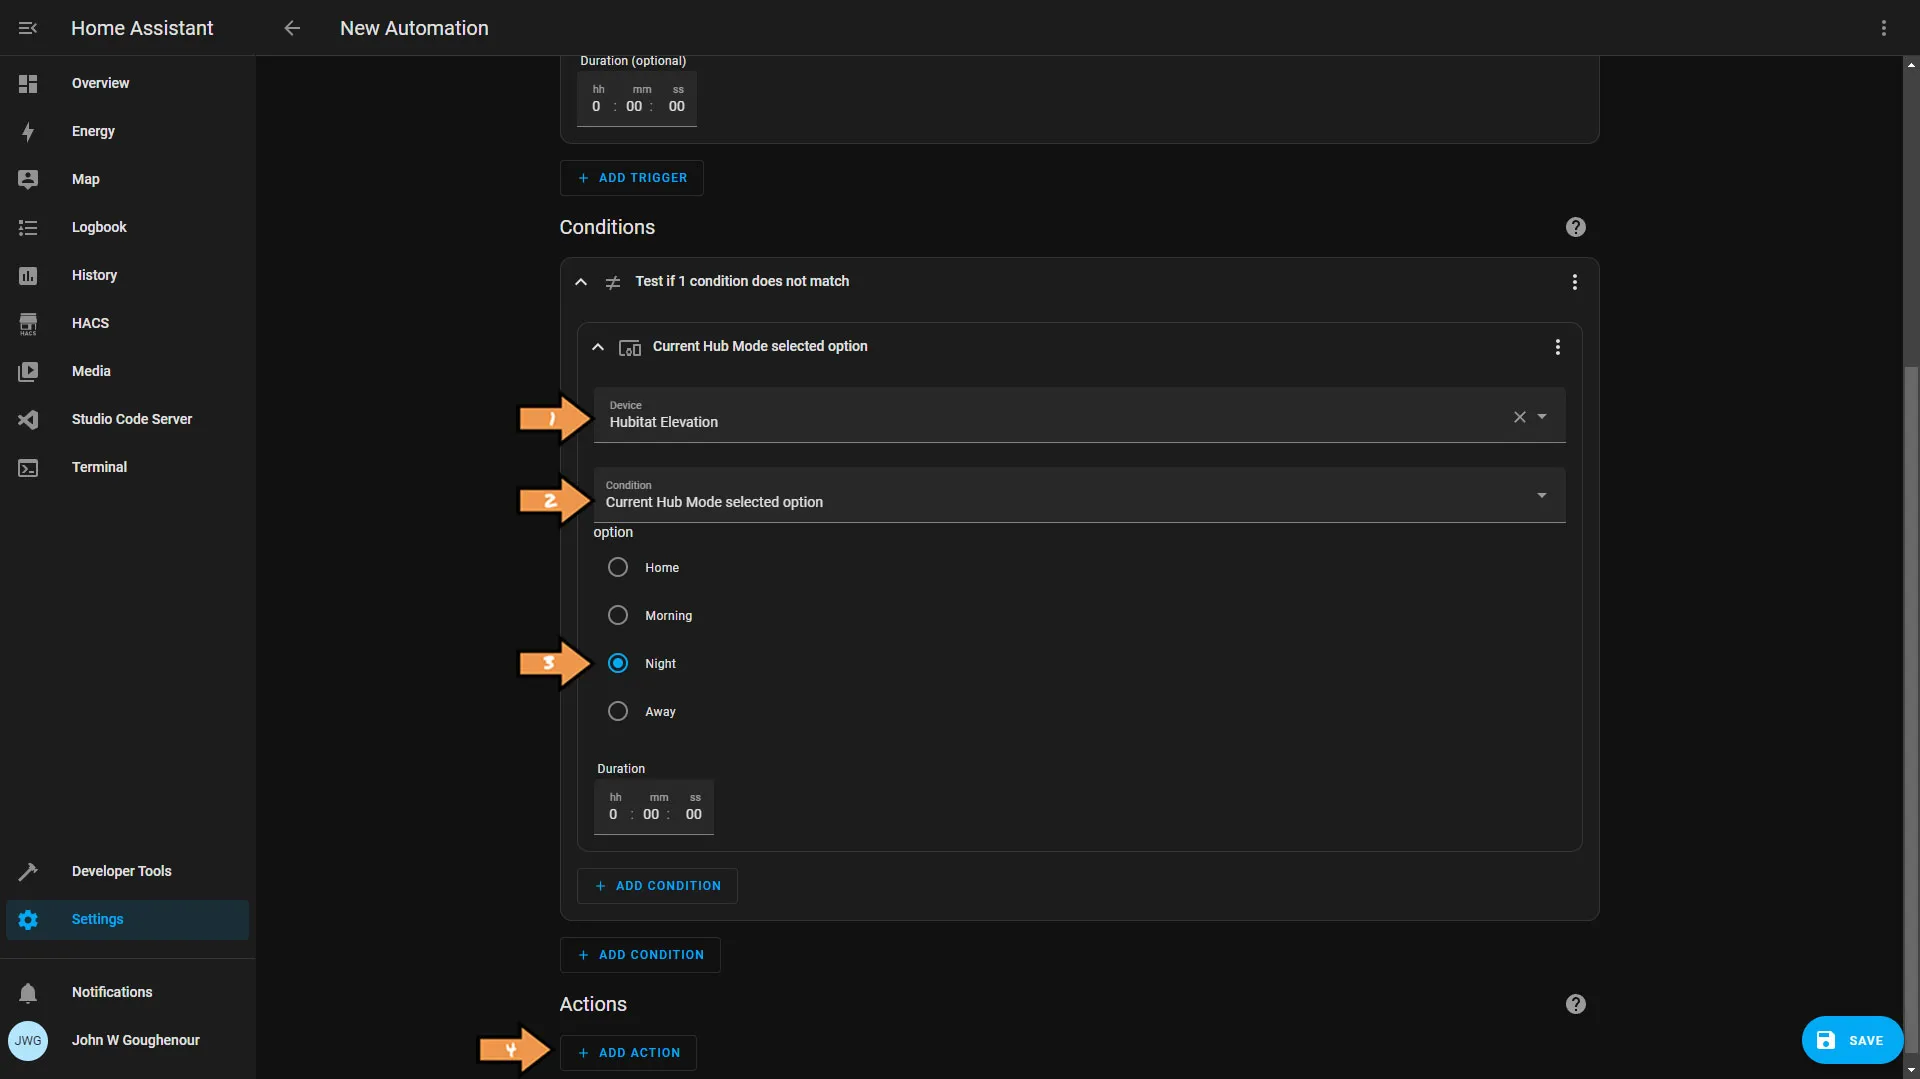
Select Not from the condition list.
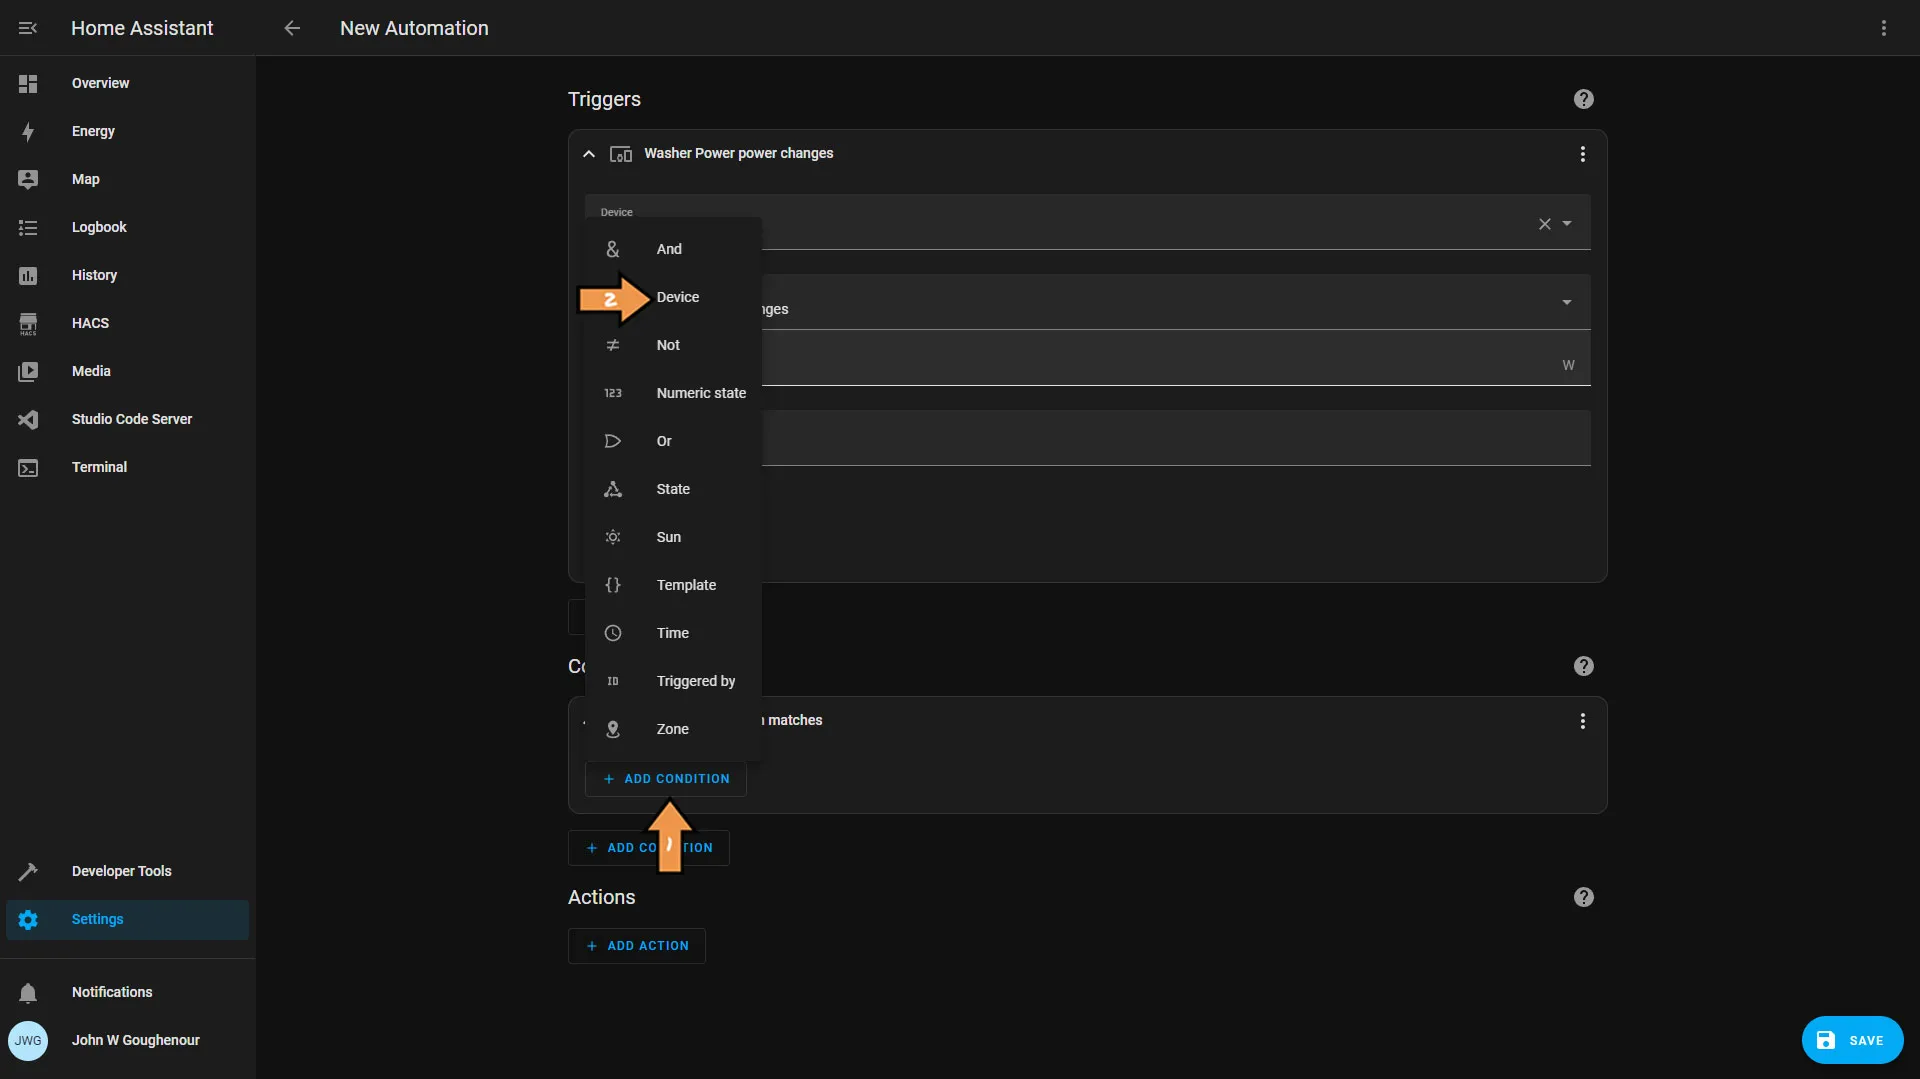
Then, click the Add Condition button and select Device from the list.
Next, select Hubitat Elevation from the device list. There should only be the Mode condition and select Night. Then, click the Add Action button.
If you are not using Hubitat you could use Home Assistant Modes.
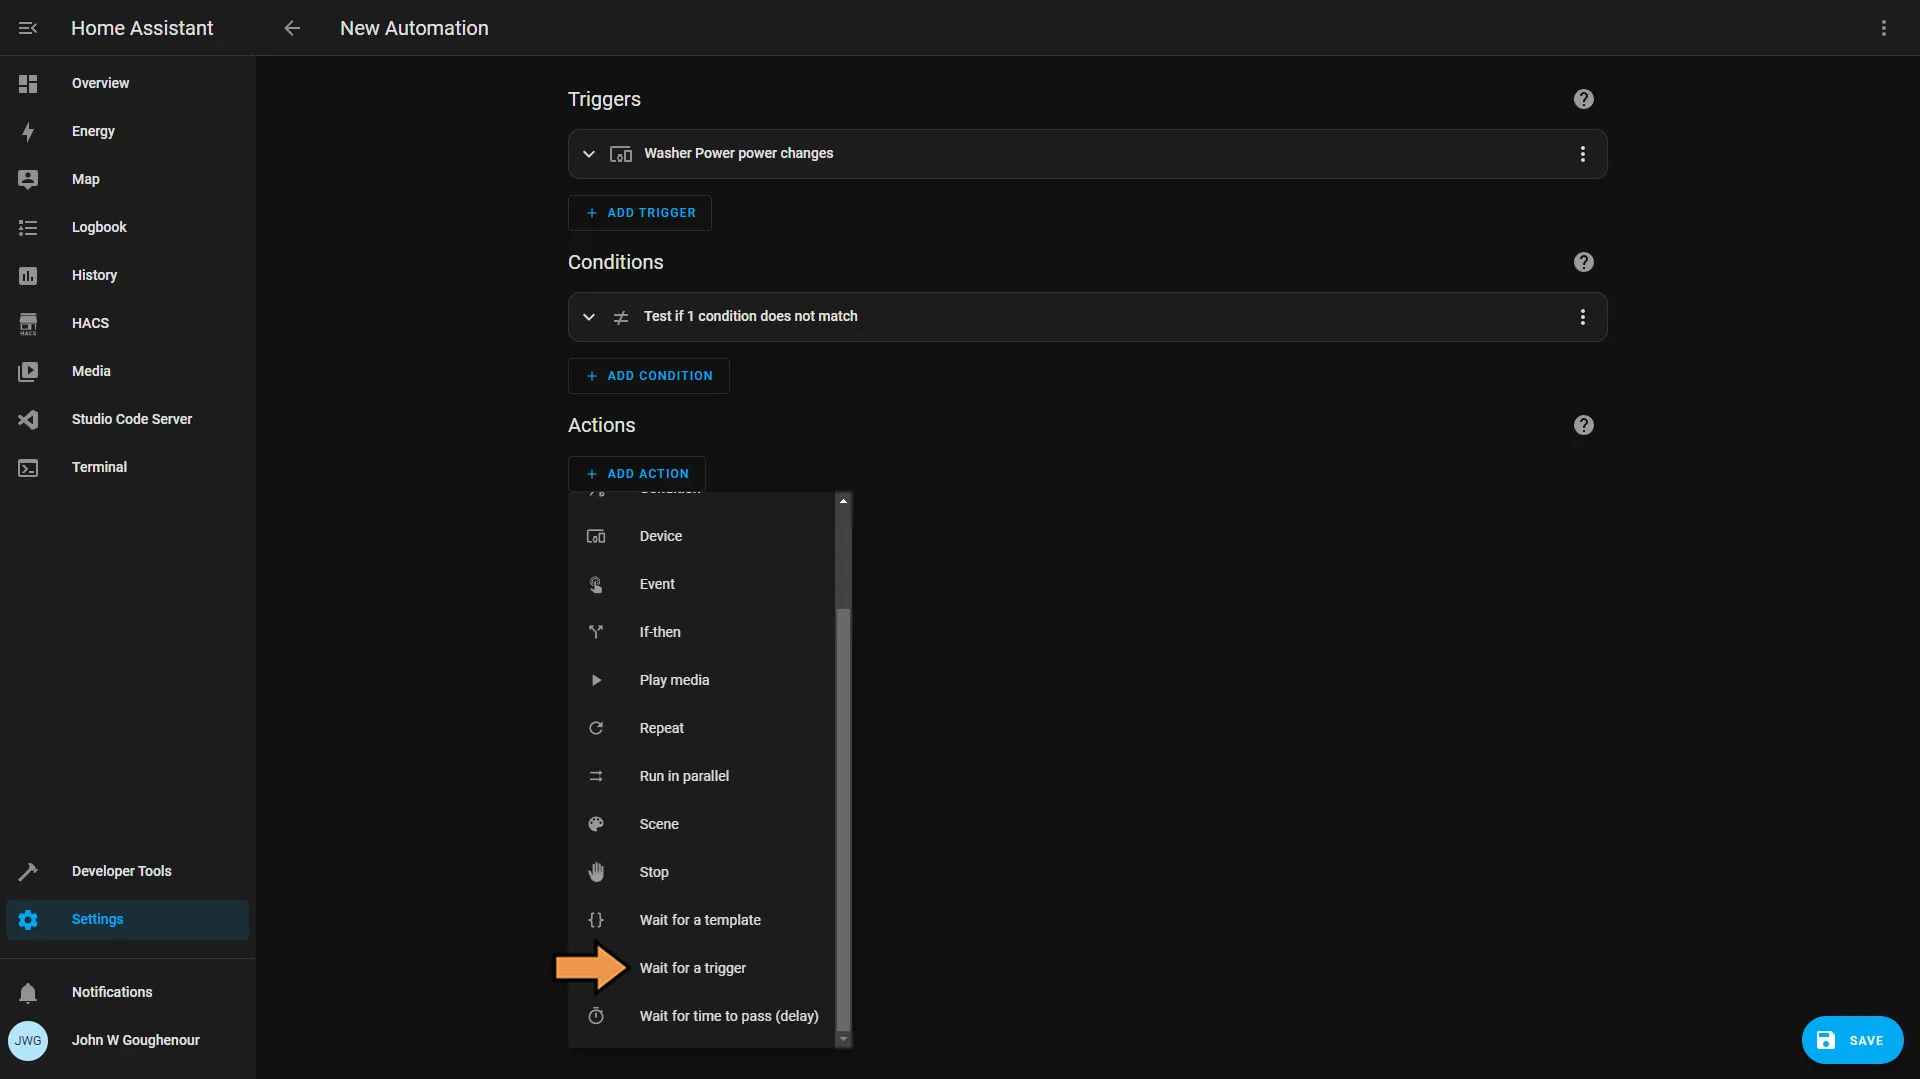
Select Wait for a trigger from the actions list.
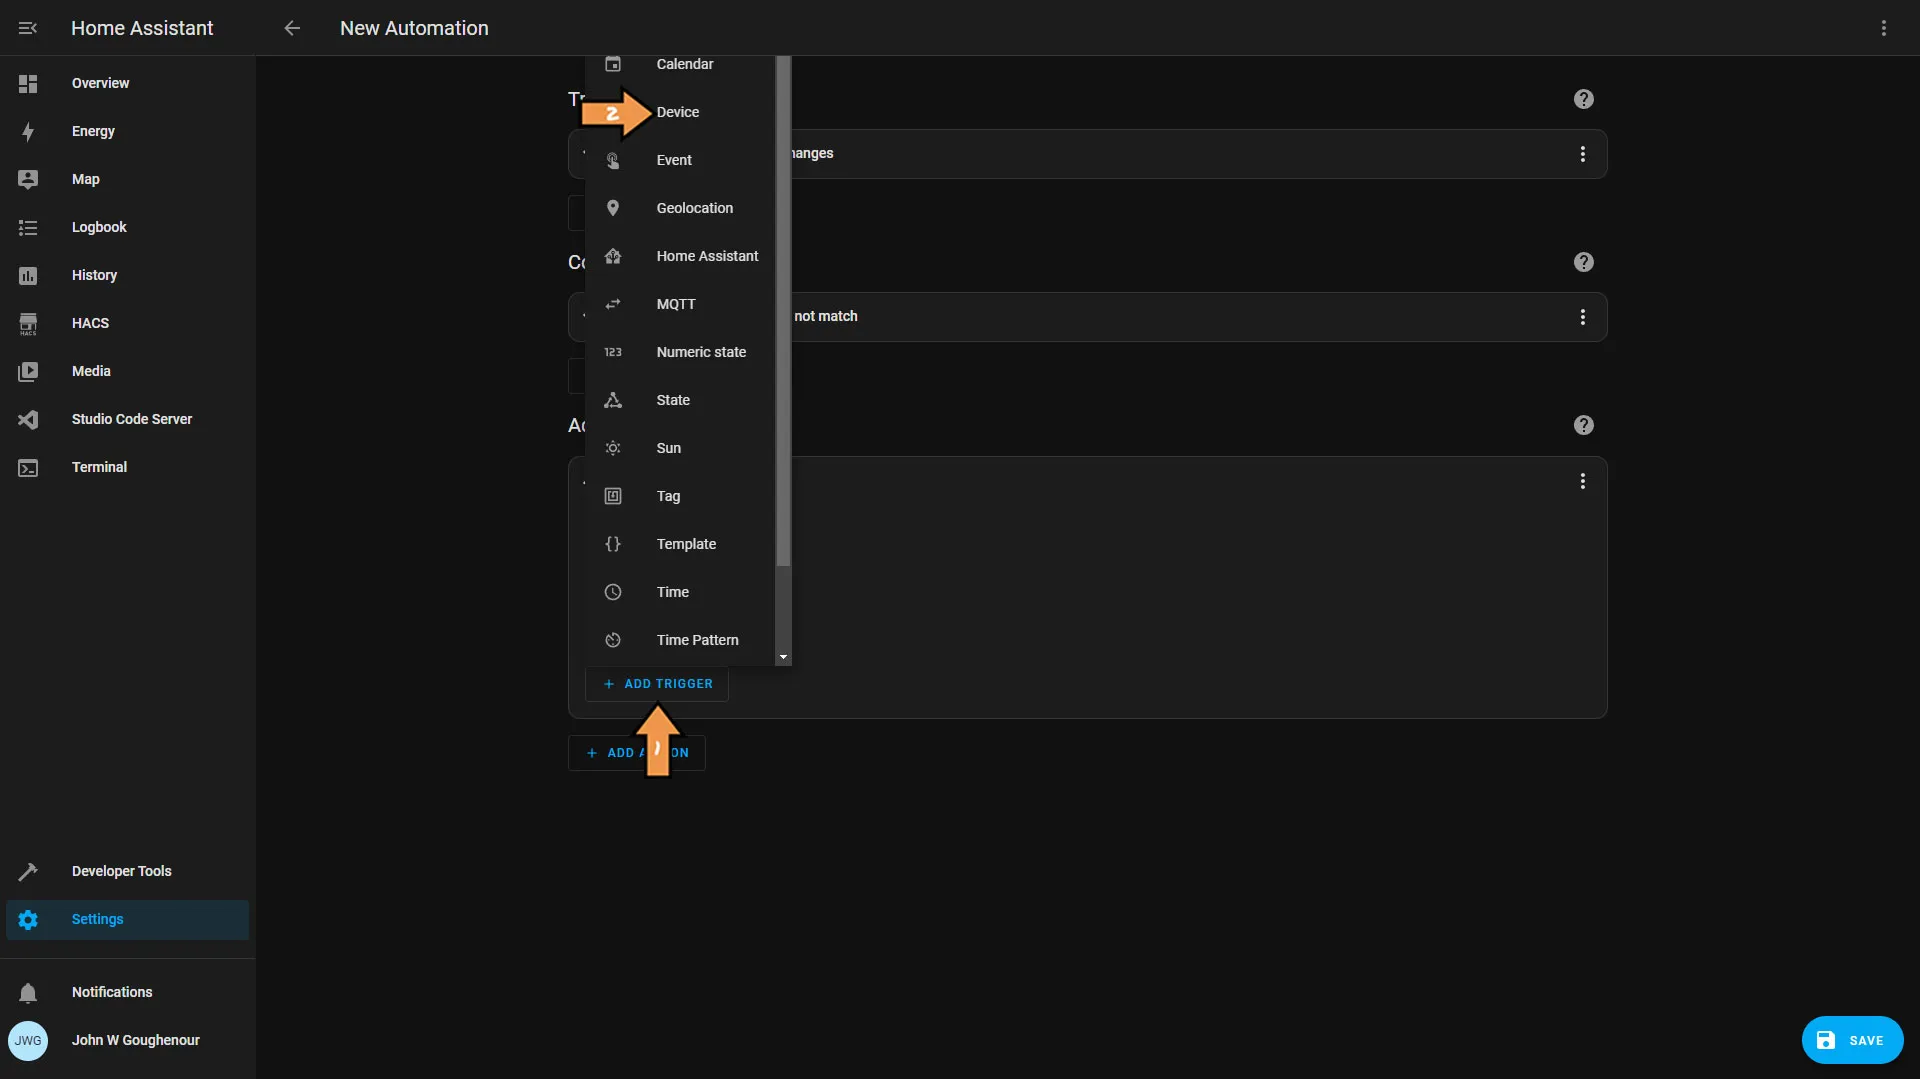
Click the Add Trigger button and then select Device from the list.
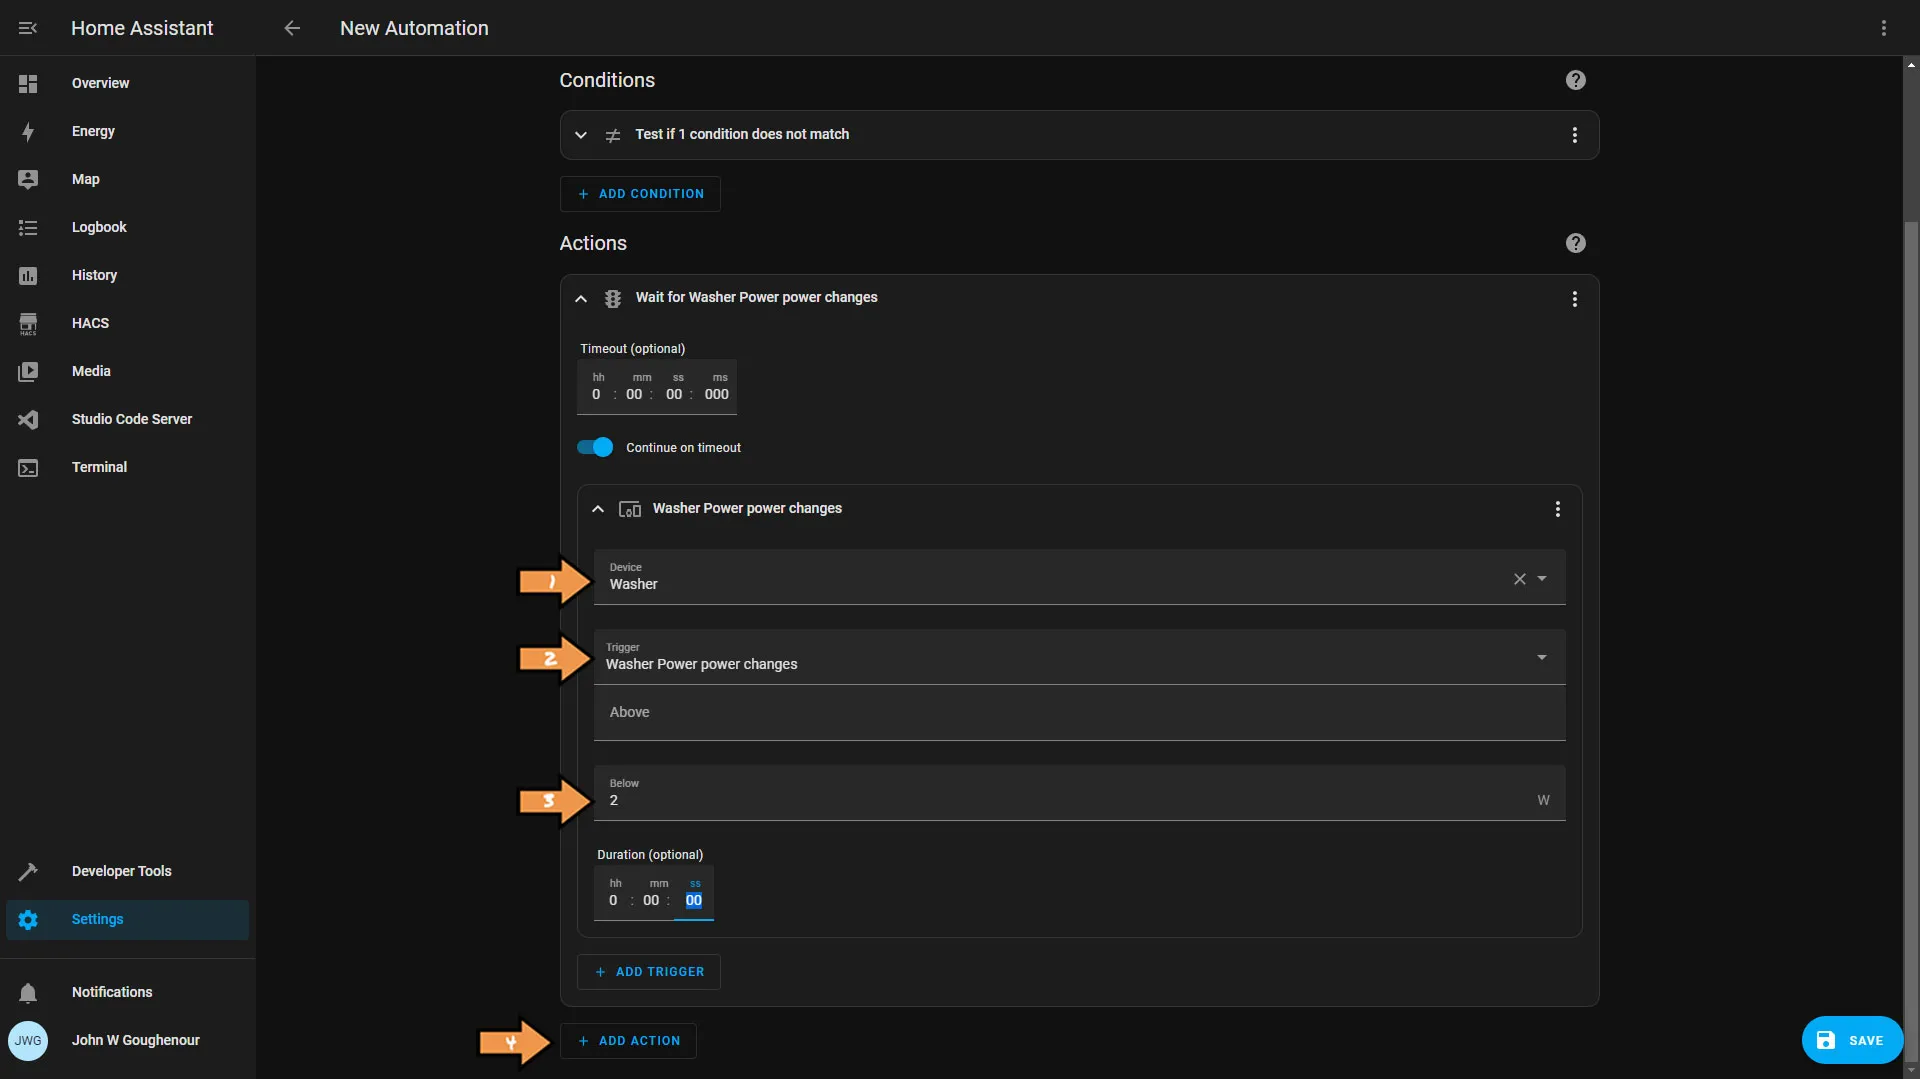
Select the smart plug and set the trigger to power changes. Then, set the value to below two, and click the Add Action button.
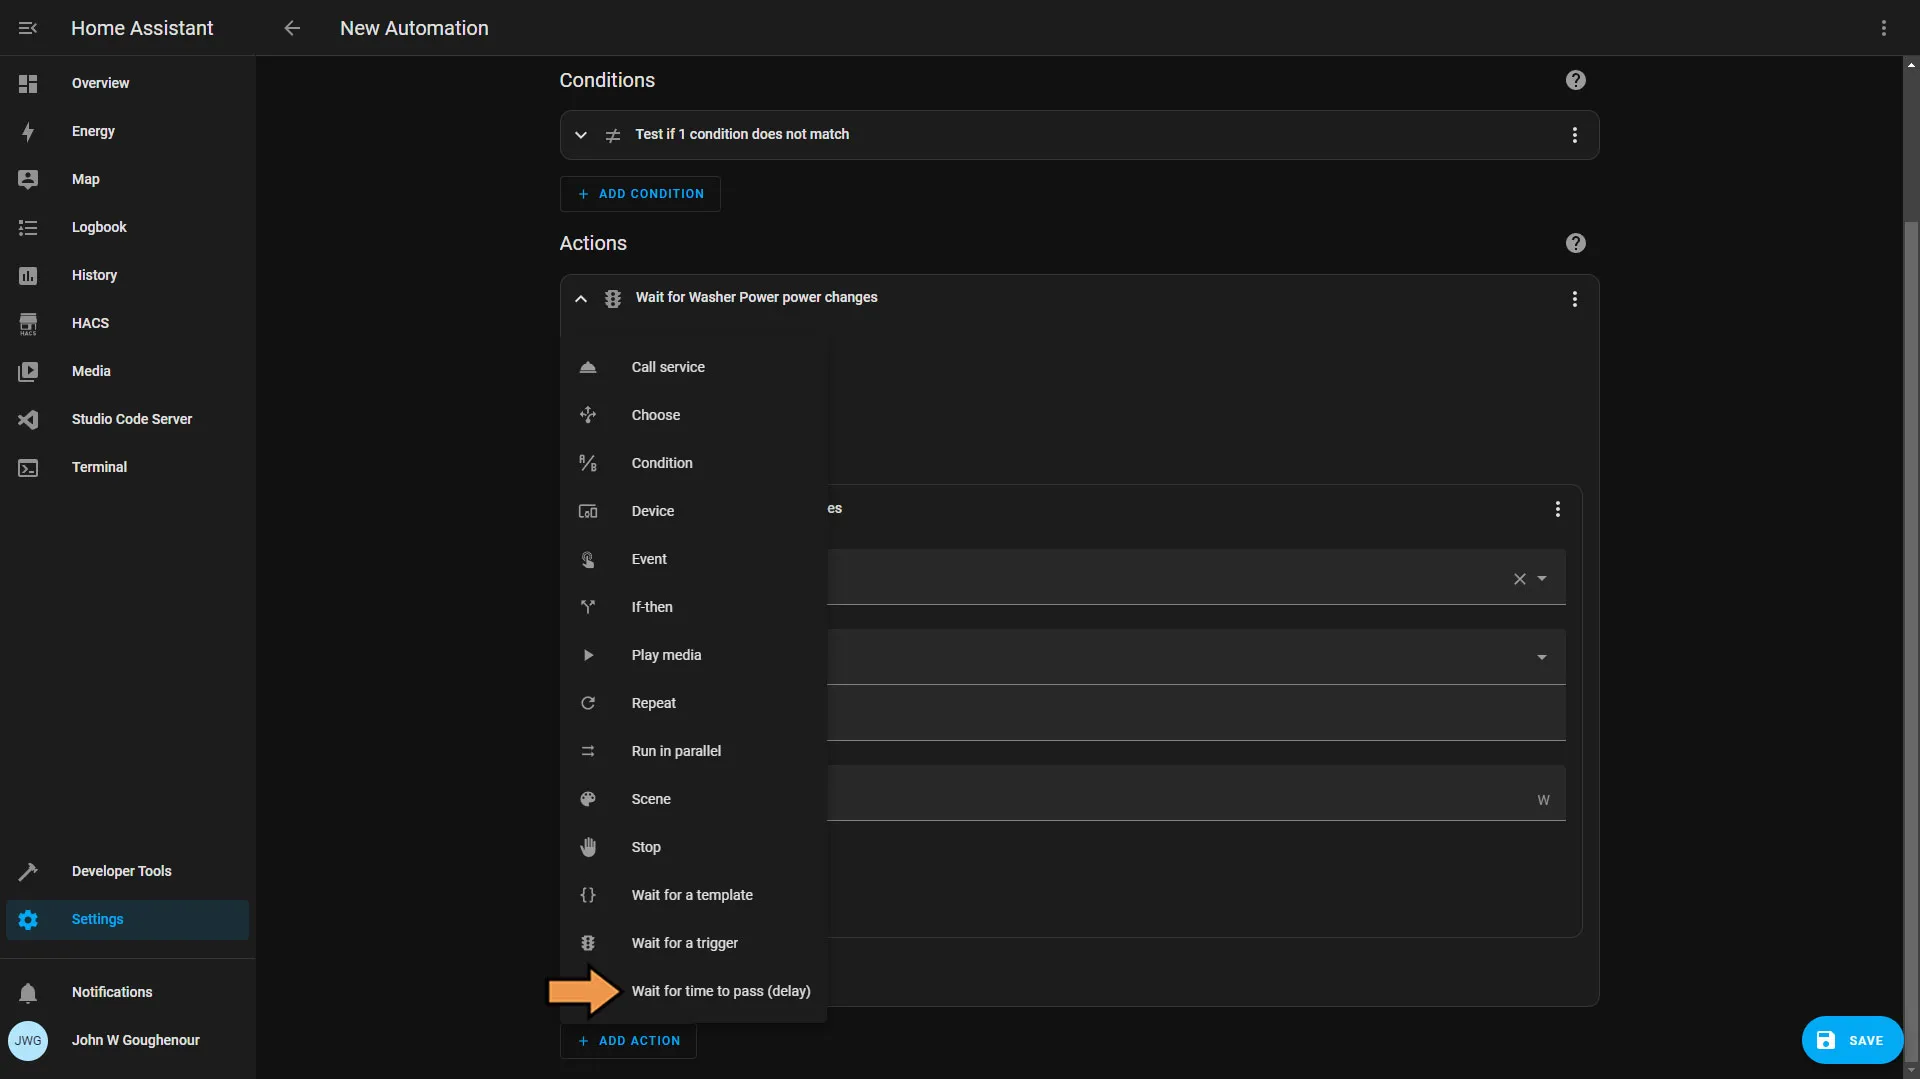
Select Wait for time to pass (delay) from the action list.
Set the delay for one minute and click the Add Action button.
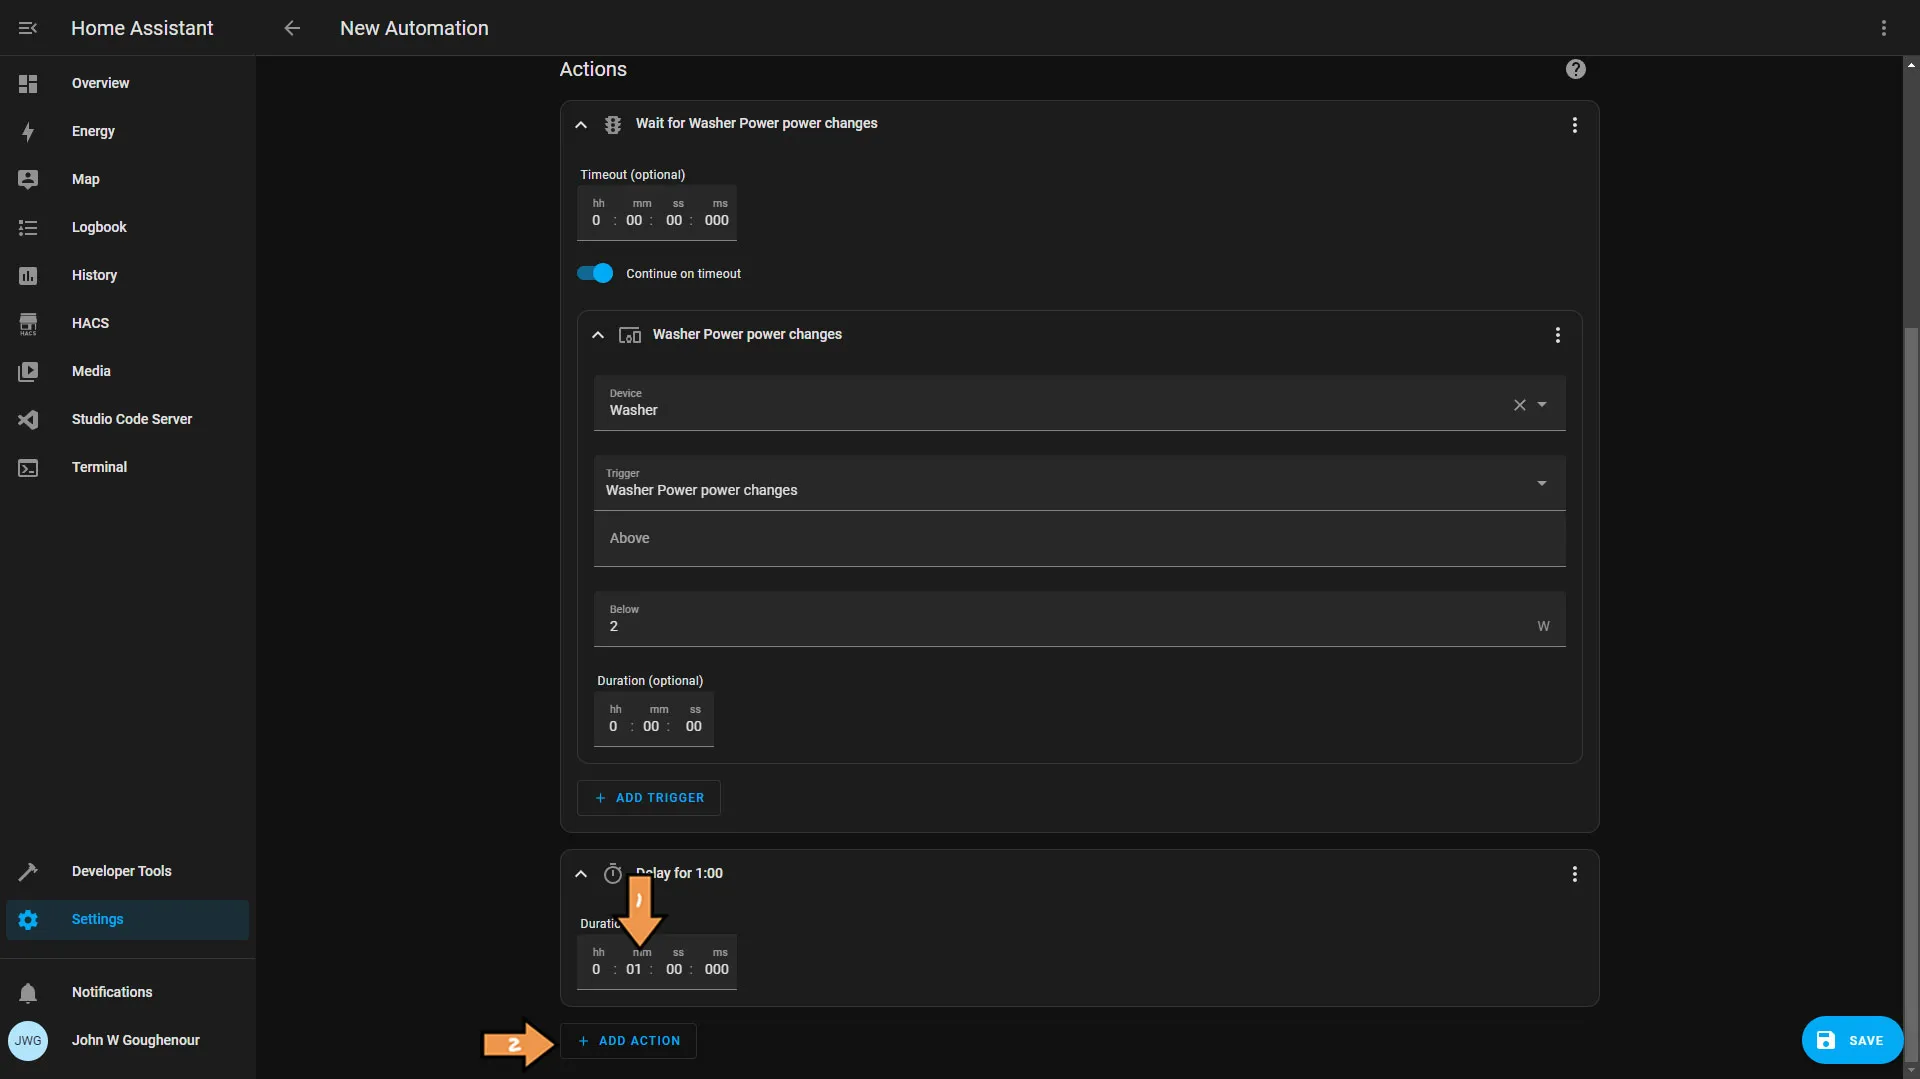
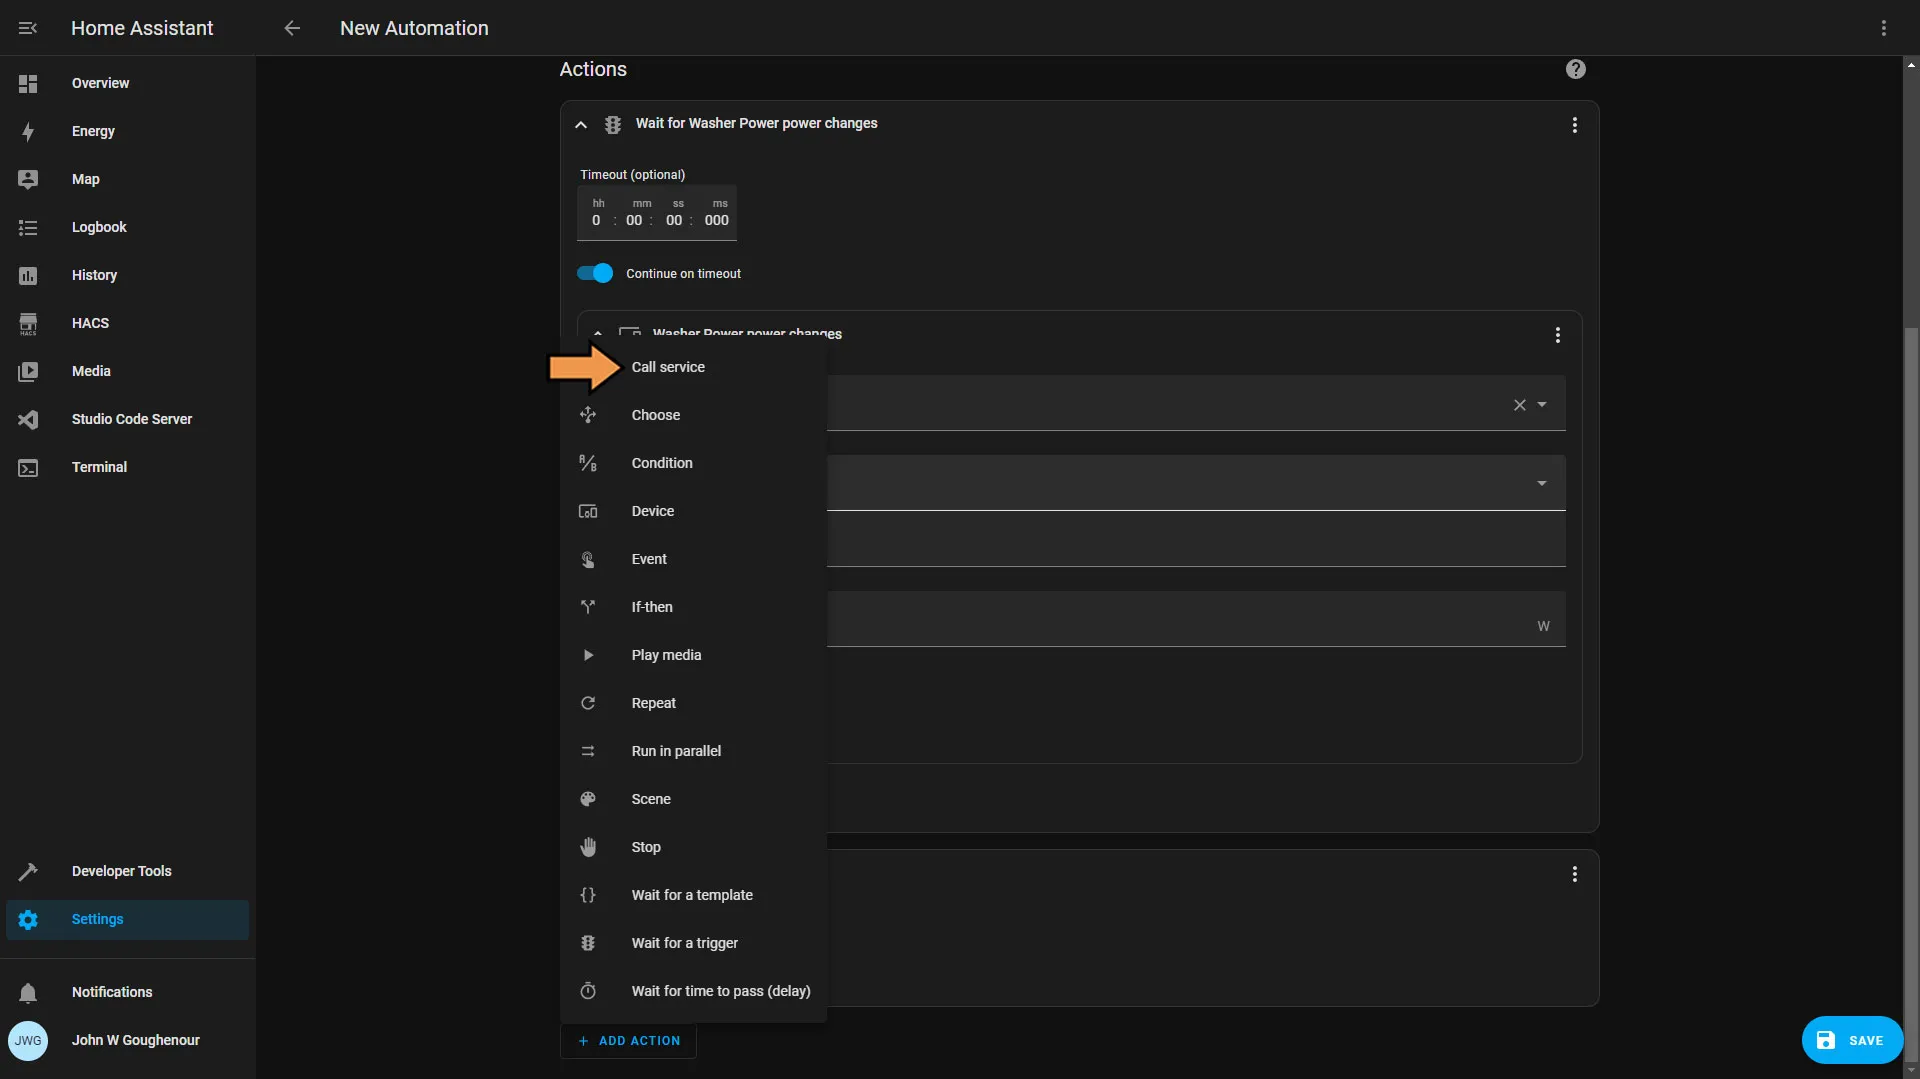
Next, select Call service from the action list.
When we set up Alexa Media Player in Home Assistant, we created a notification group and a script. We will be using them here.
In the service list, look for our announce_everywhere script. Place a checkmark in the Message box and add our message for Alexa to speak.
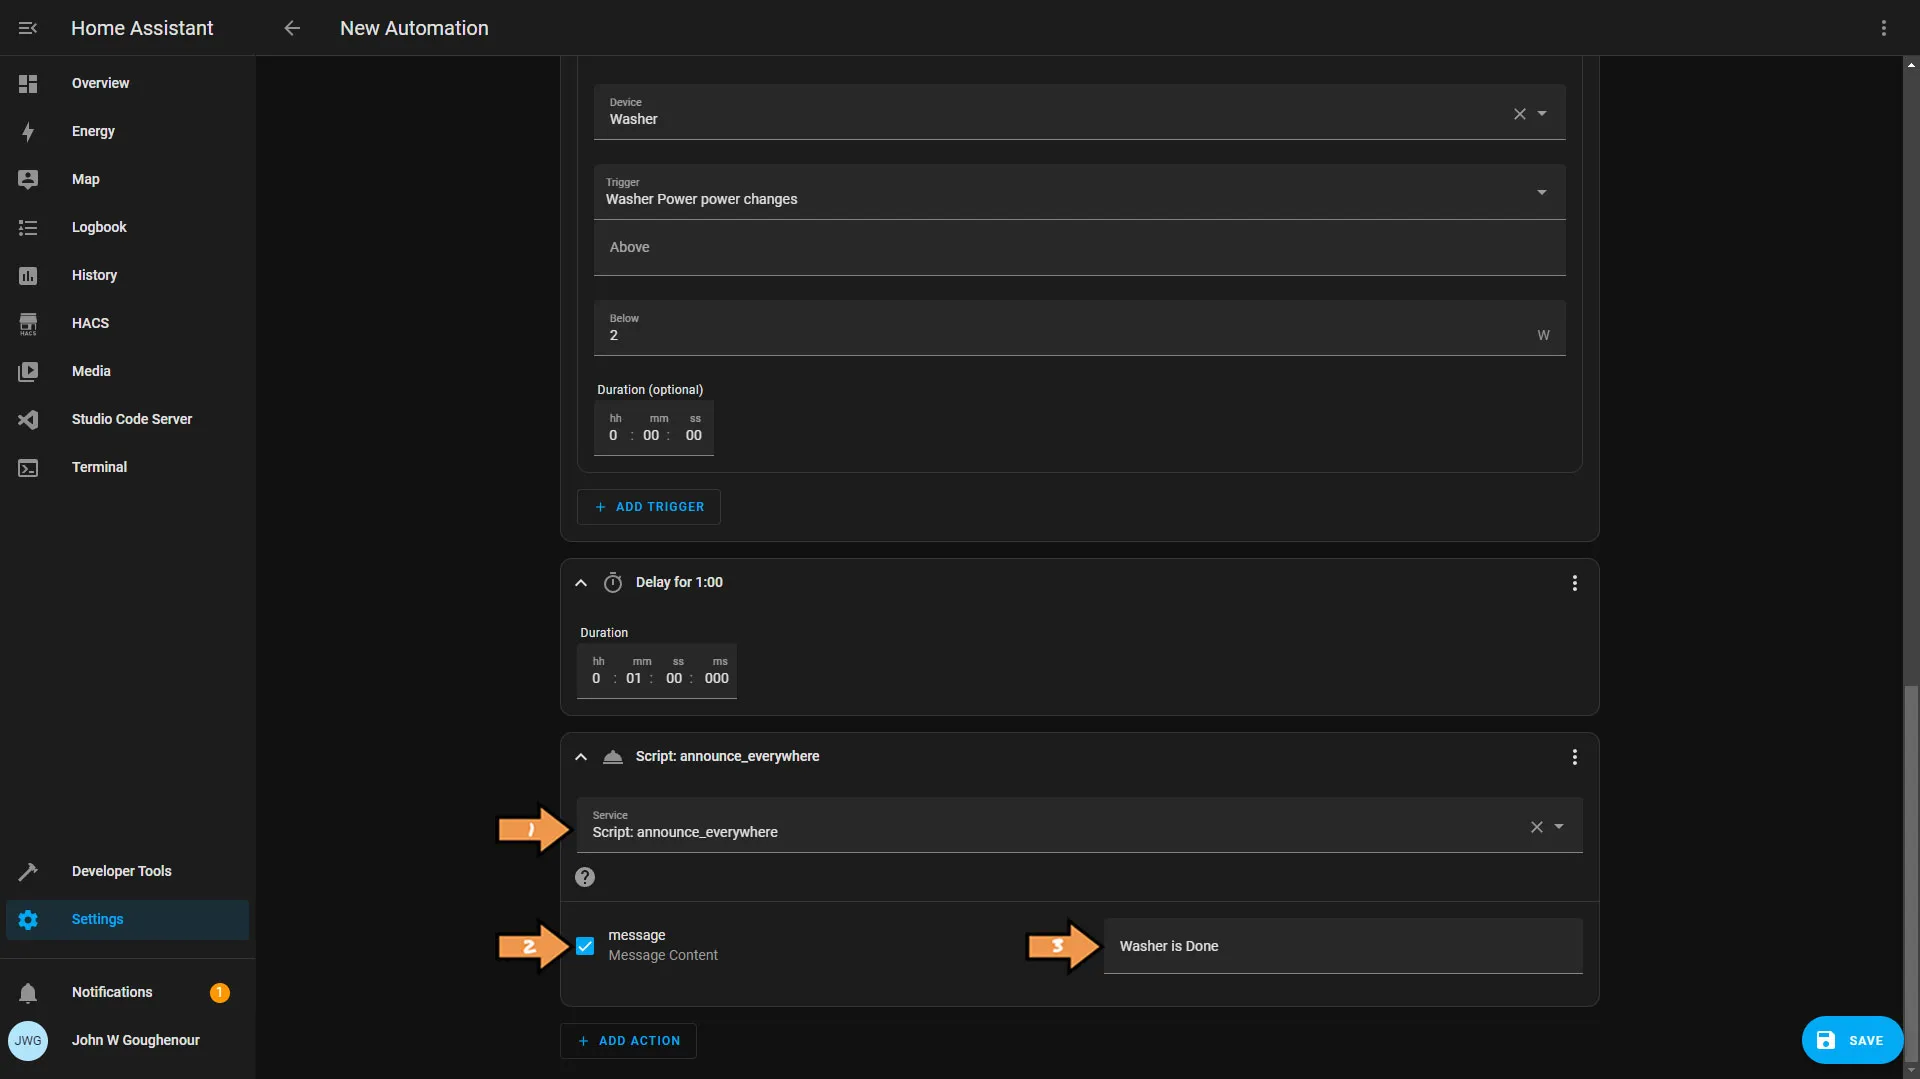
Your complete automation should look something like this.
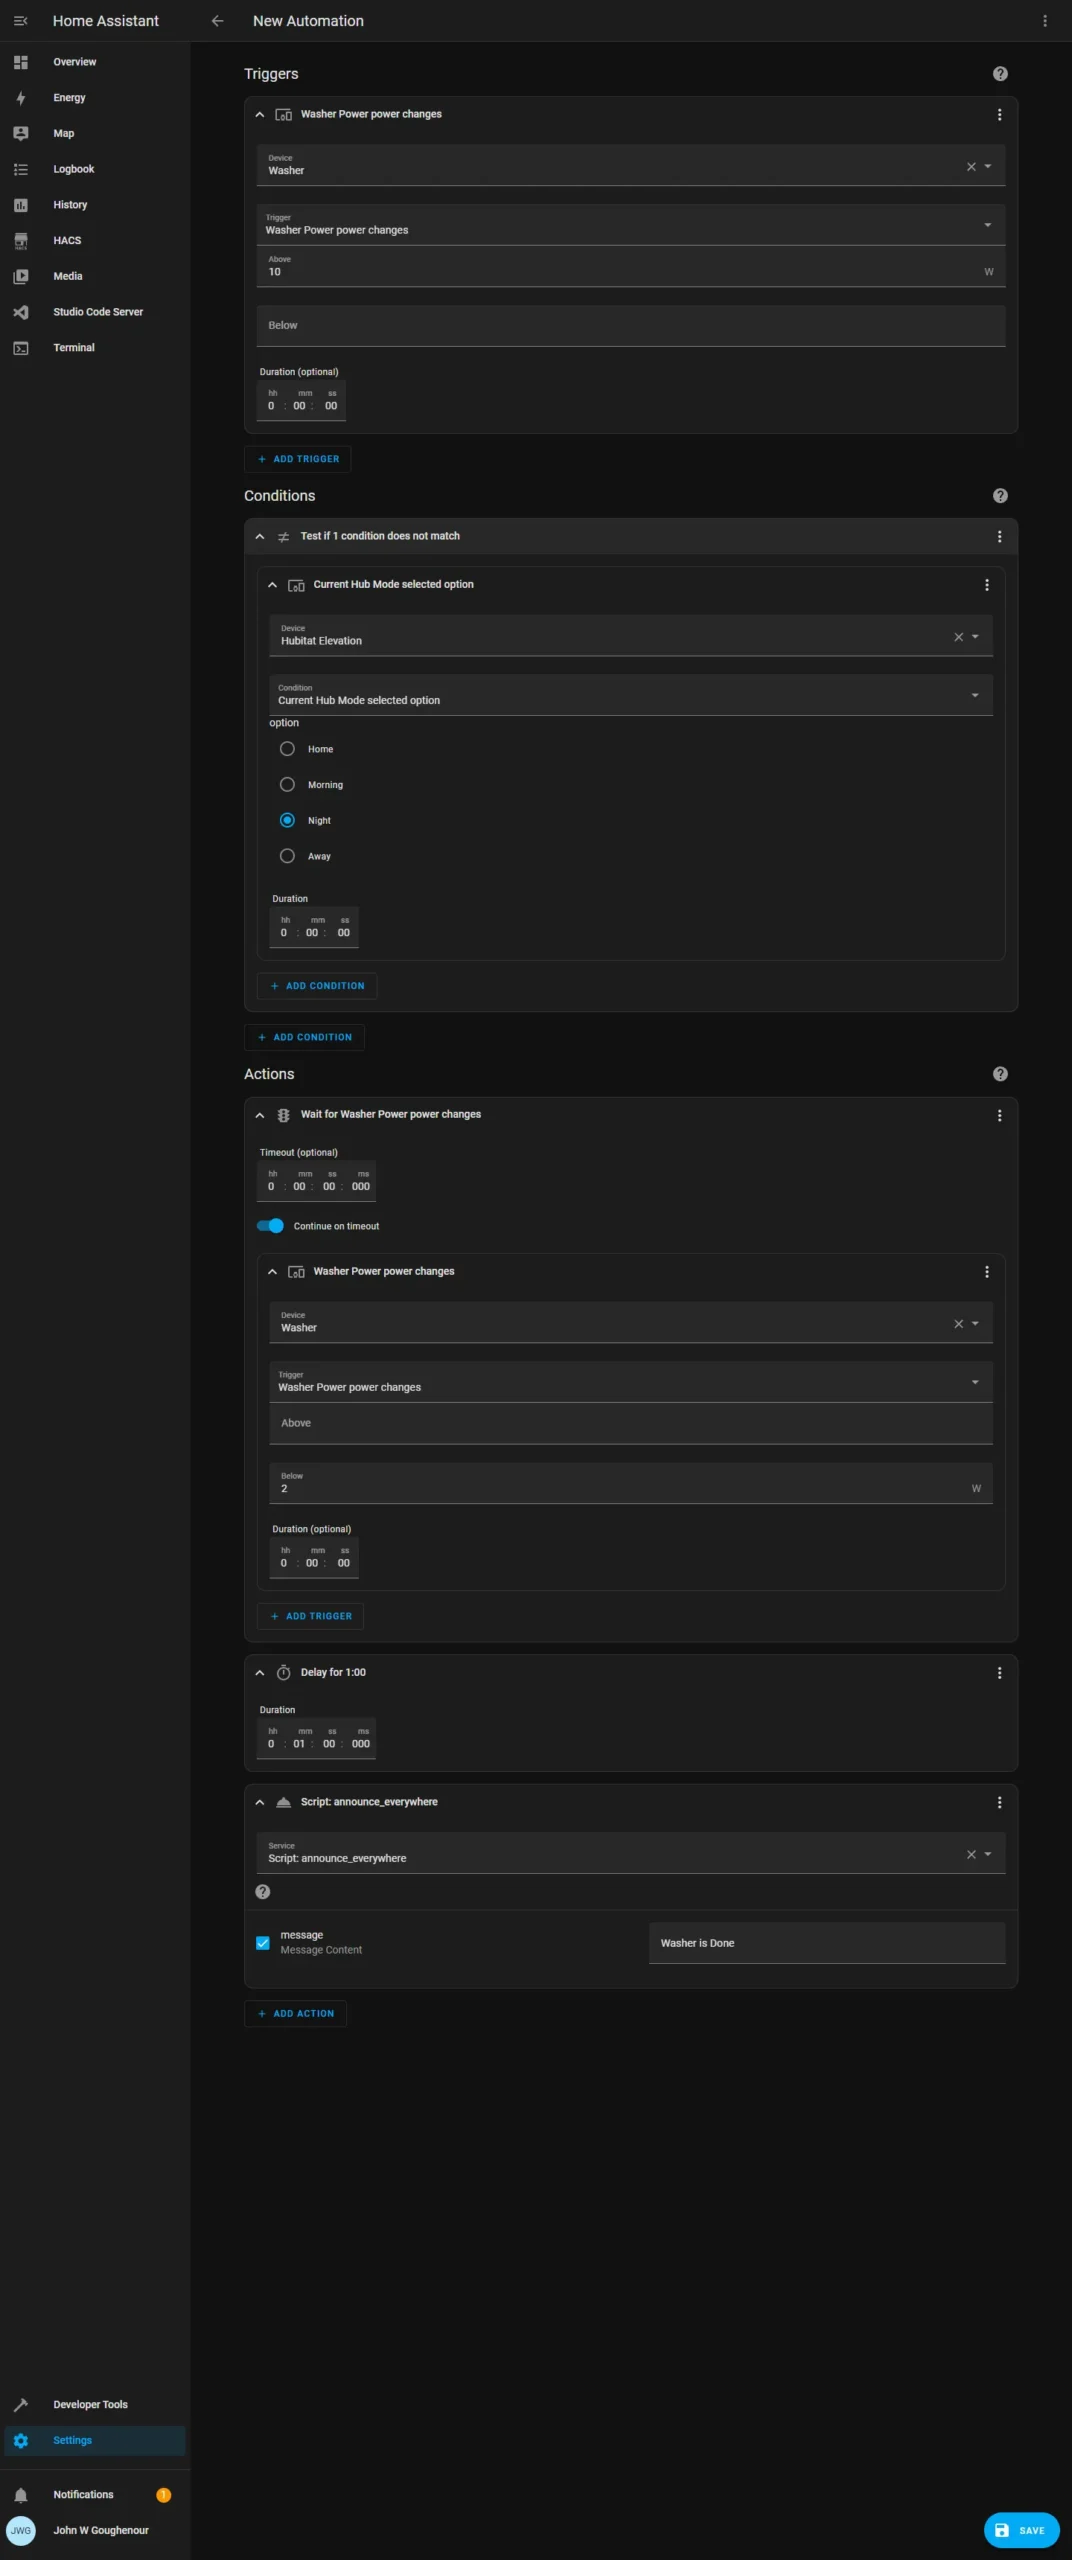
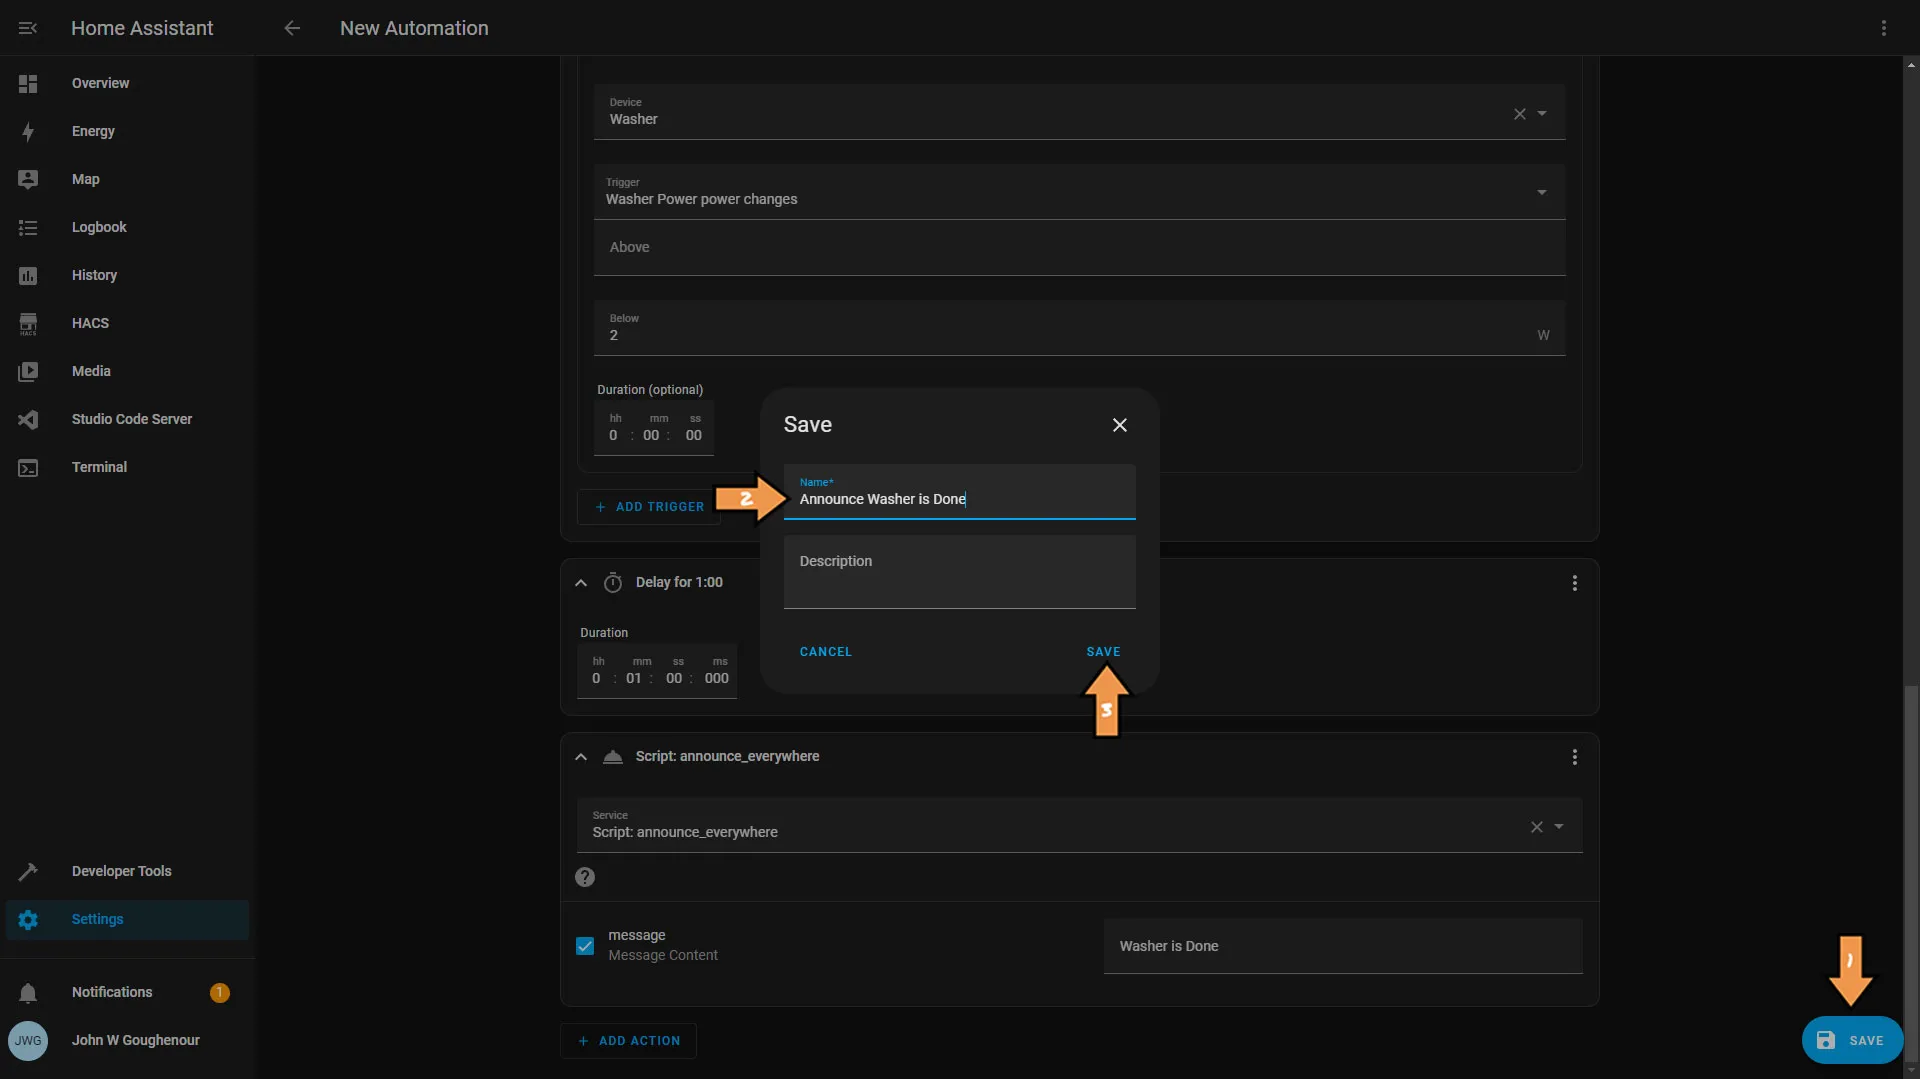
Success: That’s It! In the bottom right-hand corner, click the blue Save button. Next, name the automation and click save again.
Amazon Alexa
Announce Dryer is Done Automation
The Official Documentation for Alexa Routines
Option Two
Share a virtual switch with Alexa and use that as a trigger in the app.
Setting Up the Automation
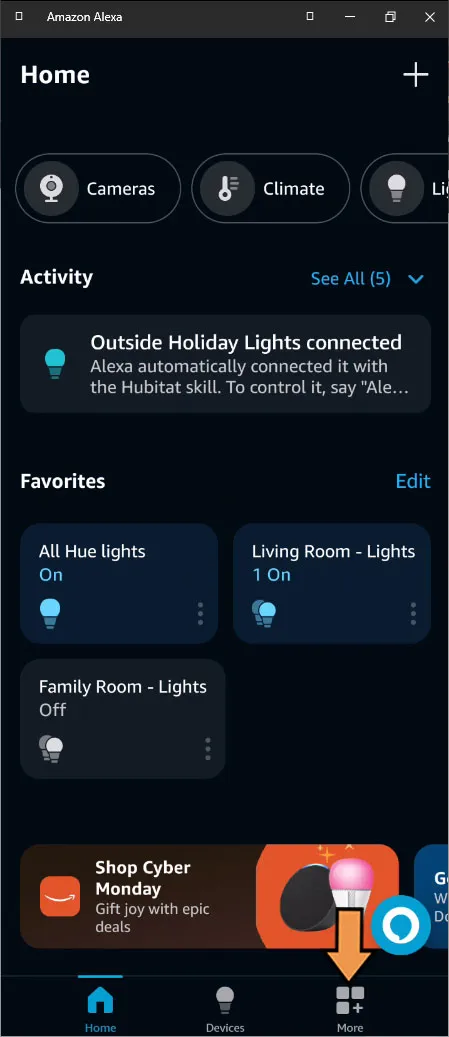
First, Click the More button at the bottom right of the screen.
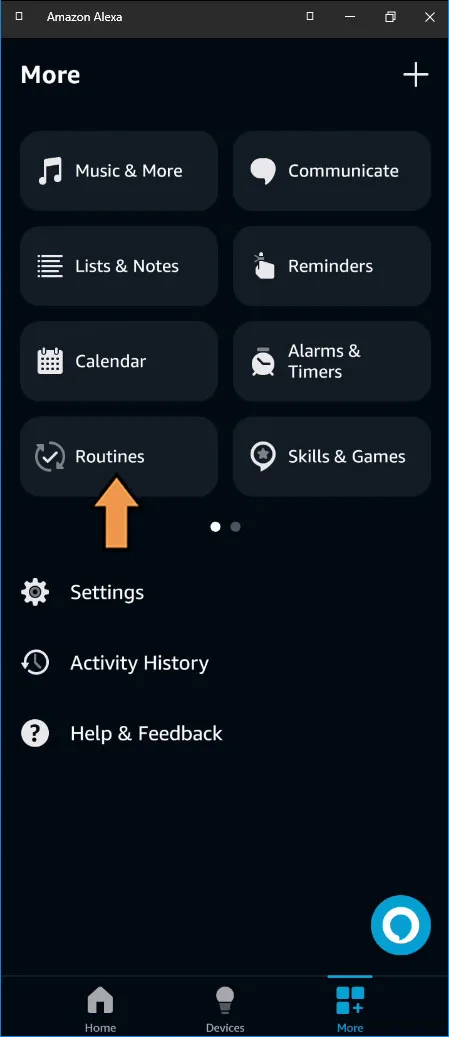
Click the Routines button.
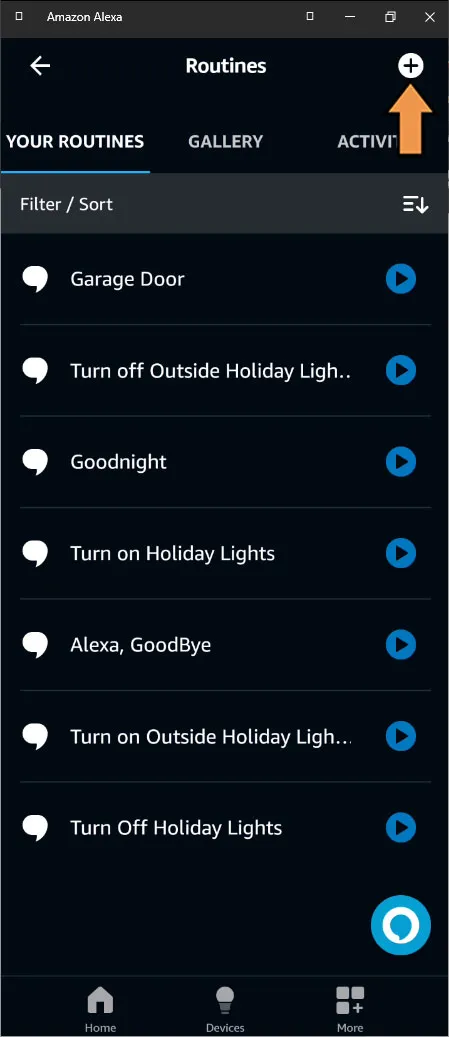
Click the plus sign to add a new routine.
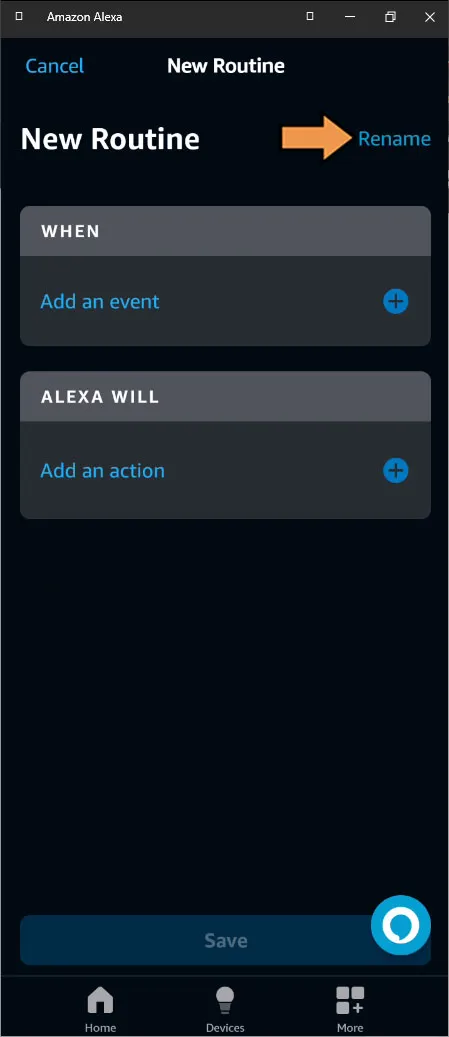
Click the plus sign by Enter routine name.
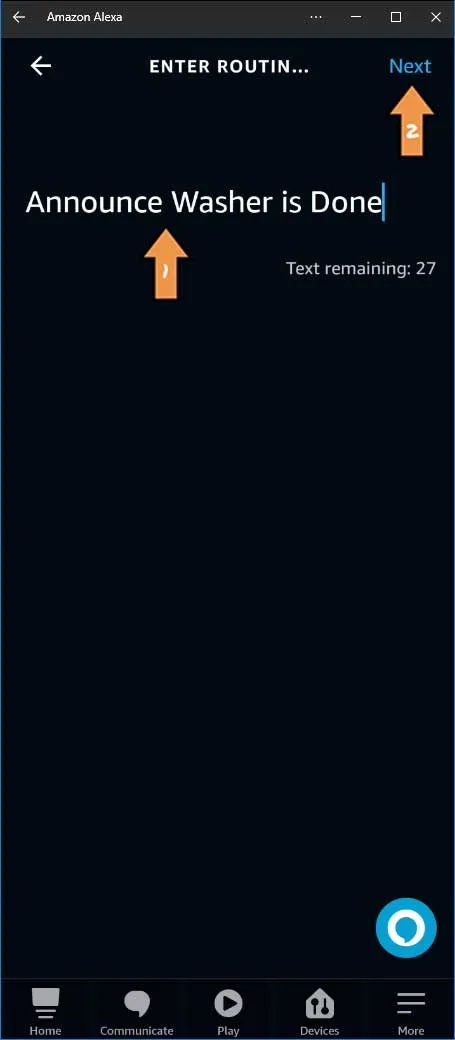
Enter a Name for the Routine, then click Next.
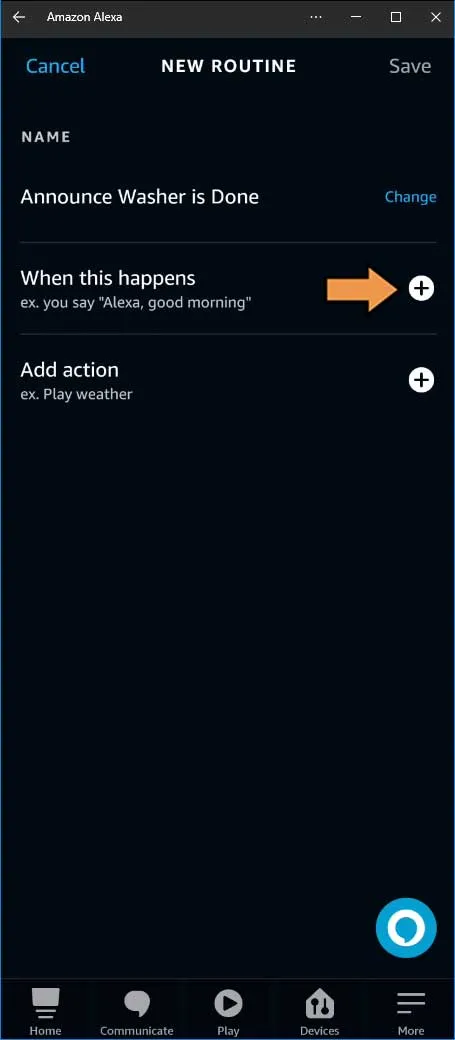
Click the plus sign by When this happens.
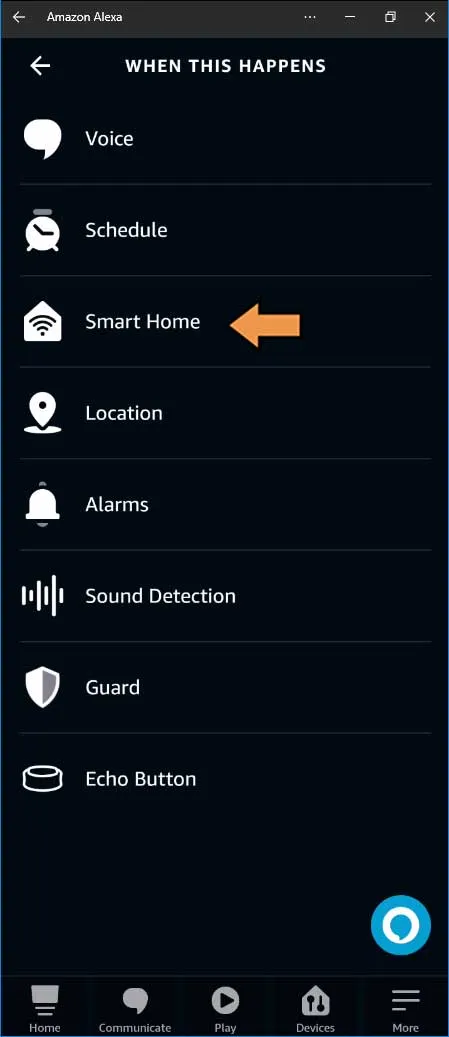
On the When This Happens screen, click Smart Home.
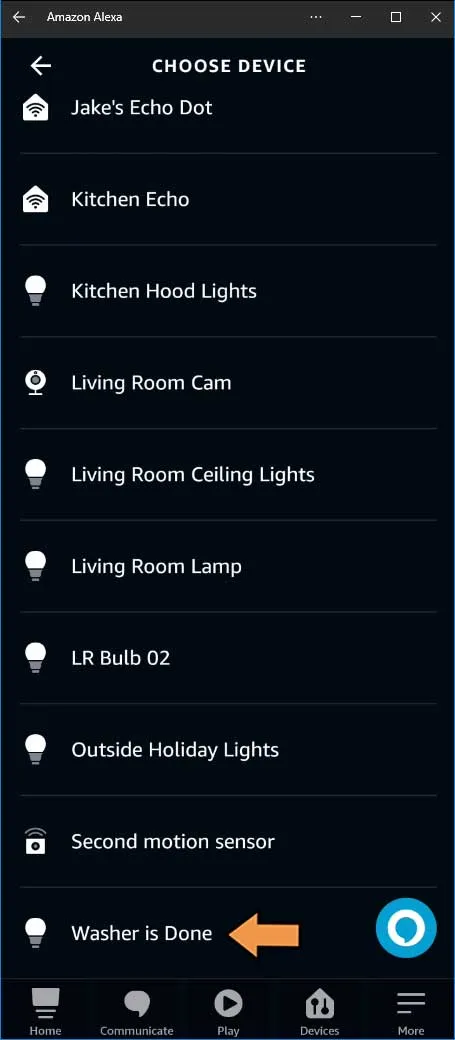
Select the virtual sensor/switch we shared with Alexa.
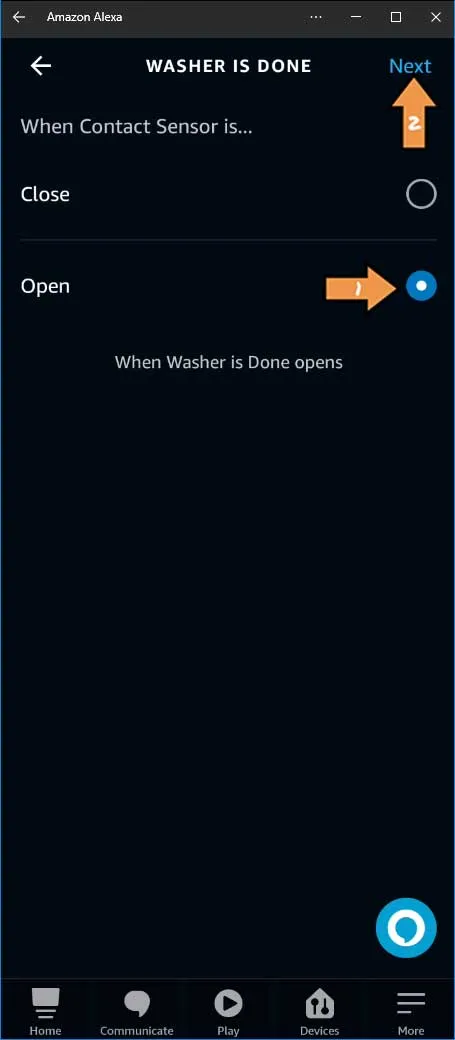
When Contact Sensor is… select open and click Next.
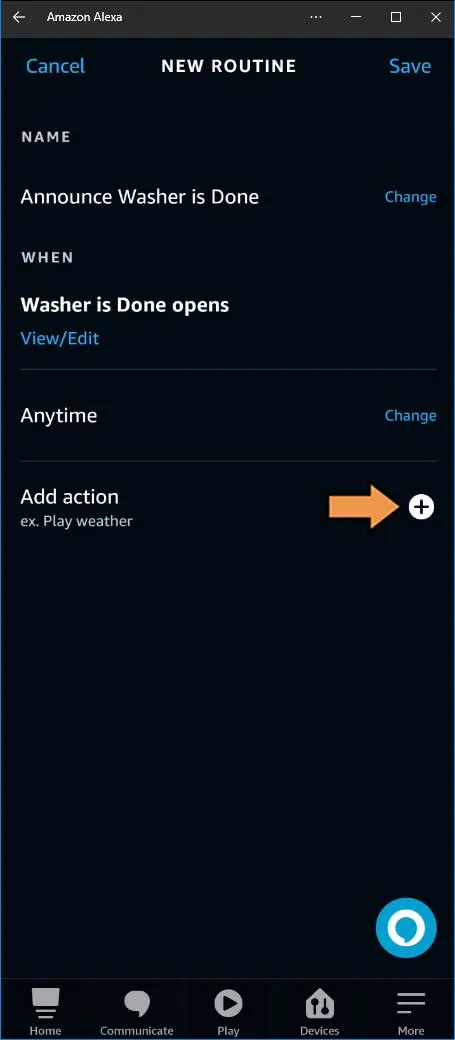
Click the plus sign by Add action.
On the Add New screen, select Alexa Says.
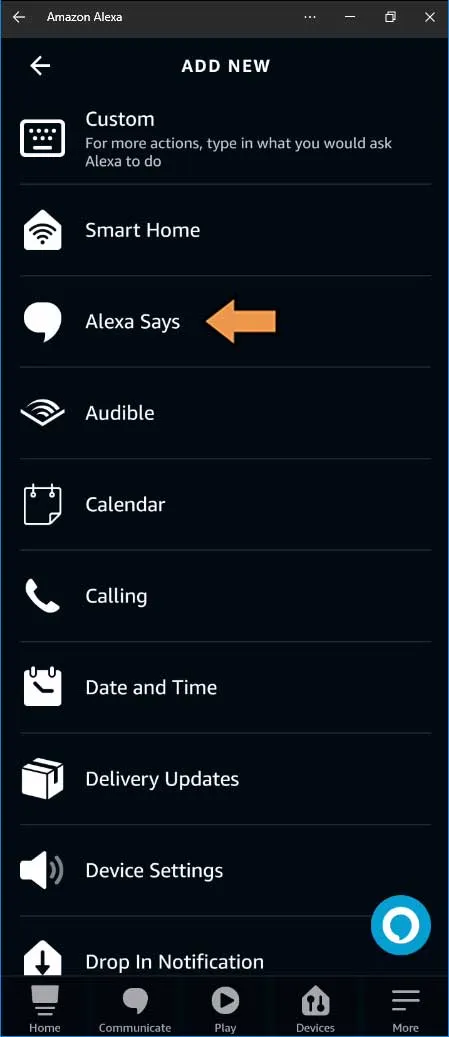
Select Customized.
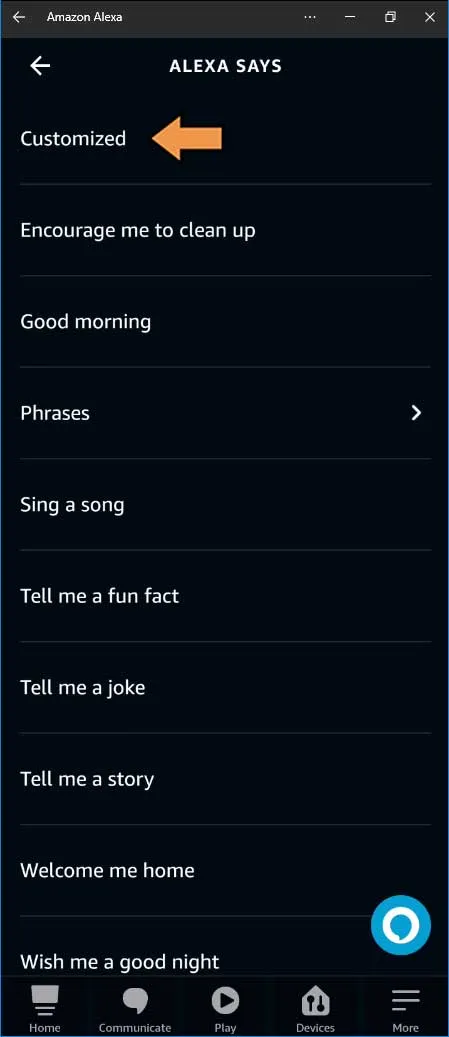
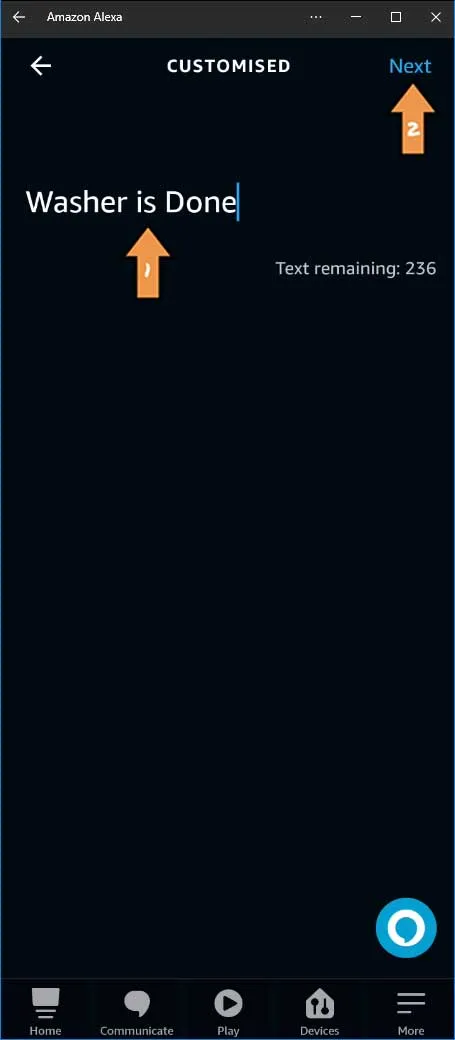
Type your message and click Next.
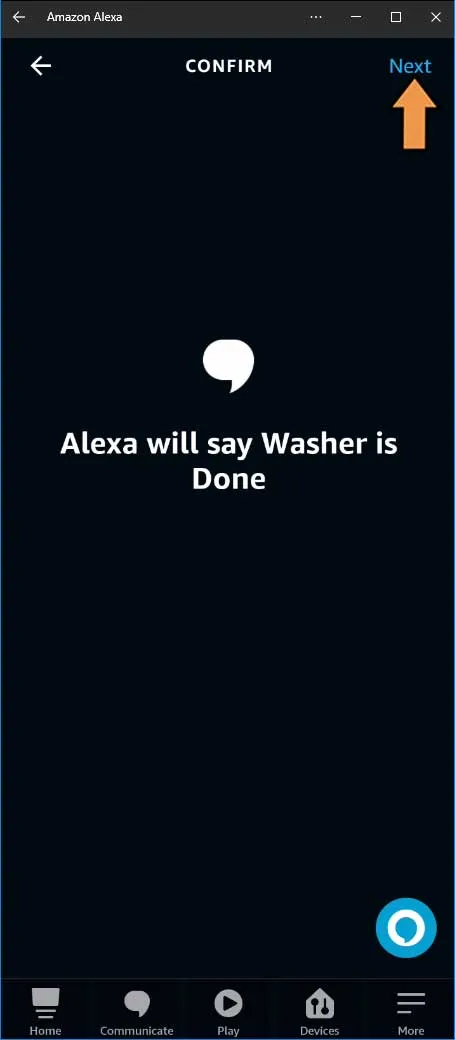
Confirm the message by clicking Next.
Click Choose Device.
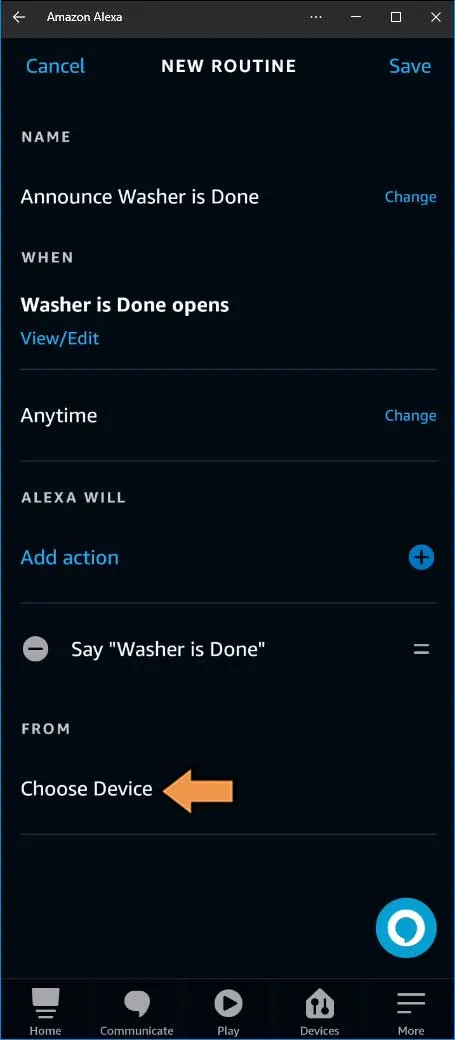
If you want to add another Alexa device you will have to add another action. Hopefully Amazon will allow you to choose a speaker group in the future.
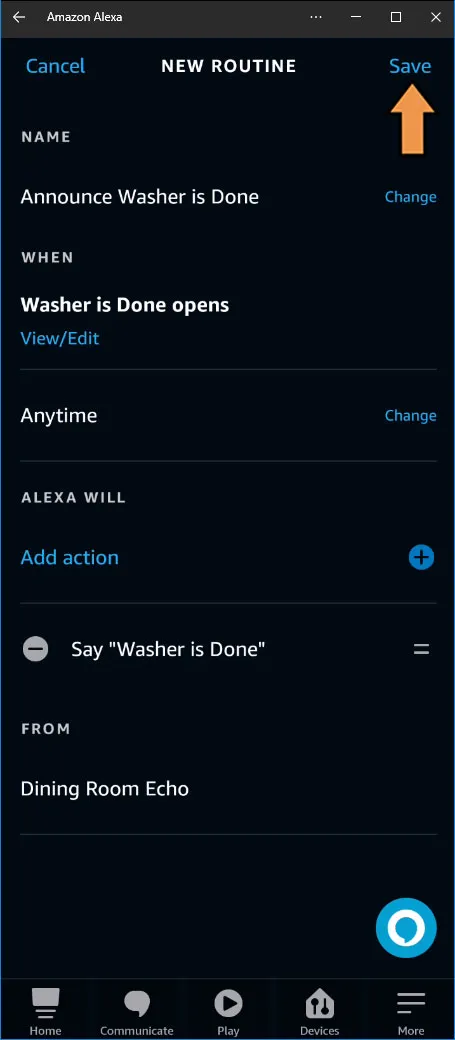
Click Save to complete the Routine.
Success: That’s It! Your Dumb Appliance is now Smart
