The Ultimate Smart Home Automation Cookbook
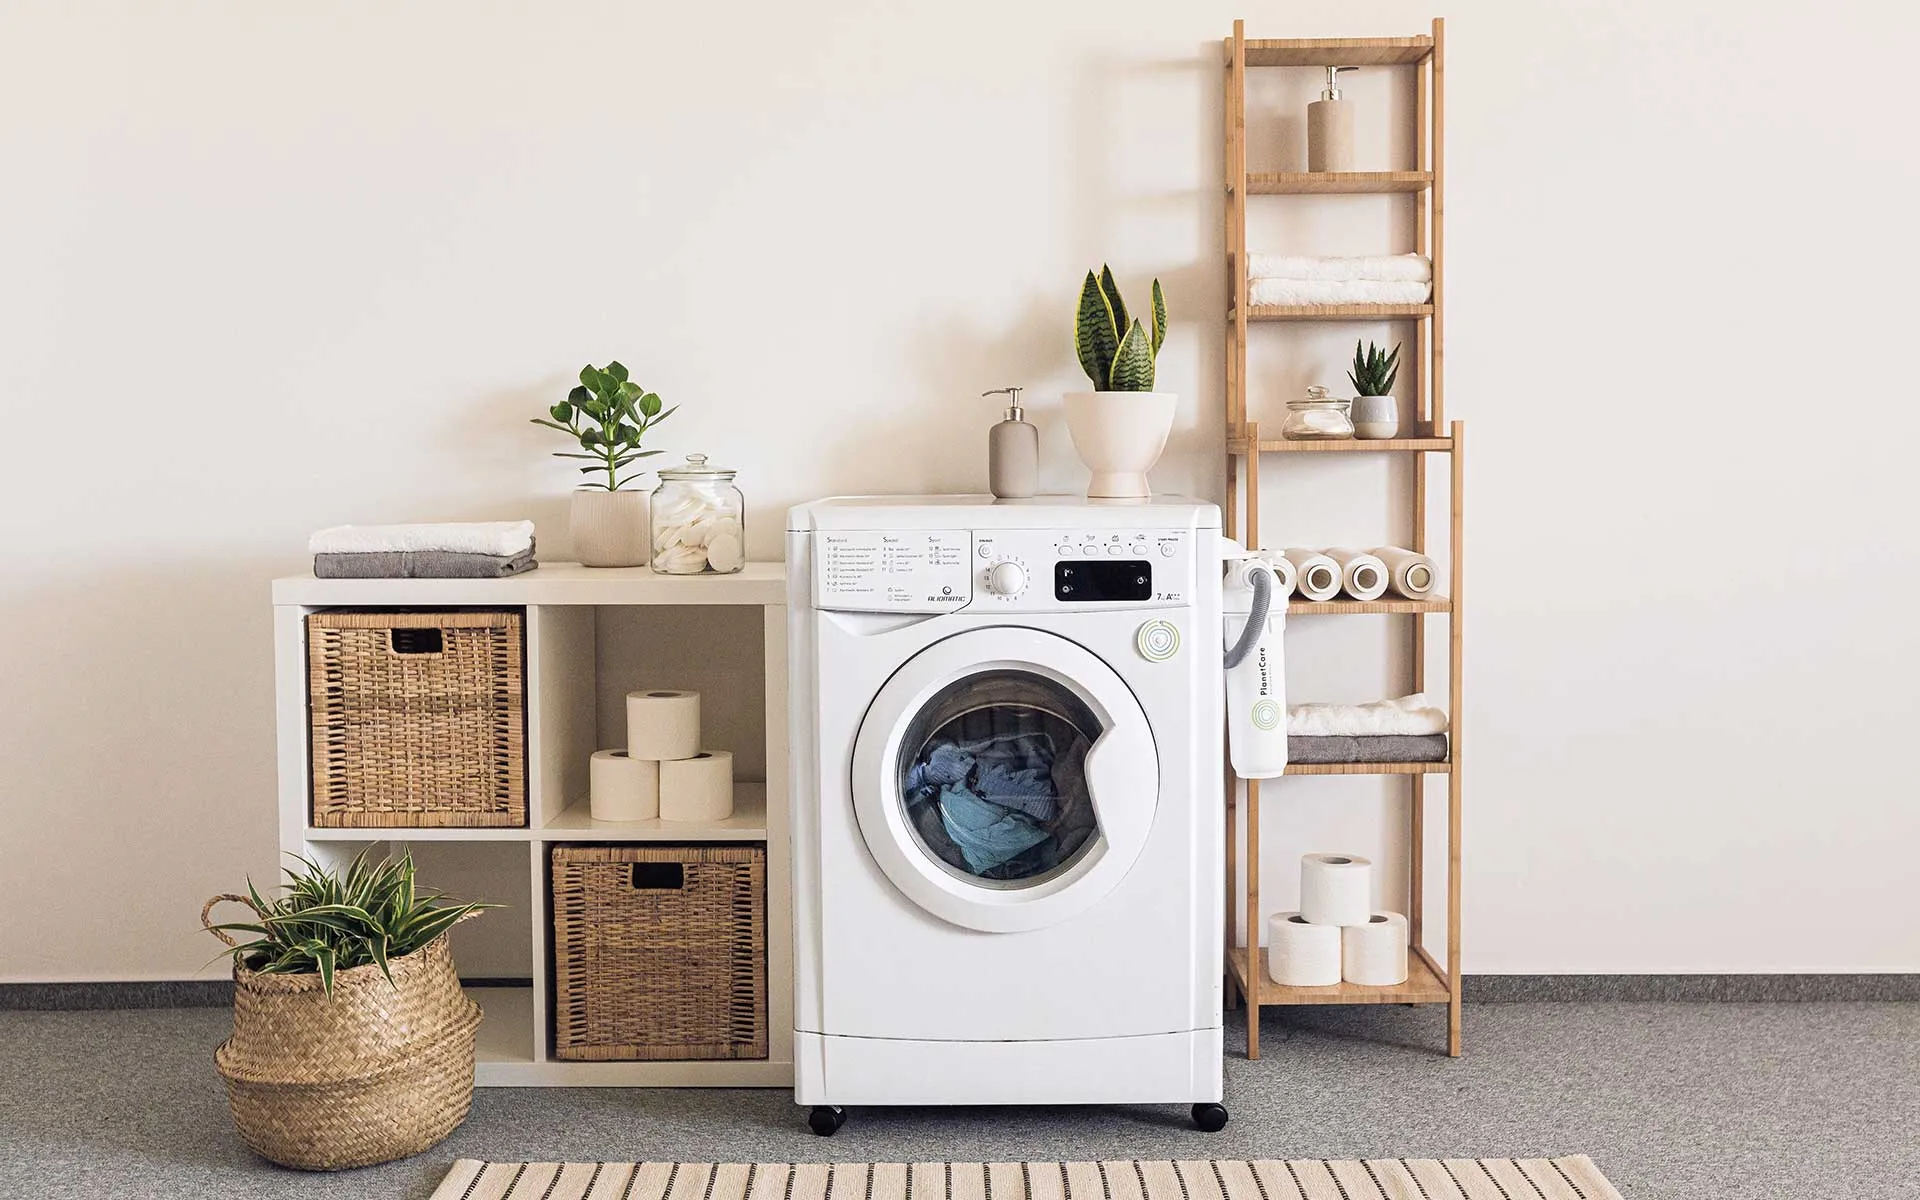
The ‘Announce Dryer is Done Automation’ is a valuable enhancement for any smart home. It utilizes a smart plug with power monitoring to transform a regular clothes dryer into a smart appliance. Smart appliances usually come at double the cost of traditional ones. But with a $25 smart plug, you can gain the advantages of a smart dryer without the hefty price tag. Integrating this with a voice assistant takes your home’s smart home evolution to the next level.
Automation Details
Required Devices
- Smart Plugs
- Contact Sensors
- Voice Assistant
Triggers:
- Dryer Finishes
- Dryer Door Opens
Conditions:
- Don't Announce if Mode is Night
- Max 2 Notifications per Cycle
Actions:
- Announce Dryer is Done
- Increment Dryer Cycle Counter
Important: Smart Plug must have Power Monitoring.
Hubitat
Announce Dryer is Done Automation
The Official Documentation for Rule Machine
Option One
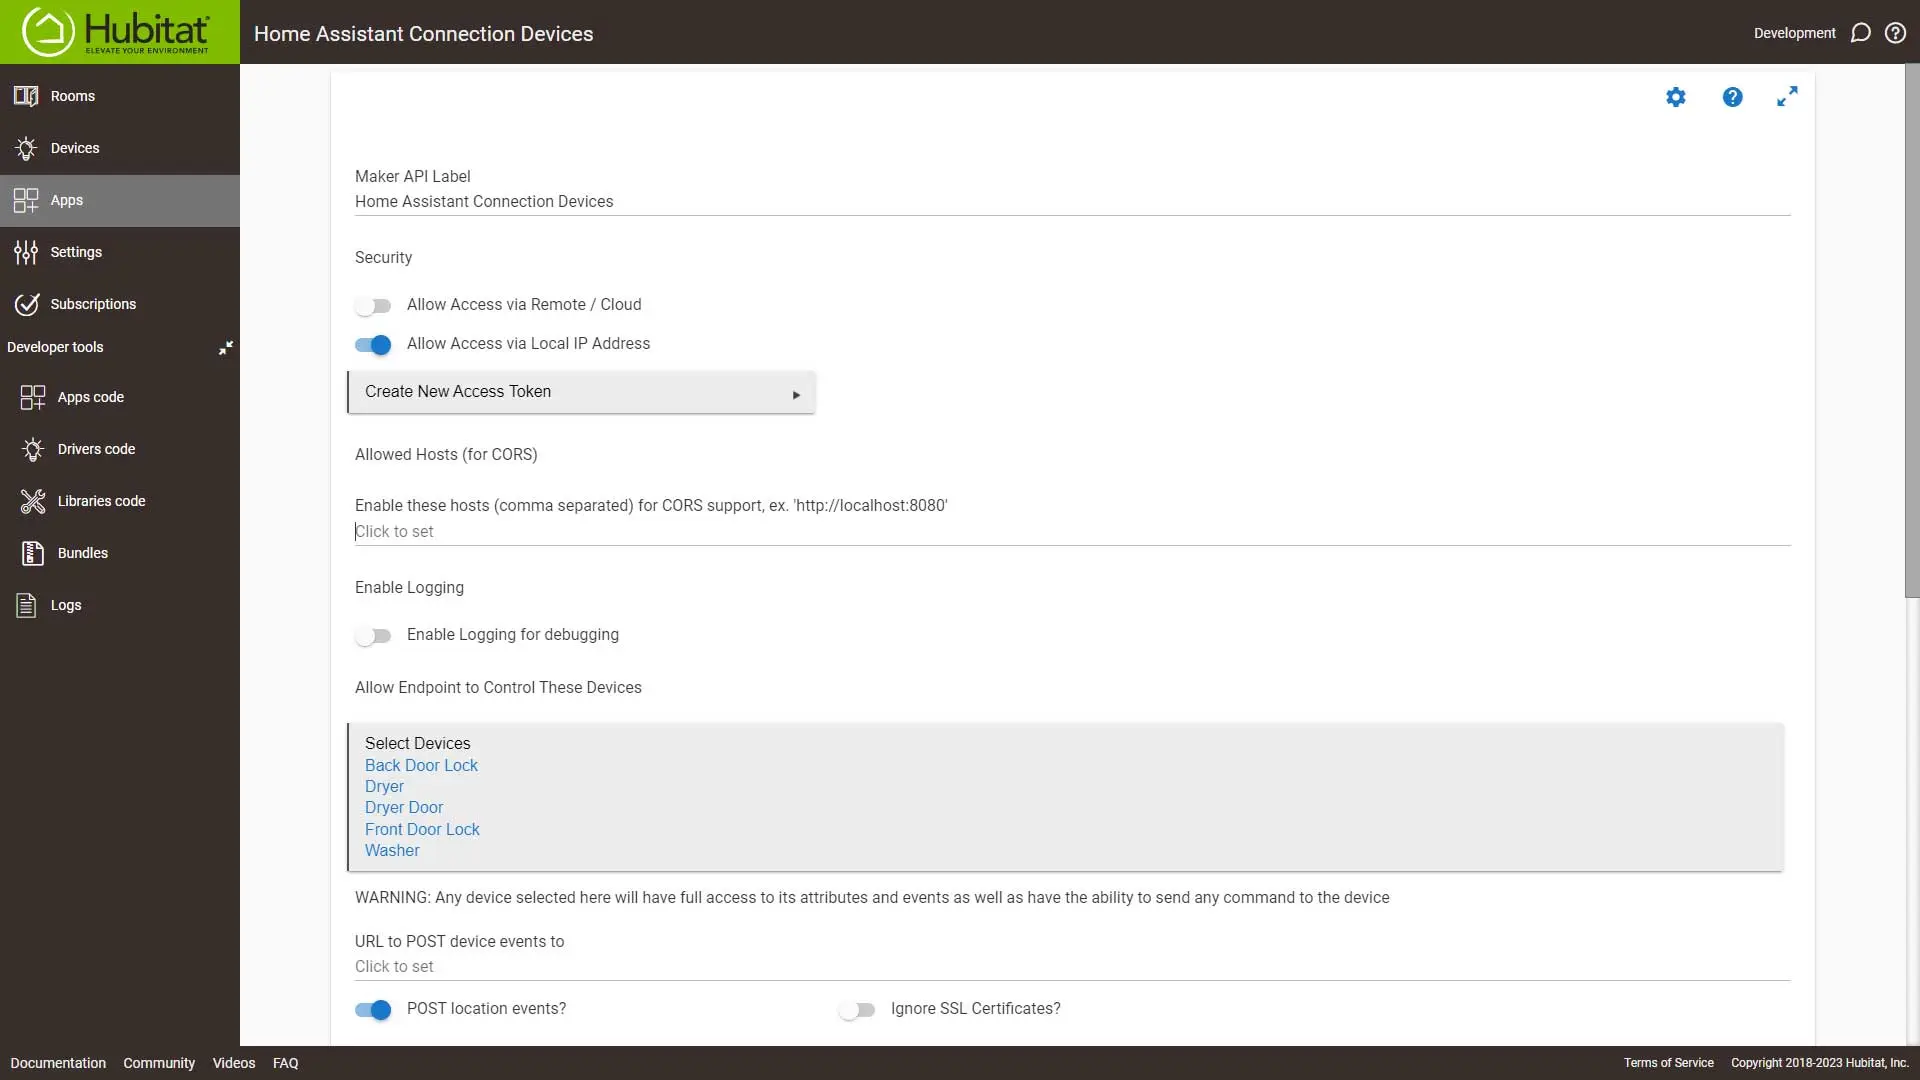
Share your devices with Home Assistant using Hubitat Connect. Then create an automation in Home Assistant using the Alexa Speaks integration outlined under the Home Assistant tab.
- Share your smart plug with Home Assistant.
Option Two
Create and share a virtual switch with Alexa using Alexa Speaks: Shared Devices. Then create an automation as outlined in Option Three.
Option Three
We’ll use an MQTT Notification device using Alexa Speaks integration.
Setting Up the Automation
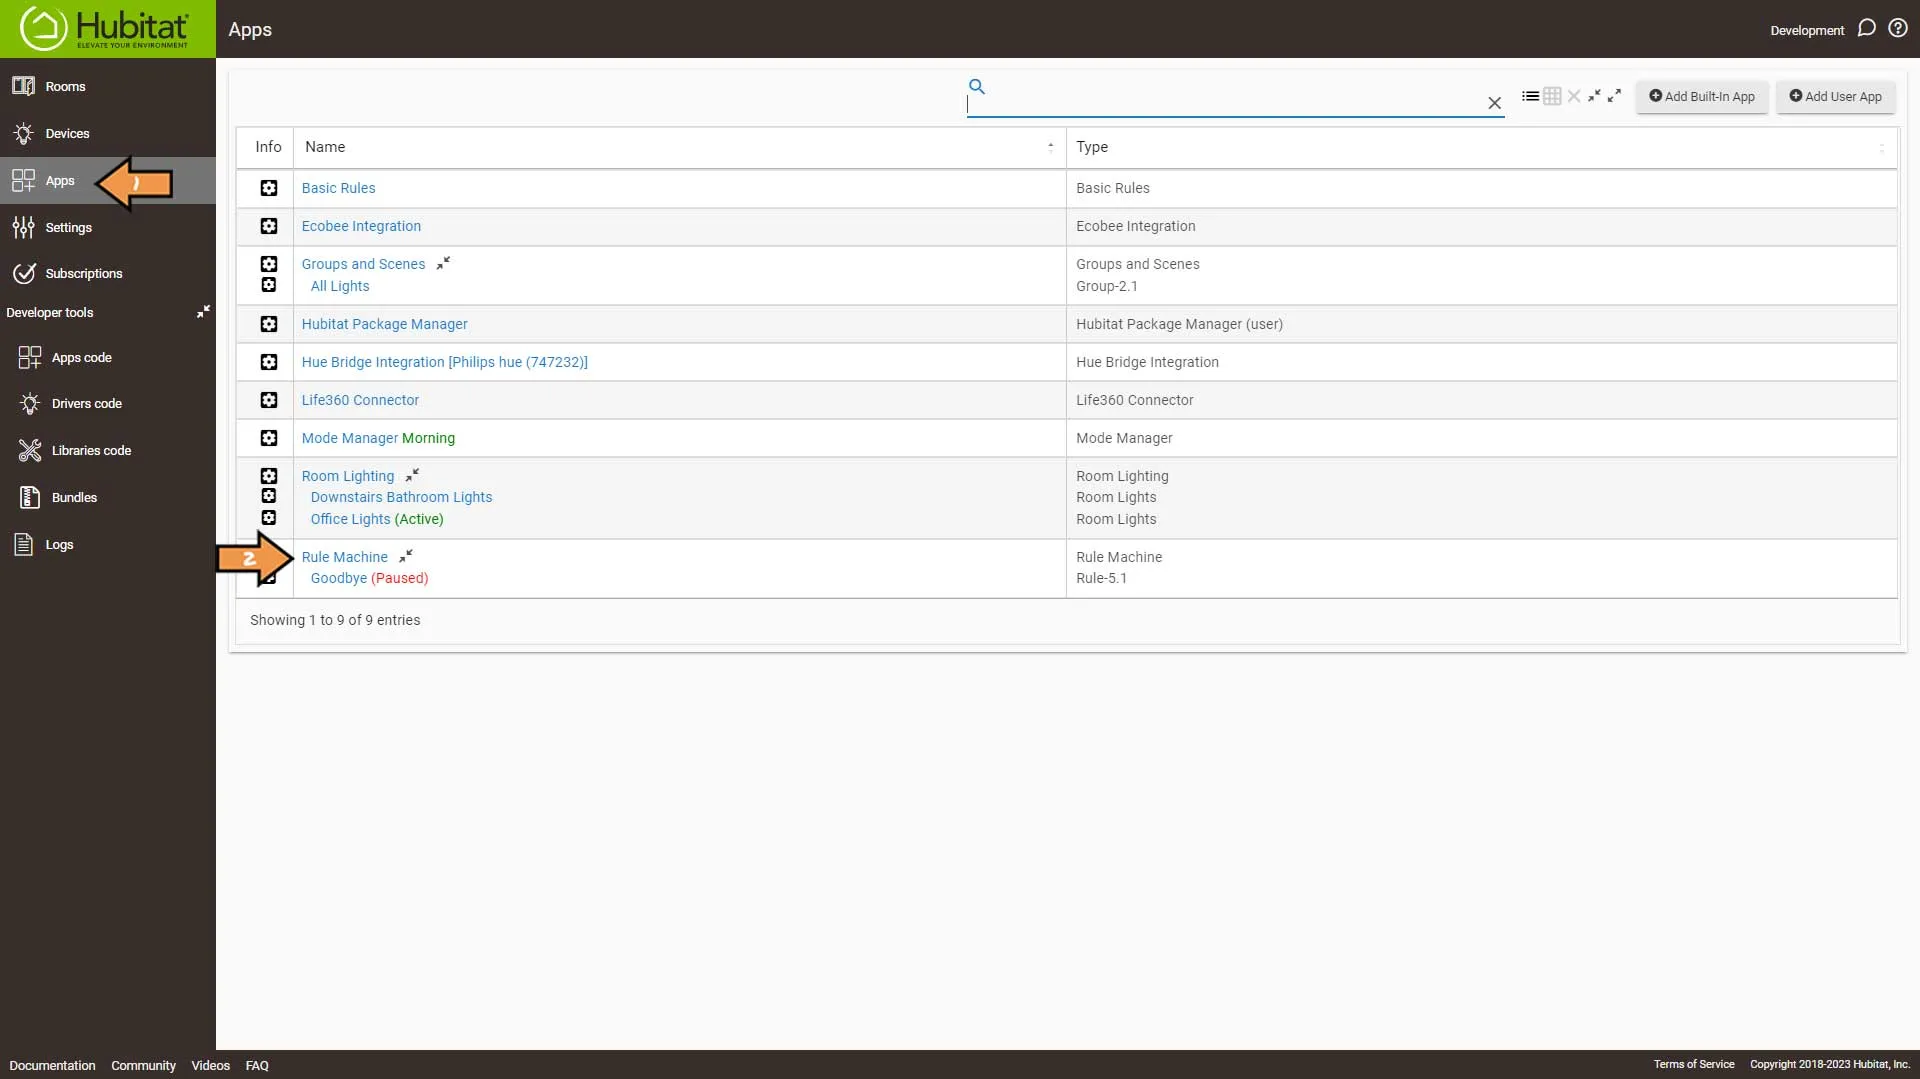
Next, go to Apps and click Rule Machine.
Select Create New Rule.
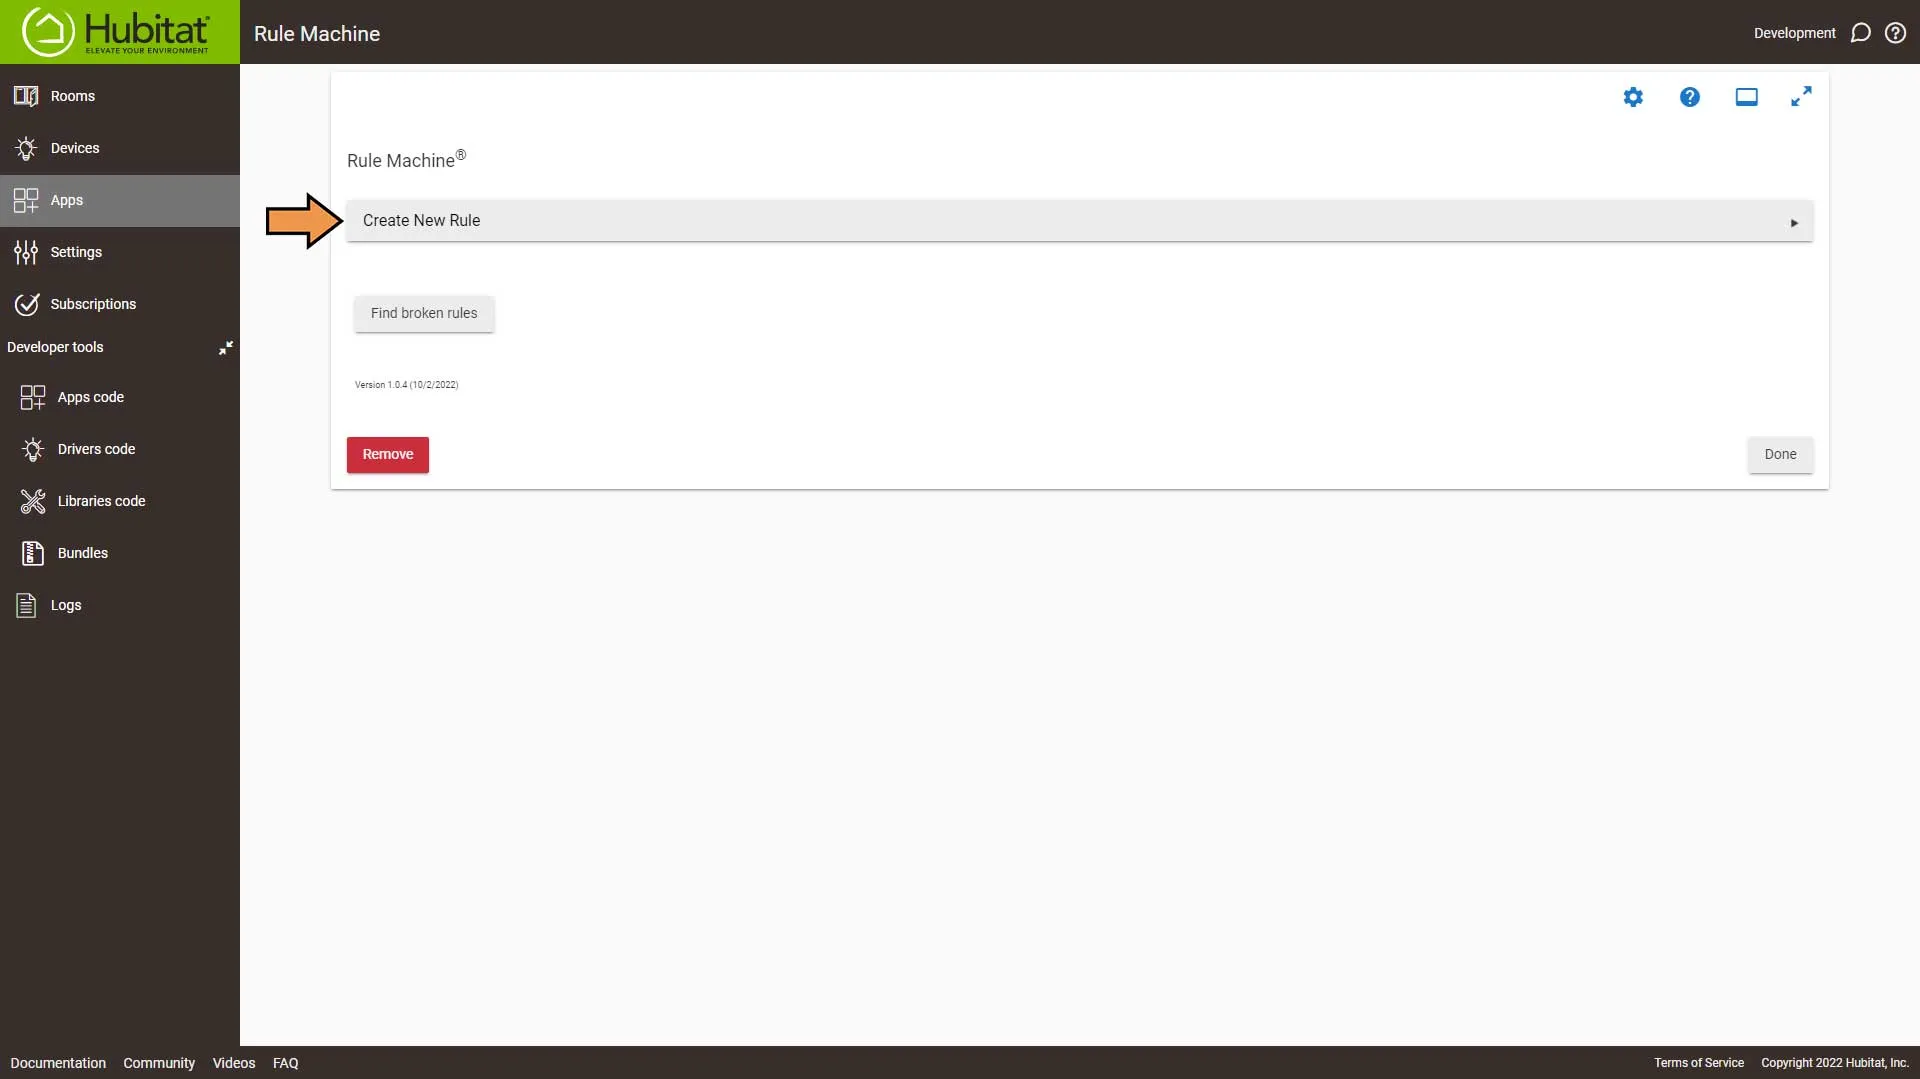
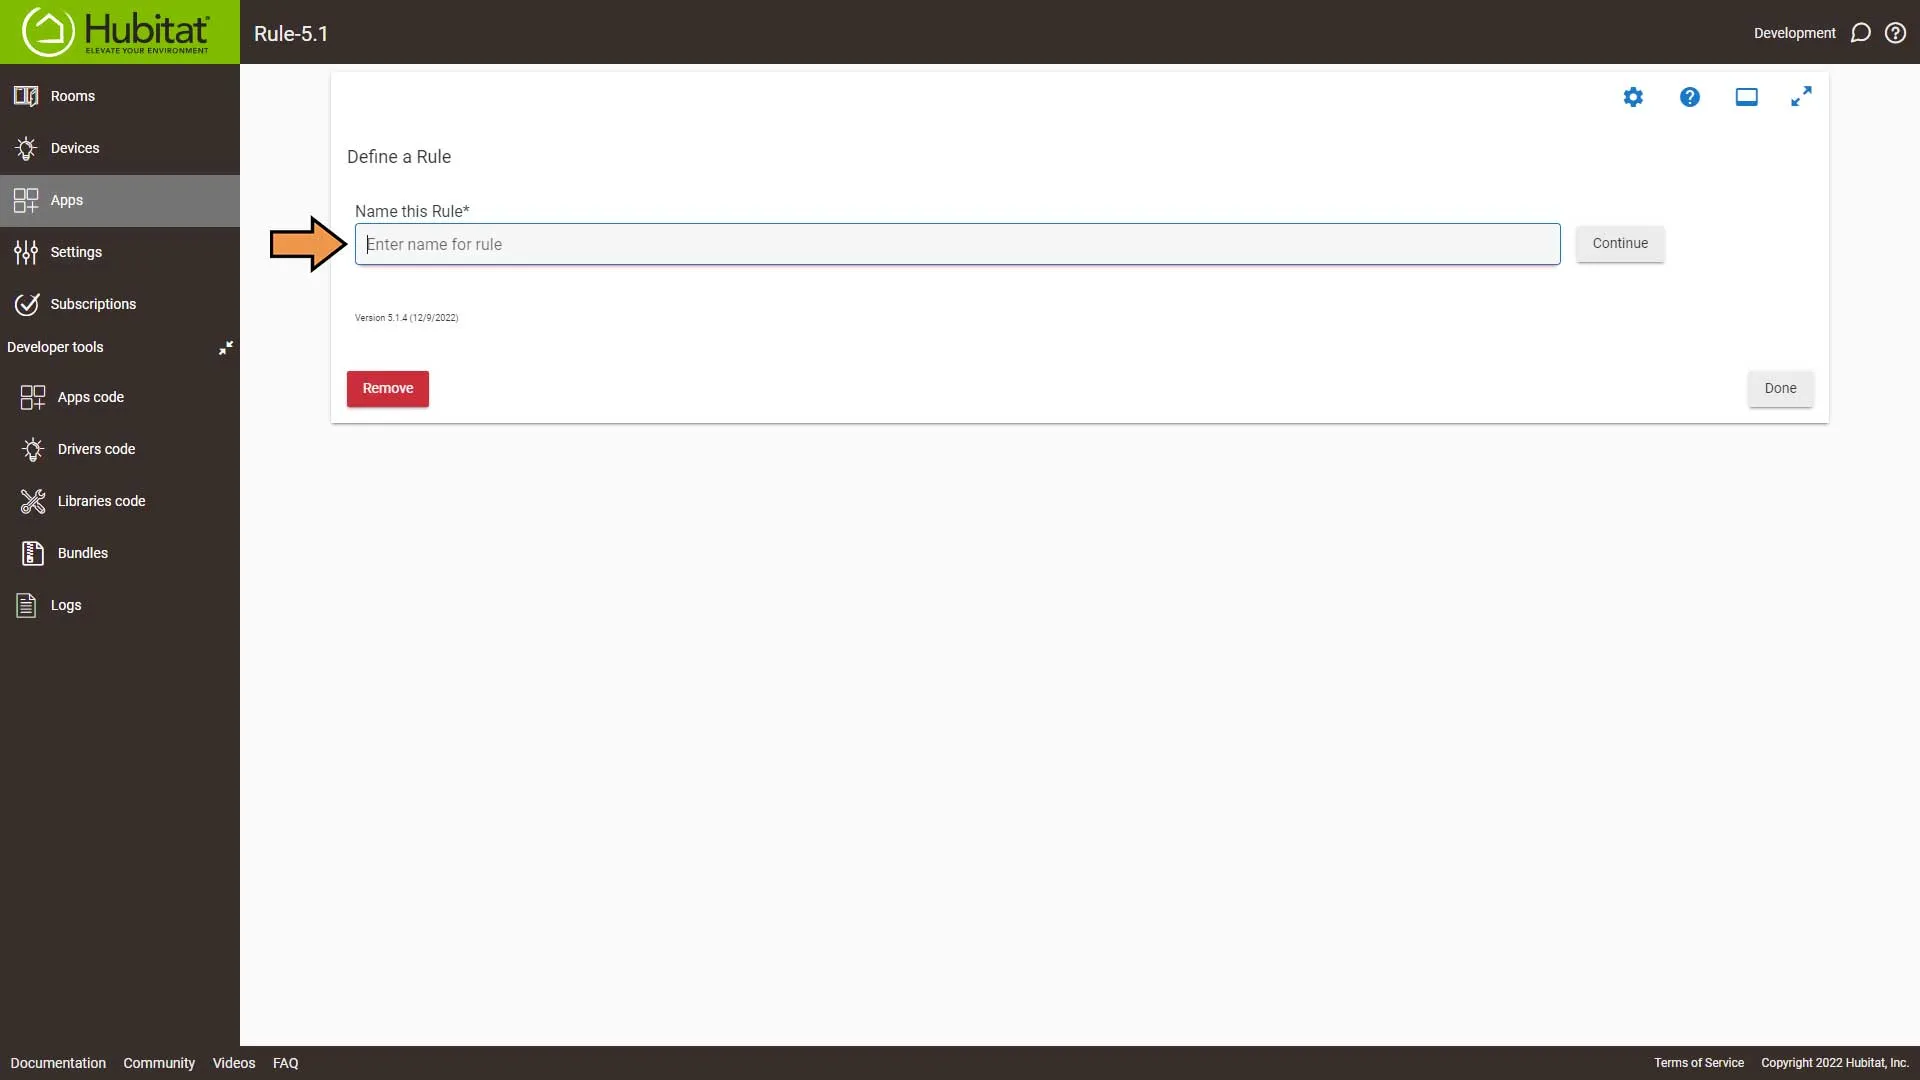
Select Create New Rule.
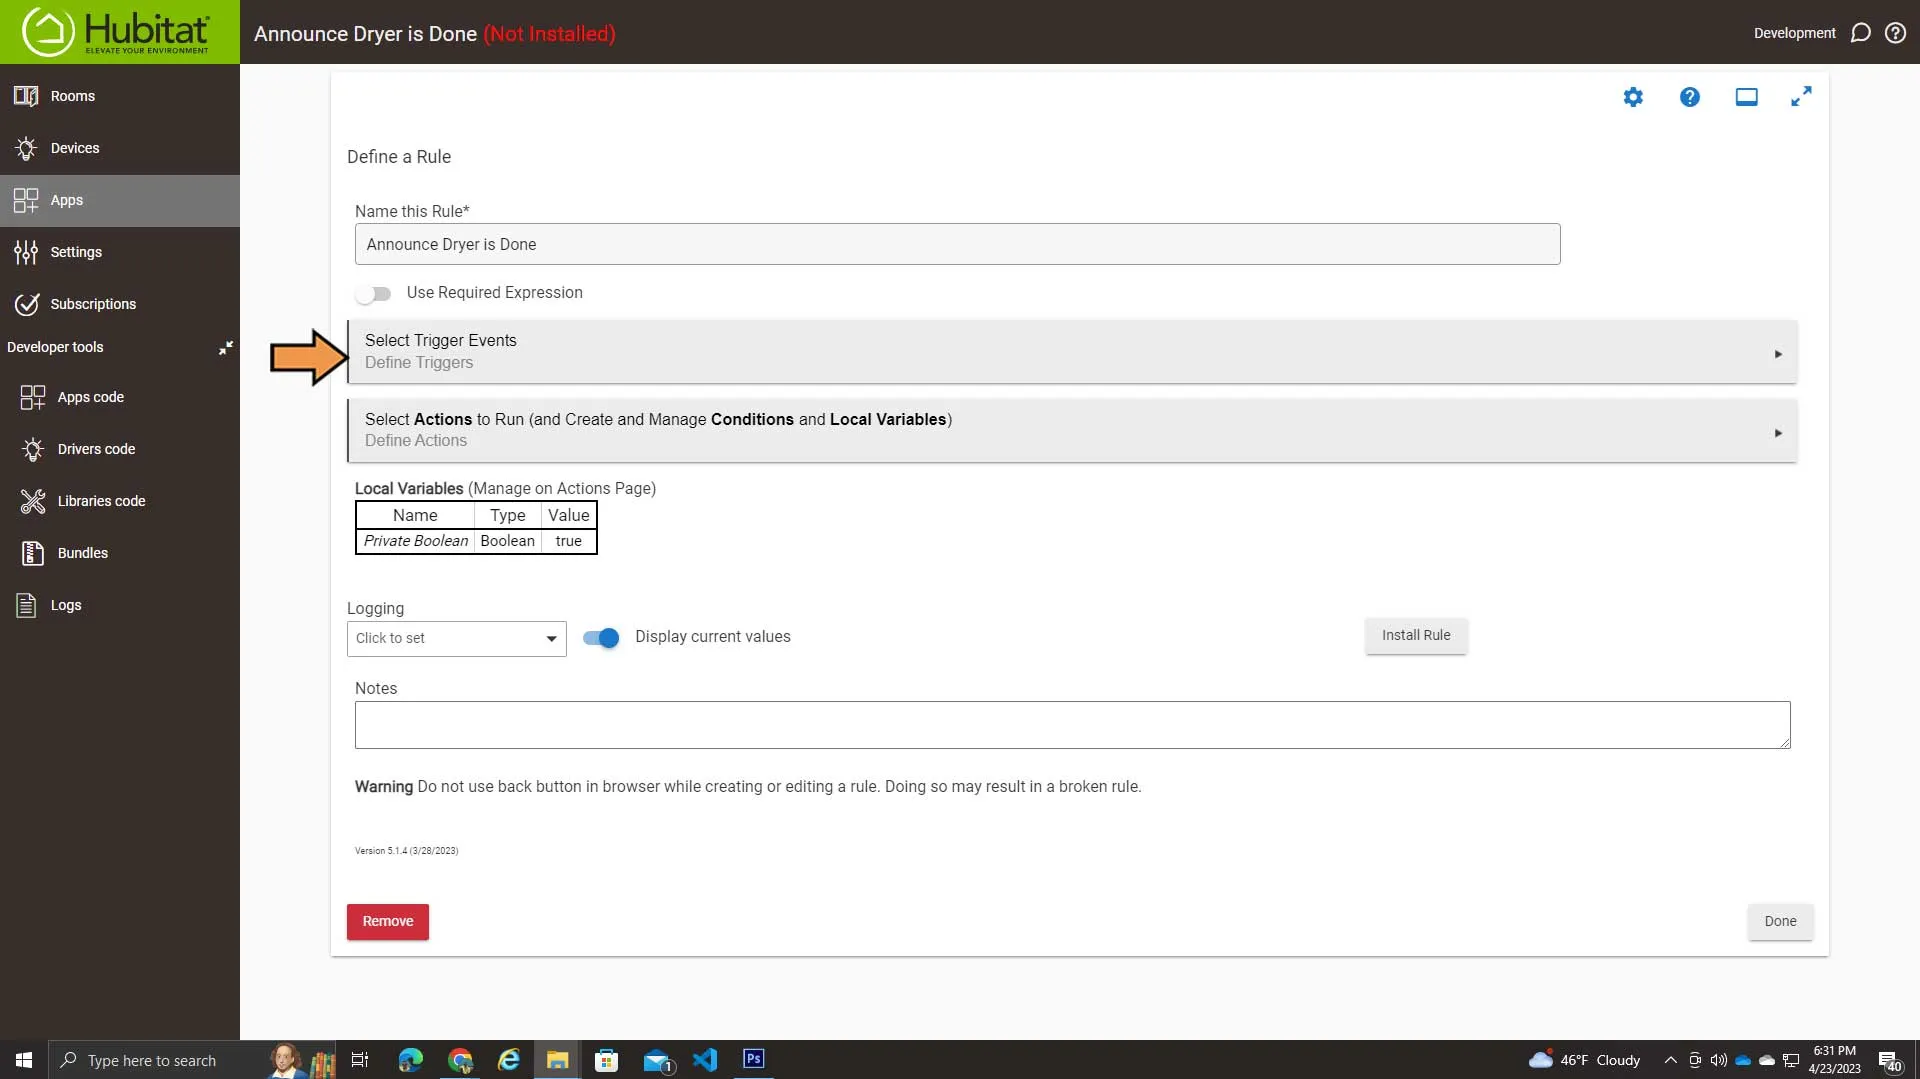
Select Trigger Event.
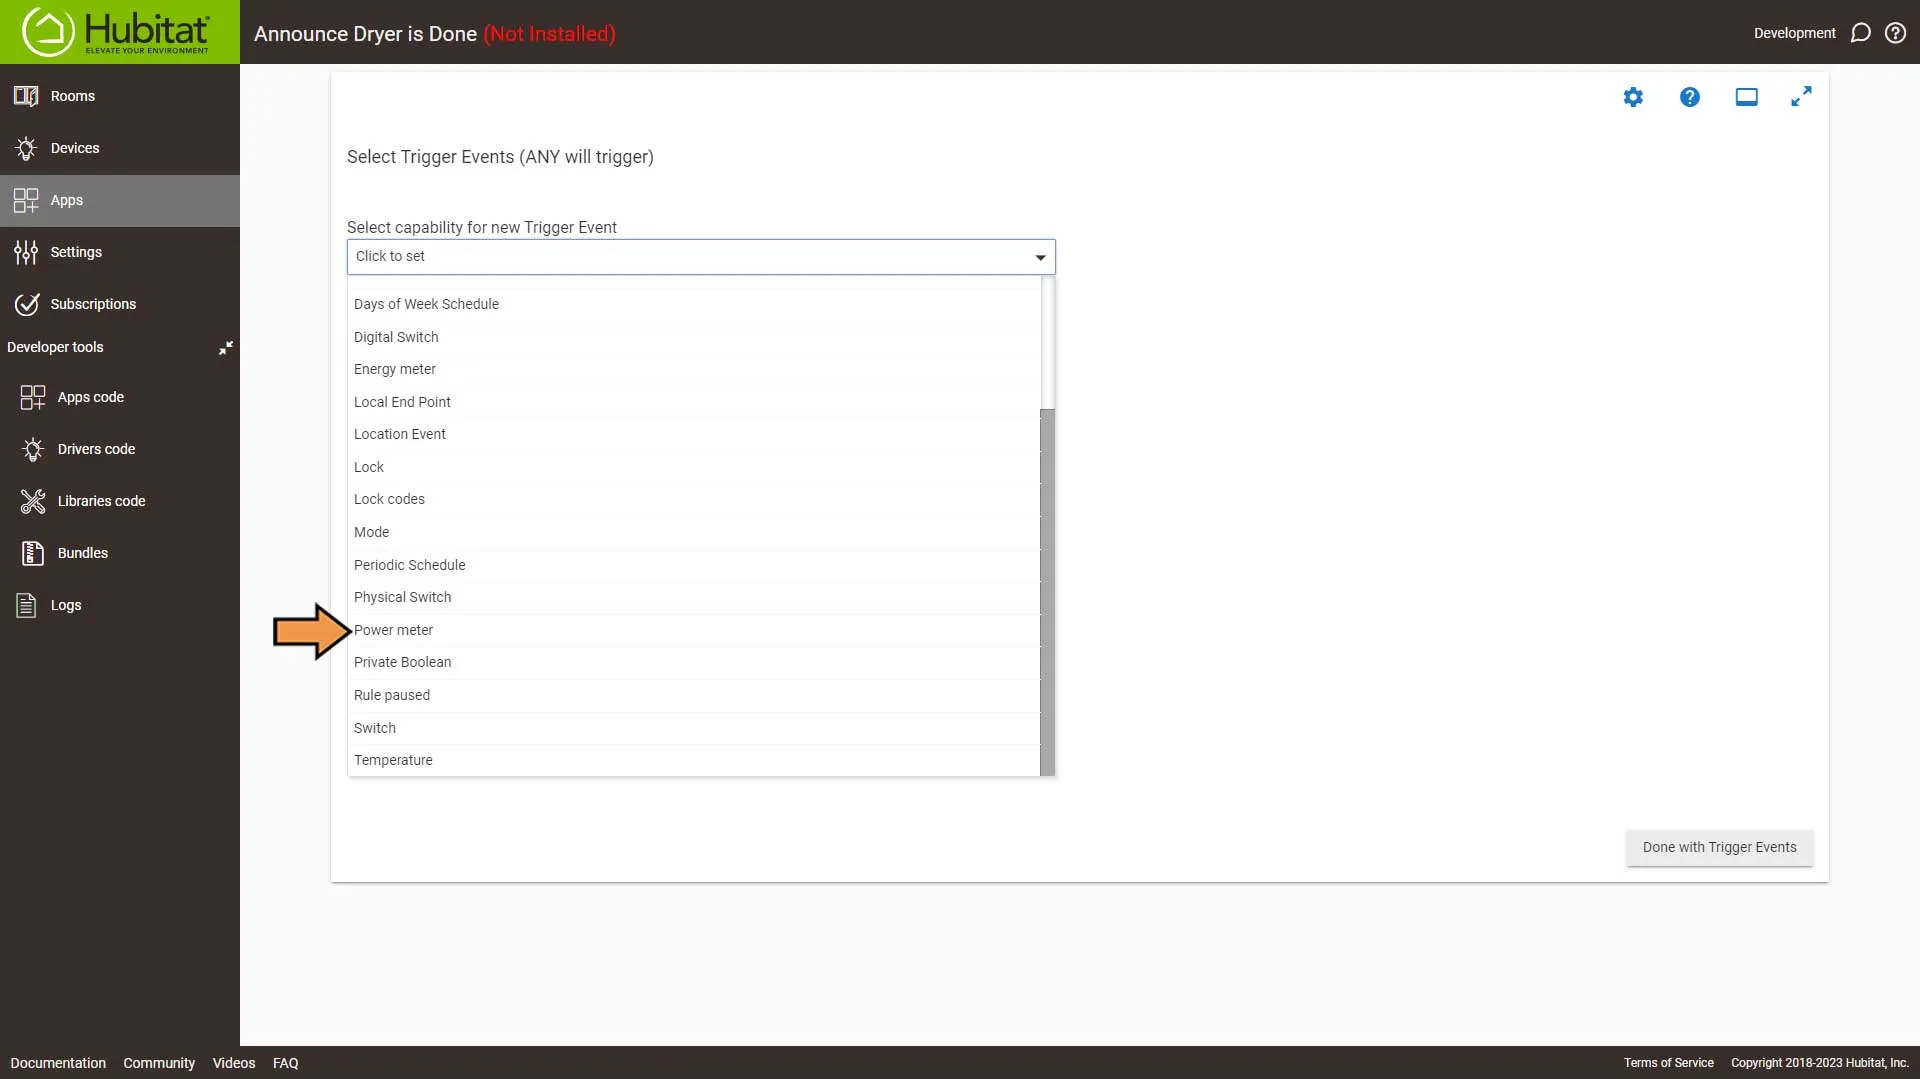
From the Capability drop-down, select Power meter.
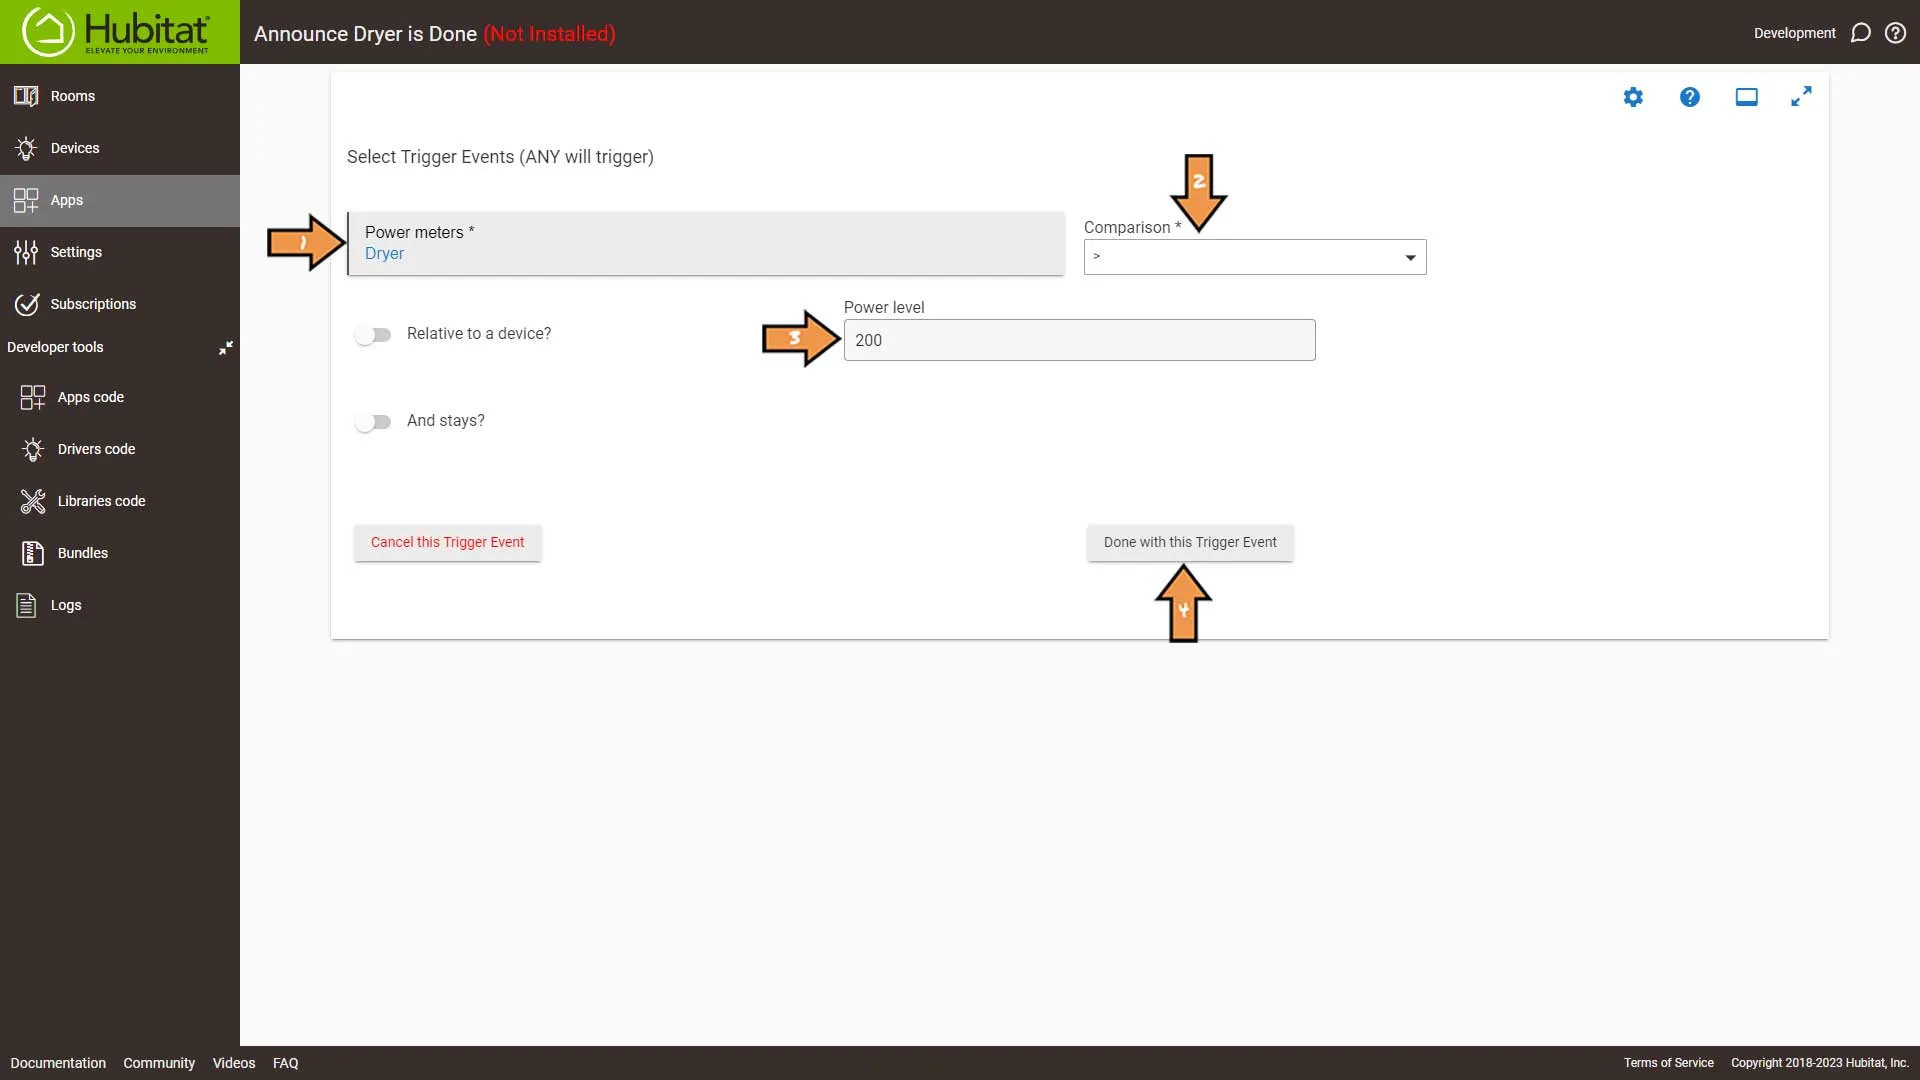
Set the Trigger event as follows:
- Select our smart plug
- Set the comparison to Greater Than
- Set the Power level to 200
- Then click the Done with this Trigger Event button
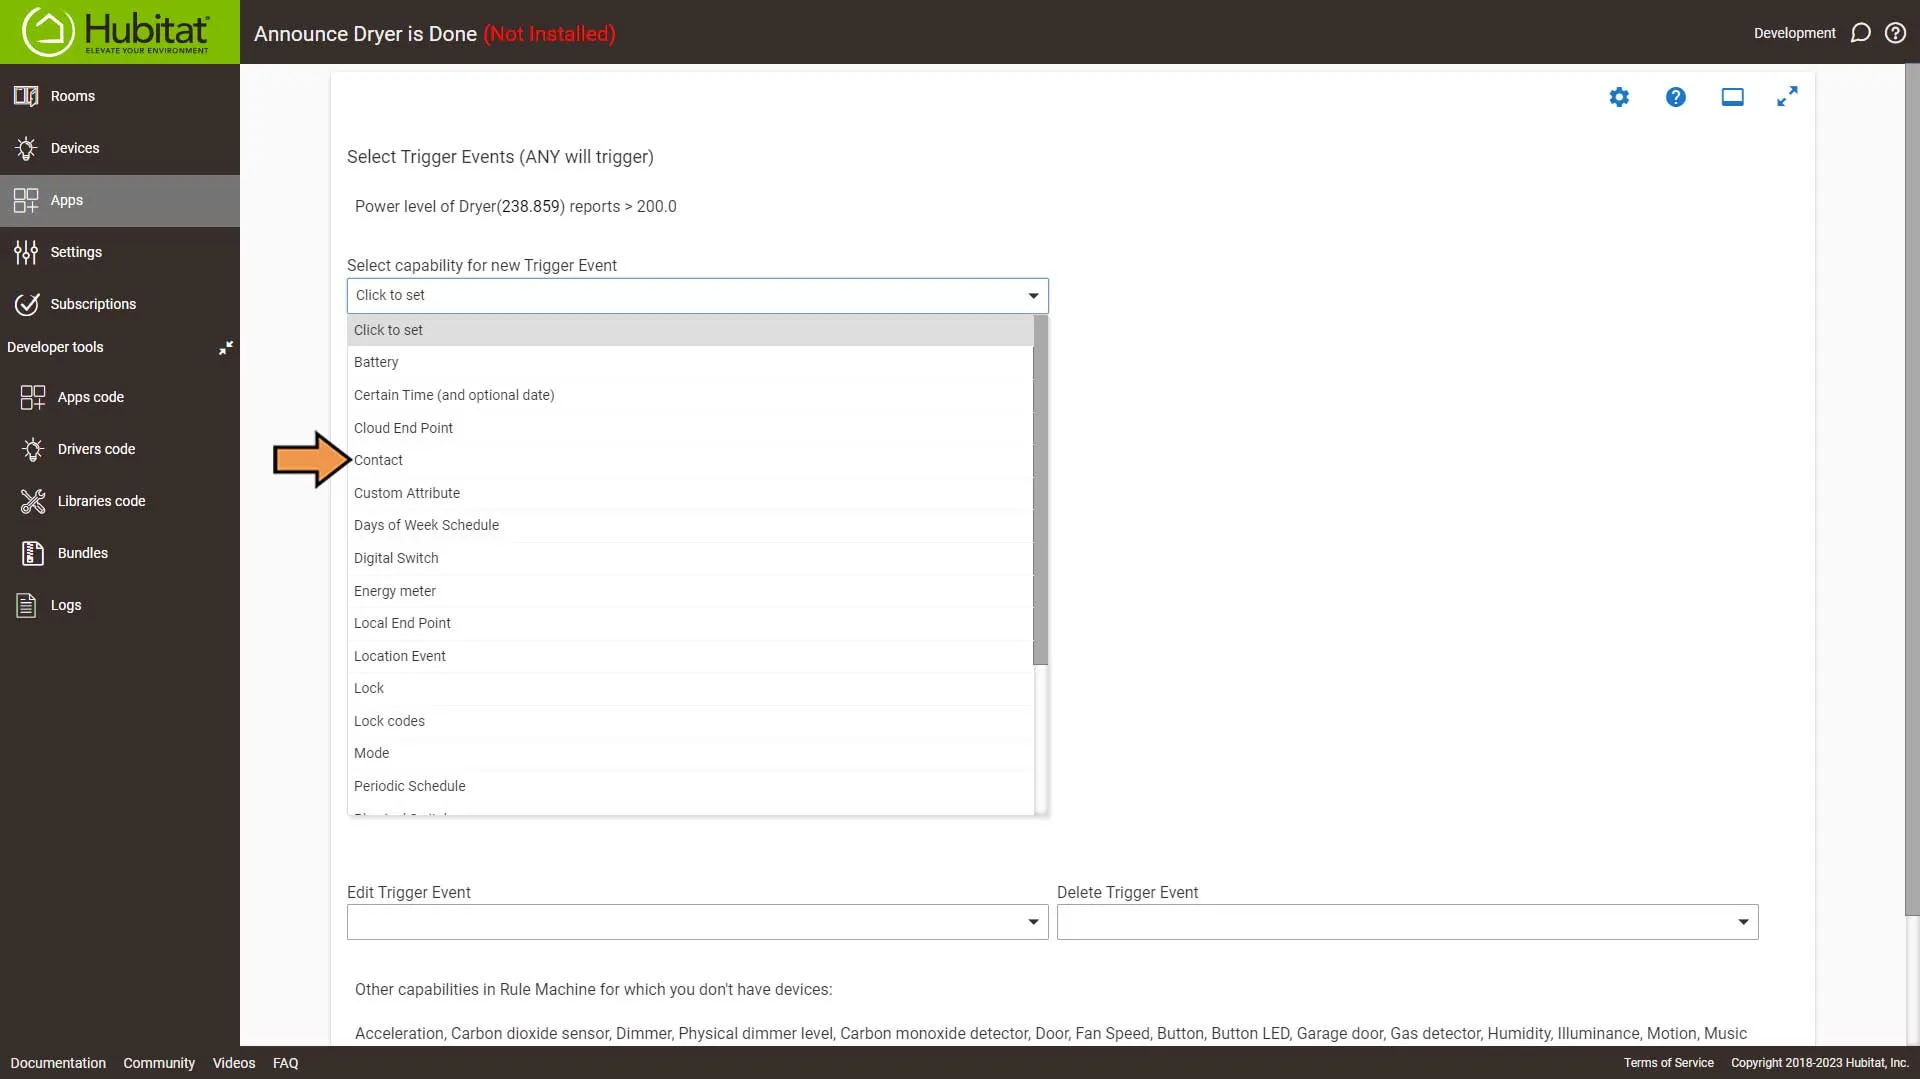
From the Capability drop-down, select Contact.
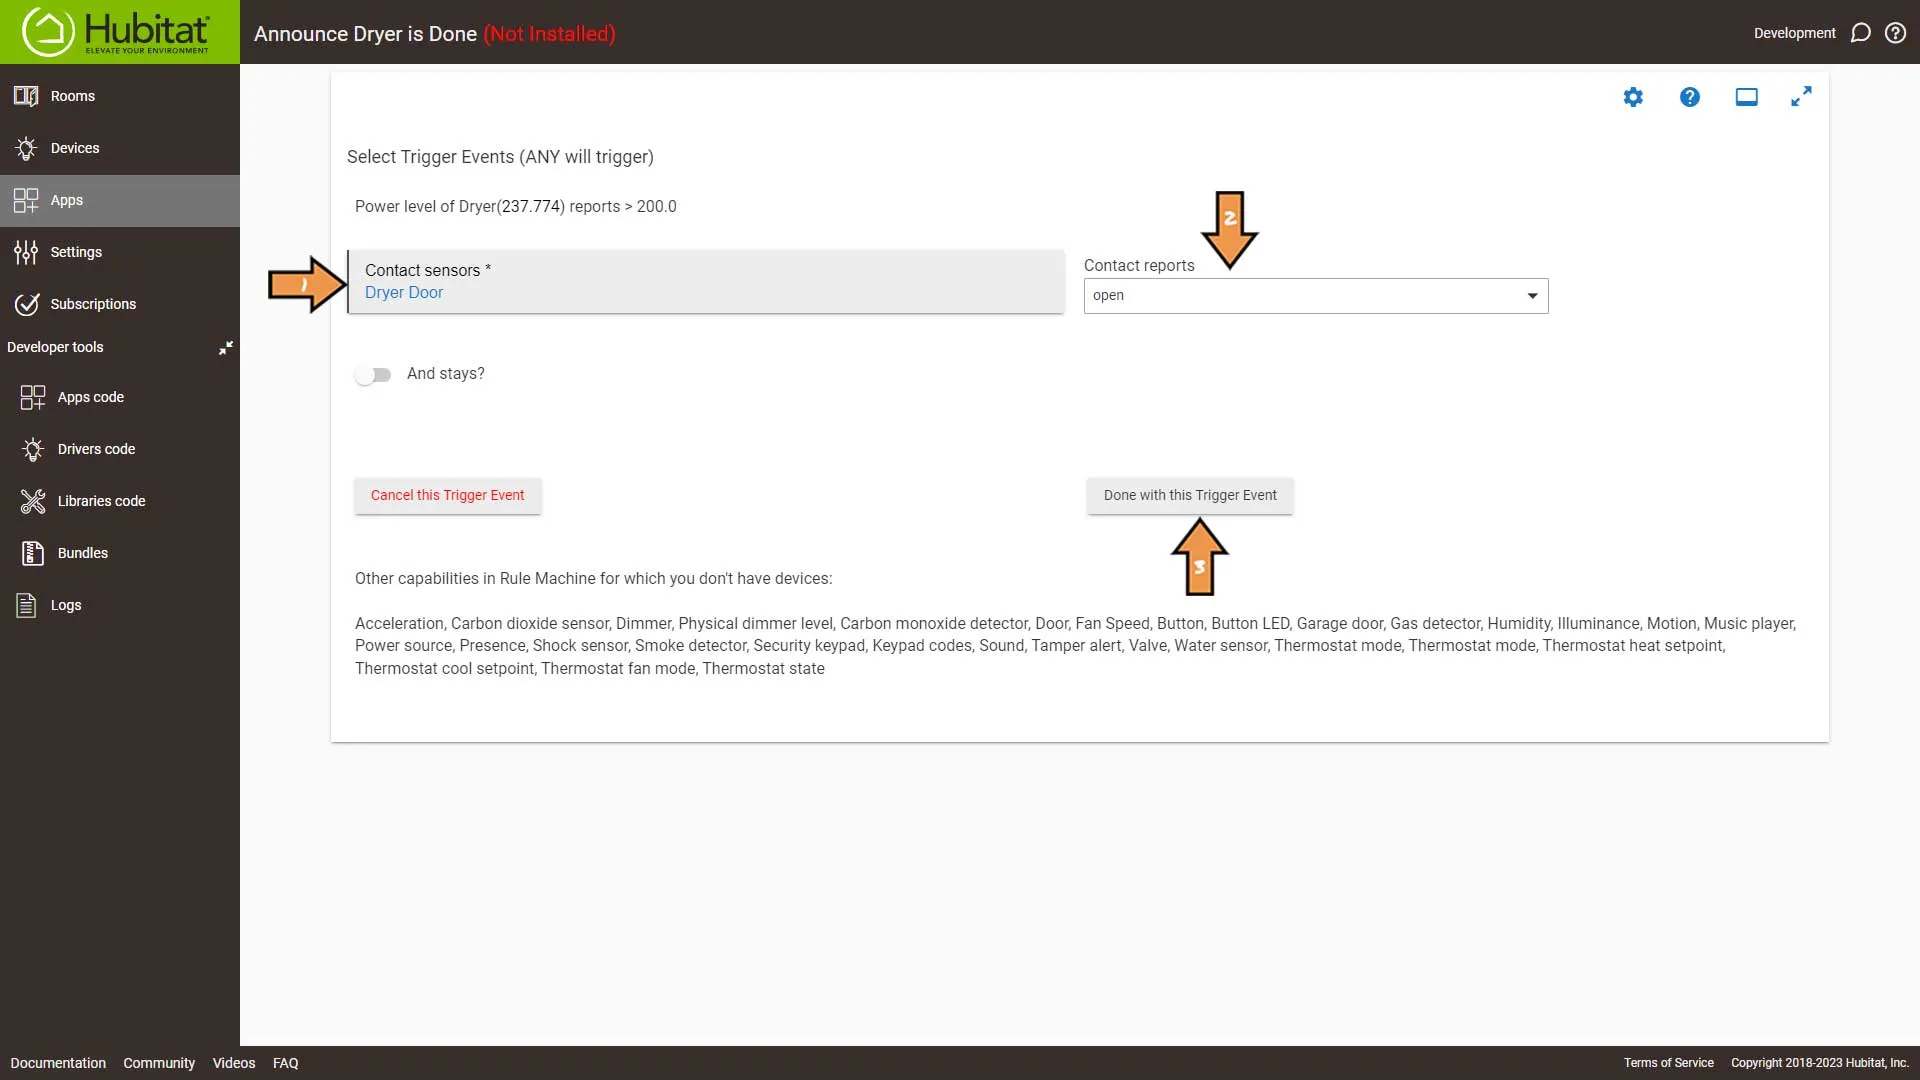
Set the Trigger event as follows:
- Select our Dryer Door sensor
- Set the Contact reports to open
- Then click the Done with this Trigger Event button
Next, Click the Done with Trigger Events button.
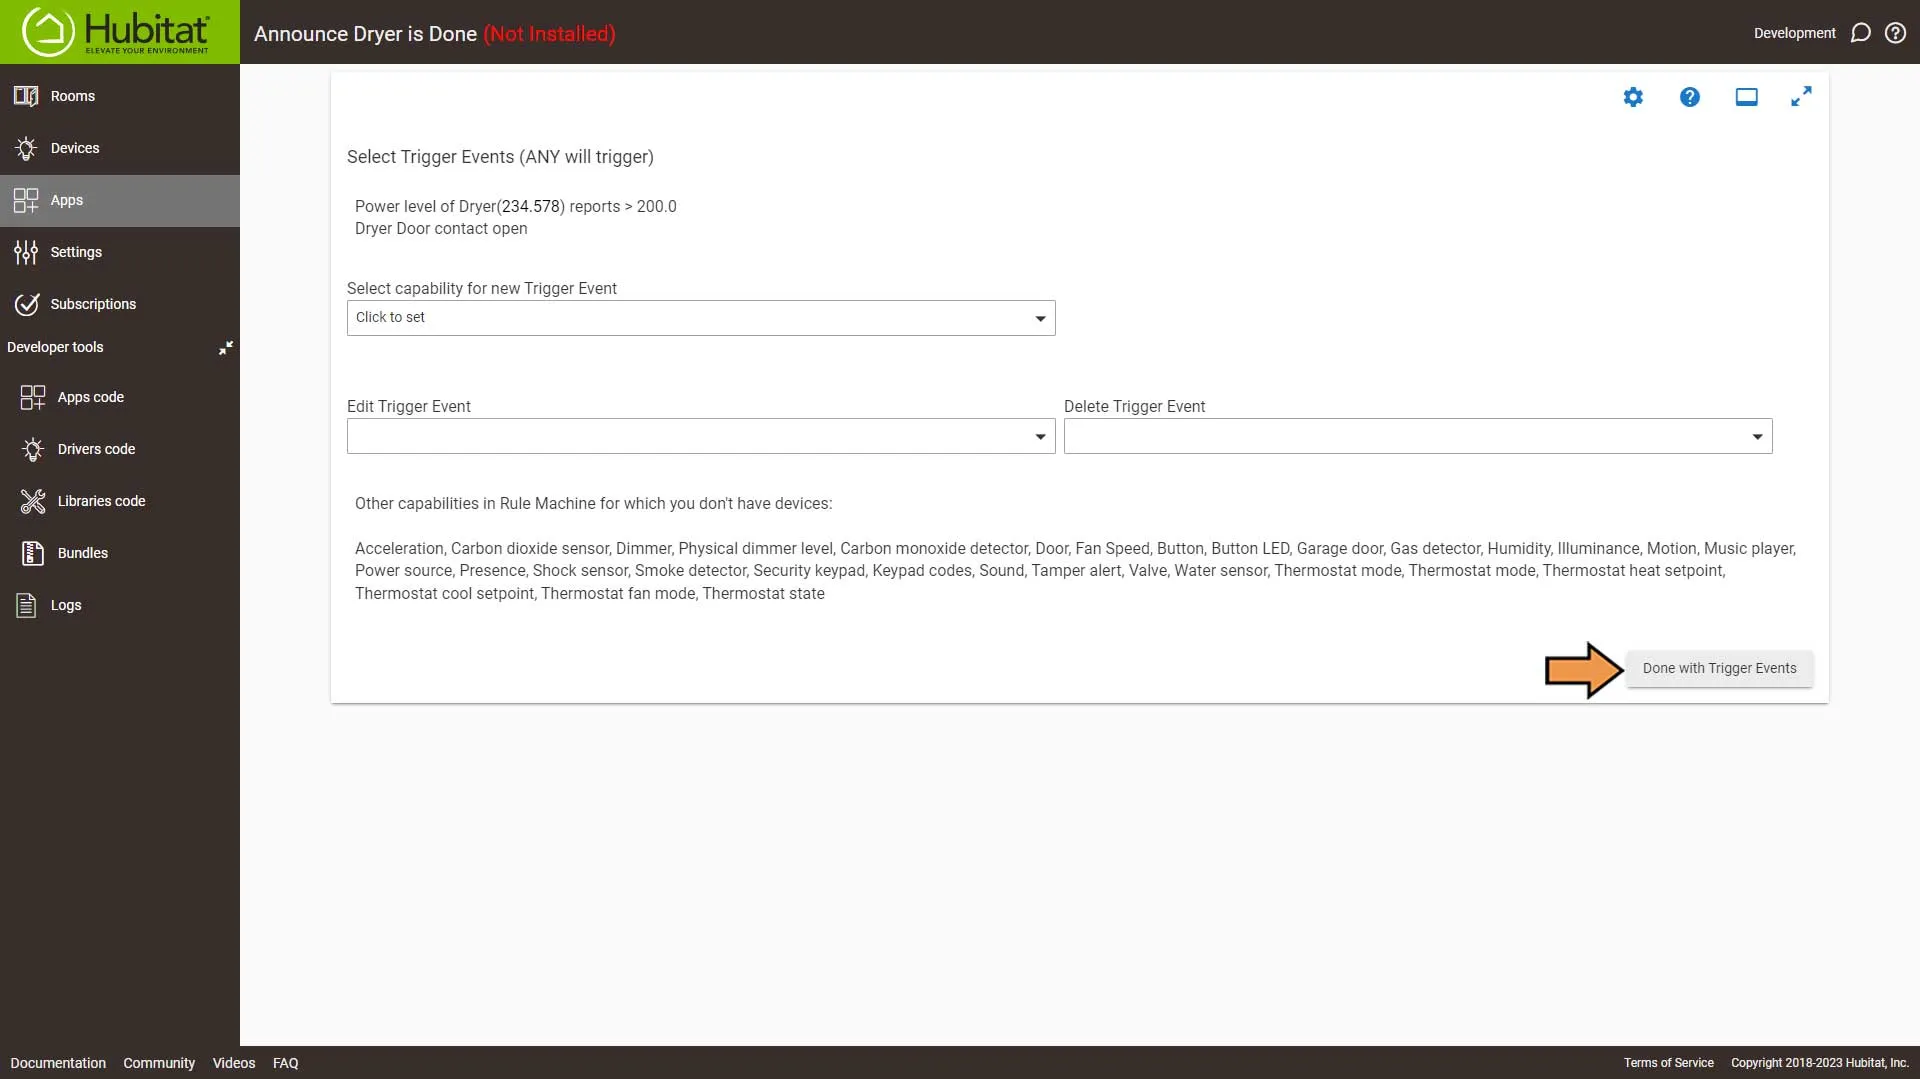
Select Actions to Run.
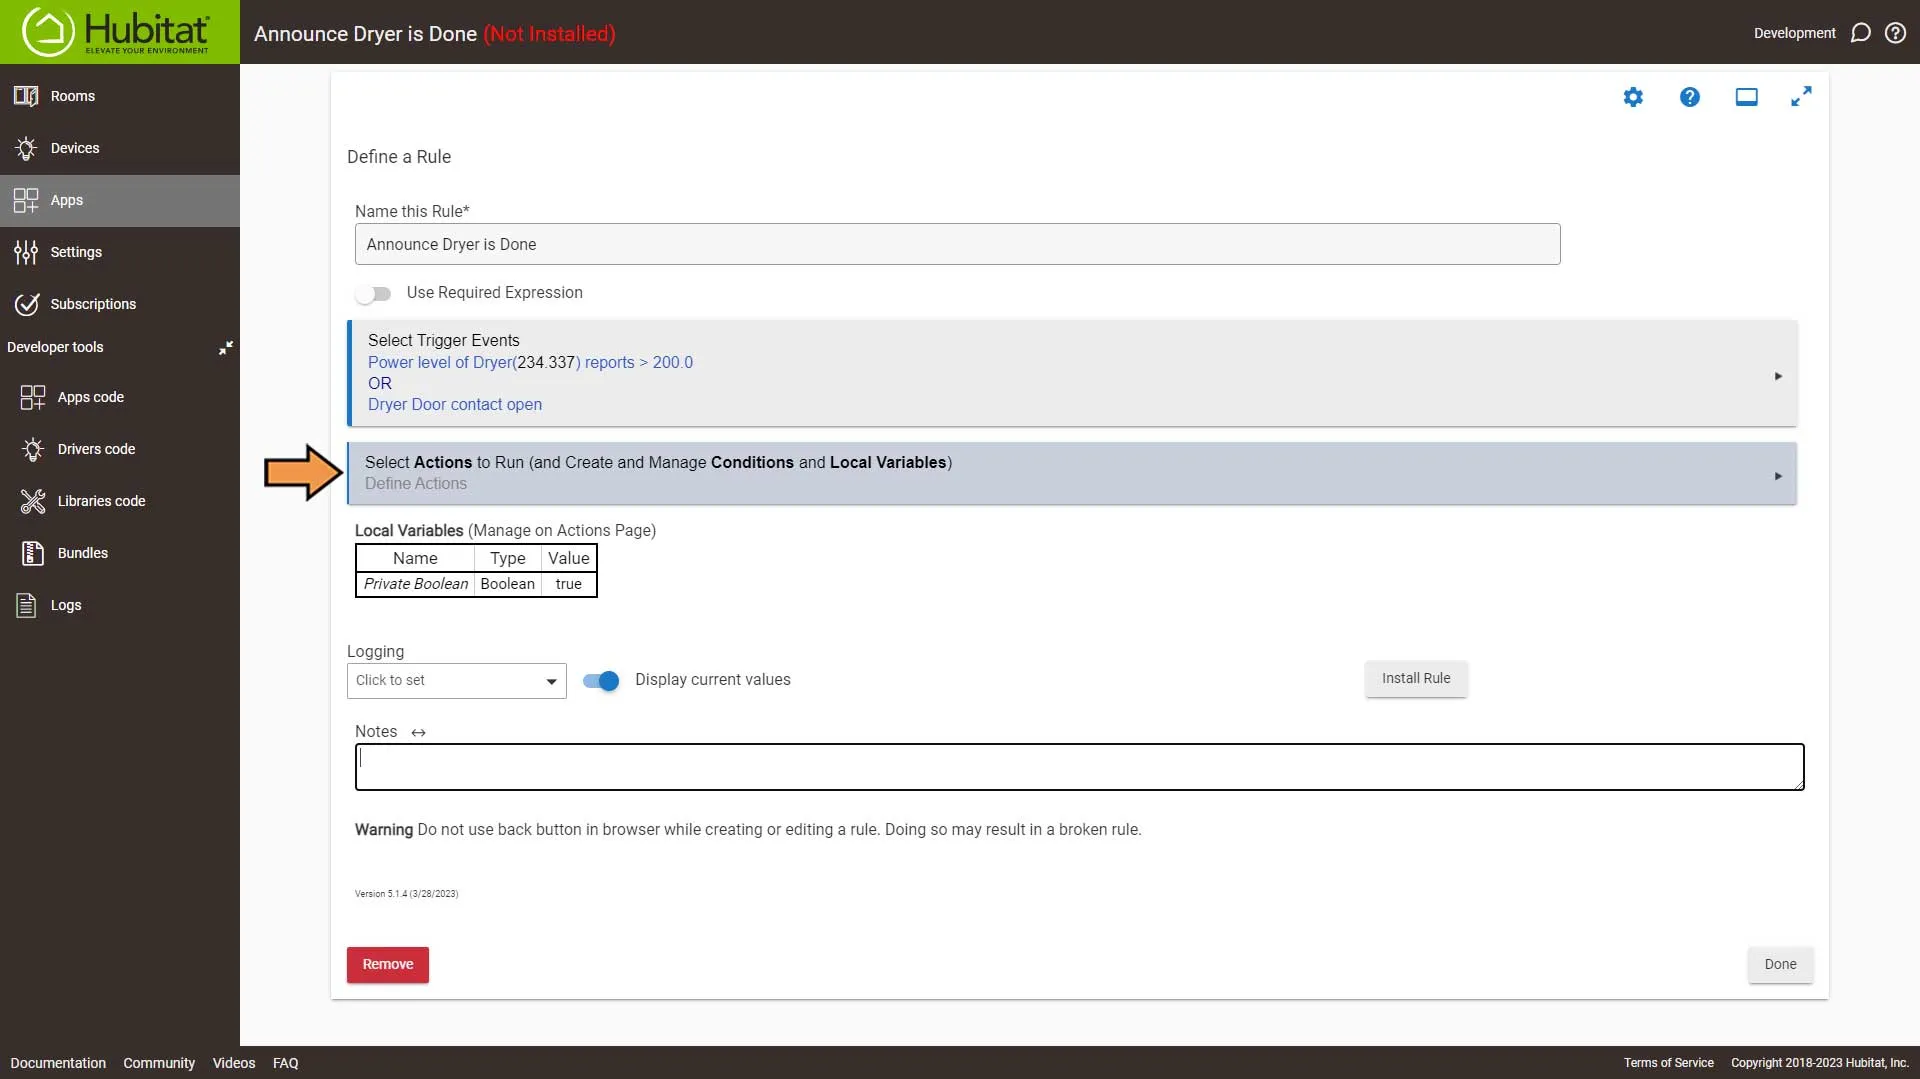
Select the Green Plus Sign to Add New Local Variable.
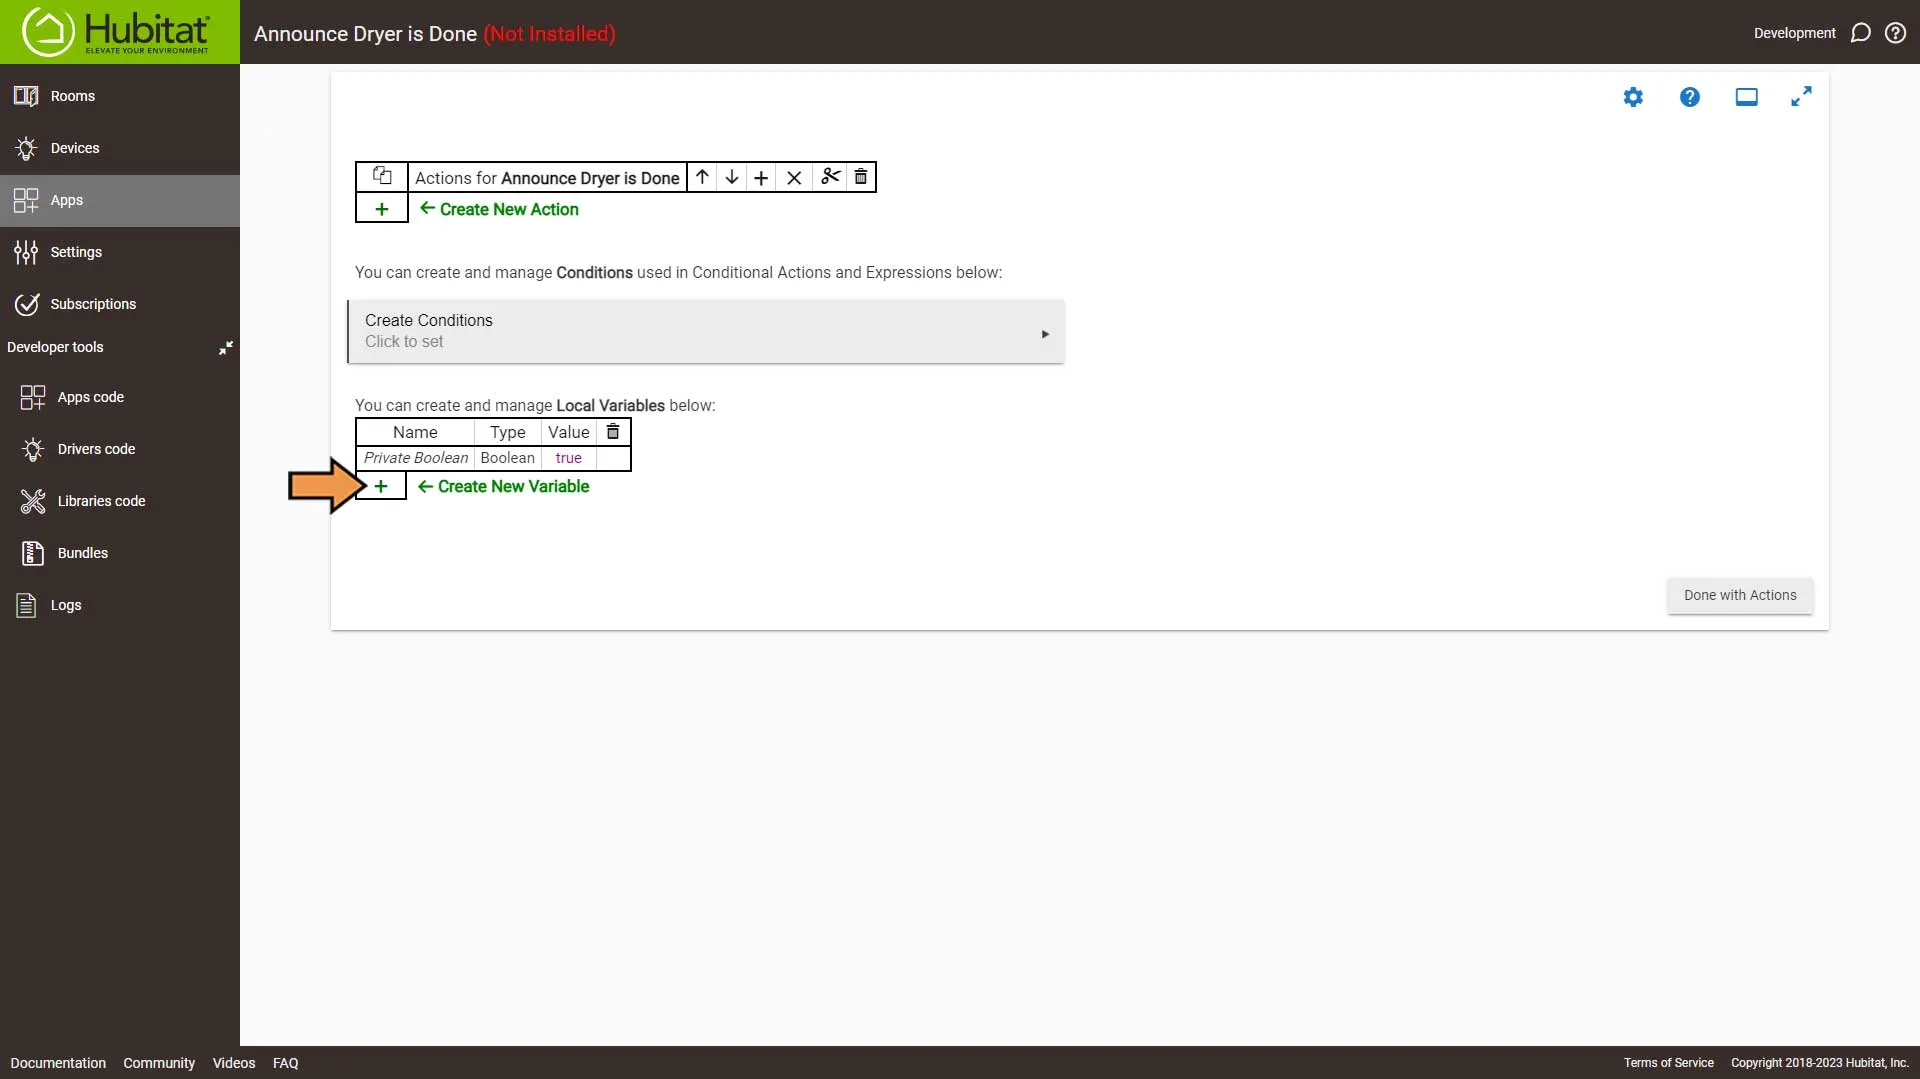
First, we name the variable dryerCount, then set the type to Number and the value to zero. Next, we select Create Conditions.
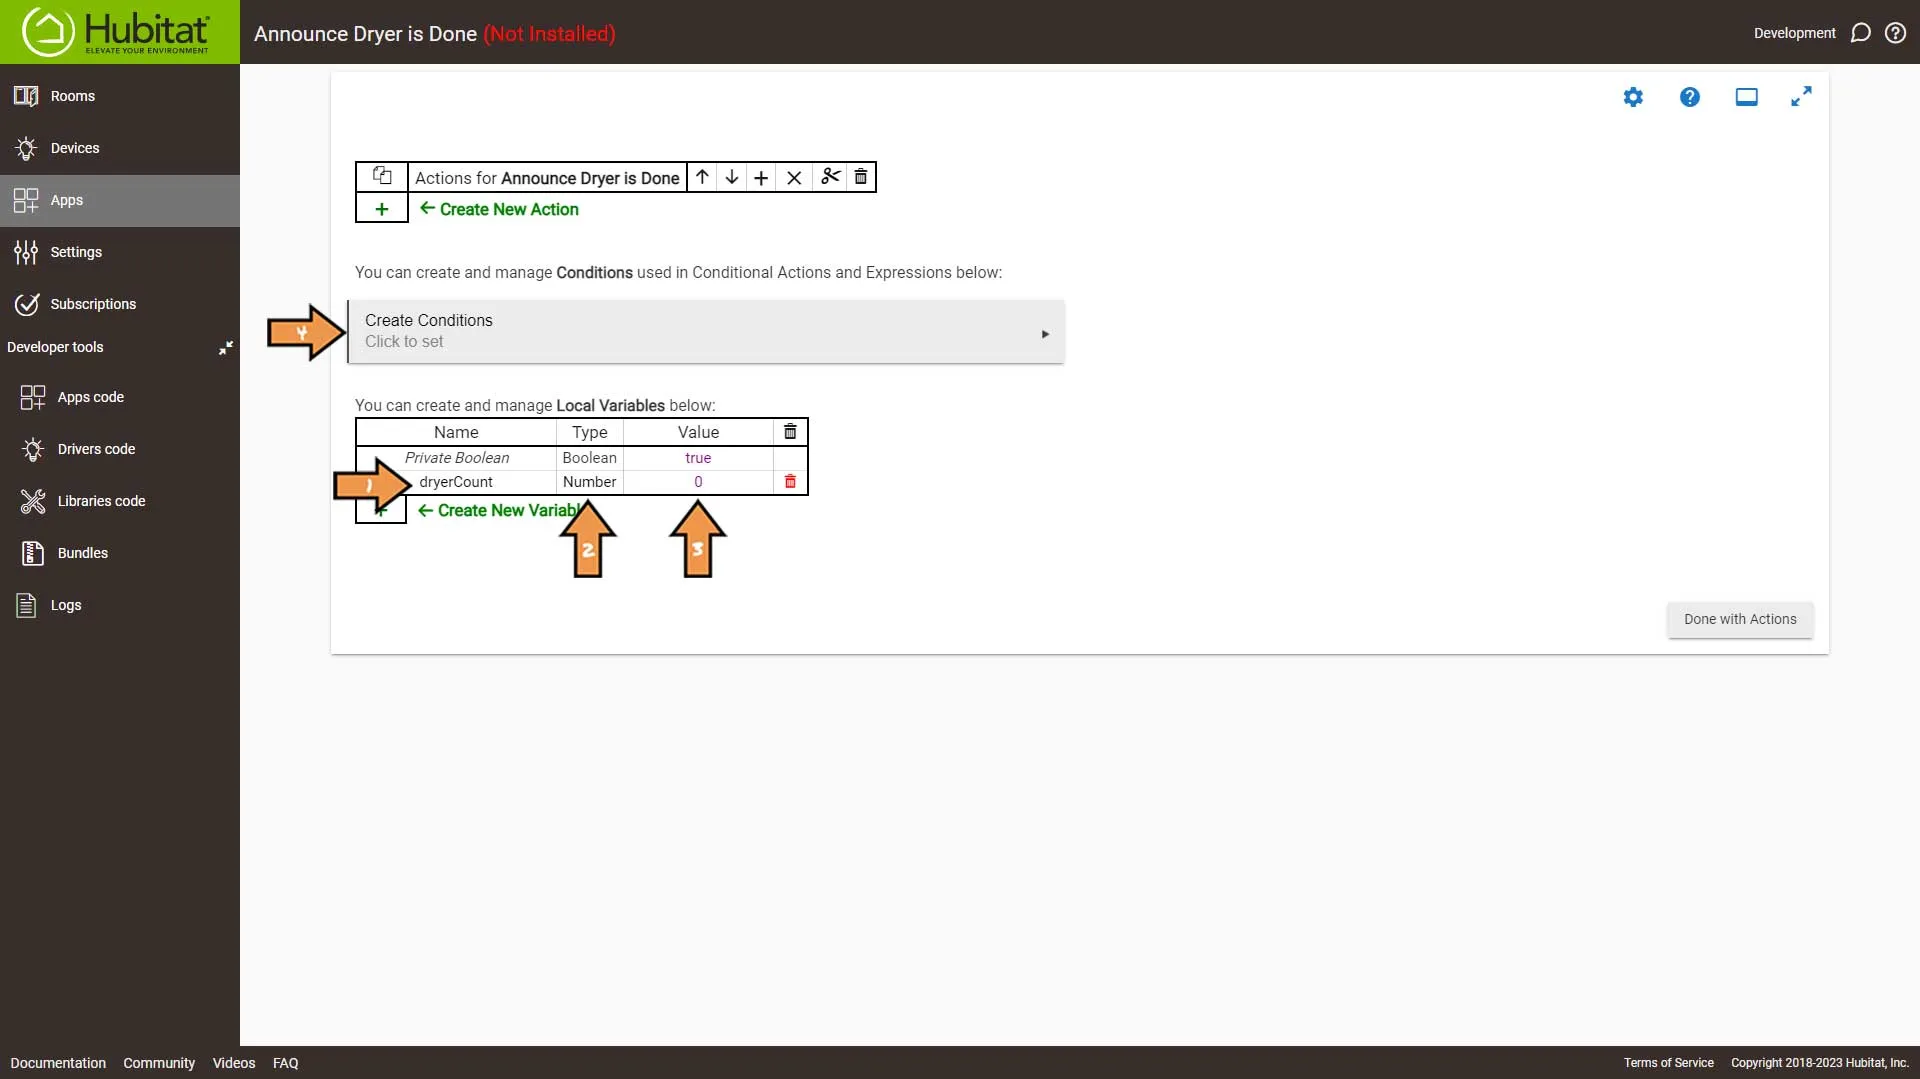
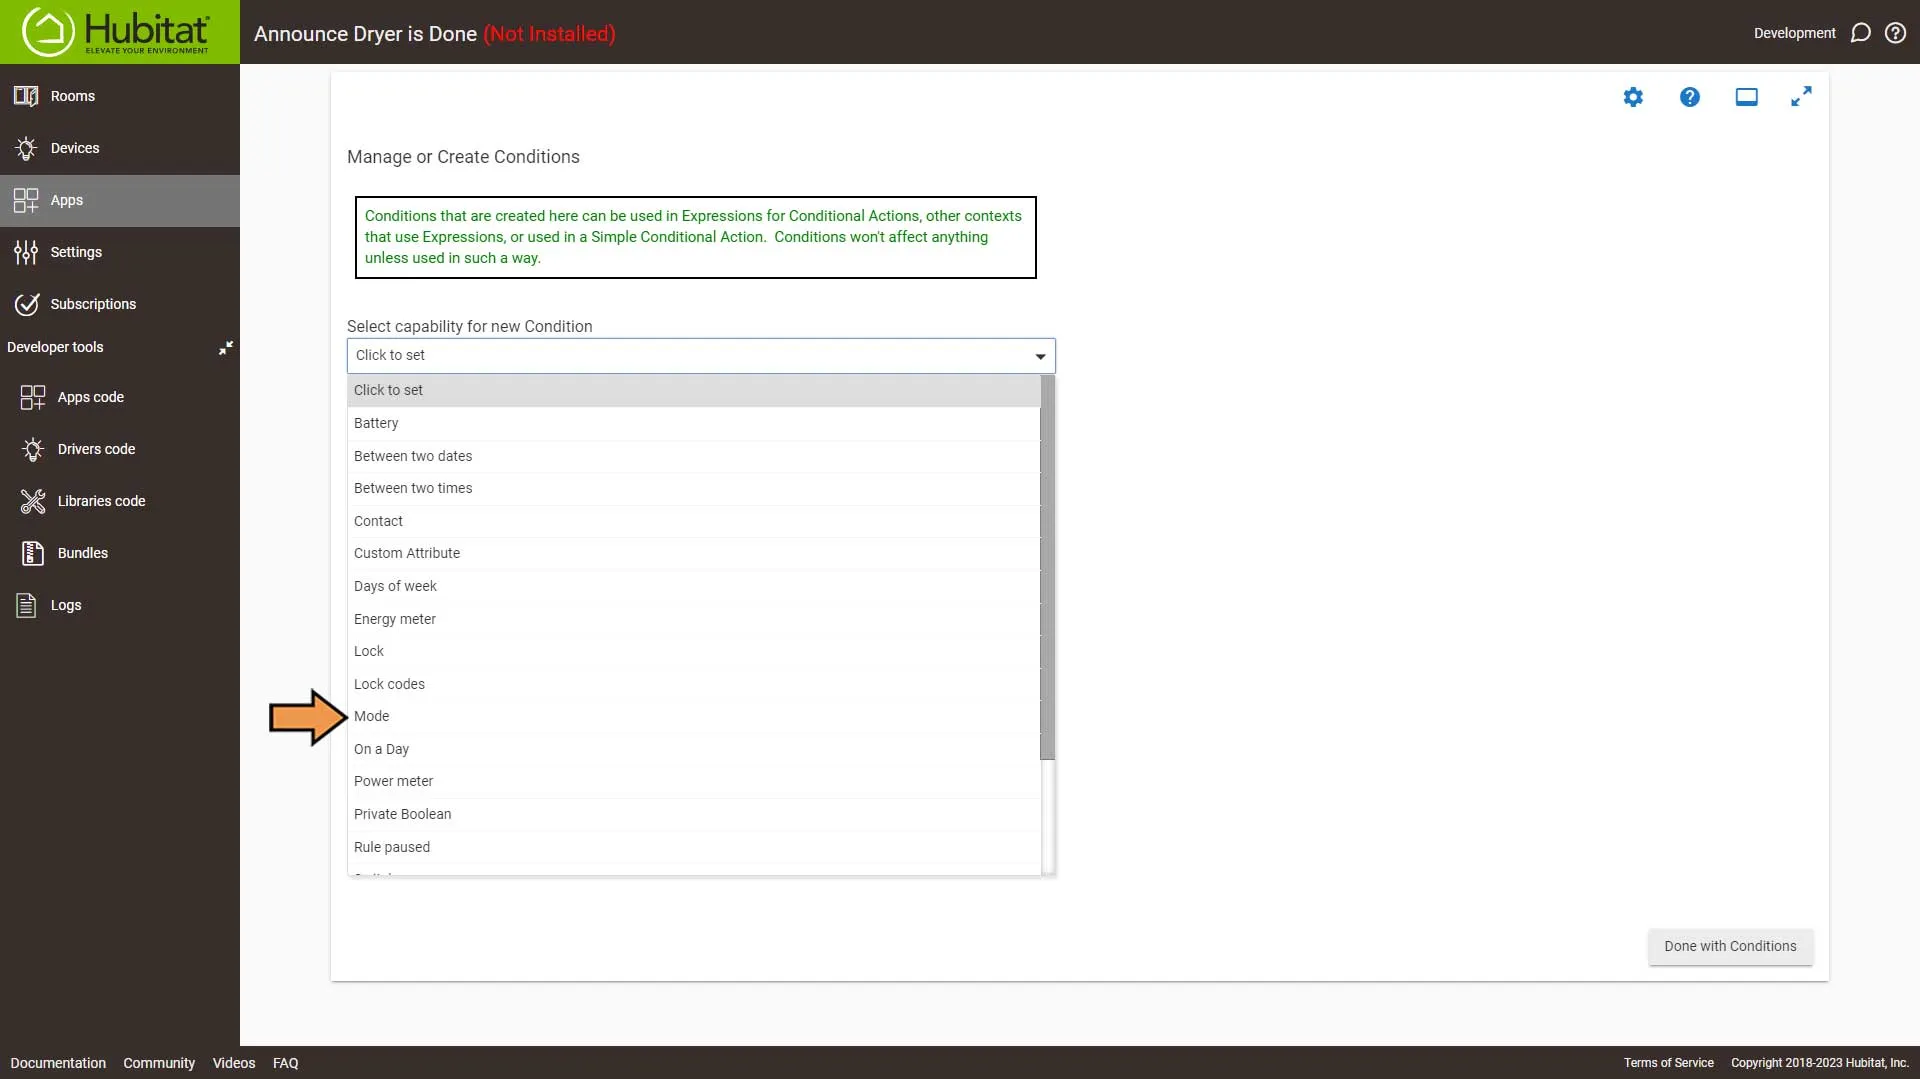
From the Capability drop-down, select Mode.
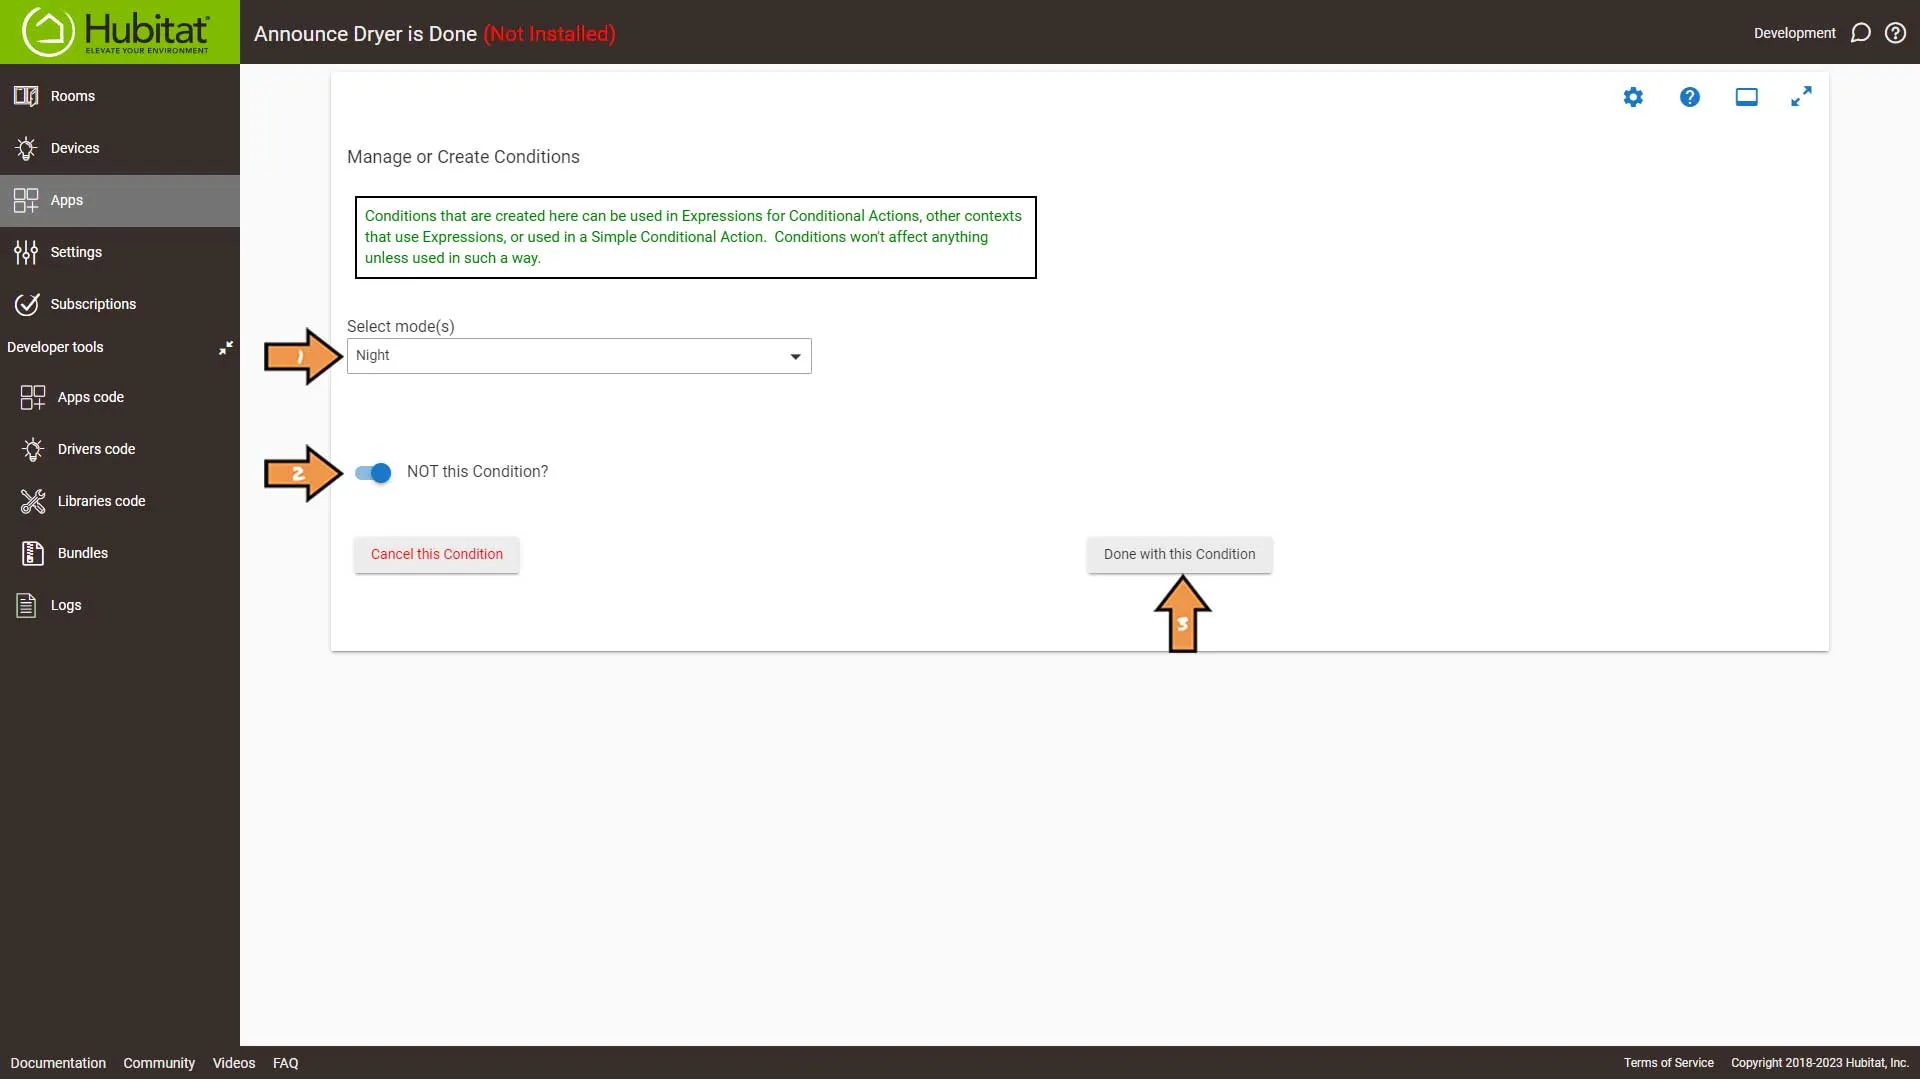
Select Night from the Modes dropdown box. Next, select NOT this Condition and click the Done with this Condition button.
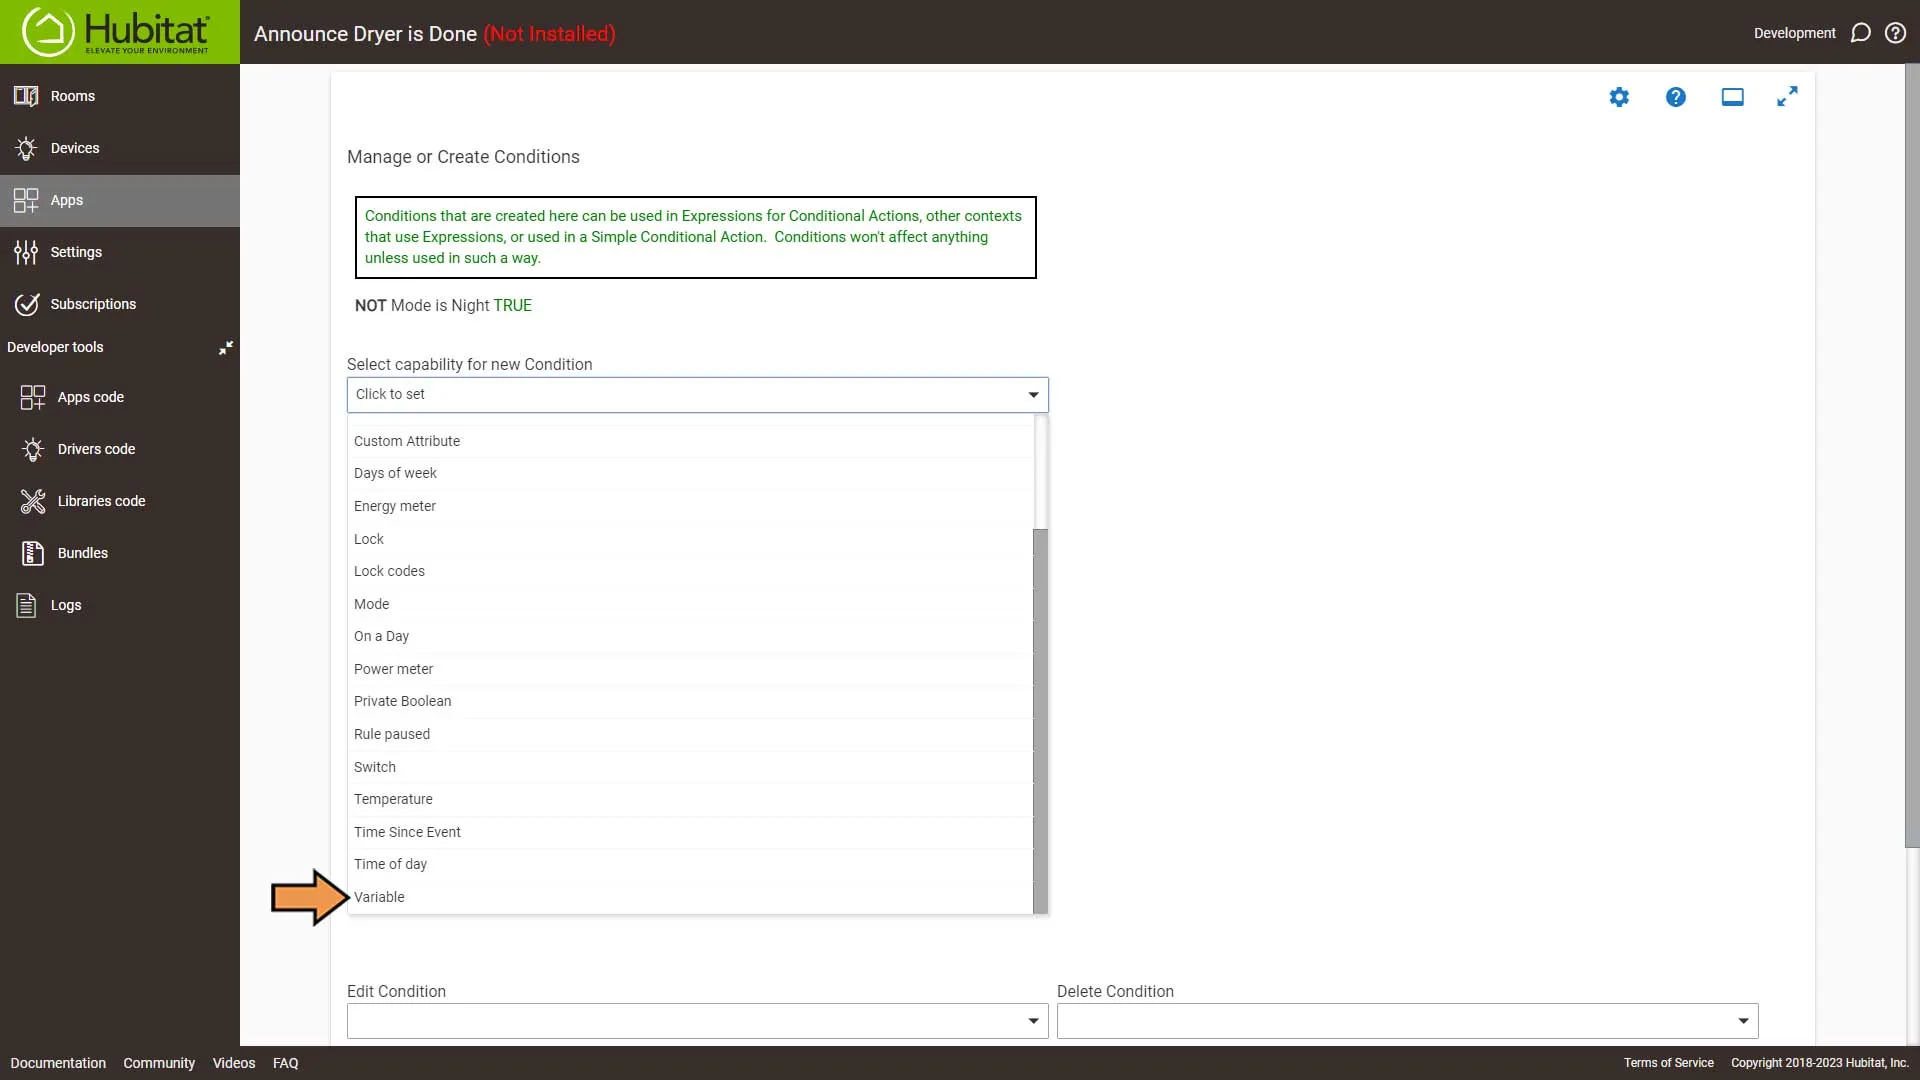
We will add another condition from the Capability drop-down, select Variable.
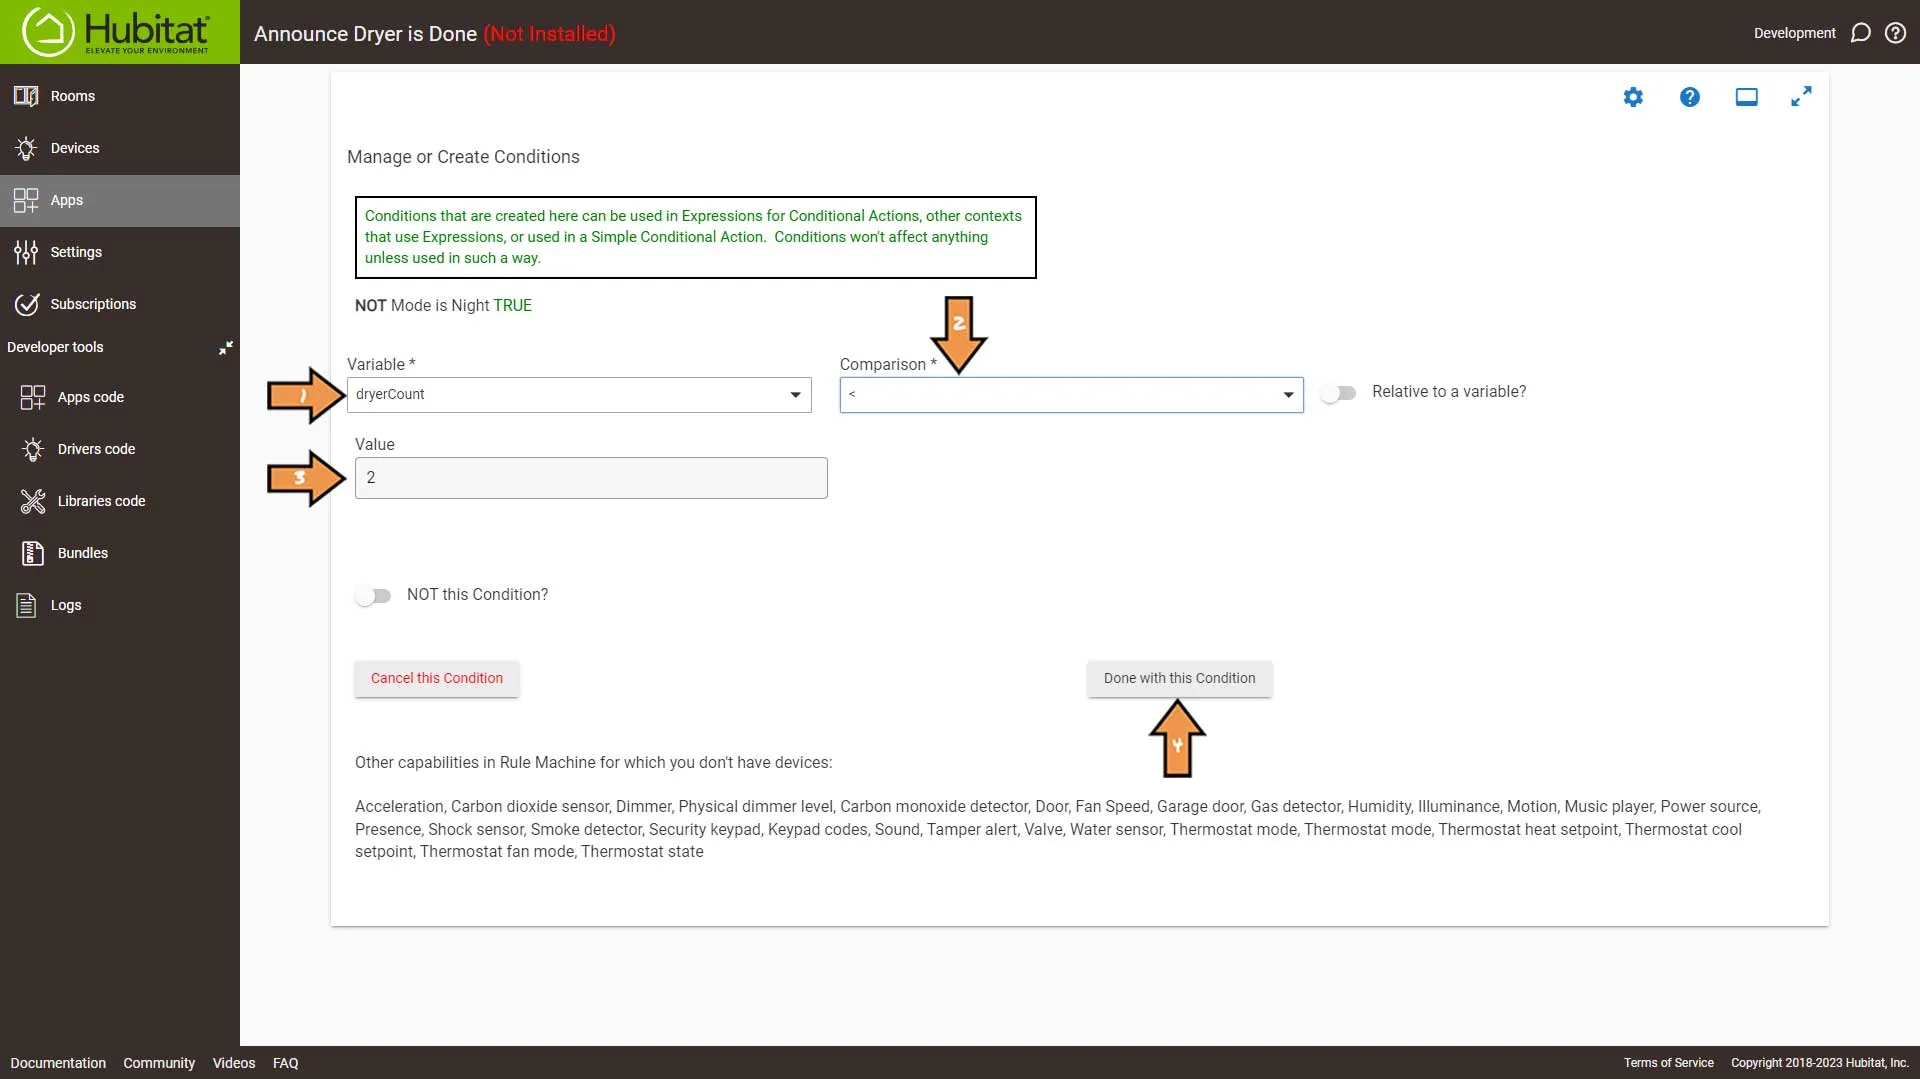
We will select the variable we created earlier, then set the Comparison to Less Than and the value to 2. Then click the Done with this Condition button.
The value is how many times Alexa will announce that the dryer is done. You can adjust it to your liking.
We will add one final condition from the Capability drop-down, select Contact.
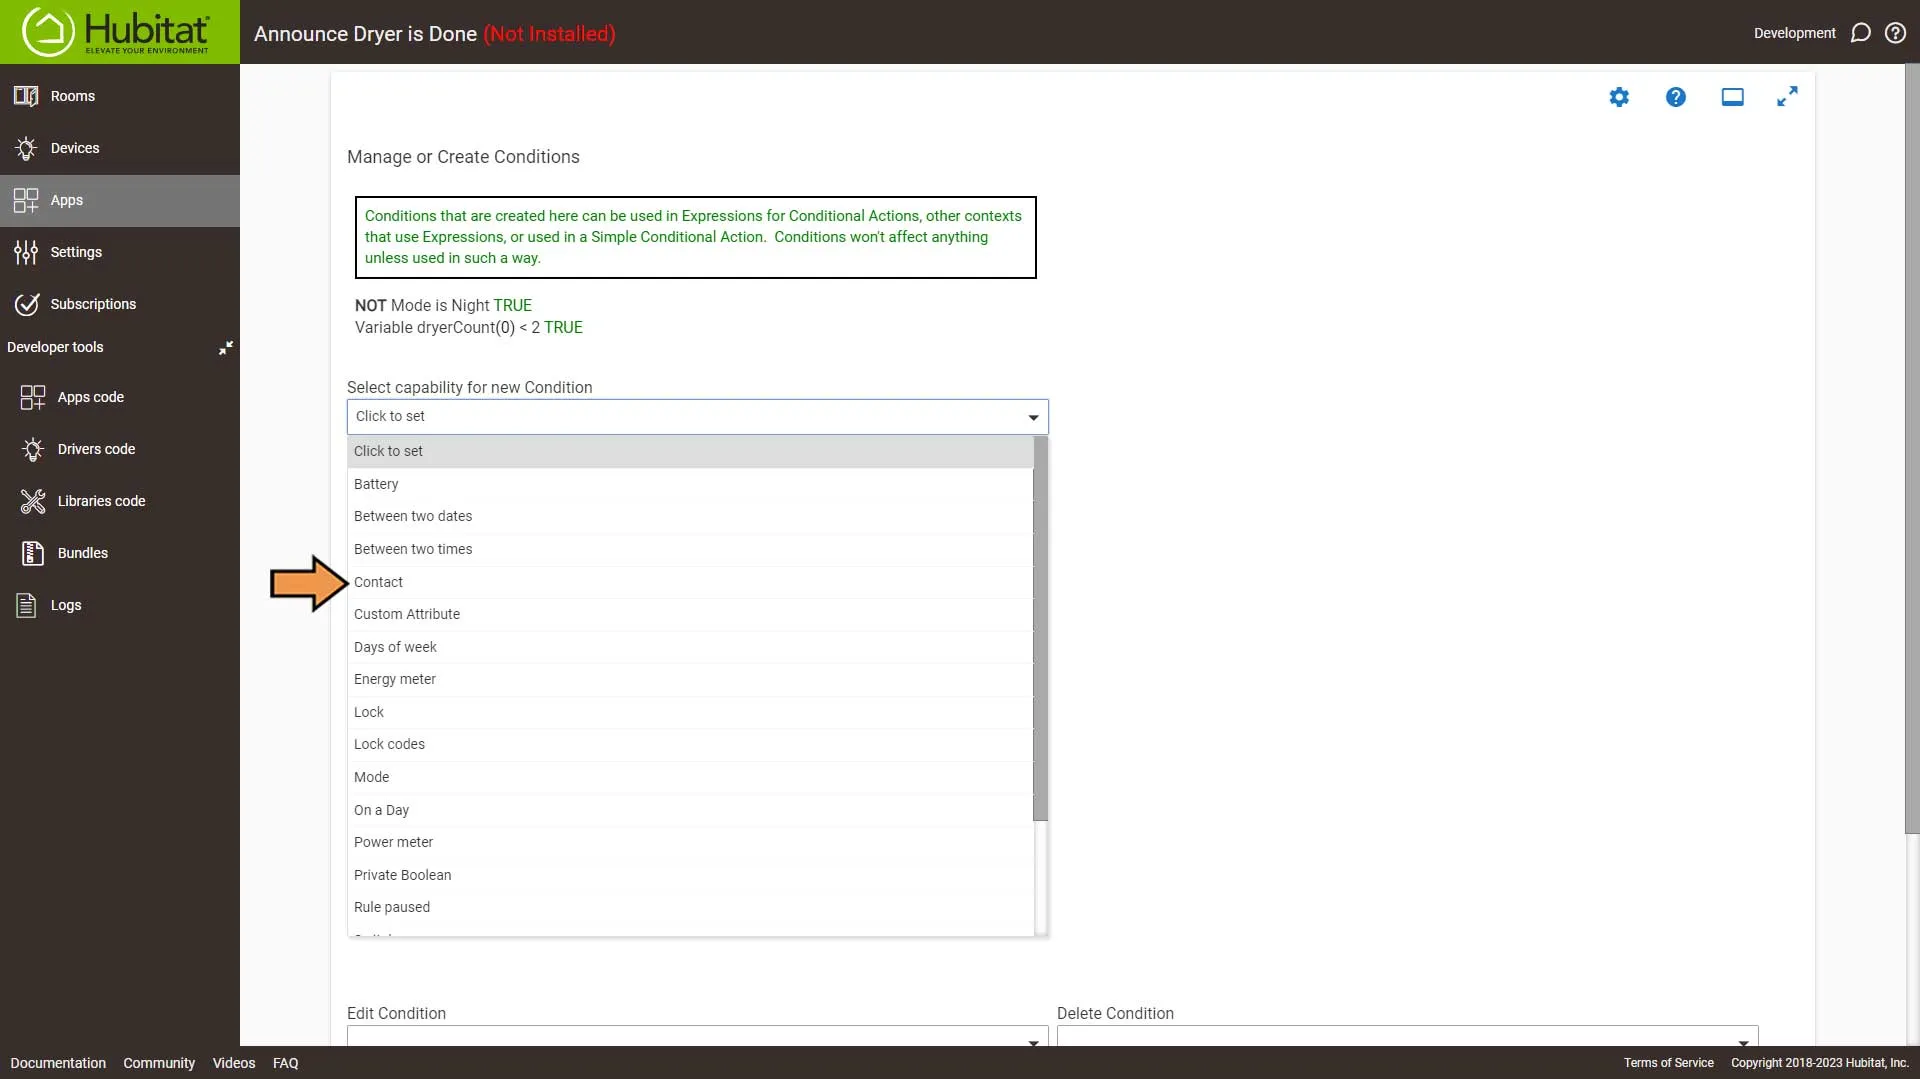
Set the Condition as follows:
- Select our Dryer Door sensor
- Set the Contact is to open
- Then click the Done with this Condition button.
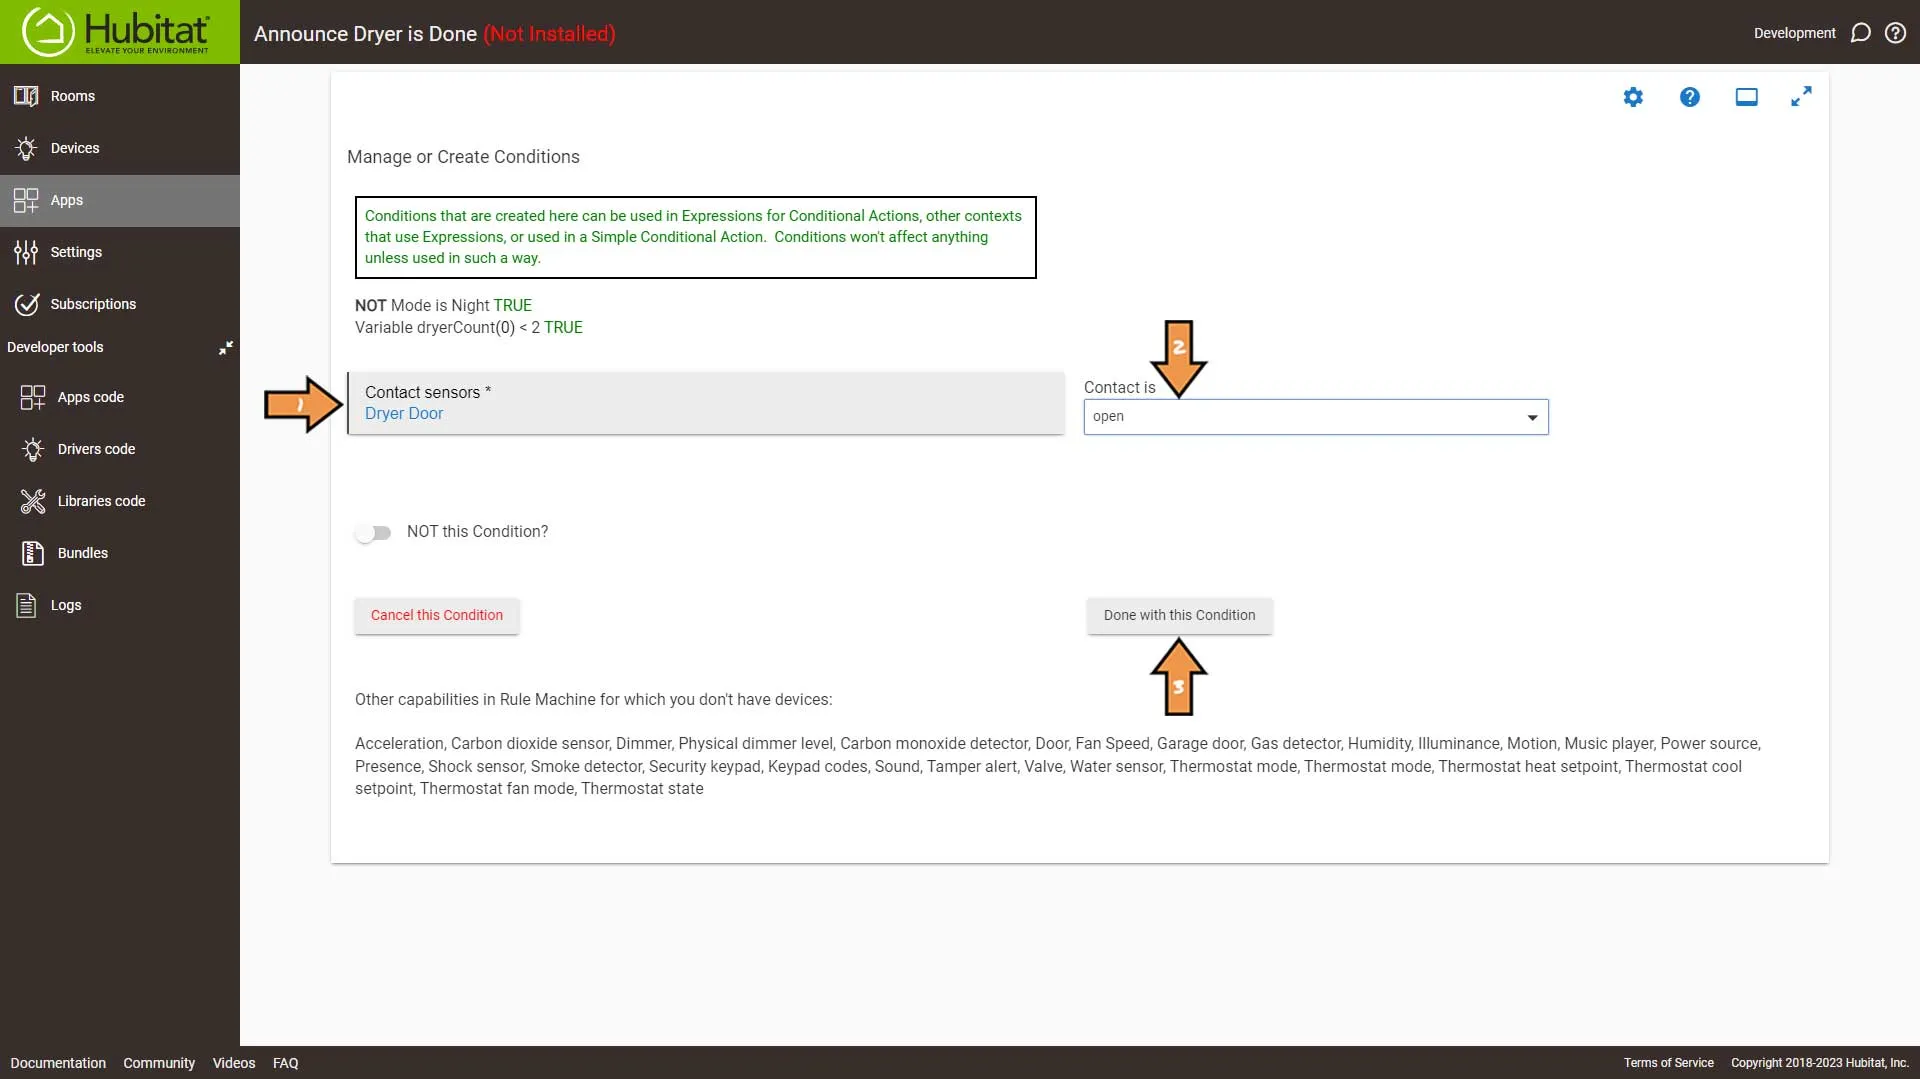
Then, Click the Done with Conditions button.
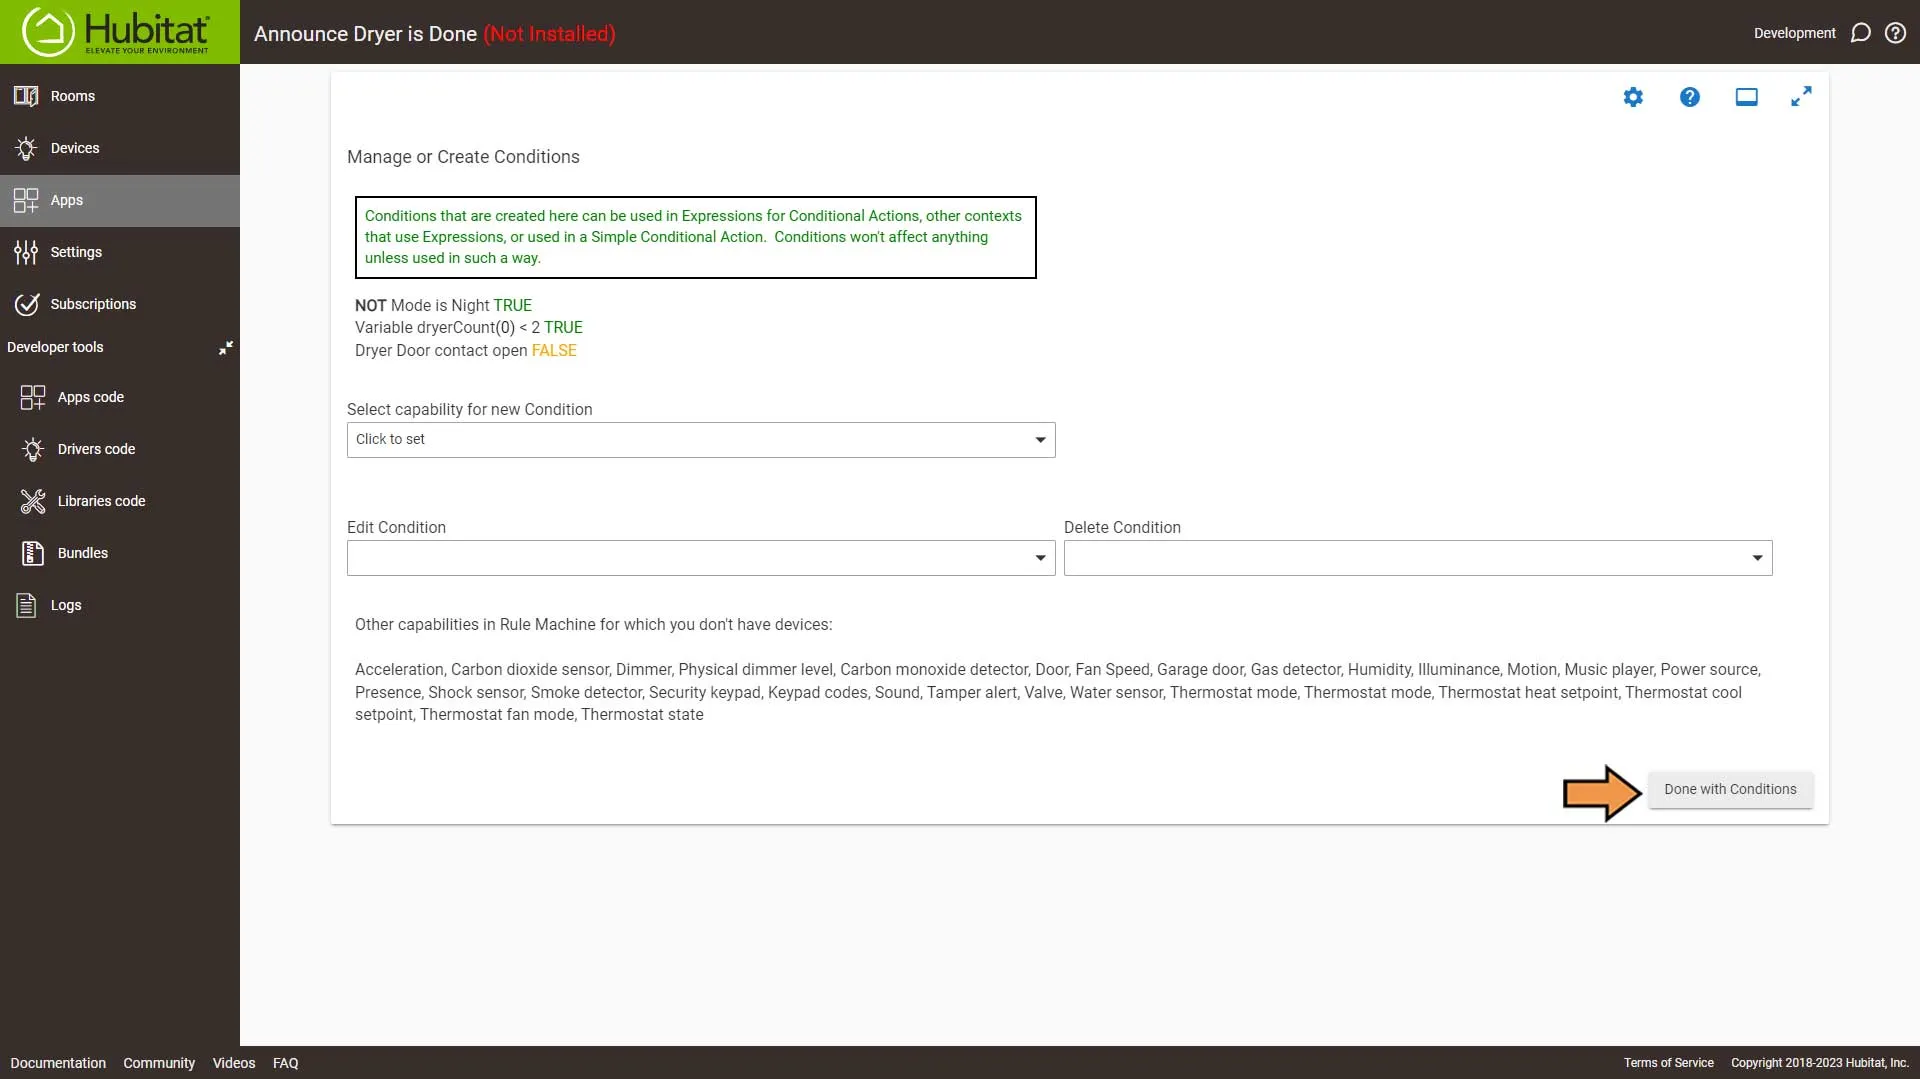
Select the Green Plus Sign to Add New Action.
Configure the New Action as follows:
- From the first dropdown, select Conditional Actions
- Then, select the If Expression THEN from the list in the following dropdown.
- Select the contact condition we created earlier
- Then, click the Done with IF Expression THEN button.
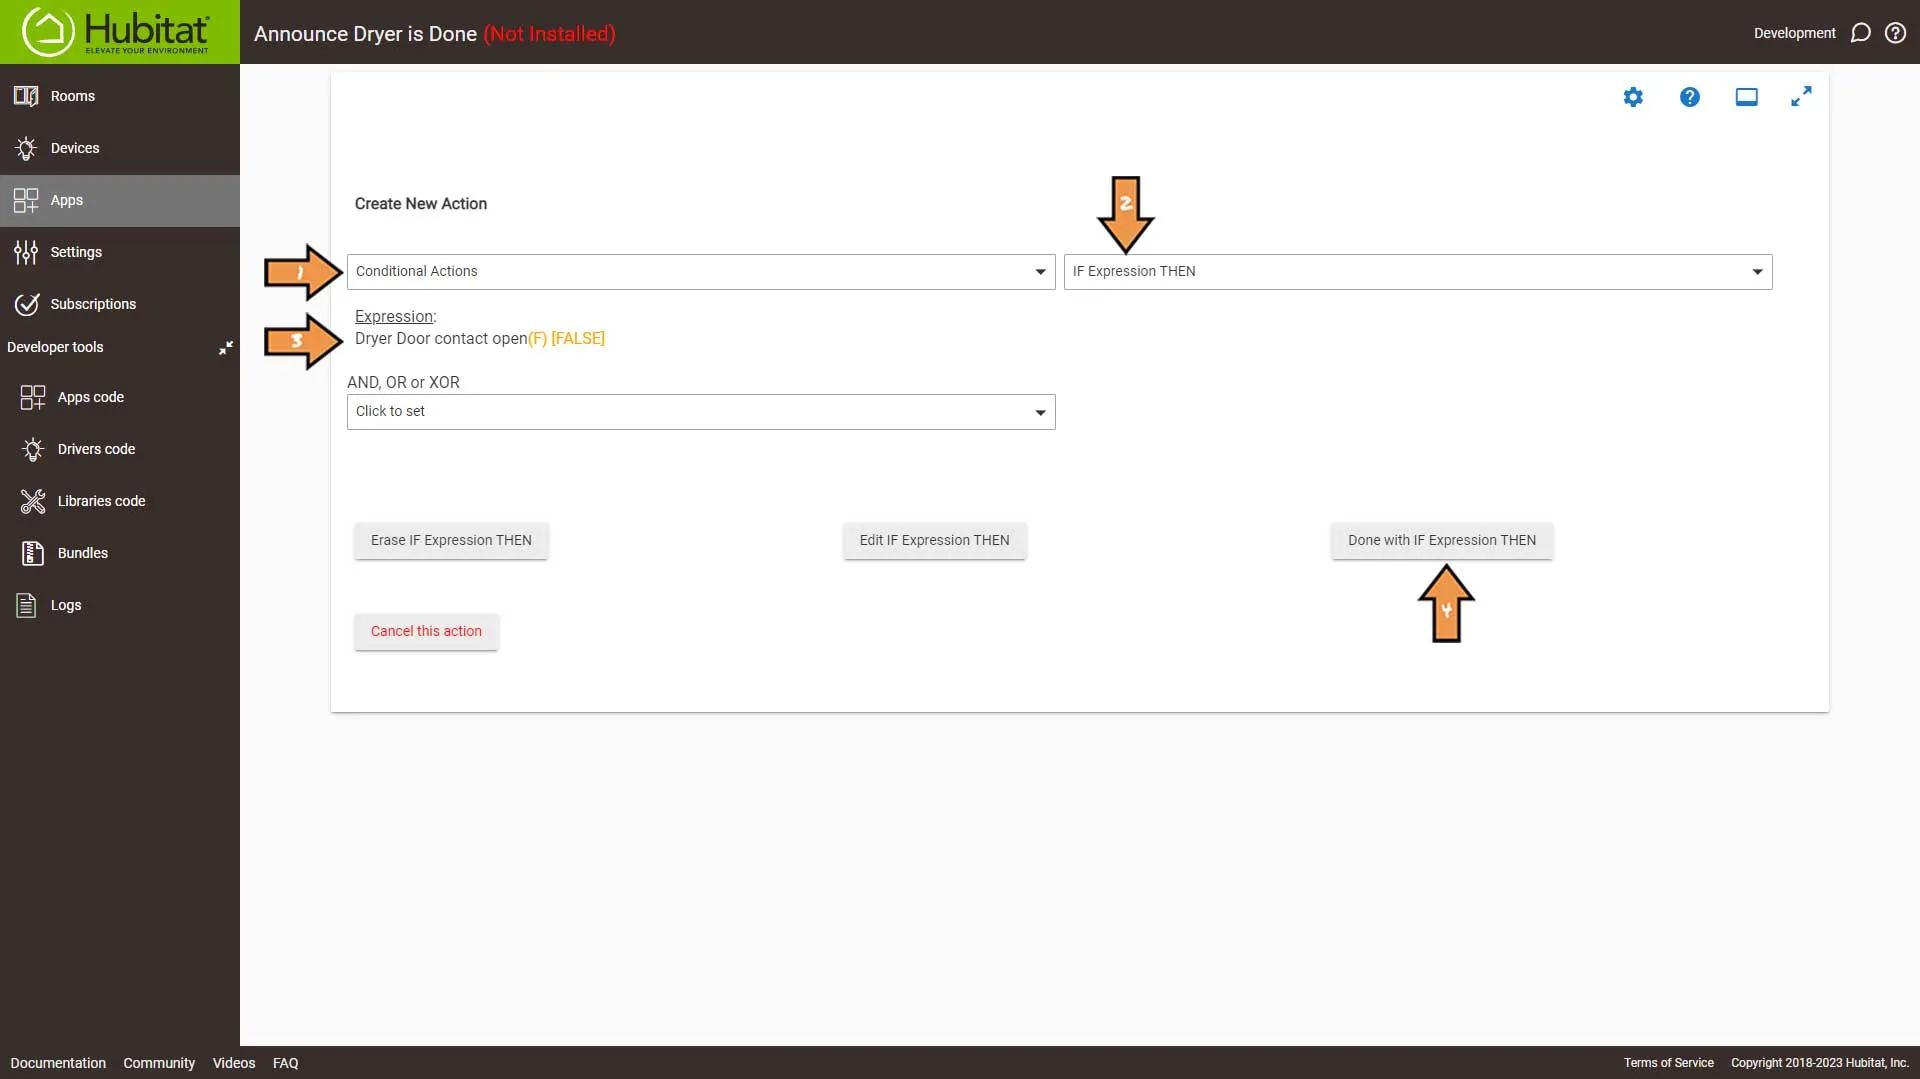
Select the Green Plus Sign to Add New Action.
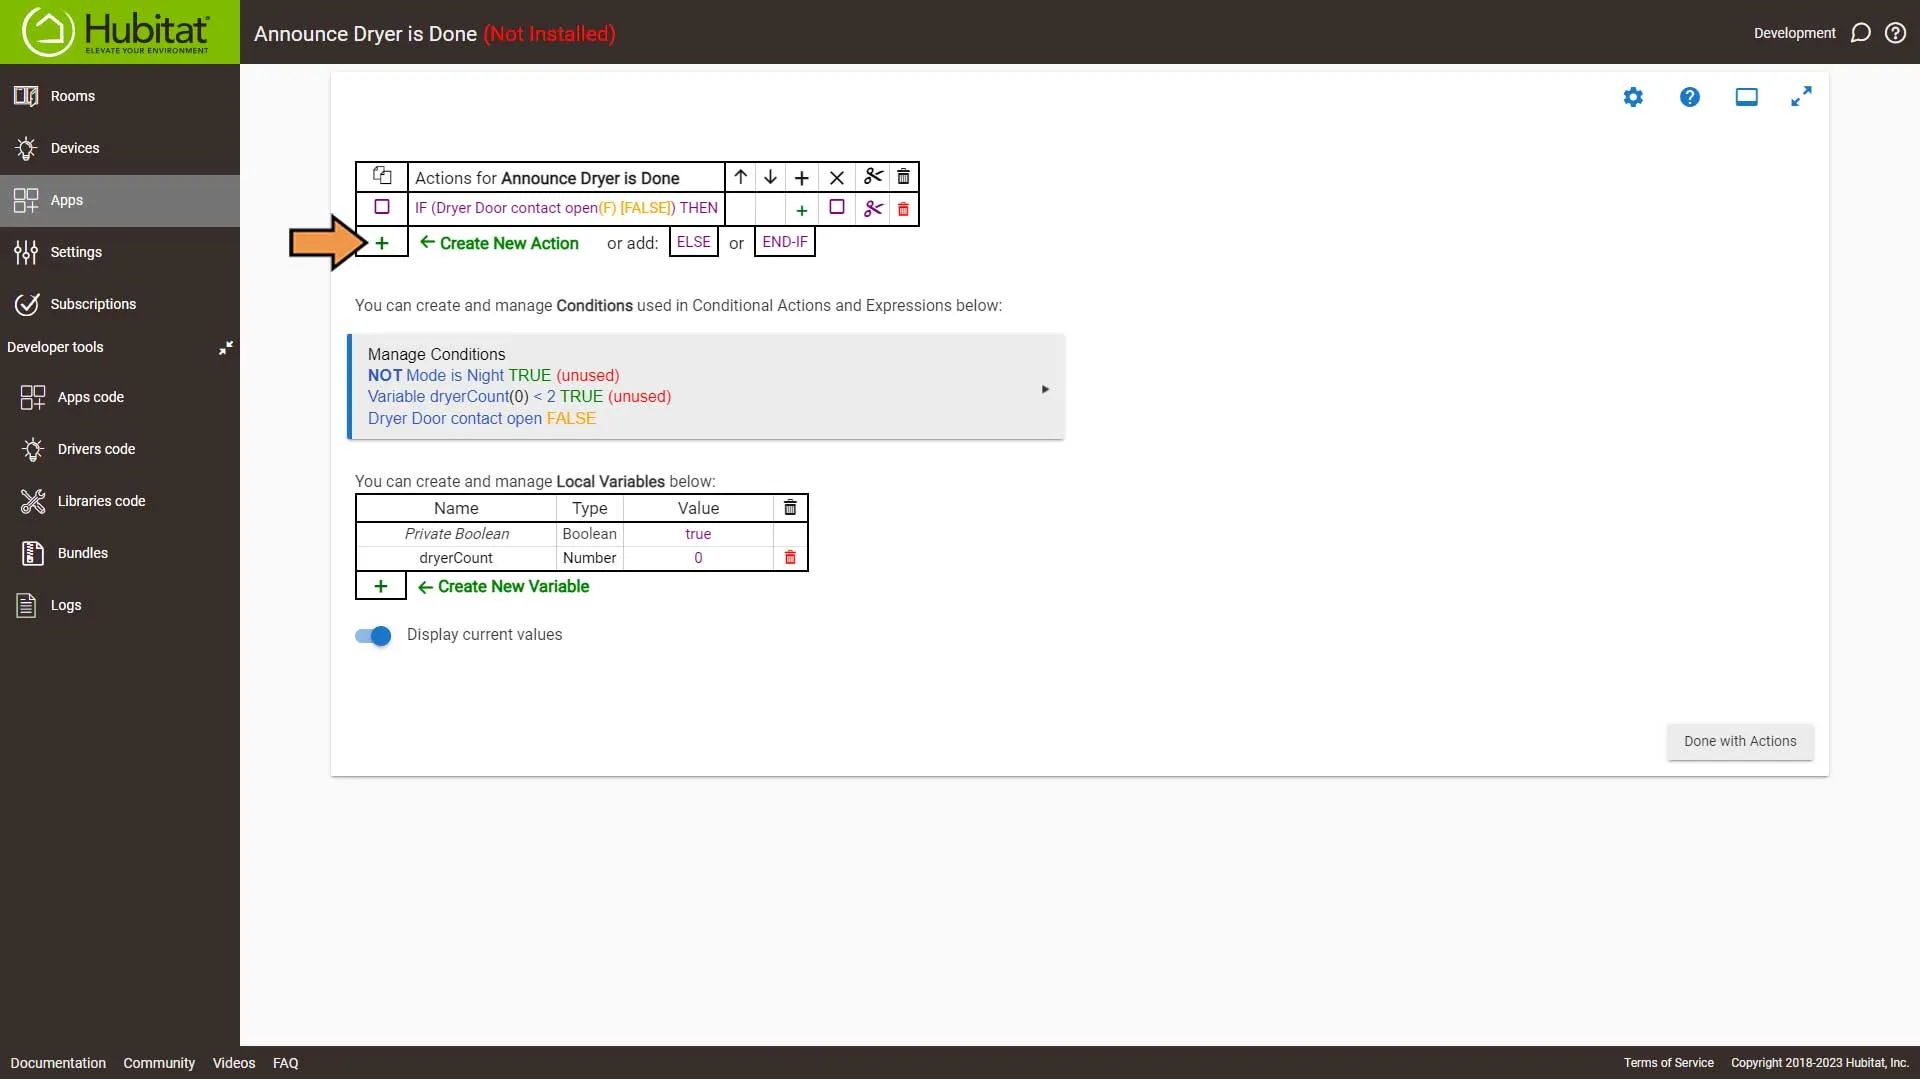
Configure the New Action as follows:
- From the first dropdown, select Set Variable, Mode or File, Run Custom Action
- From the following dropdown select Set Variable
- Then select the local variable we created earlier
- Set the Select operation to Number
- Set the Number to set dryerCount to zero
- Then, click the Done with action button.
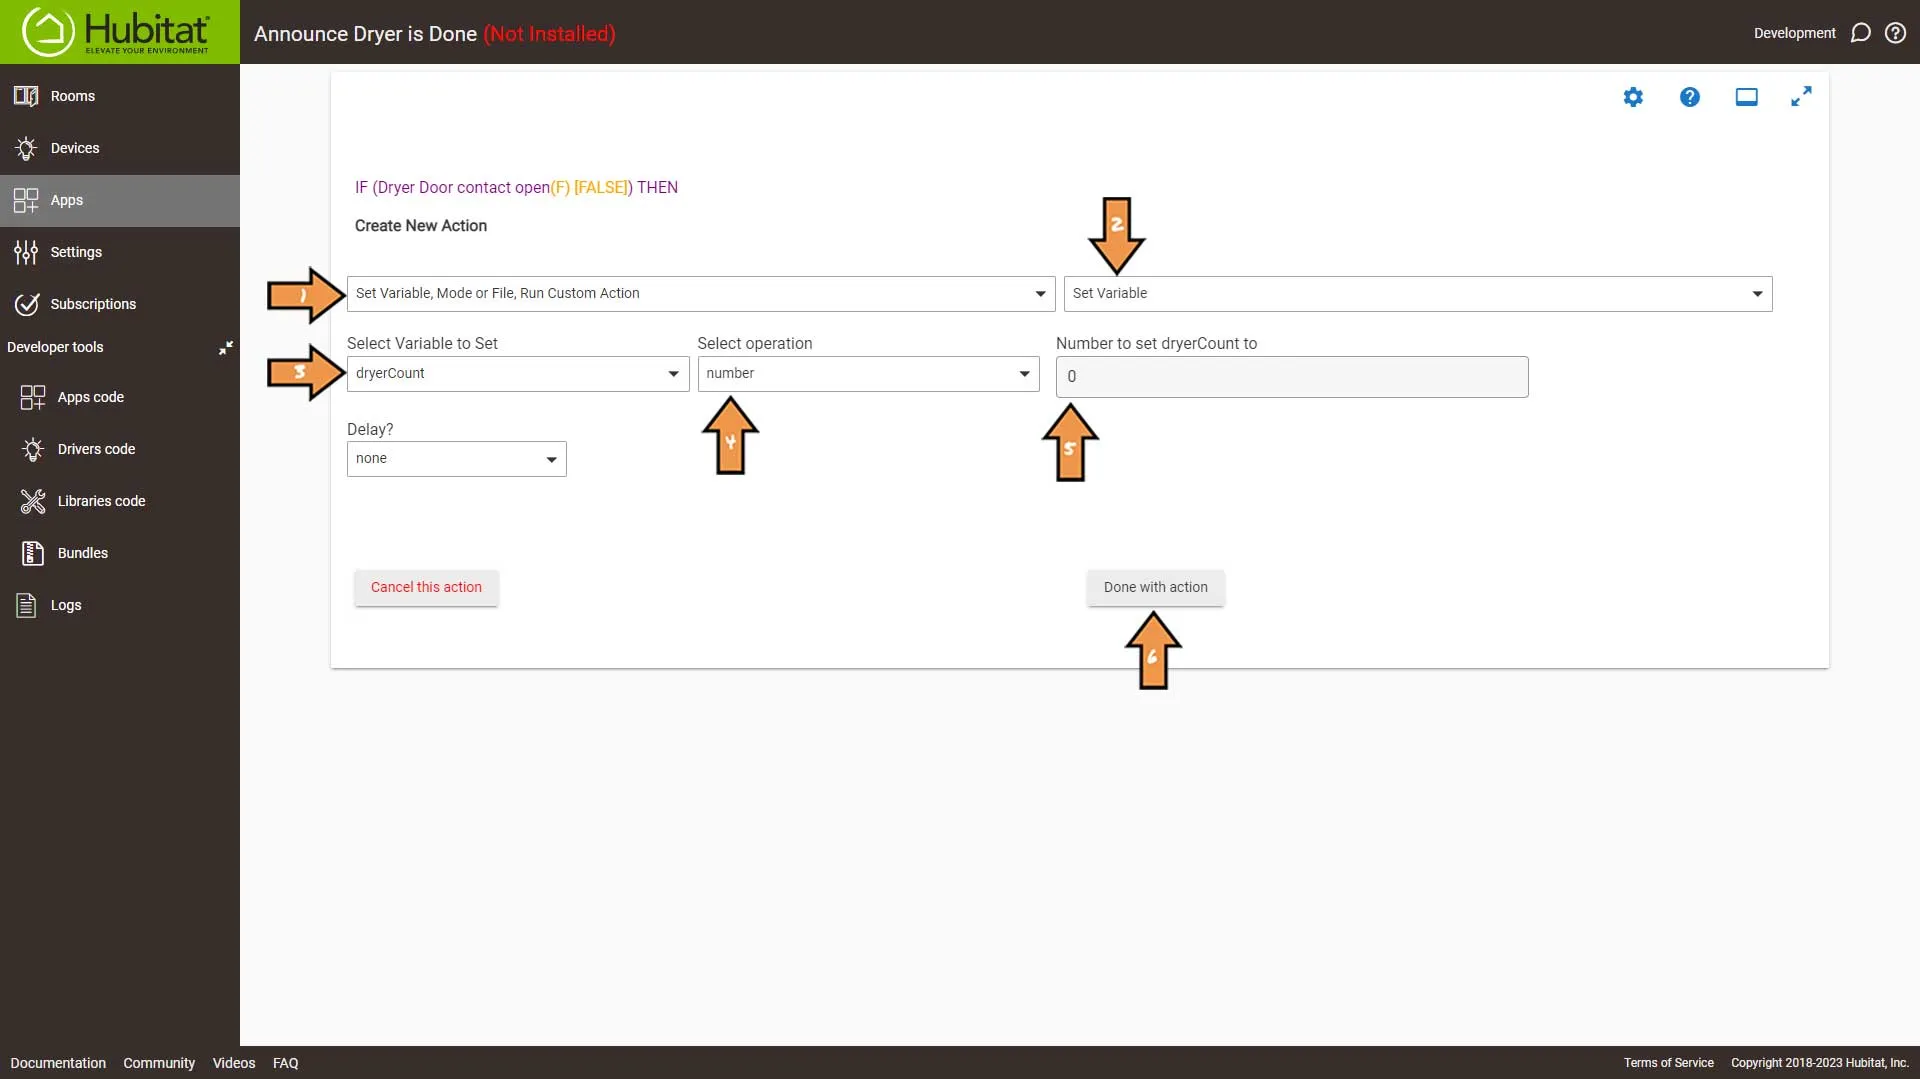
Click the ELSE button and then select the Green Plus Sign to Add New Action.
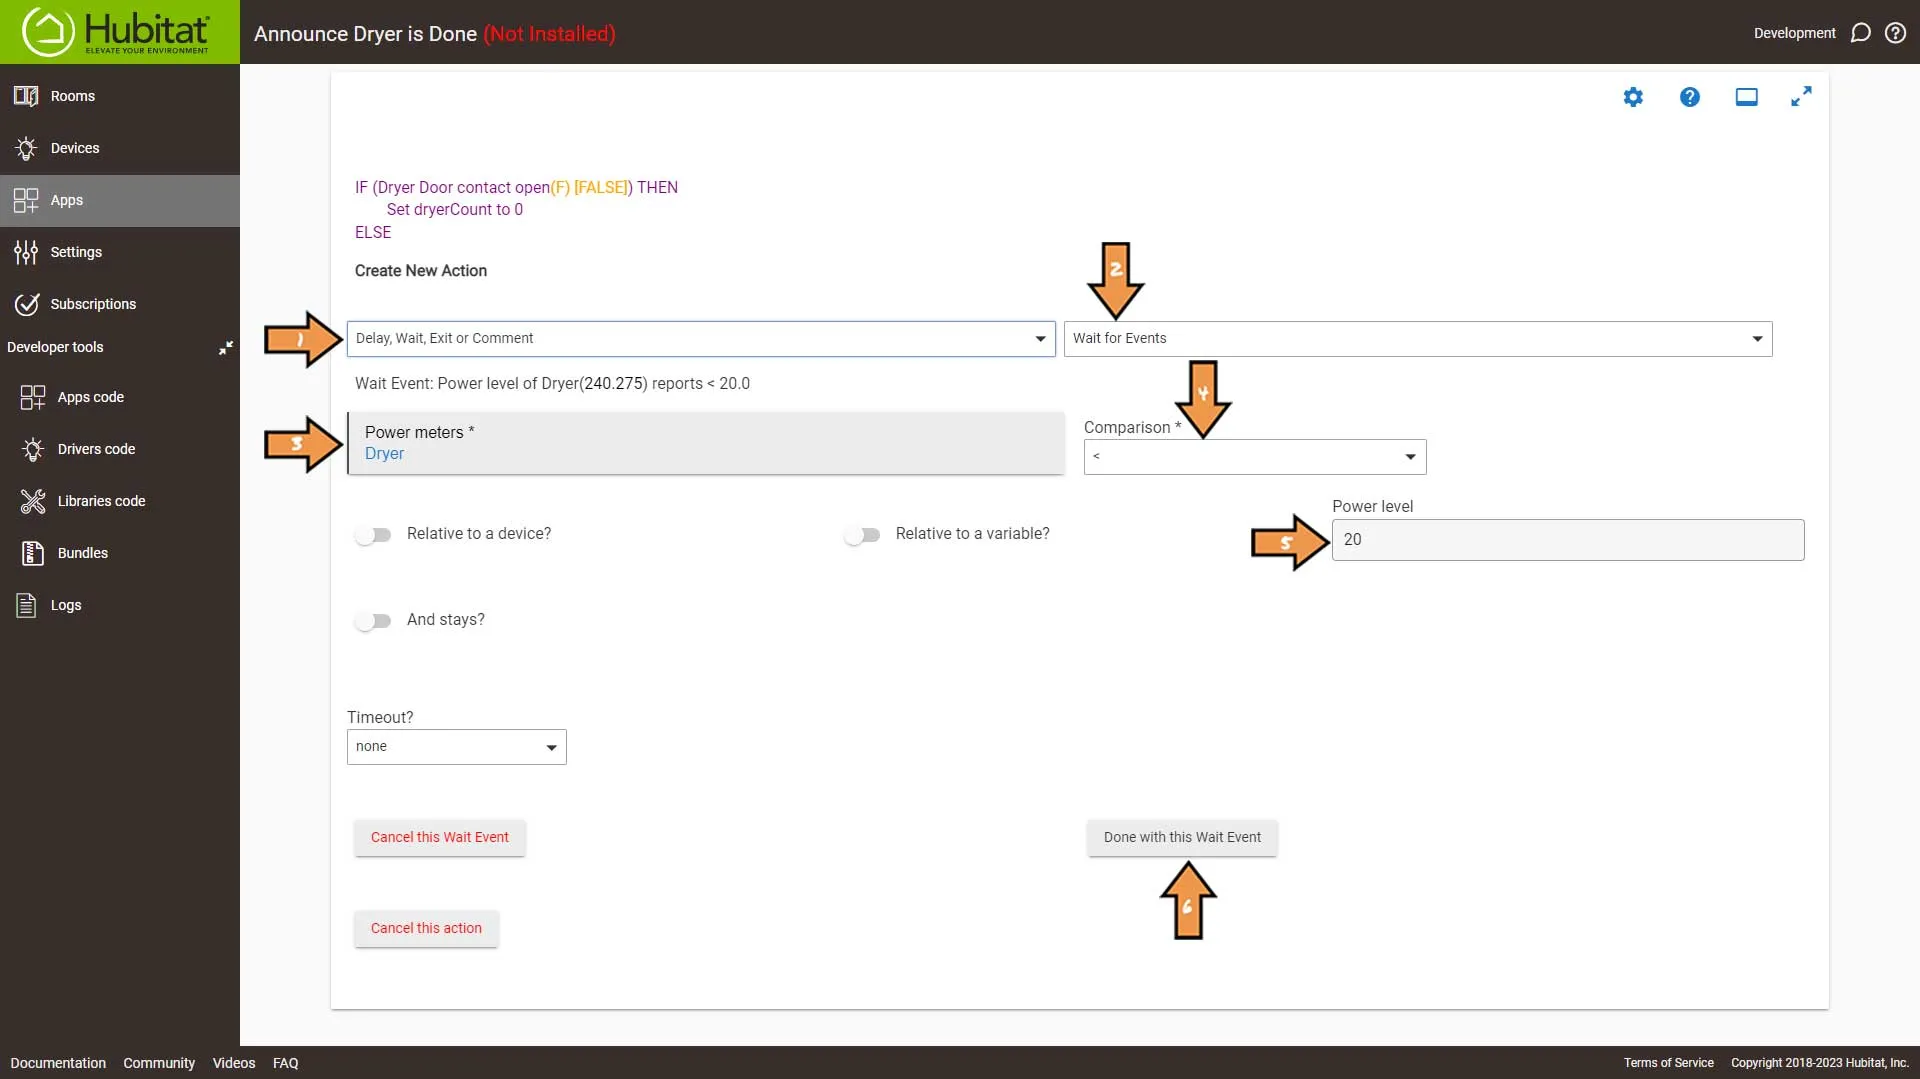
Configure the New Action as follows:
- From the first dropdown, select Delay, Wait, Exit, or Comment
- From the following dropdown, select Wait for Events
- Then select Power meter and select our smart plug
- Set the Comparison to less than
- Set the Power level to 20
- Then, click the Done with this Wait Event button.
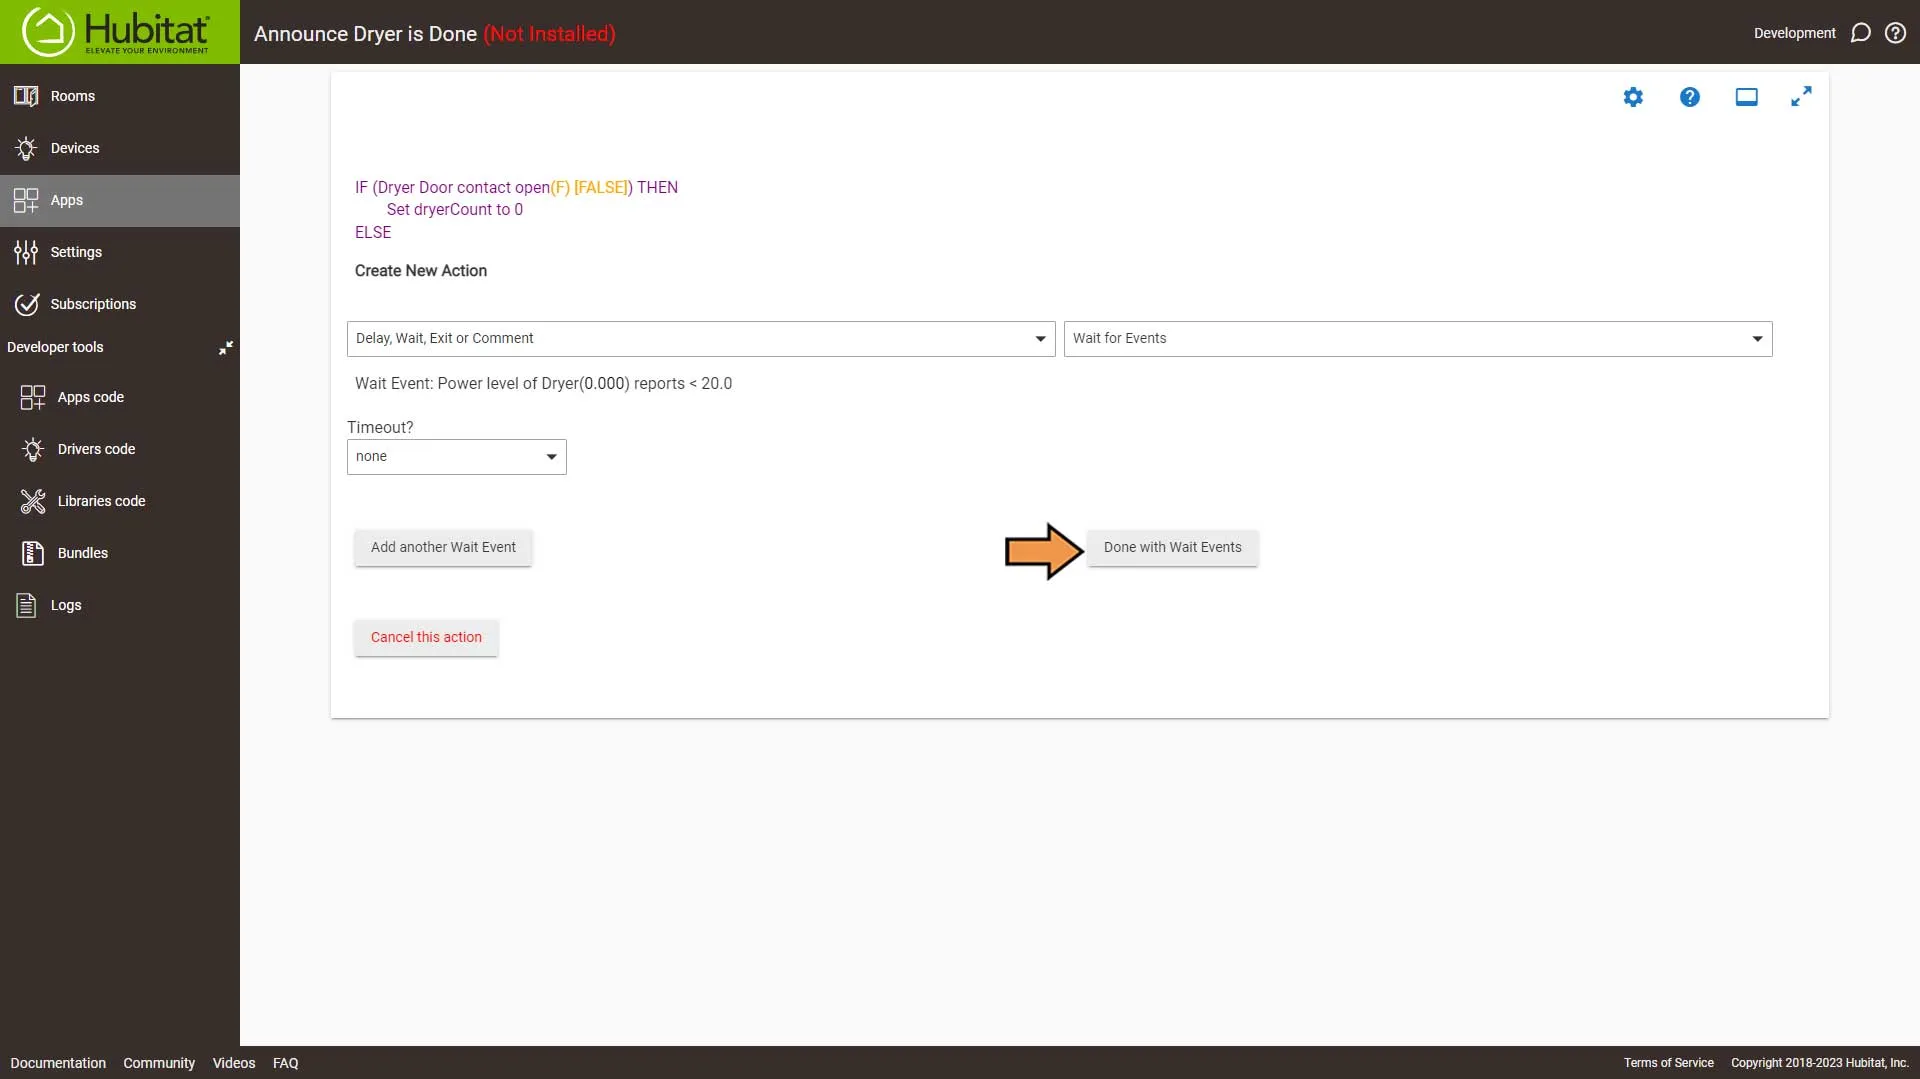
Next, click the Done with Wait Events button.
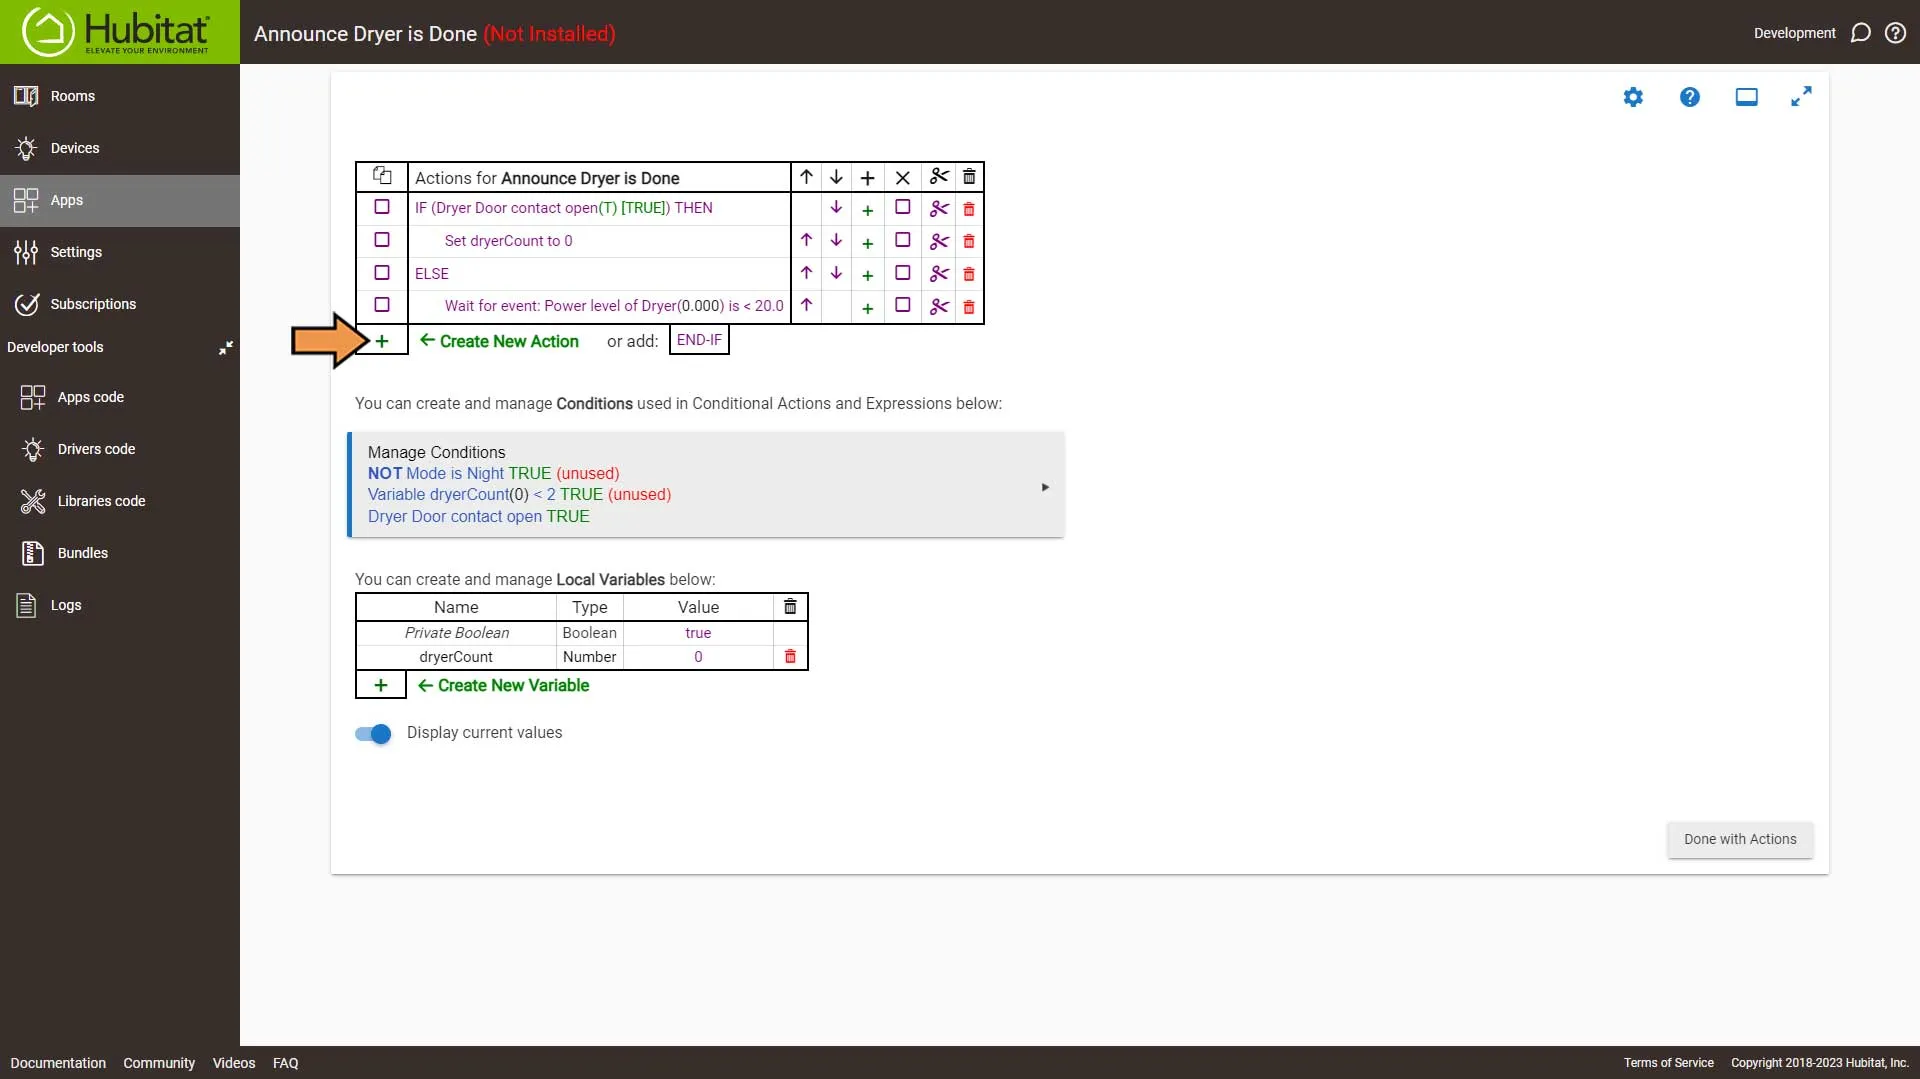
Select the Green Plus Sign to Add New Action.
Configure the New Action as follows:
- From the first dropdown, select Conditional Actions
- Then, select the If Expression THEN from the list in the following dropdown.
- Select the mode condition we created earlier
- Then, select AND from the dropdown list
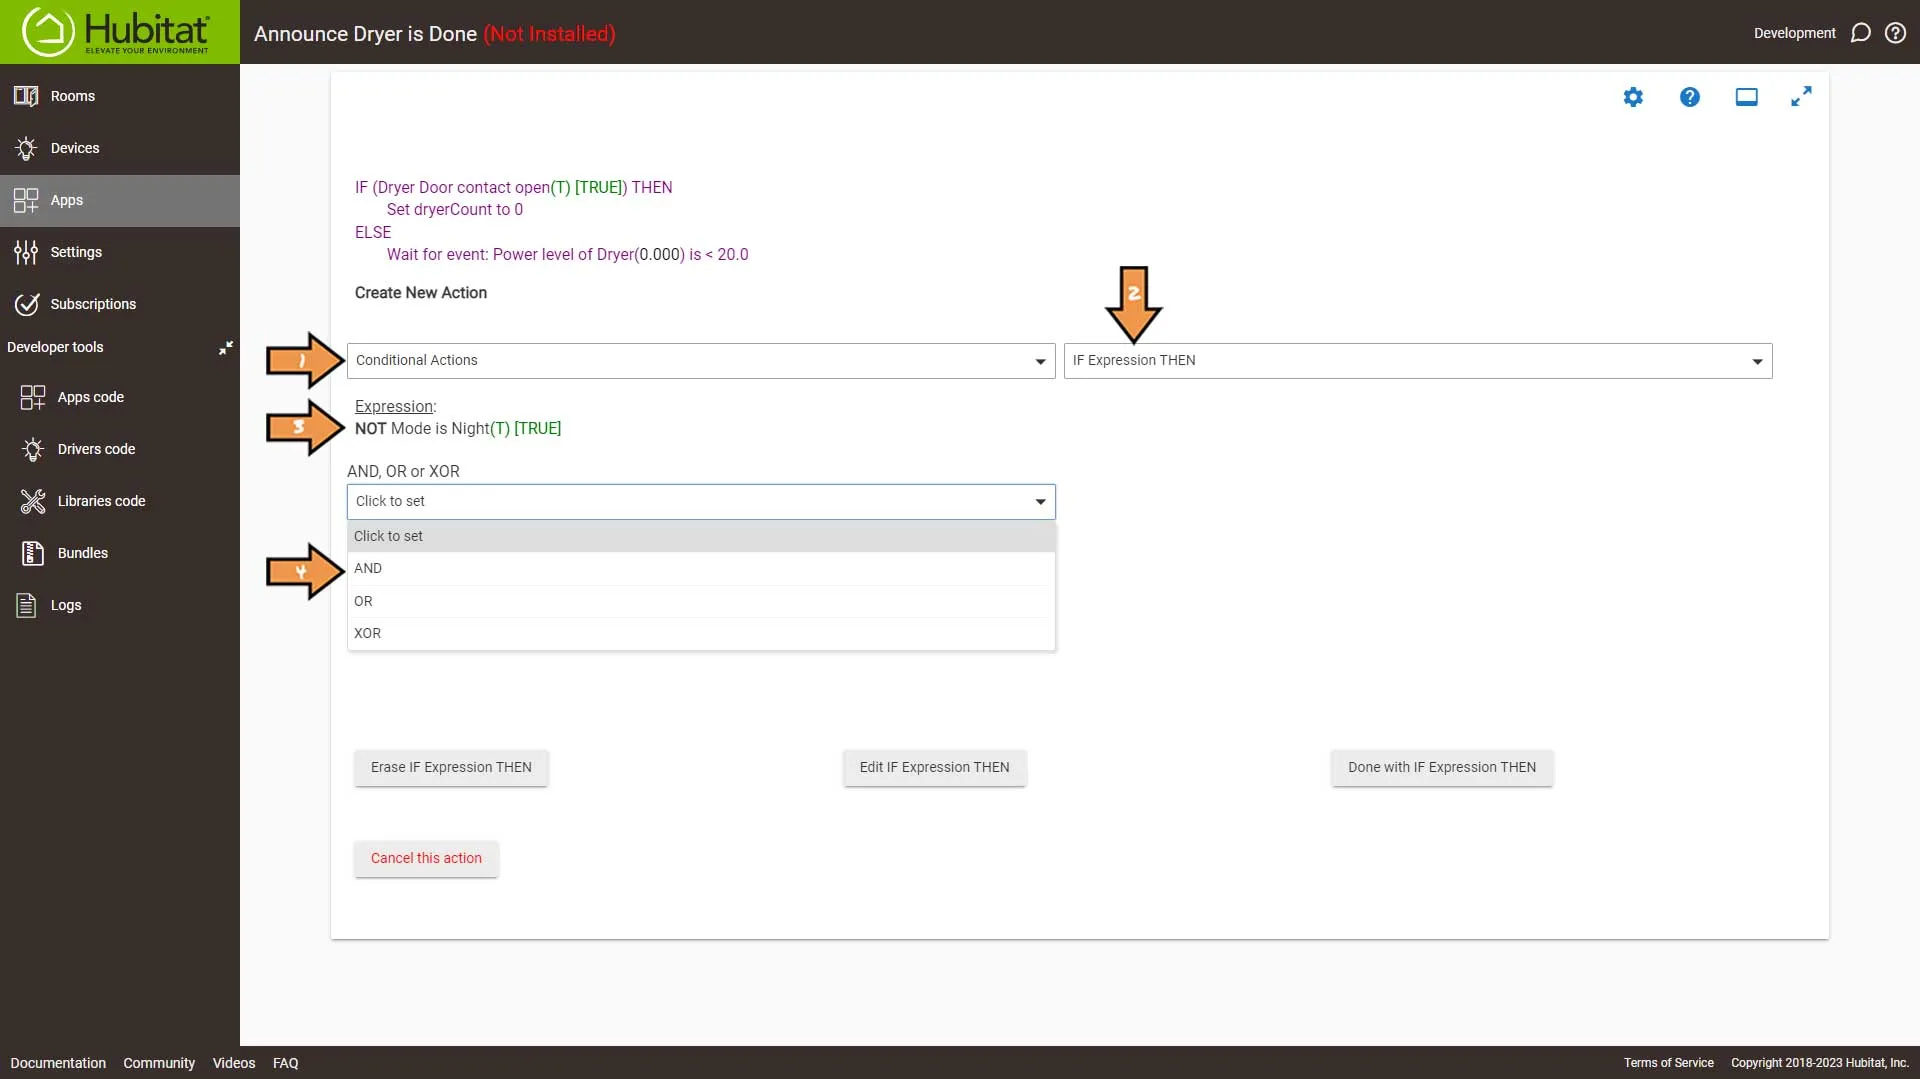
Next, Select the variable condition we created earlier, then click the Done with IF Expression THEN button.
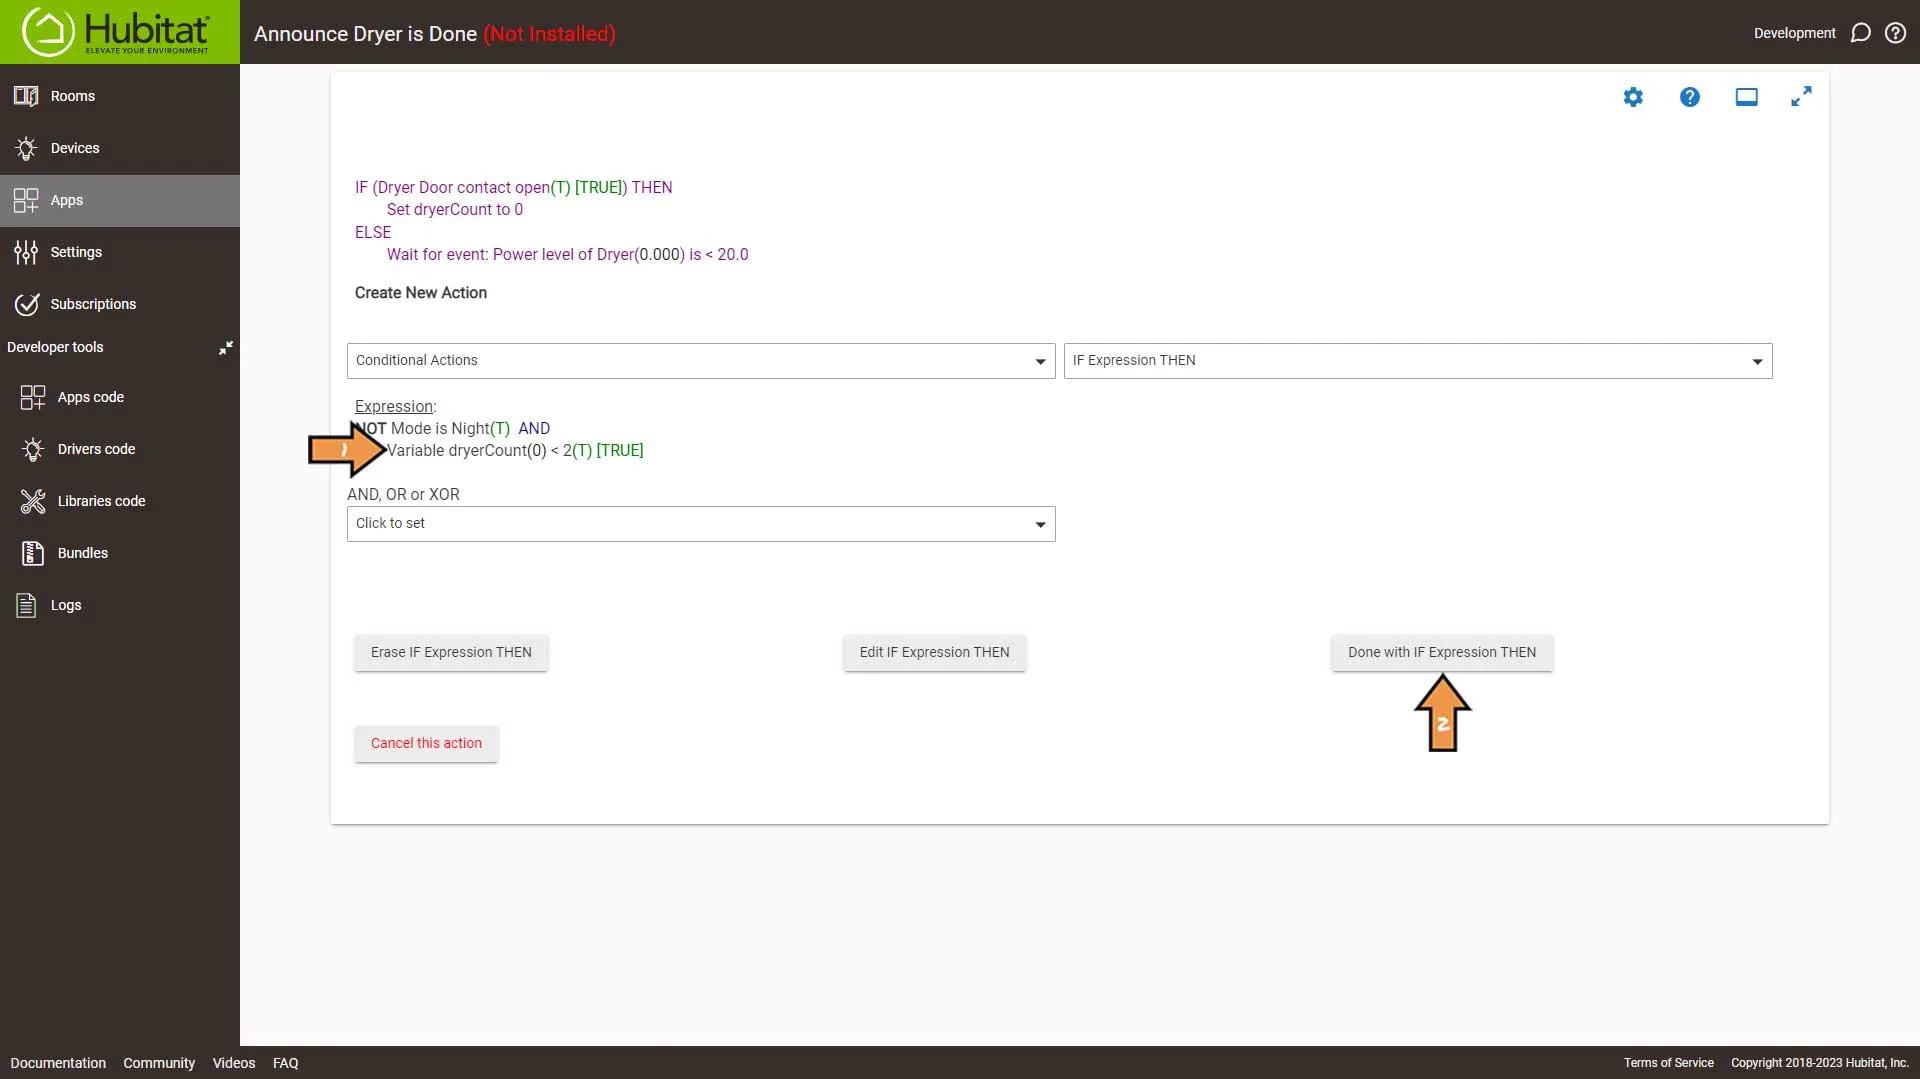
Select the Green Plus Sign to Add New Action.
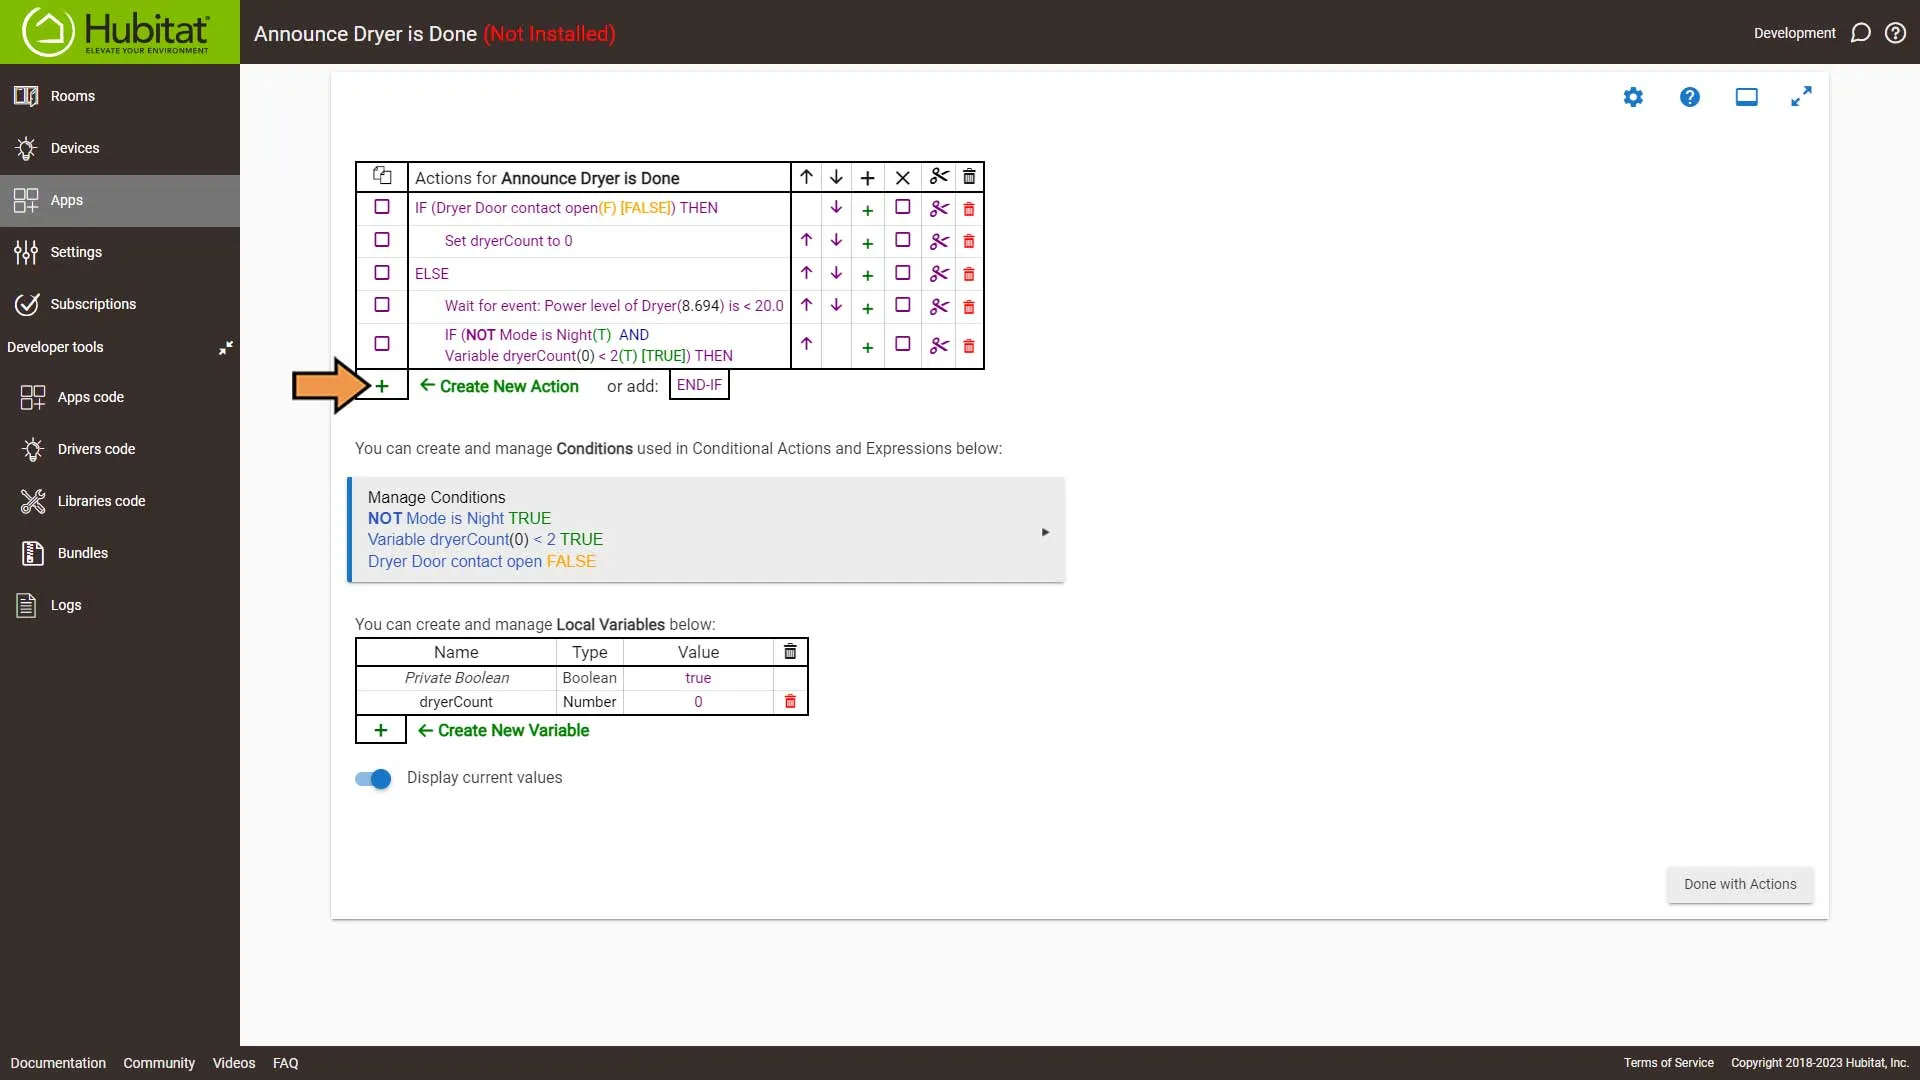
On the Create New Action screen we have a decision to make.
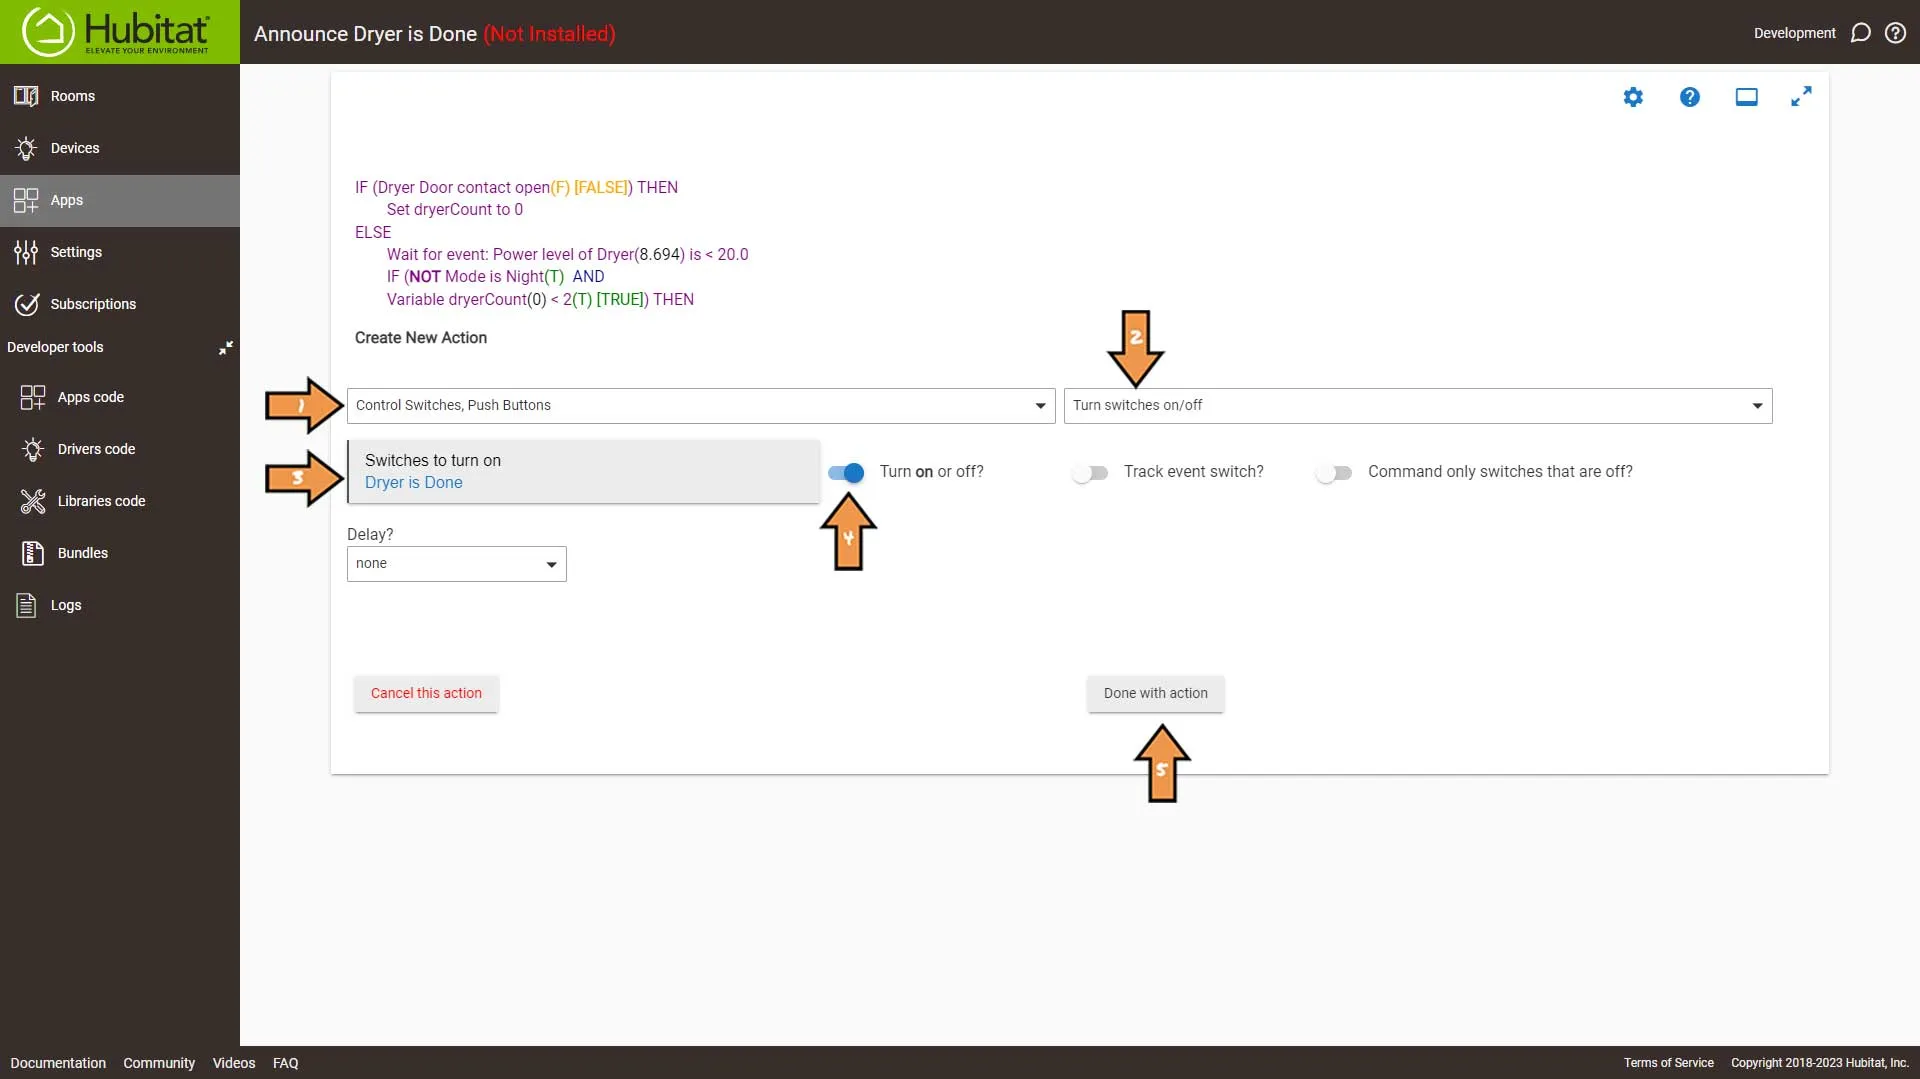
Option two:
Configure the New Action as follows:
- From the first dropdown, select Control Switches, Push Buttons
- Then, select the Turn switches on/off from the list in the following dropdown.
- Select the virtual switch we create earlier.
- Make sure it’s set to on.
- Then, click the Done with action button.
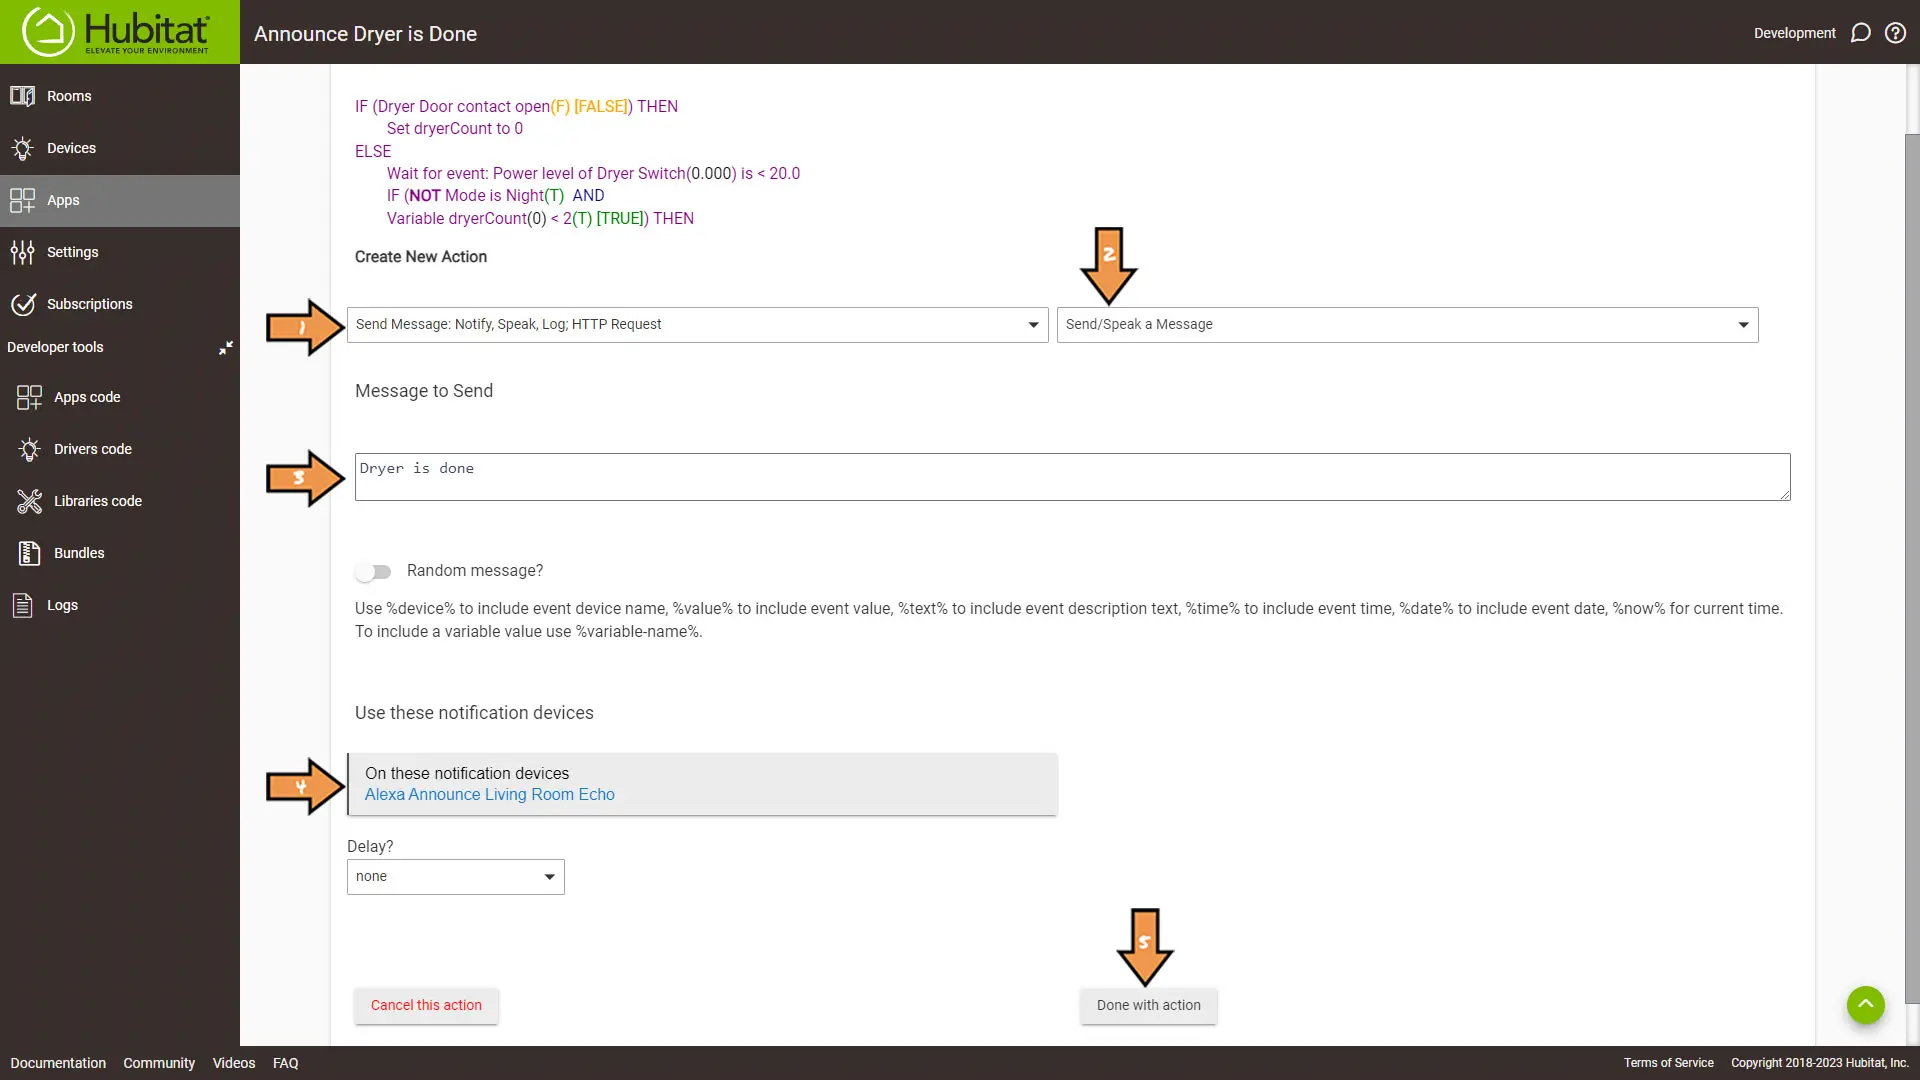
Option Three:
Configure the New Action as follows:
- Select Send Message: Notify, Speak, Log, HTTP Request from the list for the first dropdown.
- Then Select Send/Speak a message.
- Type your message.
- Select your MQTT Notification device.
- Then, click the Done with action button.
Select the Green Plus Sign to Add New Action.
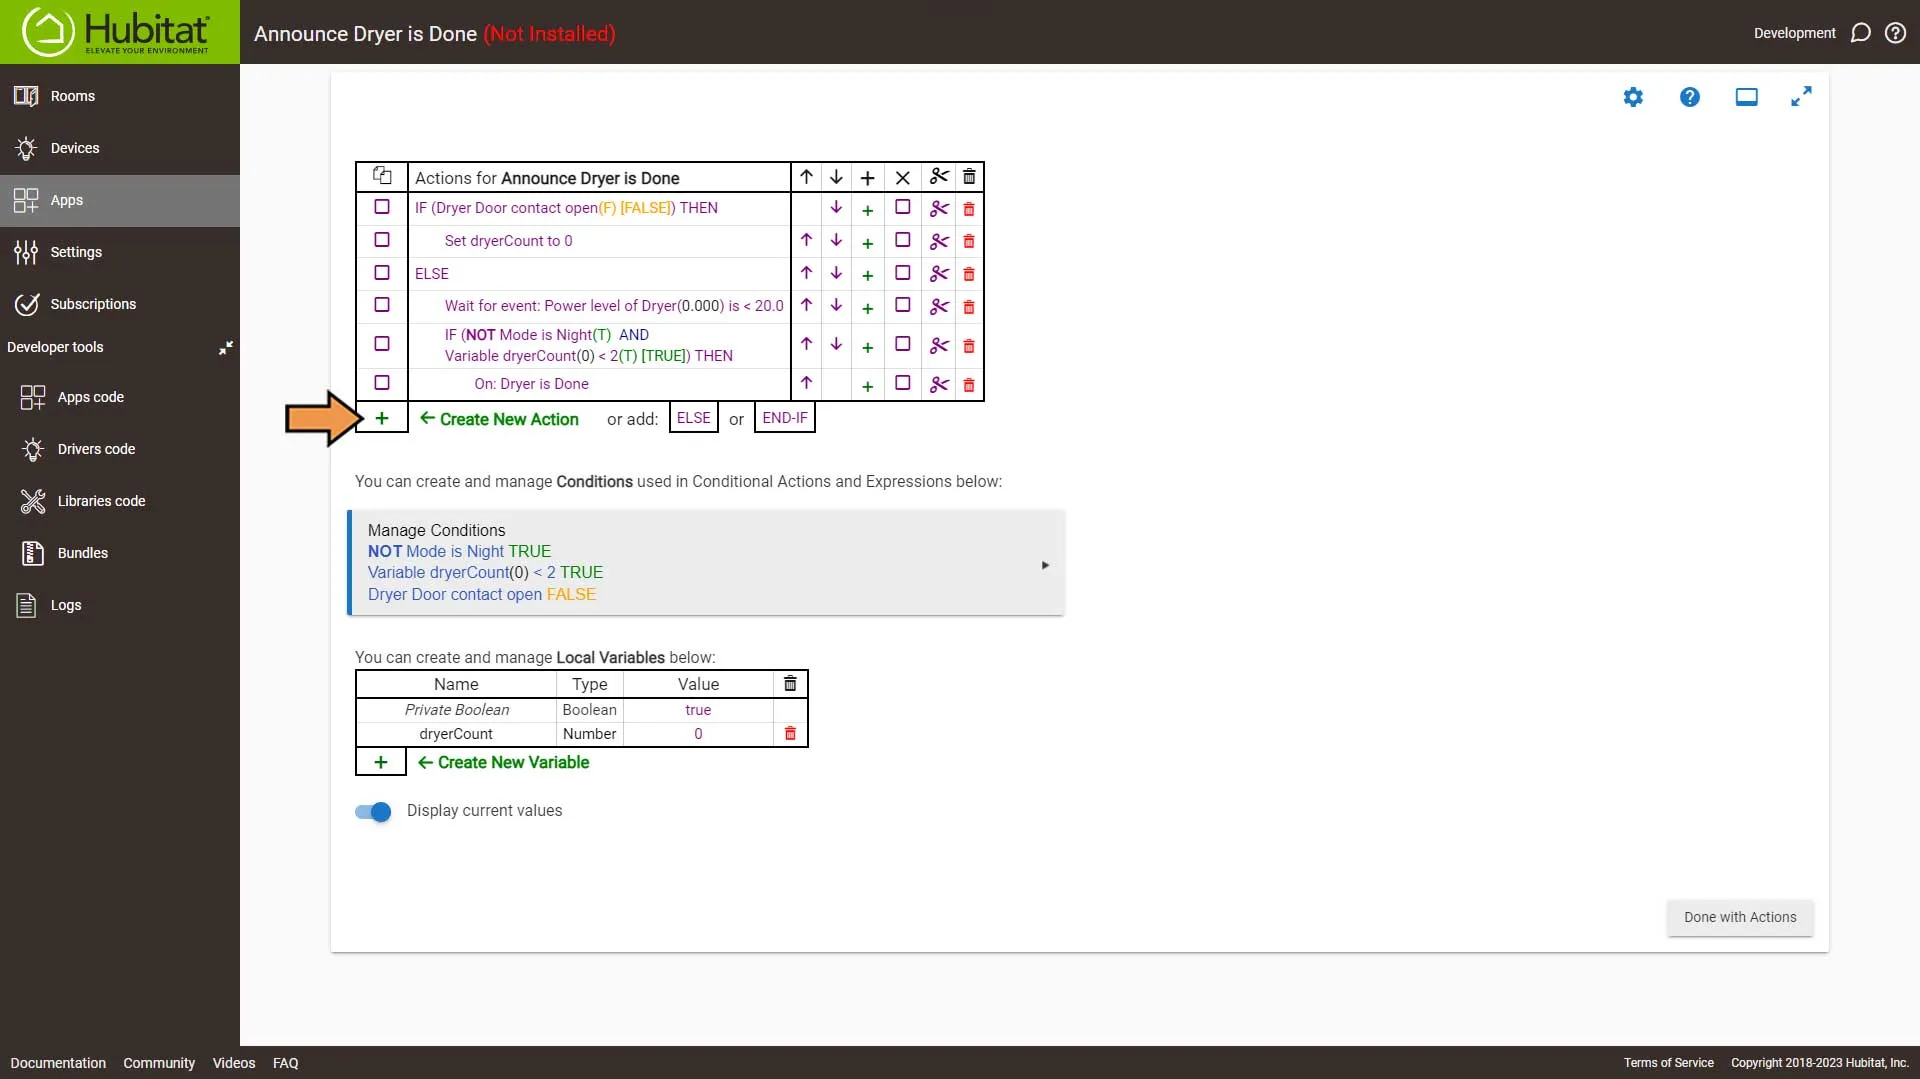
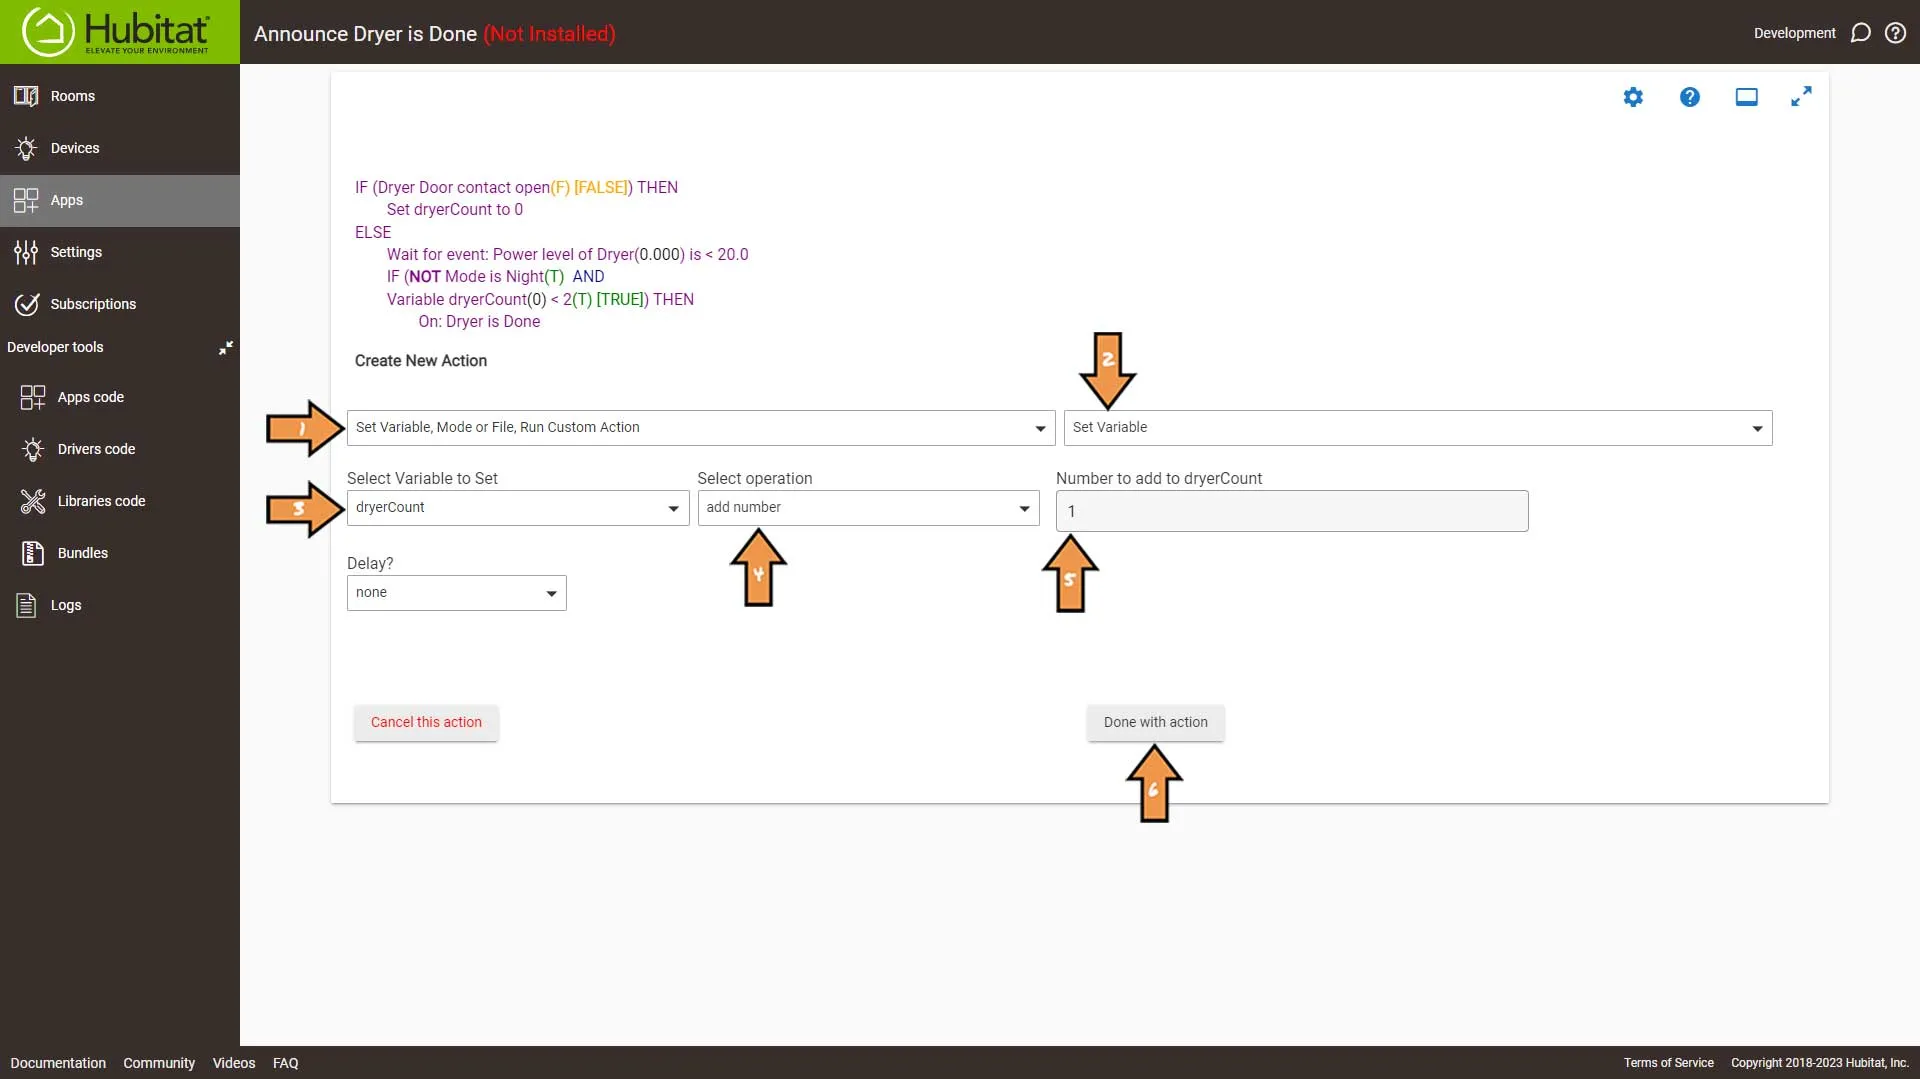
Configure the New Action as follows:
- From the first dropdown, select Set Variable, Mode or File, Run Custom Action
- From the following dropdown, select Set Variable
- Then select variable we created earlier
- Set the Select operation to add number
- Set the Number to add to 1
- Then, click the Done with action button.
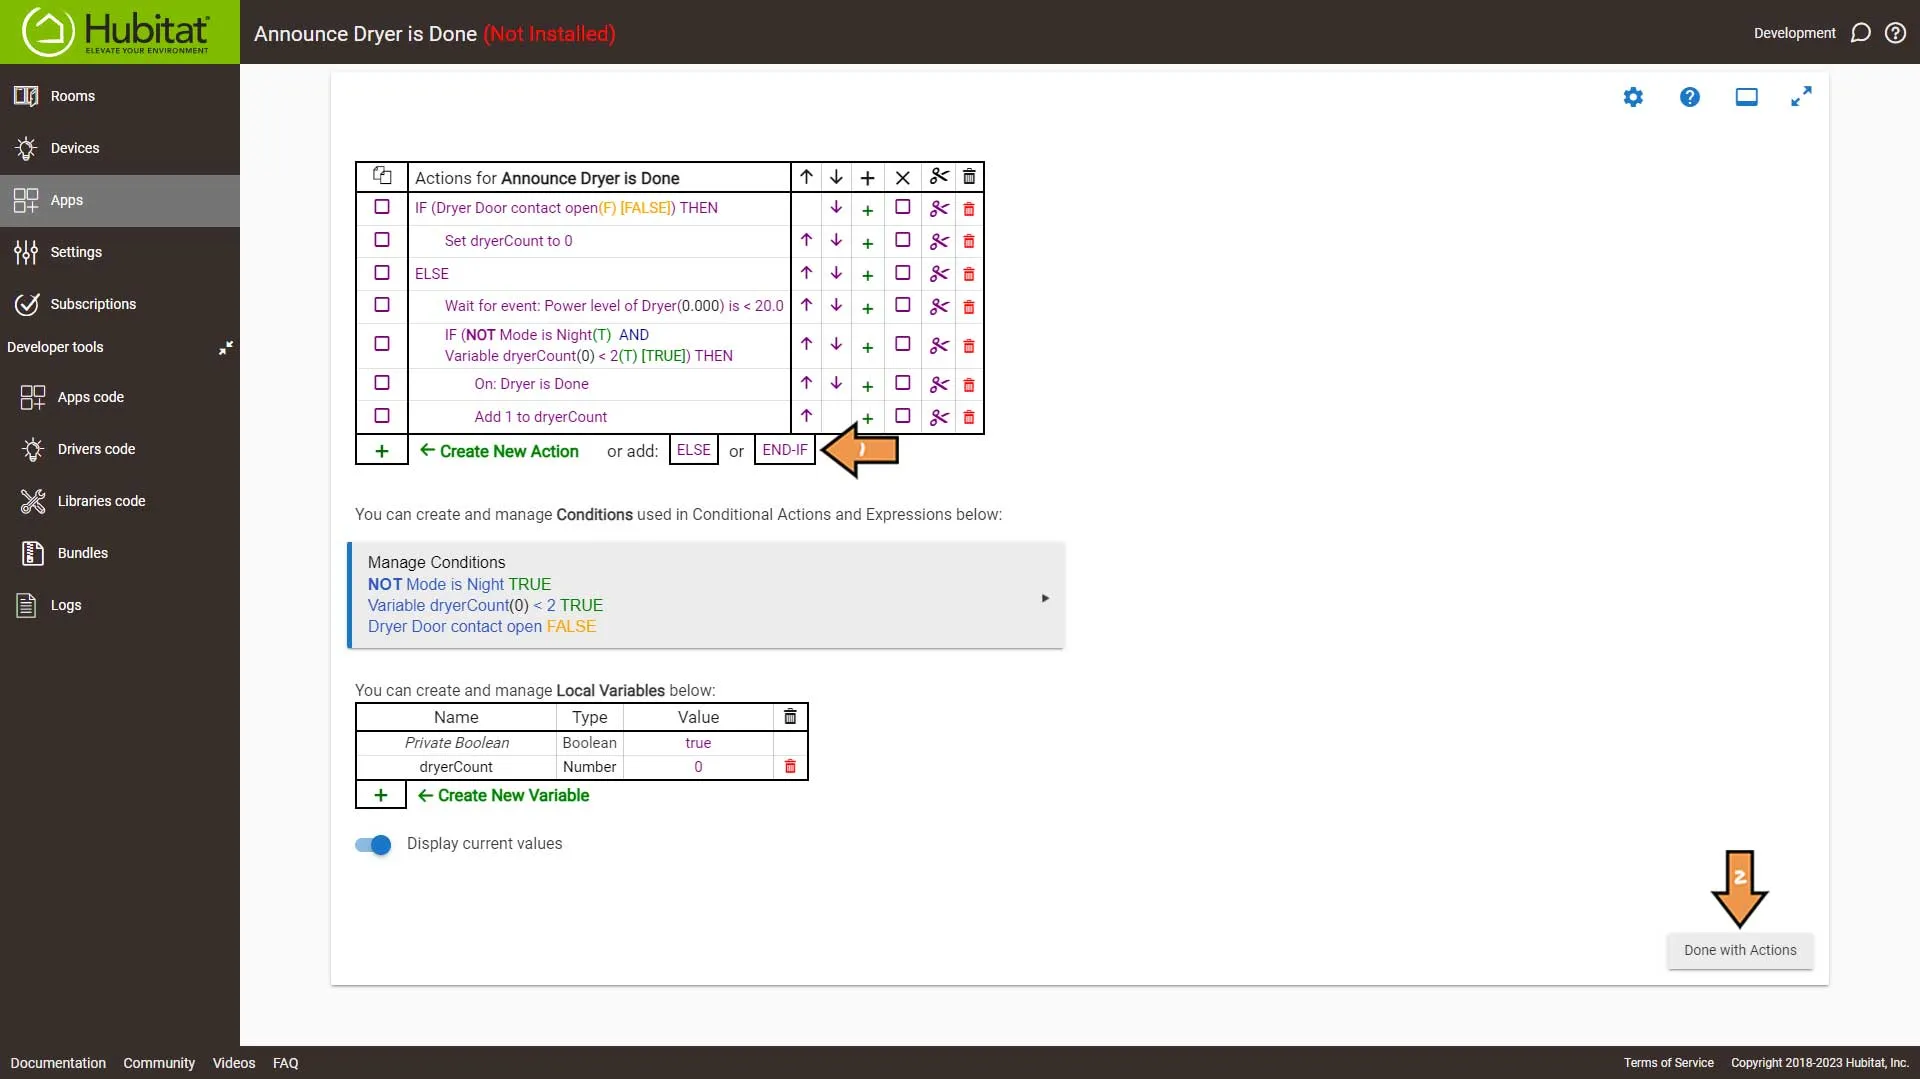
Click the END-IF button twice to close out both of our conditional actions, then click the Done with Actions button.
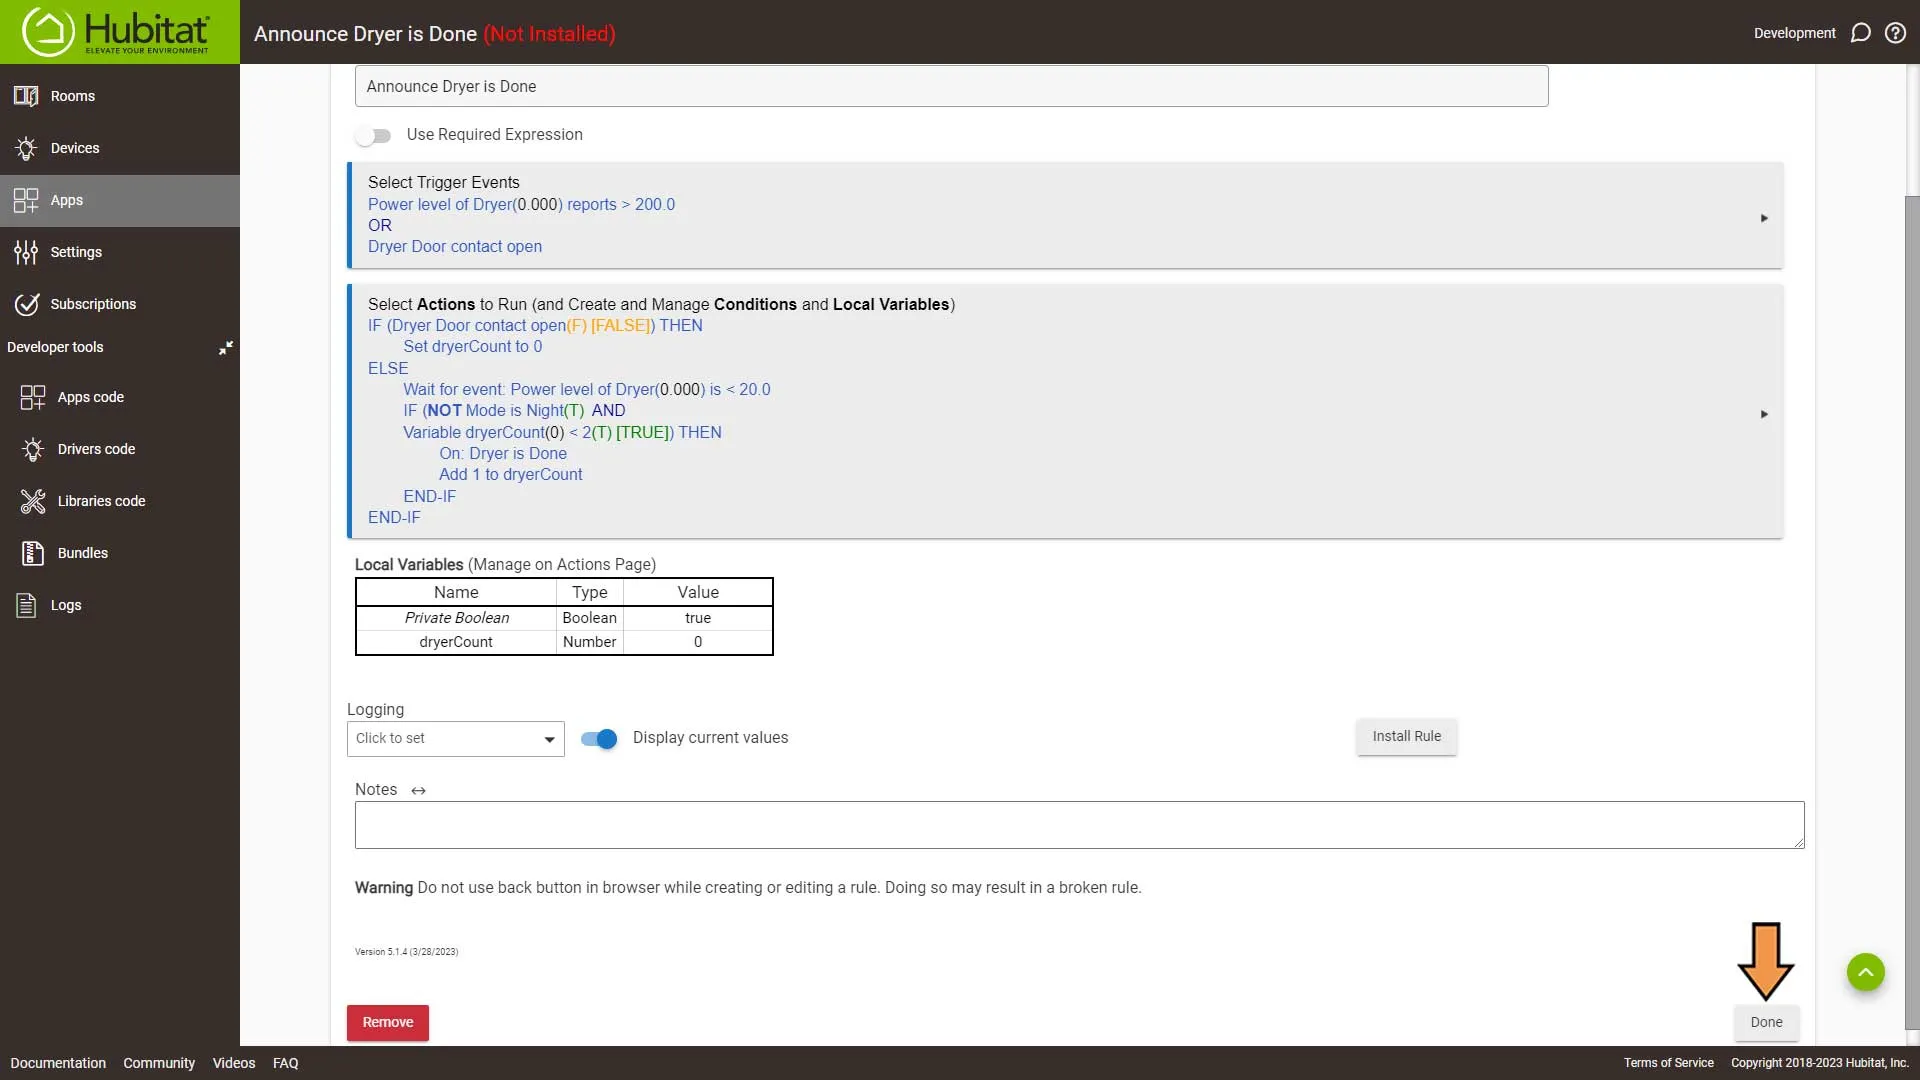
Click the Done button to complete the automation.
Success: That’s It! Now move on to the Amazon Alexa Tab if you are using Option Two
Home Assistant
Important: This automation requires Alexa Speaks Integration.
Setting Up the Automation
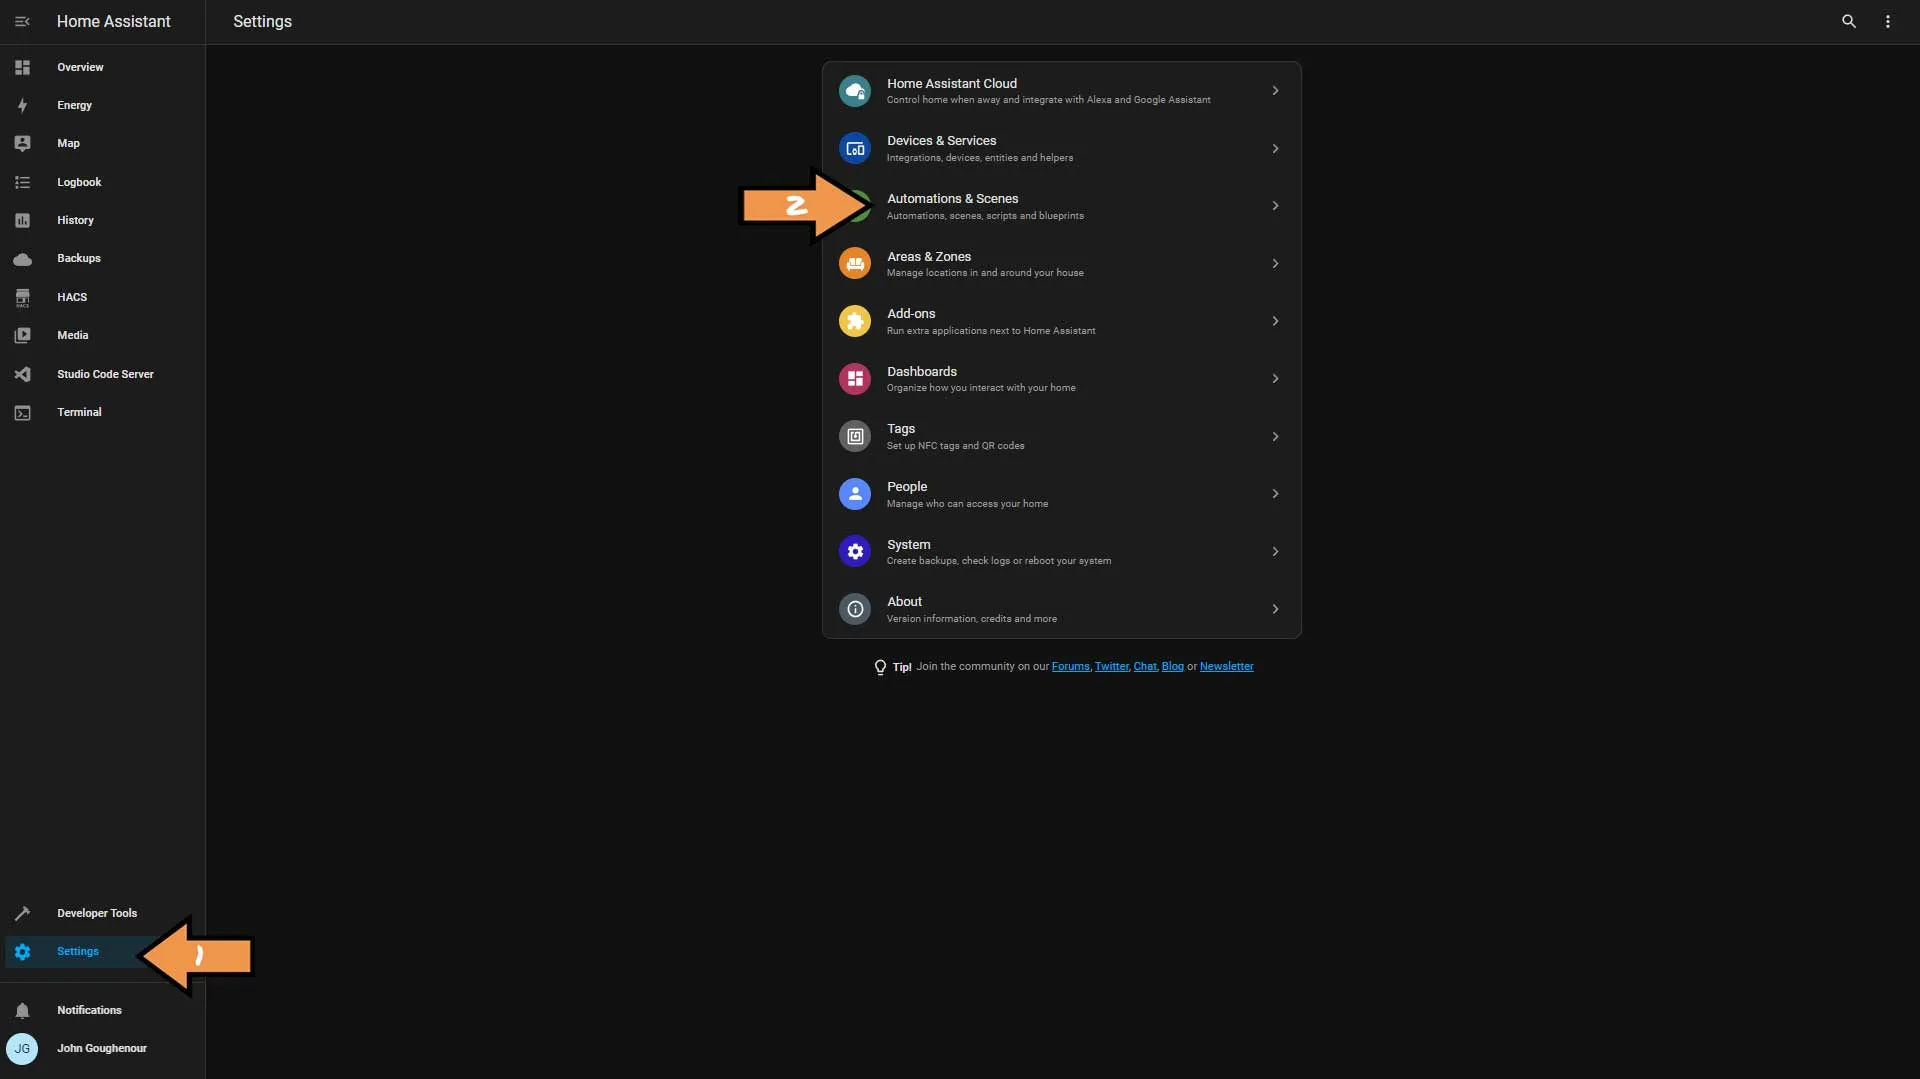
First, we need to go to Settings and Devices & Services.
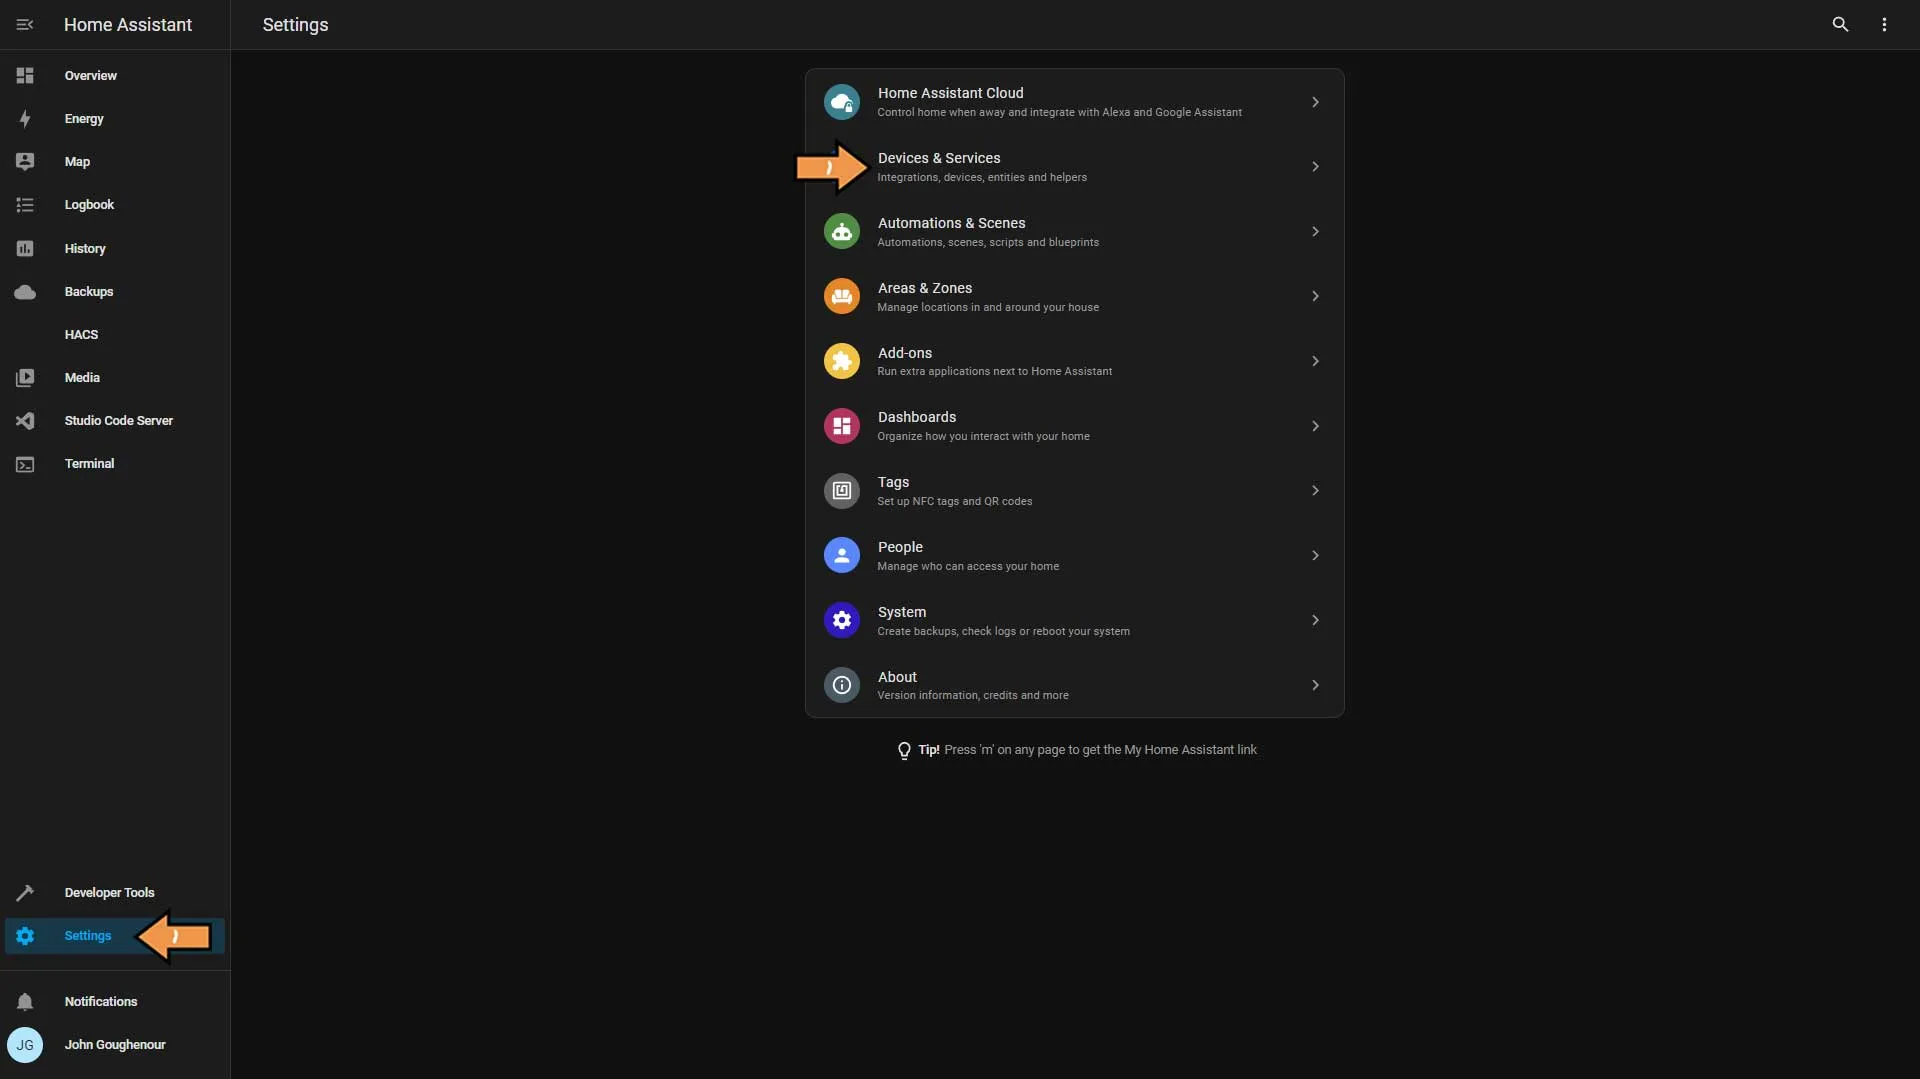
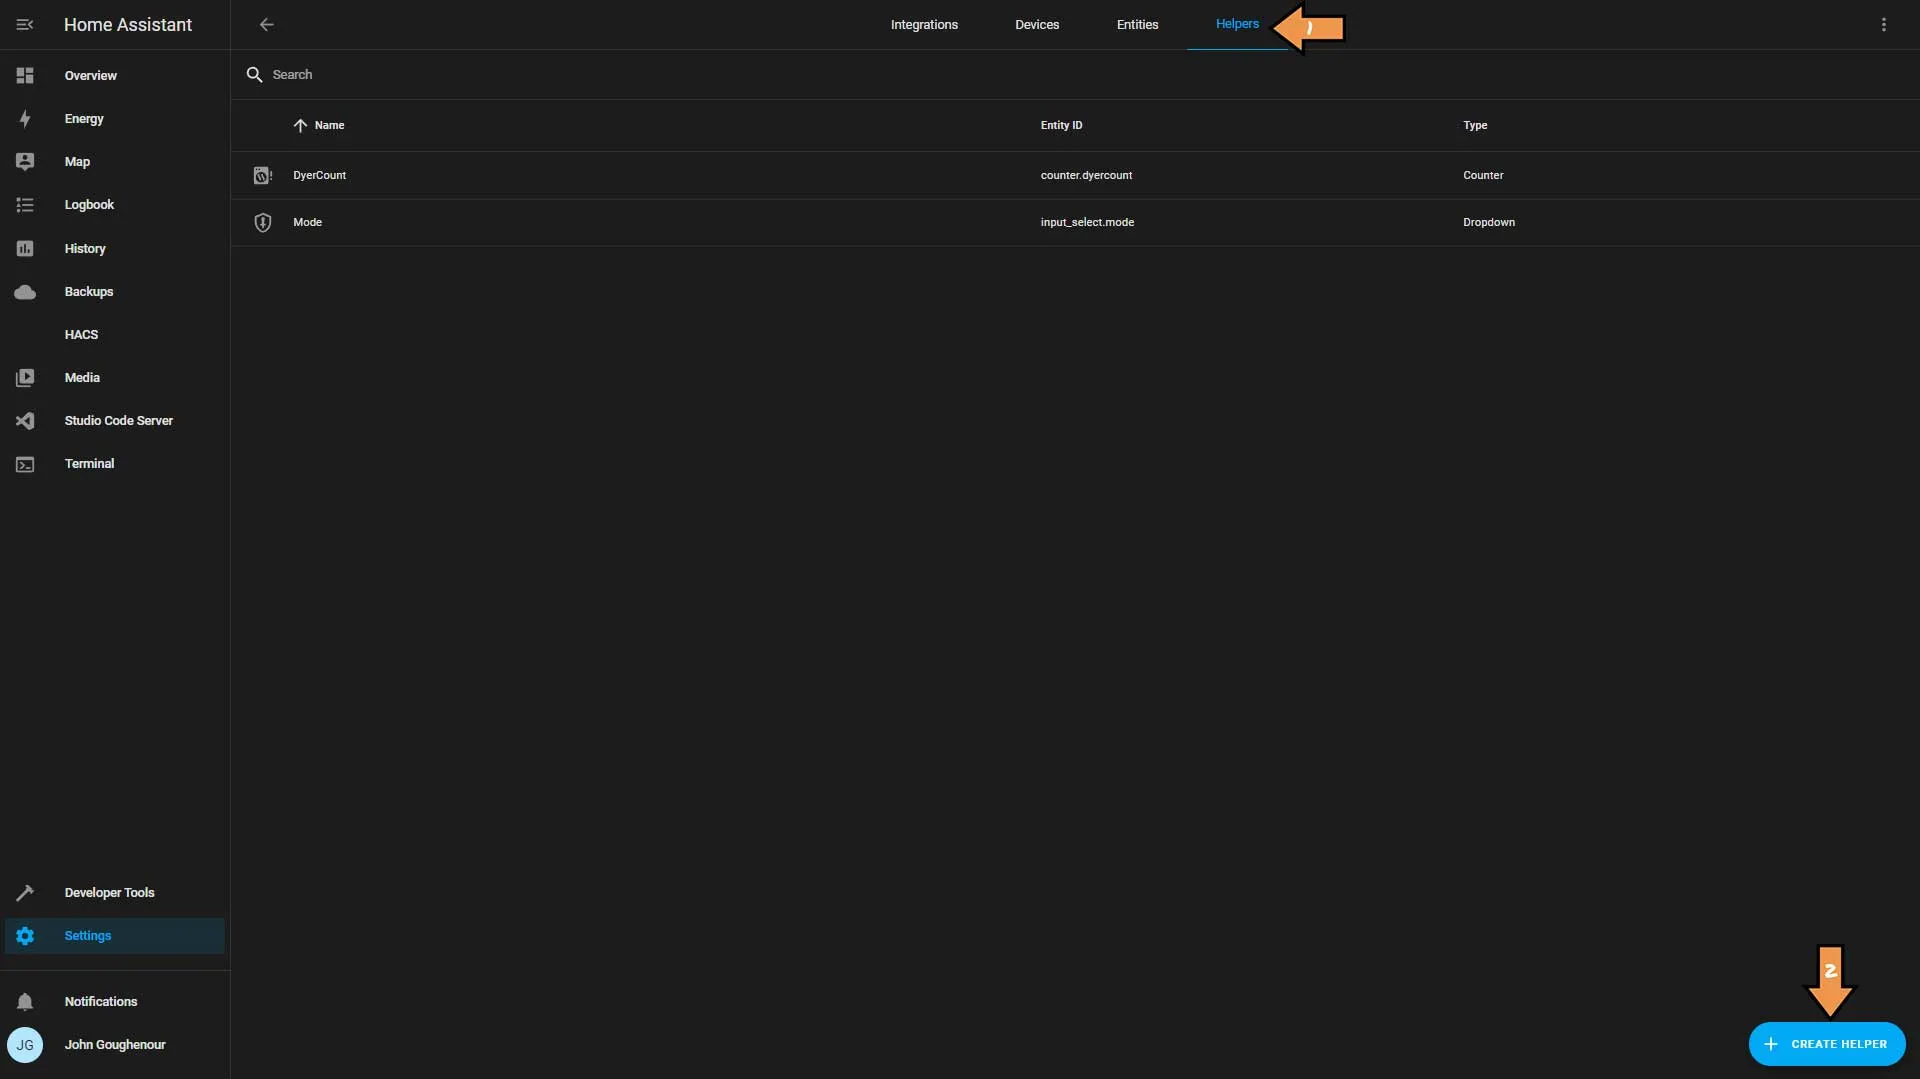
At the top of the screen, click Helpers, then the blue Create Helper button at the bottom.
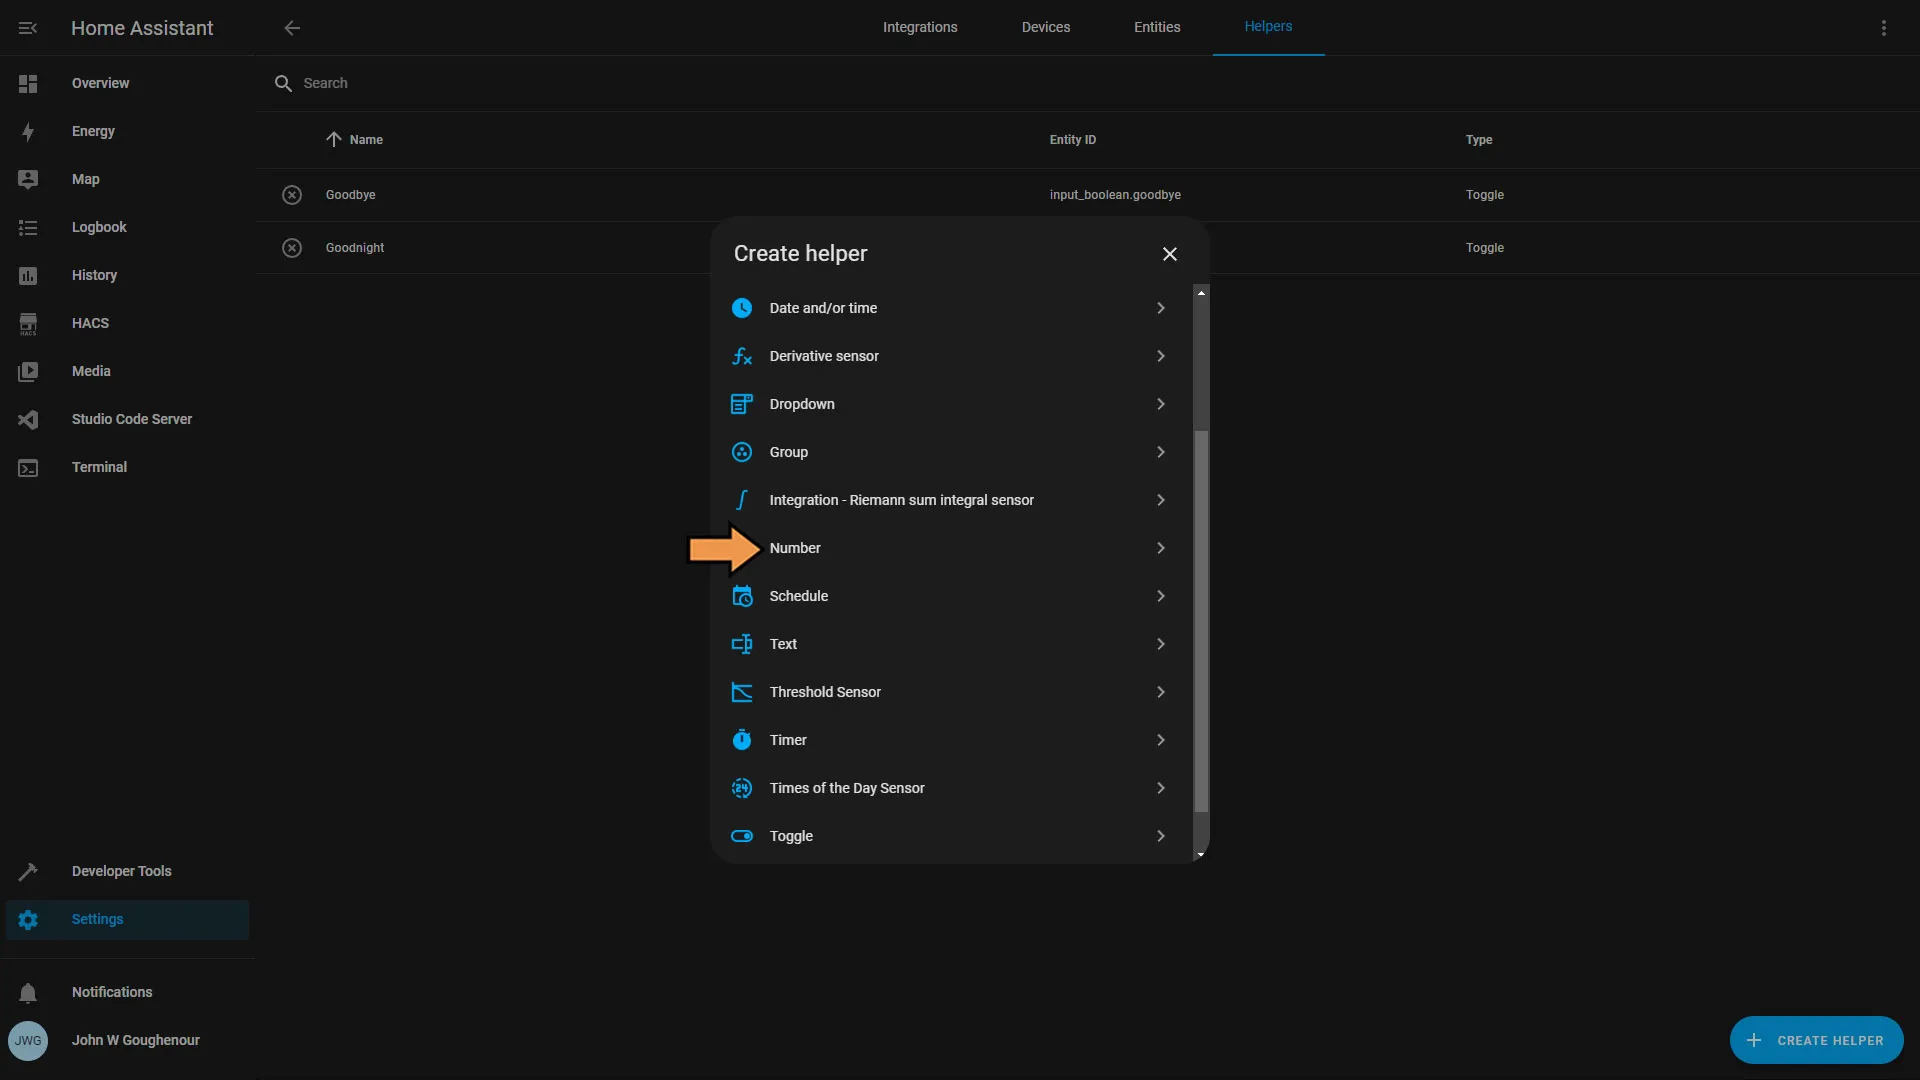
Select Number from from the helper type list.
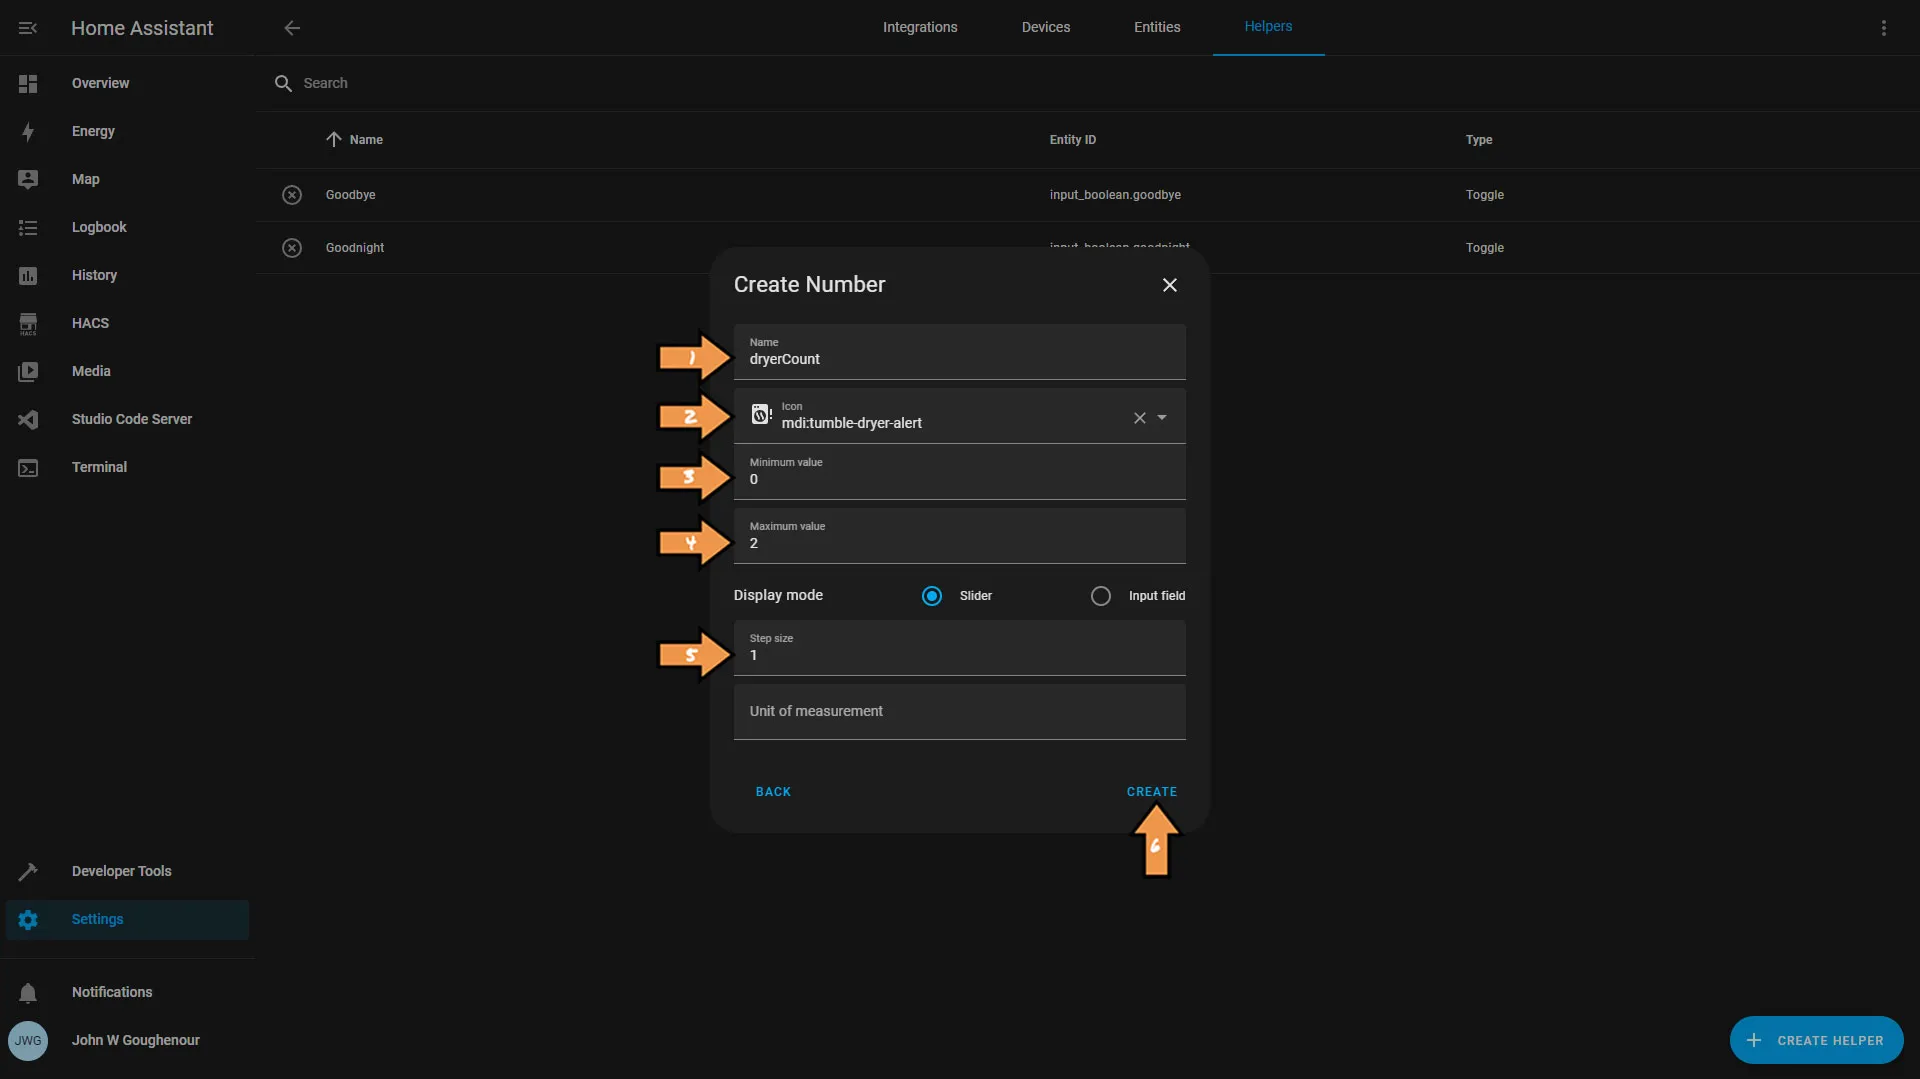
Create the Number with the following properties:
- Give the helper a name dryerCount.
- If you want to give the helper an icon, select it from the list.
- Set the Minimum value to 0.
- Set the Maximum value to 2
- Make sure the step size is set to 1.
- Click Create.
Next, we need to go to Settings and Automations & Scenes.
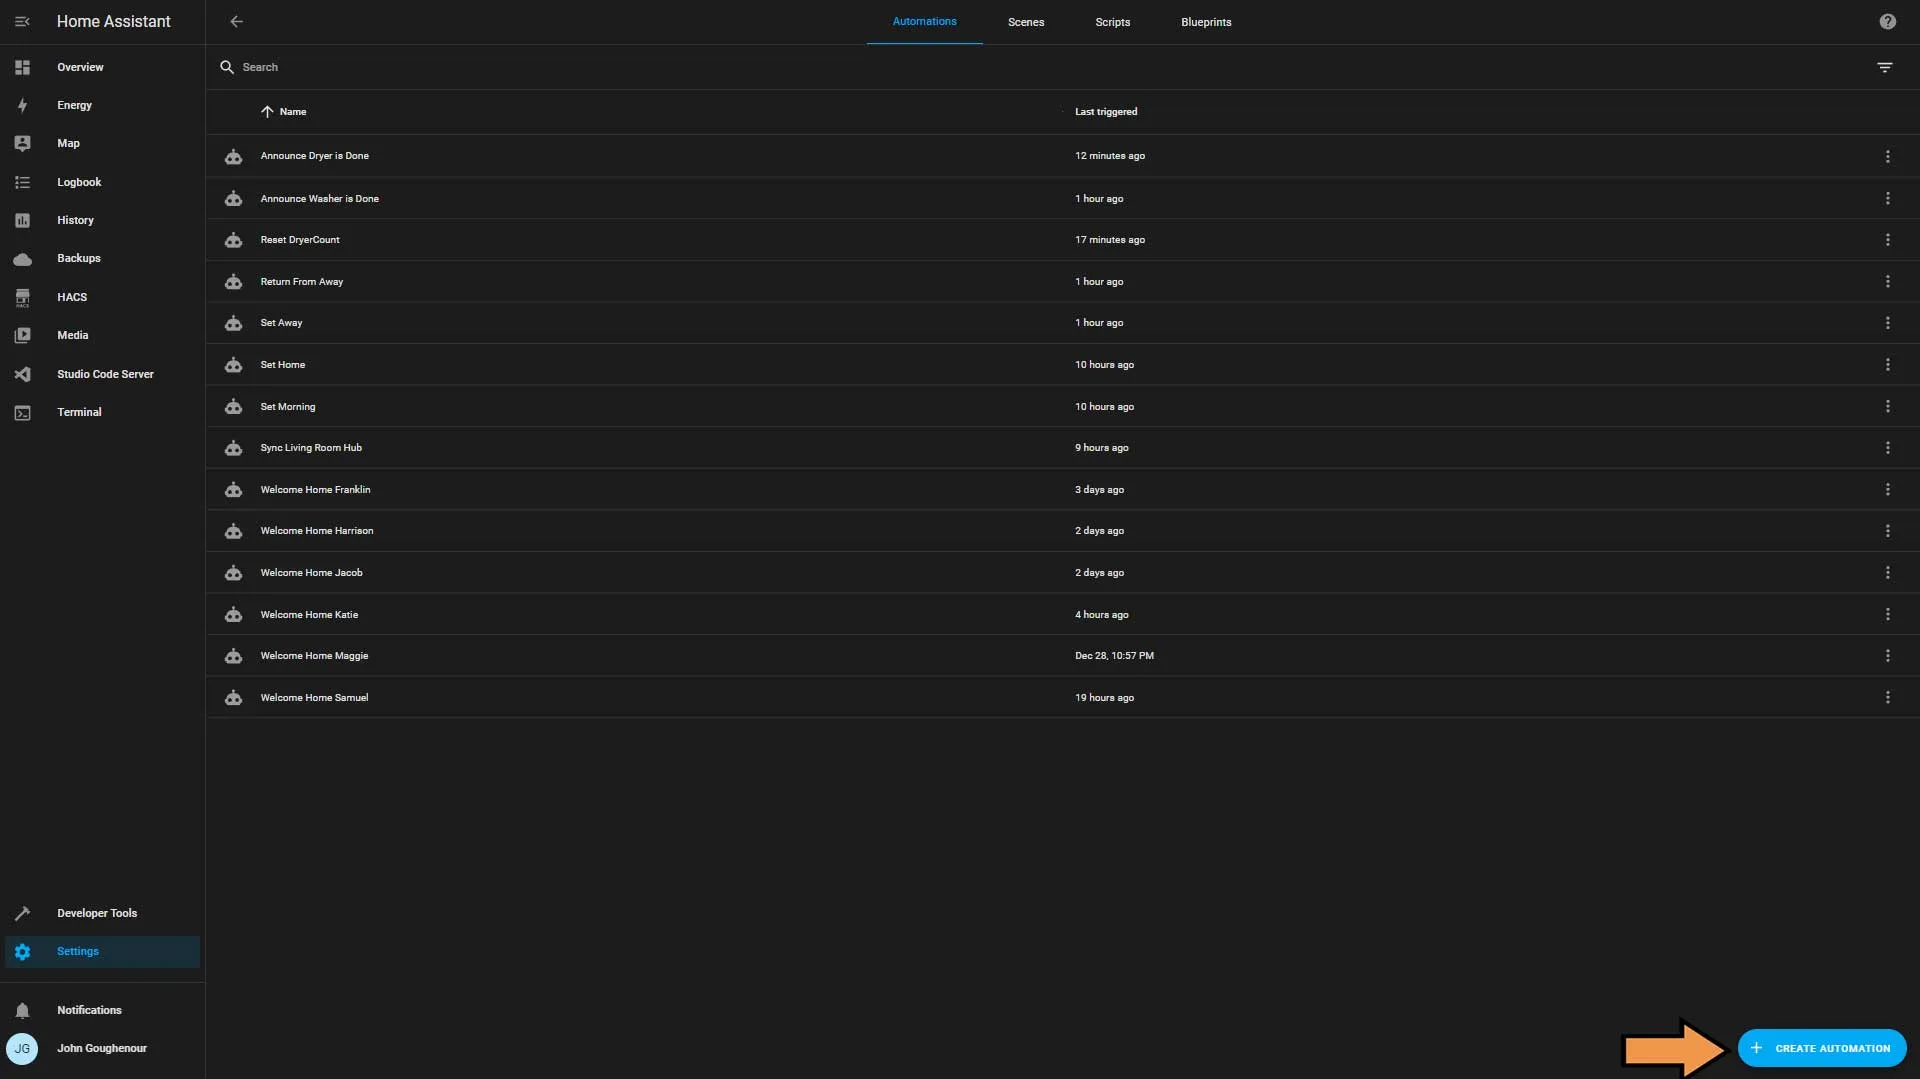
Click the blue Create Automation button.
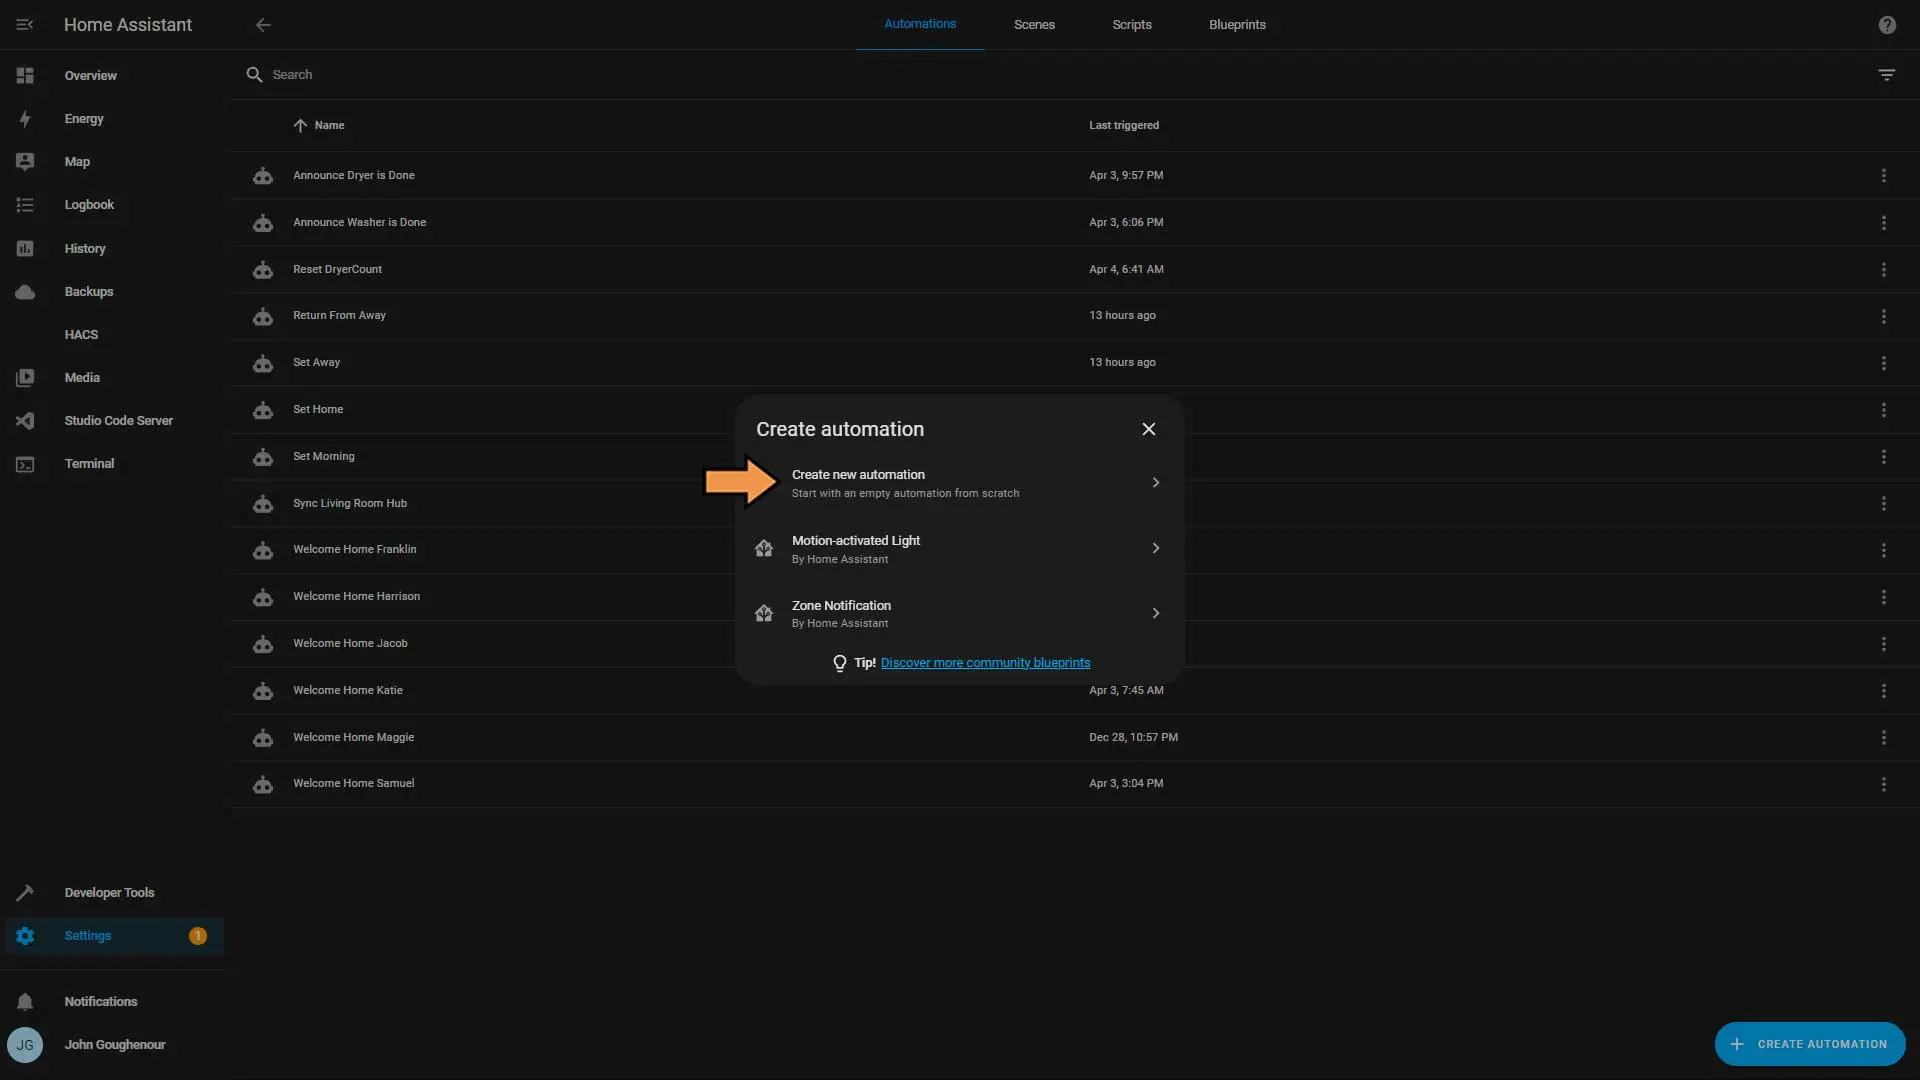
Choose Create new automation.
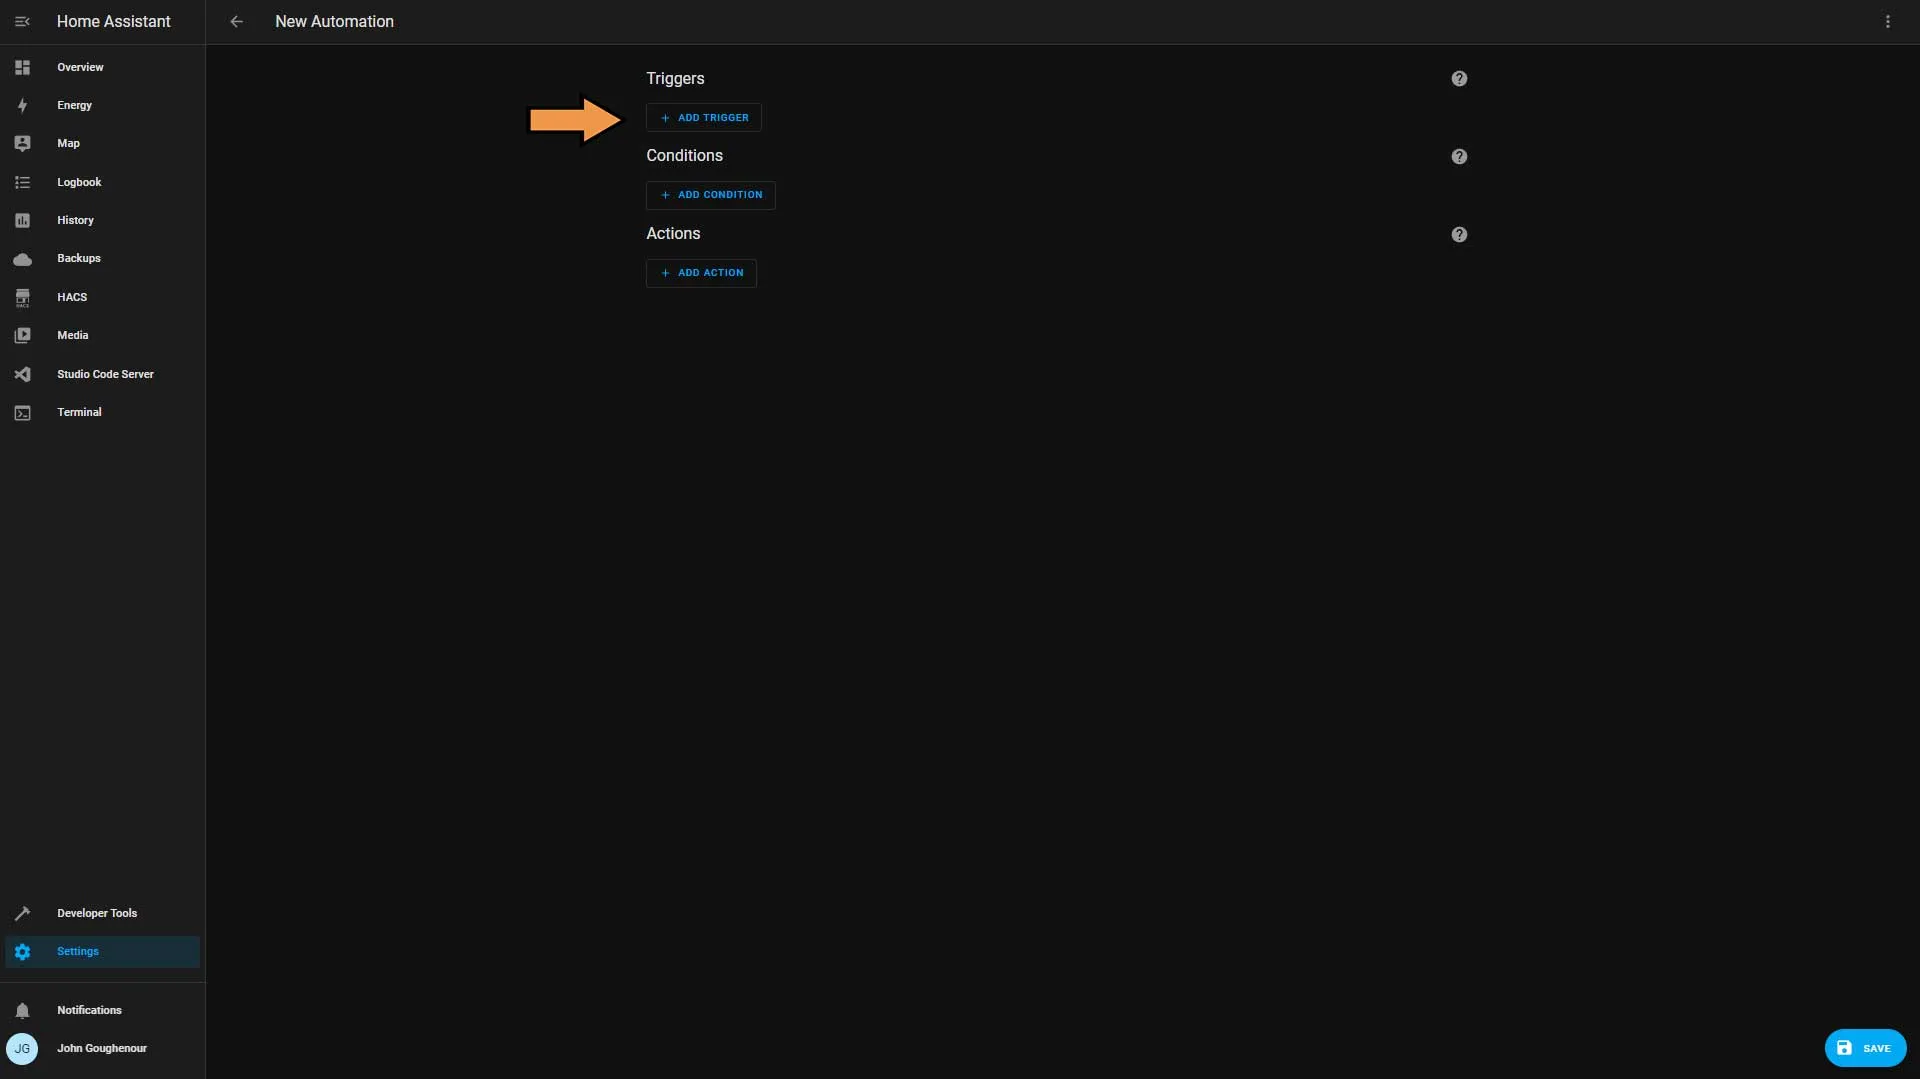
Click Add Trigger.
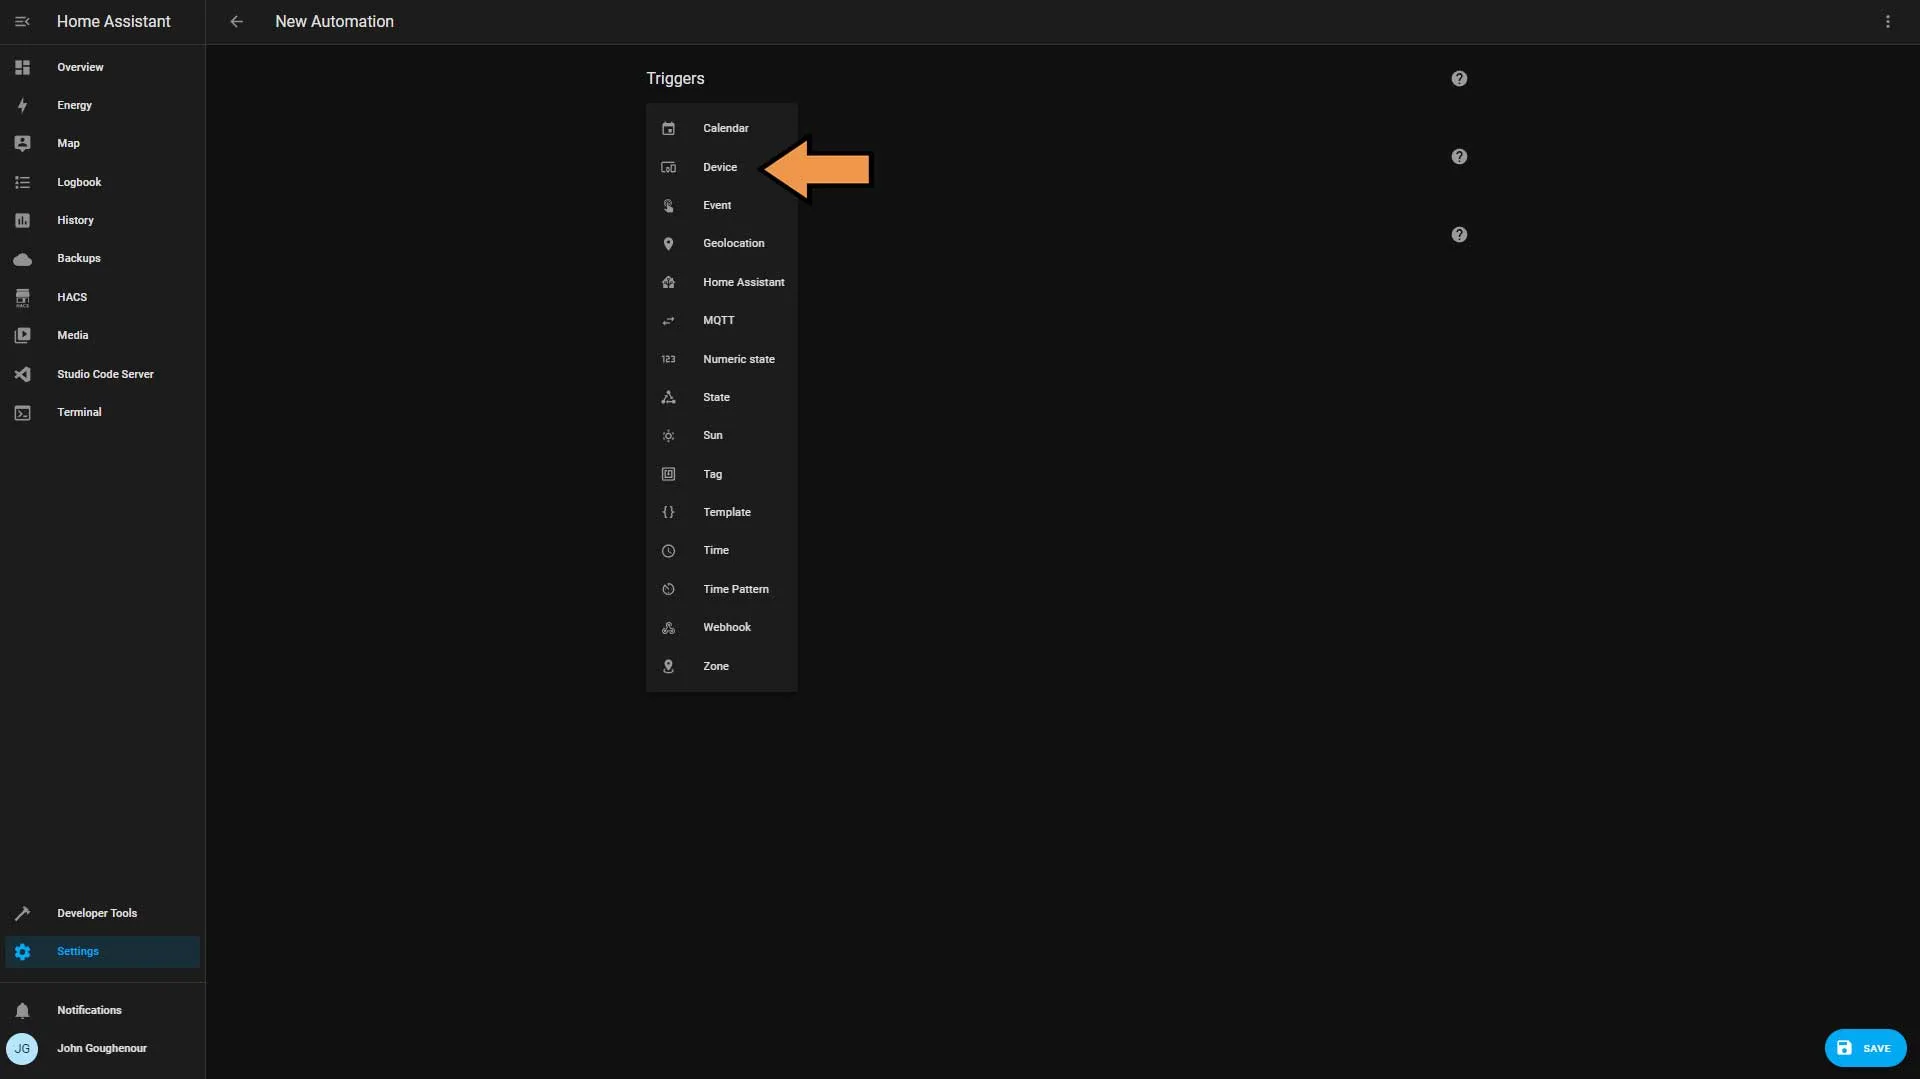
From the trigger type list, select Device.
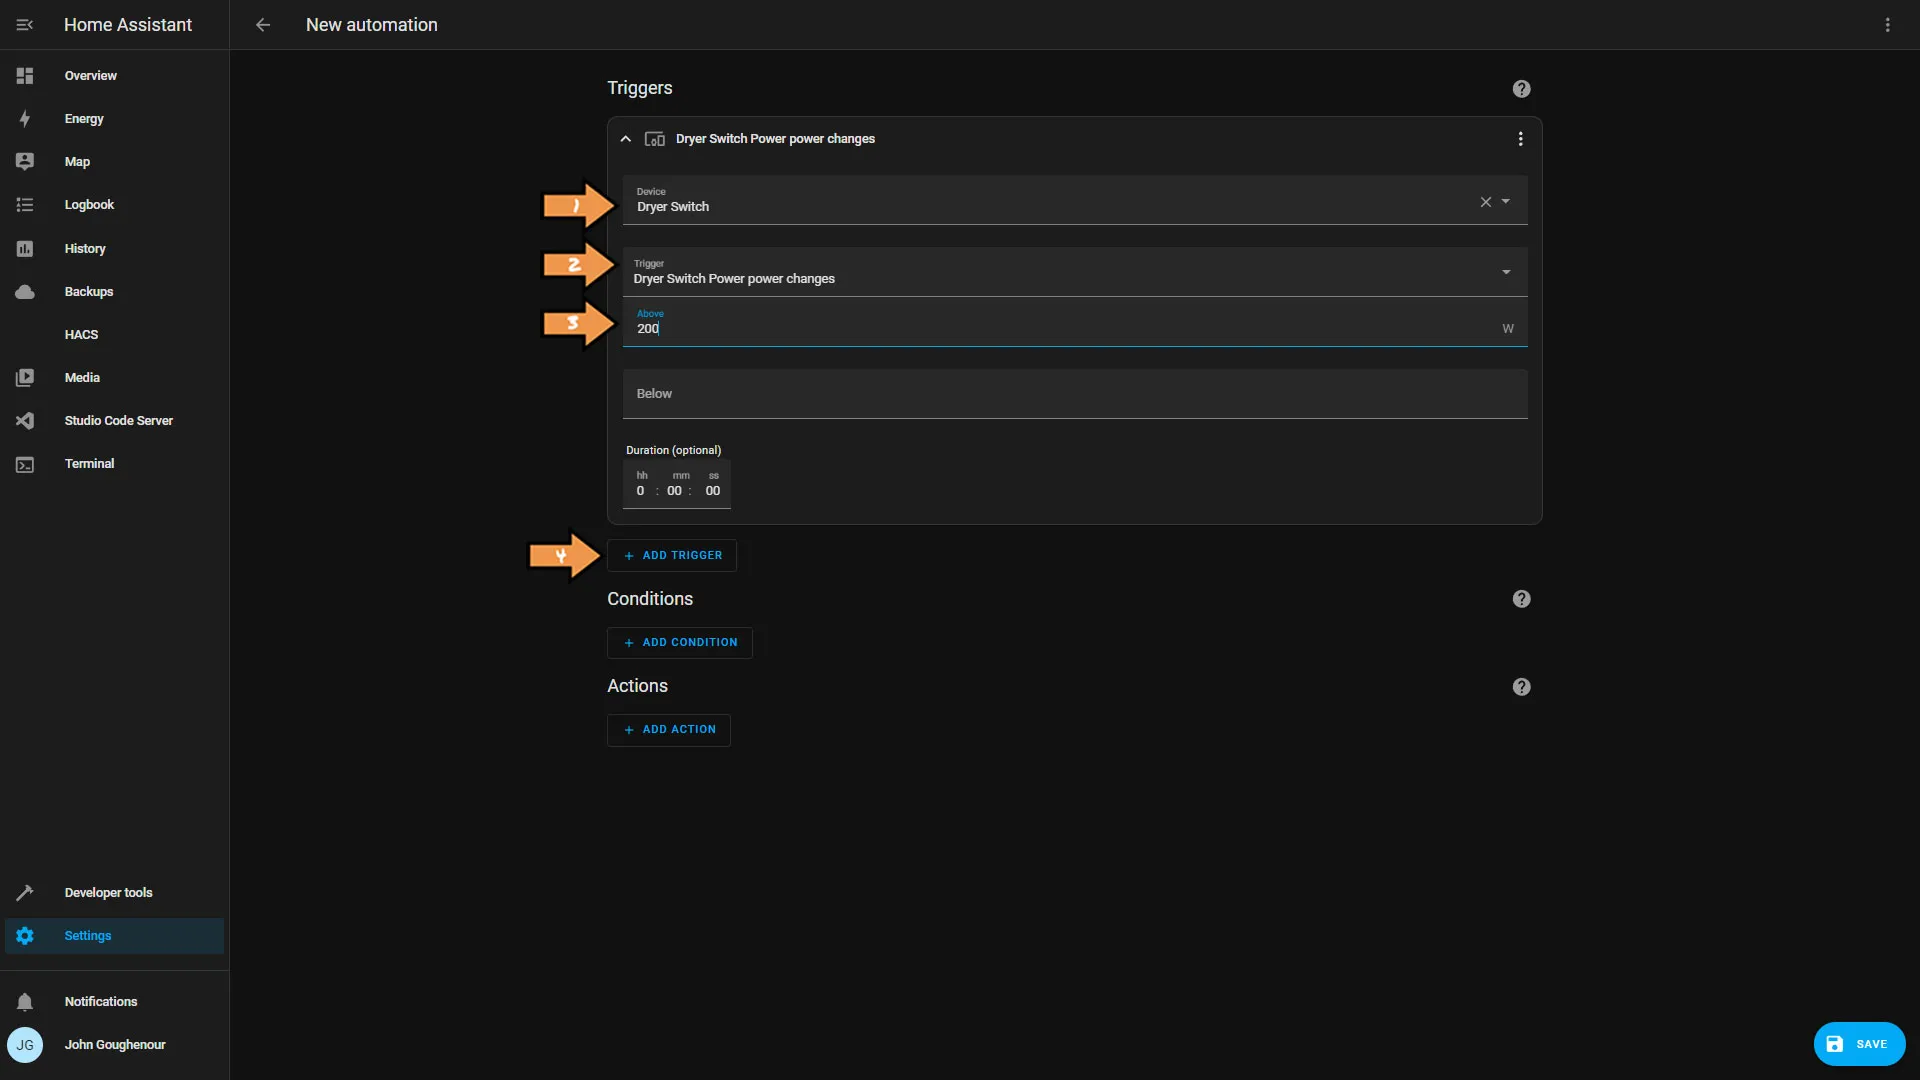
Set the trigger device as follows:
- Select our dryer switch for the device.
- Select Dryer Switch Power power changes for the trigger.
- Set the Above value to 200.
- Then, click the Add Trigger button and select Device again from the list.
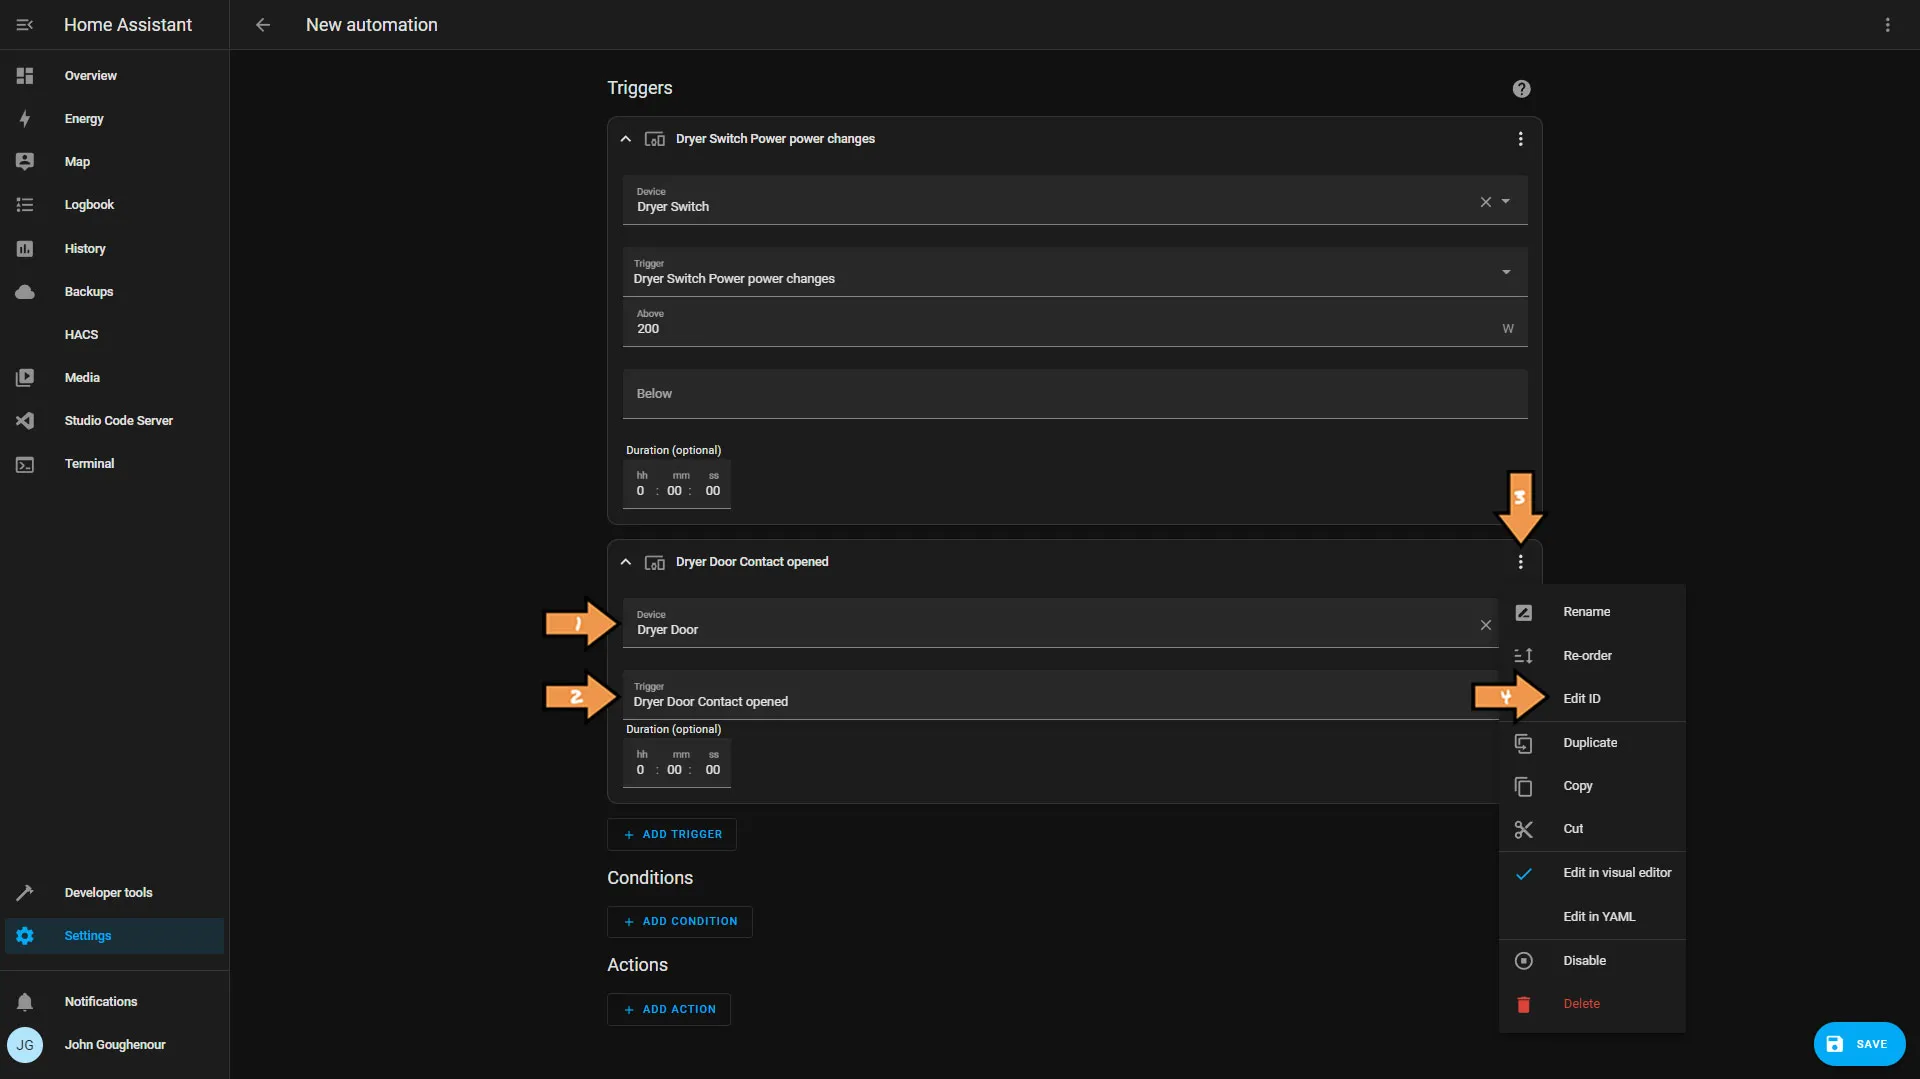
Select our dryer door contact sensor for the device and set the trigger to Dryer Door Contact opened. Then click the vertical ellipses and select Edit ID.
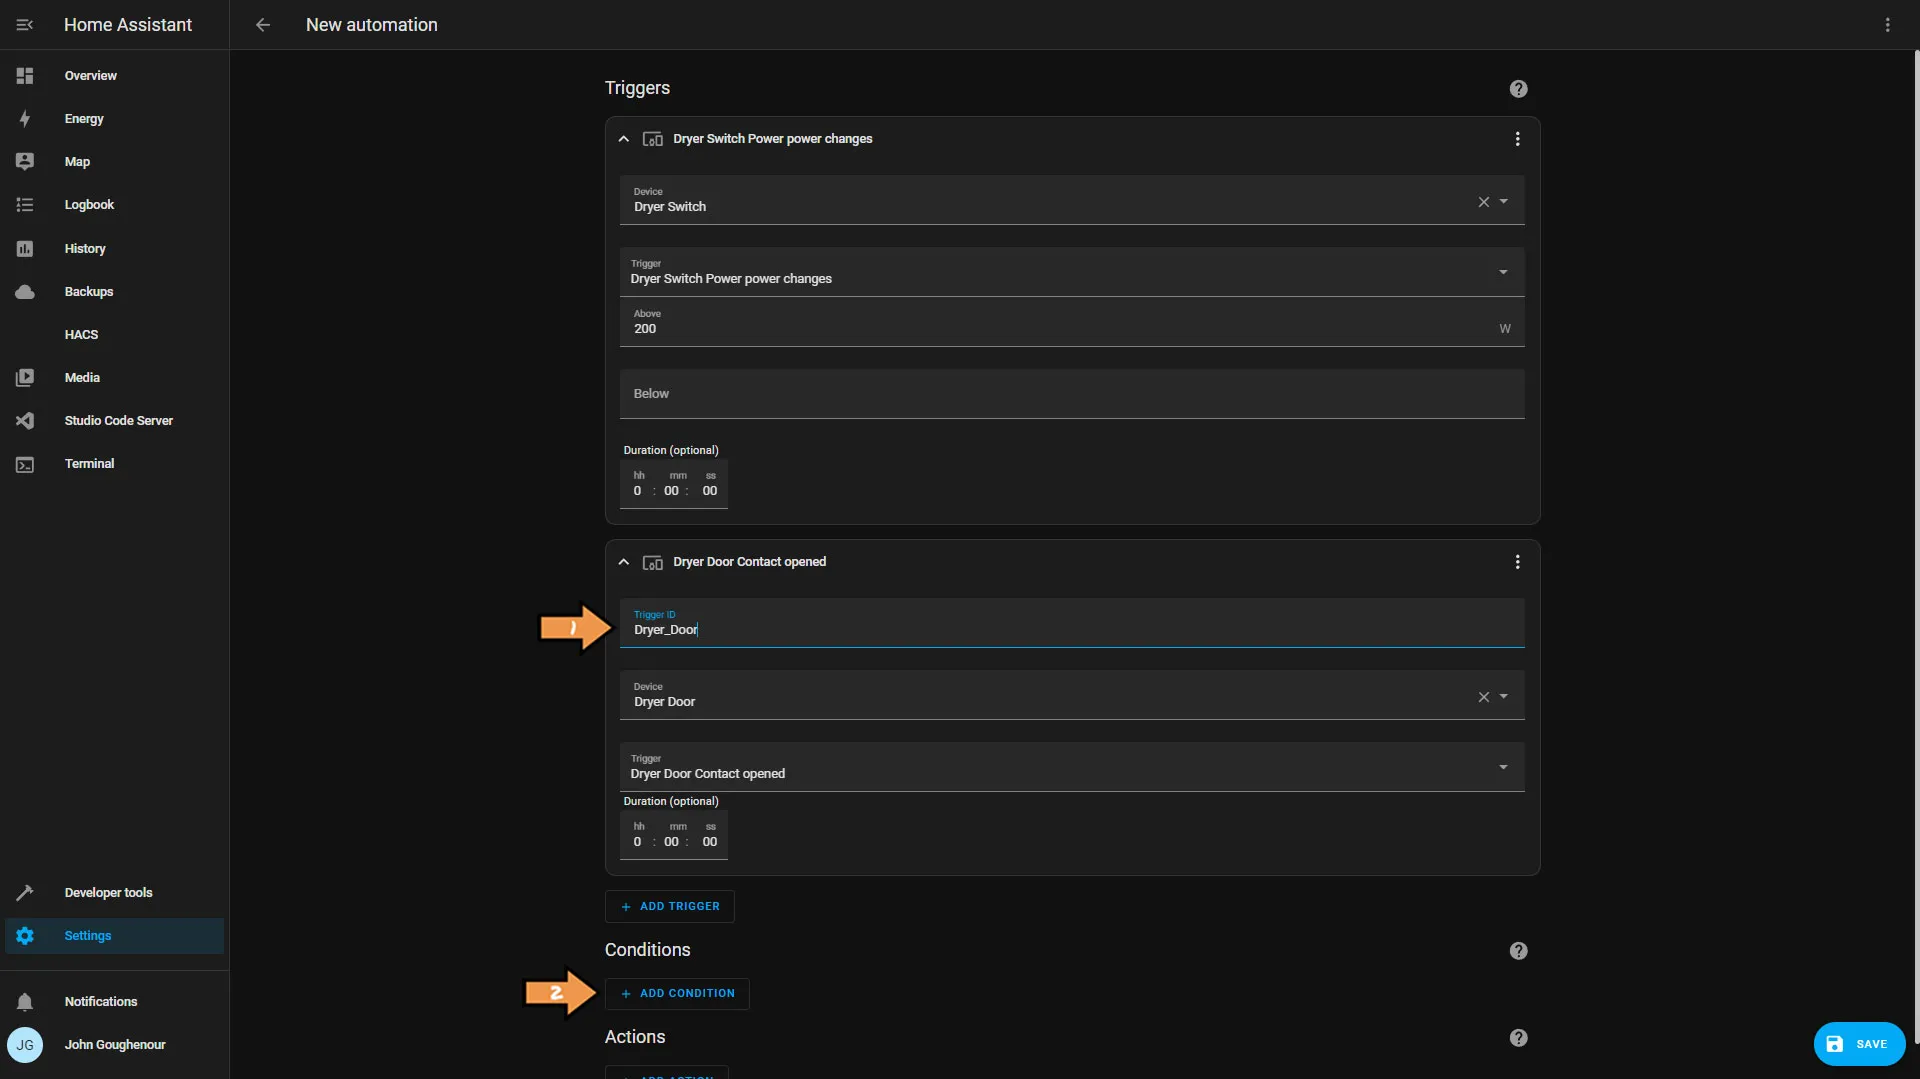
Set the ID for this trigger as Dryer_Door, and click the Add Condition button.
Select NOT from the Condition list, then click the Add Condition button and select State.
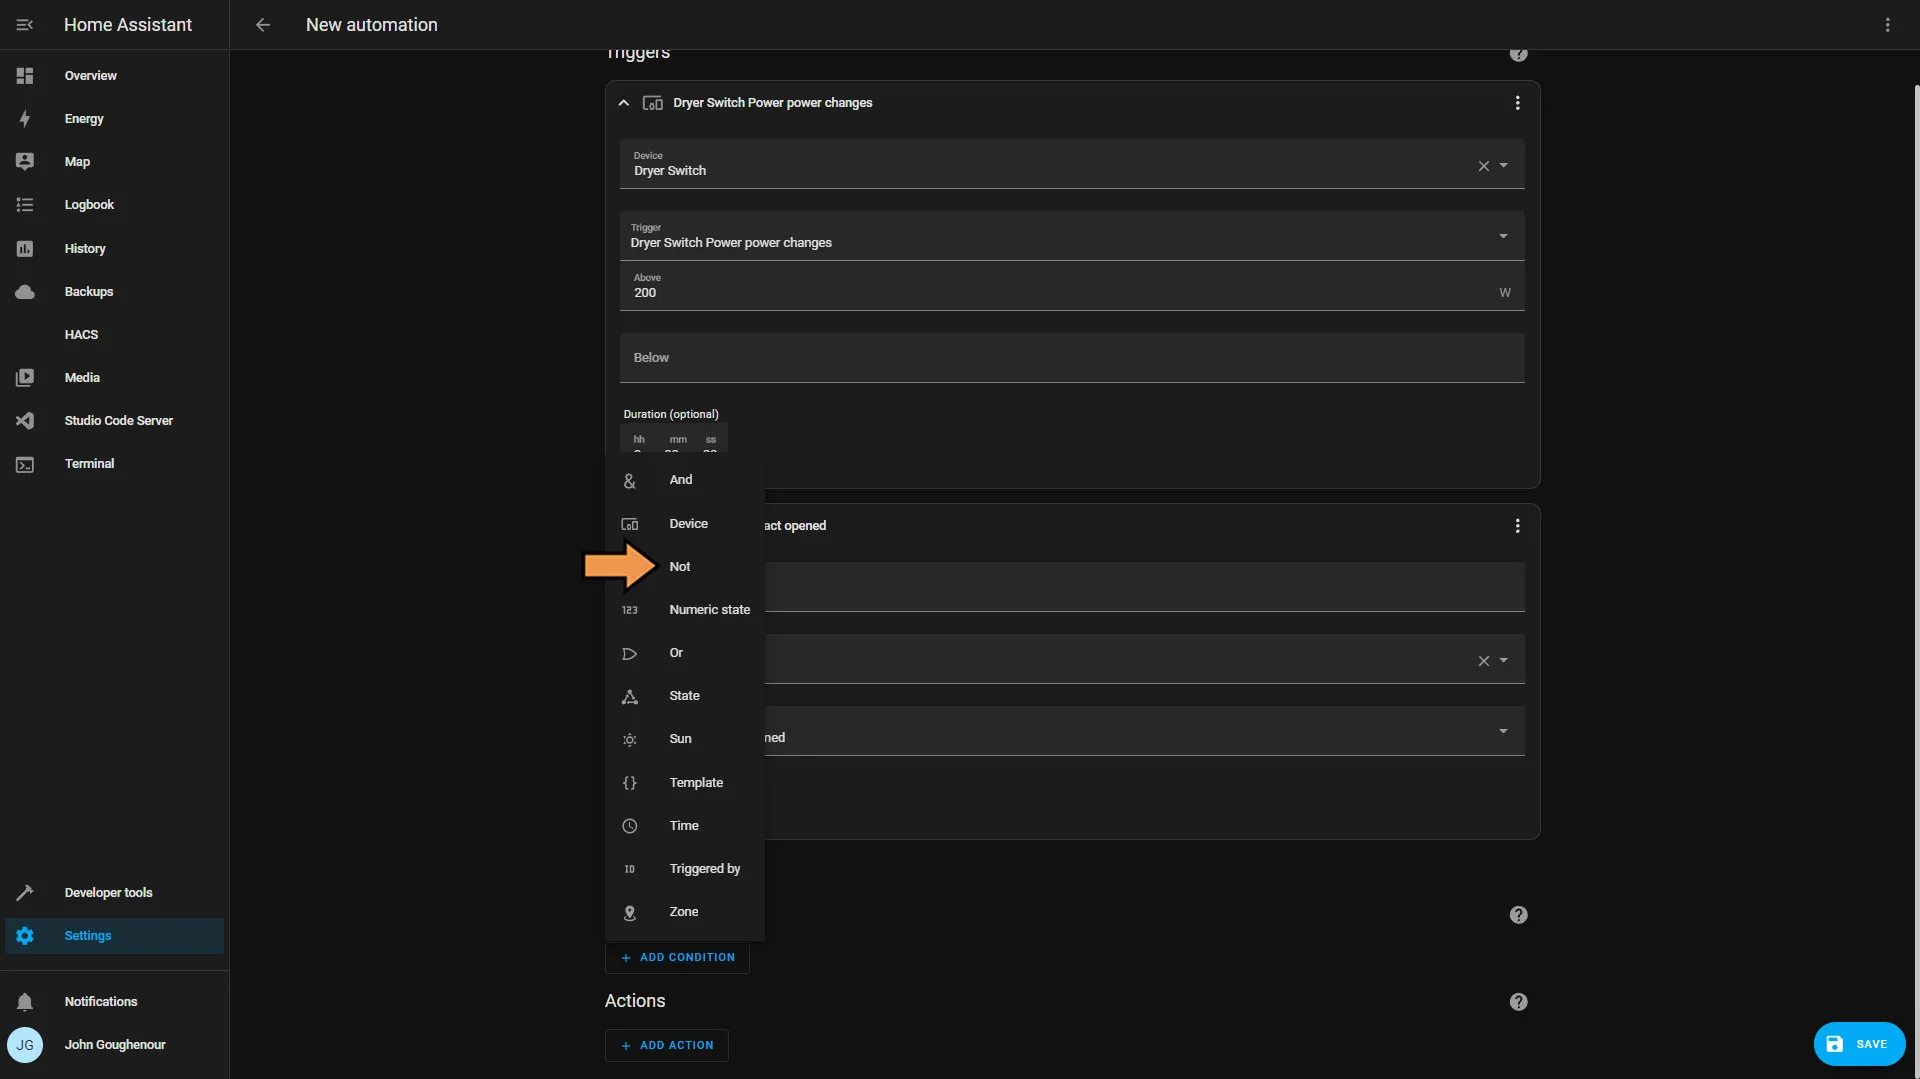
Select our Hub Mode for the Entity and set the state to Night. Then, click the Add Action button.
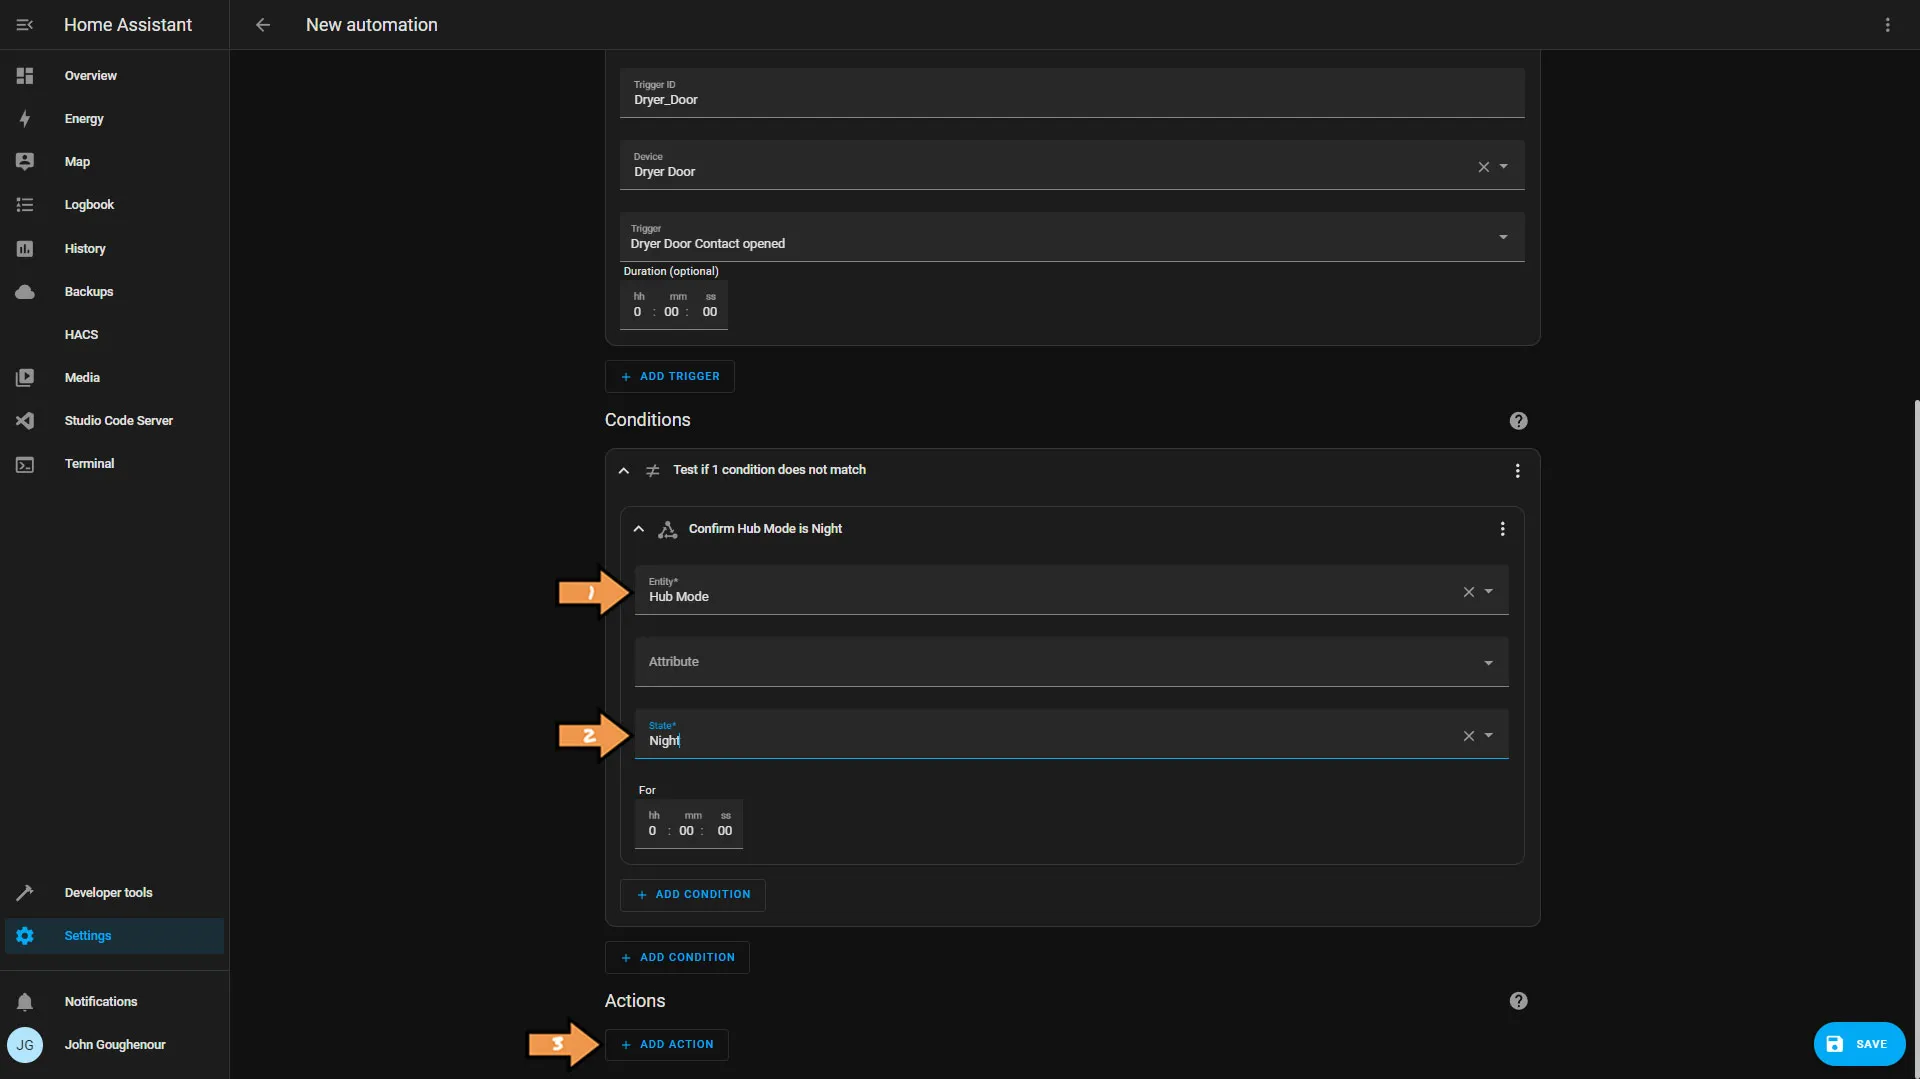
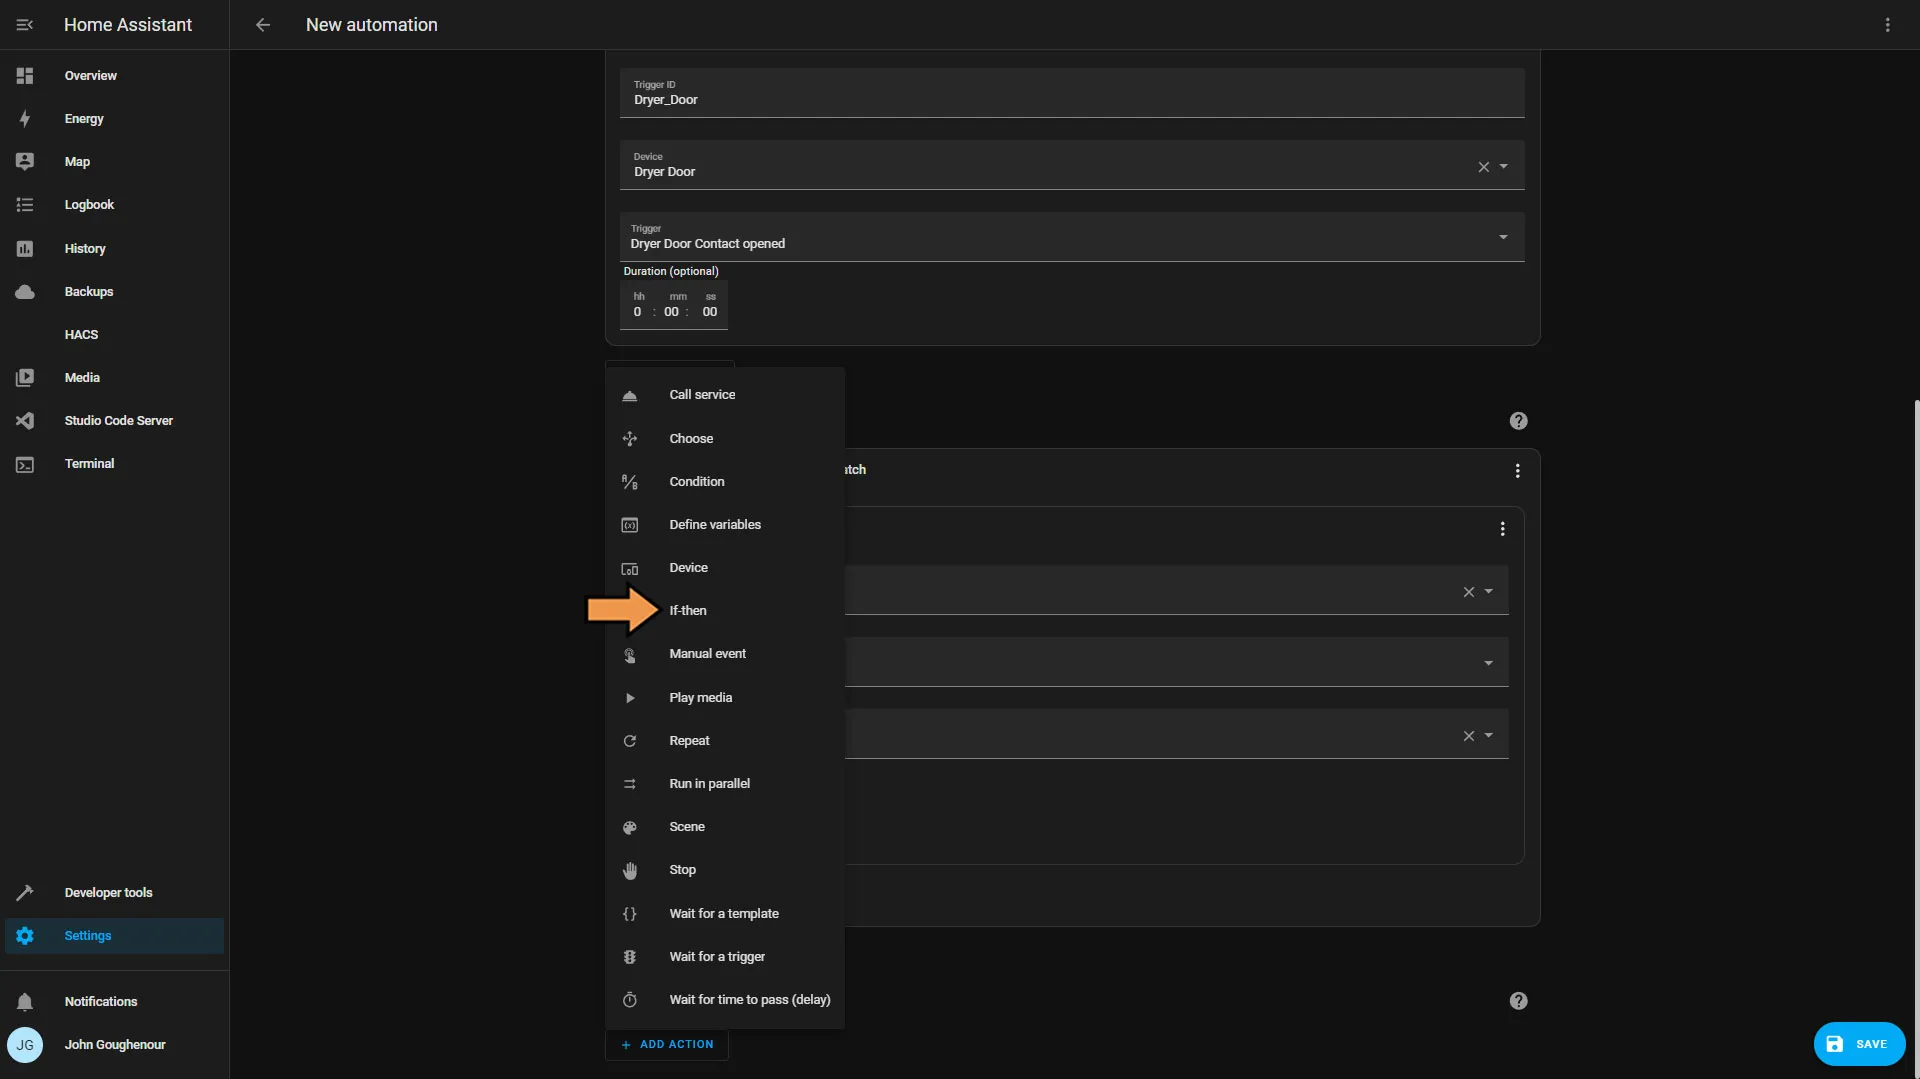
From the list of actions, select If-then.
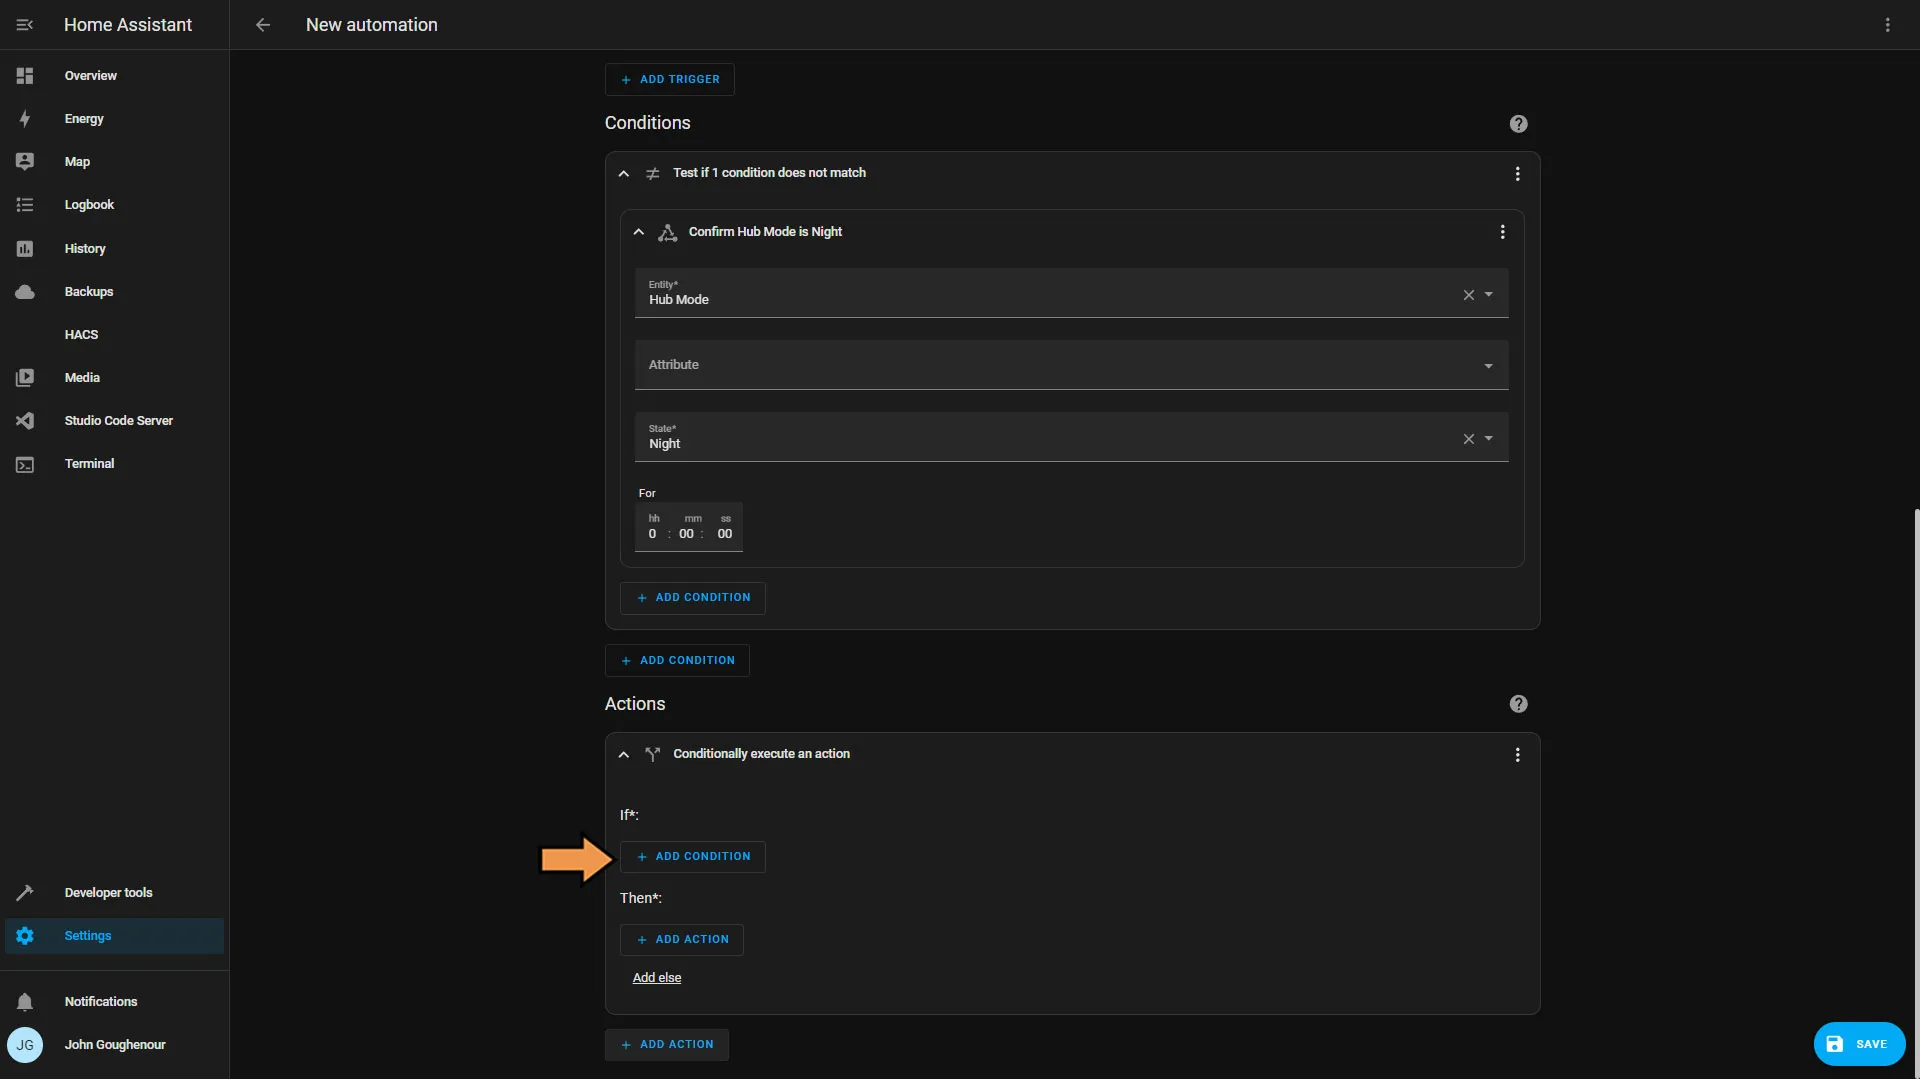
Click the Add Condition button and choose Trigger ID.
Select the Trigger ID we created earlier. Then click the Add Action button and select Call Service from the list.
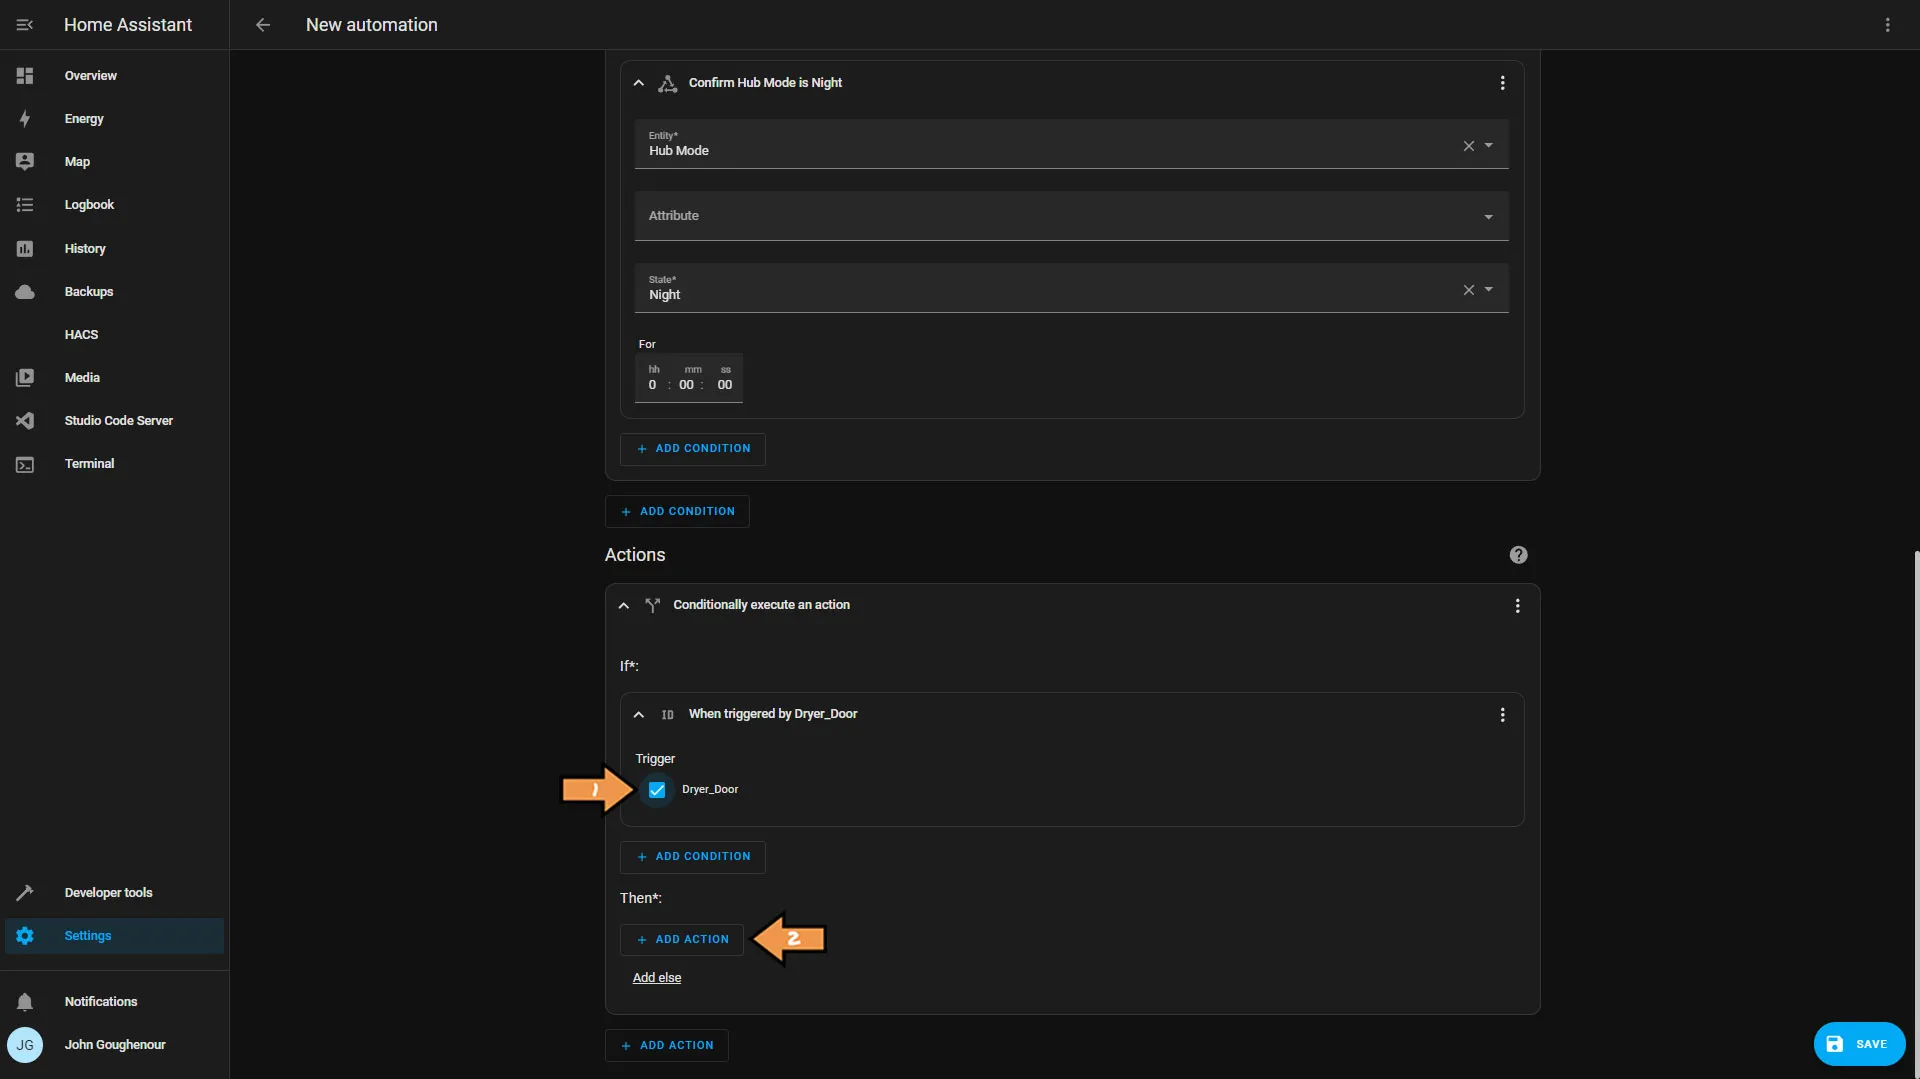
Setup the call service as follows:
- Choose Counter: Reset for the service.
- Click the Choose entity button.
- Select our DyerCount helper we created earlier.
- Then click Add else, next select Wait for Trigger Event from the list, then the Add Trigger button and select Device.
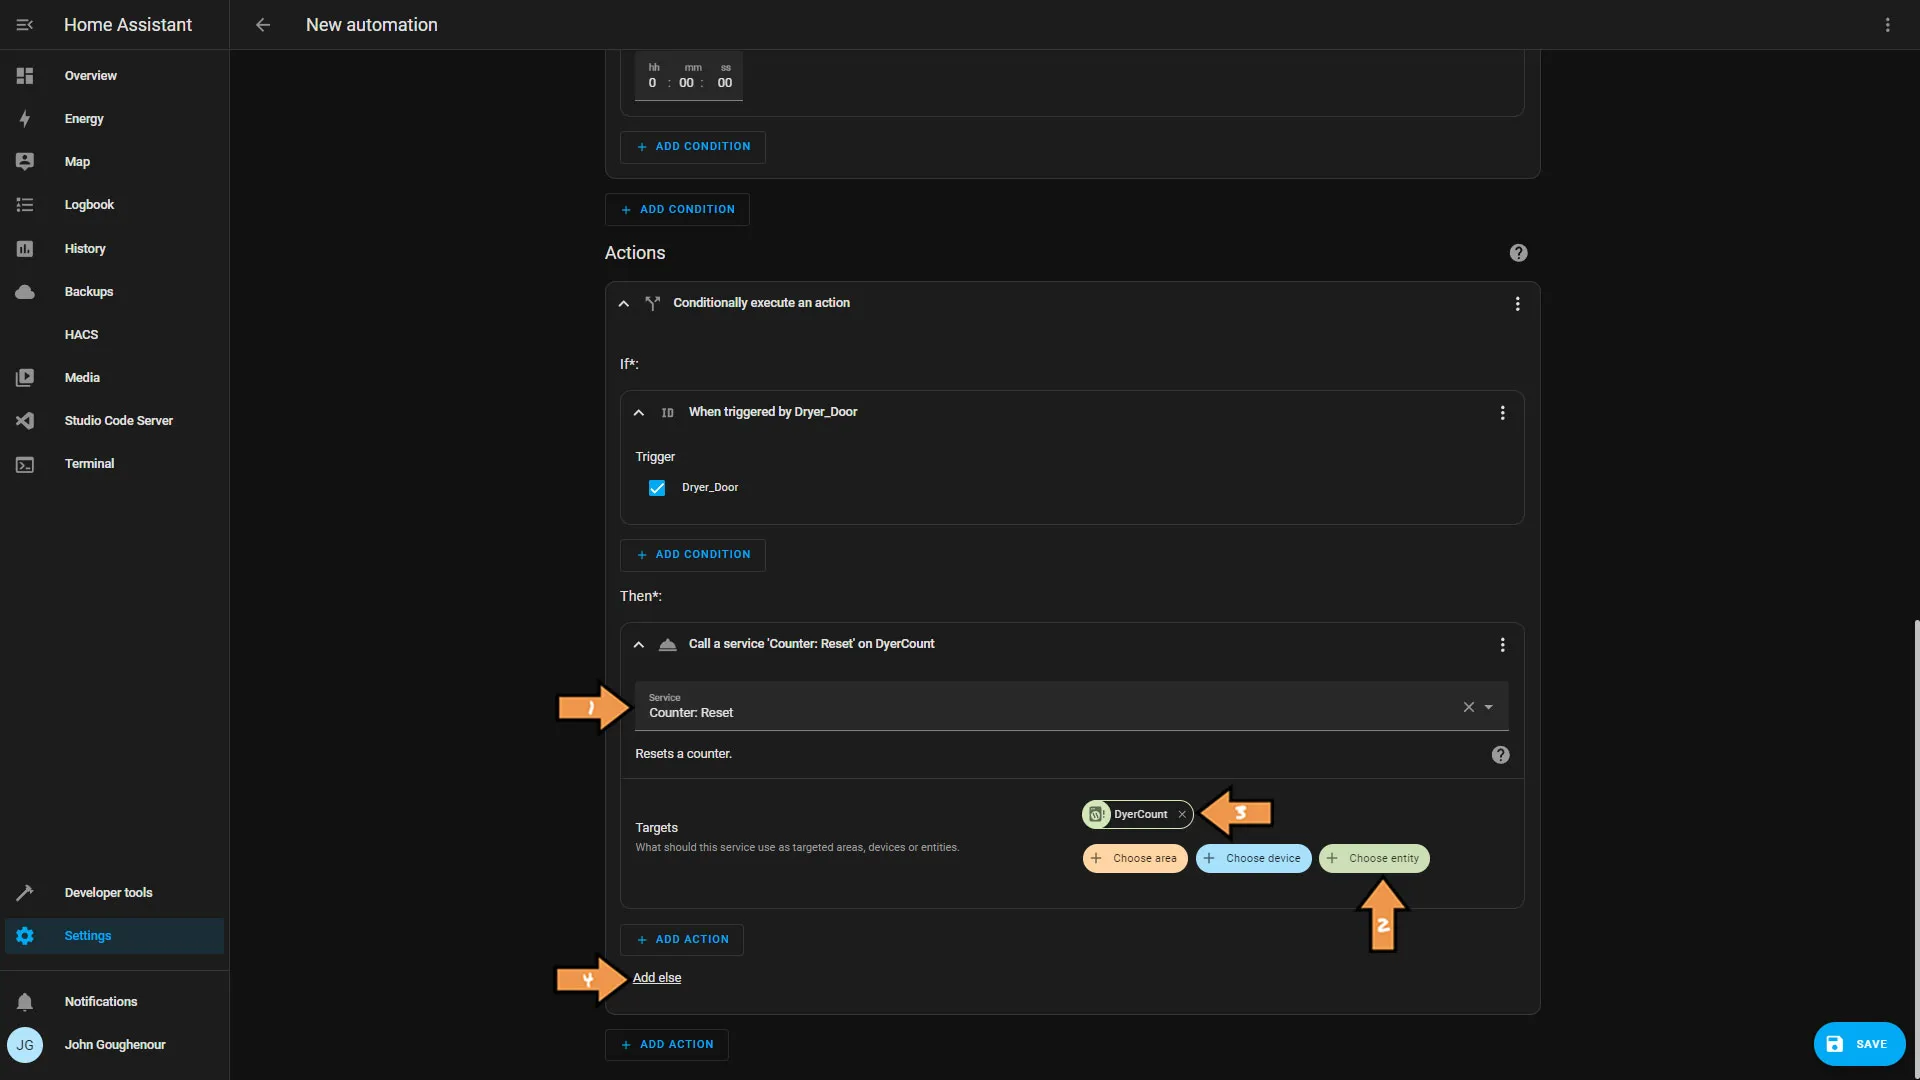
Set the device trigger event as:
- Select our Dryer Switch as the device.
- Set the trigger to Dryer Switch Power power changes.
- Set the Below value to 20.
- Then click the Add Action button and select Call Service from the action list.
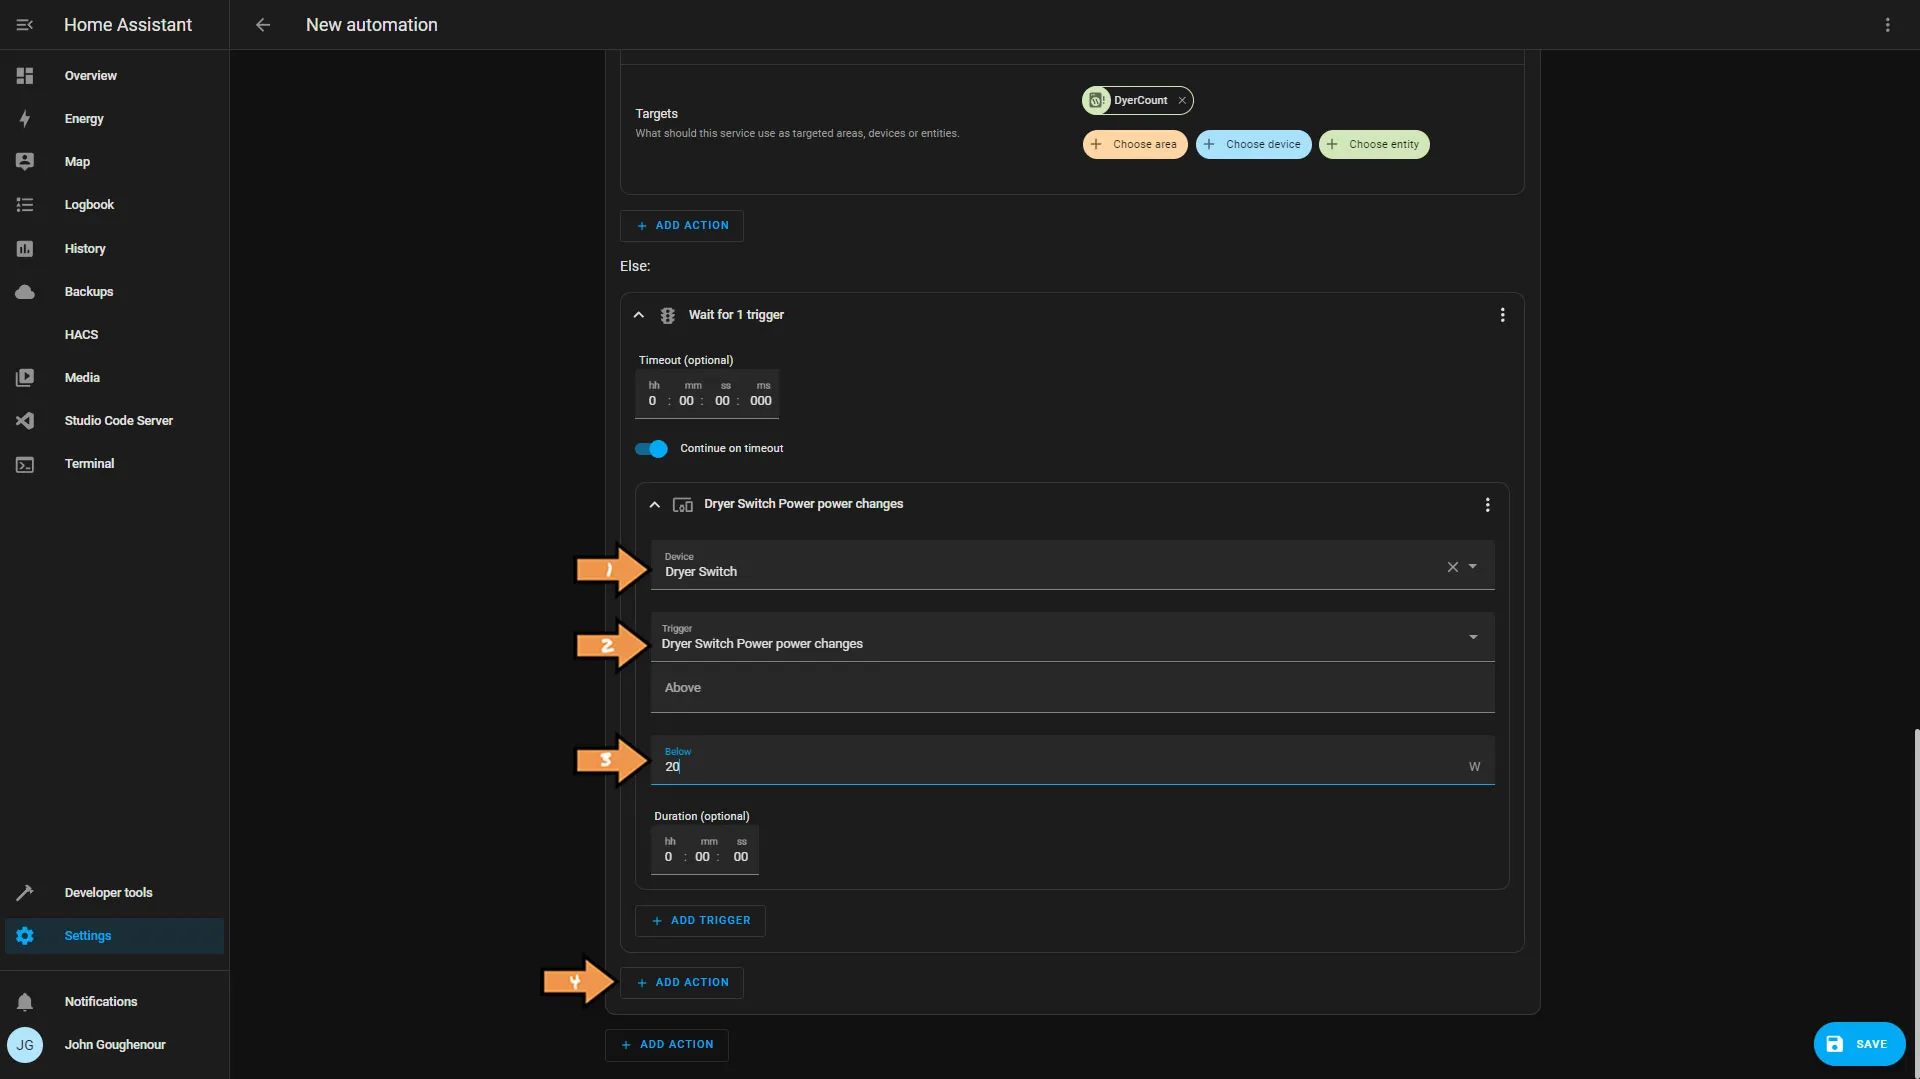
Select the echo notification device we wish to use for this automation as the service. Set the message to “Dryer is done.” Then, under data type
type: ttsthen, click the Add Action Button and select the call service from the action list.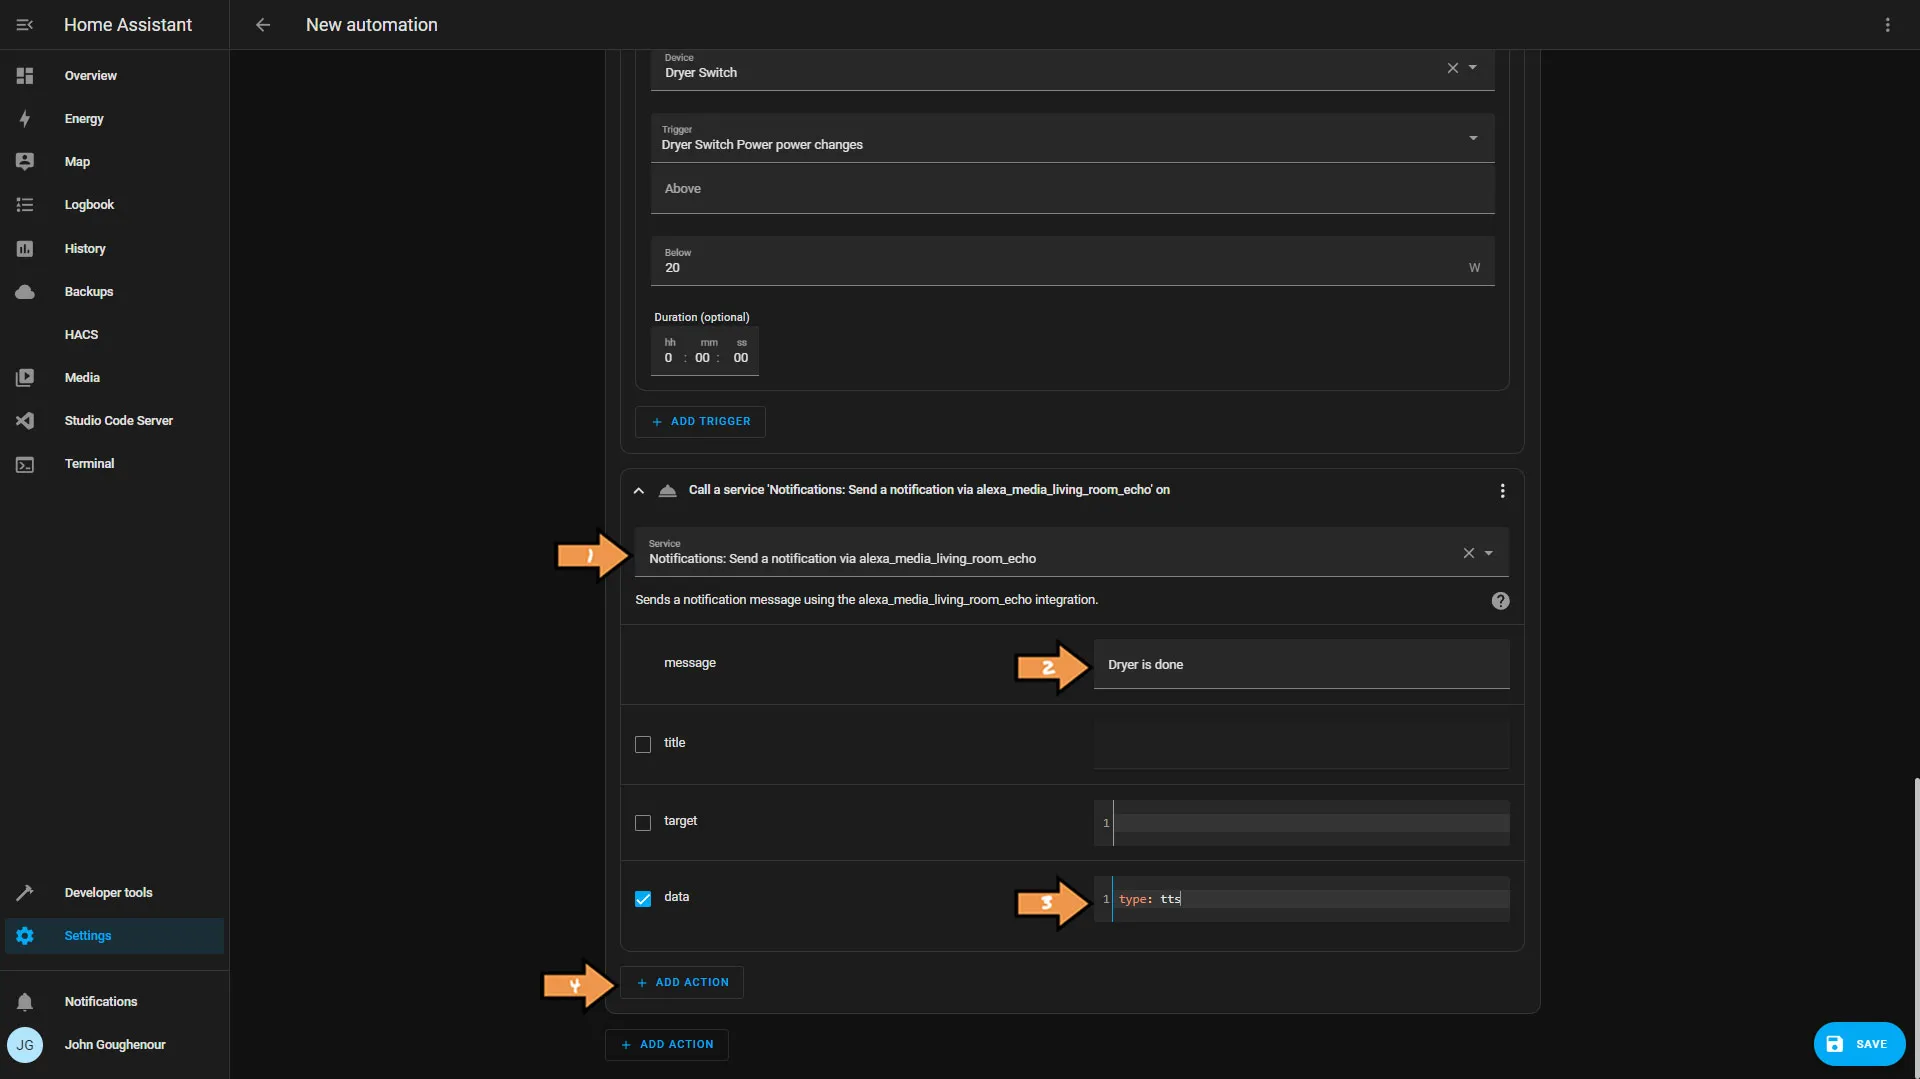
In the Service box, select Counter: Increment. Then click the Choose entity button and choose our DryerCount helper. Finally, click the blue Save button.
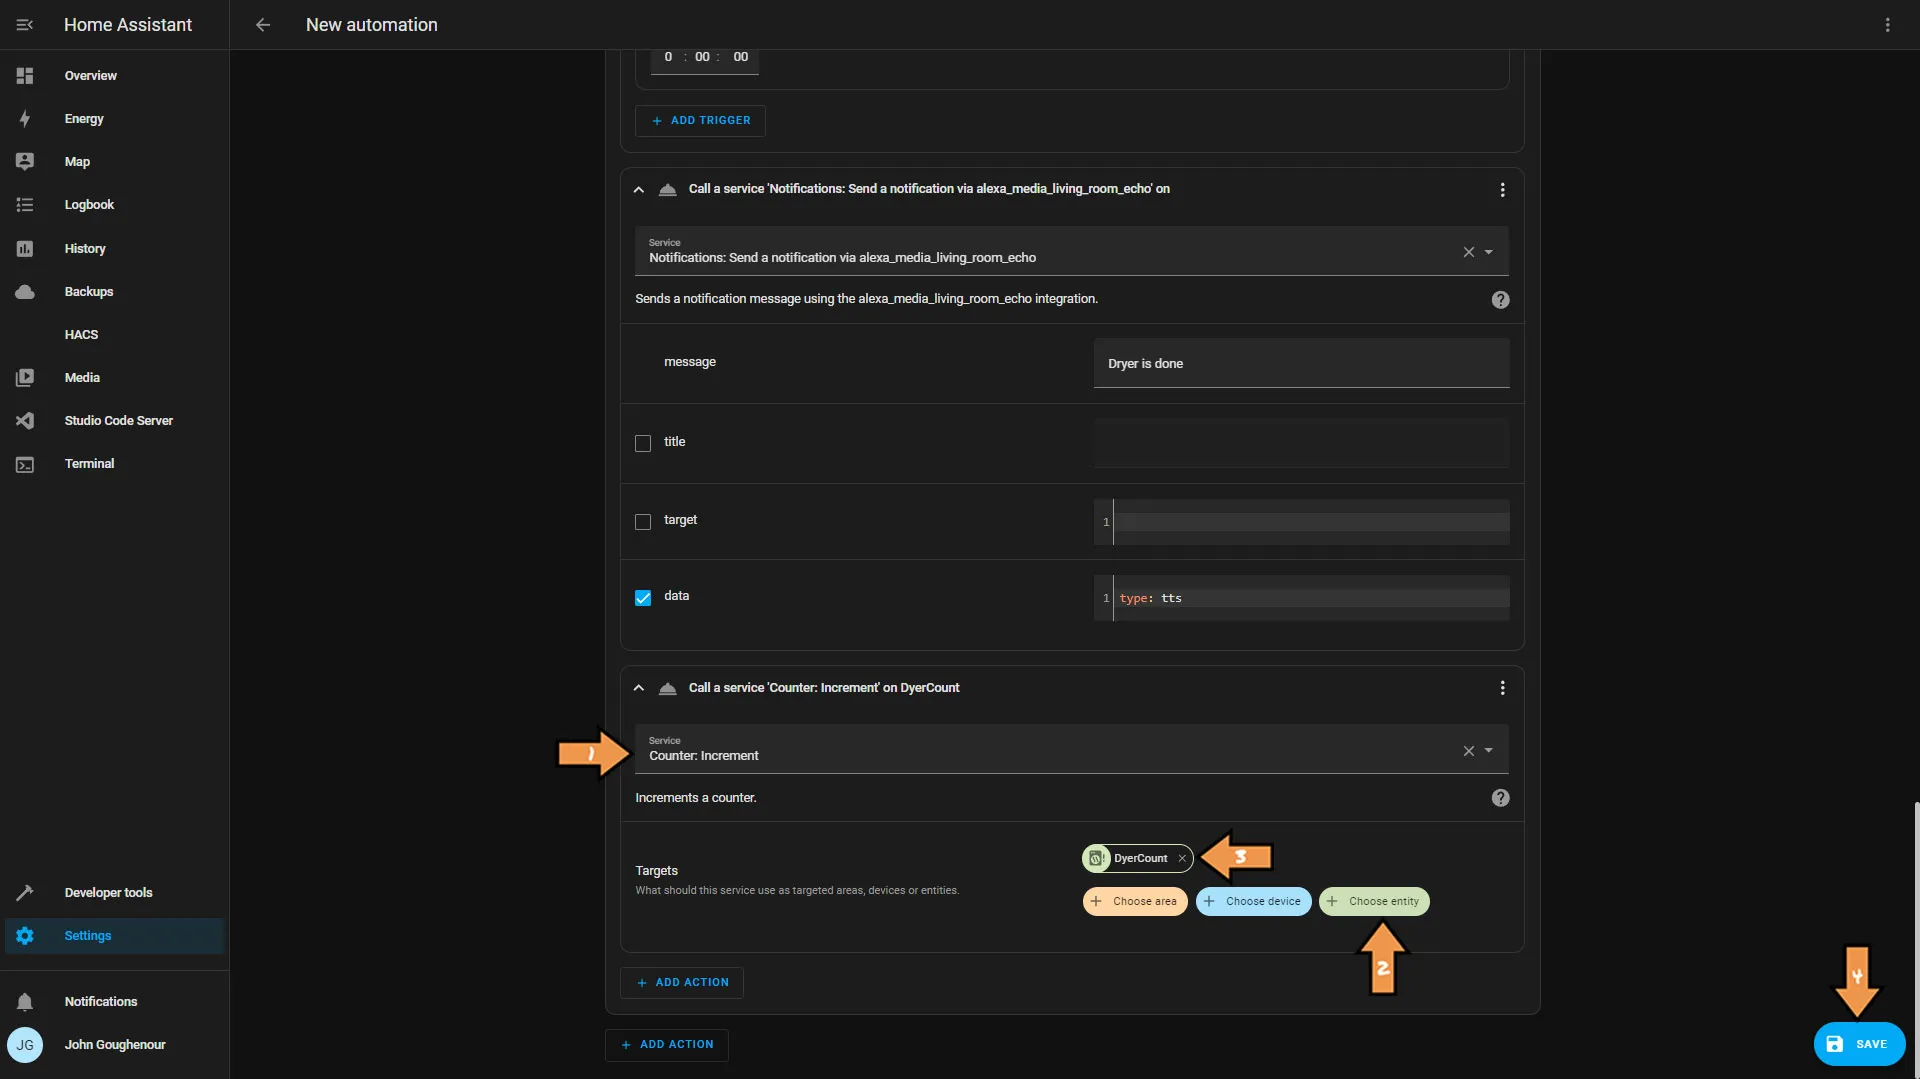
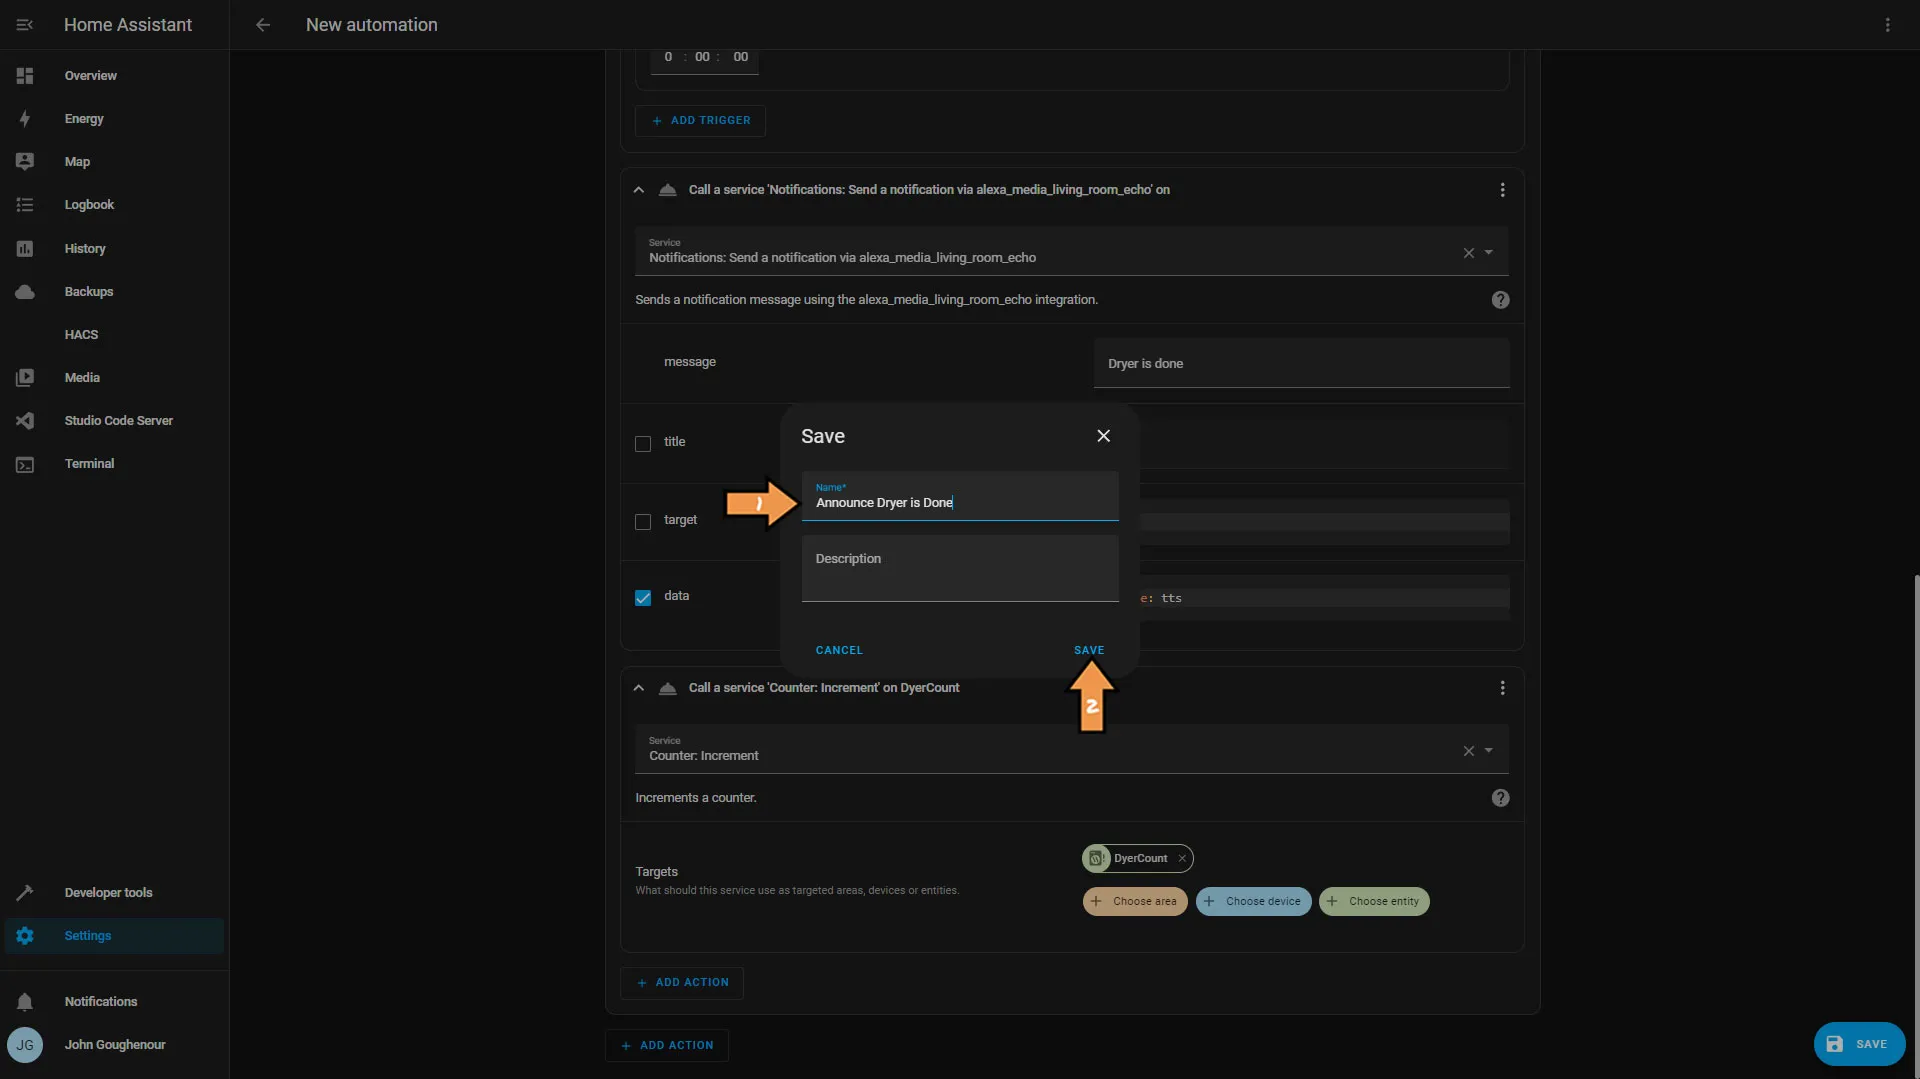
Success: That’s It! Name the automation and click save.
Amazon Alexa
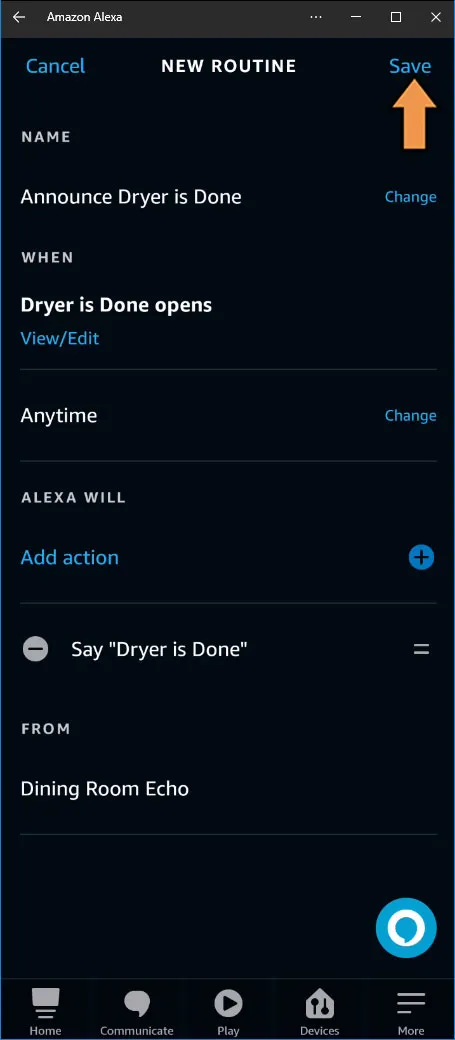
Announce Dryer is Done Automation
The Official Documentation for Alexa Routines
Option Two
Share a virtual switch with Alexa and use that as a trigger in the app.
Setting Up the Automation
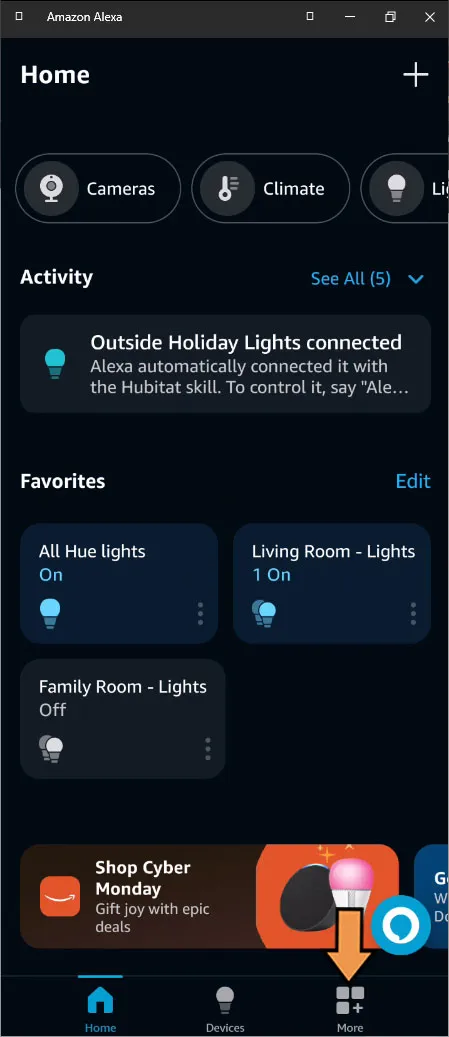
First, Click the More button at the bottom right of the screen.
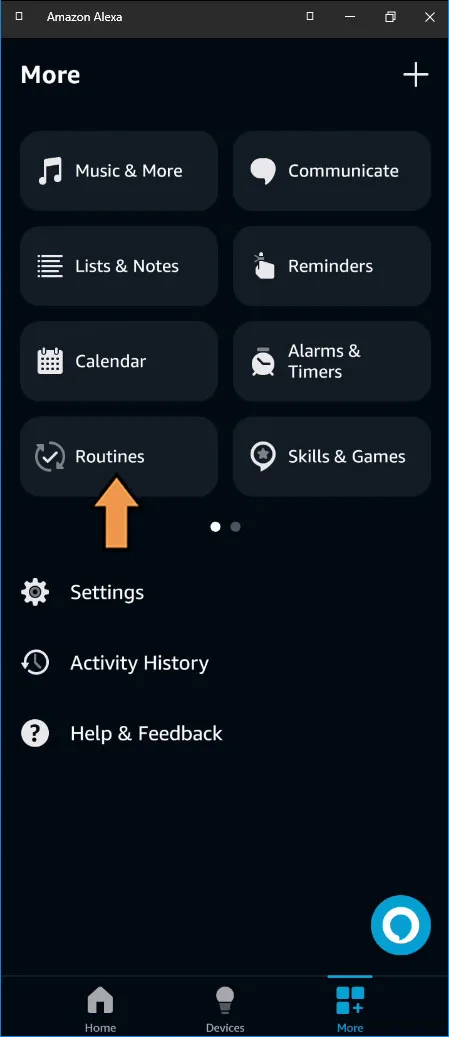
Click the Routines button.
Click the plus sign to add a new routine.
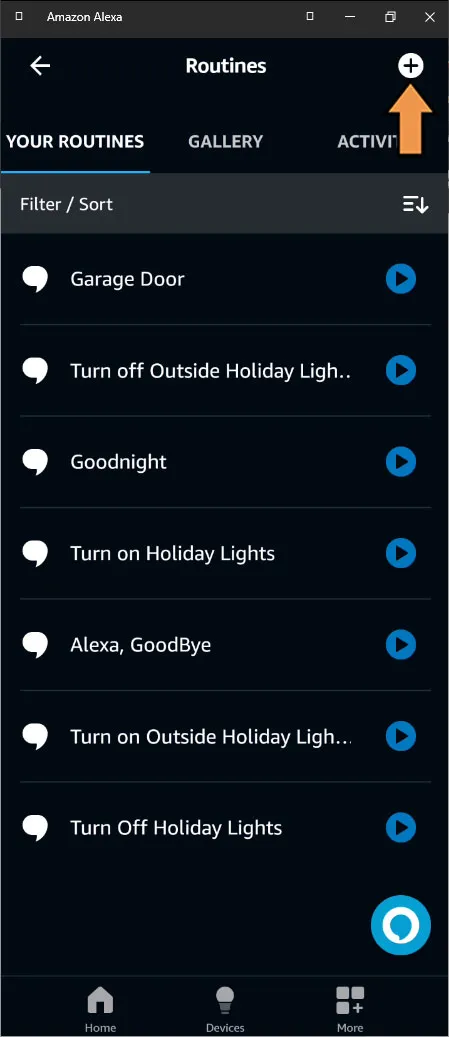
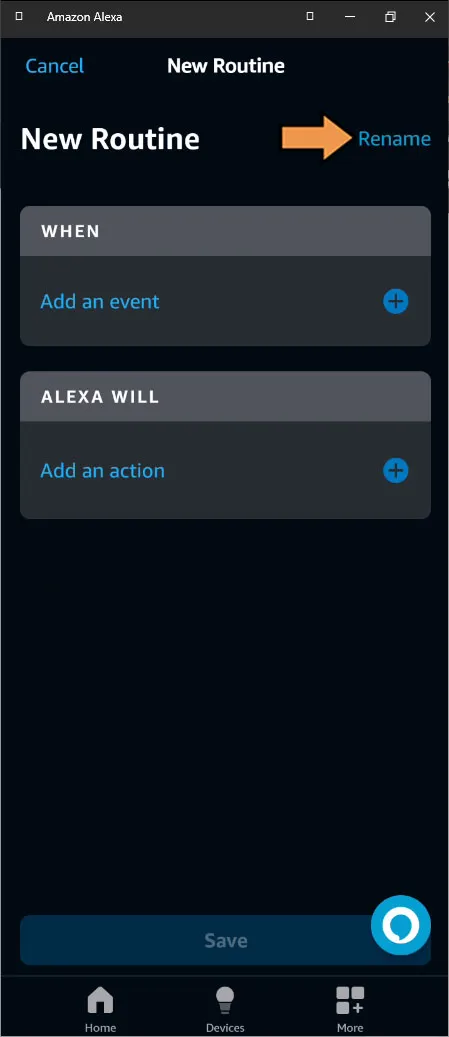
Click the plus sign by Enter routine name.
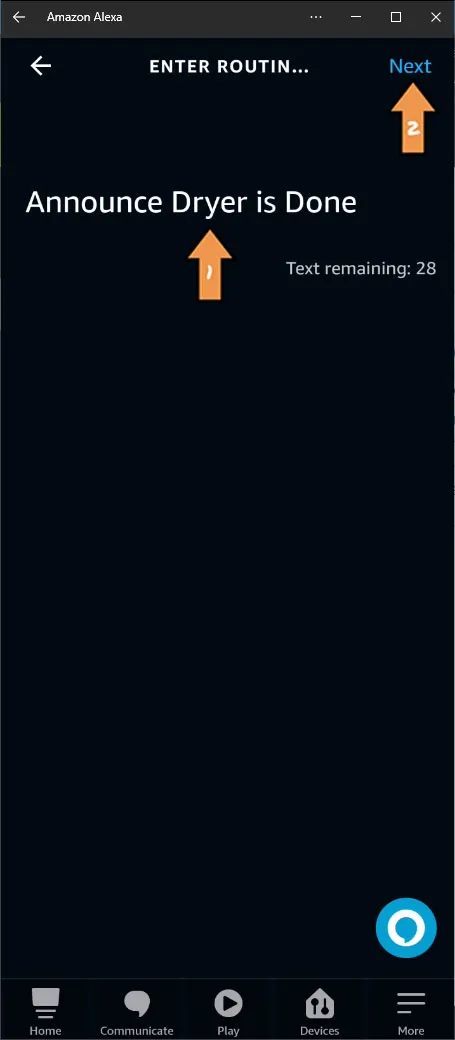
Enter a Name for the Routine, then click Next.
Click the plus sign by When this happens.
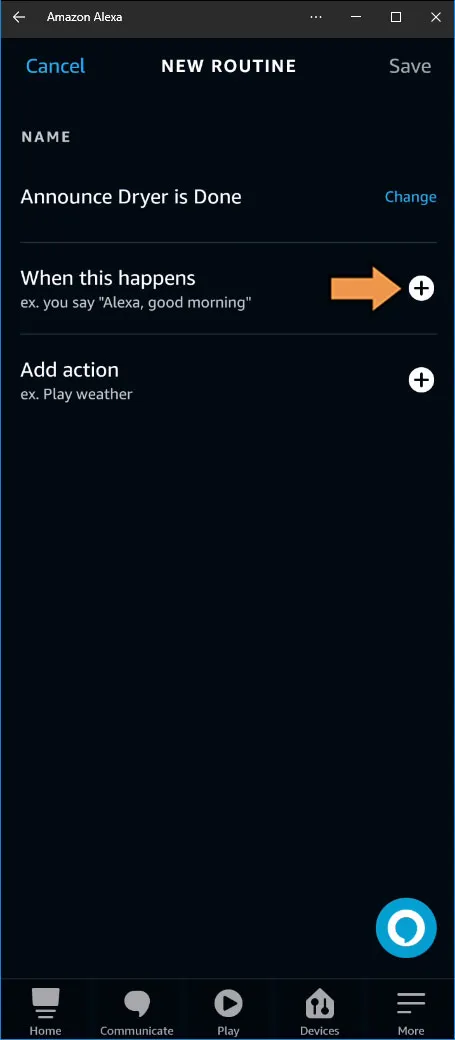
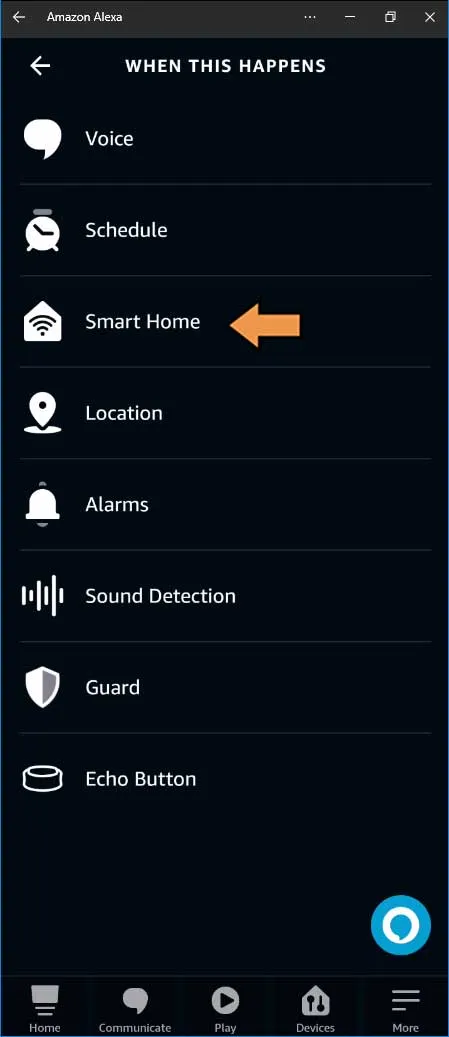
On the When This Happens screen, click Smart Home.
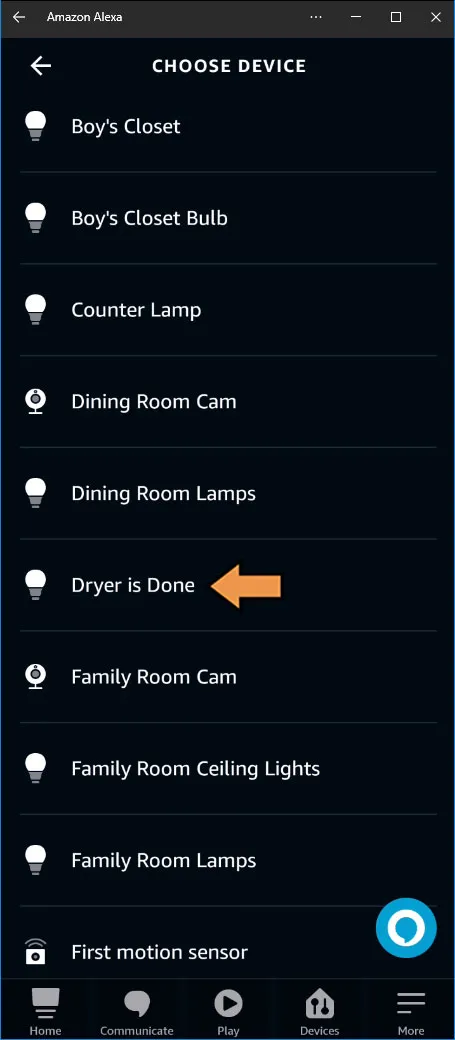
Select the virtual sensor/switch we shared with Alexa.
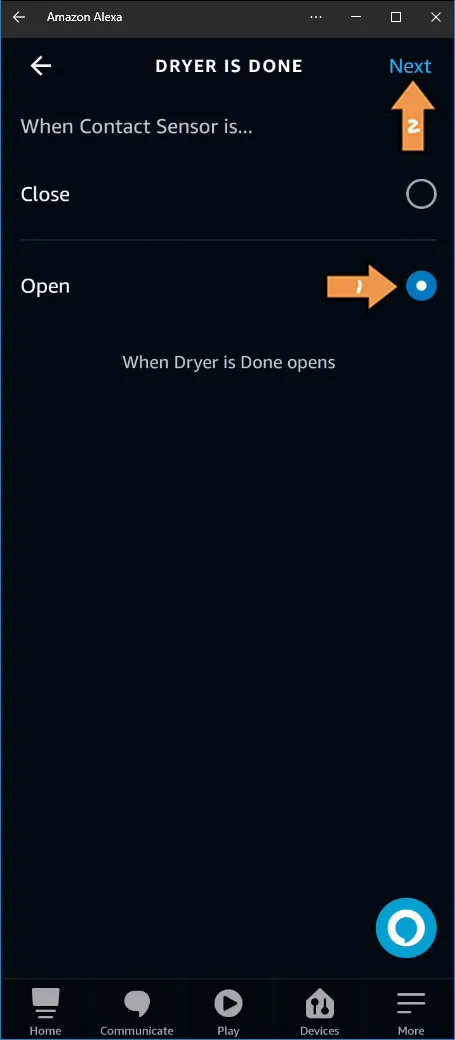
When Contact Sensor is… select open and click Next.
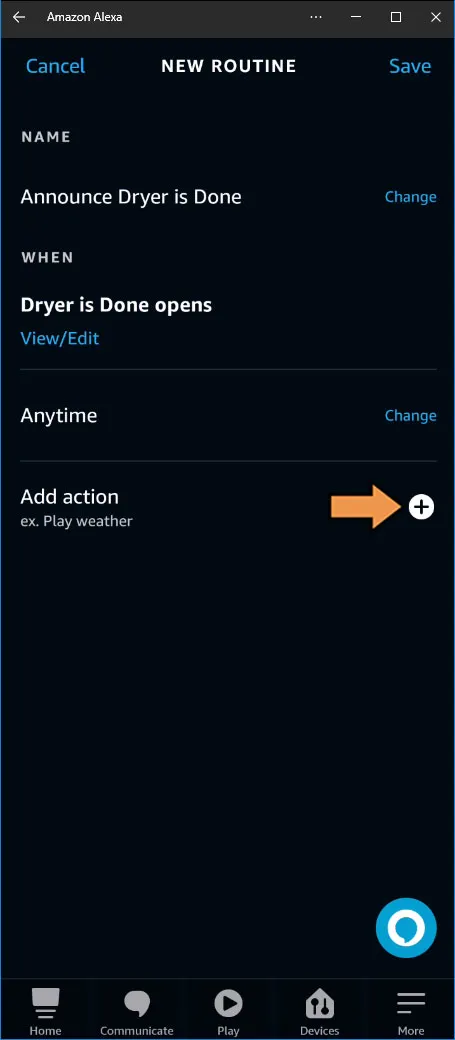
Click the plus sign by Add action.
On the Add New screen, select Alexa Says.
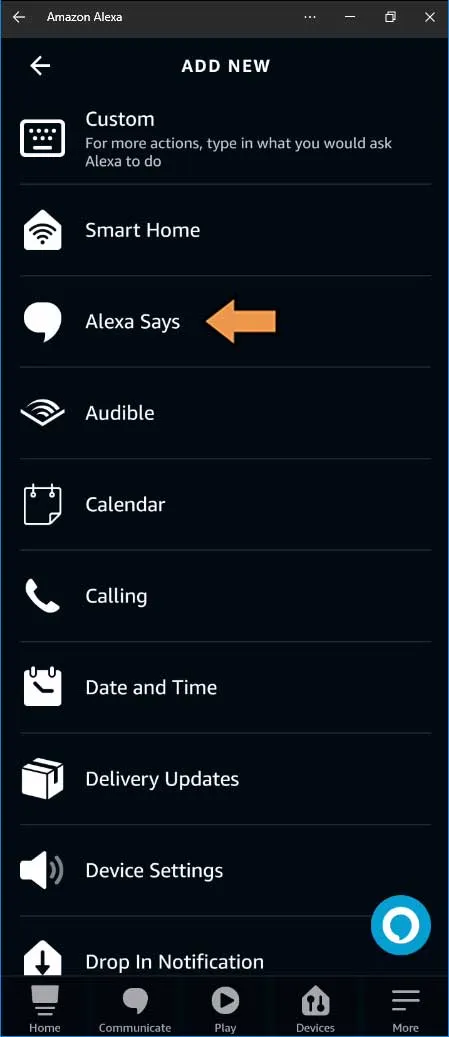
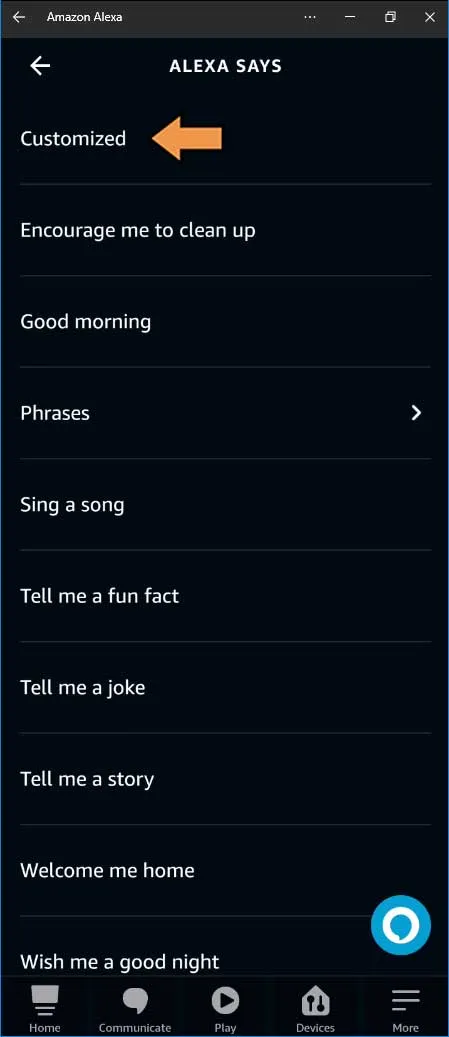
Select Customized.
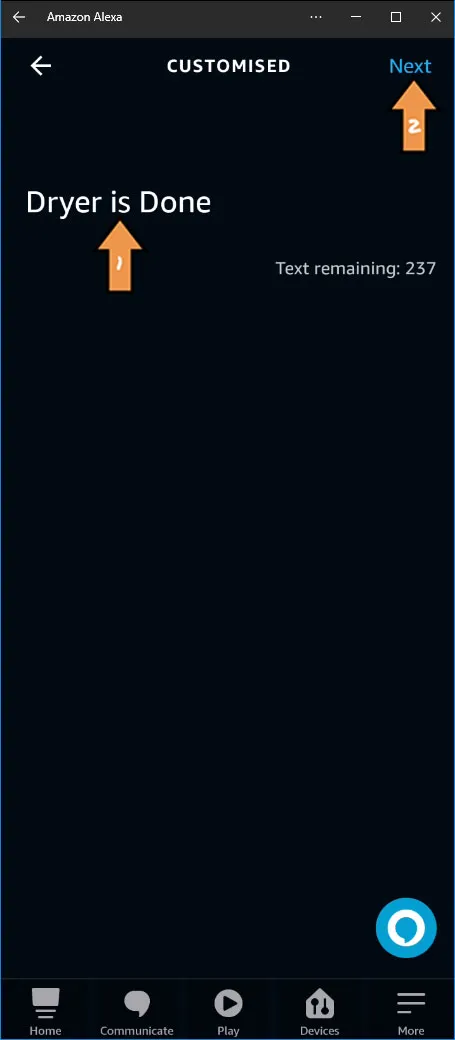
Type your message and click Next.
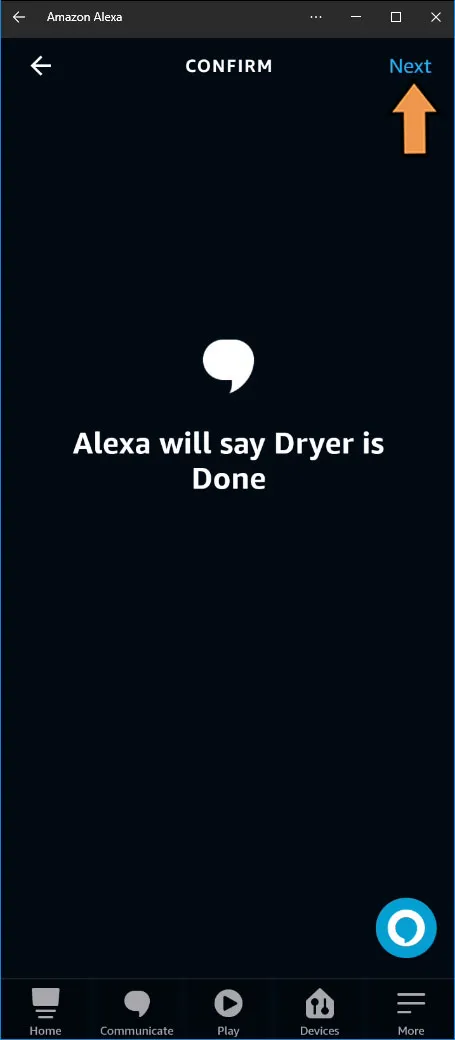
Confirm the message by clicking Next.
Click Choose Device.
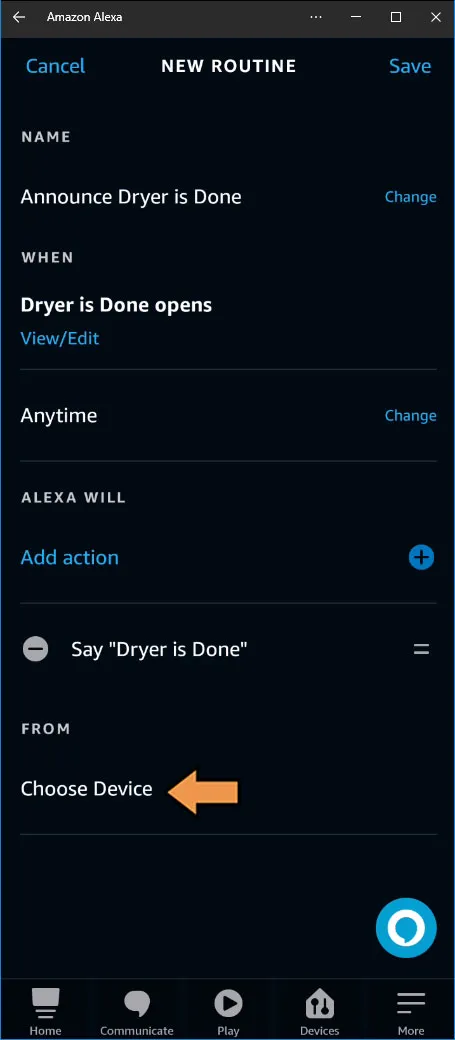
If you want to add another Alexa device you will have to add another action. Hopefully Amazon will allow you to choose a speaker group in the future.
Click Save to complete the Routine.
Success: That’s It! Your Dumb Appliance is now Smart
