The Ultimate Smart Home Integration Cookbook
Integration: It enables the smart home hub to communicate and work with various smart devices or services.
The Alexa Speaks integrations allow you to send custom notifications to Alexa for her to speak right from your smart home hub. You can use this integration in your automations to notify you of any event, such as someone arriving home, laundry done, or even if someone left the refrigerator door open. The possibilities are endless. Gone are the days when you have to create a virtual switch, share it with Alexa, and then set up a routine for every phrase you want her to speak. With this integration, you can do everything from your hub within the automation.
Automation Details
Requirements
- Community Store
Actions:
- Make Alexa Speak Custom Notifications
Important: This require you to setup Two Factor Authentication (2FA) on your Amazon Account.
Important: This integration requires the Community Store.
Hubitat
Hubitat MQTT Interface
The Official Documentation for Hubitat MQTT Interface
This integration will make use of a custom Hubitat driver that will publish an MQTT topic and a Home Assistant automation that will subscribe to that topic.
Important: This integration requires the Home Assistant MQTT Integration and the Home Assistant part of this integration.
The Hubitat Community has created the Echo Speaks integration, but it requires a monthly charge and is extremely resource intensive.
Setting Up the Automation
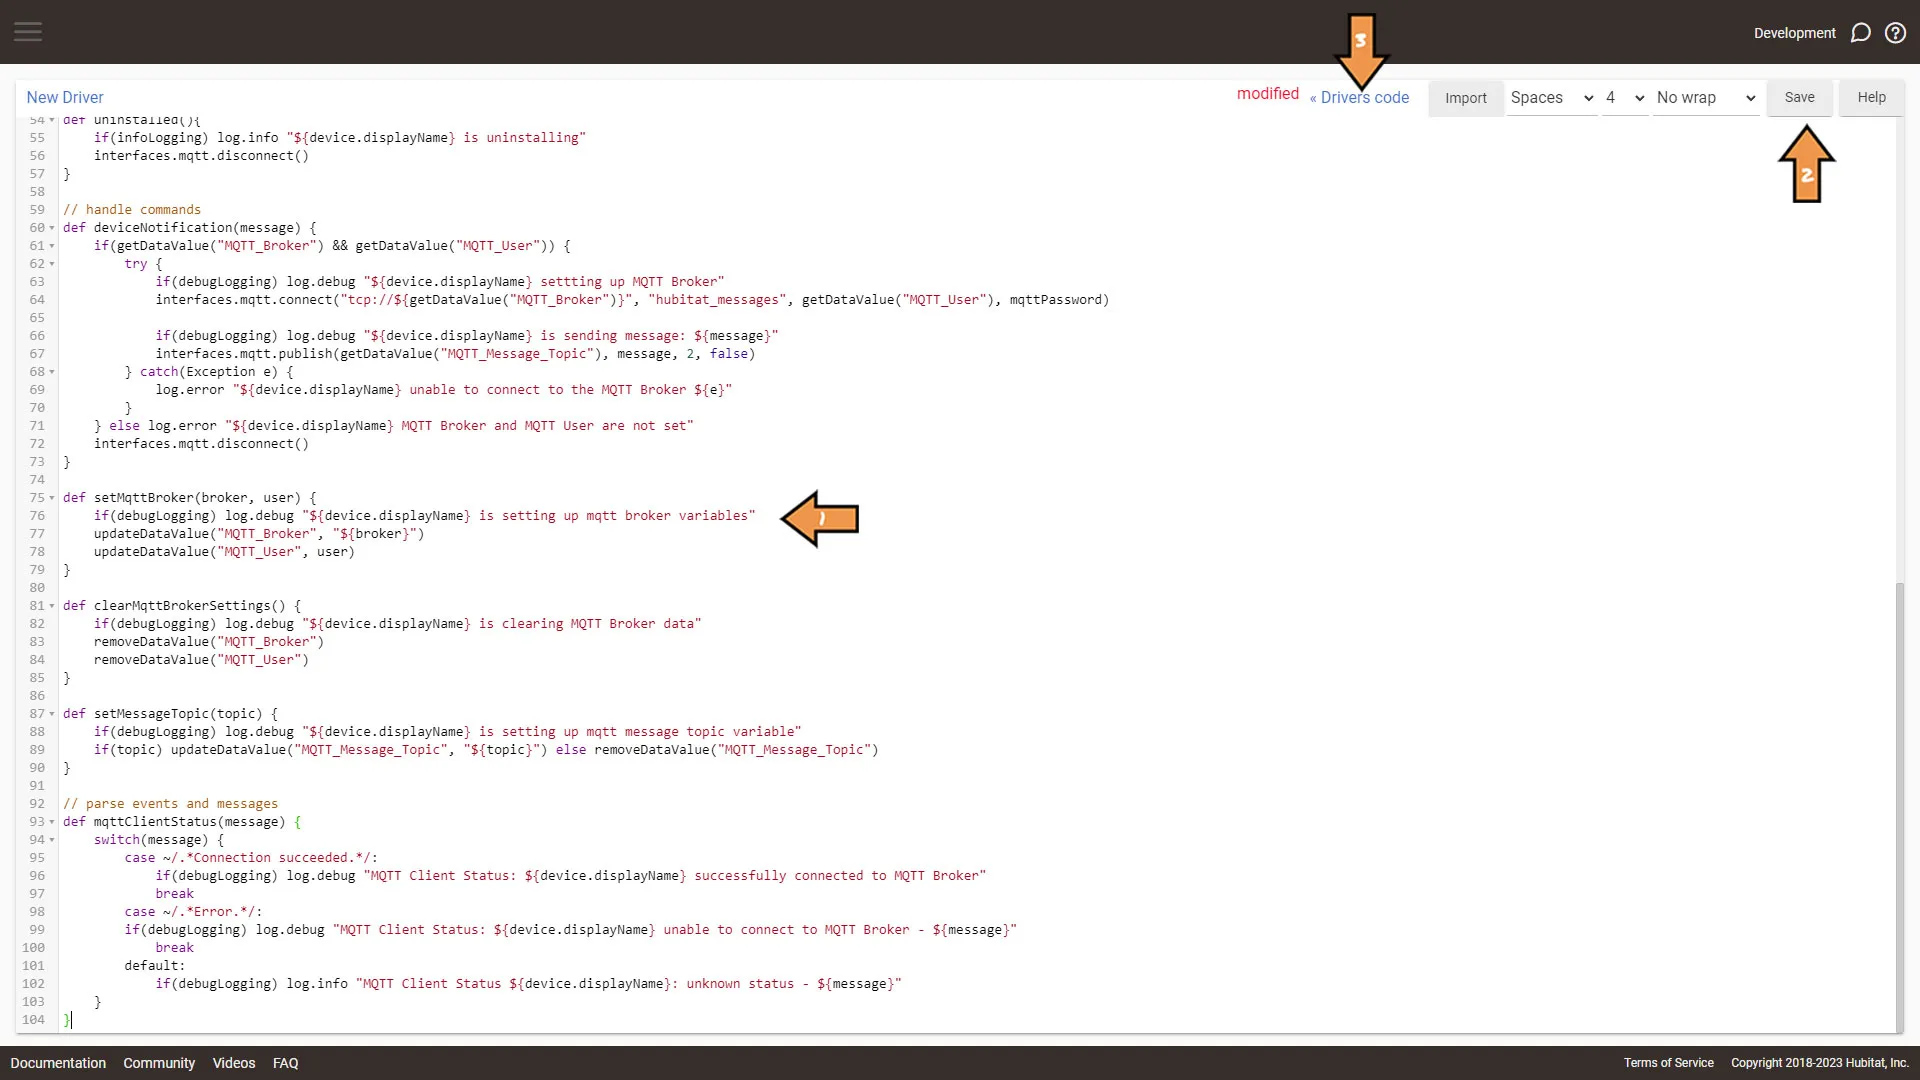
First, go to the Drivers code and click New Driver.
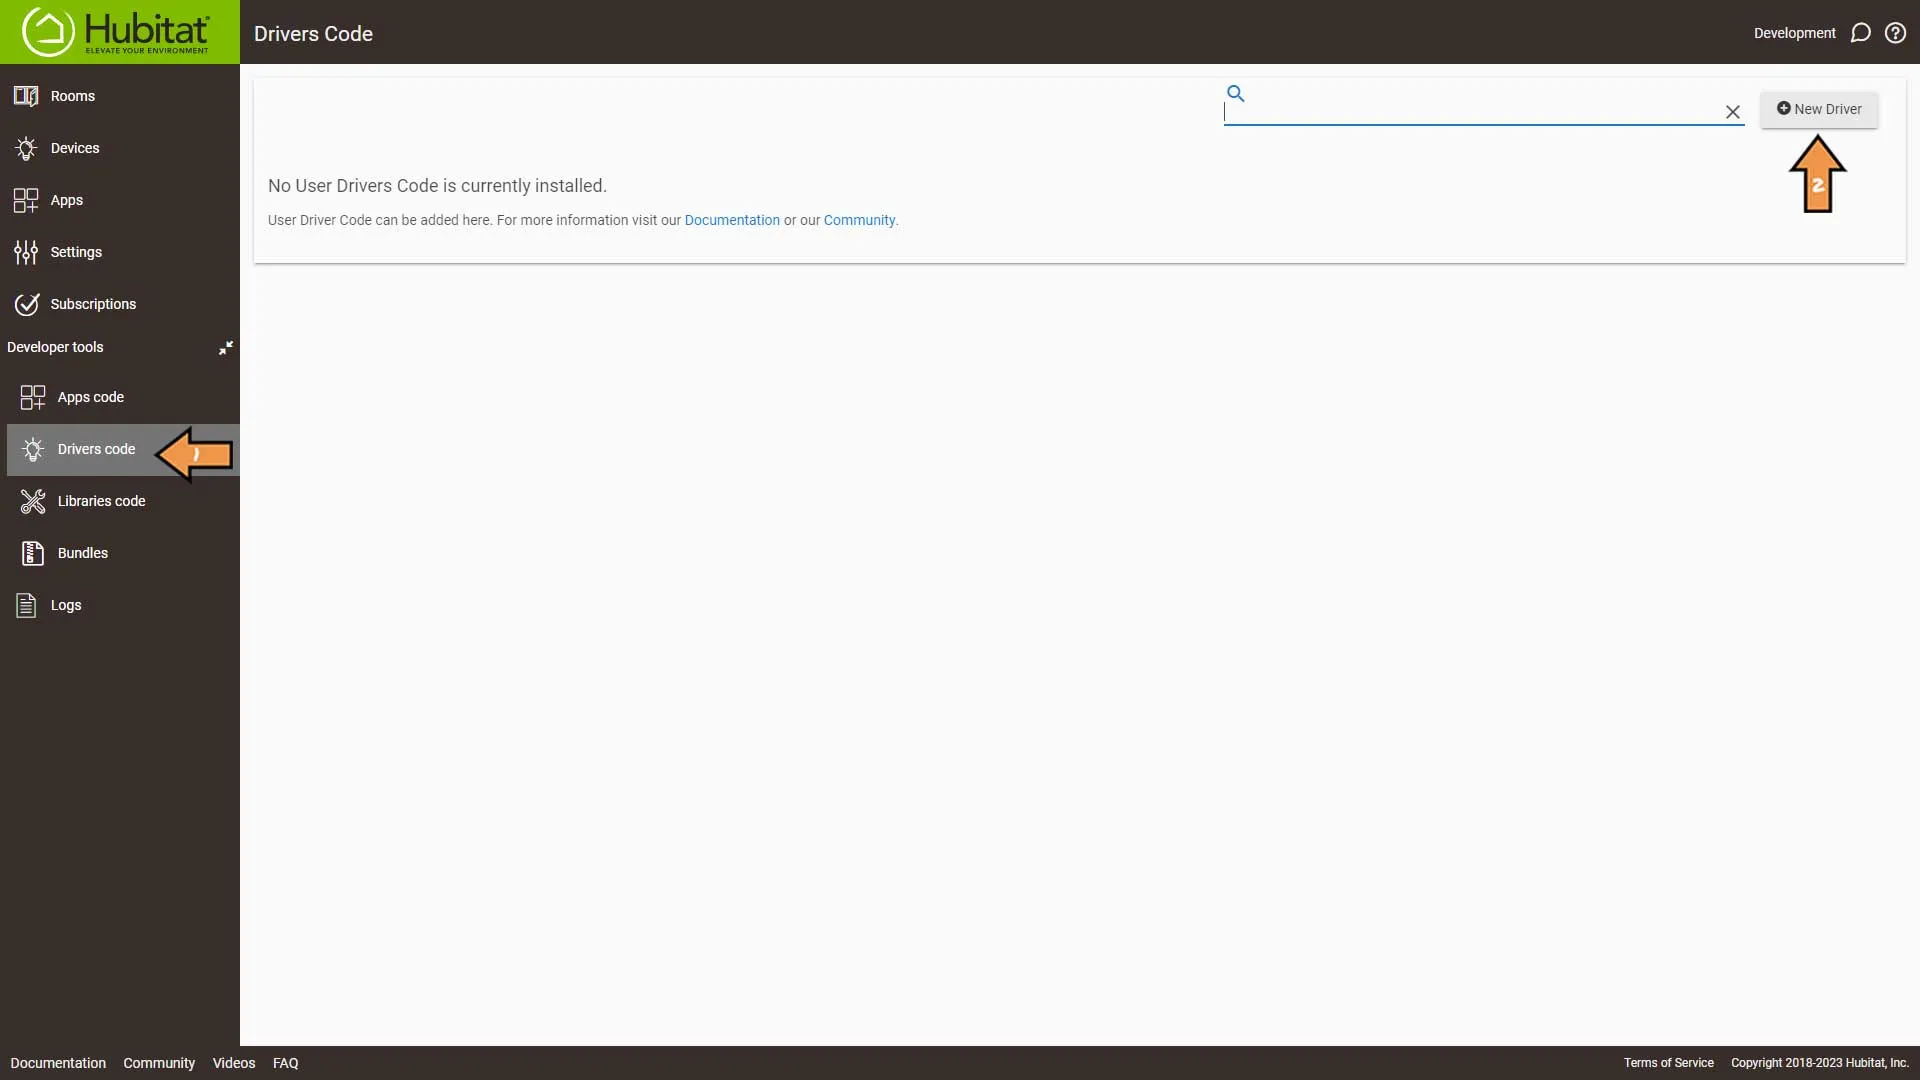
Copy and paste the below code in to the new Driver window. Then click Save and then Drivers code to exit the editor.
/**
 *  MQTT Notifications
 *
 *  MIT License
 *
 *  Copyright (c) 2023 This Old Smart Home
 *
 *  Permission is hereby granted, free of charge, to any person obtaining a copy
 *  of this software and associated documentation files (the "Software"), to deal
 *  in the Software without restriction, including without limitation the rights
 *  to use, copy, modify, merge, publish, distribute, sublicense, and/or sell
 *  copies of the Software, and to permit persons to whom the Software is
 *  furnished to do so, subject to the following conditions:
 *
 *  The above copyright notice and this permission notice shall be included in all
 *  copies or substantial portions of the Software.
 *
 *  THE SOFTWARE IS PROVIDED "AS IS", WITHOUT WARRANTY OF ANY KIND, EXPRESS OR
 *  IMPLIED, INCLUDING BUT NOT LIMITED TO THE WARRANTIES OF MERCHANTABILITY,
 *  FITNESS FOR A PARTICULAR PURPOSE AND NONINFRINGEMENT. IN NO EVENT SHALL THE
 *  AUTHORS OR COPYRIGHT HOLDERS BE LIABLE FOR ANY CLAIM, DAMAGES OR OTHER
 *  LIABILITY, WHETHER IN AN ACTION OF CONTRACT, TORT OR OTHERWISE, ARISING FROM,
 *  OUT OF OR IN CONNECTION WITH THE SOFTWARE OR THE USE OR OTHER DEALINGS IN THE
 *  SOFTWARE.
 *
 */

public static String version()      {  return "v1.0.3"  }
public static String name()         {  return "MQTT Notifications"  }
public static String codeUrl()
{
    return "https://raw.githubusercontent.com/TOSH-SmartHome/Hubitat-MQTT-Notifications/main/mqtt_notifications.groovy"
}
public static String driverInfo()
{
    return """
        <p style='text-align:center'></br>
        <strong><a href='https://thisoldsmarthome.com' target='_blank'>This Old Smart Home</a></strong> (TOSH-SmartHome)</br>
        ${name()}</br>
        <em>${version()}</em></p>
    """
}

metadata {
    definition (name: name(), namespace: "TOSH-SmartHome", author: "John Goughenour", importUrl: codeUrl())
    {
        capability "Notification"
    }

    preferences
    {
        input(name: "mqttBroker", type: "string", title: "<b>MQTT Broker</b>", description: "Enter MQTT Broker IP and Port e.g. server_IP:1883", required: false)
        input(name: "mqttUsername", type: "string", title: "<b>MQTT Username</b>", description: "Enter MQTT broker username", required: false)
        input(name: "mqttPassword", type: "password", title: "<b>MQTT Password</b>", description: "Enter password for your MQTT Broker", required: false)
        input(name: "mqttTopic", type: "string", title: "<b>MQTT Topic</b>", description: "Enter MQTT Topic to publish to", required: false)
        input(name: "infoLogging", type: "bool", title: "<b>Enable Description Text</b>", defaultValue: "true", description: "", required: false)
        input(name: "debugLogging", type: "bool", title: "<b>Enable Debug Logging</b>", defaultValue: "true", description: "", required: false)
        input name:"about", type: "text", title: "<b>About Driver</b>", description: "Publish notifications to MQTT. ${driverInfo()}"
     }
}

def installed()
{
	if(infoLogging) log.info "${device.displayName} is installing"
}

def updated()
{
	if(infoLogging) log.info "${device.displayName} is updating"
}

def uninstalled()
{
	if(infoLogging) log.info "${device.displayName} is uninstalling"
}

// handle commands
def deviceNotification(message)
{
    if(infoLogging) log.info "${device.displayName} is sending notification message: ${message}"
    if(mqttBroker && mqttUsername && mqttTopic) {
        try {
            if(debugLogging) log.debug "${device.displayName} settting up MQTT Broker"
            interfaces.mqtt.connect(
                "tcp://${mqttBroker}",
                "${location.hub.name.toLowerCase().replaceAll(' ', '_')}_${device.getDeviceNetworkId()}",
                mqttUsername, mqttPassword
            )

            if(debugLogging) log.debug "${device.displayName} is sending Topic: ${mqttTopic} Command: ${cmnd}"
            interfaces.mqtt.publish(mqttTopic, message, 2, false)
        } catch(Exception e) {
            log.error "${device.displayName} unable to connect to the MQTT Broker ${e}"
        }
        interfaces.mqtt.disconnect()
    } else log.warn "${device.displayName} MQTT Broker and MQTT User are not set"
}

// parse events and messages
def mqttClientStatus(message)
{
    switch(message) {
        case ~/.*Connection succeeded.*/:
            if(debugLogging) log.debug "MQTT Client Status: ${device.displayName} successfully connected to MQTT Broker"
            break
        case ~/.*Error.*/:
            log.error "MQTT Client Status: ${device.displayName} unable to connect to MQTT Broker - ${message}"
            break
        default:
            log.warn "MQTT Client Status: ${device.displayName}: unknown status - ${message}"
    }
}
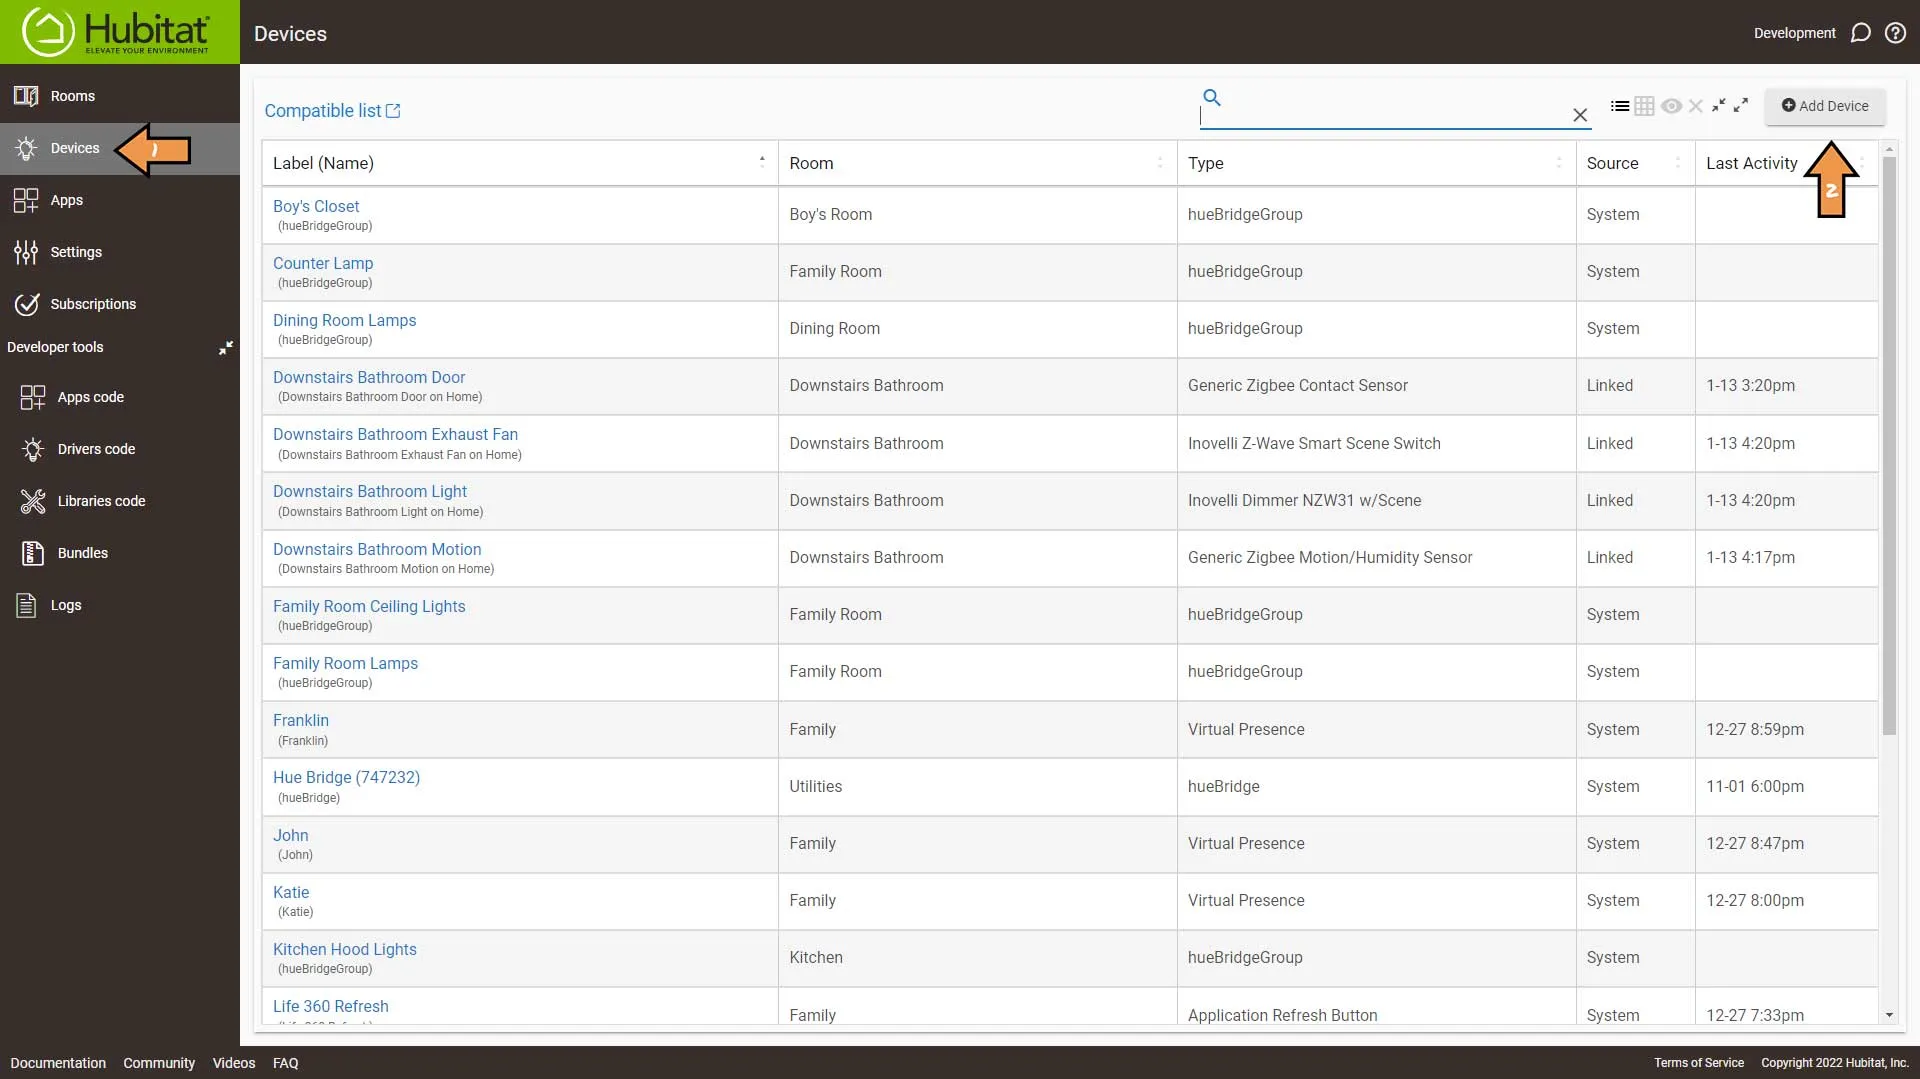
Next, go to Devices and then click Add Device.
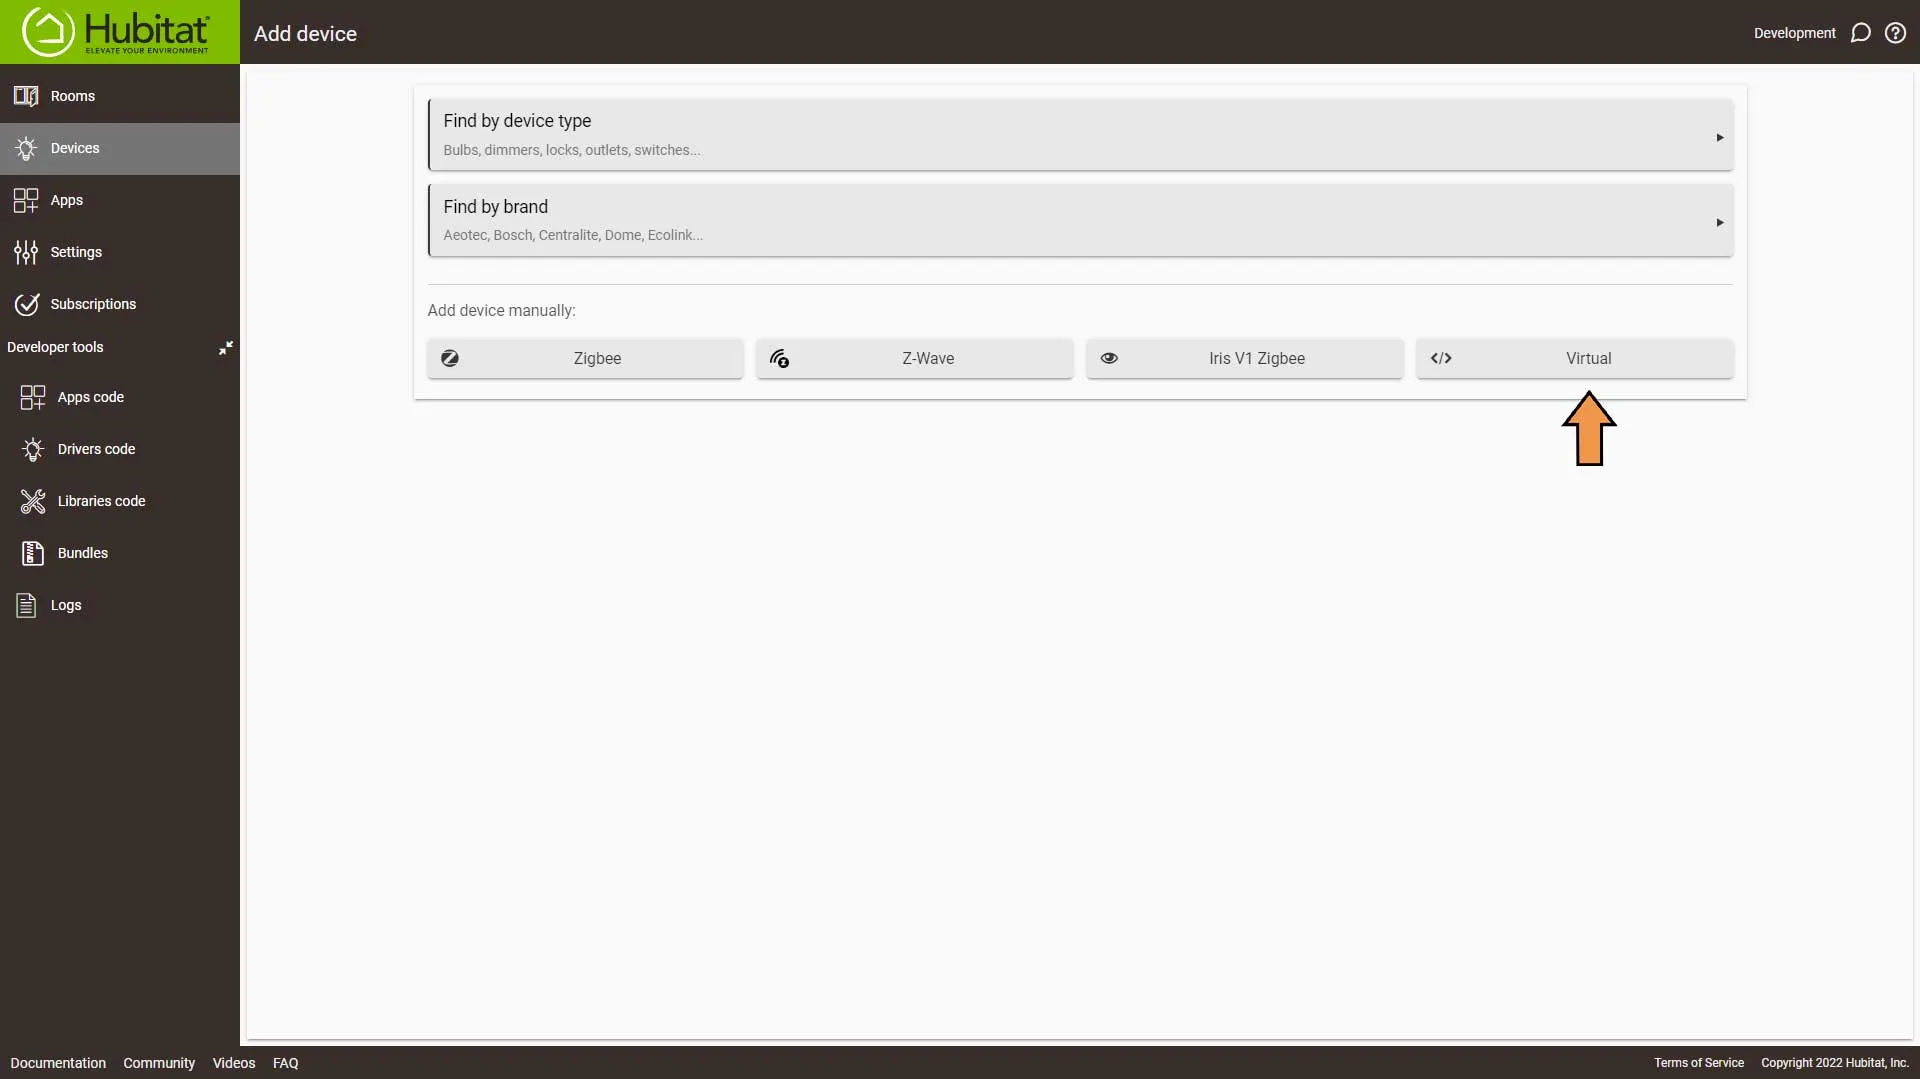
Click the Virtual button.
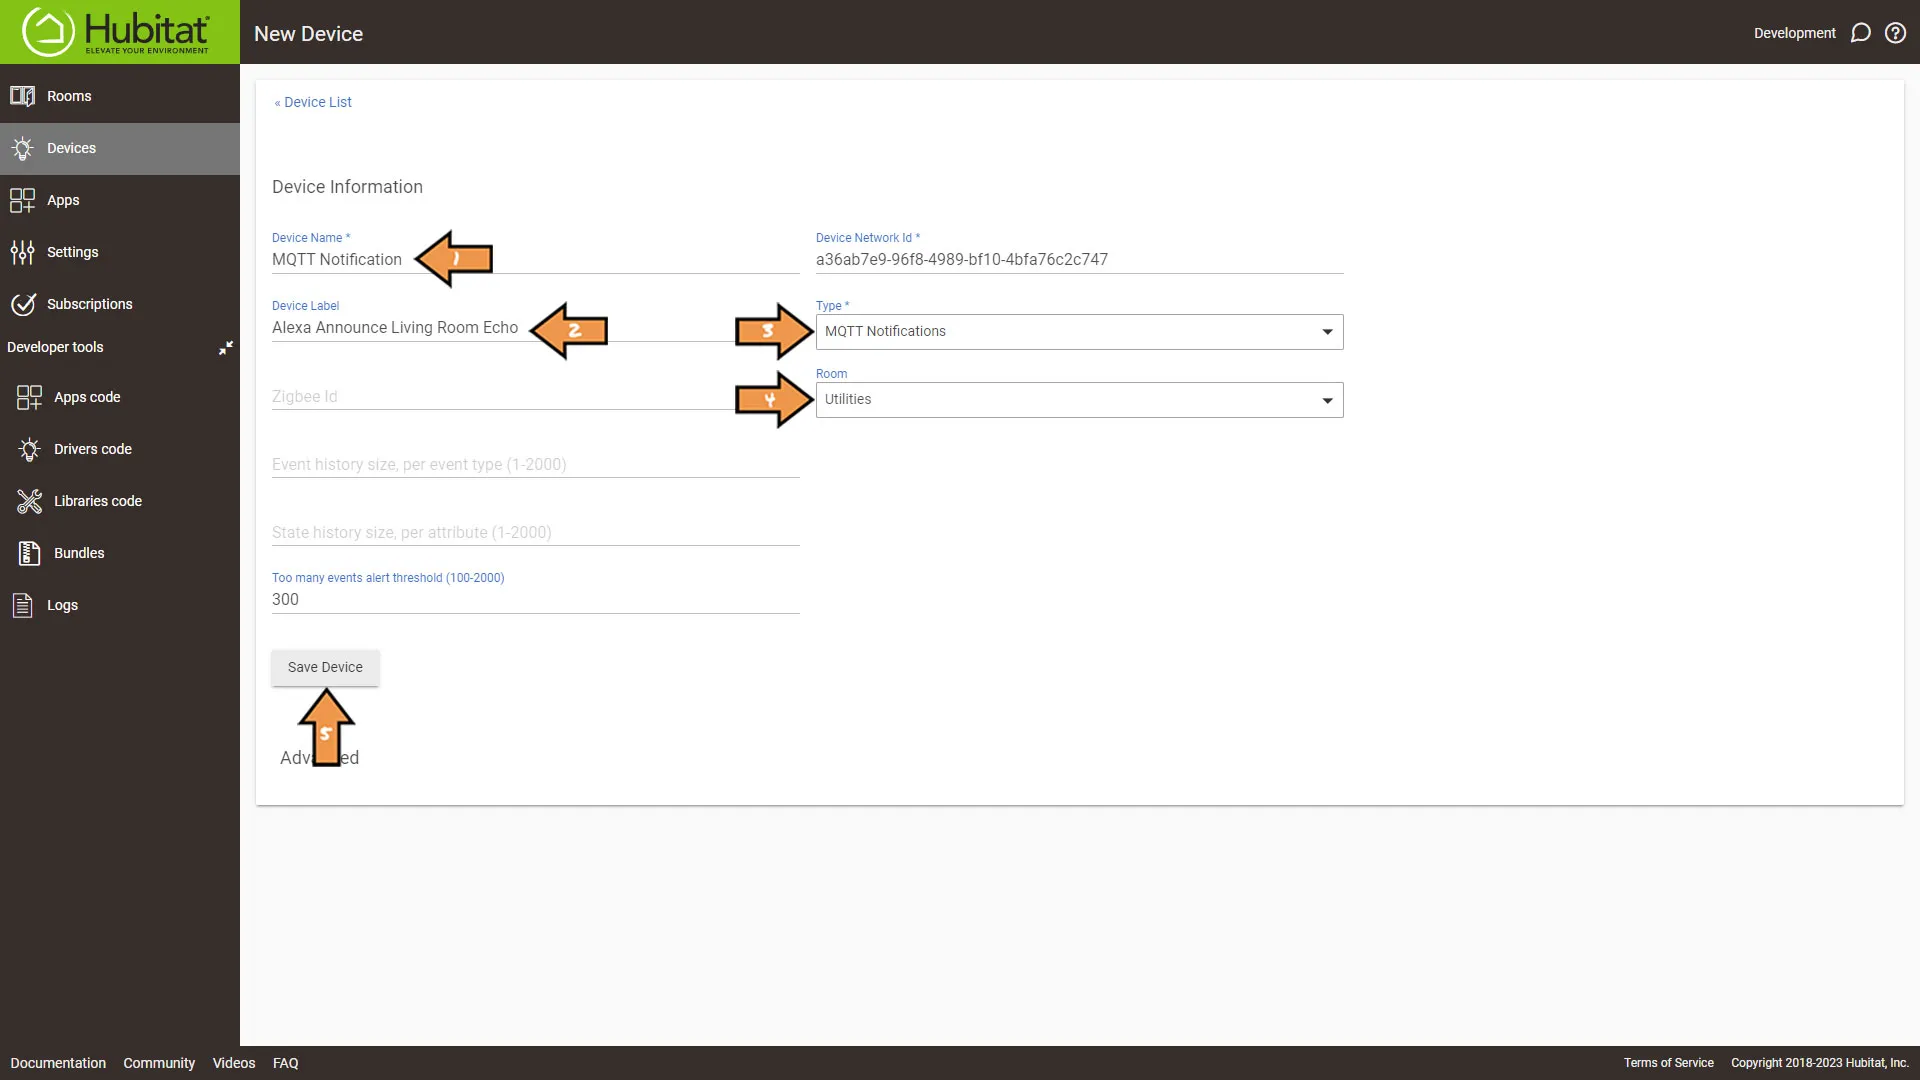
Fill out the Device Information as follows:
- Enter the Device Name, I like to use the type of virtual device it is.
- Enter the Device Label, something discriptive.
- Set the Type to MQTT Notifications.
- Optional, add the device to a room.
- Then click the Save Device button.
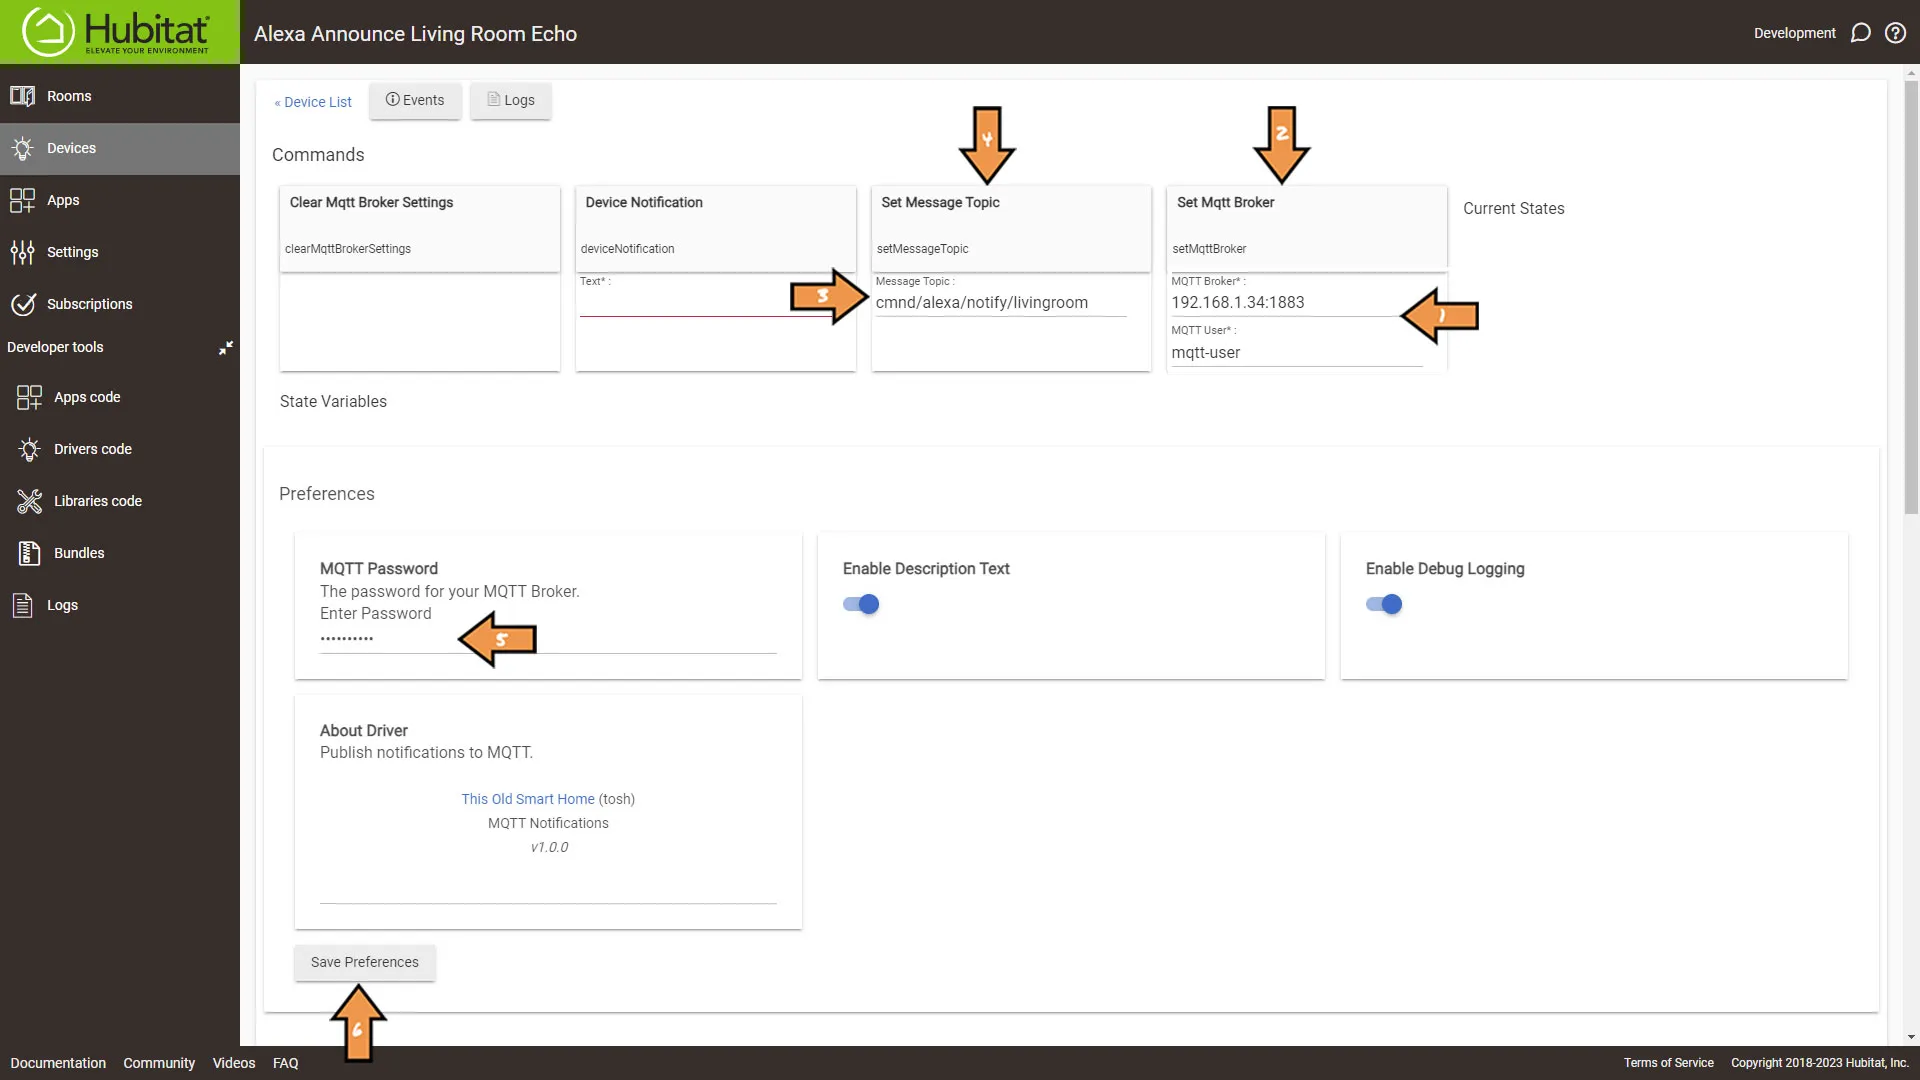
Now we need to set up the MQTT settings.
- Enter the MQTT Broker IP address and port.
- Click the Set Mqtt Broker button.
- Create a topic.
- Click the Set Message Topic button.
- In the Preferences, set MQTT Password.
- Finally, click the Save Preferences button.
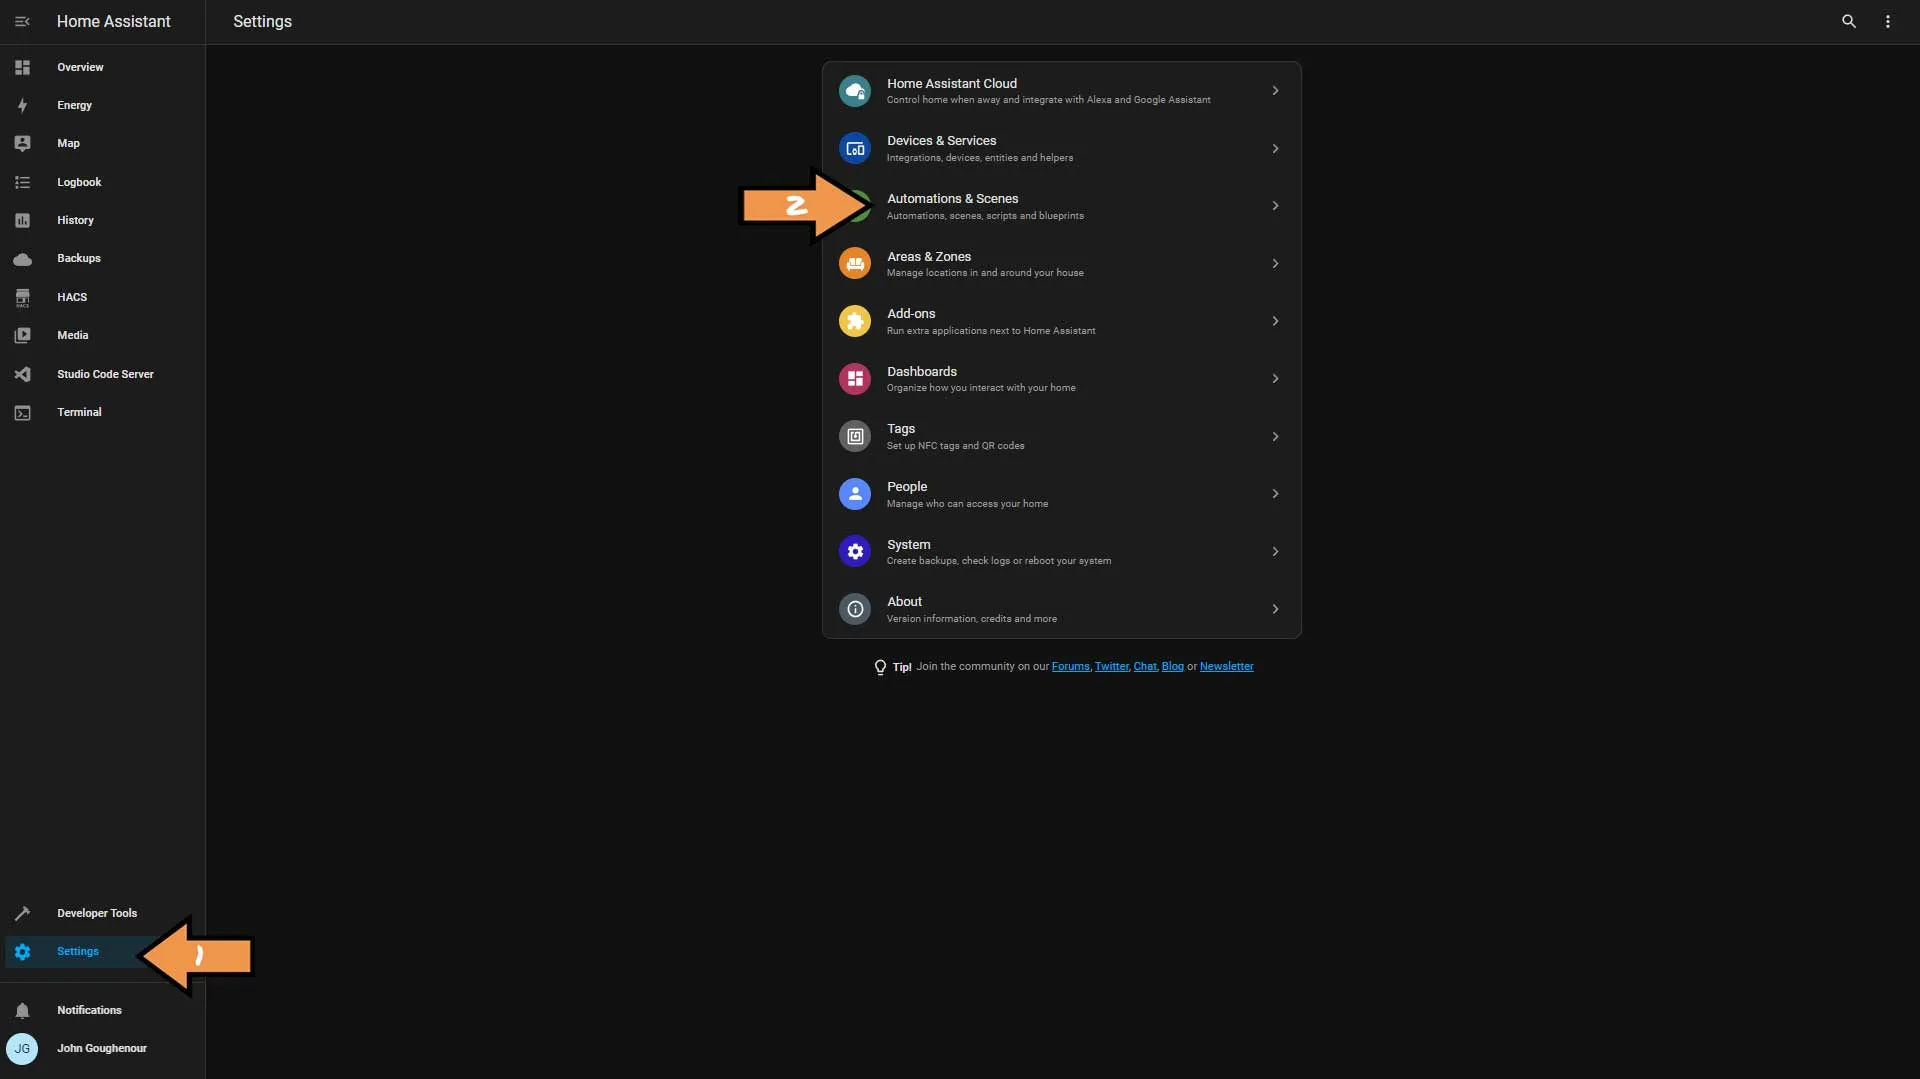
Next, hop over to your Home Assistant instance and go to Settings and Automations & Scenes.
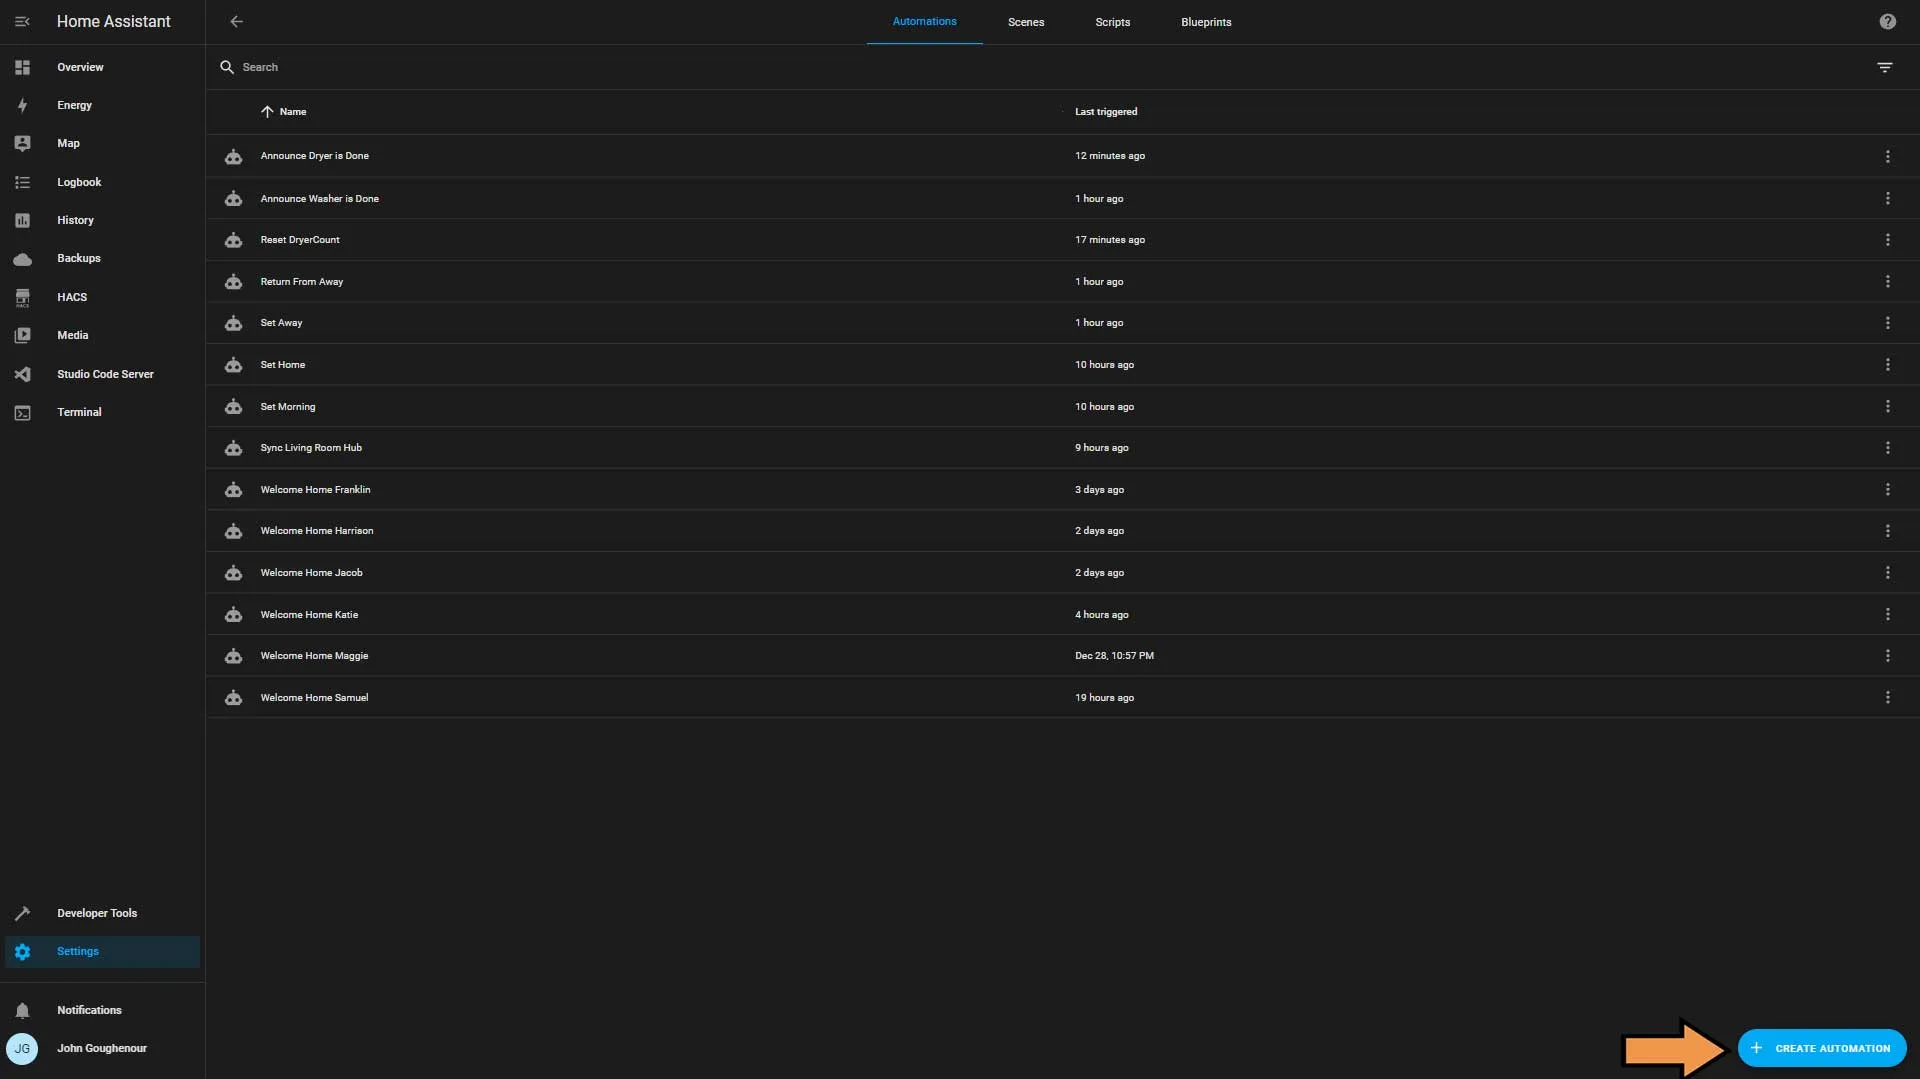
Click the blue Create Automation button.
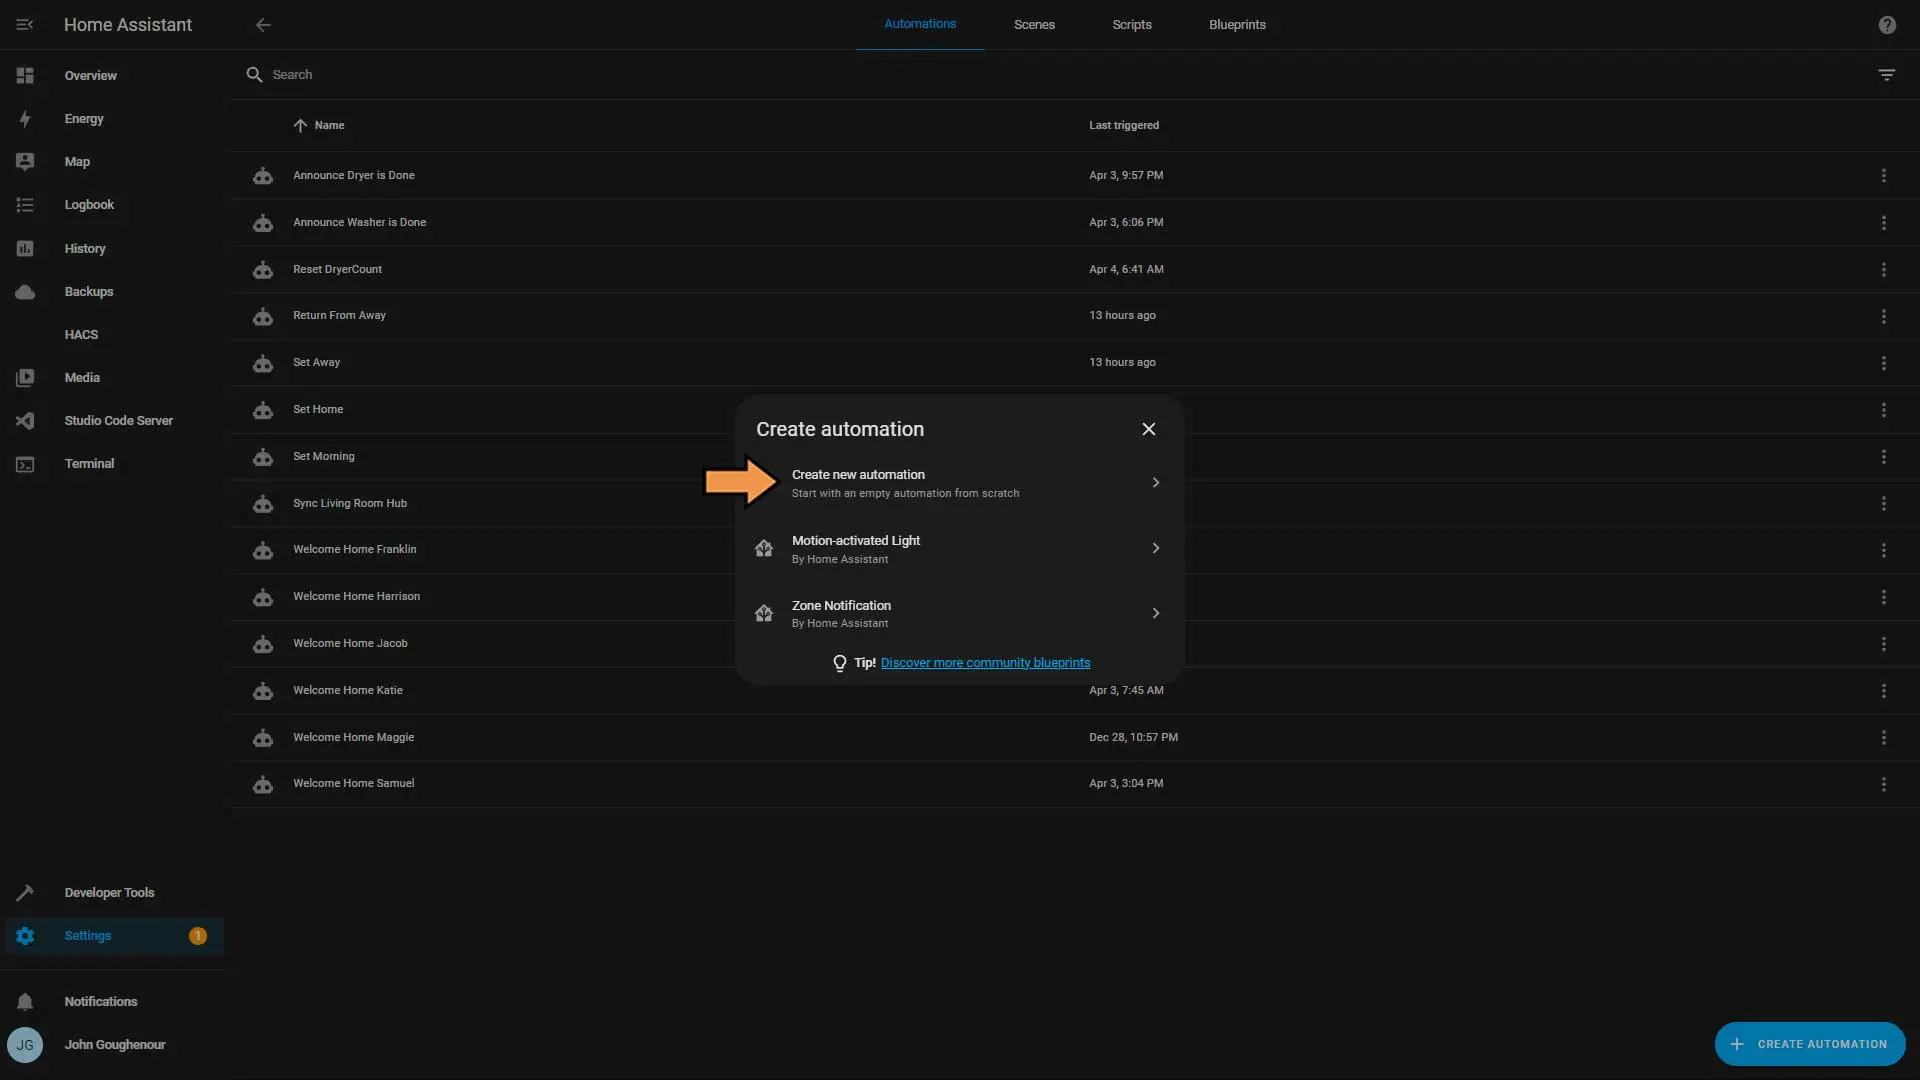
Choose Create new automation.
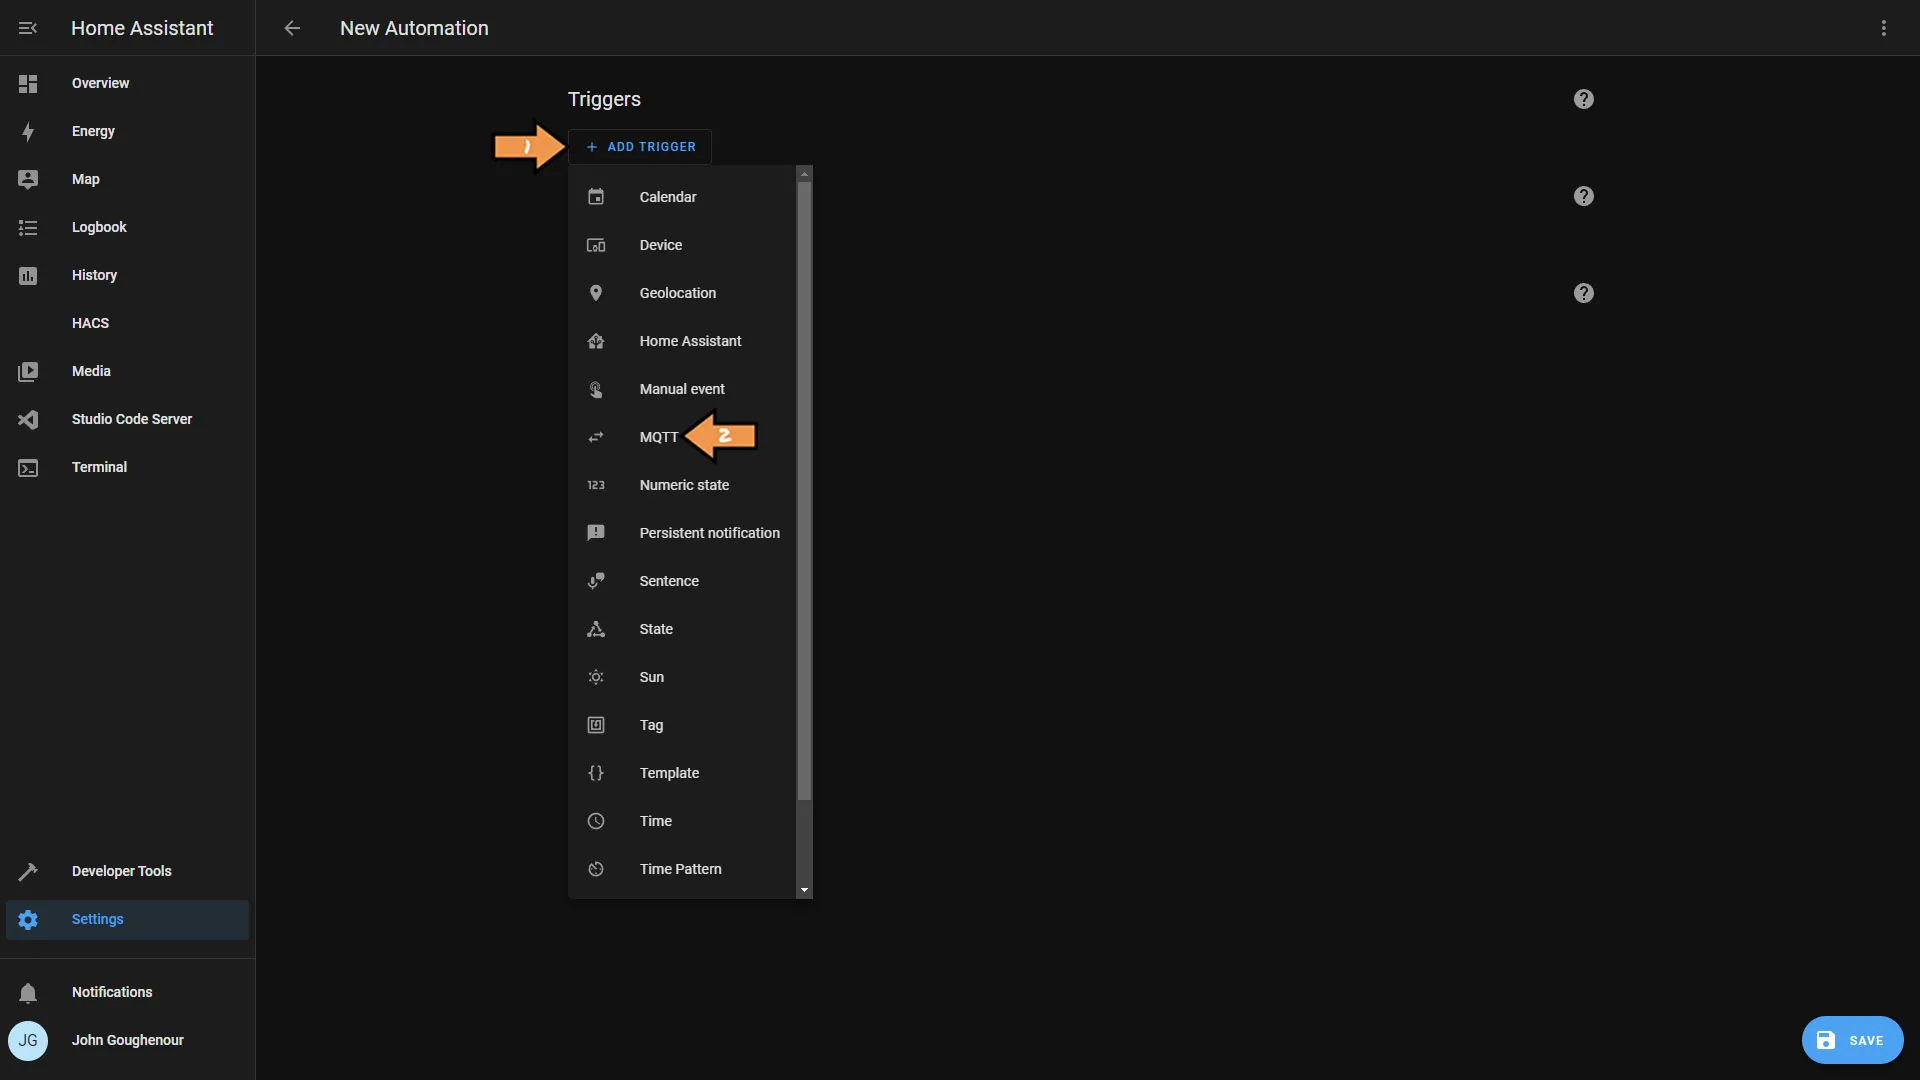
Click Add Trigger, then select MQTT from the list of events.
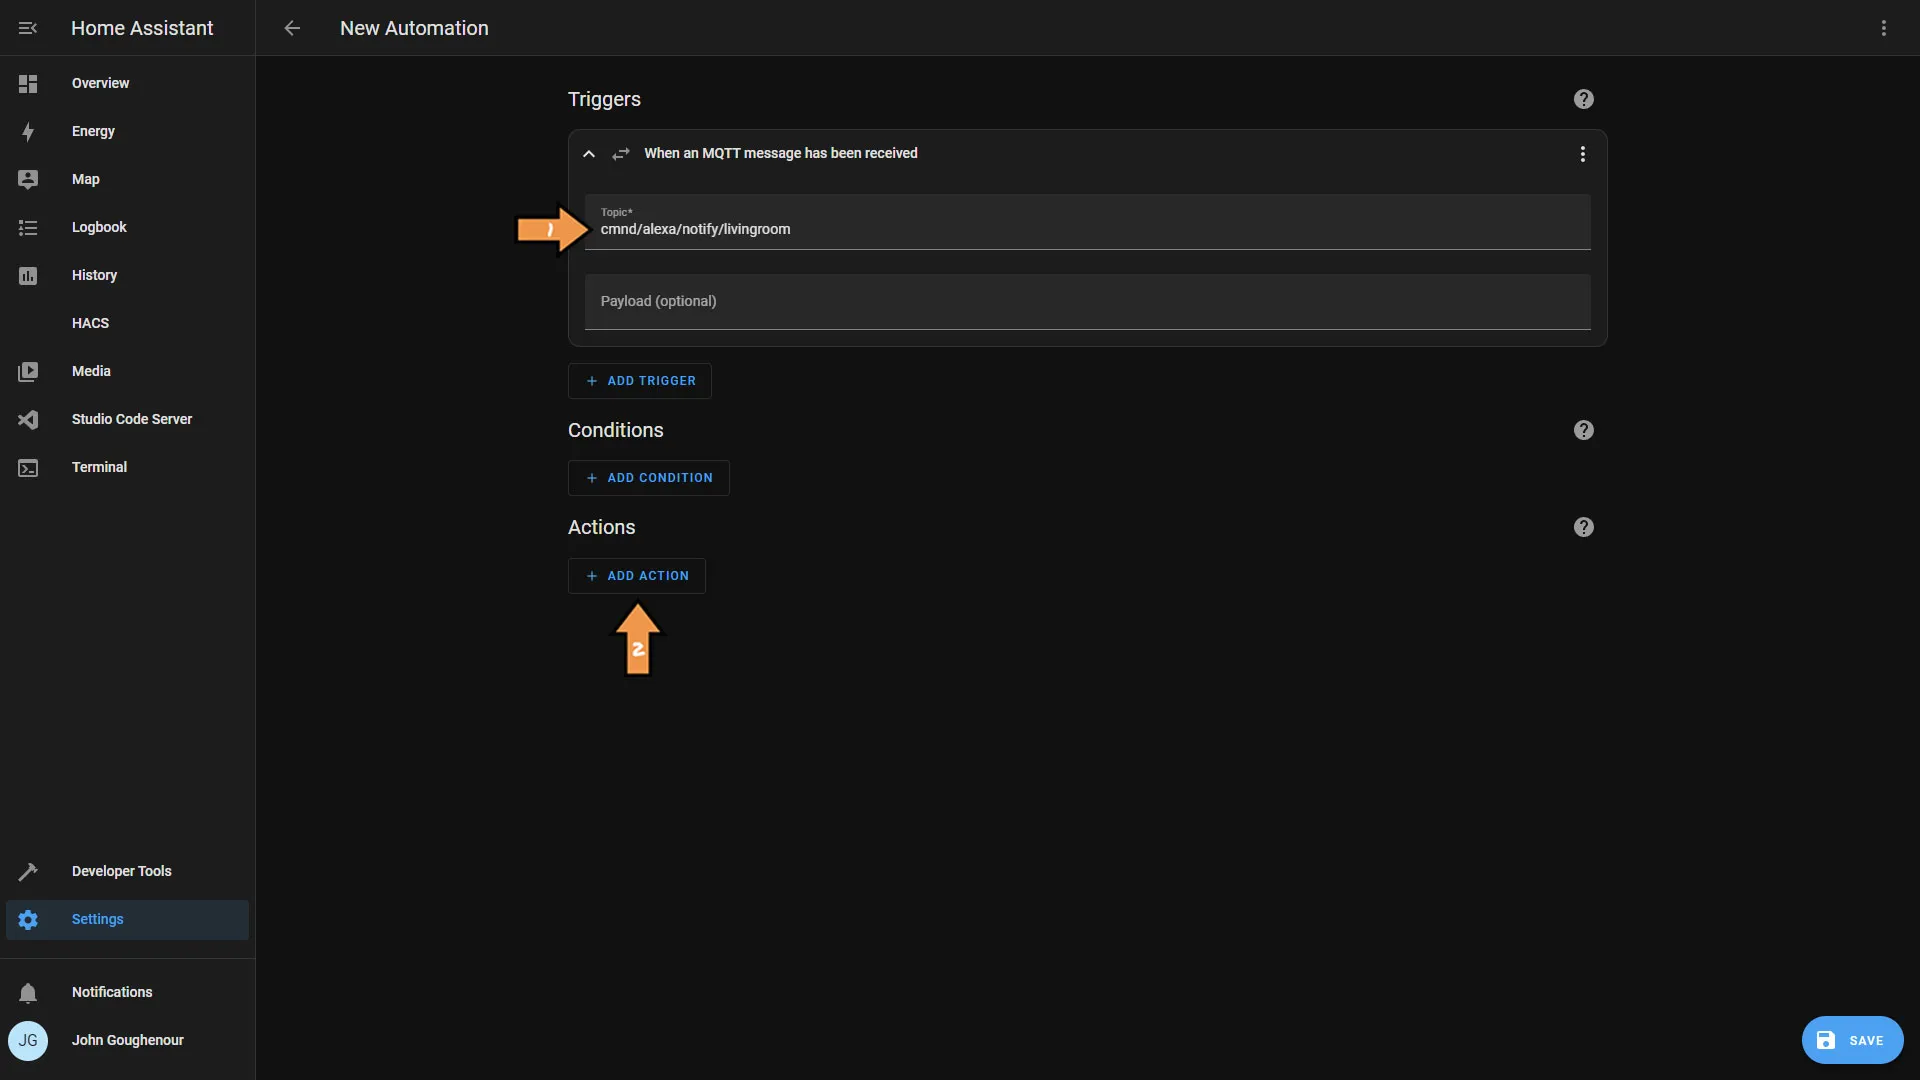
In the topic box, enter the exact topic we created for the Hubitat driver. Click Add Action and select Call Service.
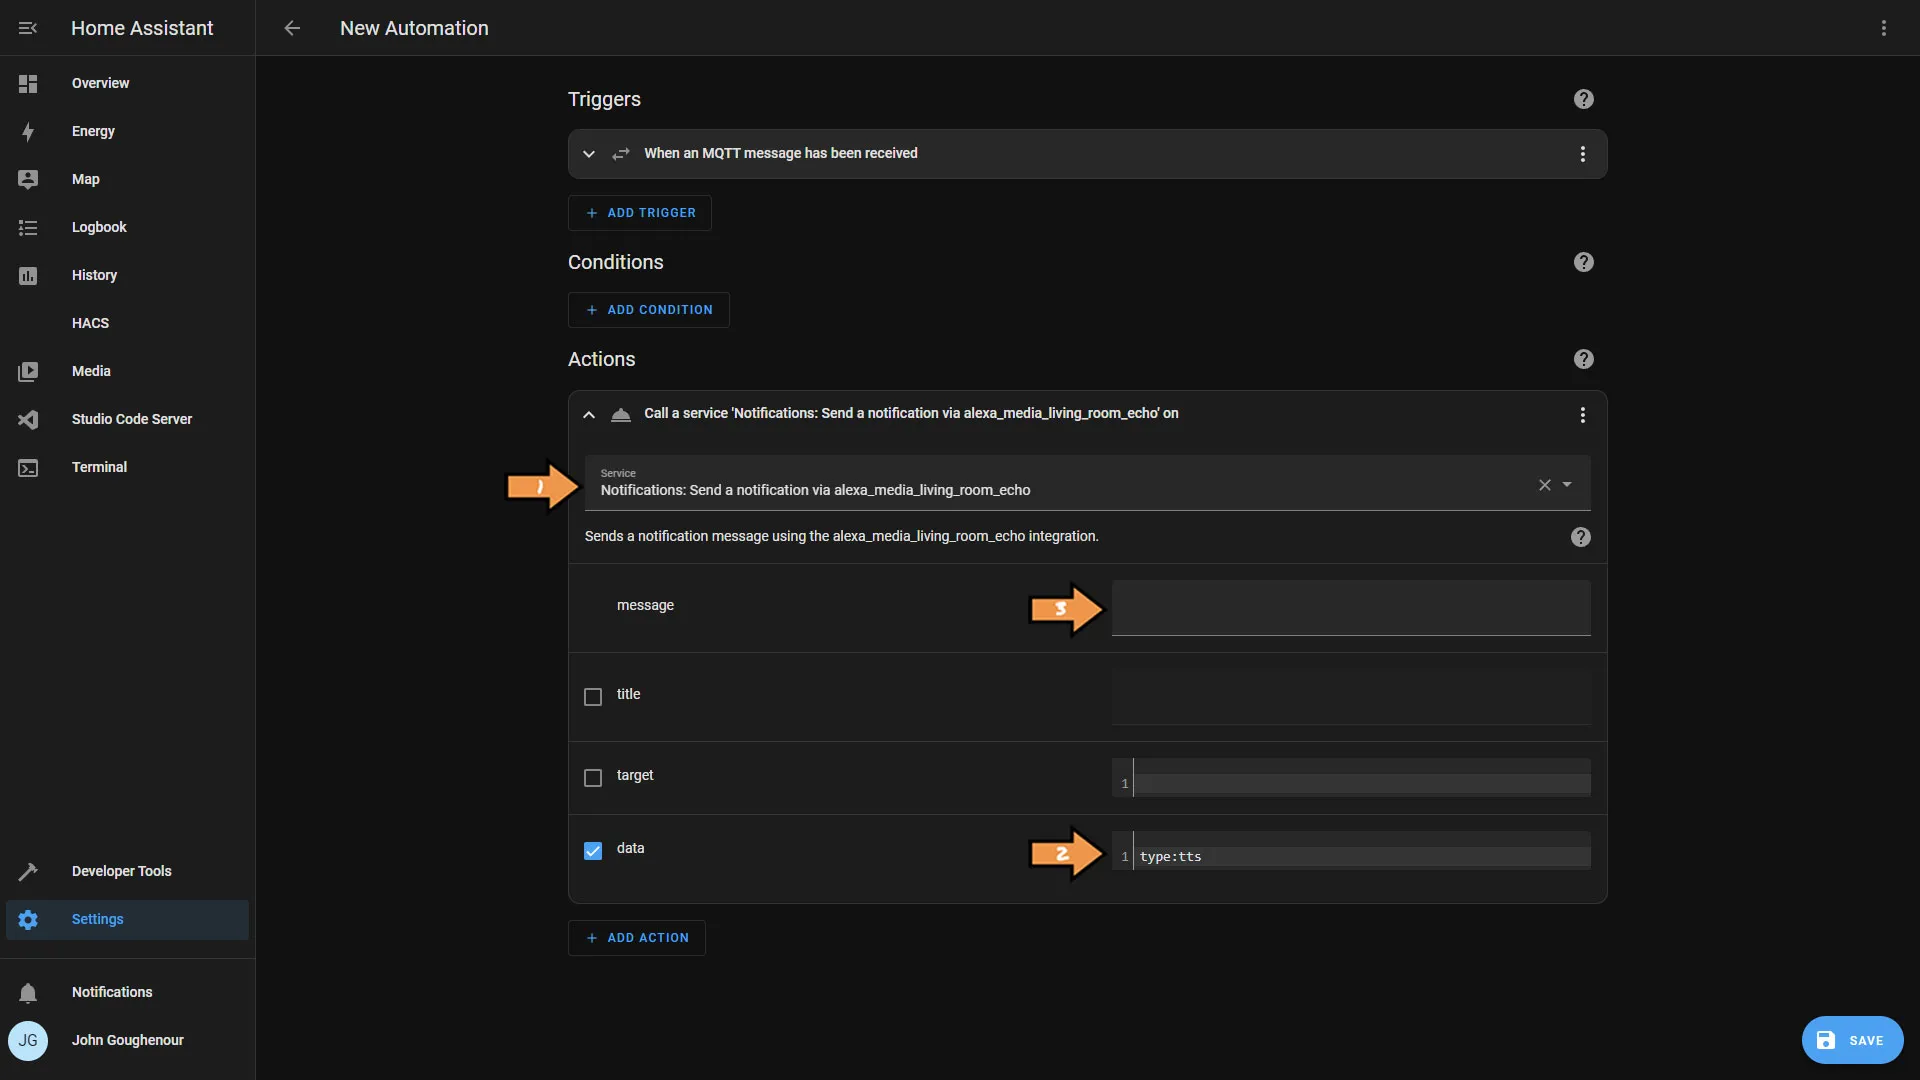
You’ll need to fill out the service call as follows:
- Select the Notifications for the Alexa device you desire.
- In the data enter
type:ttr - You will need to type
{{ trigger.payload }}
However when you do you will drop into YAML editor.

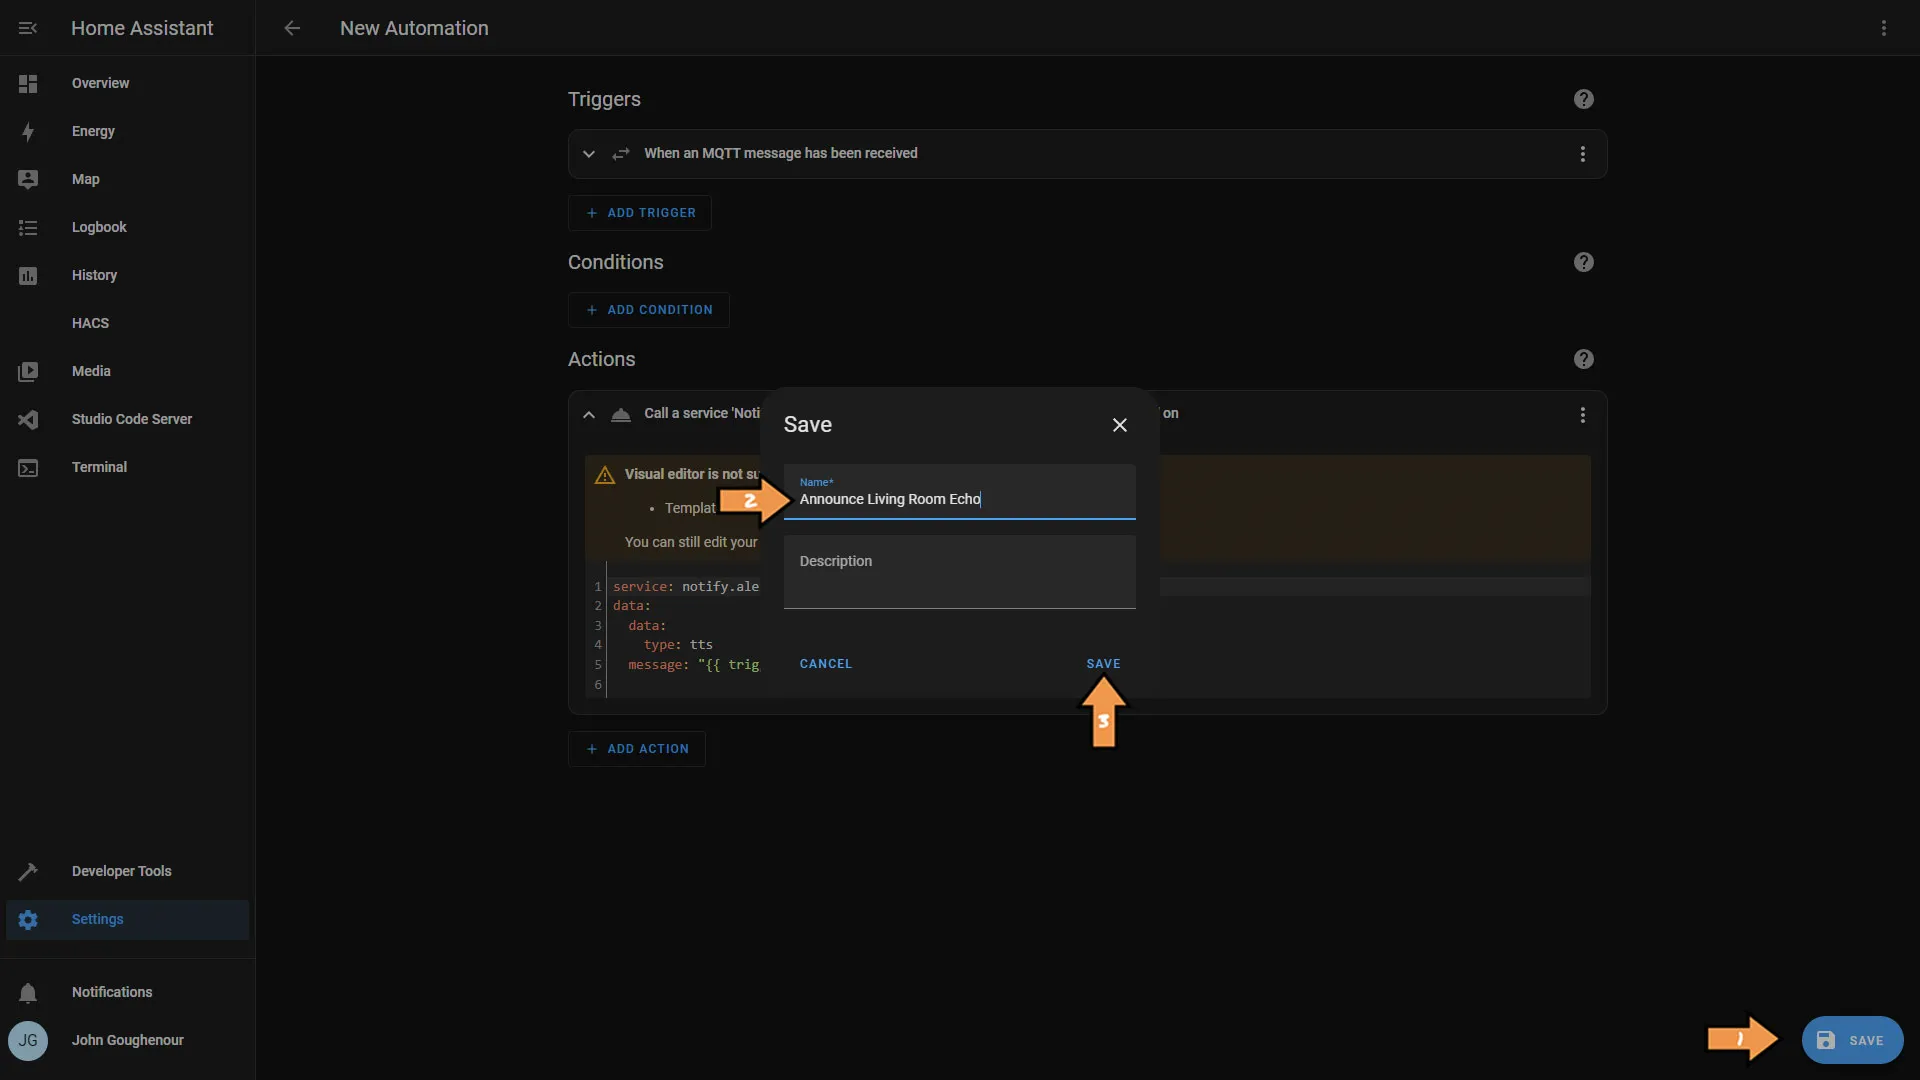
Success: That’s It! In the bottom right-hand corner, click the blue Save button. Next, name the automation and click save again.
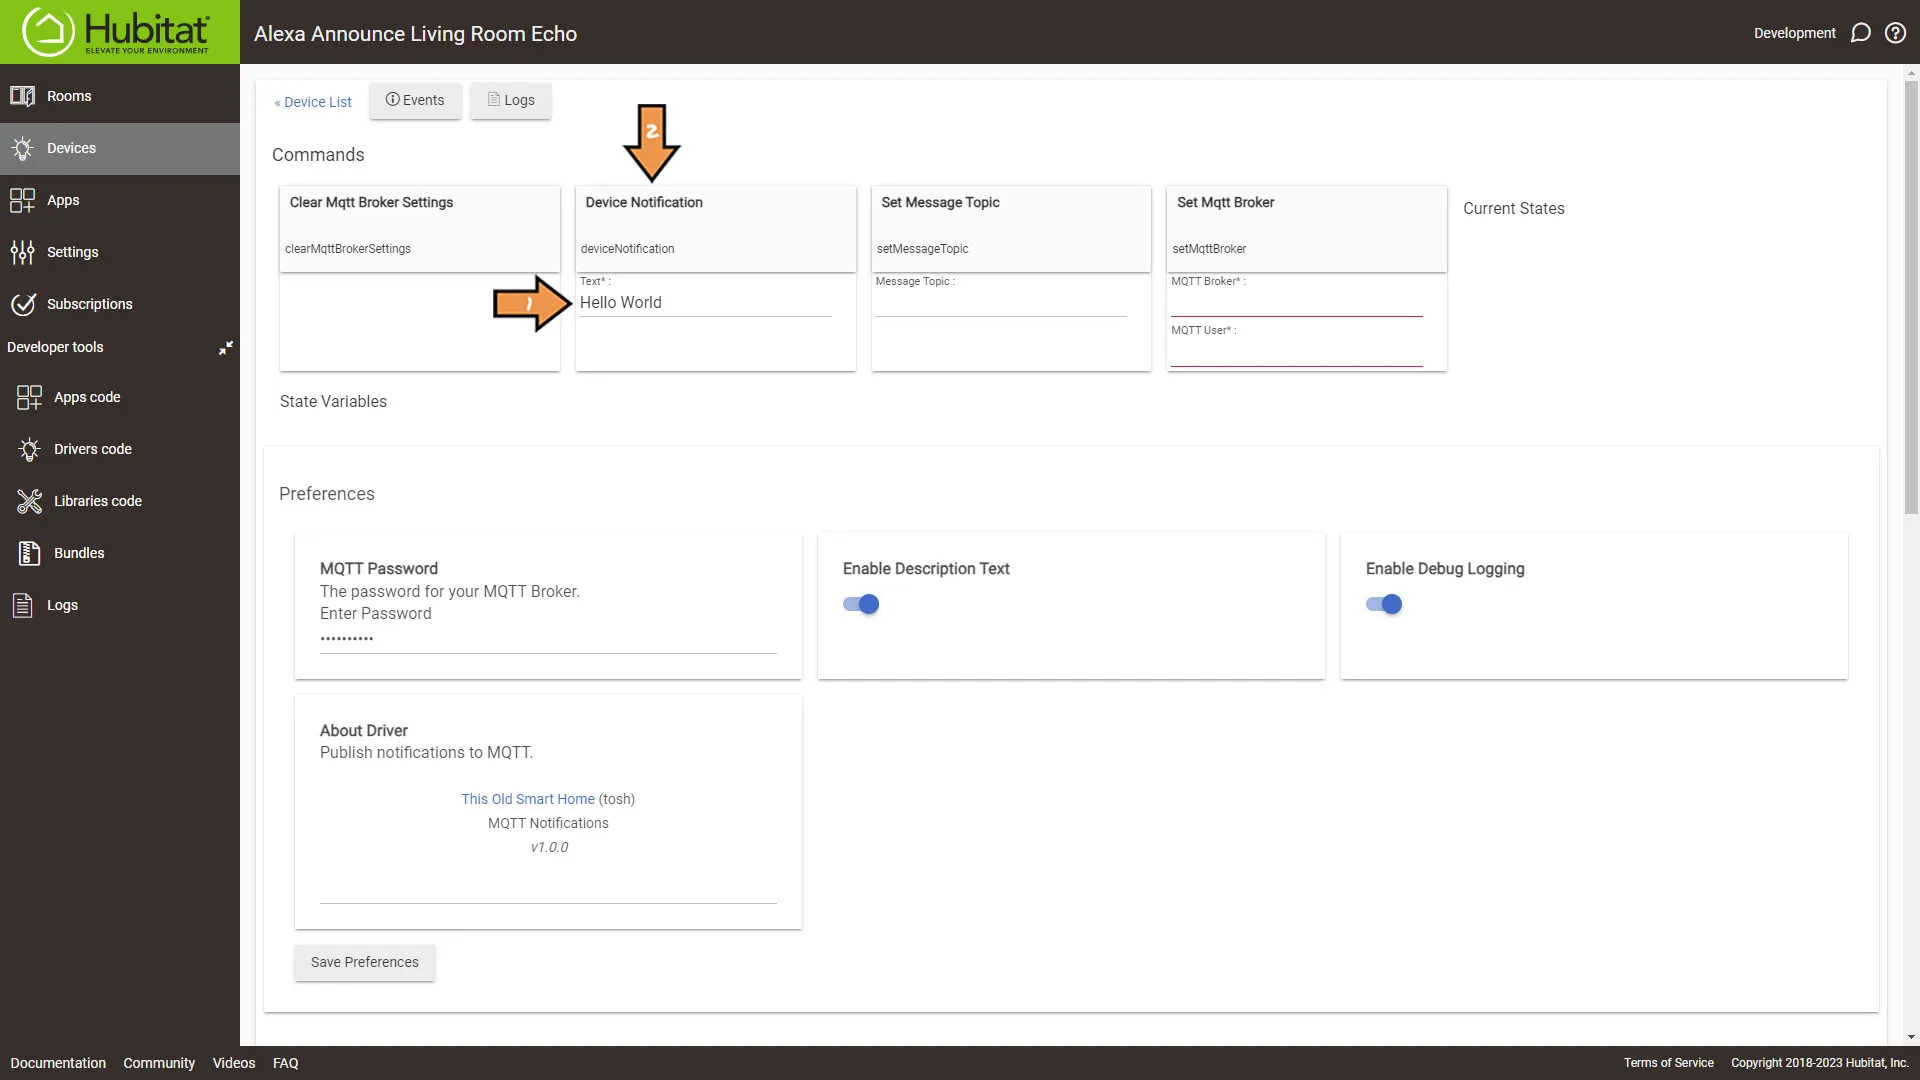
Head back over to the device we created in Hubitat, so we can test the set up. In the Device Notification Text box enter a message then click the Device Notification button. You should hear your device speak the message.
Home Assistant
Alexa Media Player
The Official Documentation for Alexa Media Player
Setting Up the Automation
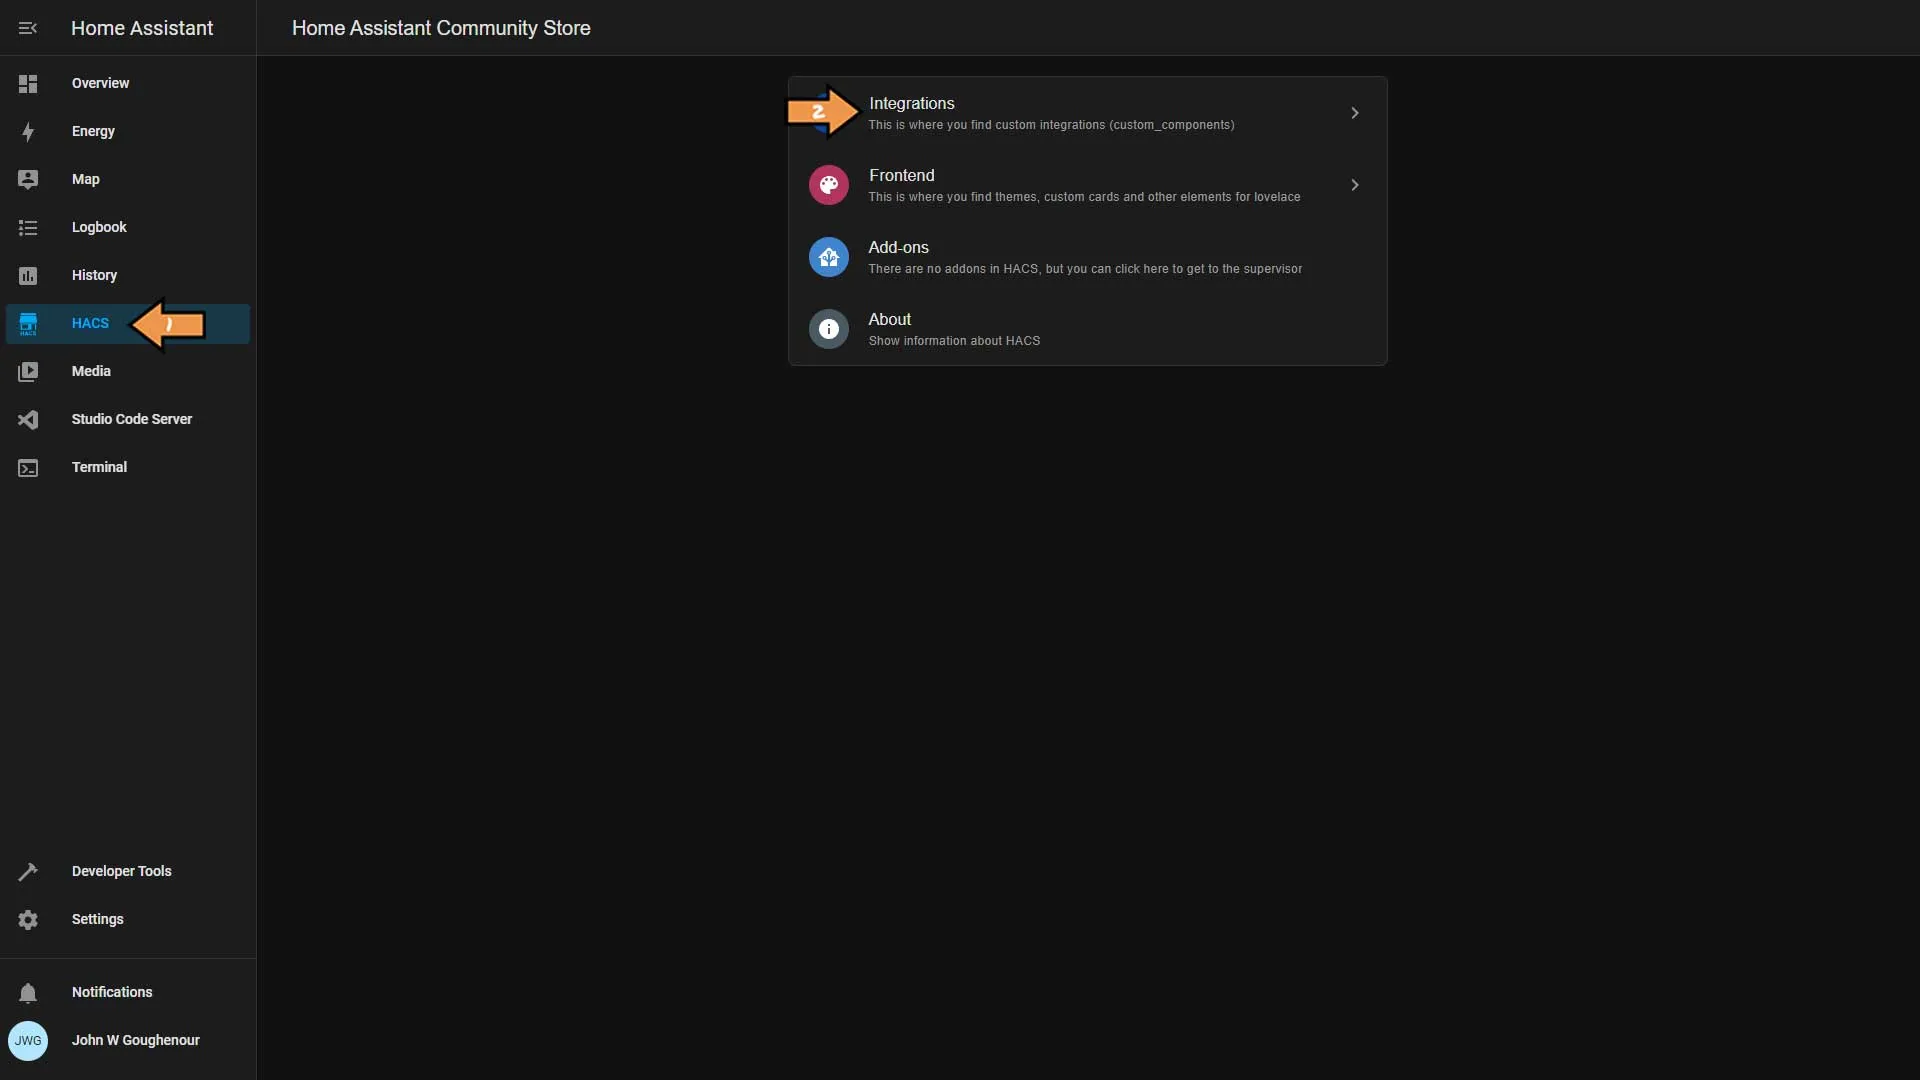
First, go to HACS, then Integrations.
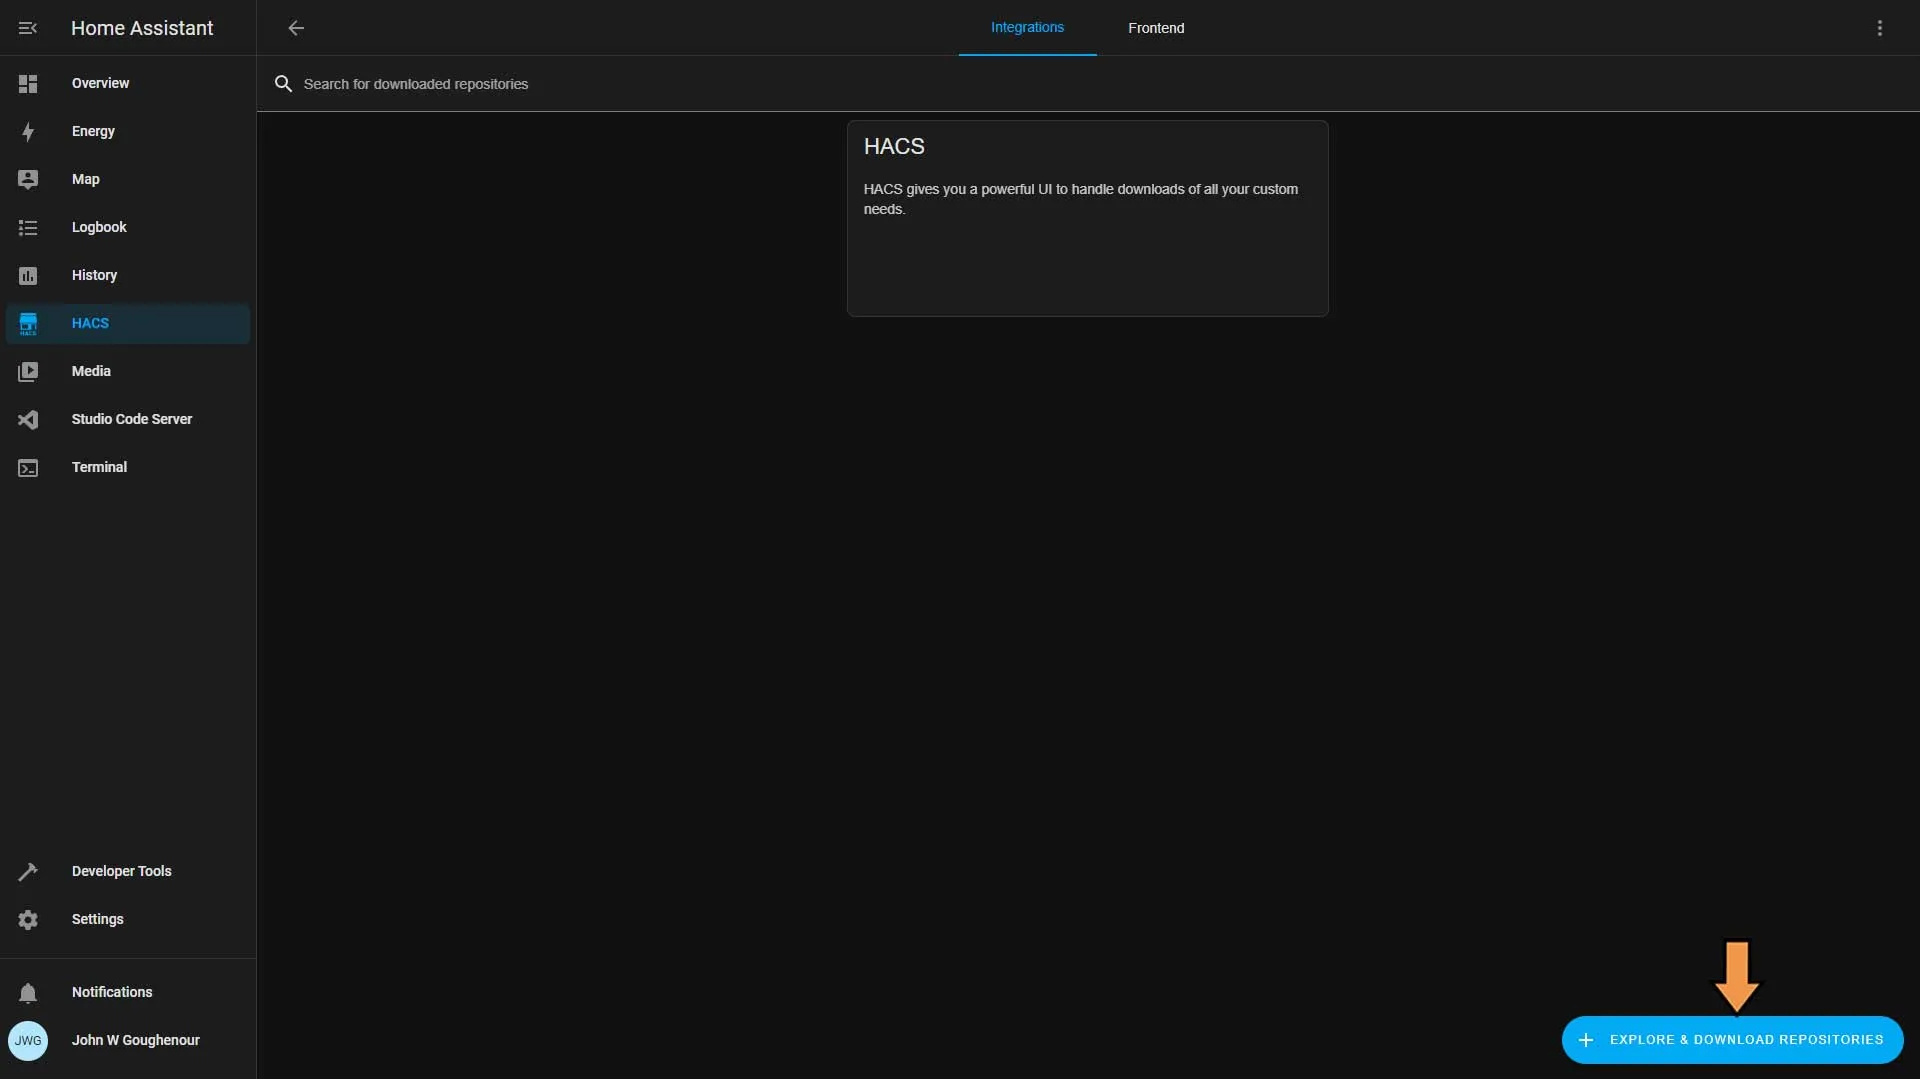
Click the Explore & Download Repositories button.
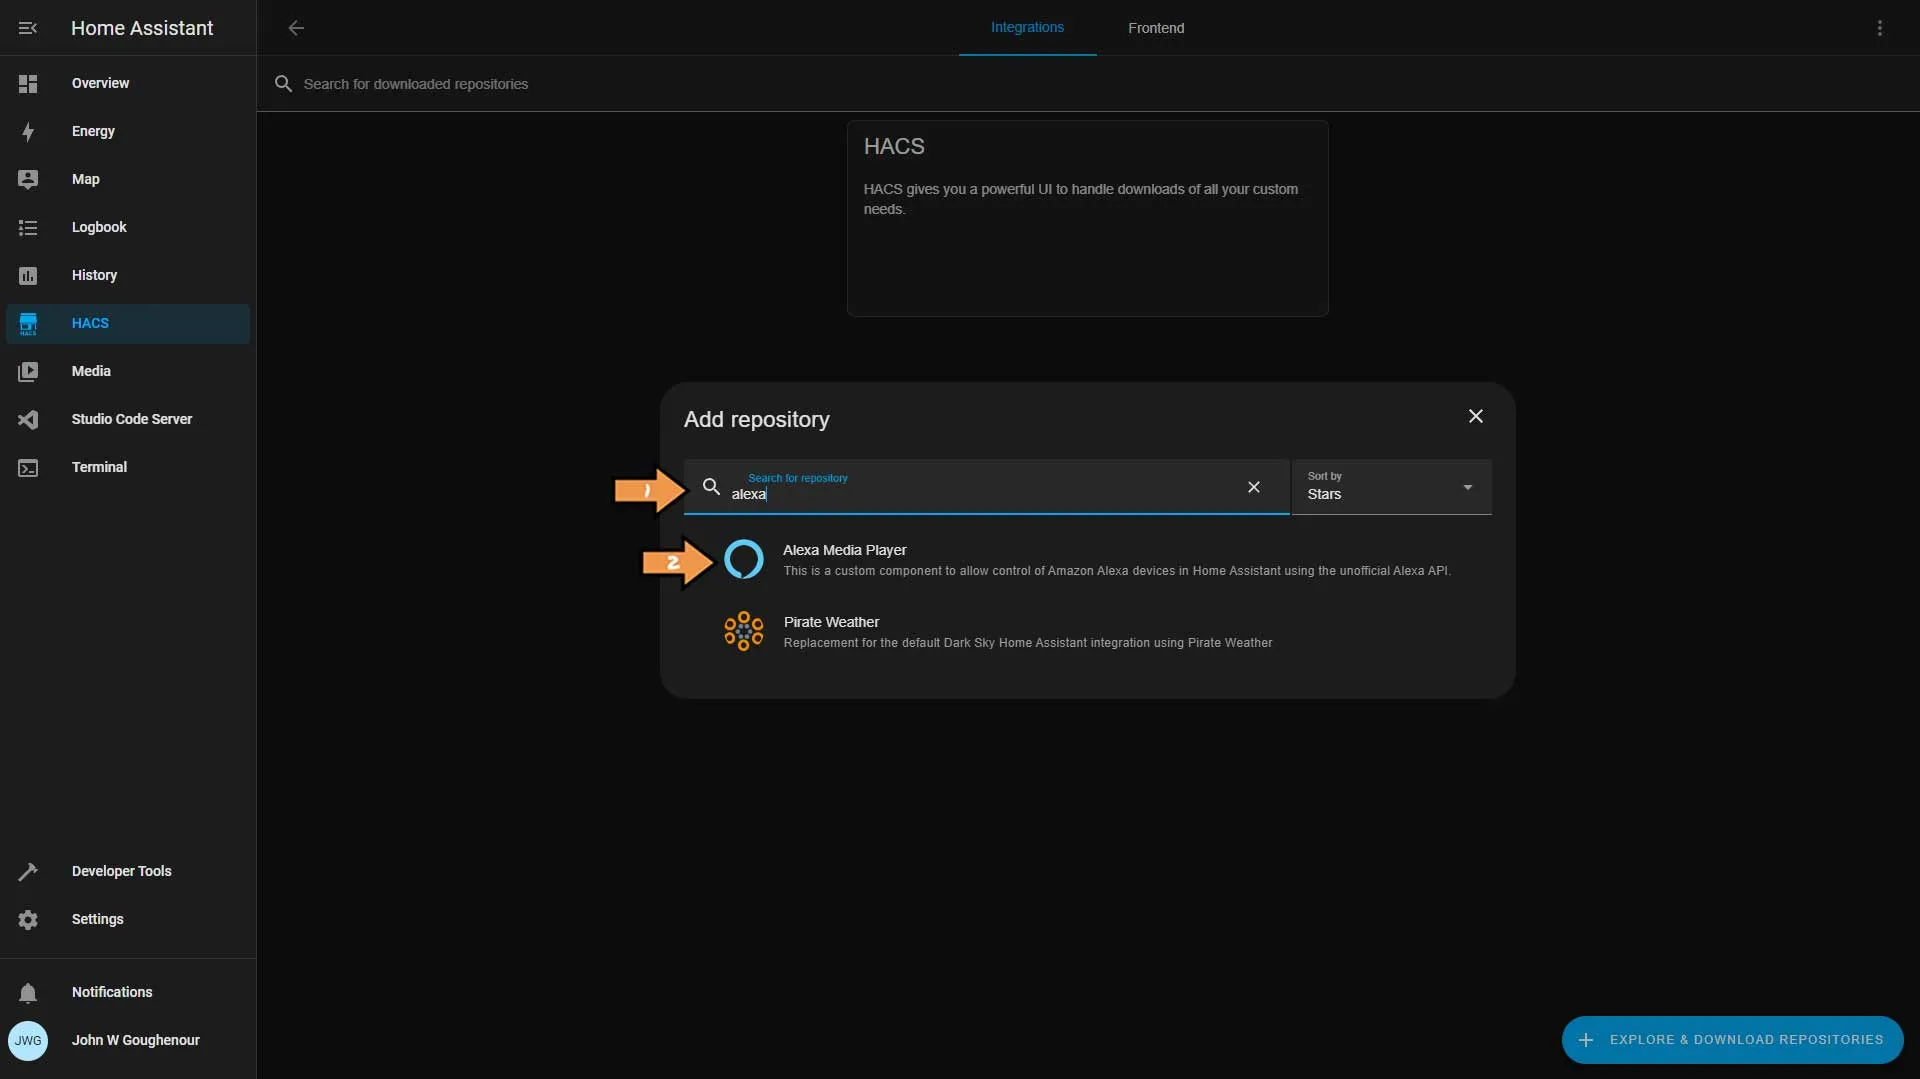
Search for Alexa and select Alexa Media Player from the list.
At the bottom of the screen, click the Download button.

In the pop-up window, click Download. Once done, click the back arrow at the top of the screen

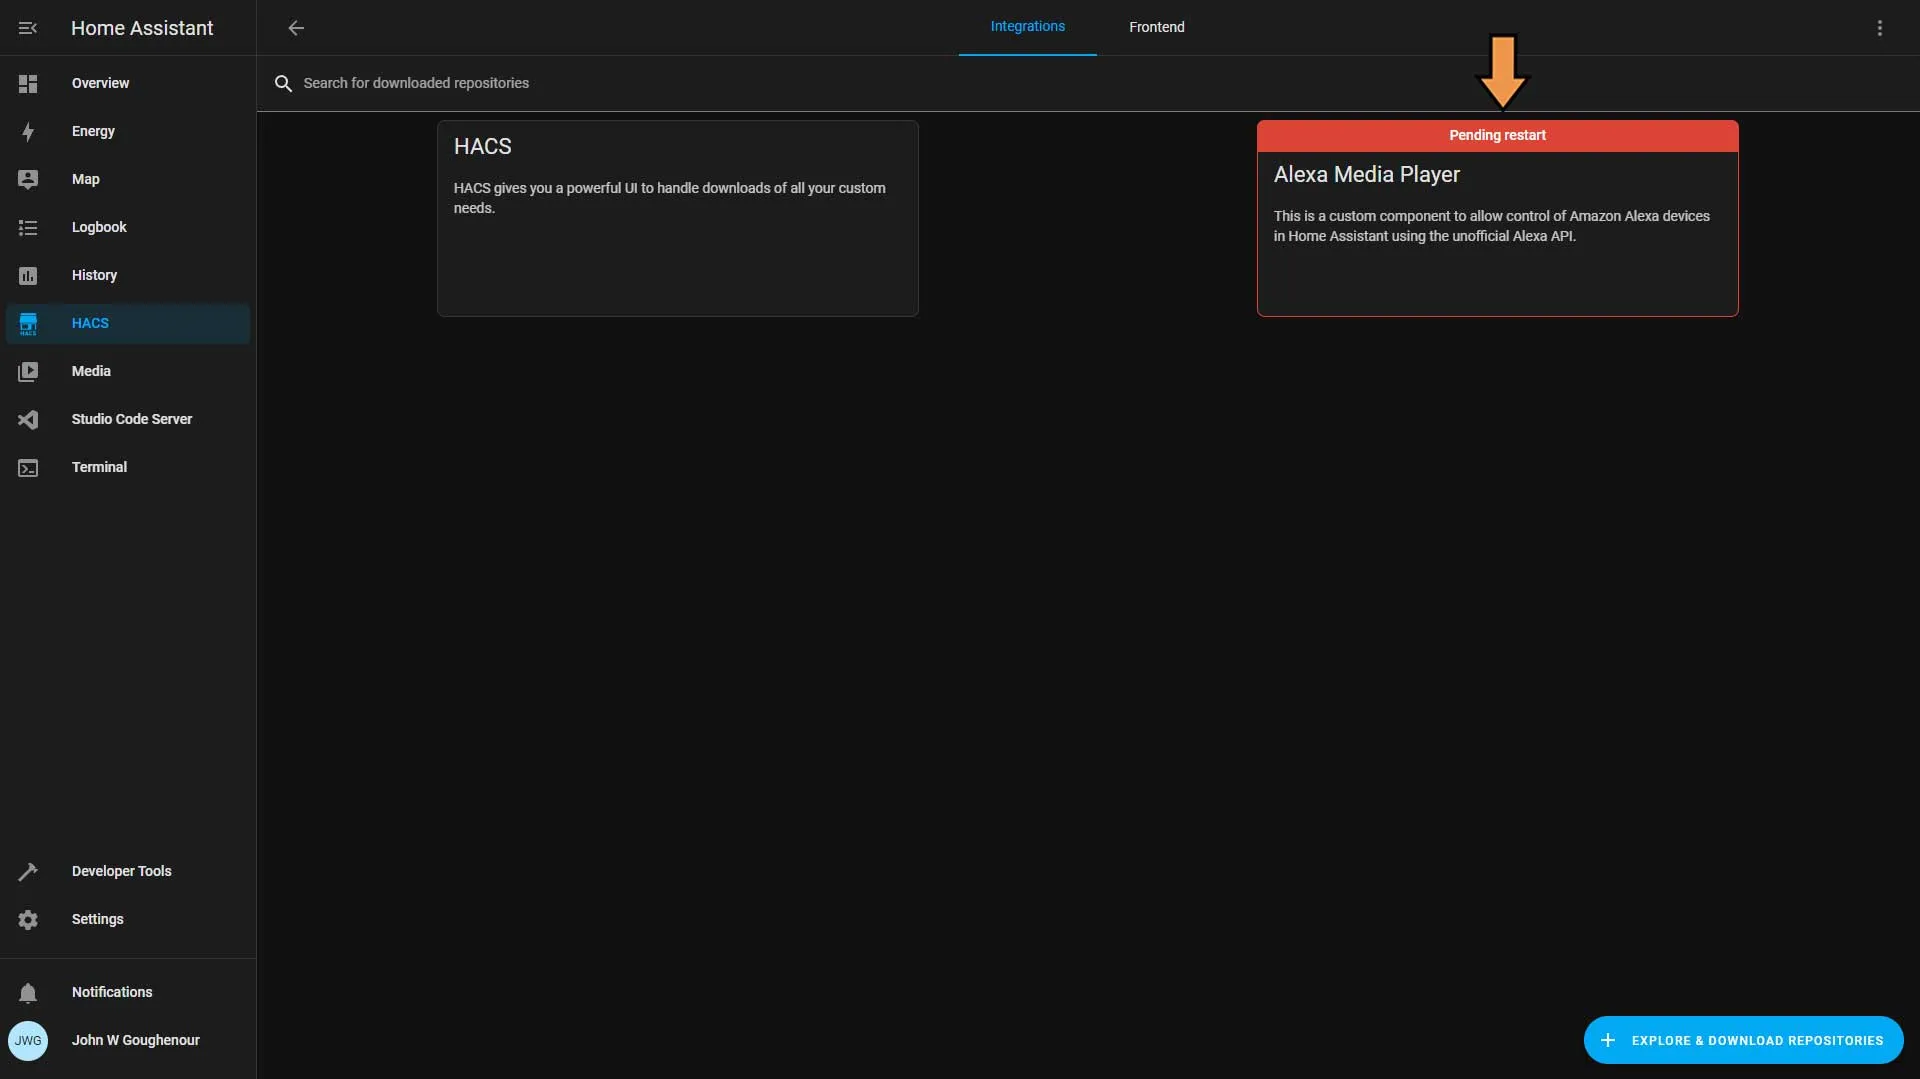
Alexa Media Player is pending a restart.
Go to Developer Tools and click Check Configuration, and if everything is alright, click Restart.
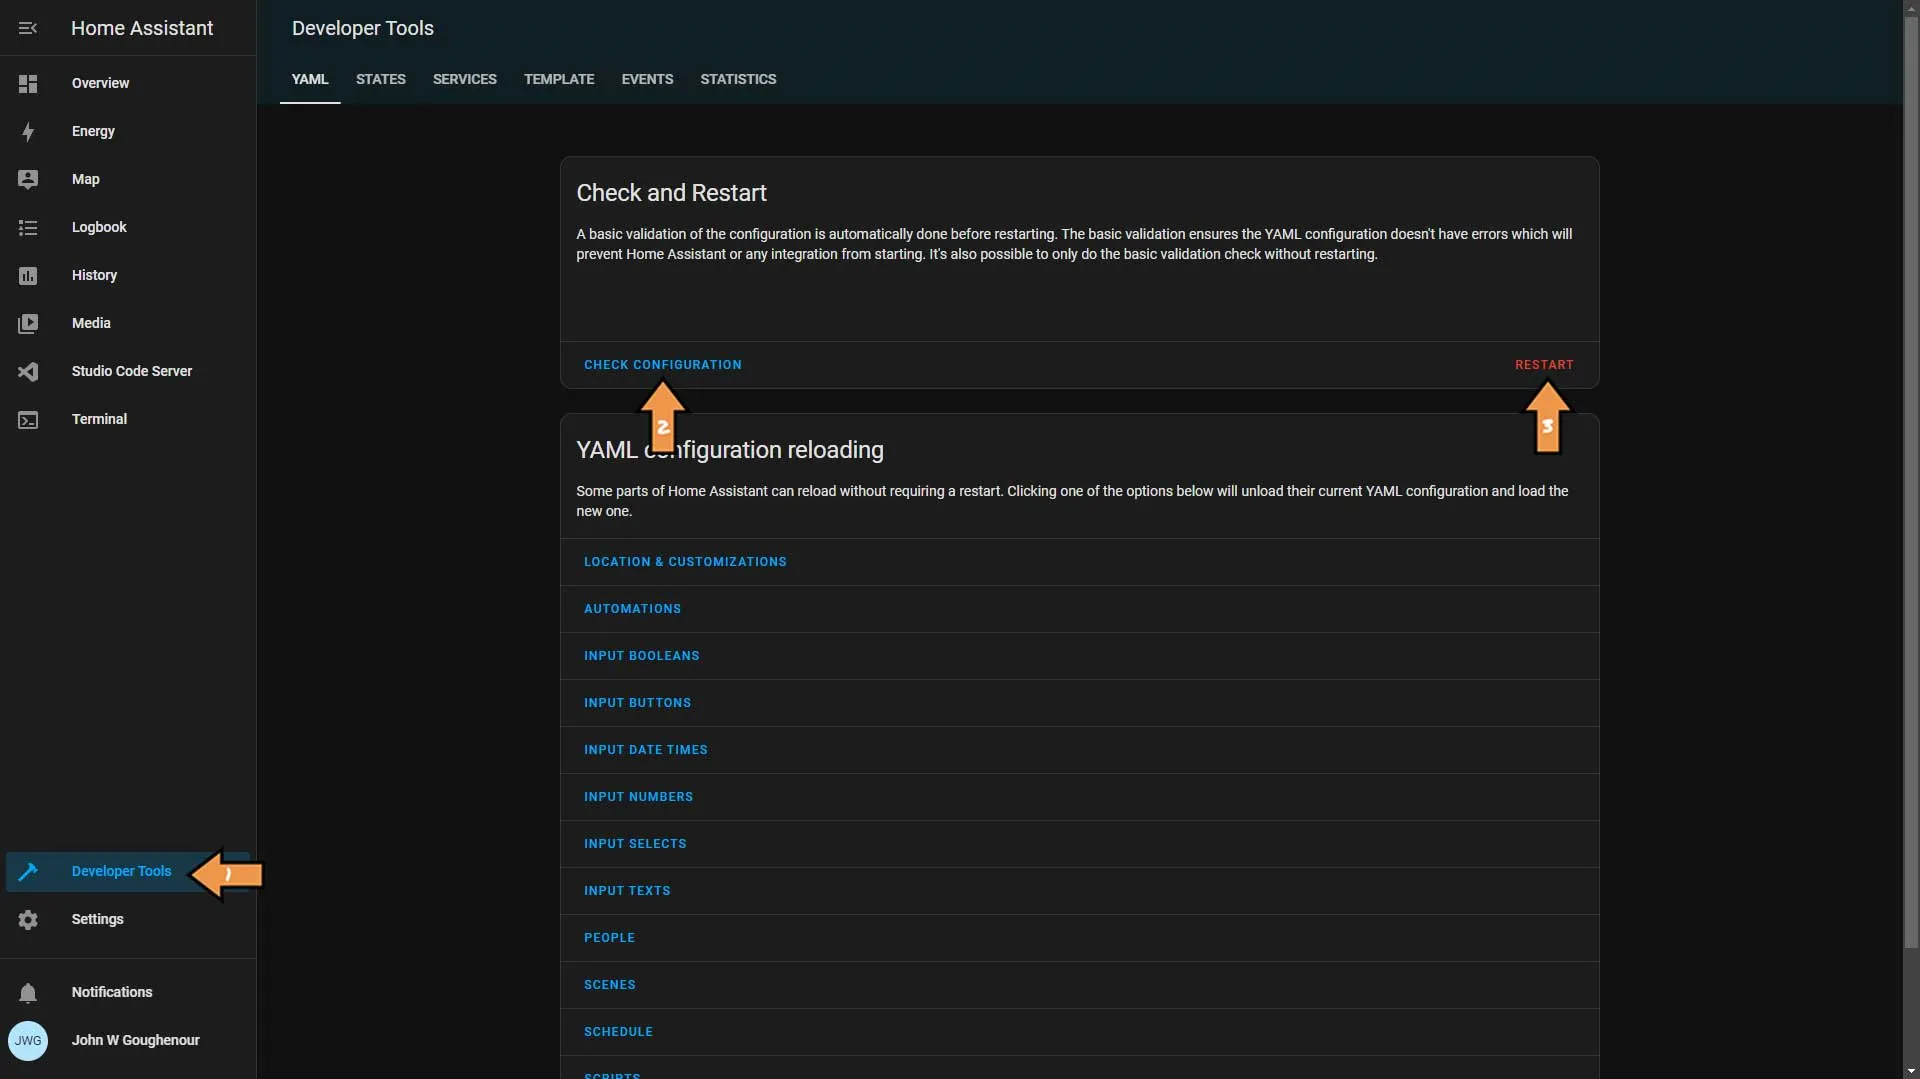
Confirm Restart.

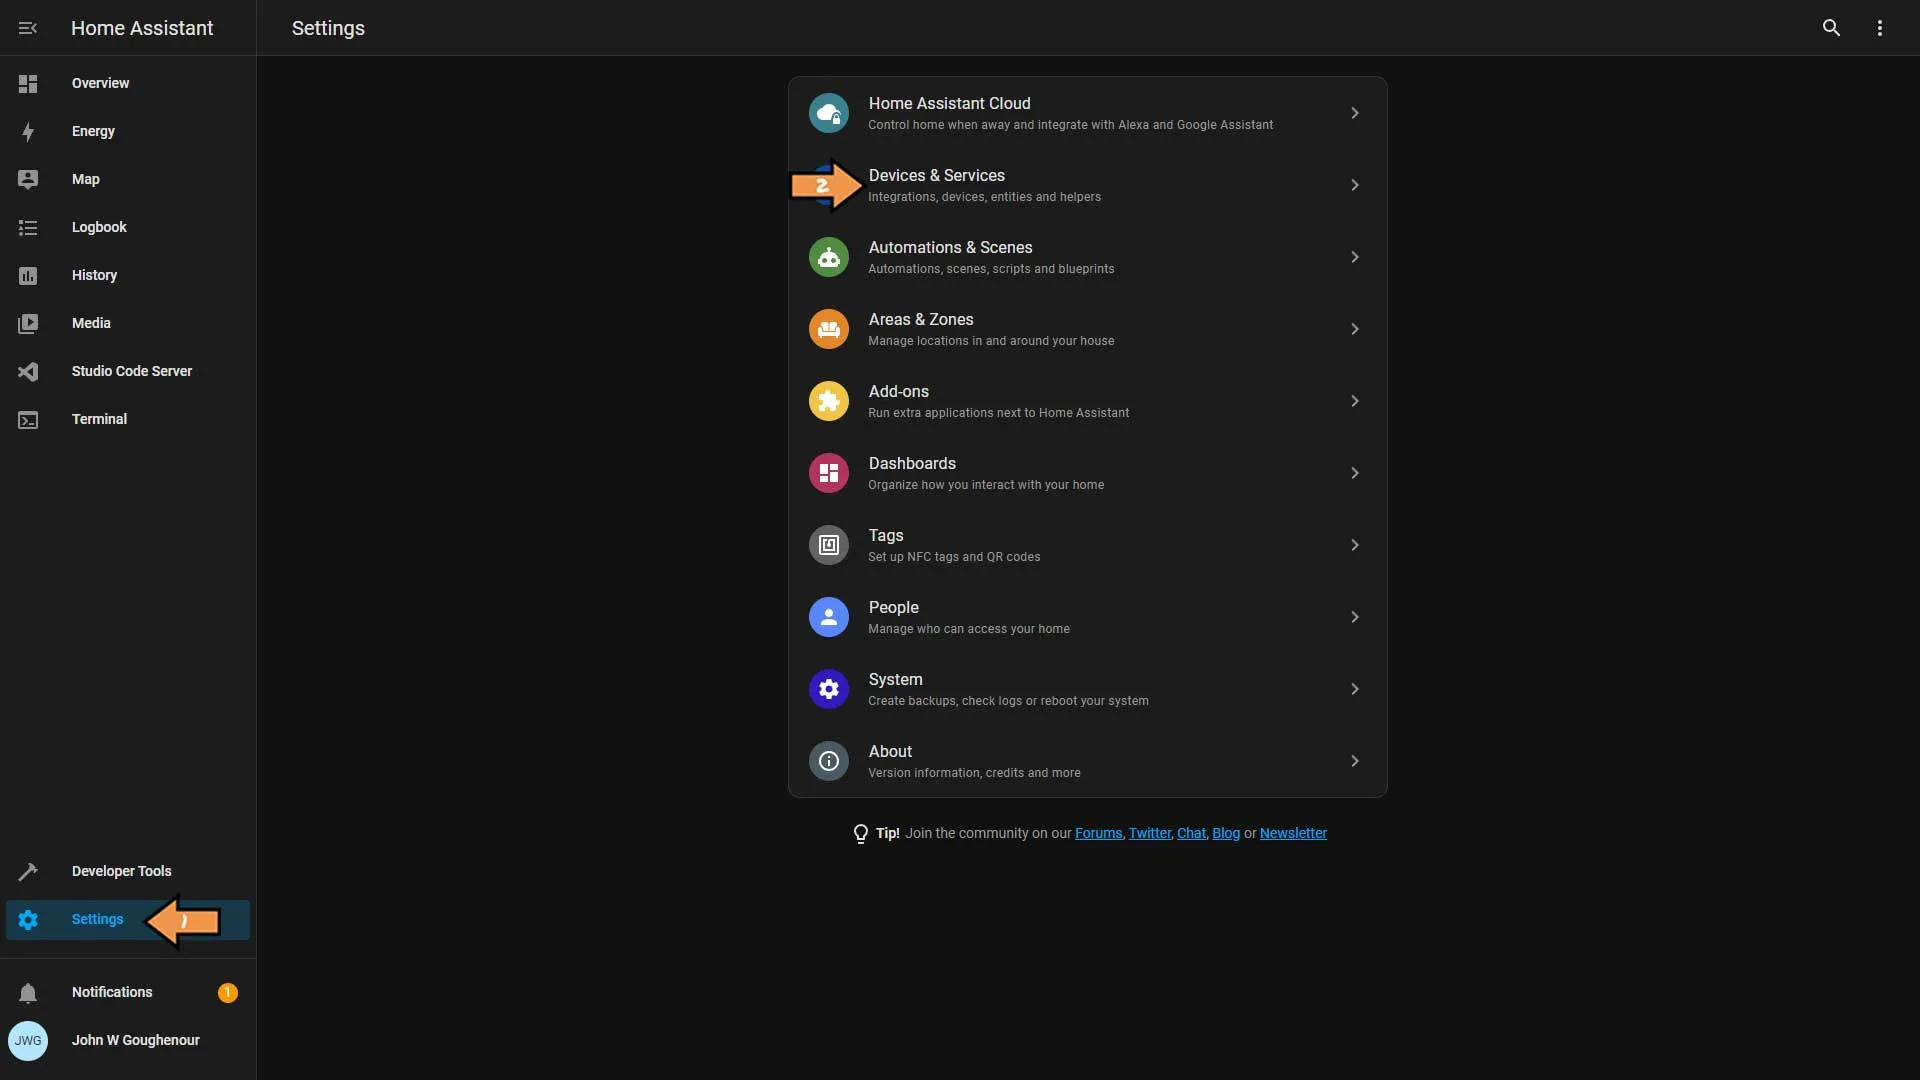
Next, go to Settings and Devices & Services.
On the Integrations tab Press the Shift Key + F5 to perform a hard refresh on the browser. Then click the Blue Add Integration button at the bottom of the screen.
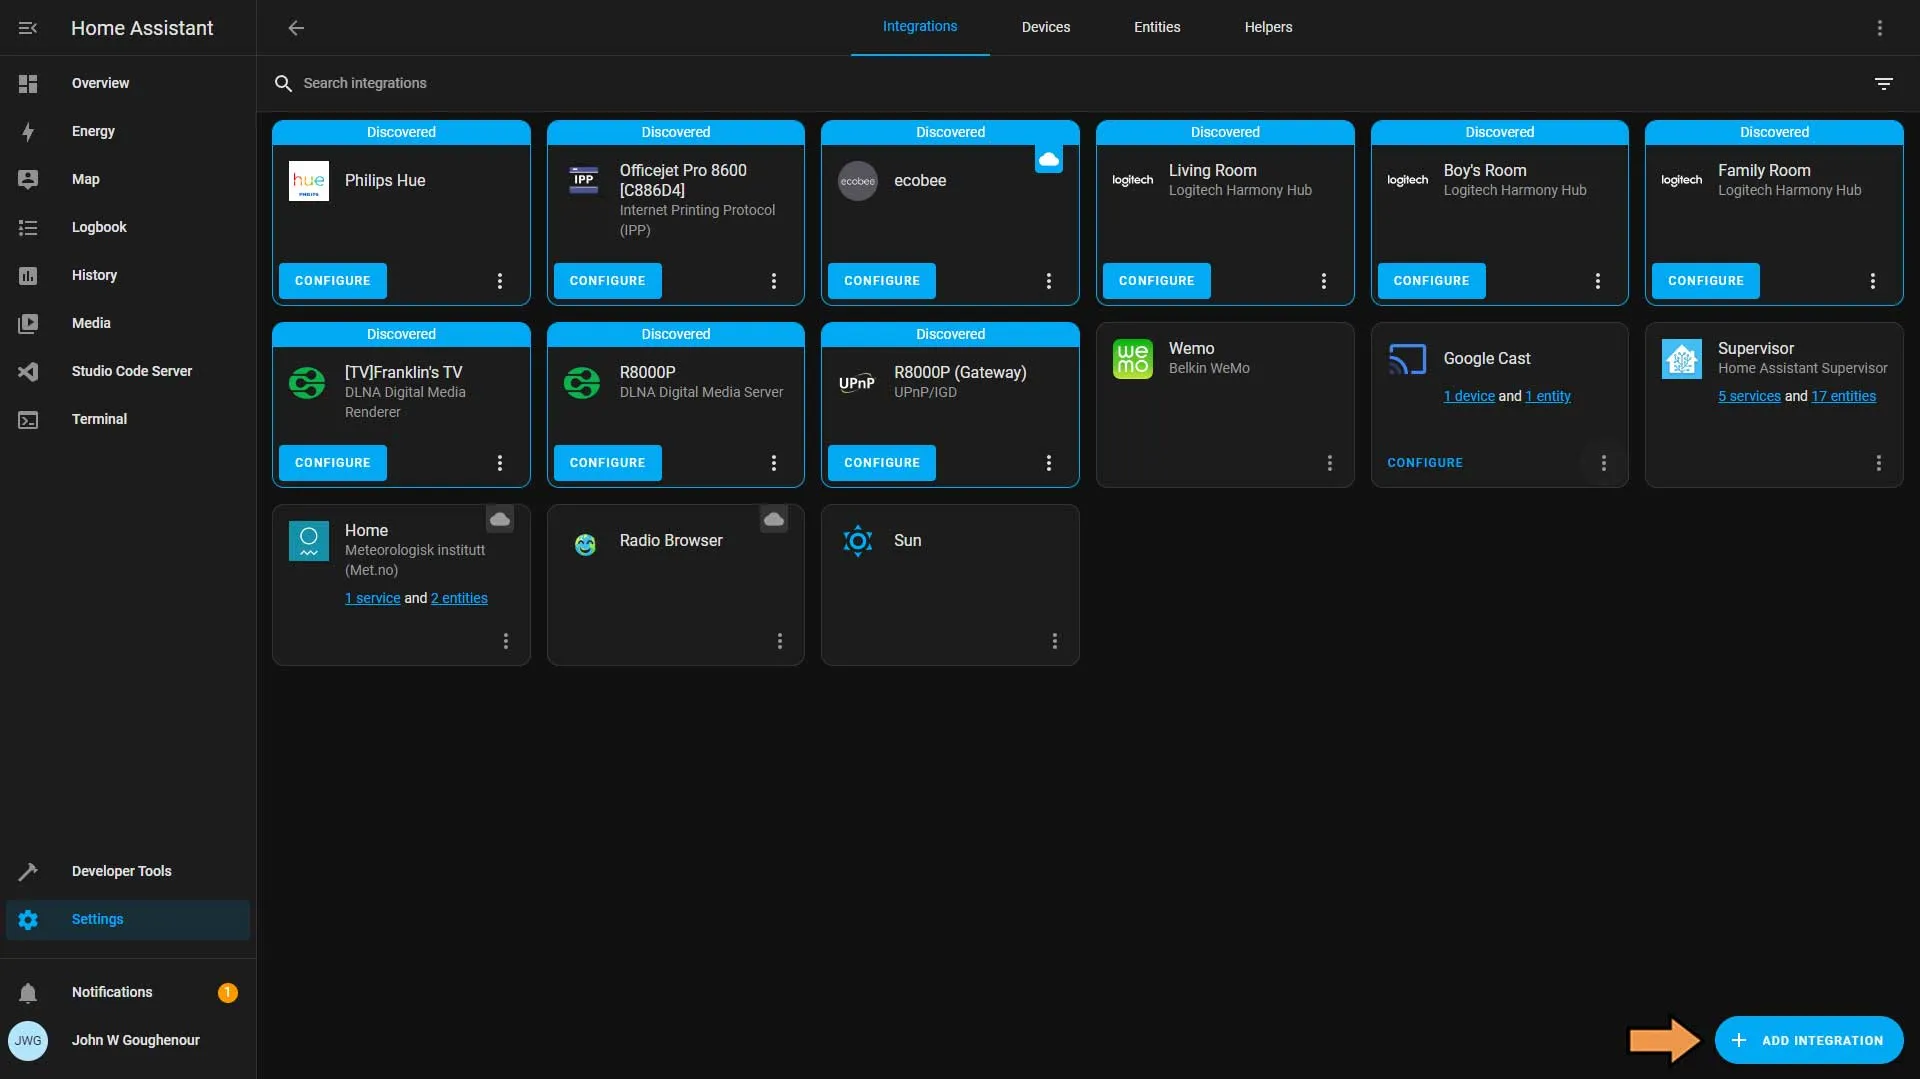
You can just search for Alexa Media Player and select it from the list.
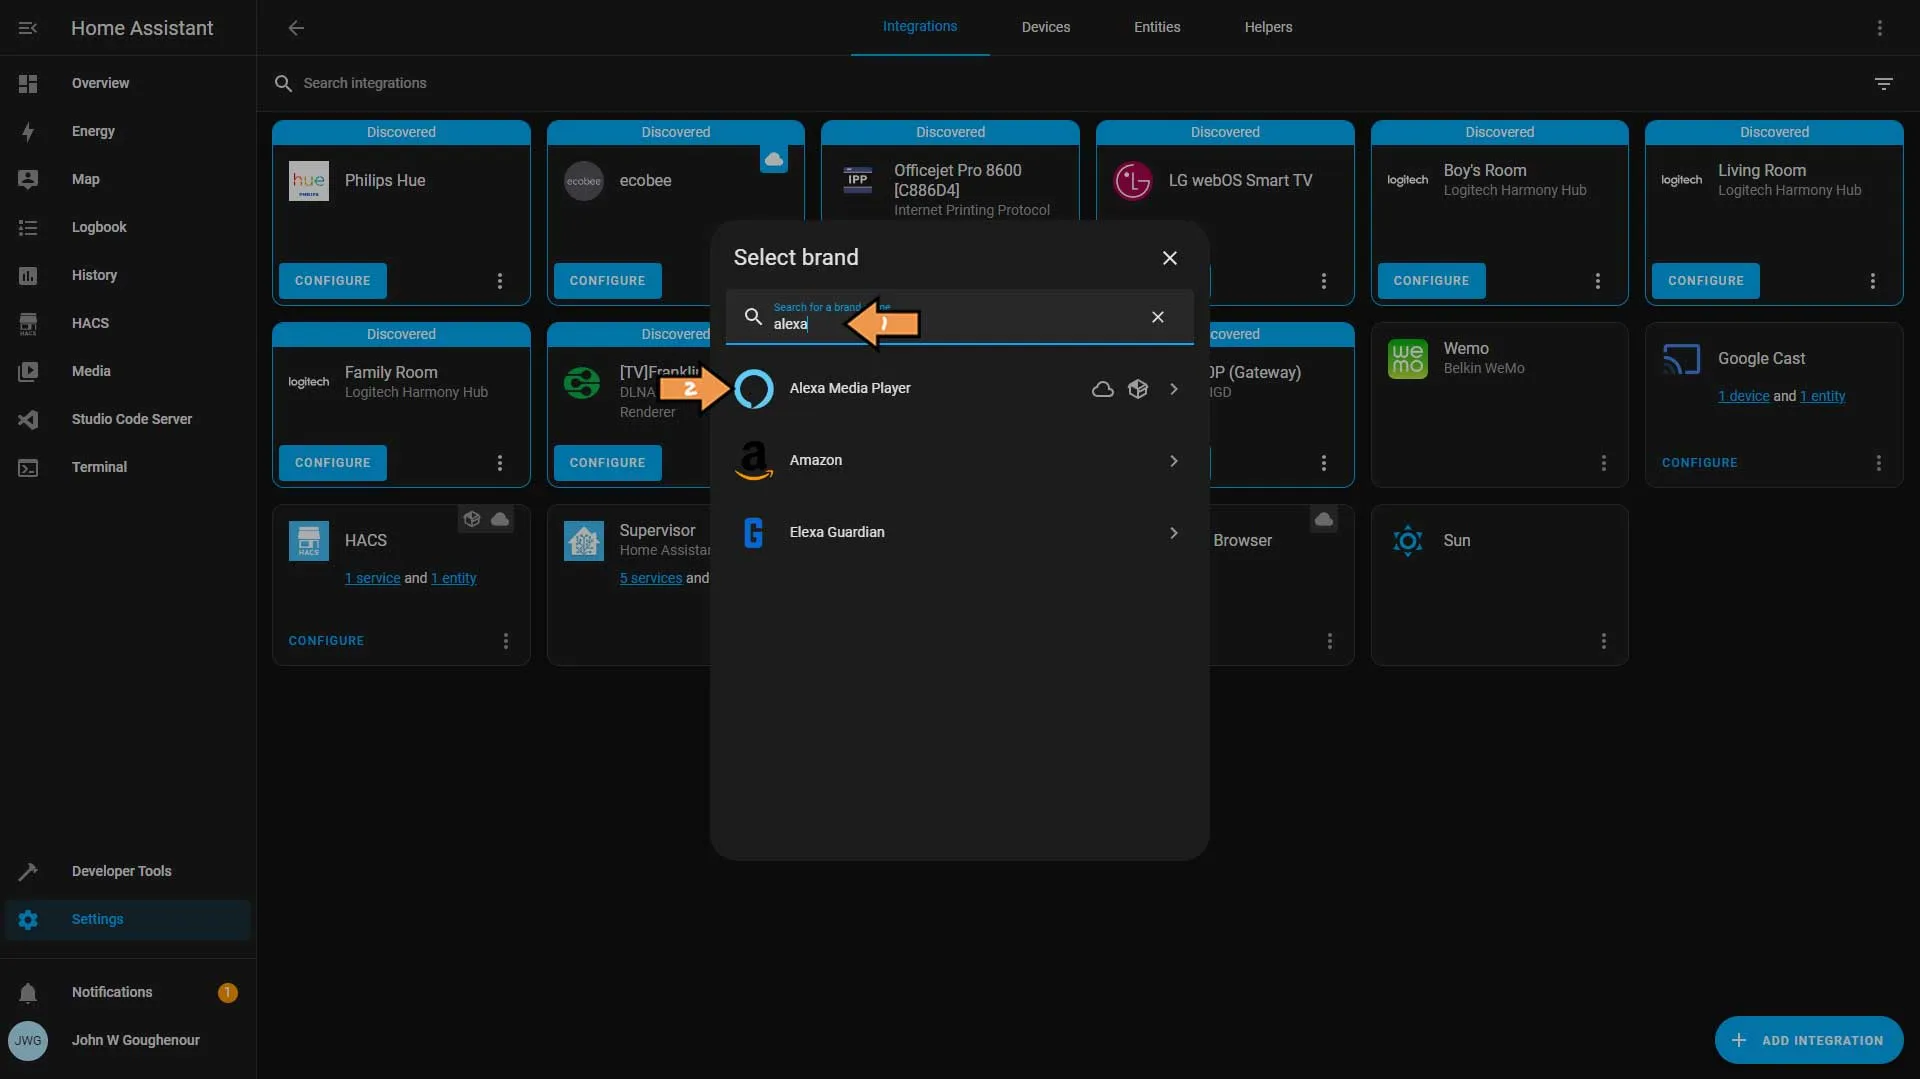
Enter your Amazon credentials, select your region’s Amazon domain, and click submit.
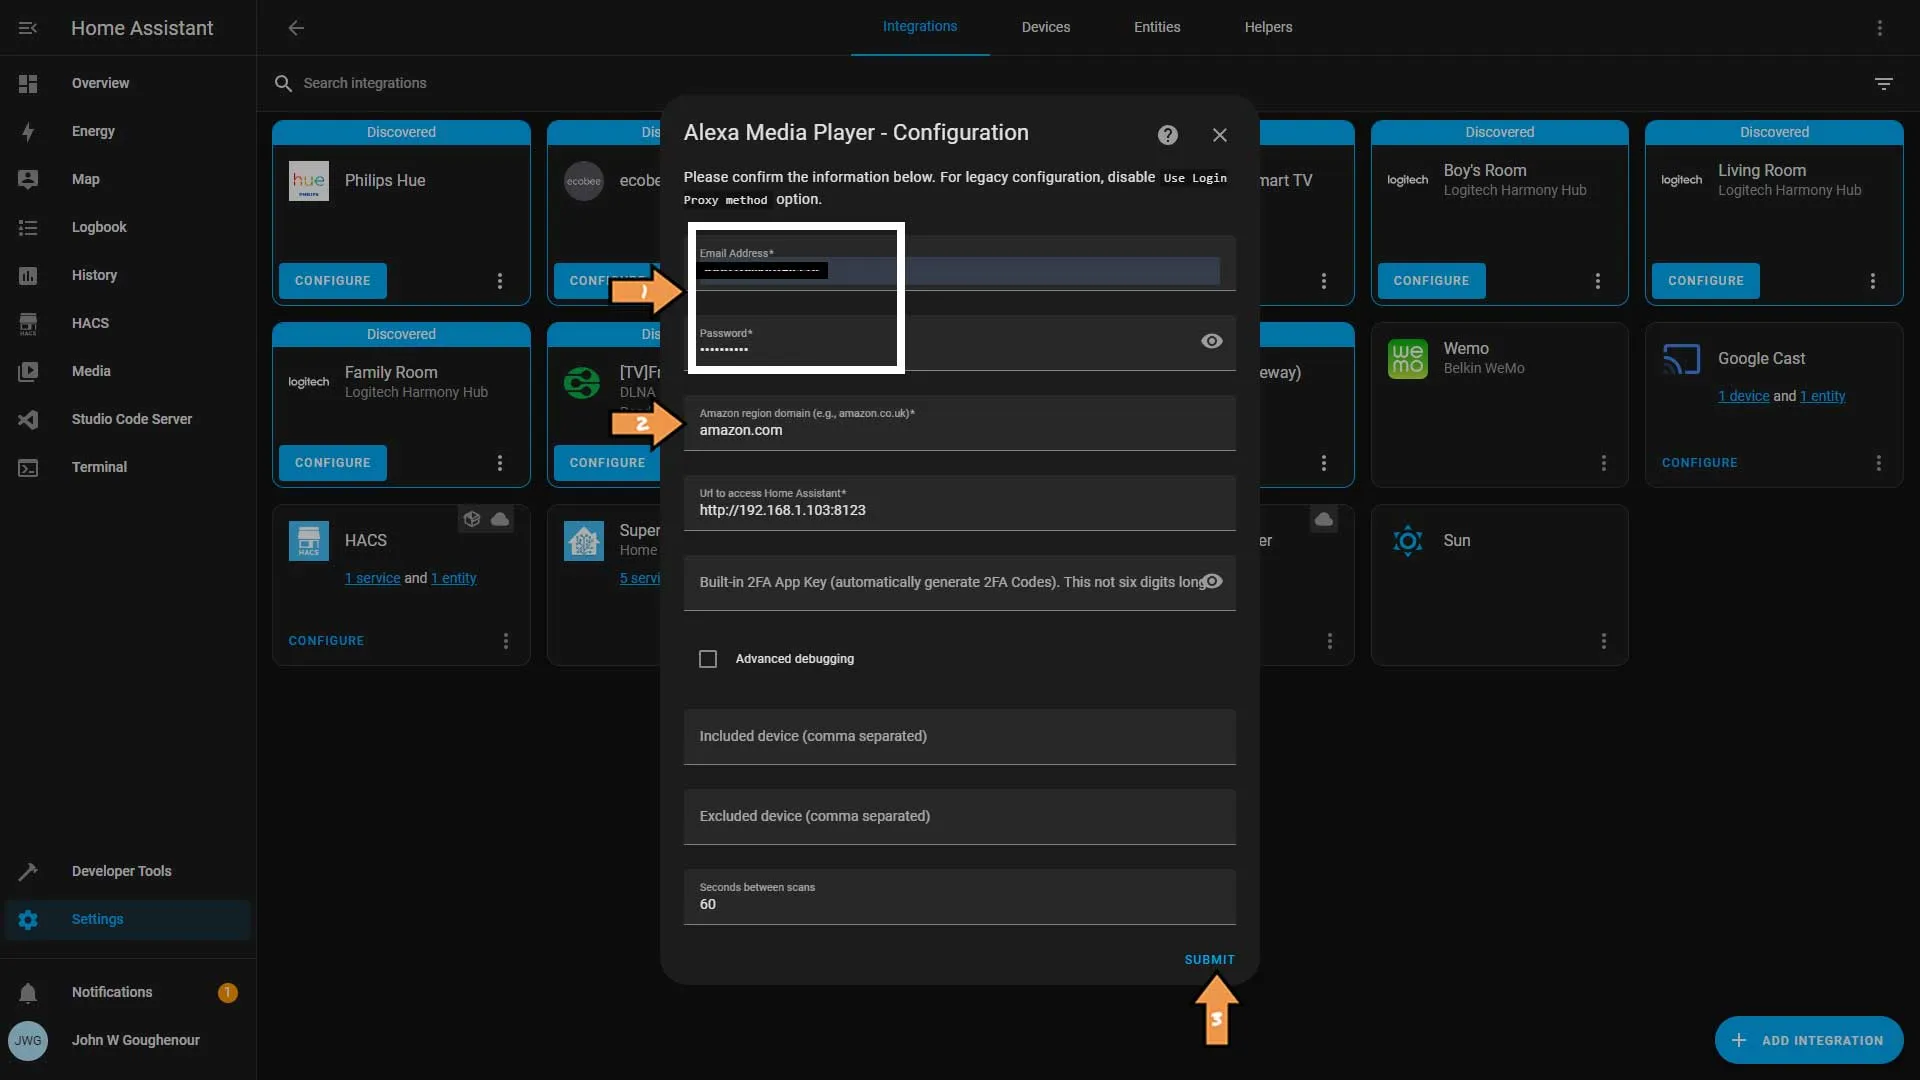
Enter your Amazon credentials, check the Keep me signed in box, and click Sign In.
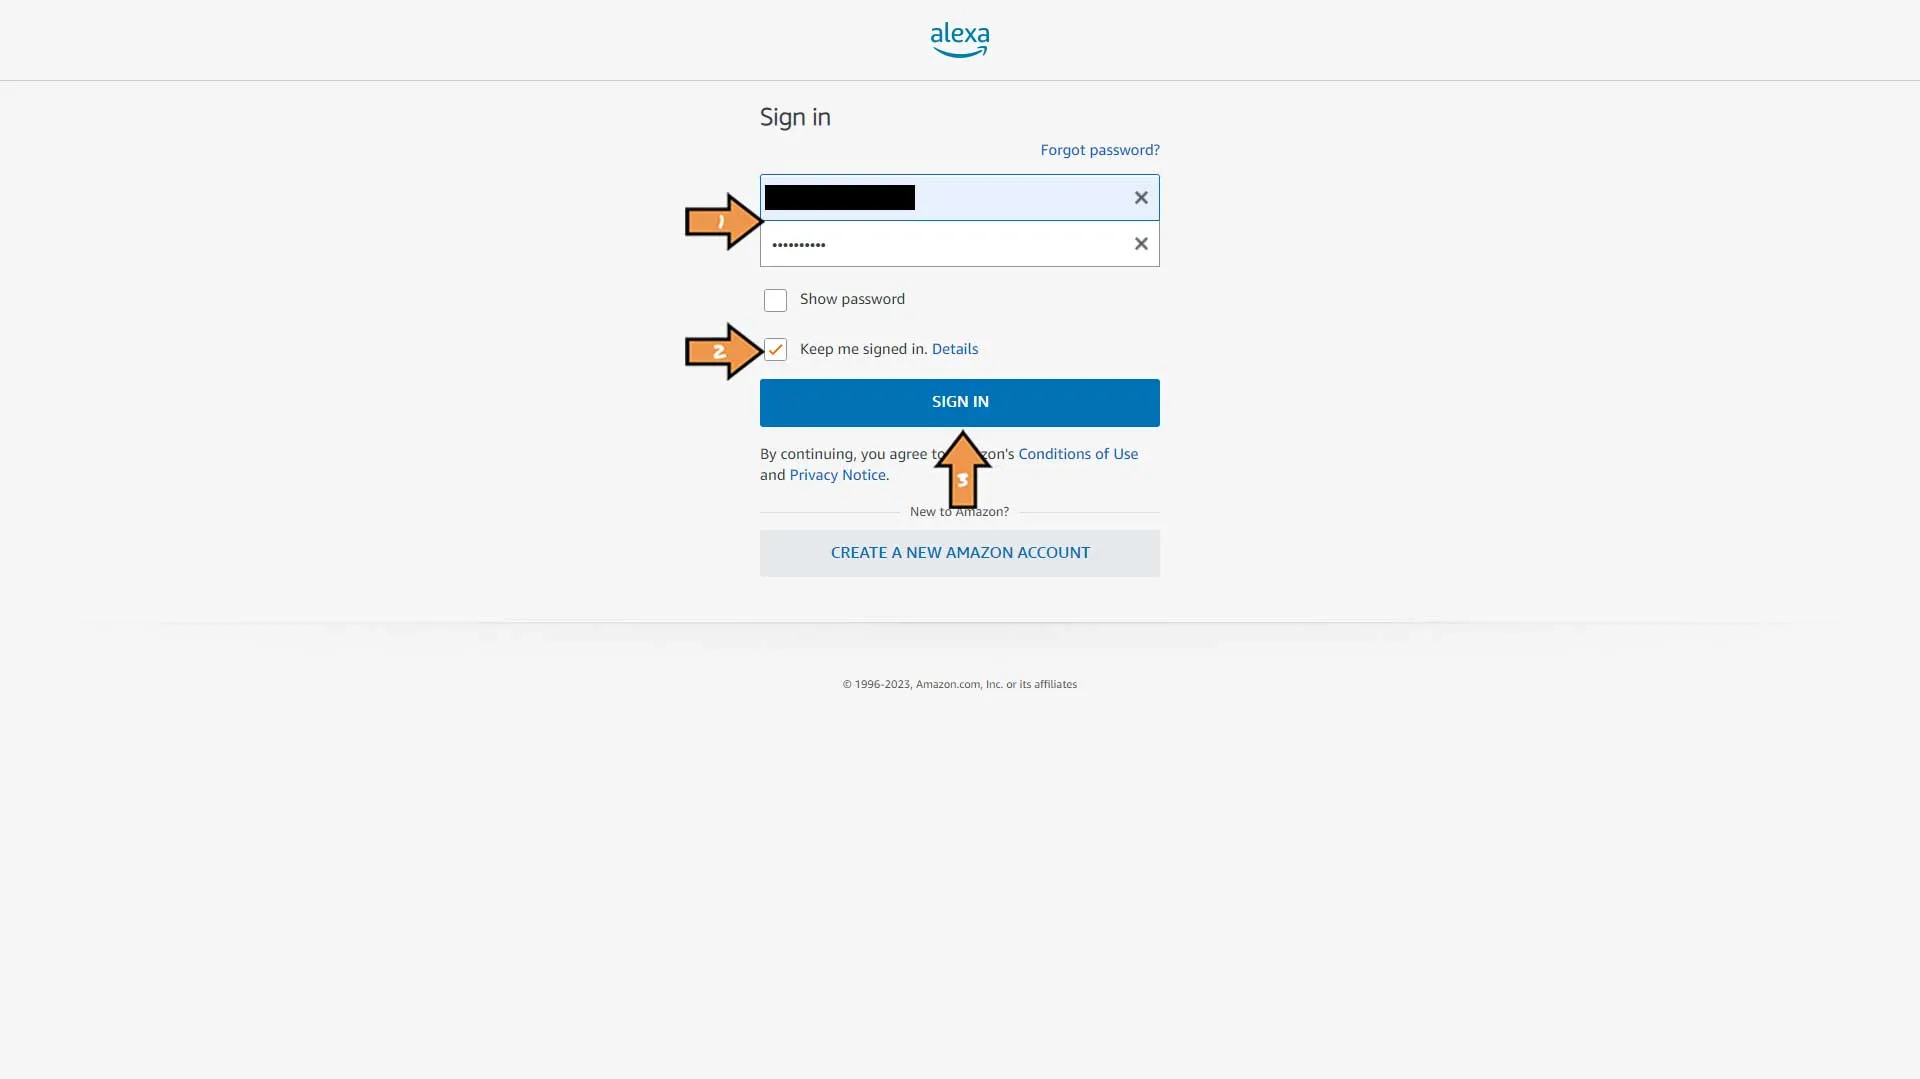
Enter your six-digit code from the Authenticator App. Then, check the Don’t require OTP on this browser box and click Sign In.
Success: That’s it. Alexa Media Player is installed. You can assign your devices to an area and click Finish.

Next we will set up a notification group and a script to use with our automations.
First, we must go to our Home Assistant files and open the configuration.yaml. Then we must include our scripts.yaml and our notifications.yaml so Home Assistant is aware of them.
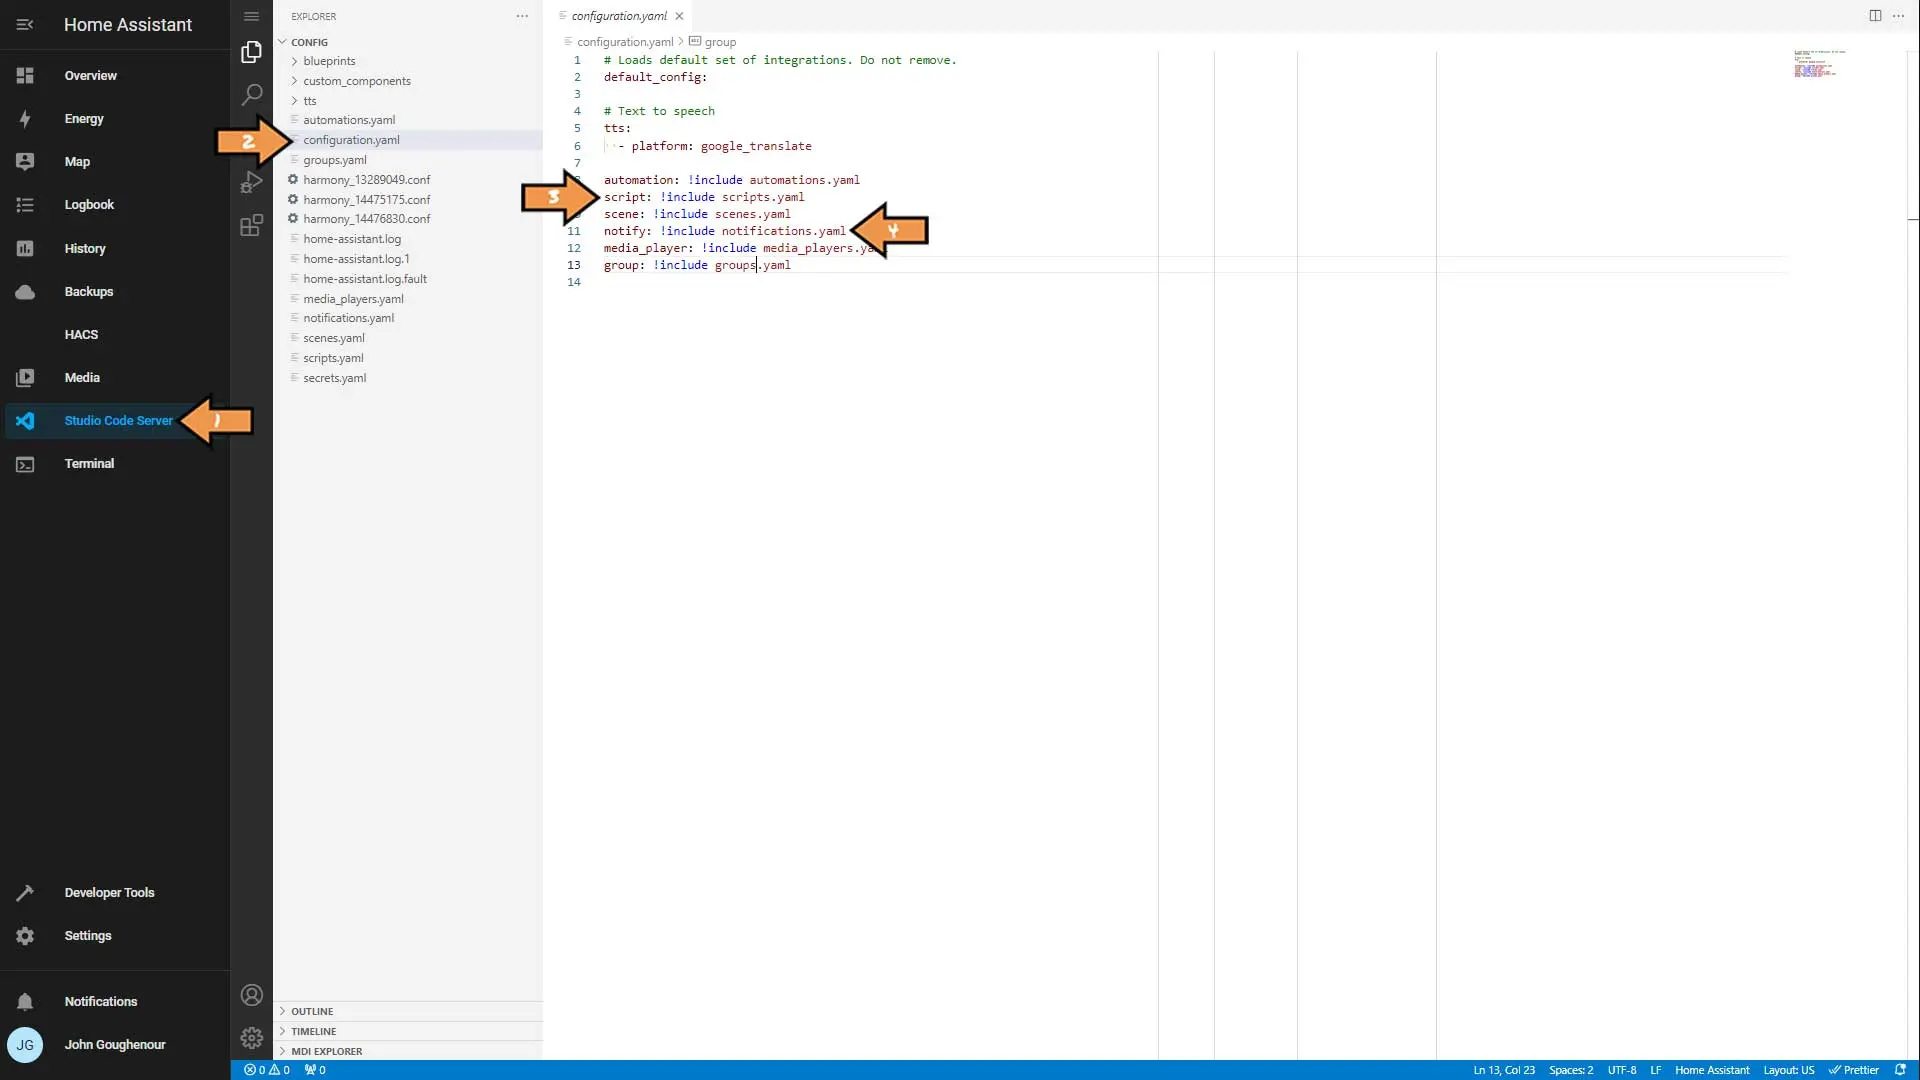
Next we will create our notifications.yaml by clicking the New File button. Select the new file and paste the following code in it.
- name: announce_everywhere
  platform: group
  services:
    - service: alexa_media_kitchen_echo
    - service: alexa_media_dining_room_echo
    - service: alexa_media_living_room_echo
    - service: alexa_media_boy_s_fire_tv_cube
    - service: alexa_media_jake_s_echo_dot
    - service: alexa_media_franklin_s_fire_tv_cube
    - service: alexa_media_garage_echo
    - service: alexa_media_john_s_ecobee4
    - service: alexa_media_john_s_alexa_app_for_pc
Important: Be sure to user your device names.
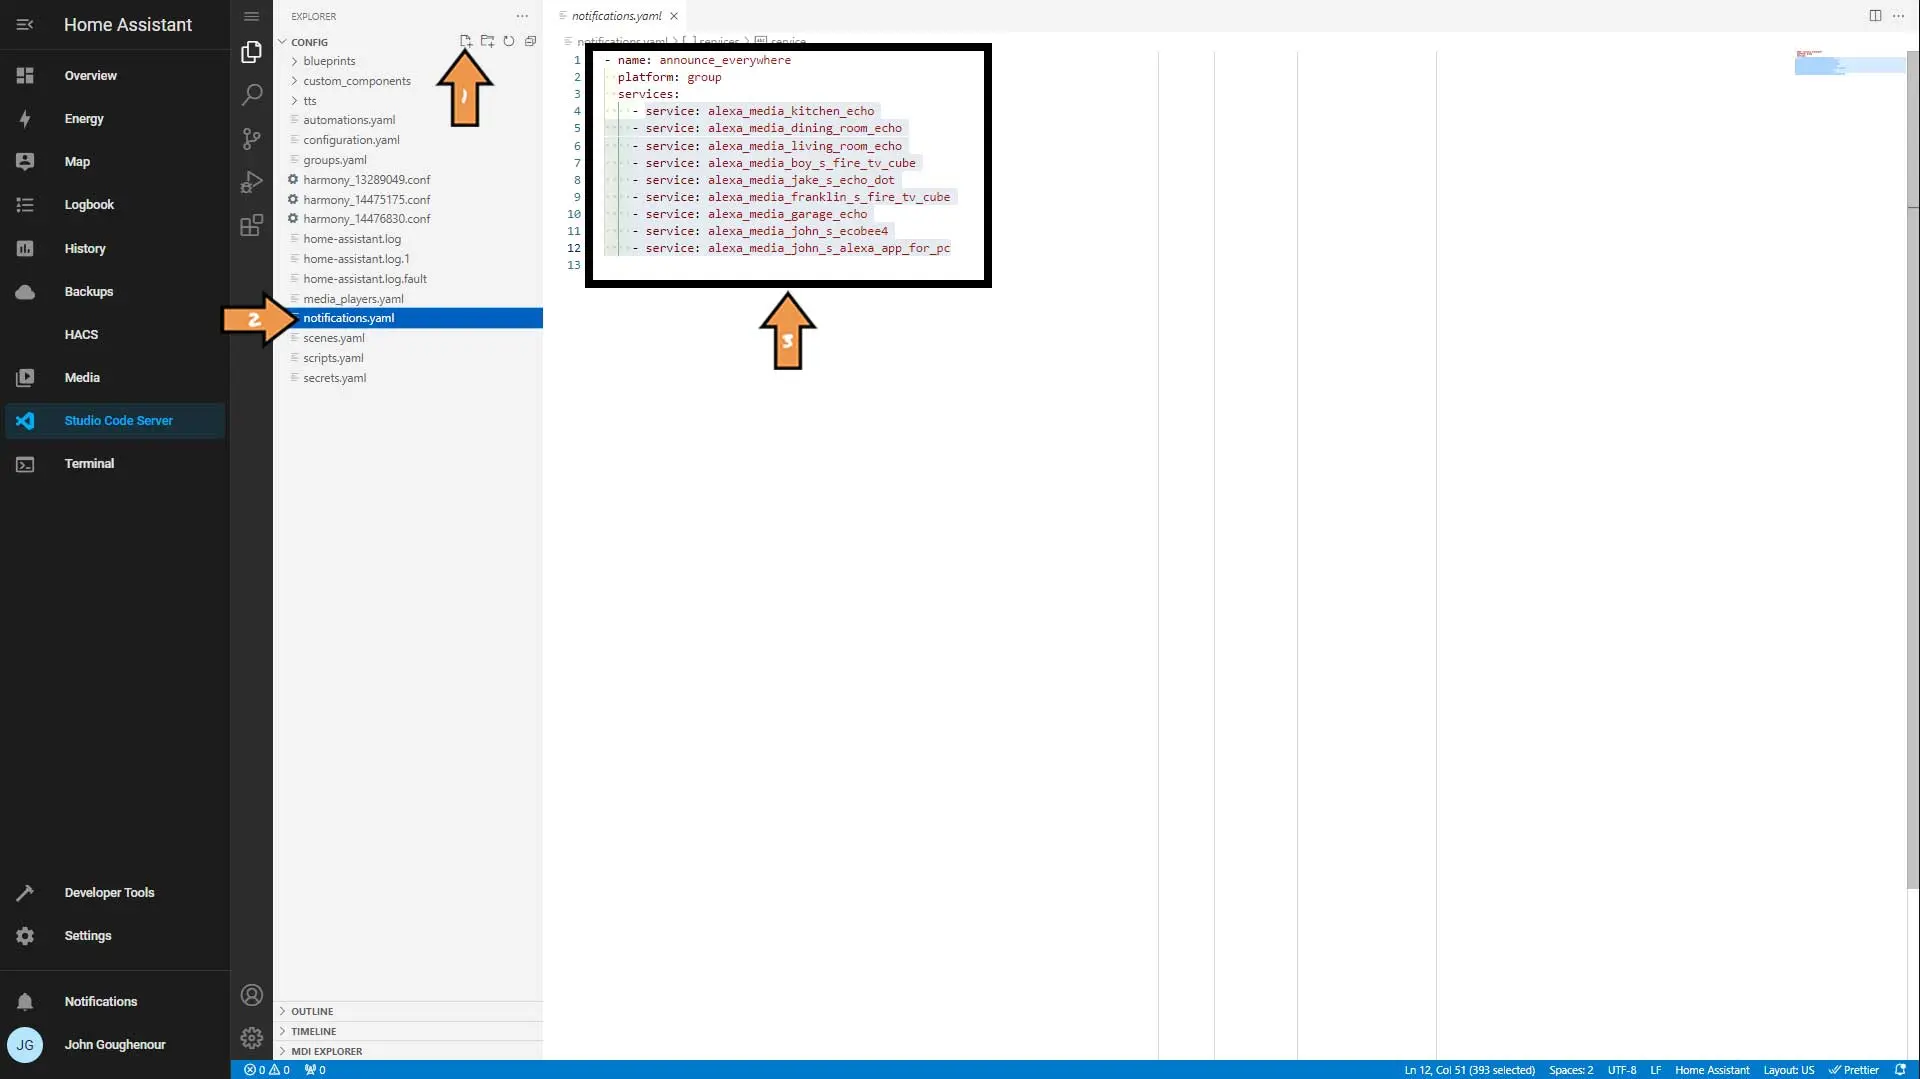
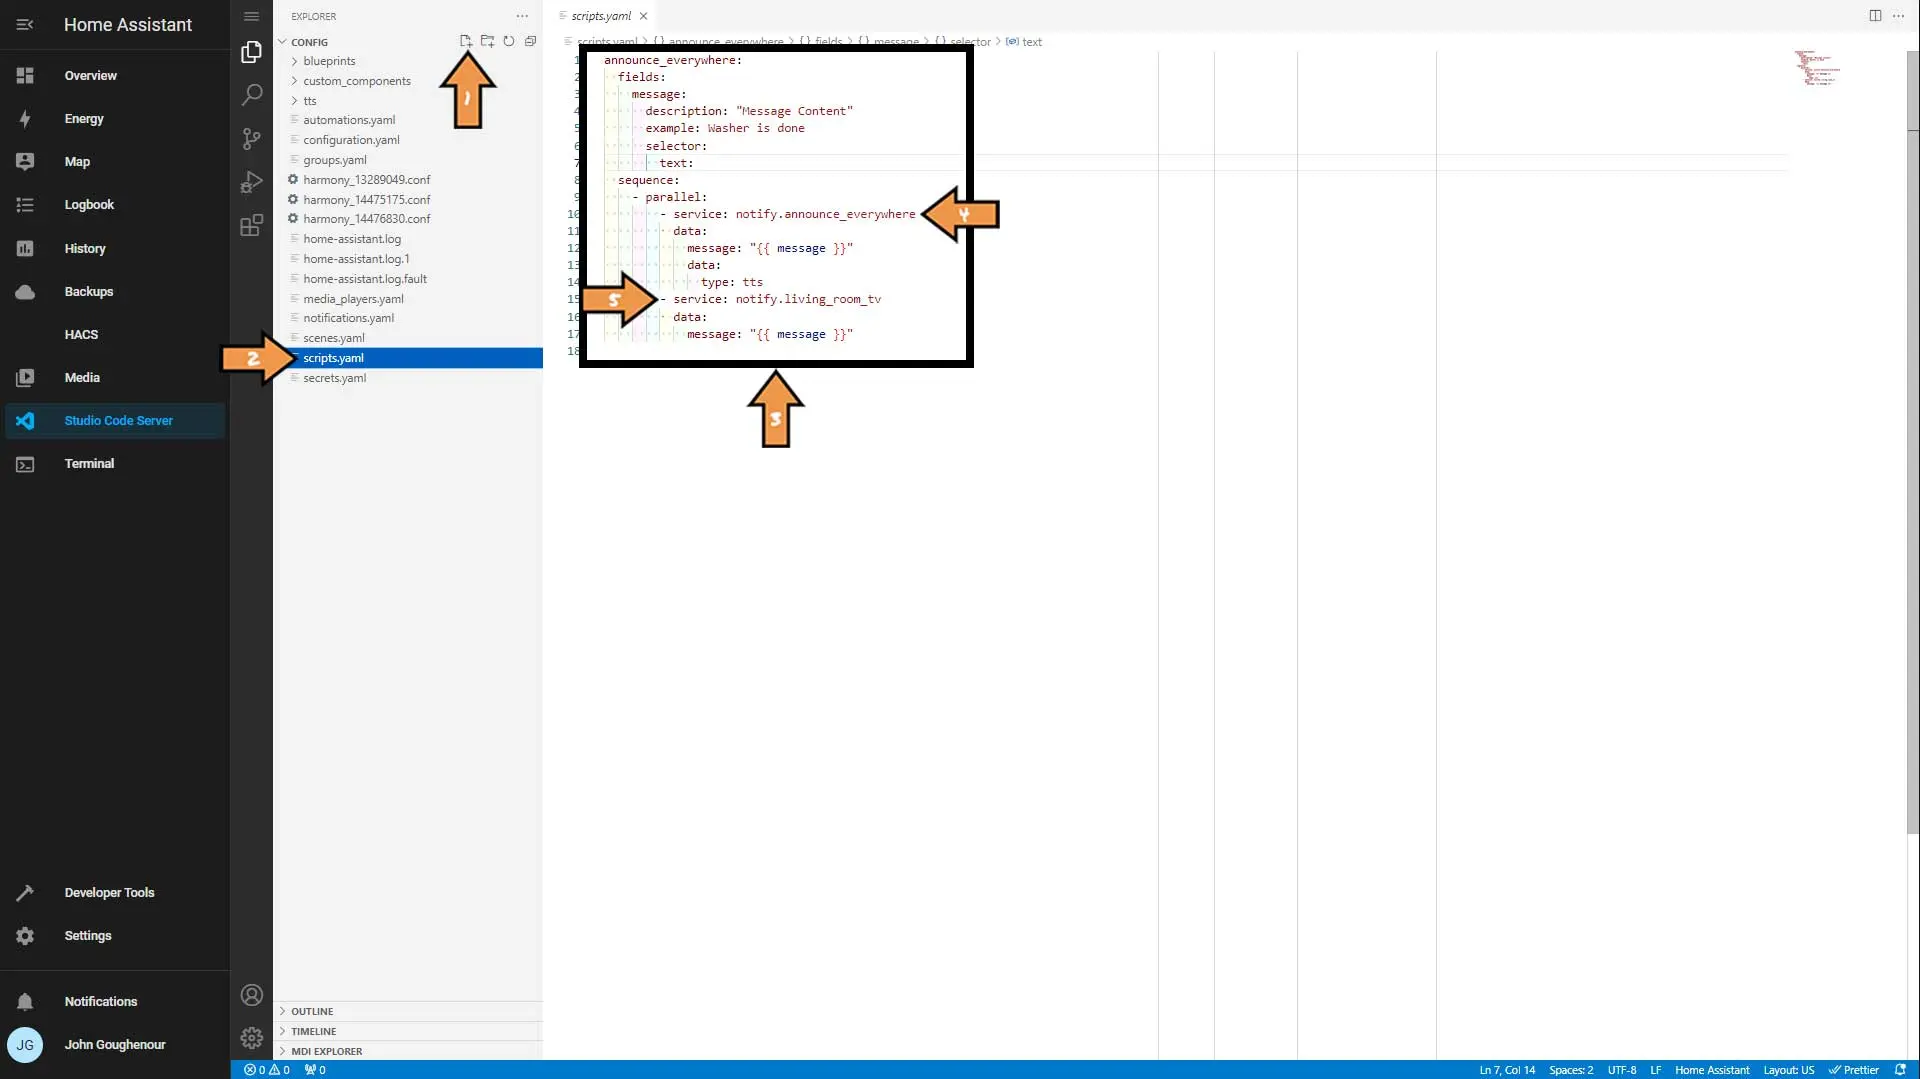
Finally we will add our script.
- Click the Add File button if you do not have a scripts.yaml file already.
- Select the scripts.yaml file.
- Paste the below code into the file.
- We will use the notification group we created in the last step.
- This step is optional, but my TV allows me to send the notification so it appears on my screen.
announce_everywhere:
  fields:
    message:
      description: "Message Content"
      example: Washer is done
      selector:
        text:
  sequence:
    - parallel:
        - service: notify.announce_everywhere
          data:
            message: "{{ message }}"
            data:
              type: tts
        - service: notify.living_room_tv
          data:
            message: "{{ message }}"

 by
by


