The Ultimate Smart Home Integration Cookbook
Integration: It enables the smart home hub to communicate and work with various smart devices or services.
Community stores are where you can get custom apps and drivers to extend your hub’s integrations. These stores are built and maintained by the community for the community and as such, are not official integrations of the hub. However, hubs that allow for custom integrations give users the freedom and flexibility to extend their platform to suit themselves better. Custom integrations are a powerful tool and a great addition to any smart home, not just for adding other devices but for makers too. Since these are not official integrations, a little precaution is necessary. Do your homework, and you’ll be fine. These integrations usually have their dedicated topic in the community forum. These stores are the developer’s preferred way to install custom integrations, not only for ease of installation but for keeping them up to date with the latest version.
Automation Details
Requirements
- Custom Integrations
Actions:
- Install Community Store

Hubitat
Watch the Video
Hubitat Package Manager
The Official Documentation for Hubitat Package Manager
Setting Up the Automation
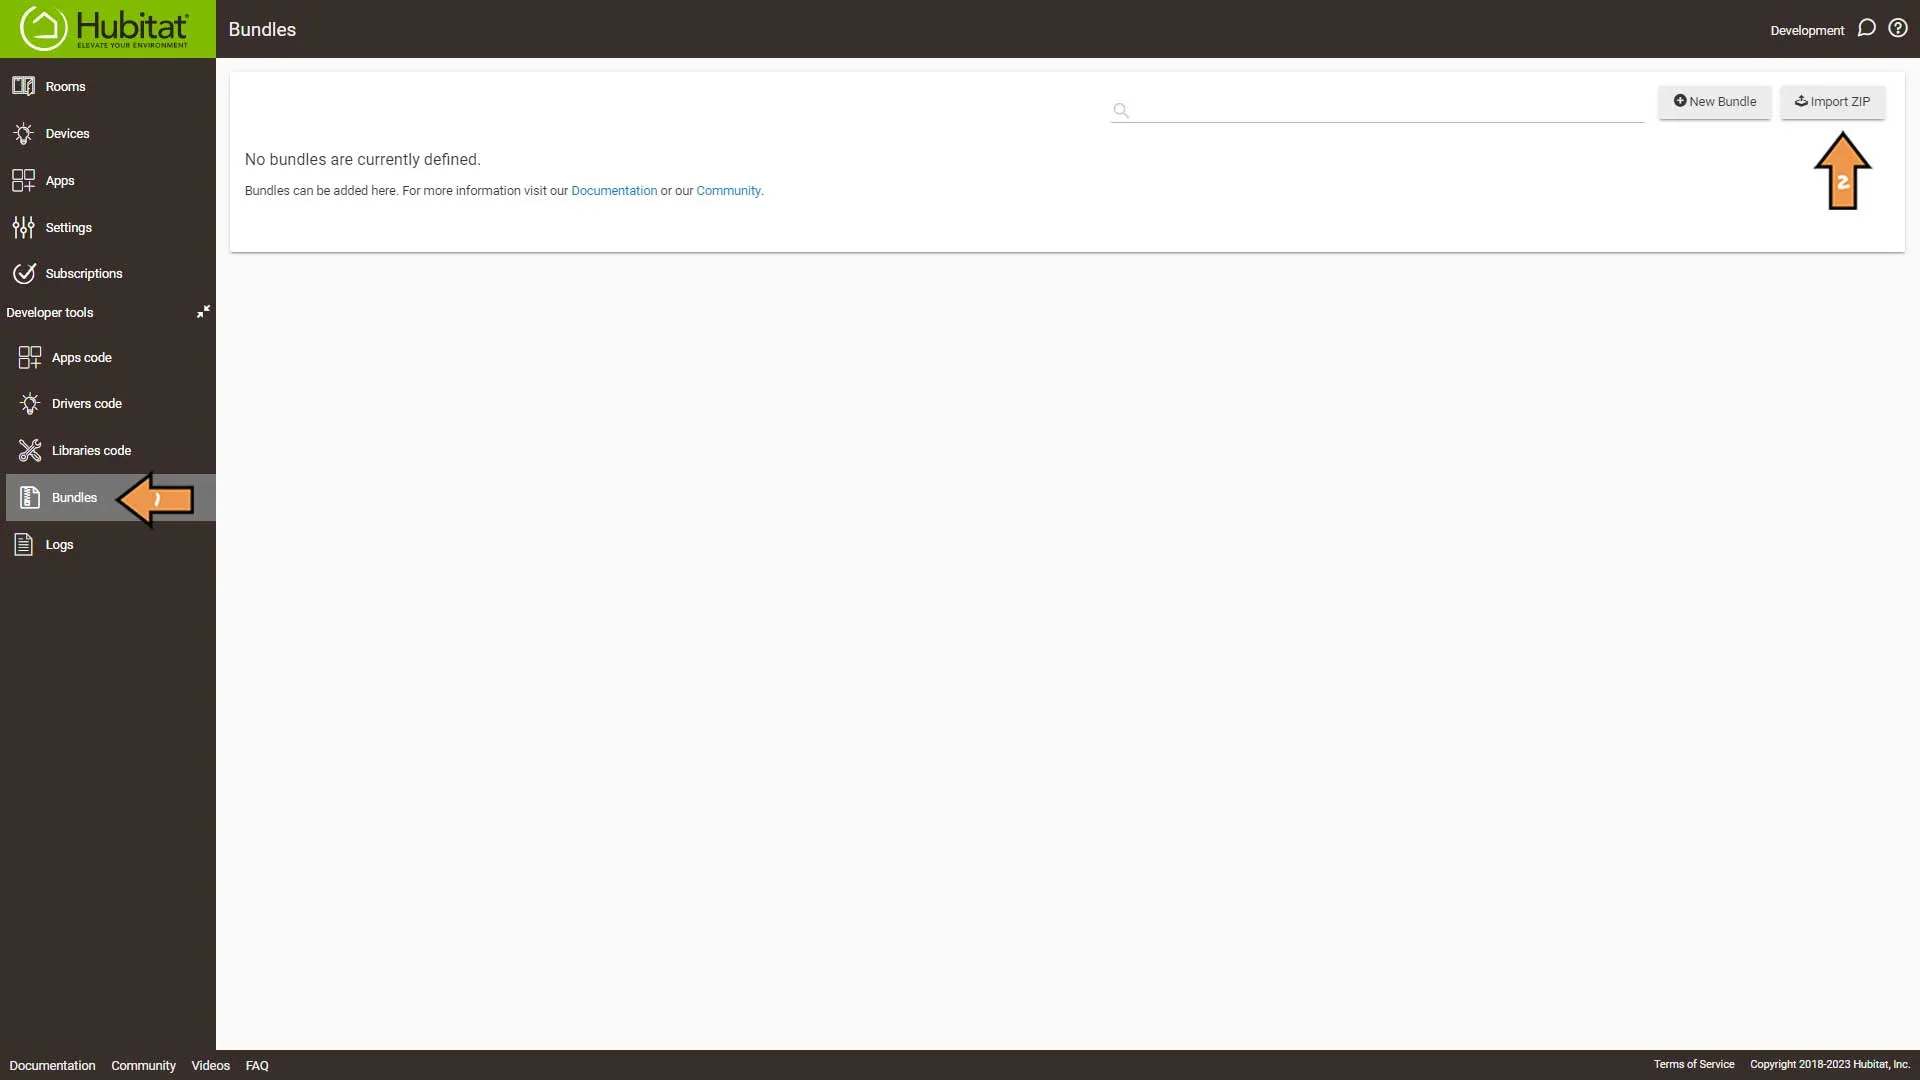
First, we need to go into Bundles and then click the Import ZIP button at the top of the screen.
Next,
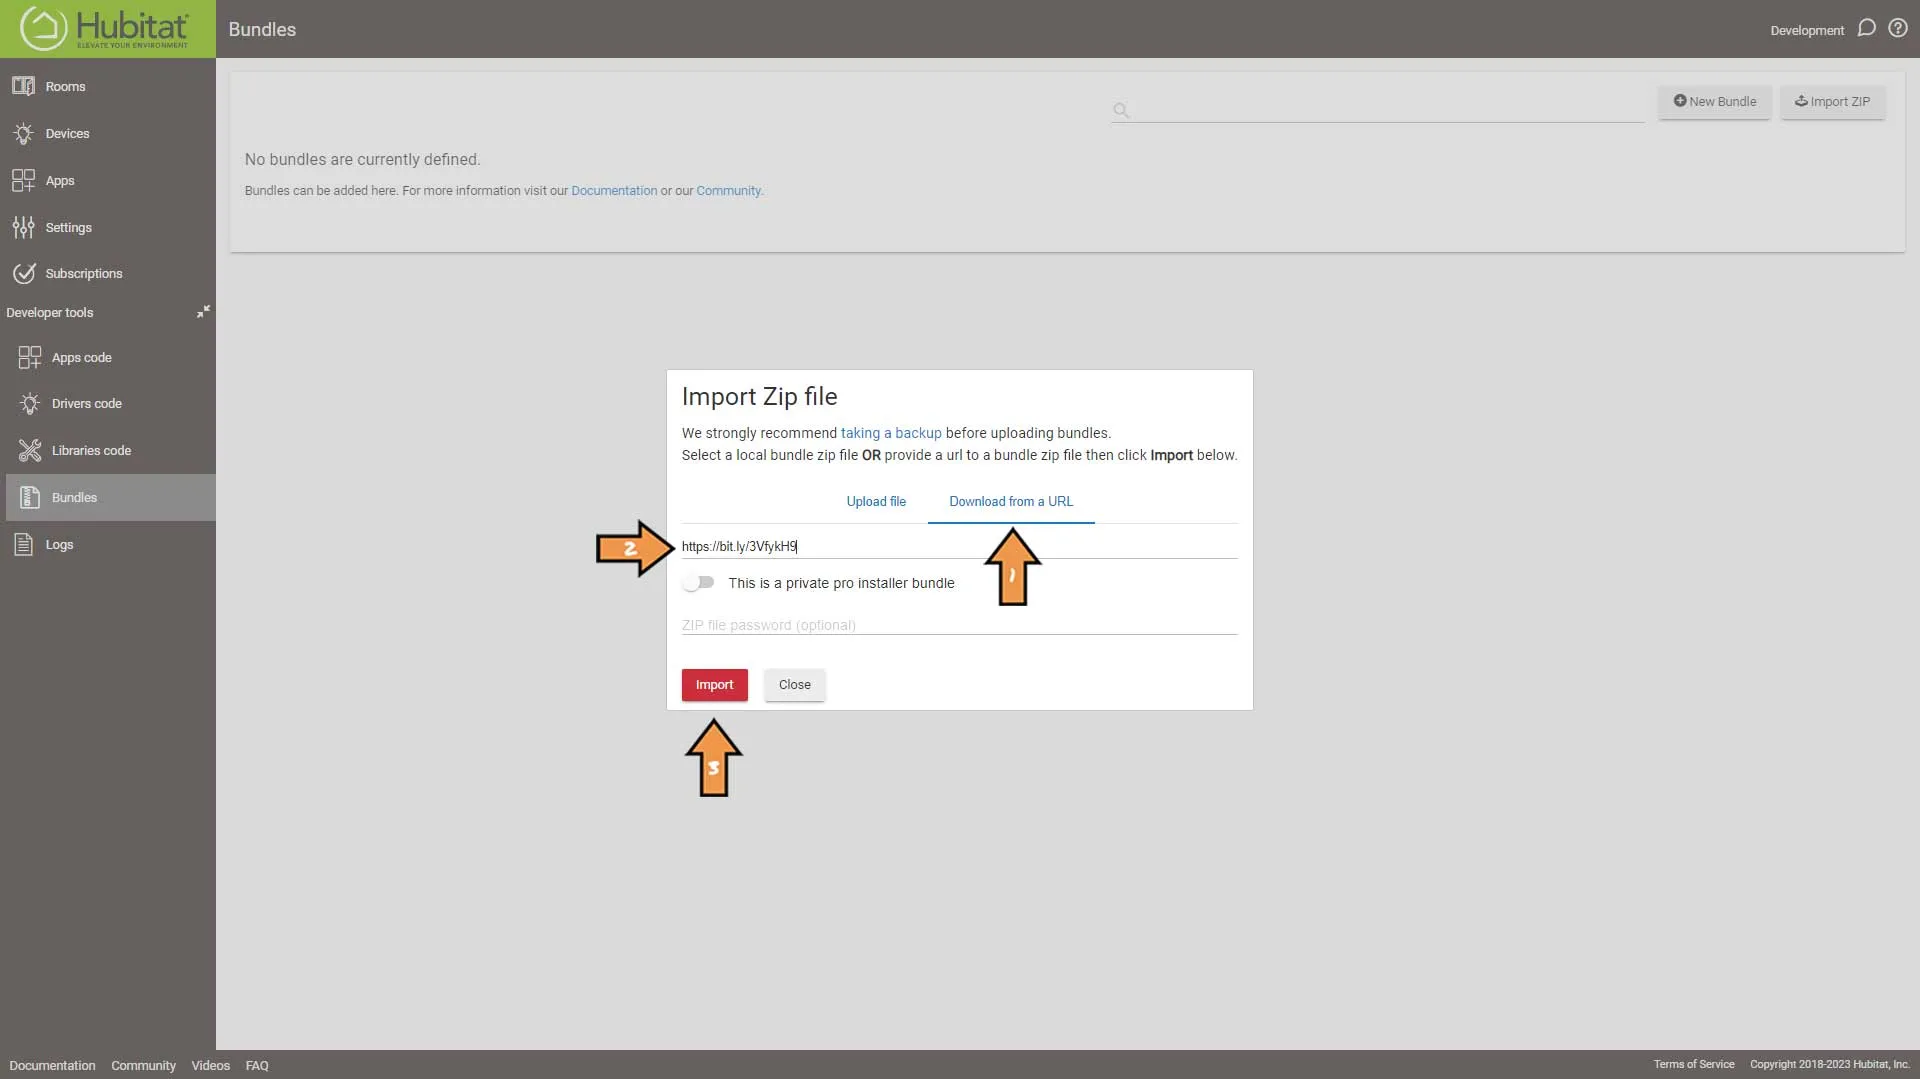
- Click the Download from a URL tab.
- Paste in this URL https://bit.ly/3VfykH9.
- Then click the Import button.
Now we need to install the App. Go under Apps and click the Add User App button.
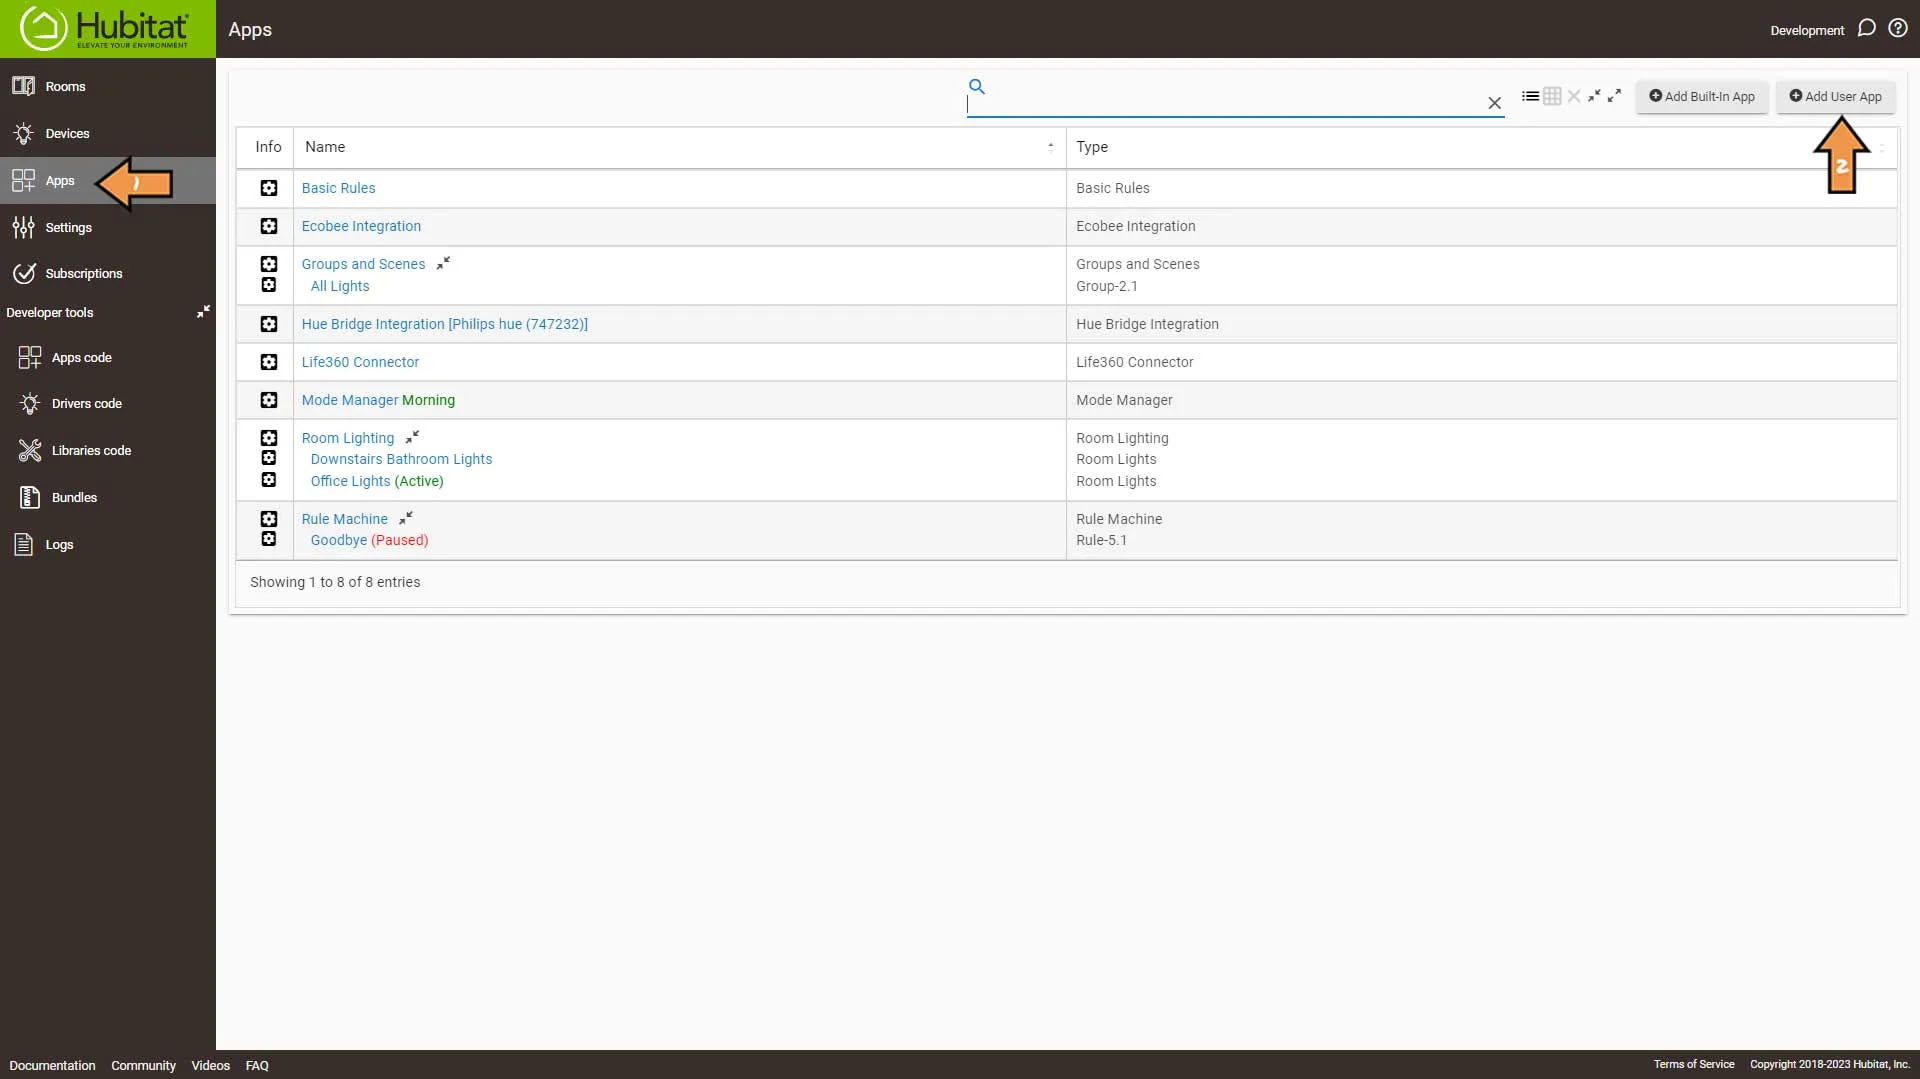
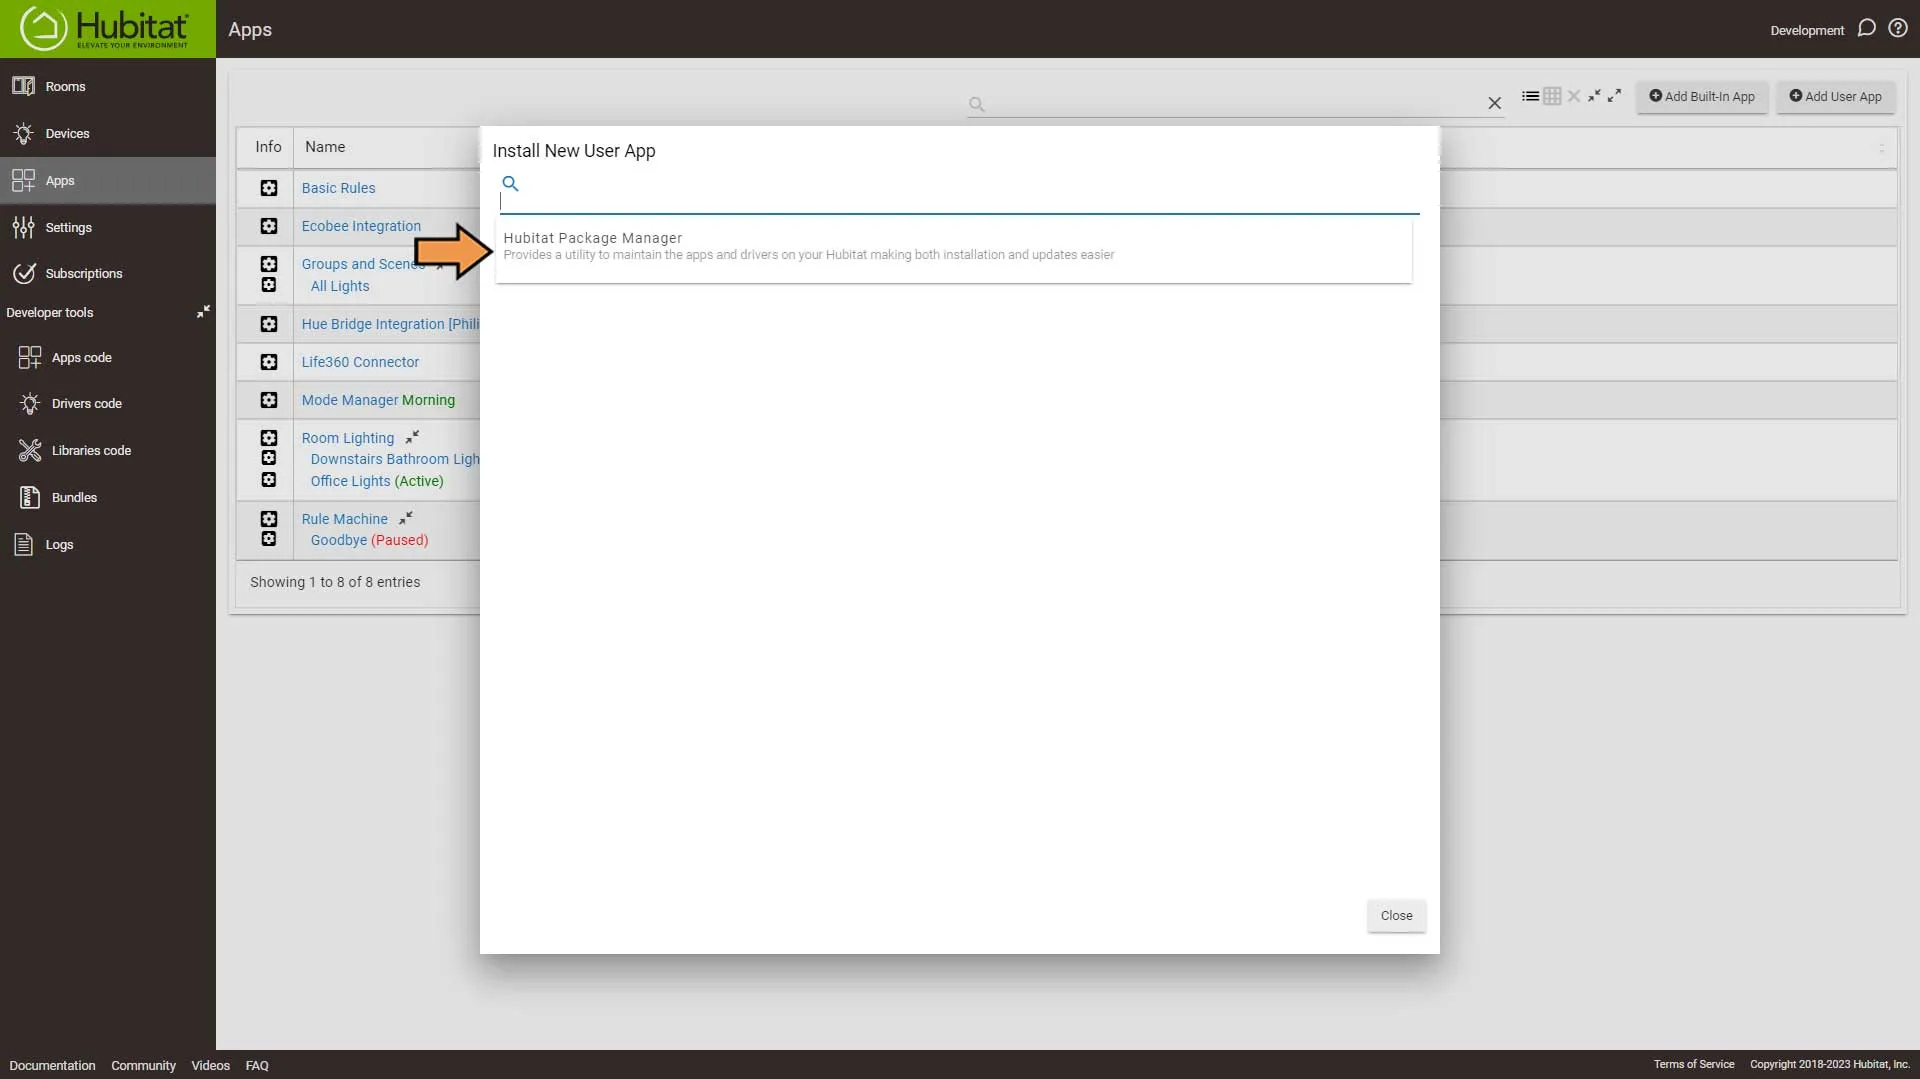
Select the Hubitat Package Manager.
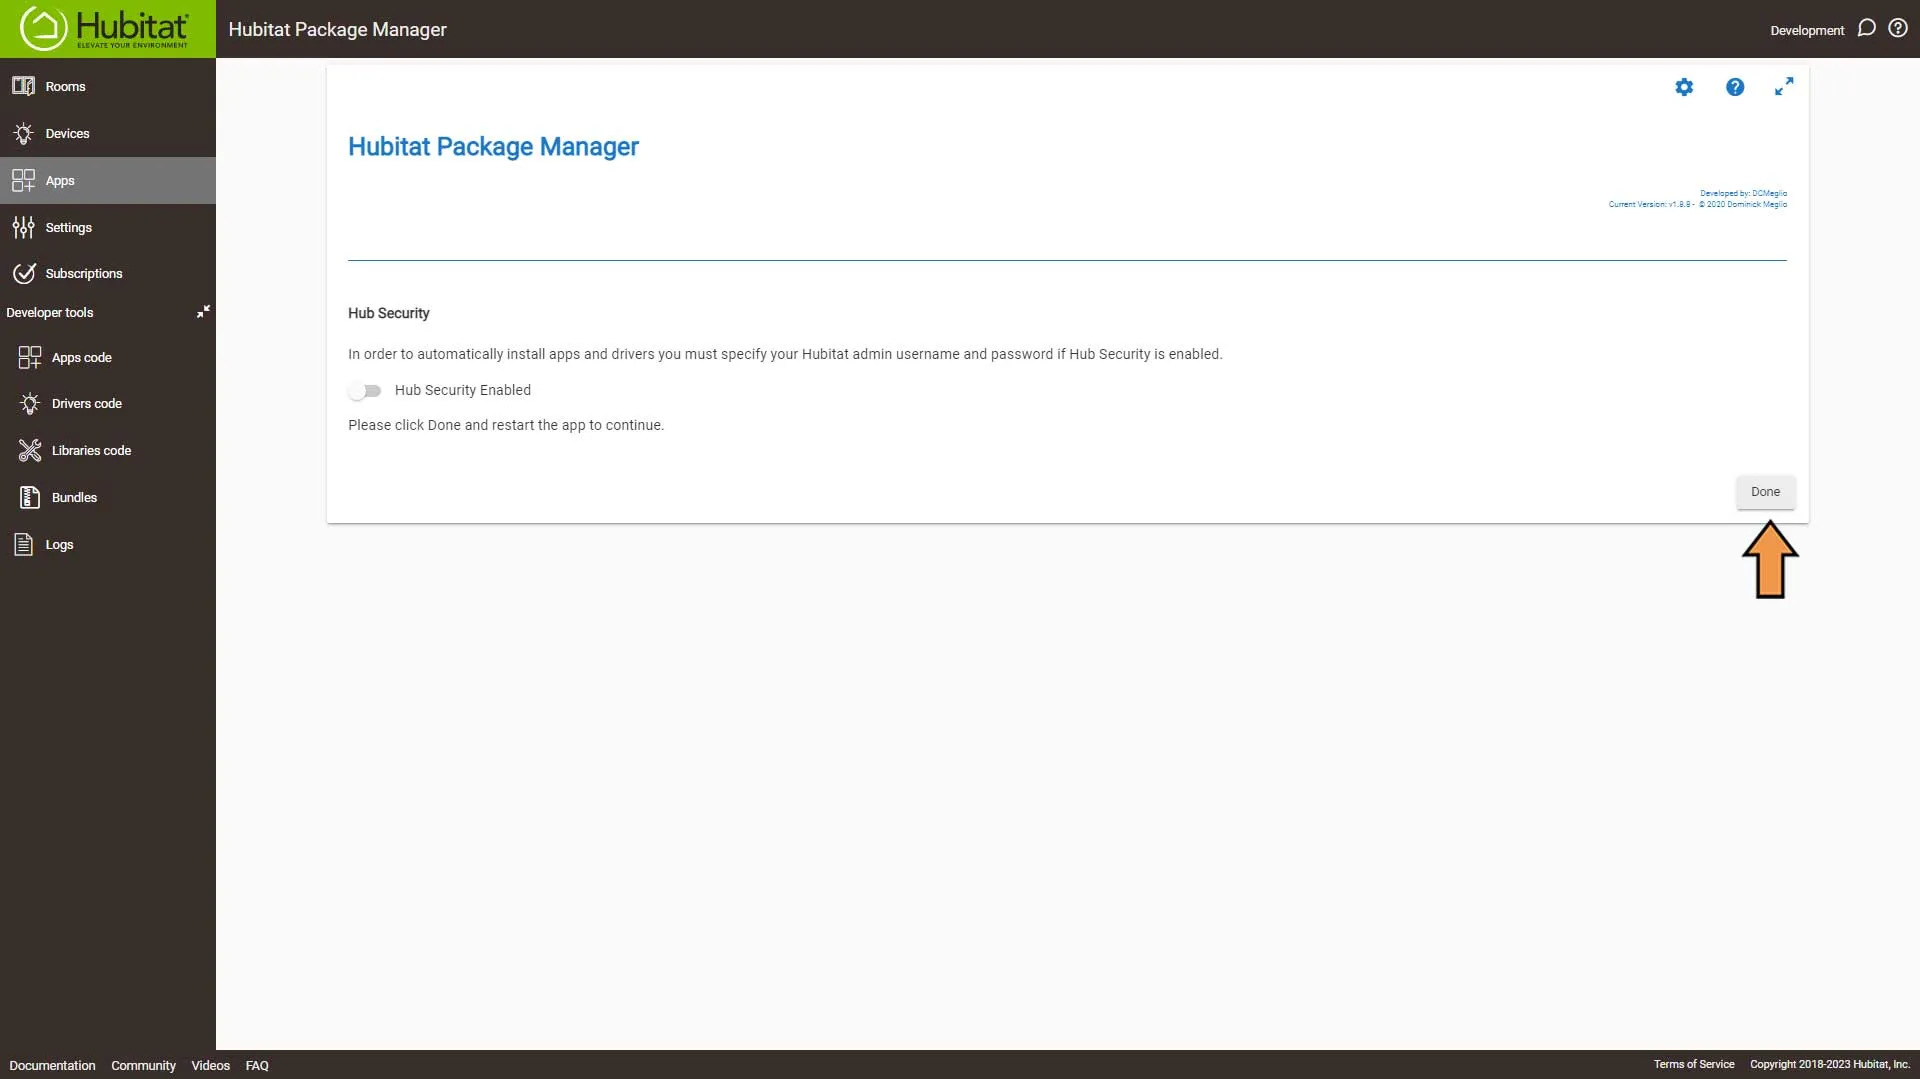
Then, on the Hubitat Package Manager screen, click Done.
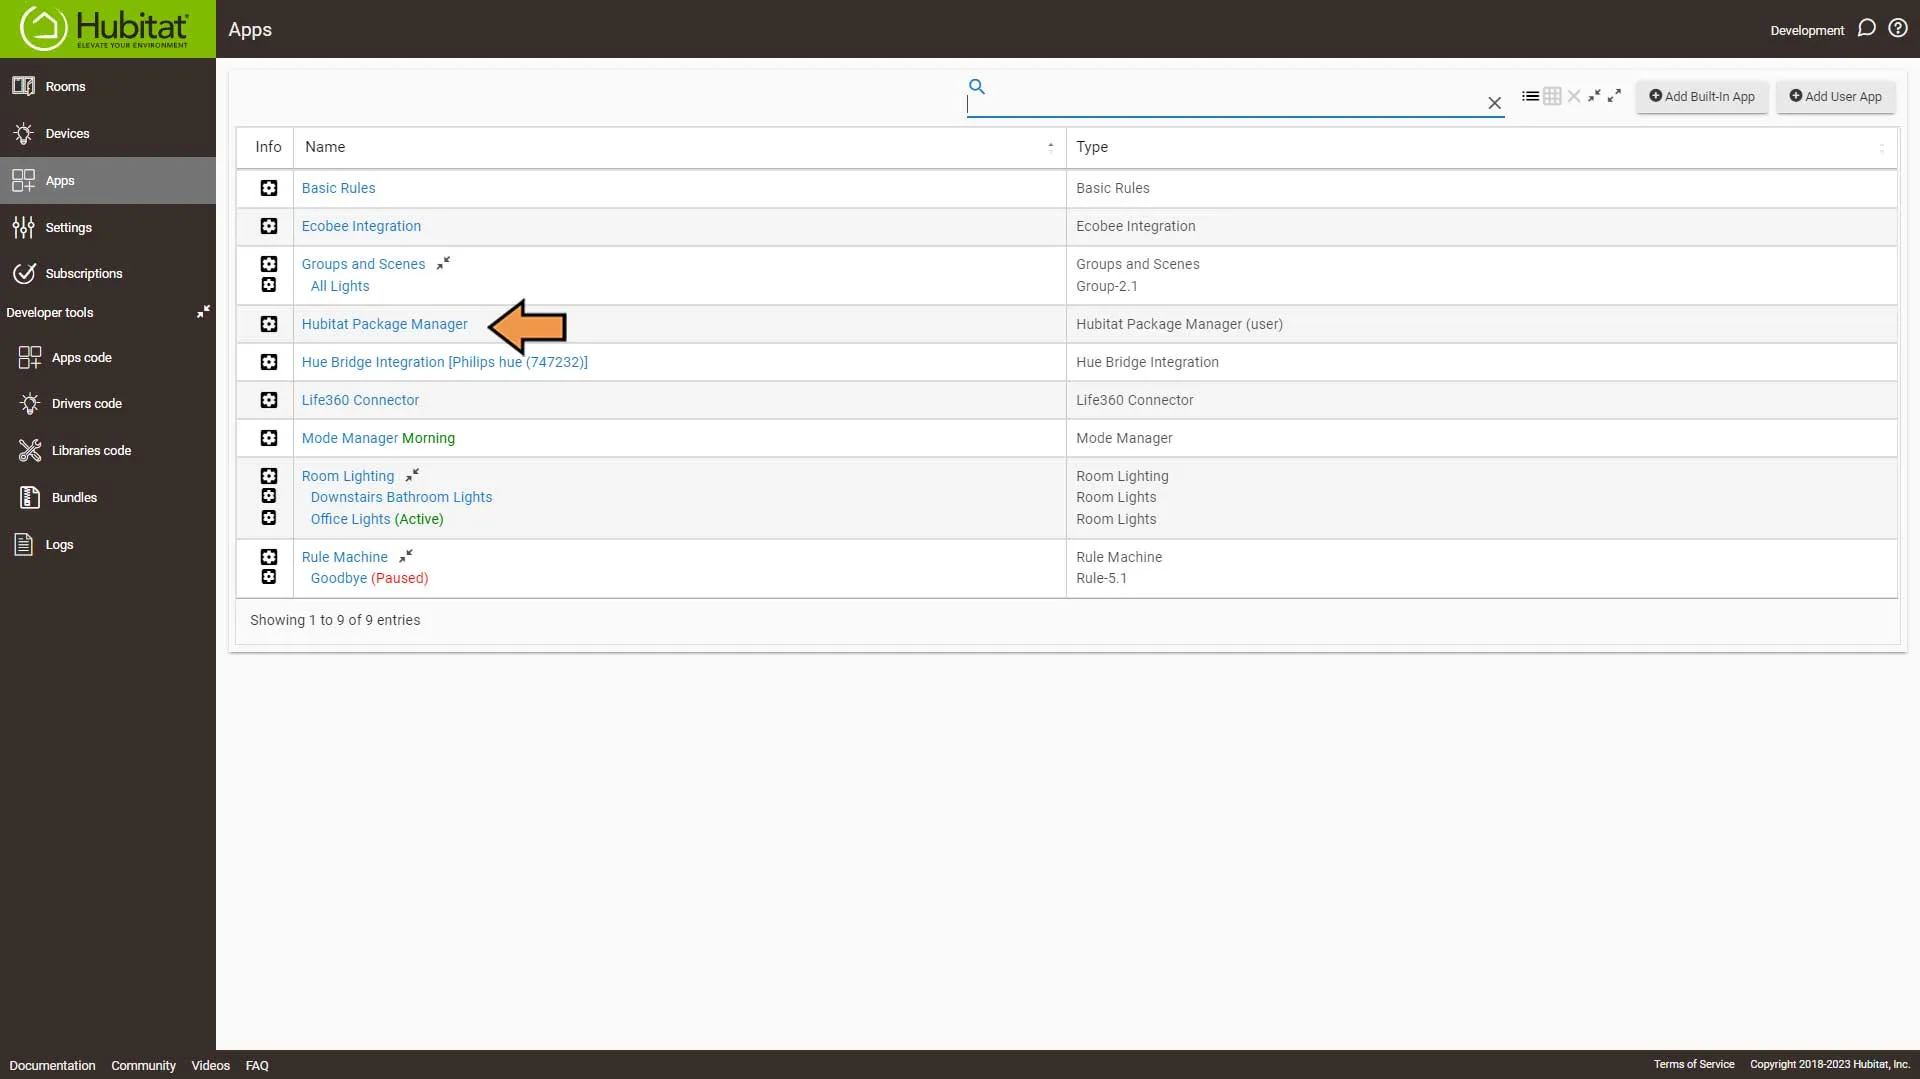
Then, we need to go back into Hubitat Package Manager.
Next, HPM will want to scan your Drivers and Apps to see if you have any that can be managed with HPM. Click Next.
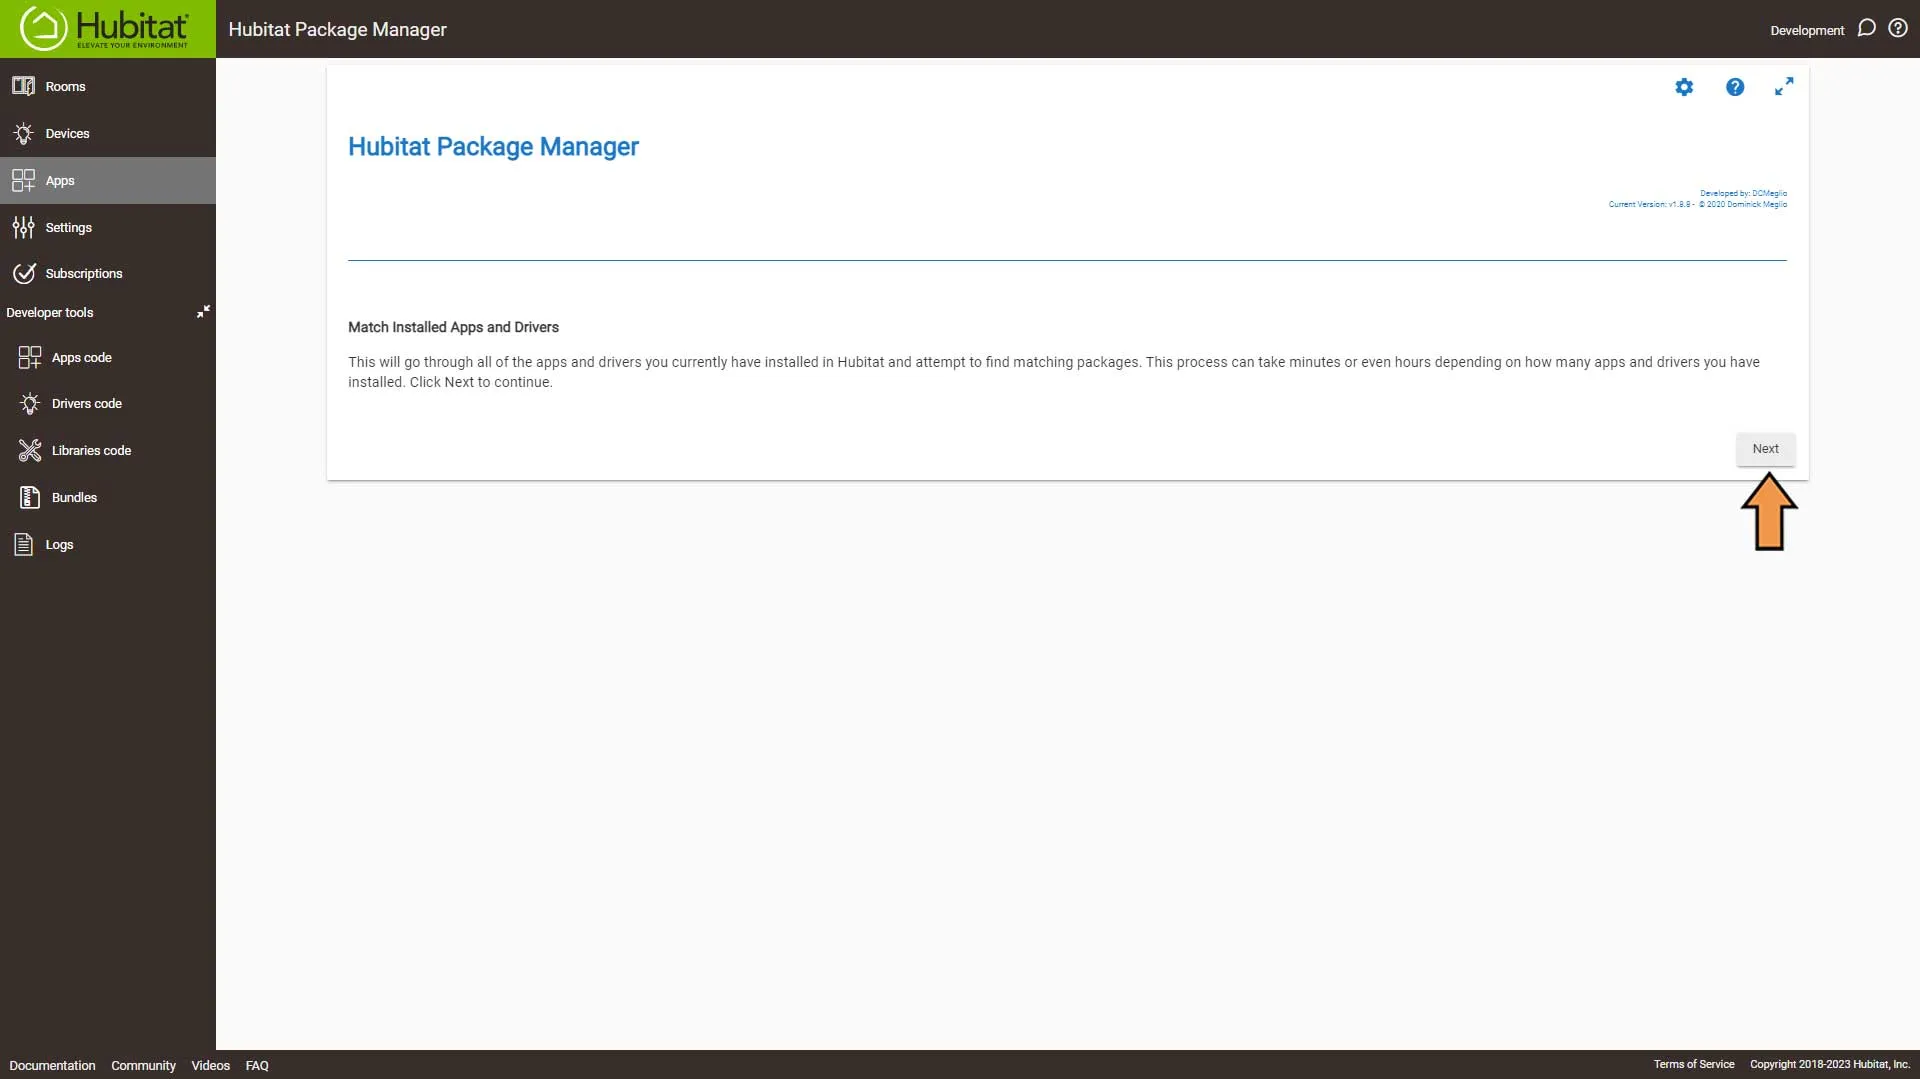
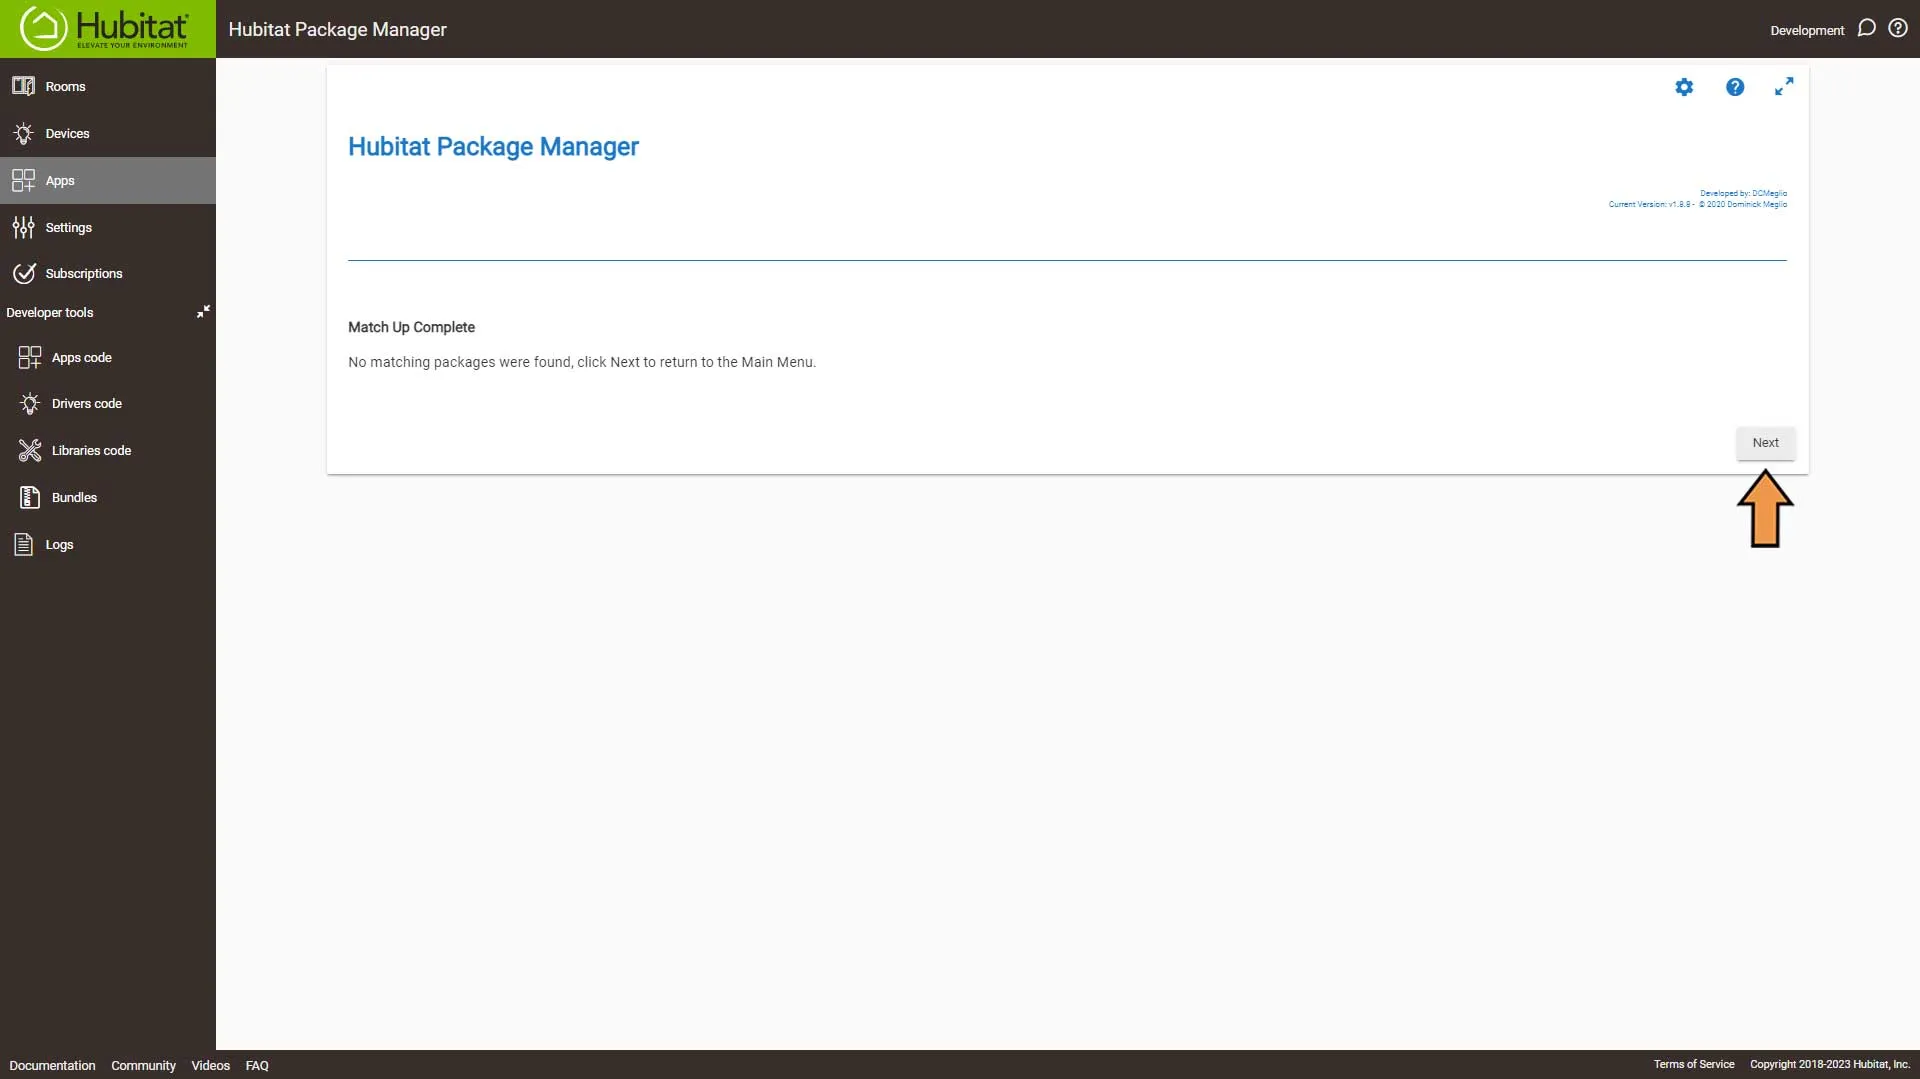
If any drivers or apps are found it will ask if you want to manage them with HPM, else click Next.
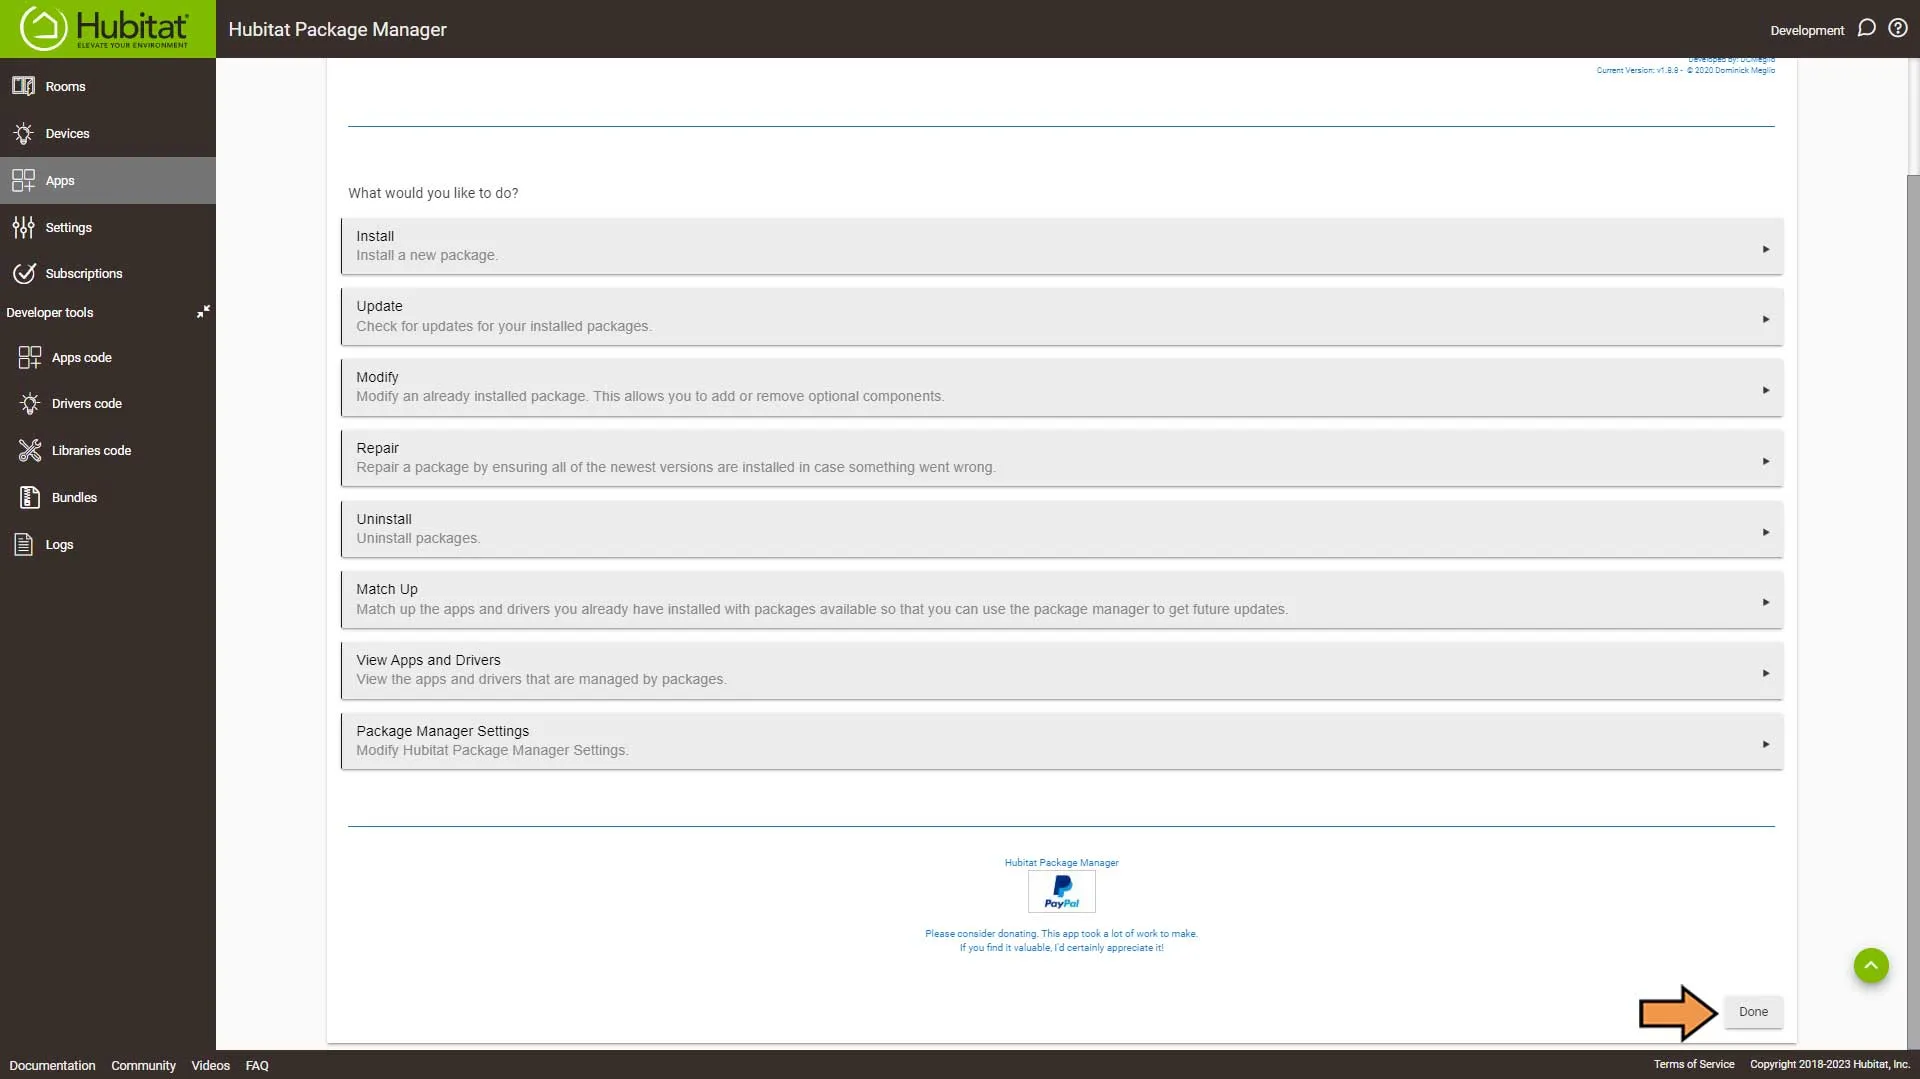
Finally, Click Done.
Home Assistant
Watch the Video
Home Assistant Community Store
The Official Documentation for Home Assistant Community Store
Important: You need a GitHub account, but it's free to set one up.
Setting Up the Automation
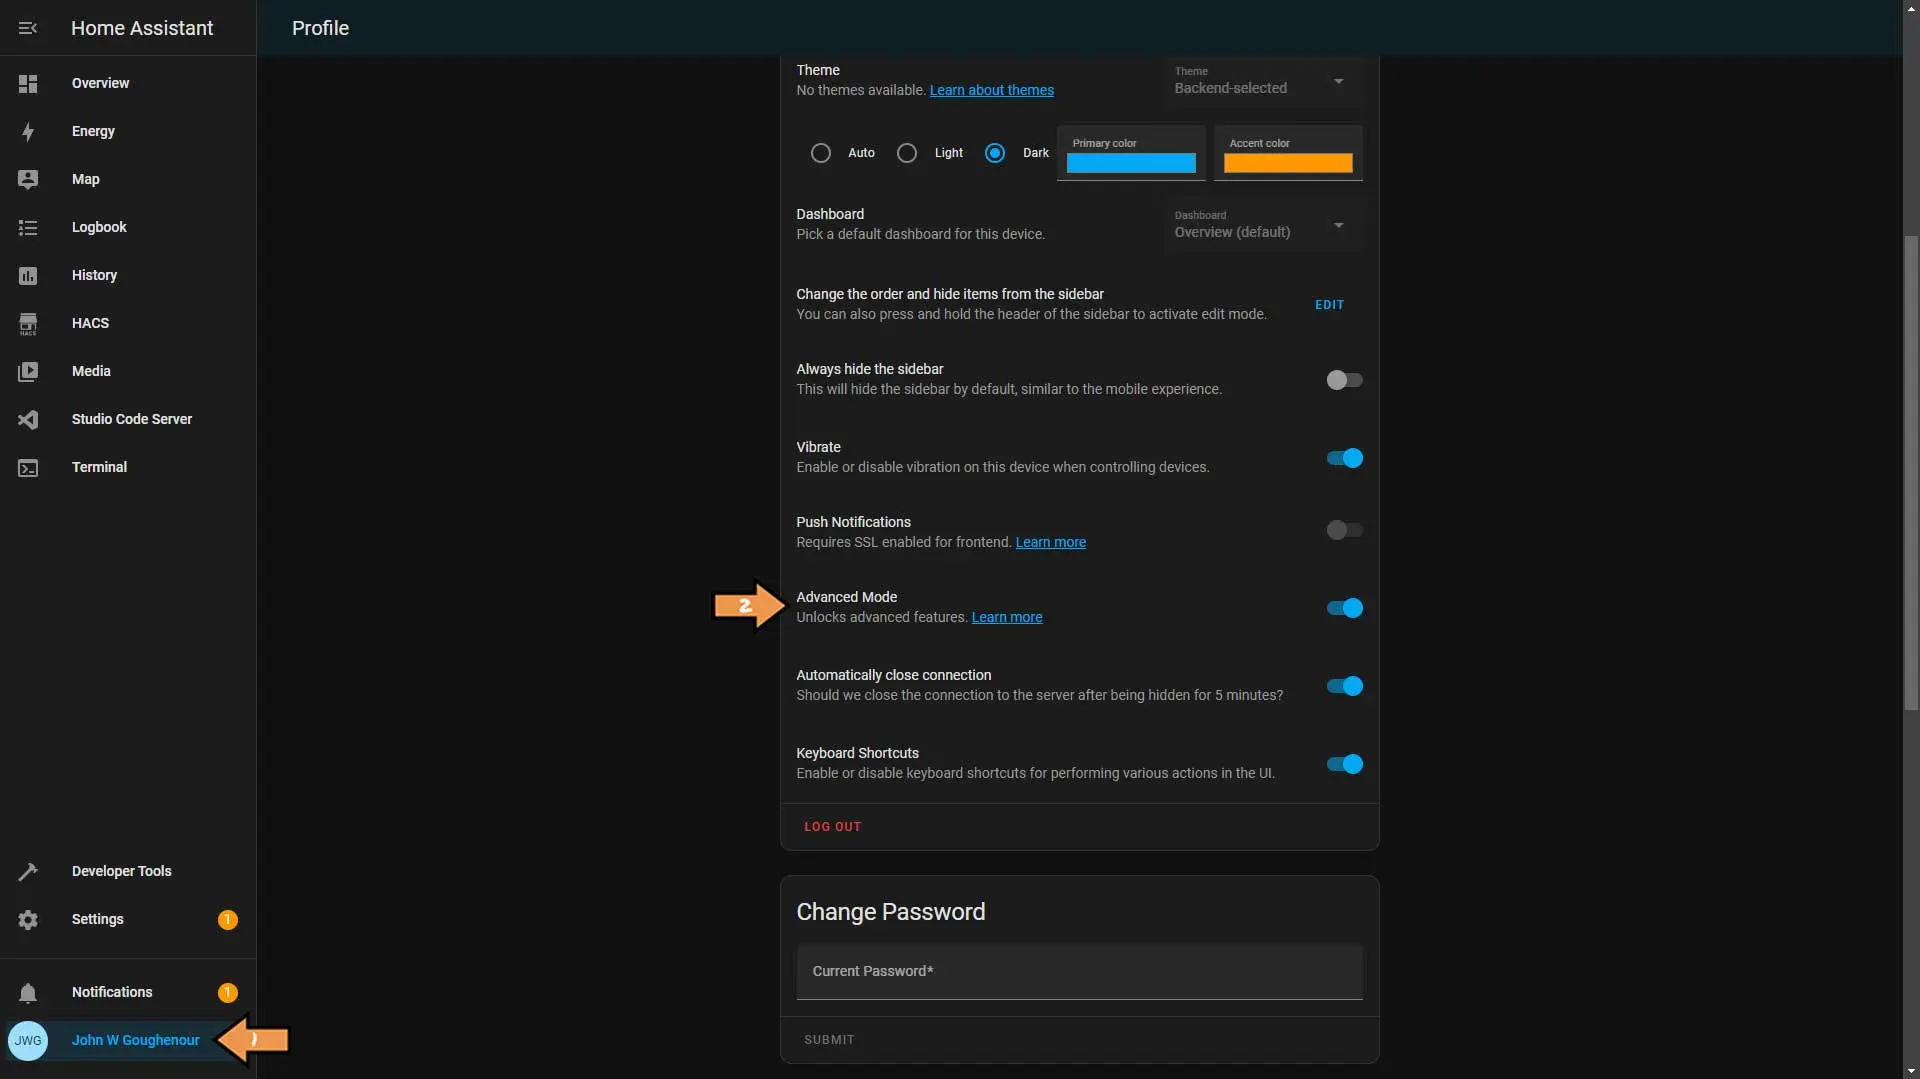
First, we need to ensure Advance Mode is enabled. So click on your account, scroll down till you see Advanced mode, and turn it on.
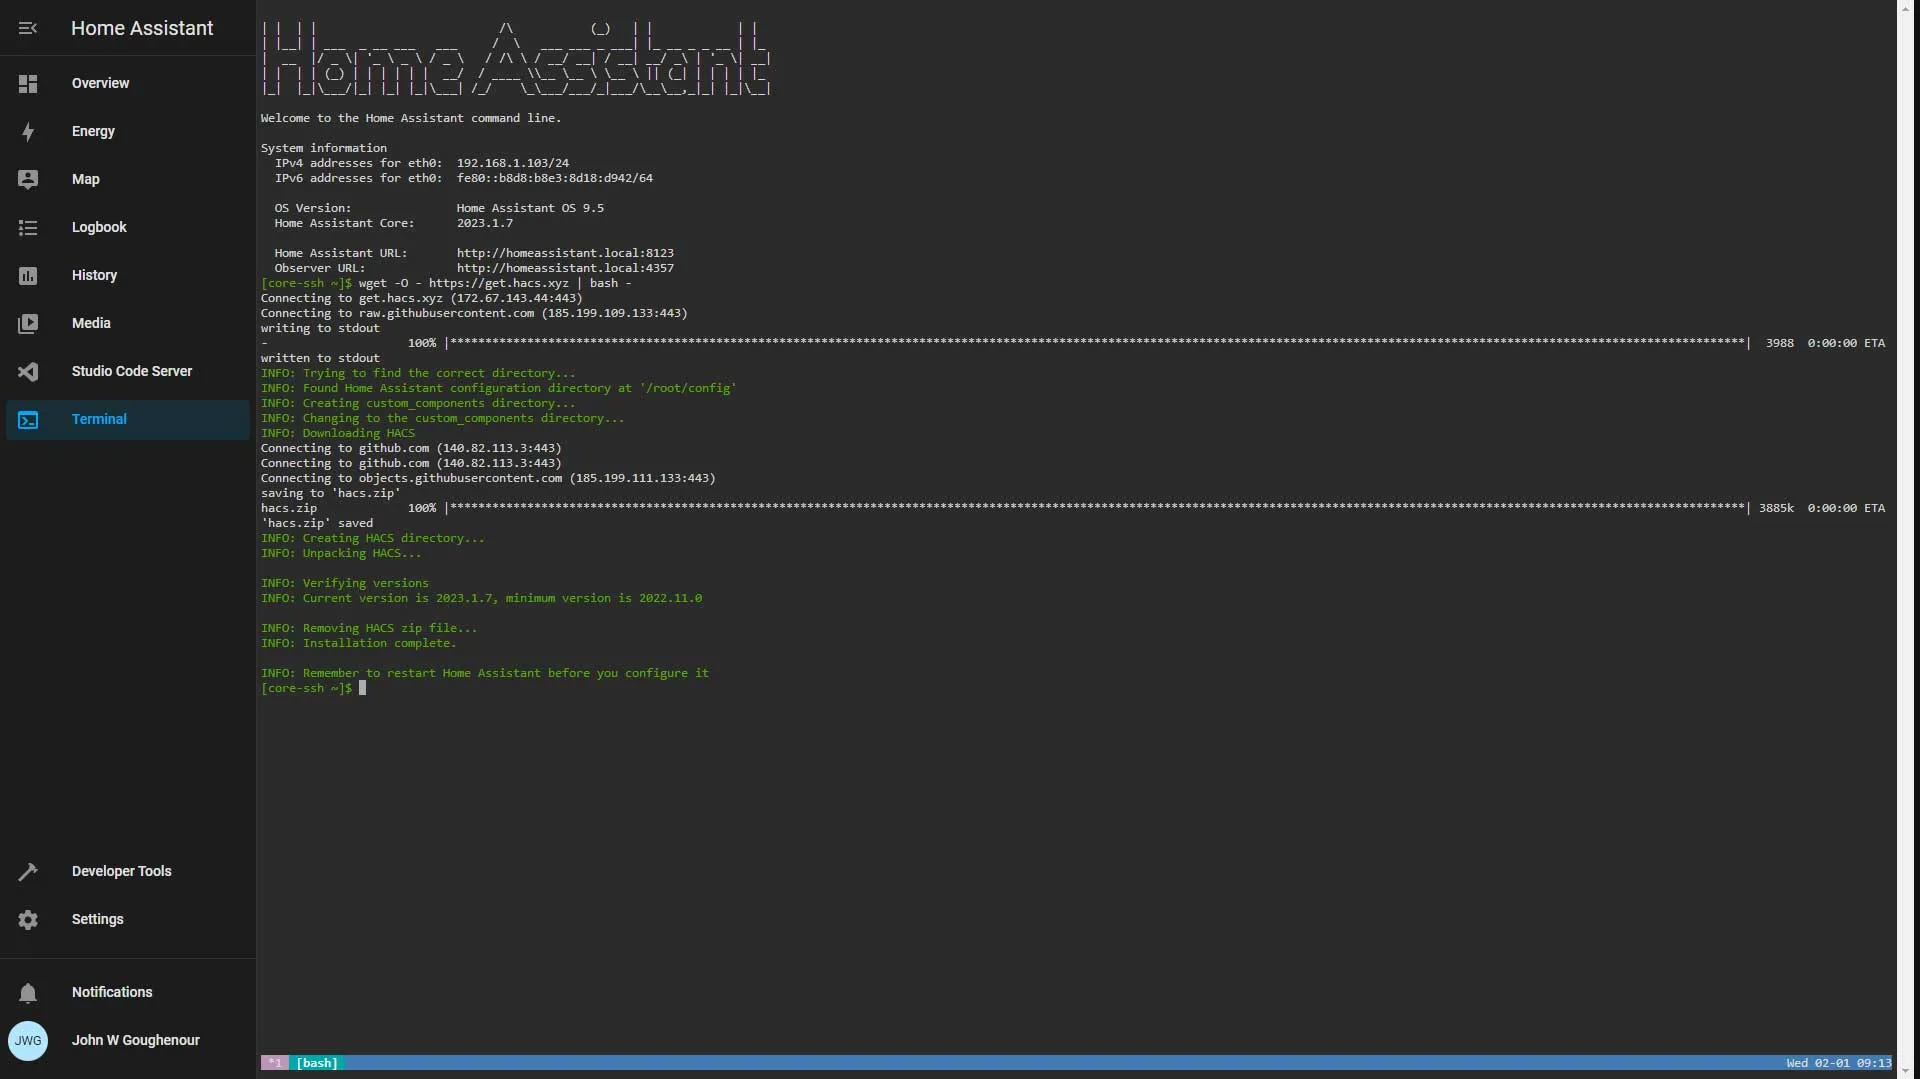
Next, we need to go into the Terminal and Paste the following command:
wget -O - https://get.hacs.xyz | bash -This will download the required files needed for the store.
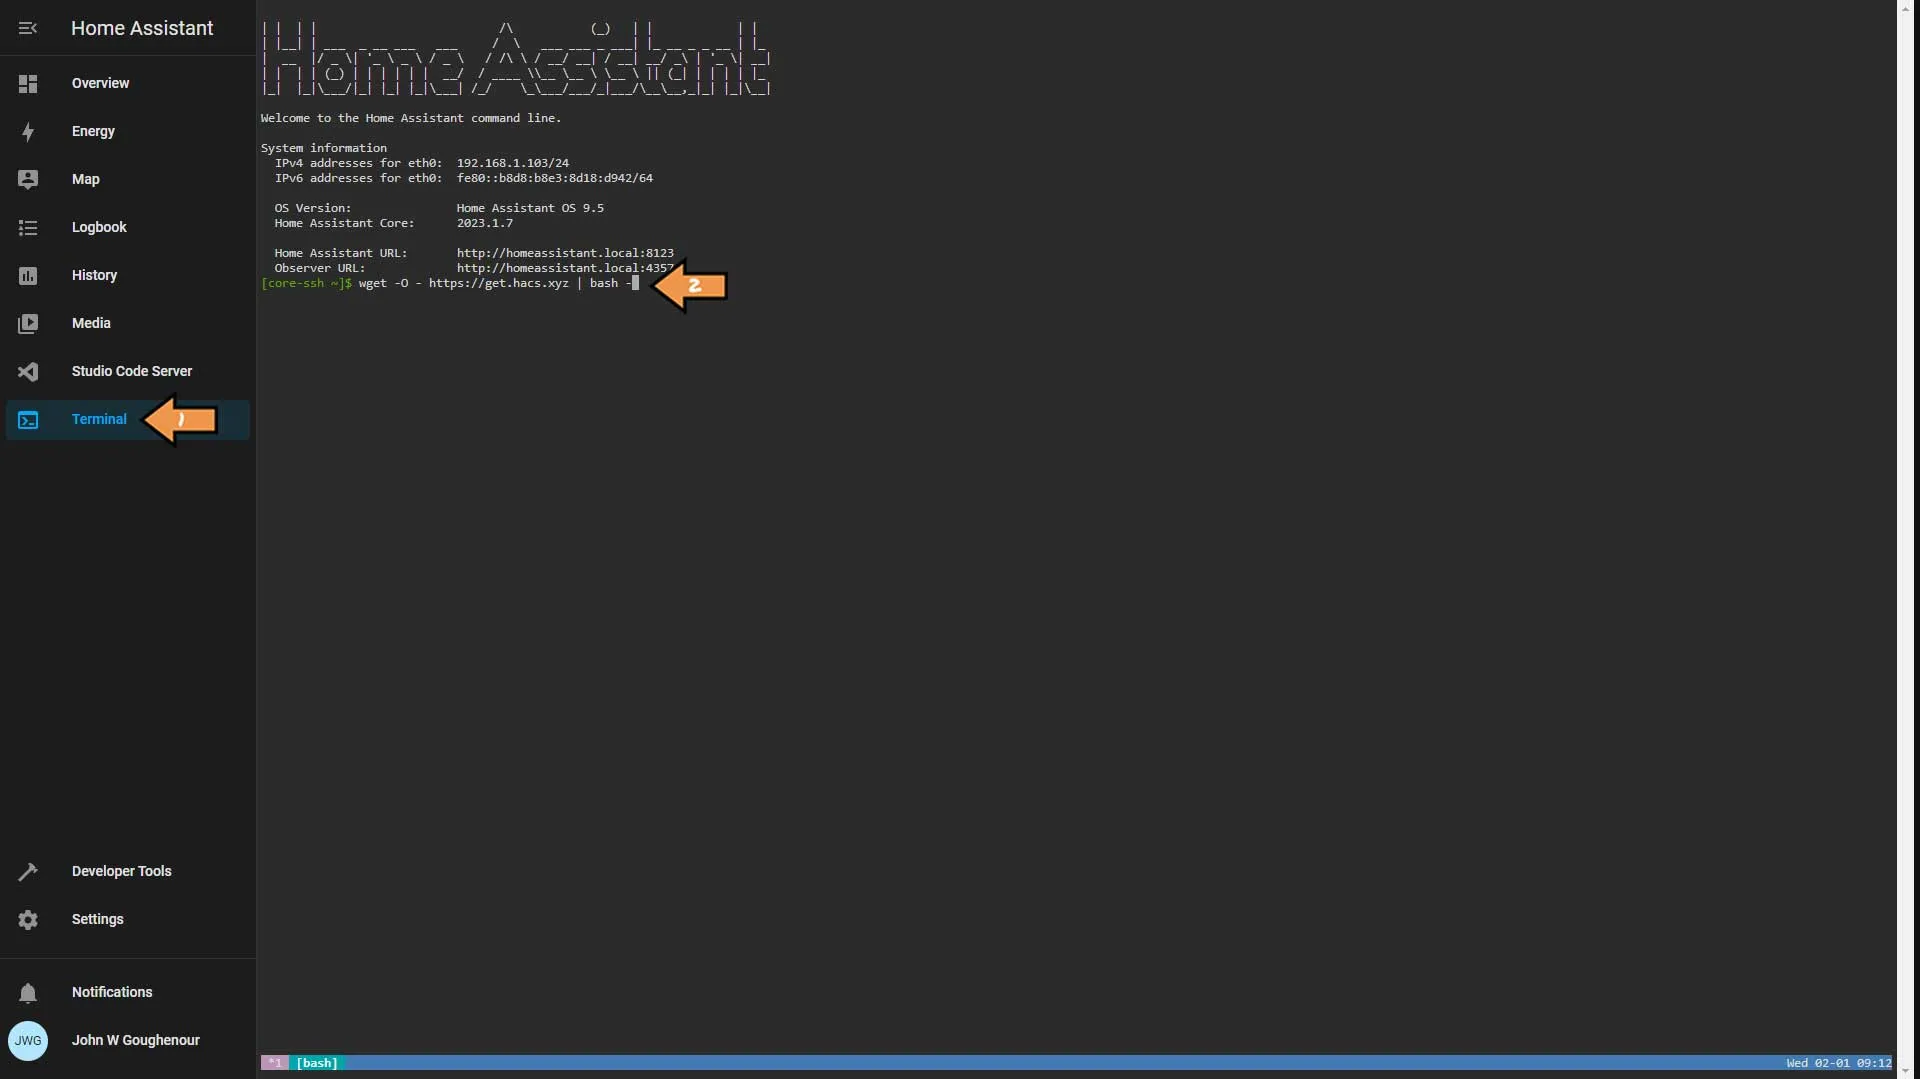
Once it’s completed, it will prompt you to restart Home Assistant.
Go to Developer Tools and click Check Configuration, and if everything is alright, click Restart.
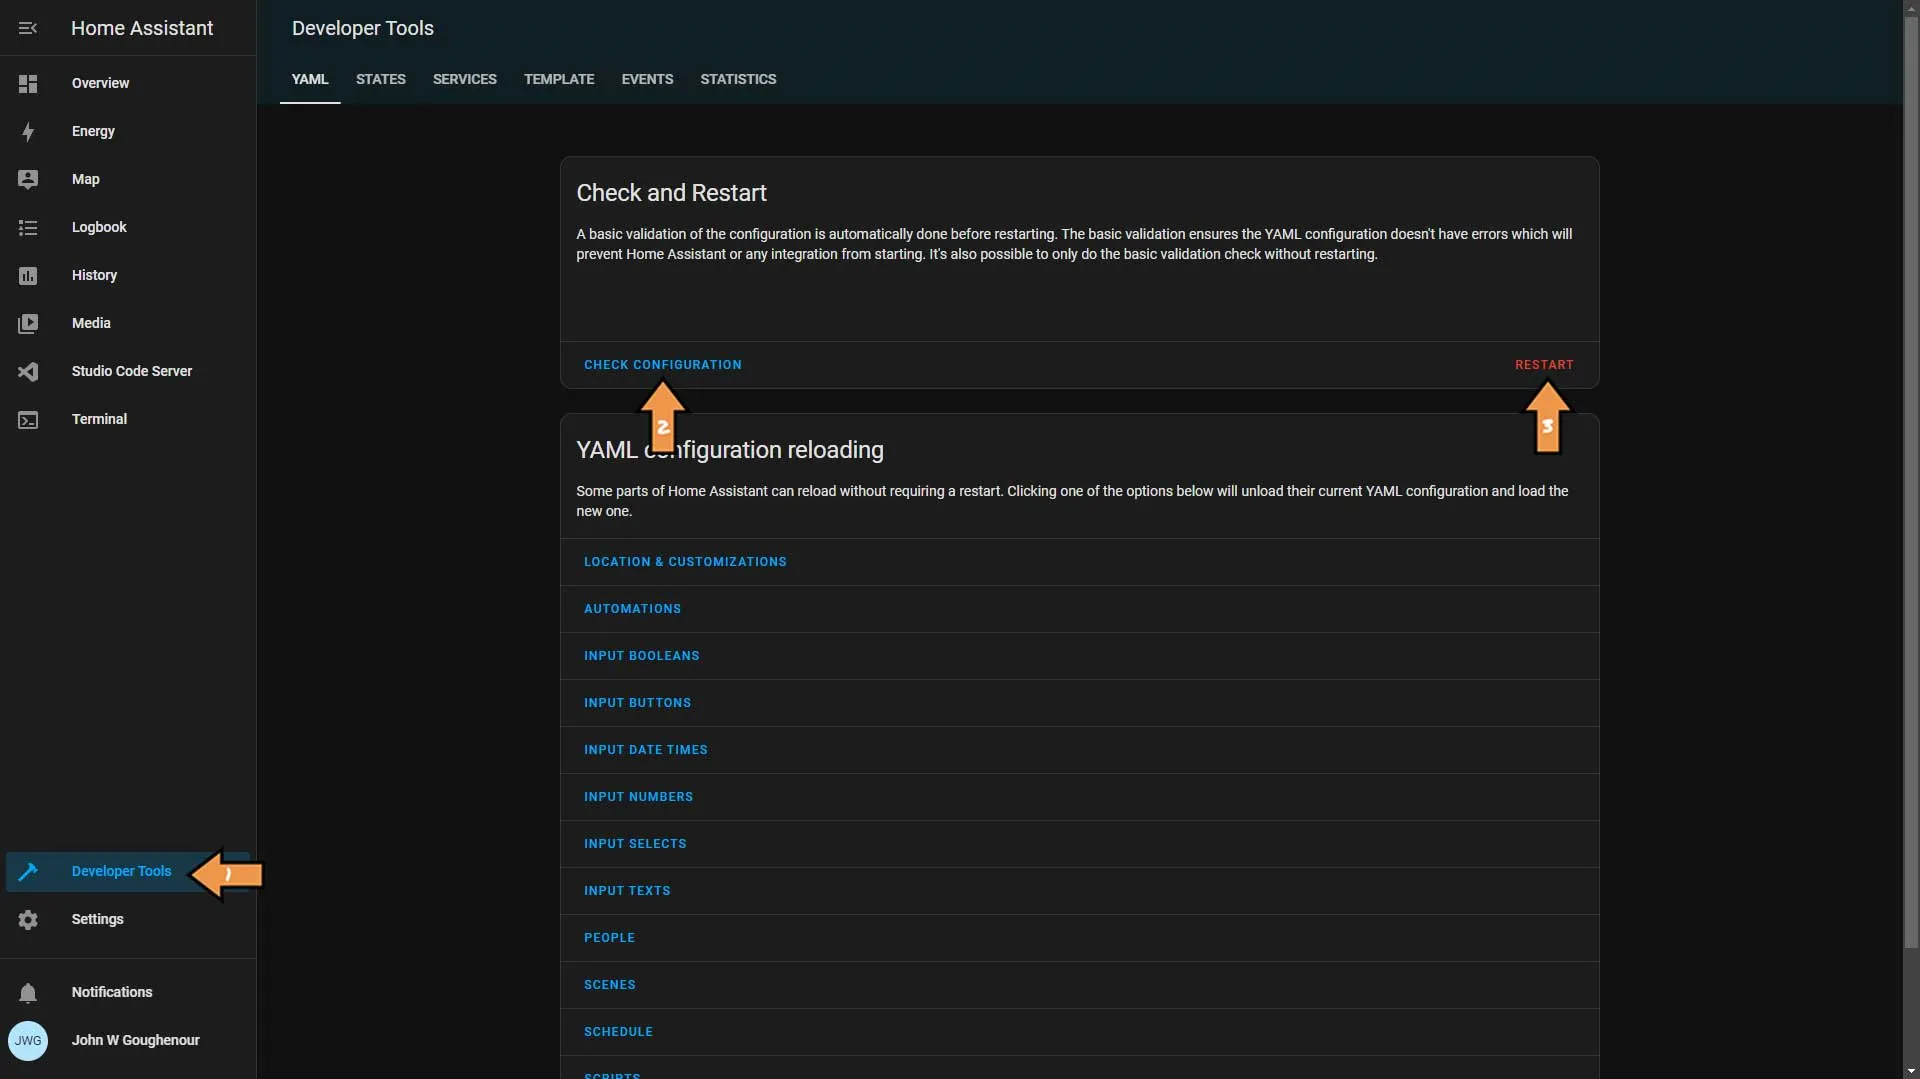
Confirm Restart.

Next, go to Settings and Devices & Services.
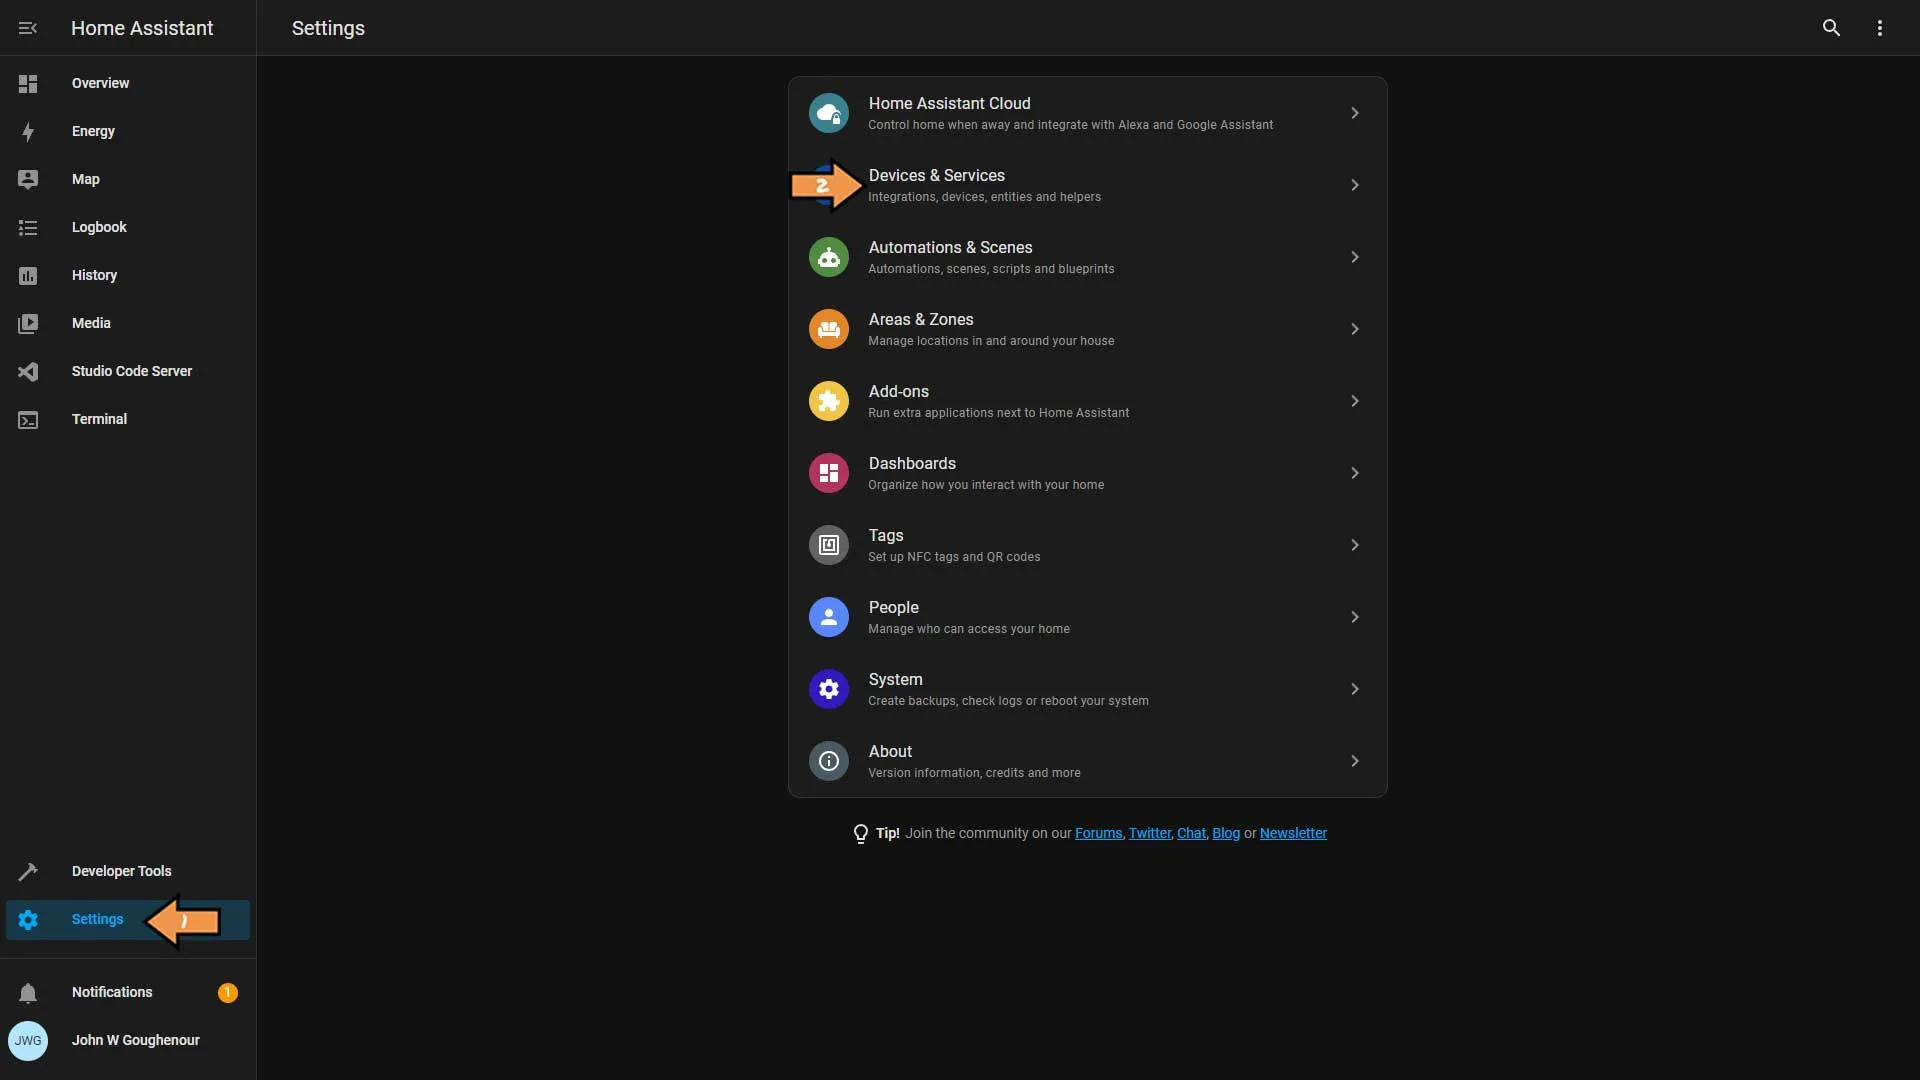
On the Integrations tab Press the Shift Key + F5 to perform a hard refresh on the browser. Then click the Blue Add Integration button at the bottom of the screen.
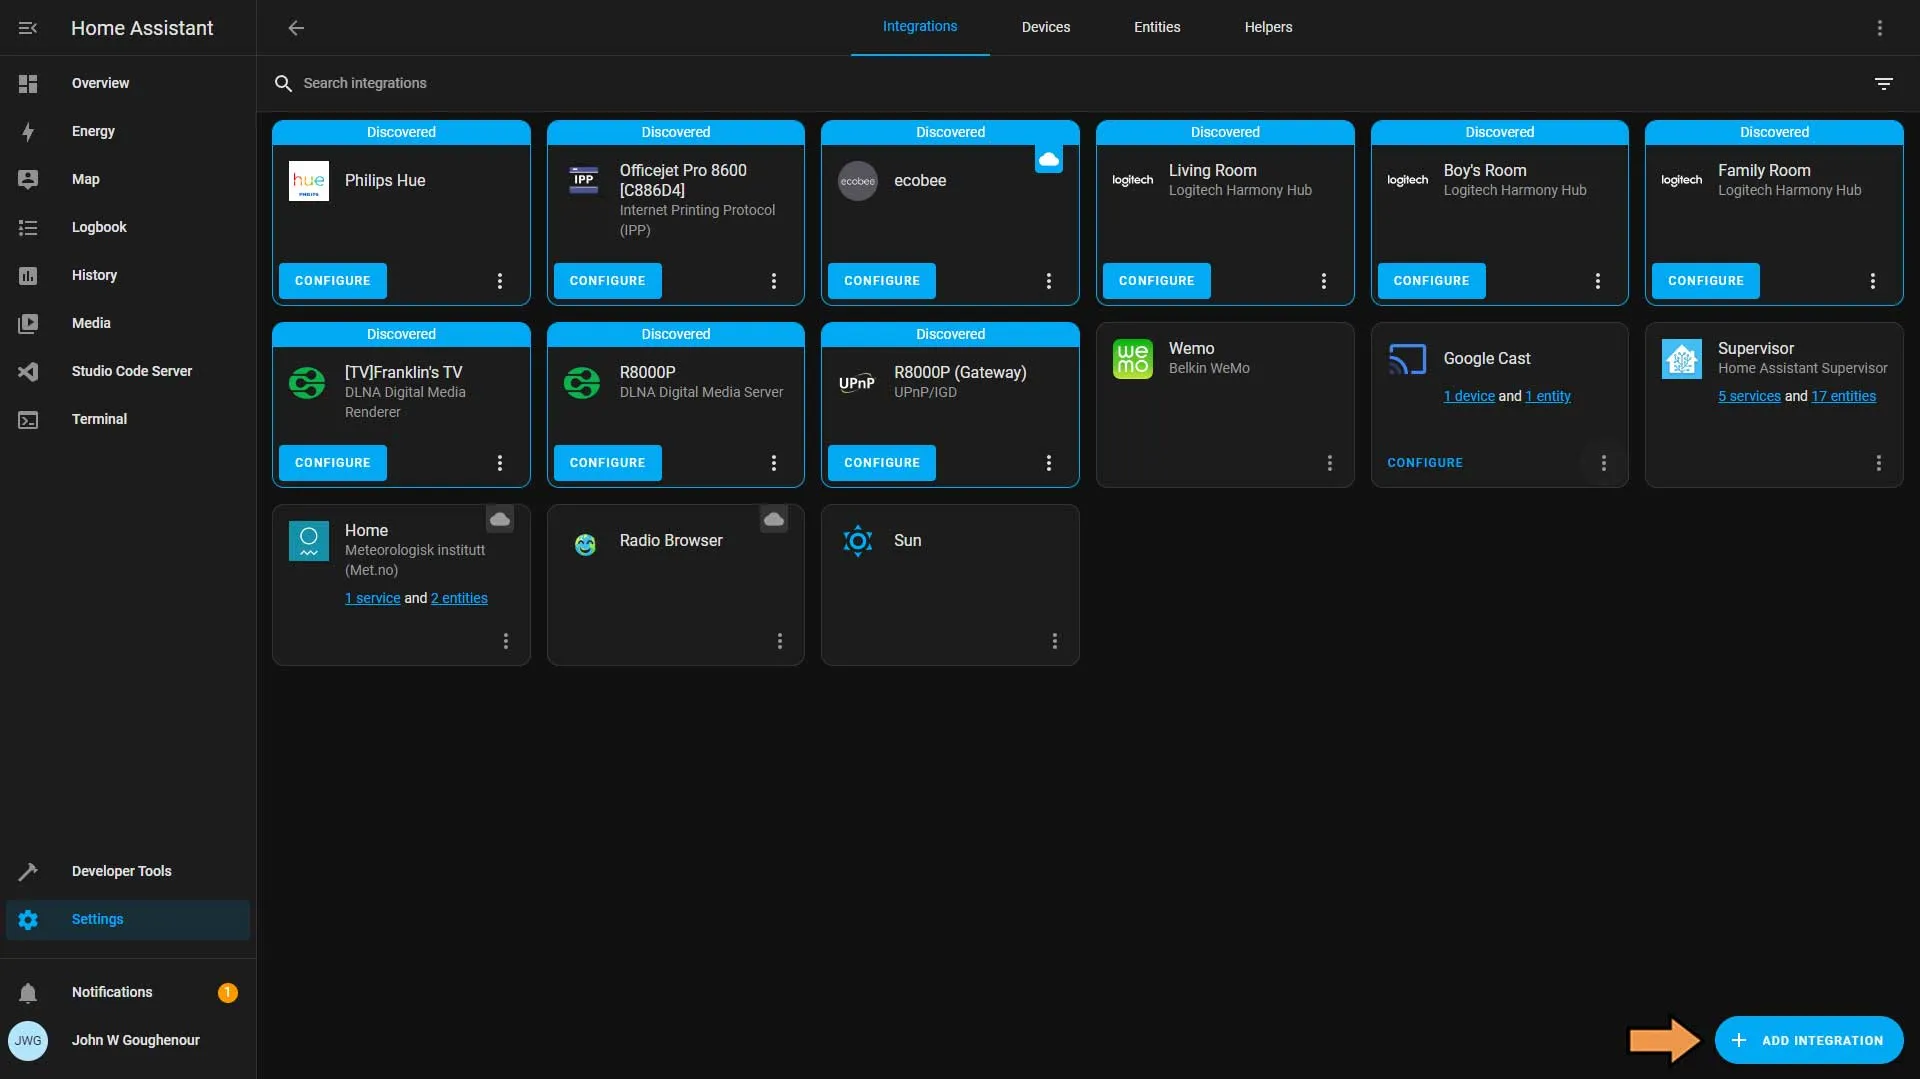
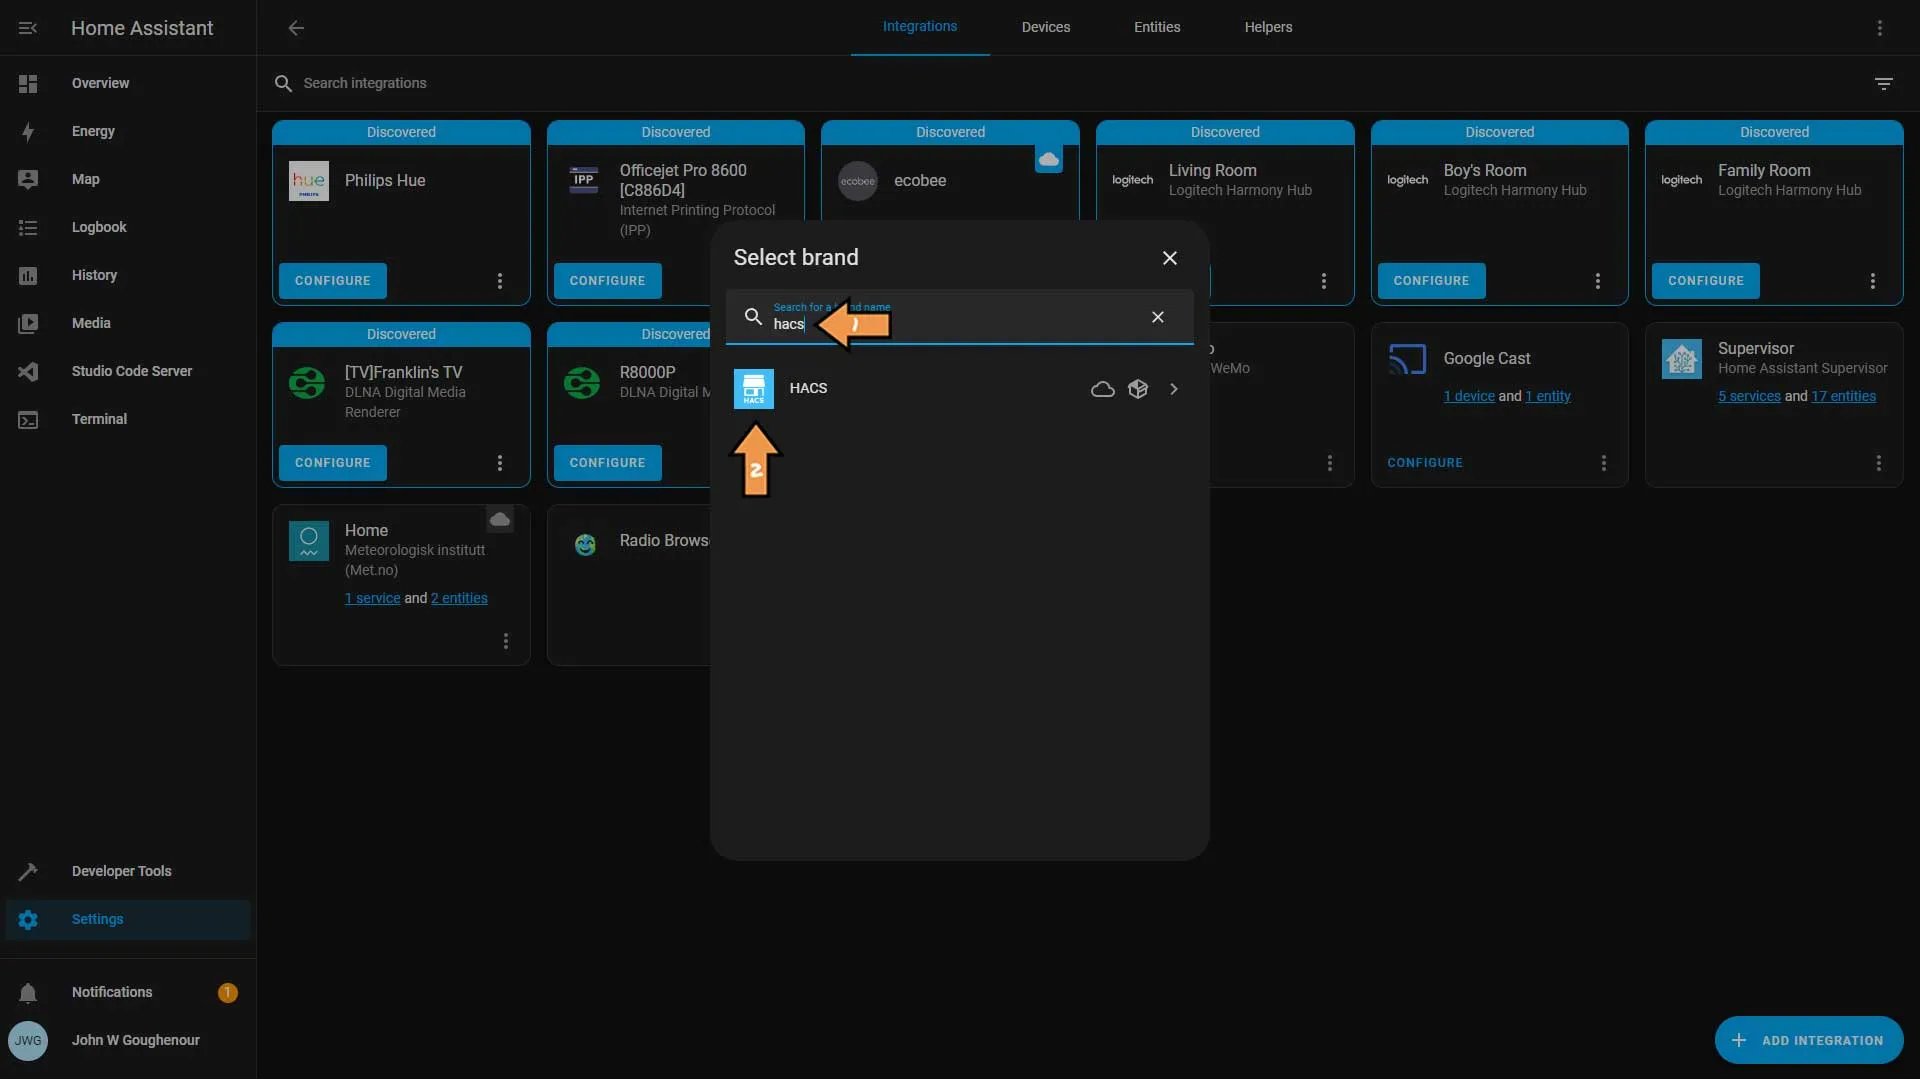
You can just search for HACS and select it from the list.
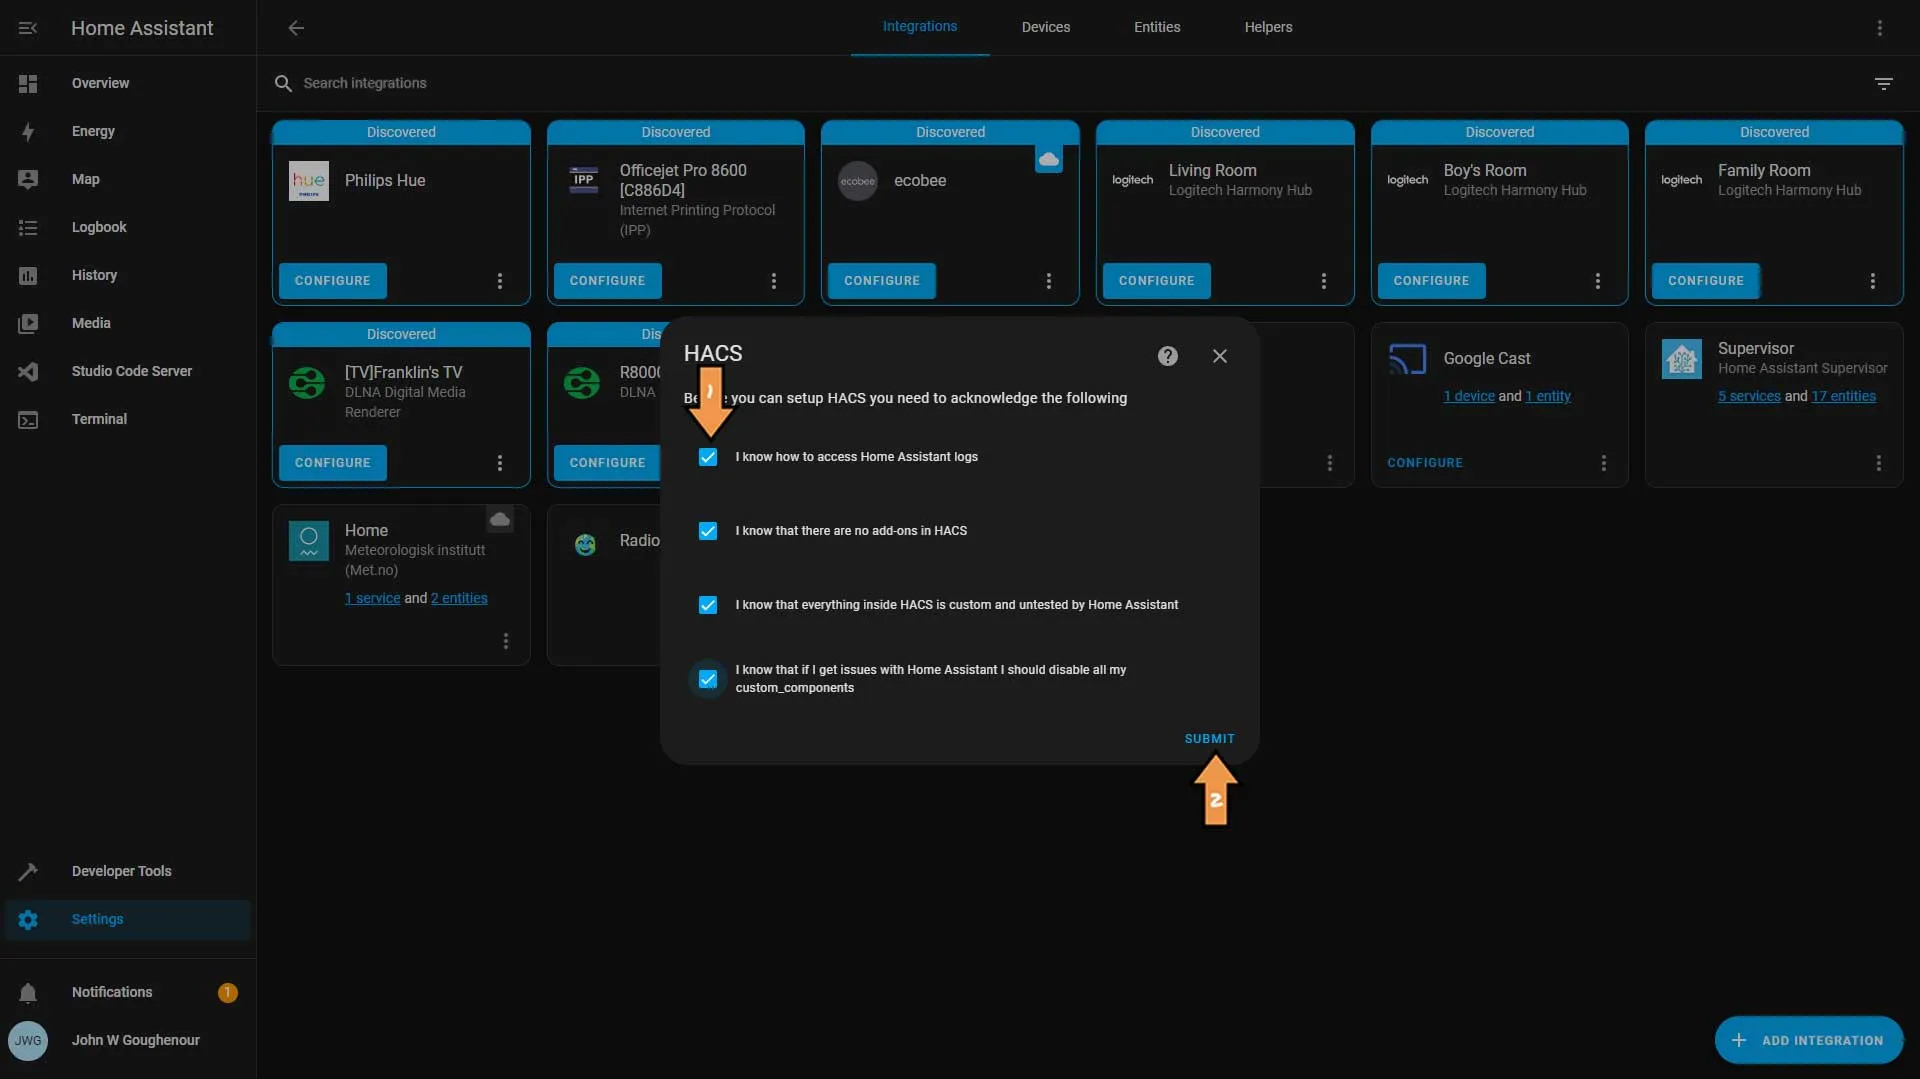
Please acknowledge all the statements and click Submit.
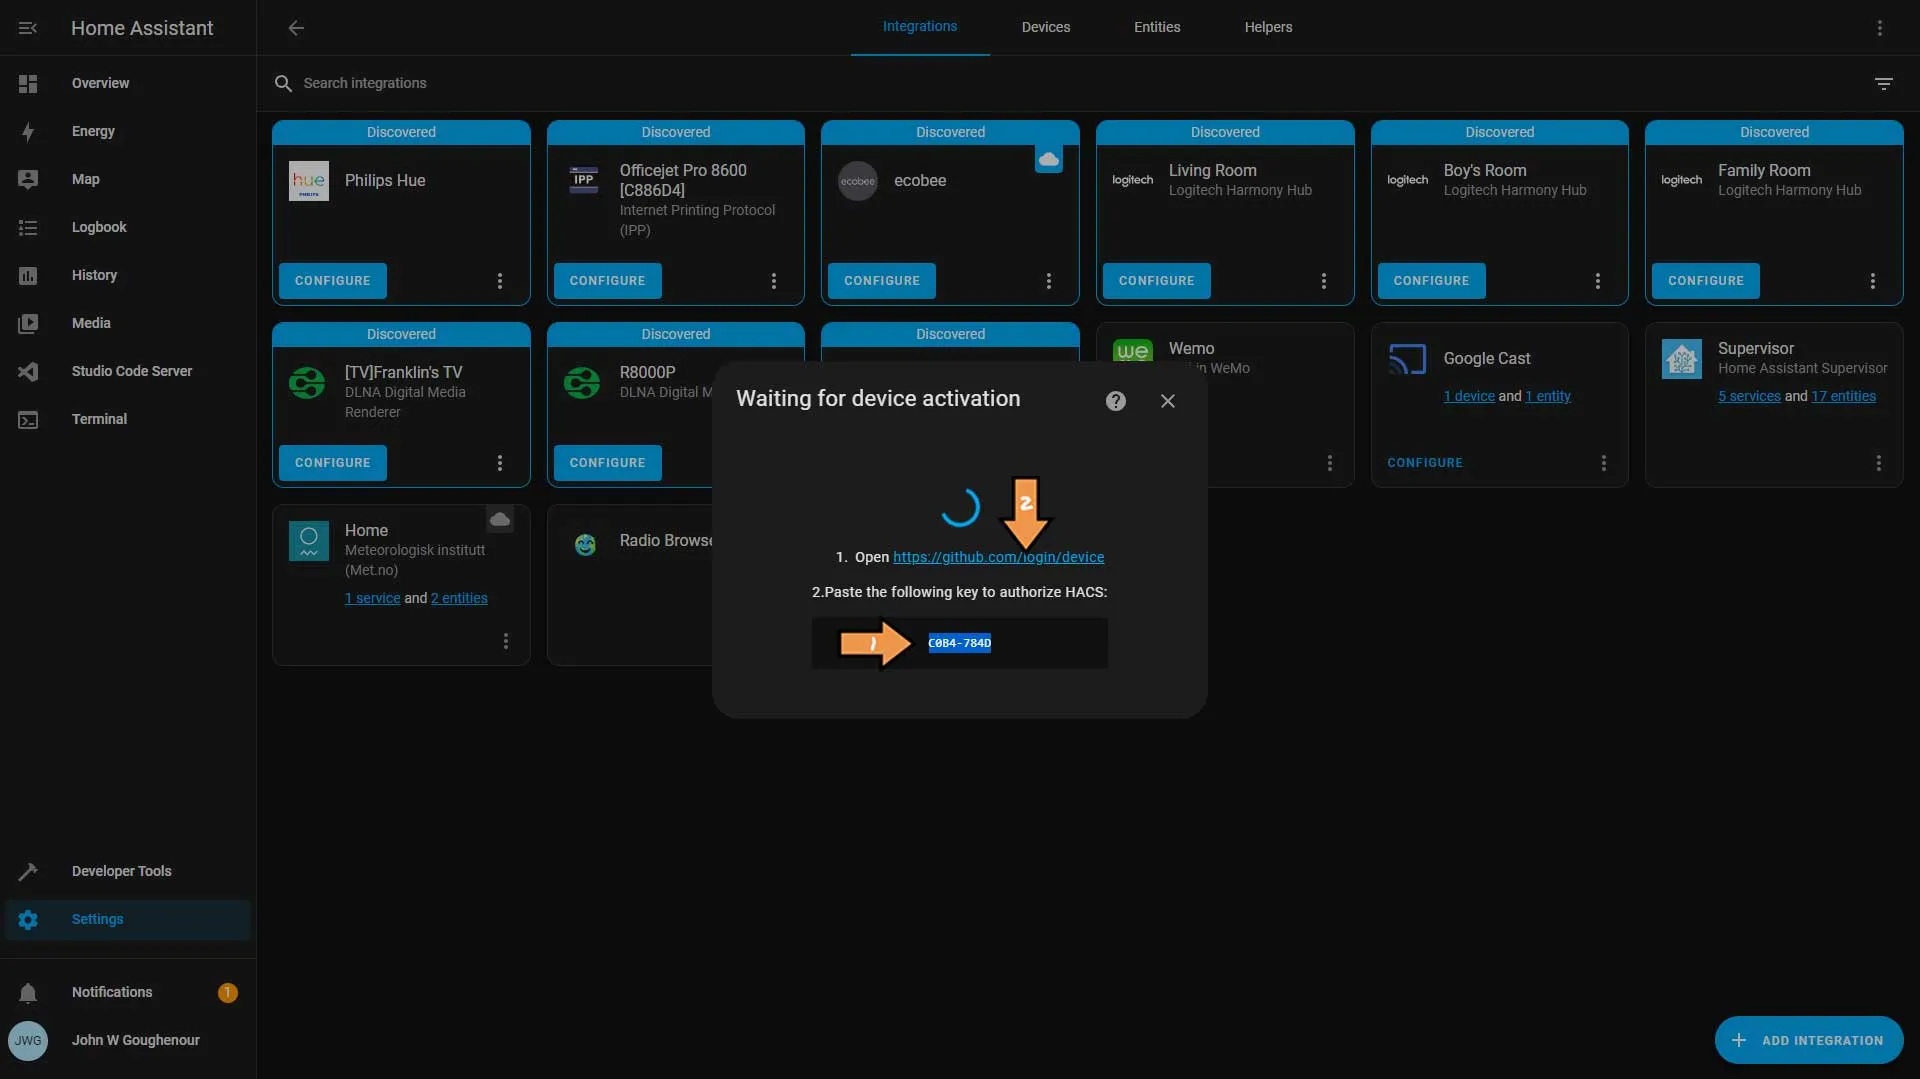
Copy the Authorization Key and follow the link.
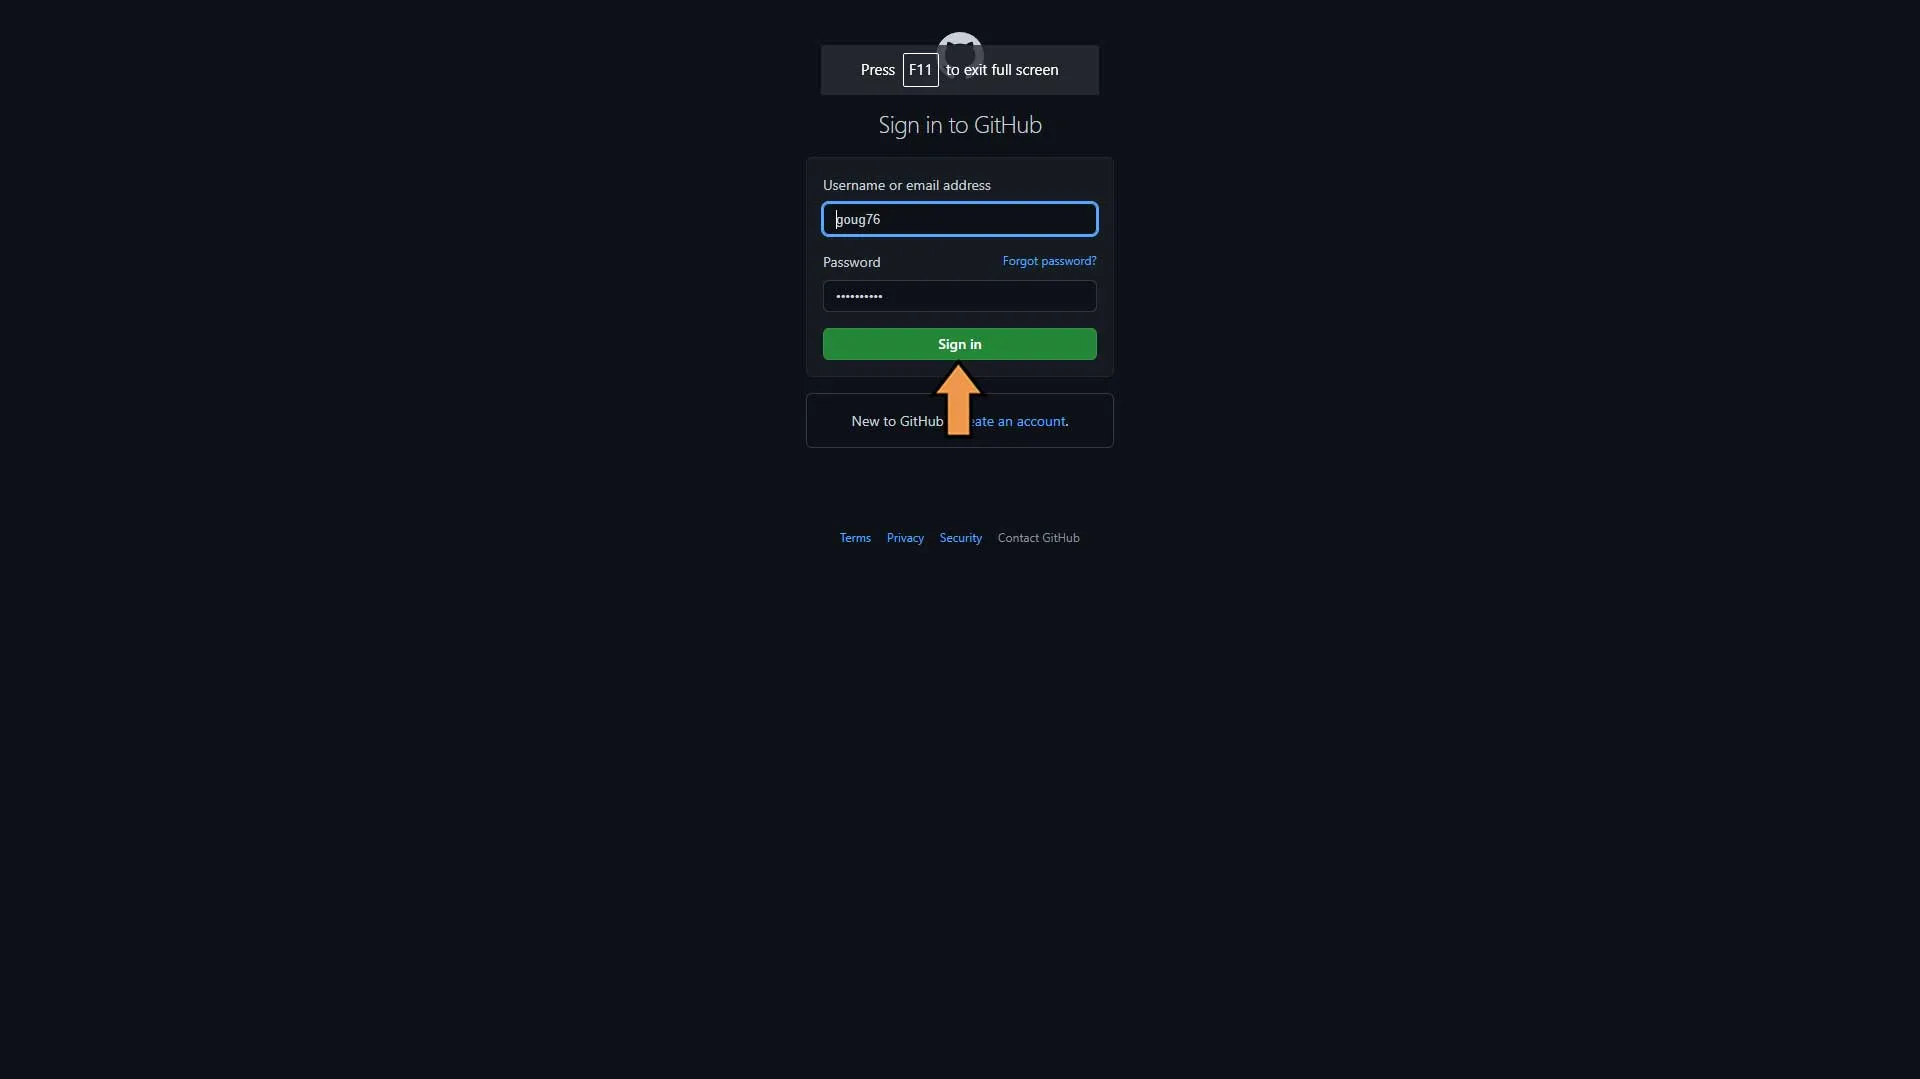
You will have to log into GitHub with your credentials.
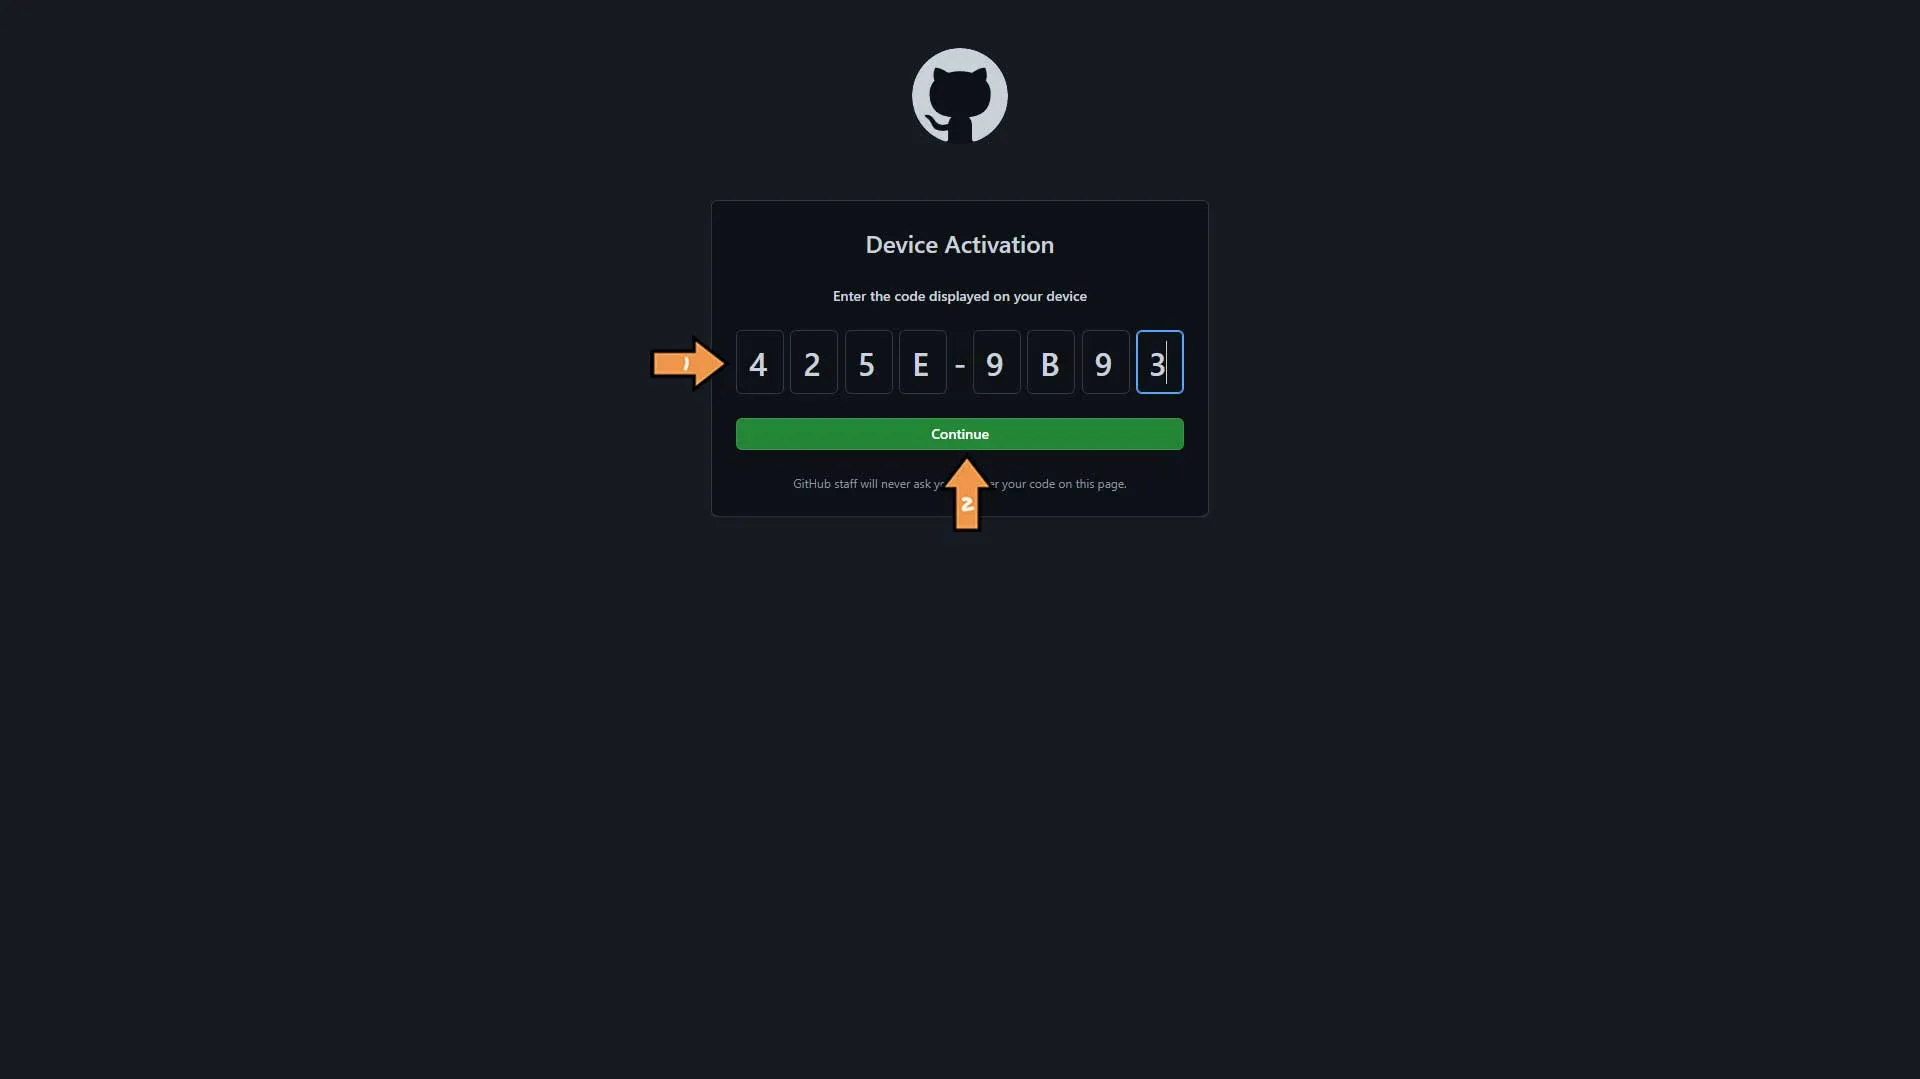
Paste the Authorization Key from HACS, then click the Continue button.
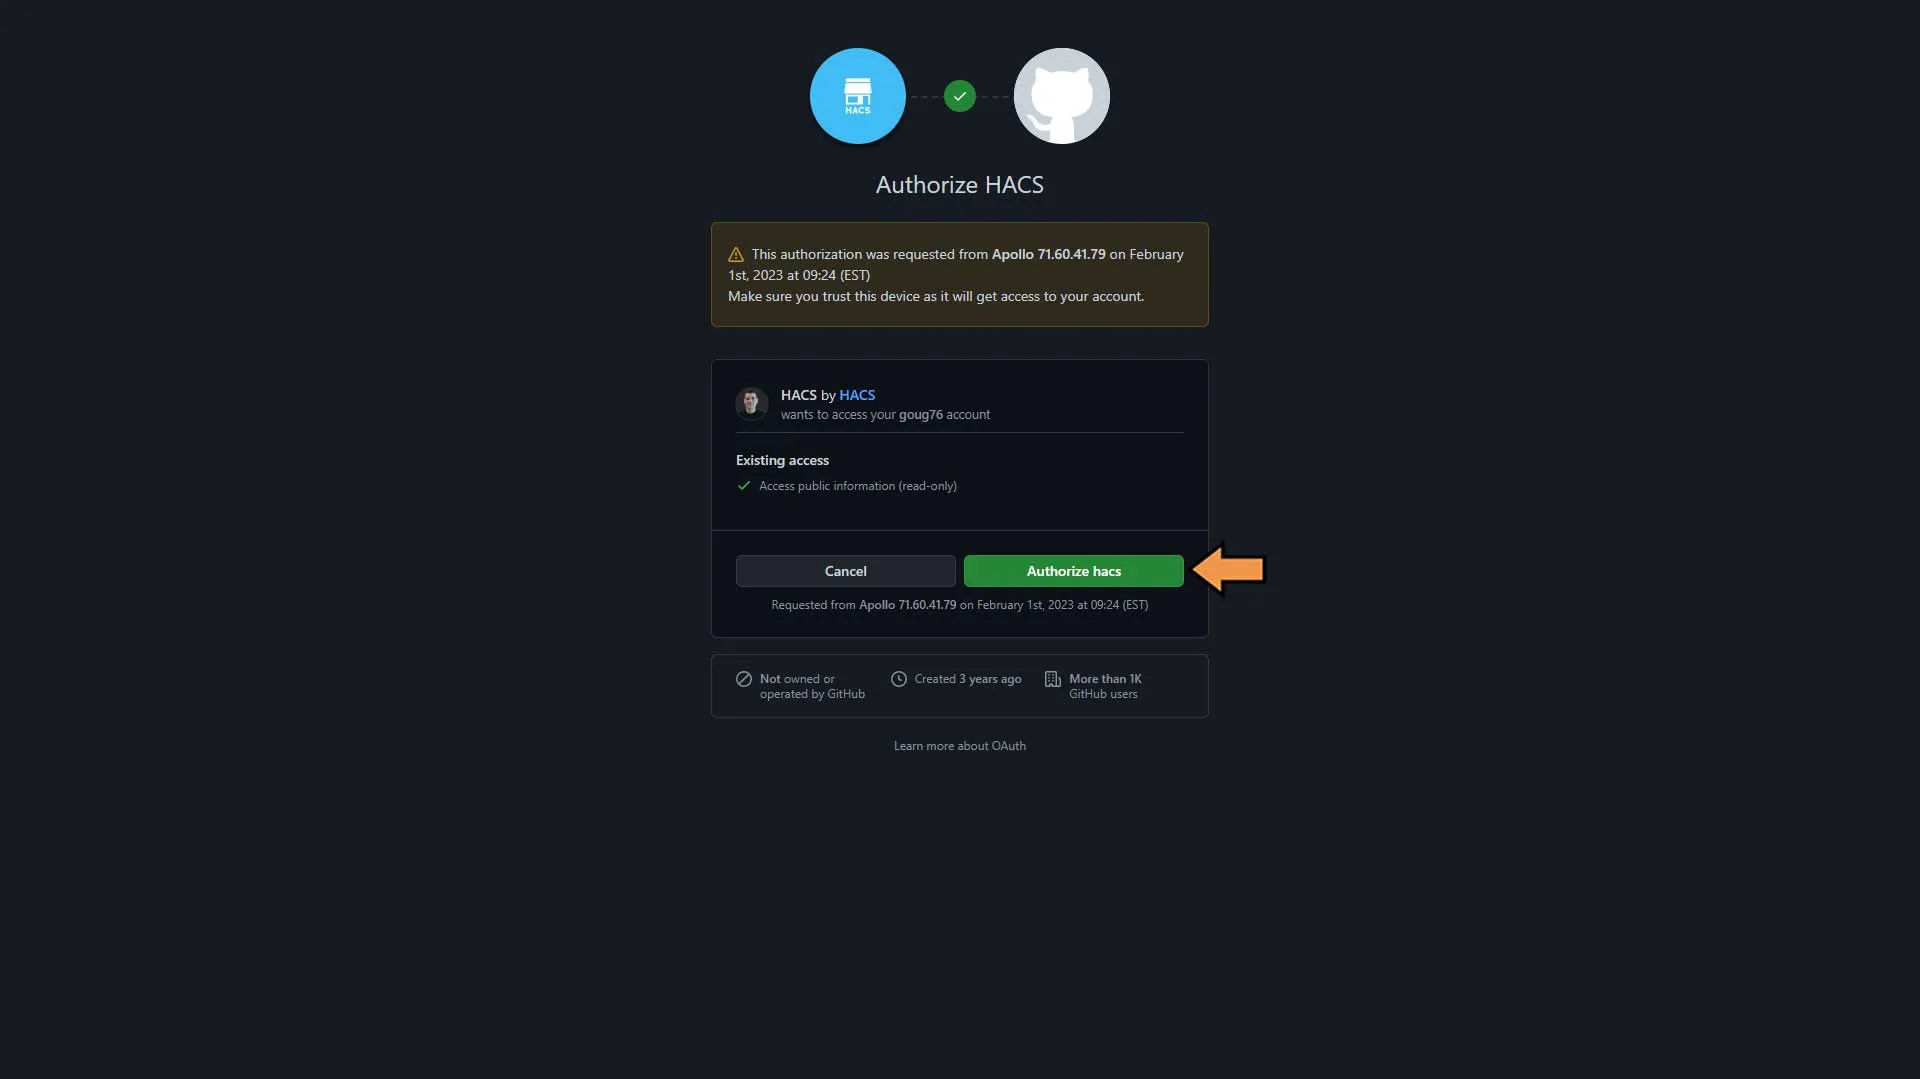
Click Authorize HACS.
Once you’re done, you can close out the tab.

Back in Home Assistant, you should see a Success message. Assign HACS to an area and click Finish.
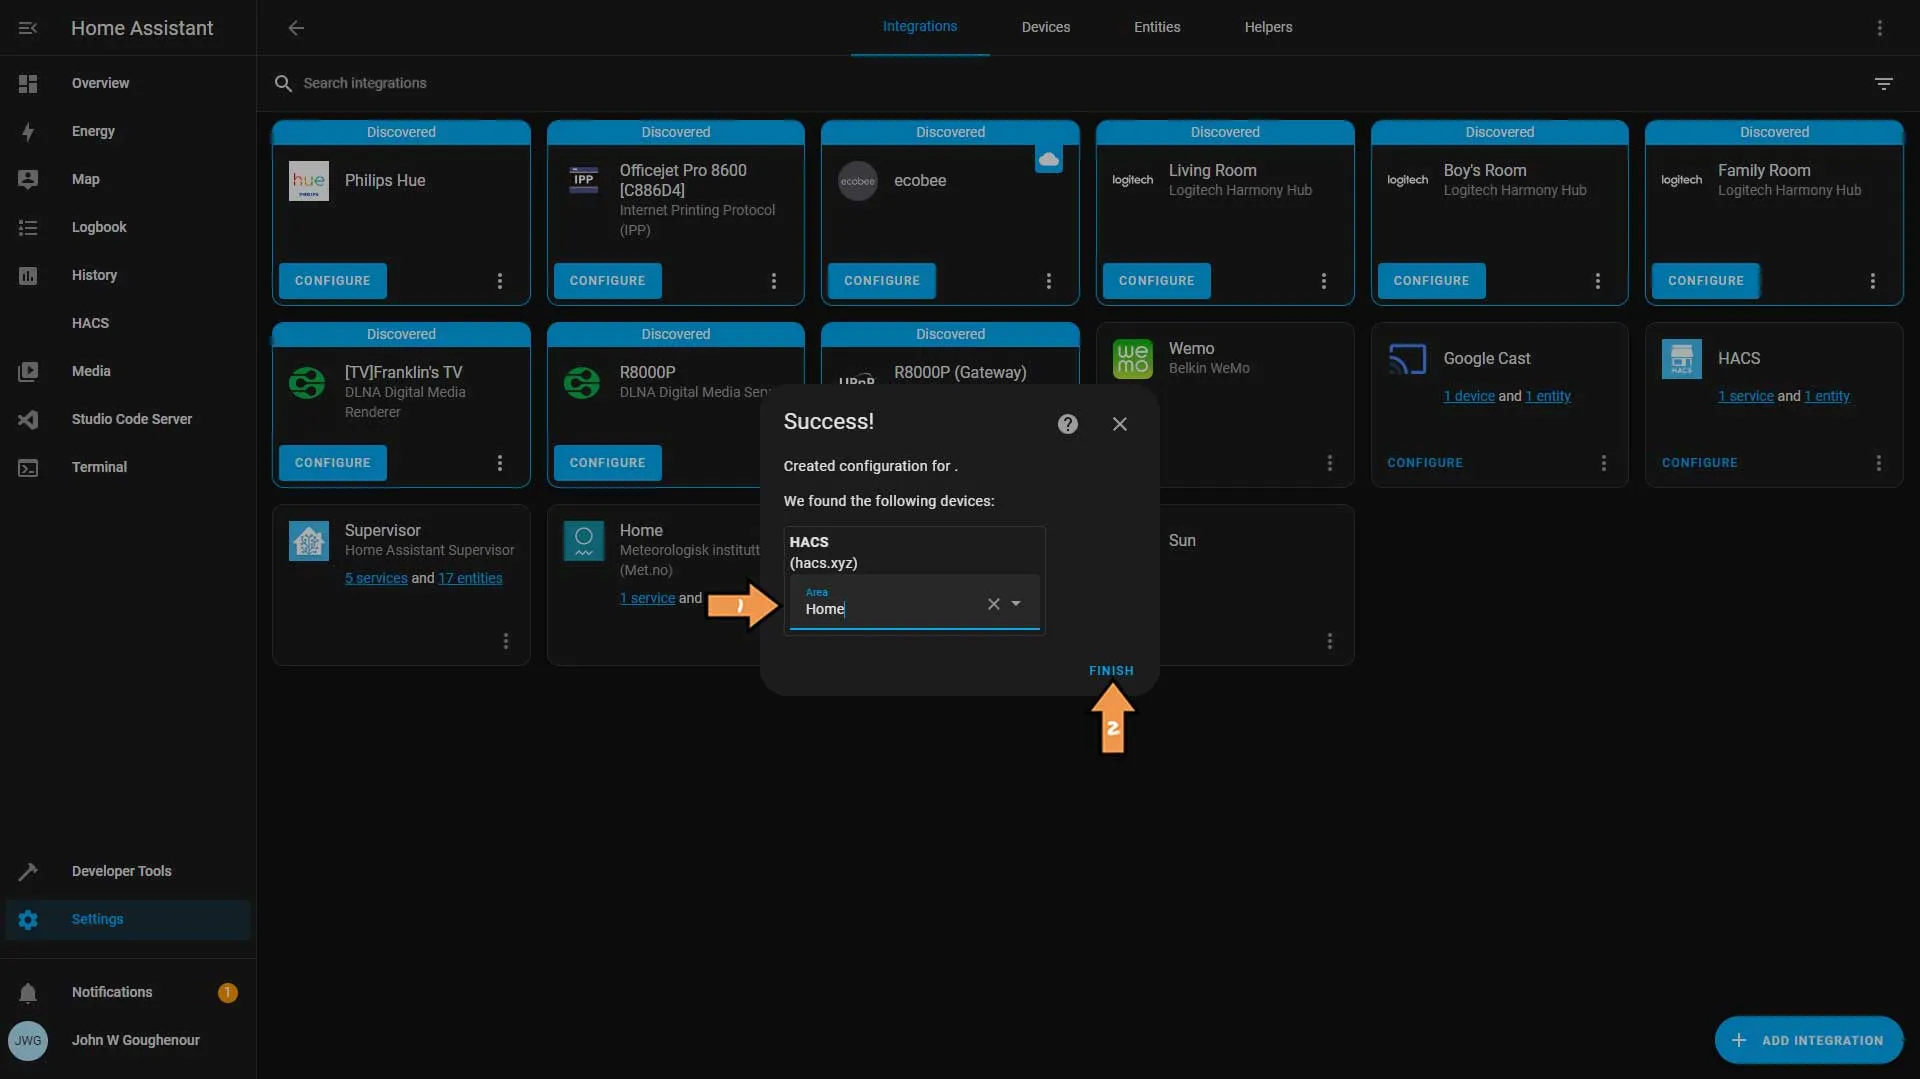
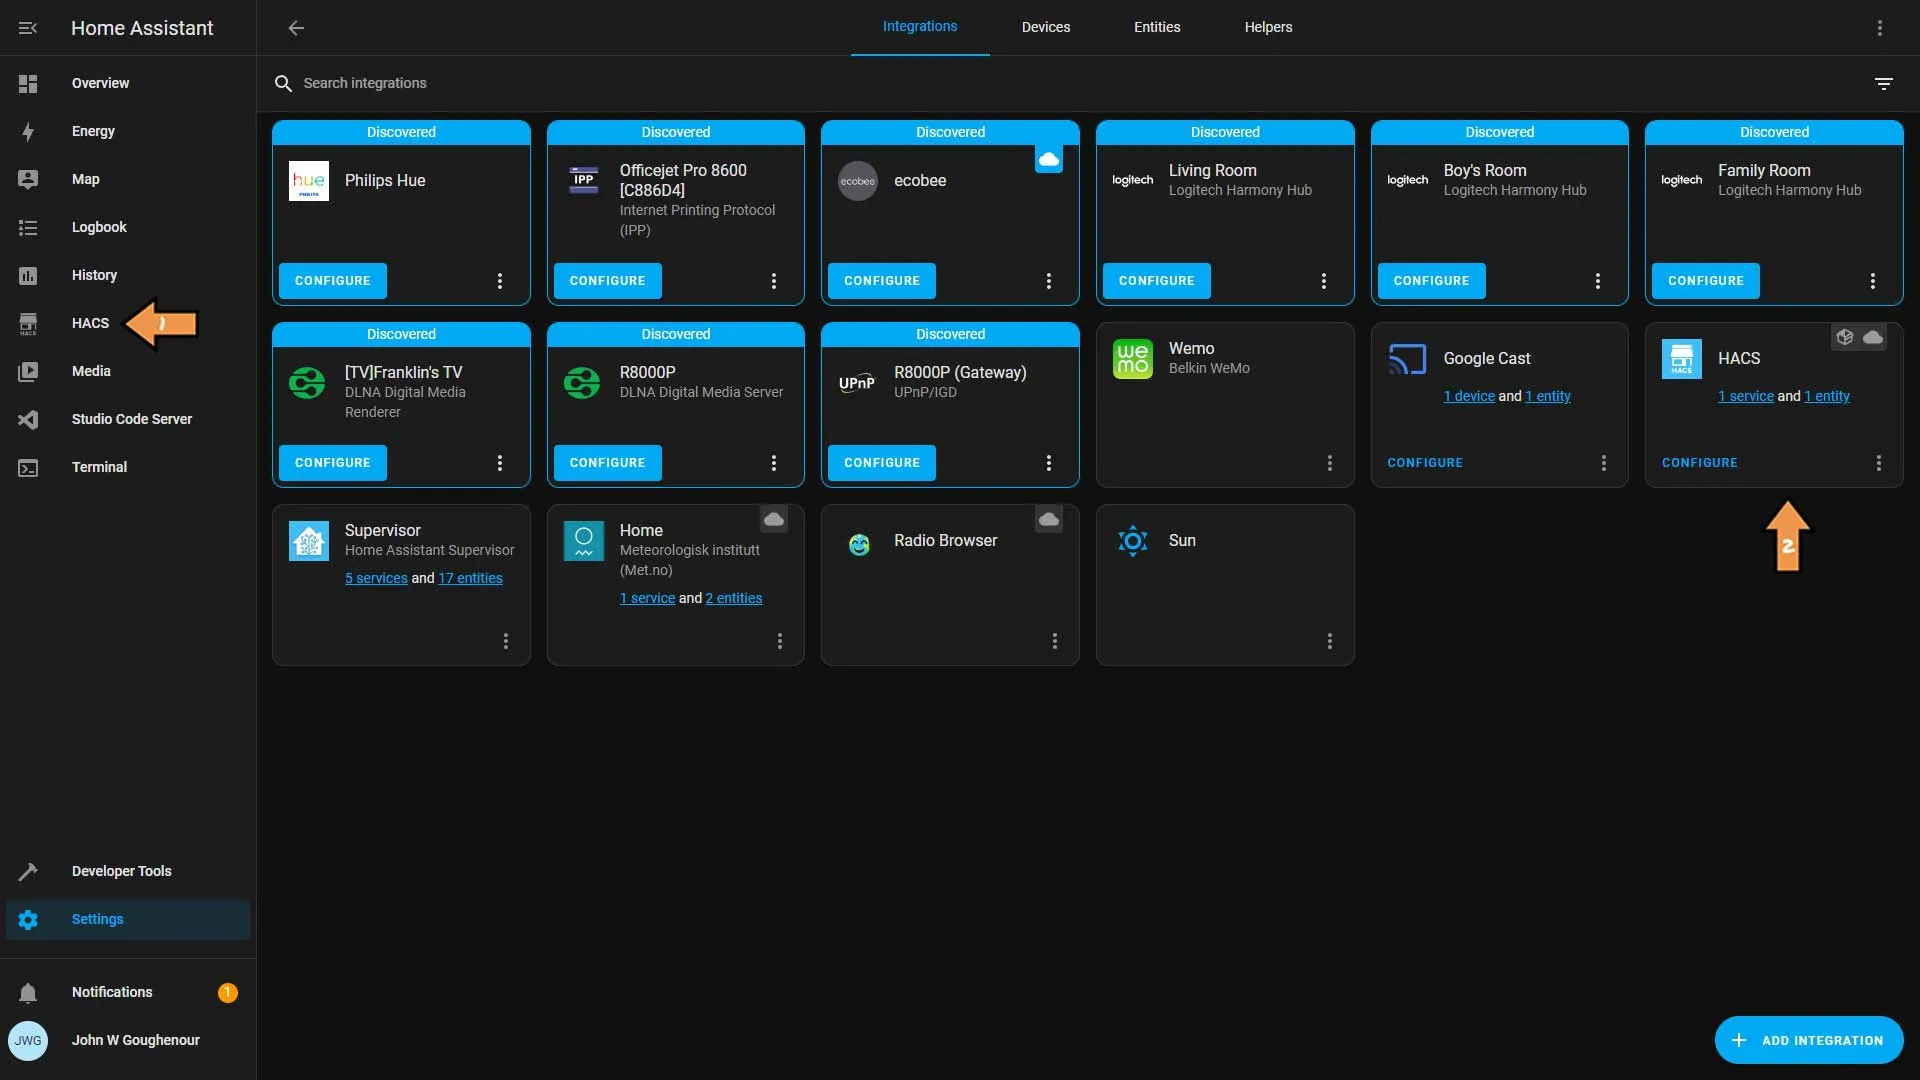
That’s it. You should see HACS in the side menu and under Integrations.
