The Ultimate Smart Home Automation Cookbook
Goodnight Automation is a practical and essential feature for any smart home, providing the perfect way to end your day. While setting up our smart home hub, we established a Night mode but left its activation flexible due to the subjective nature of adult bedtimes. The versatility of Goodnight Automation comes into play here, allowing for manual control over when your home transitions into Night mode. This is especially useful for those nights when routines vary, such as during special events like New Year’s Eve or date nights. You wouldn’t want your home switching to Night mode unexpectedly during these occasions.
With Goodnight Automation, you have the power to manually activate Night mode at your convenience. This automation not only switches the mode but also takes care of turning off all the lights, locking the doors, and setting the thermostat to your preferred nighttime setting. The integration of Goodnight Automation into your smart home setup ensures that your home responds to your lifestyle, rather than dictating it.
Additionally, Goodnight Automation includes the use of a virtual switch, enhancing its flexibility and user-friendliness. This virtual switch can be integrated with your voice assistant, allowing for voice commands to activate the automation. Alternatively, it can be assigned to a button action for even easier access. This level of customization makes Goodnight Automation not just a utility, but a personalized experience that adapts to your unique living habits, ensuring your home is always in sync with your needs.
Automation Details
Required Devices
- Virtual Device
- Smart Lighting
- Smart Locks
- Smart Thermostats
Triggers:
- Virtual Switch Turns On
Conditions:
- Don't Turn Off Bathroom Lights If Occupied
Actions:
- Set Mode to Night
- Turn Off All Lights
- Lock All Doors
- Lower Thermostat
Important: We are going to be using our All Lights group. Check out this automation to learn how to Create Groups.
We'll only cover a few options for this automation, but the possibilities are endless. You could implement your TVs, Garage door opener, or any device you want.

Hubitat
Goodnight Automation
The Official Documentation for Rule Machine
Setting Up the Automation
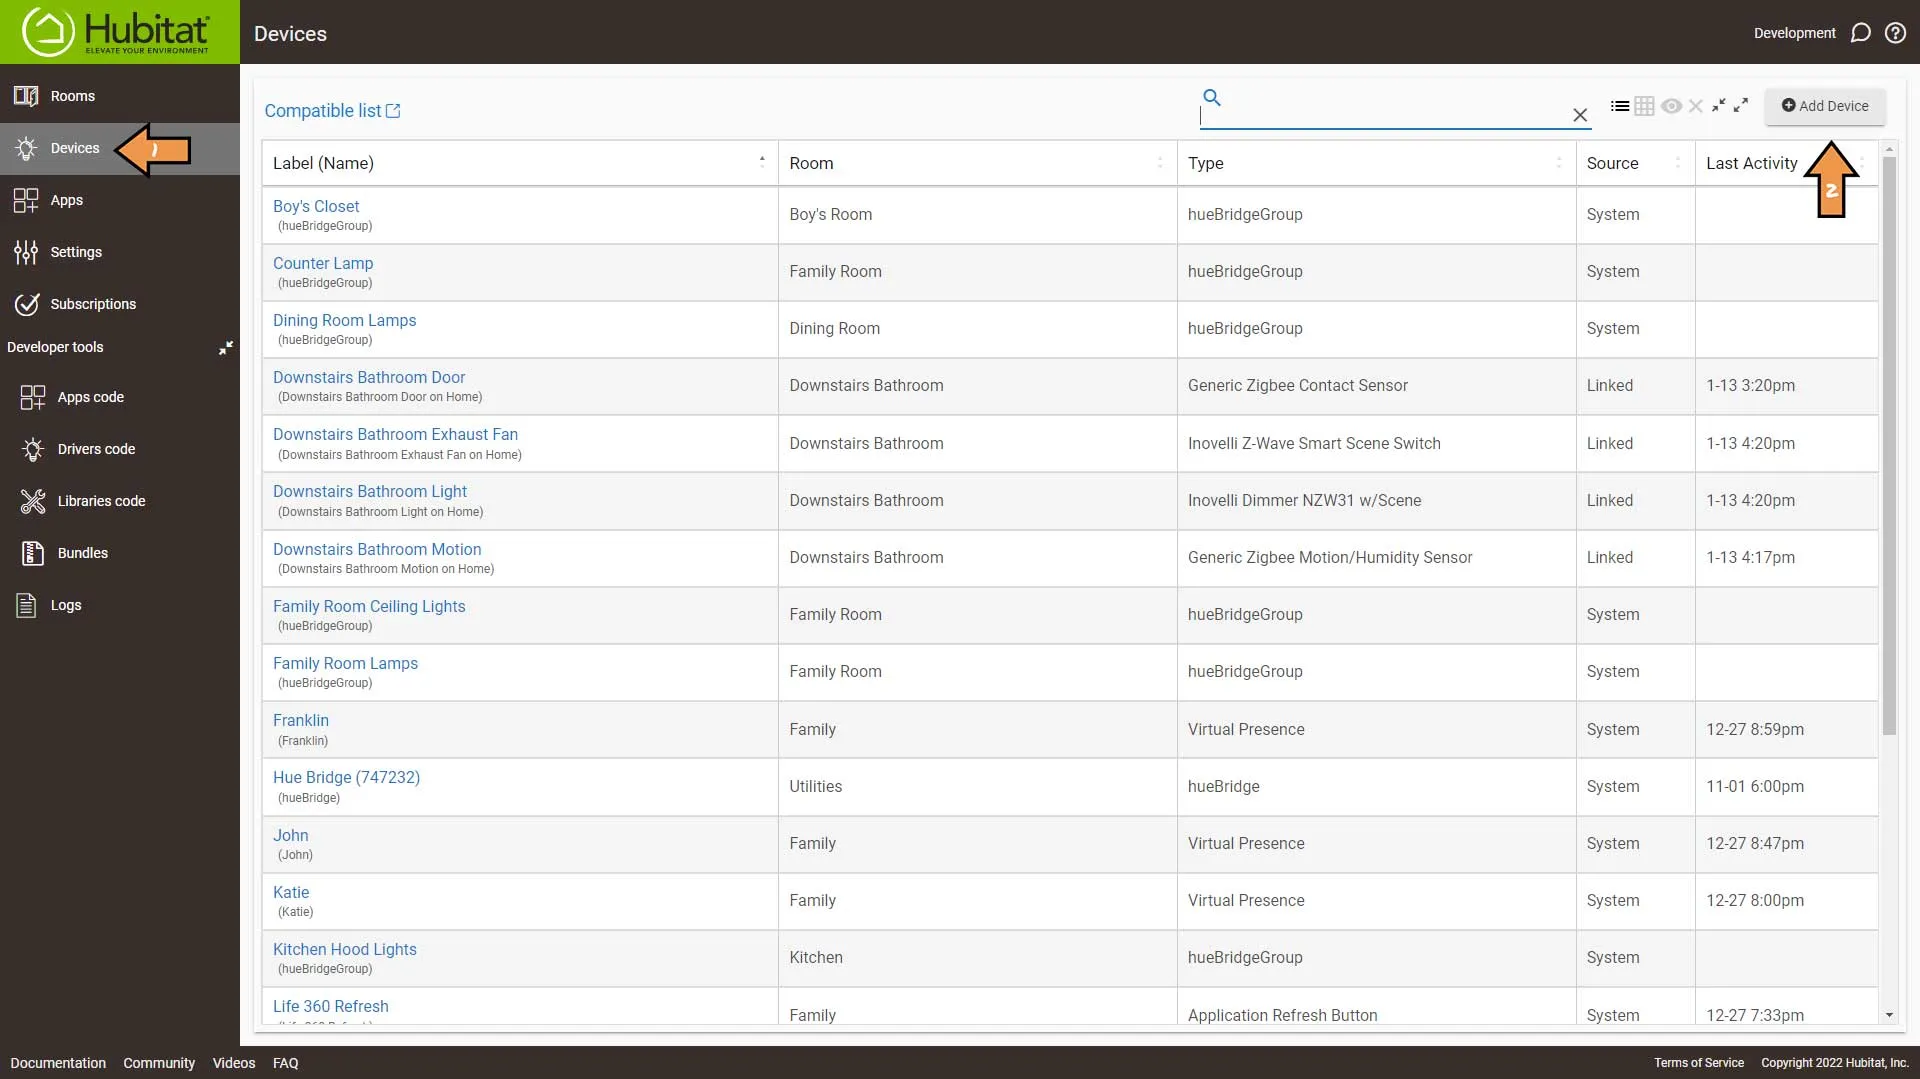
First, go to Devices and then click Add Device.
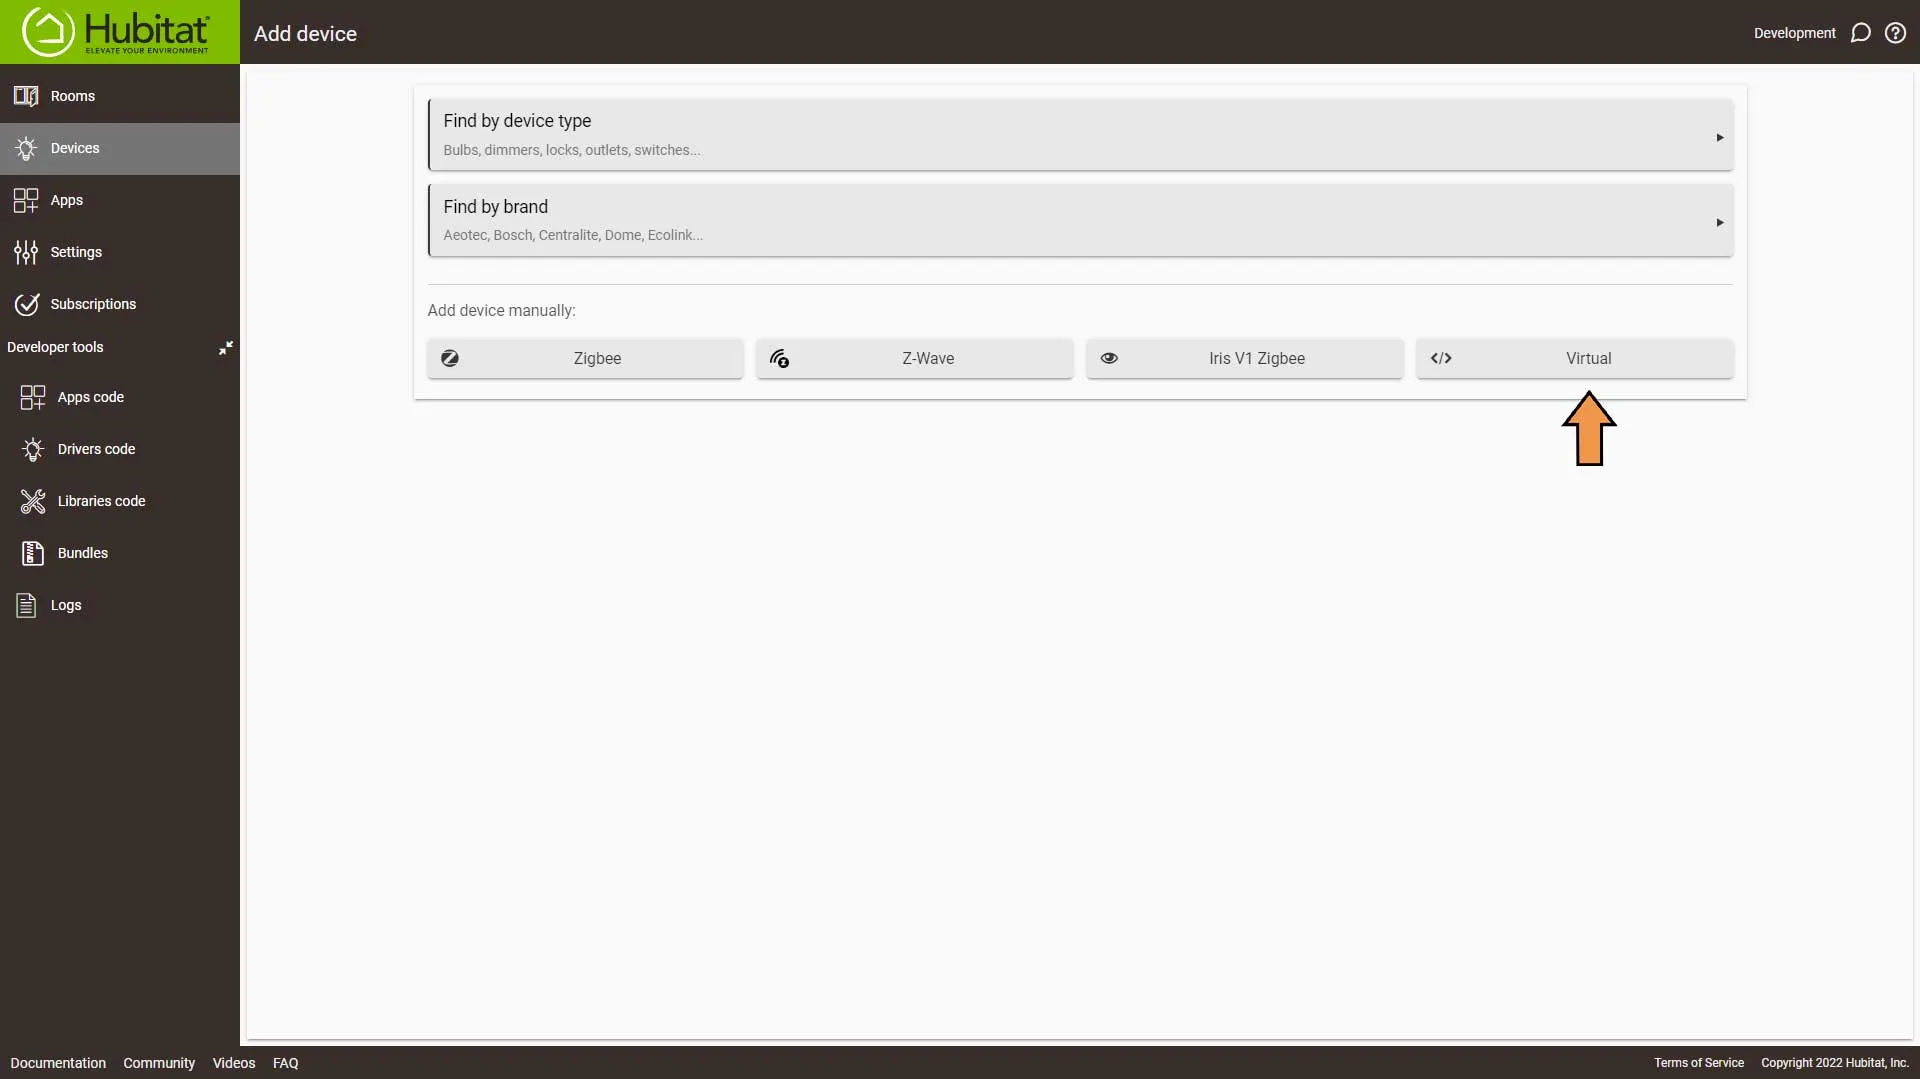
Click the Virtual button.
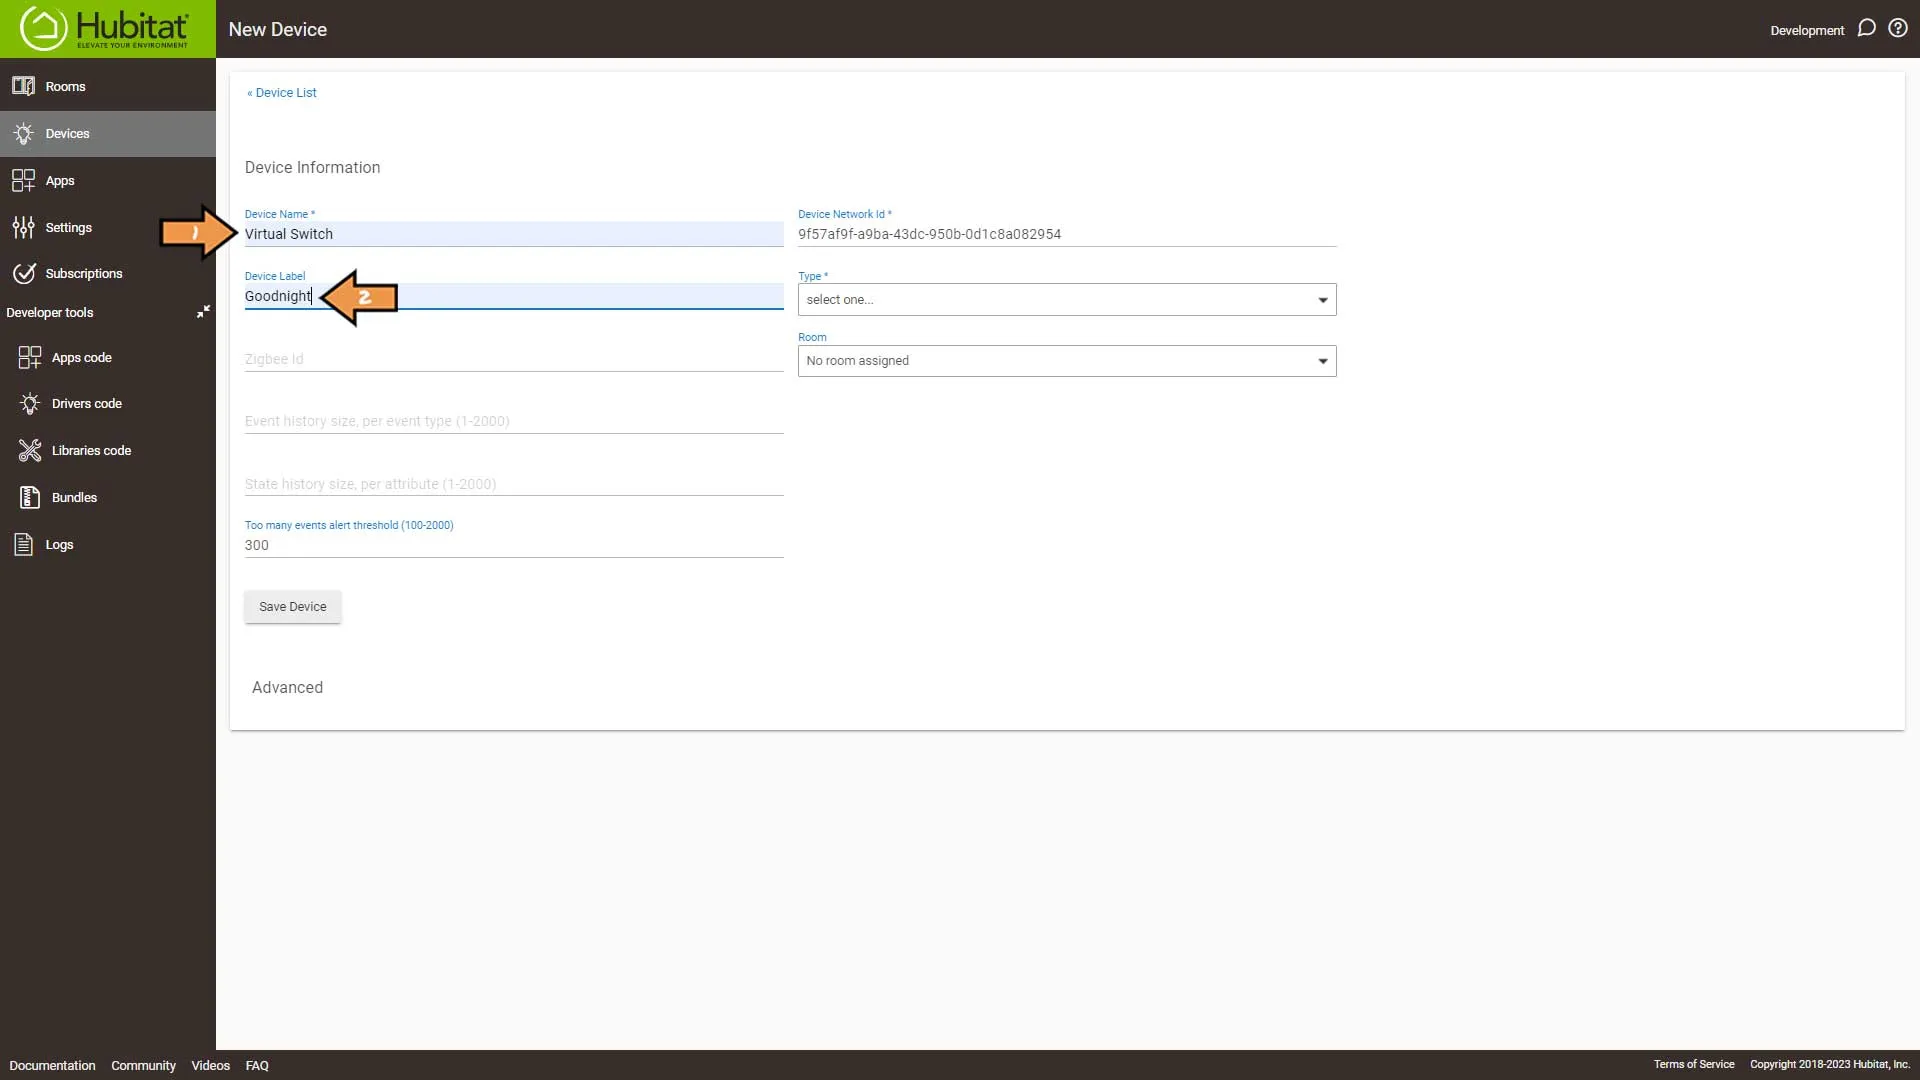
Add the Device Name and Device Label. Of course, you could enter the Device Name, but I like to use that to remind me what it is. Then the label is the name of the device.
For the Device Type select Virtual Switch from the drop-down.
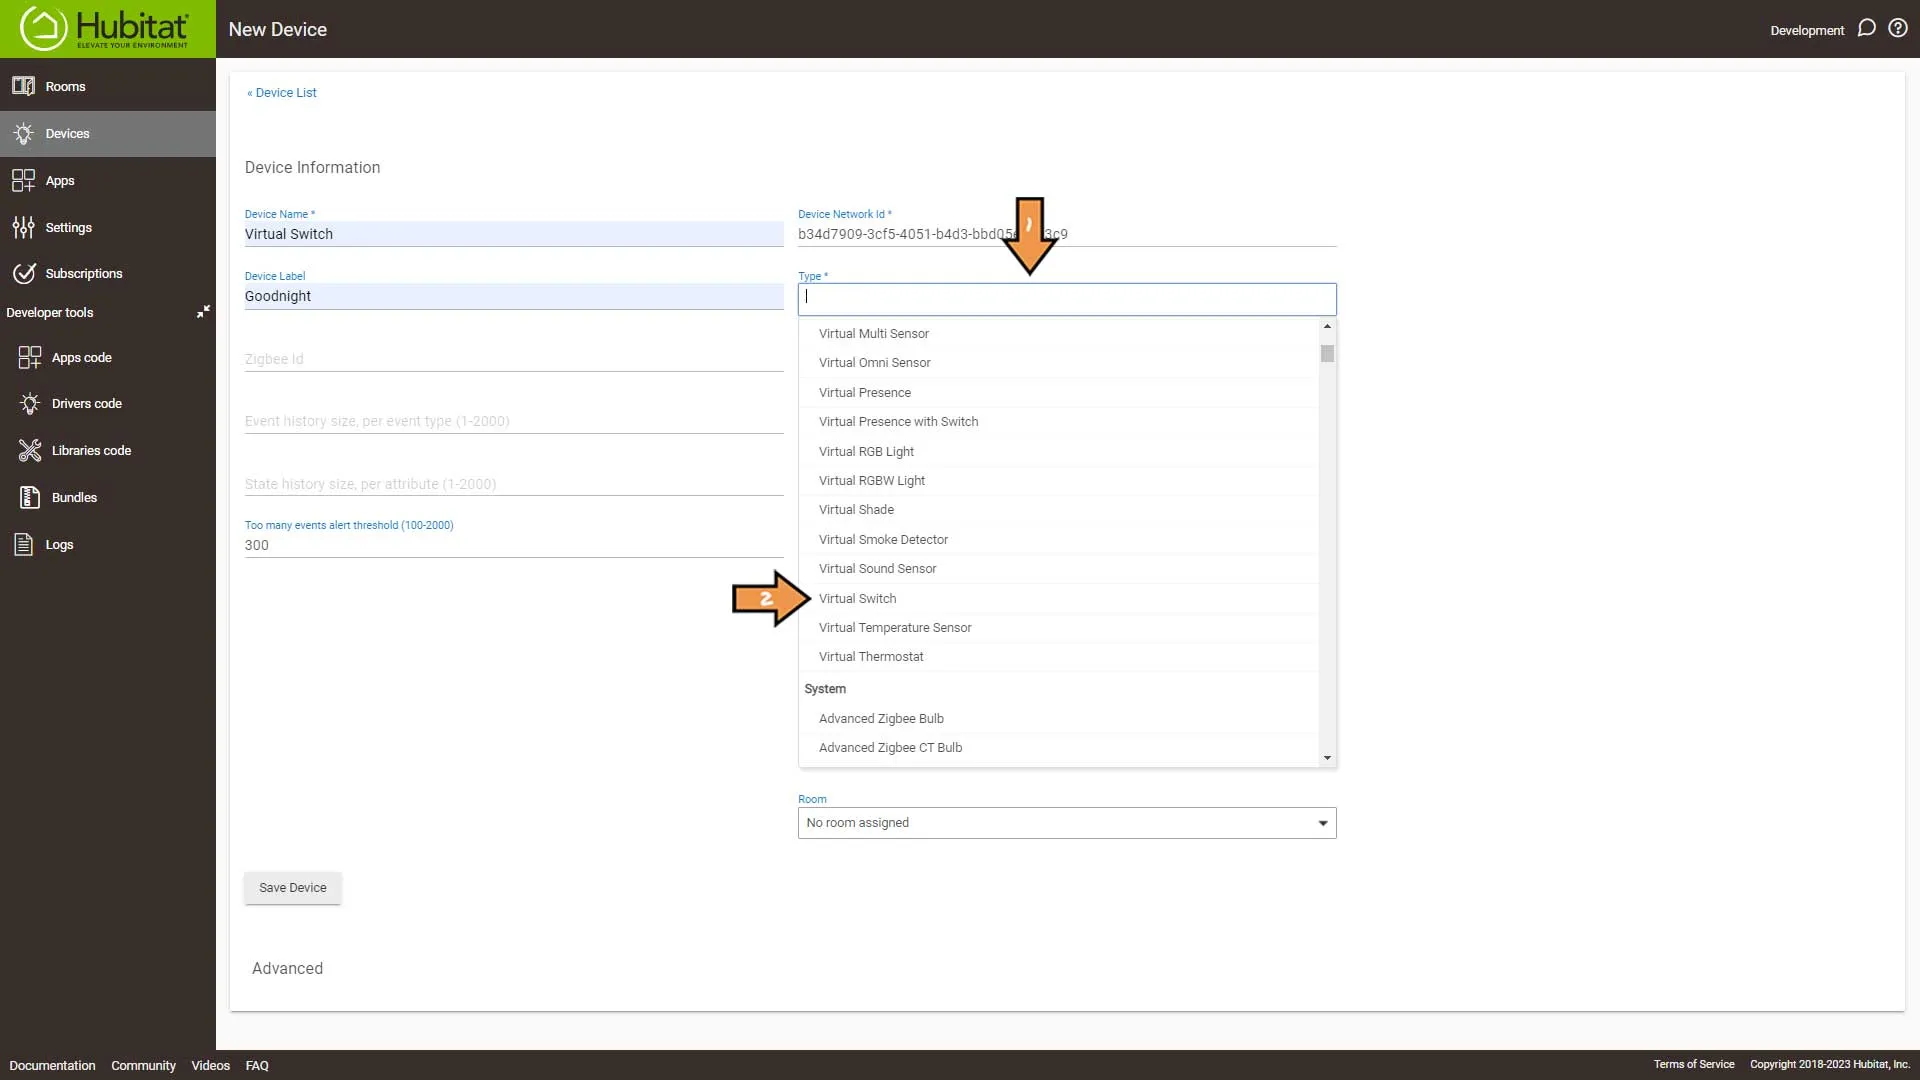
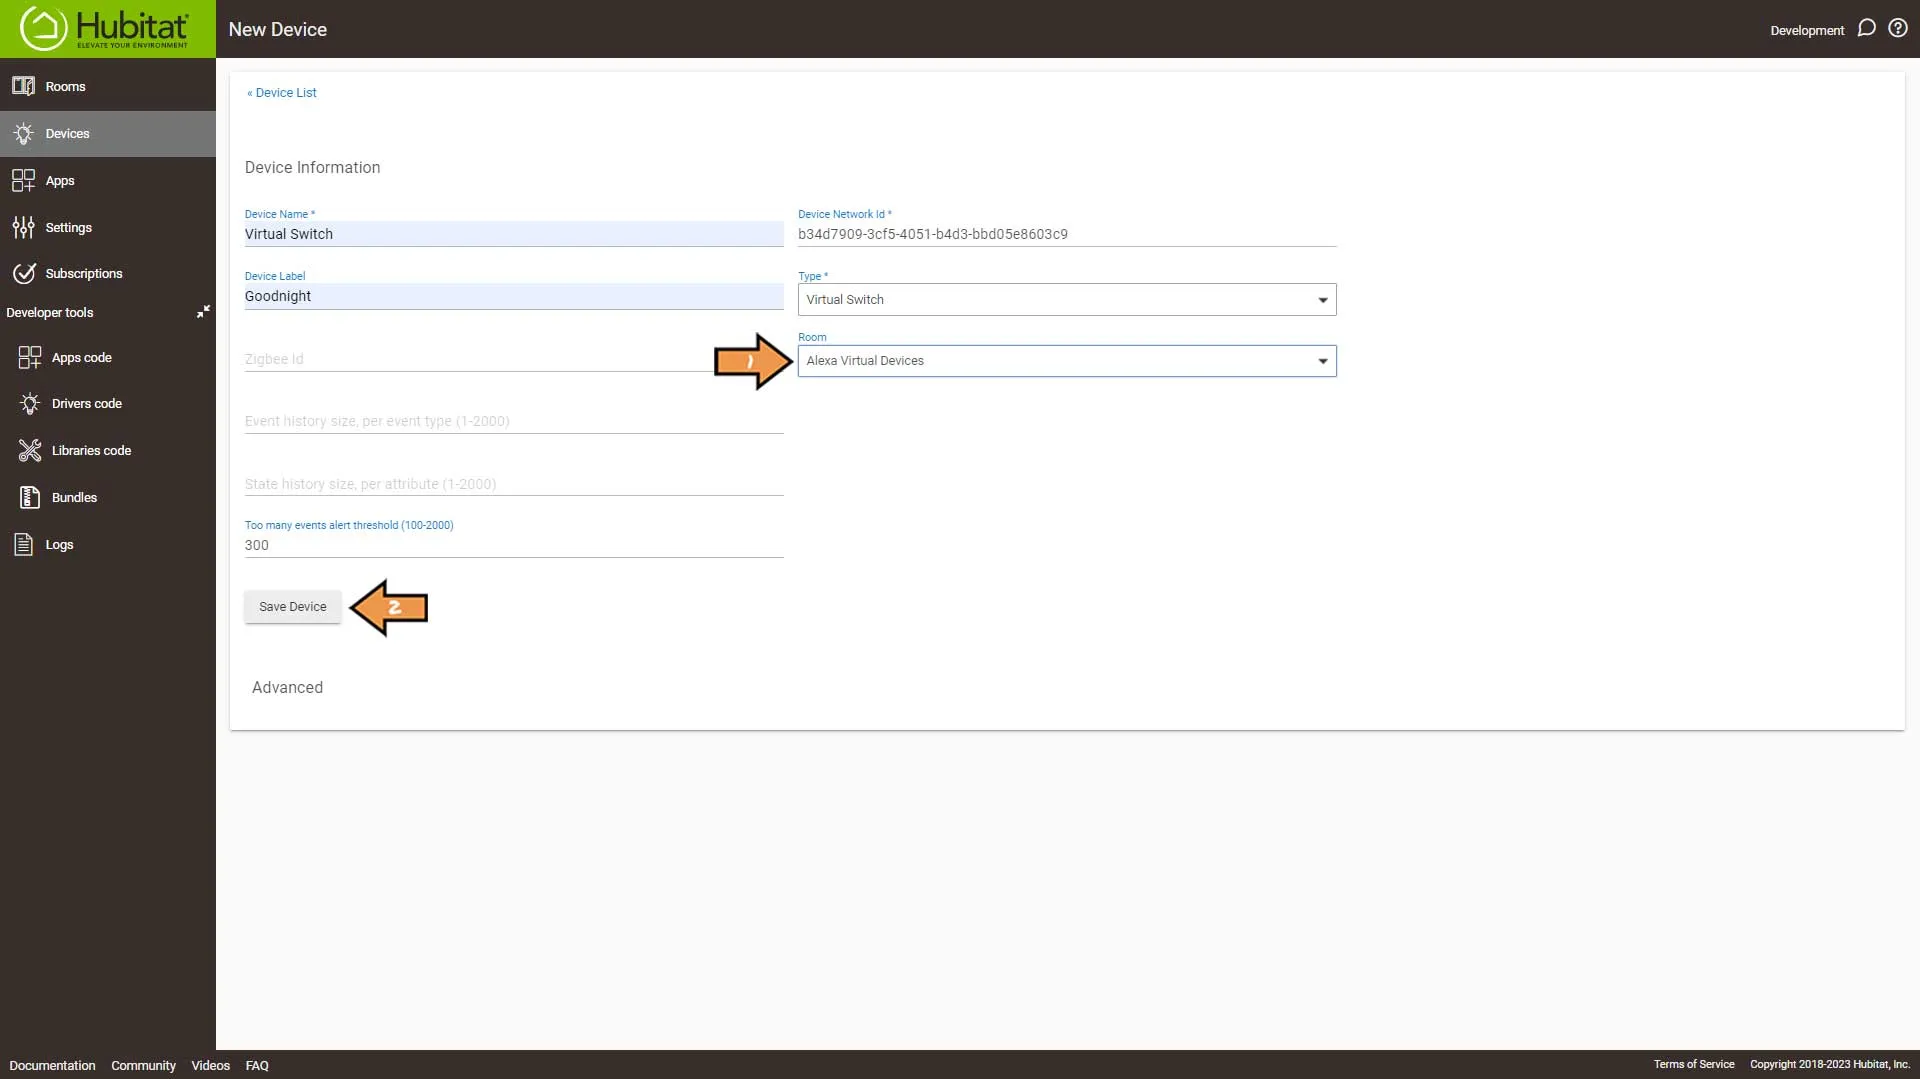
Add the device to a Room and click Save Device.
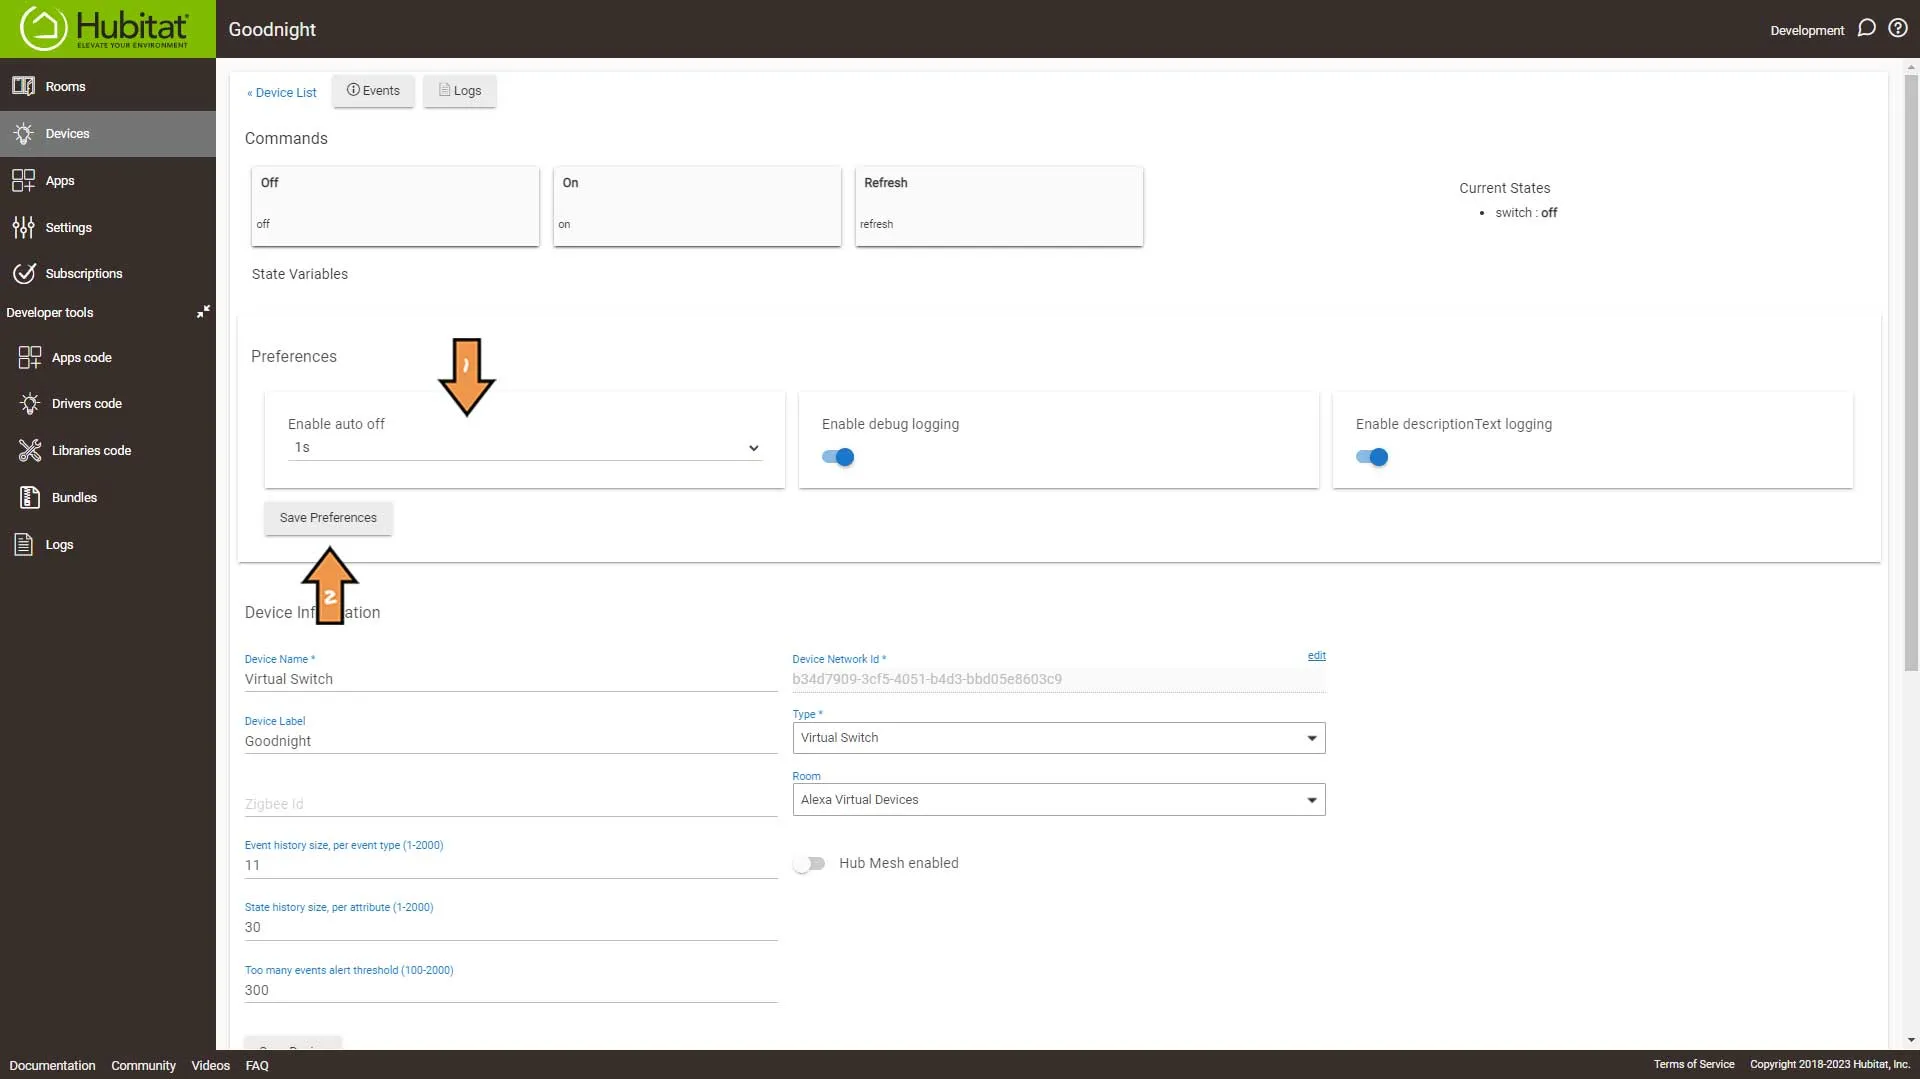
On the Device screen set Enable Auto off for 1 second and click Save Preferences.
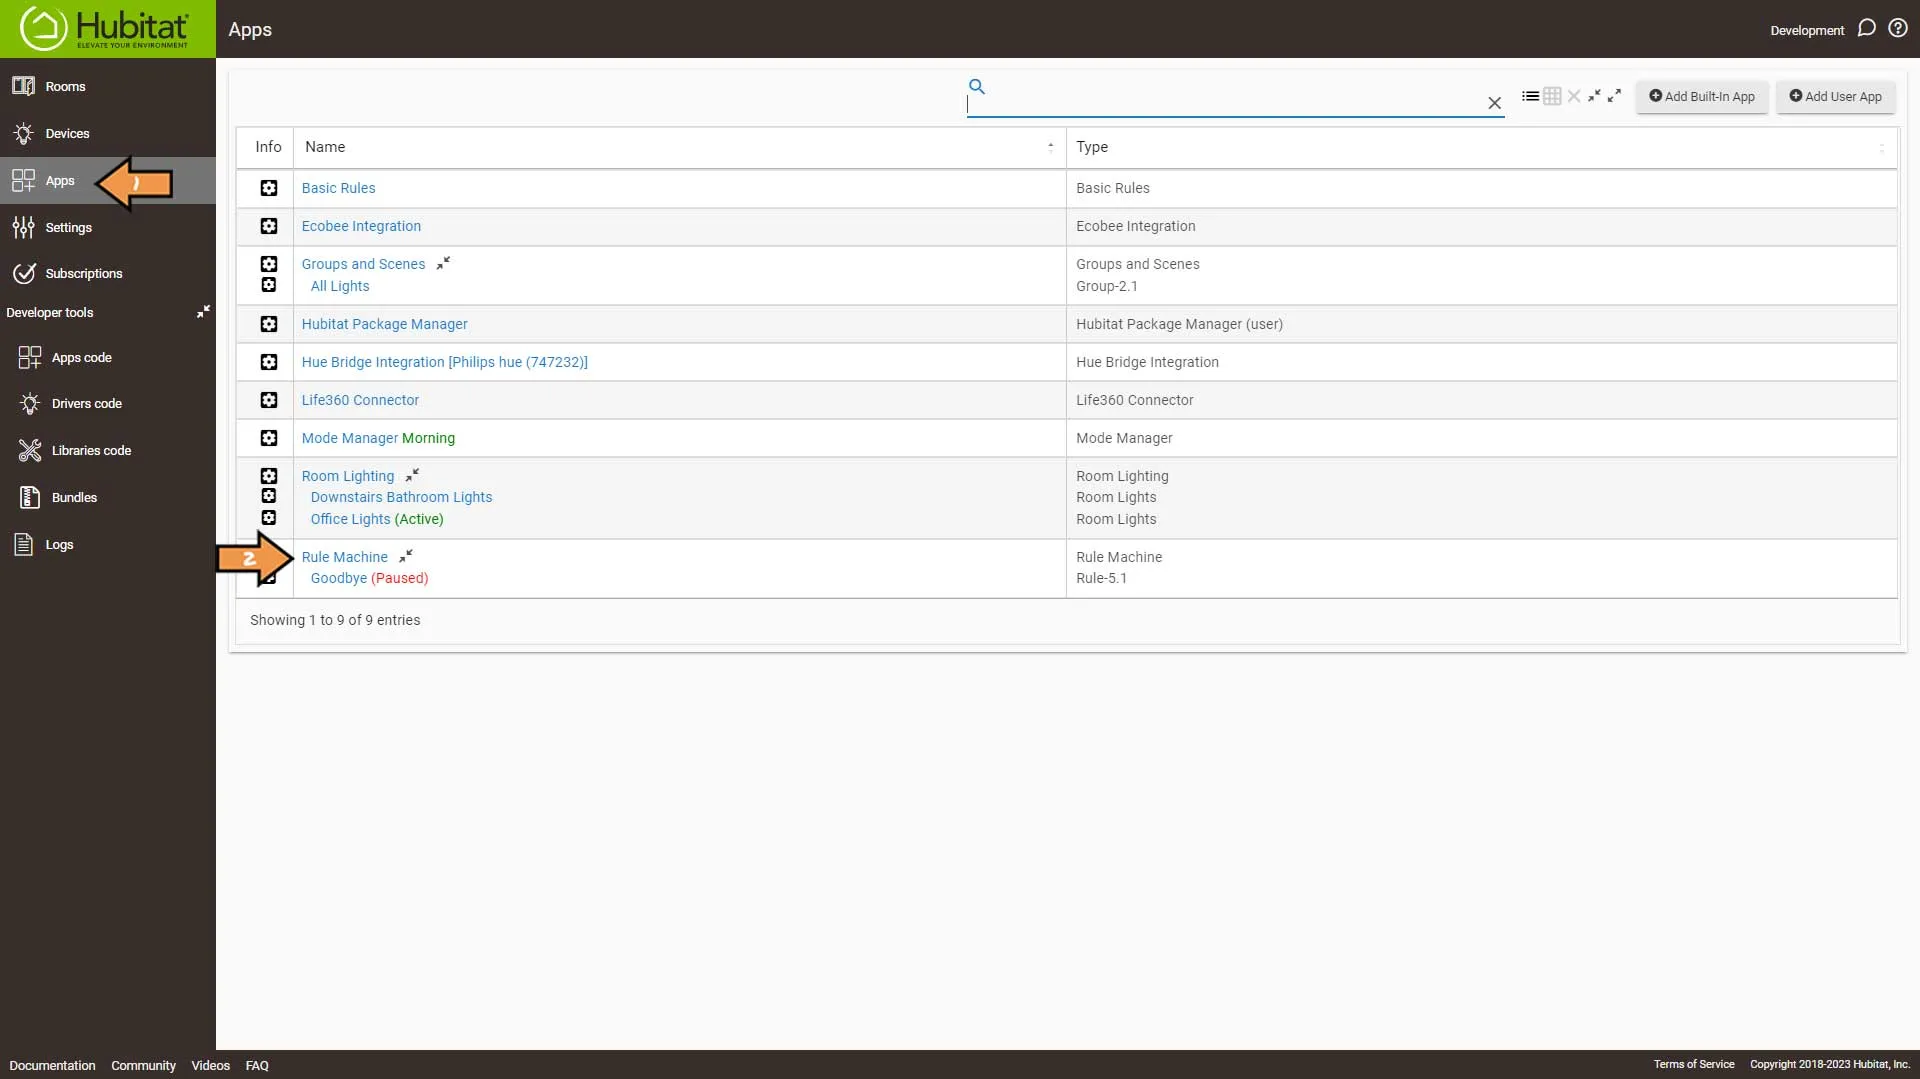
Next, go to Apps and click Rule Machine.
Select Create New Room Lights Automation…
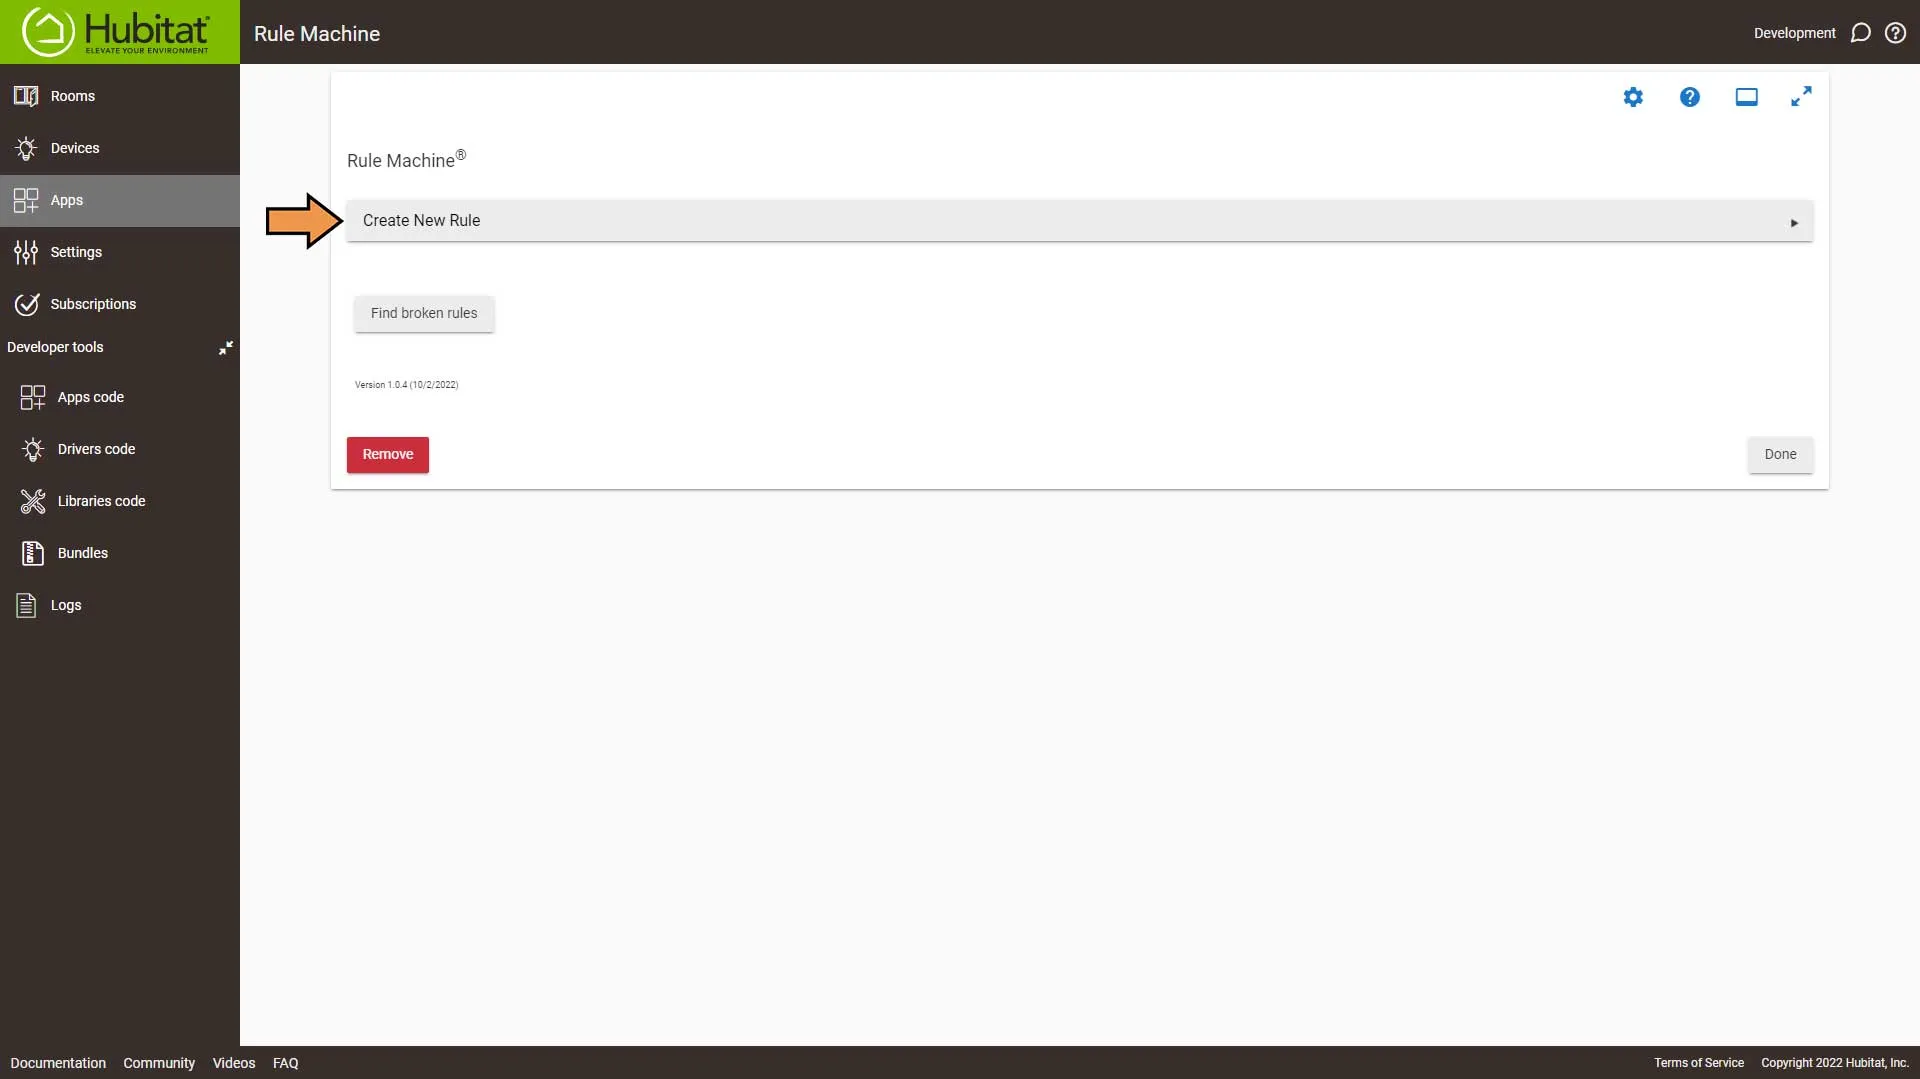
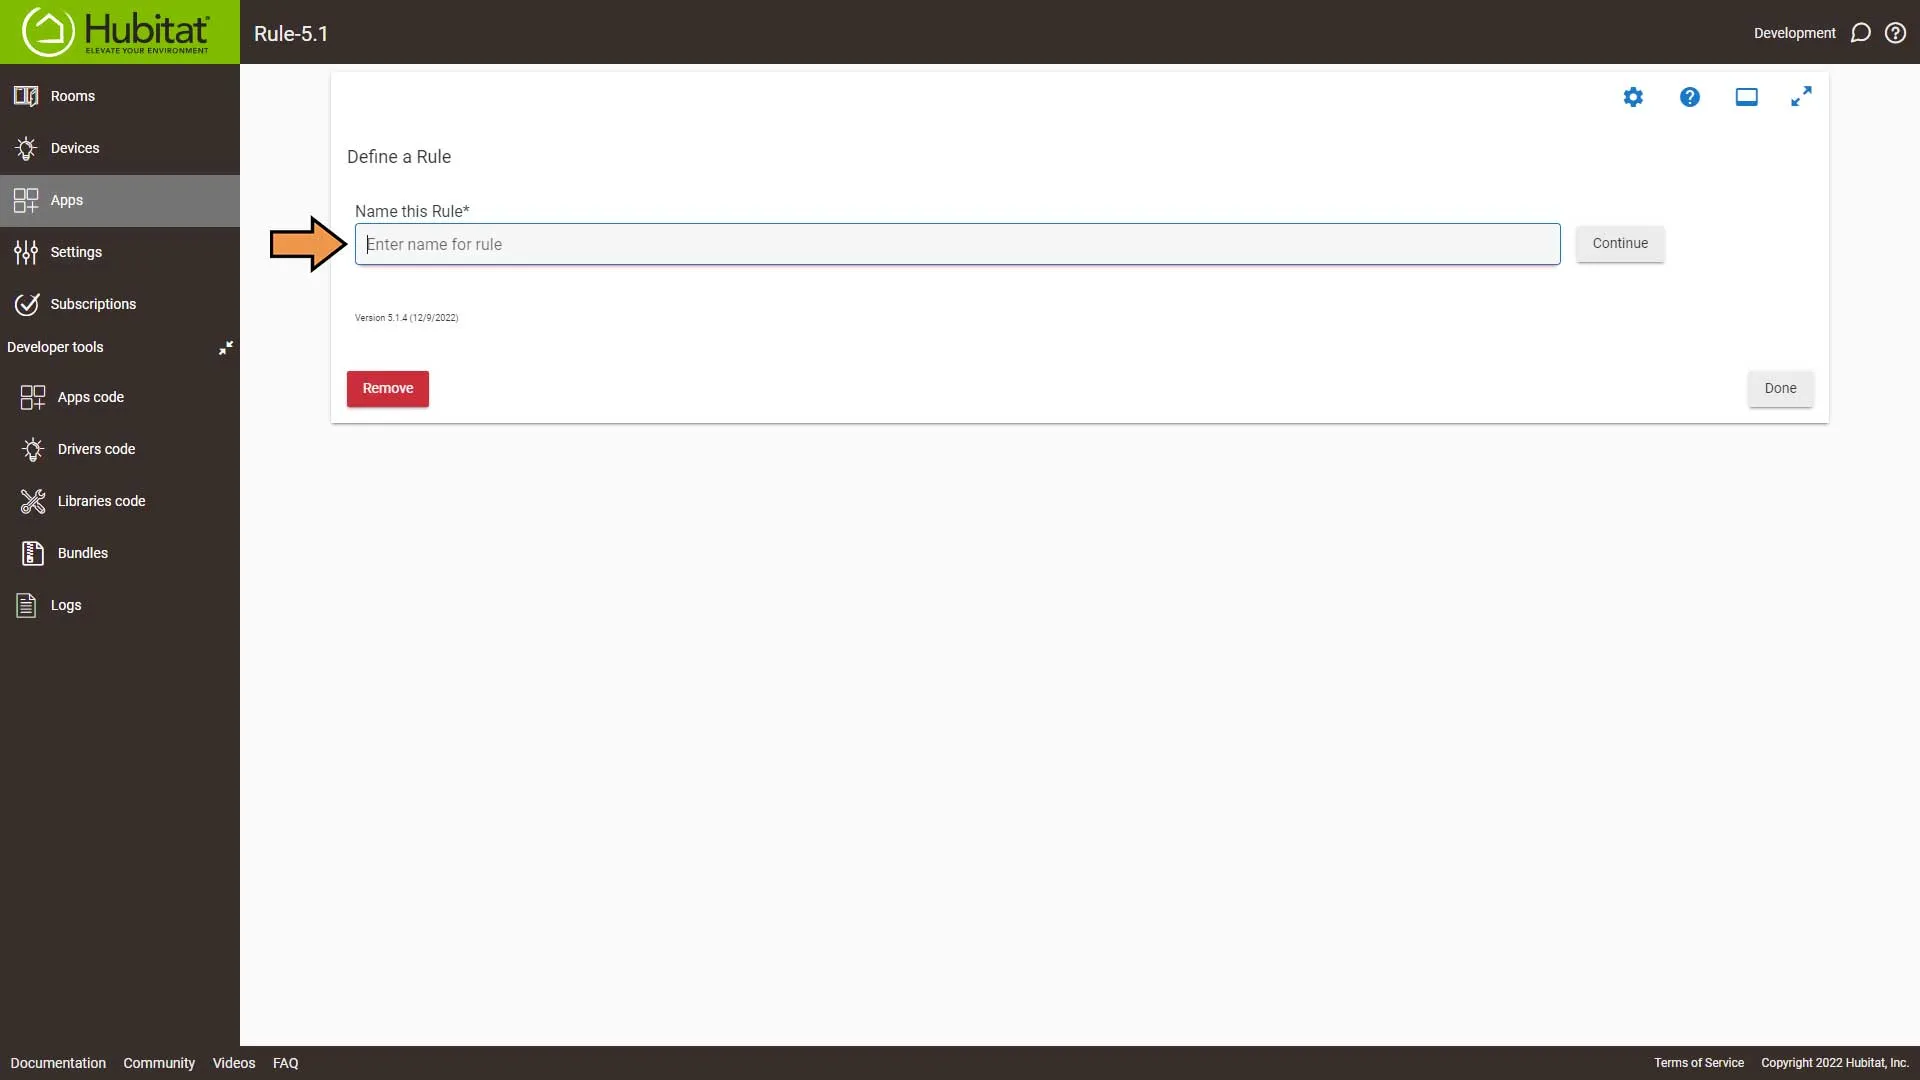
Enter a name for the Rule and hit Enter.
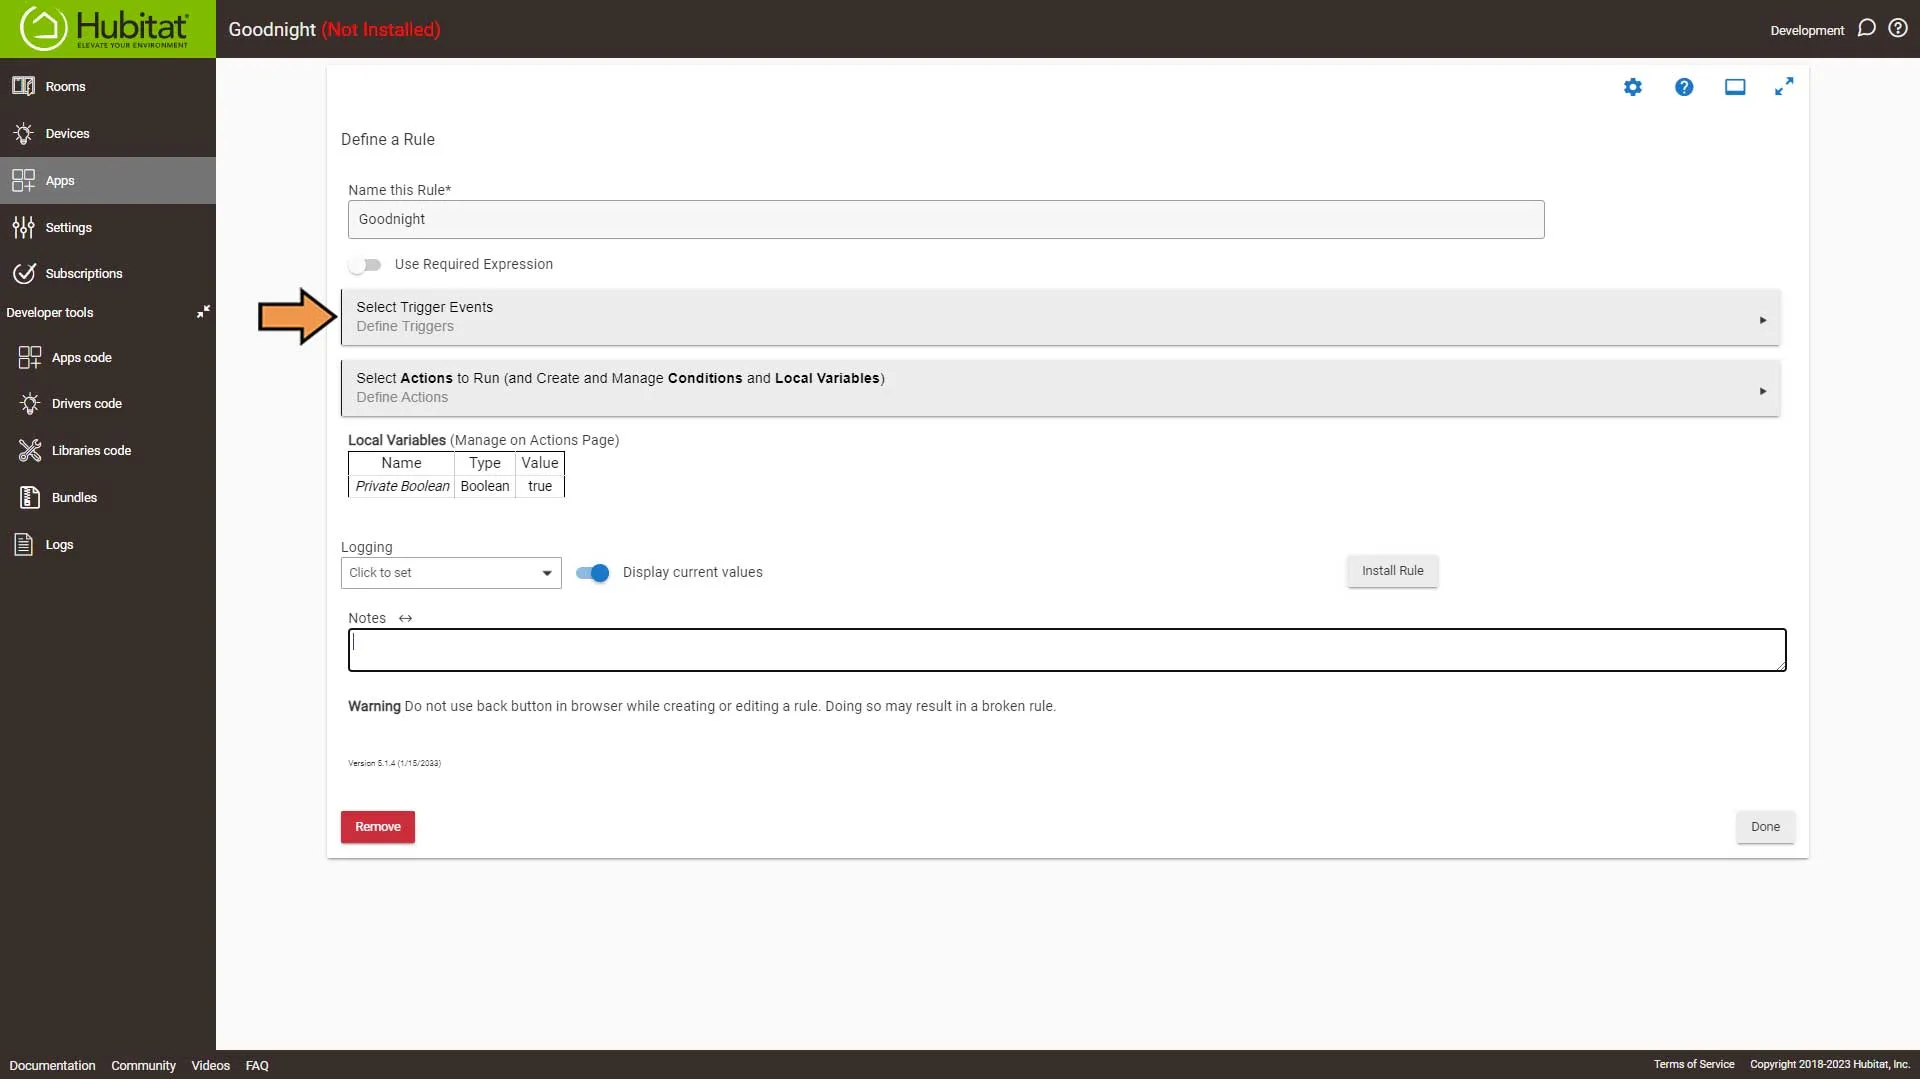
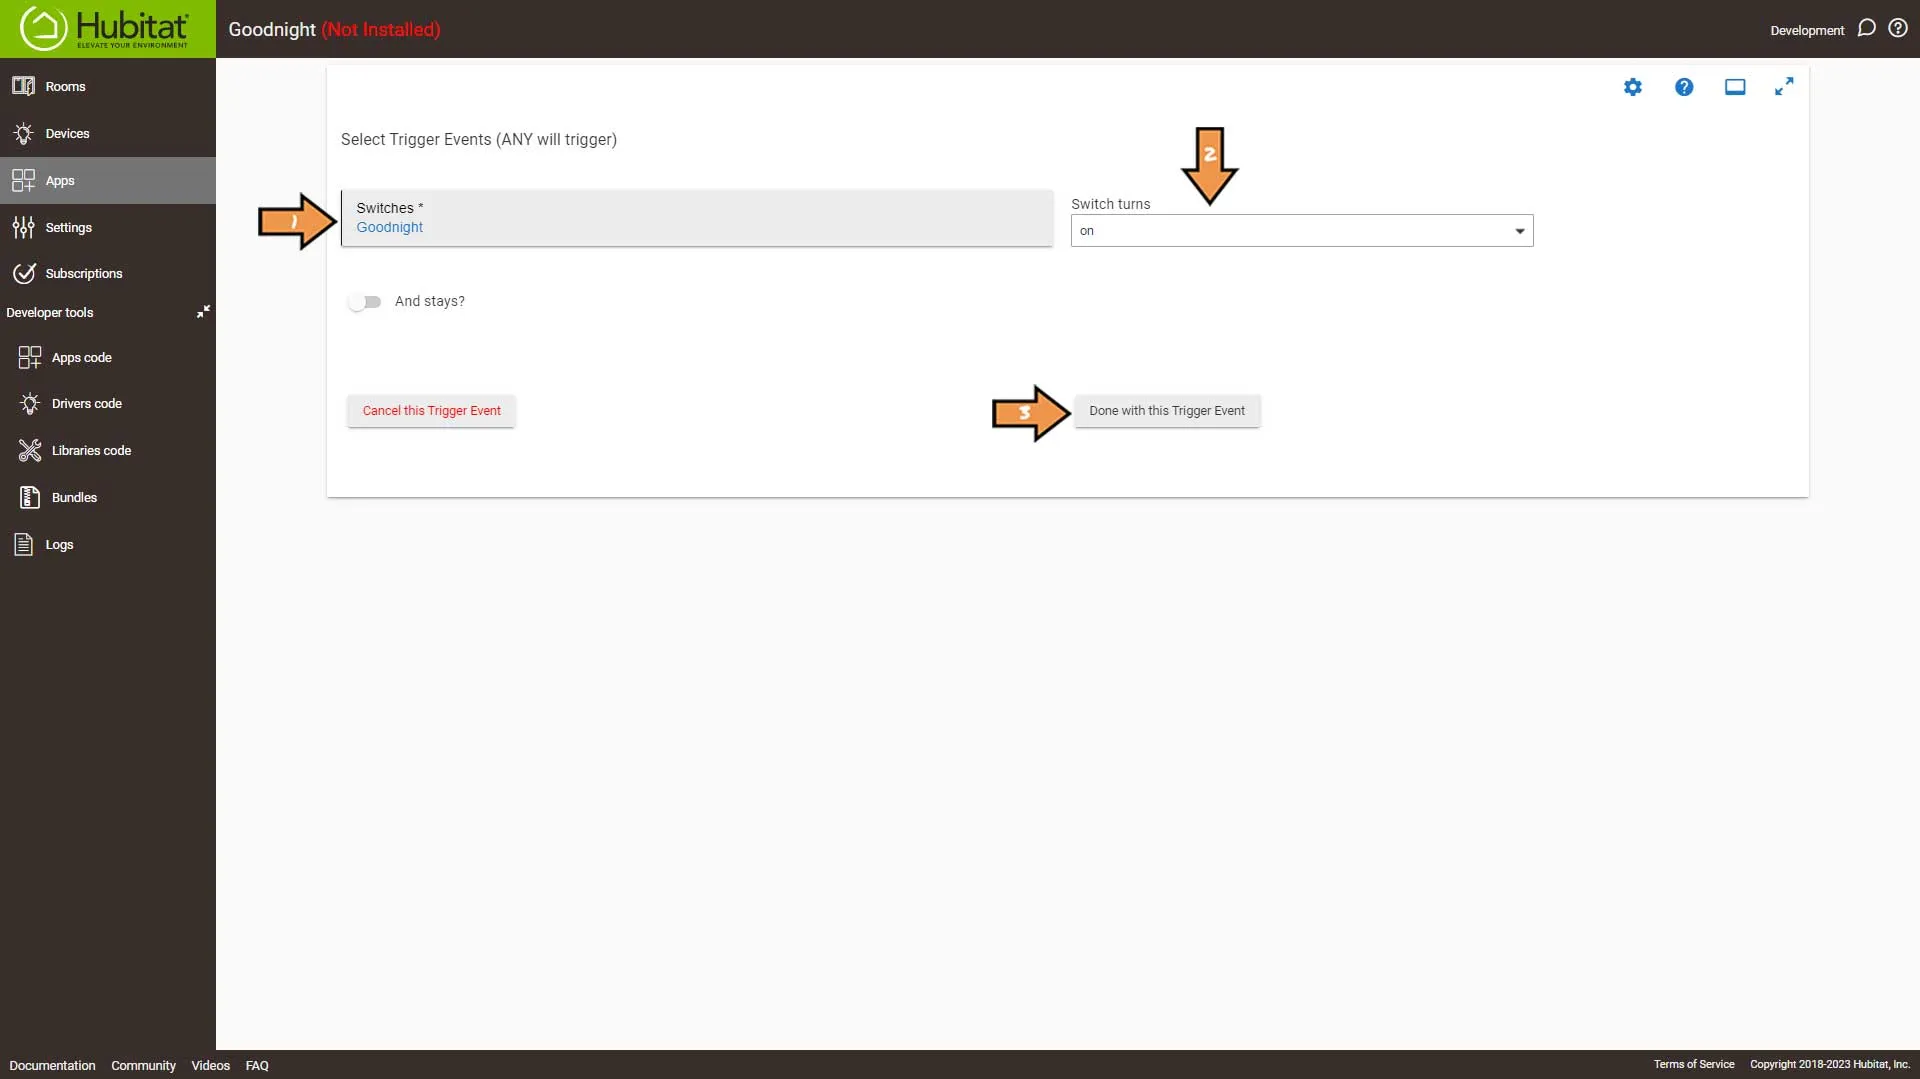
Select Trigger Event.
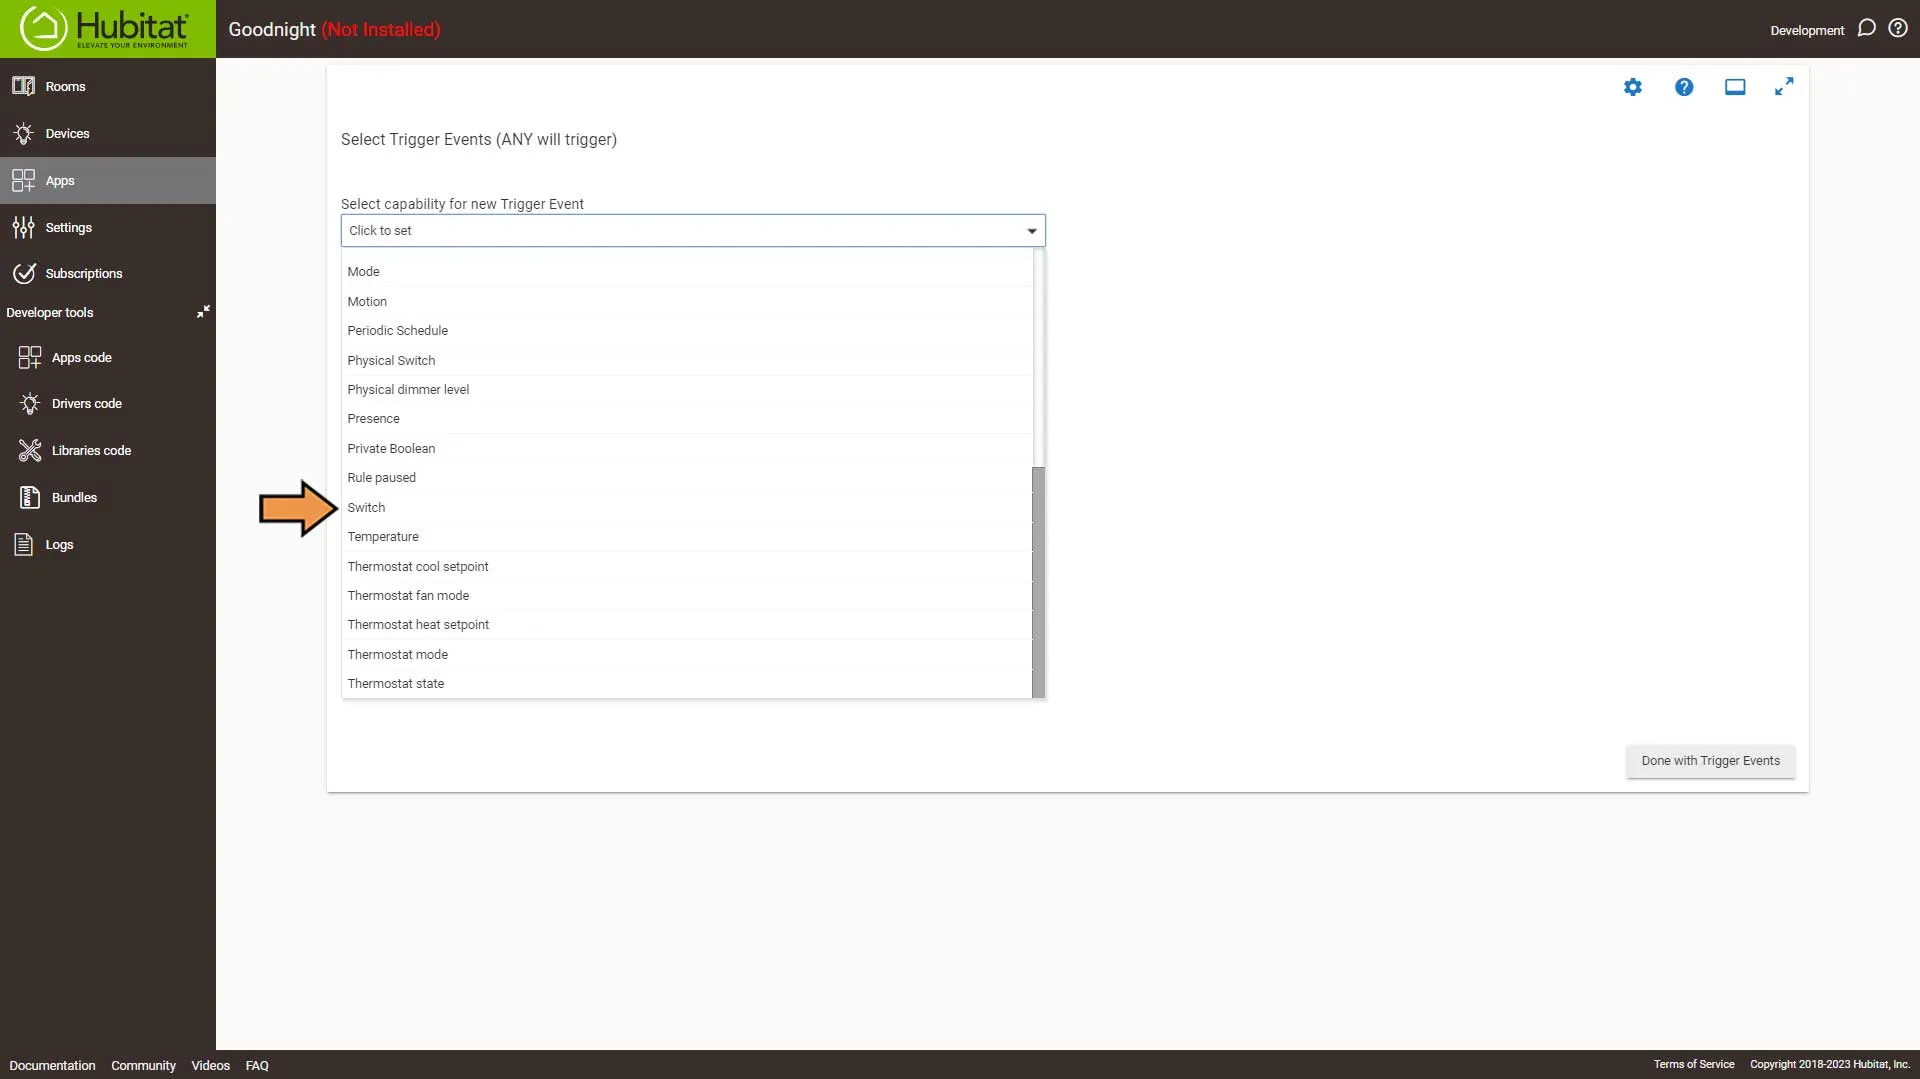
From the Capability drop-down, select Switch.
Do the following:
- From the Switches drop-down, select the virtual switch we created earlier.
- From the Switch Action drop-down make sure it’s set to On.
- Then click the Done with this Trigger Event.
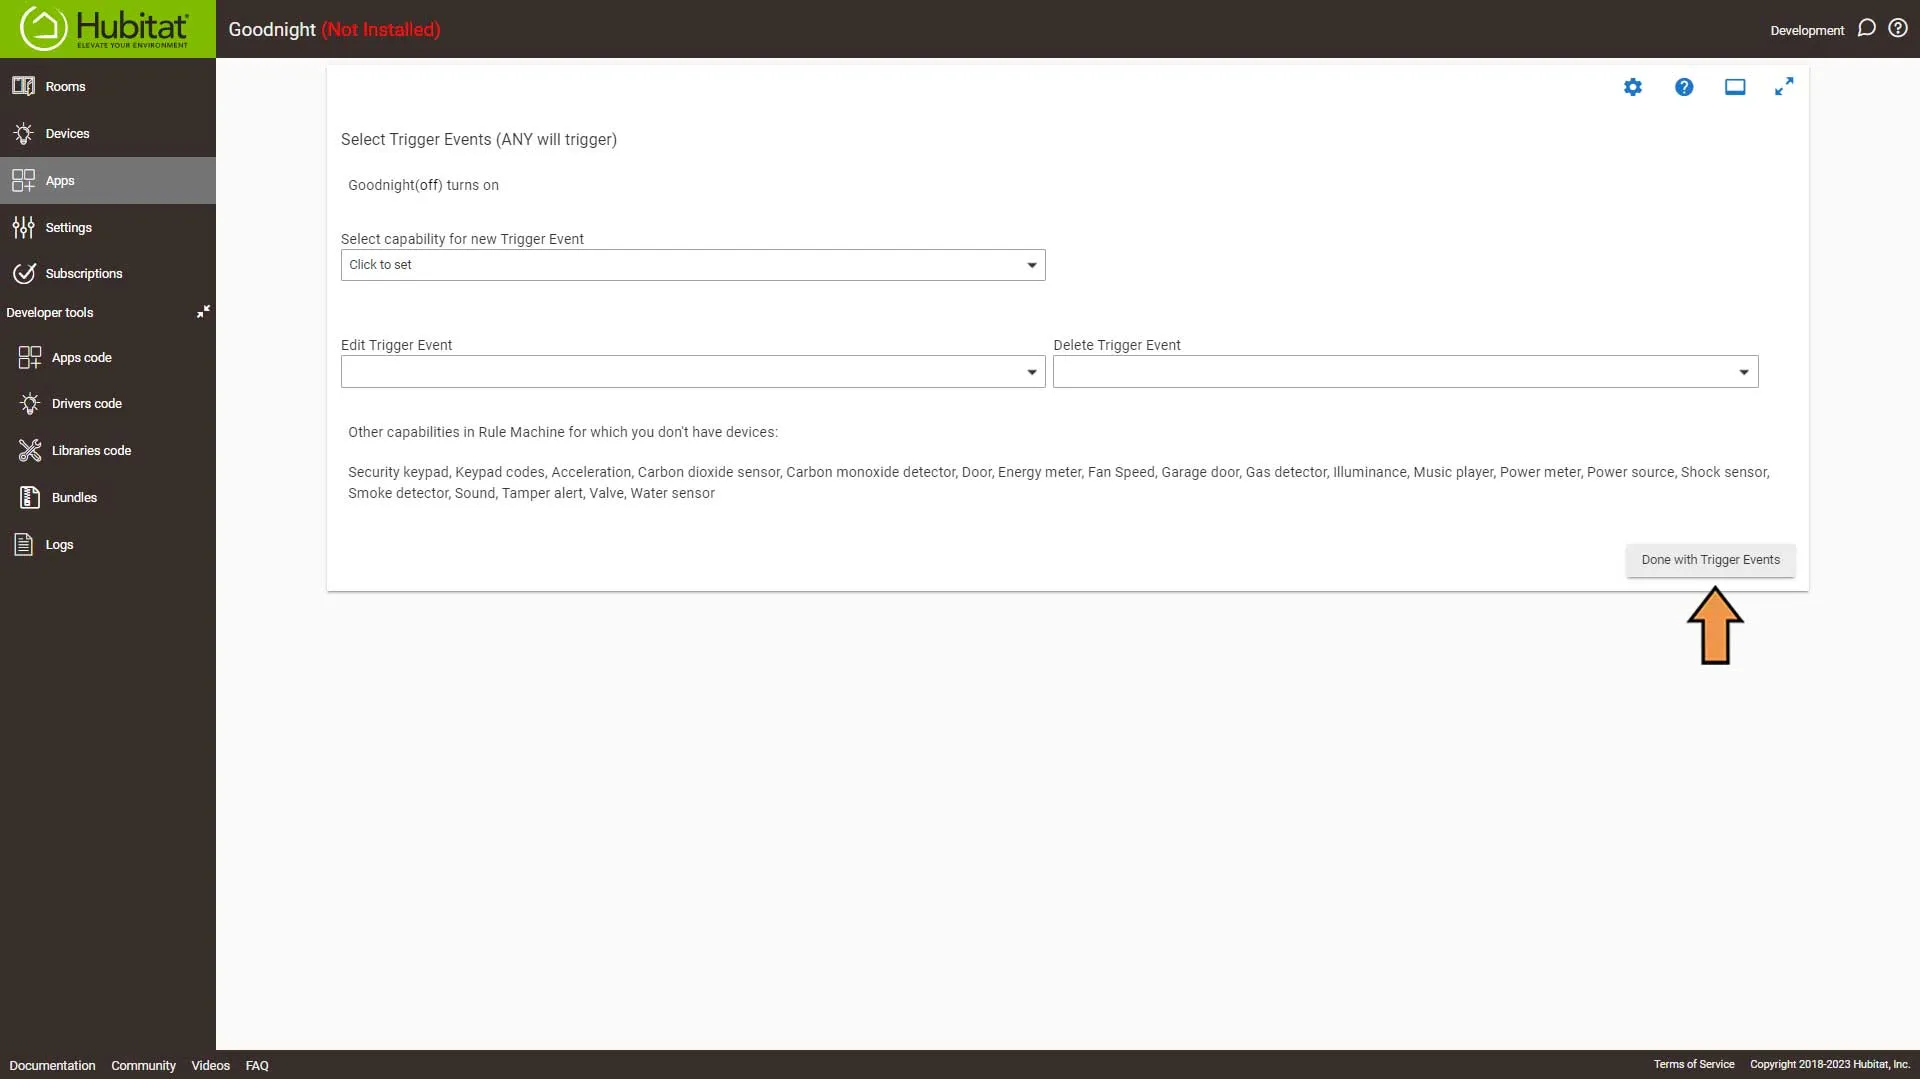
On the Select Trigger Events page, click Don with Trigger Events.
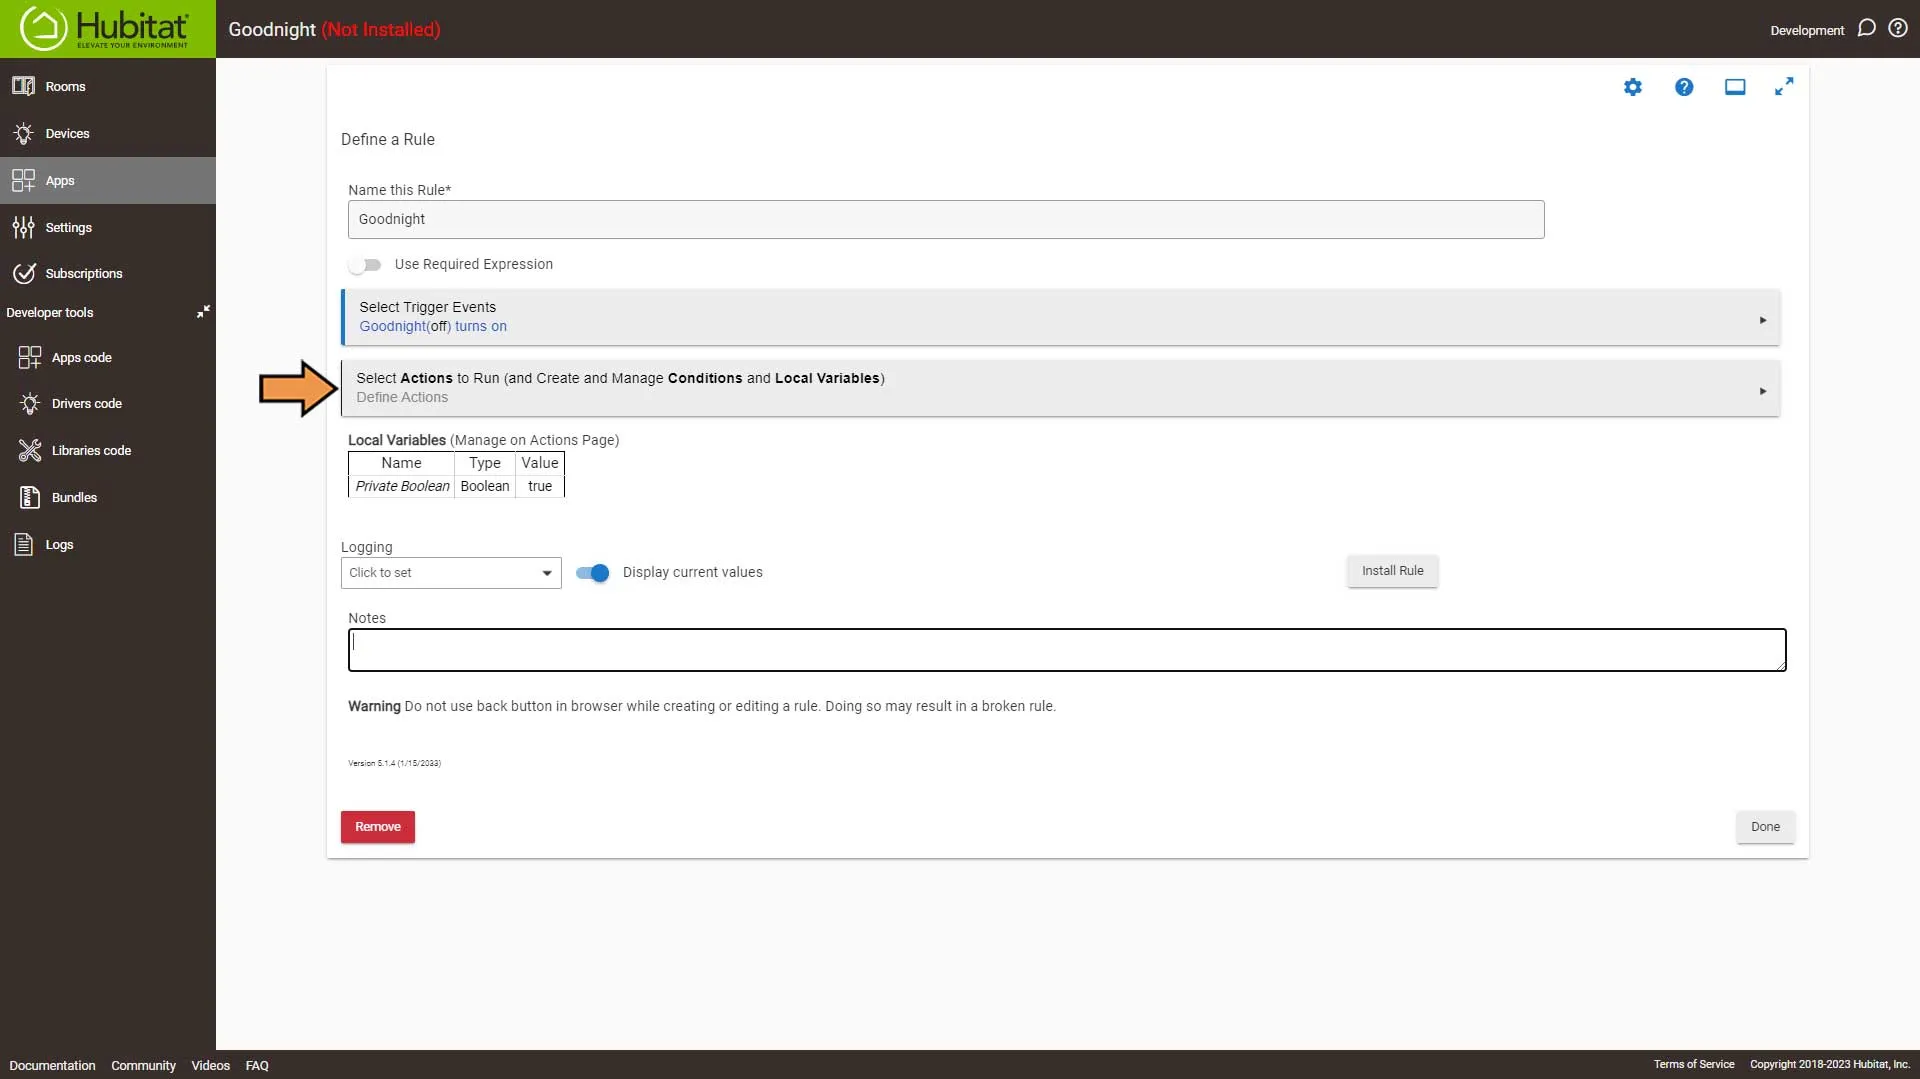
Select Actions to Run.
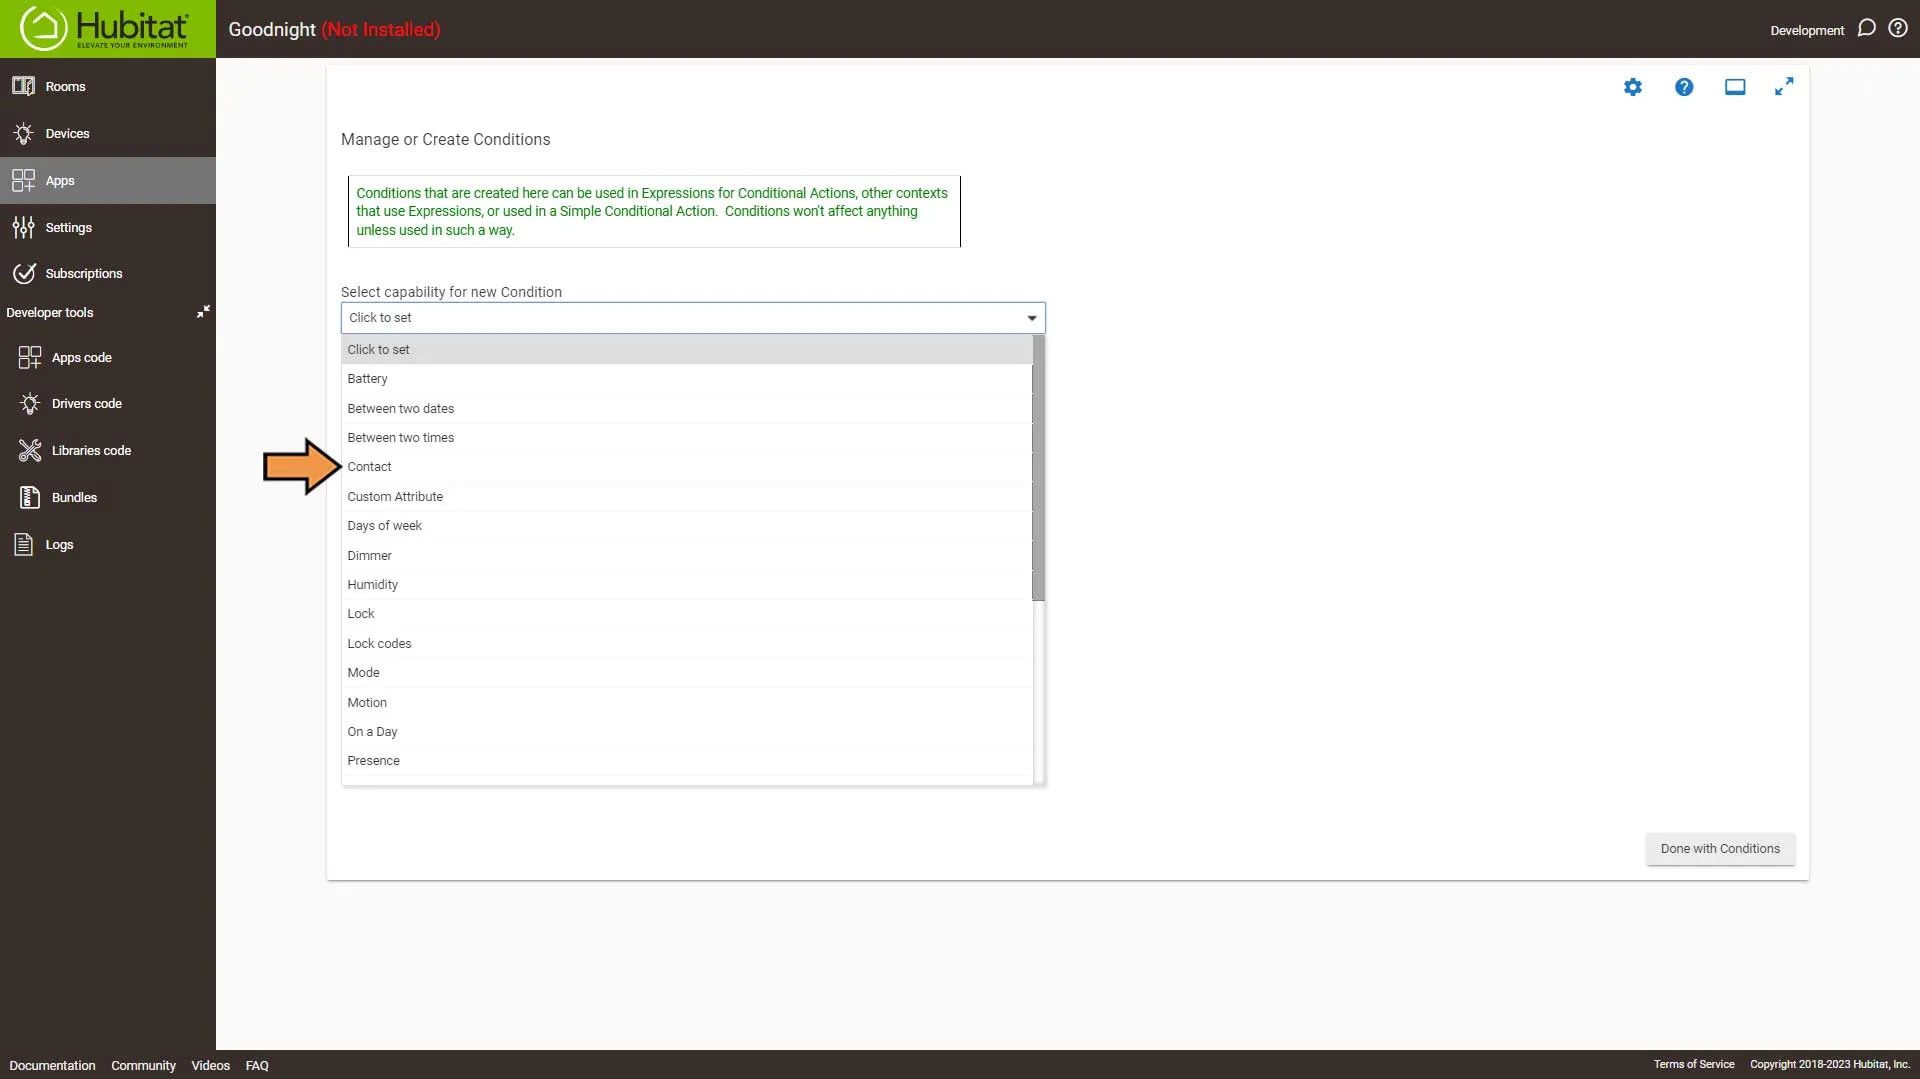
Then click Create Conditions.

From the Select capability for new Condition drop-down, select Contact.
From the Contact sensors drop-down select our bathroom door sensor, make sure Contact is set to open and click the Done with this Condition button.
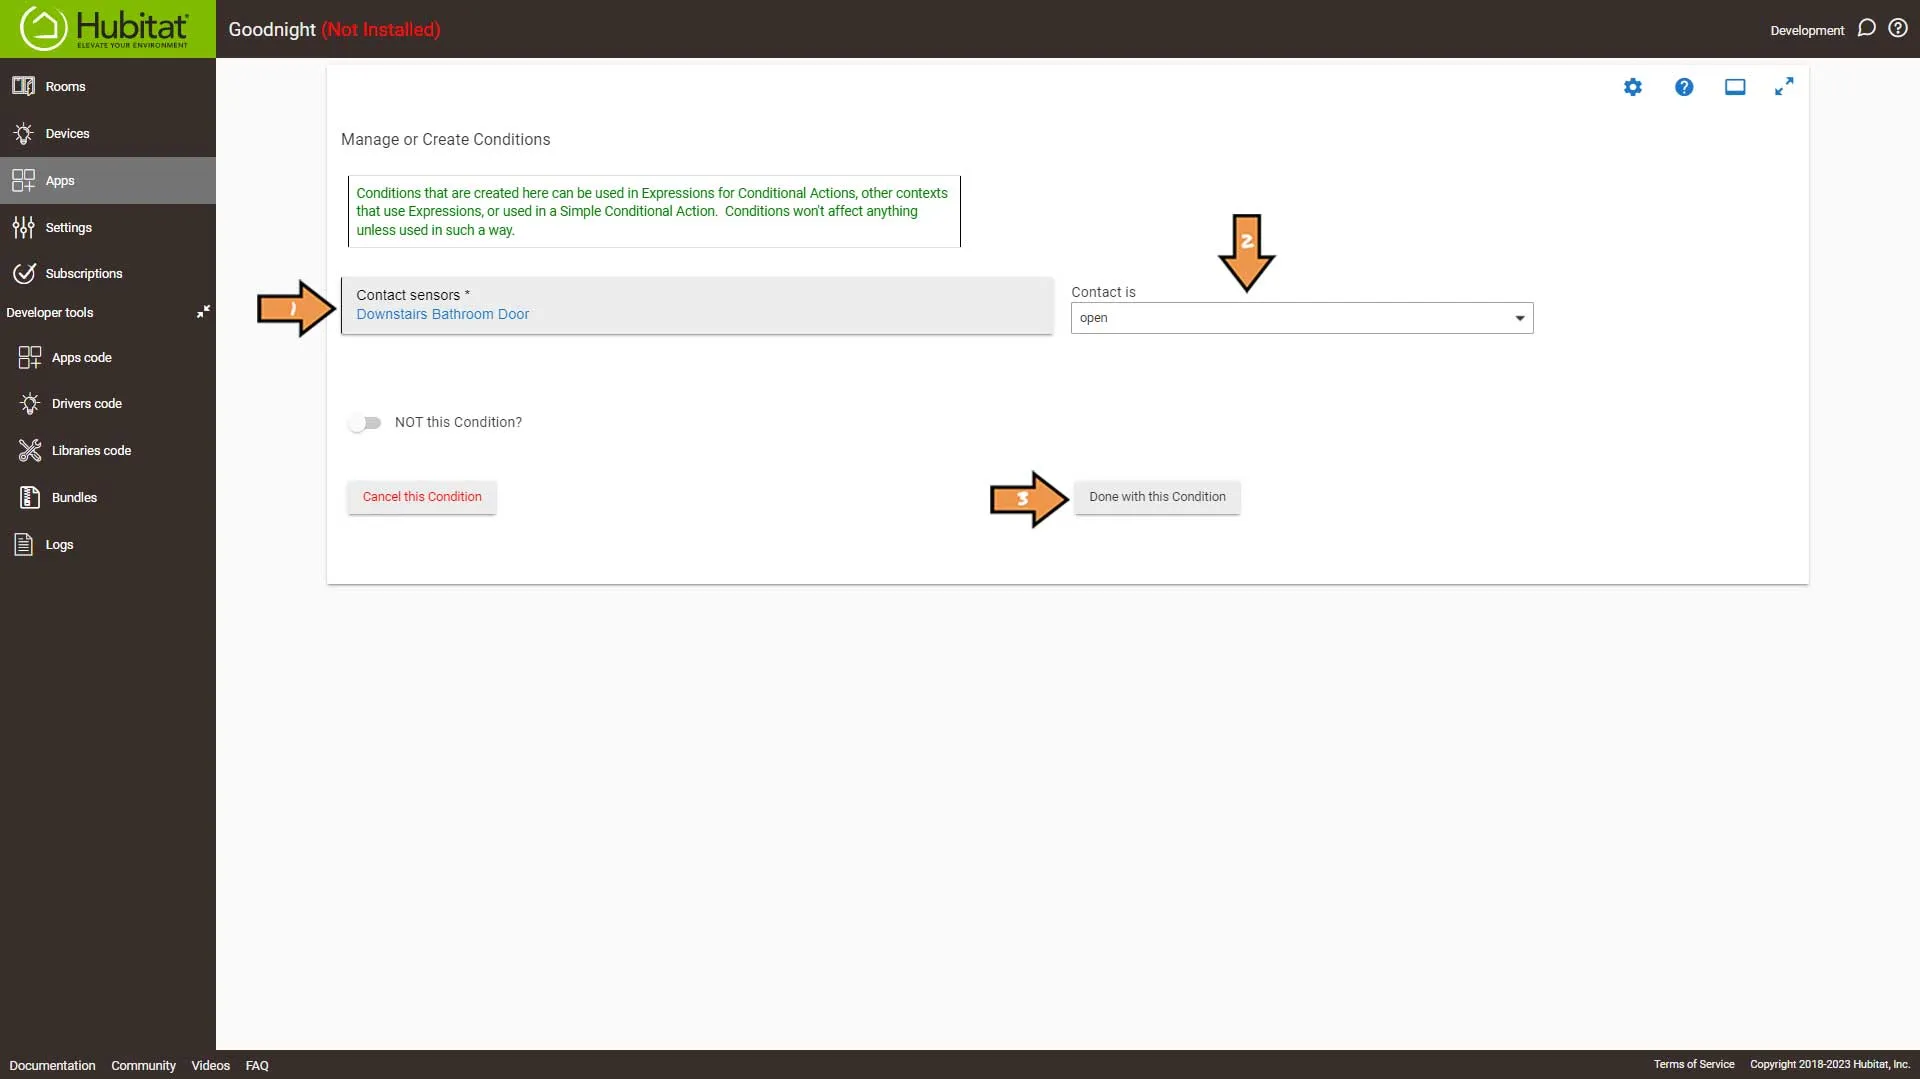
Then on the Manage or Create Conditions screen, click Done with Conditions.
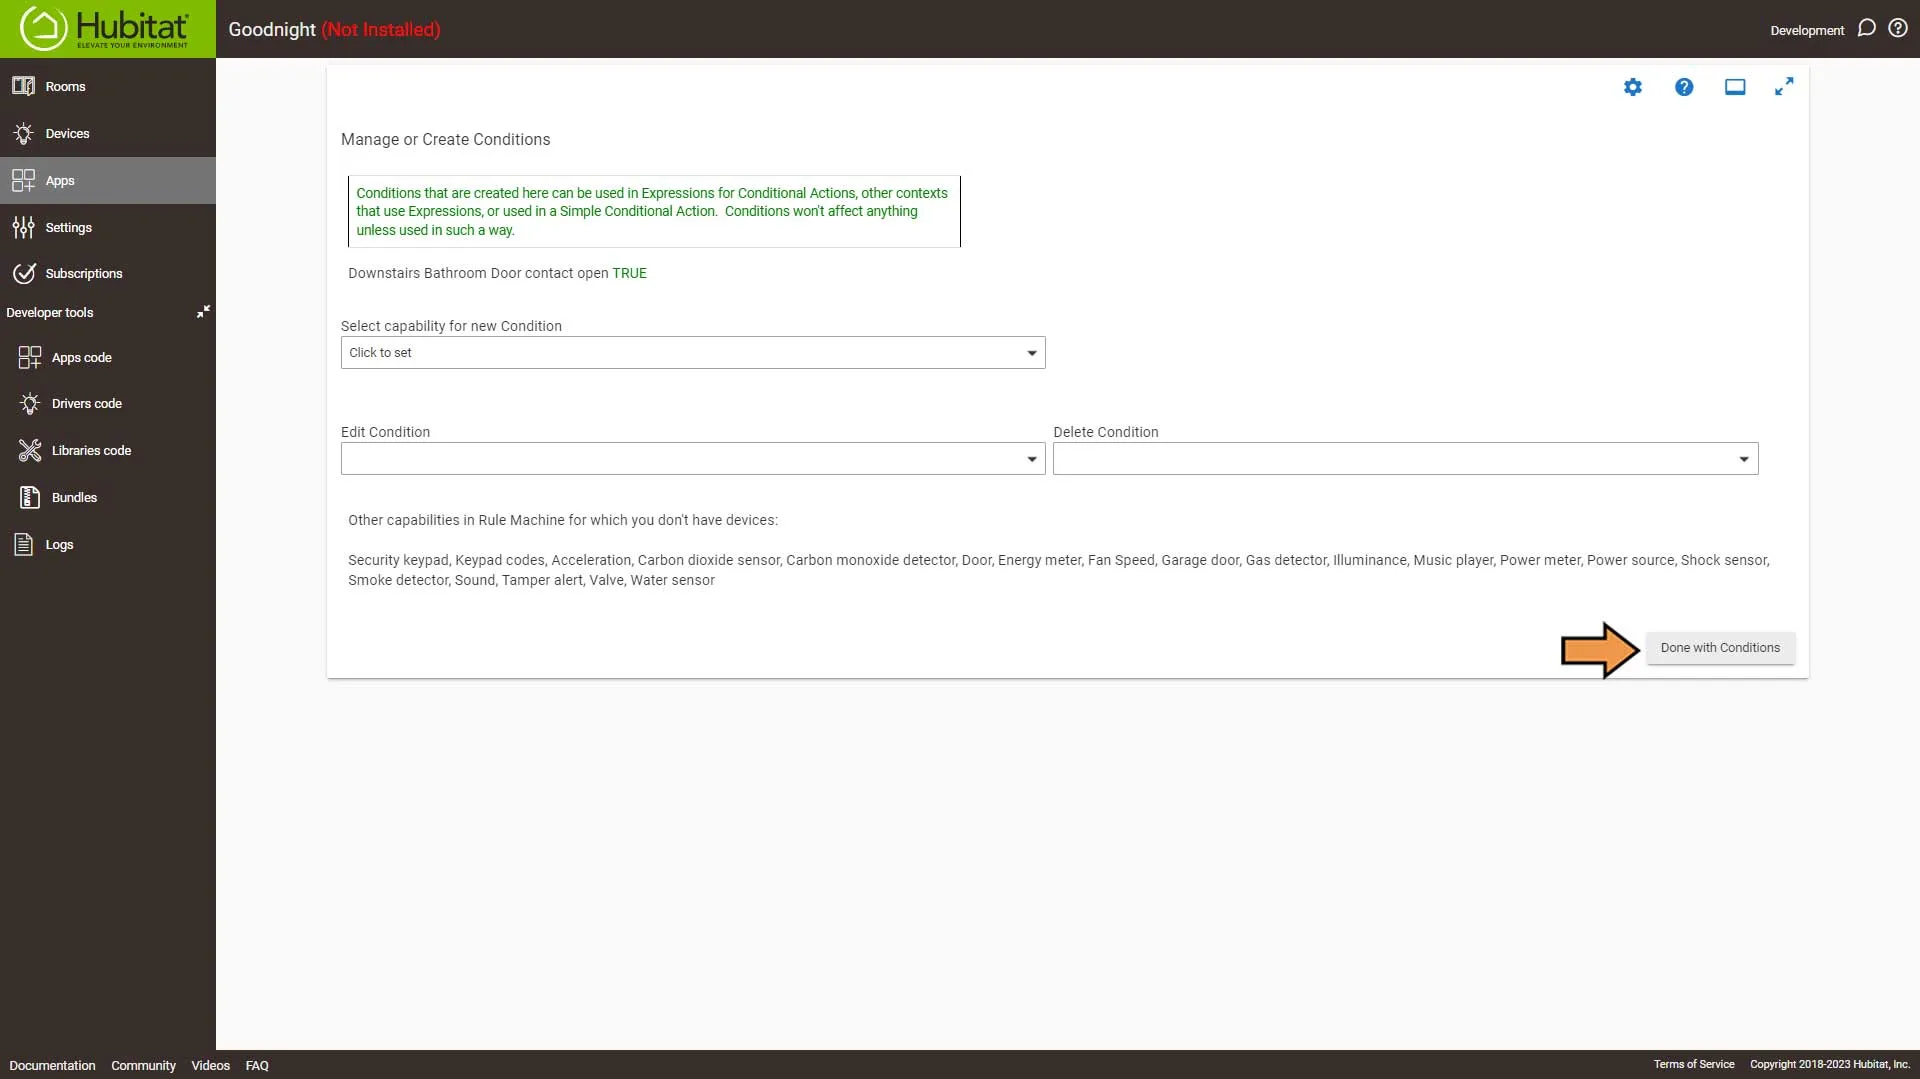
Select the Green Plus Sign to Add New Action.
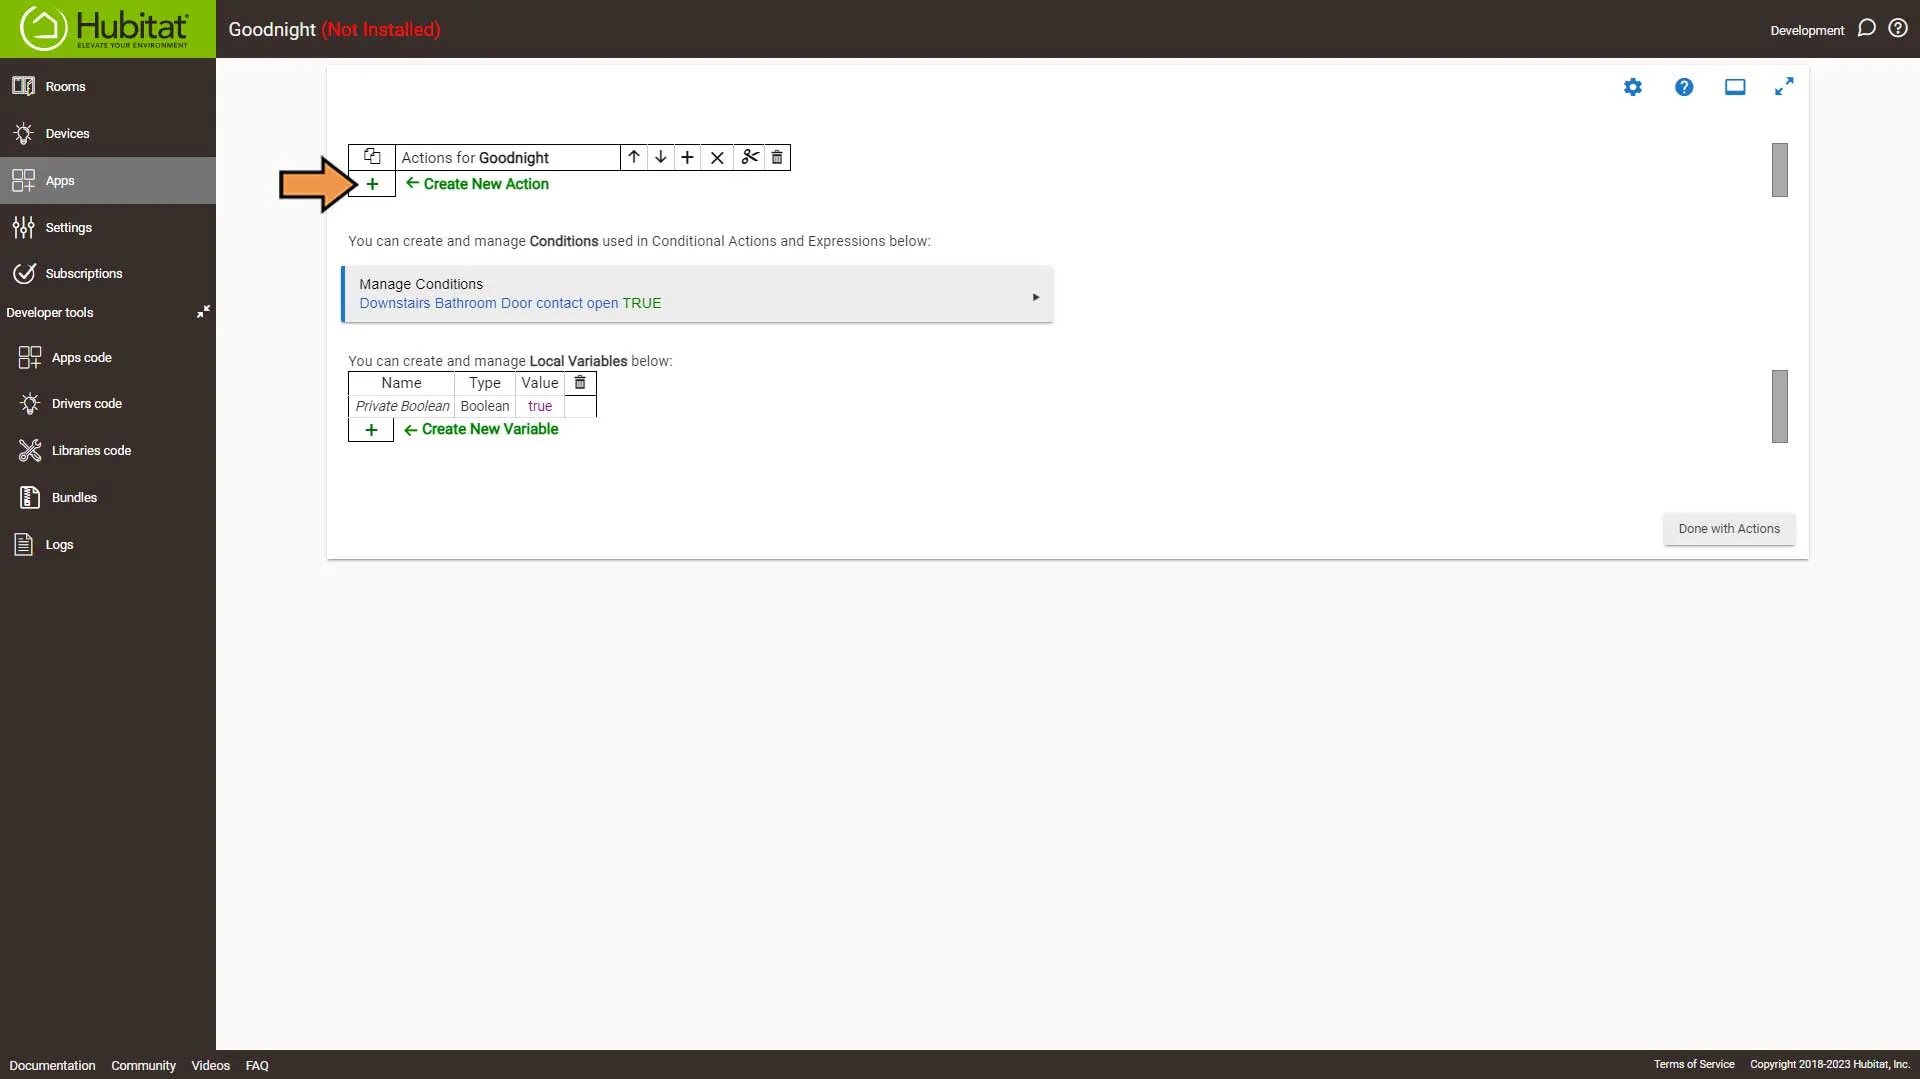
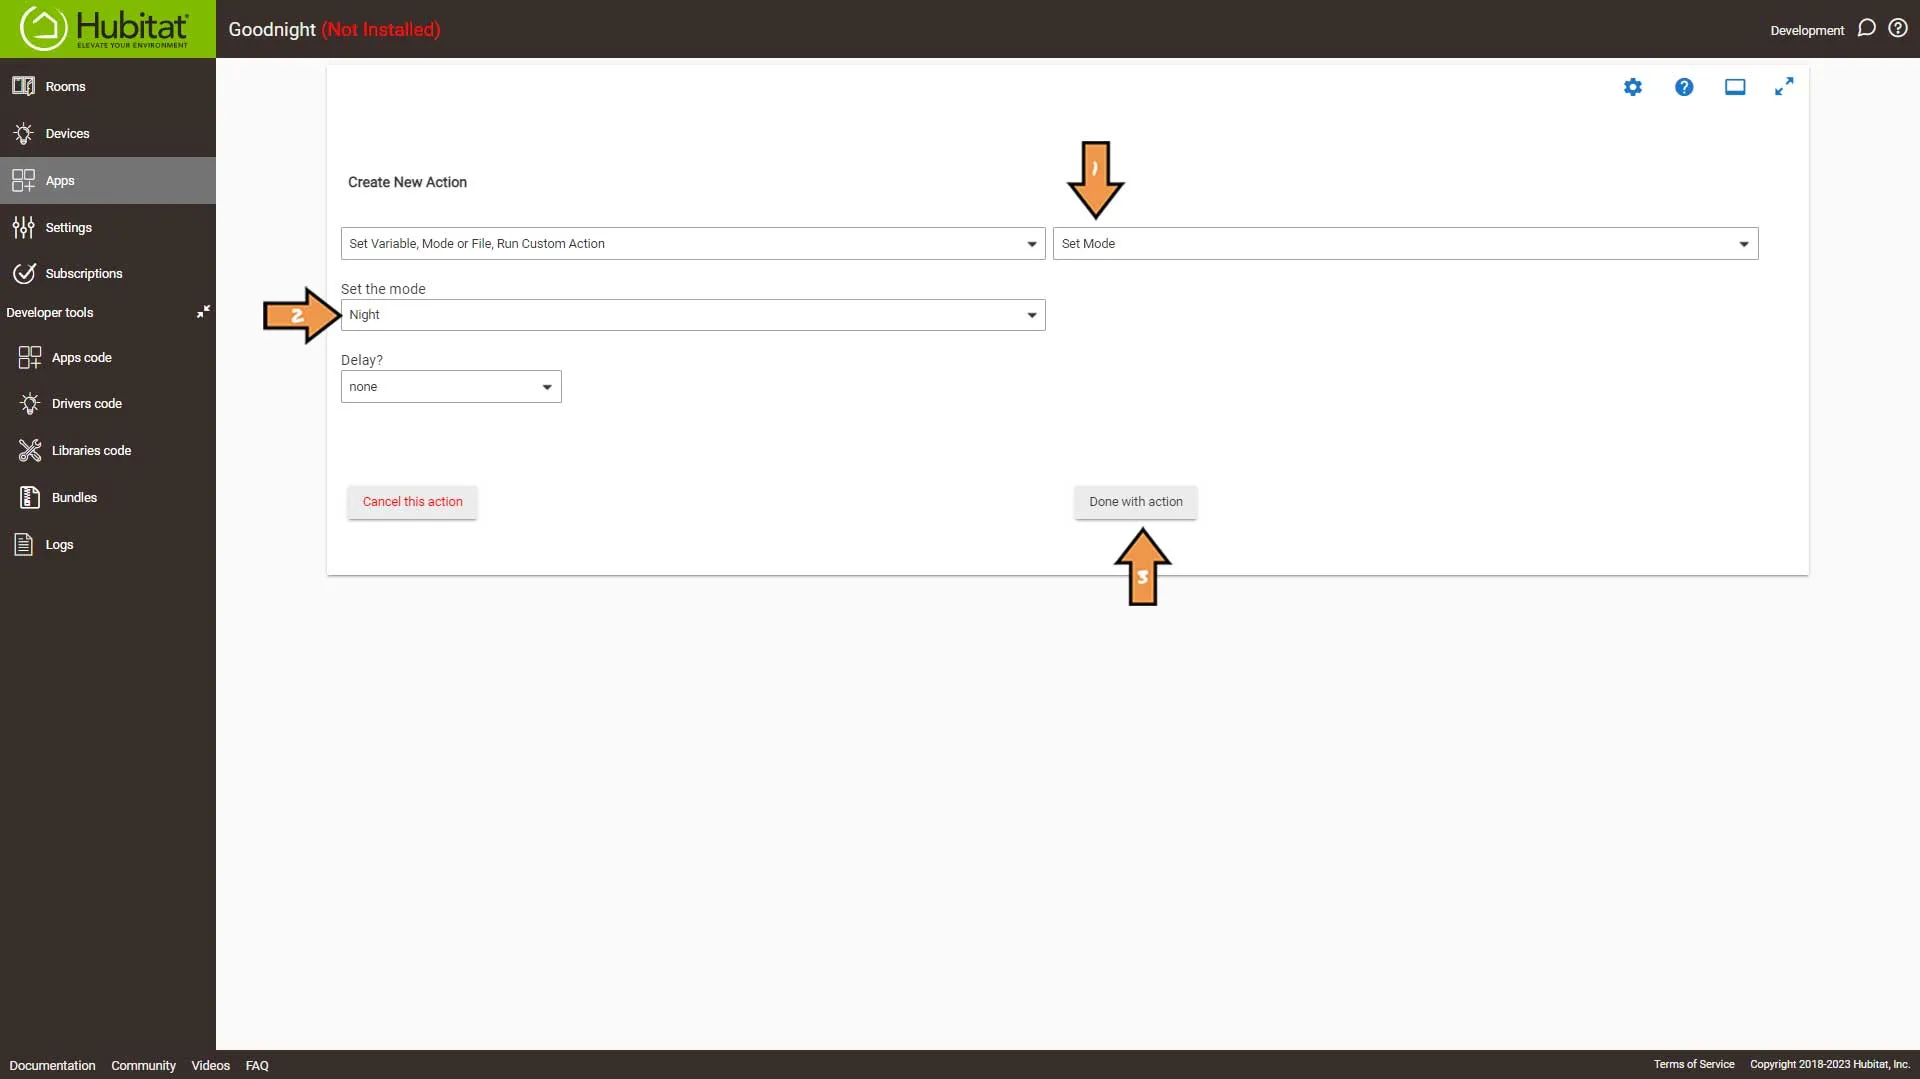
In the Select Action Type drop-down, select Set Mode option.
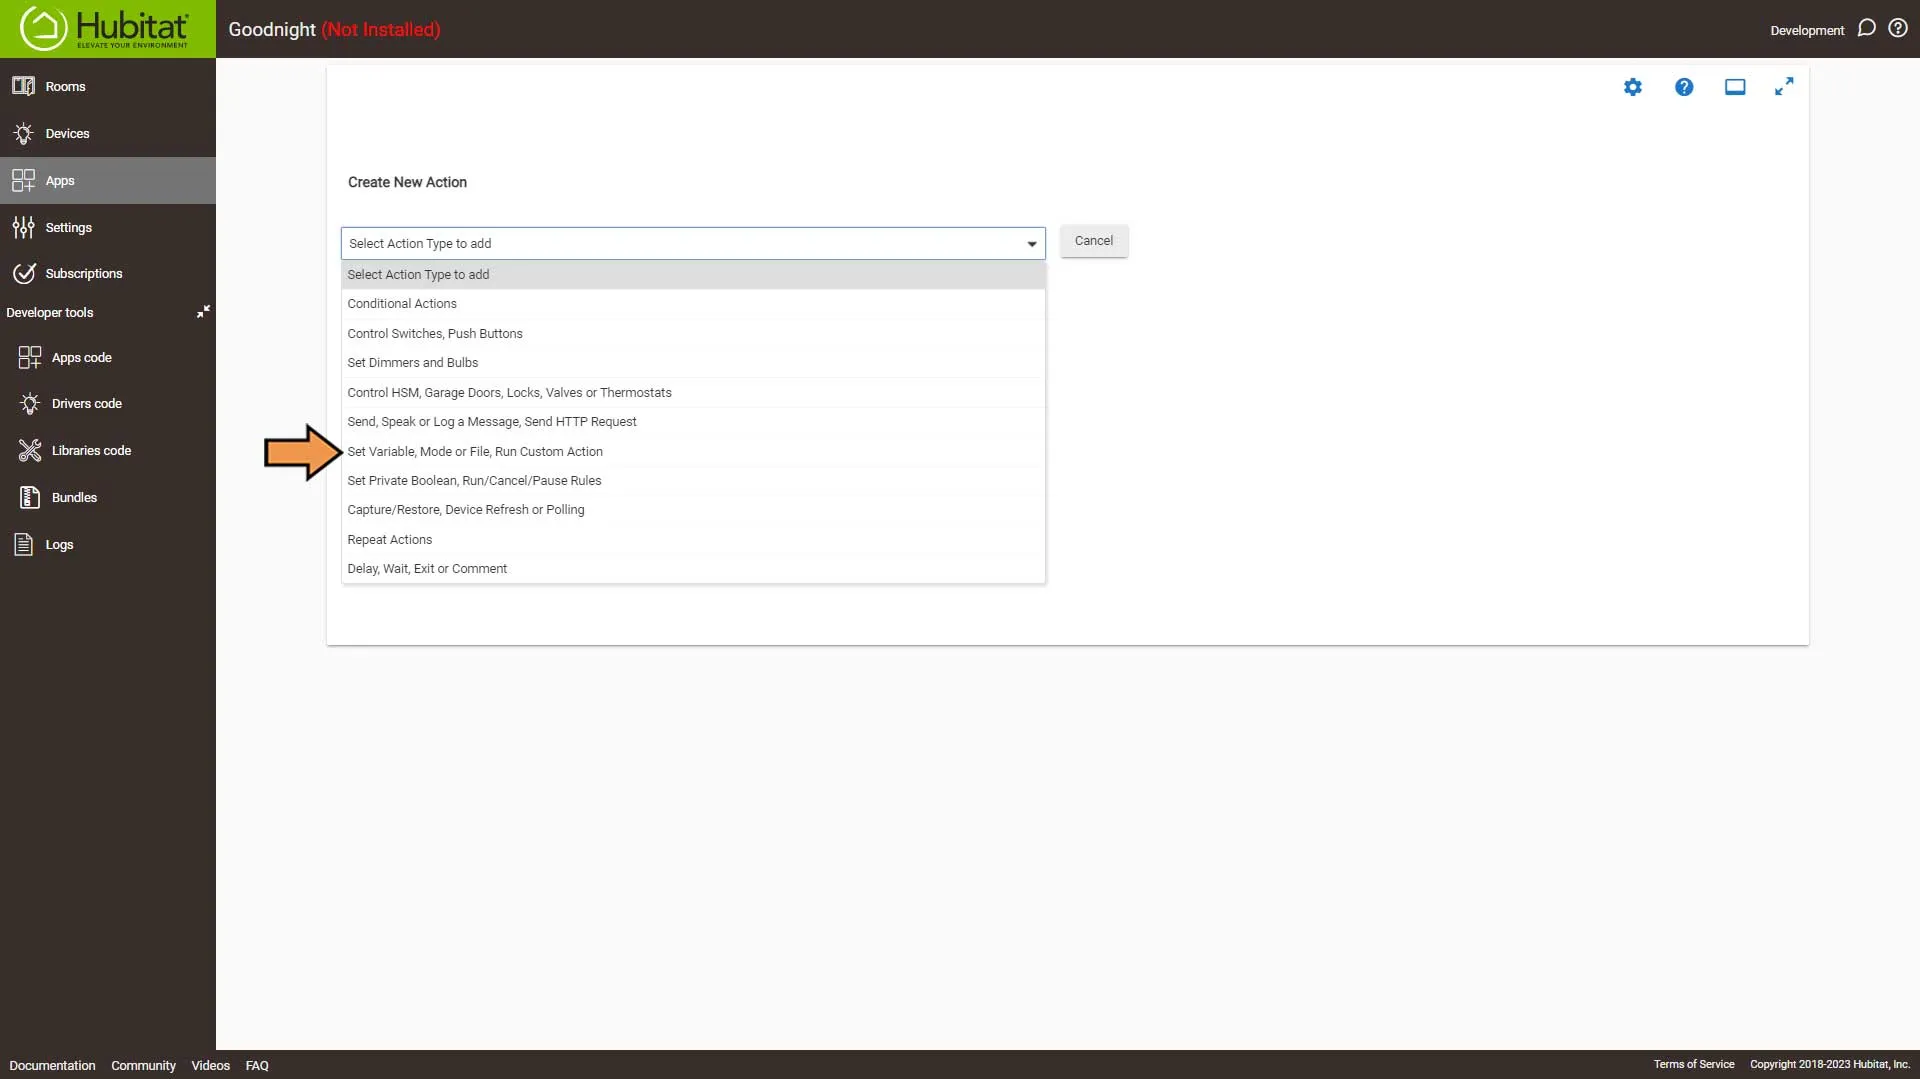
Set the following Action settings:
- In the Select Which Action, select the Set Mode option.
- In the Set the mode drop-down select Night.
- Then click the Done with Action button.
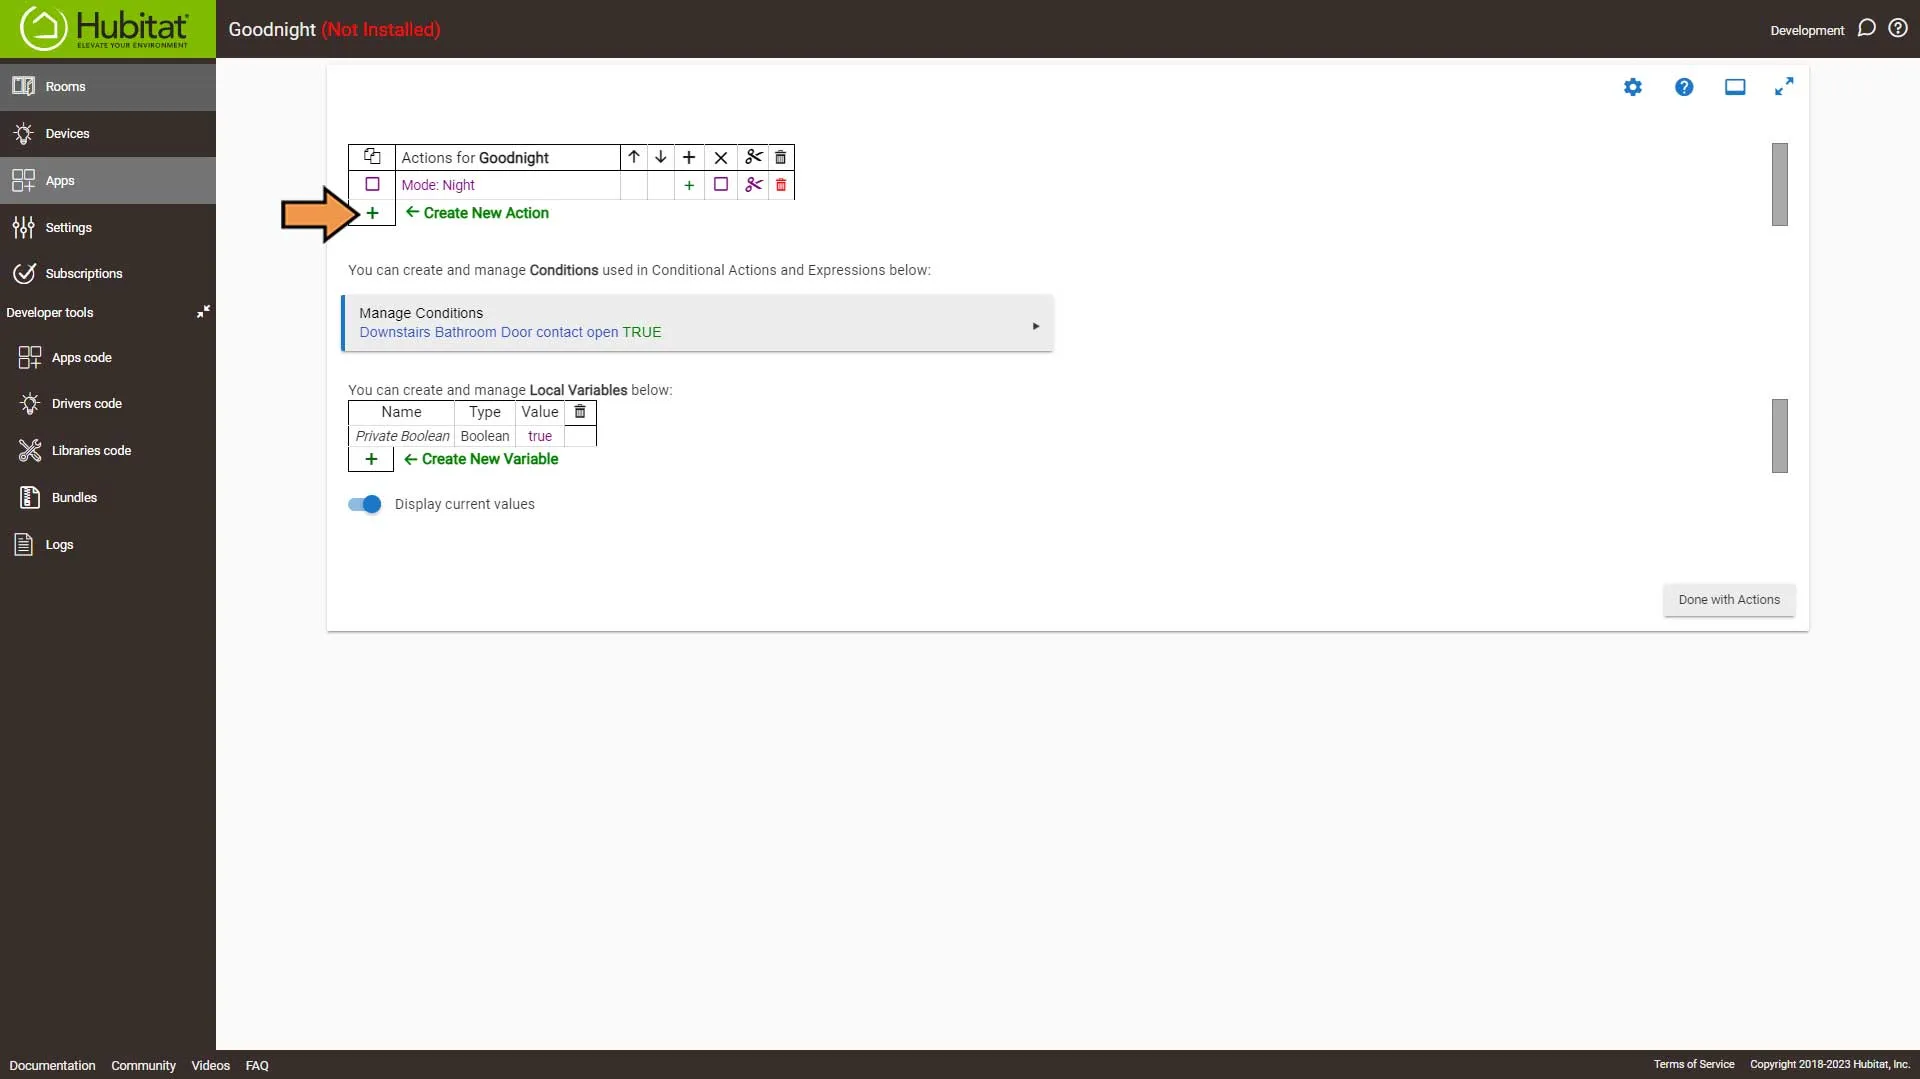
Again, select the Green Plus Sign to Add New Action.
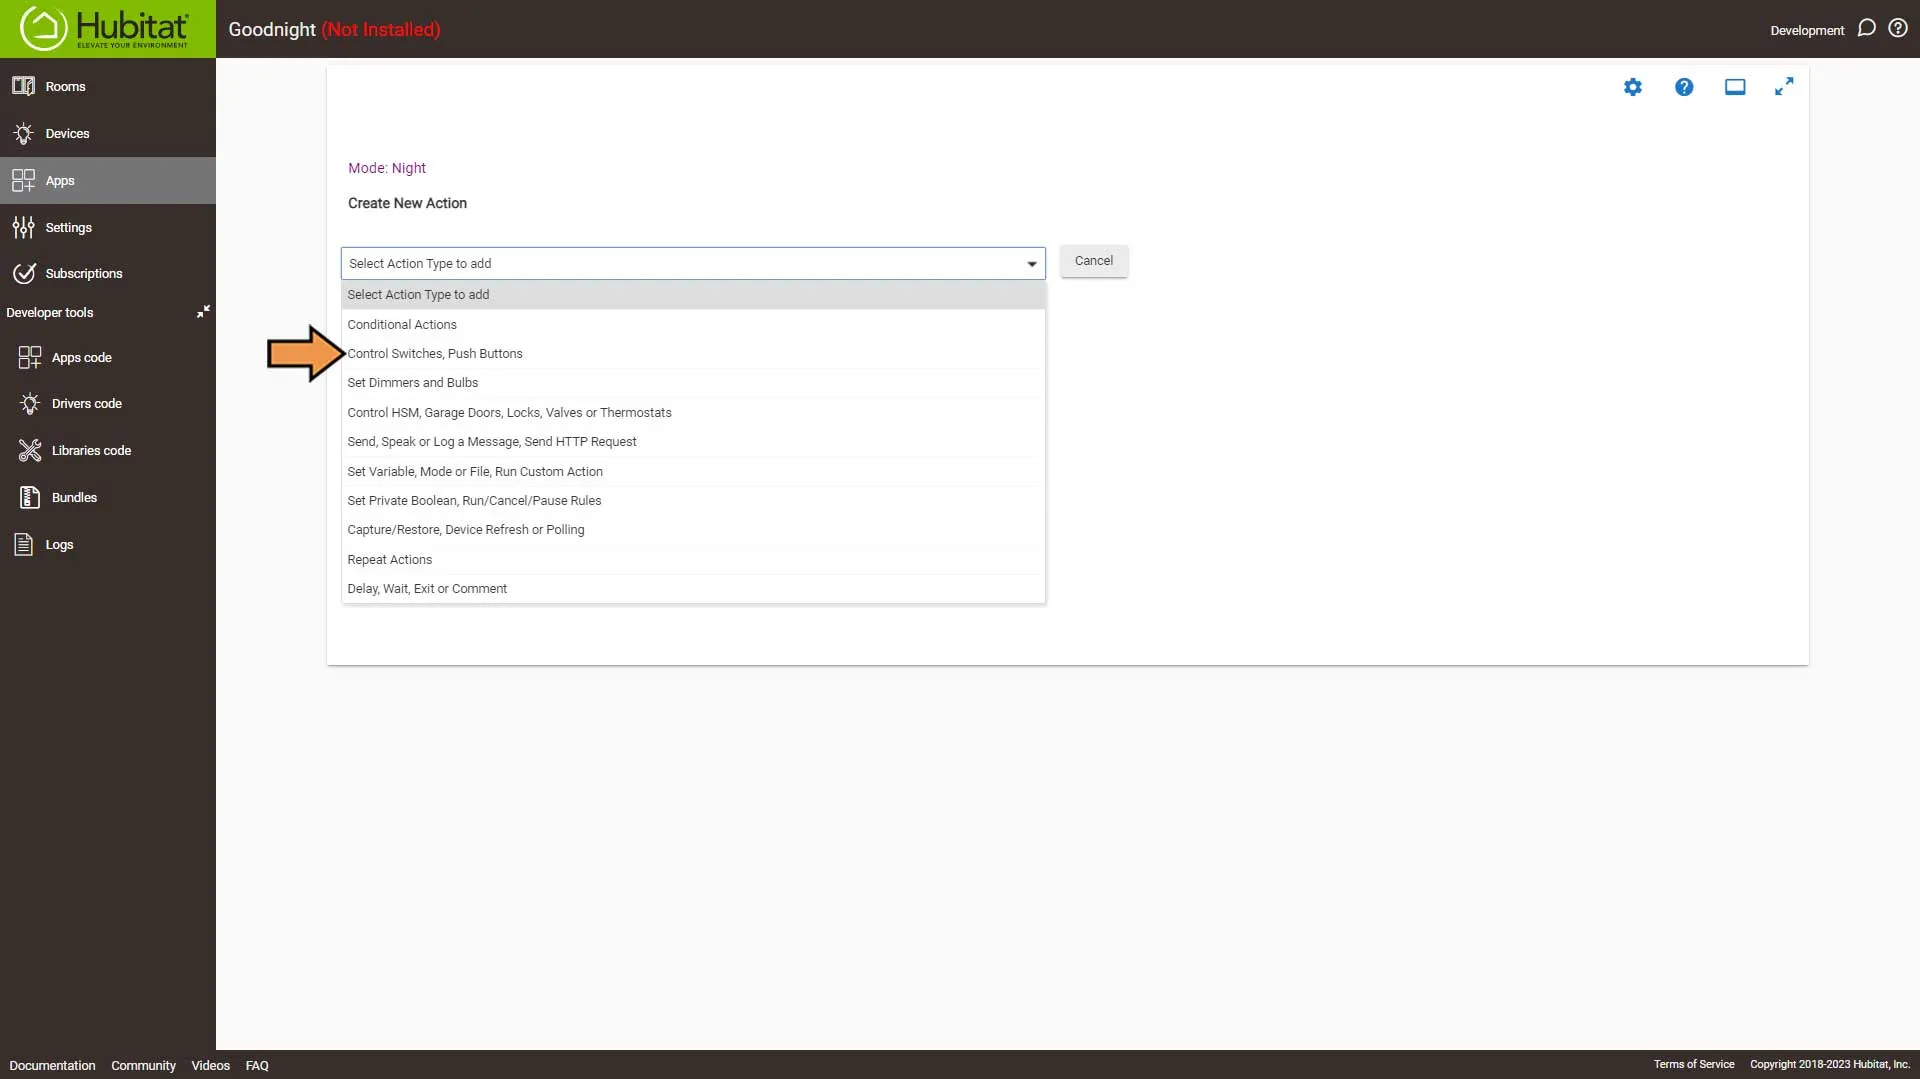
In the Select Action Type drop-down, select Control Switches option.
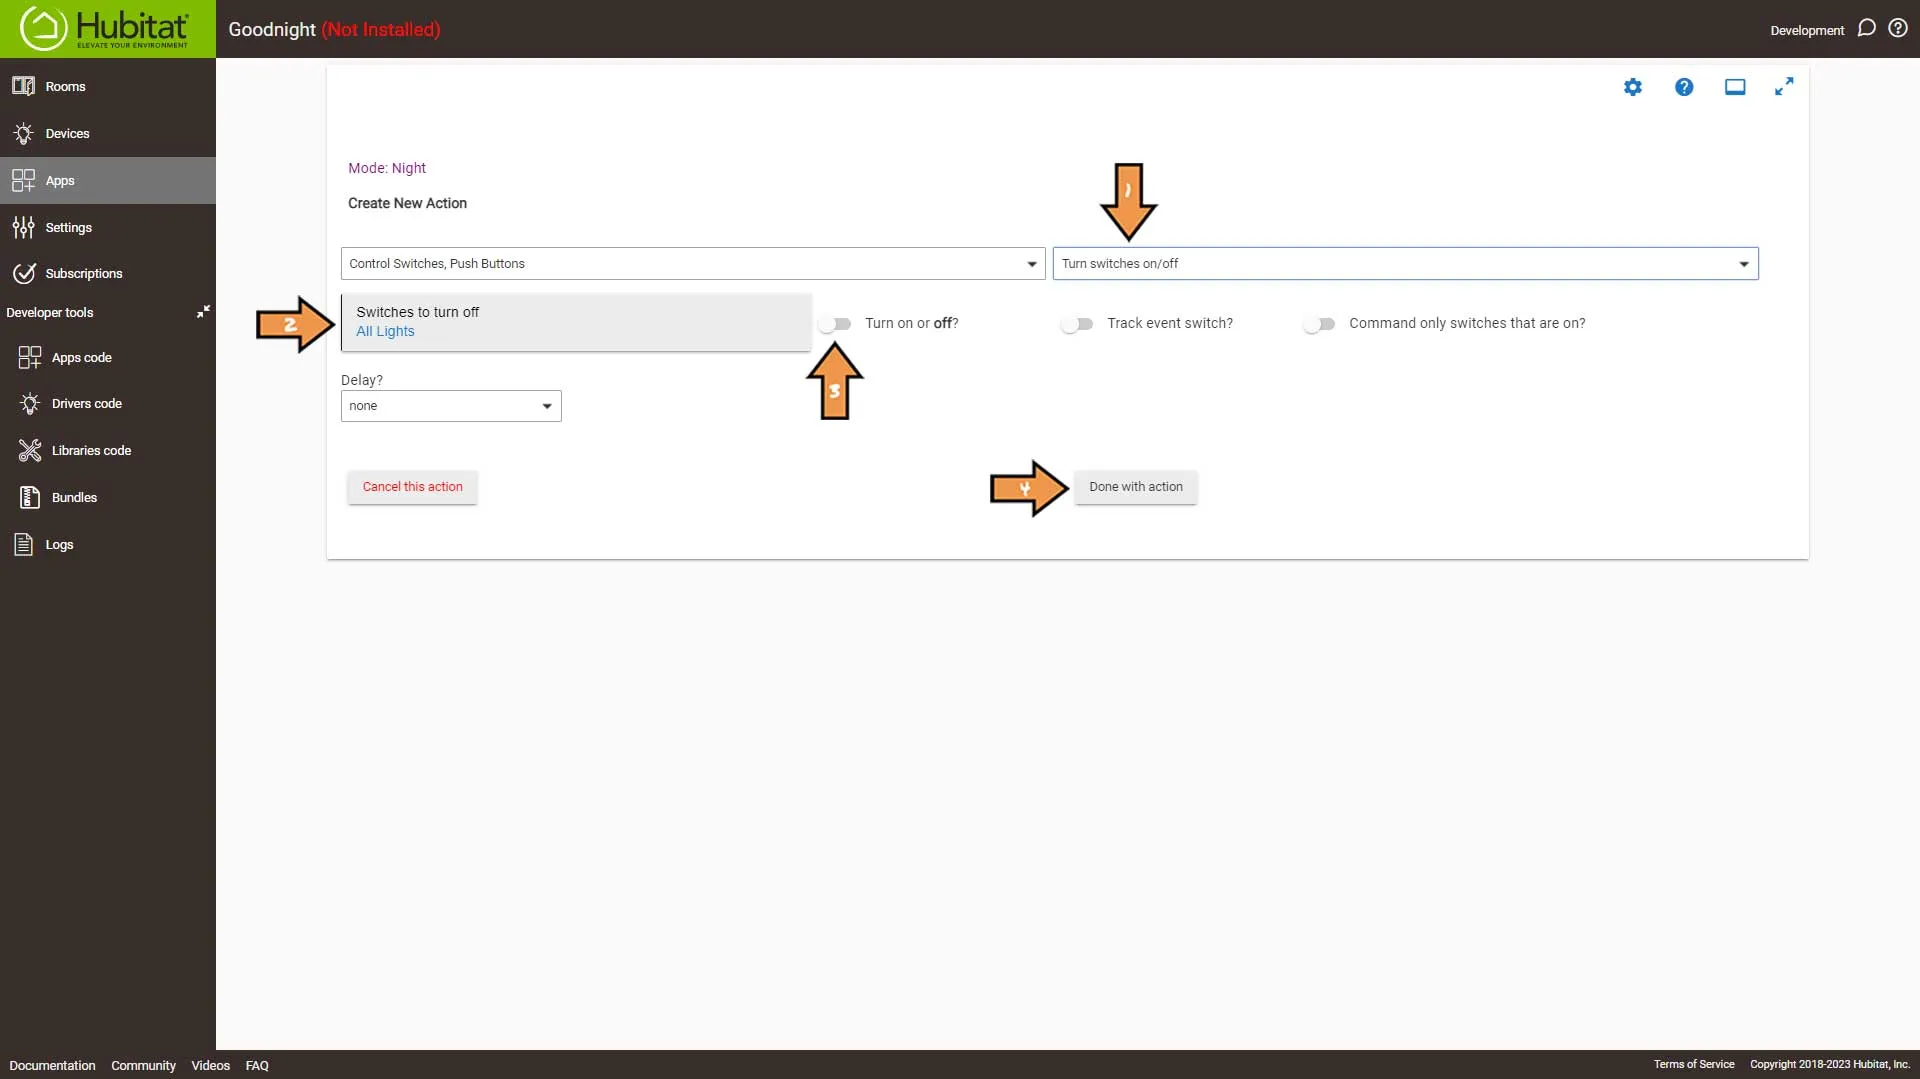
Set the following Action settings:
- In the Select Which Action, select the Turn switches on/off option.
- Next, in the Switches to turn off drop-down, select the All Lights group.
- Make sure the Turn on or off switch is set to Off.
- Then click the Done with Action button.
Again, select the Green Plus Sign to Add New Action.
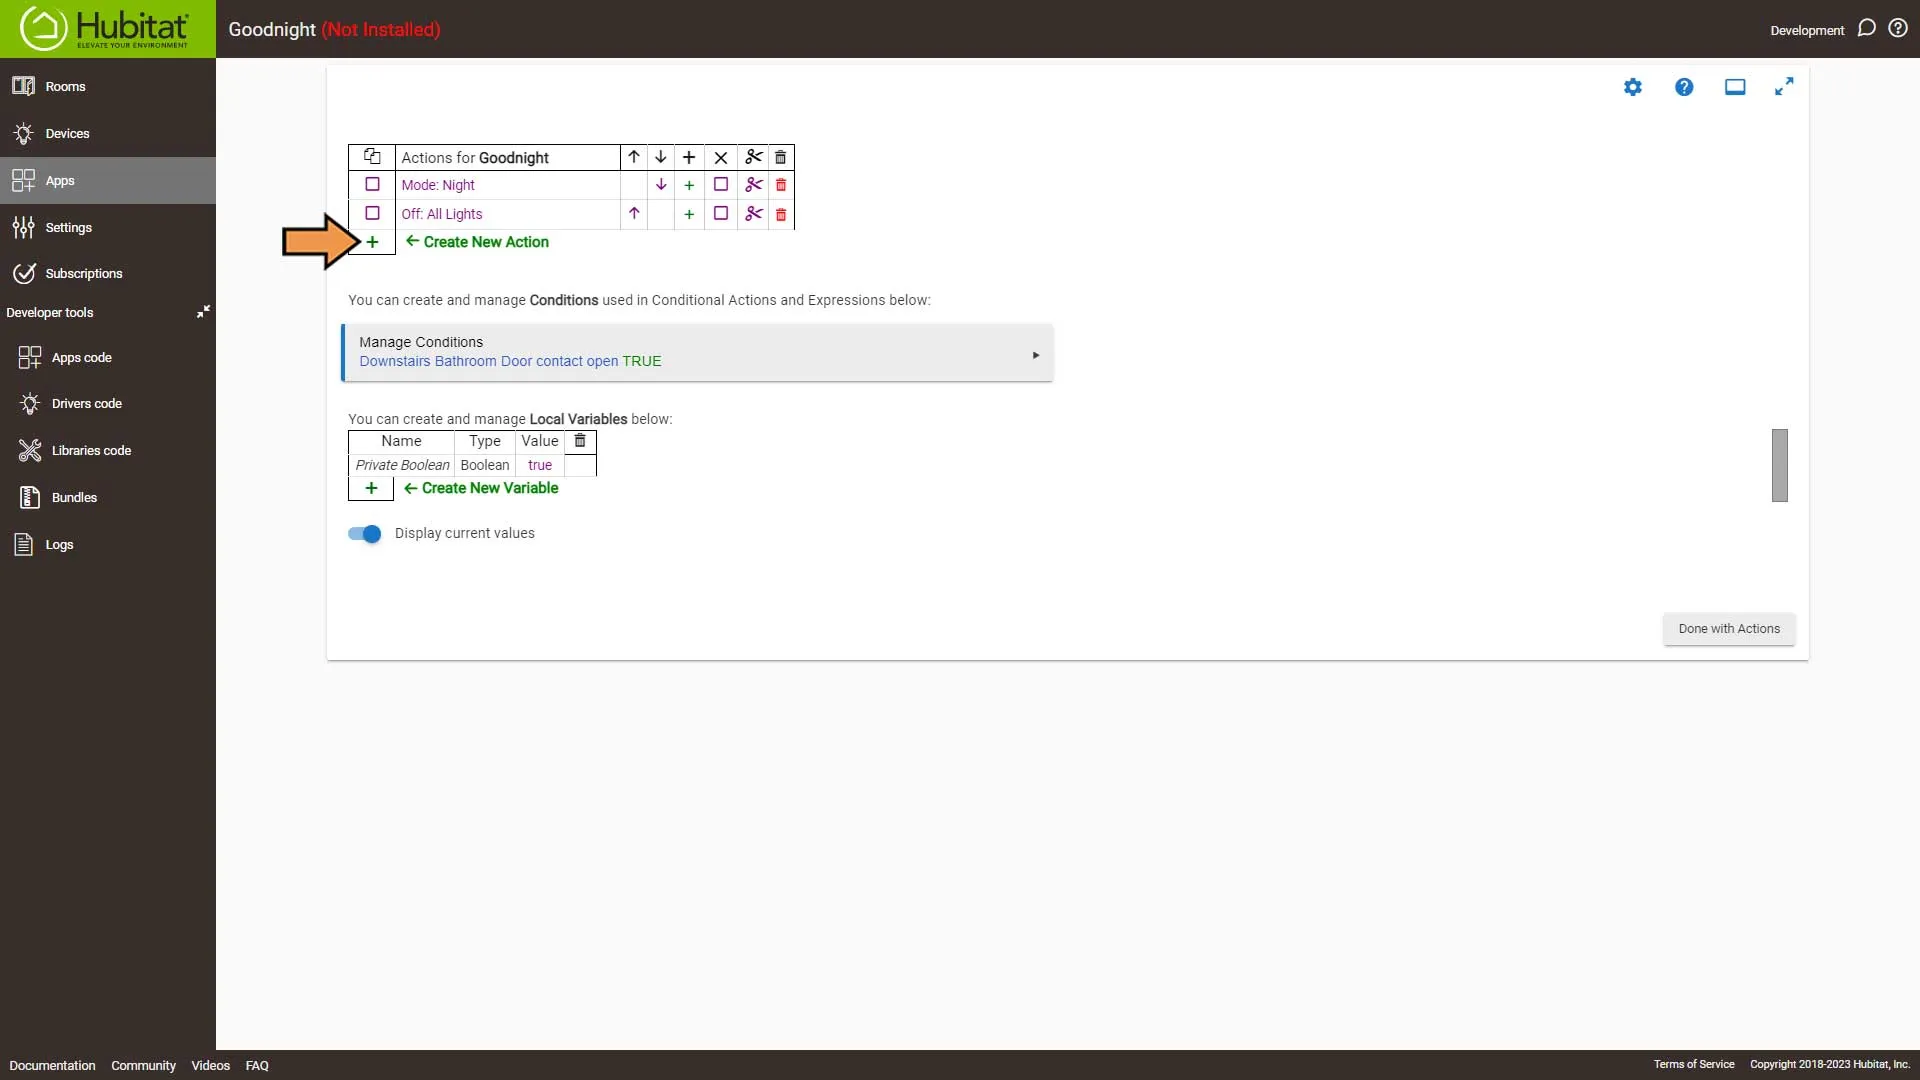
In the Select Action Type drop-down, select Control Locks.
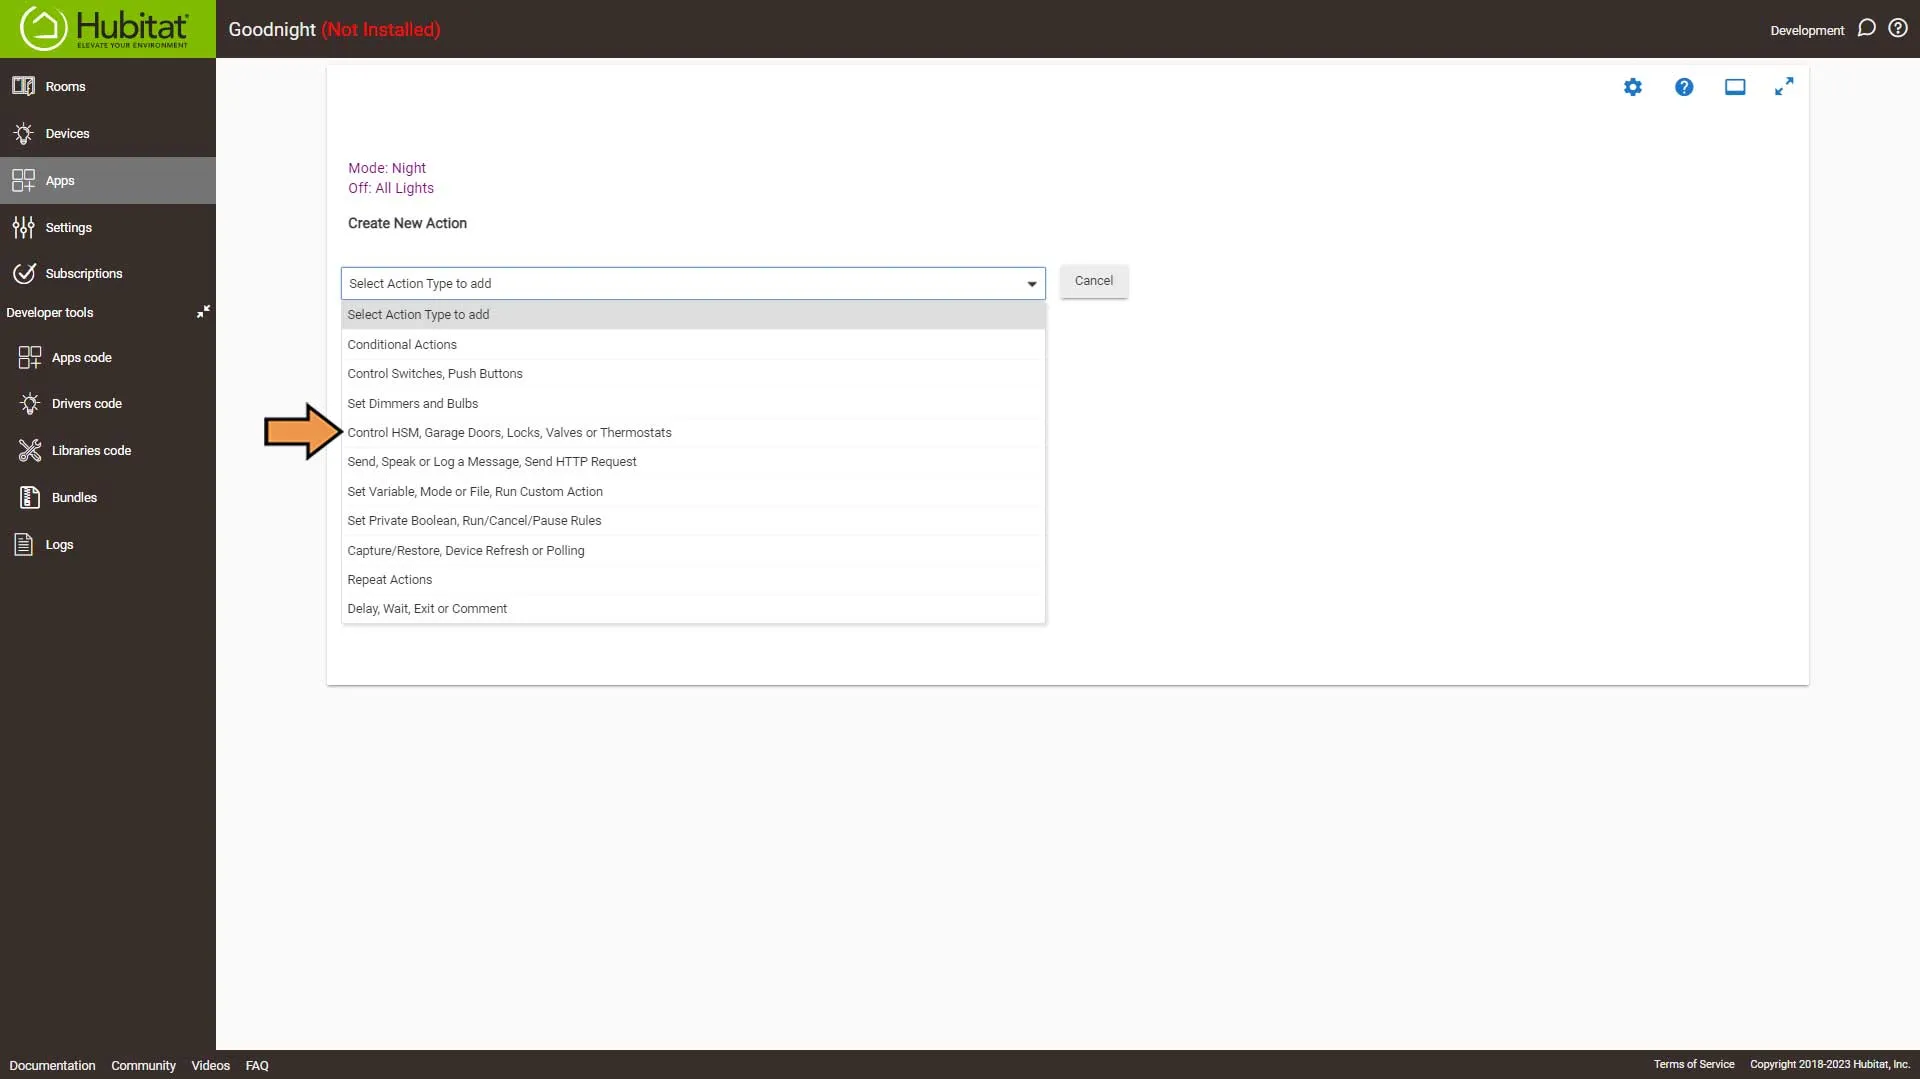
Set the following Action settings:
- In the Select Which Action, select the Lock/Unlock locks option.
- Make sure the Lock or Unlock switch is set to Lock.
- Next, in the Lock these locks drop-down, select select all of our locks.
- Then click the Done with Action button.
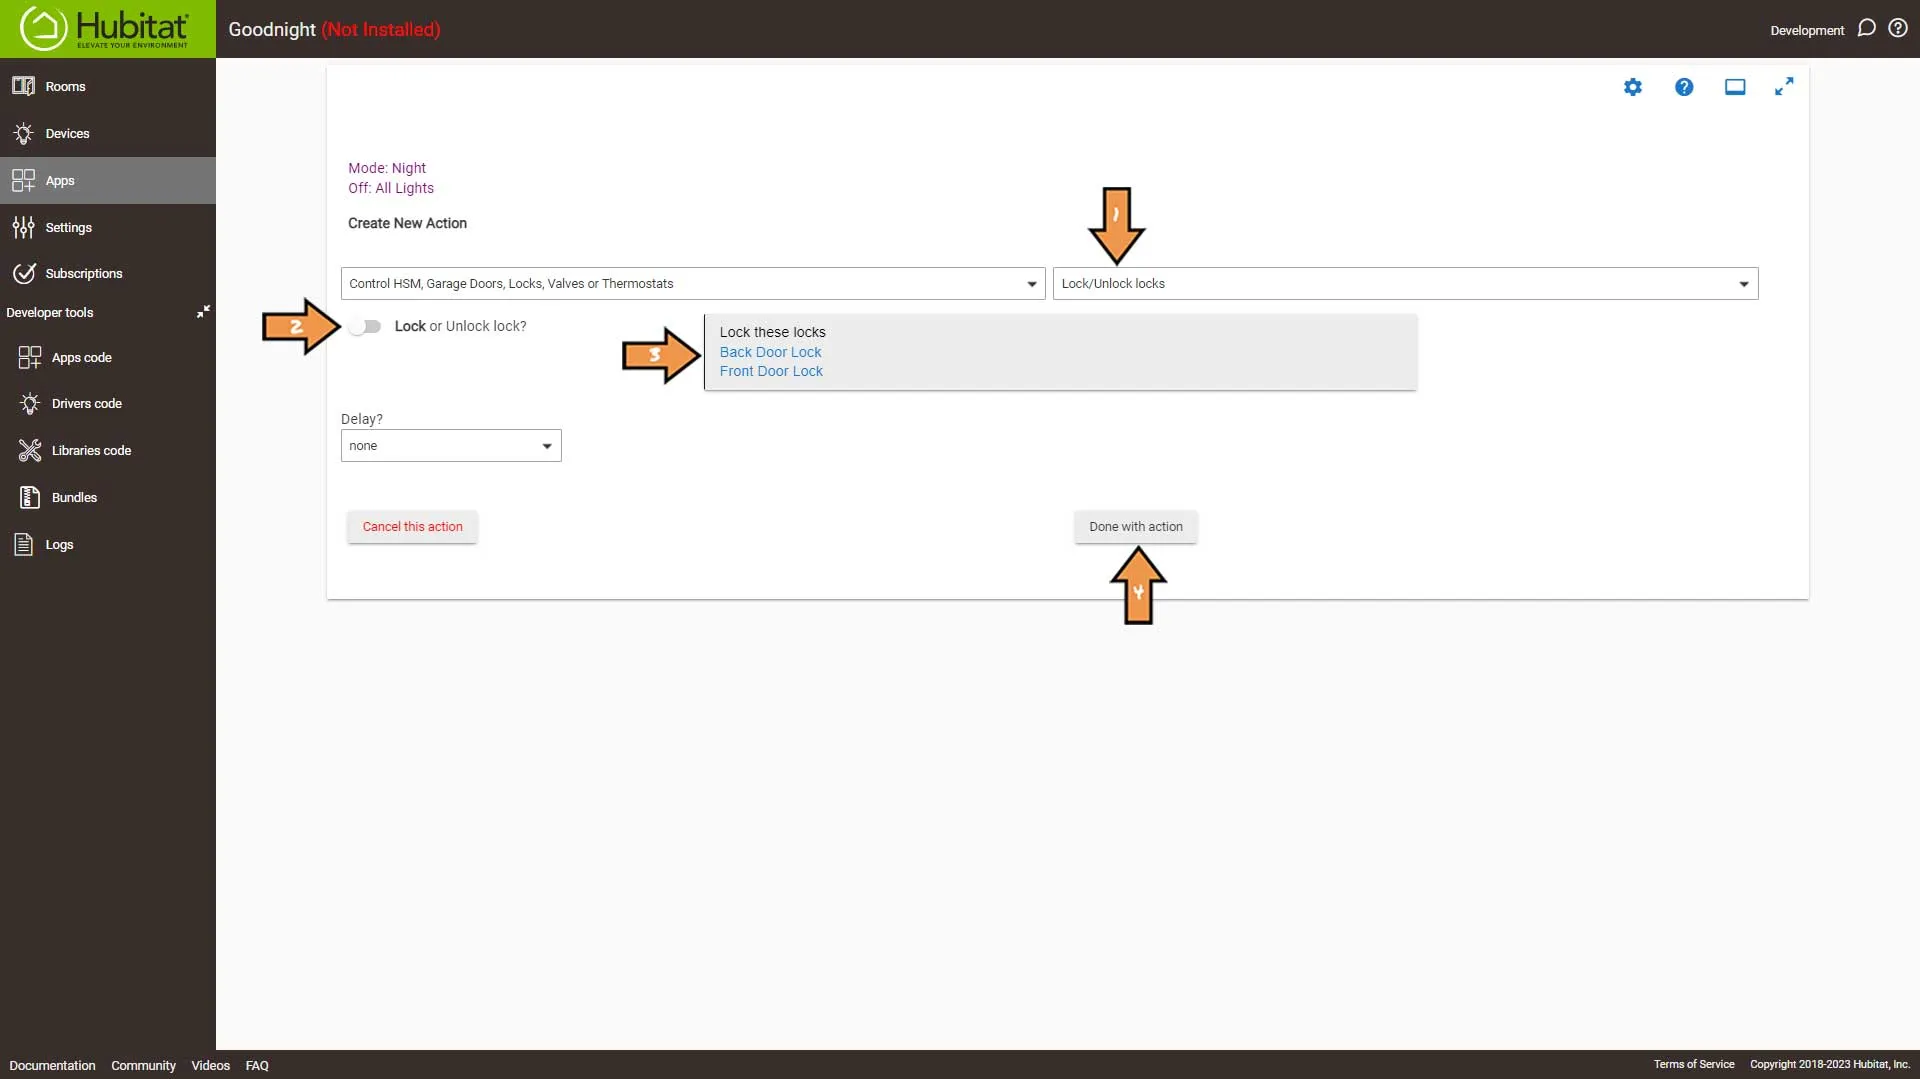
Once again, select the Green Plus Sign to Add New Action.
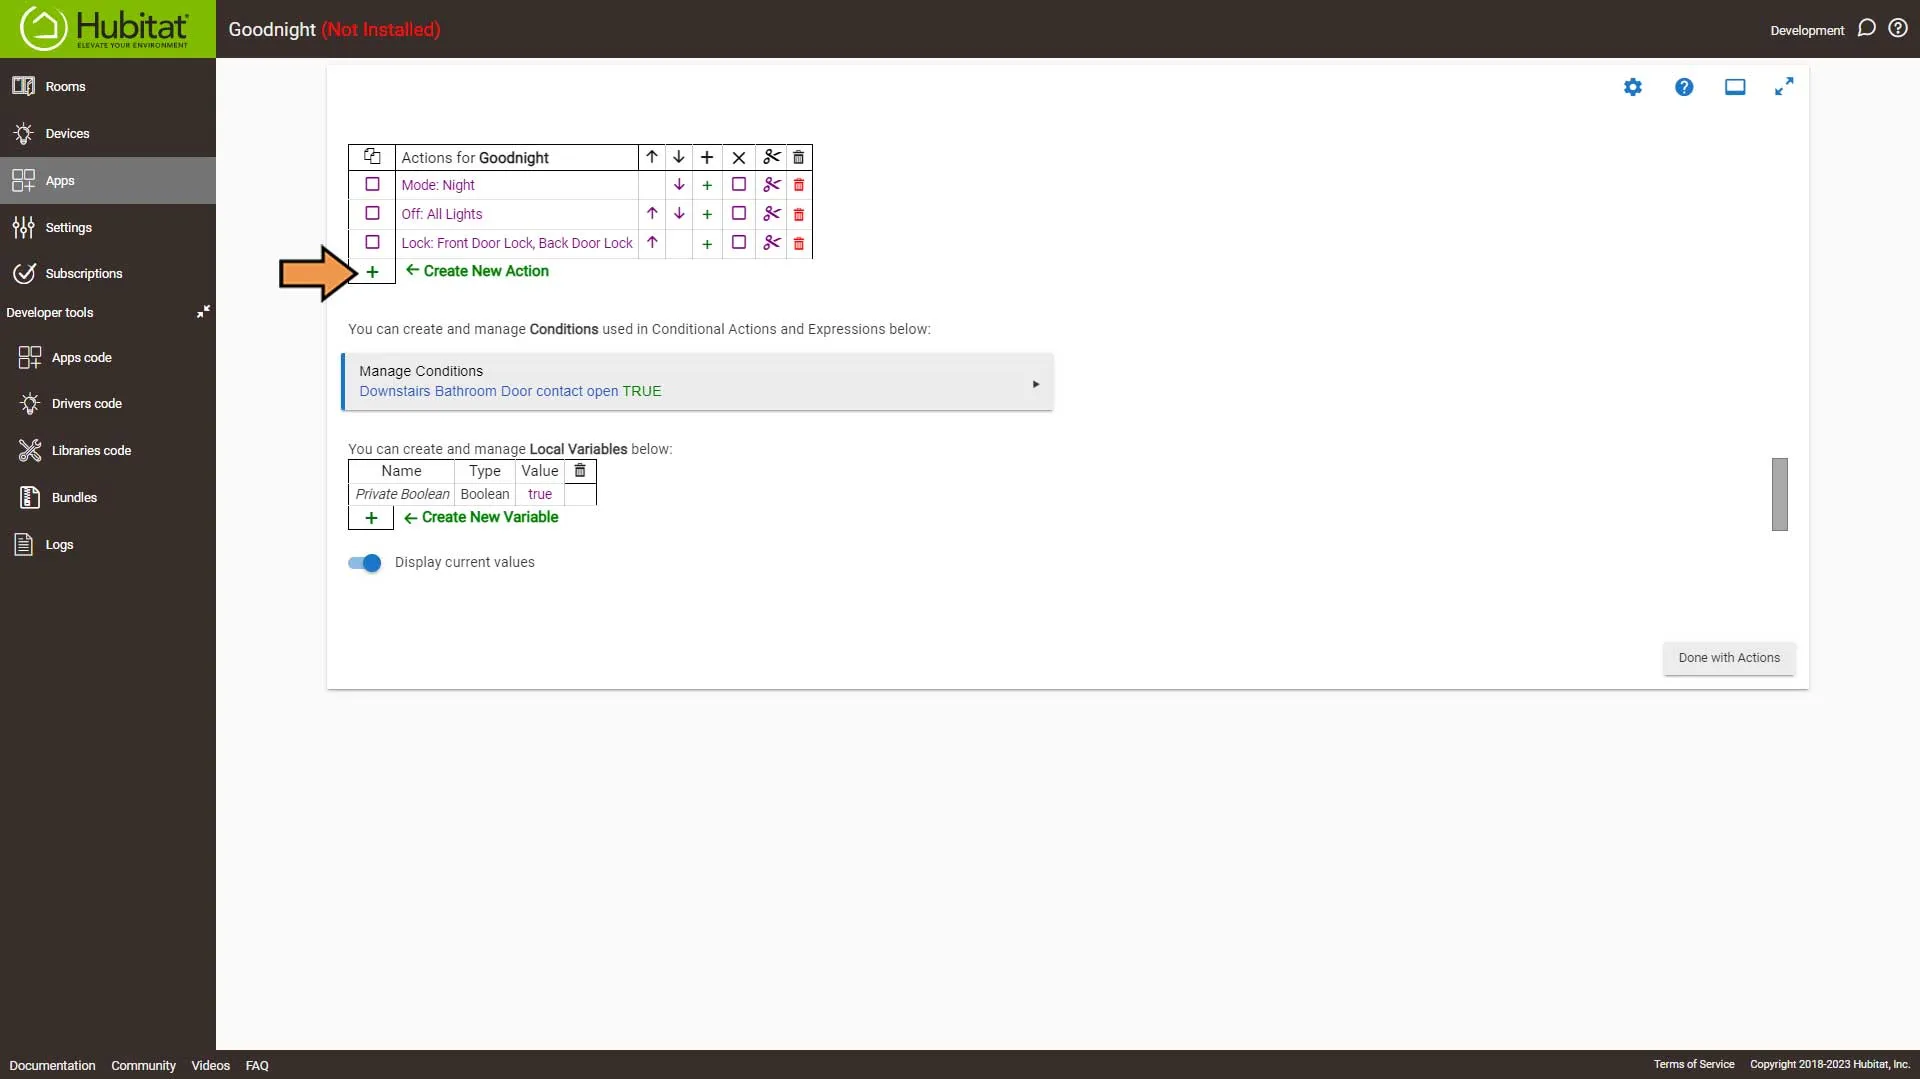
In the Select Action Type drop-down, select Control Thermostats.
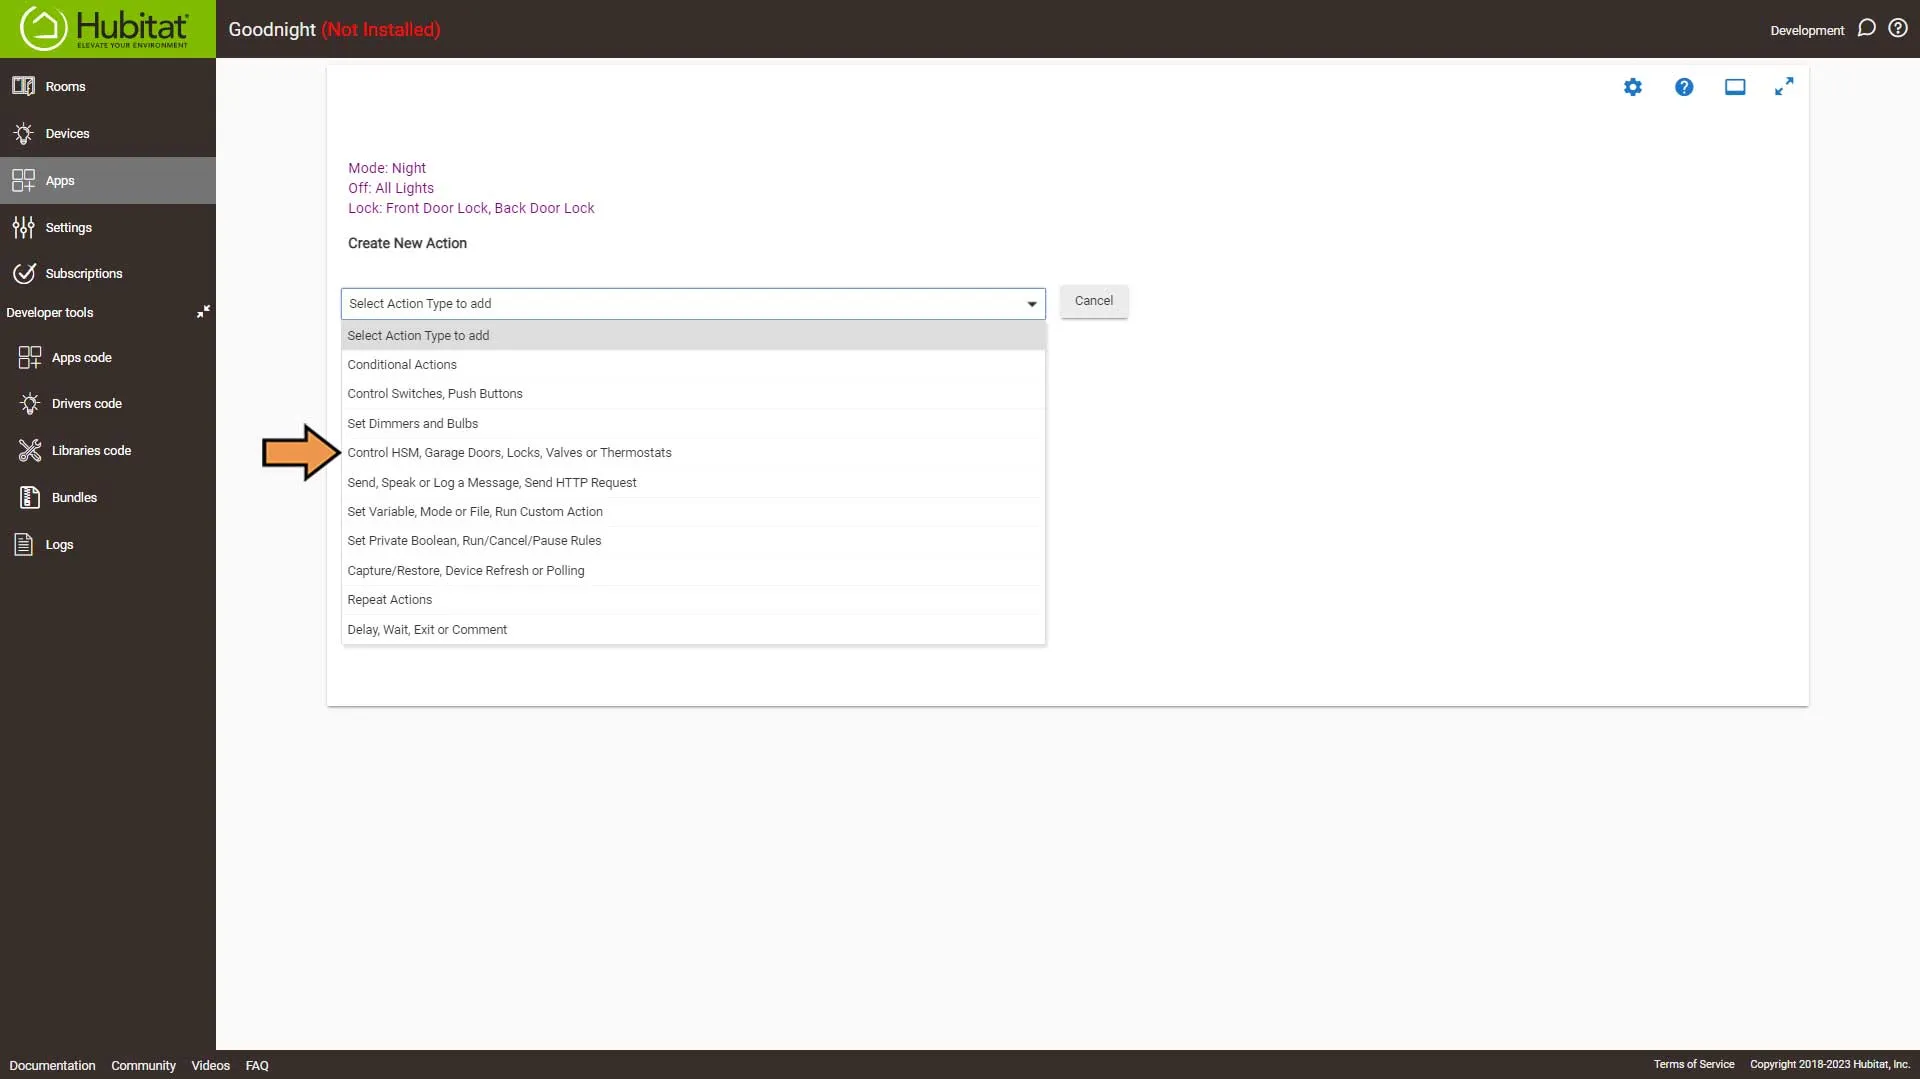
Set the following Action settings:
- In the Select Which Action, select the Set thermostats option.
- Select your thermostat.
- set the heating and cooling set points.
- Then click the Done with Action button.
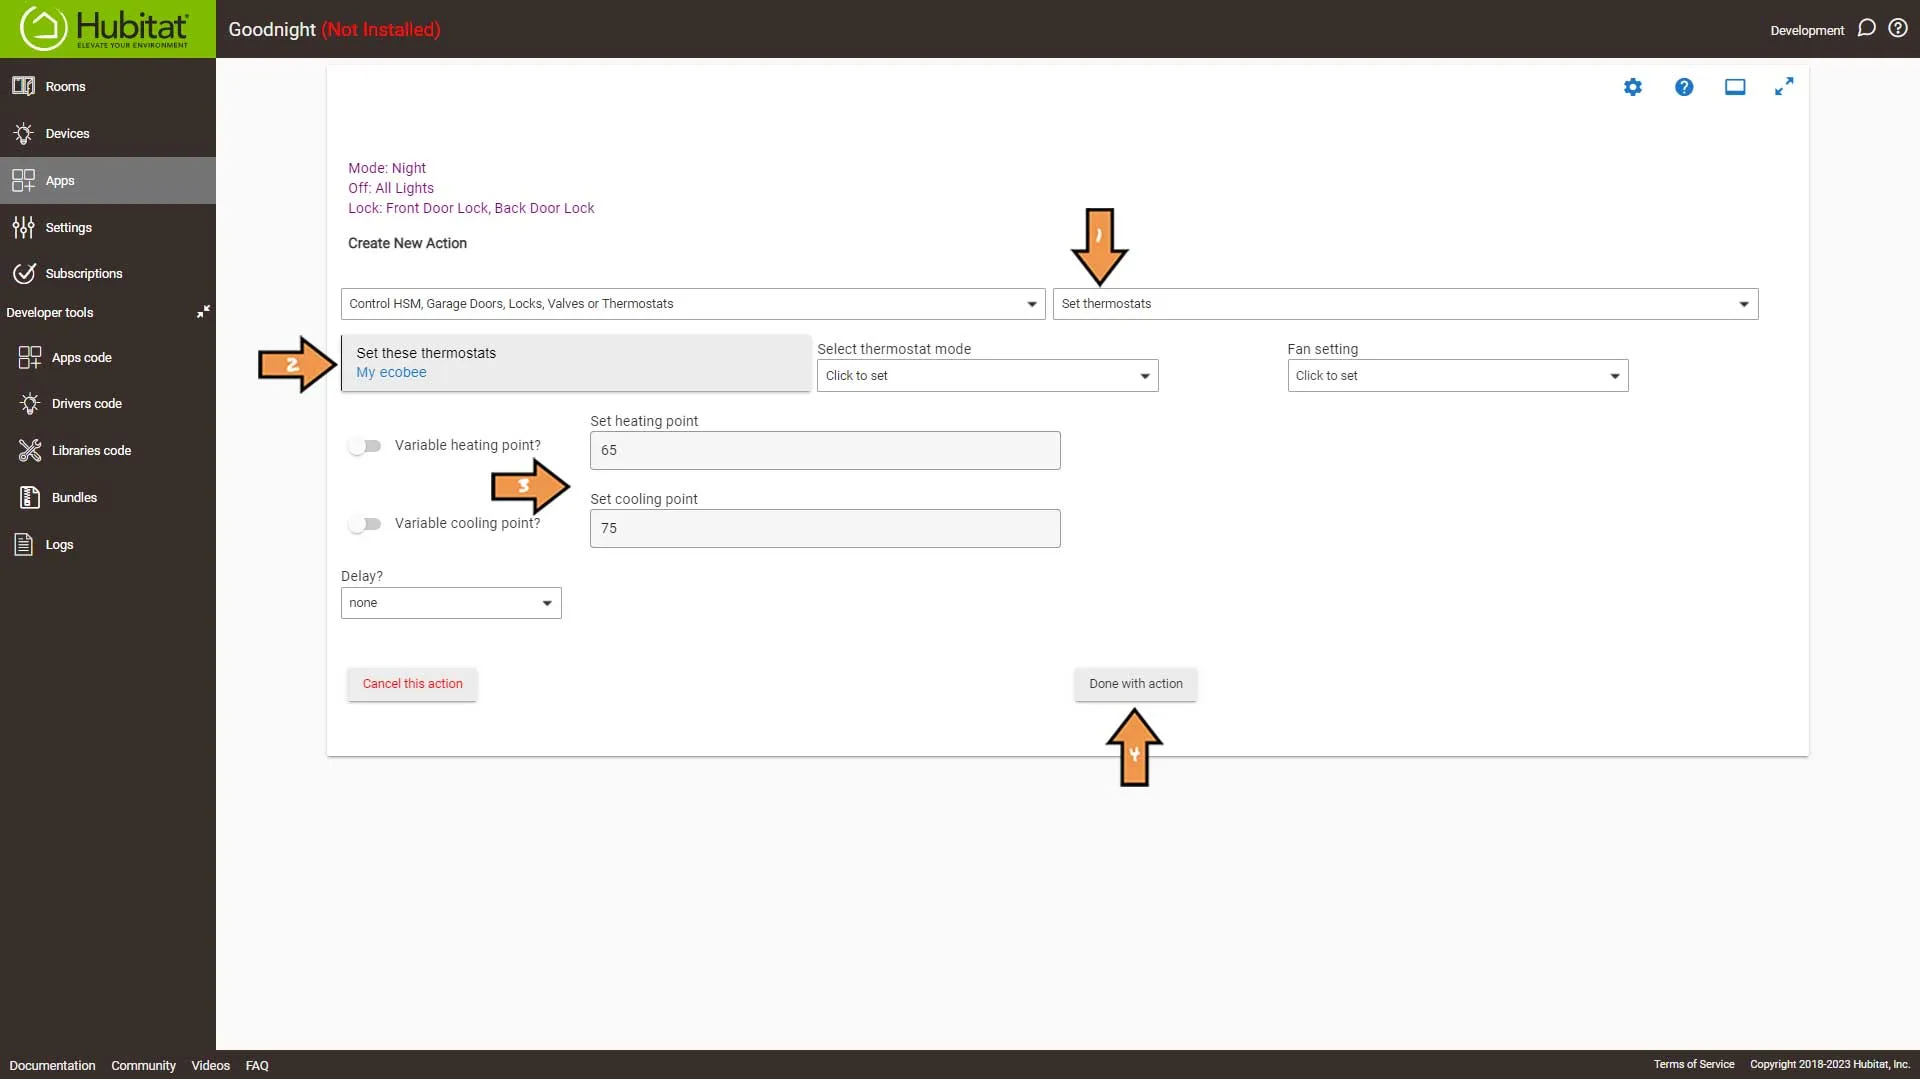
Again, select the Green Plus Sign to Add New Action.
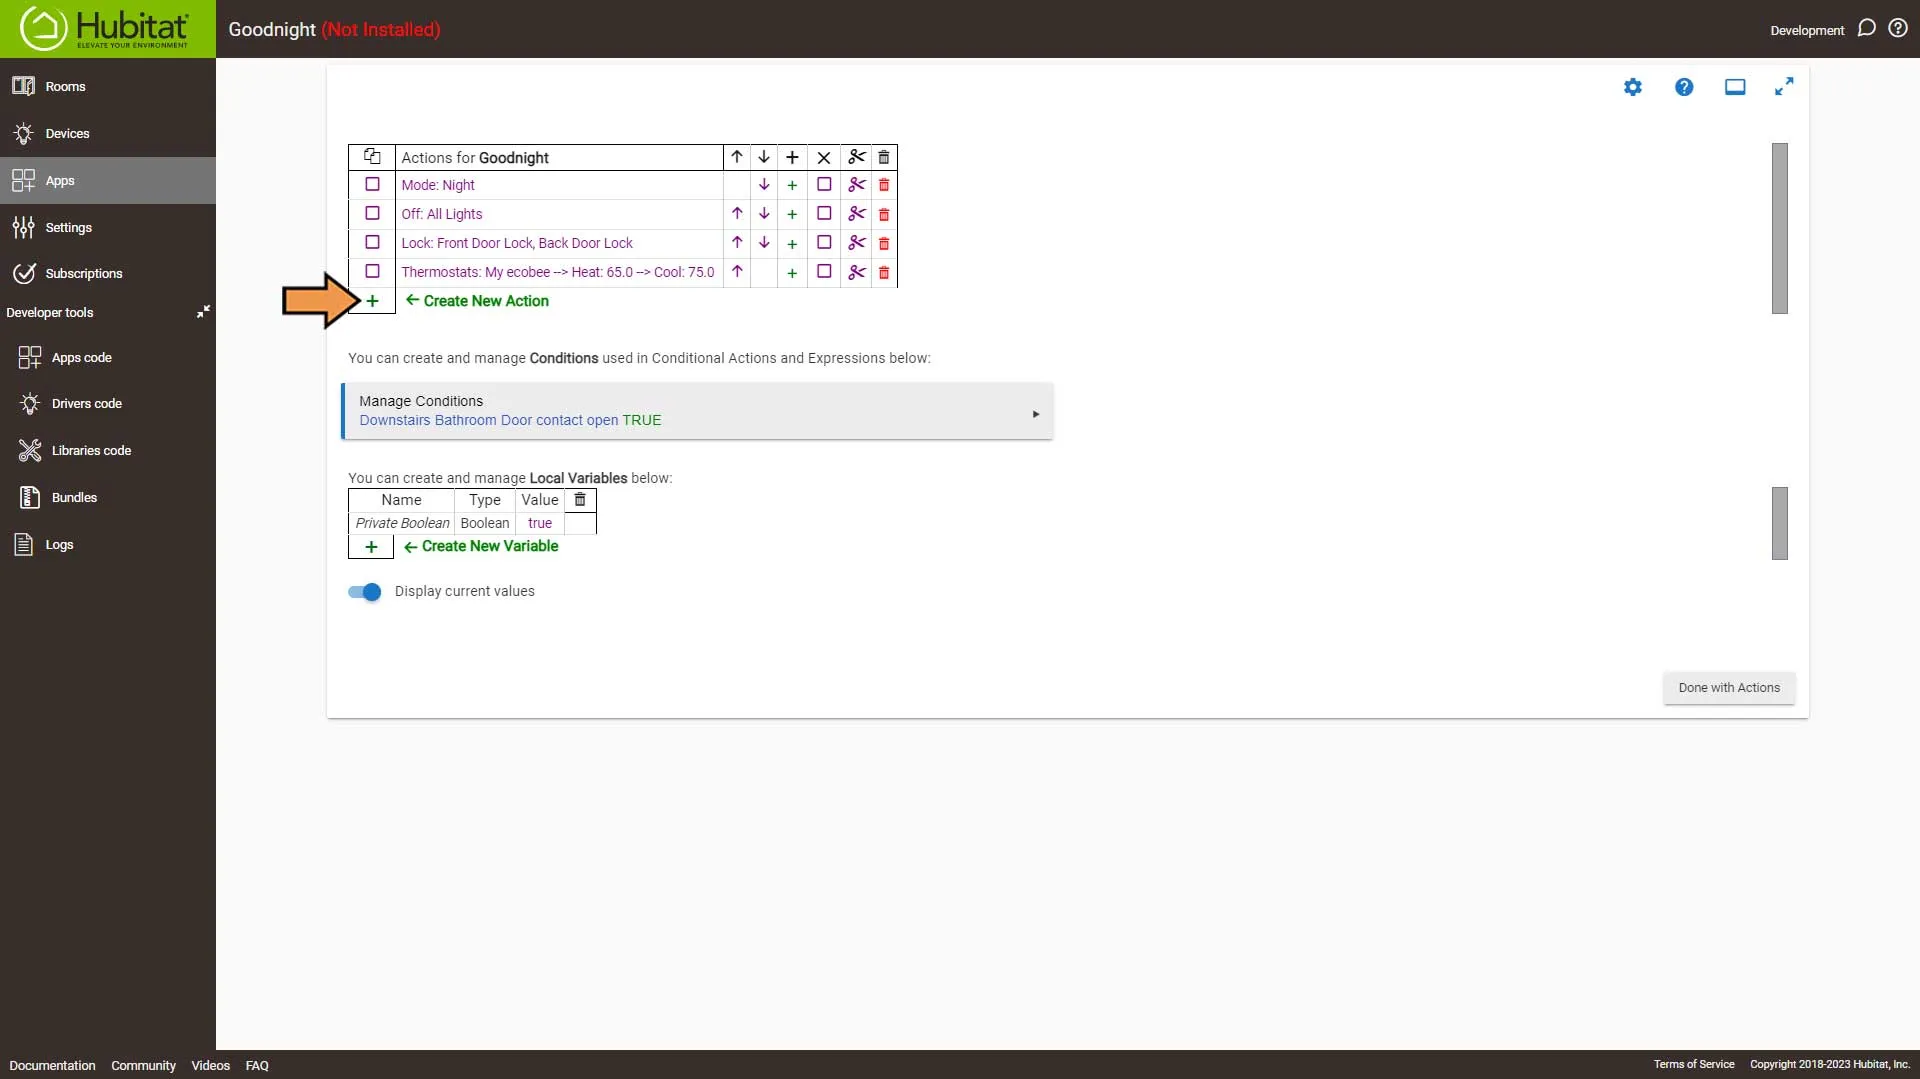
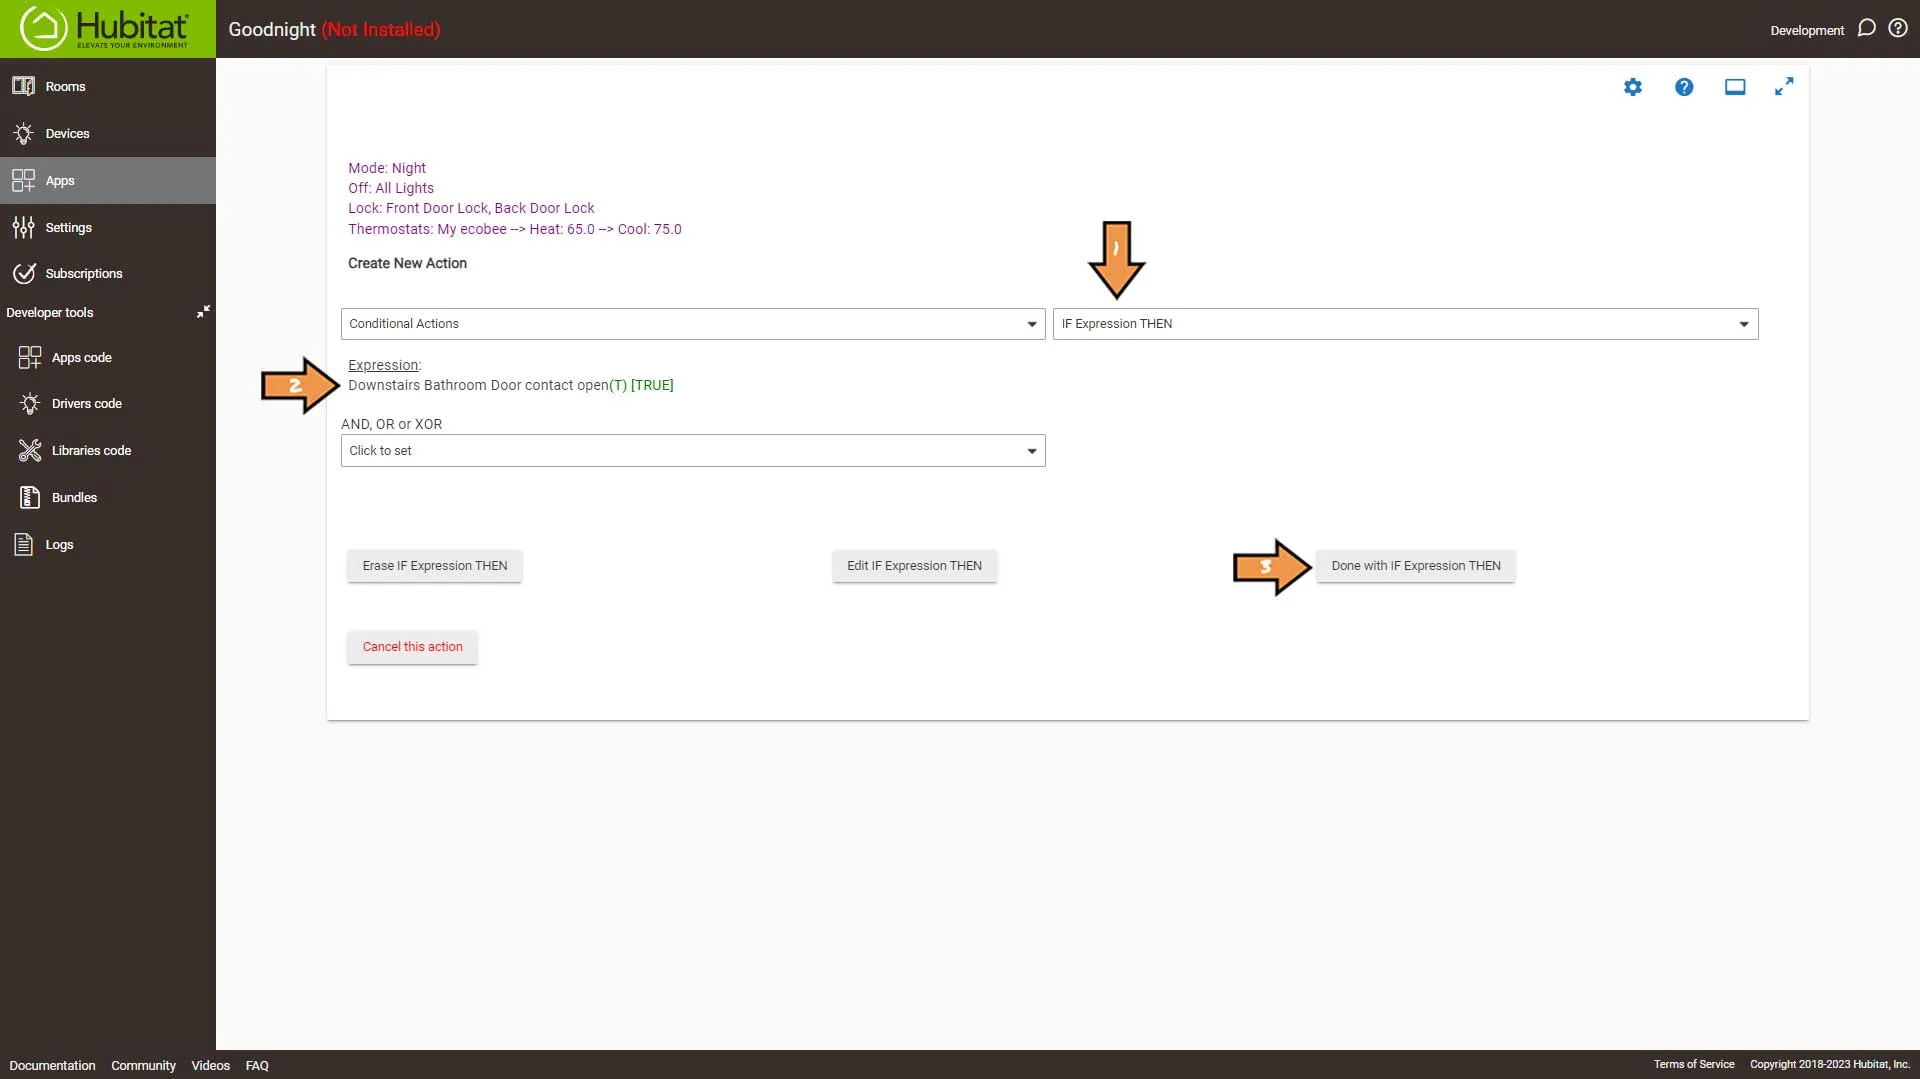
In the Select Action Type drop-down, select Conditional Actions.
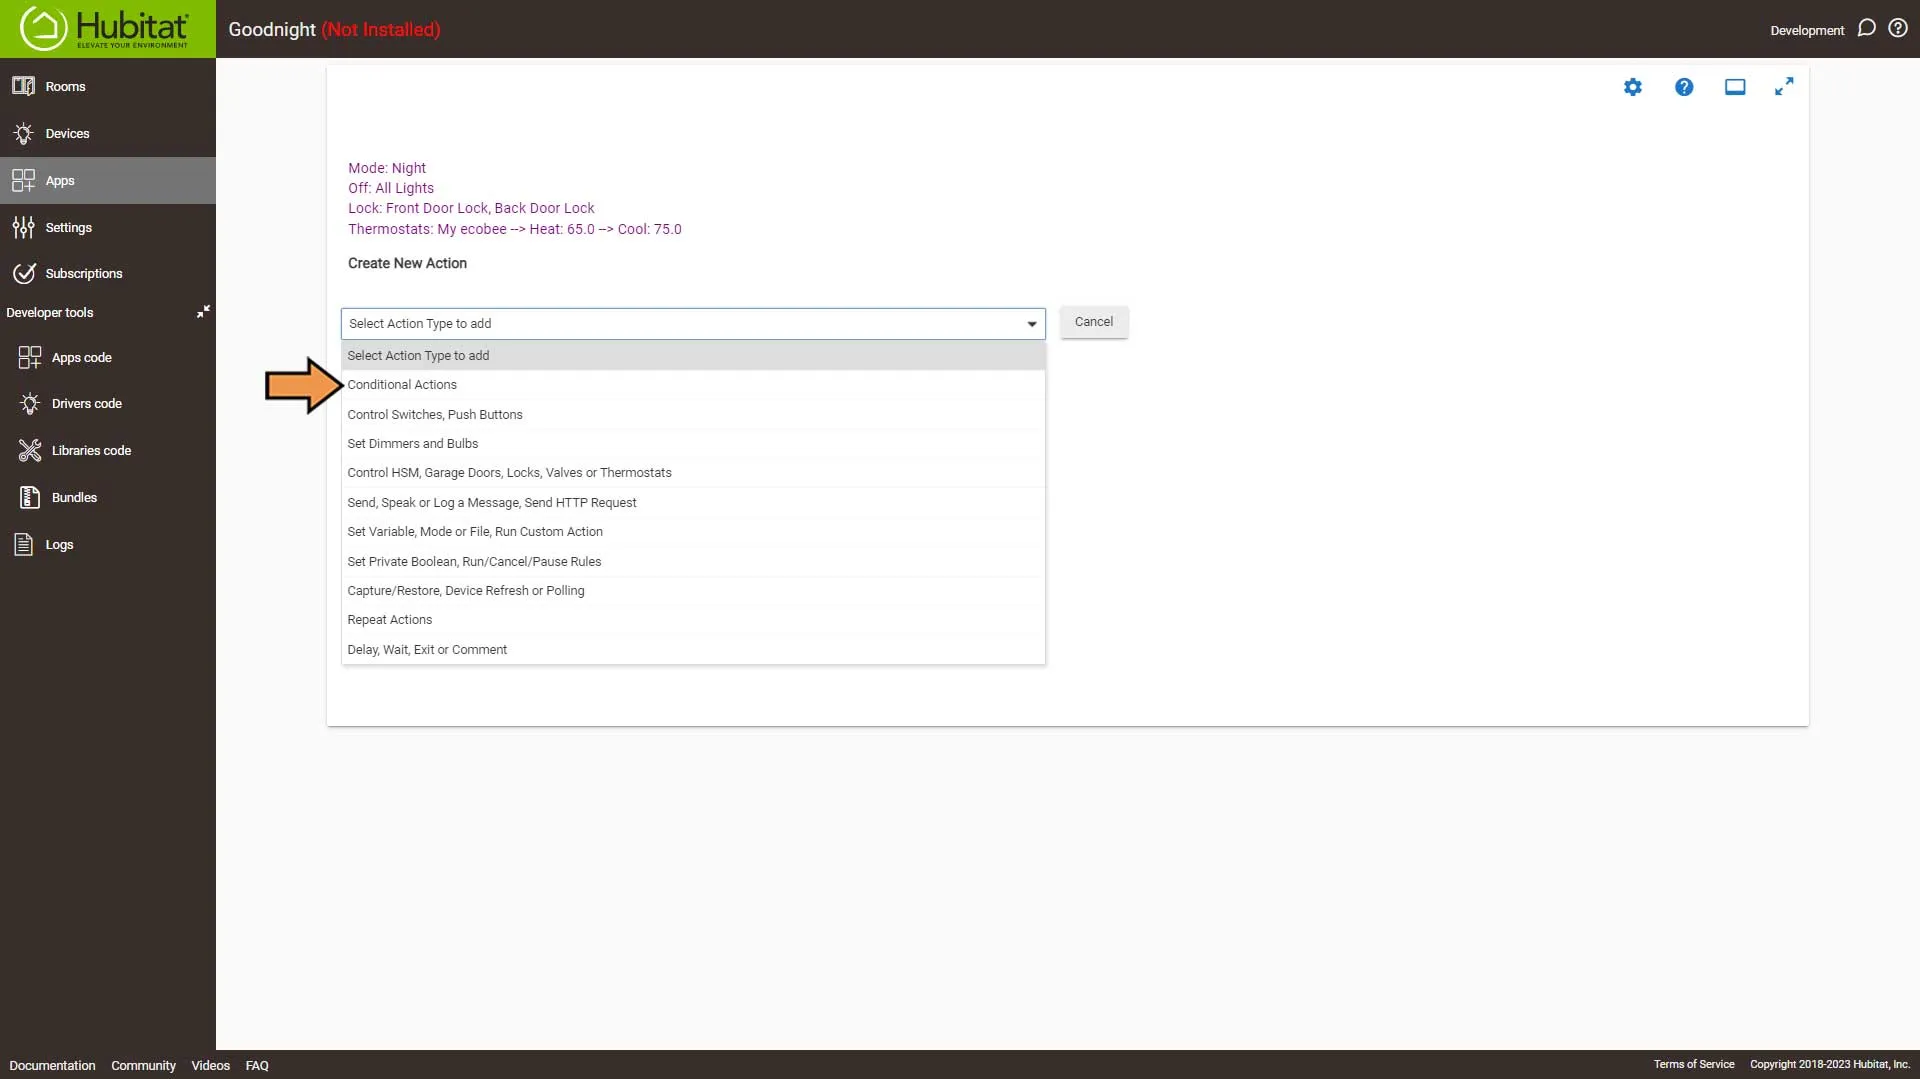
Set the following Action settings:
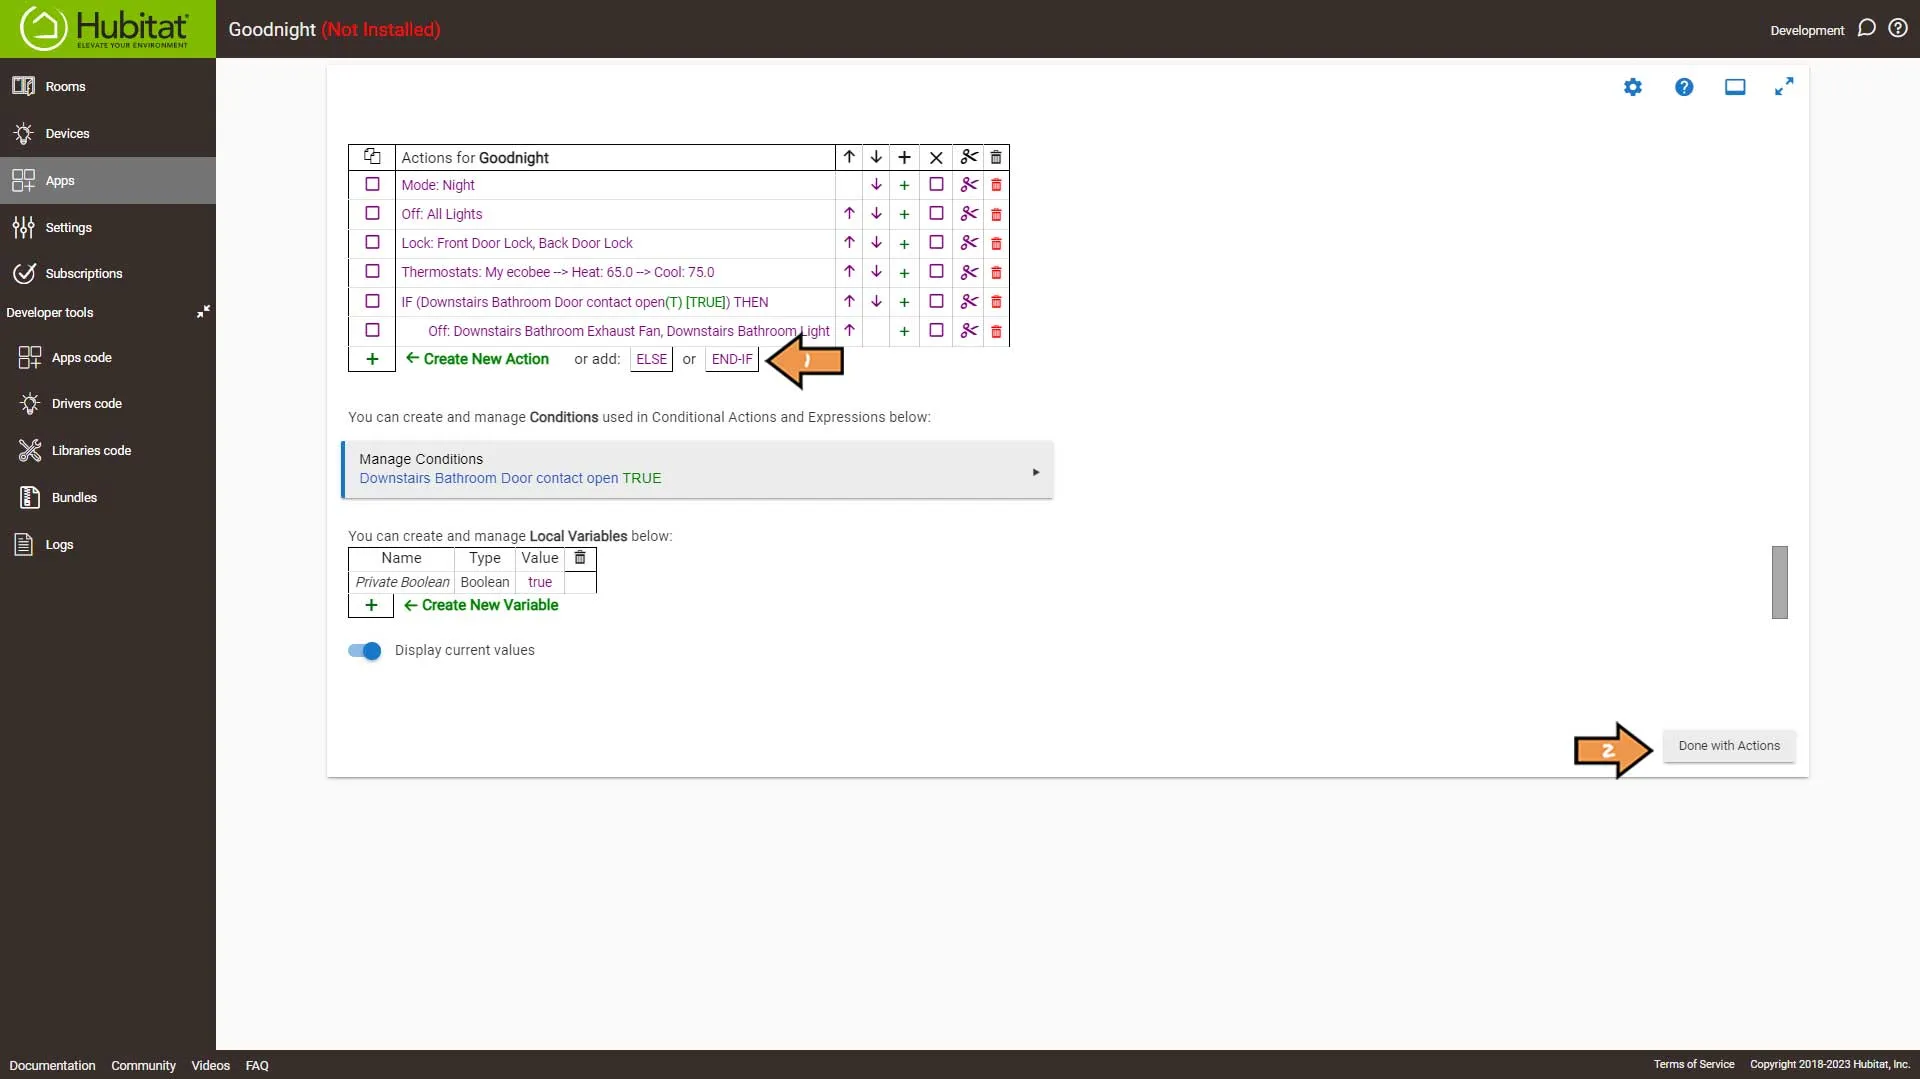
- In the Select Which Action, select the IF Expression THEN option.
- In the Define Expression element drop-down, select the Condition we created earlier.
- Then click the Done with IF Expression Then button.
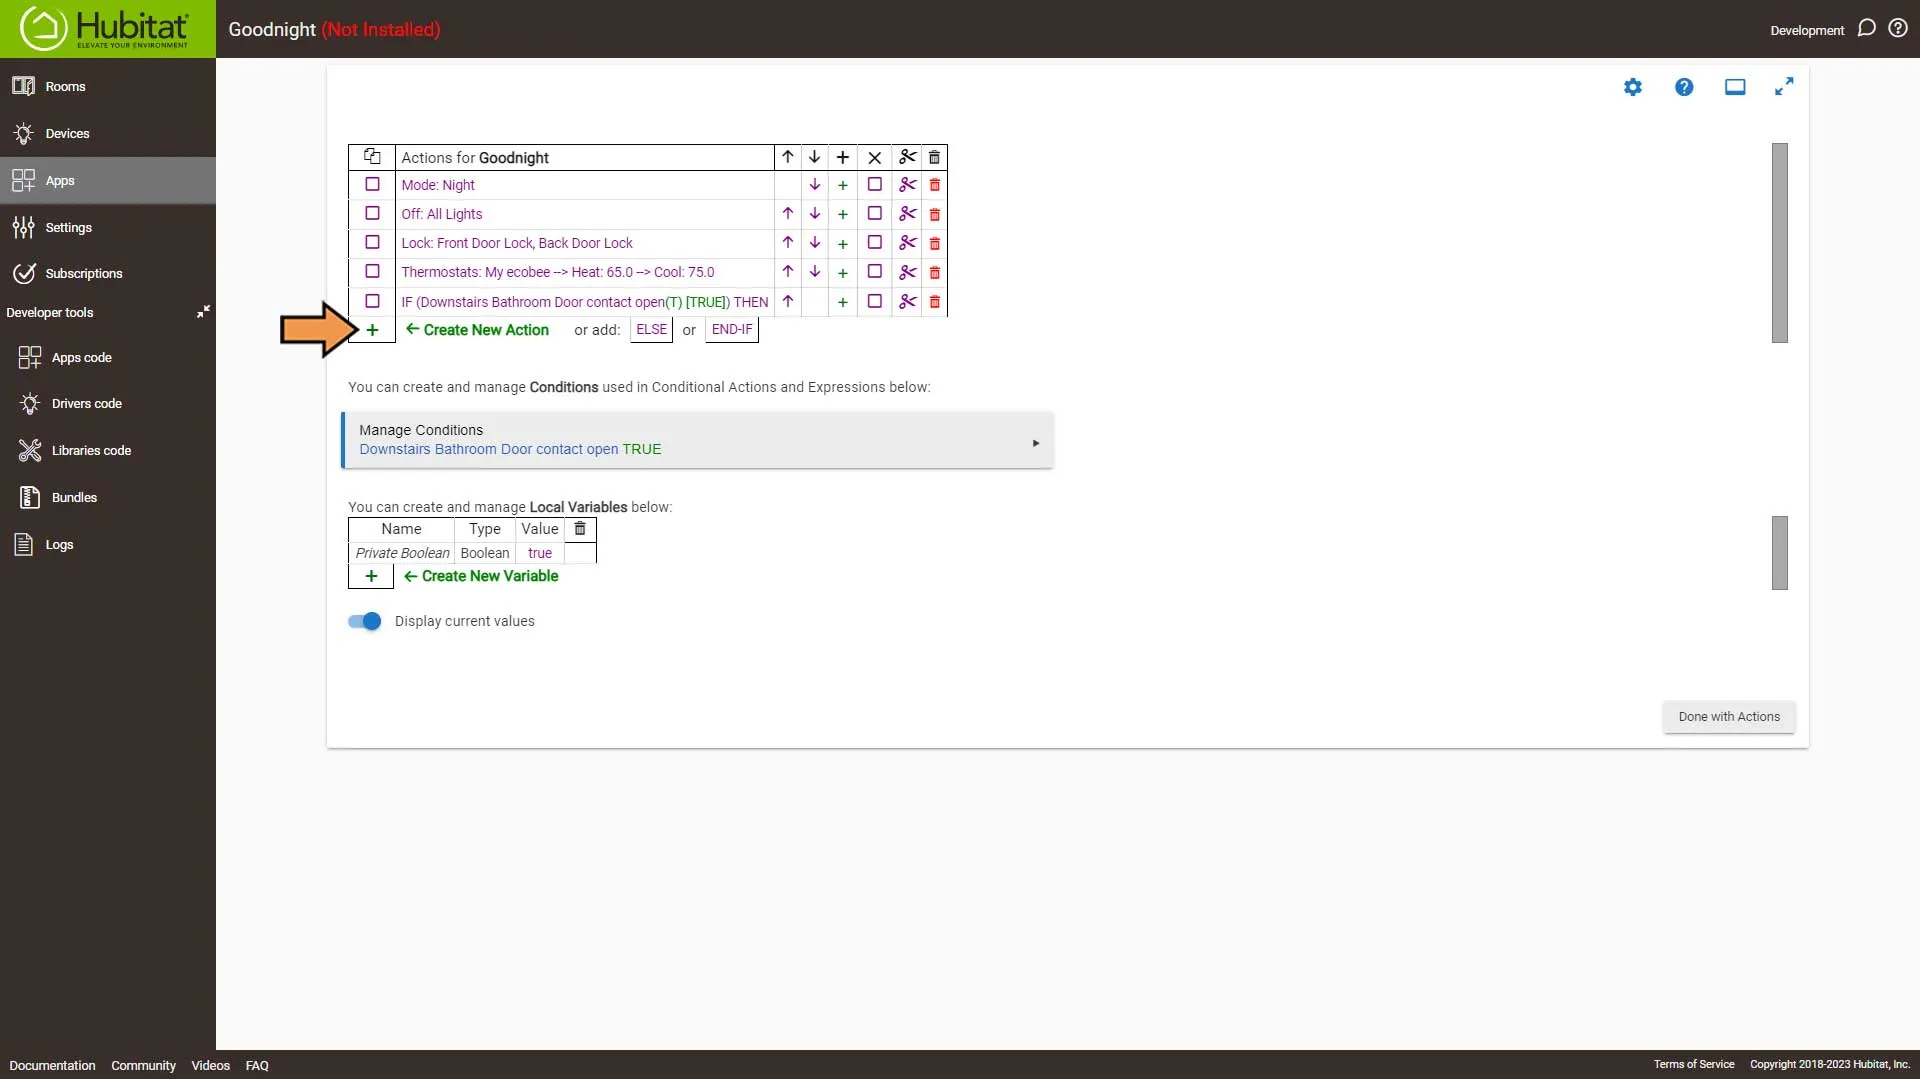
One last time, select the Green Plus Sign to Add New Action.
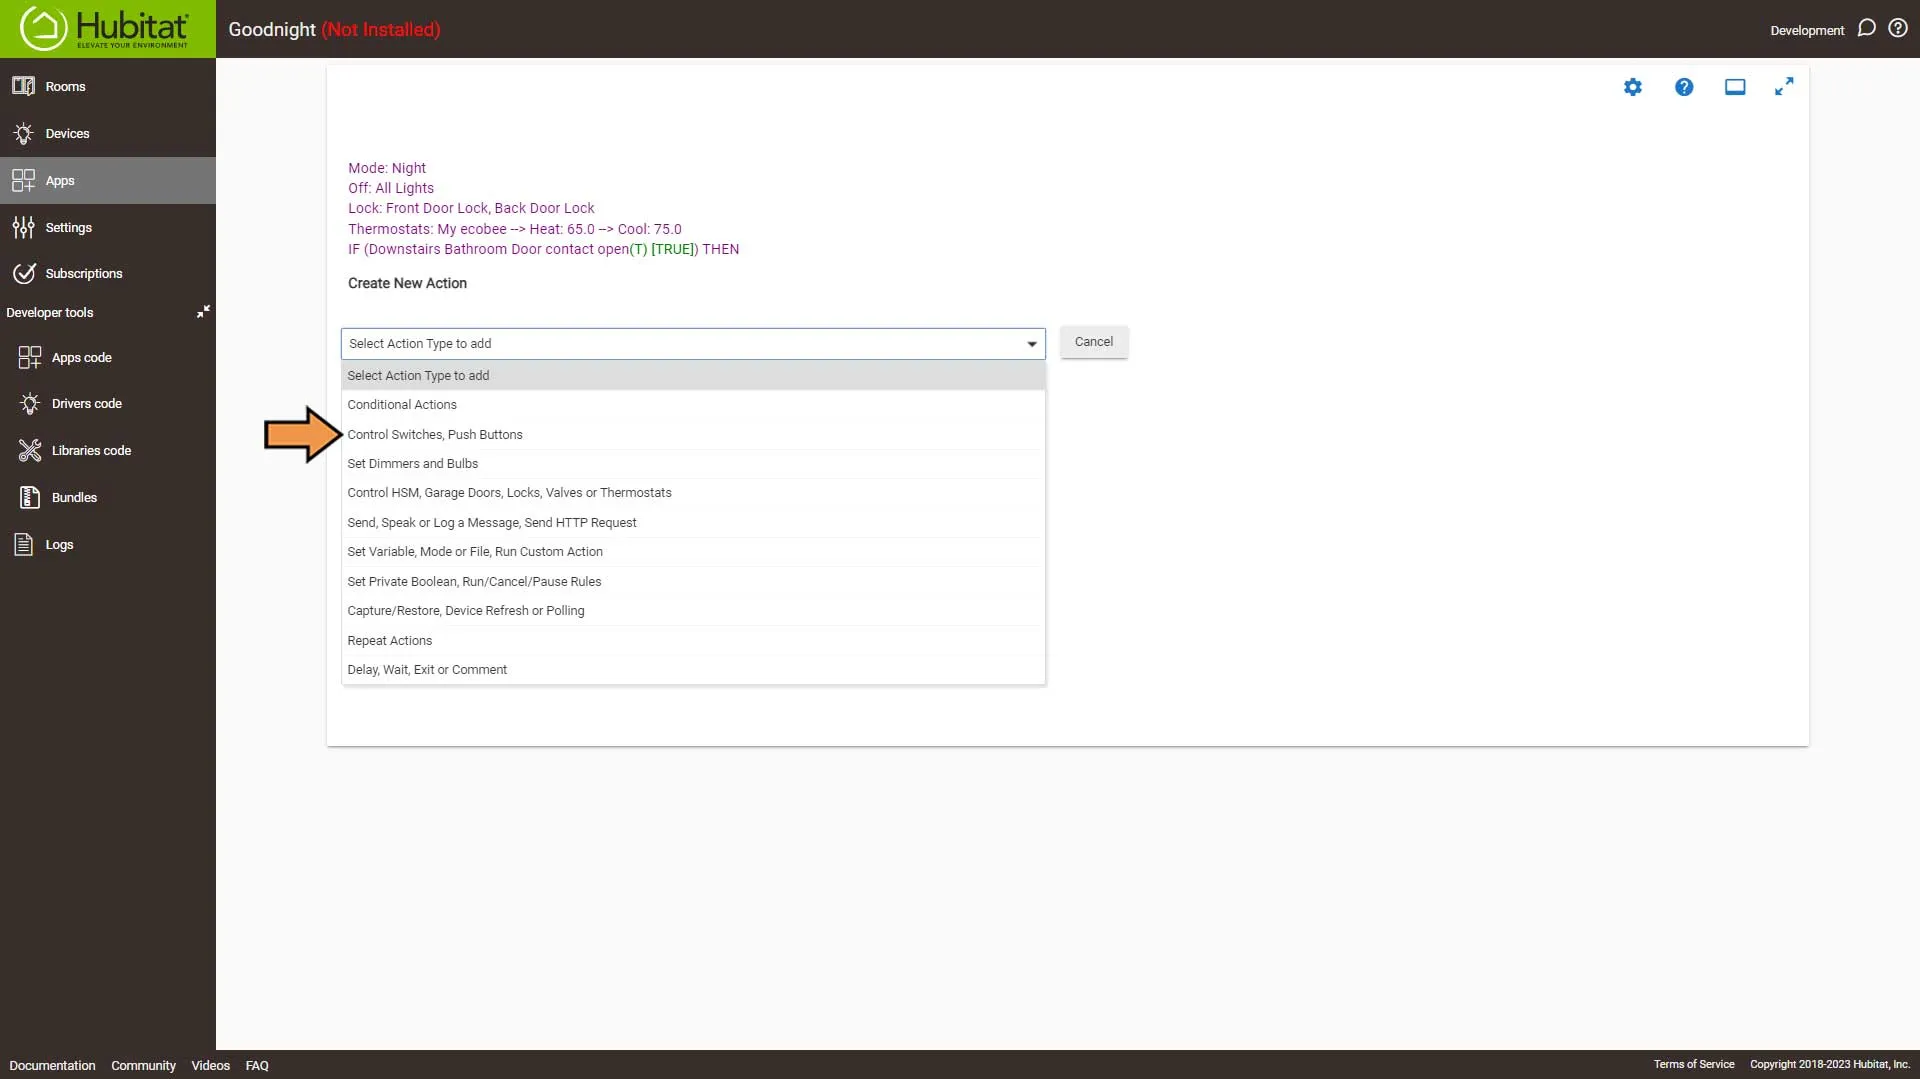
In the Select Action Type drop-down, select Control Switches option.
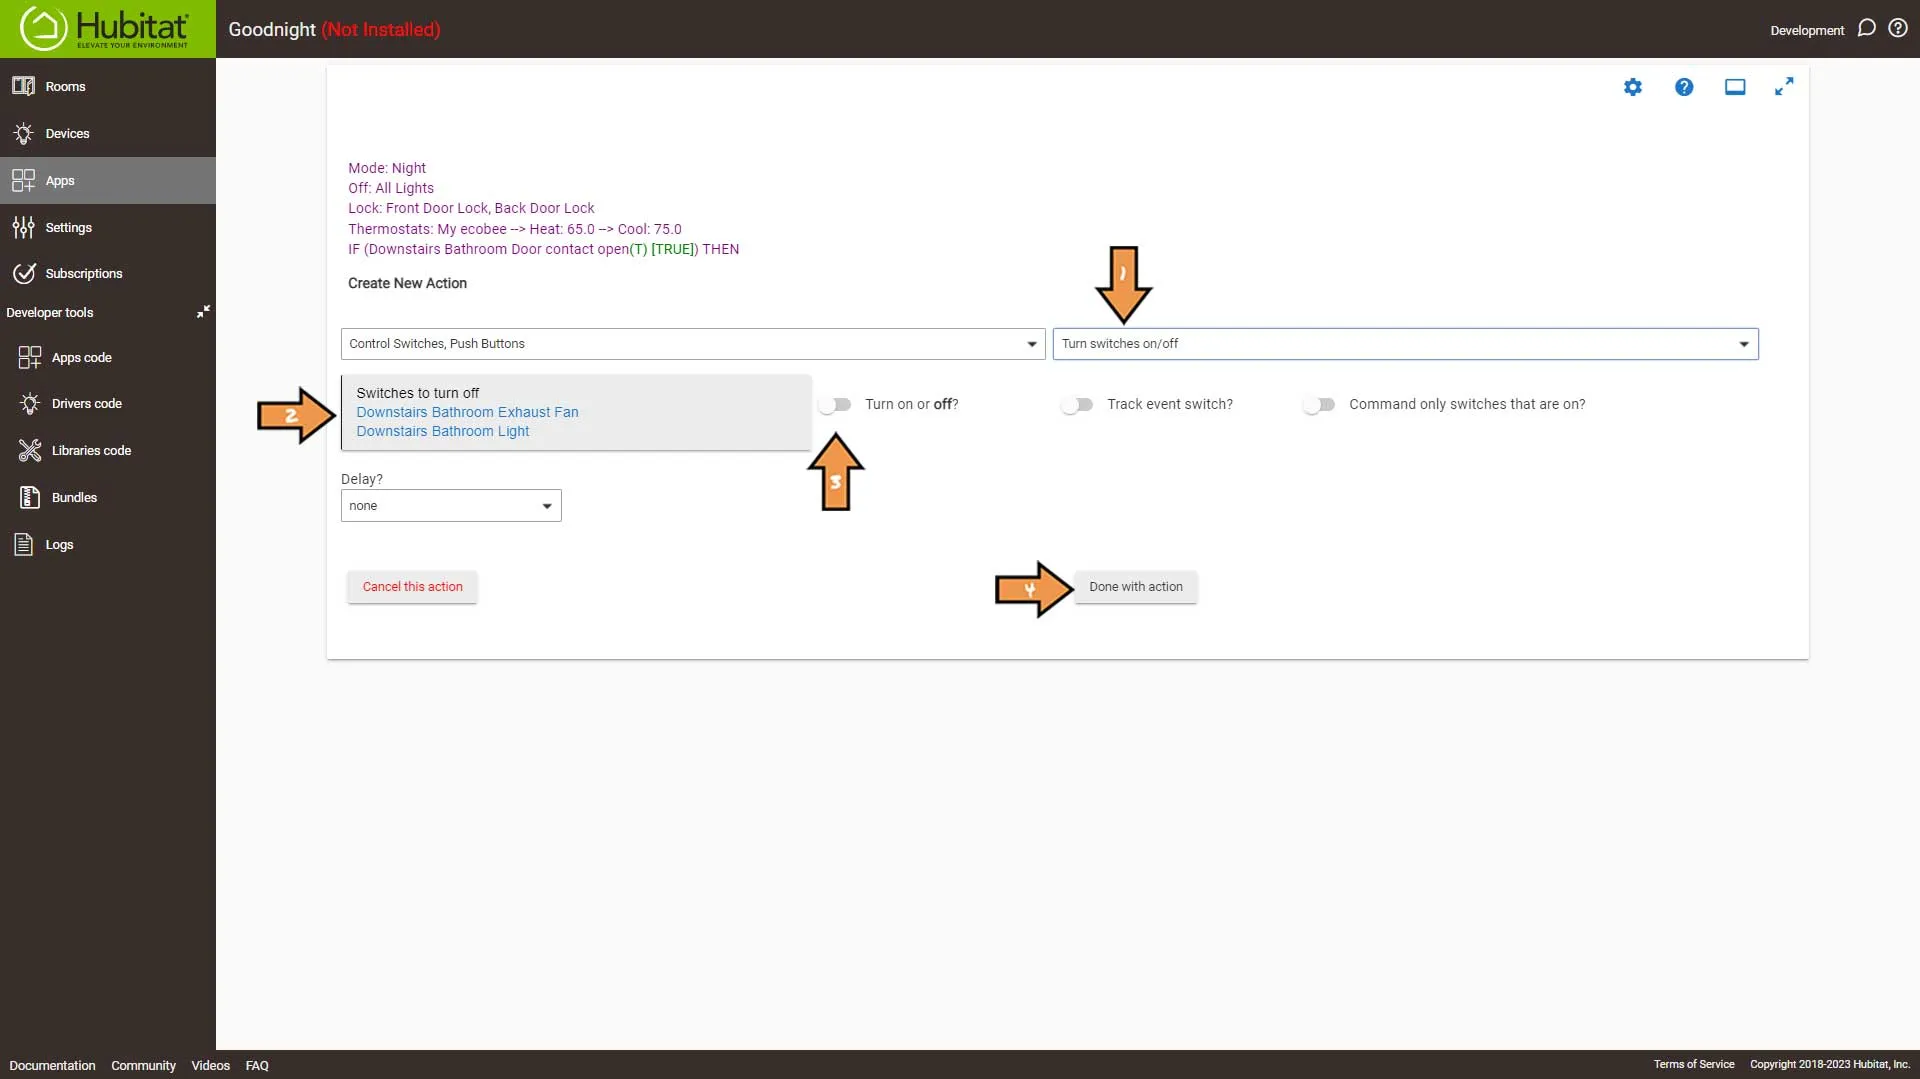
Set the following Action settings:
- In the Select Which Action, select the Turn switches on/off option.
- Next, in the Switches to turn off drop-down, select the bathroom lights.
- Make sure the Turn on or off switch is set to Off.
- Then click the Done with Action button.
Select END-IF and click the Done with Actions button.
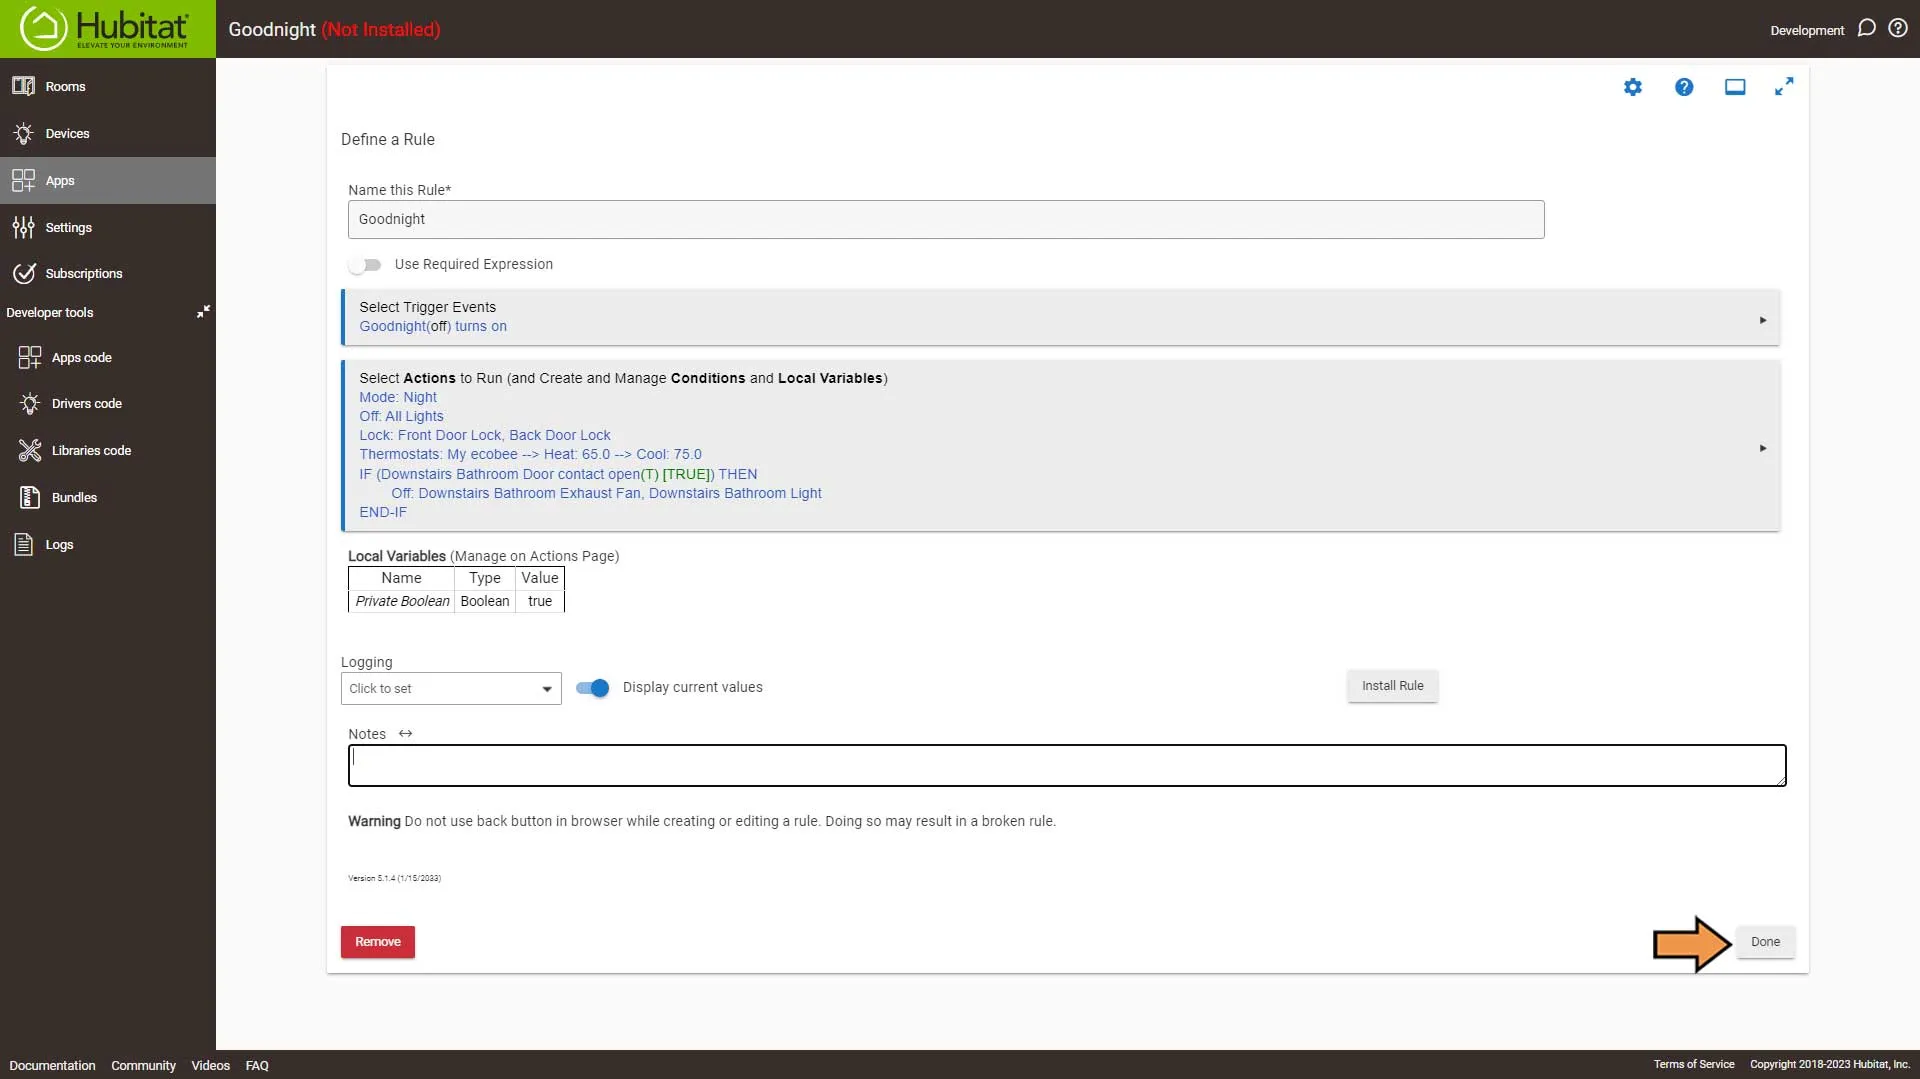
Then click Done to finish the Automation.
Home Assistant
Goodnight Automation
The Official Documentation for Automation editor
Setting Up the Automation
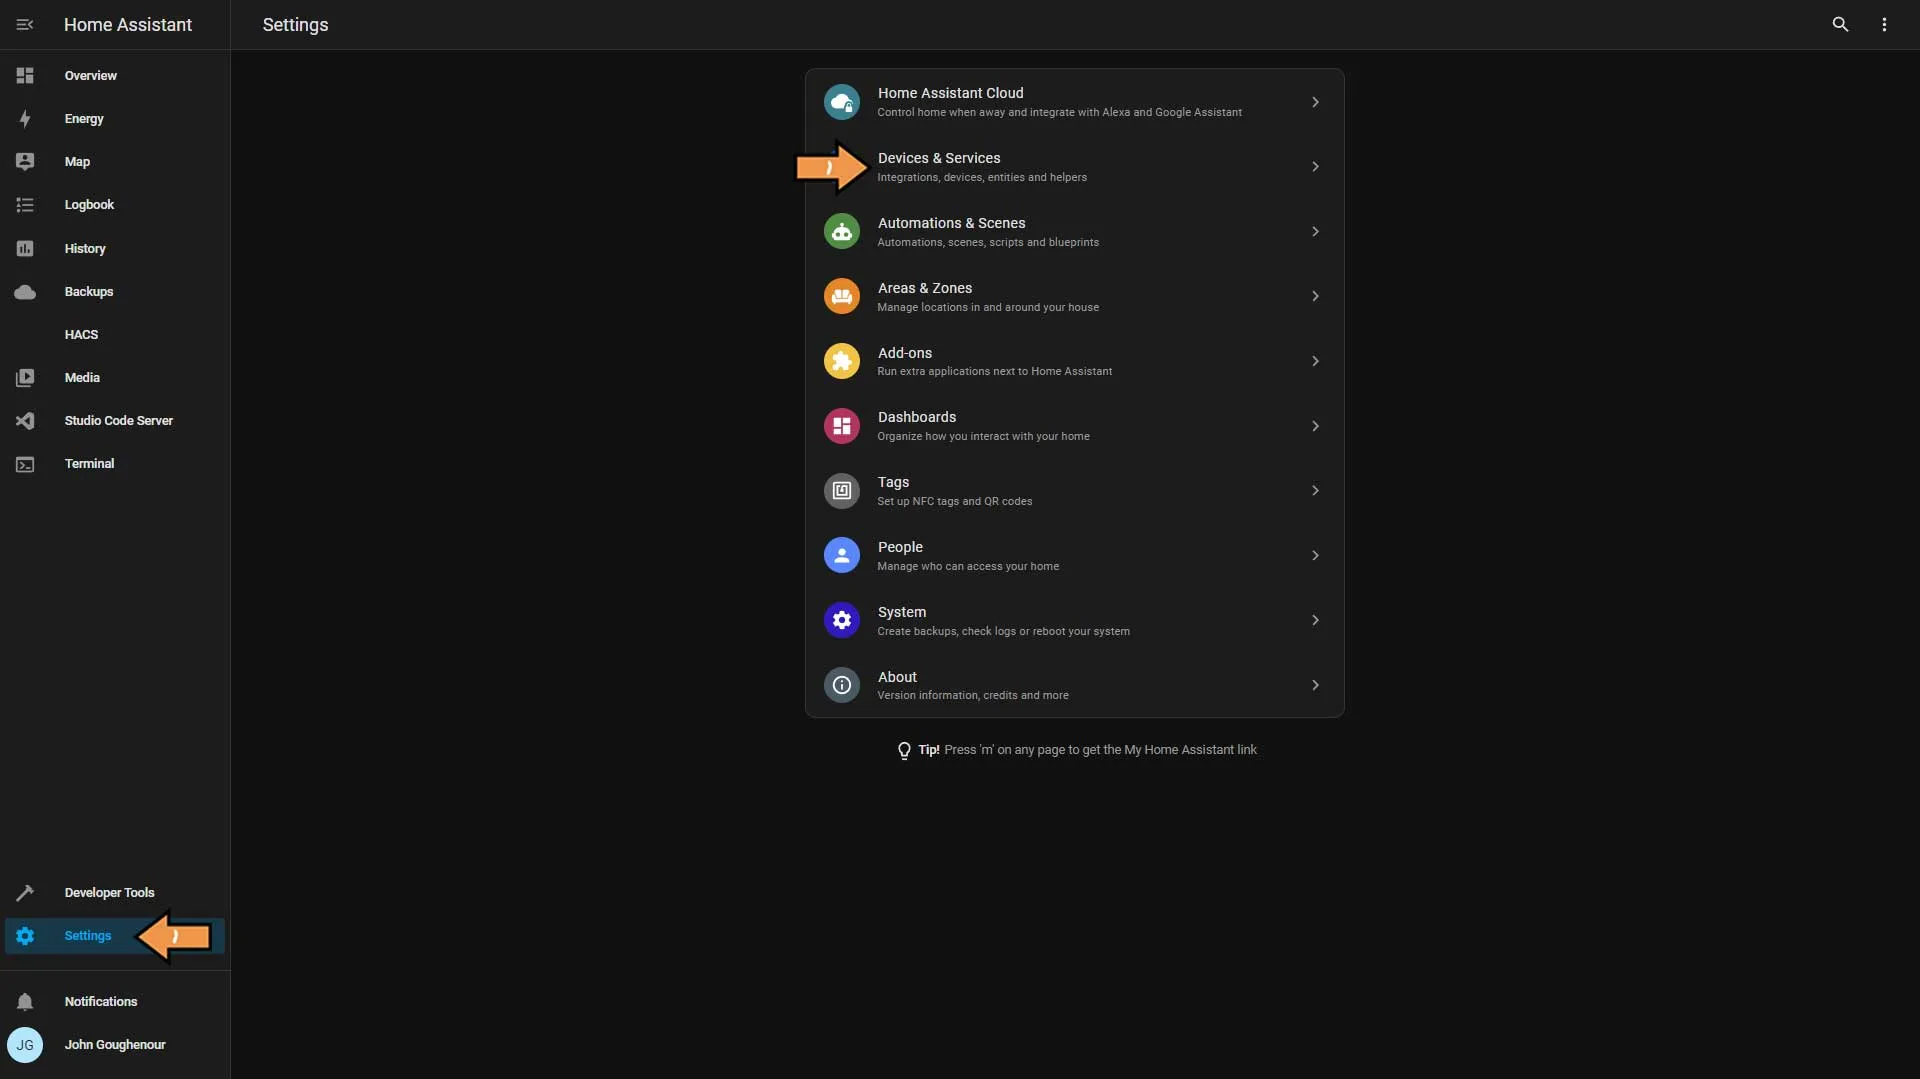
First, we need to go to Settings and Devices & Services.
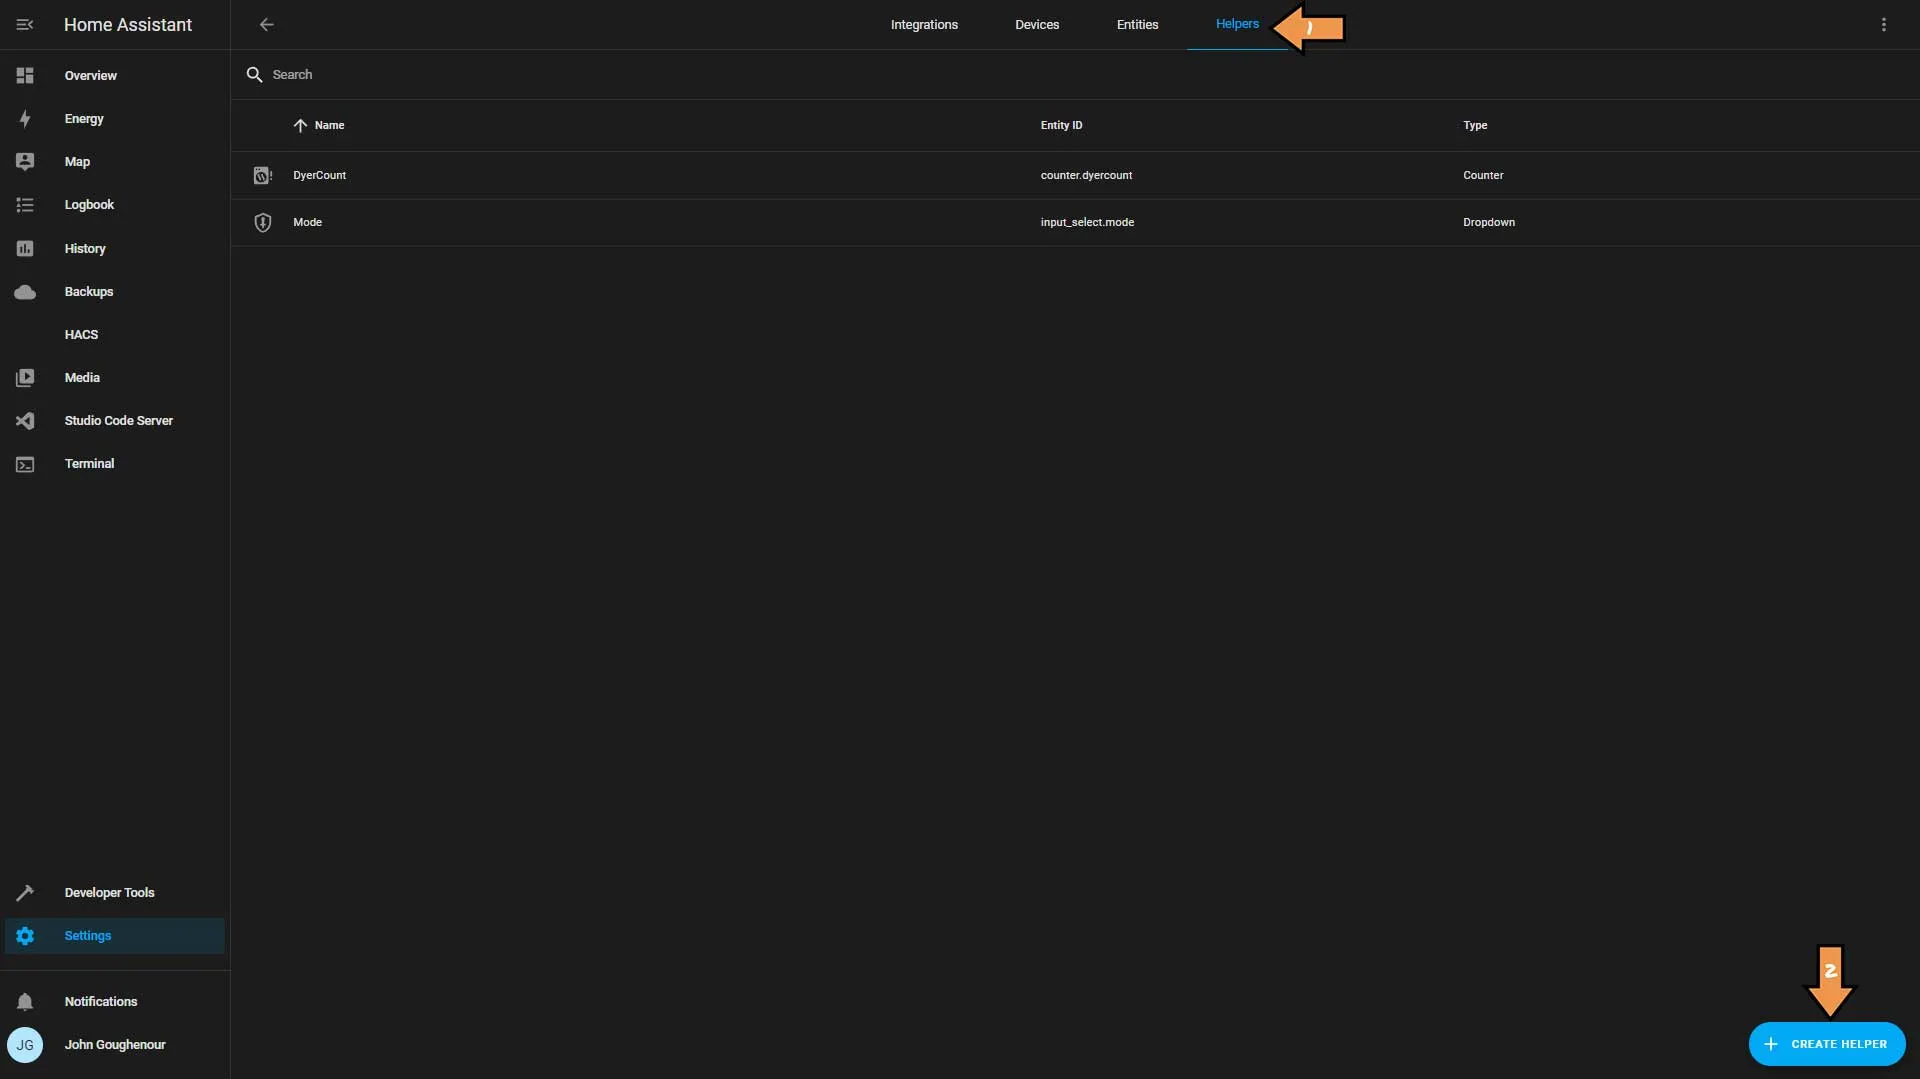
At the top of the screen, click Helpers, then the blue Create Helper button at the bottom.
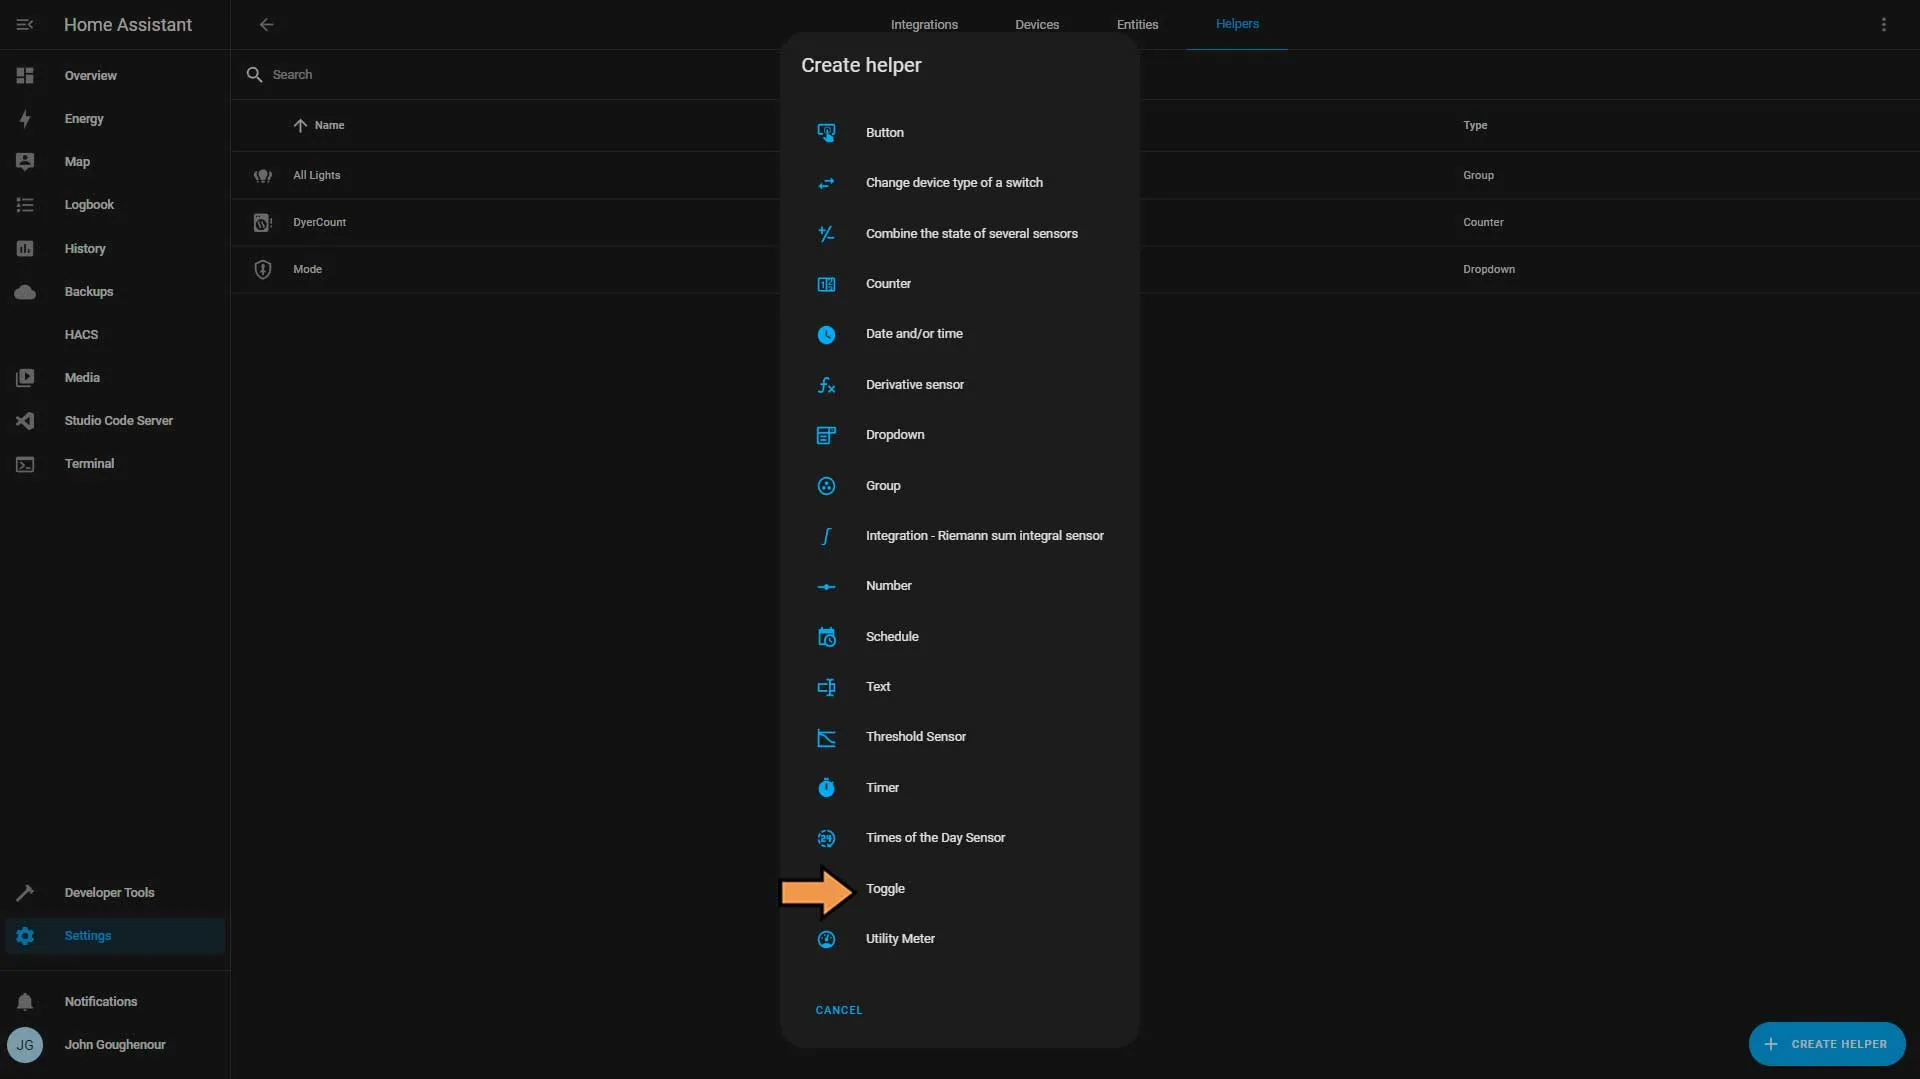
In the Create helper pop-up window, select Toggle.
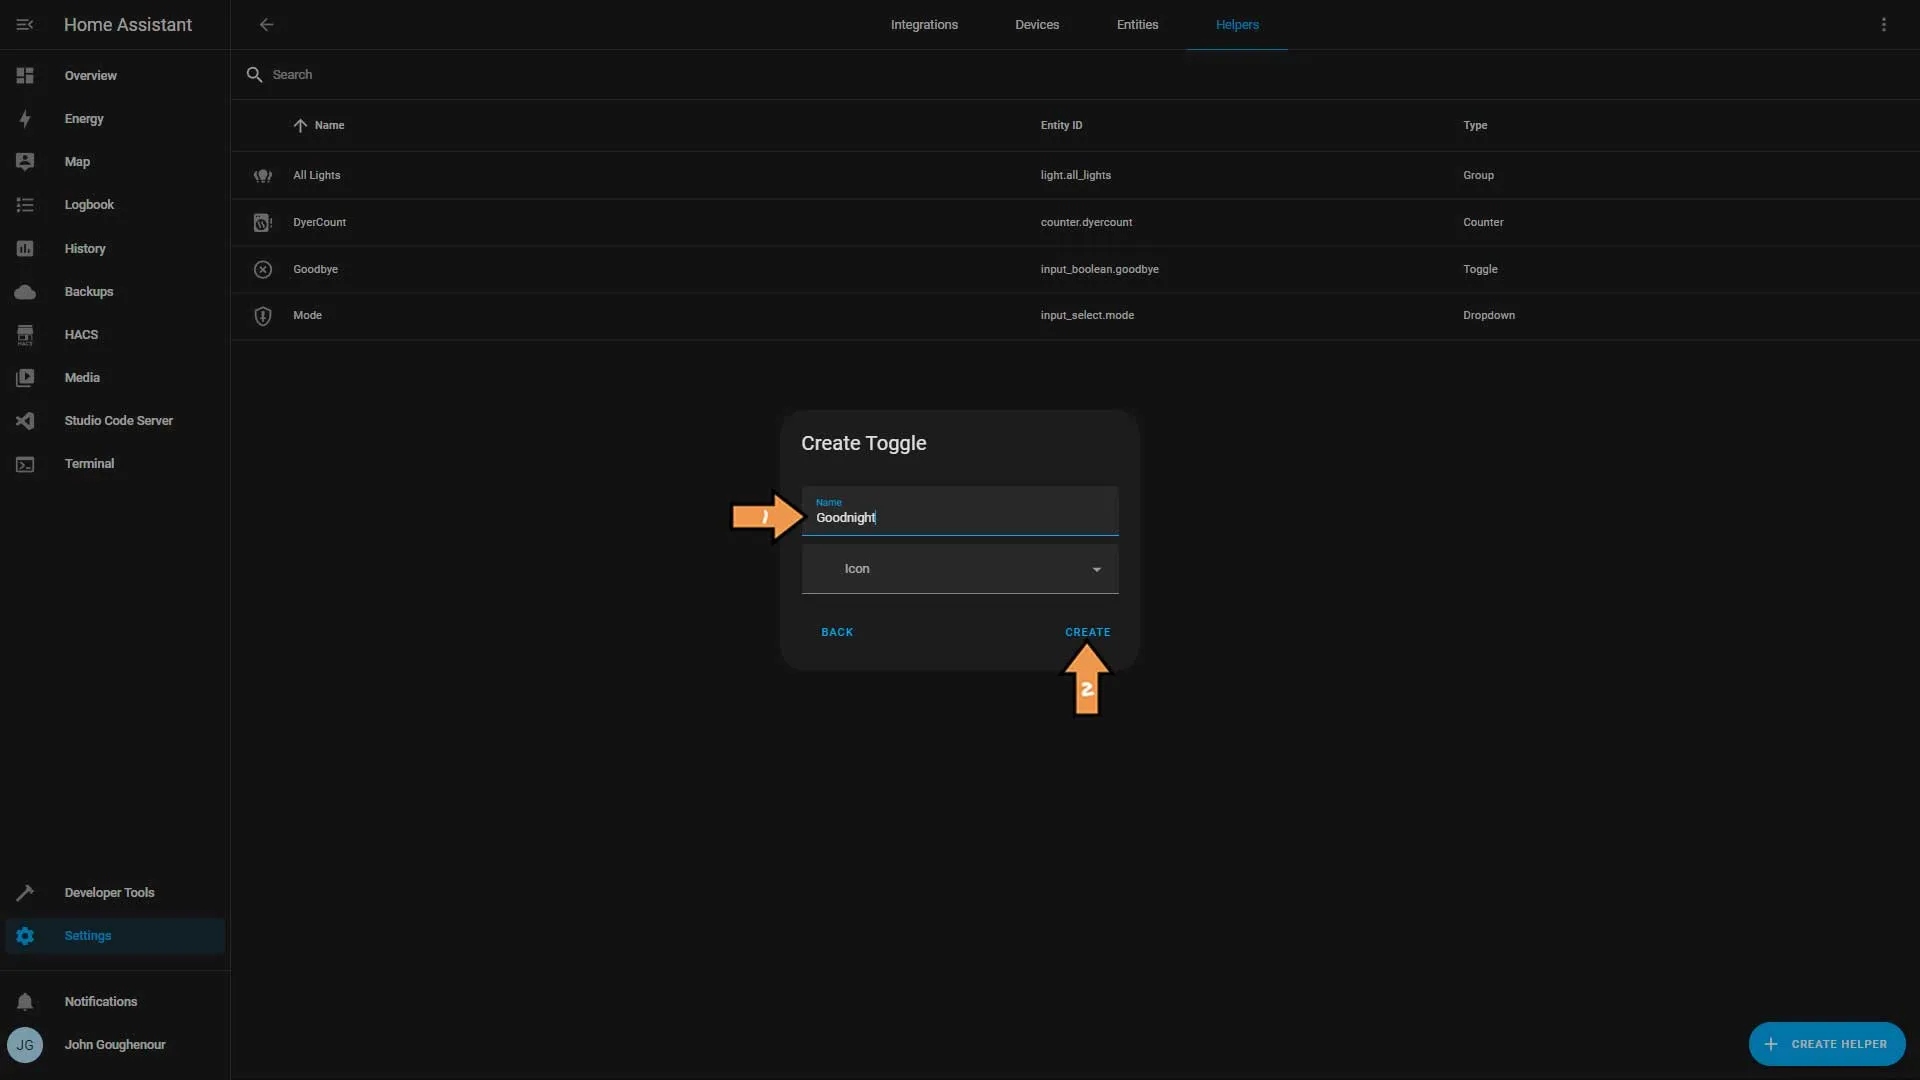
Name the virtual switch. Then click Create.
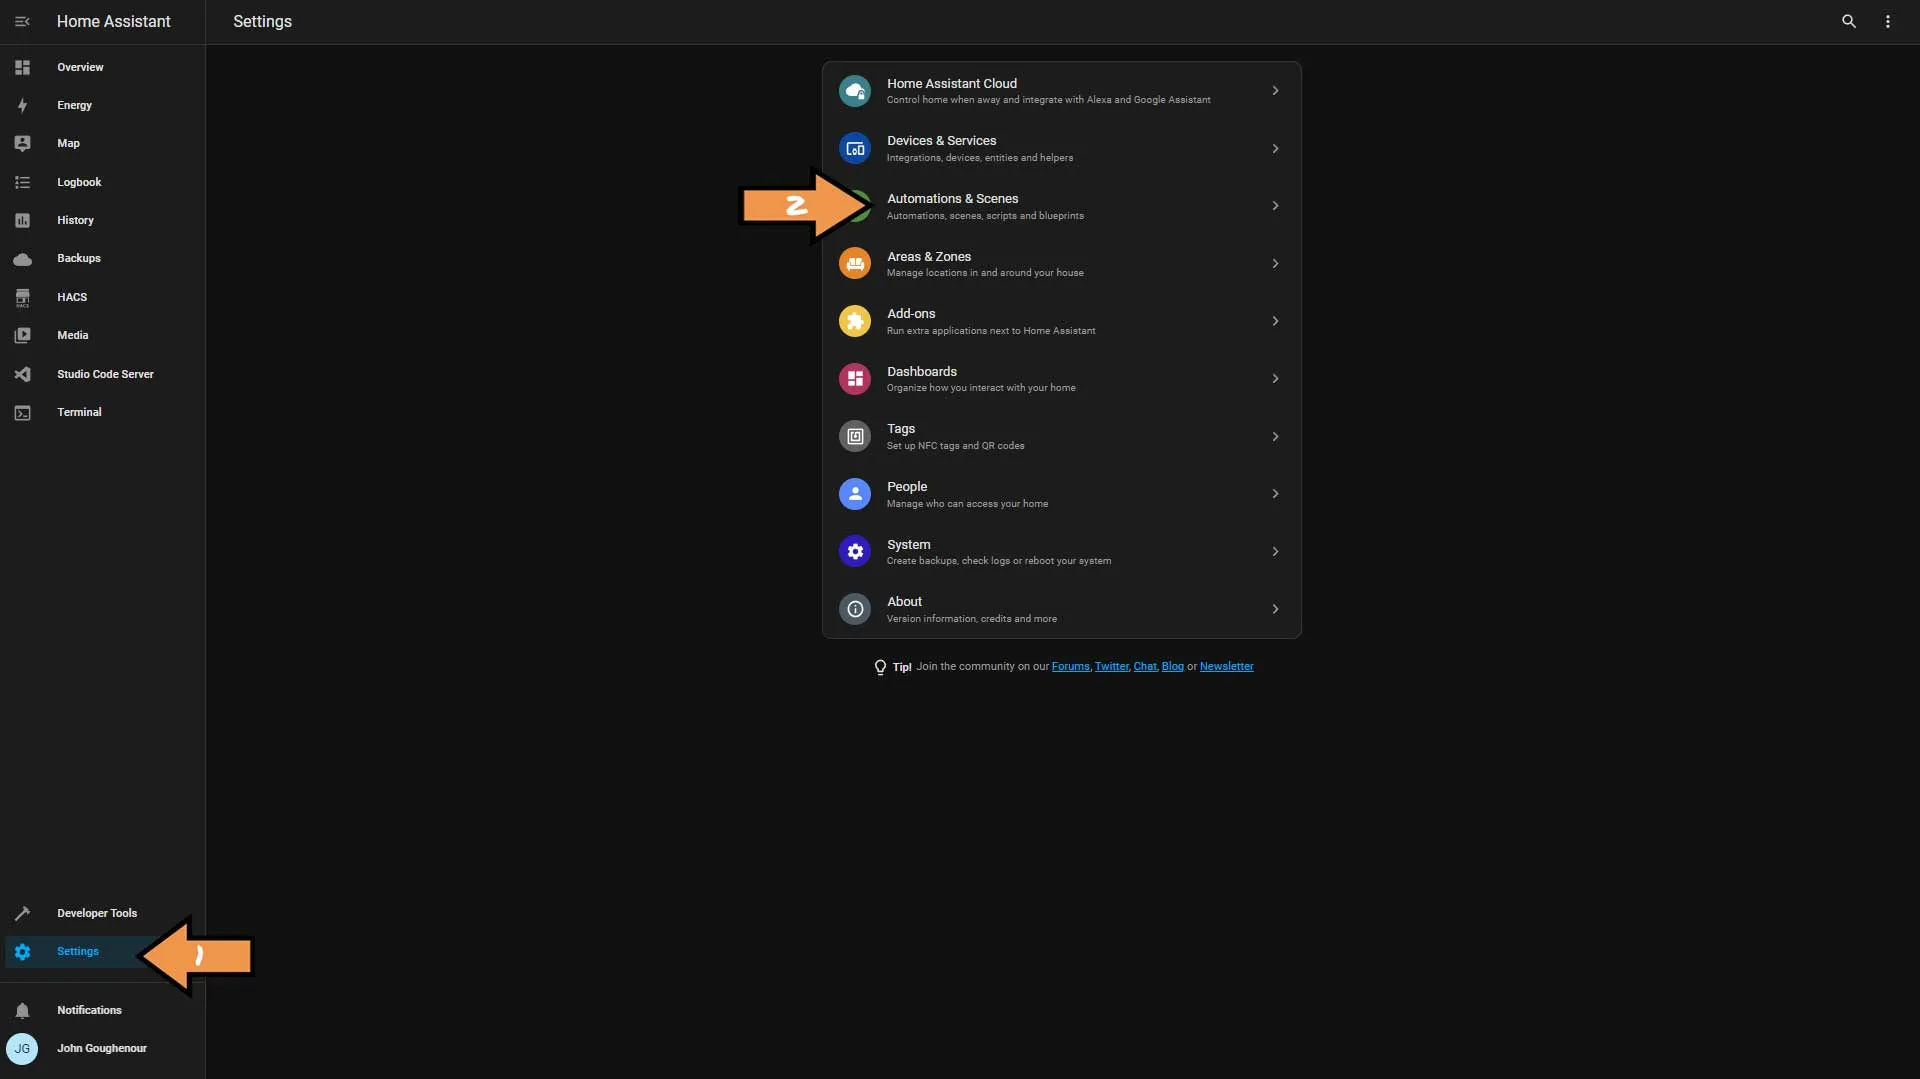
Next, we need to go to Settings and Automations & Scenes.
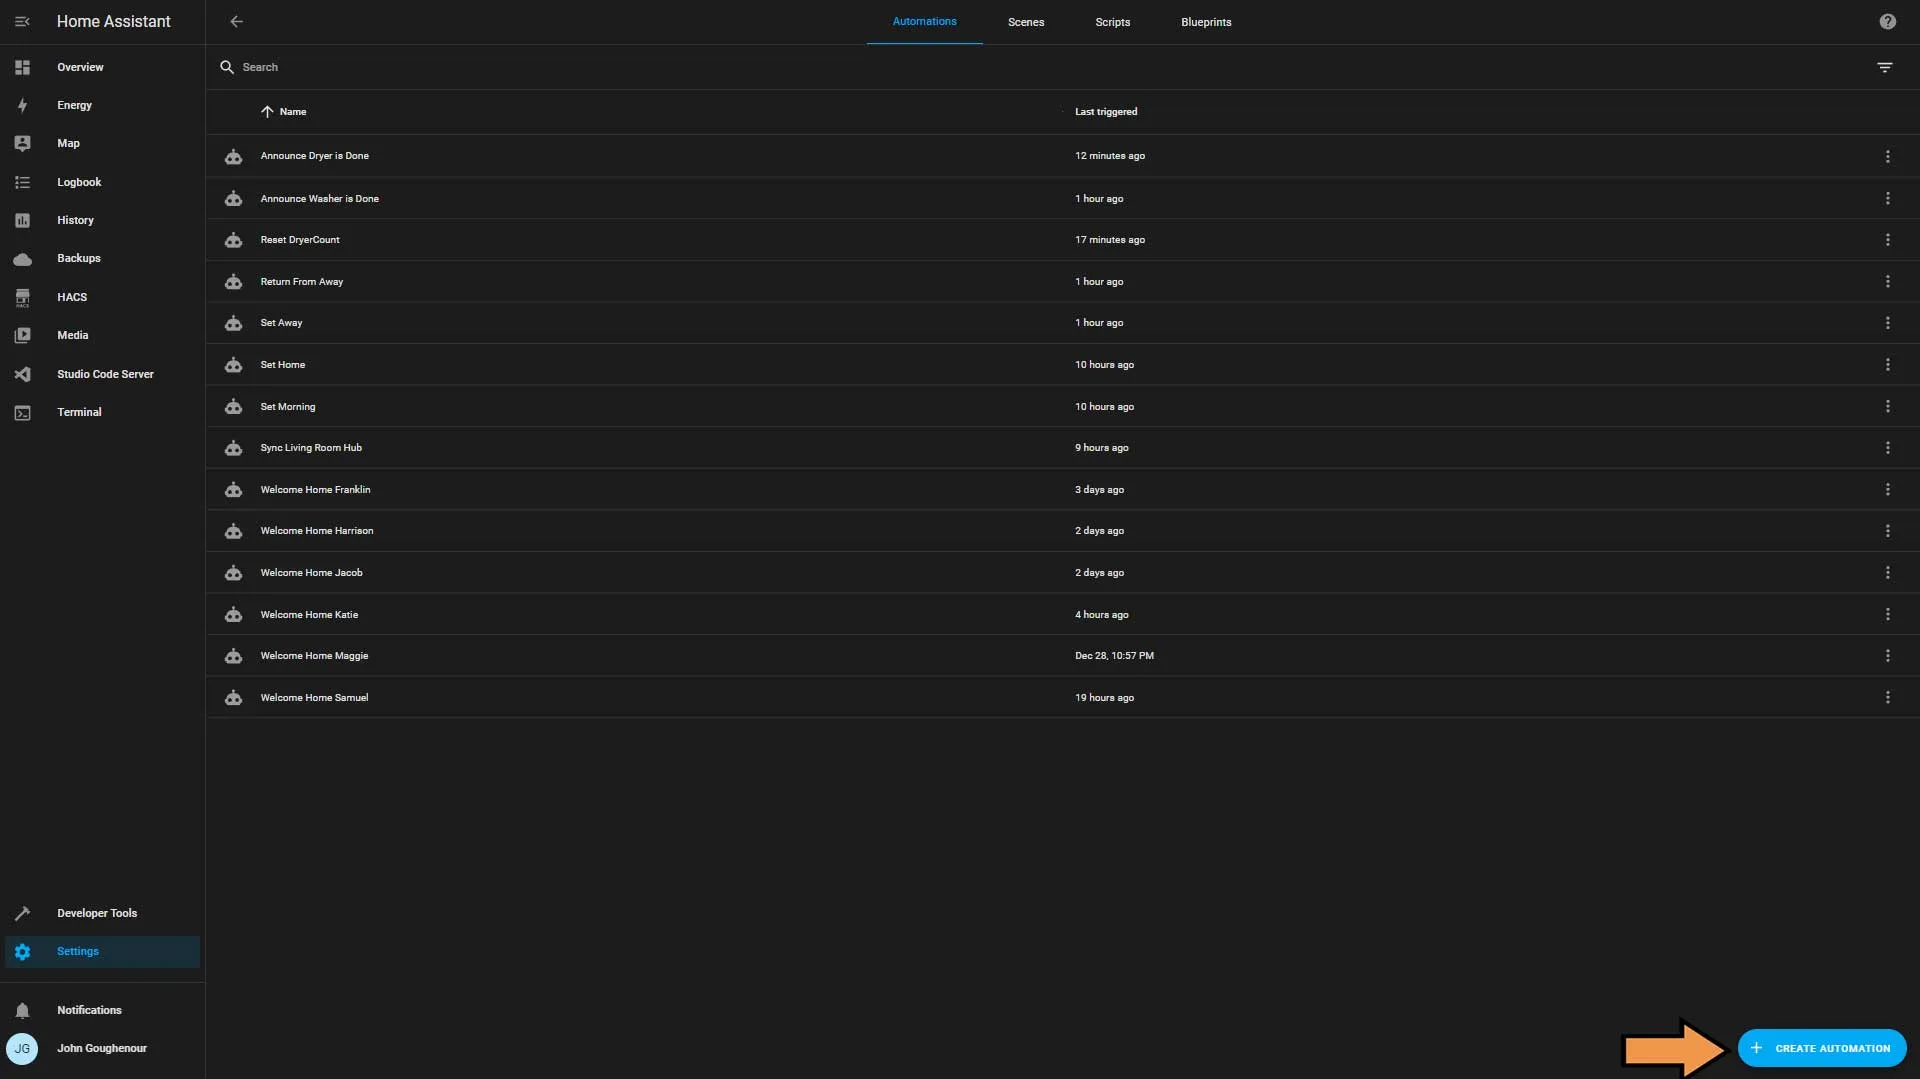
Click the blue Create Automation button.
Choose Create new automation.
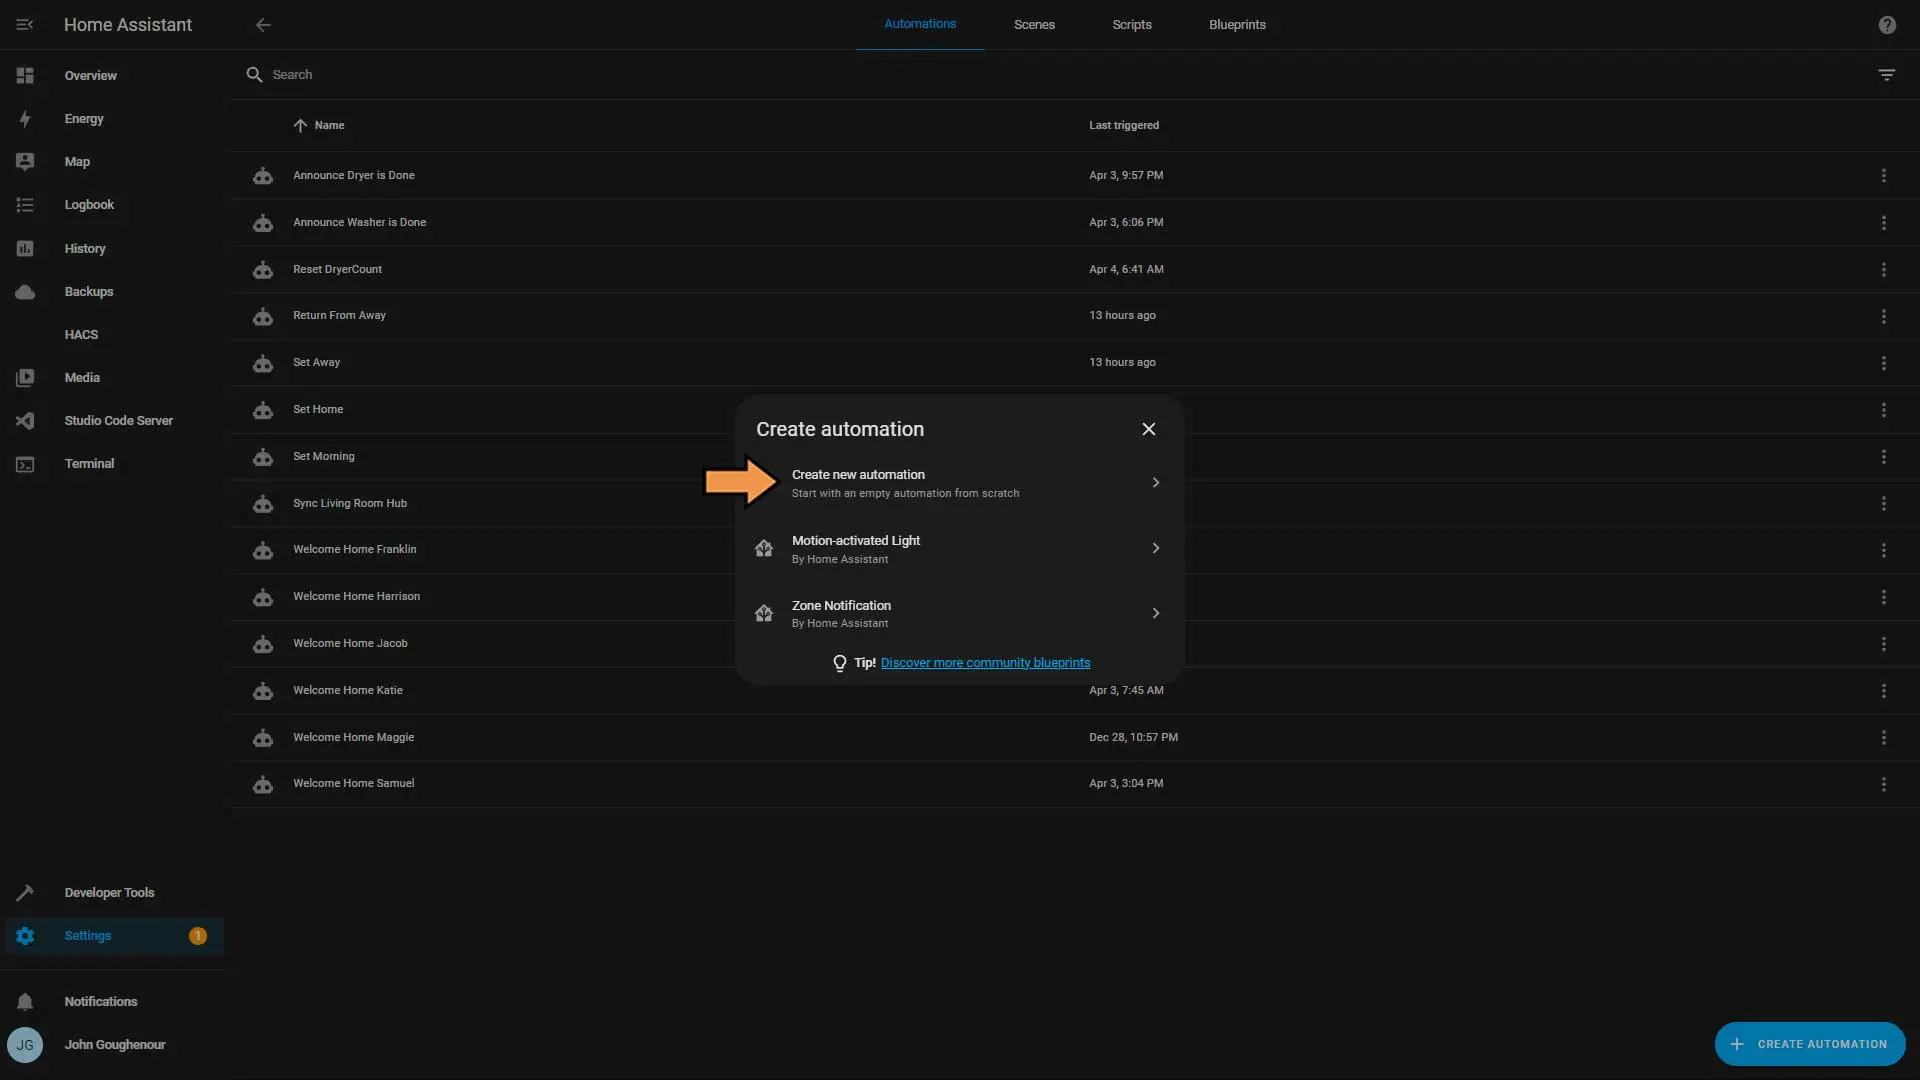
Click Add Trigger.
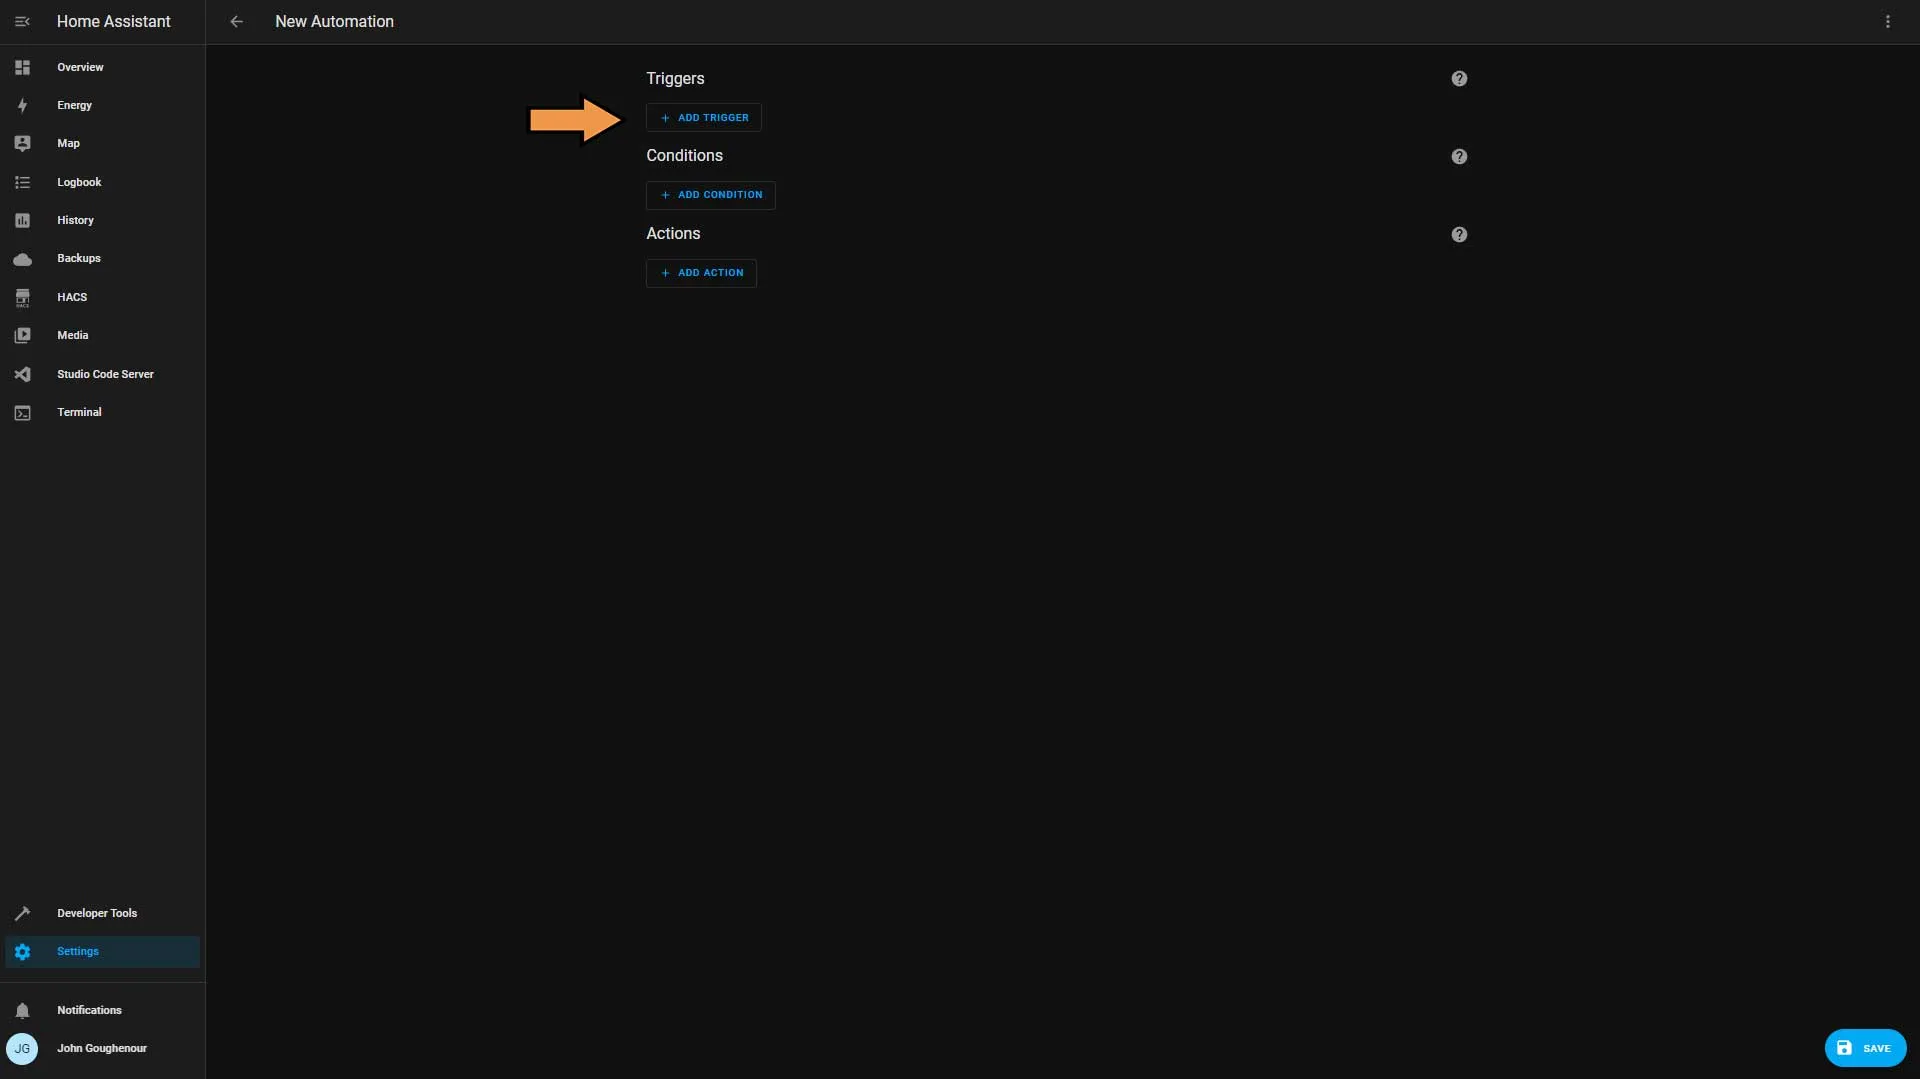
From the list, select State.
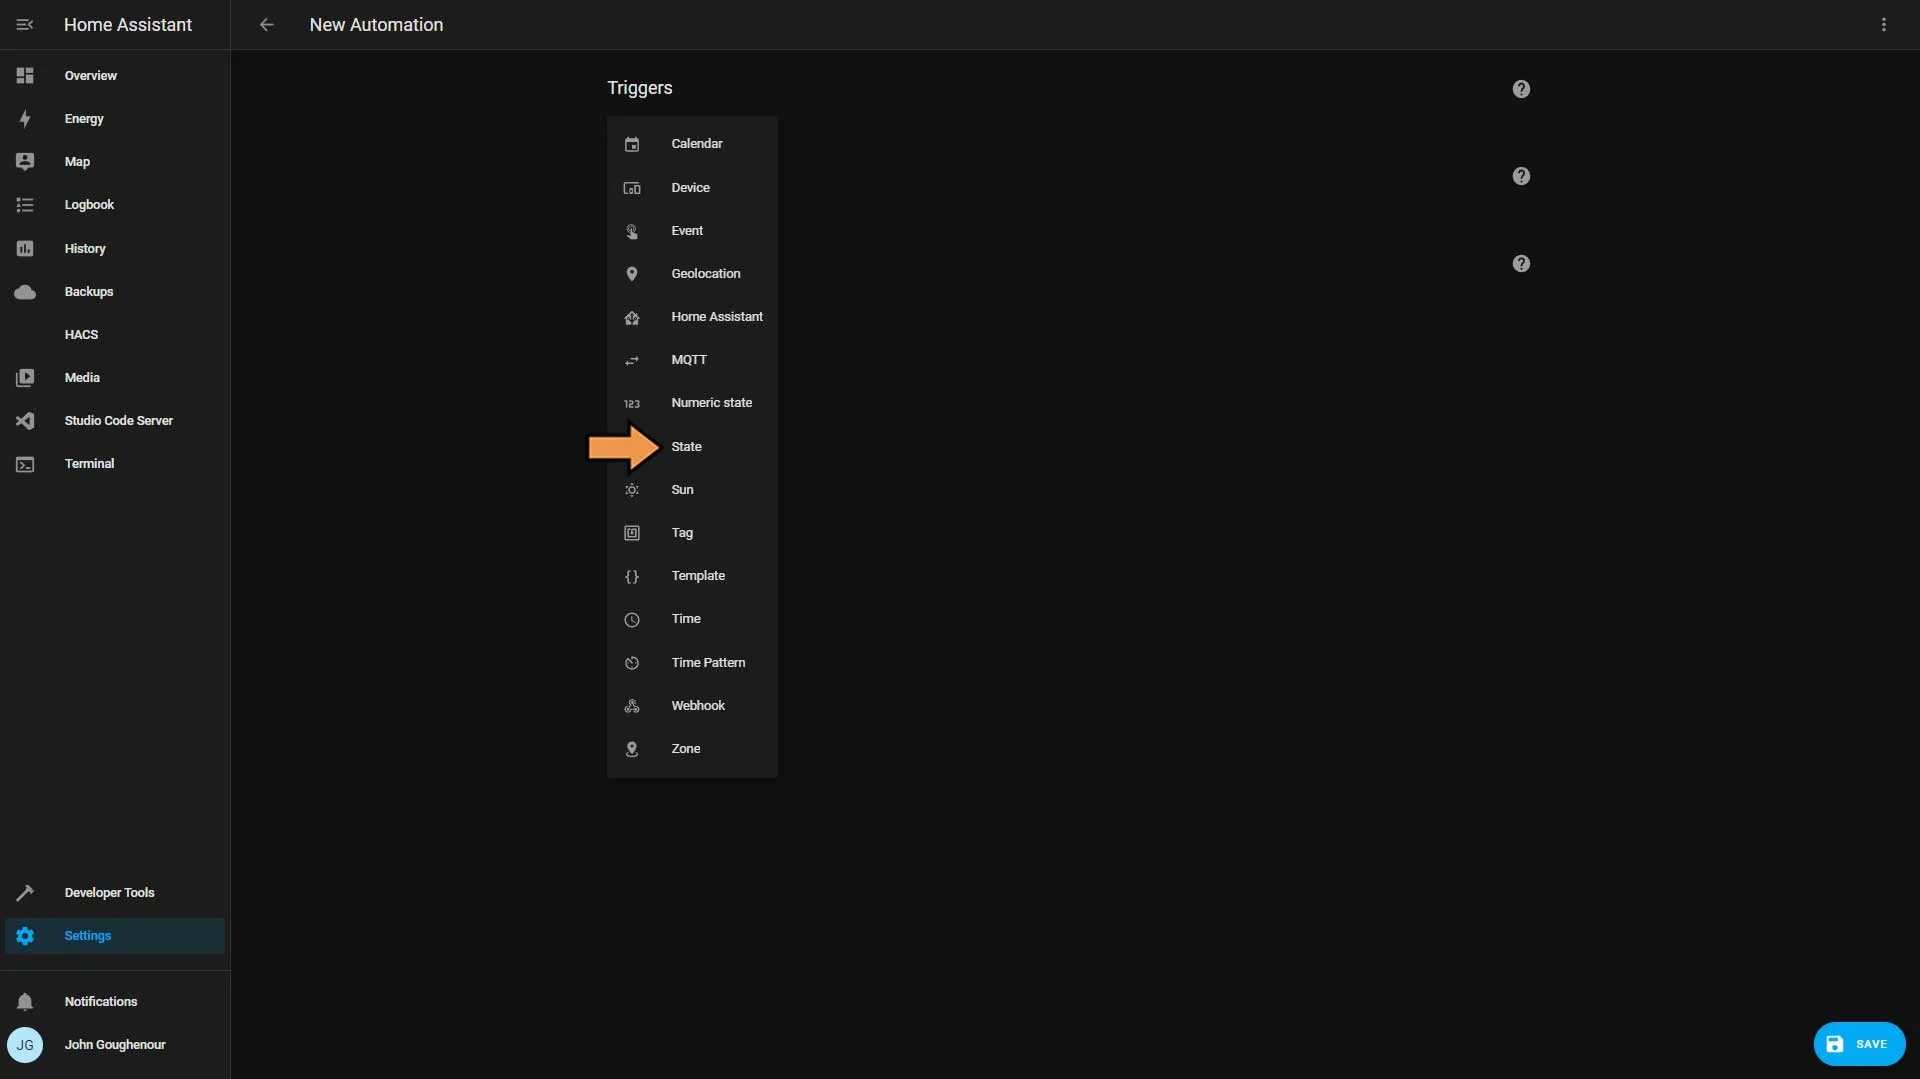
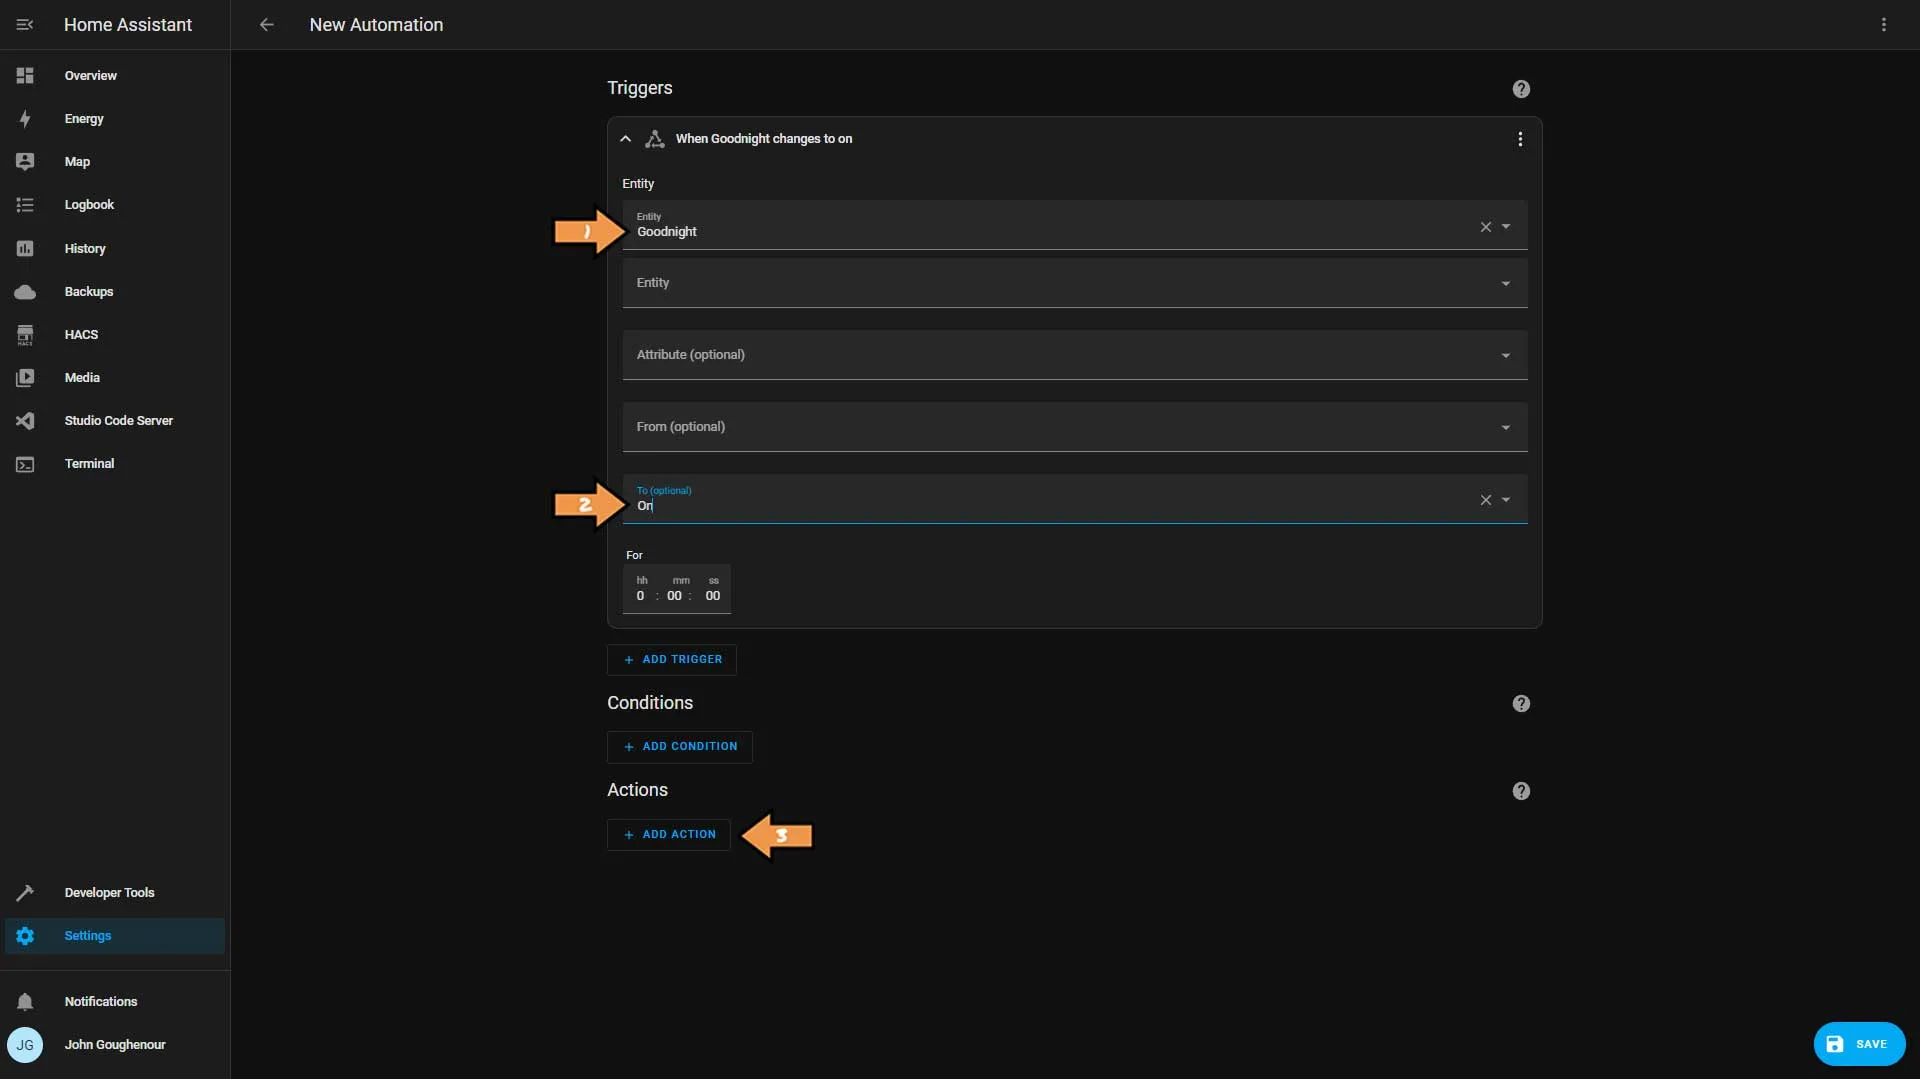
In the Entity box select our virtual switch we created earlier and set the “To” option to On. Then click the Add Action button.
From the Action type list, select Call service.
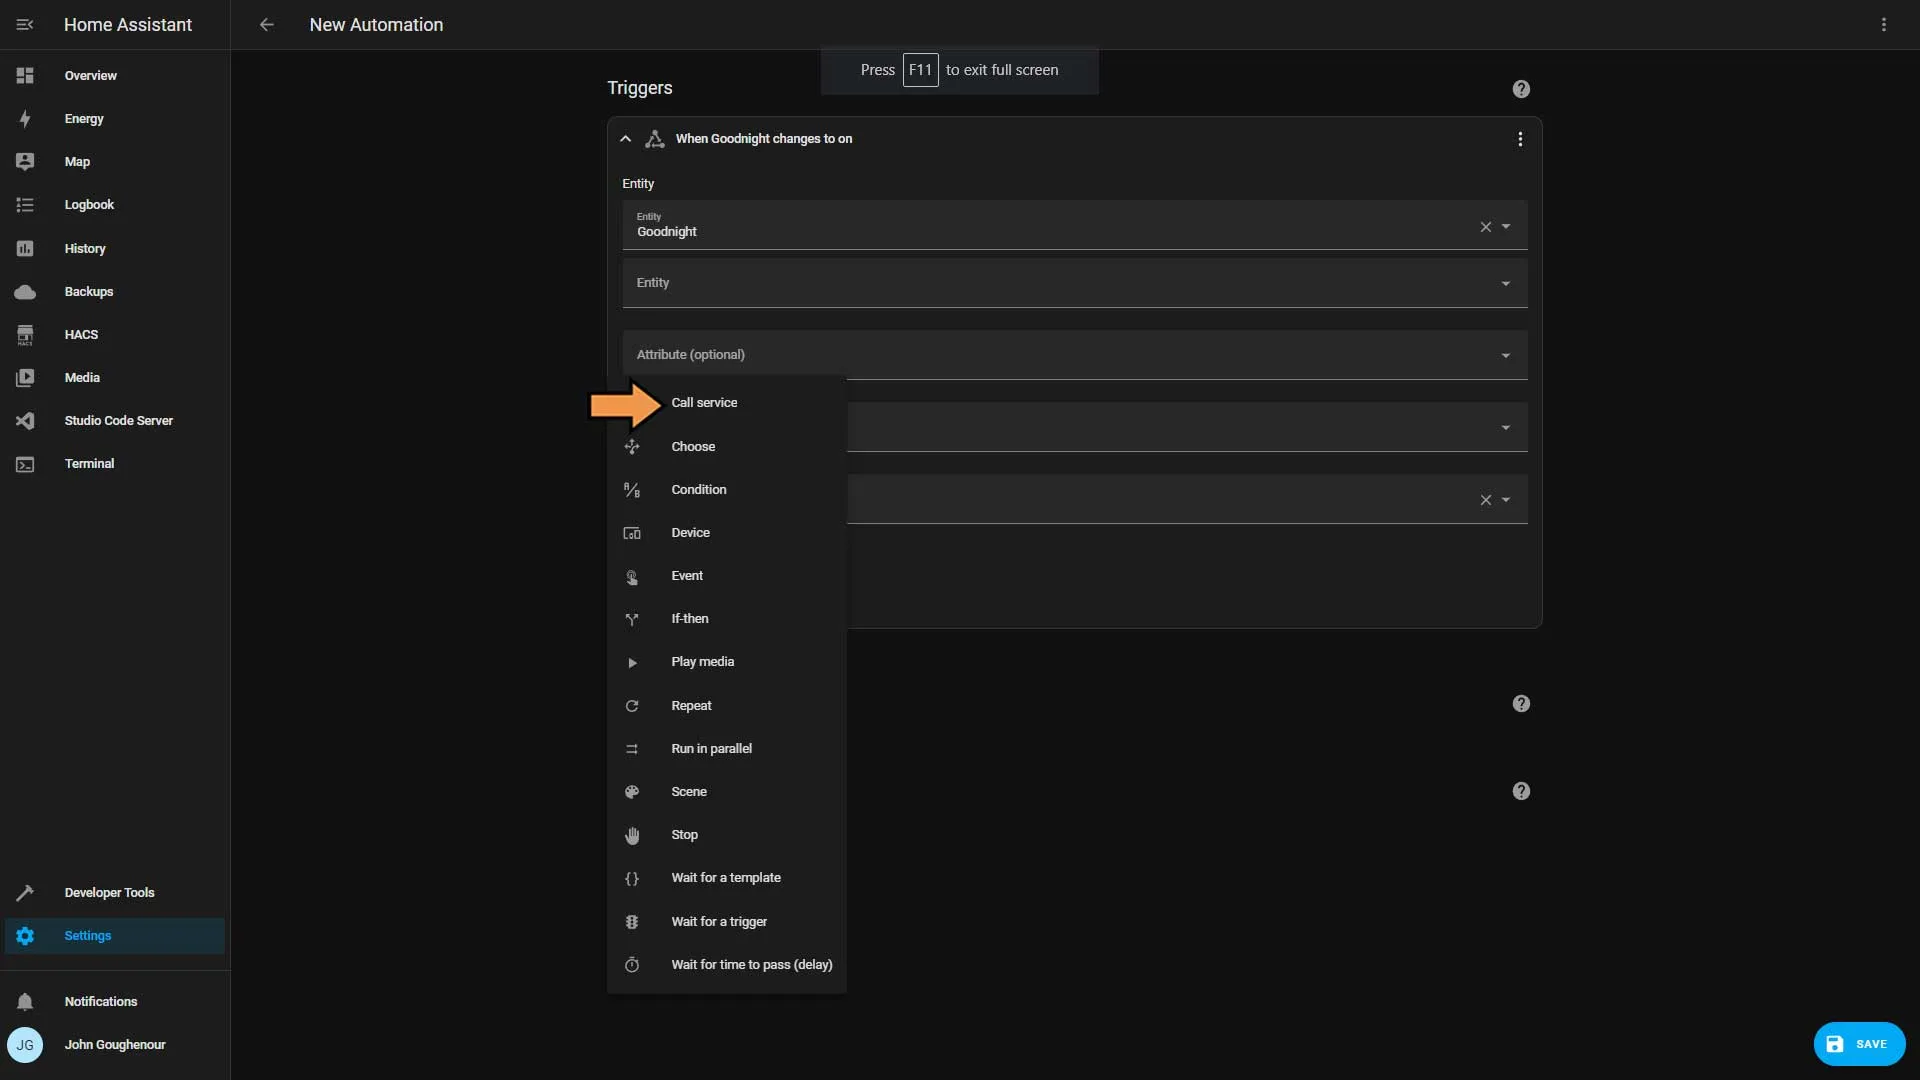
Perform the following actions:
- In the Service drop-down, select Input select: Select.
- Click the Choose entity button
- select our Mode helper.
- In the Options to be selected, type Night.
- Then click the Add Action button.
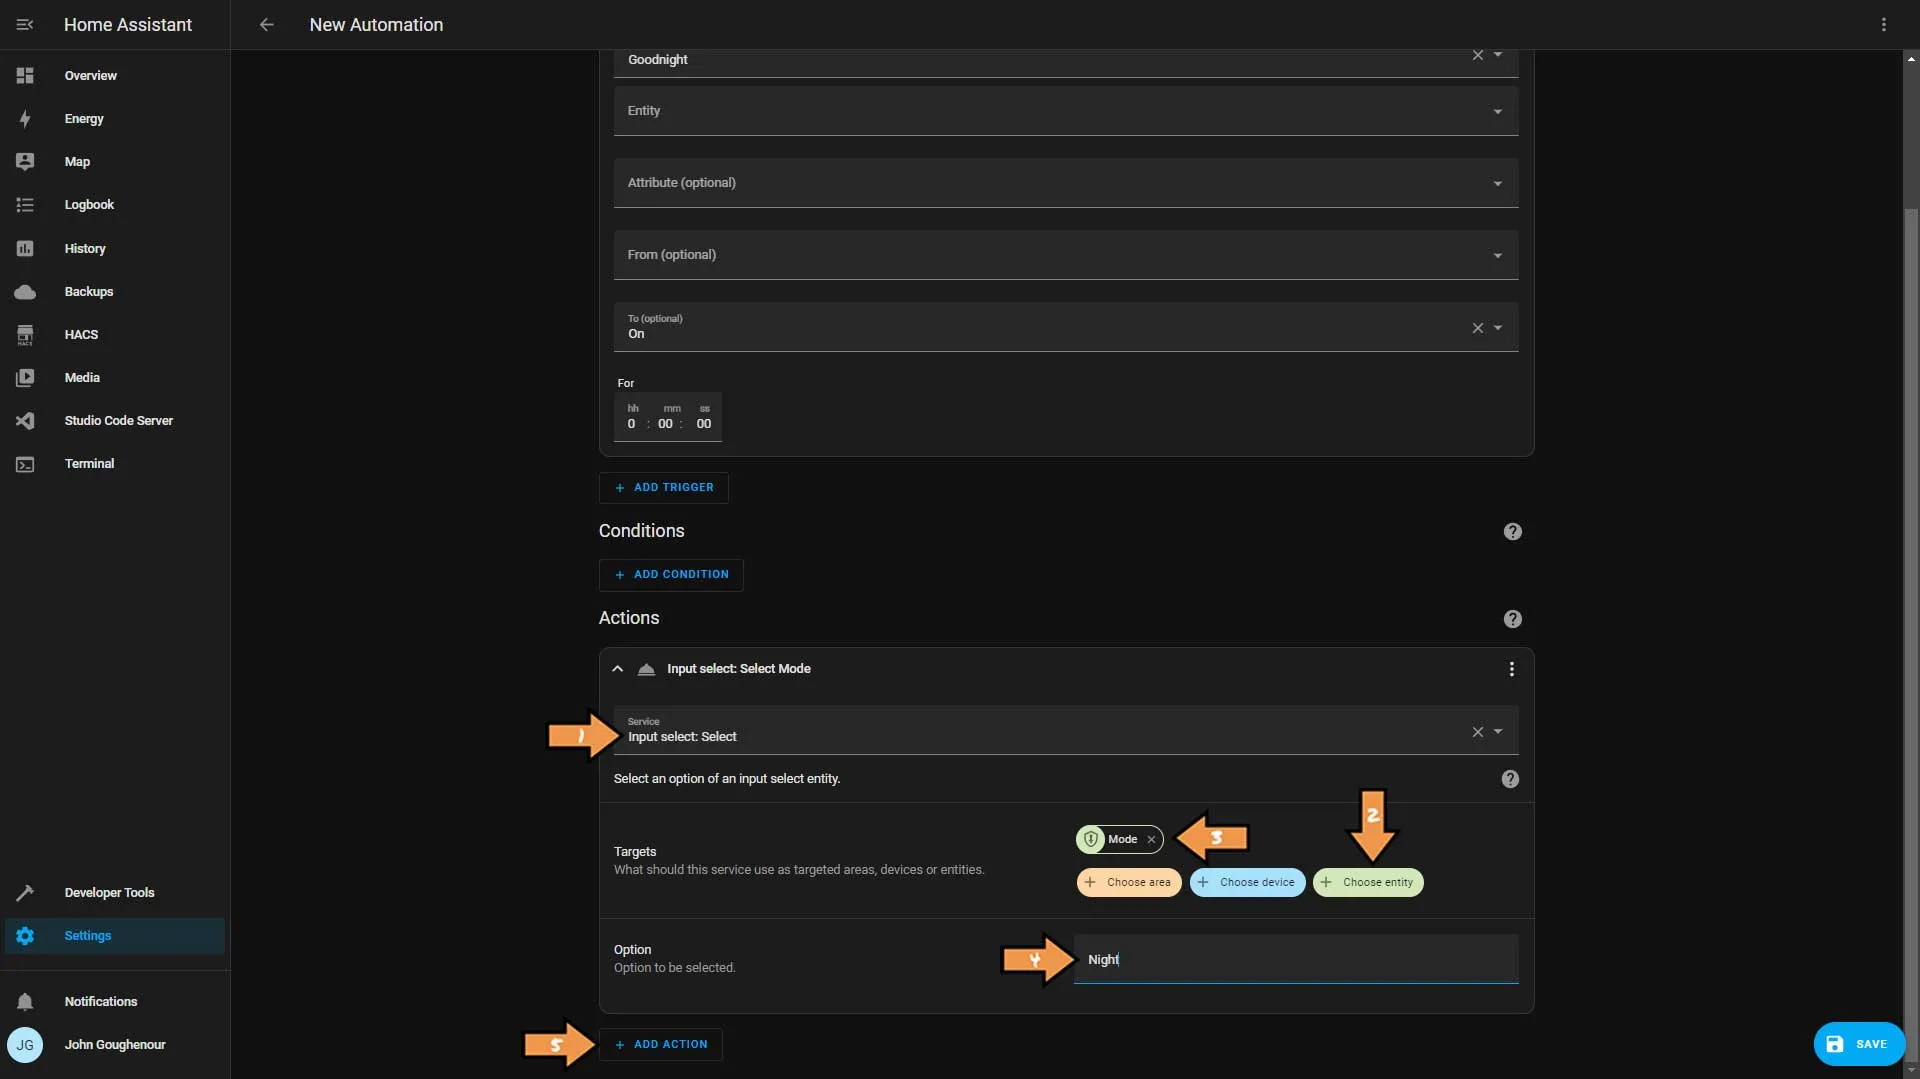
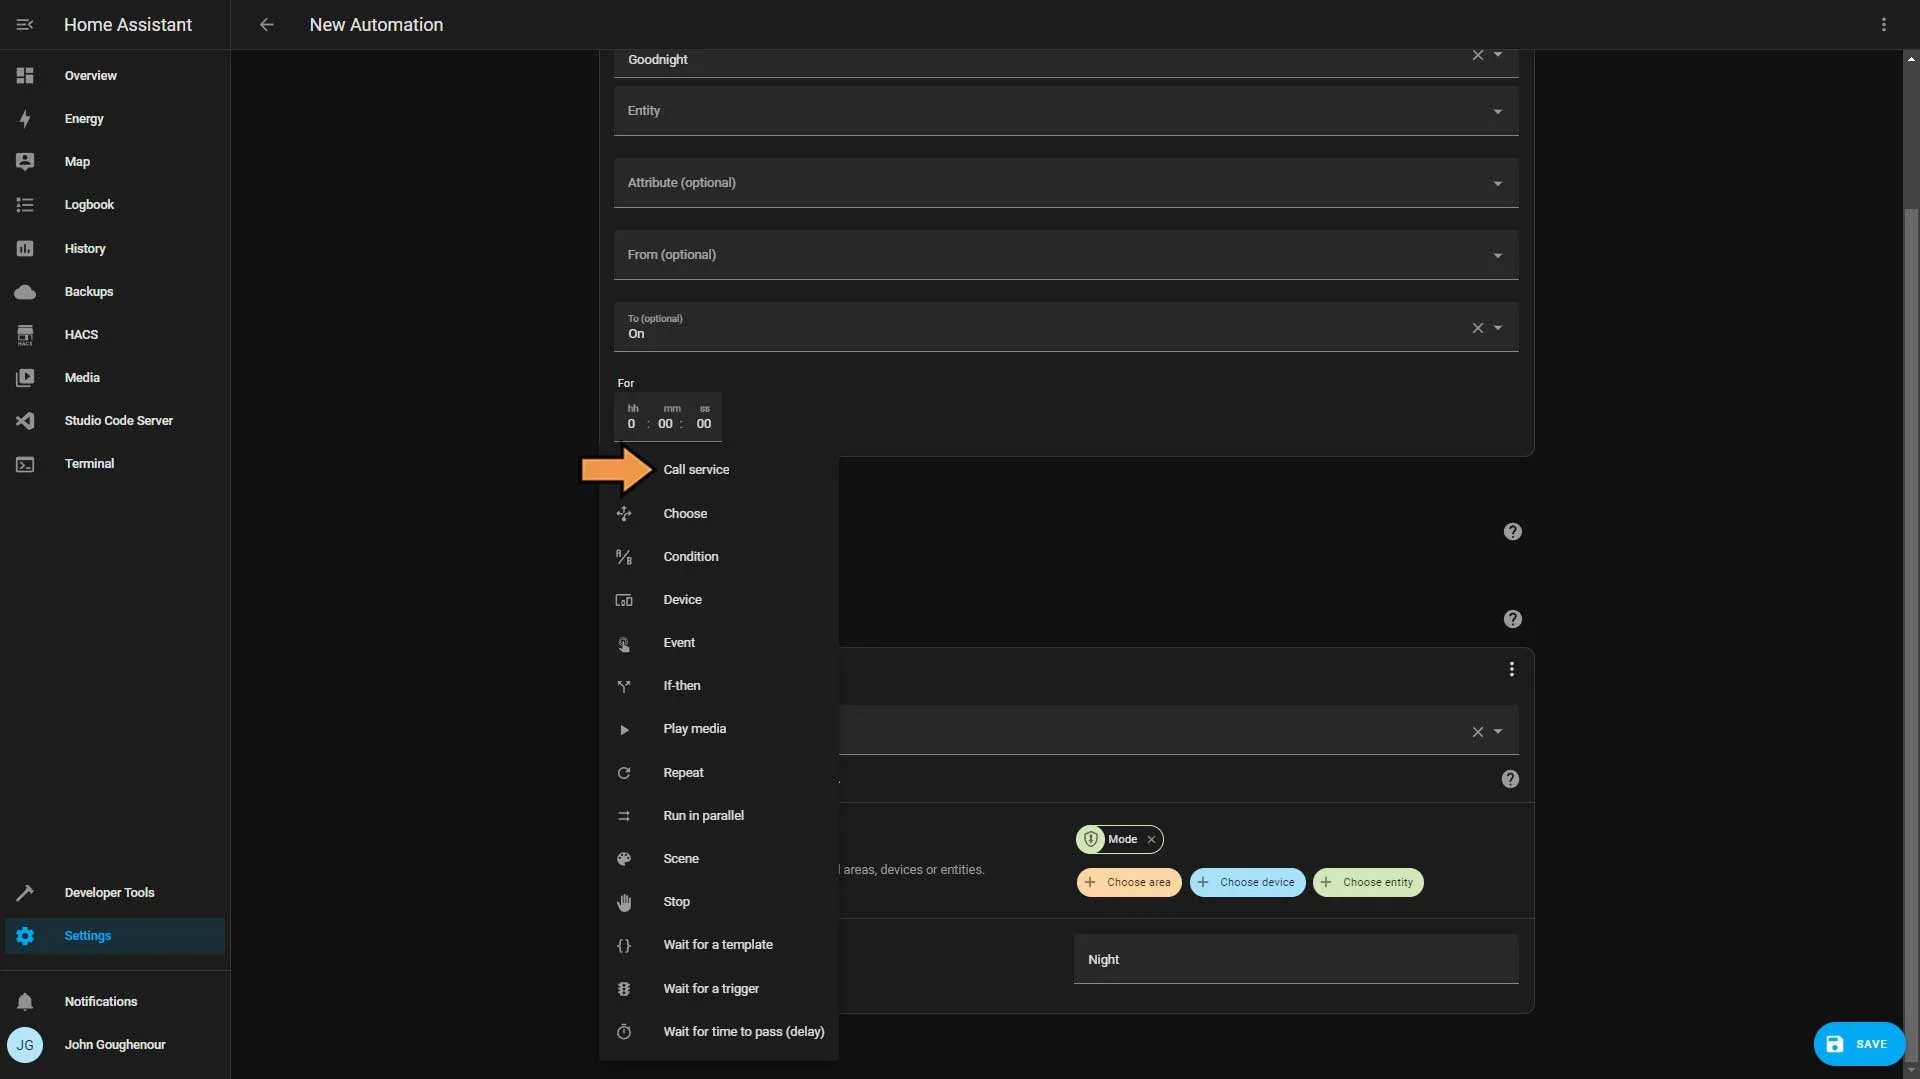
From the Action type list, select Call service.
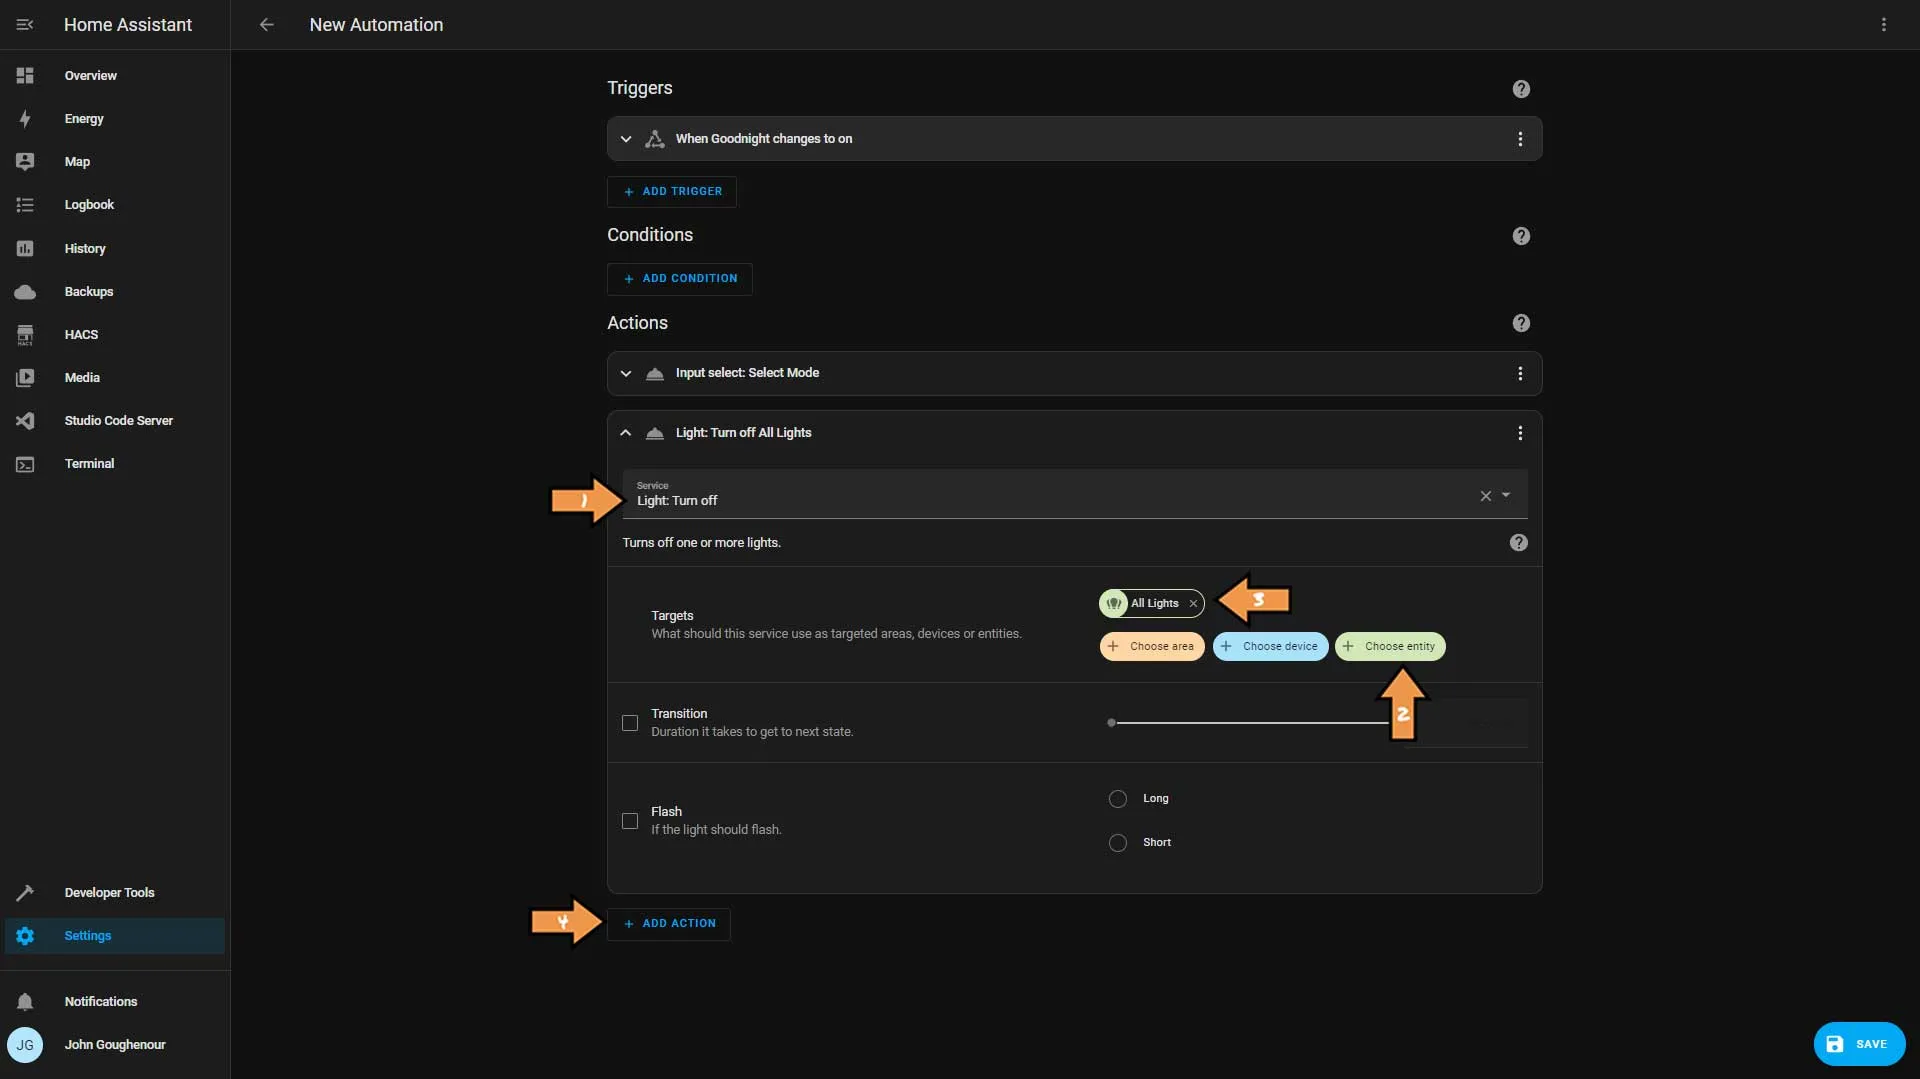
In the Service drop-down select Light: Turn off. Click the Choose entity button and select our All Lights Group. Then click Add Action.
From the Action type list, select Device.
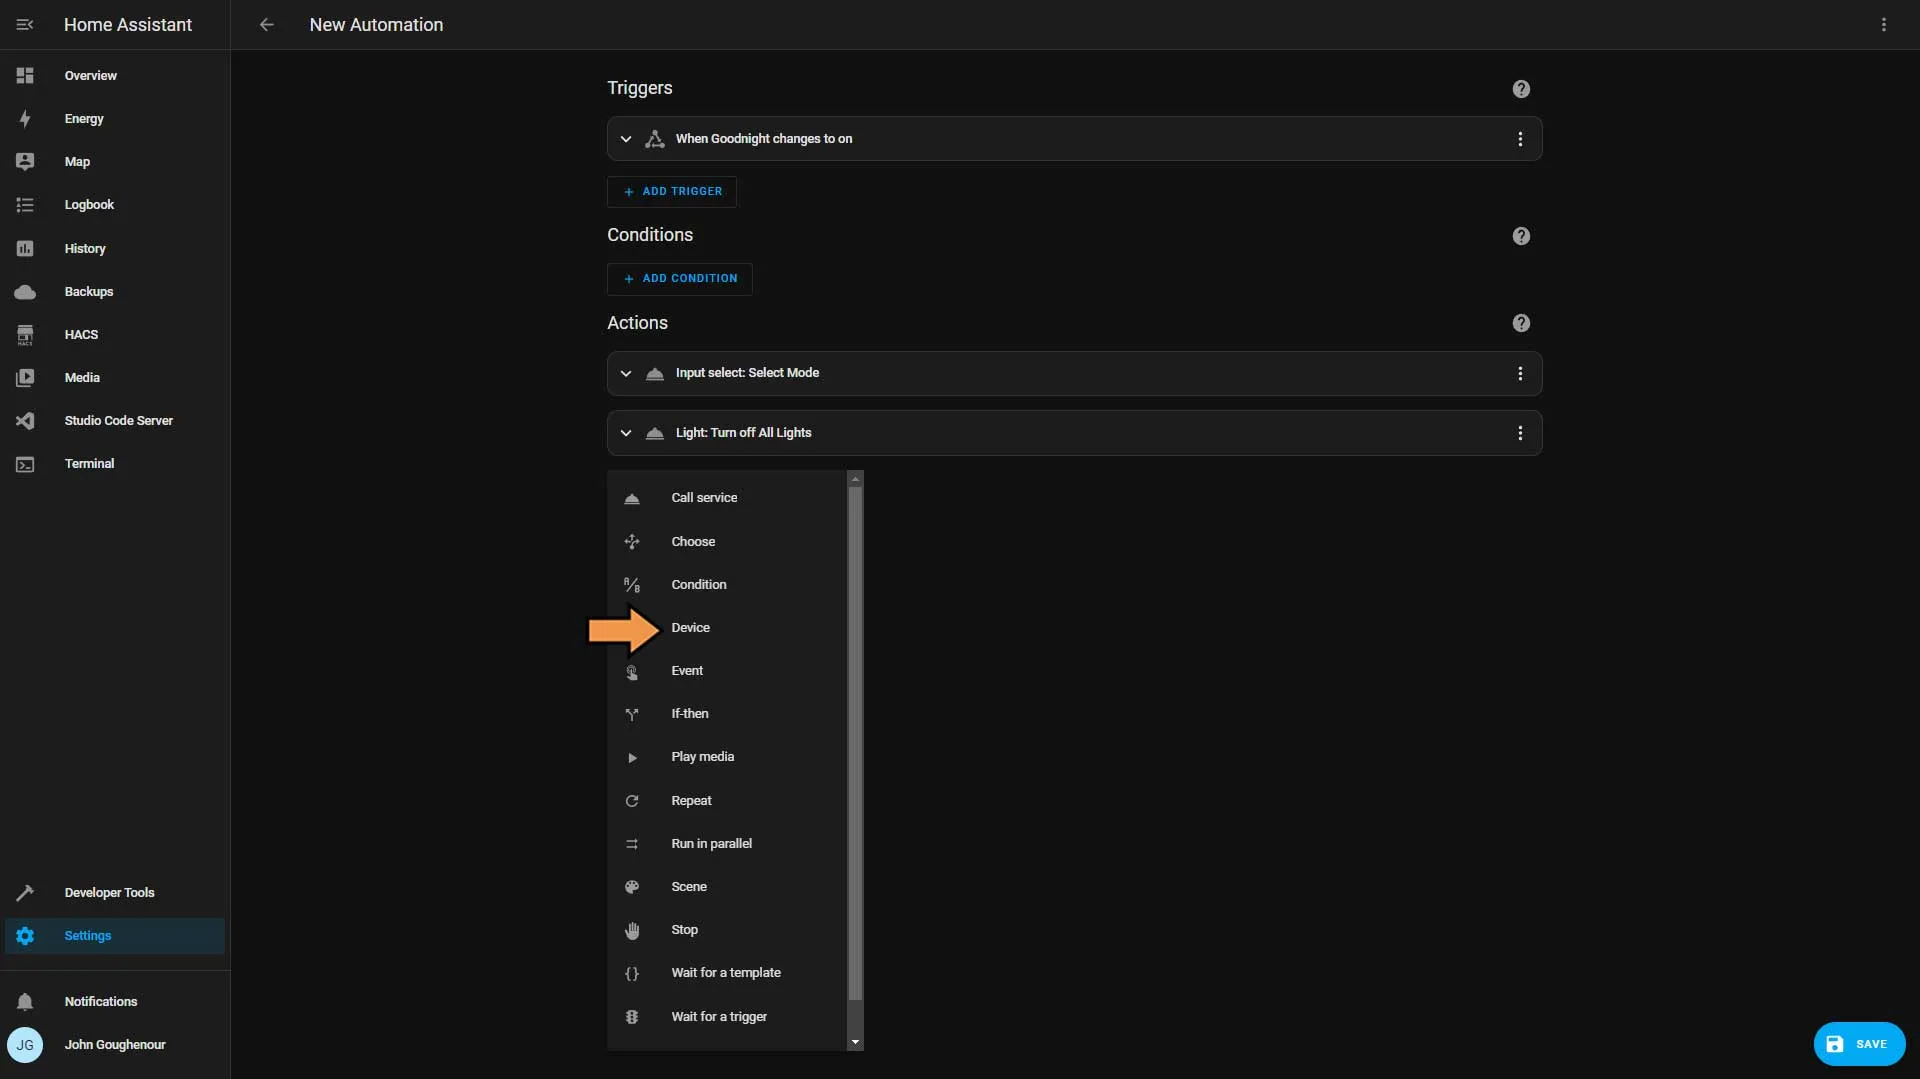
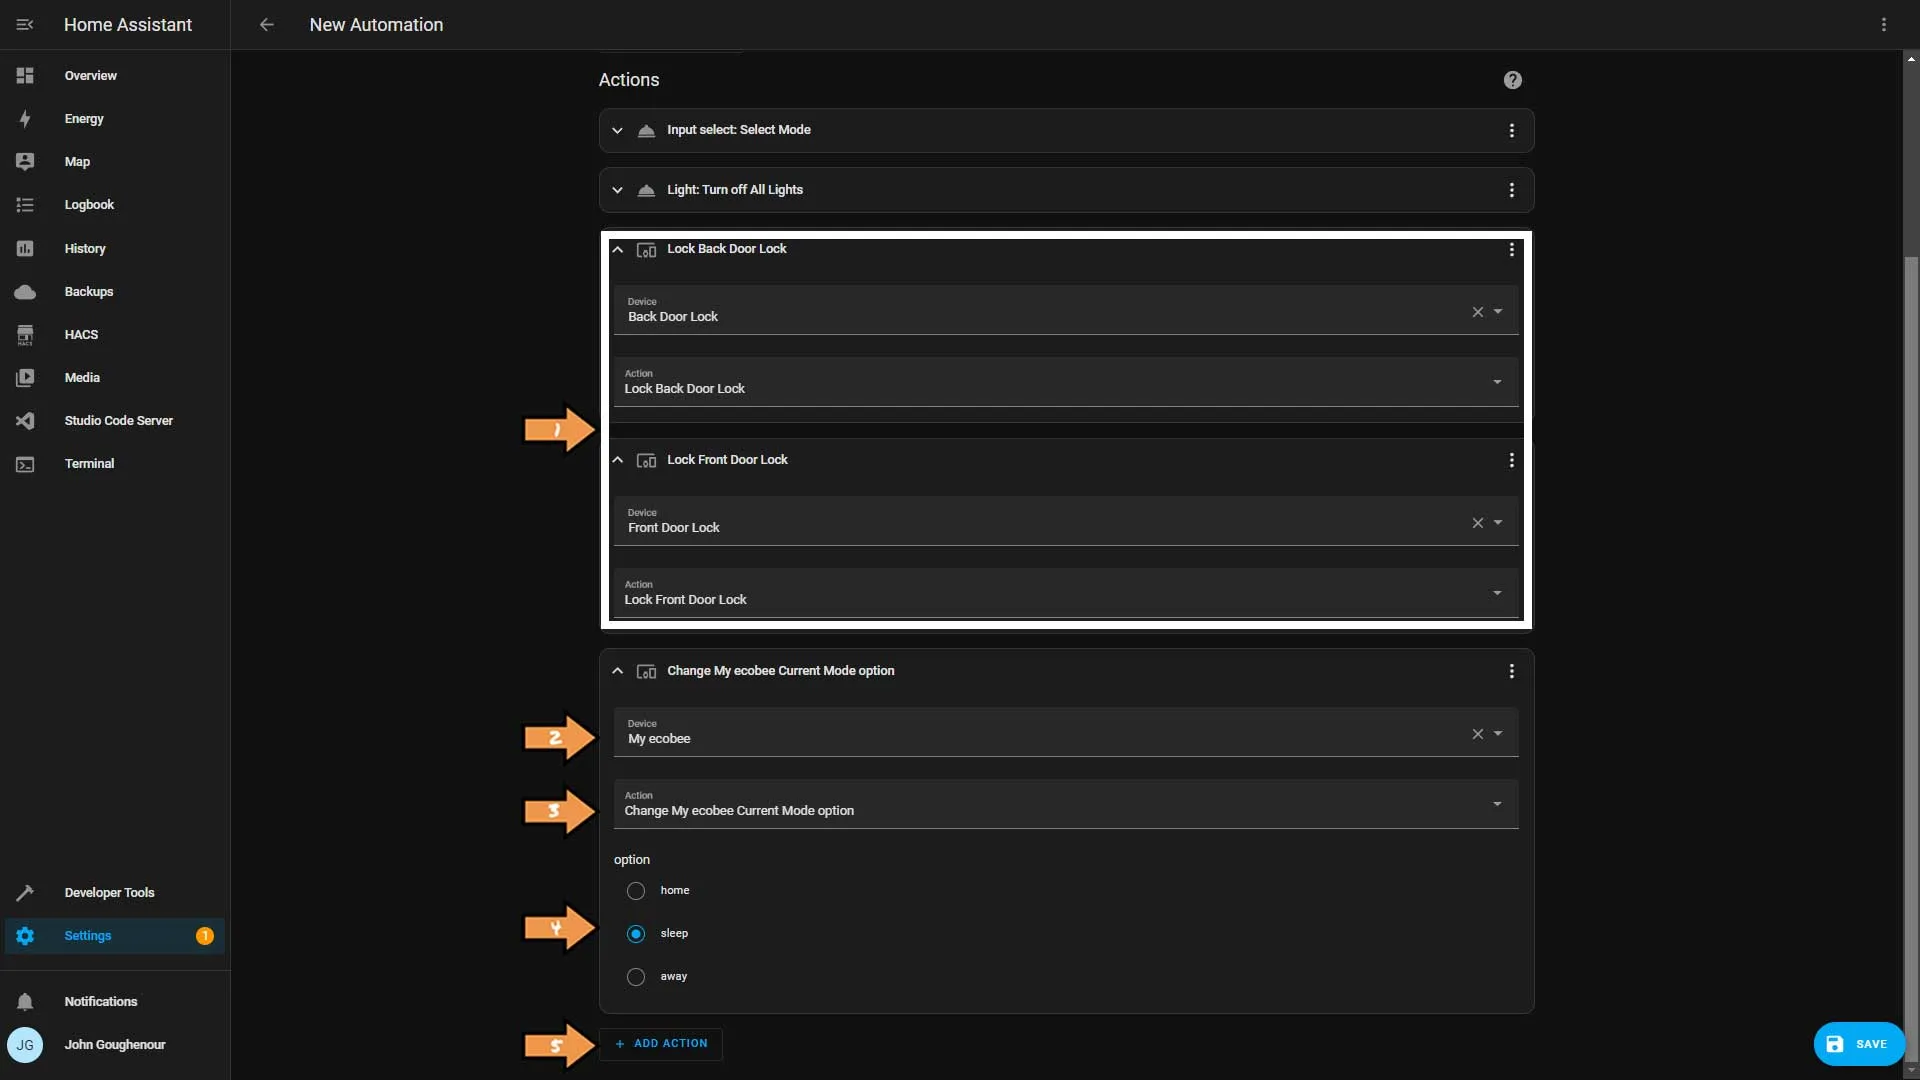
We will be adding three devices as follows:
- Select our locks and for the Action choose Lock.
- Then we’ll select our Smart Thermostat.
- We’ll set the Action to “Change My ecobee Current Mode option”.
- Set the Option to sleep.
- Then click the Add Action button.
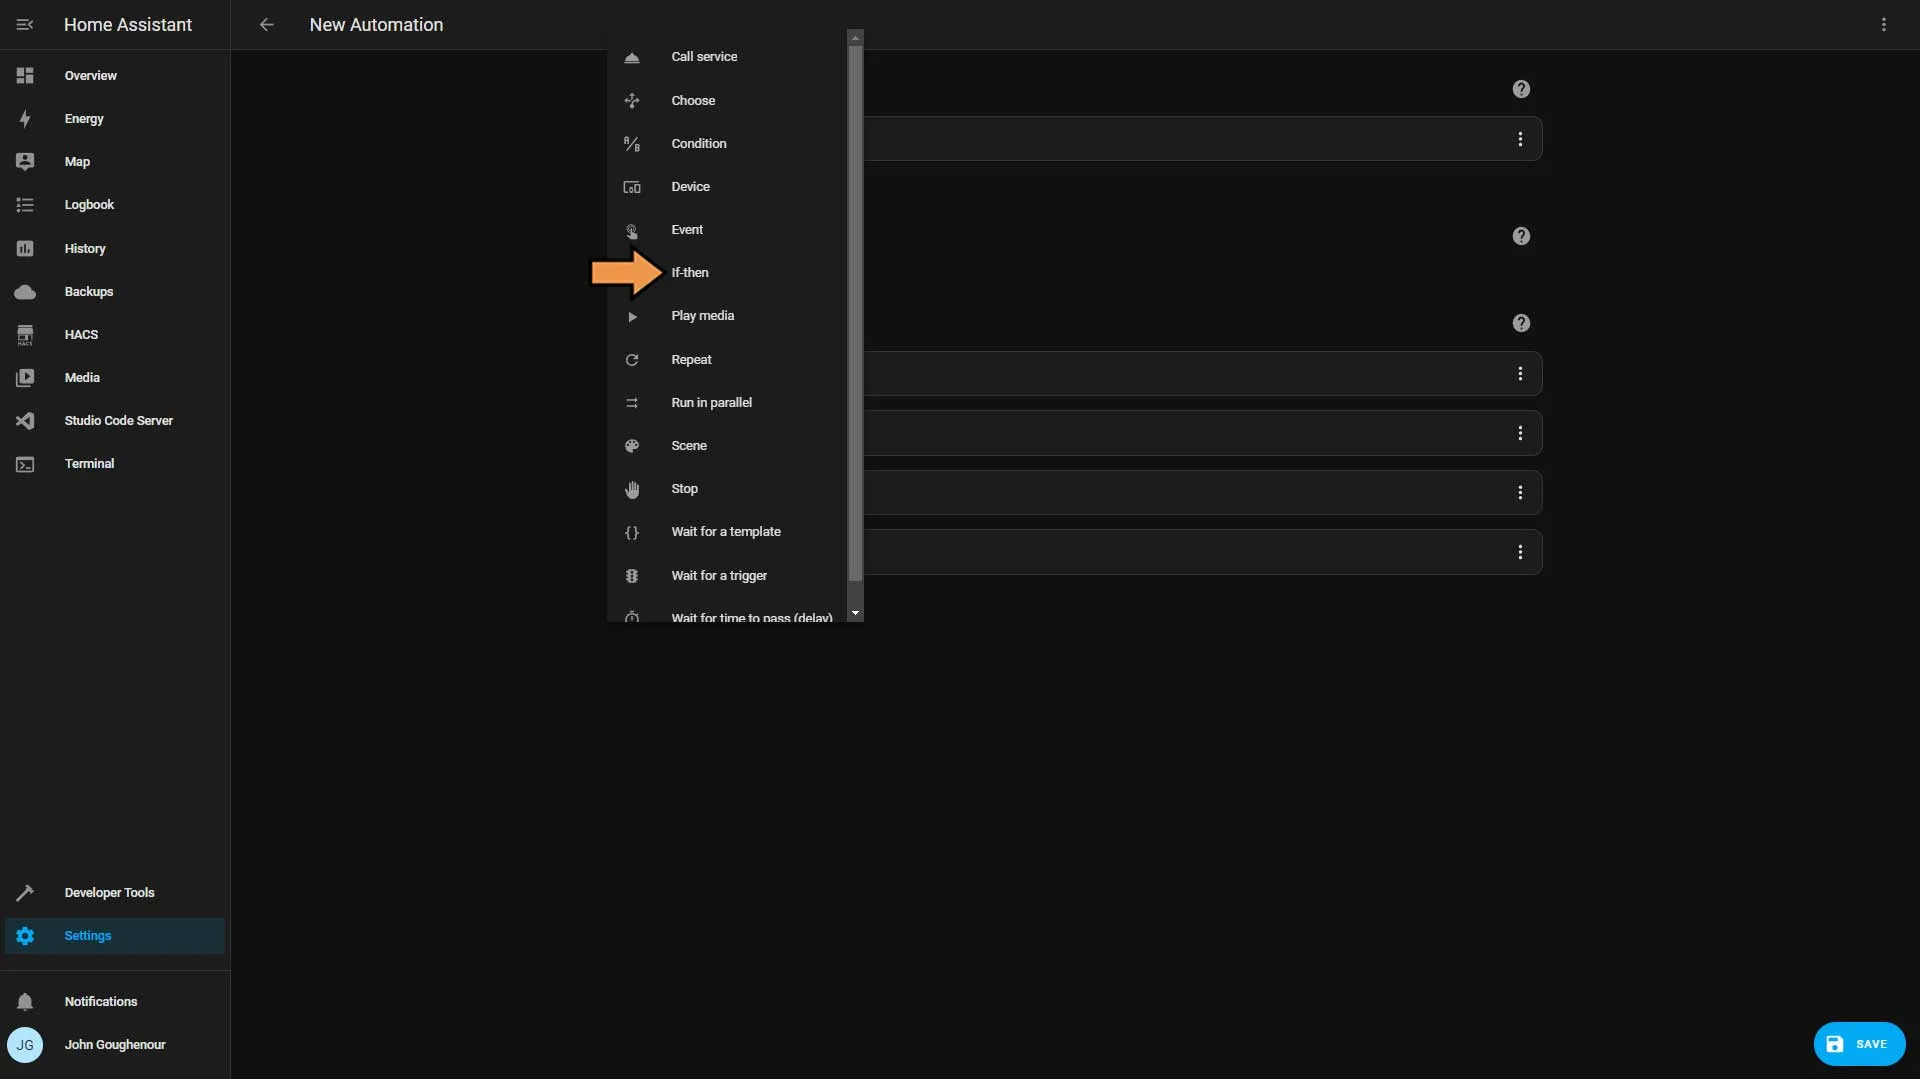
From the Action type list, select If-then.
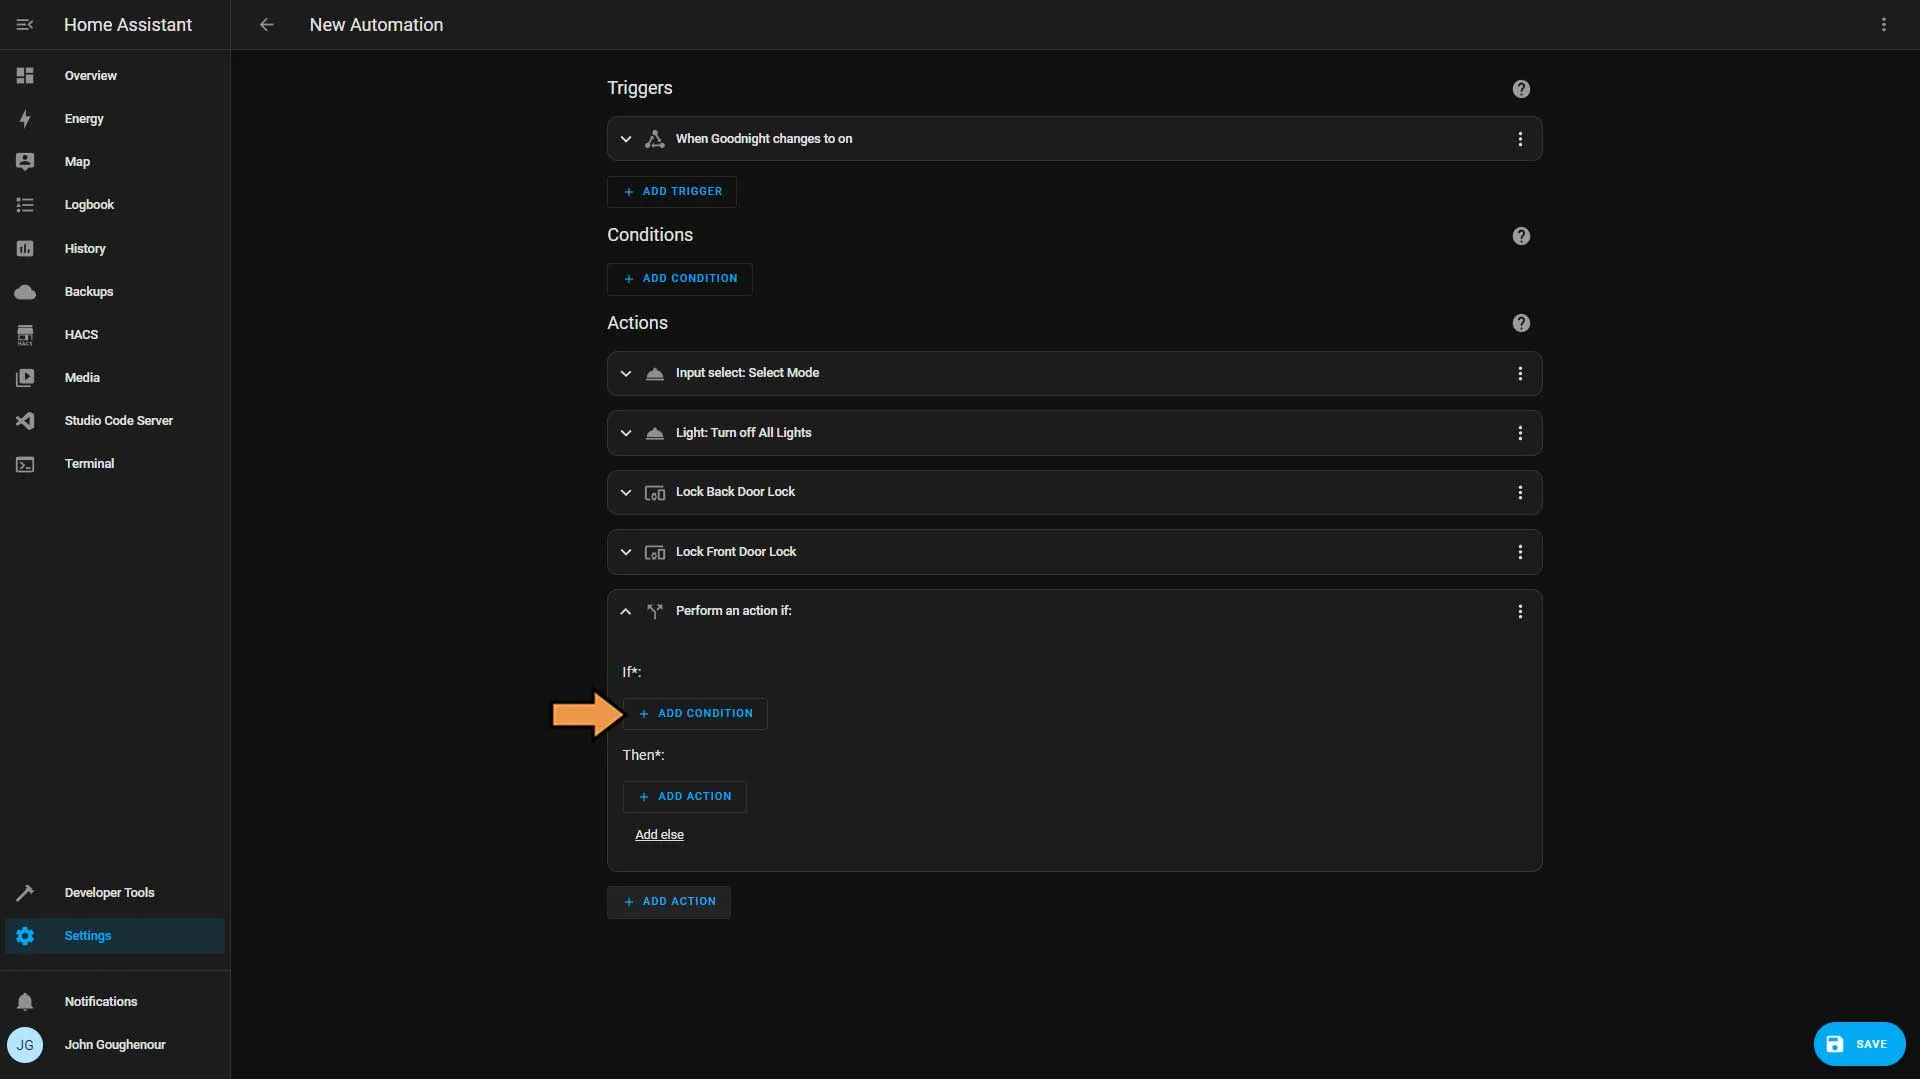
Click the Add Condition button.
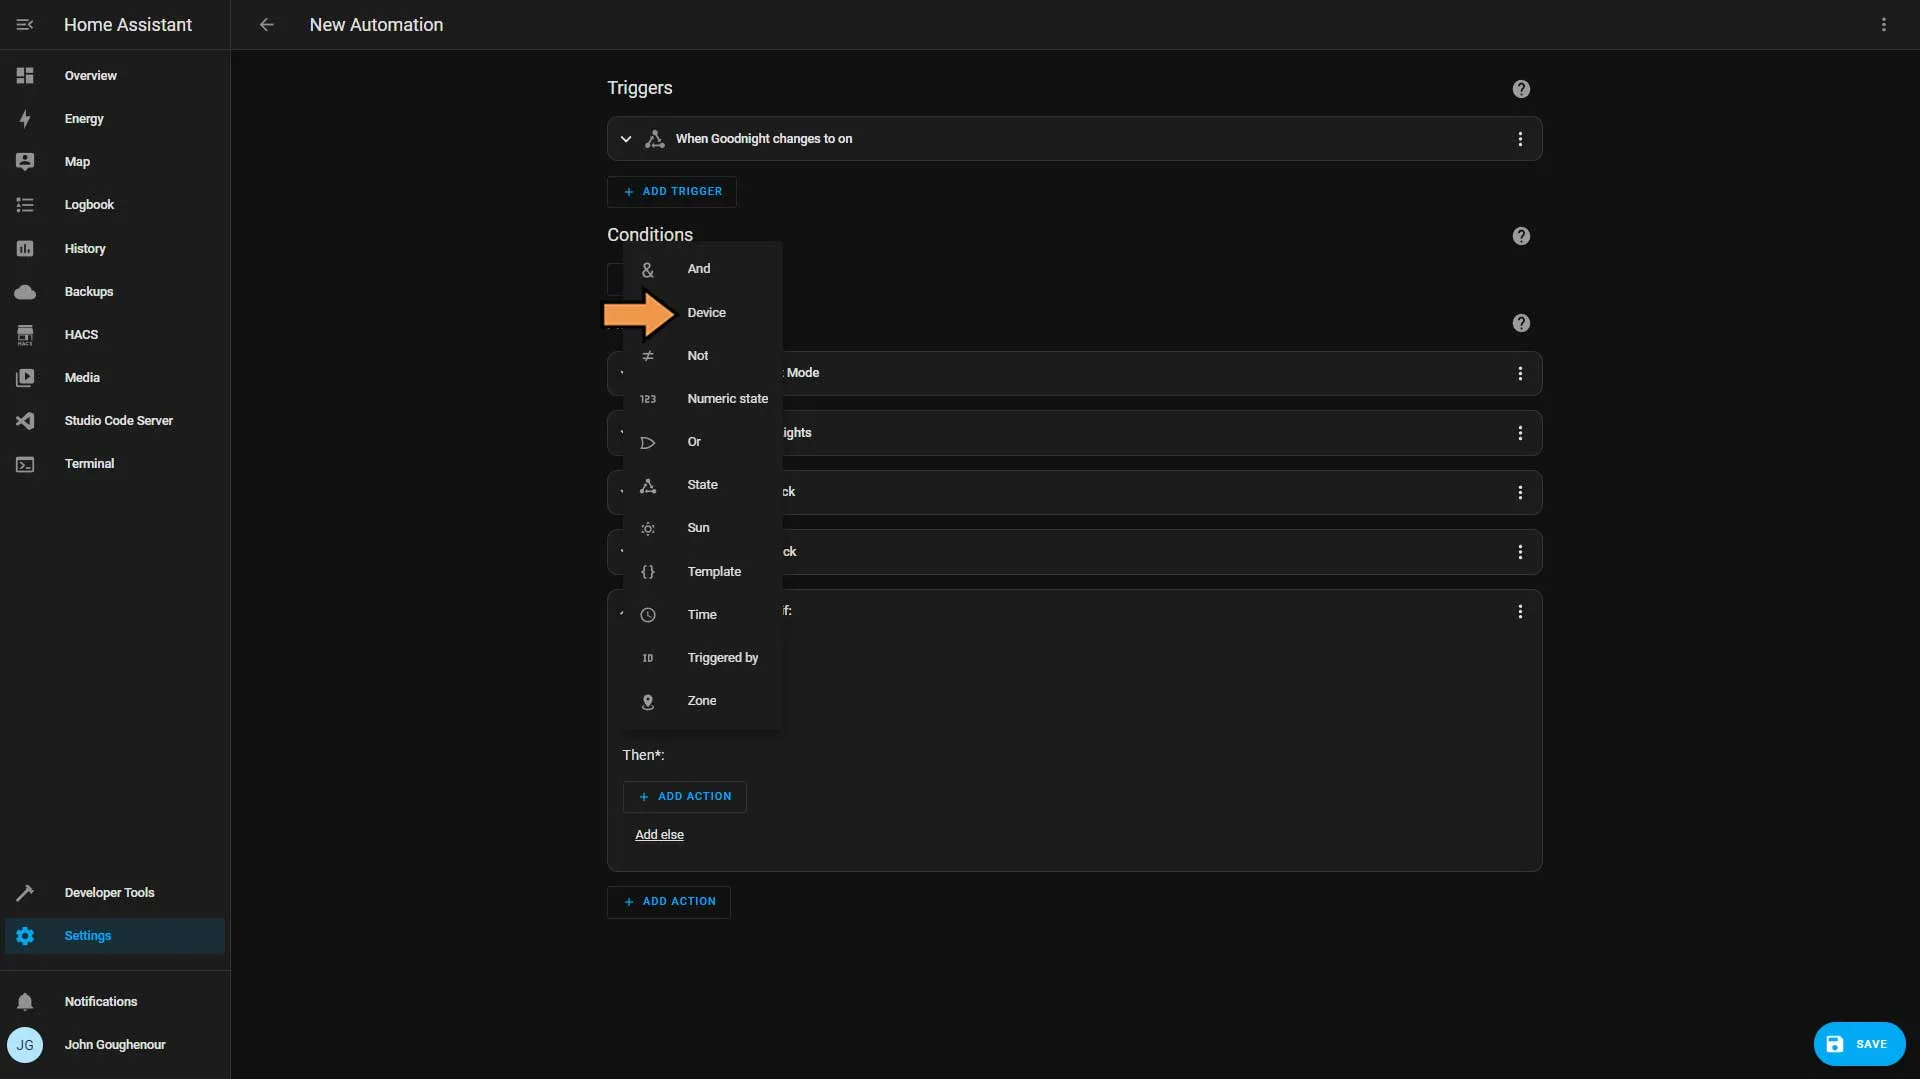
From the list, select the Device option.
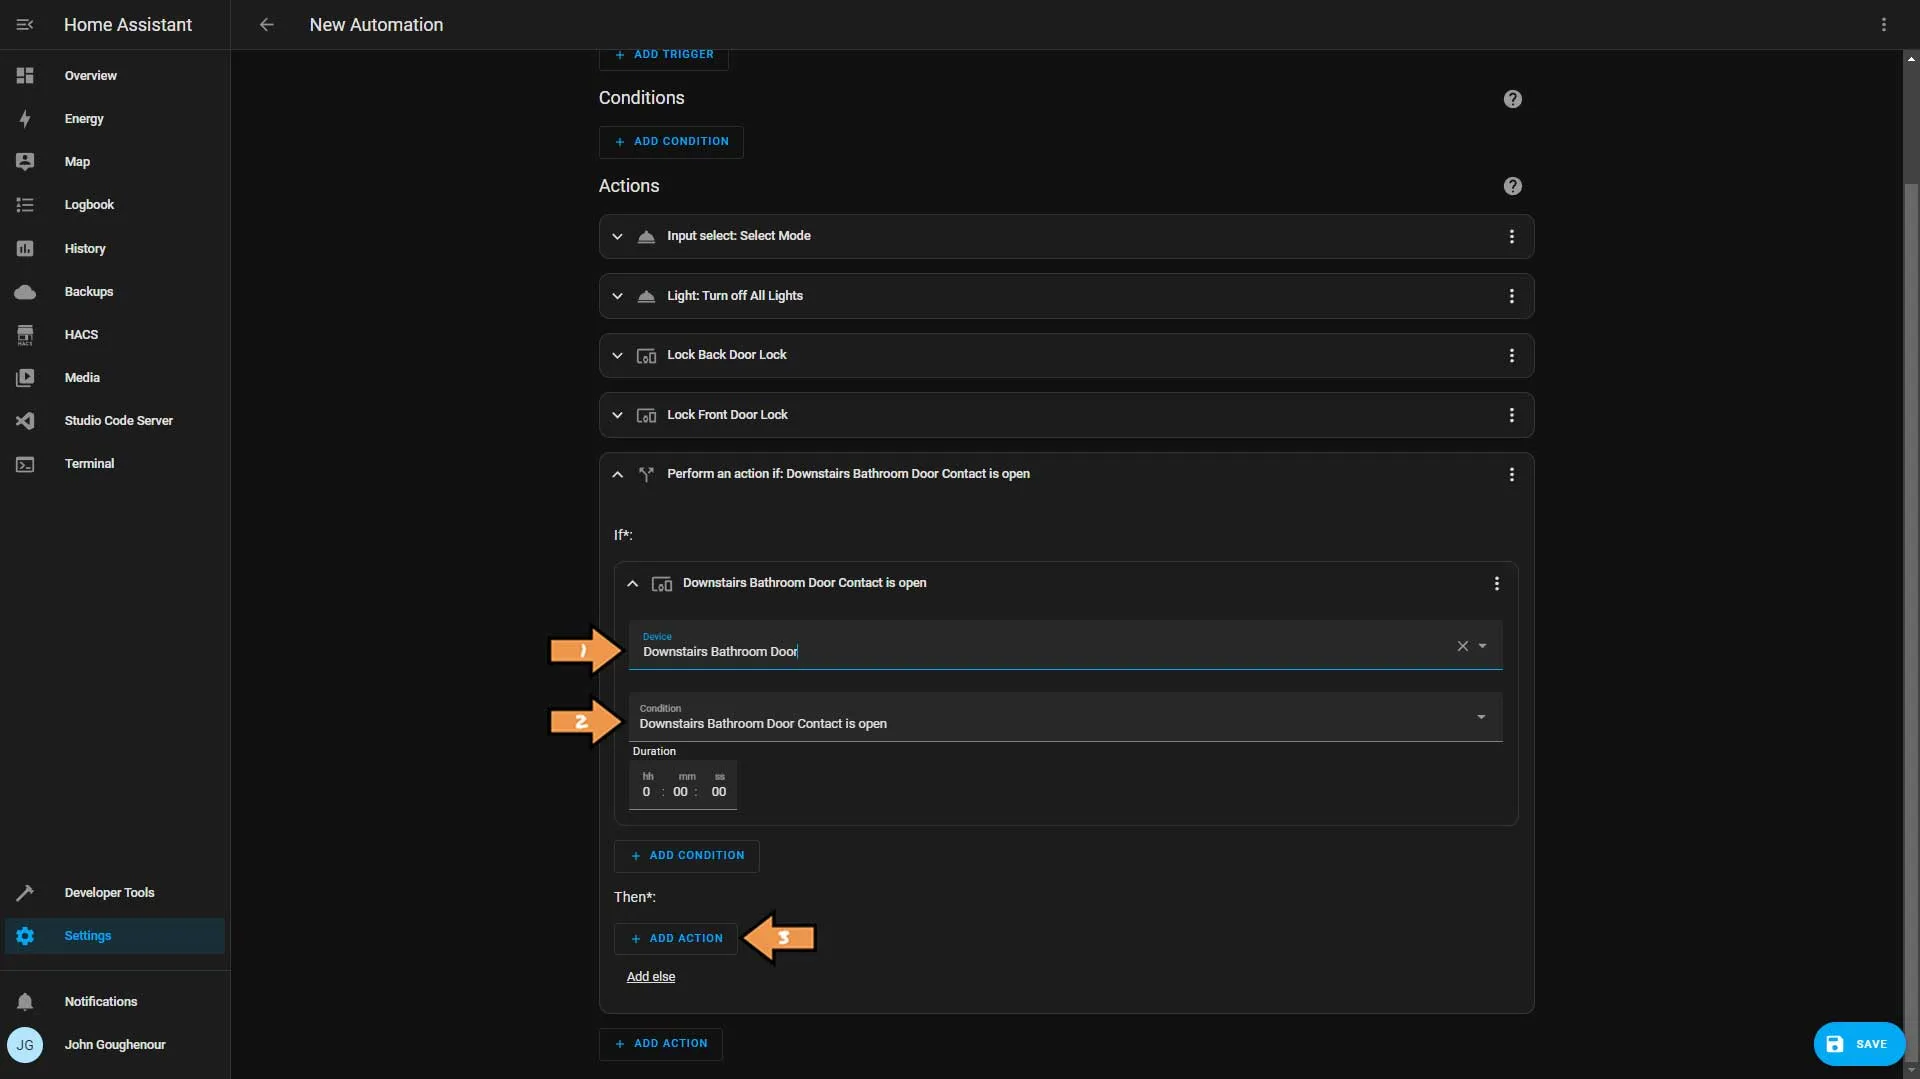
In the Device drop-down, select our bathroom door contact sensor, set the condition to open, and then click the Add Action button.
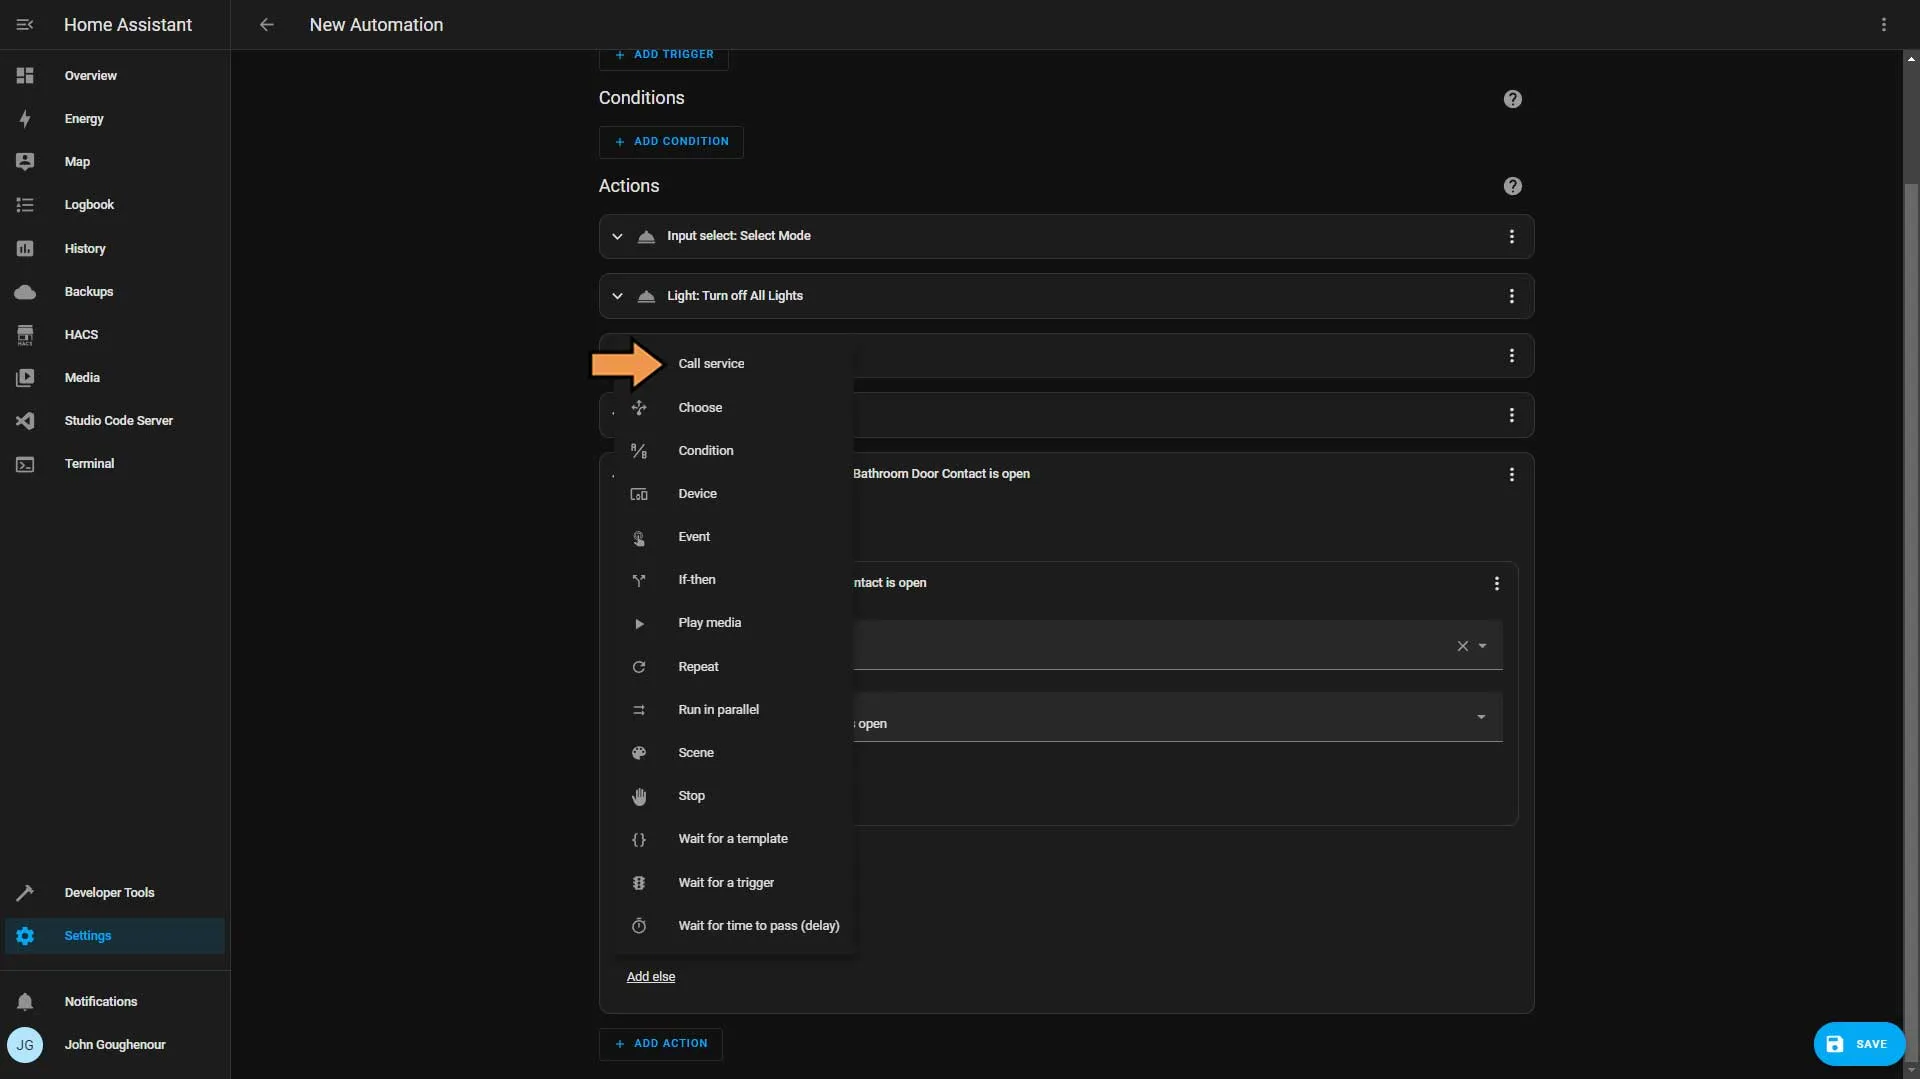
From the Action type list, select Call service.
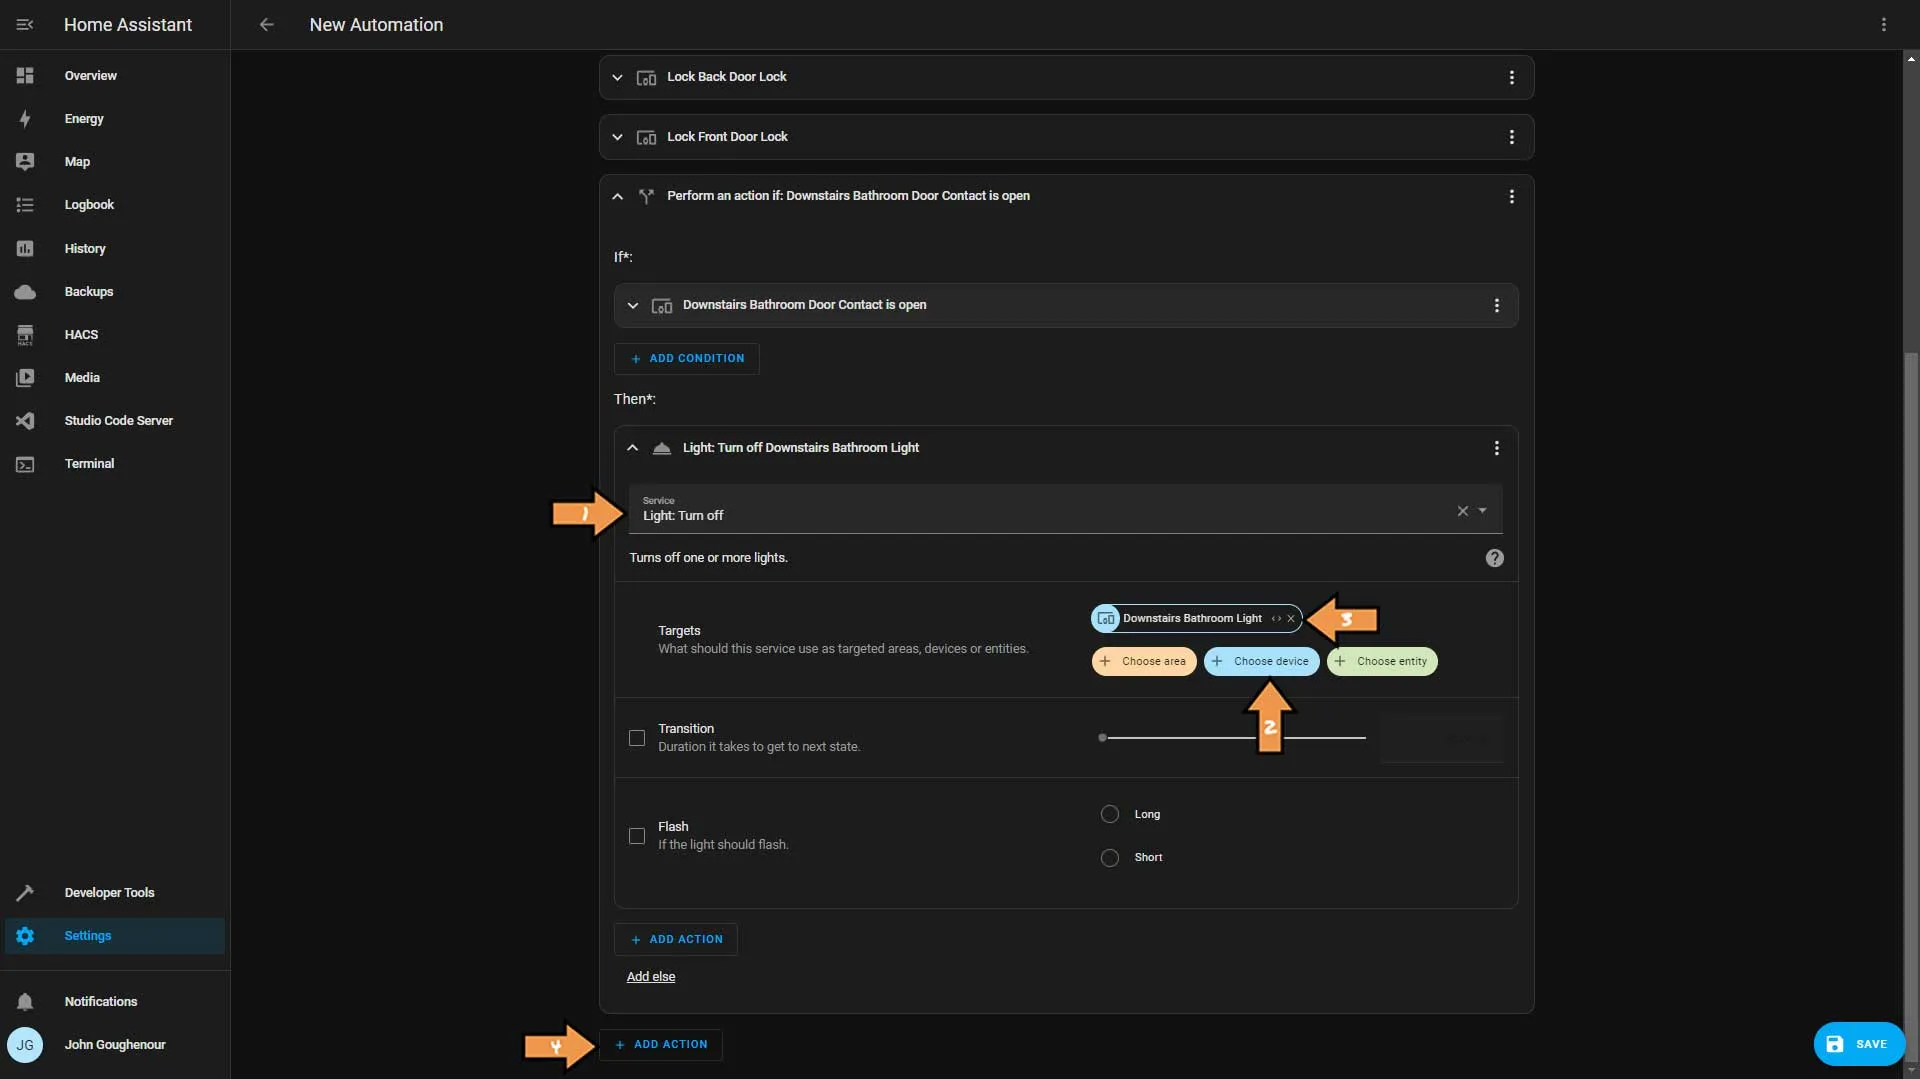
In the Service drop-down, select Light: Turn off. Next, click the Choose device button and select our bathroom lights. Then click the Add Action button outside the if statement.
From the Action type list, select Call service. Then in the Service drop-down select Input Boolean: Turn off. Then click Choose entity and select our virtual switch we created earlier.
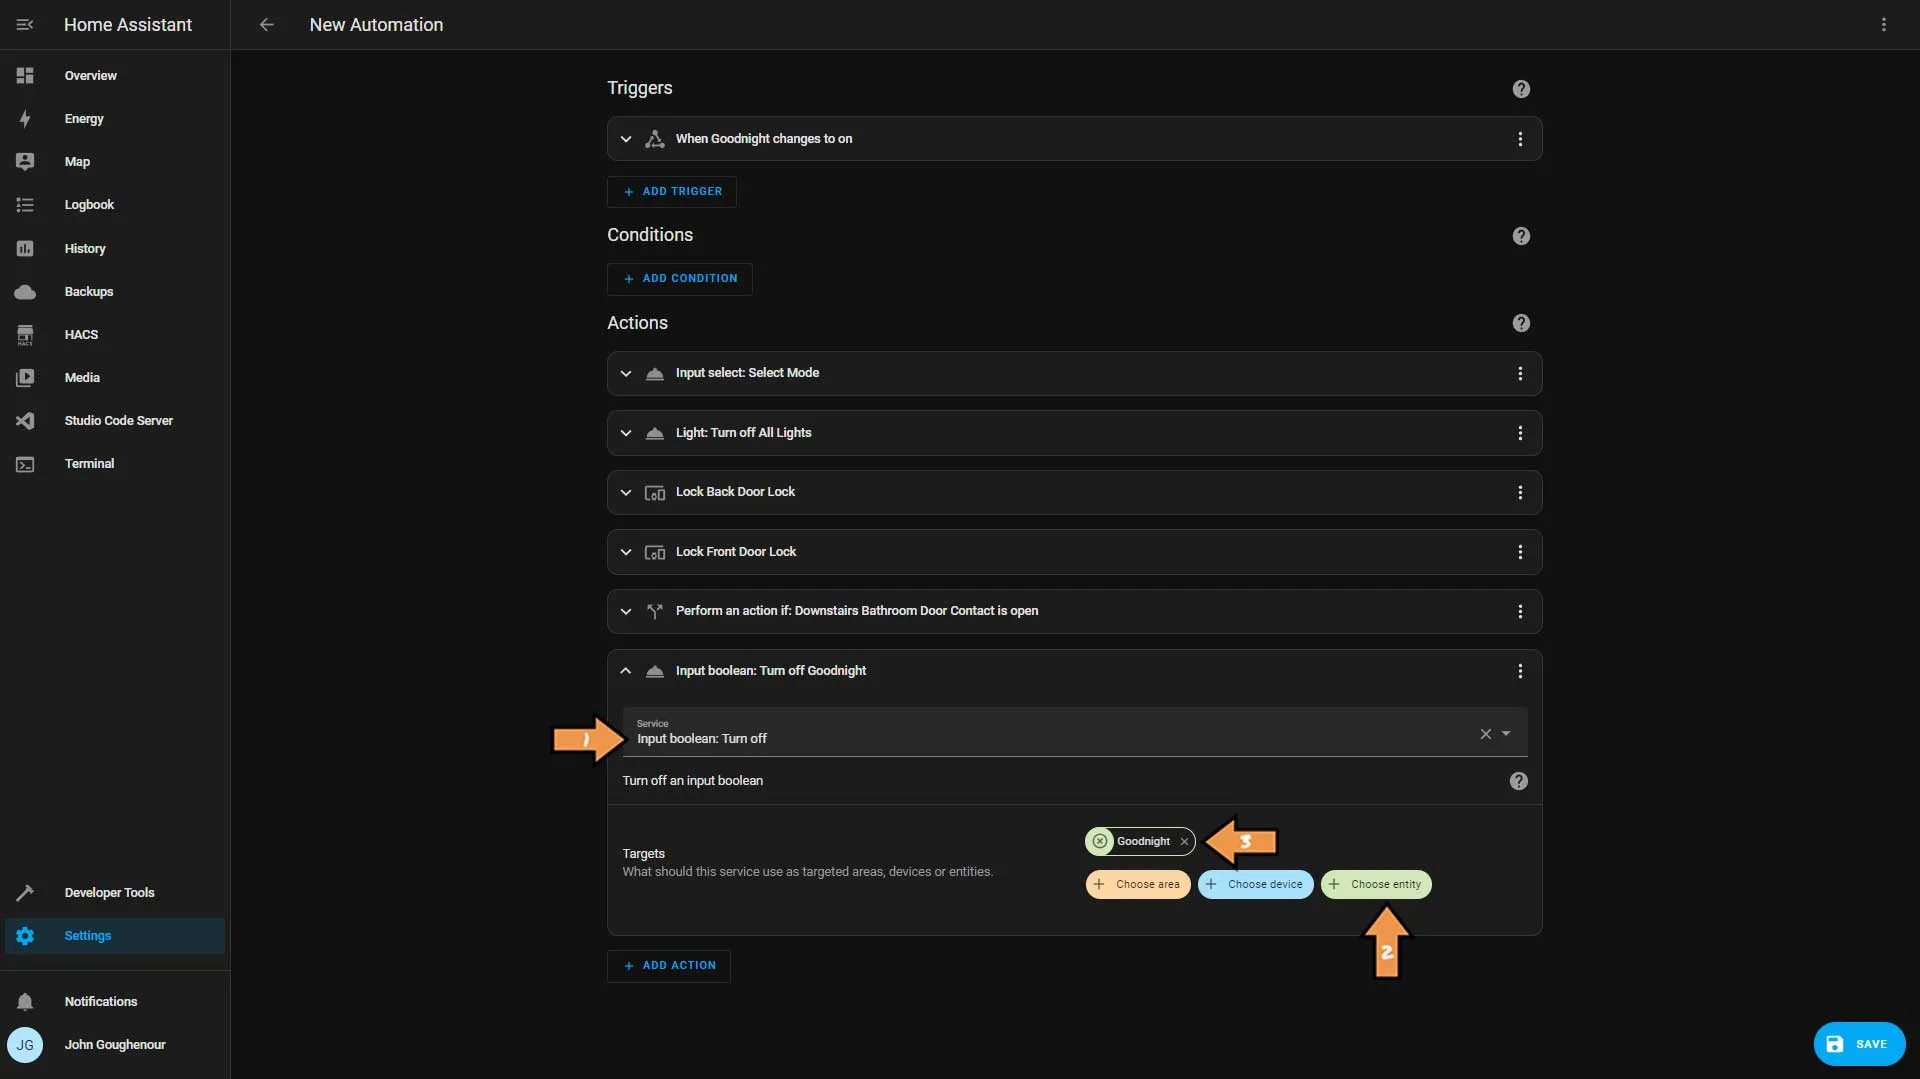
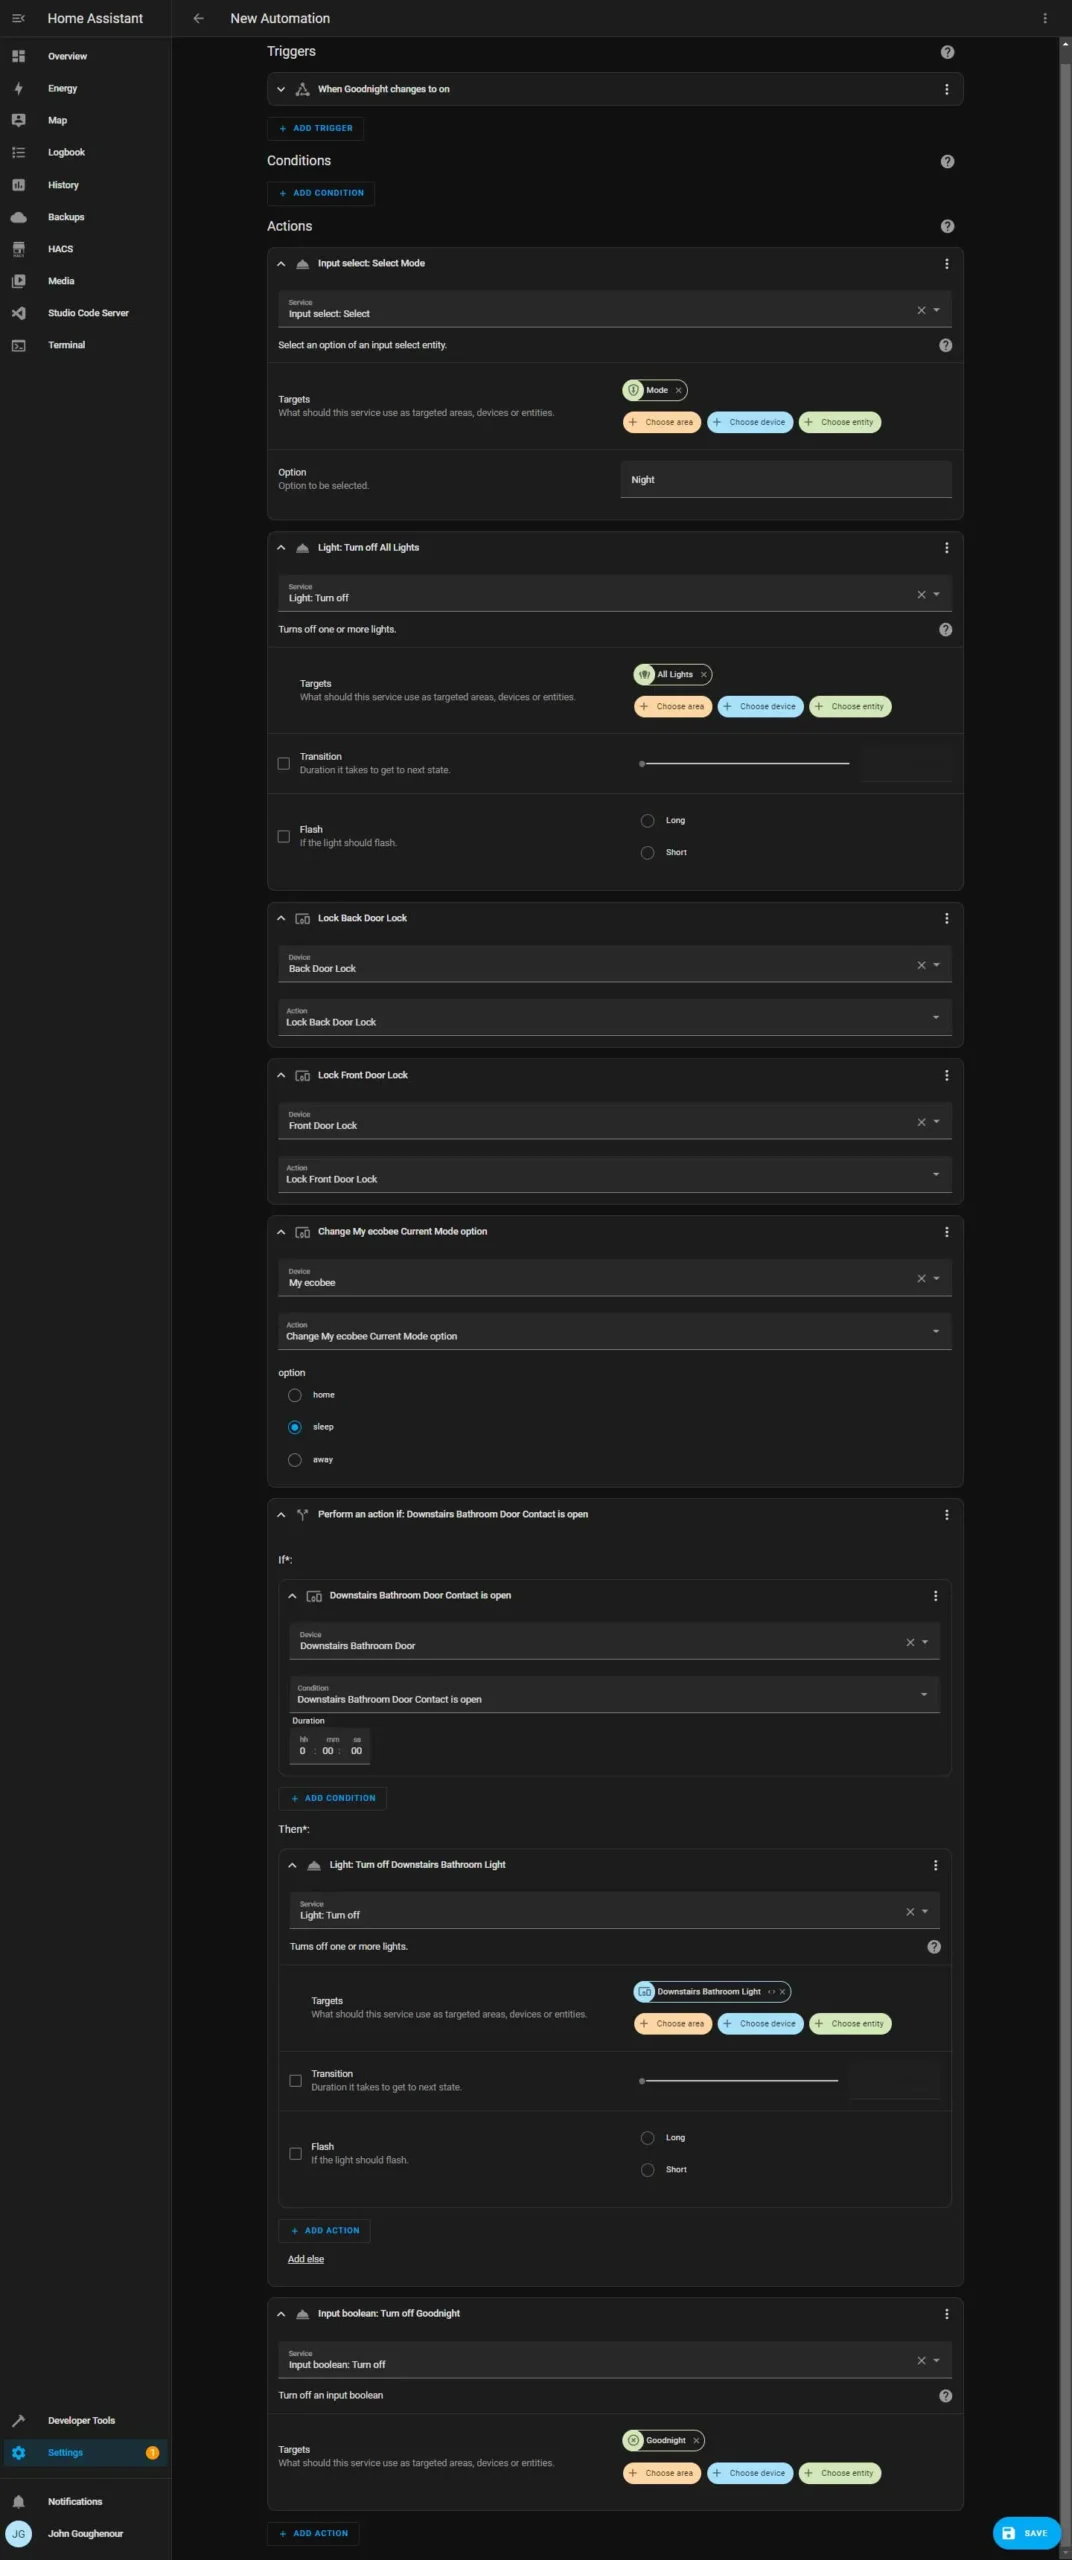
Our completed action list should look like this.
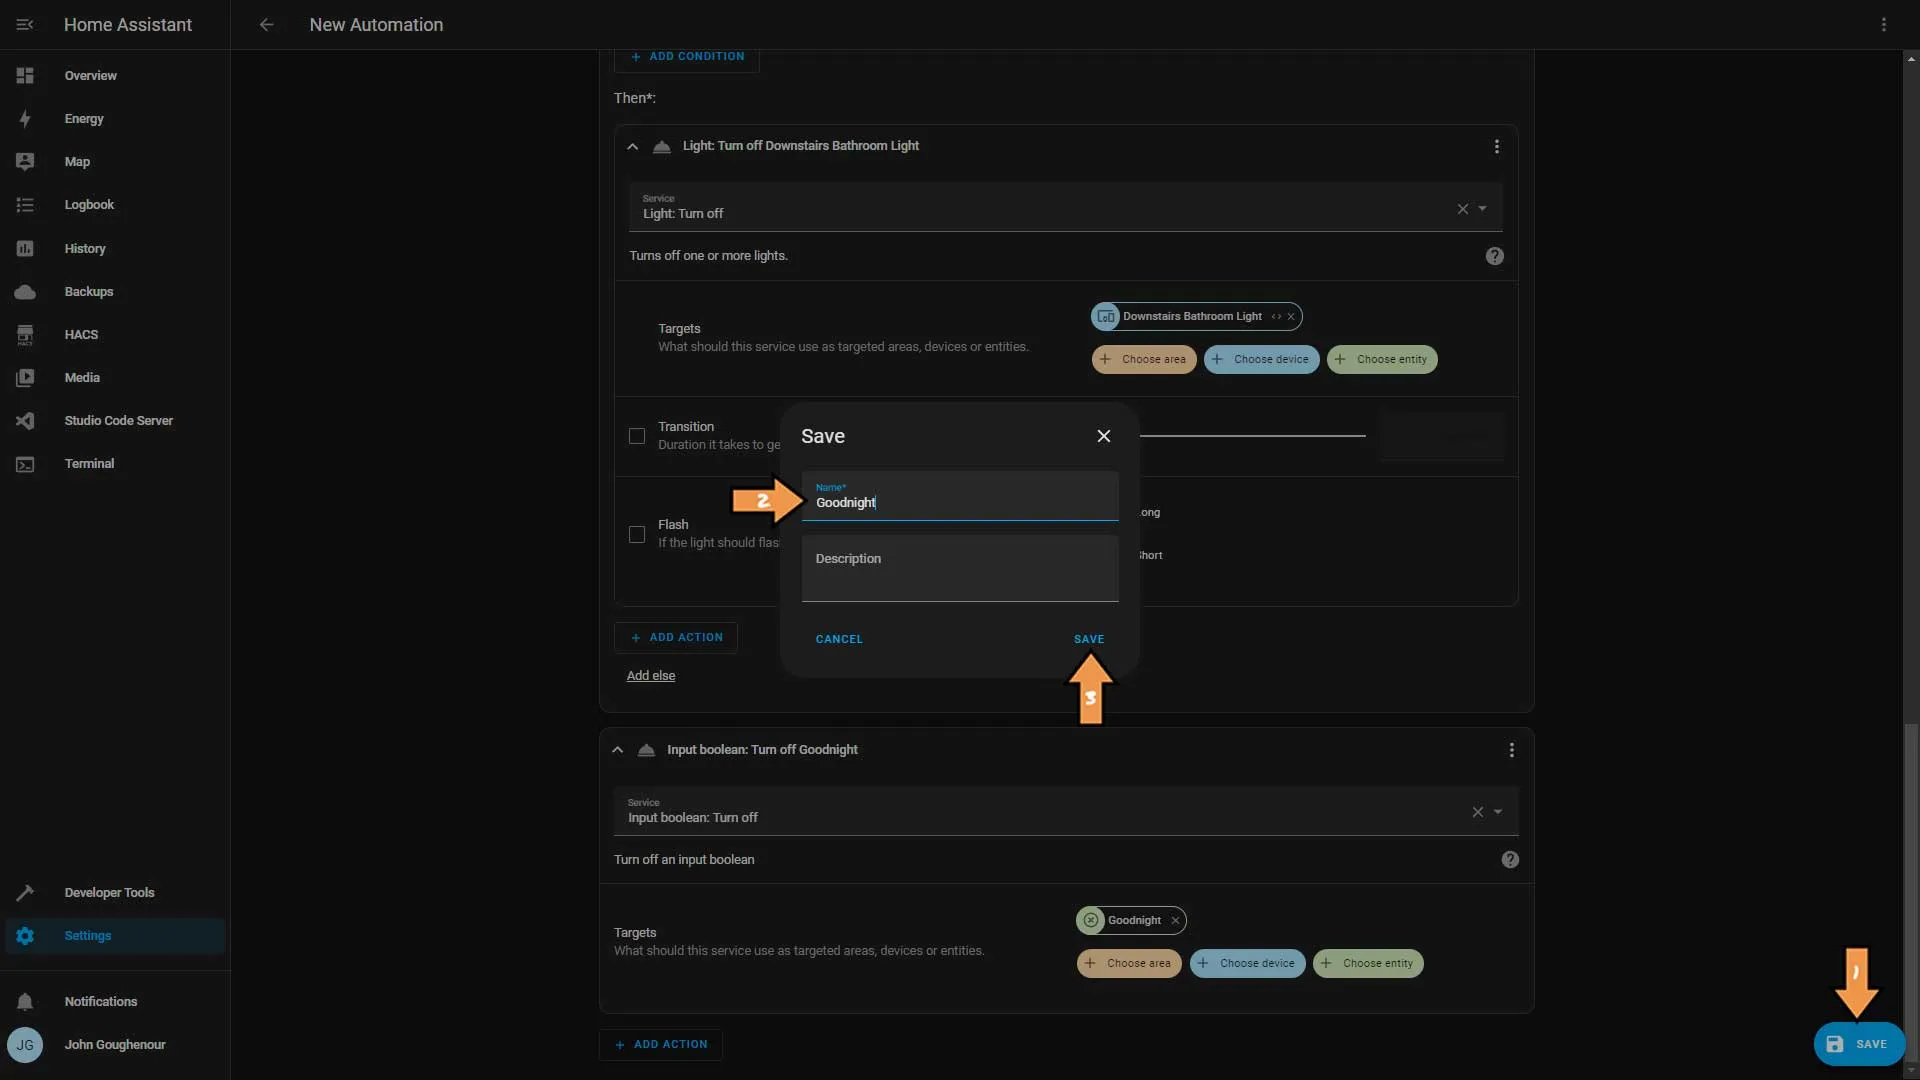
At the bottom right corner, click the blue Save button. Next, name the automation and click save again.
Amazon Alexa
Goodnight Automation
The Official Documentation for Alexa Routines
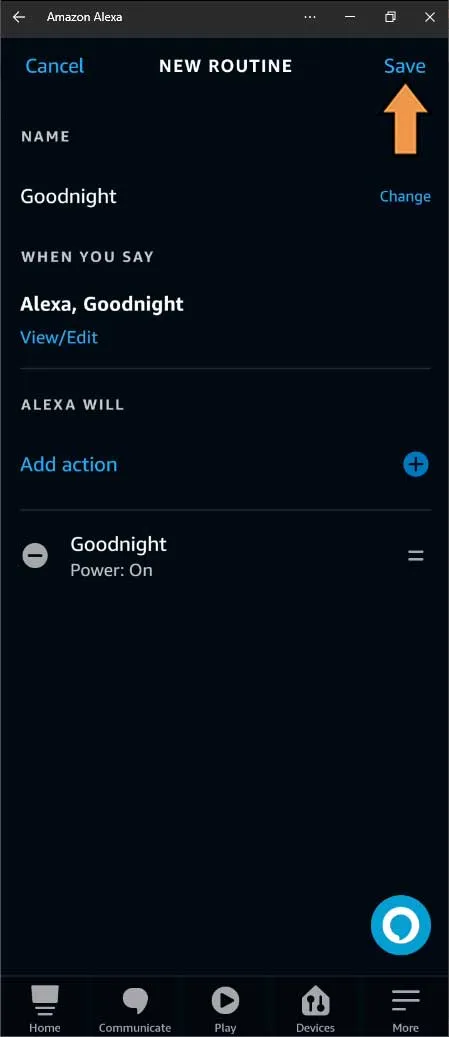
This routine will use the Virtual Switch we shared with Alexa from the other hubs.
Setting Up the Automation
First, Click the More button at the bottom right of the screen.
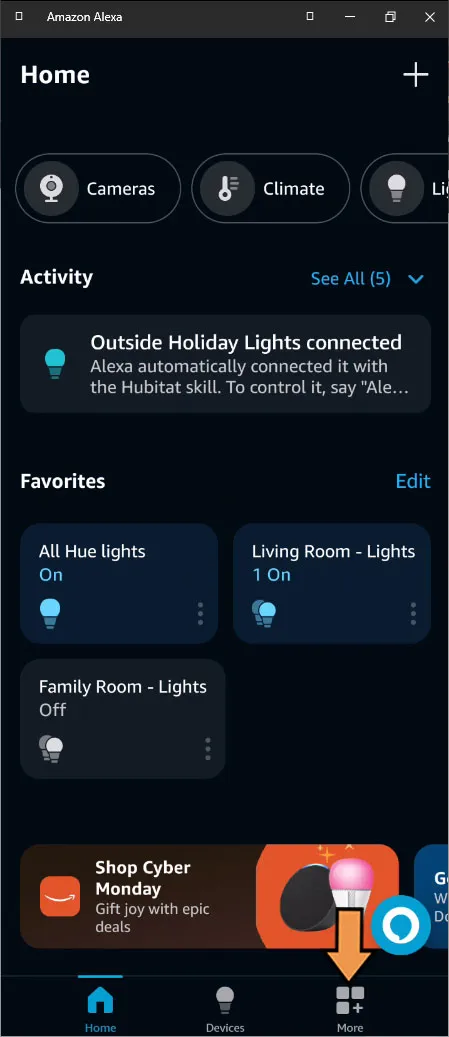
Click the Routines button.
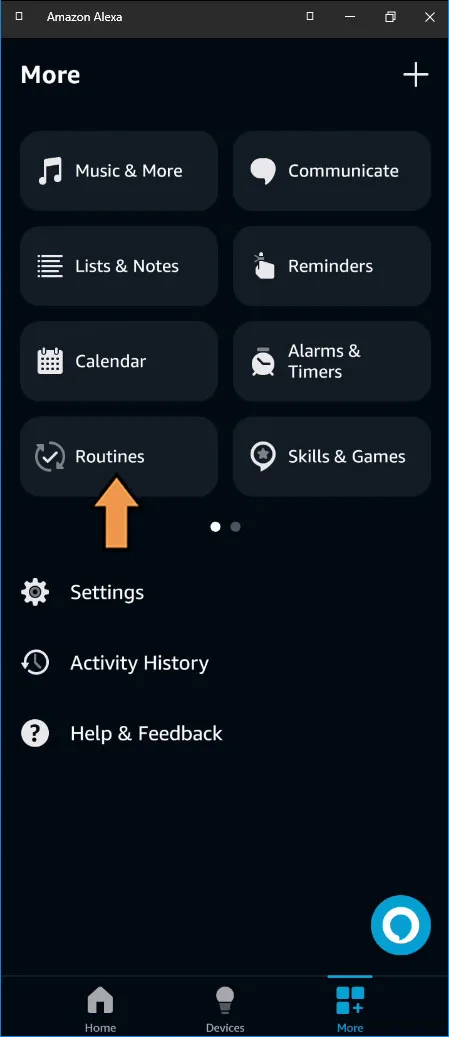
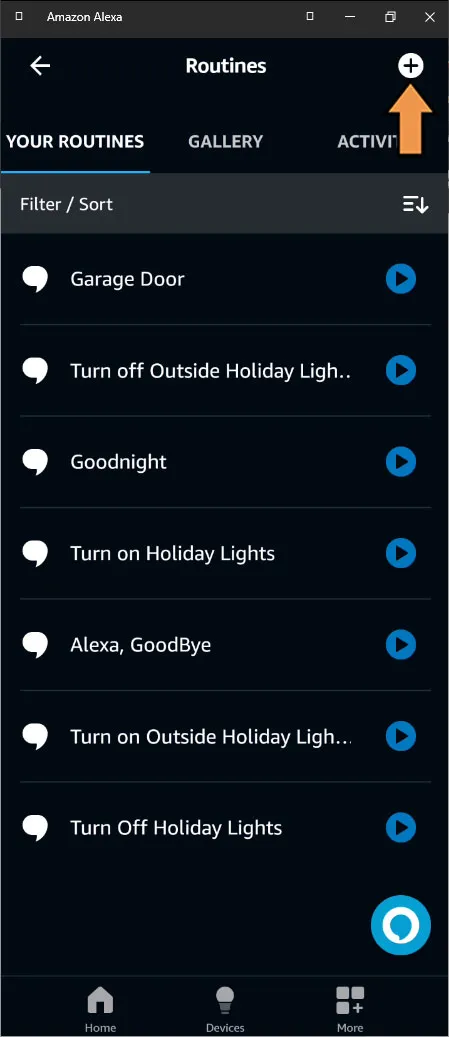
Click the plus sign to add a new routine.
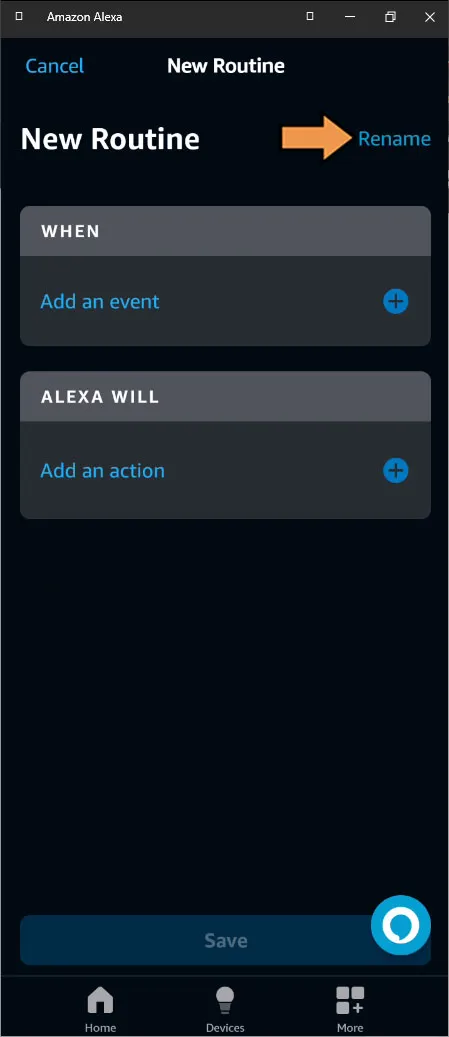
Click the plus sign by Enter routine name.
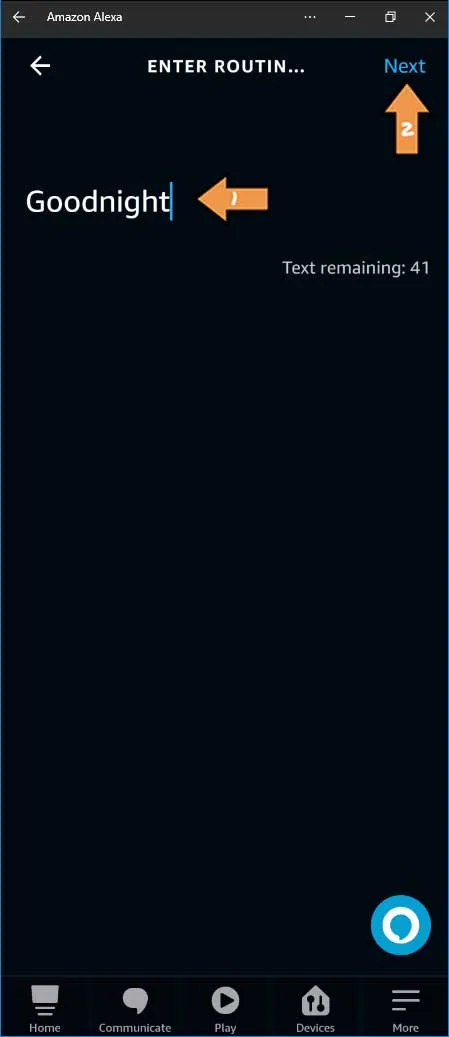
Enter a name for the routine and click next.
Click the plus sign by When this happens.
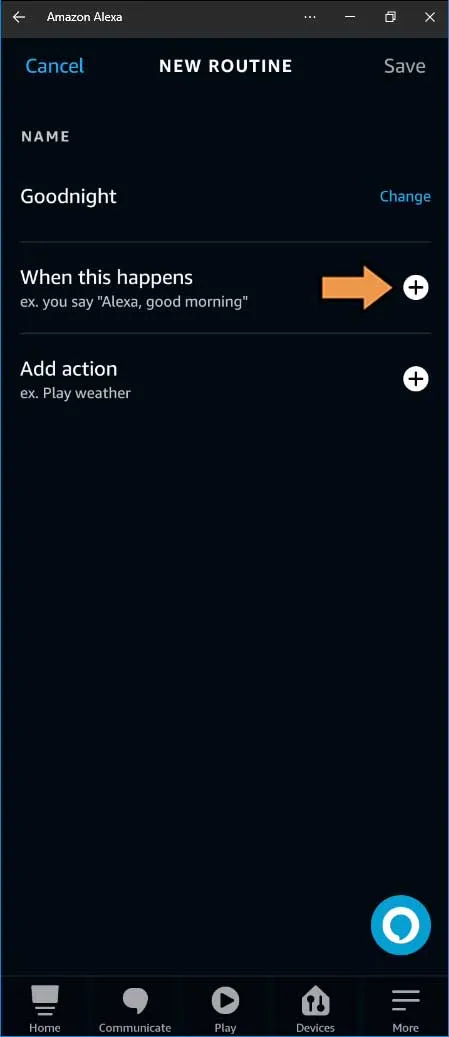
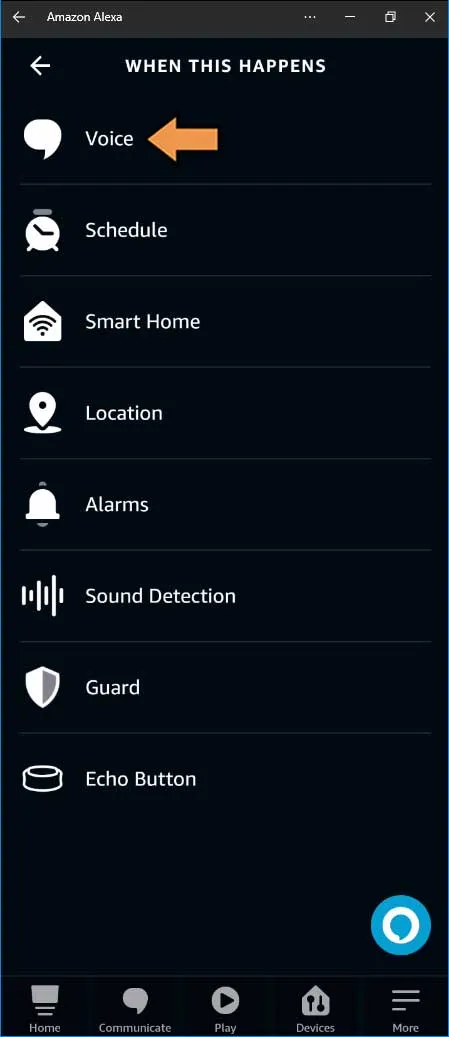
On the When This Happens screen, click Voice.
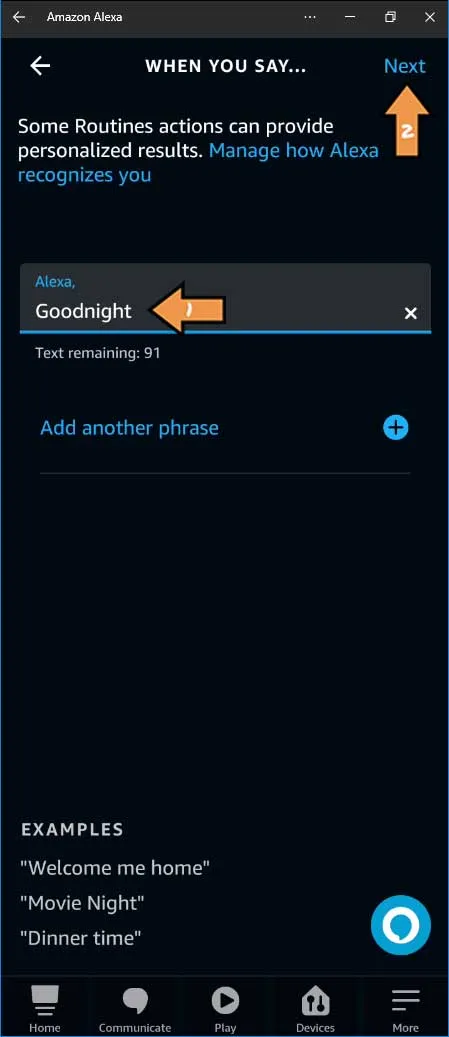
You can just enter the phrase you want to trigger this routine and click Next.
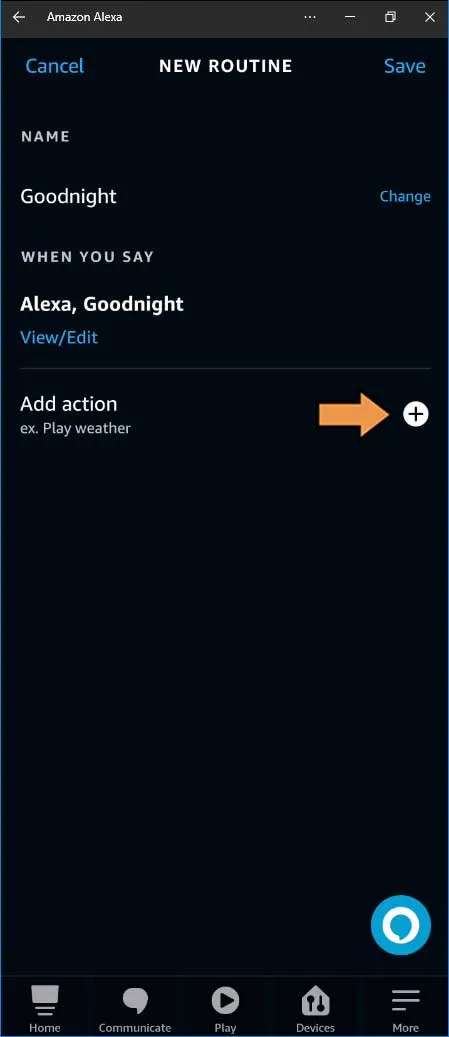
Click the plus sign by Add action.
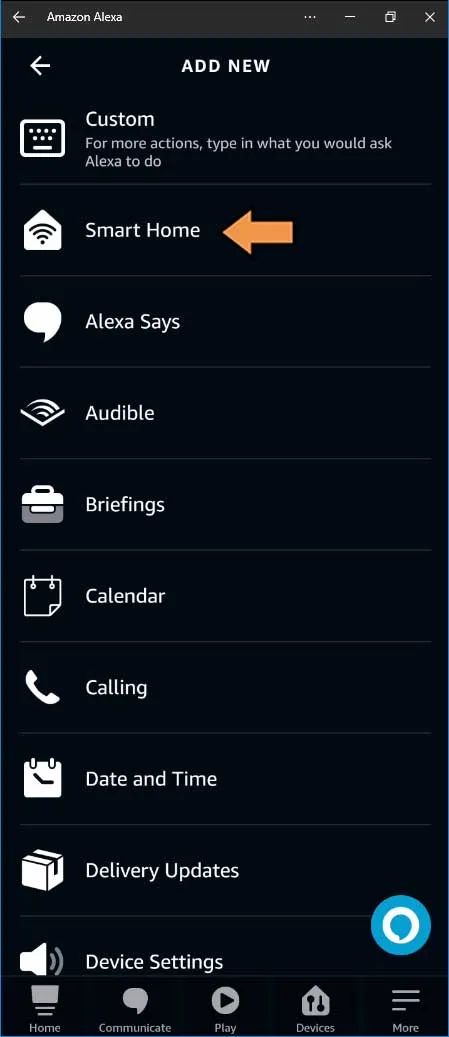
On the Add New screen, select Smart Home.
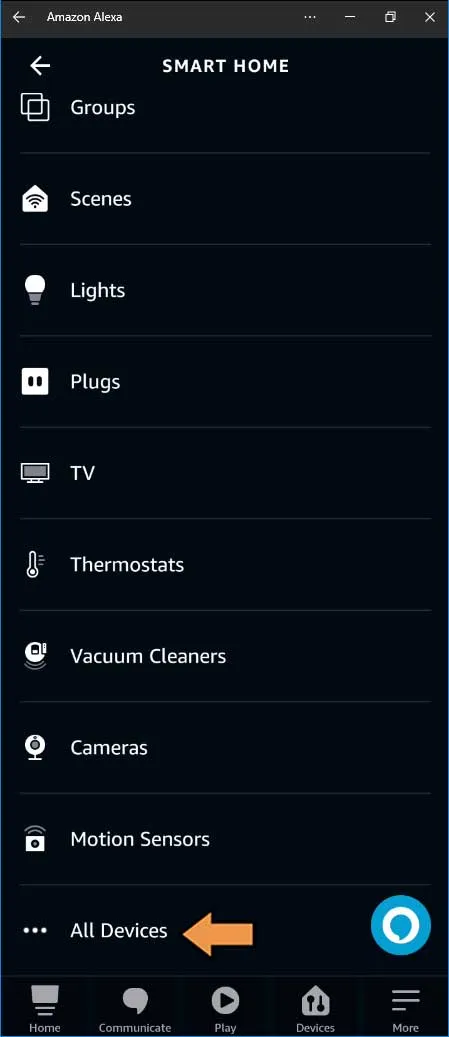
Scroll to the bottom and select All Devices.
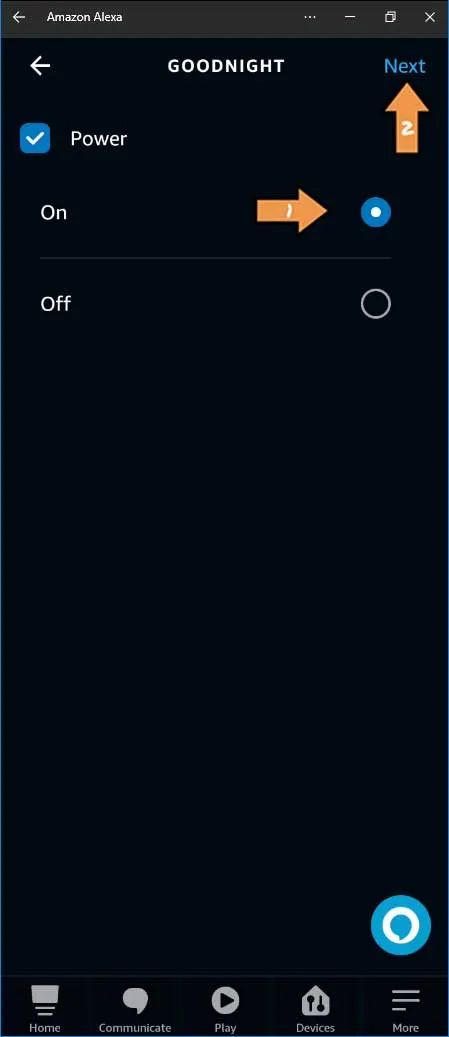
Please scroll through the list of devices till you find our Goodnight virtual switch we shared with Alexa.

Ensure it set to turn On and click next.
Click Save to complete the routine.
