The Ultimate Smart Home Automation Cookbook
Goodbye Automation is an indispensable tool for any smart home, ensuring peace of mind every time you step out. The essence of Goodbye Automation lies in its ability to take care of the essentials as you leave your home. No more second-guessing whether you turned off the lights or locked the doors; Goodbye Automation handles these tasks effortlessly. The beauty of this system is in its dual-trigger functionality: one manual and the other automatic, catering to different leaving scenarios.
When you opt for the manual trigger of Goodbye Automation, it’s as simple as using a virtual switch, which can be integrated with your voice assistant or linked to a button action. This allows you to initiate the automation with just a command or a press, turning off lights and other specified equipment. On the other hand, Goodbye Automation’s automatic trigger is activated when everyone leaves the home, and the hub switches to Away mode. This not only turns off unnecessary utilities but also ensures that your home is secure, locking doors and activating security systems.
Goodbye. Automation isn’t just a convenience; it’s a layer of security and efficiency. By customizing the actions performed during manual and automatic triggers, Goodbye Automation becomes more than just a routine facilitator; it becomes a guardian of your home. Whether you’re rushing out for work or leisure, Goodbye Automation gives you the assurance that your home is safe, secure, and energy-efficient in your absence.
Automation Details
Required Devices
- Virtual Device
- Smart Lighting
- Smart Locks
- Smart Thermostats
Triggers:
- Virtual Switch Turns On
- Mode Becomes Away
Conditions:
- When Triggered Manual Only Turn Off Lights
Actions:
- Turn Off All Lights
- Lock All Doors
- Lower Thermostat
Important: We are going to be using our All Lights group. Check out this automation to learn how to Create Groups.
We'll only cover a few options for this automation, but the possibilities are endless. You could implement your TVs, Garage door opener, or any device you want.

Hubitat
Goodbye Automation
The Official Documentation for Rule Machine
Setting Up the Automation
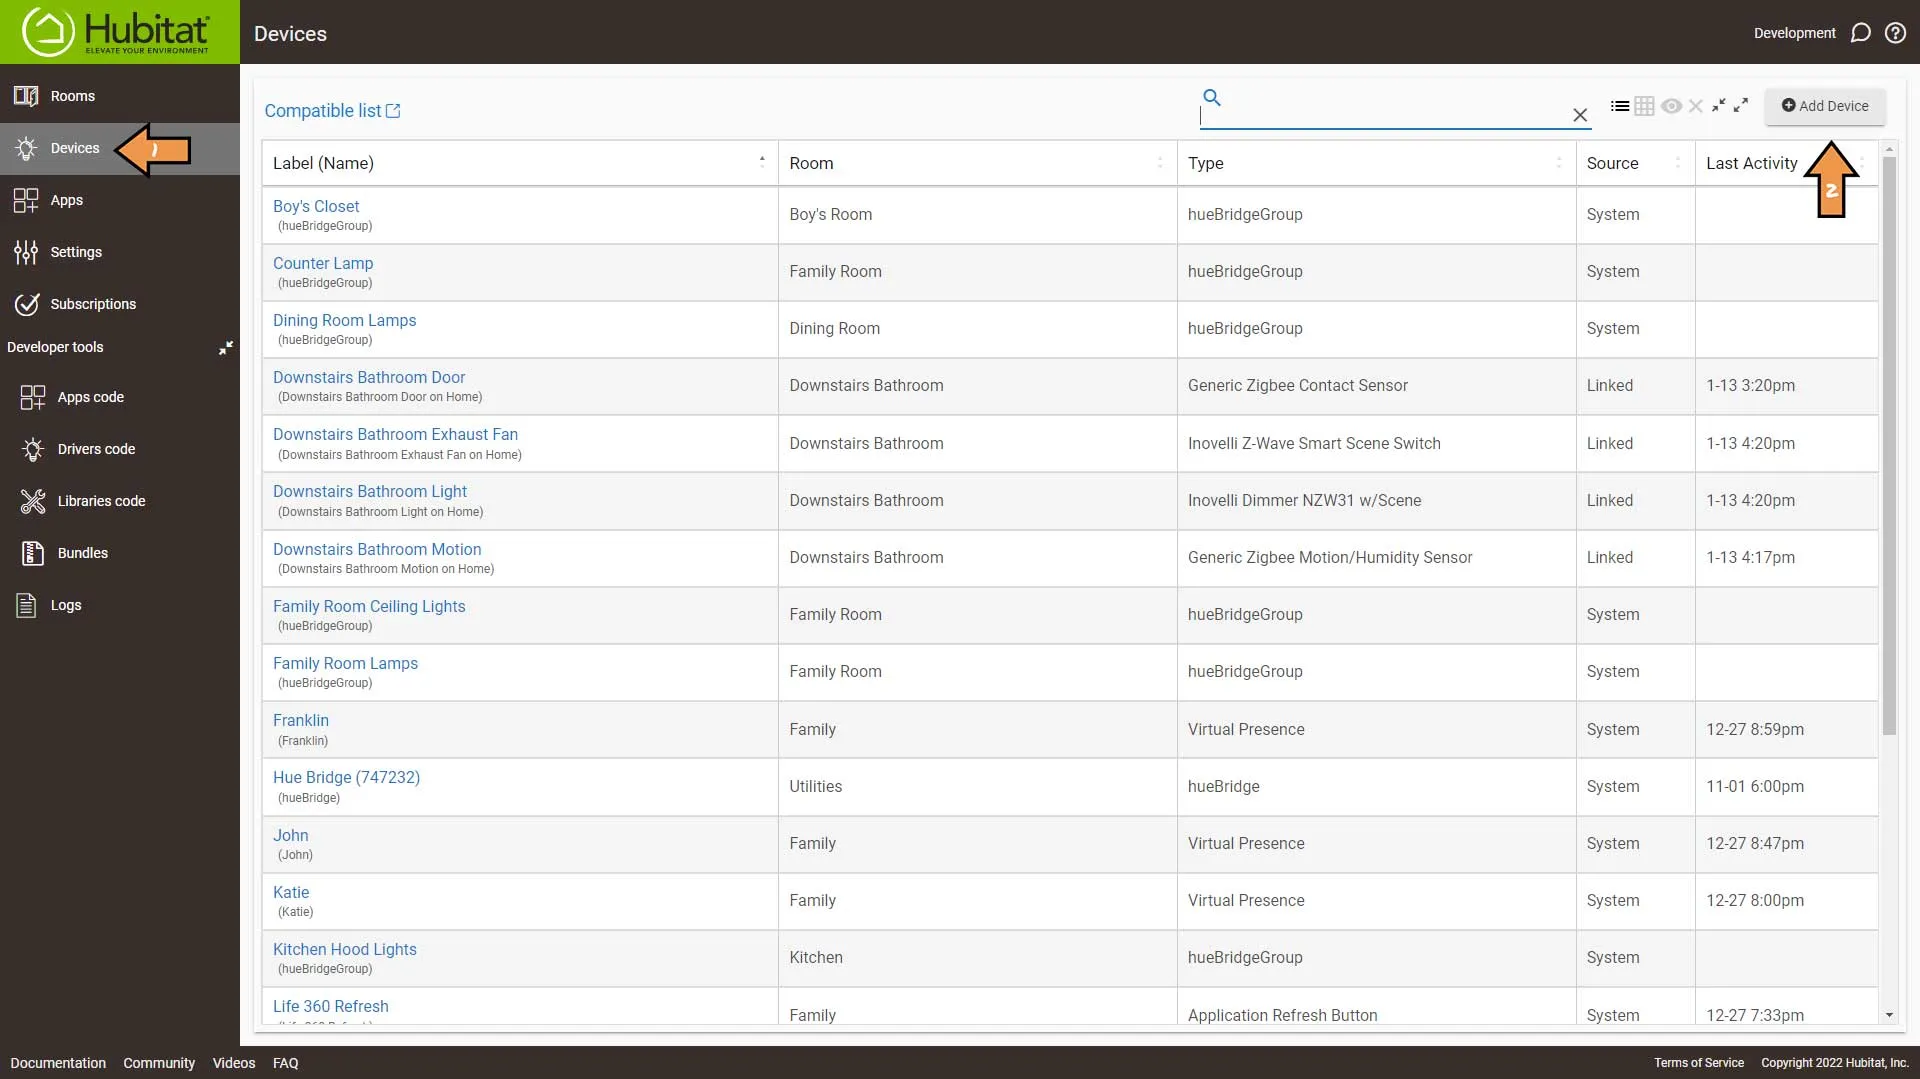
First, go to Devices and then click Add Device.
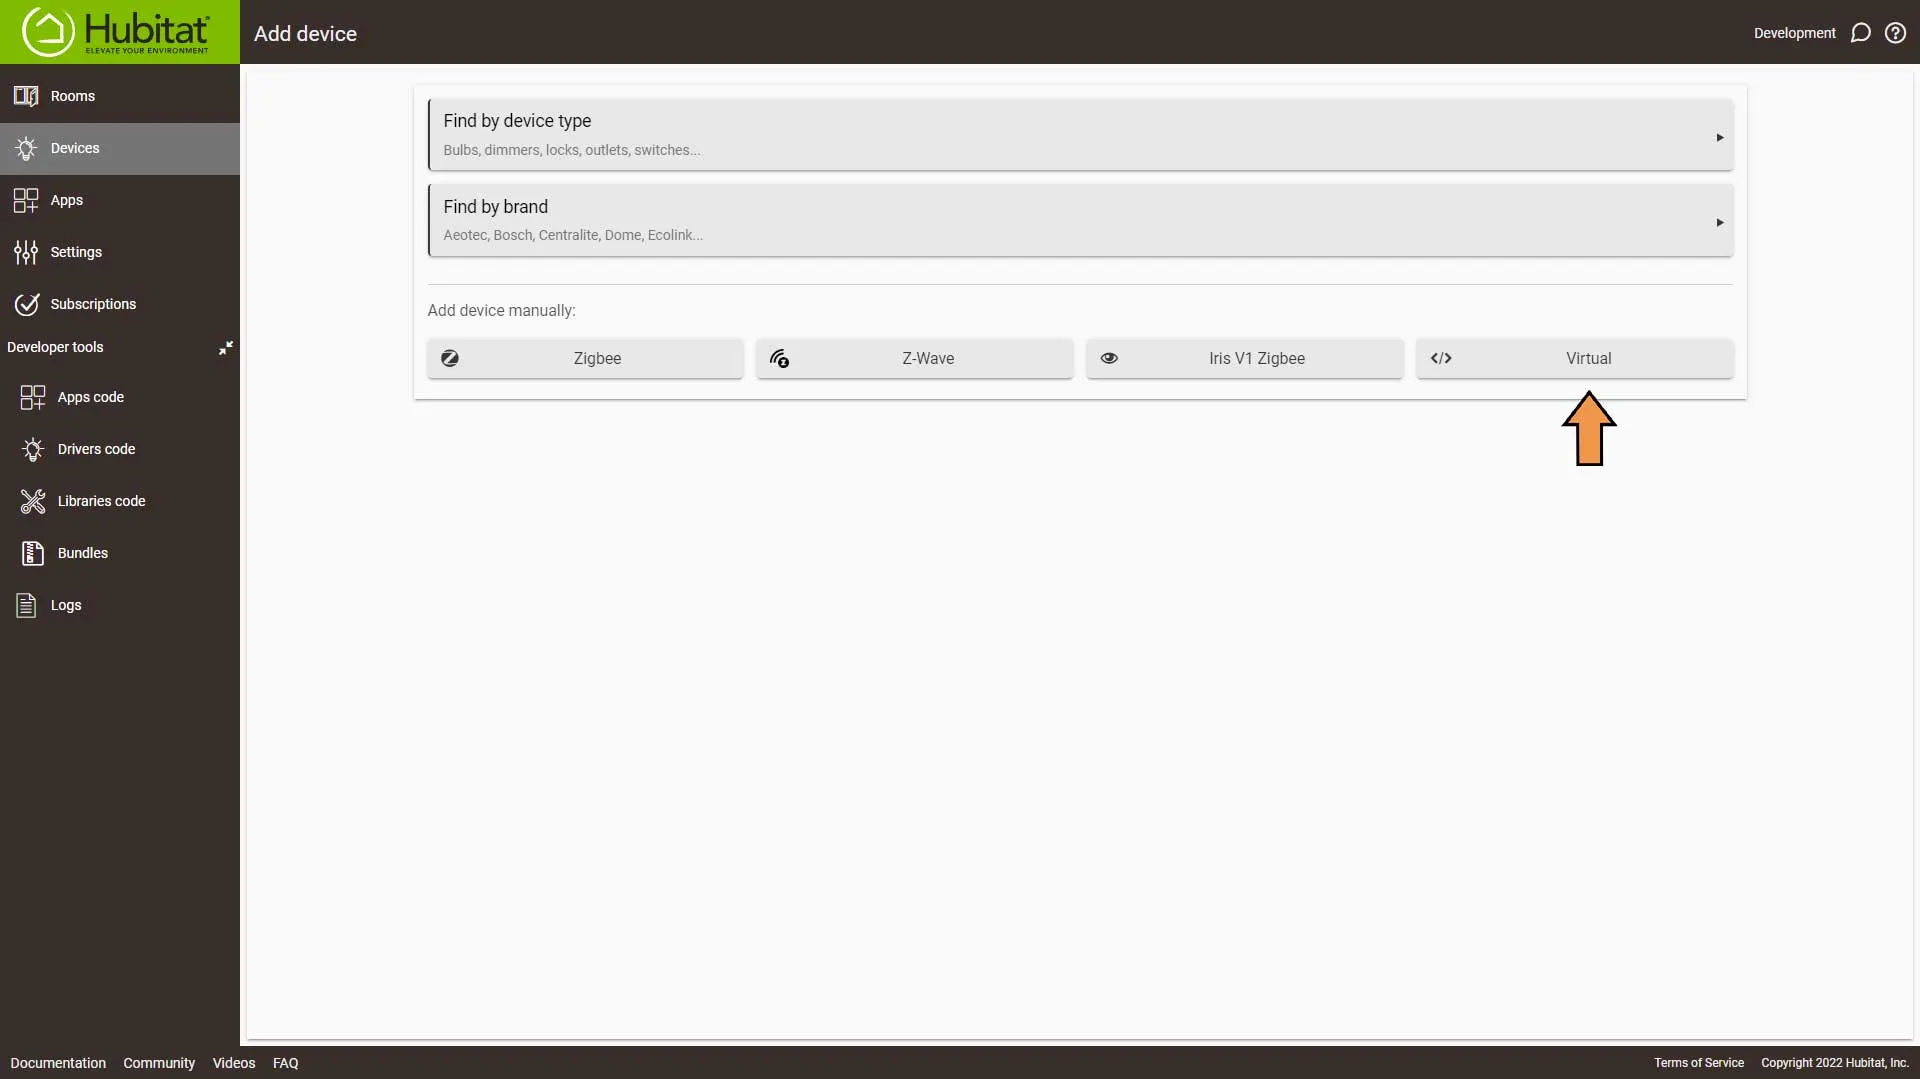
Click the Virtual button.
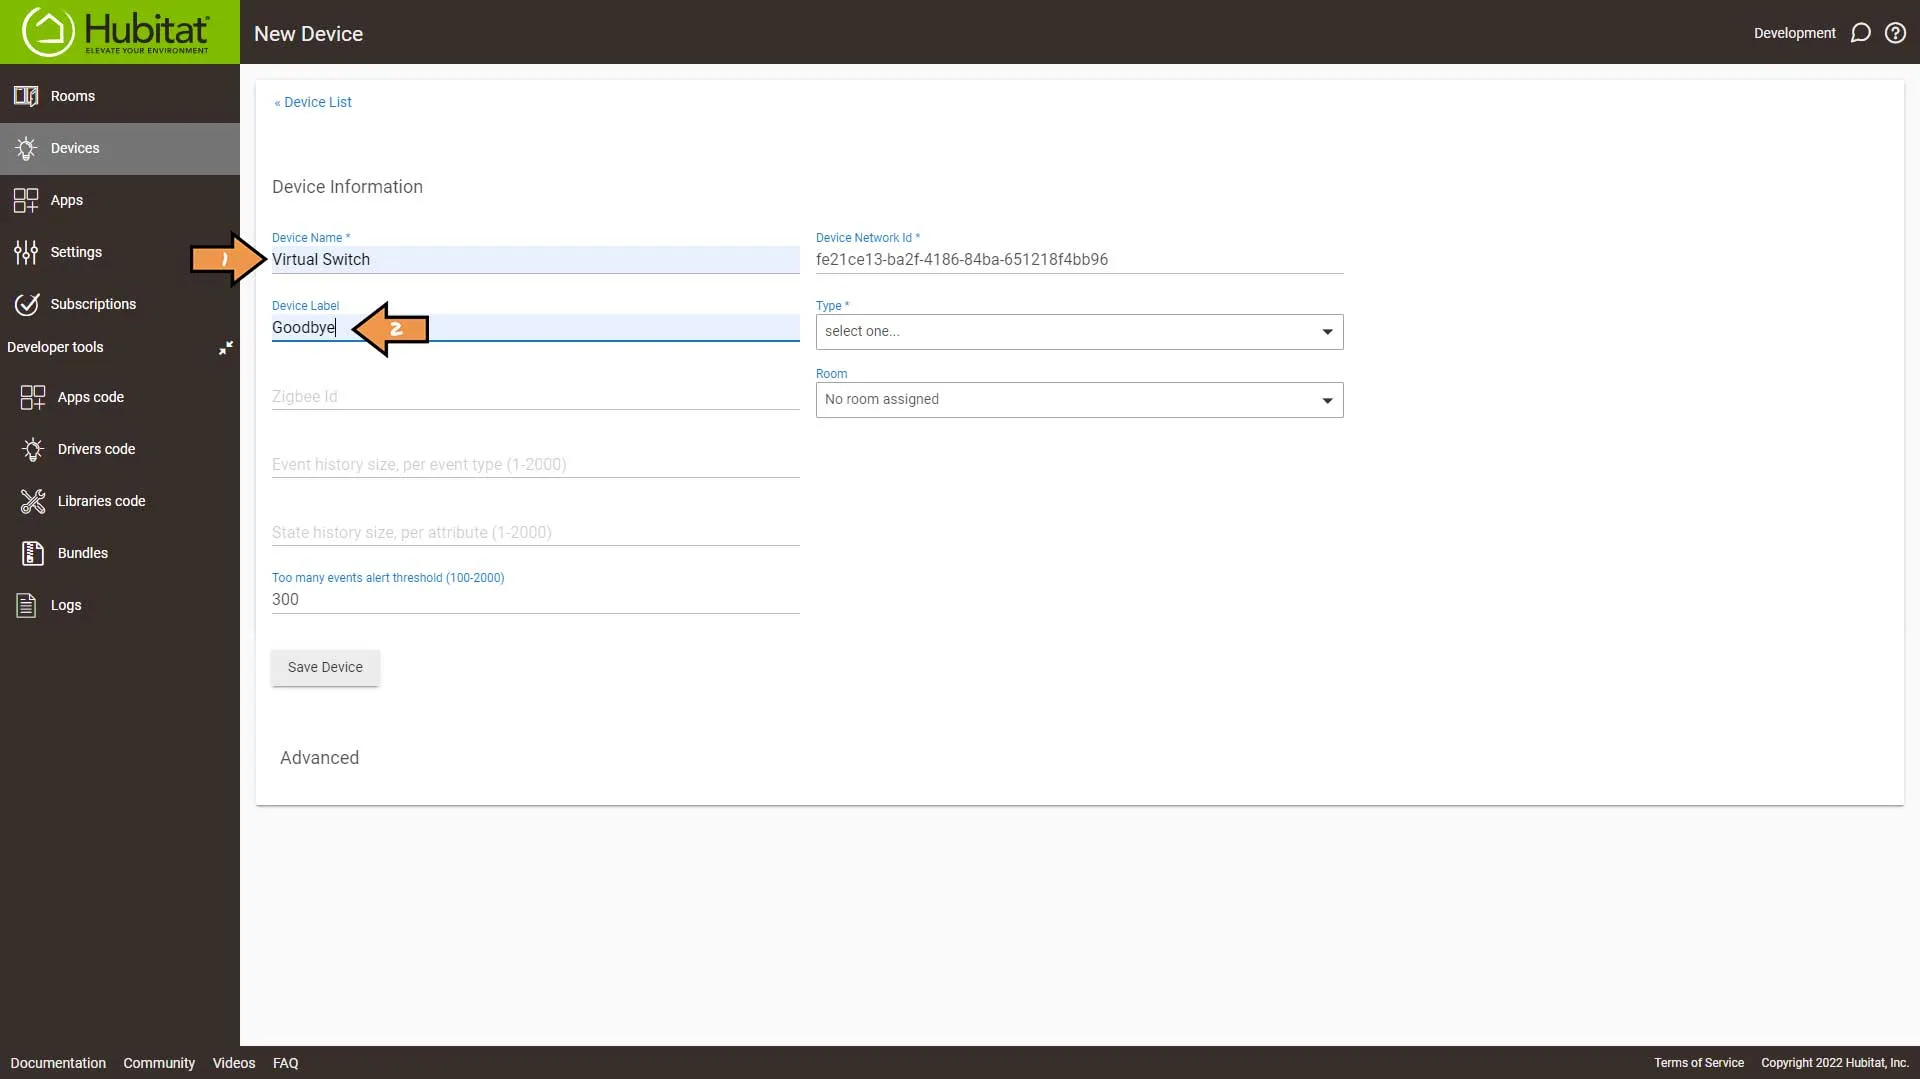
Add the Device Name and Device Label. Of course, you could enter the Device Name, but I like to use that to remind me what it is. Then the label is the name of the device.
For the Device Type select Virtual Switch from the drop-down.
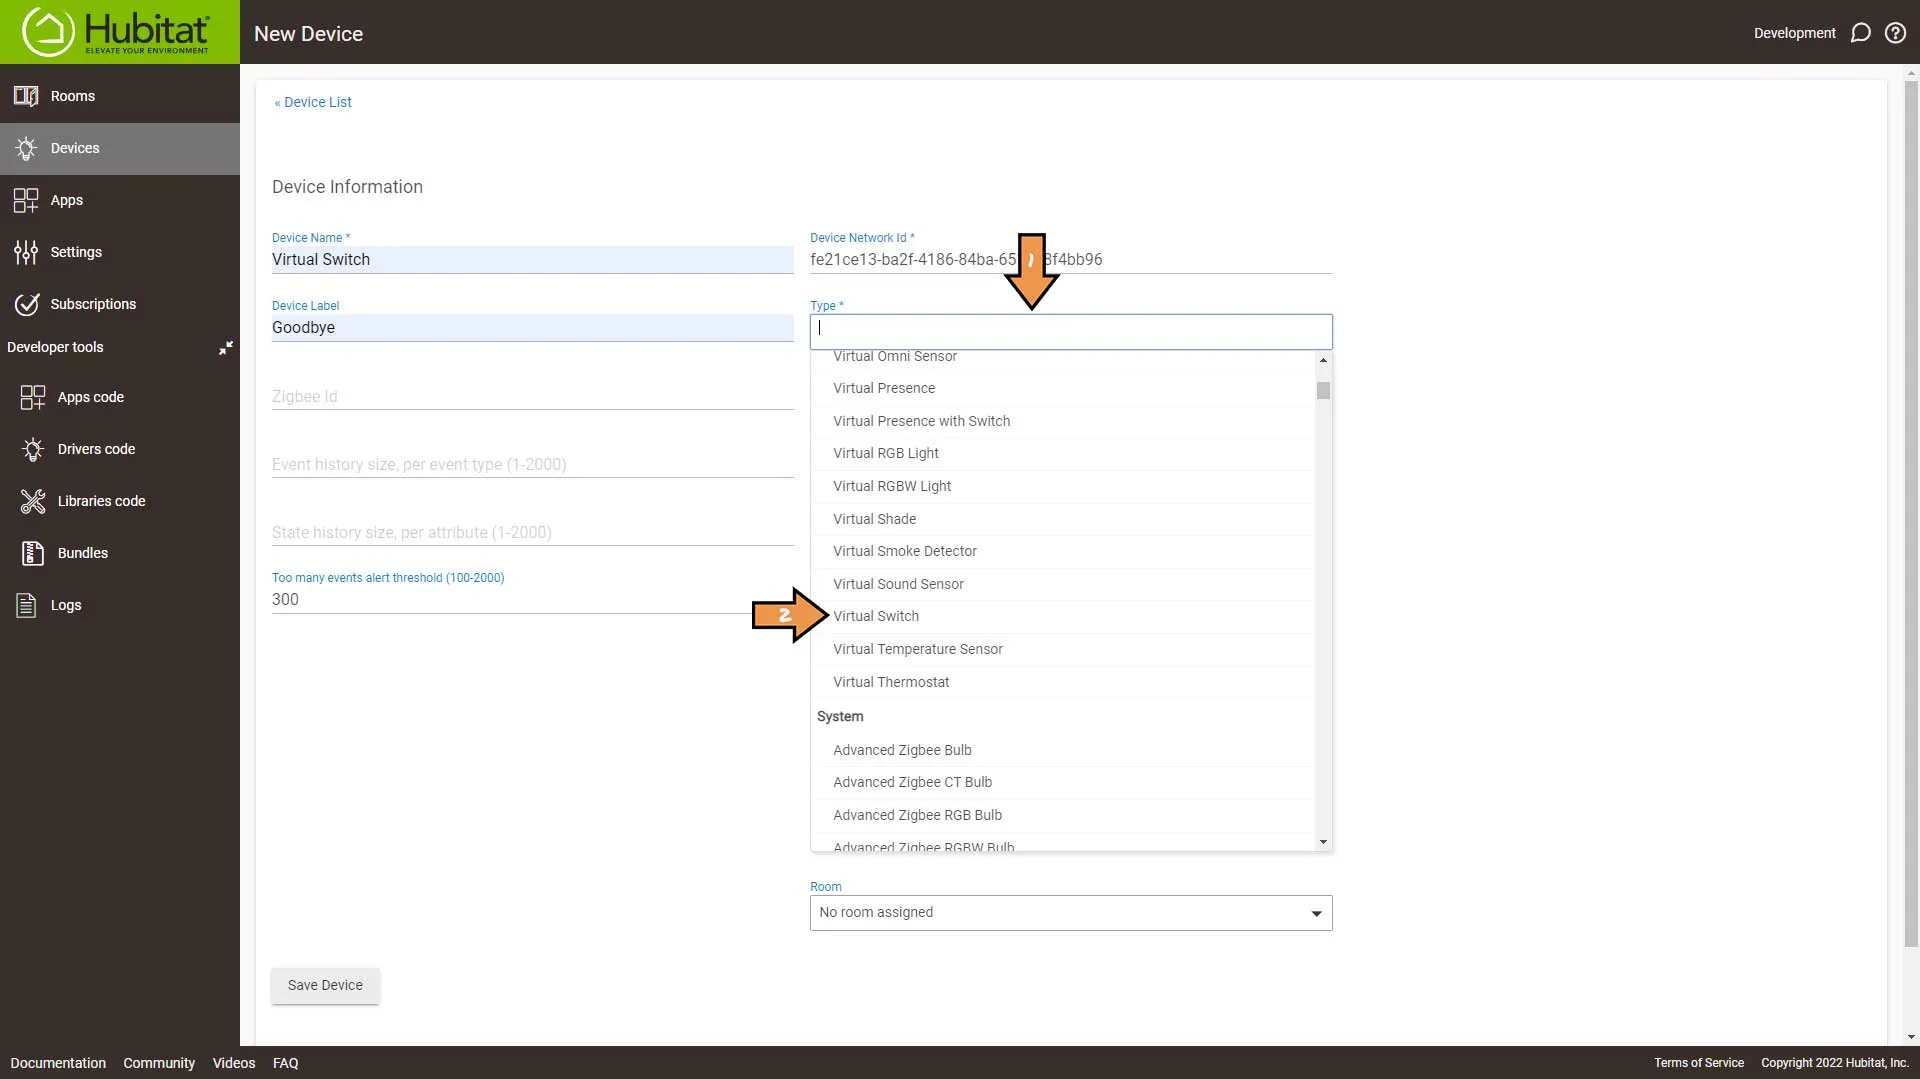
Add the device to a Room and click Save Device.
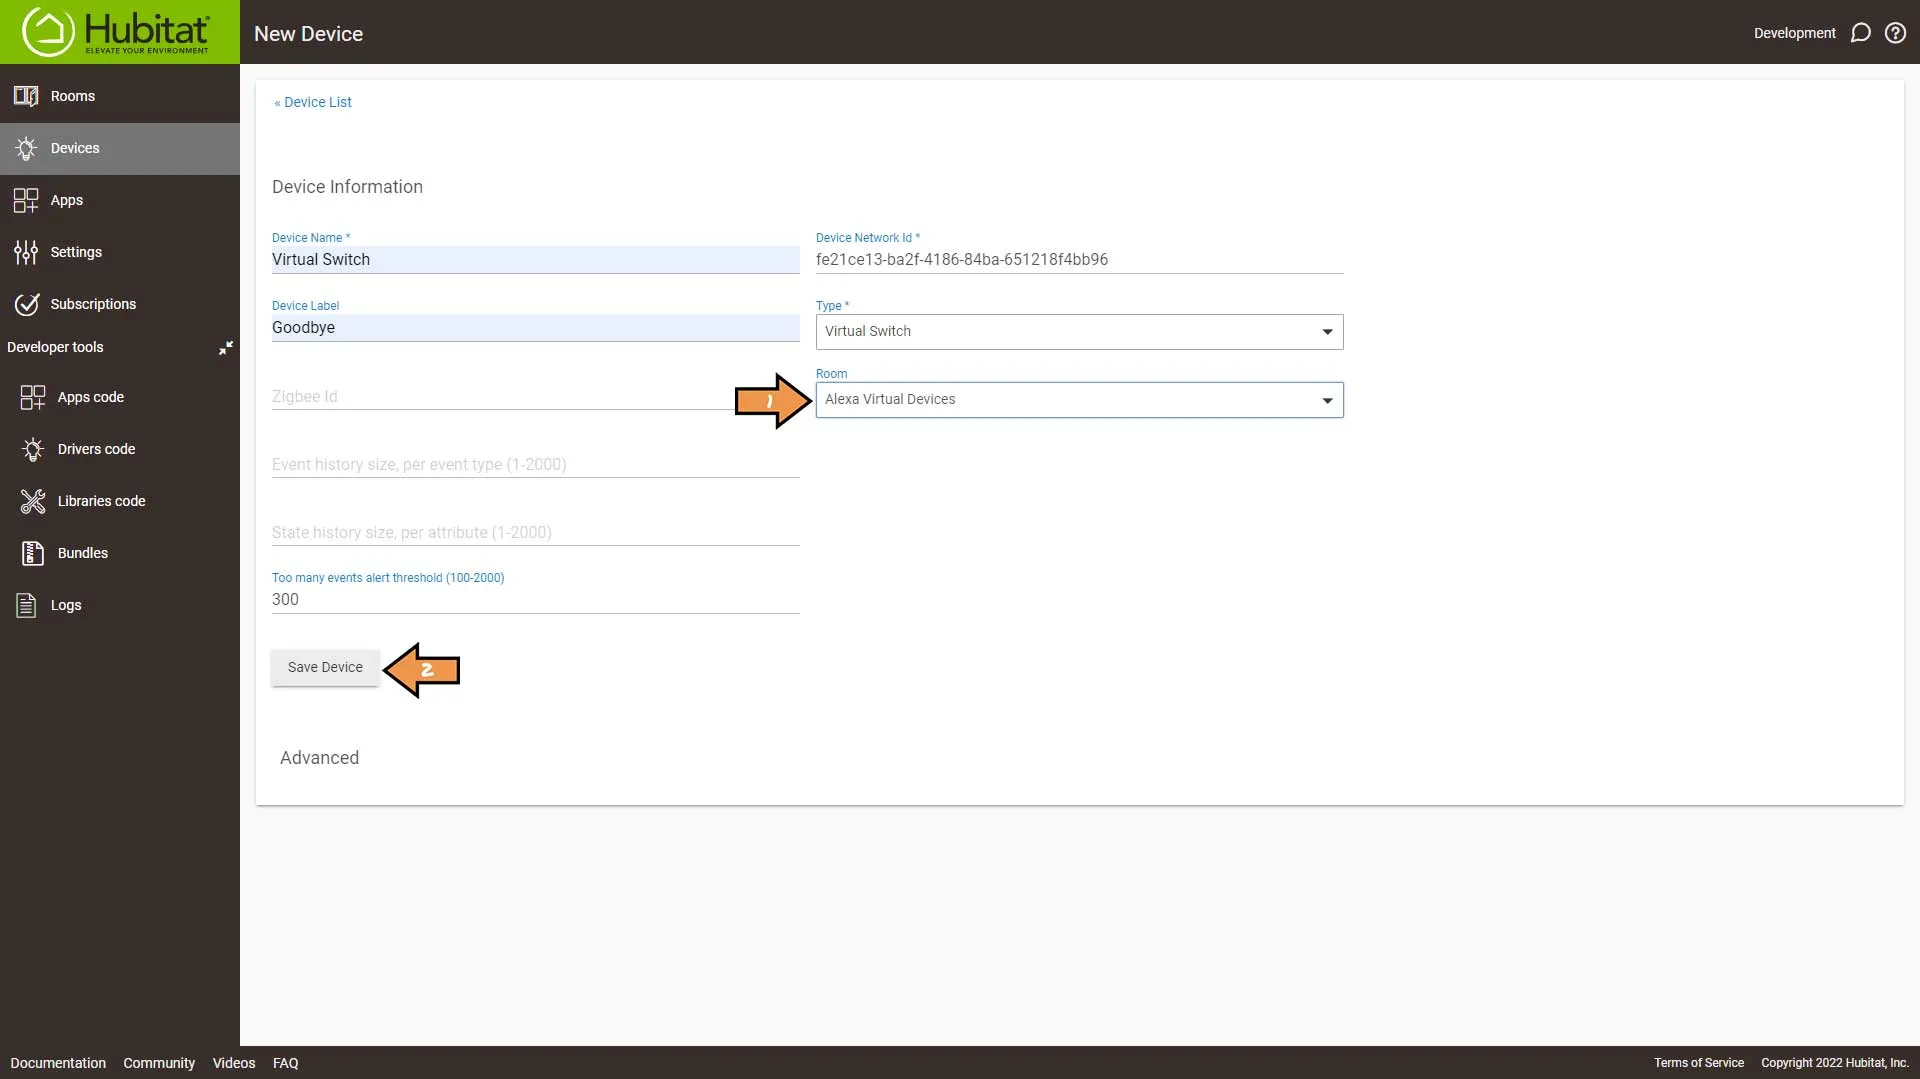
On the Device screen set Enable Auto off for 1 second and click Save Preferences.
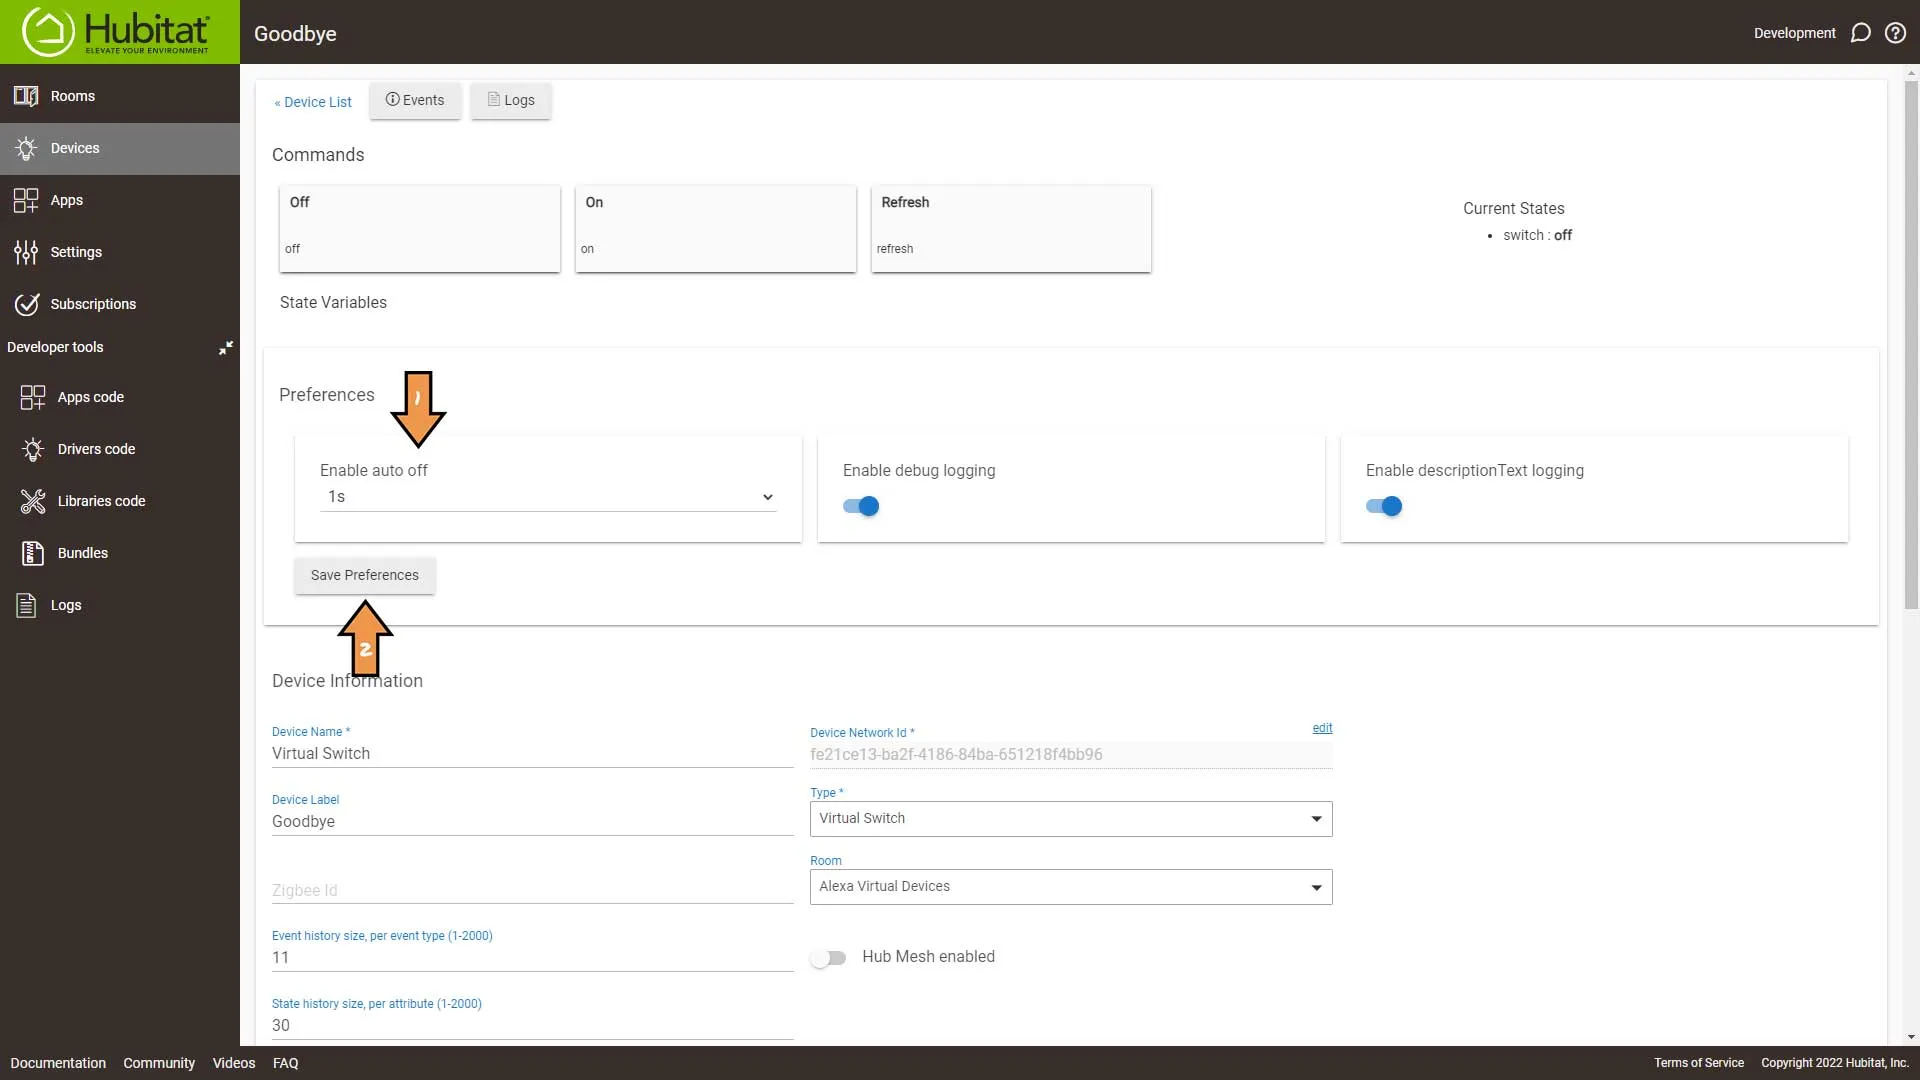
Next, go to Apps and press Add Built-in App button.
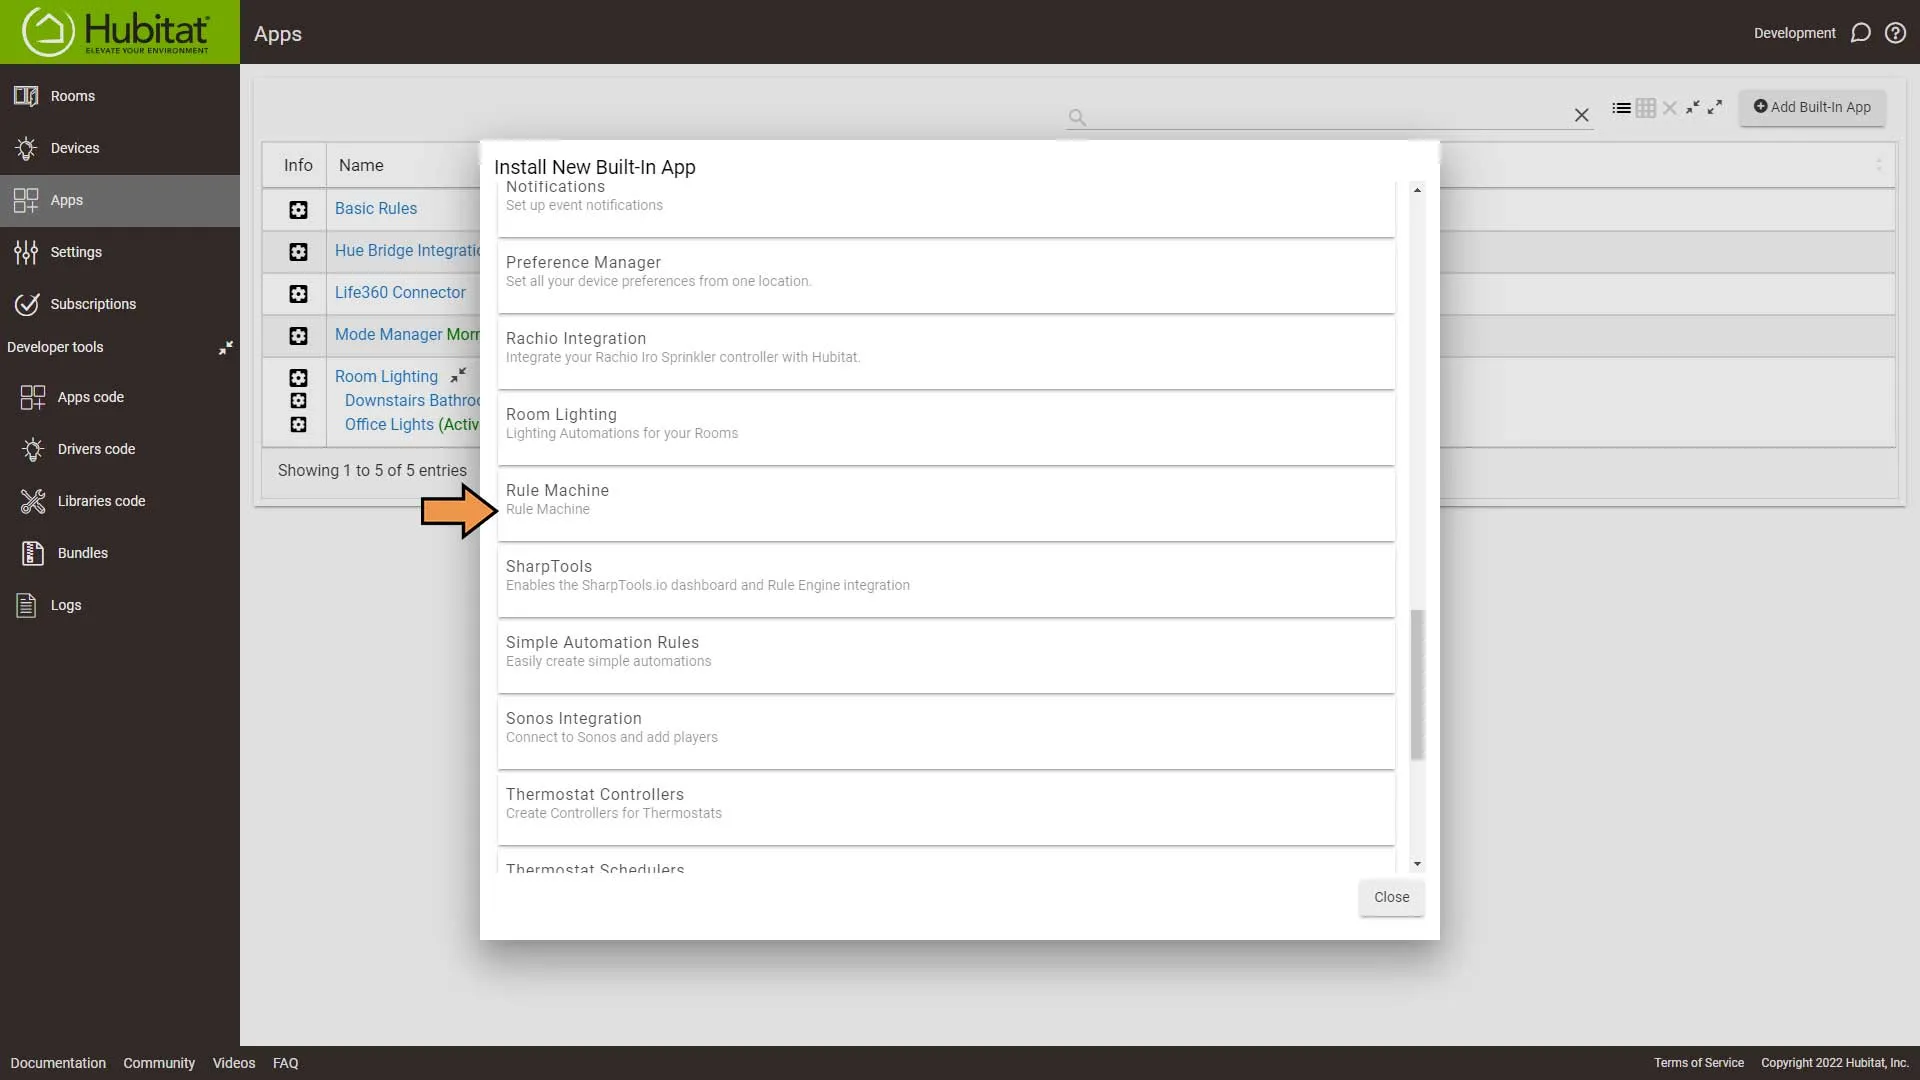
Please scroll down to you see Rule Machine and select it.
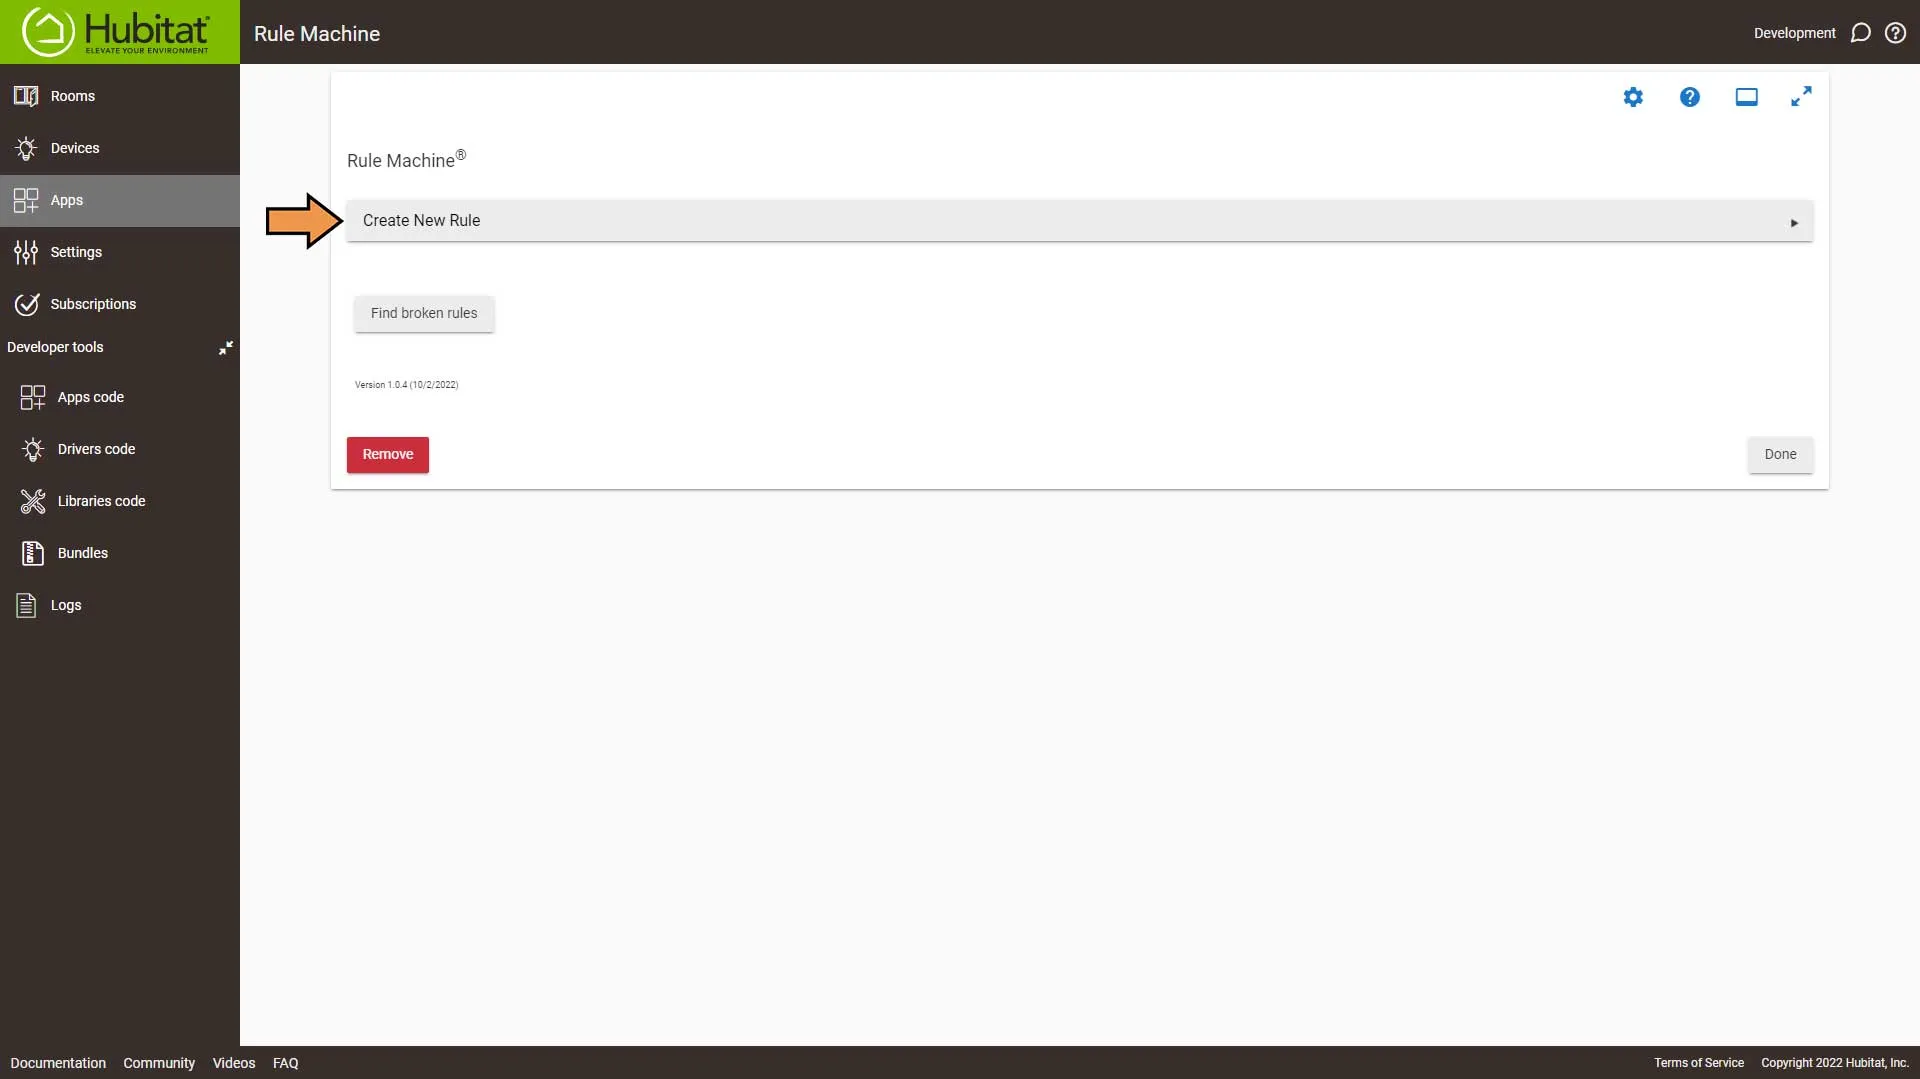
Select Create New Room Lights Automation…
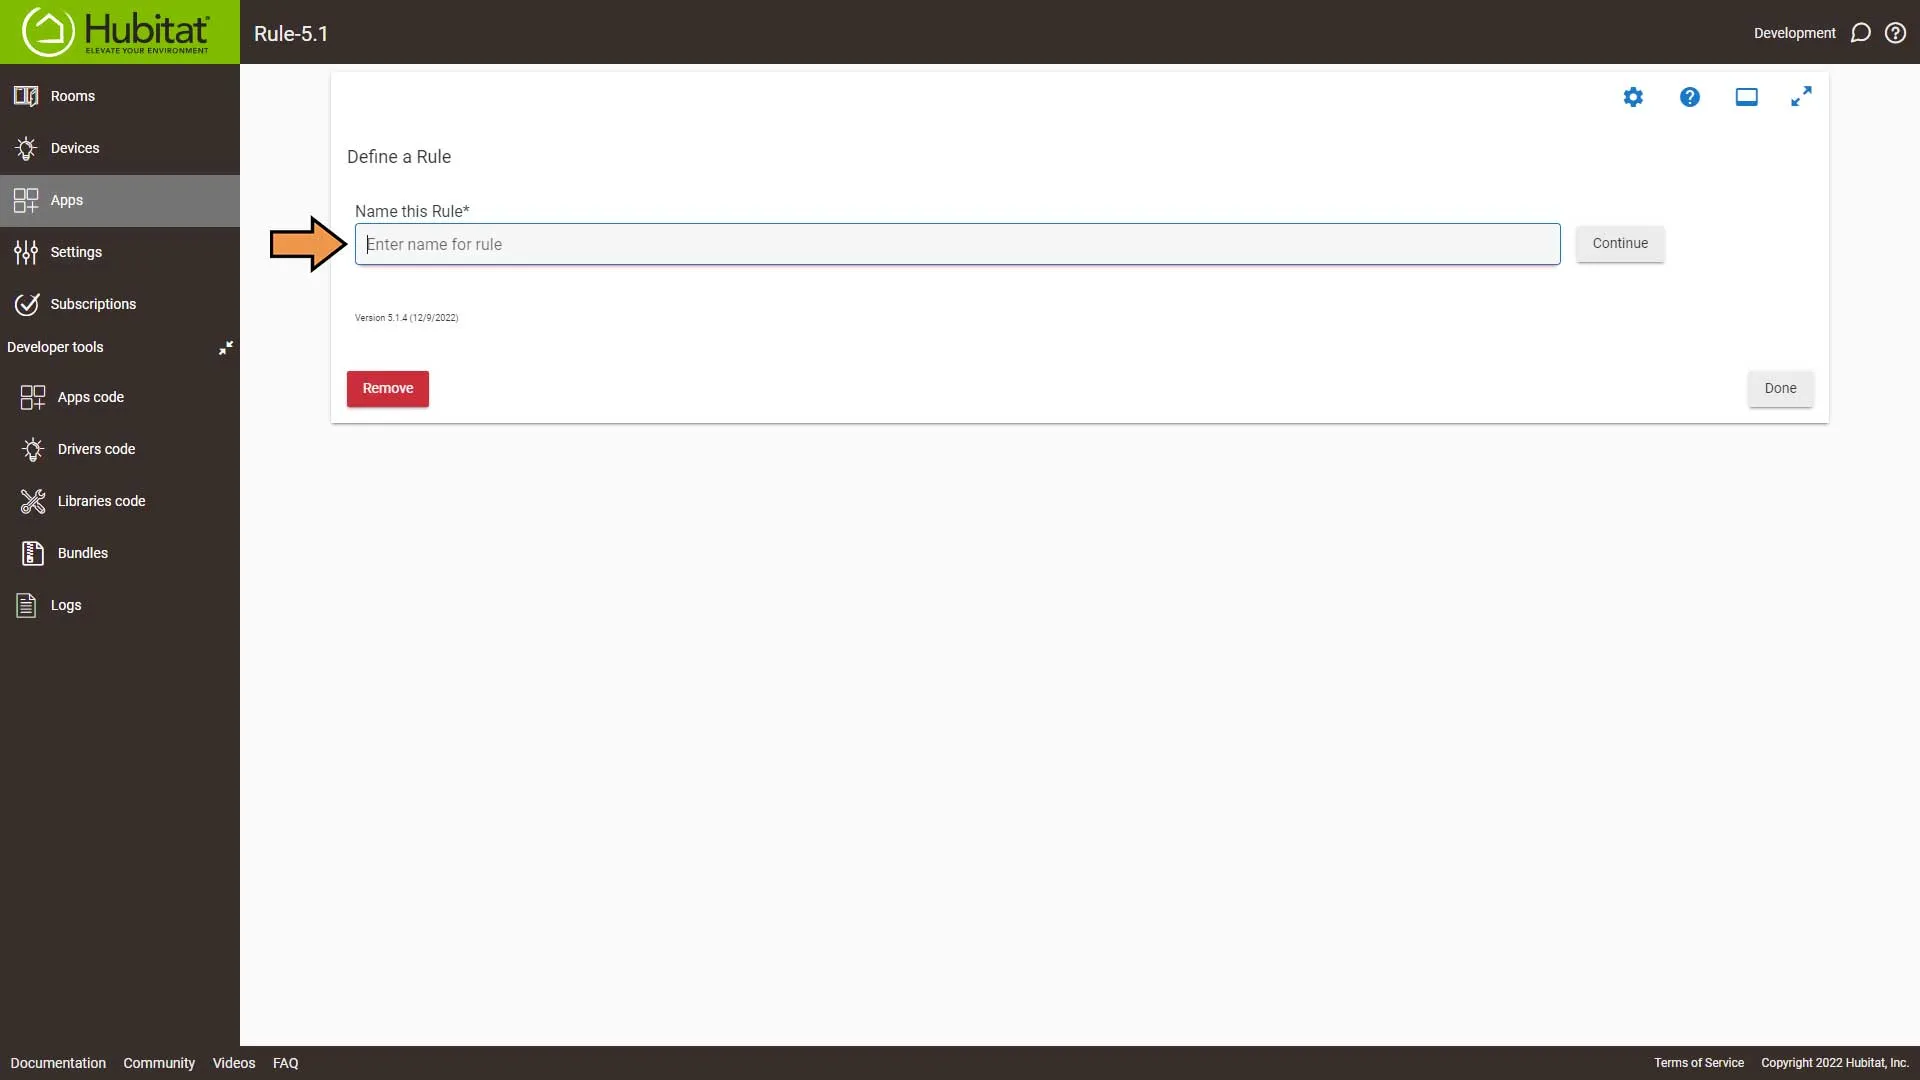
Enter a name for the Rule and hit Enter.
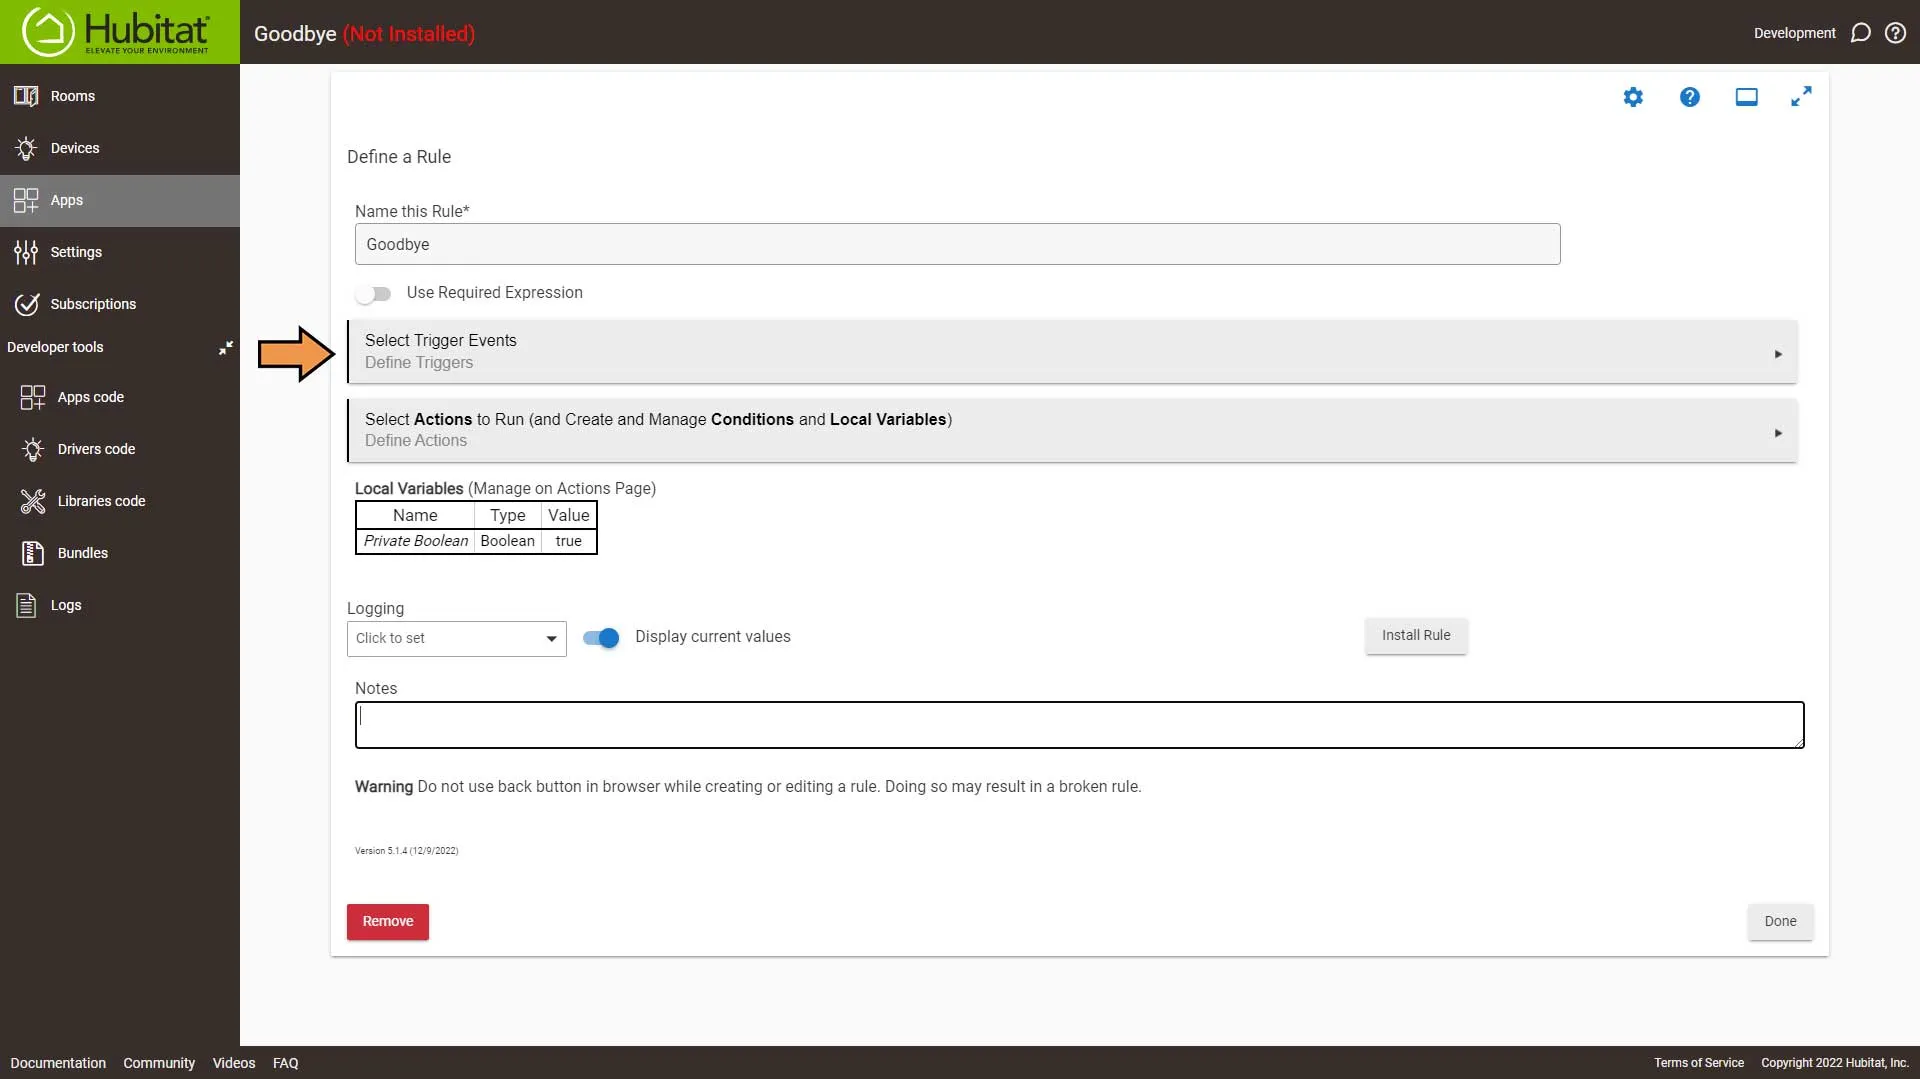
Select Trigger Event.
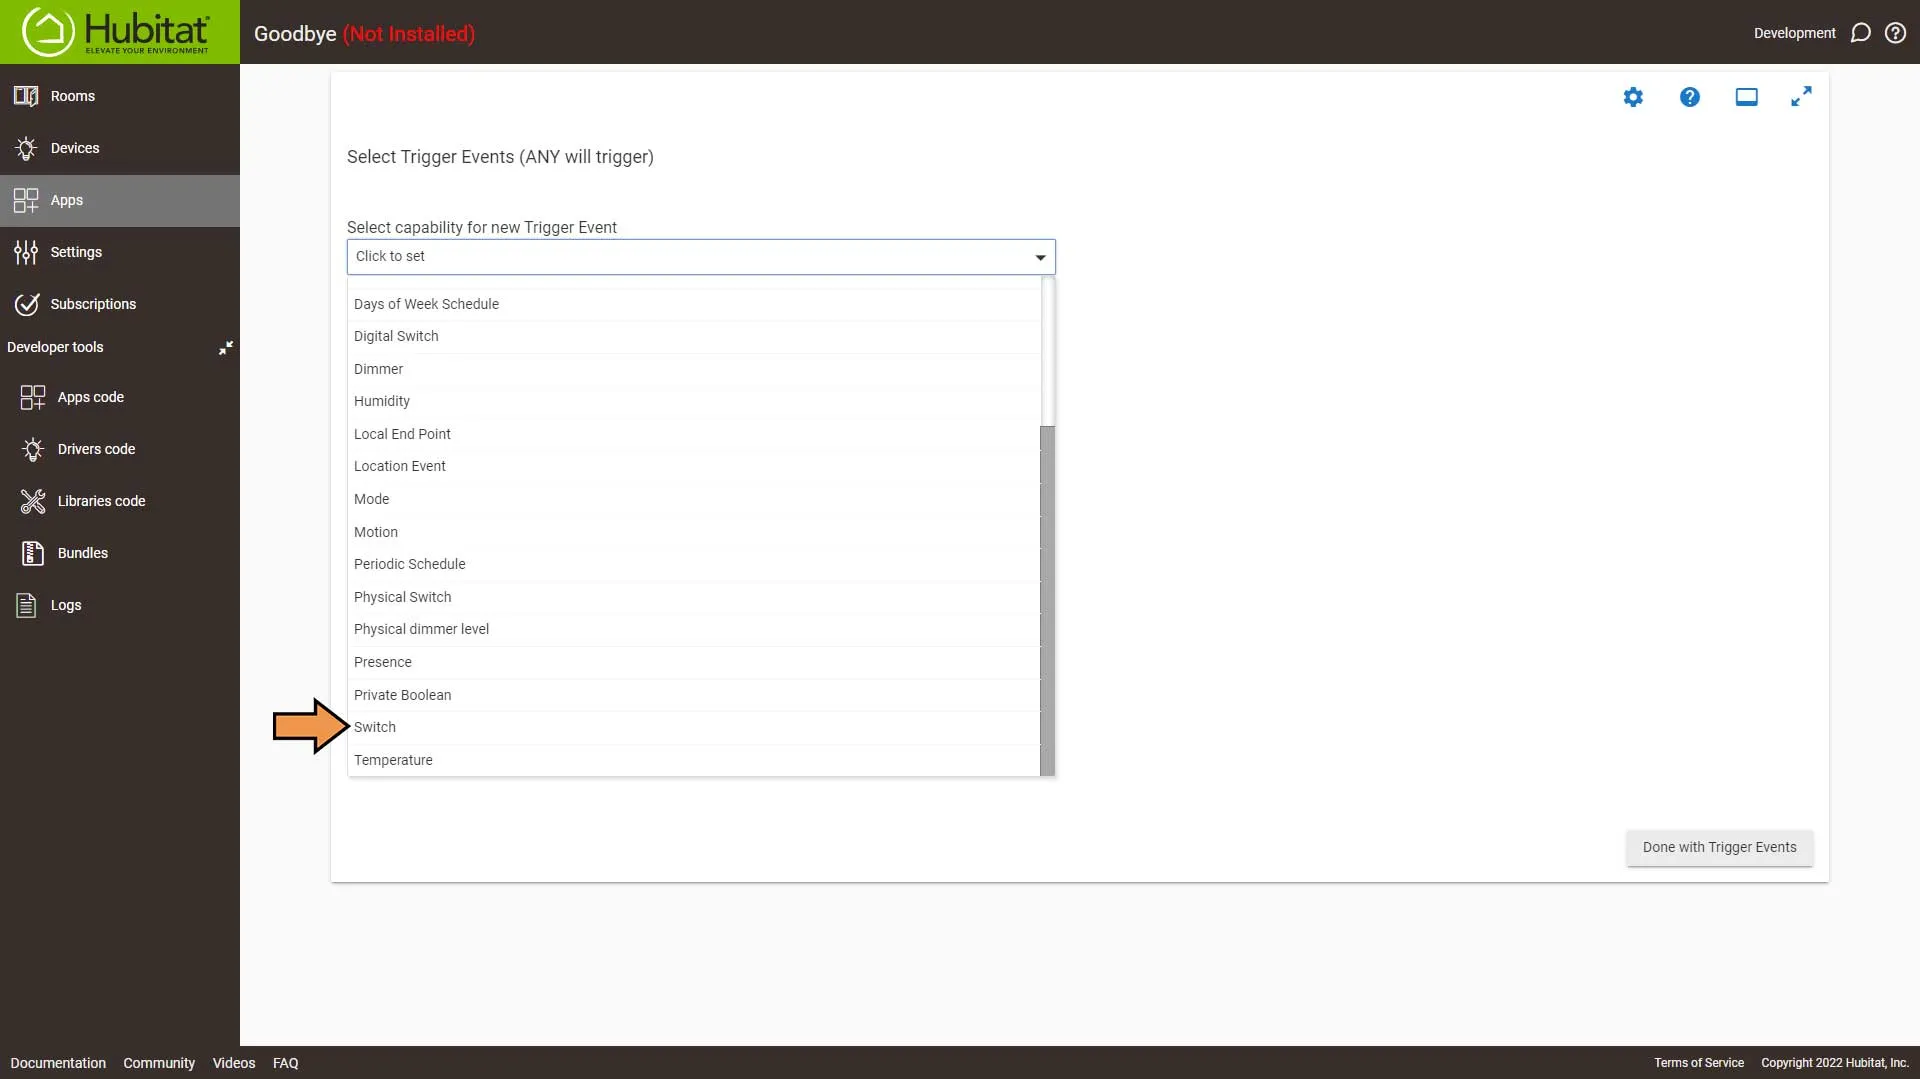
From the Capability drop-down, select Switch.
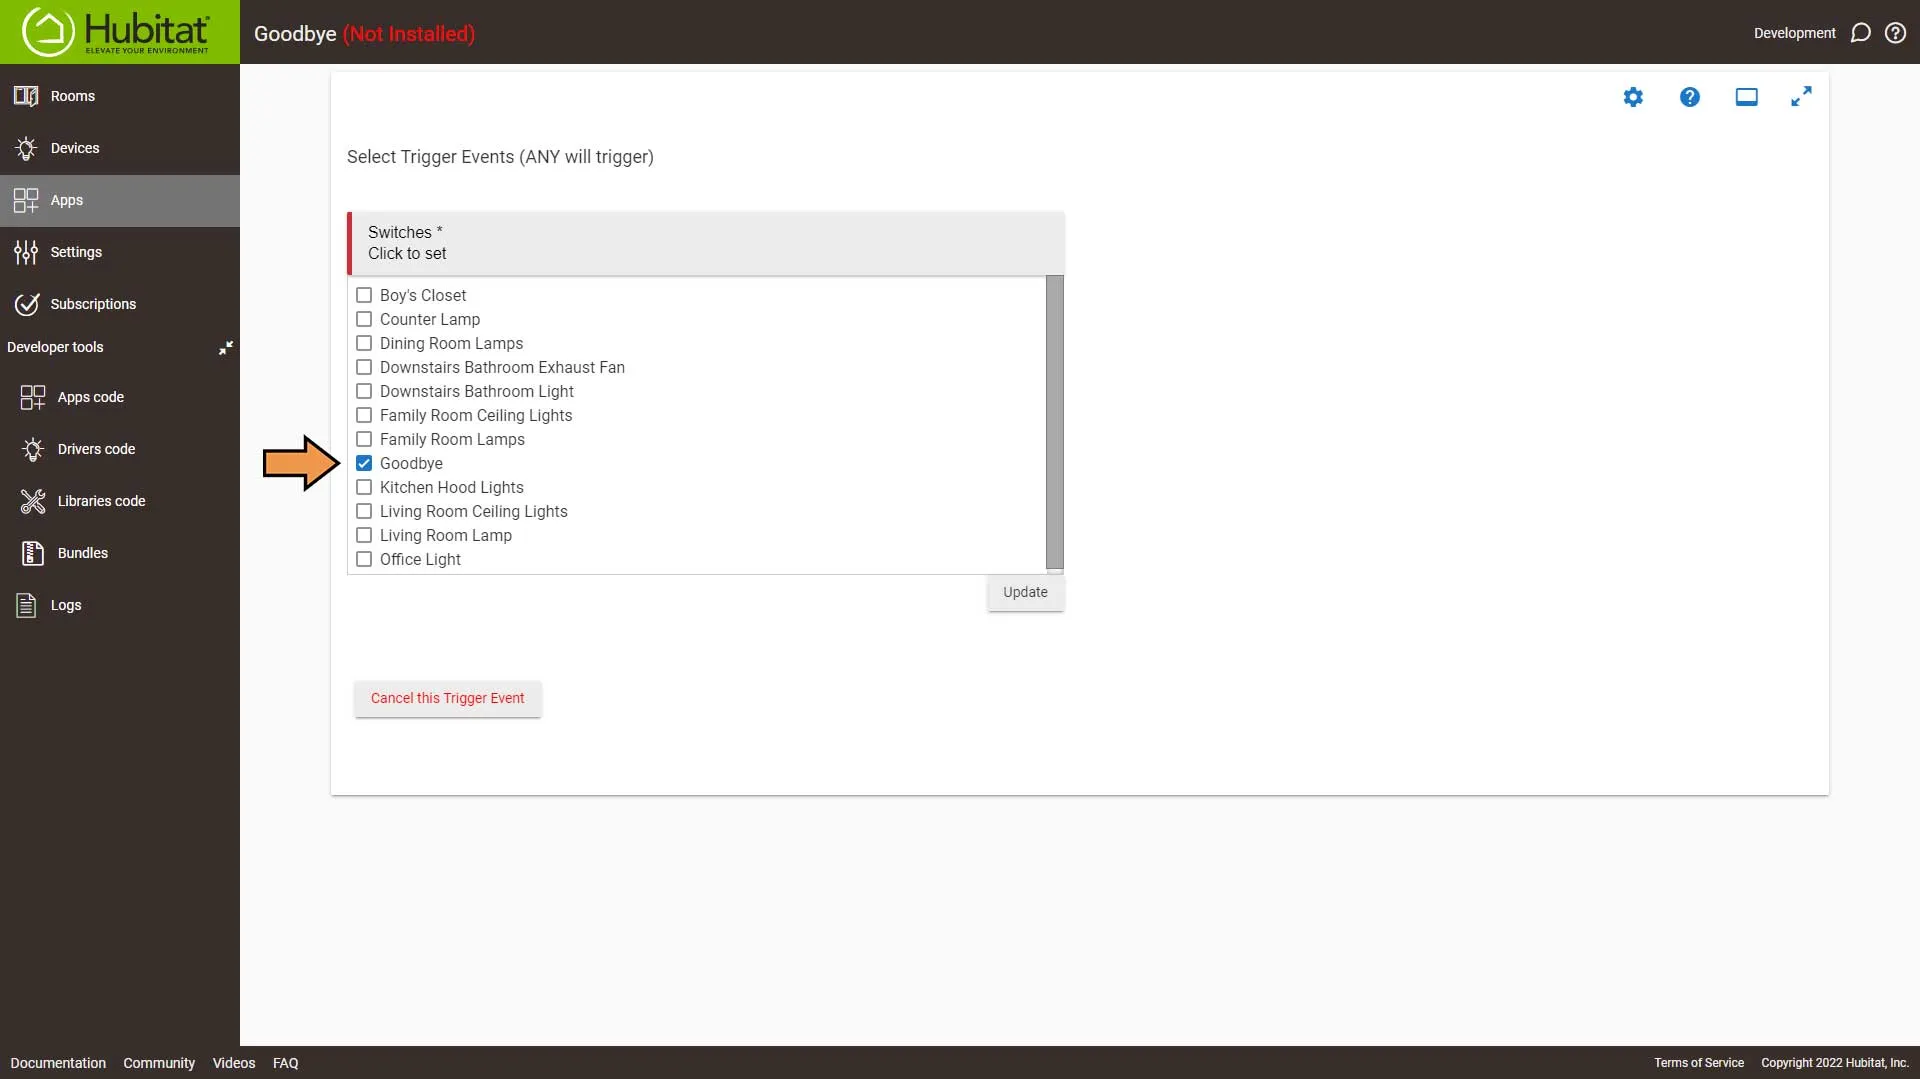
Then, from the Switches drop-down, select the virtual switch we created earlier.
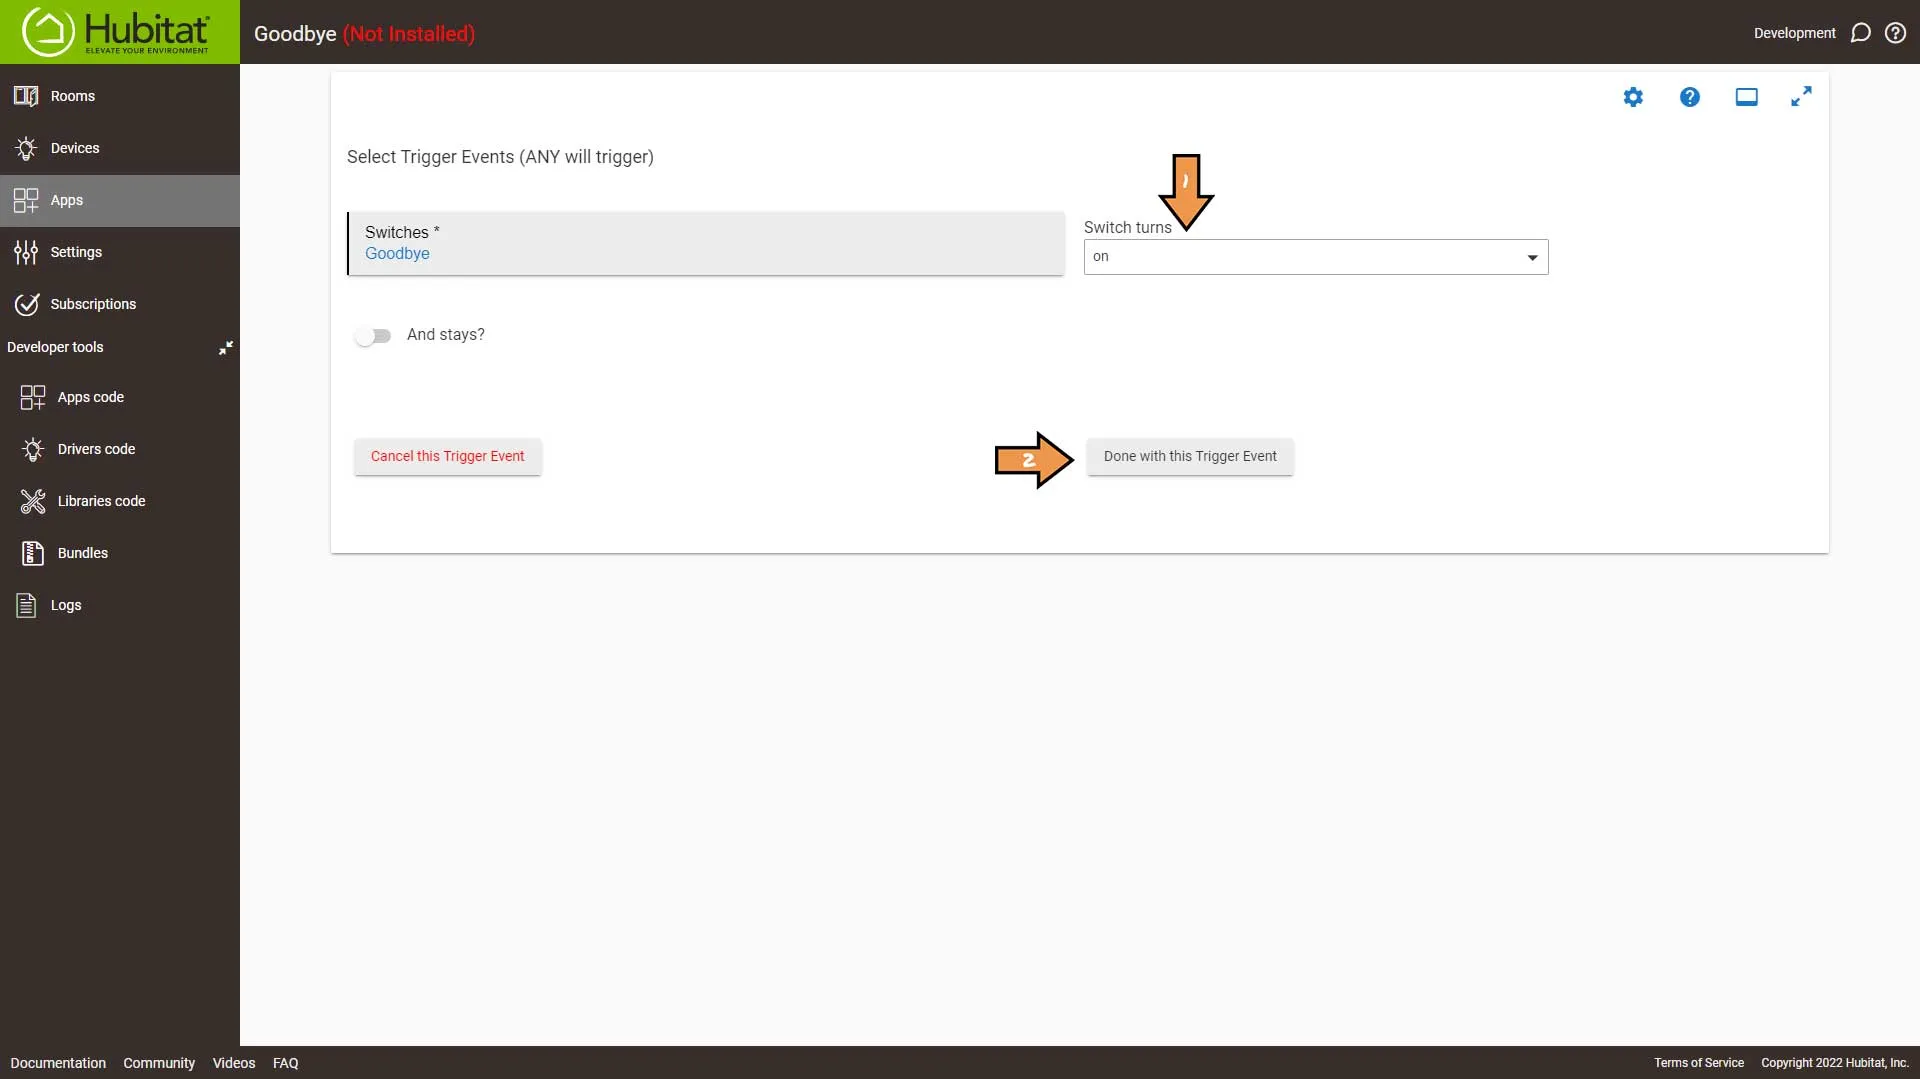
From the Switch Action drop-down make sure it’s set to On. Then click the Done with this Trigger Event.
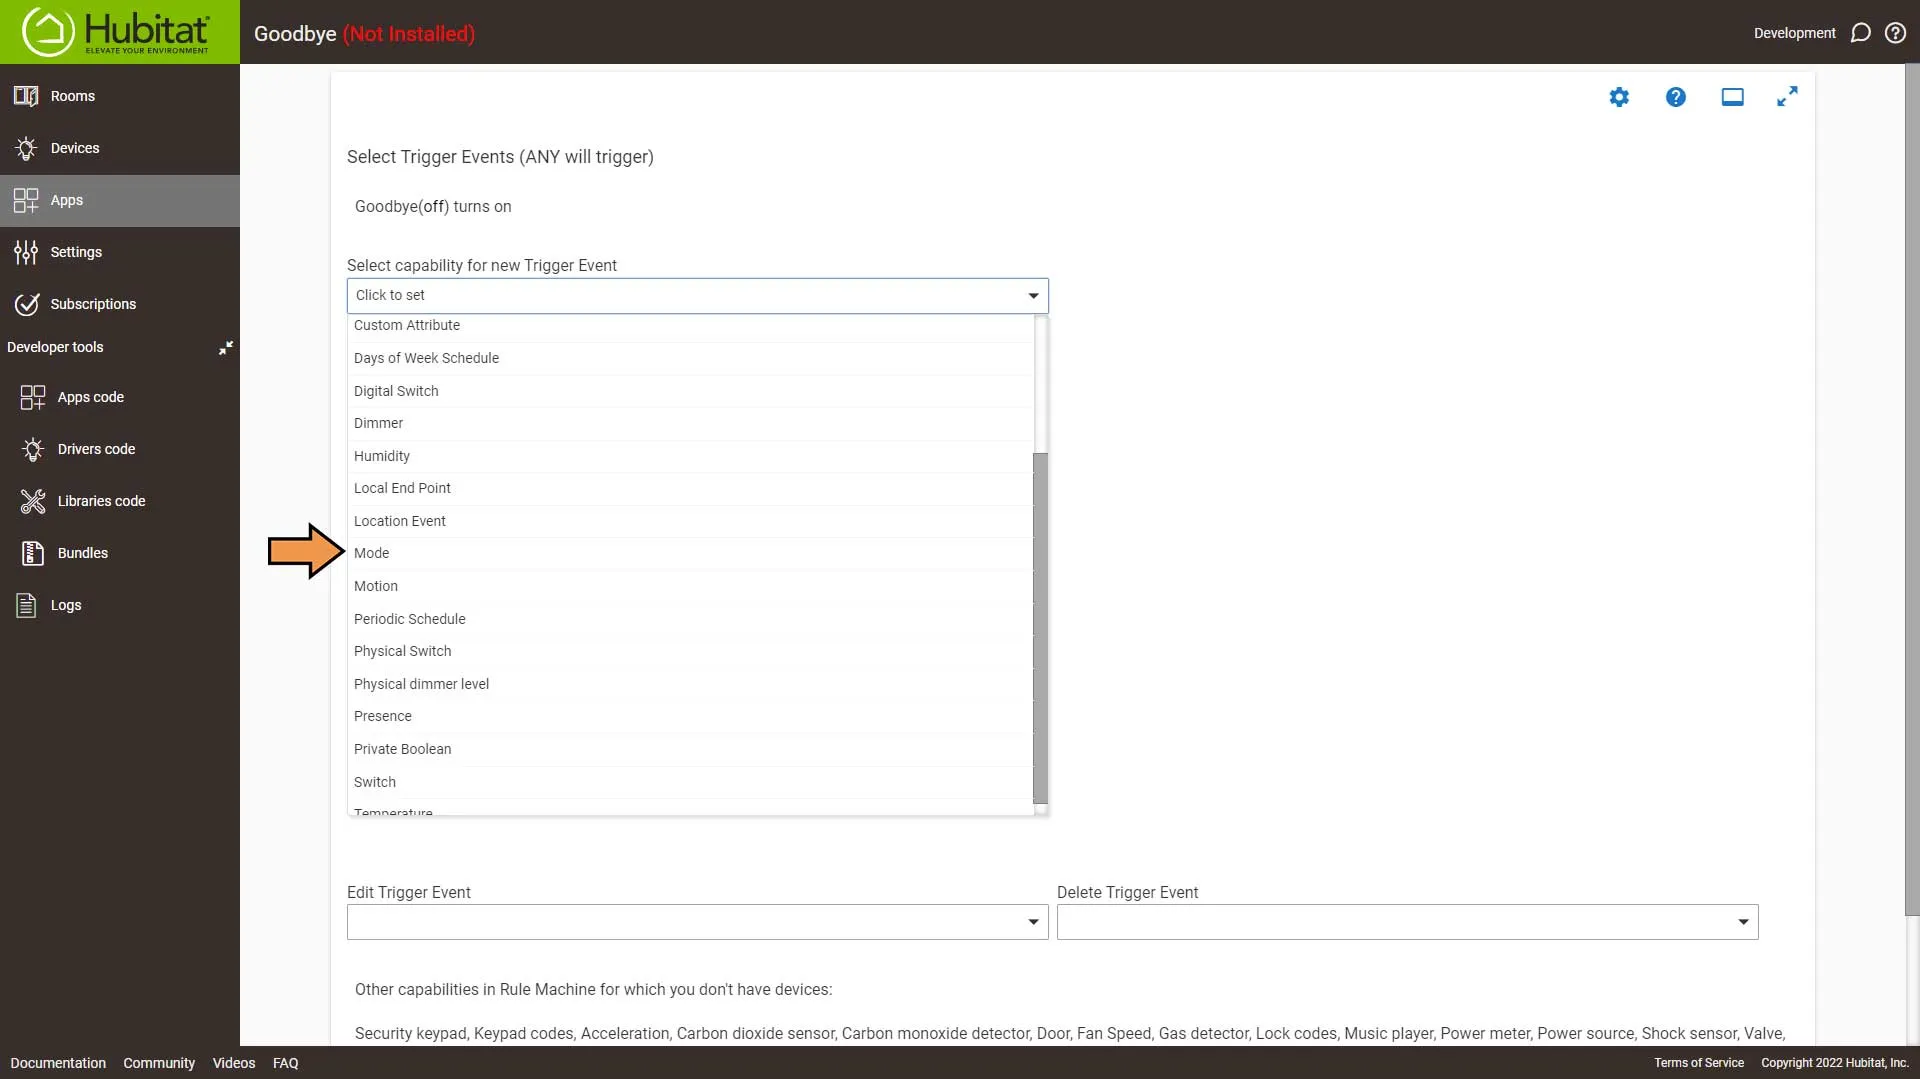
From the Capability drop-down, select Mode.
Select Away mode and click Done with this Trigger Event.
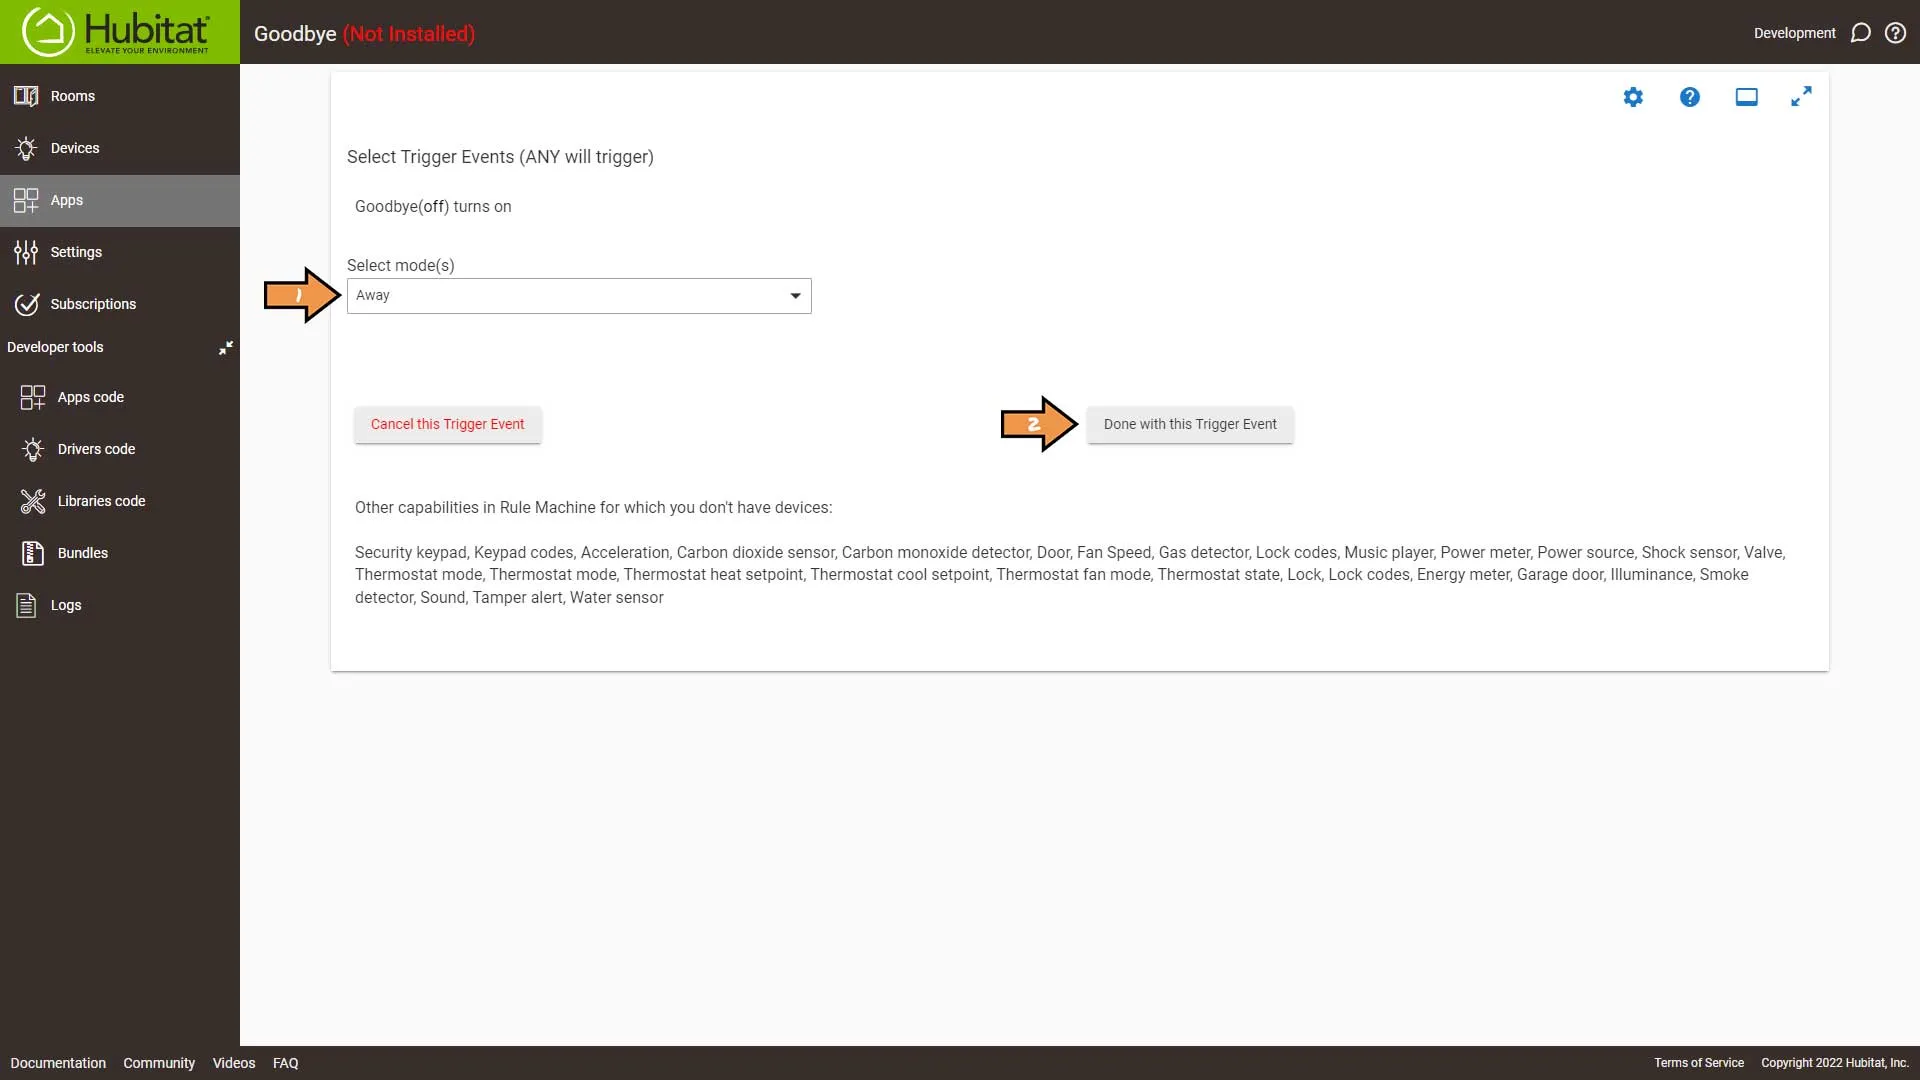
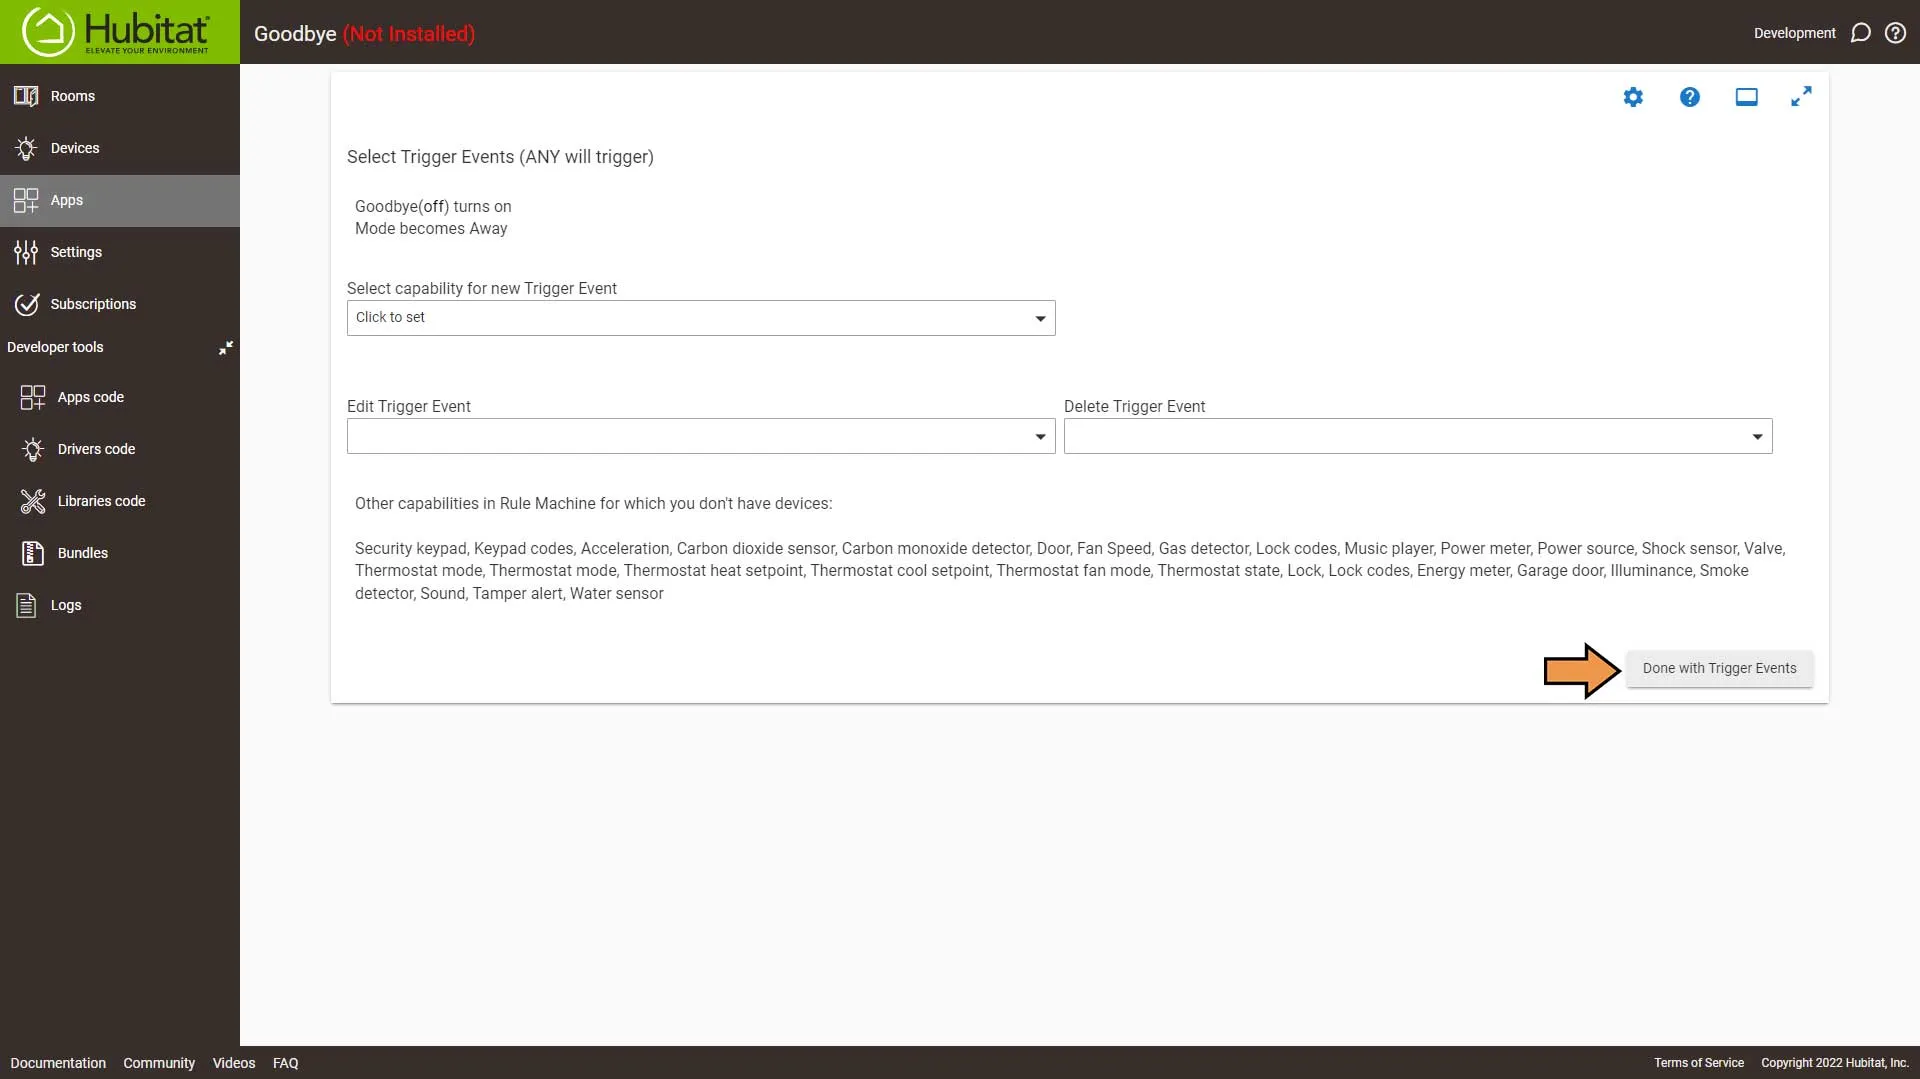
On the Select Trigger Events page, click Don with Trigger Events.
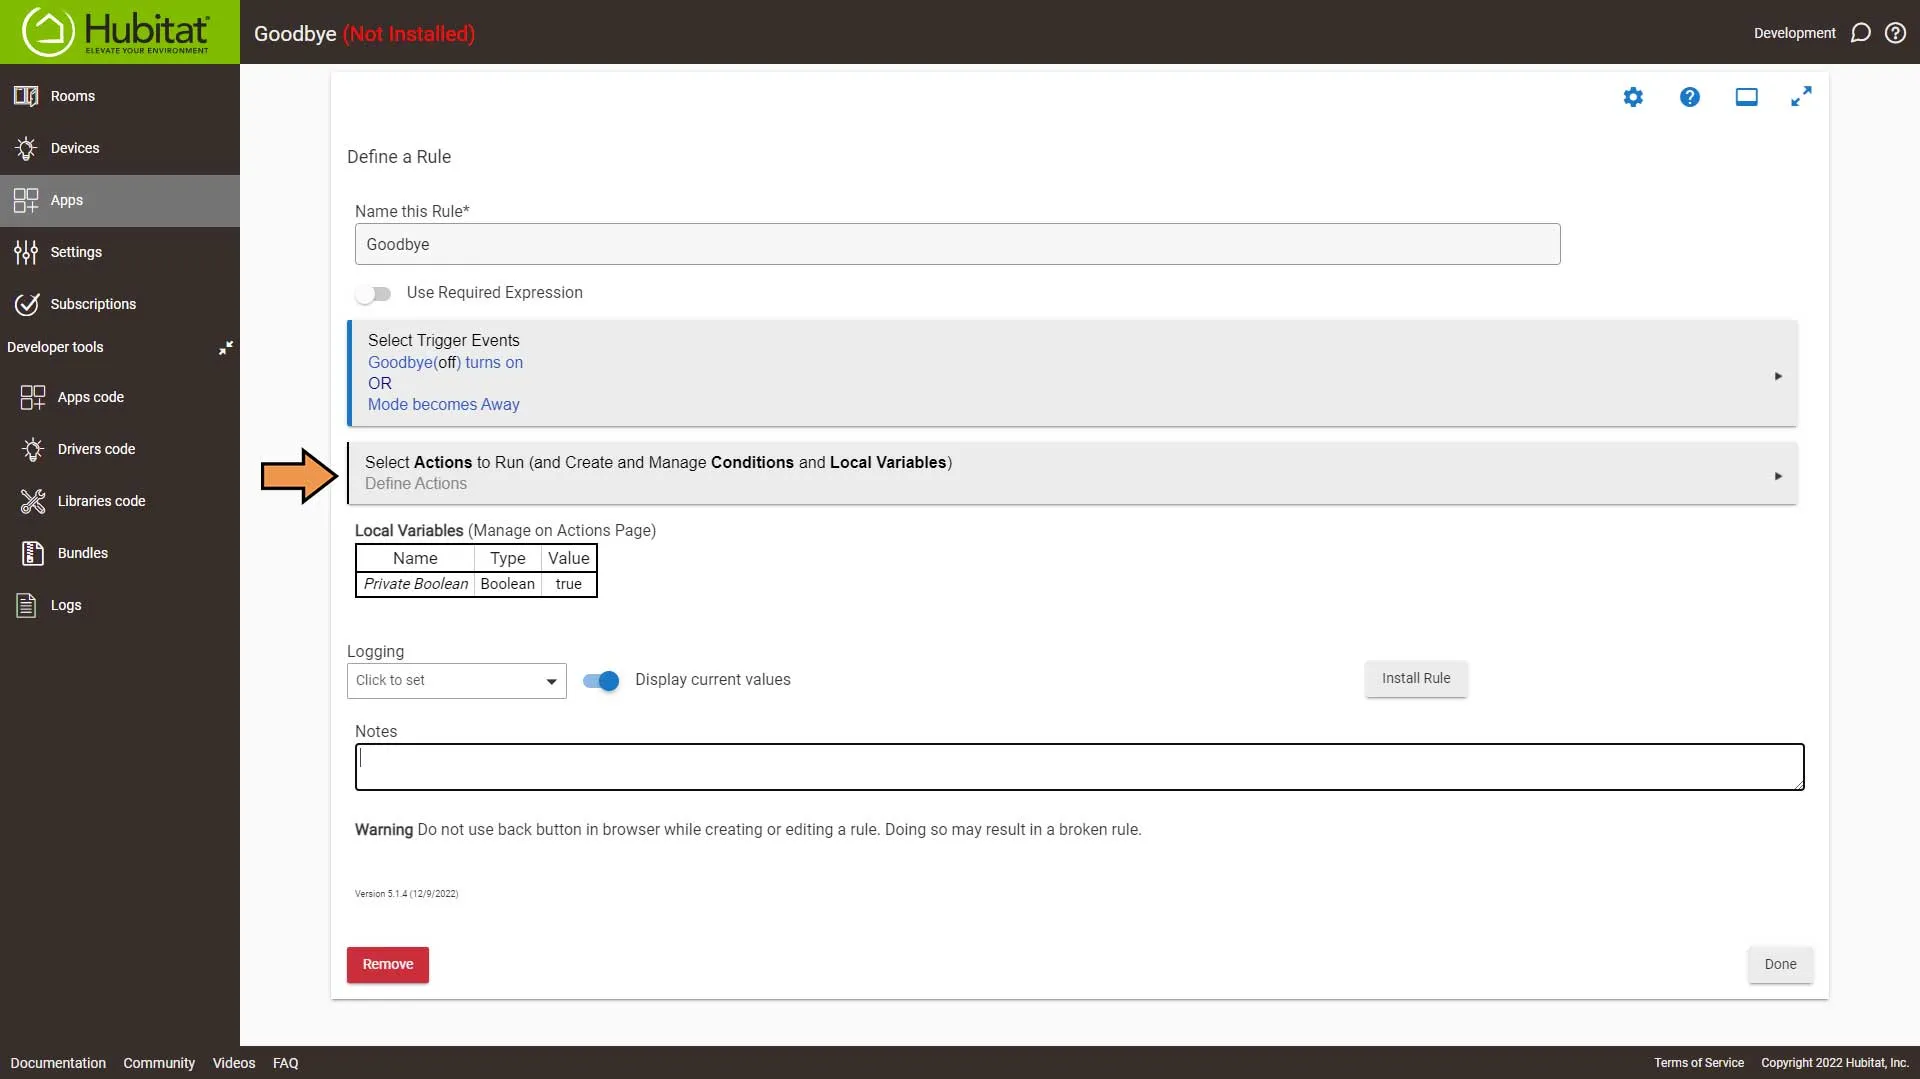
Select Actions to Run.
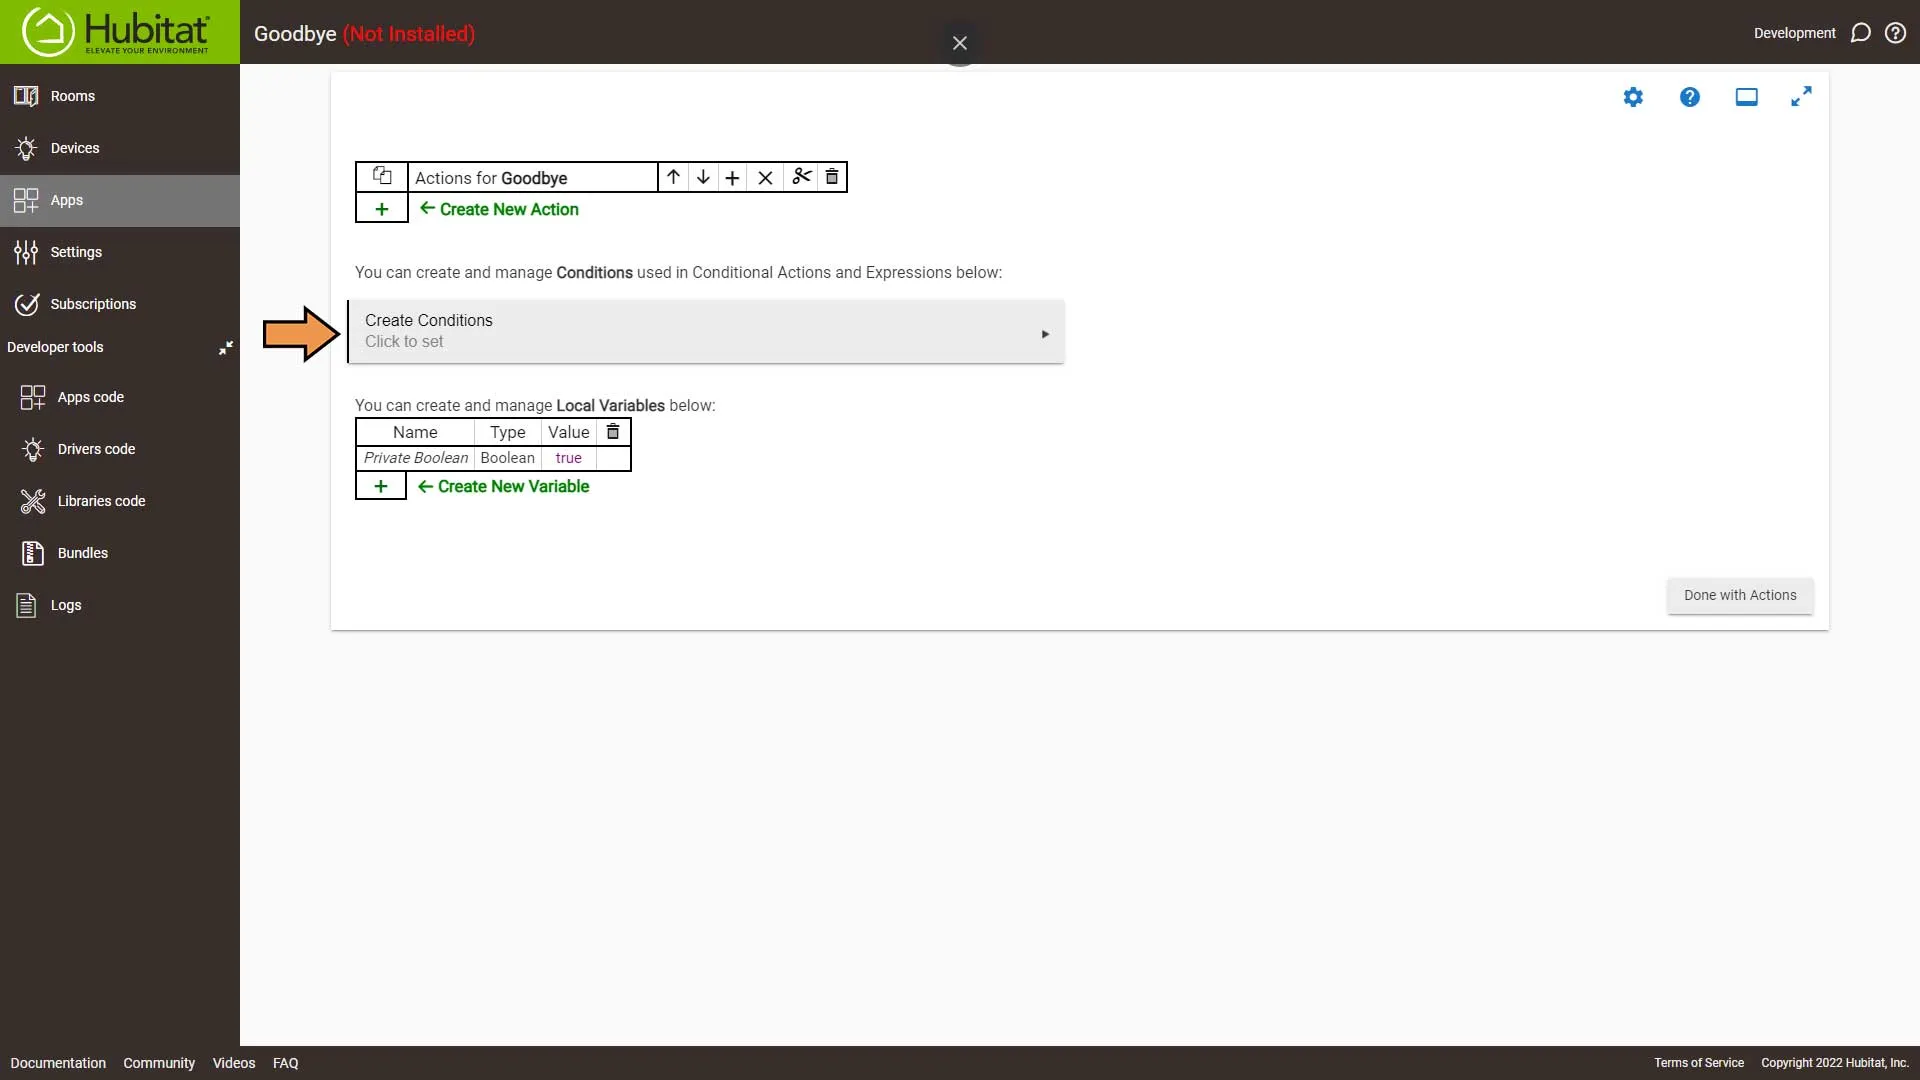
Then click Create Conditions.
From the Select capability for new Condition drop-down, select Mode.
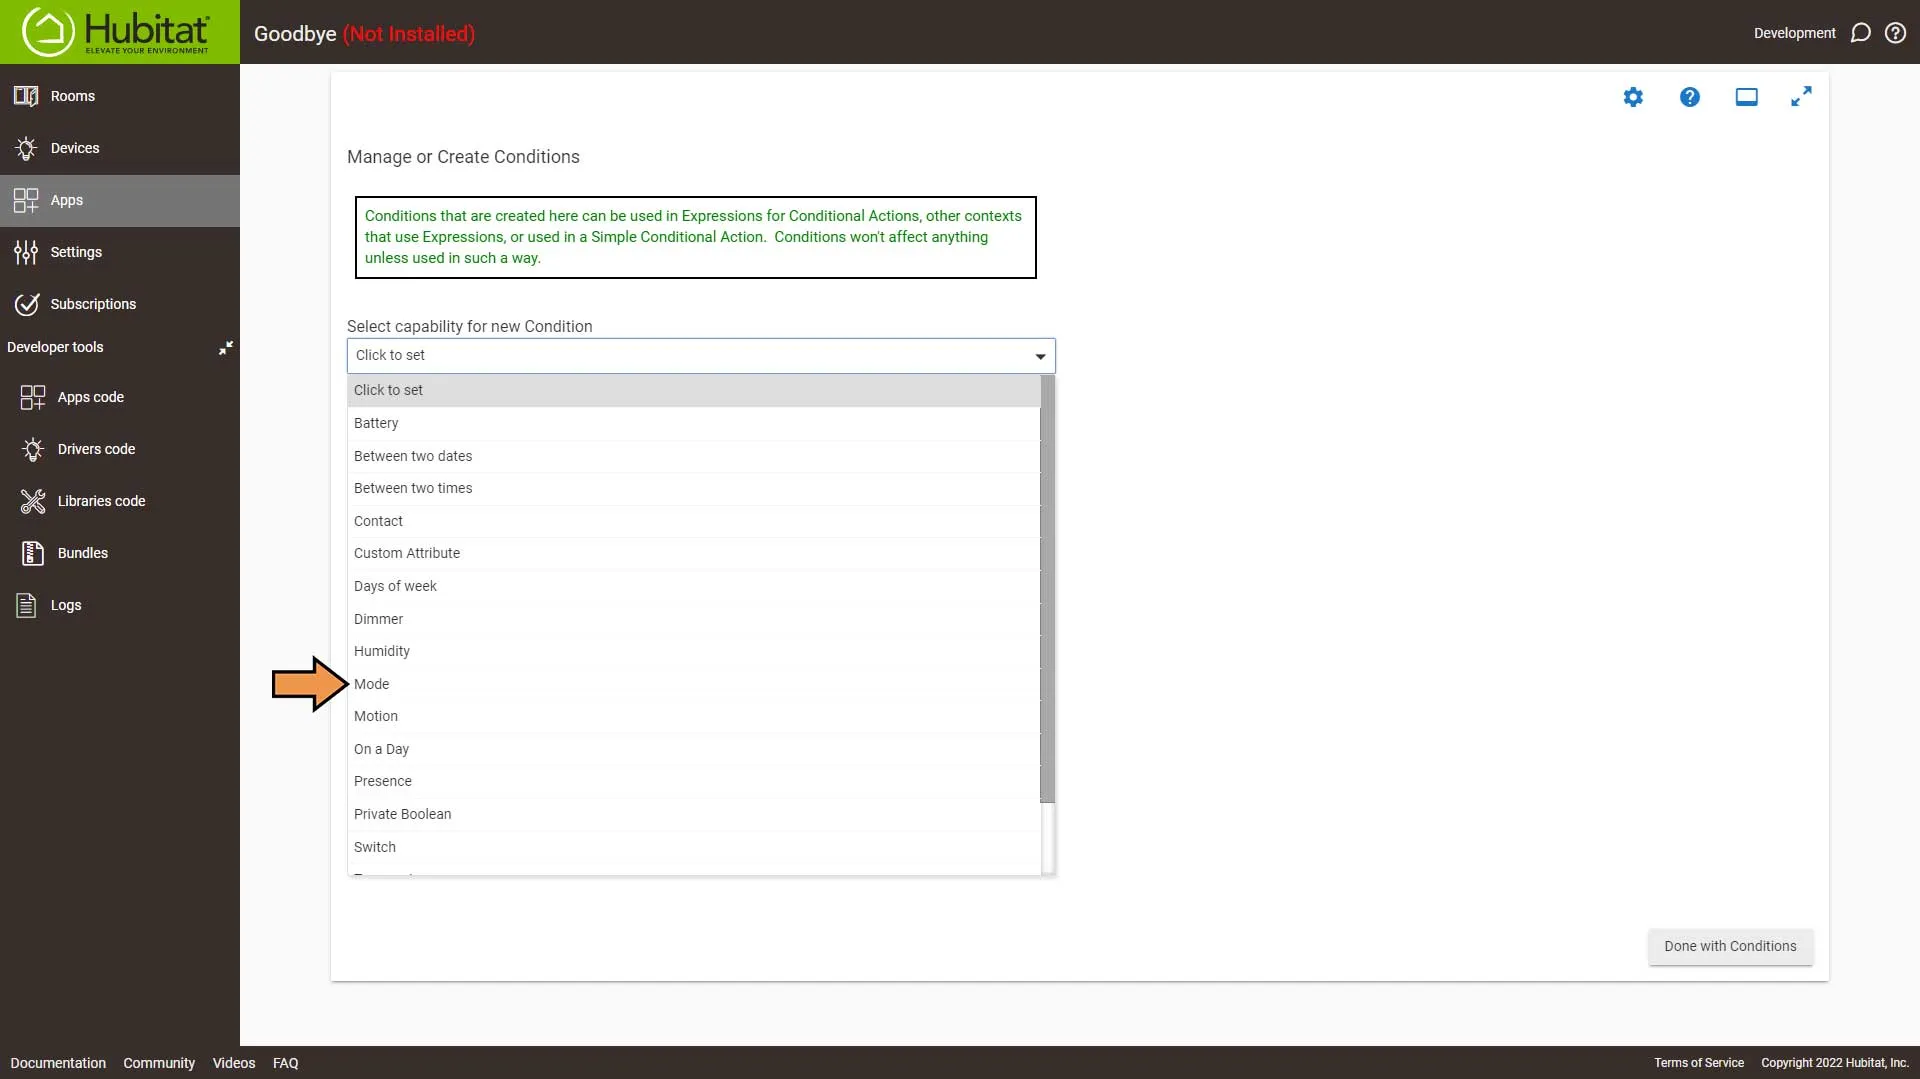
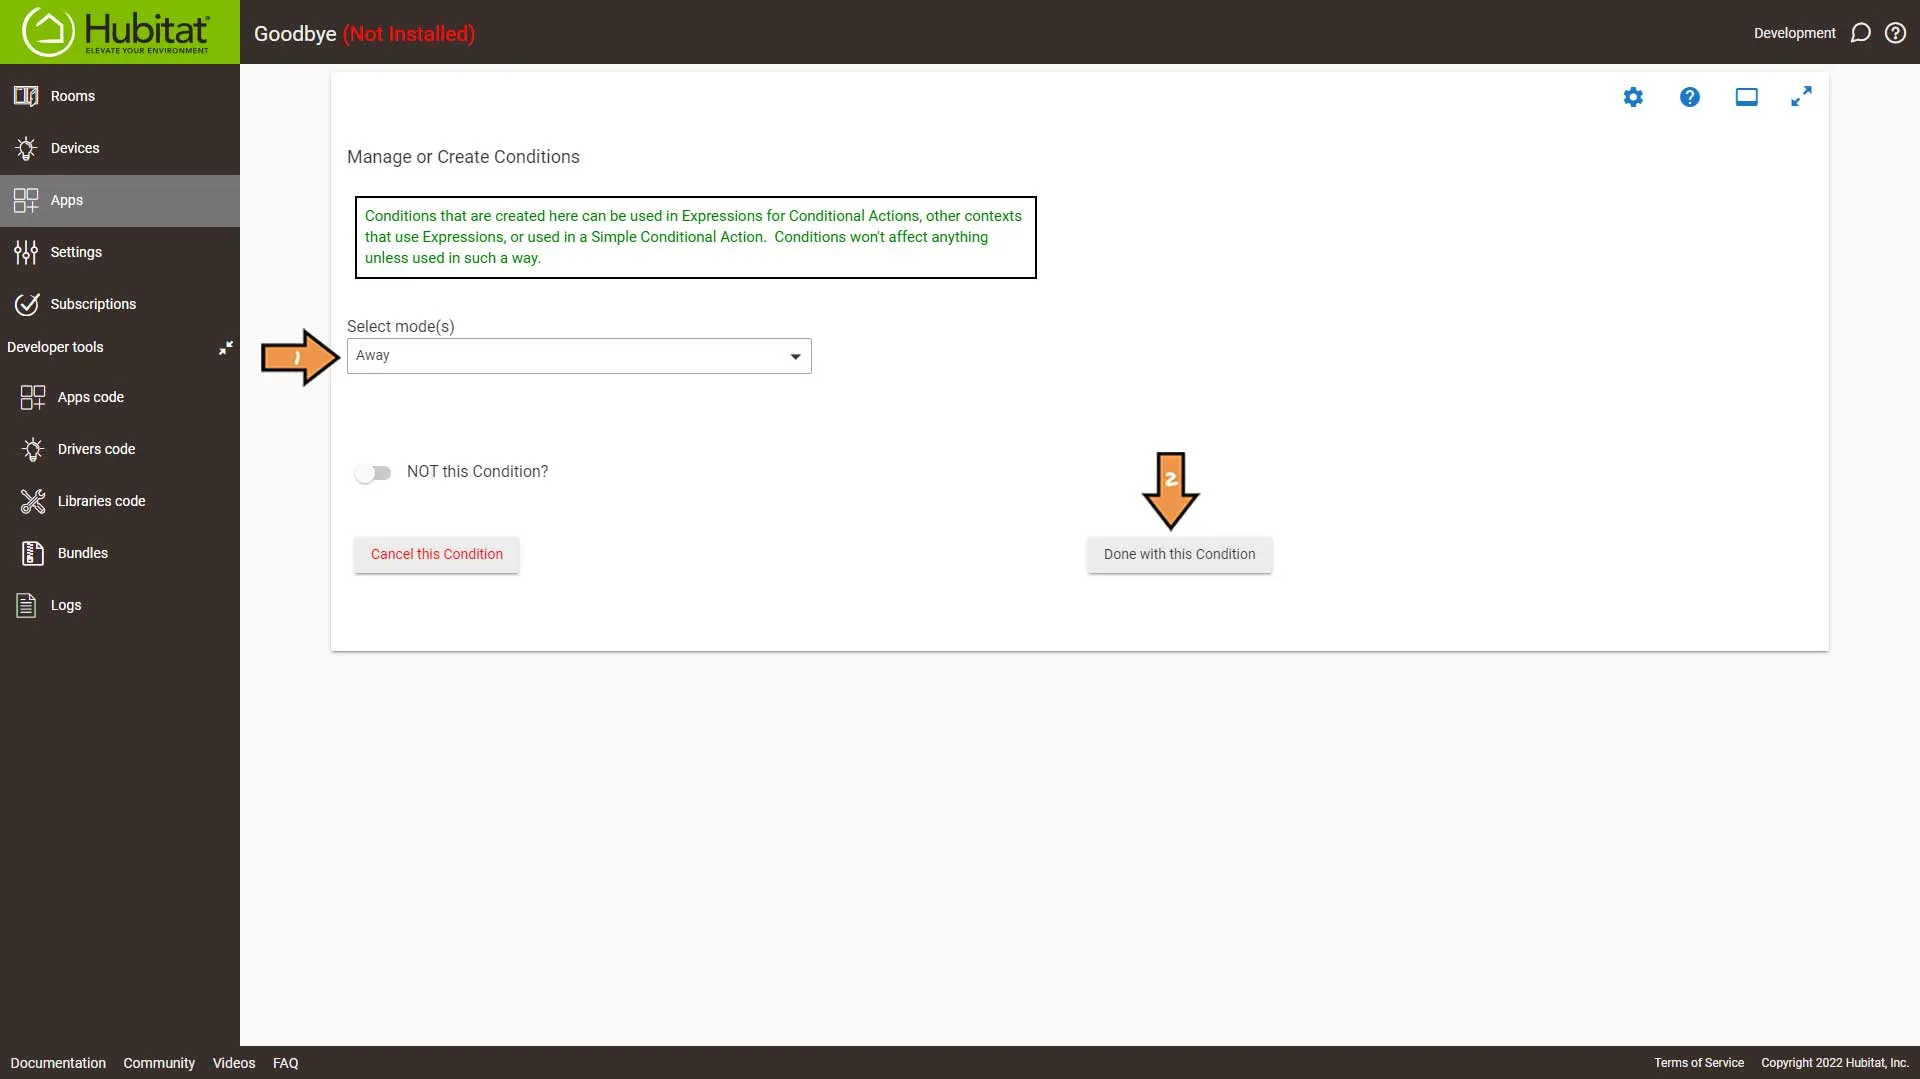
Select Away mode and click the Done with this Condition button.
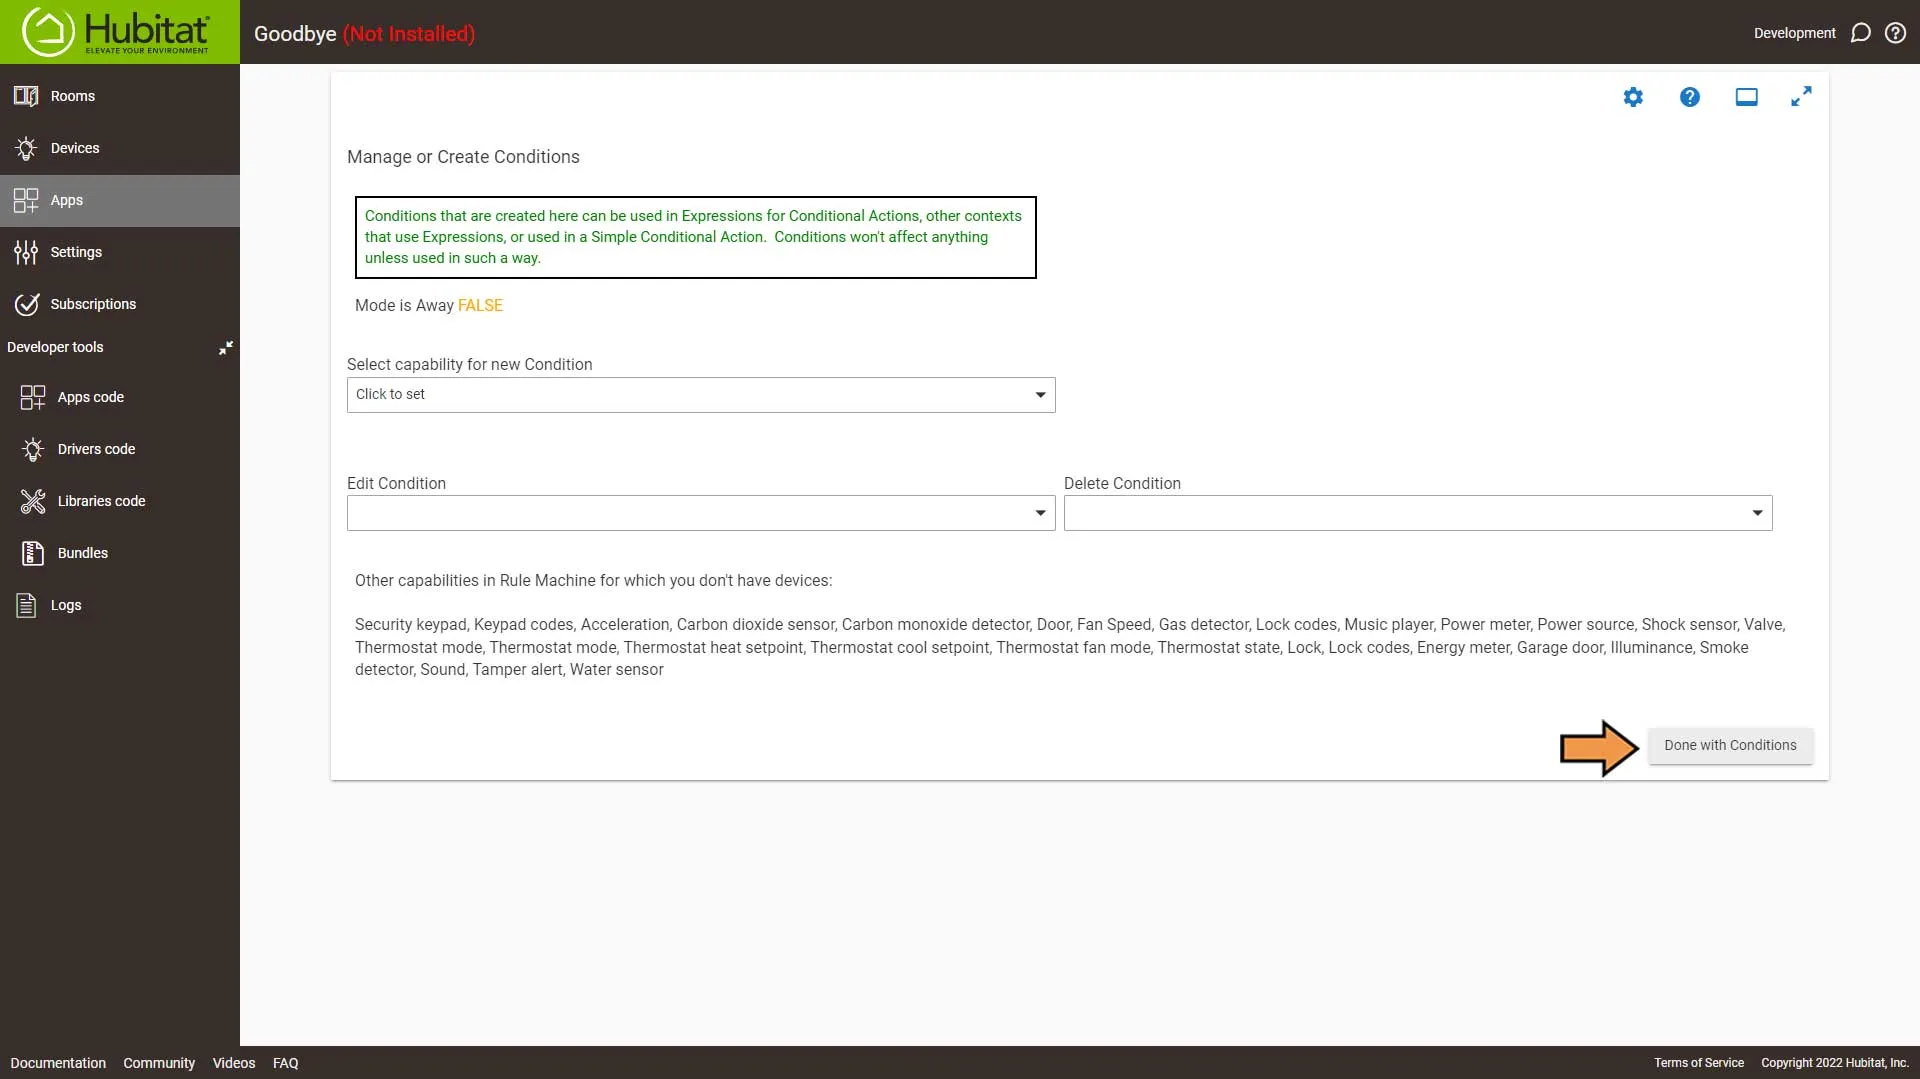
Then on the Manage or Create Conditions screen, click Done with Conditions.
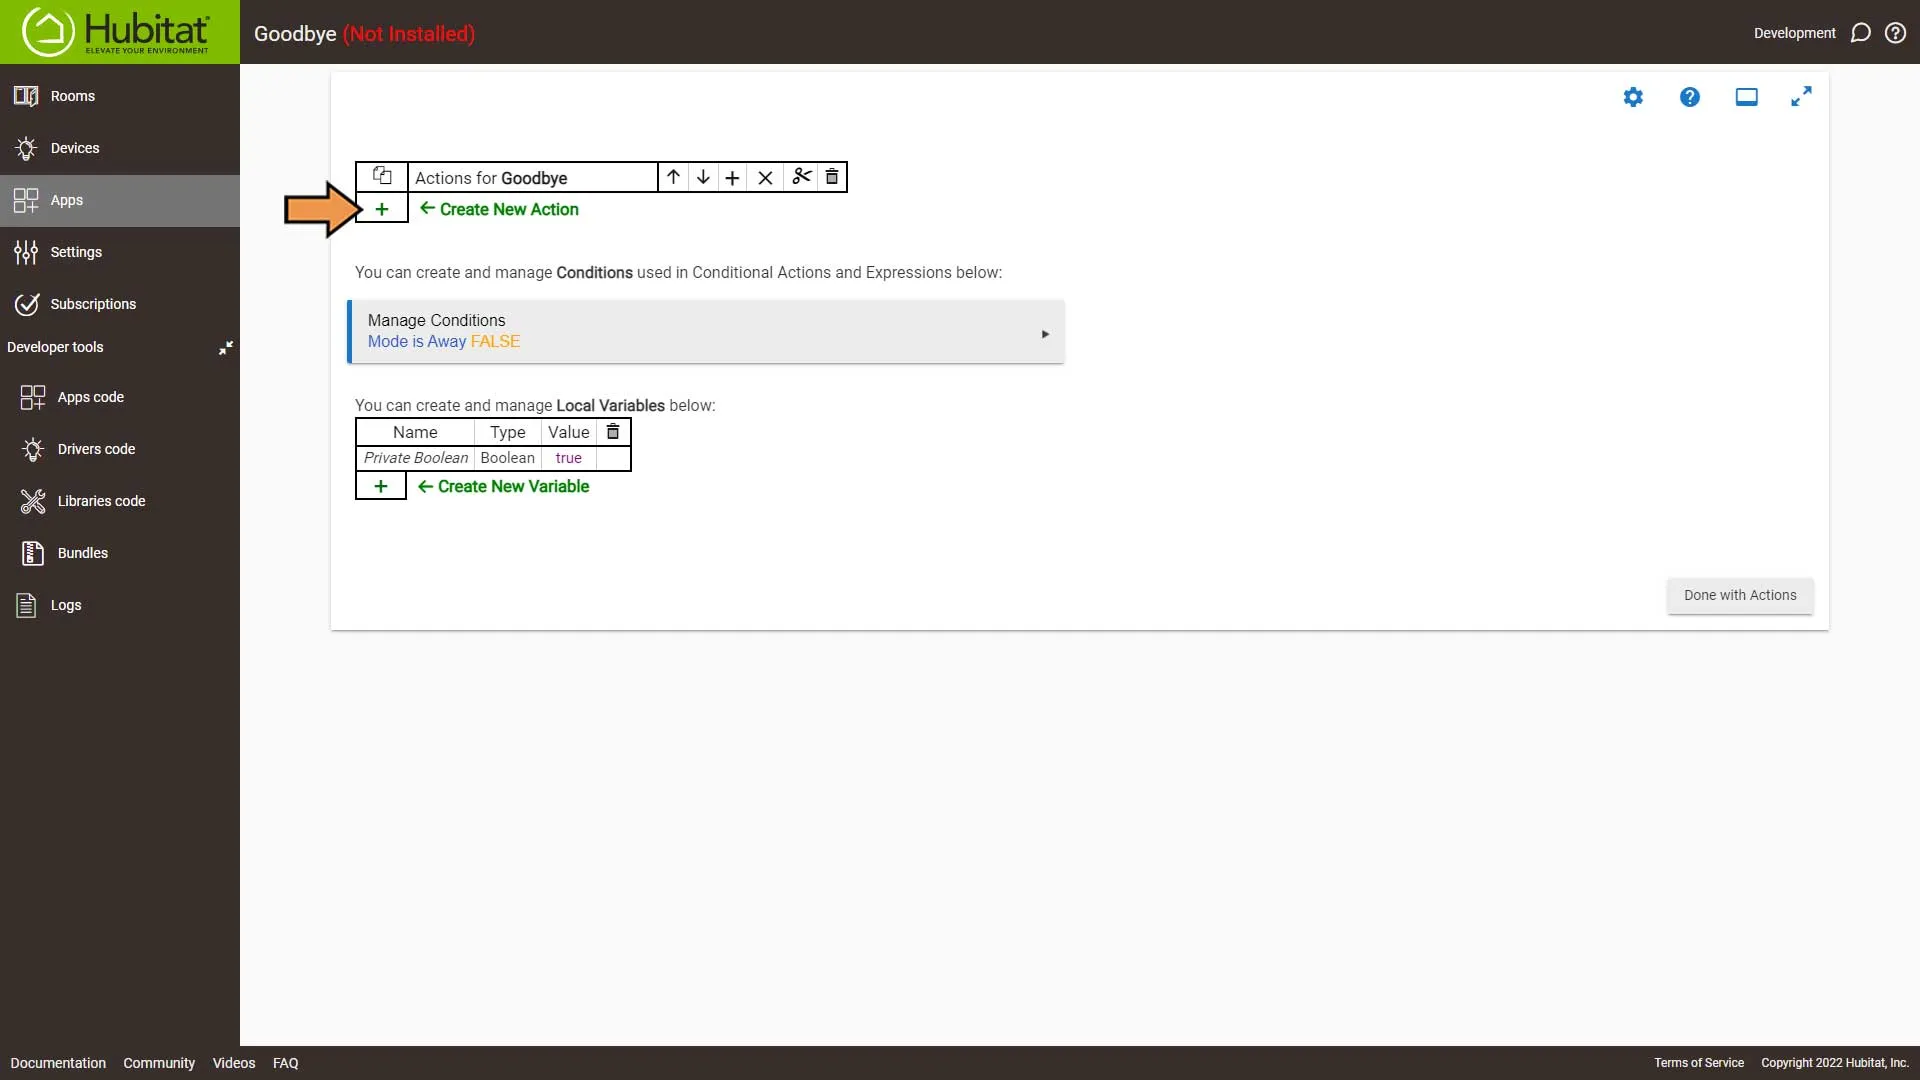
Select the Green Plus Sign to Add New Action.
In the Select Action Type drop-down, select Control Switches option.
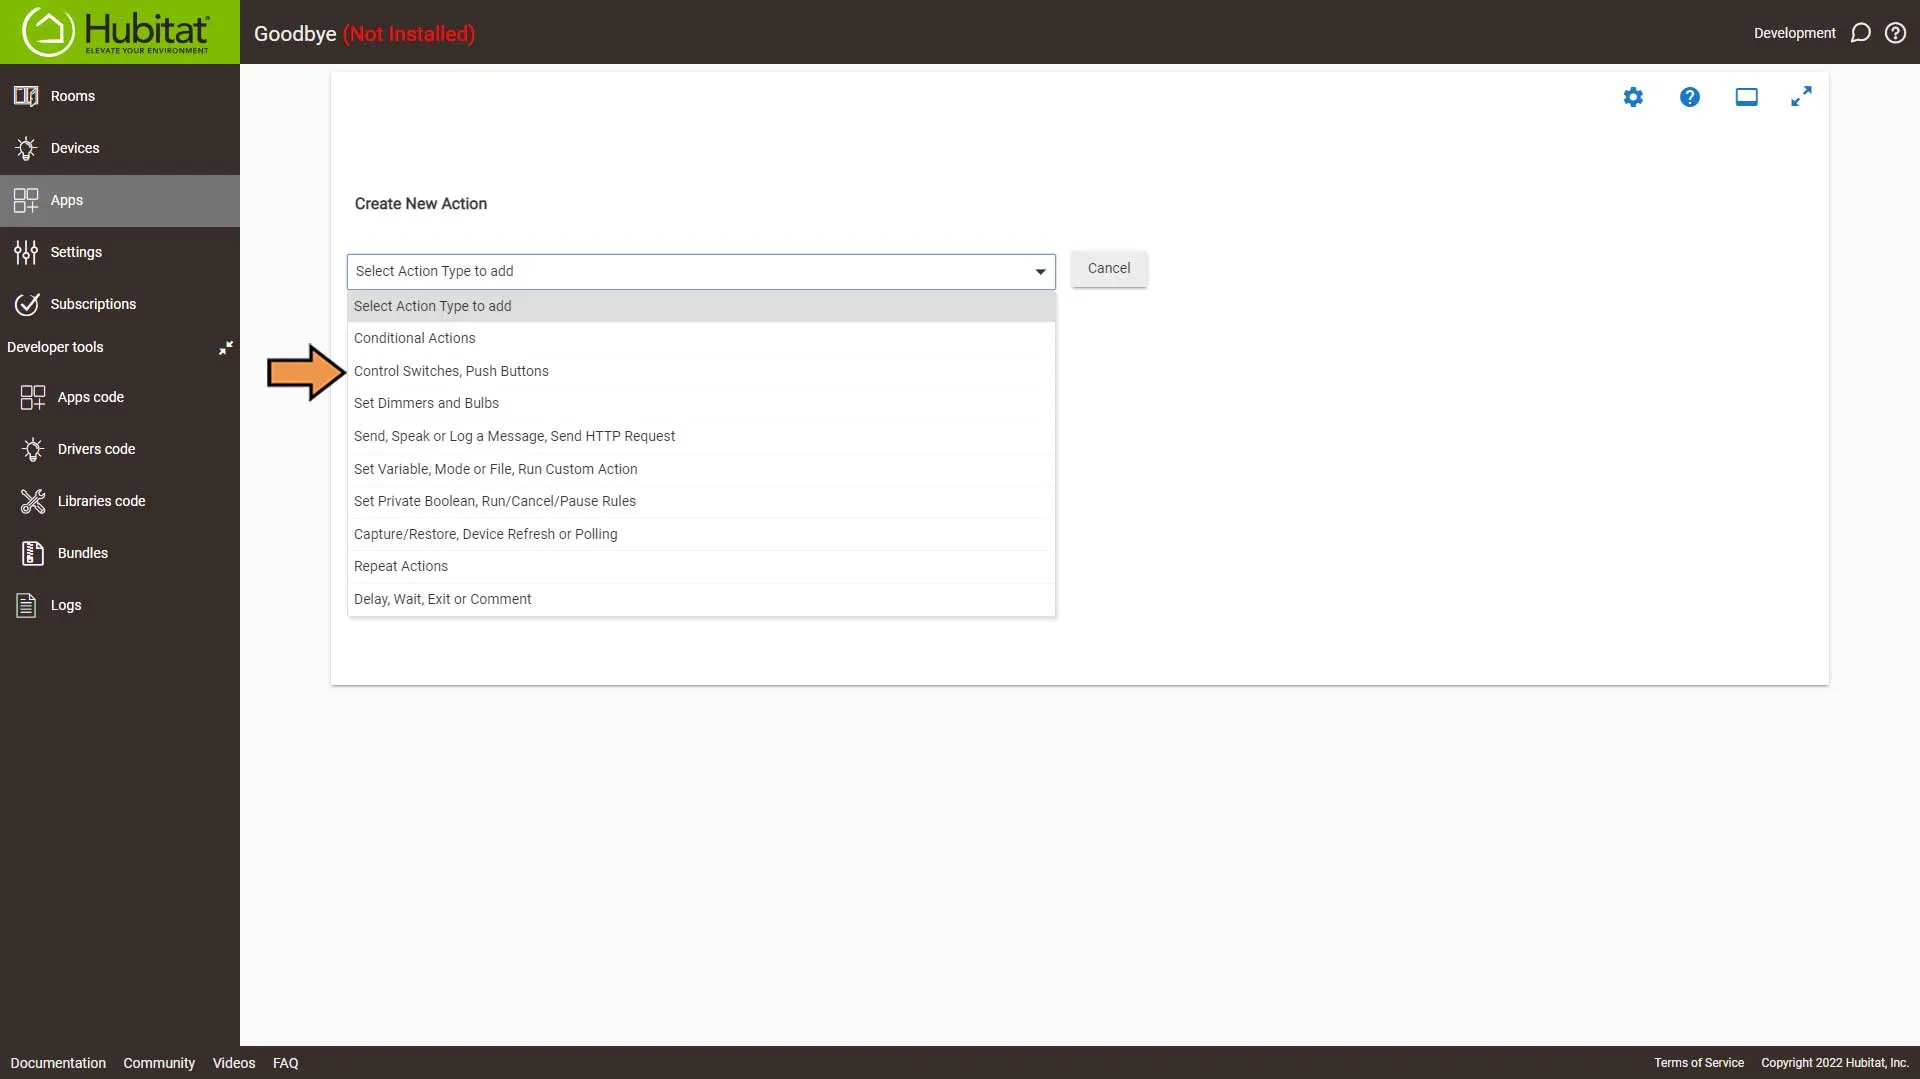
Then in the Select Which Action, select the Turn switches on/off option.
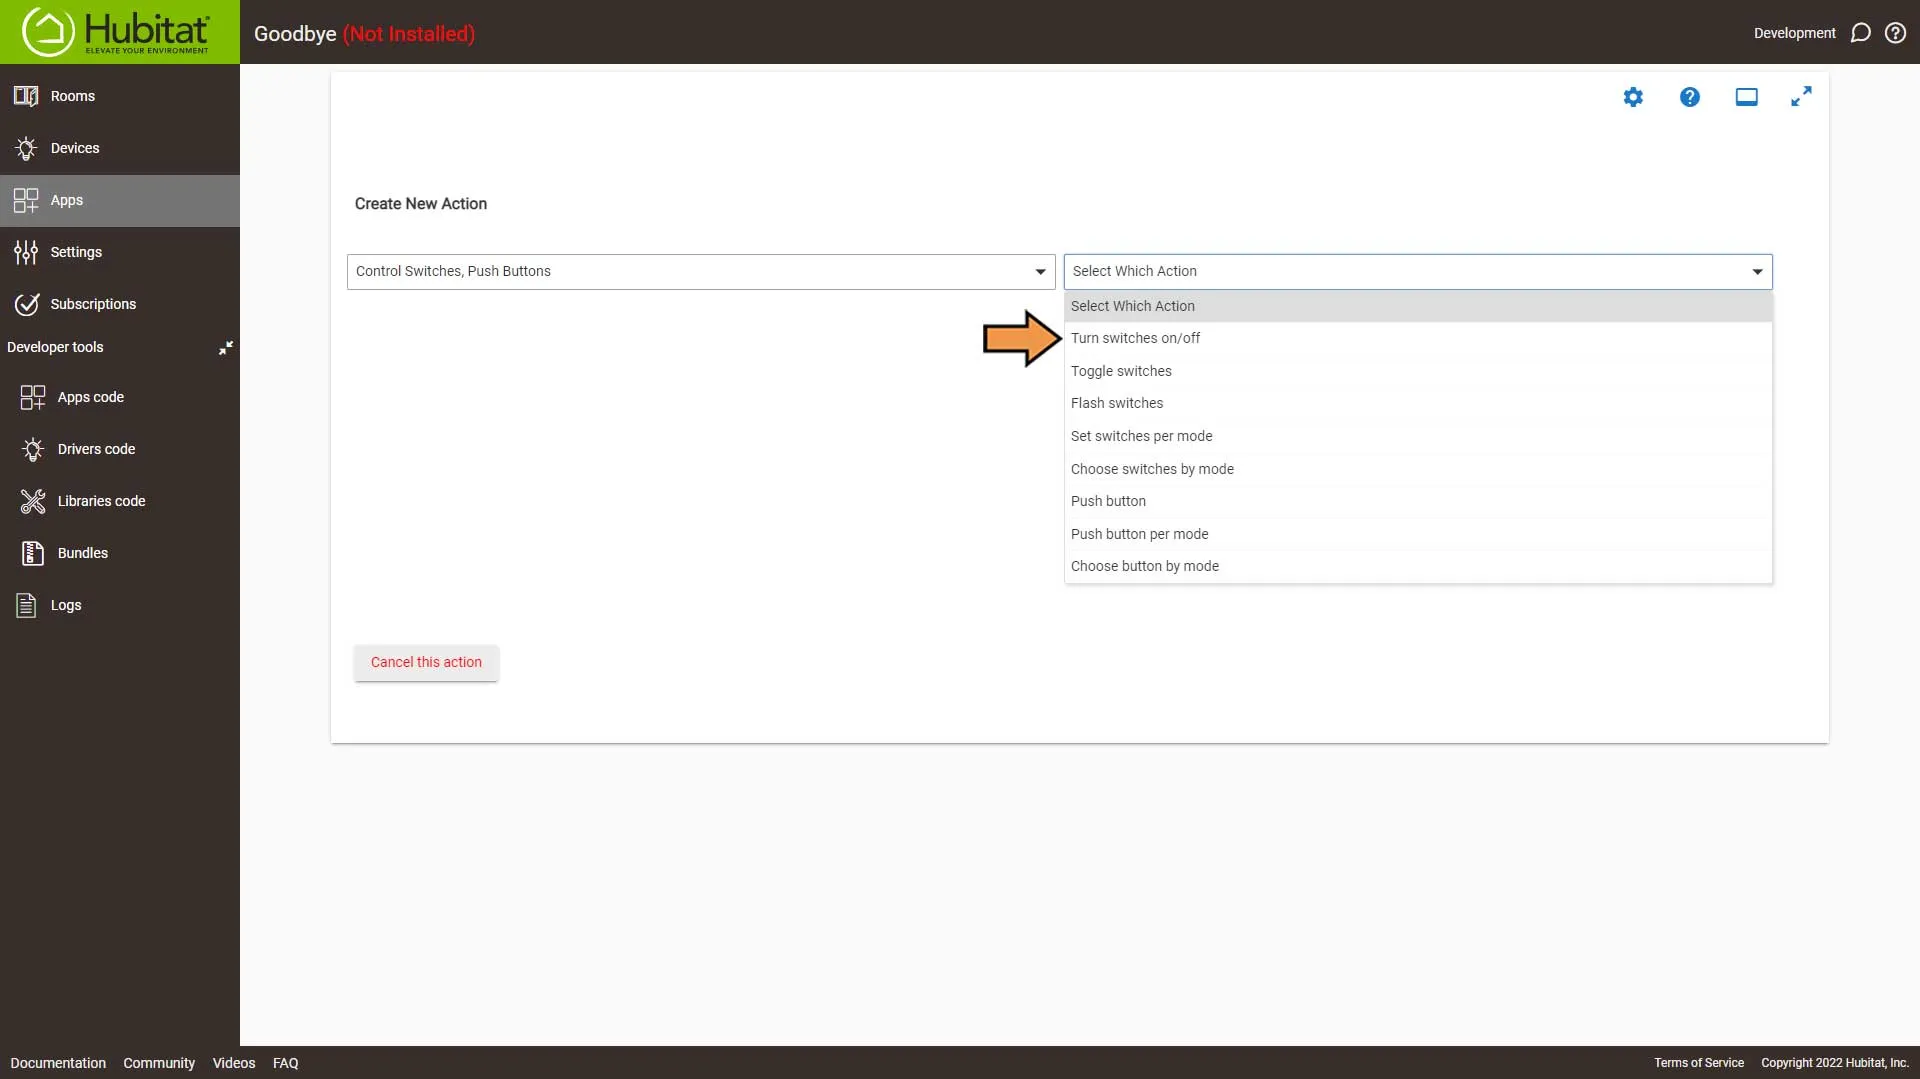
Make sure the Turn on or off switch is set to Off. Next, in the Switches to turn off drop-down, select the All Lights group. Then click the Done with Action button.
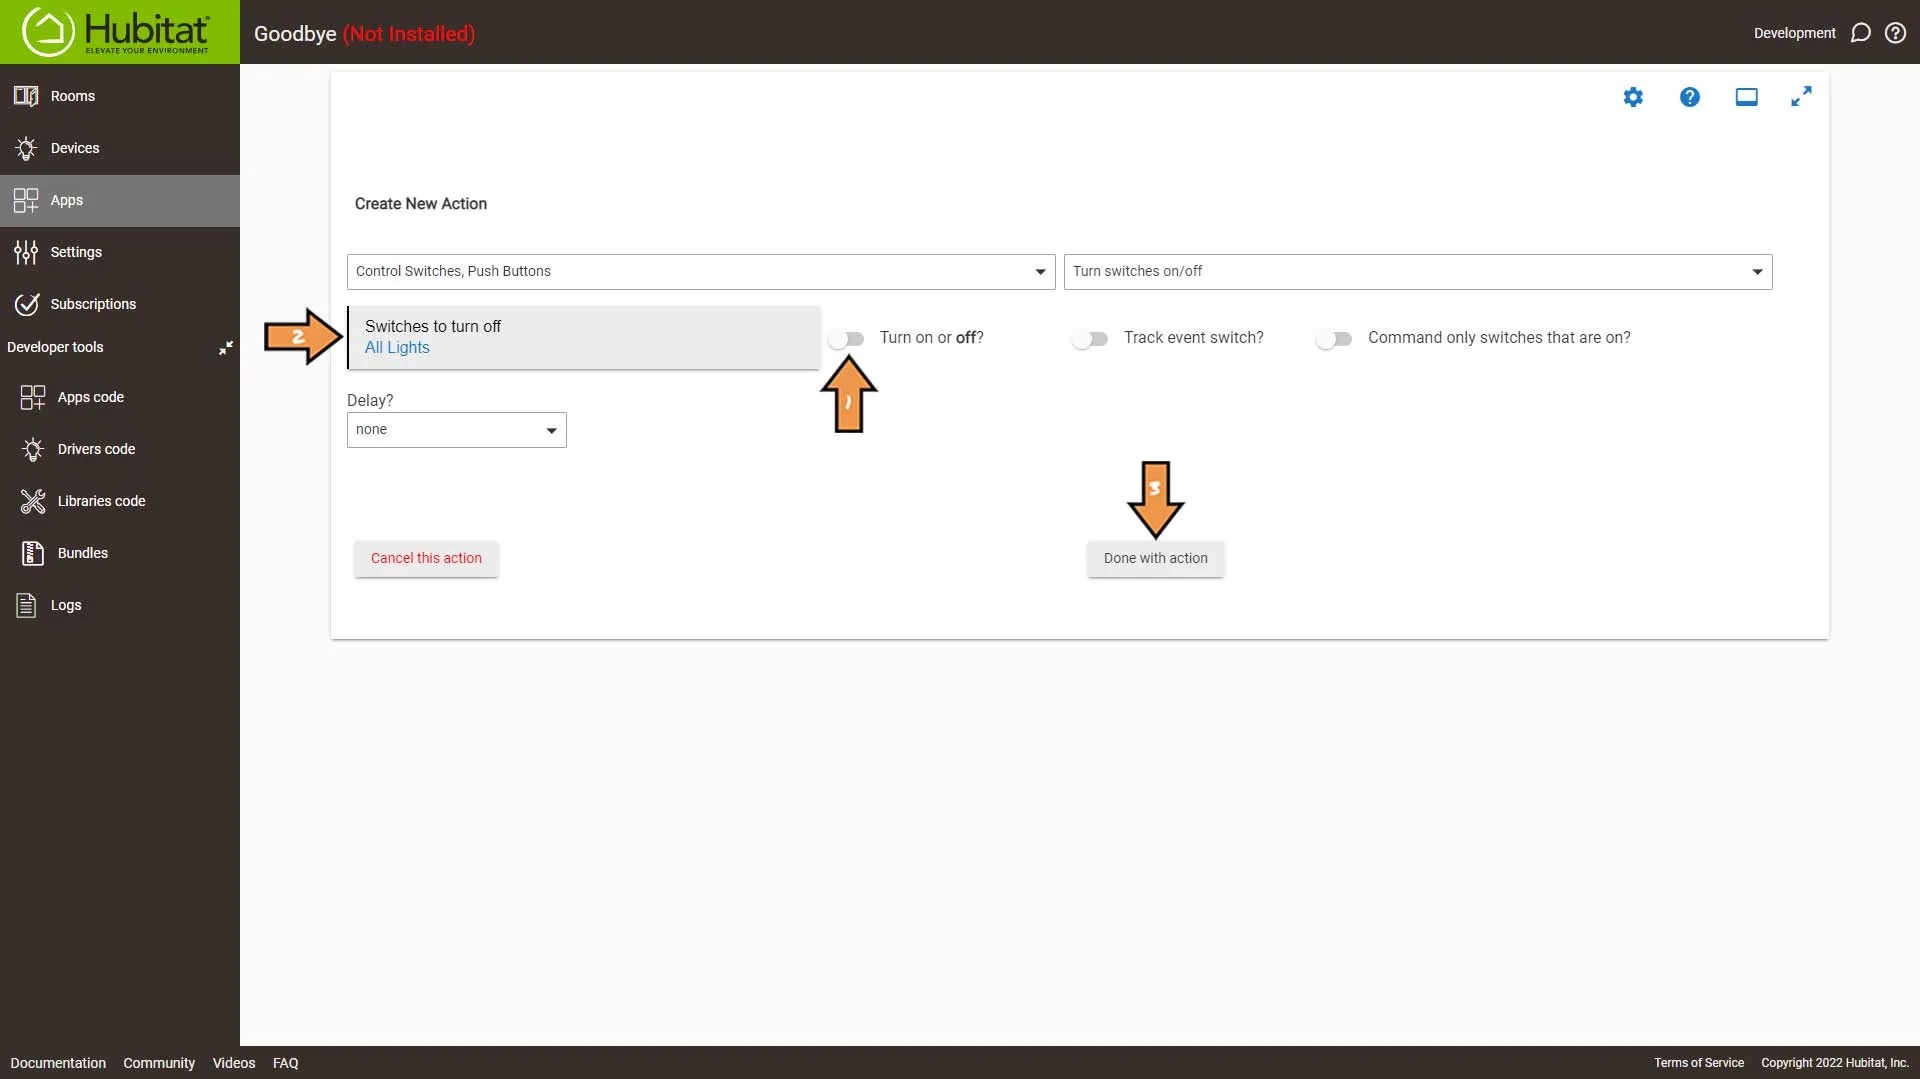
Again, select the Green Plus Sign to Add New Action.
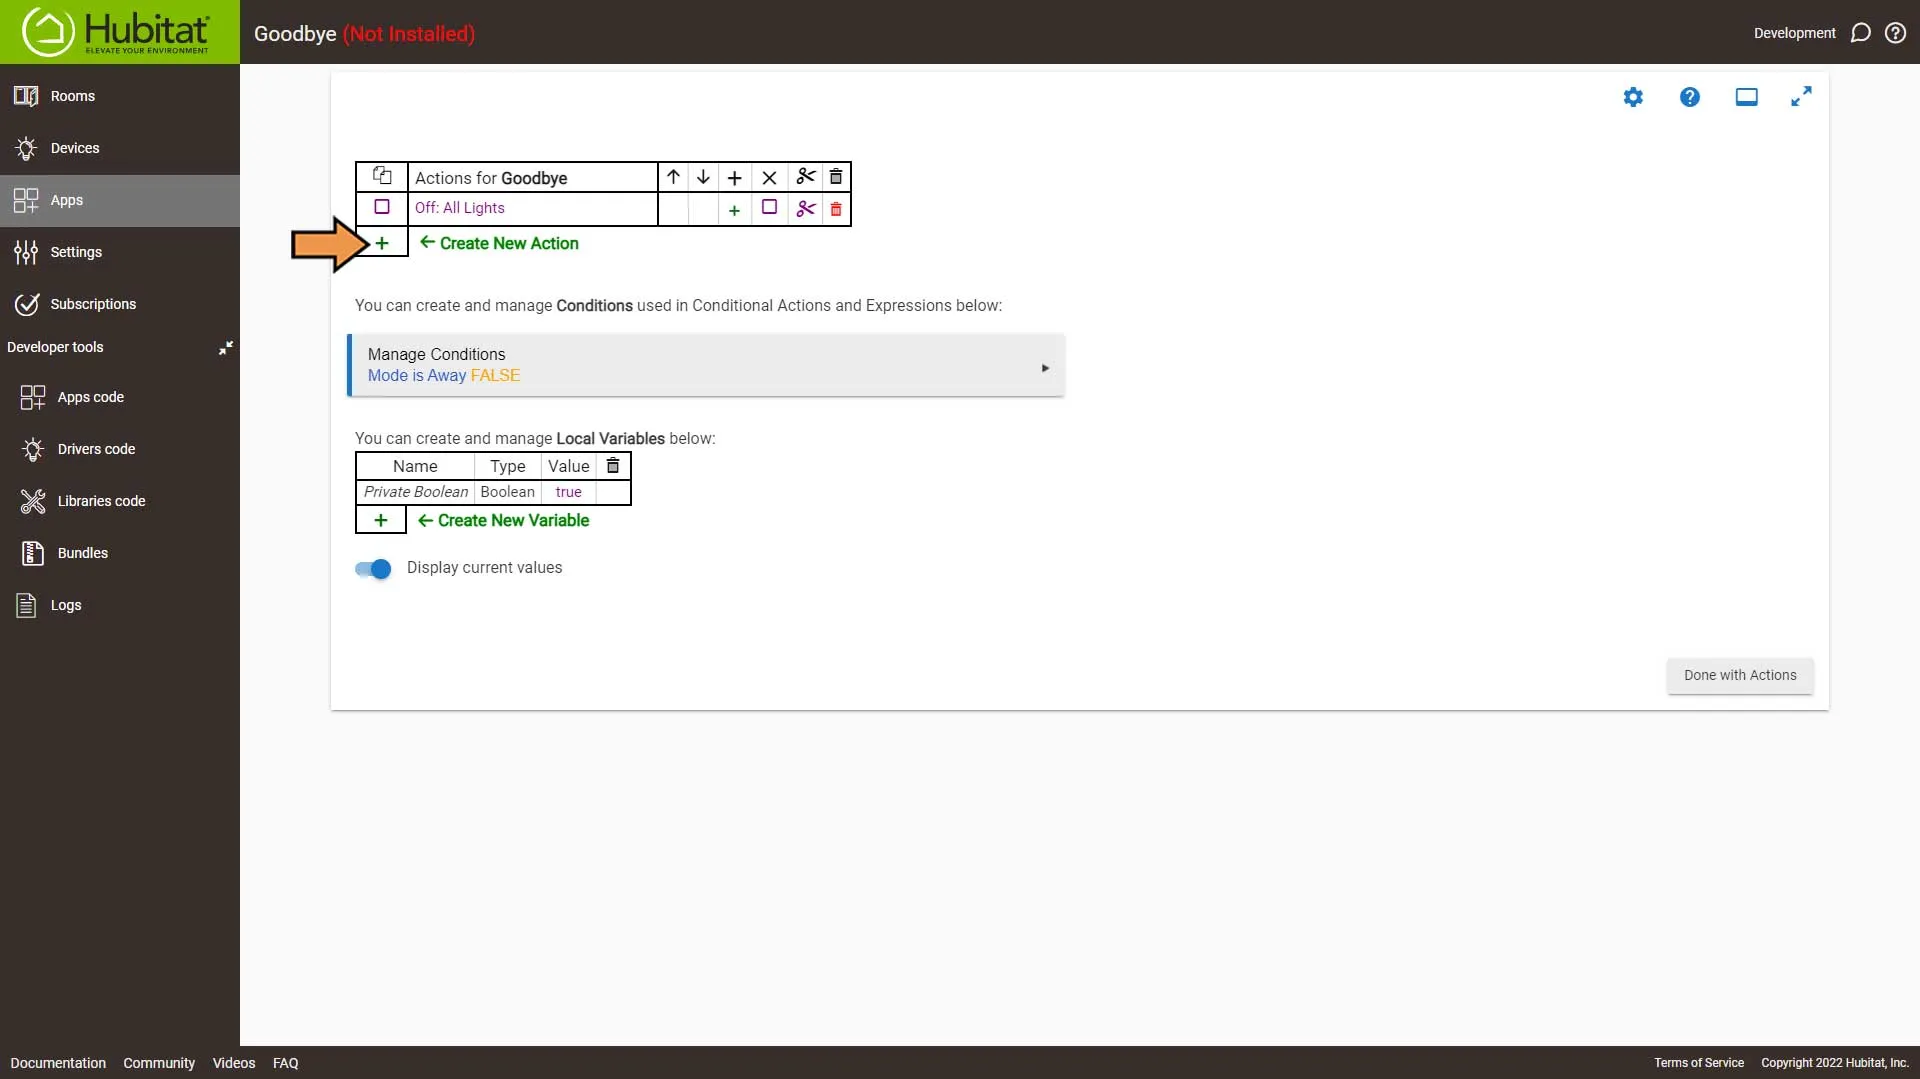
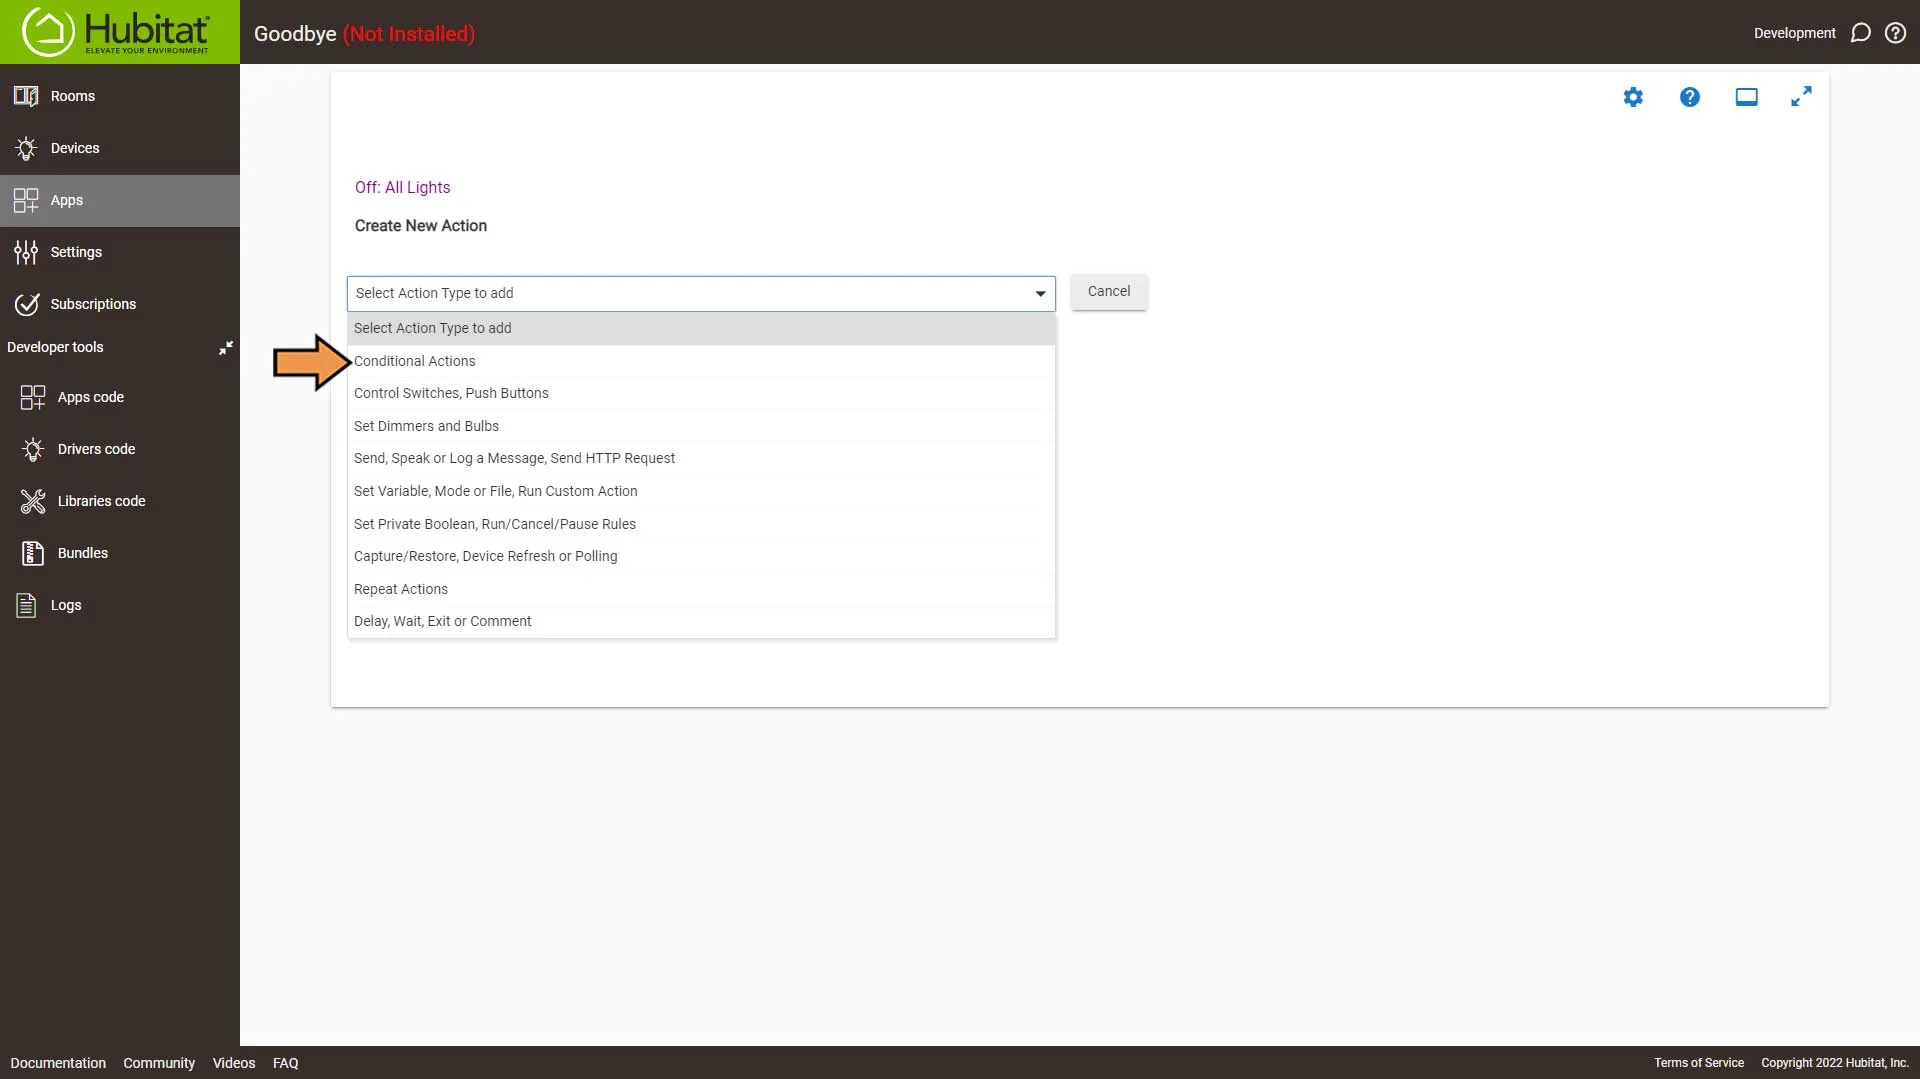
In the Select Action Type drop-down, select Conditional Actions.
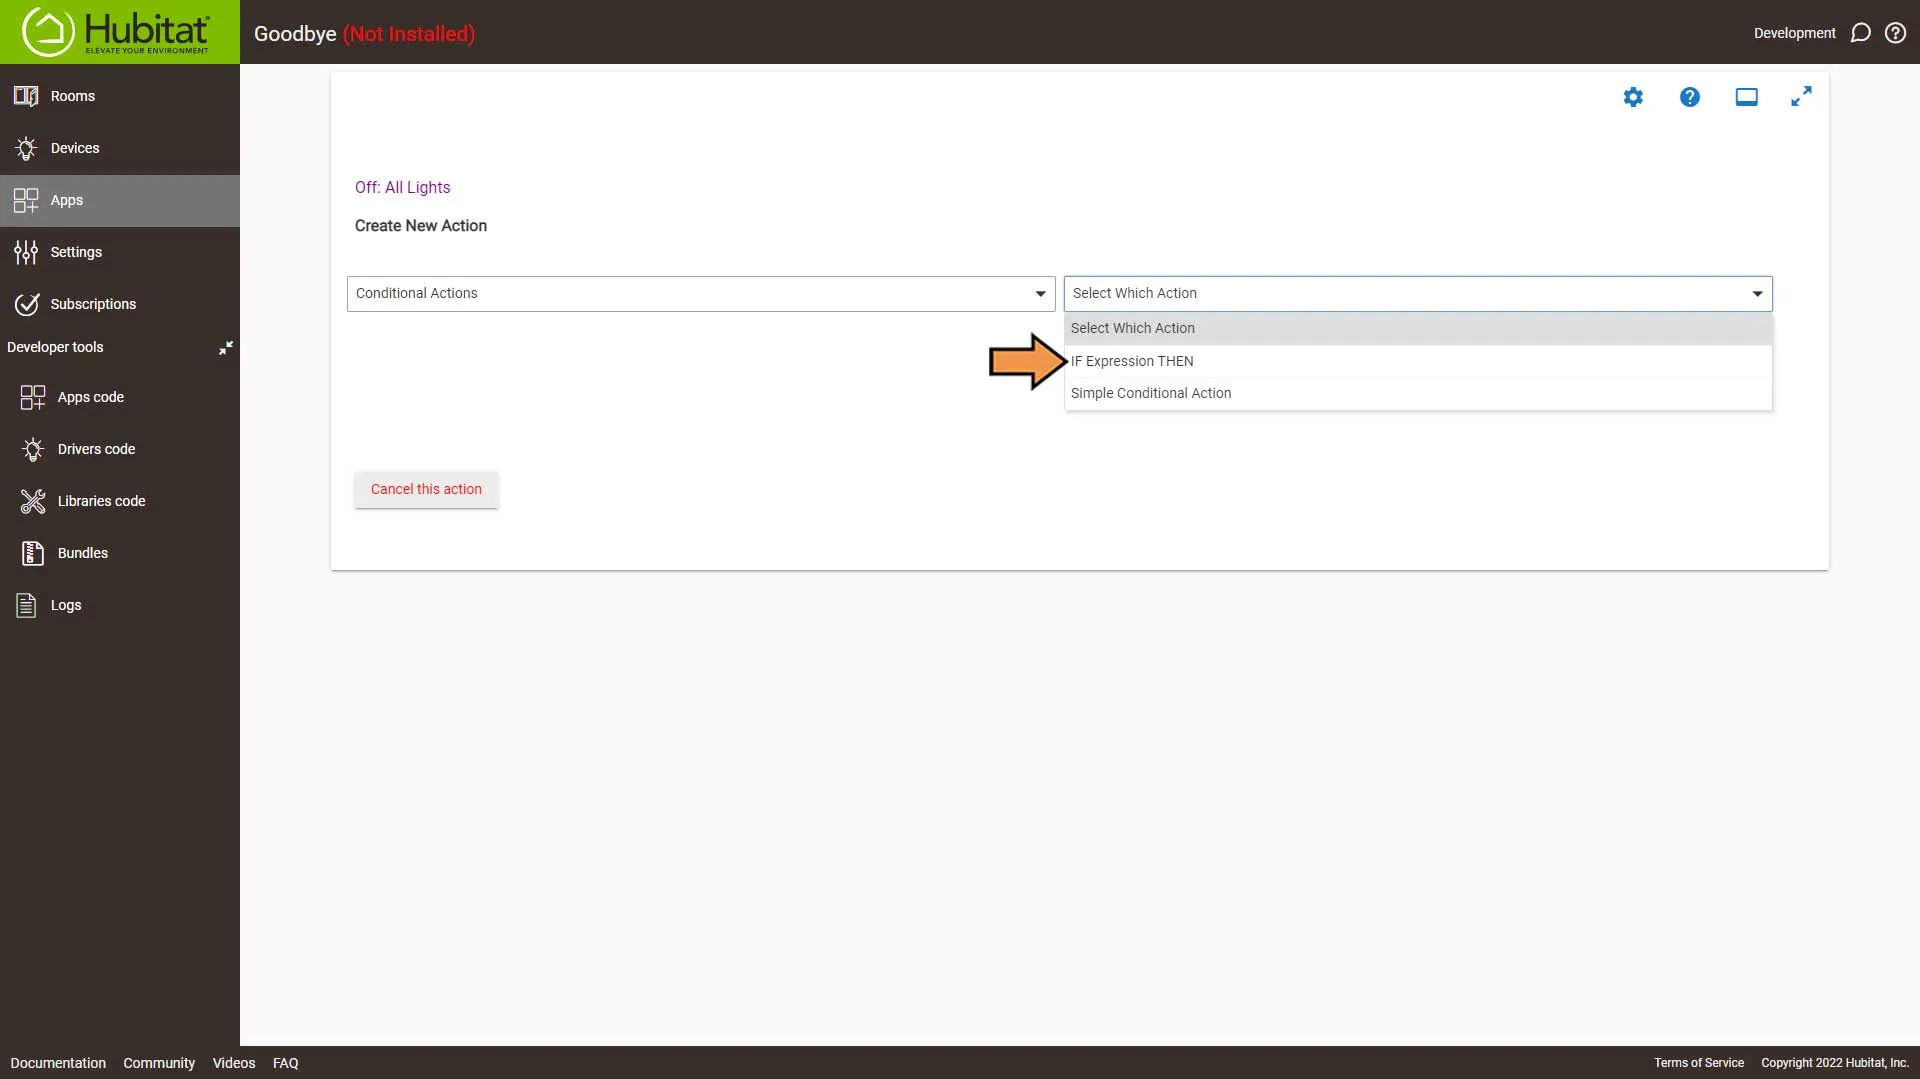
Then in the Select Which Action, select the IF Expression THEN option.
In the Define Expression element drop-down, select the Condition we created earlier.
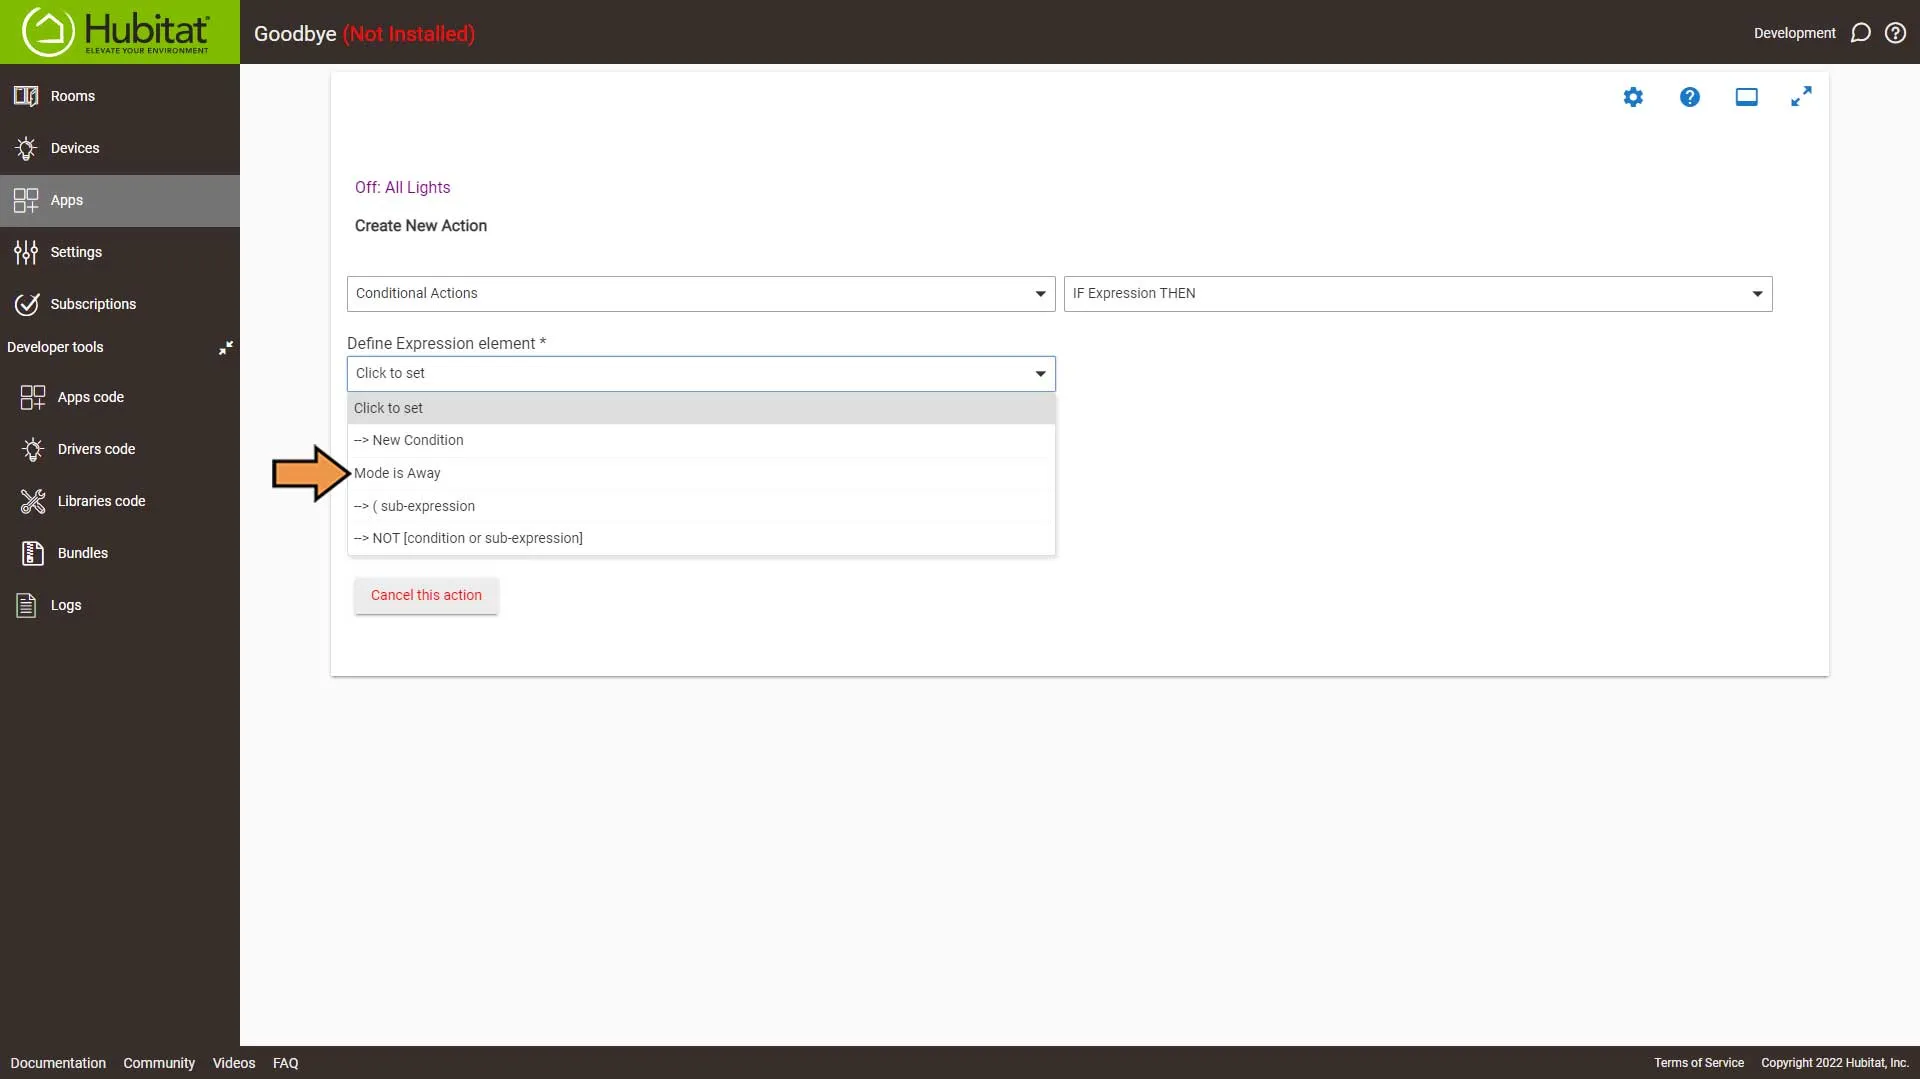
Then click Done with IF Expression THEN button.
Again, select the Green Plus Sign to Add New Action.
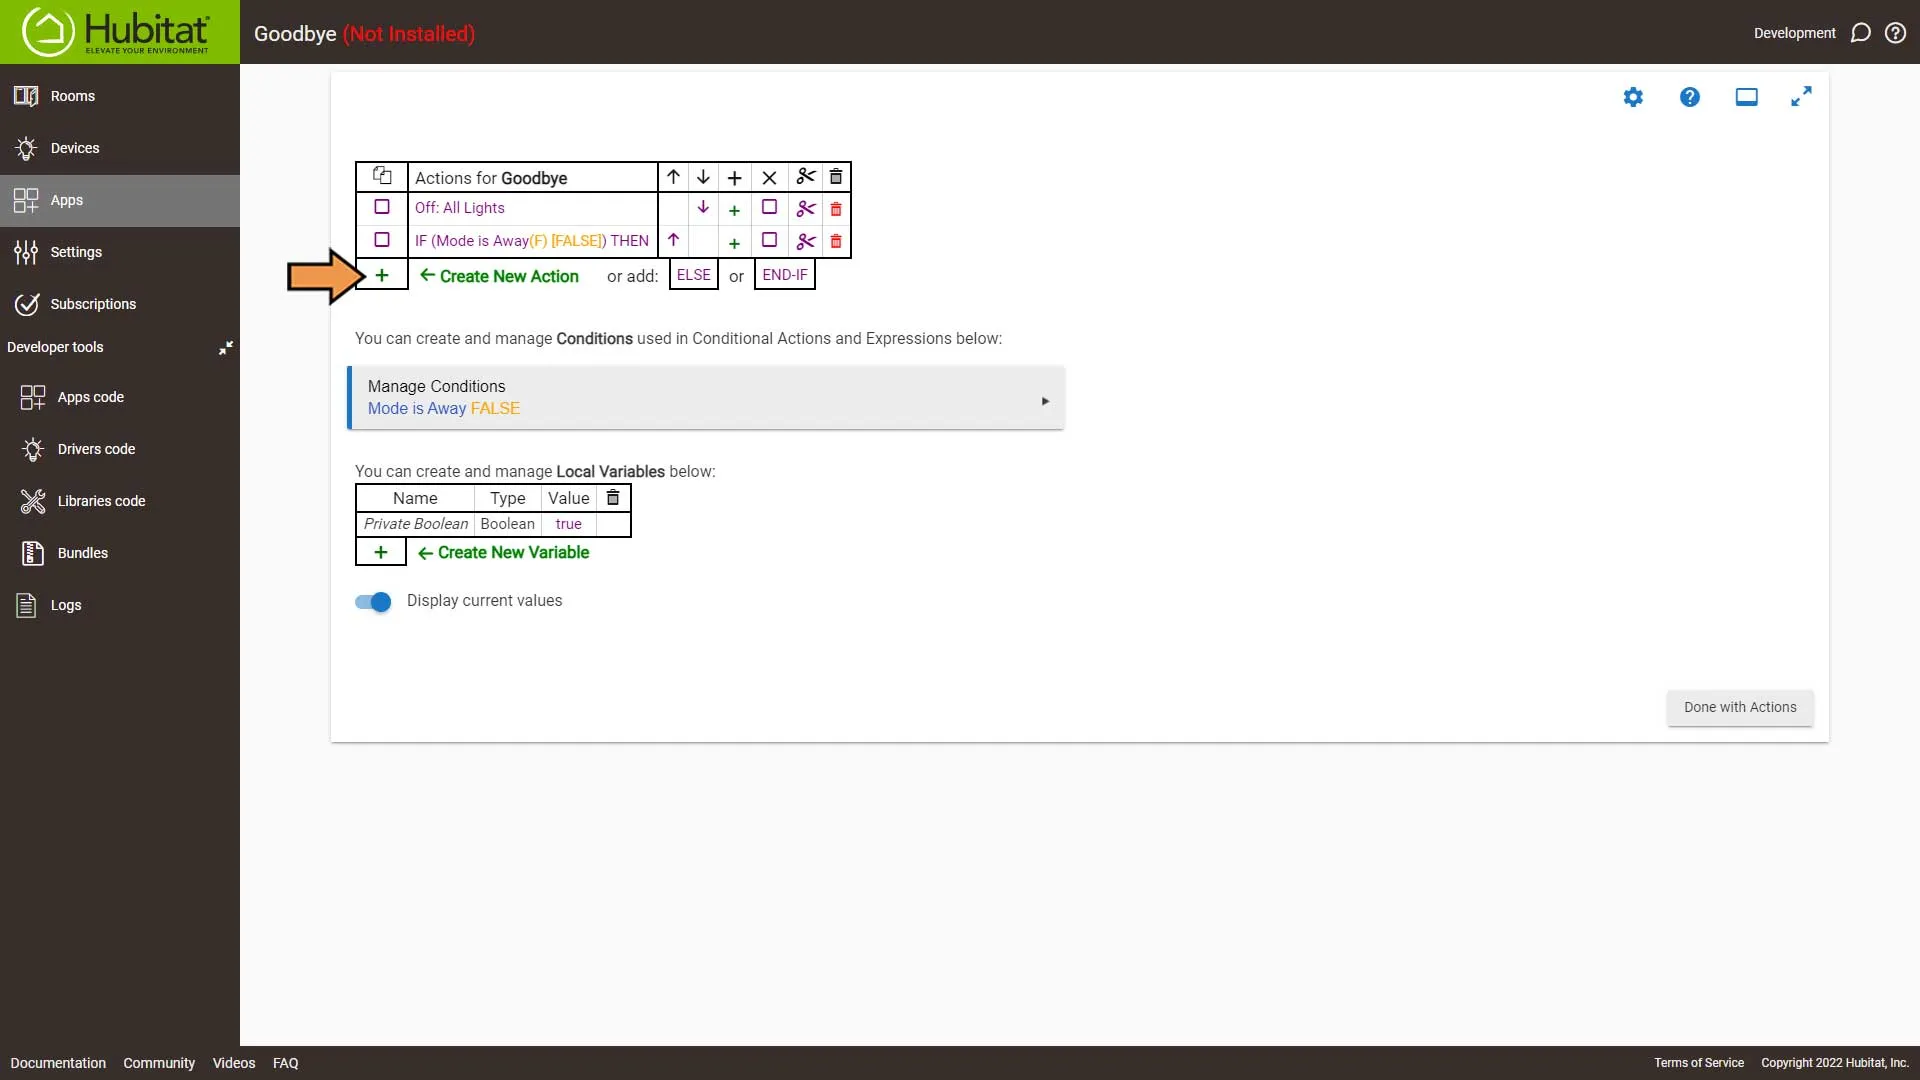
In the Select Action Type drop-down, select Control Locks.
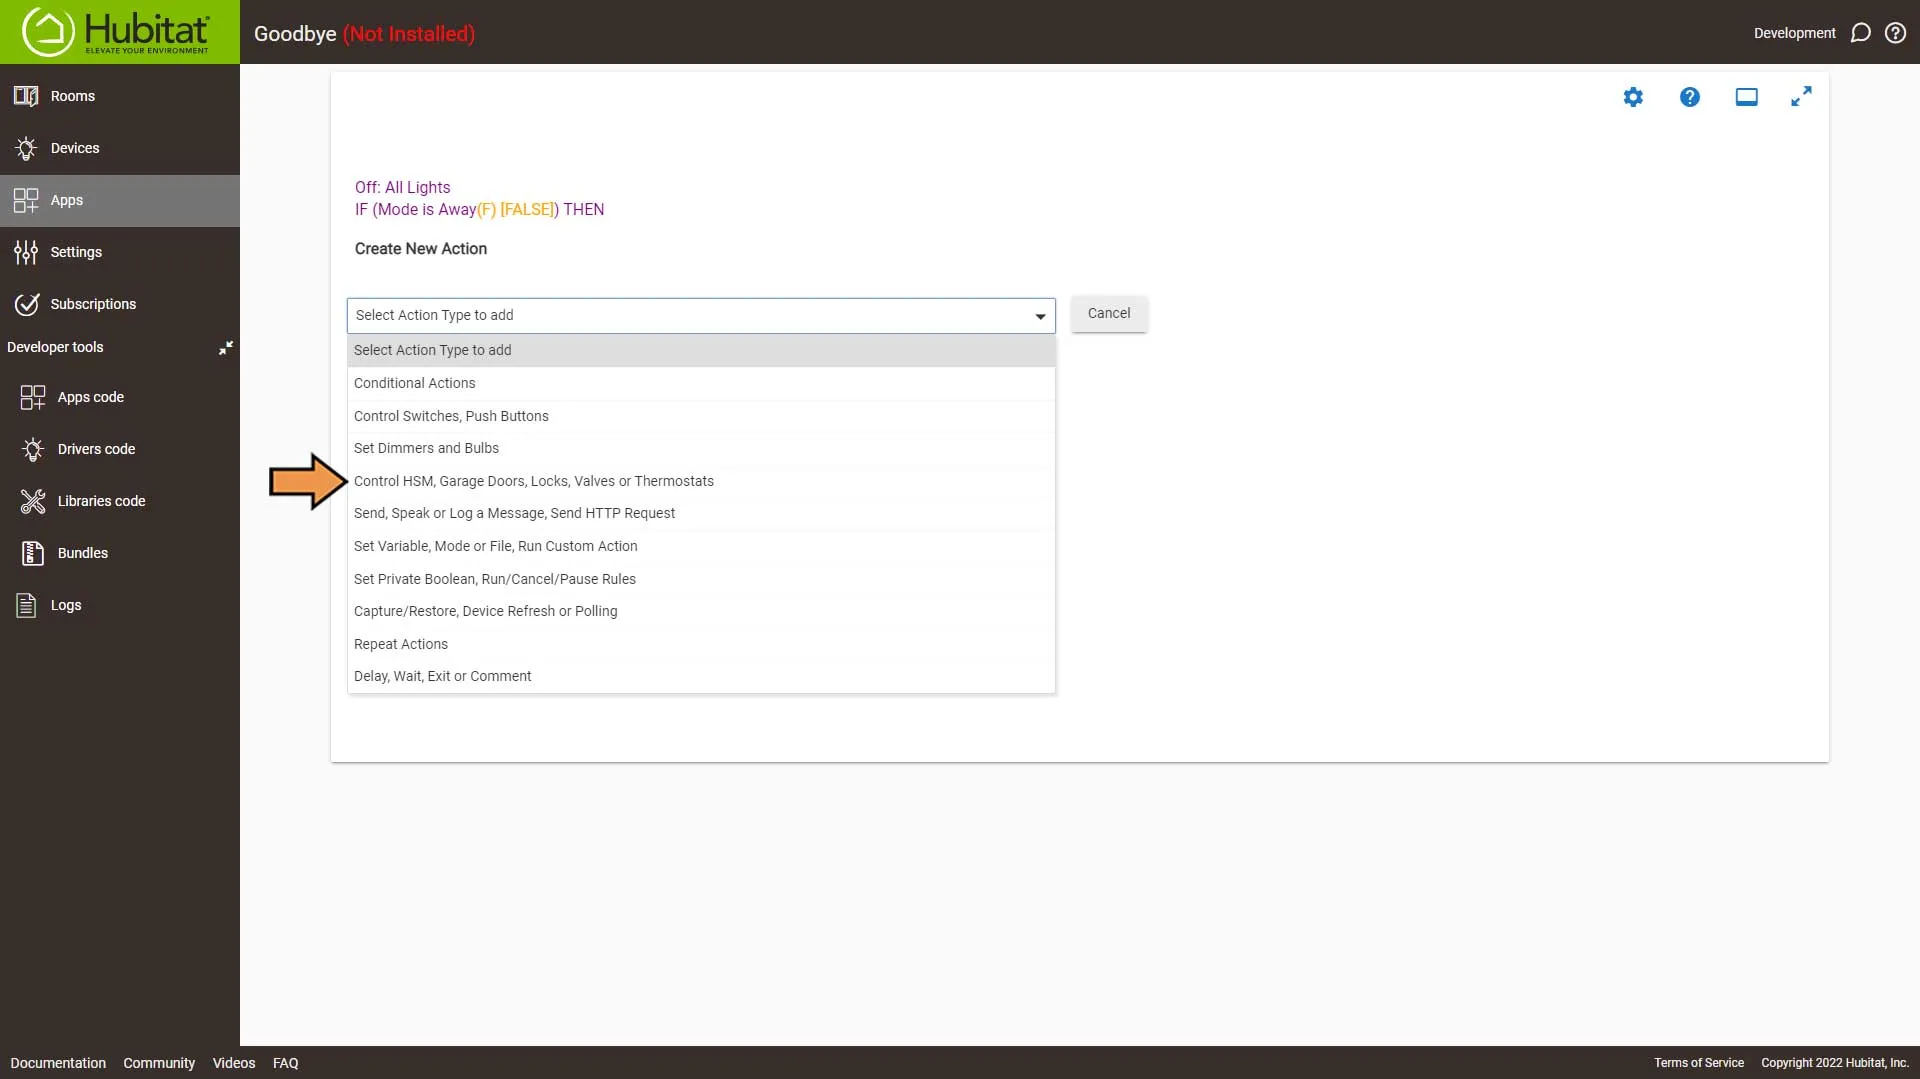
Then in the Select Which Action, select the Lock/Unlock locks option.
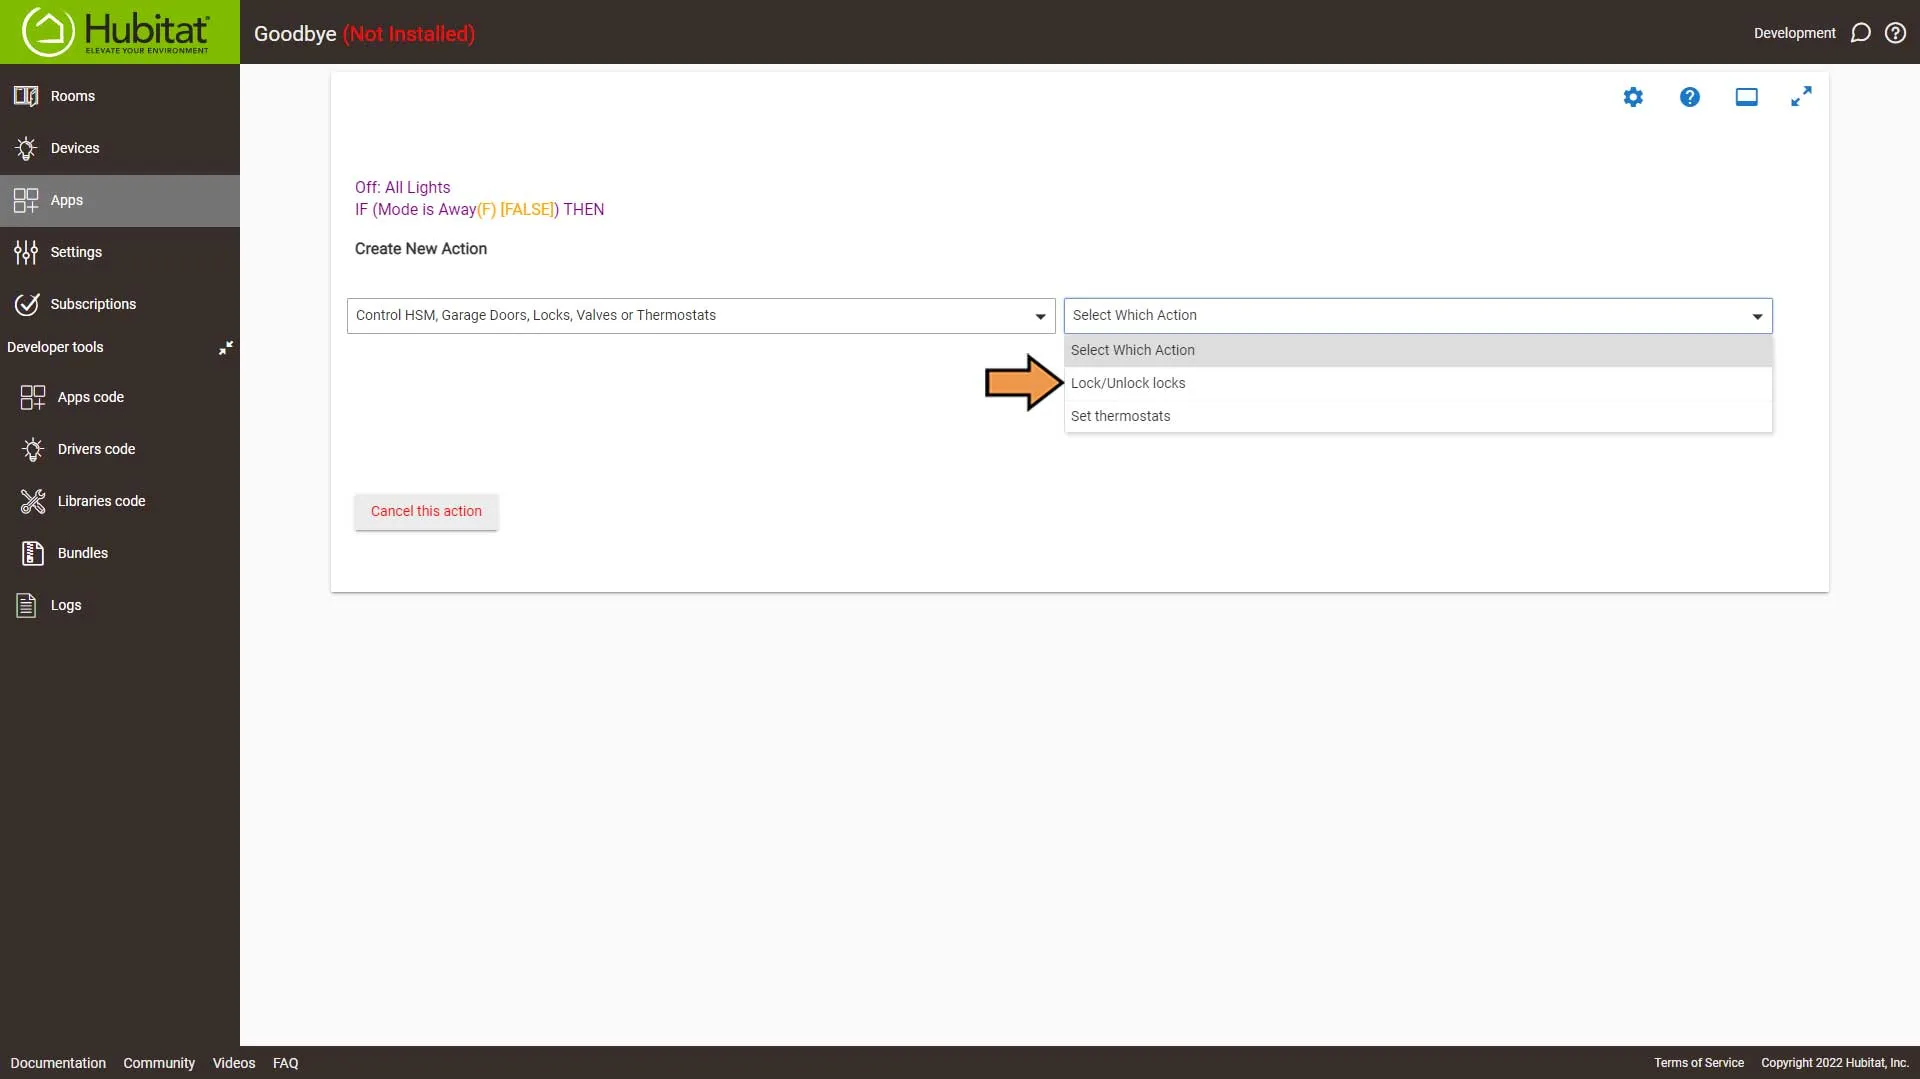
Ensure the Lock or Unlock locks are set to Lock and select the locks from the drop-down. Then click the Done with action button.
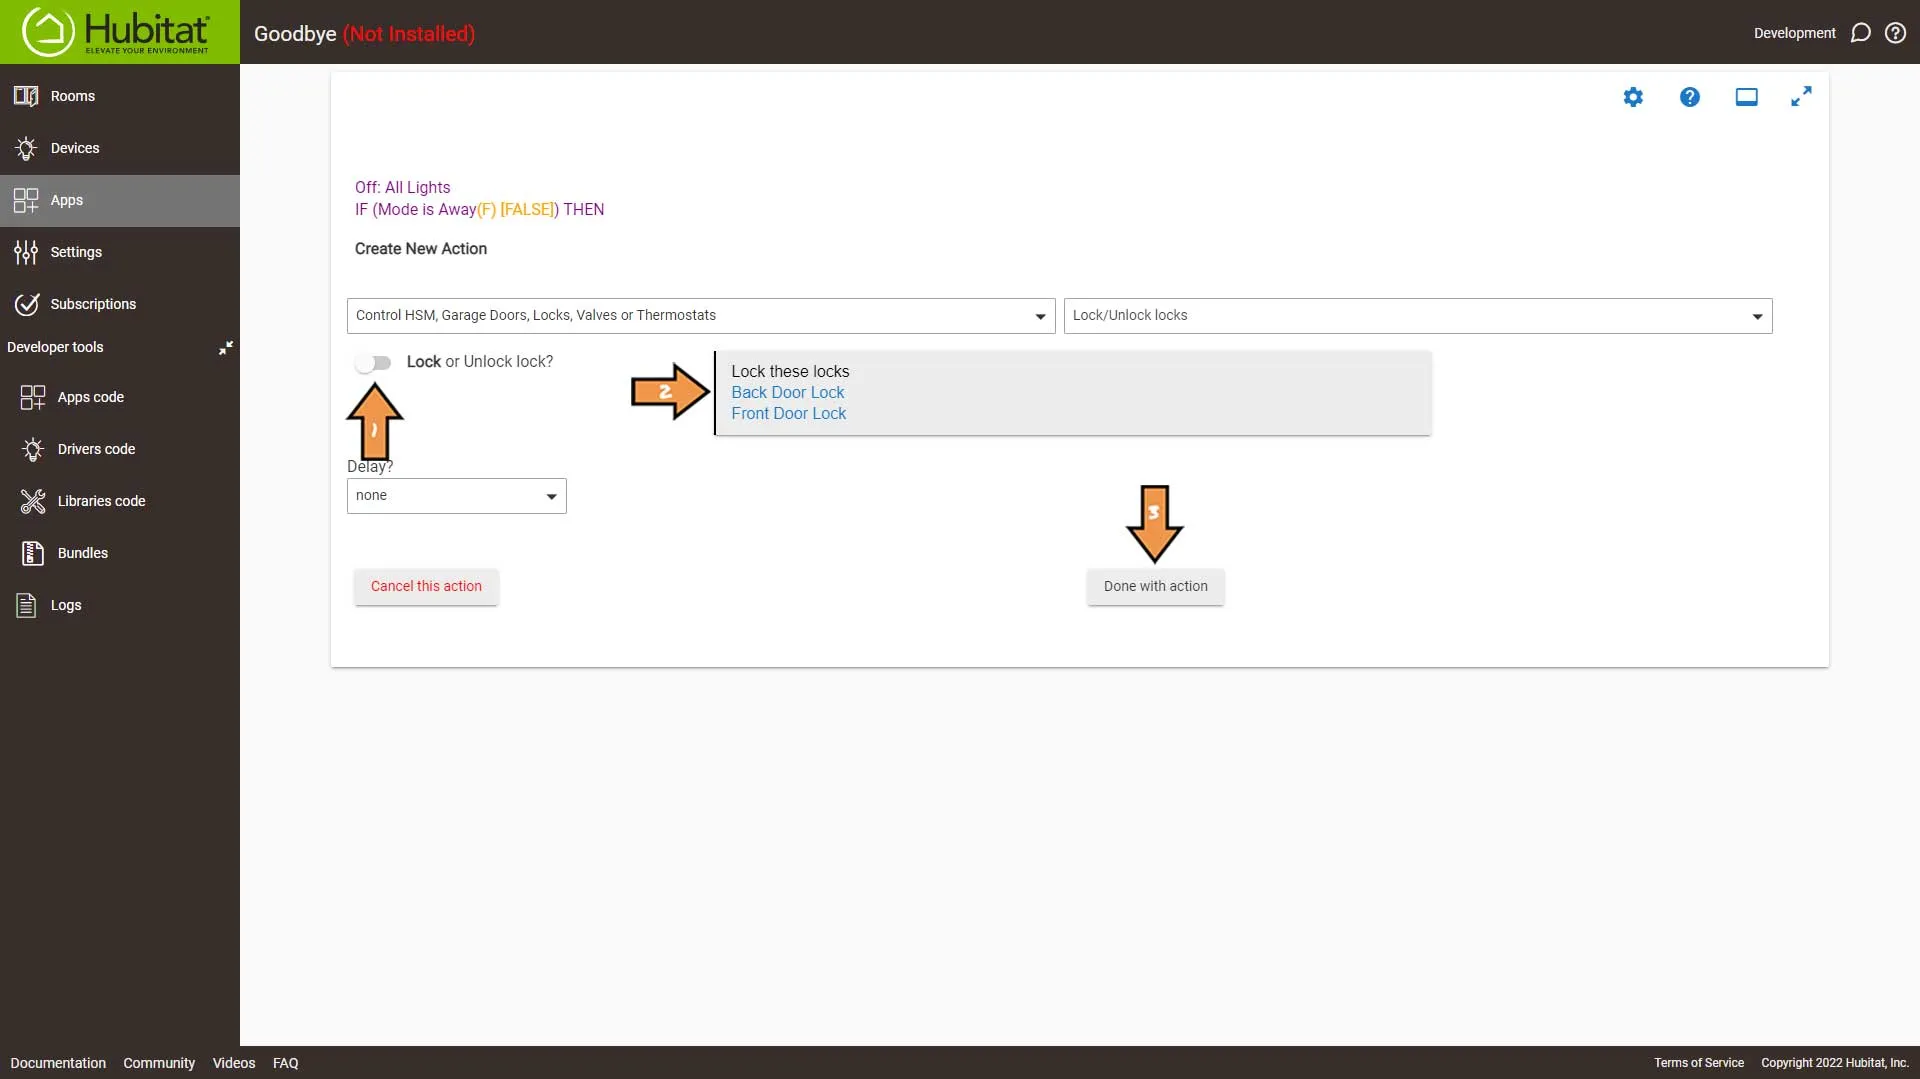
Once again, select the Green Plus Sign to Add New Action.
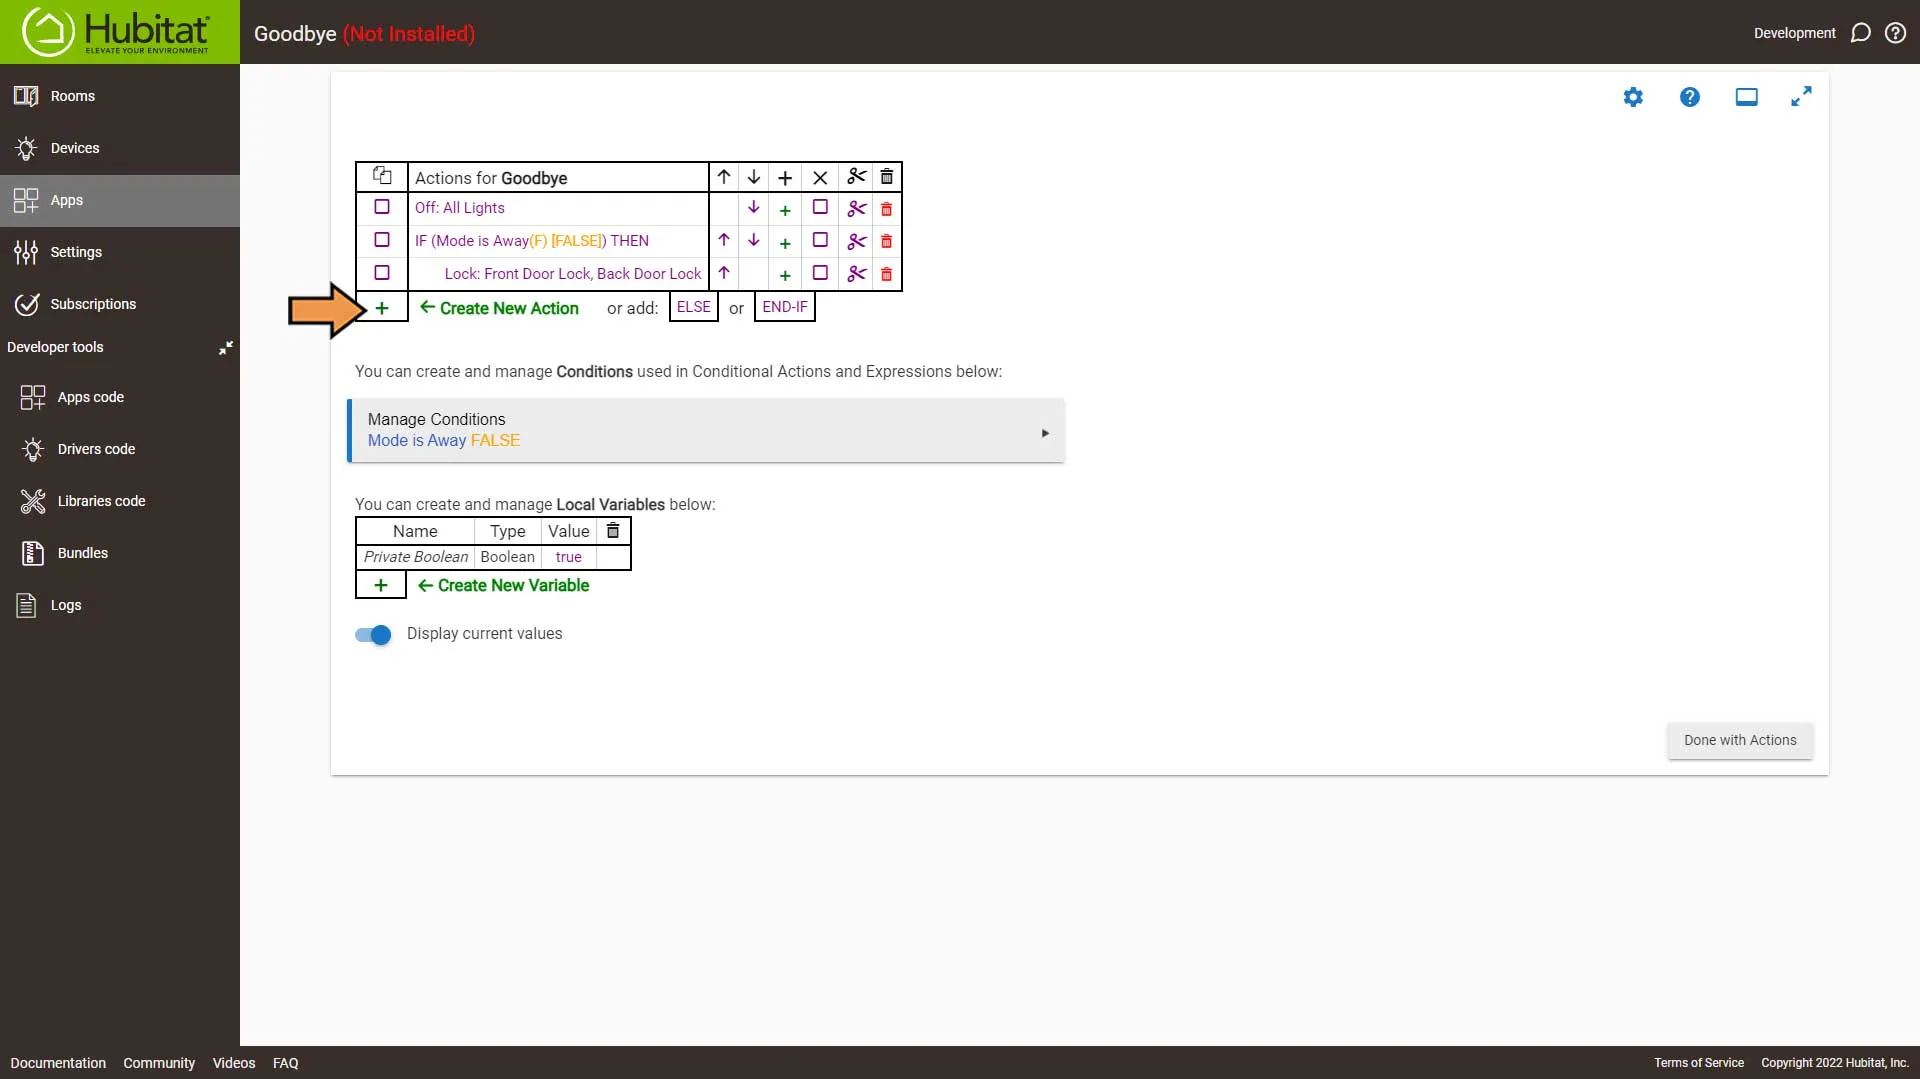
In the Select Action Type drop-down, select Control Thermostats.
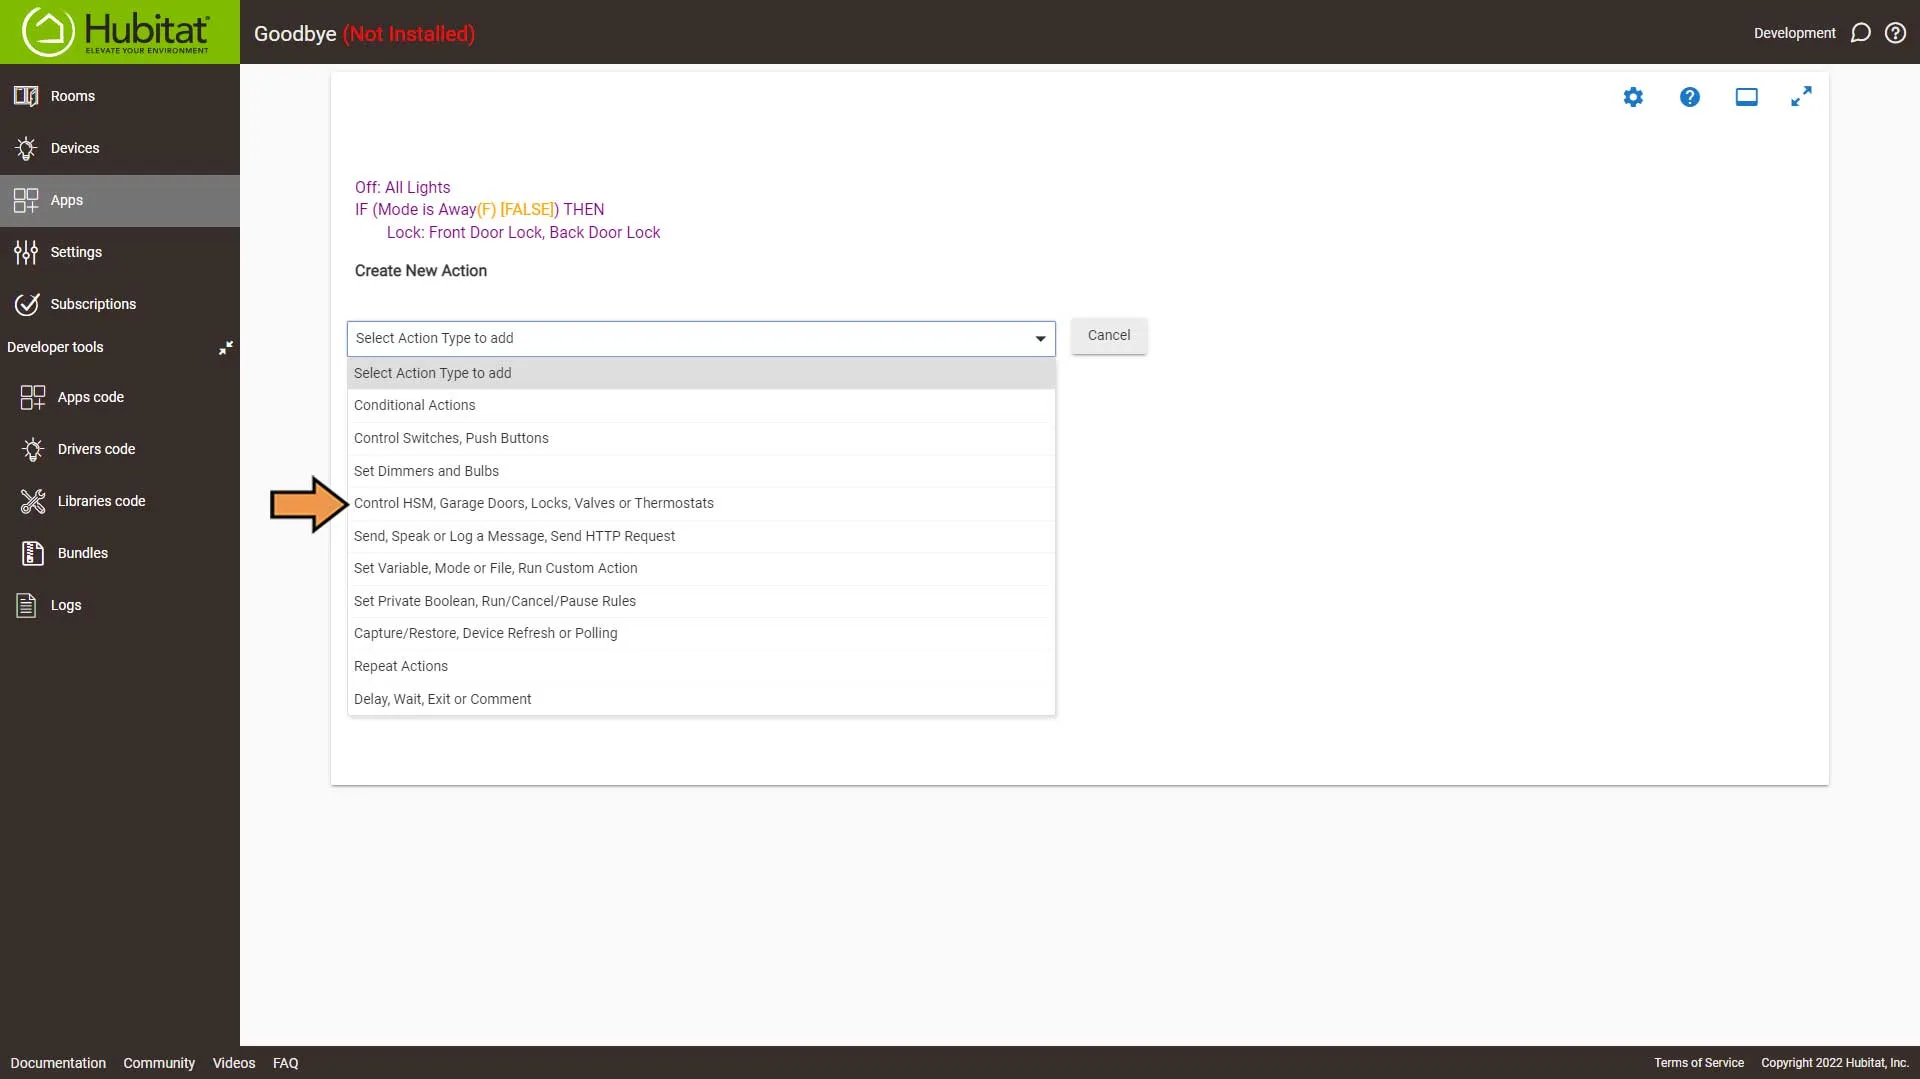
Then in the Select Which Action, select the Set thermostats option.
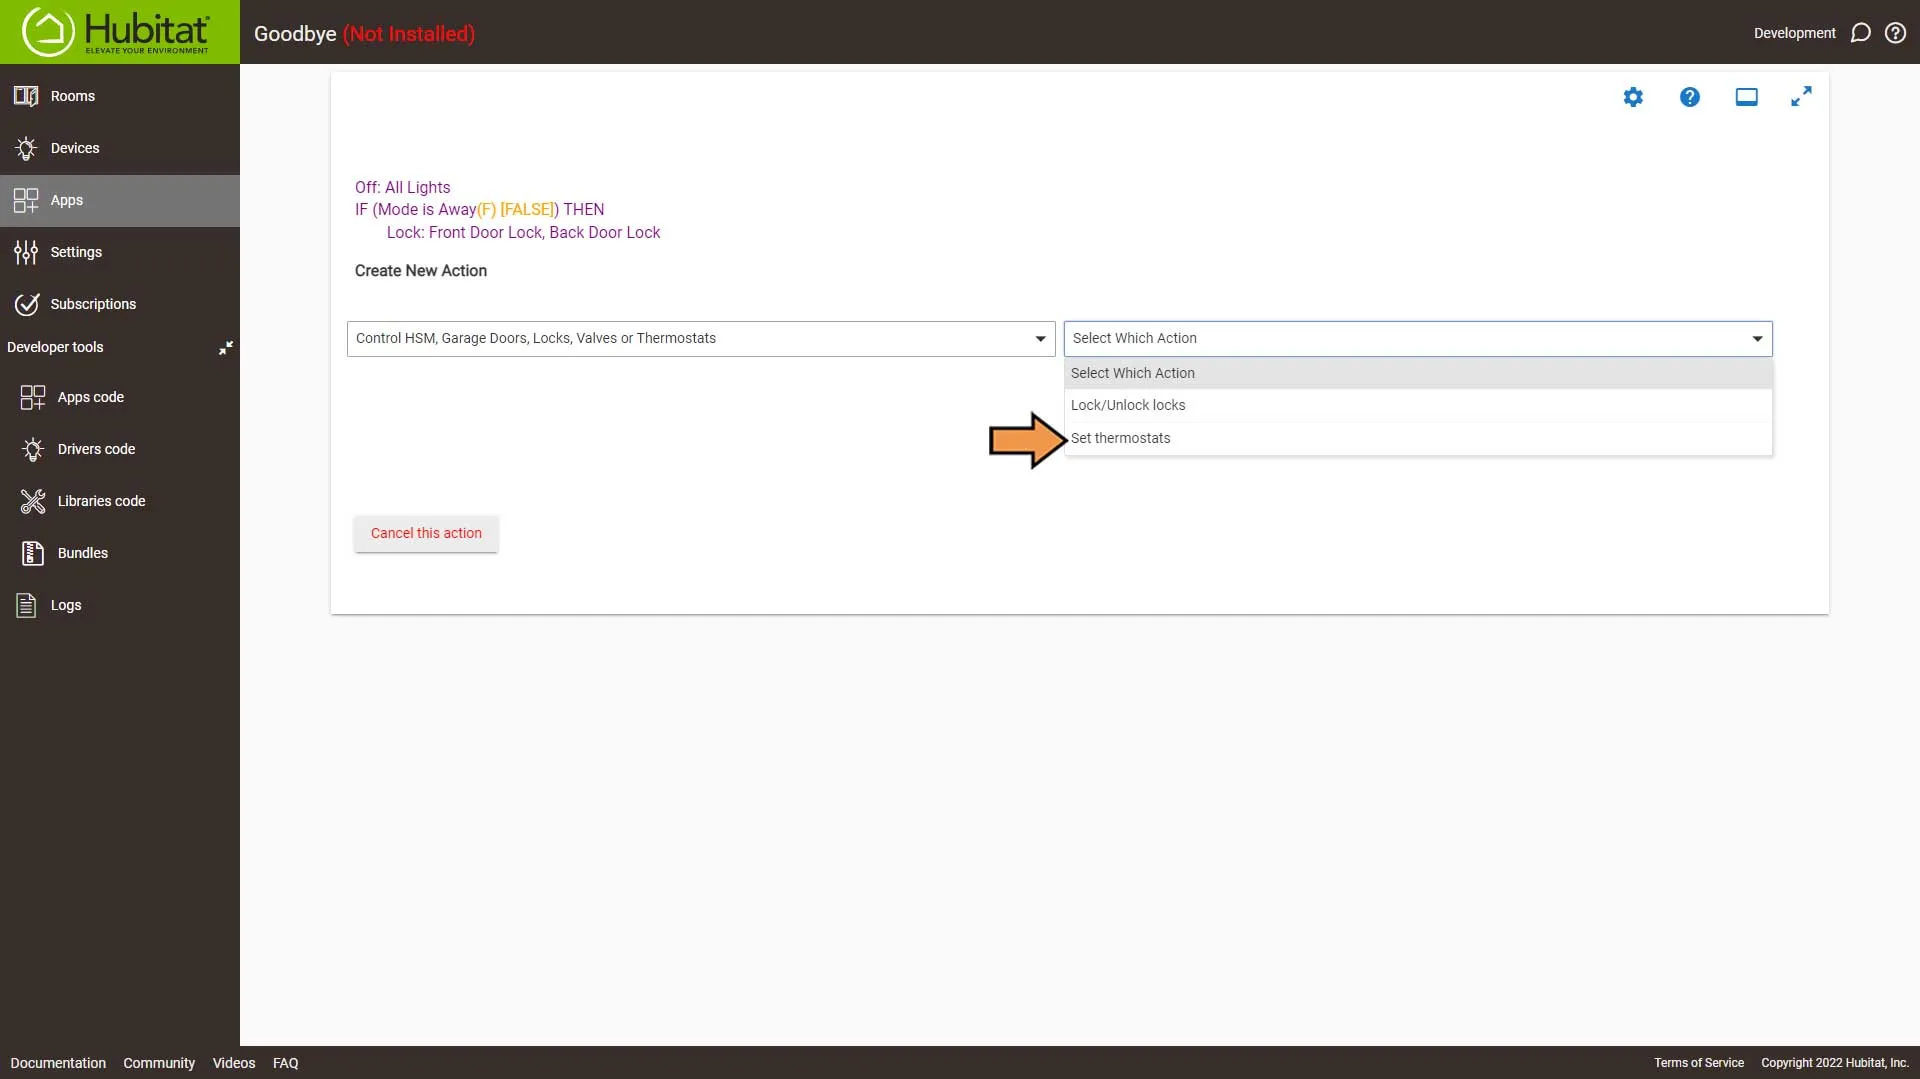
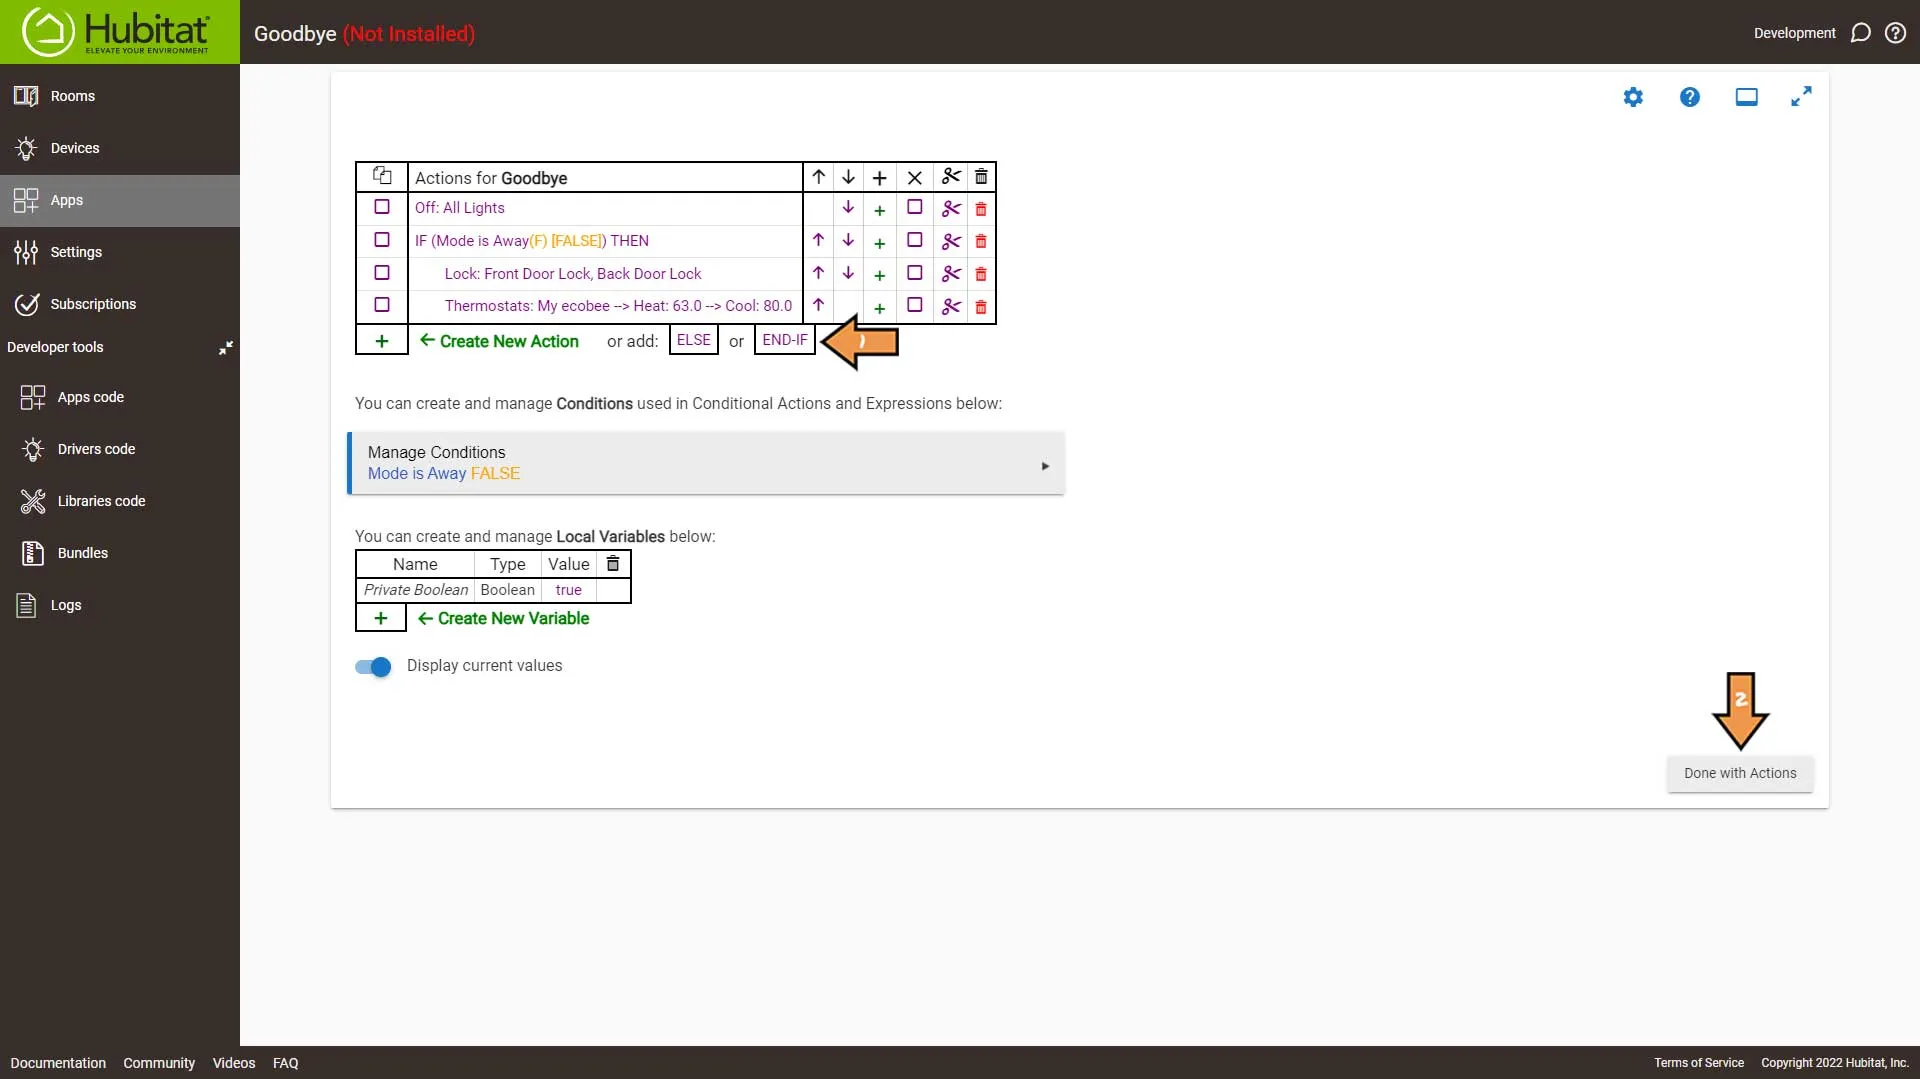
Select your thermostat, set the heating and cooling set points, and click the Done with action button.
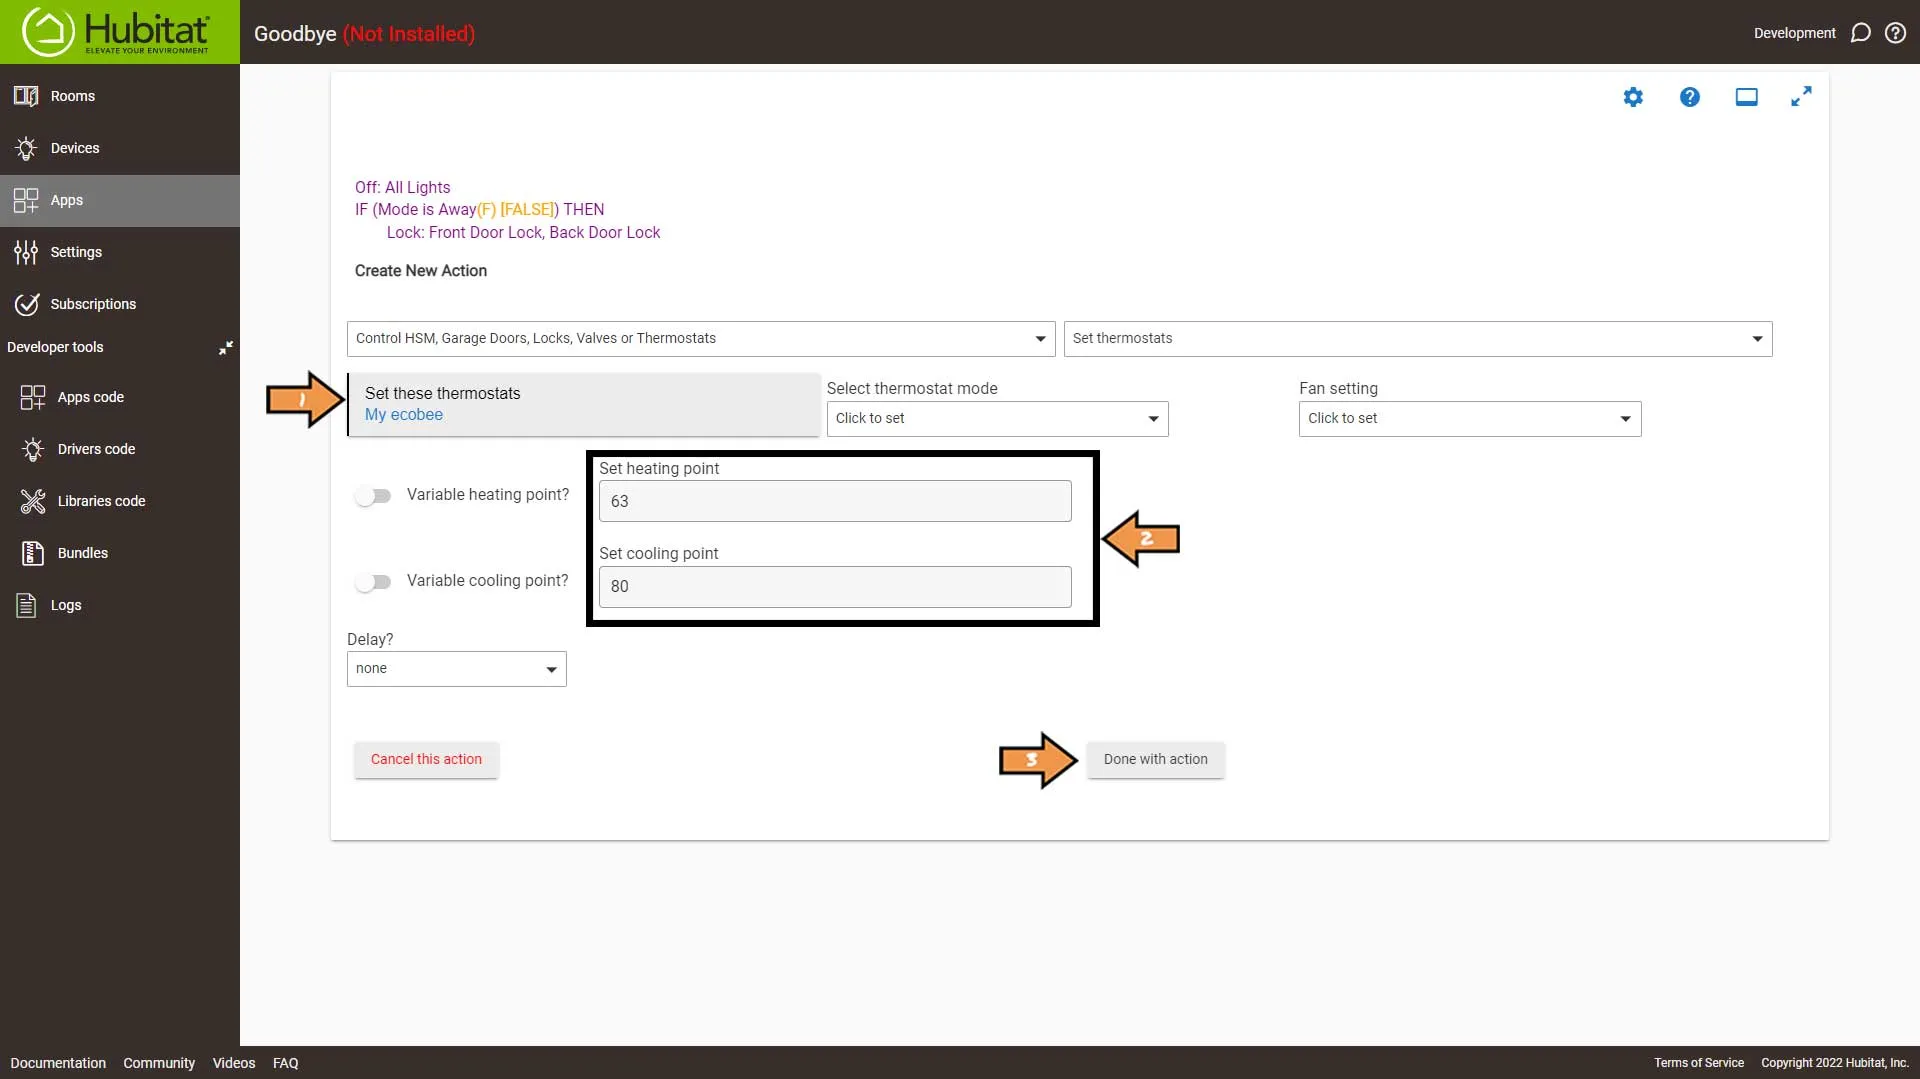
Select END-IF and click the Done with Actions button.
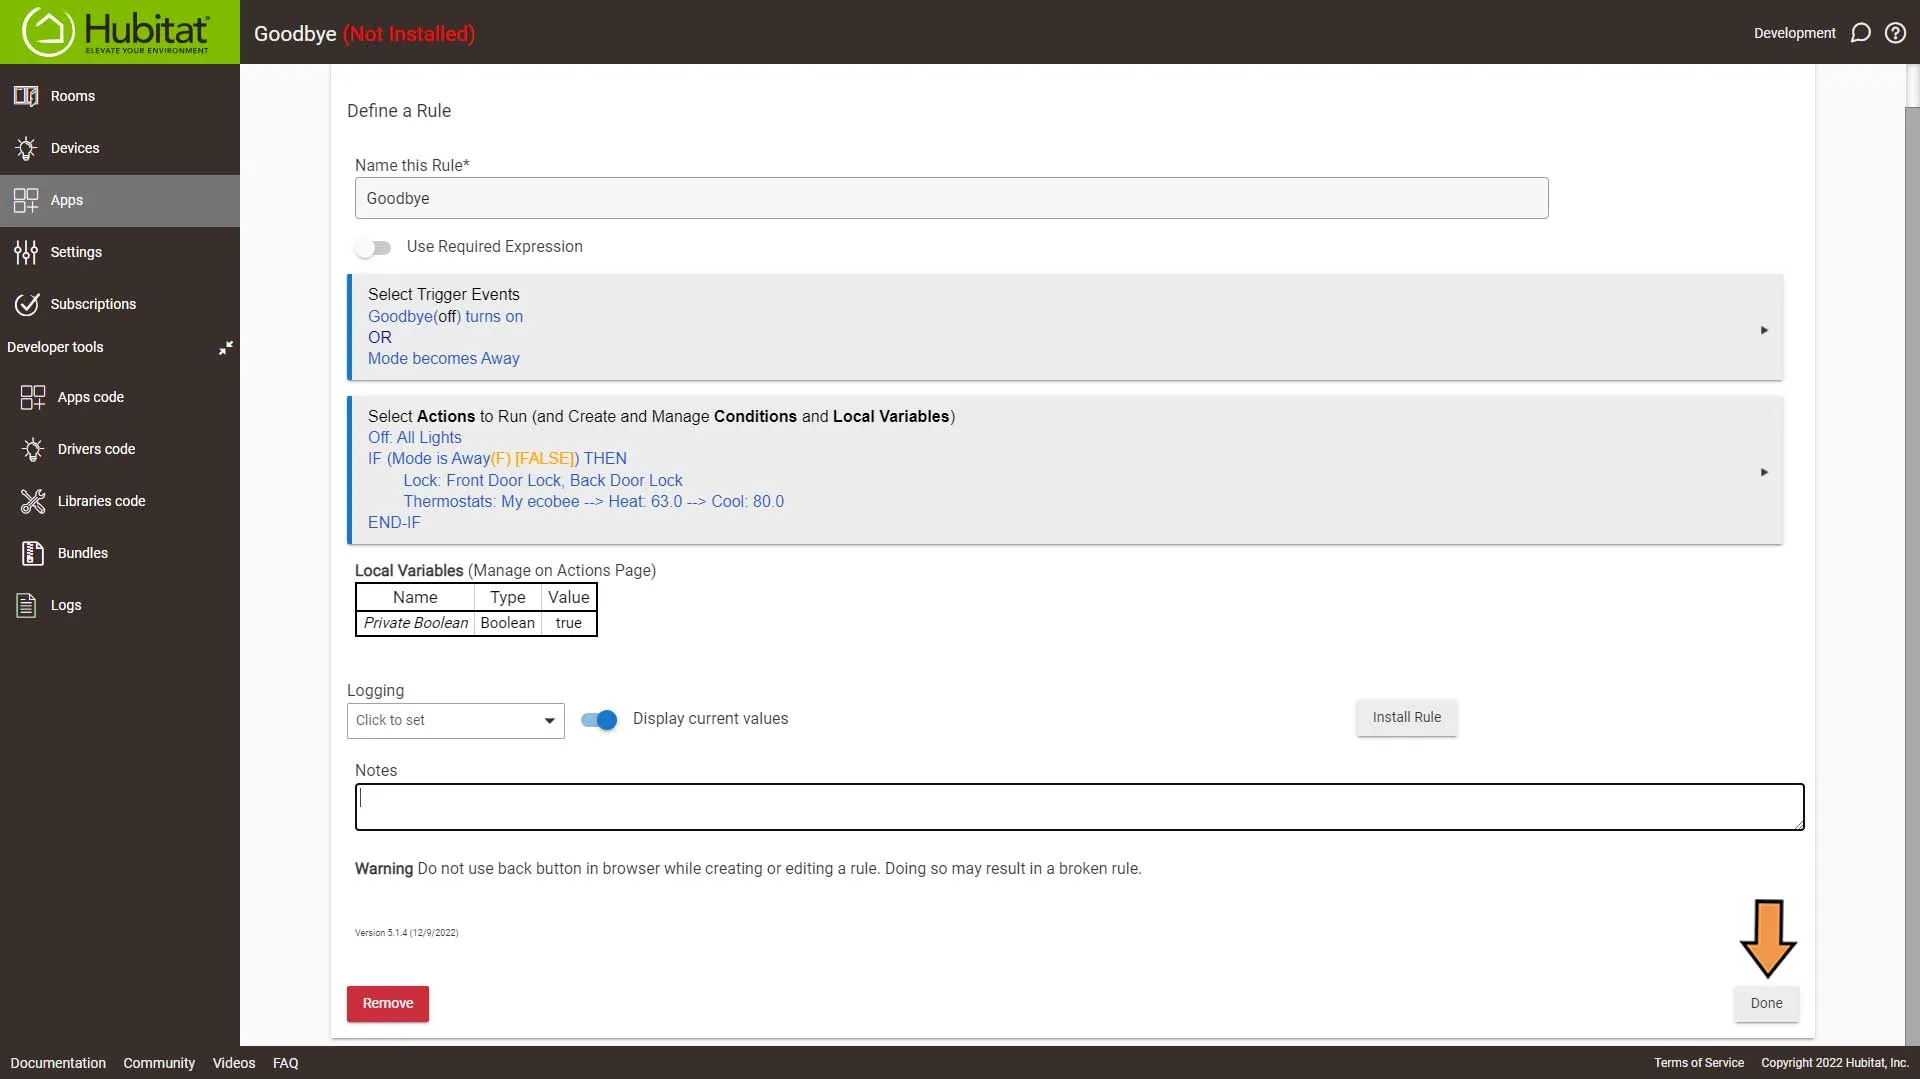
Then click Done to finish the Automation.
Home Assistant
Goodbye Automation
The Official Documentation for Automation editor
Important: Home Assistant doesn't have any native way of handling Hub Modes, but you can read Hub Modes to learn how to set it up.
Setting Up the Automation
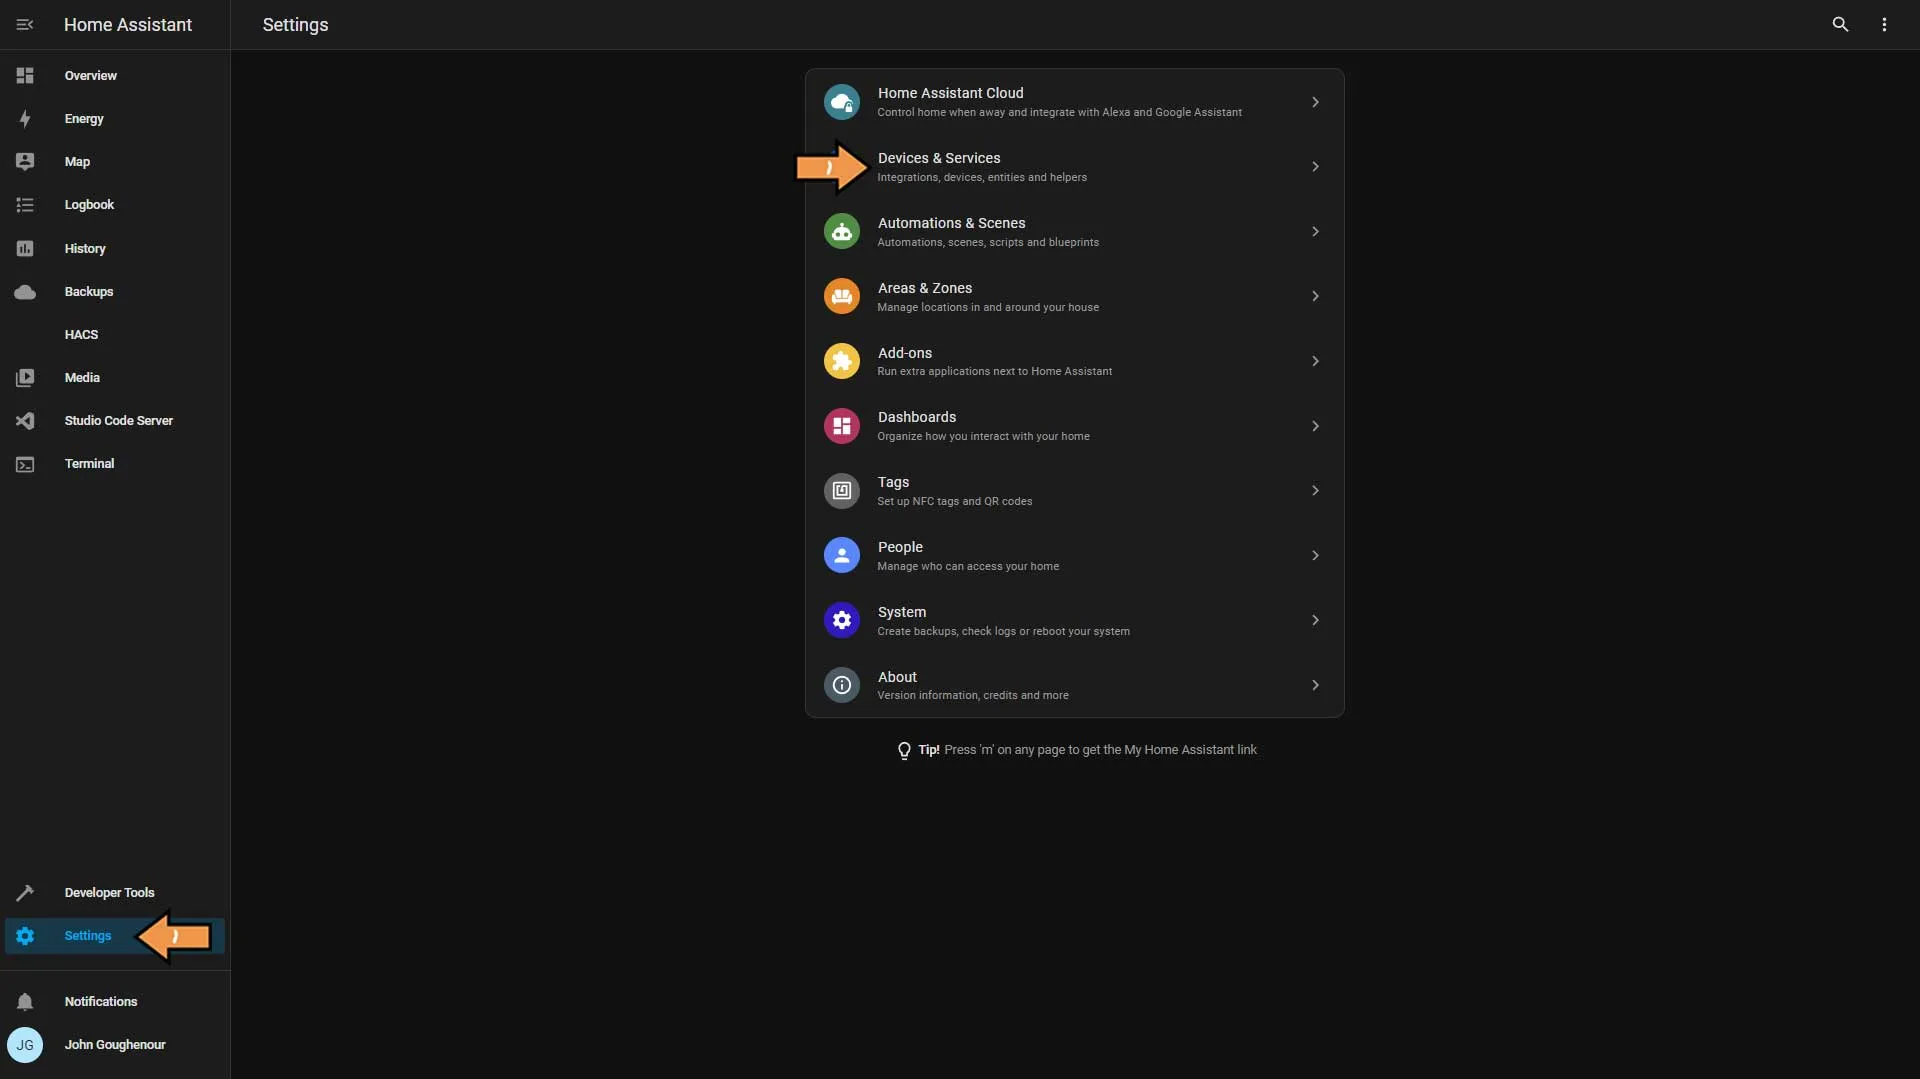
First, we need to go to Settings and Devices & Services.
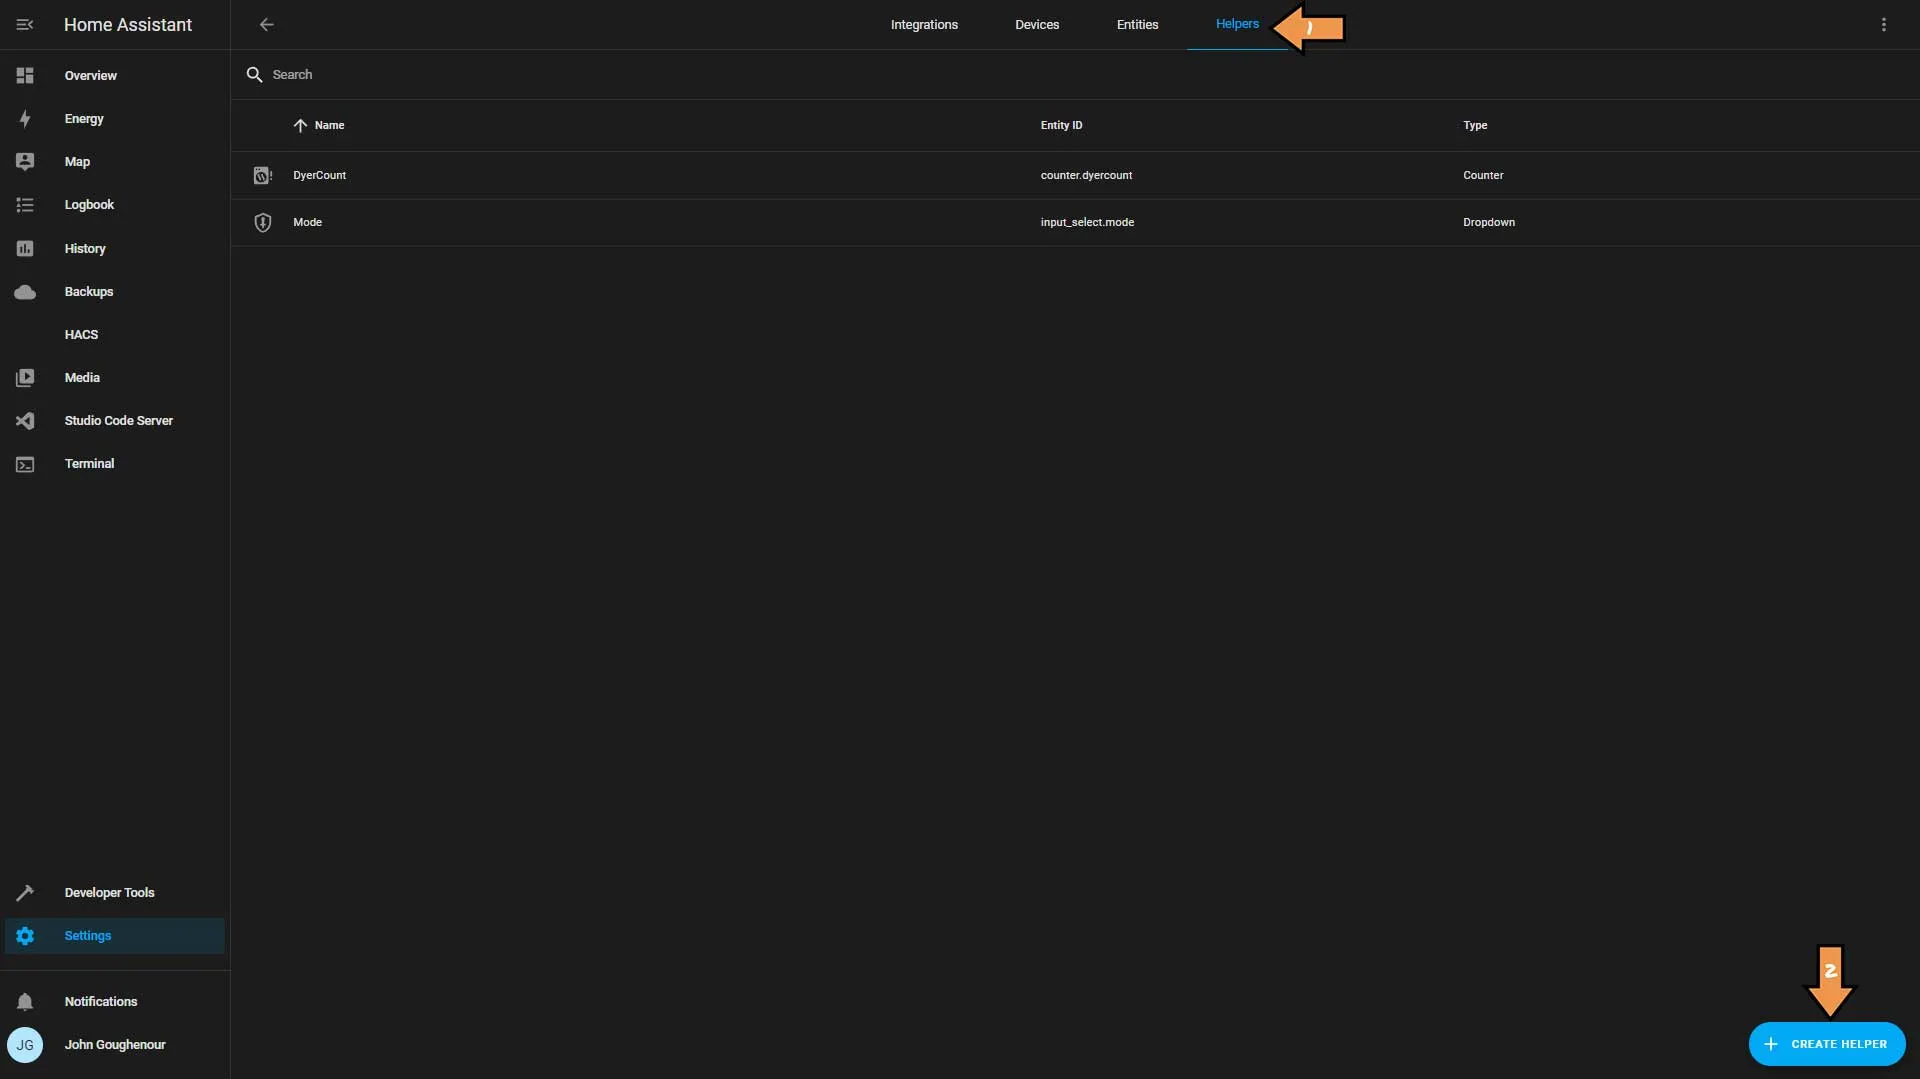
At the top of the screen, click Helpers, then the blue Create Helper button at the bottom.
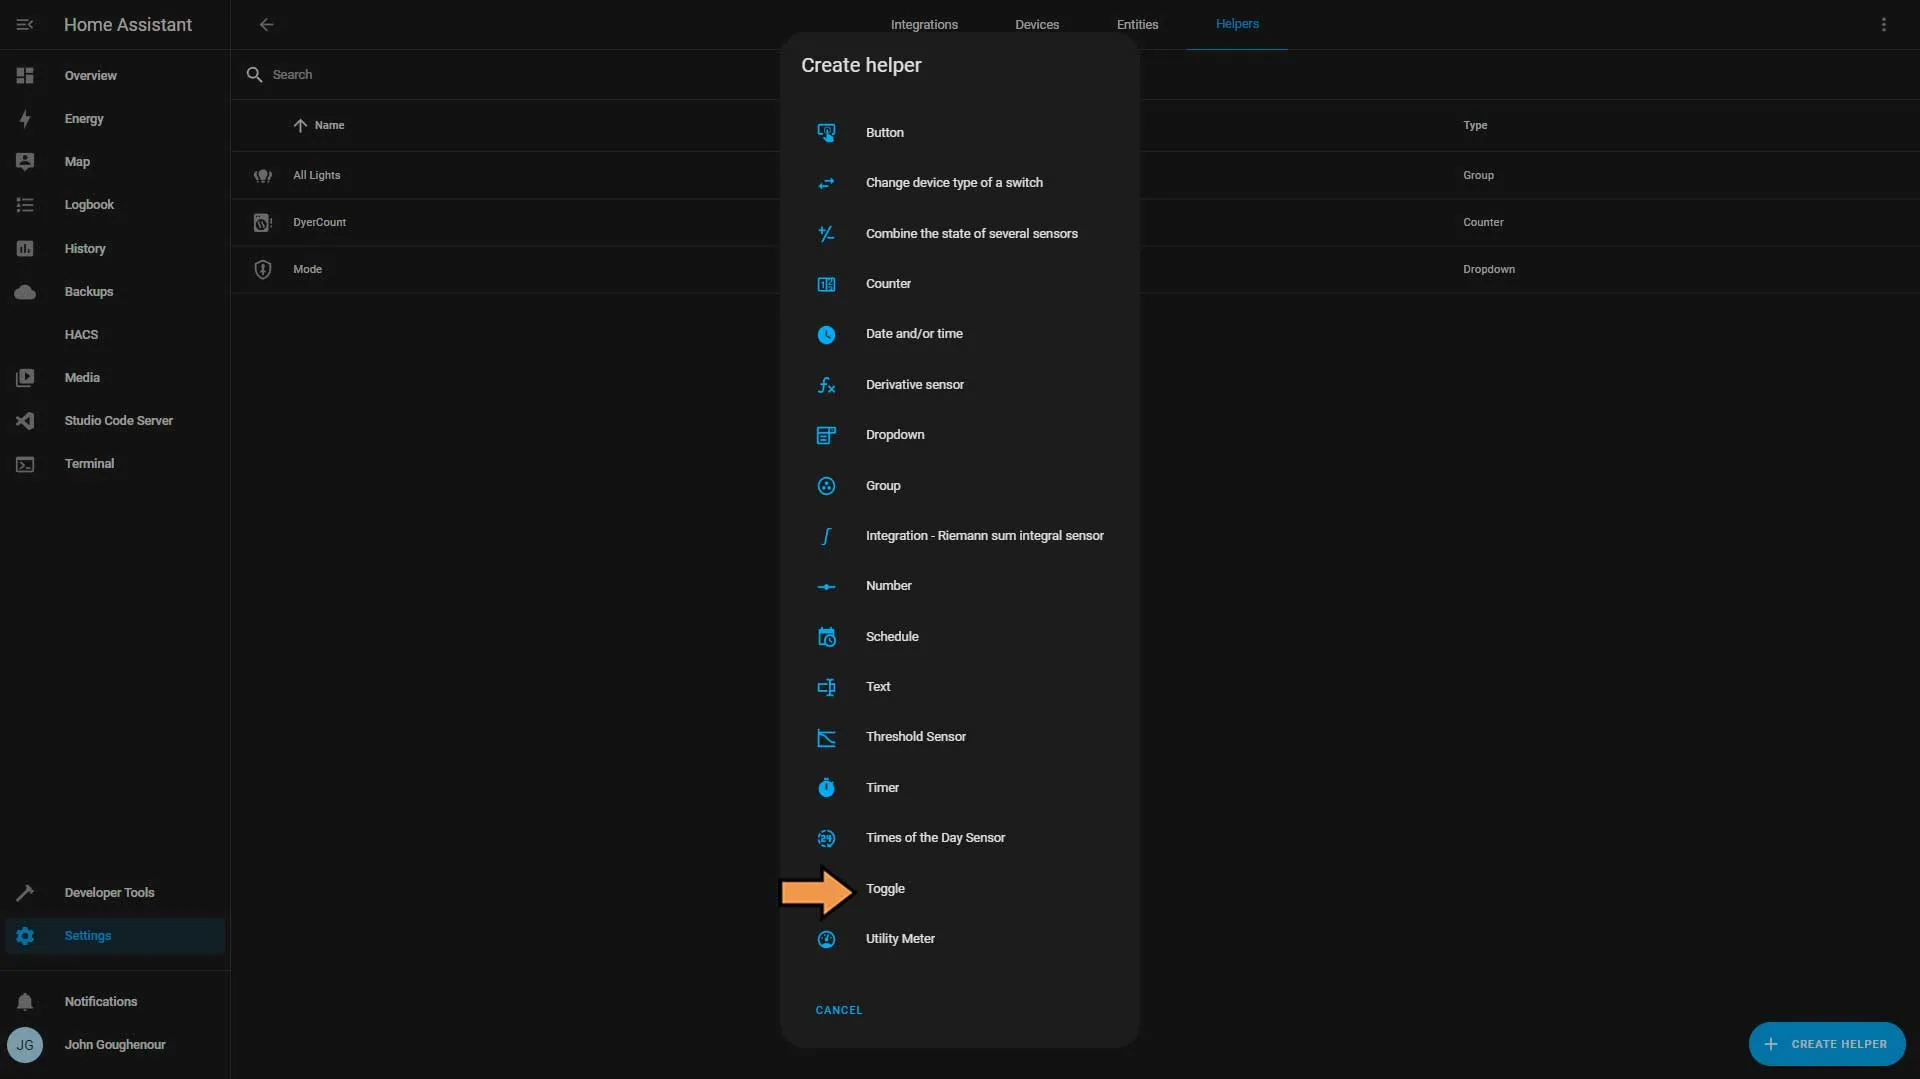
In the Create helper pop-up window, select Toggle.
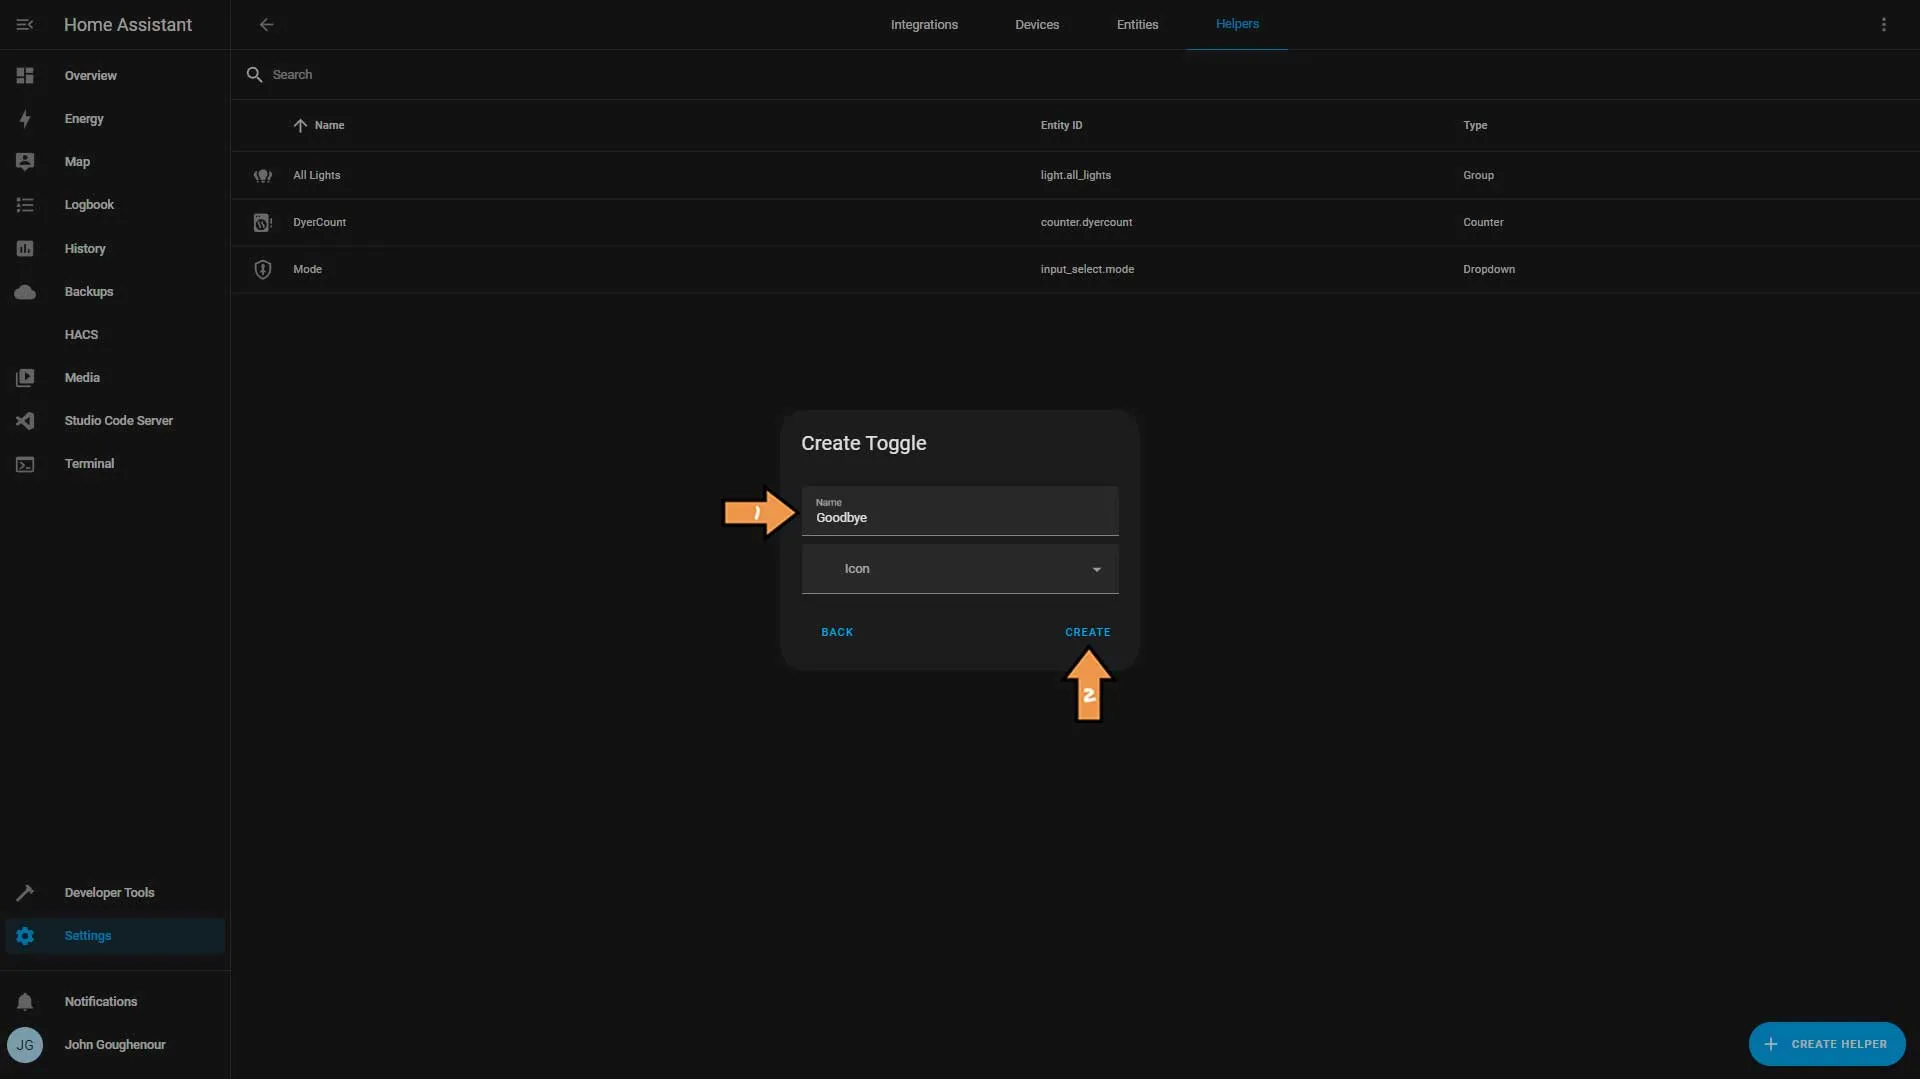
Name the virtual switch. Then click Create.
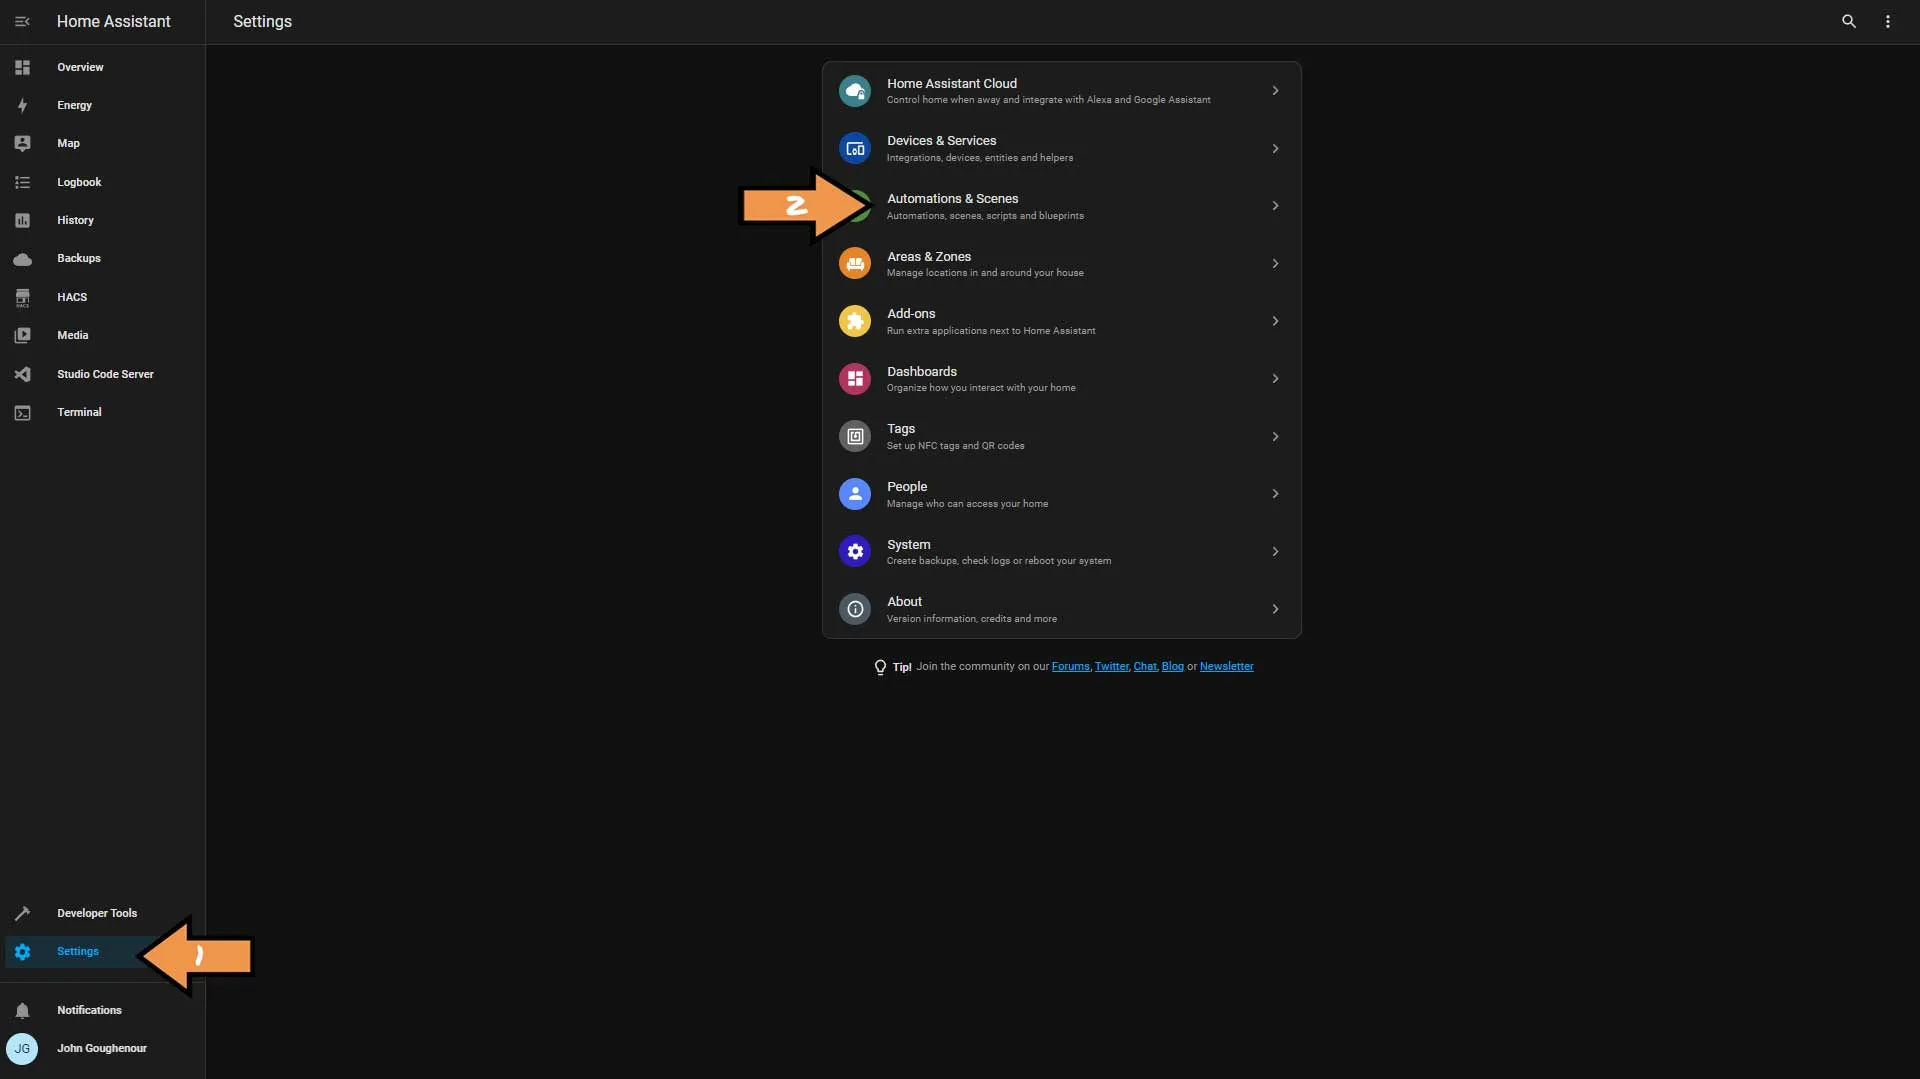
Next, we need to go to Settings and Automations & Scenes.
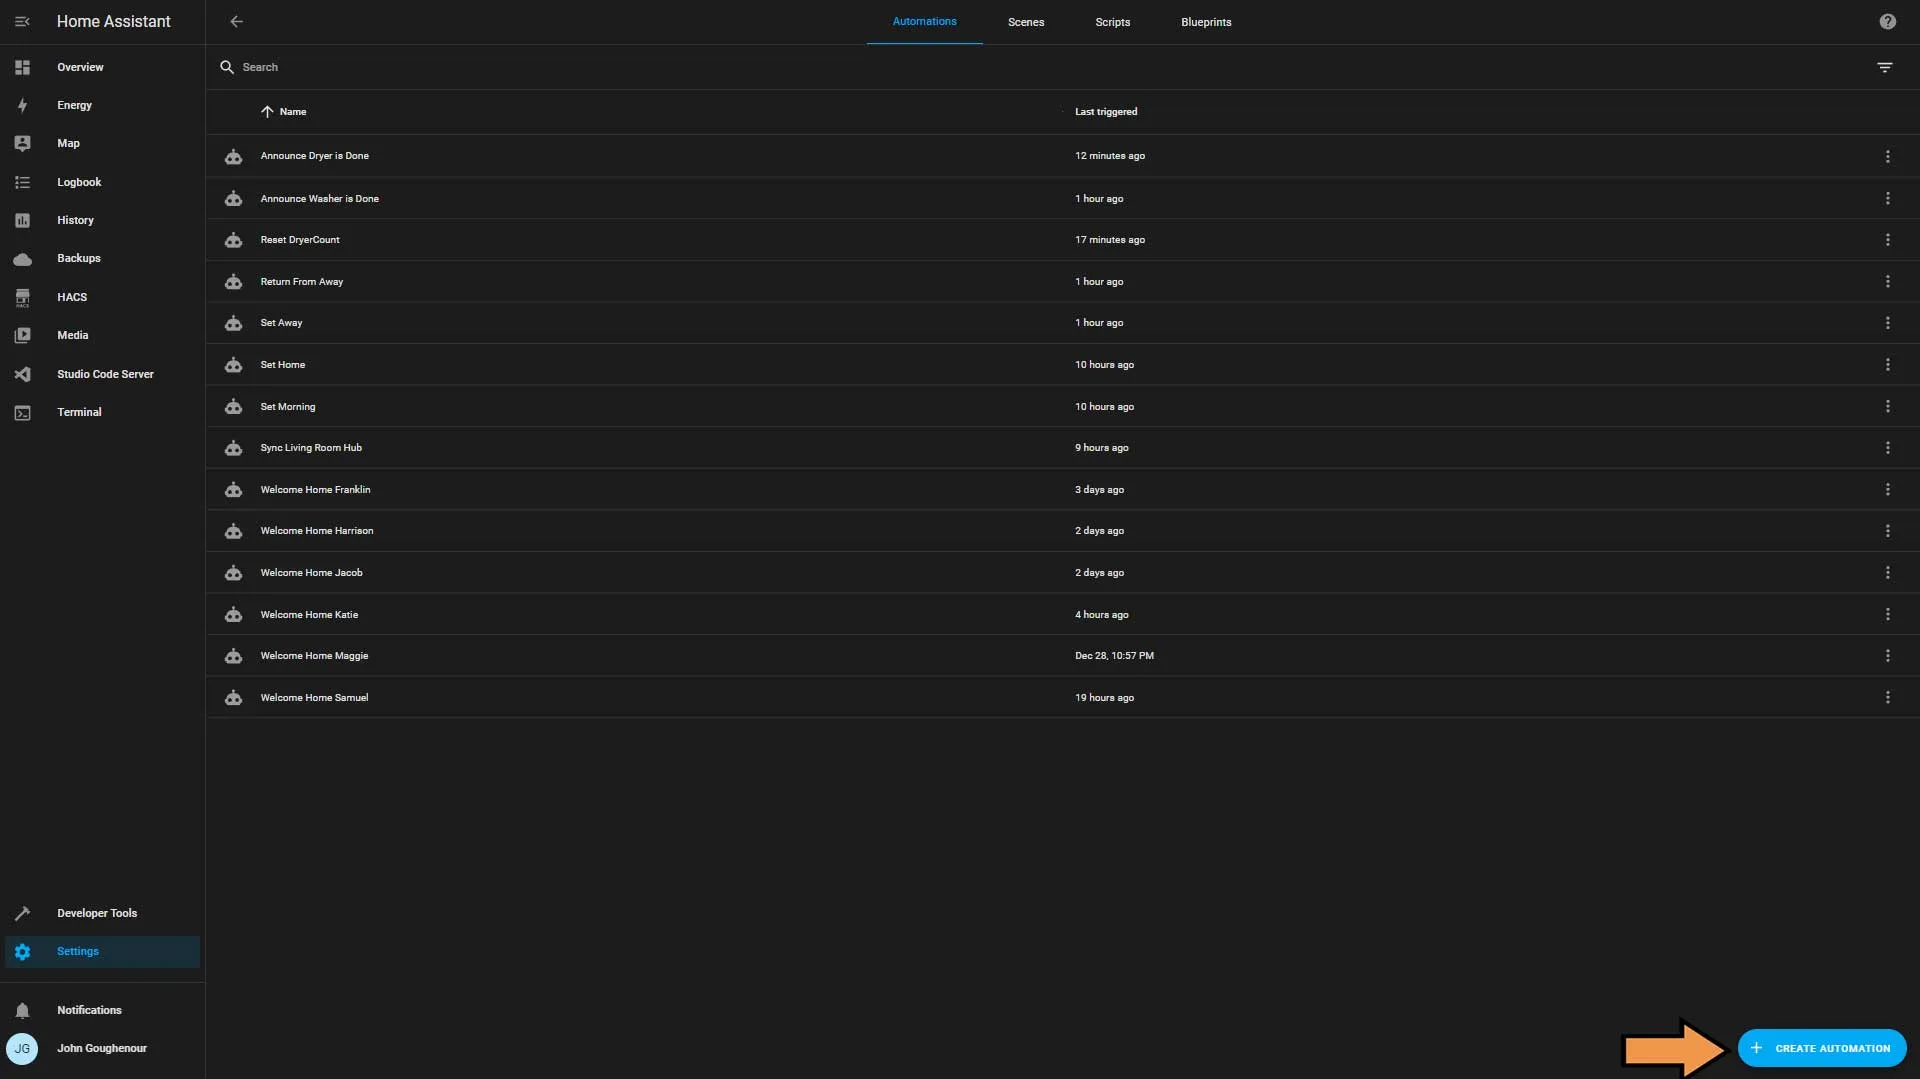
Click the blue Create Automation button.
Choose Create new automation.
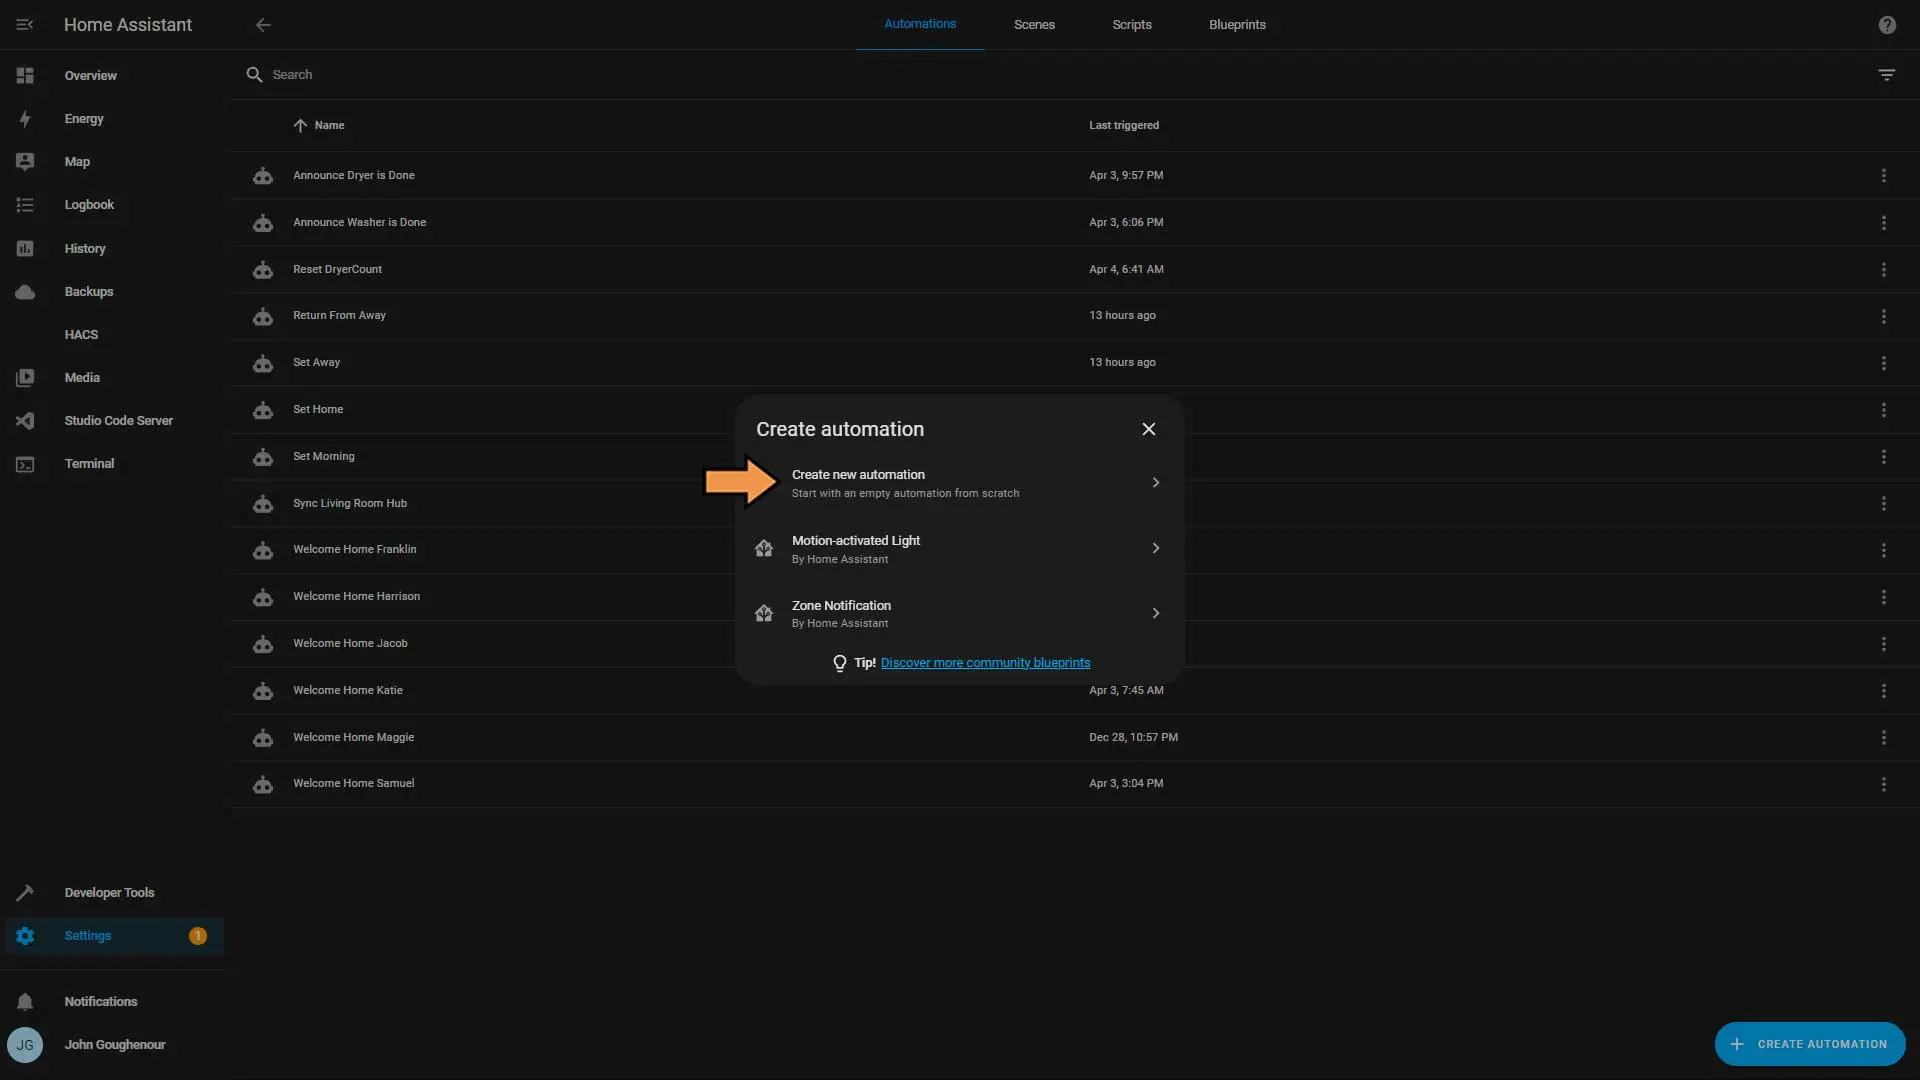
Click Add Trigger.
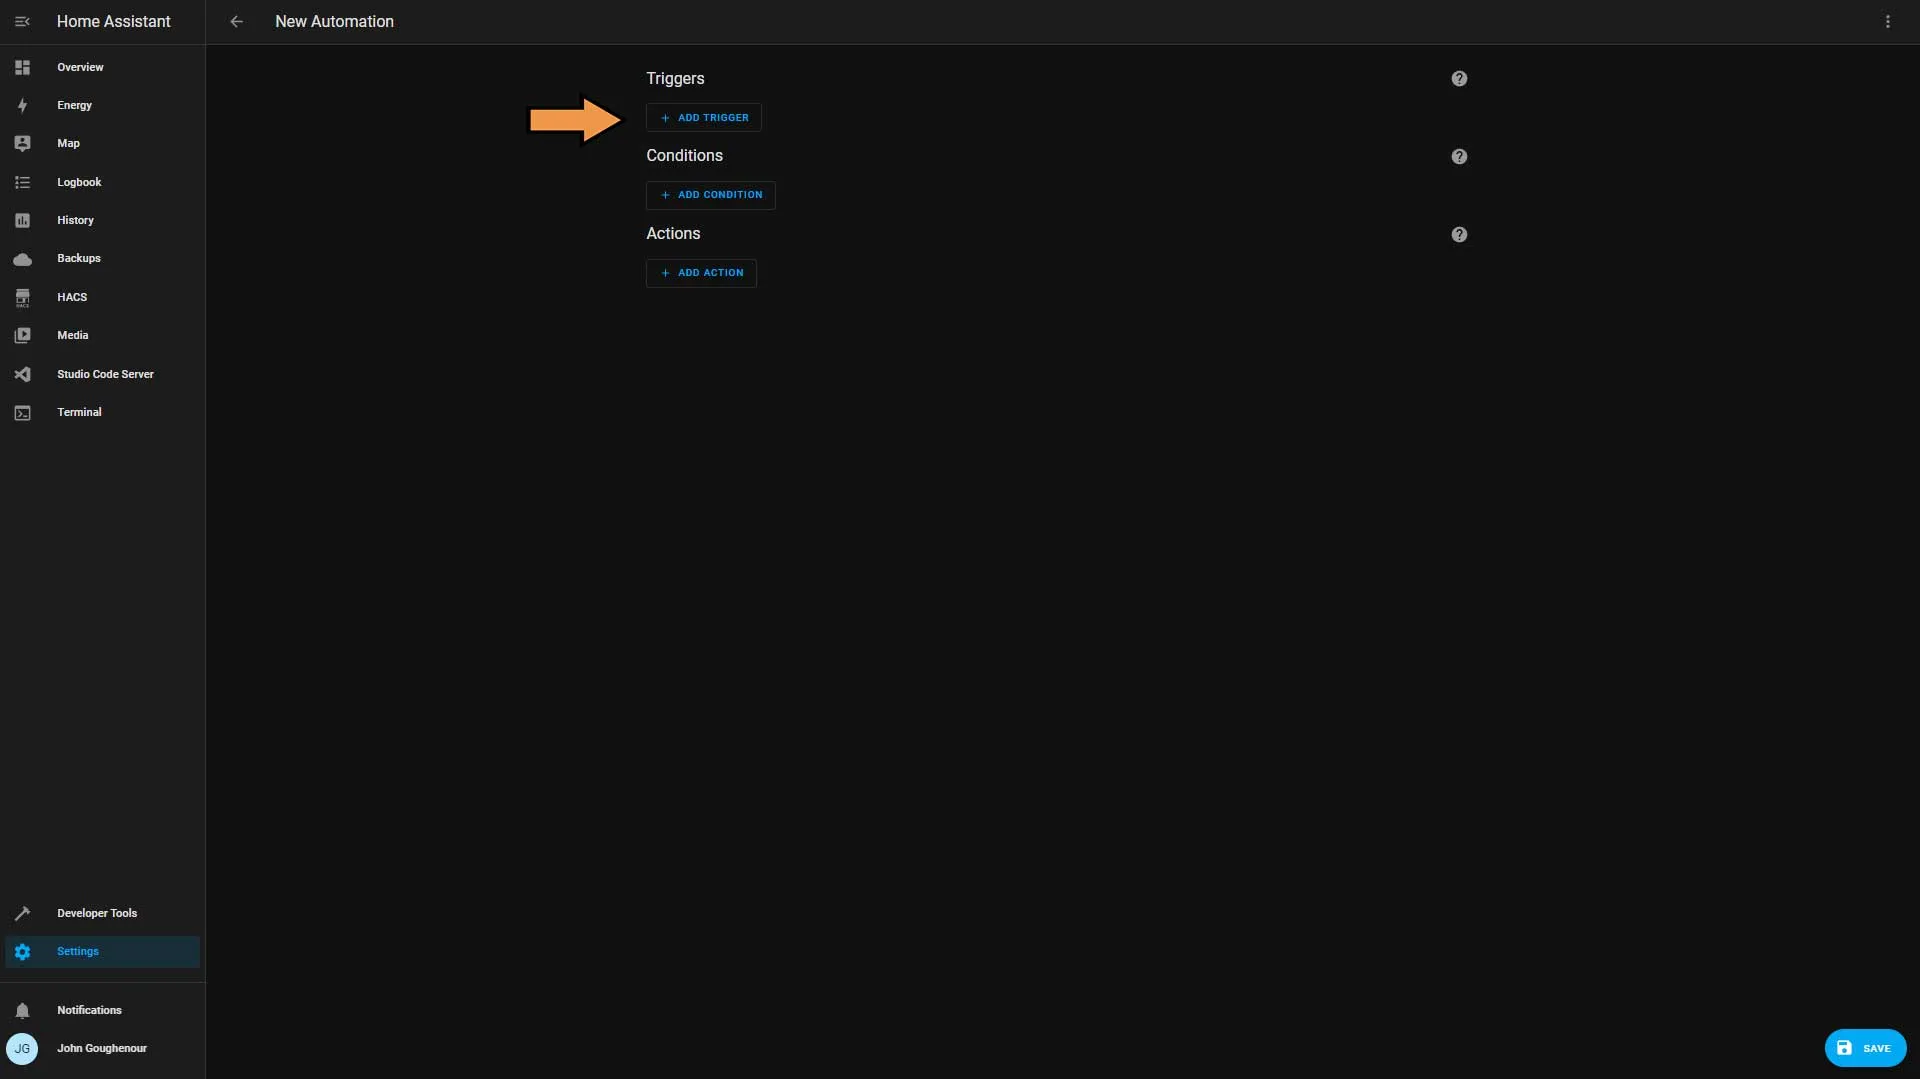
From the list, select State.
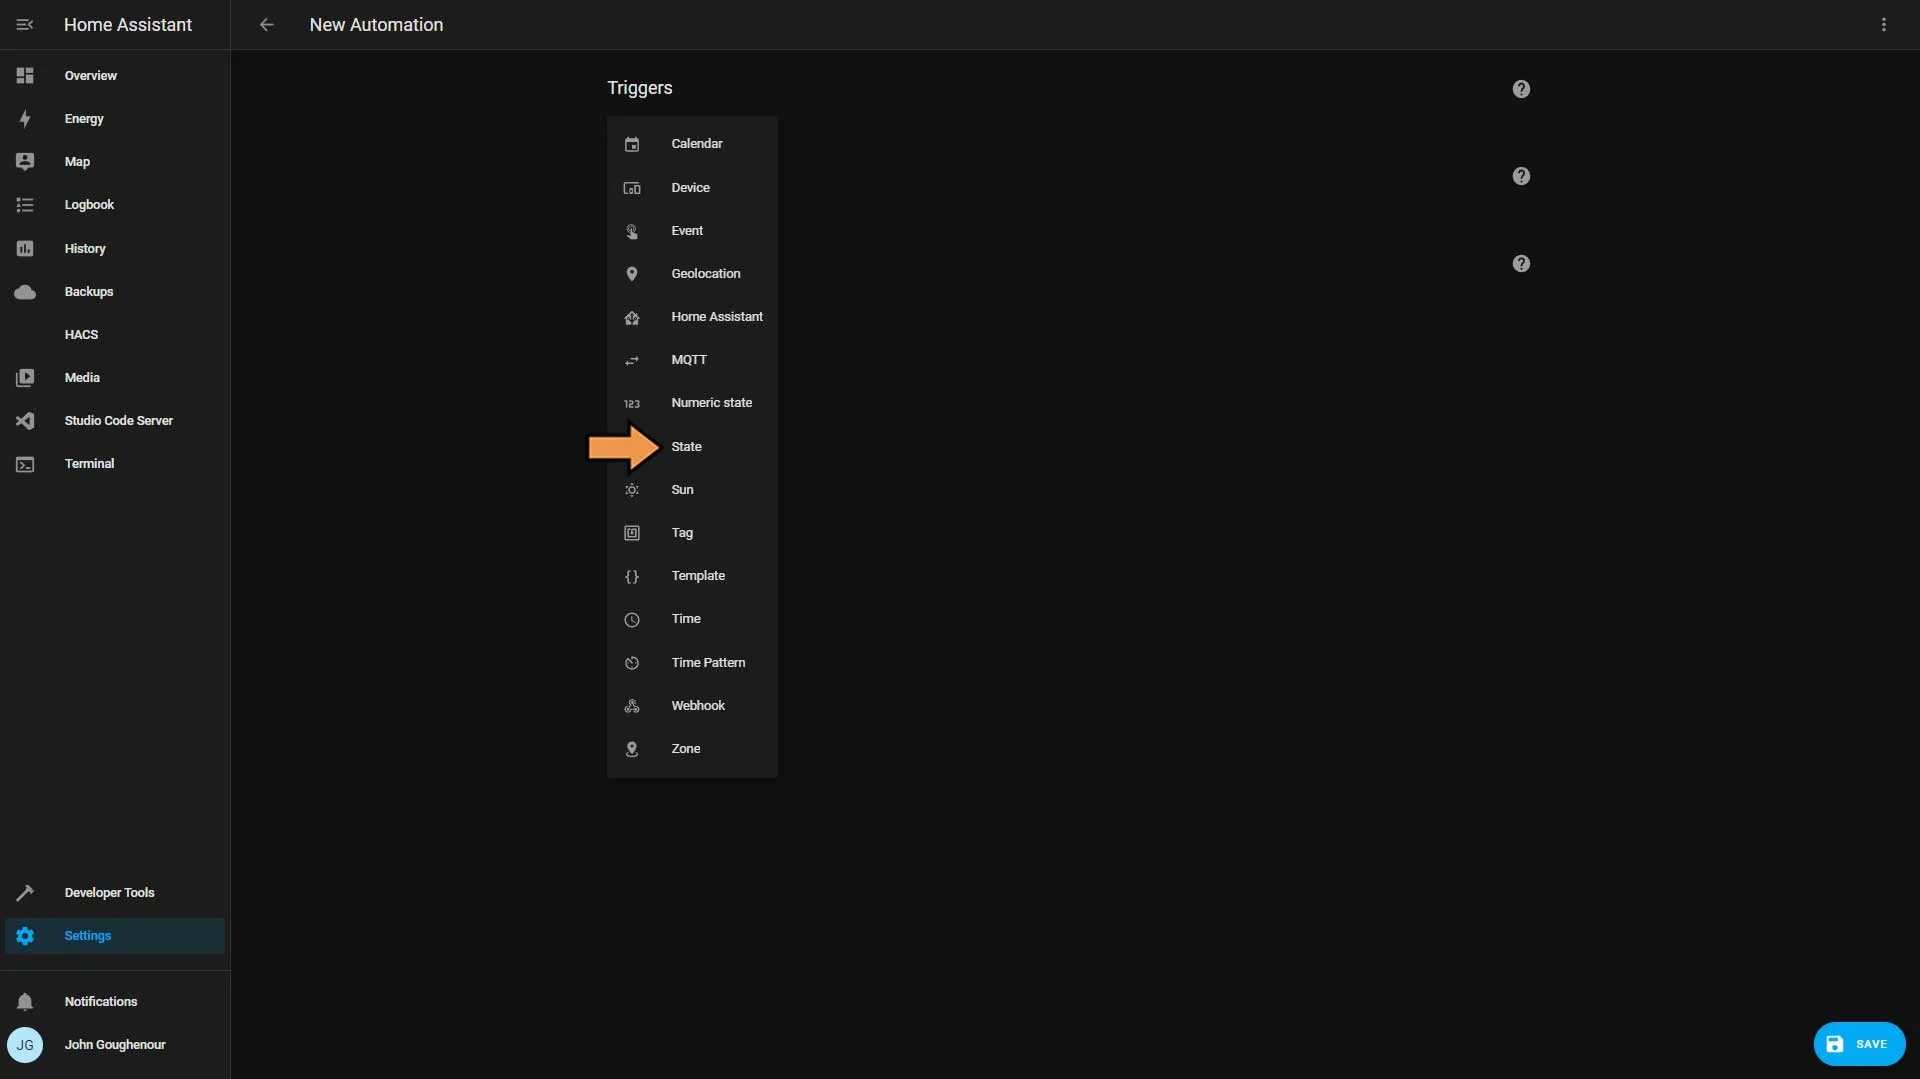
In the Entity box select our virtual switch we created earlier and set the “To” option to On. Then click the Add Trigger button.
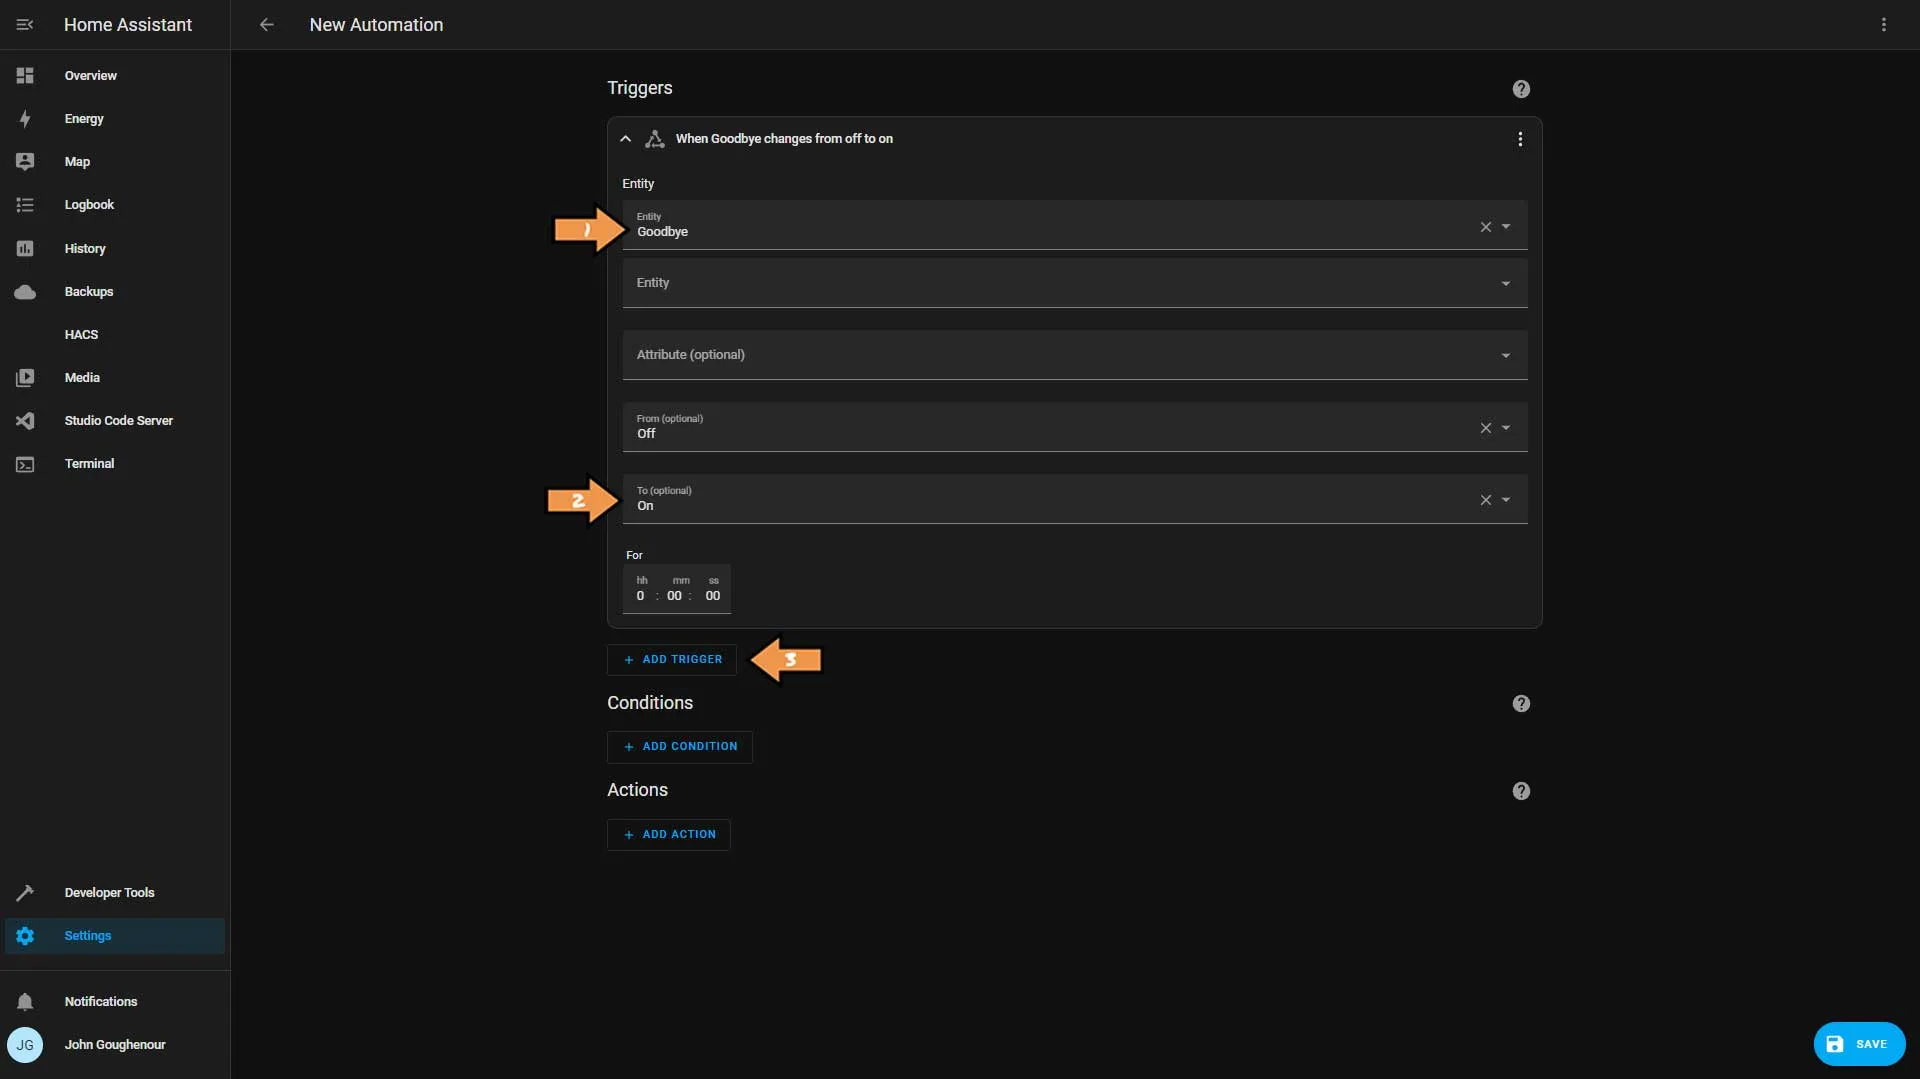
In the Entity box select Mode and set the “To” option to Away. Then click the vertical ellipse in the upper right-hand corner and select Edit ID.
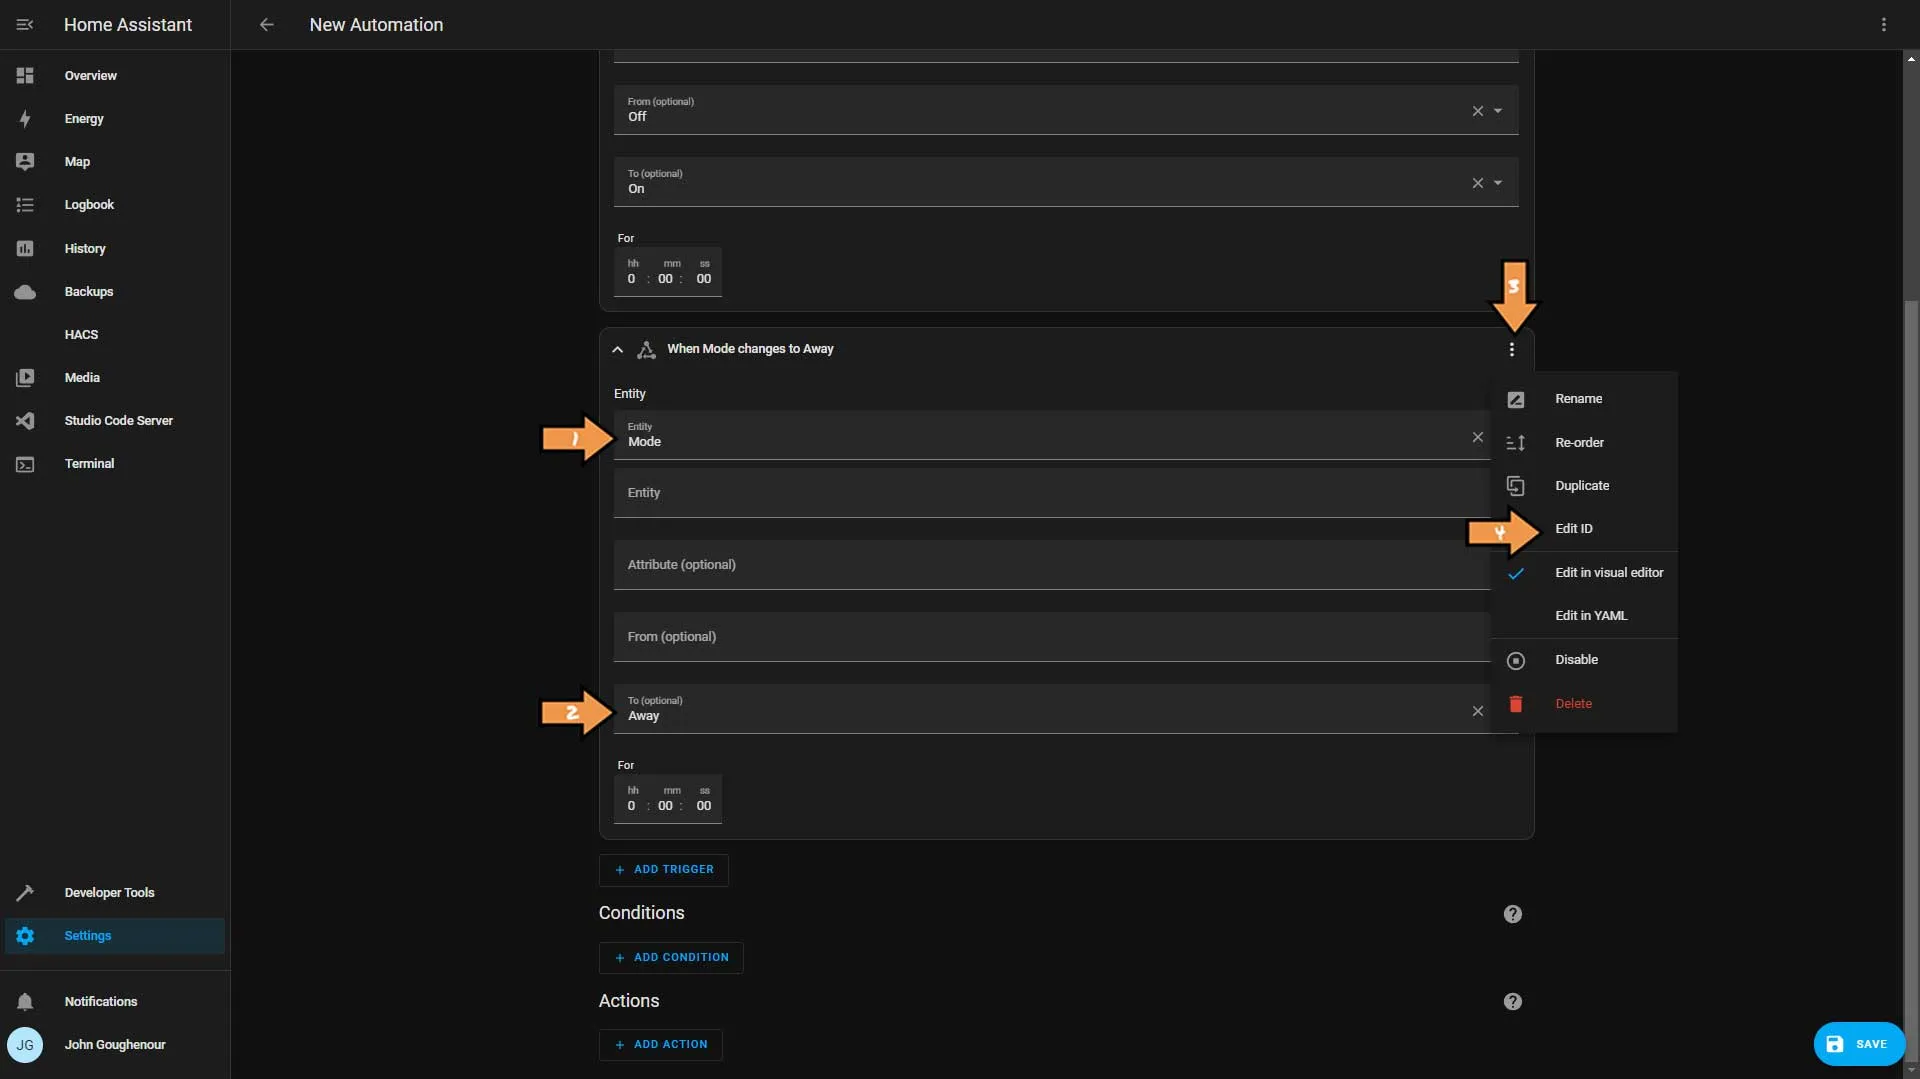
Add a Trigger ID. You can call it anything you like, but we’ll use changed_away. Then click the Add Action button.
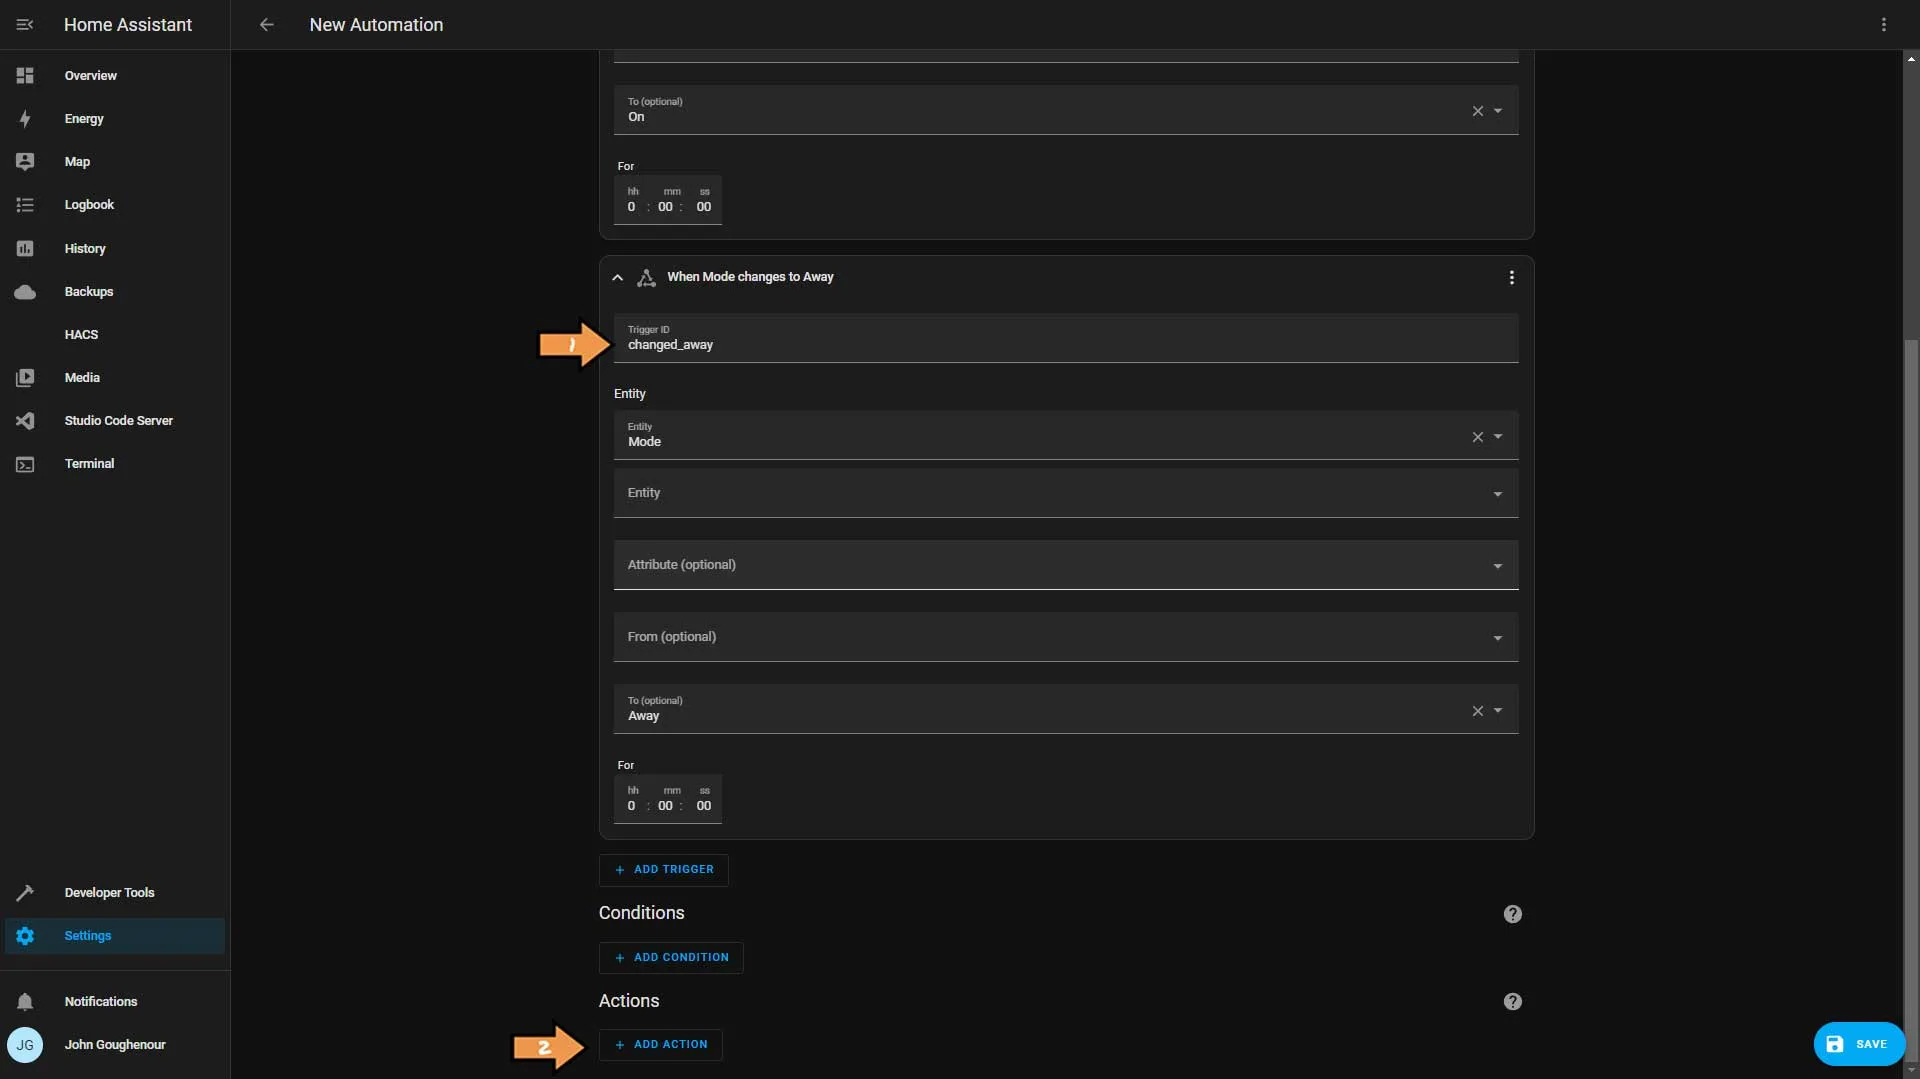
From the Action type list, select Call service.
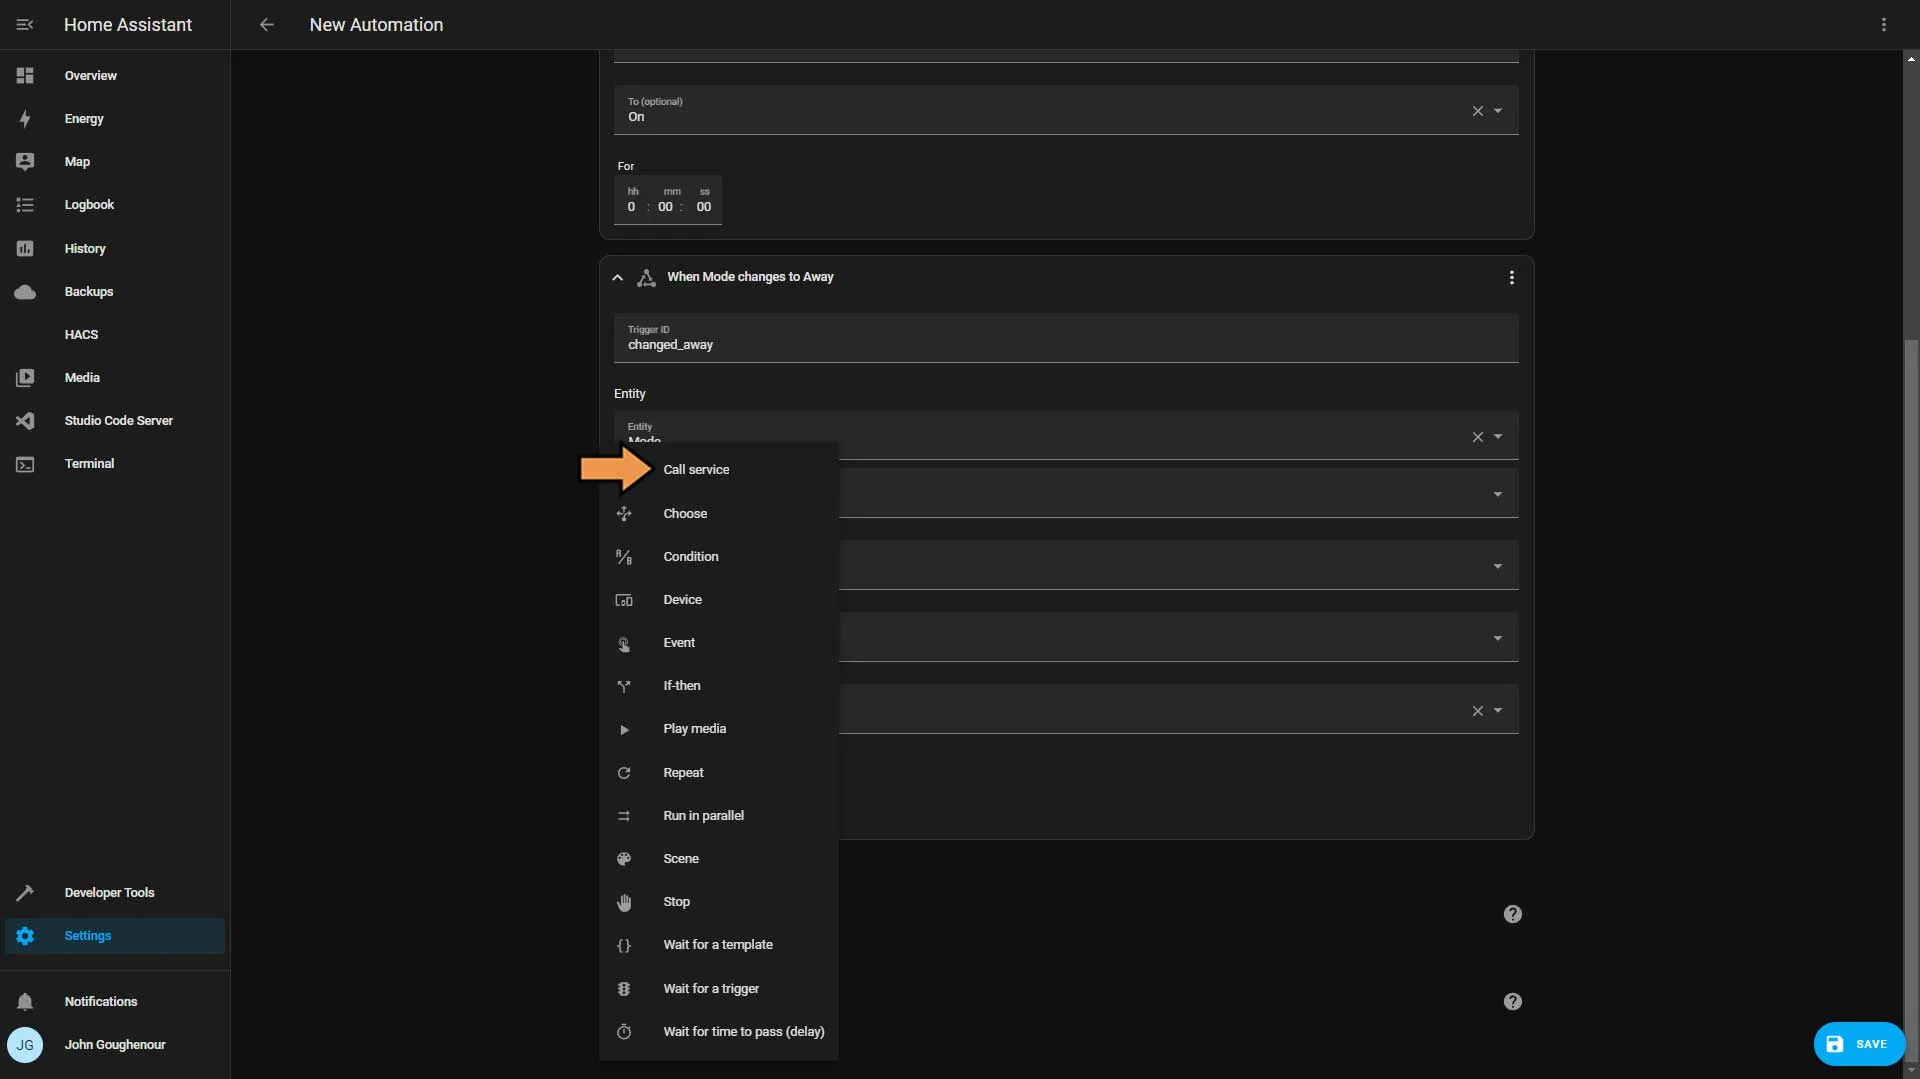
In the Service drop-down select Light: Turn off. Click the Choose entity button and select our All Lights Group. Then click Add Action.
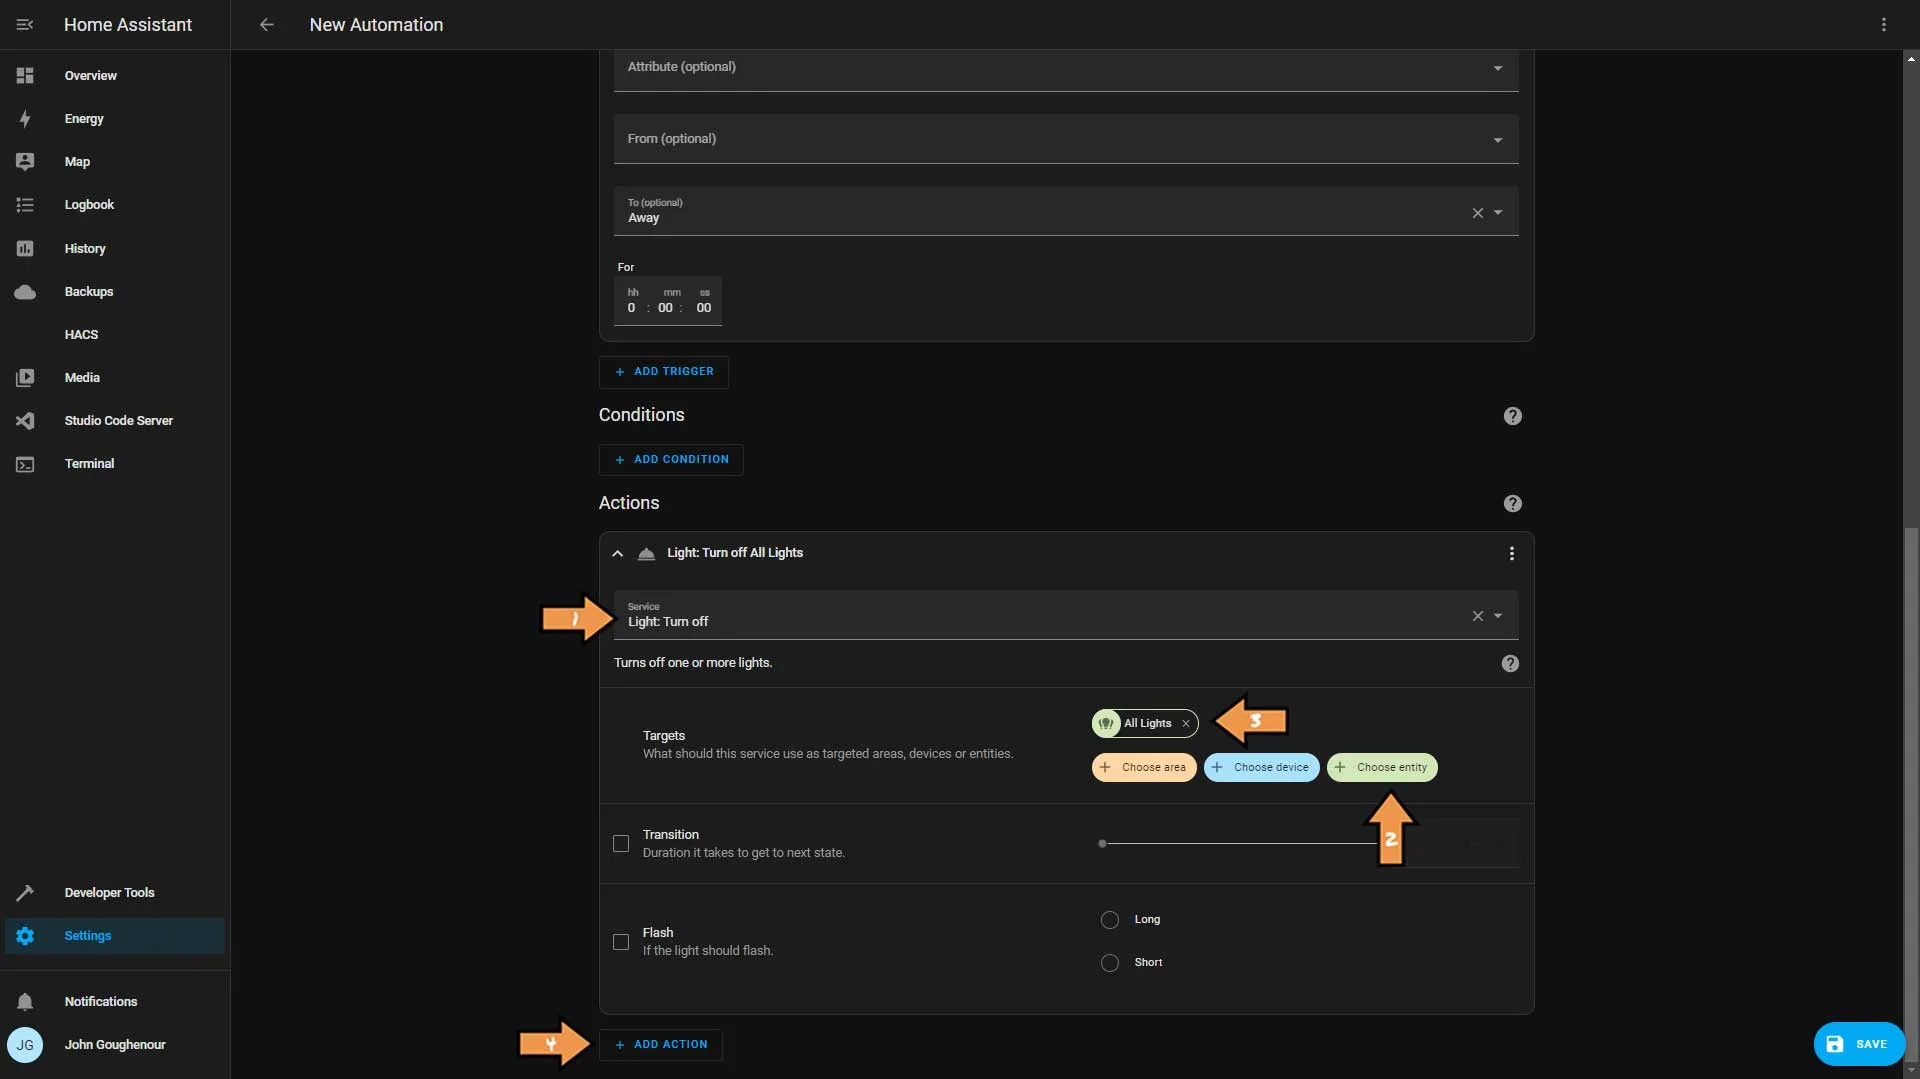
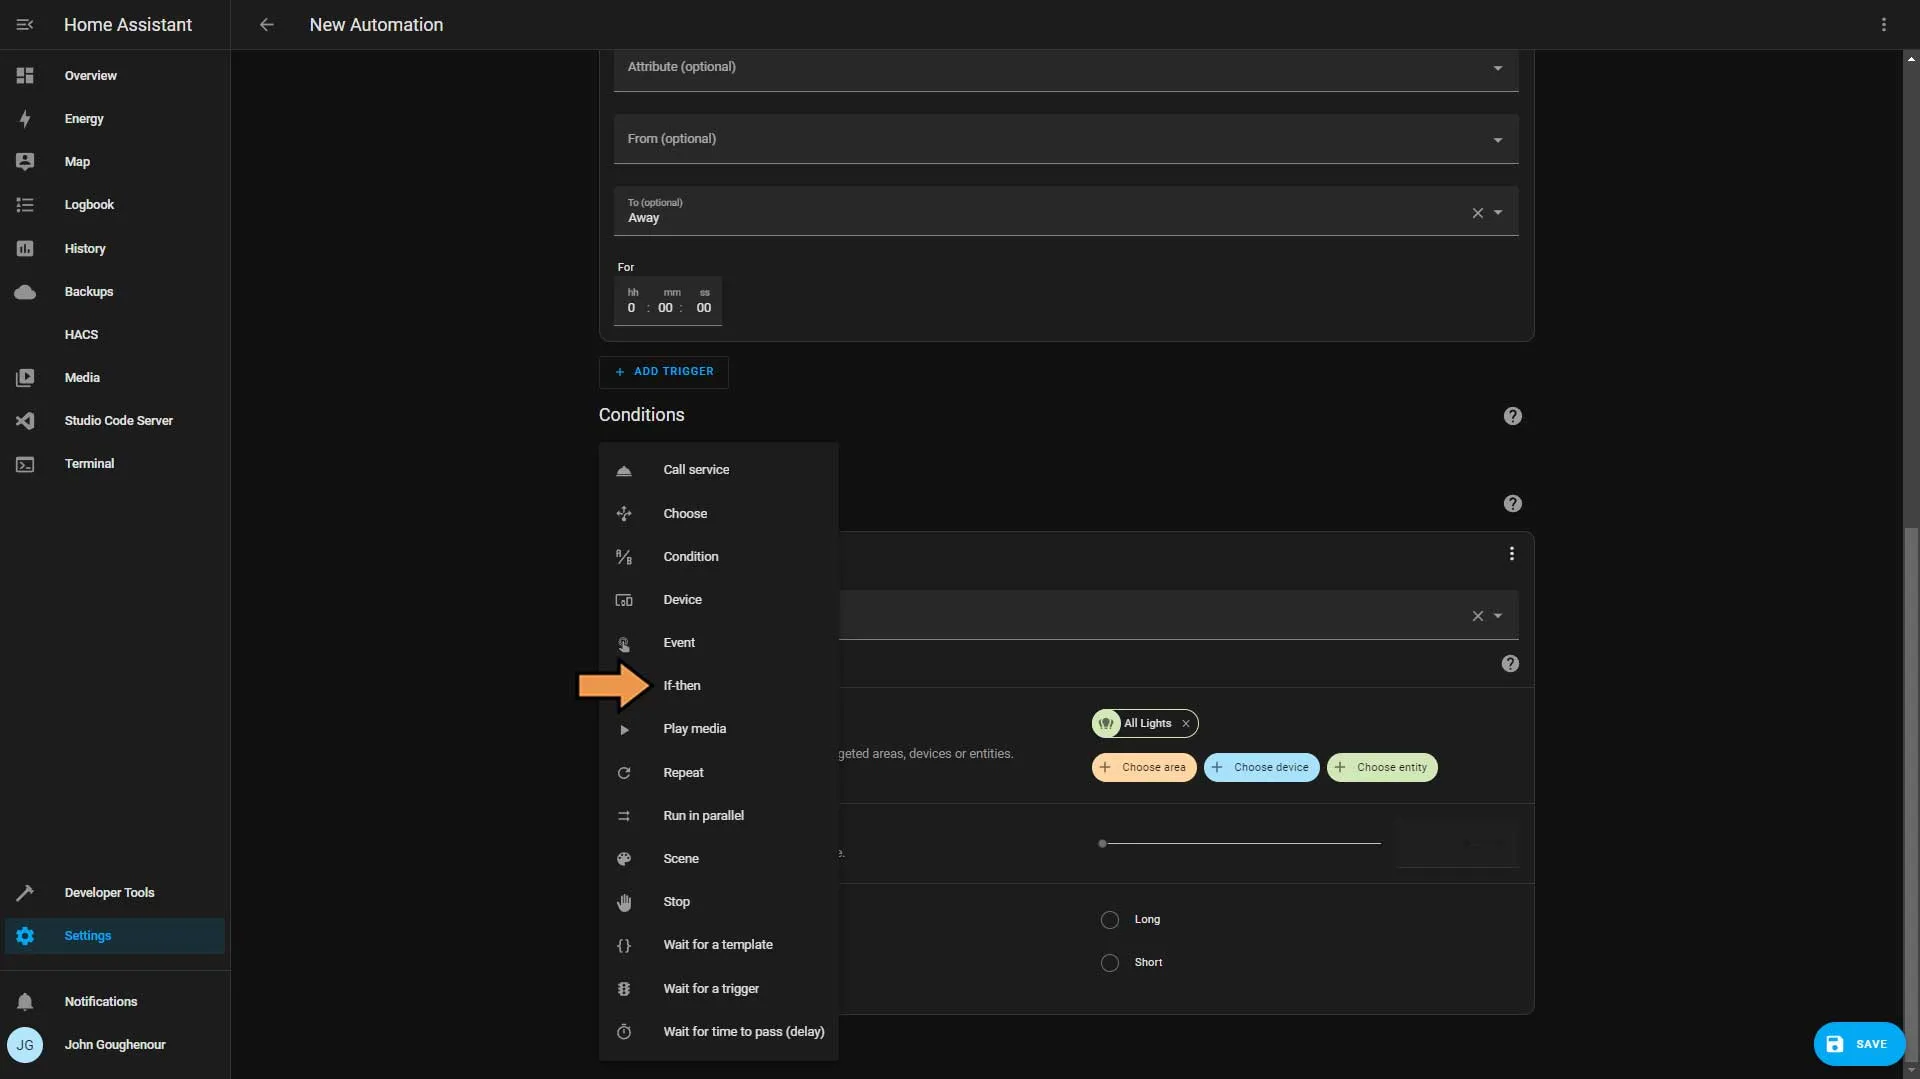
From the Action type list, select If-then.
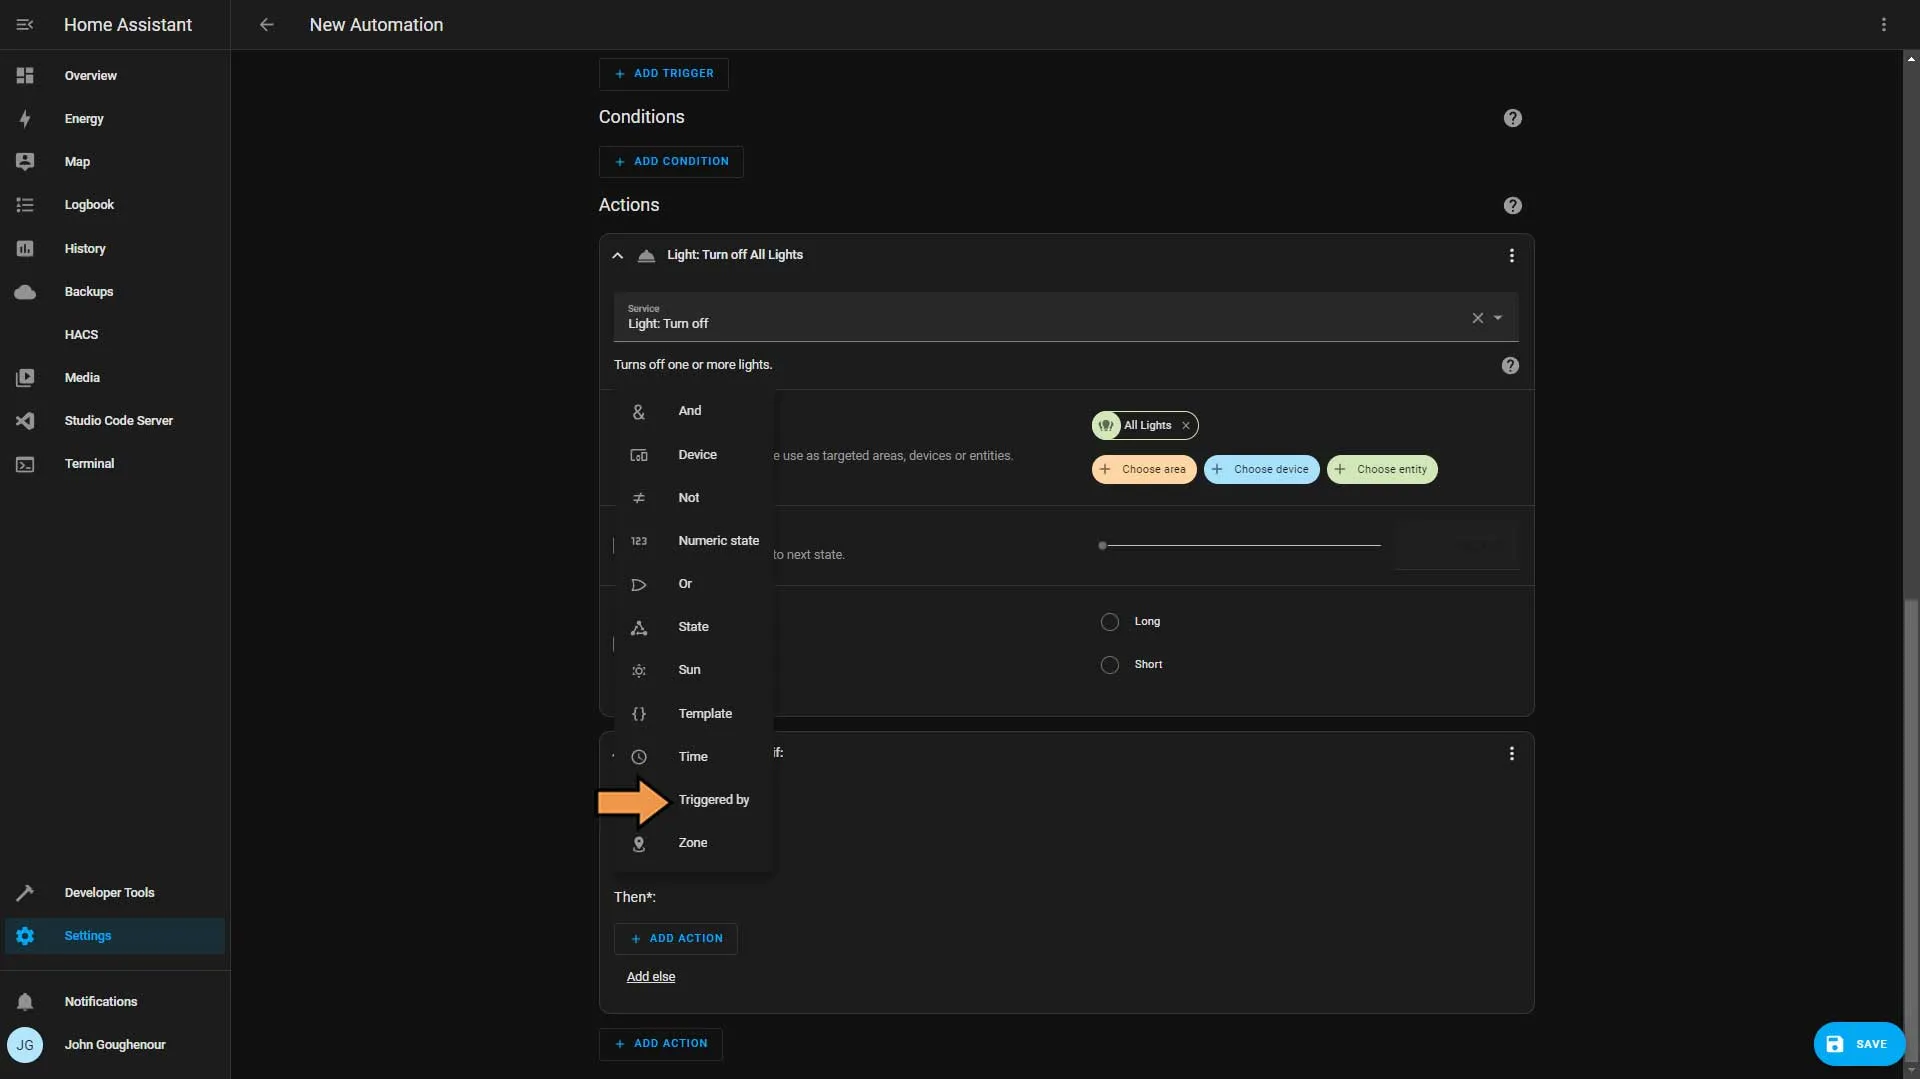
Click the Add Condition button within the if statement and select Triggered by from the list.
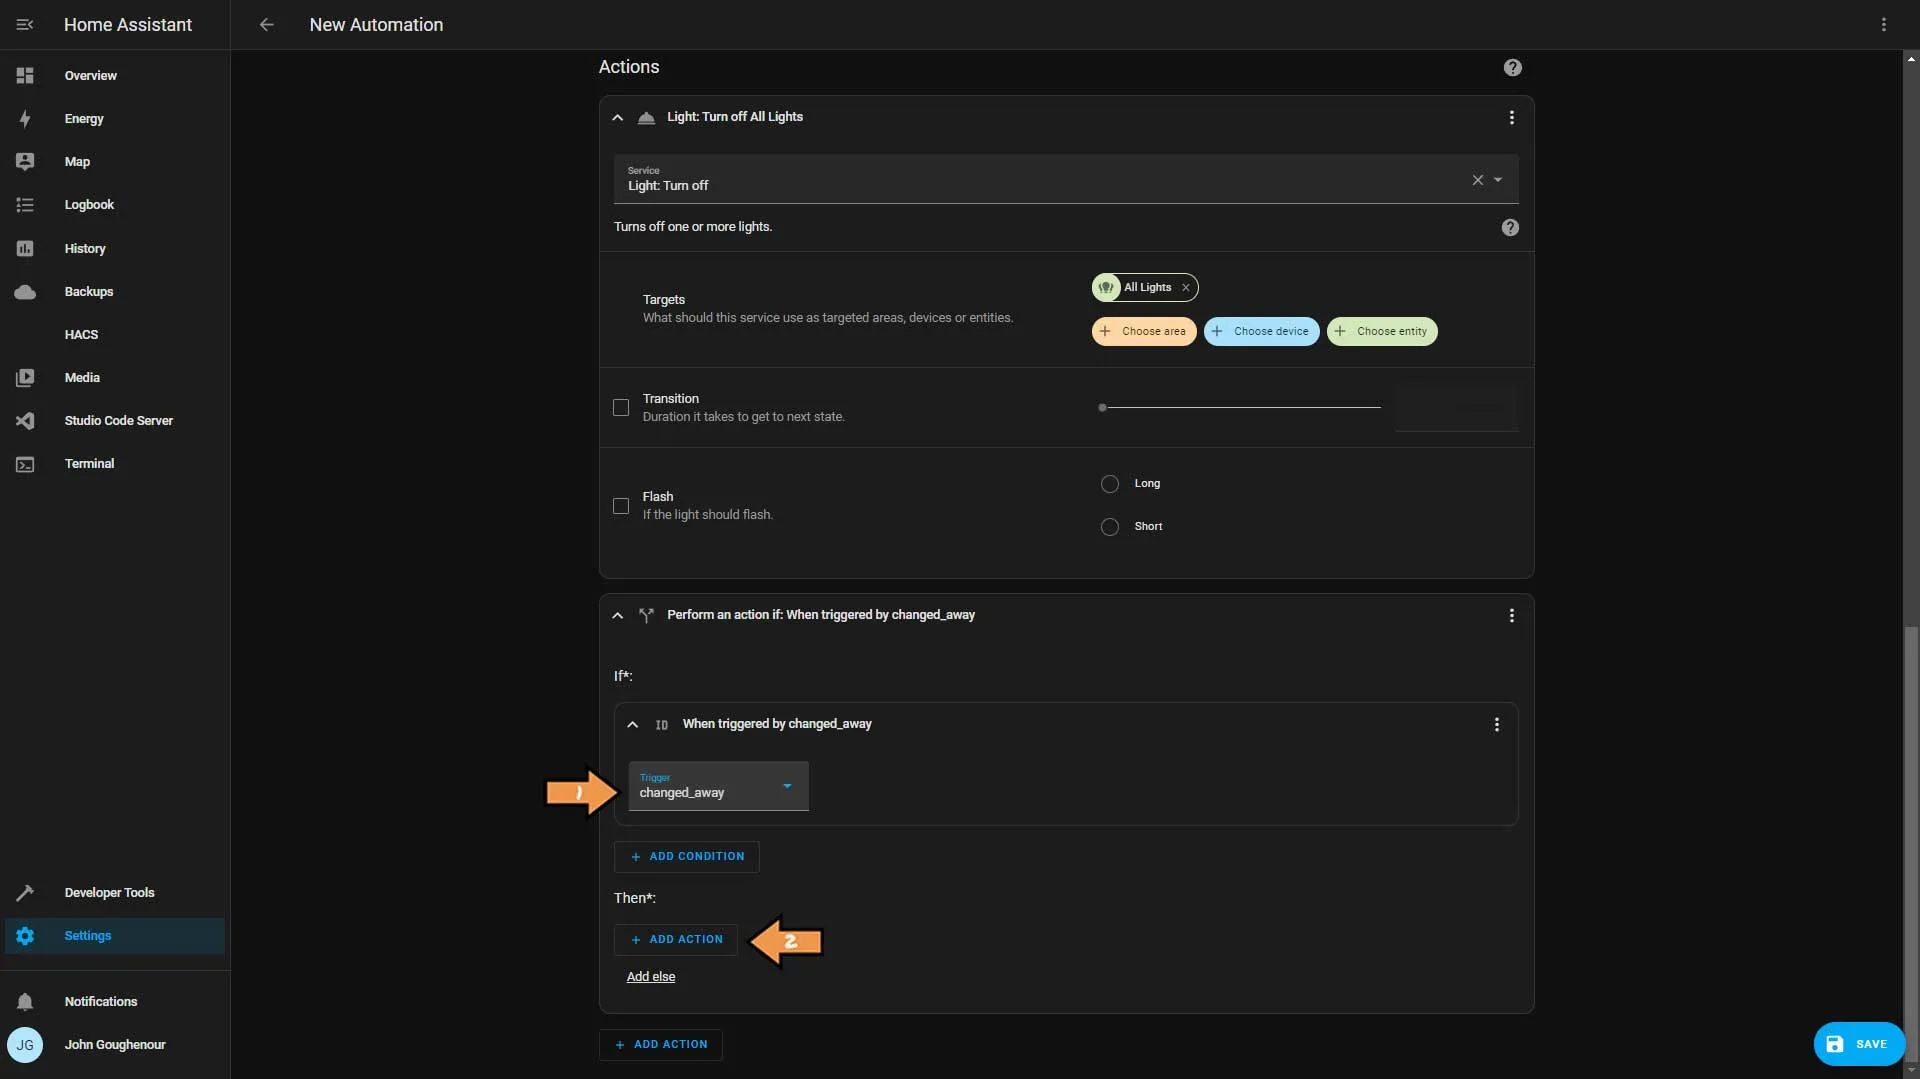
Select the ID we created earlier and then click the Add Action button.
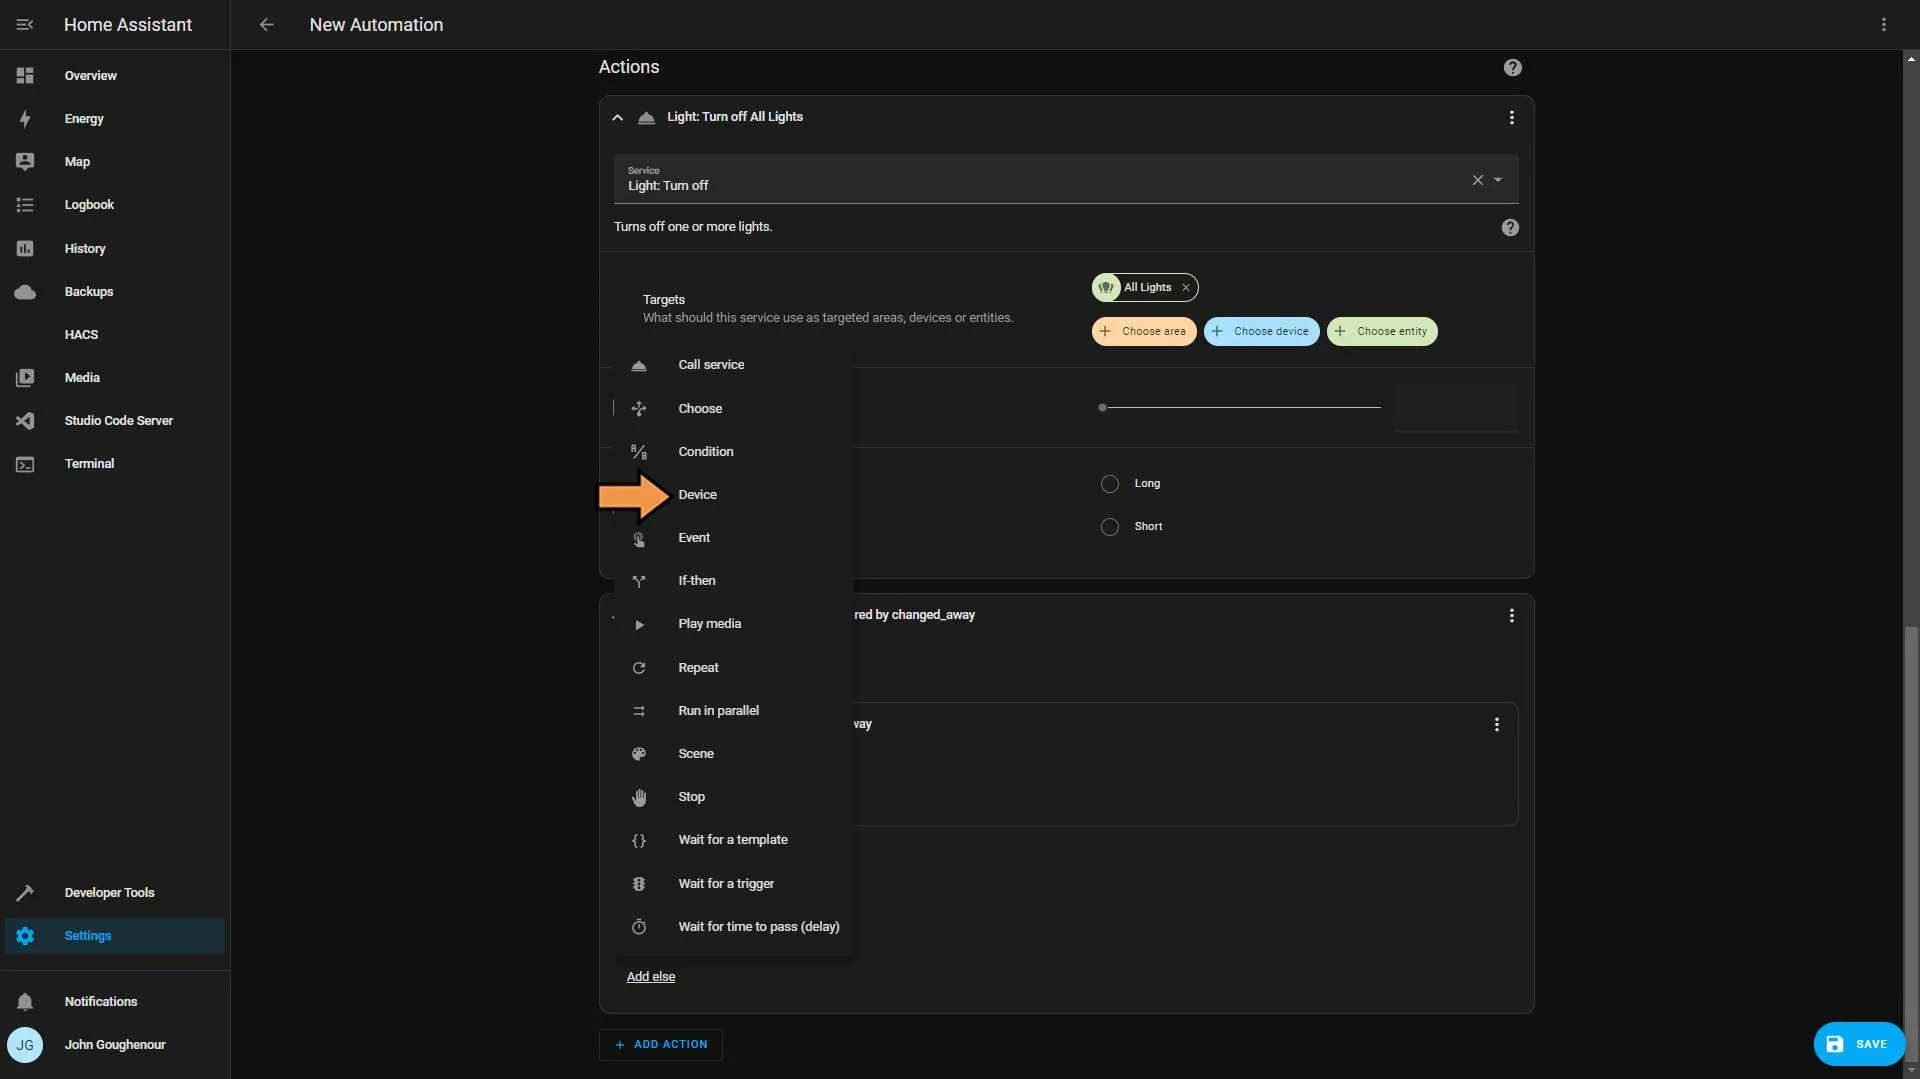
From the list, select the Device option.
We will be adding three devices as follows:
- Select our locks and for the Action choose Lock.
- Then we’ll select our Smart Thermostat.
- We’ll set the Action to “Change My ecobee Current Mode option”.
- Set the Option to away.
- Then click the Add Action button outside the If-Statement.
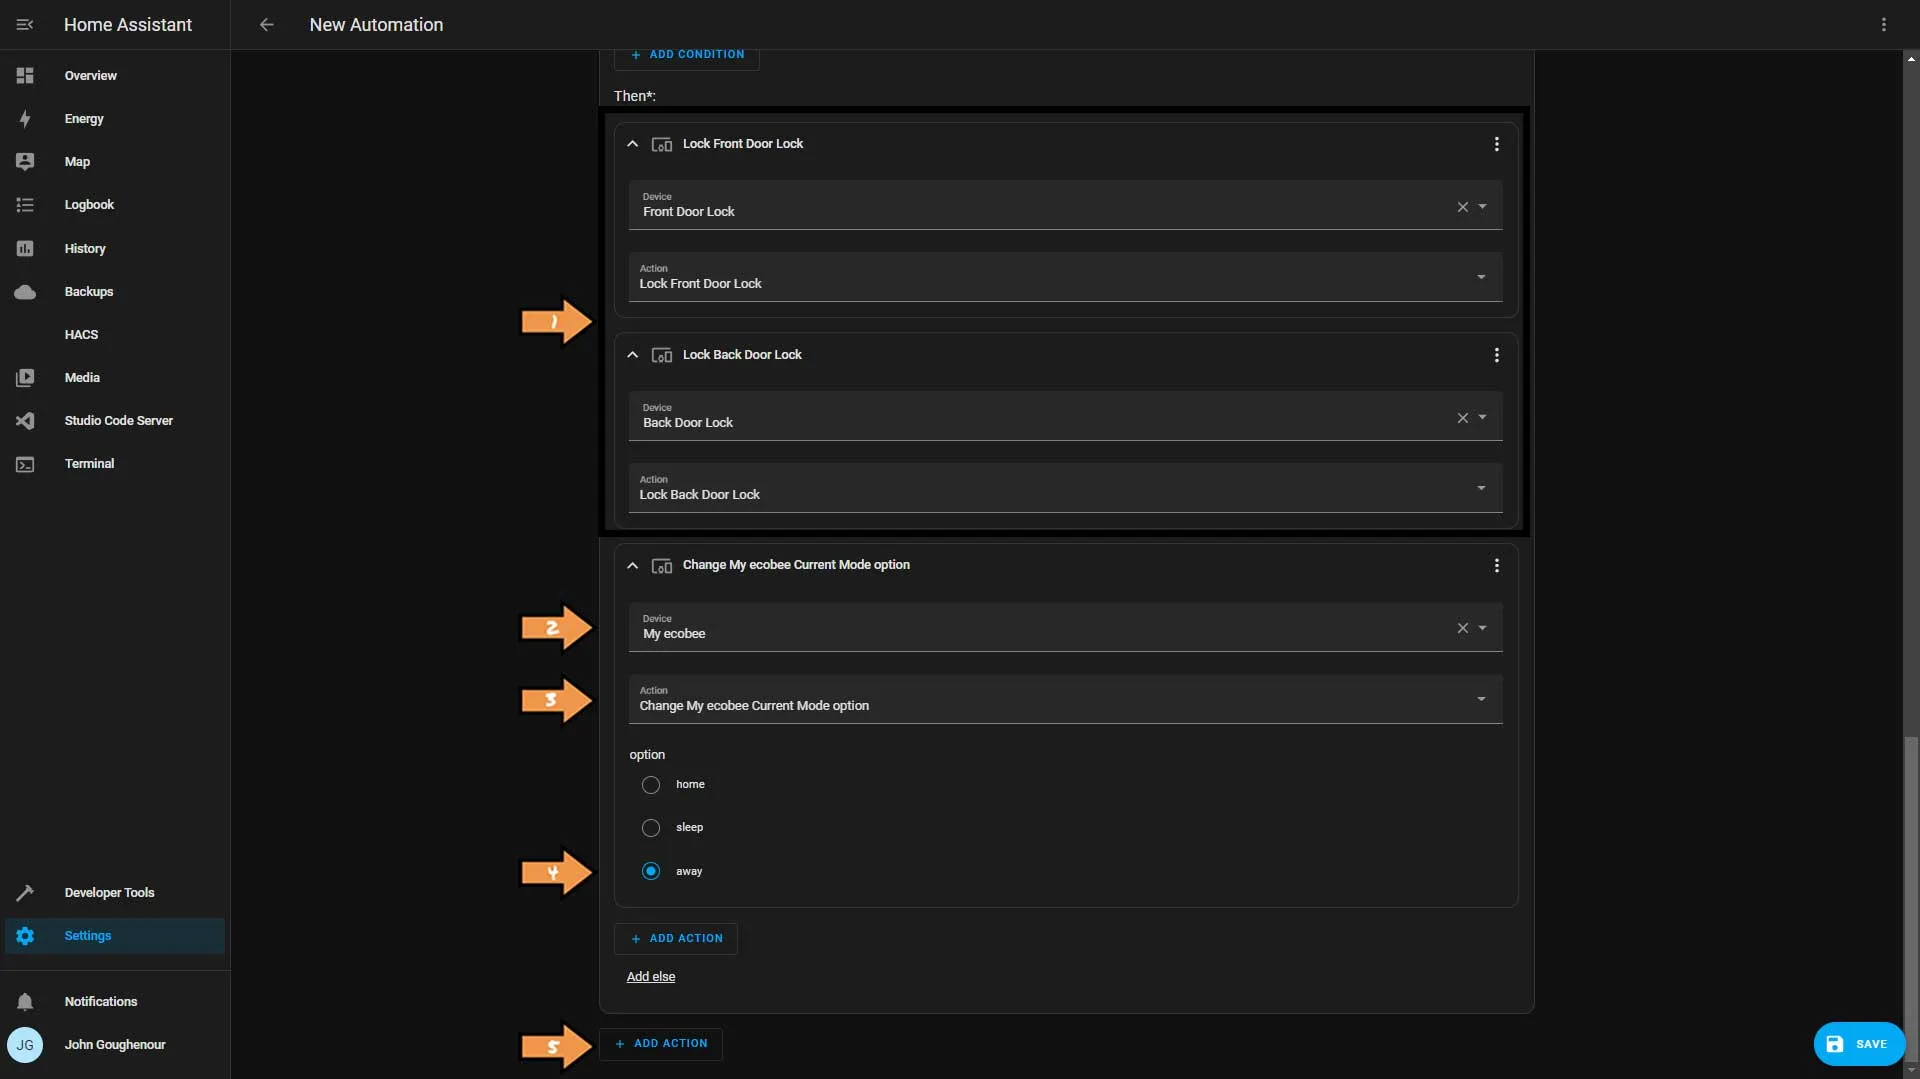
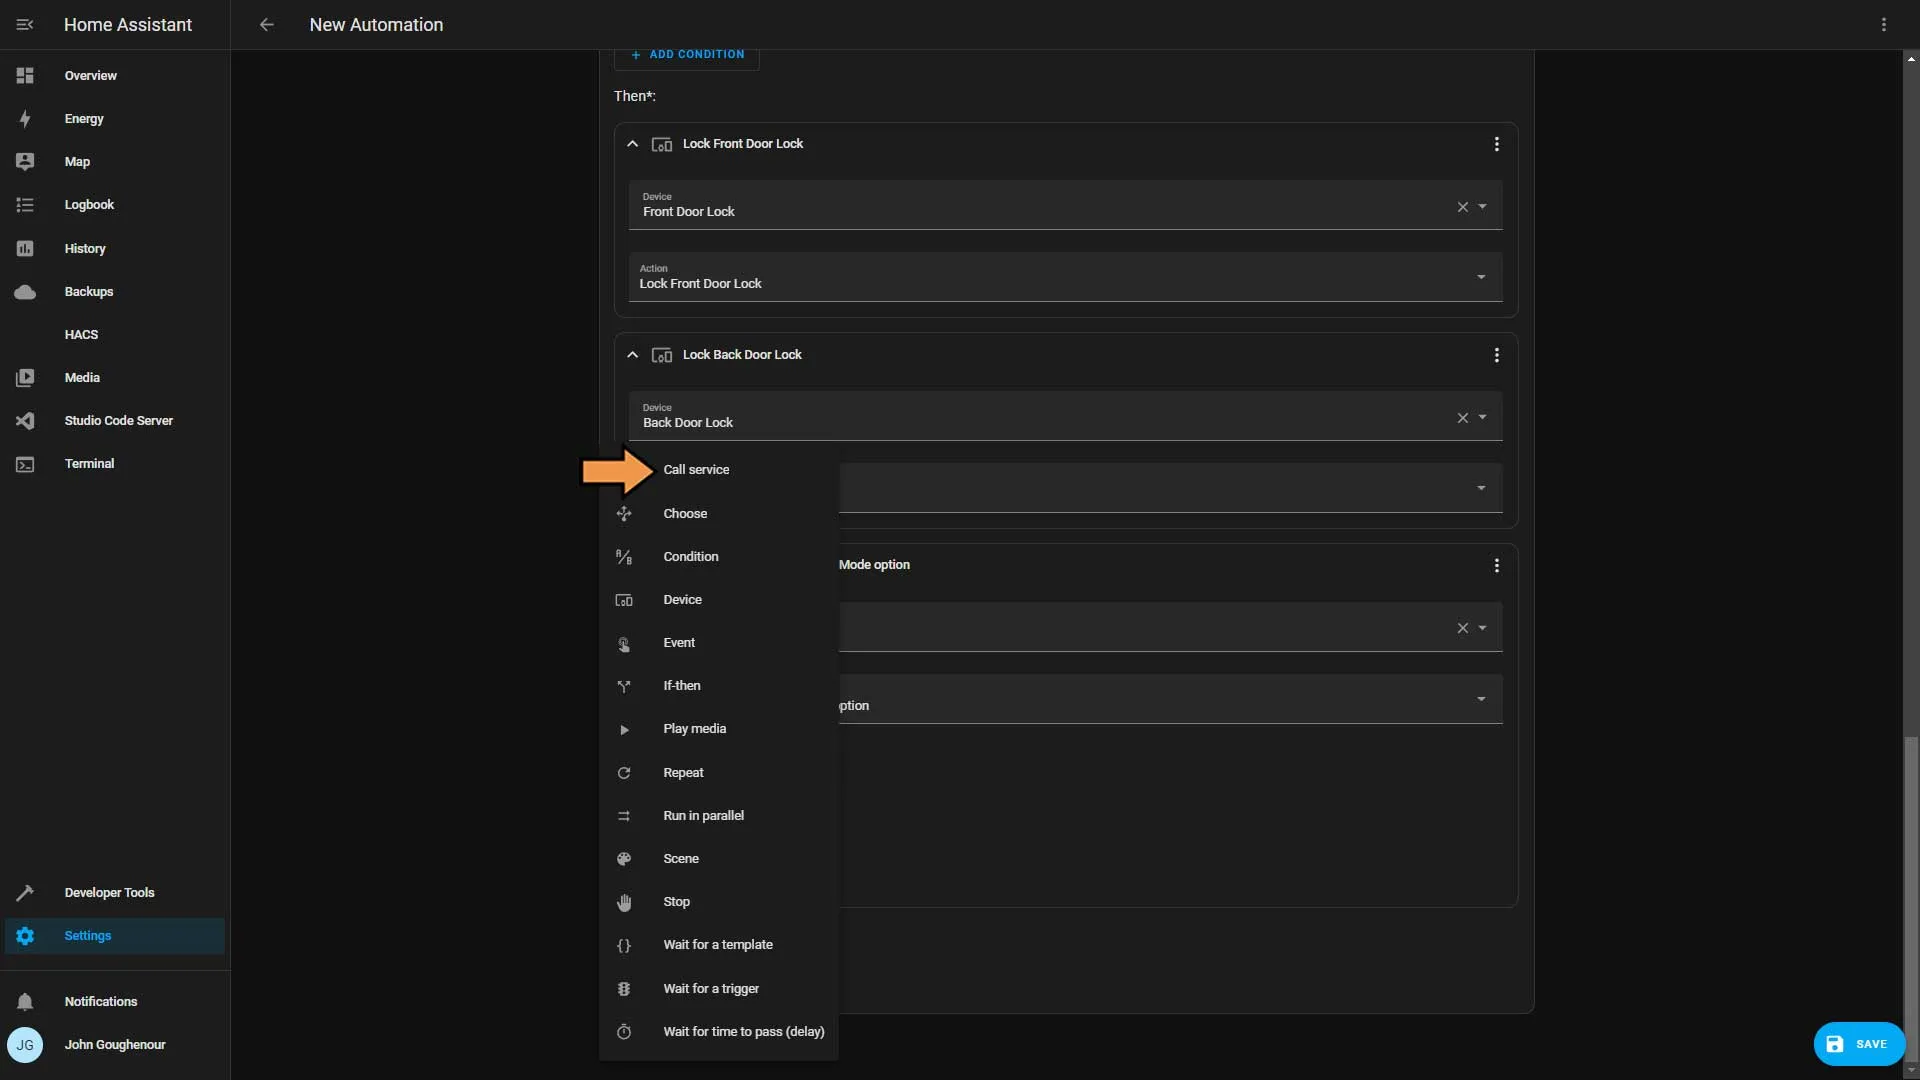
From the Action type list, select Call service.
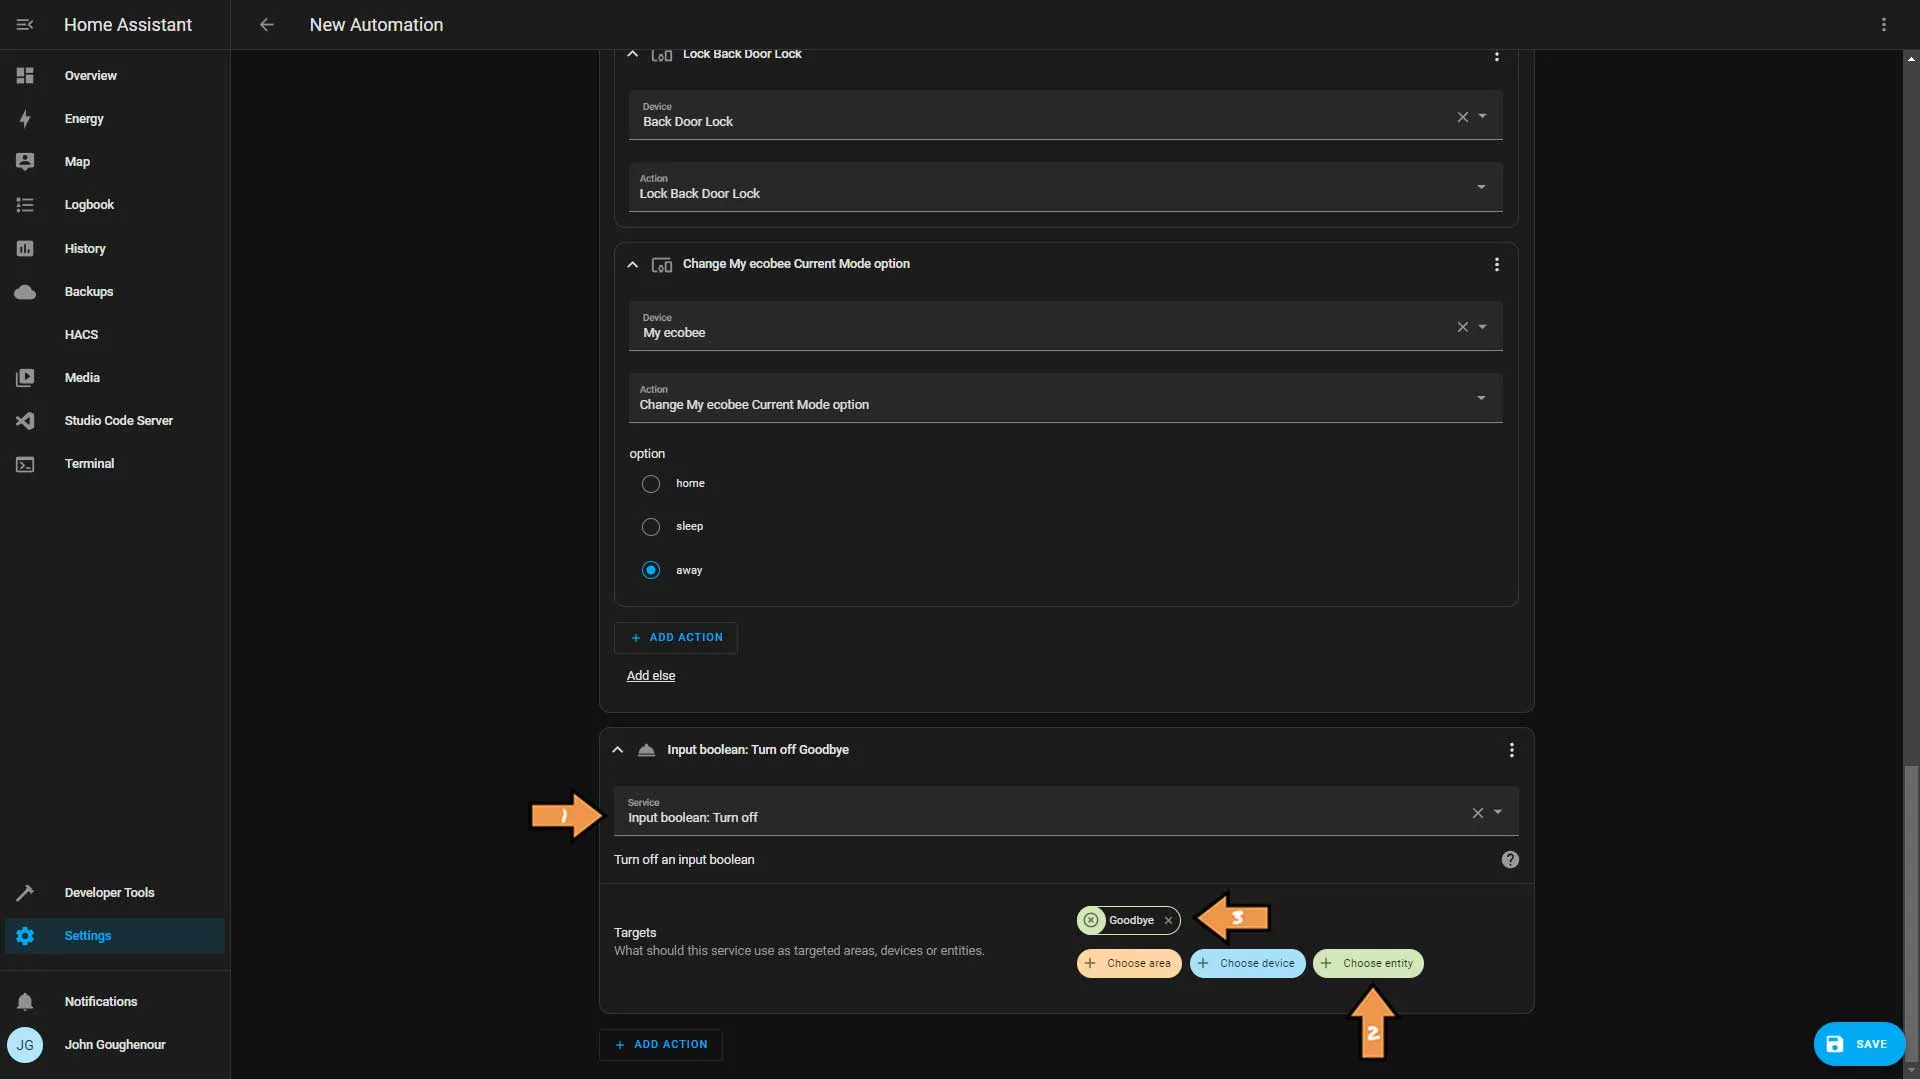
In the Service drop-down select Input Boolean: Turn off. Then click Choose entity and select our virtual switch we created earlier.
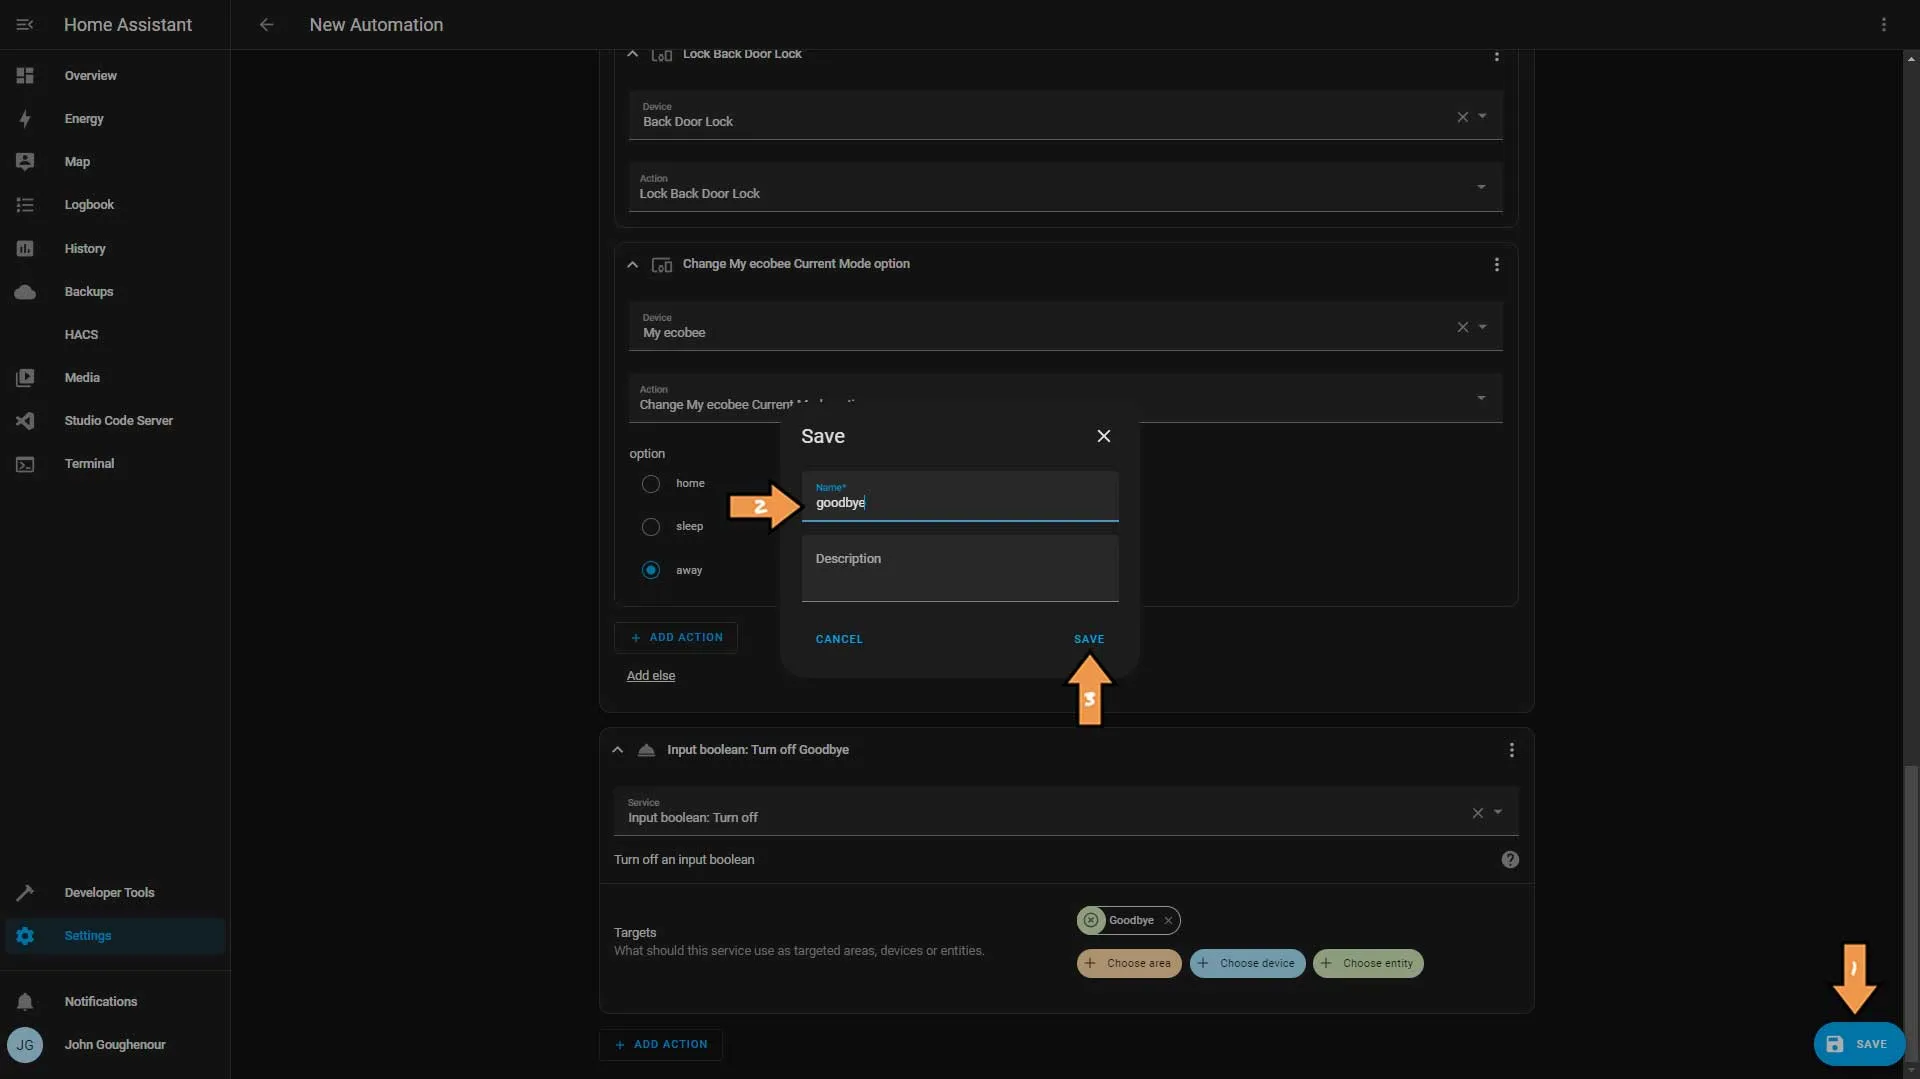
At the bottom right corner, click the blue Save button. Next, name the automation and click save again.
