The Ultimate Smart Home Automation Cookbook
Bathroom Lighting Automation offers a clever workaround to the typical challenges faced with motion-activated lighting. A common issue in traditional setups is that when you’re in the shower, you’re often out of the motion sensor’s range, resulting in the lights turning off unexpectedly. While adding an additional motion sensor in the shower area might seem like a solution, it’s not ideal due to the high moisture levels.
This is where Bathroom Lighting Automation steps in with an innovative solution. In many homes, like ours, bathroom doors remain open unless the room is occupied. By integrating Bathroom Lighting Automation with a contact sensor on the door, we can create a more responsive system. With this setup, closing the bathroom door triggers the contact sensor, which in turn disables the motion-activated lights from turning off. This ensures that even when out of sight of the motion sensor, such as when you’re in the shower, the lights remain on.
Bathroom Lighting Automation resolves the inconvenience of lights turning off and enhances energy efficiency. By having lights that only stay on when the bathroom is in use, as indicated by the door’s position, Bathroom Lighting Automation creates a more innovative, user-friendly environment. This approach to Bathroom Lighting Automation ensures comfort and convenience, making it an essential feature in modern smart homes.
Automation Details
Required Devices
- Motion Sensors
- Contact Sensors
- Smart Lighting
Triggers:
- When Motion is Detected
- When Motion Stops
Conditions:
- Don't Run While Away
- Don't Turn Off if Door is Closed
- Moring and Home Modes Stay for 5 Minutes and Stay 3 Minutes During Night Mode
- Morning and Home Full Brightness and 50% Brightness at Night
Actions:
- Turn On Lights
- Turn Off Lights
Stay Time is the amount of time after motion stops before turning off lights.

Hubitat
Bathroom Lighting Automation
The Official Documentation for Room Lighting
Setting Up the Automation
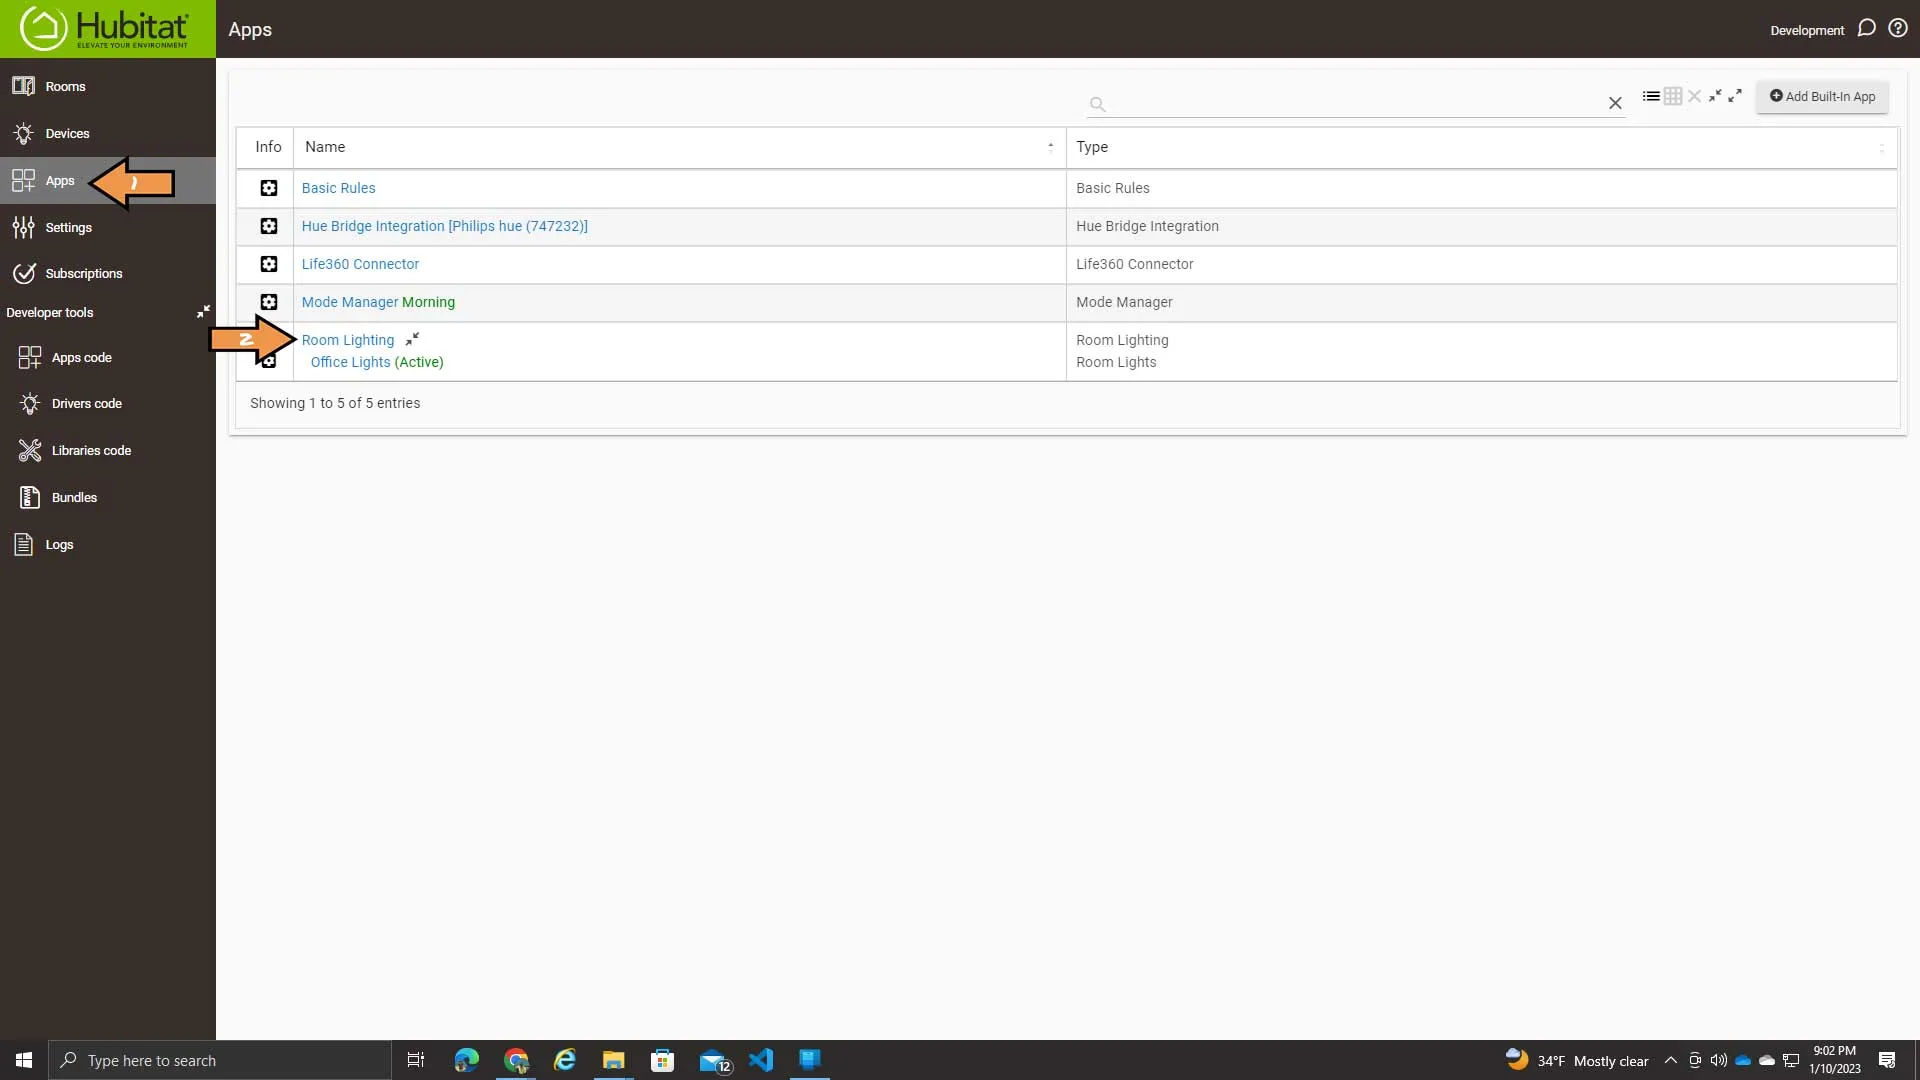
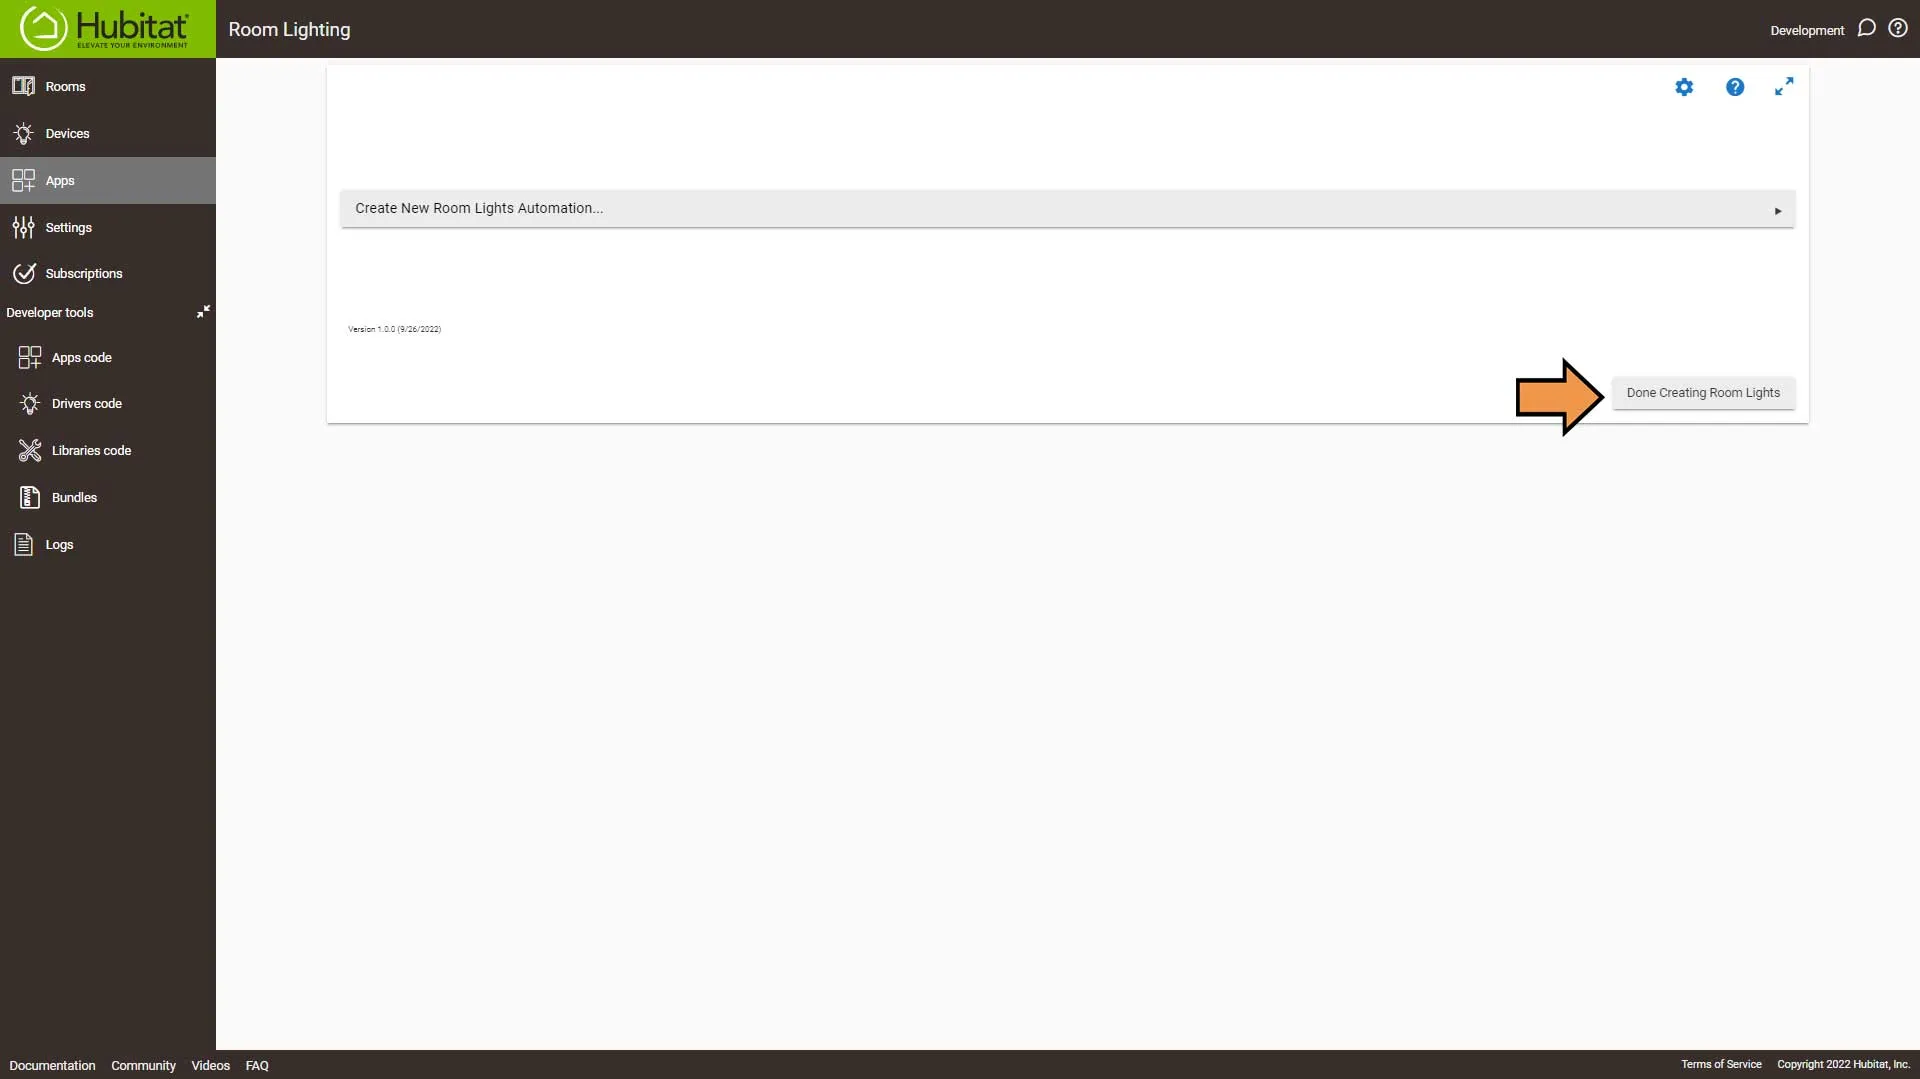
First, go to Apps and then Room Lighting.
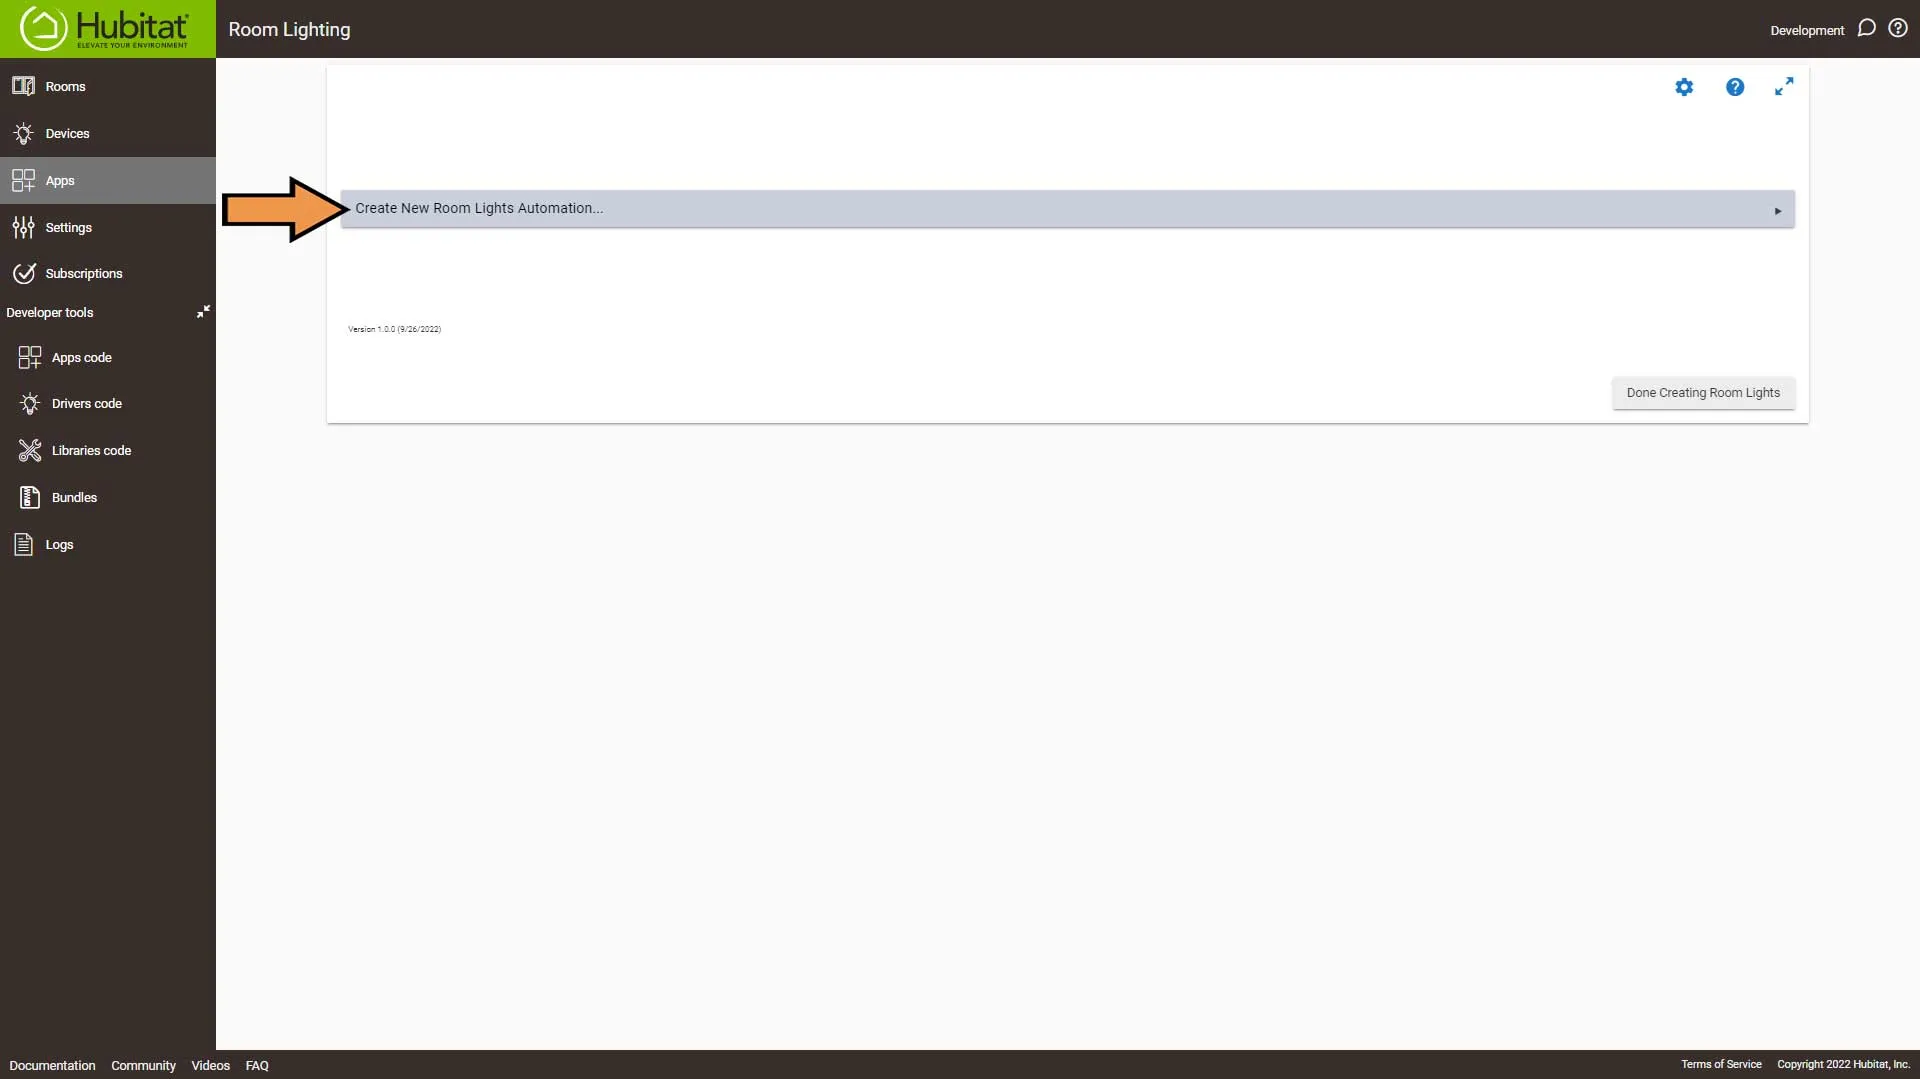
Select Create New Room Lights Automation…
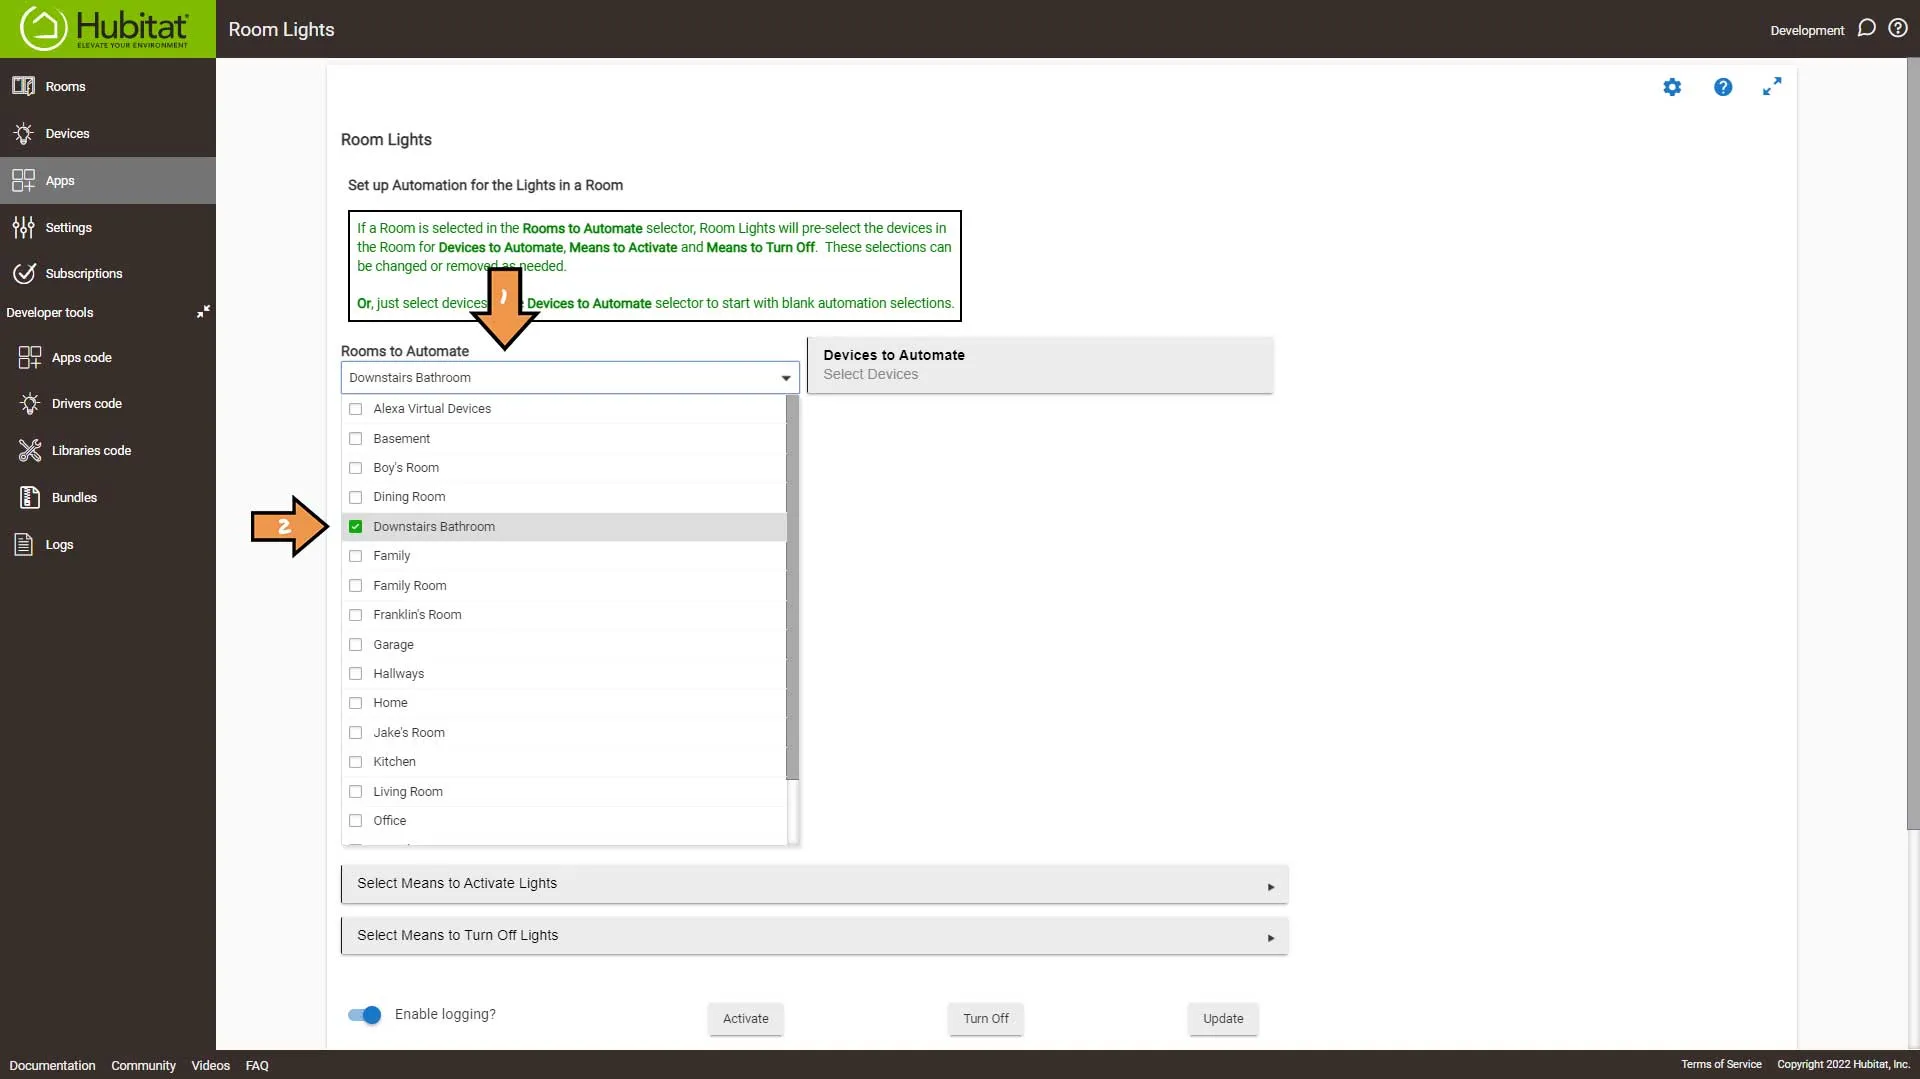
From the Rooms to Automate dropdown, select your room. Mine is Downstairs Bathroom.
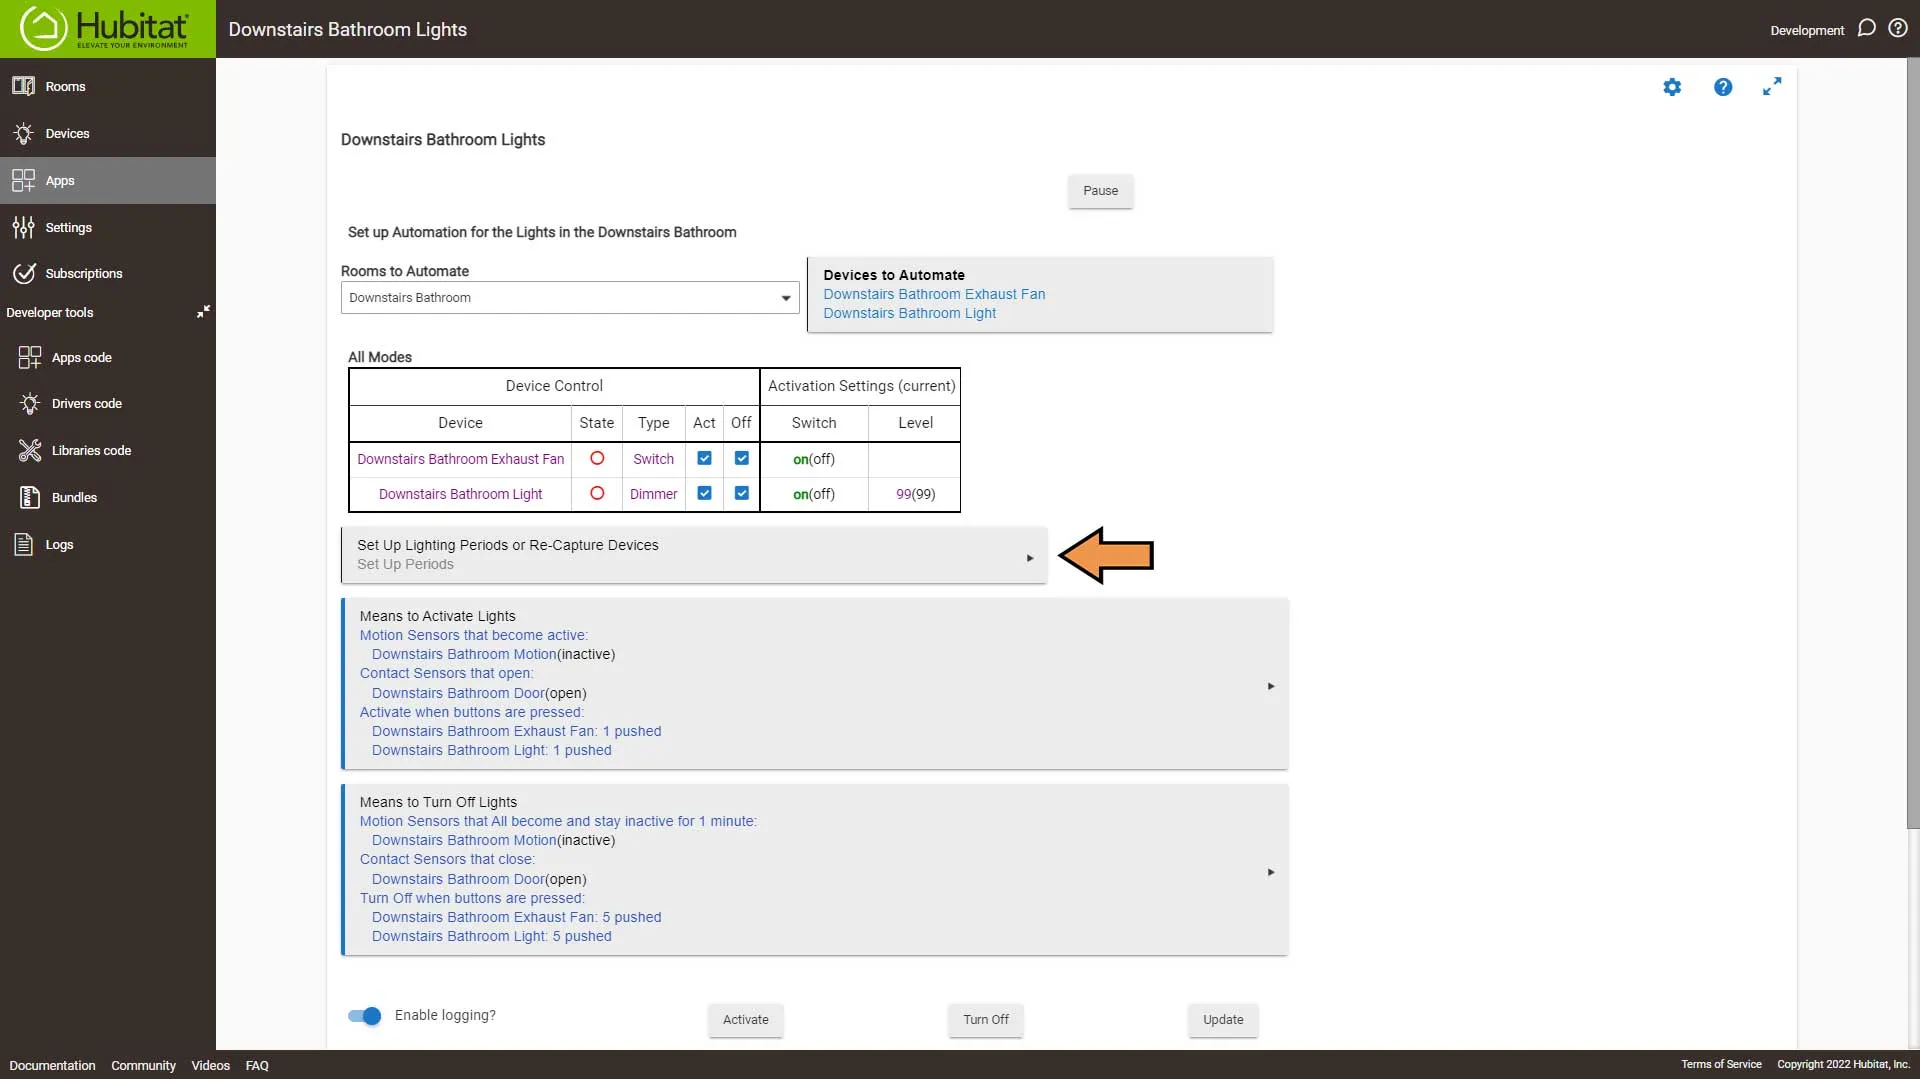
Hubitat will look at your devices in that room and select them accordingly. Next, we are going to go into Set Up Lighting Periods.
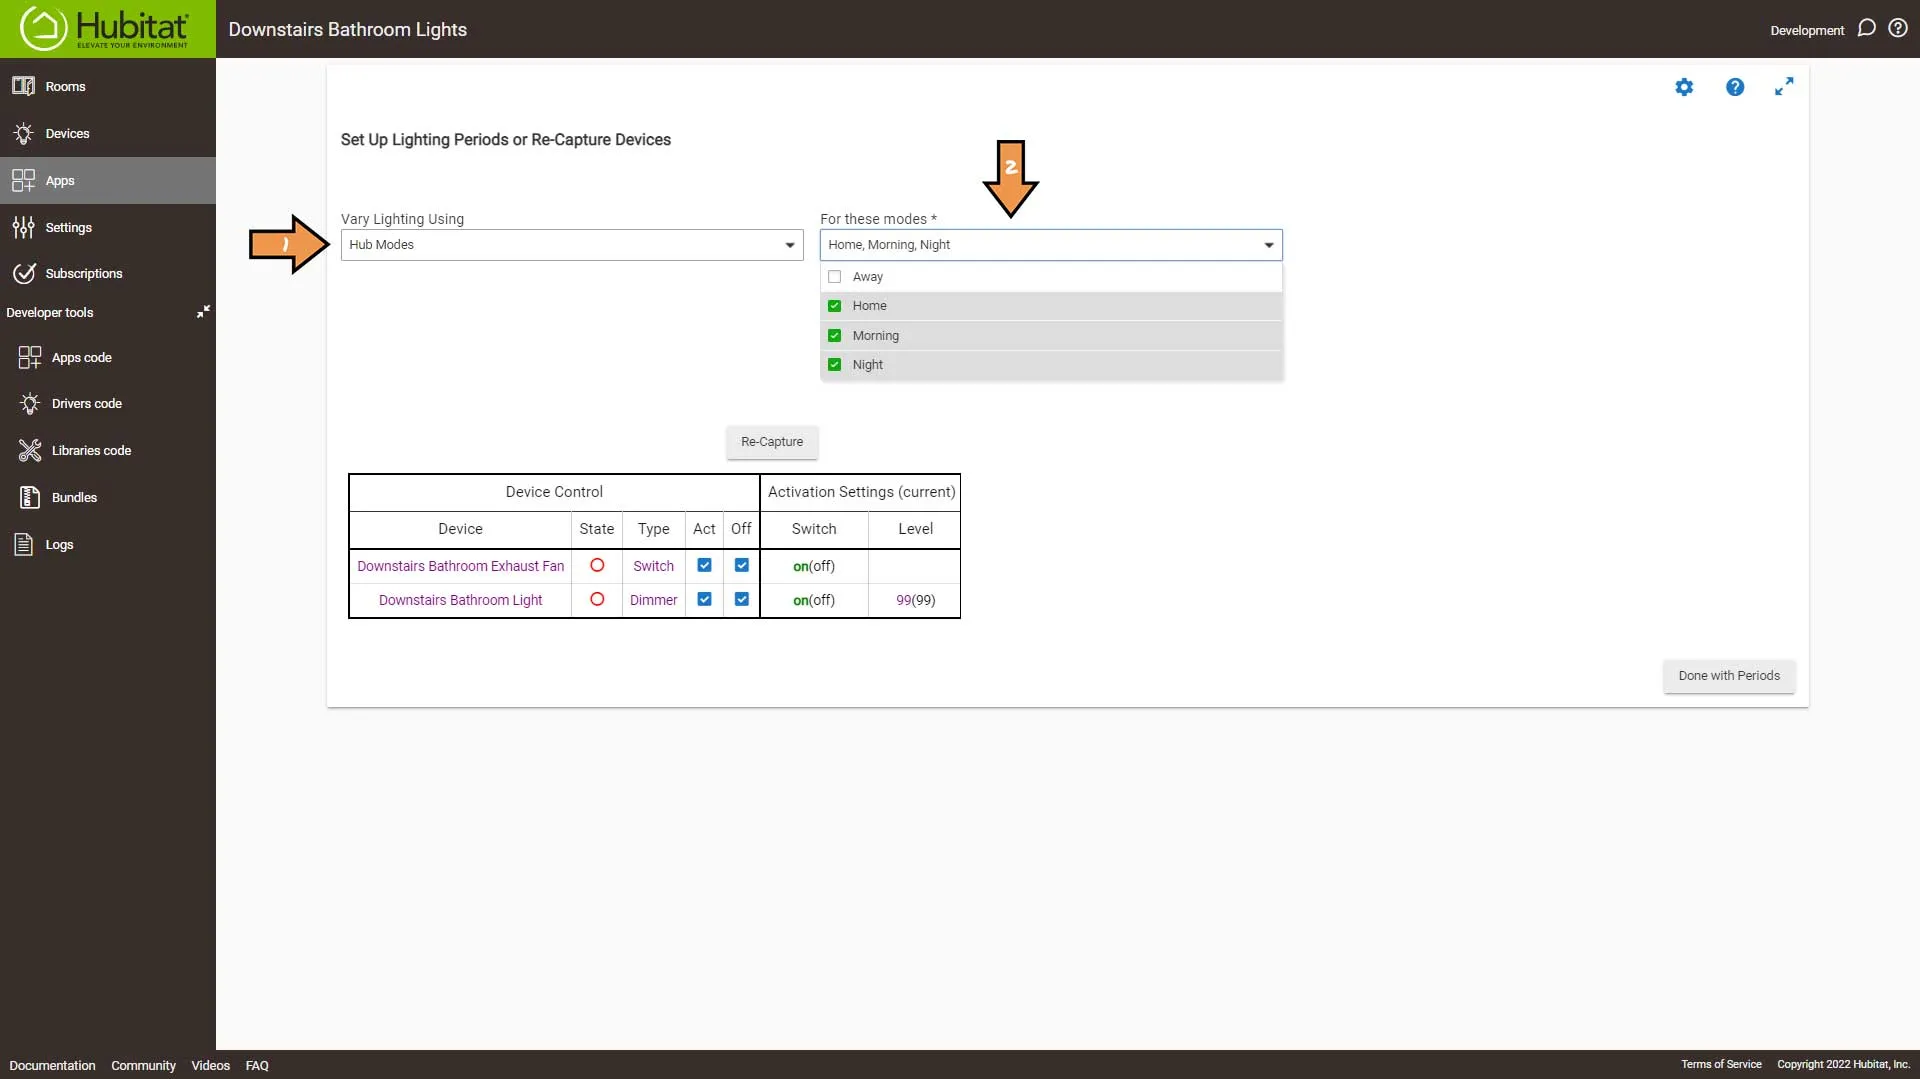
Select Hub Modes from the Vary Lighting Using drop-down and select your modes from the new drop-down. We are not setting Away since we don’t want our automation running while Away.
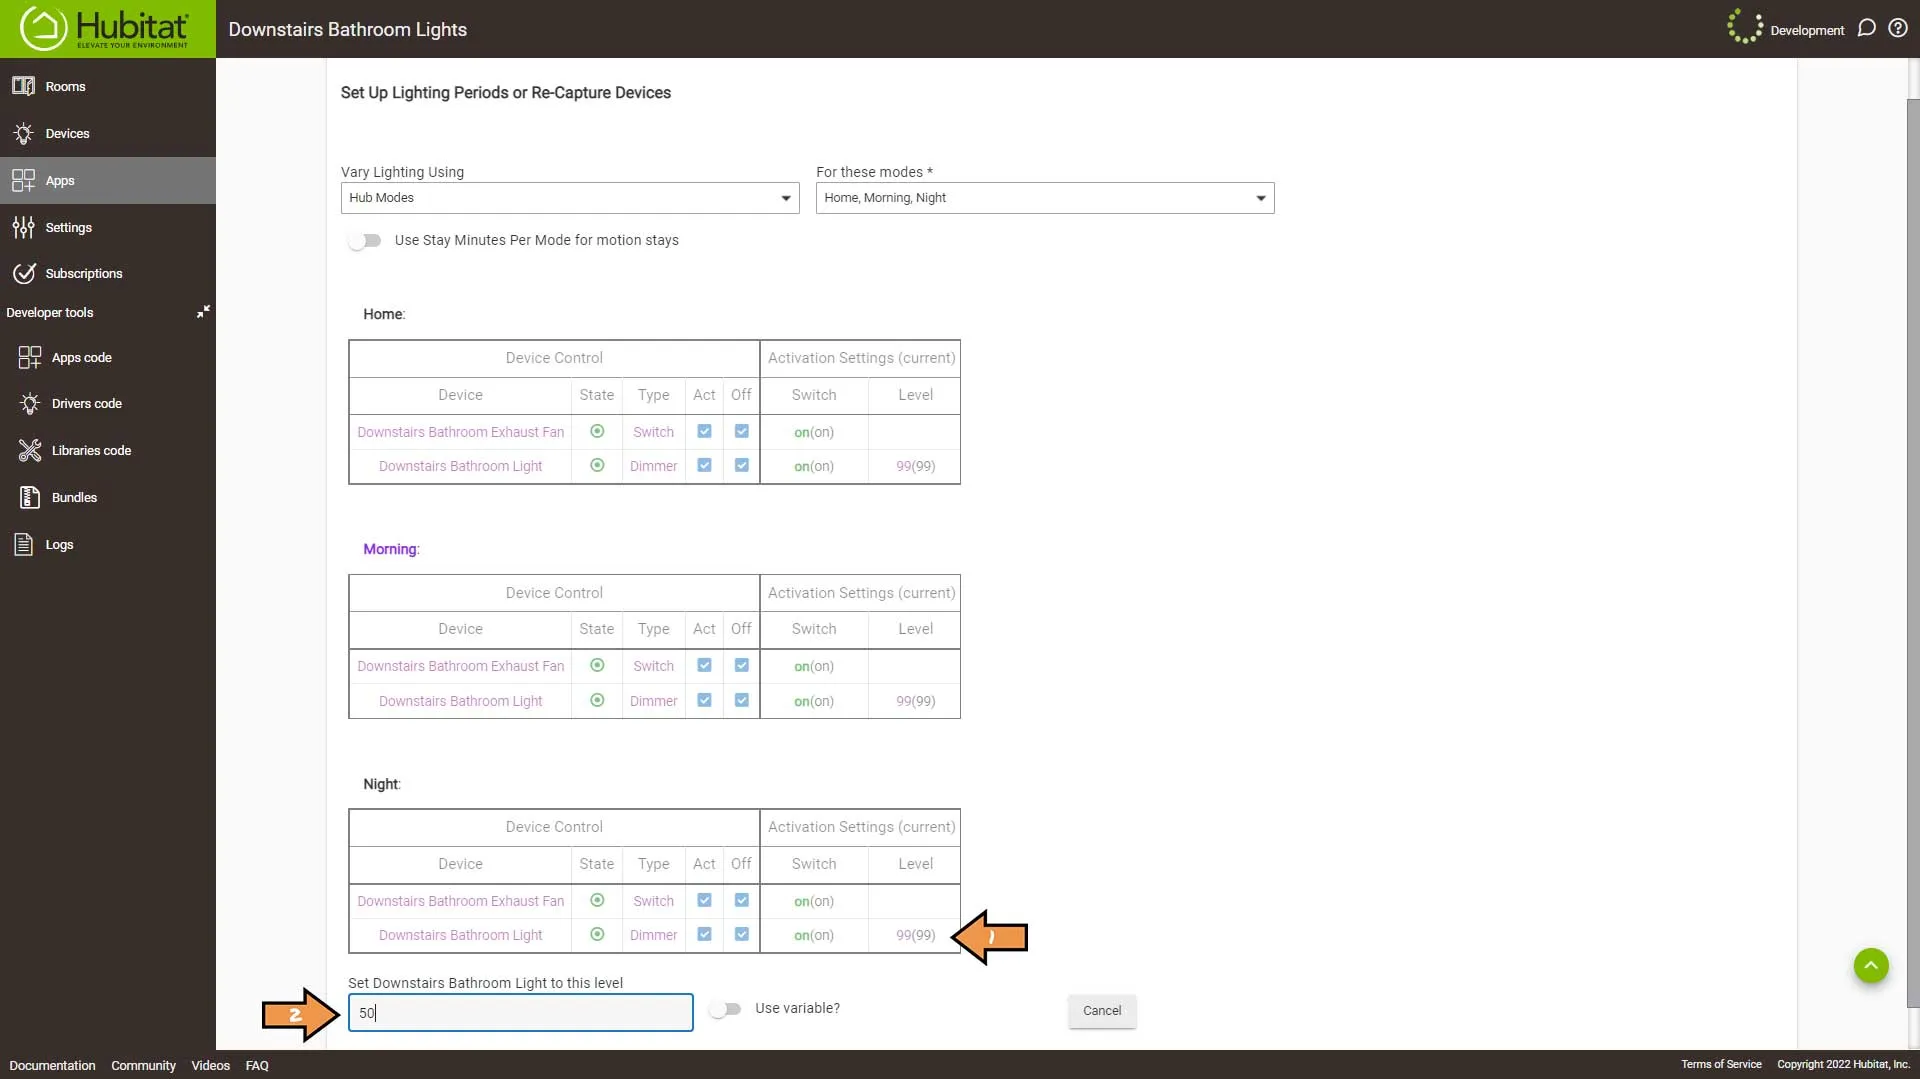
For morning and home, I am OK with them coming on full brightness, but for Night I want to change the brightness to 50%.
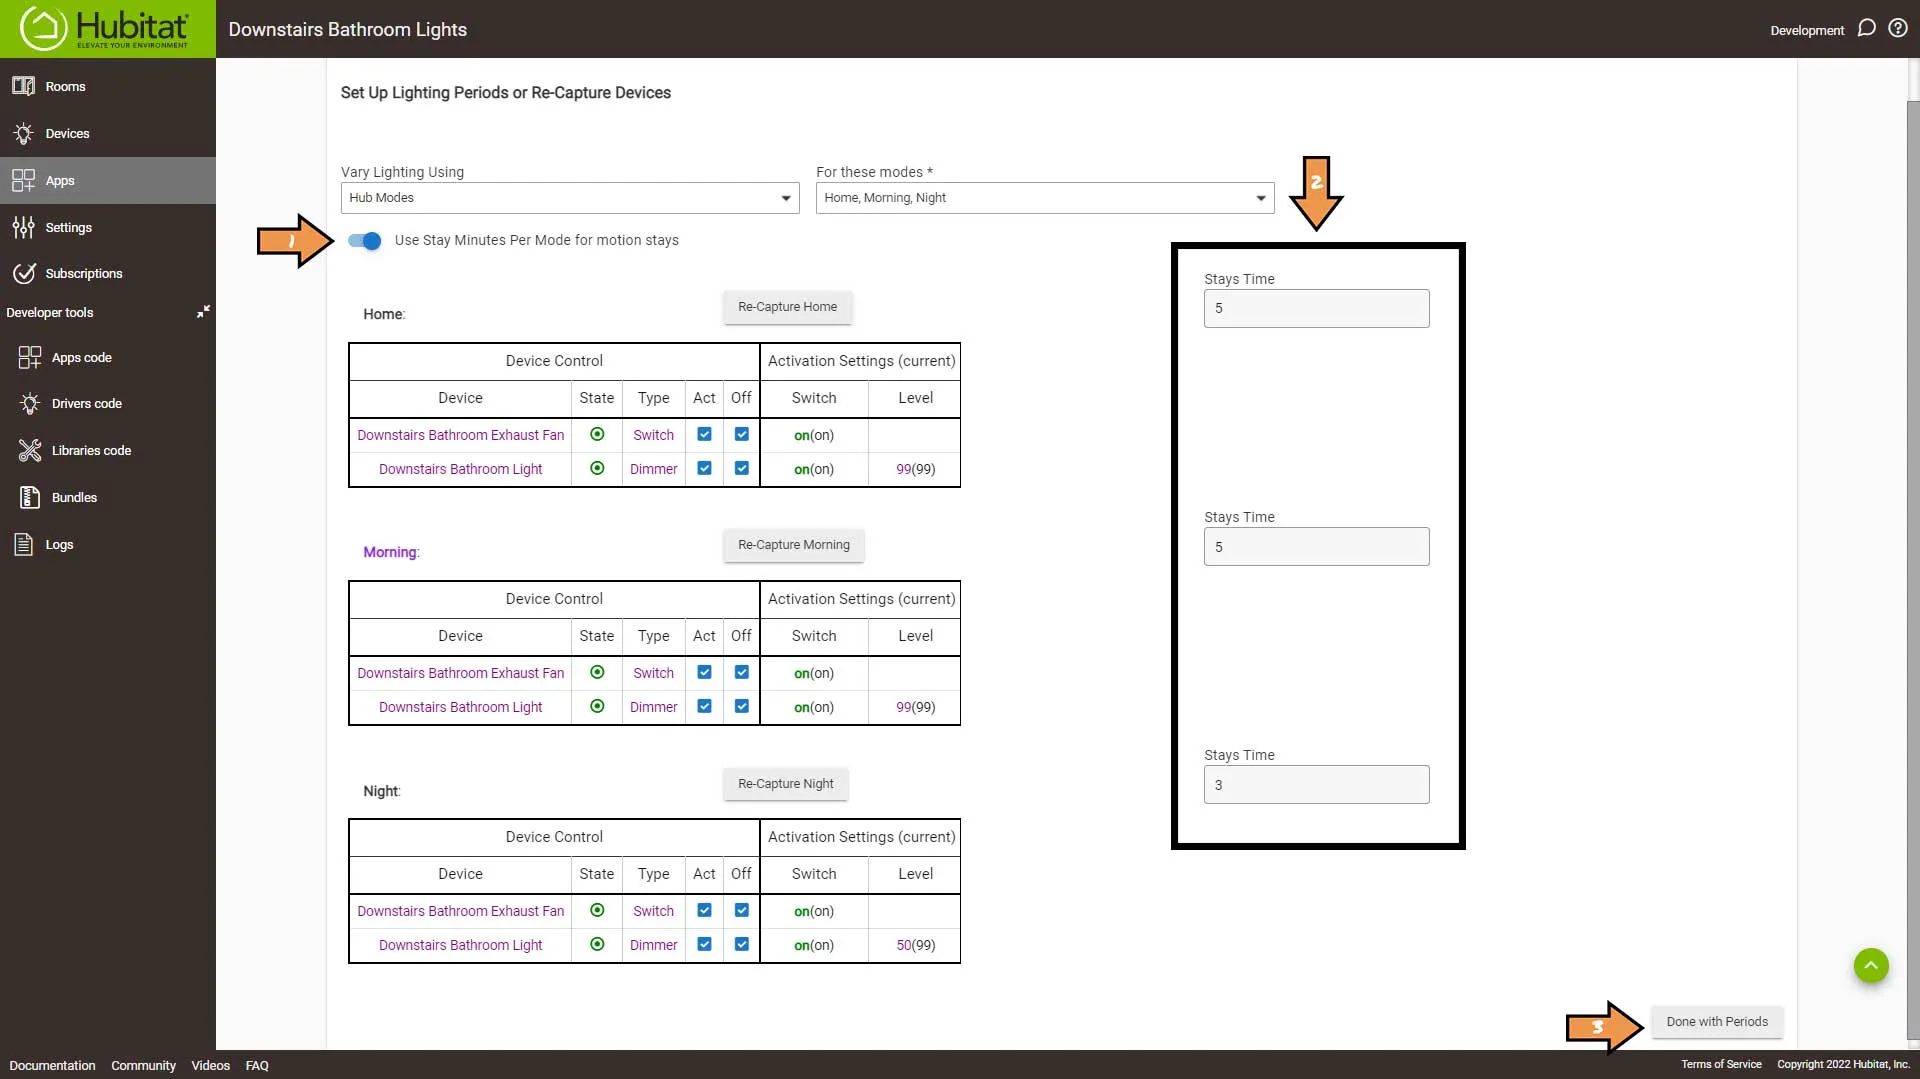
We want different motion stay times, so we’ll turn on Use Stay Minutes Per Mode. Then we’ll set the stay times for Morning and Home to 5 minutes and 3 minutes for Night. Then can click the Done With Periods button.
Next, we go into Means to Activate Lights section.
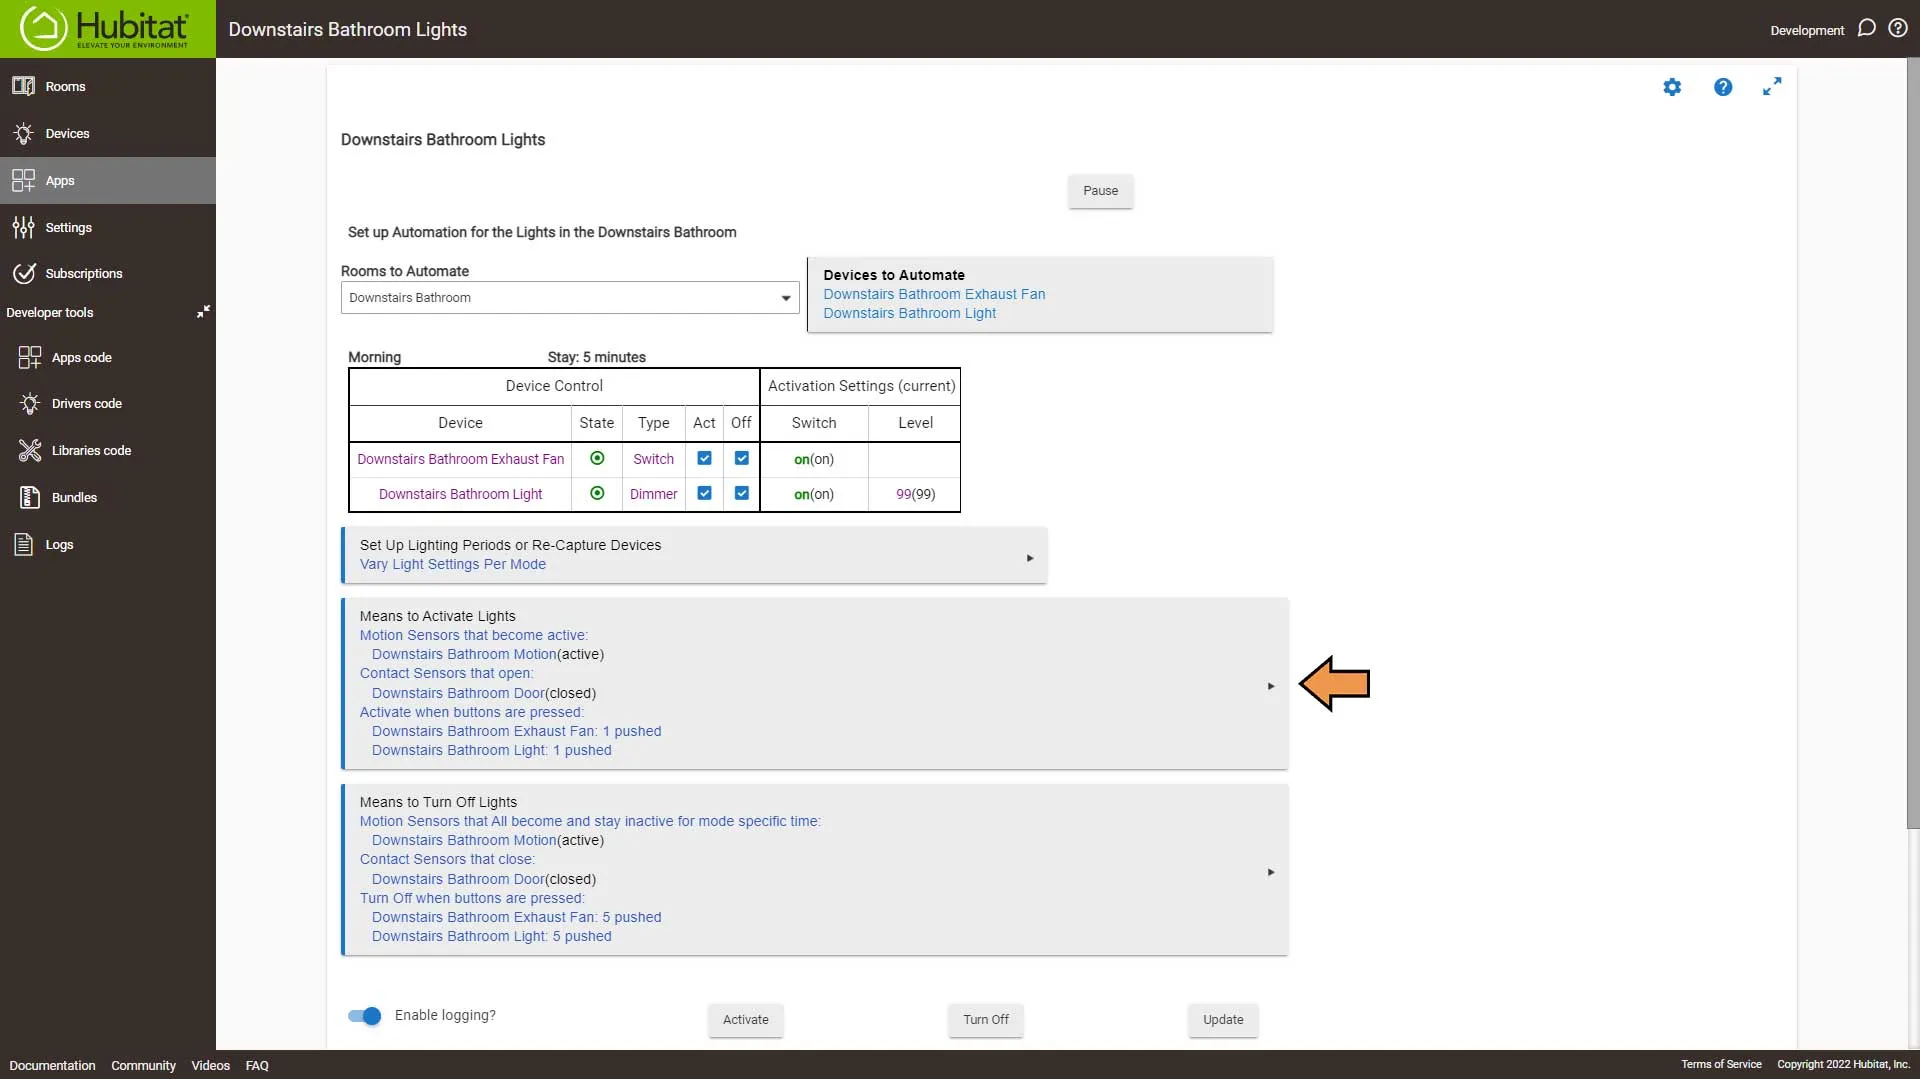
Select Means to Activate drop-down.
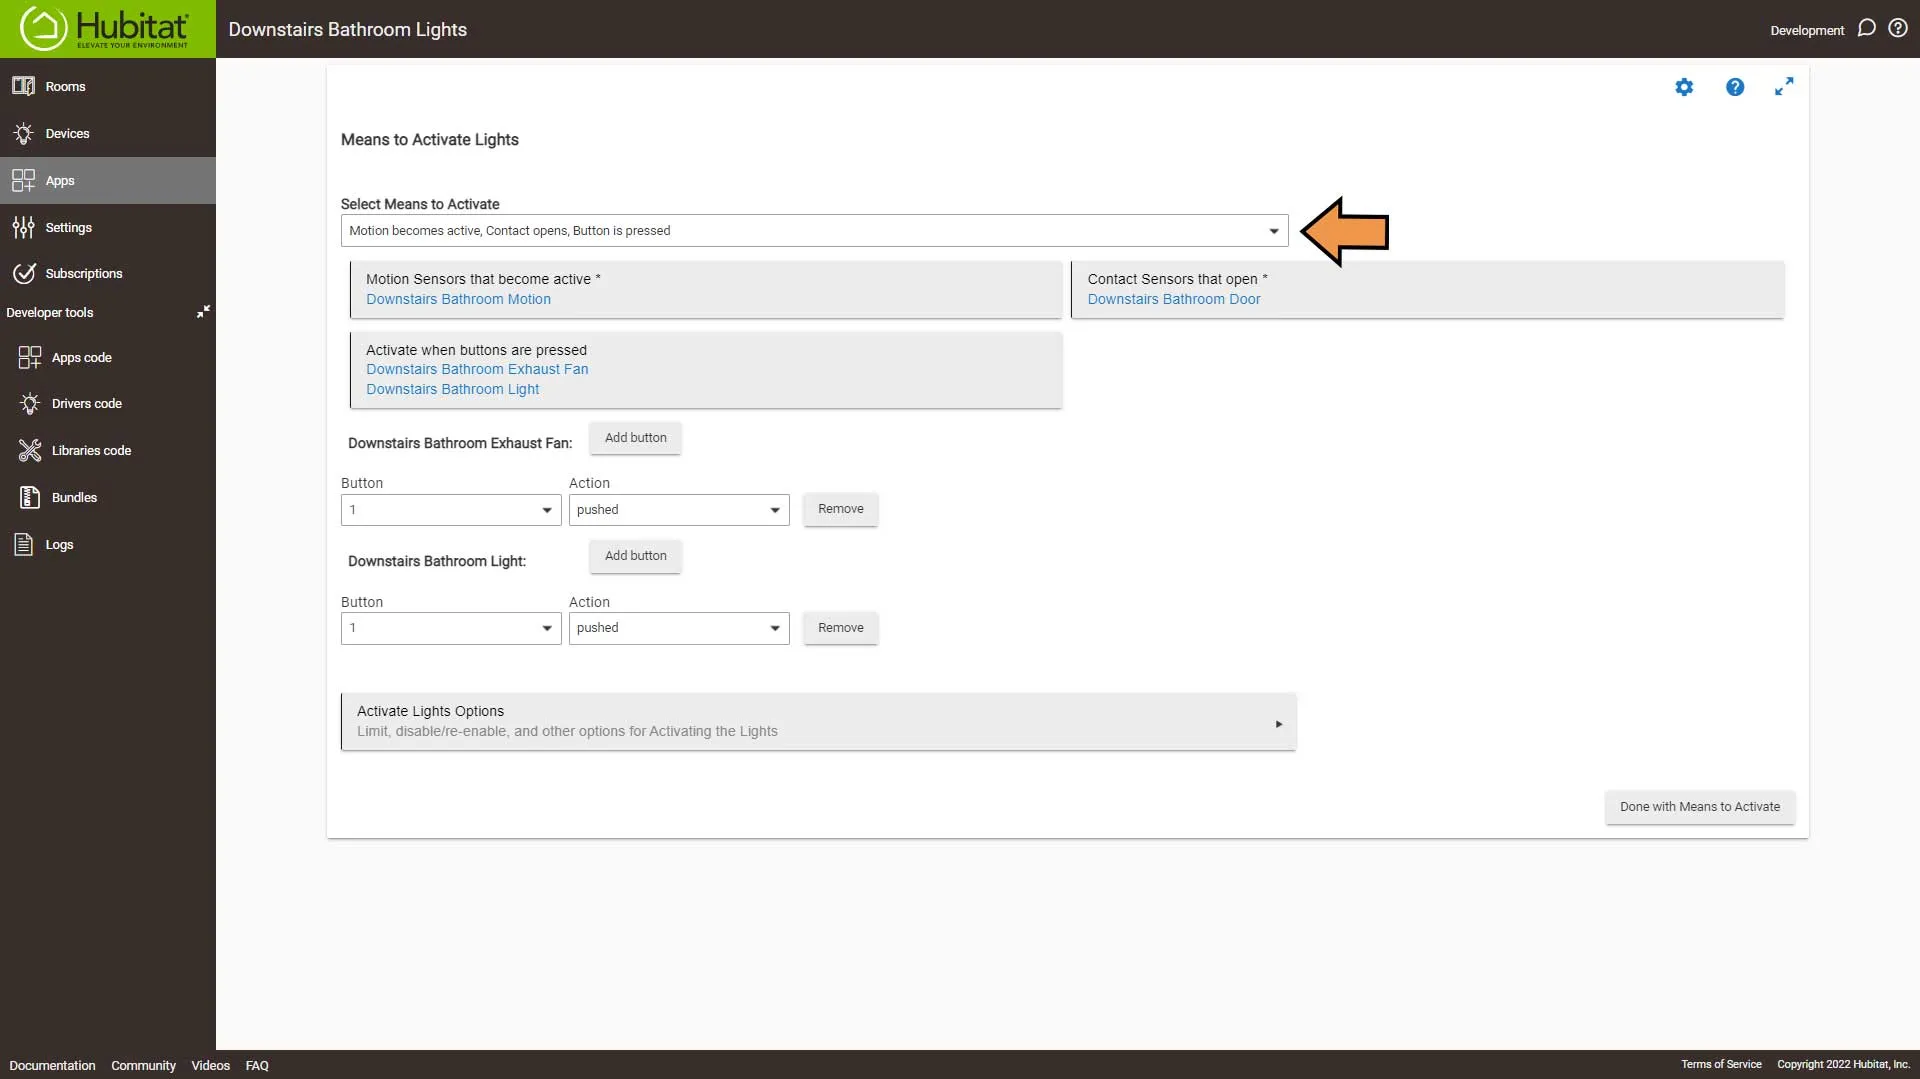
We want to unselect Contact opens and Button is pressed, and leaving Motion becomes active. Then we want to also select Switch turns on.
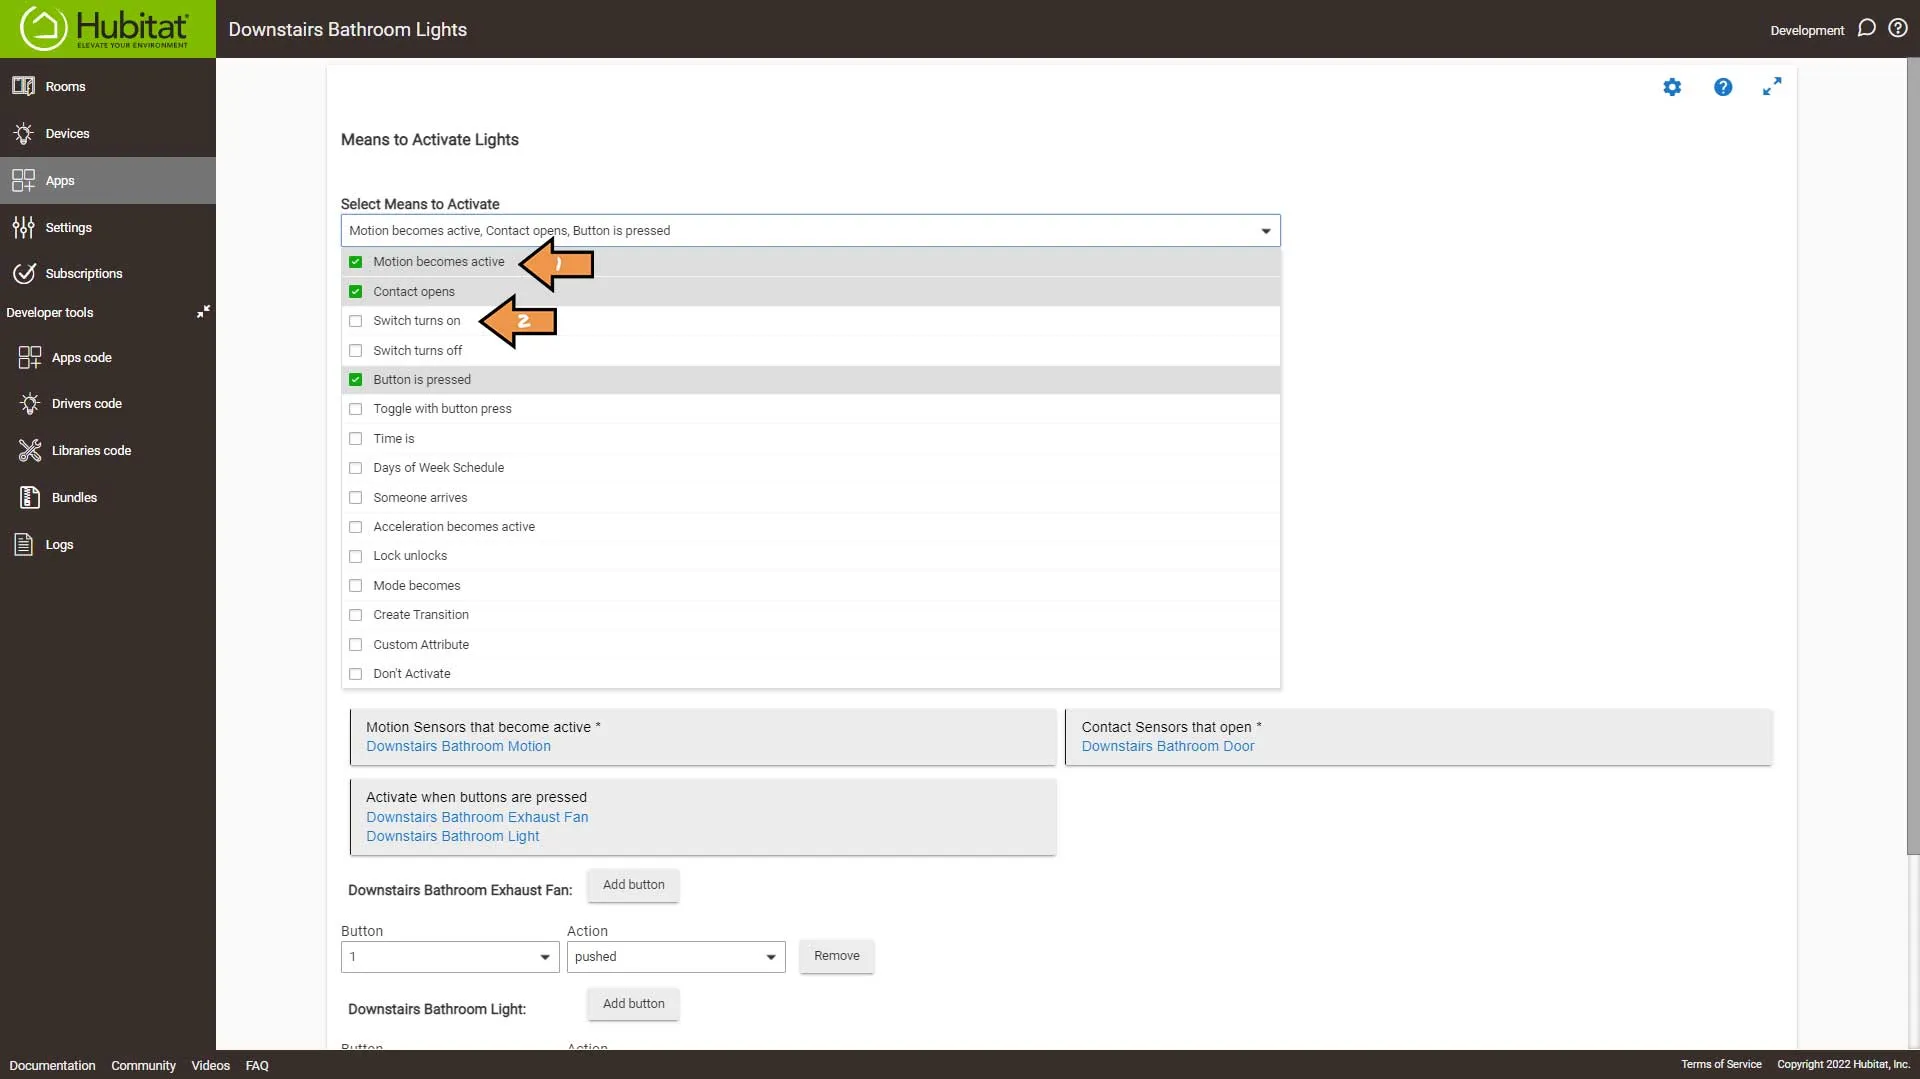
Next, in the Switches that turn on drop-down, select your lights. Then Click the Done with Means to Activate button.
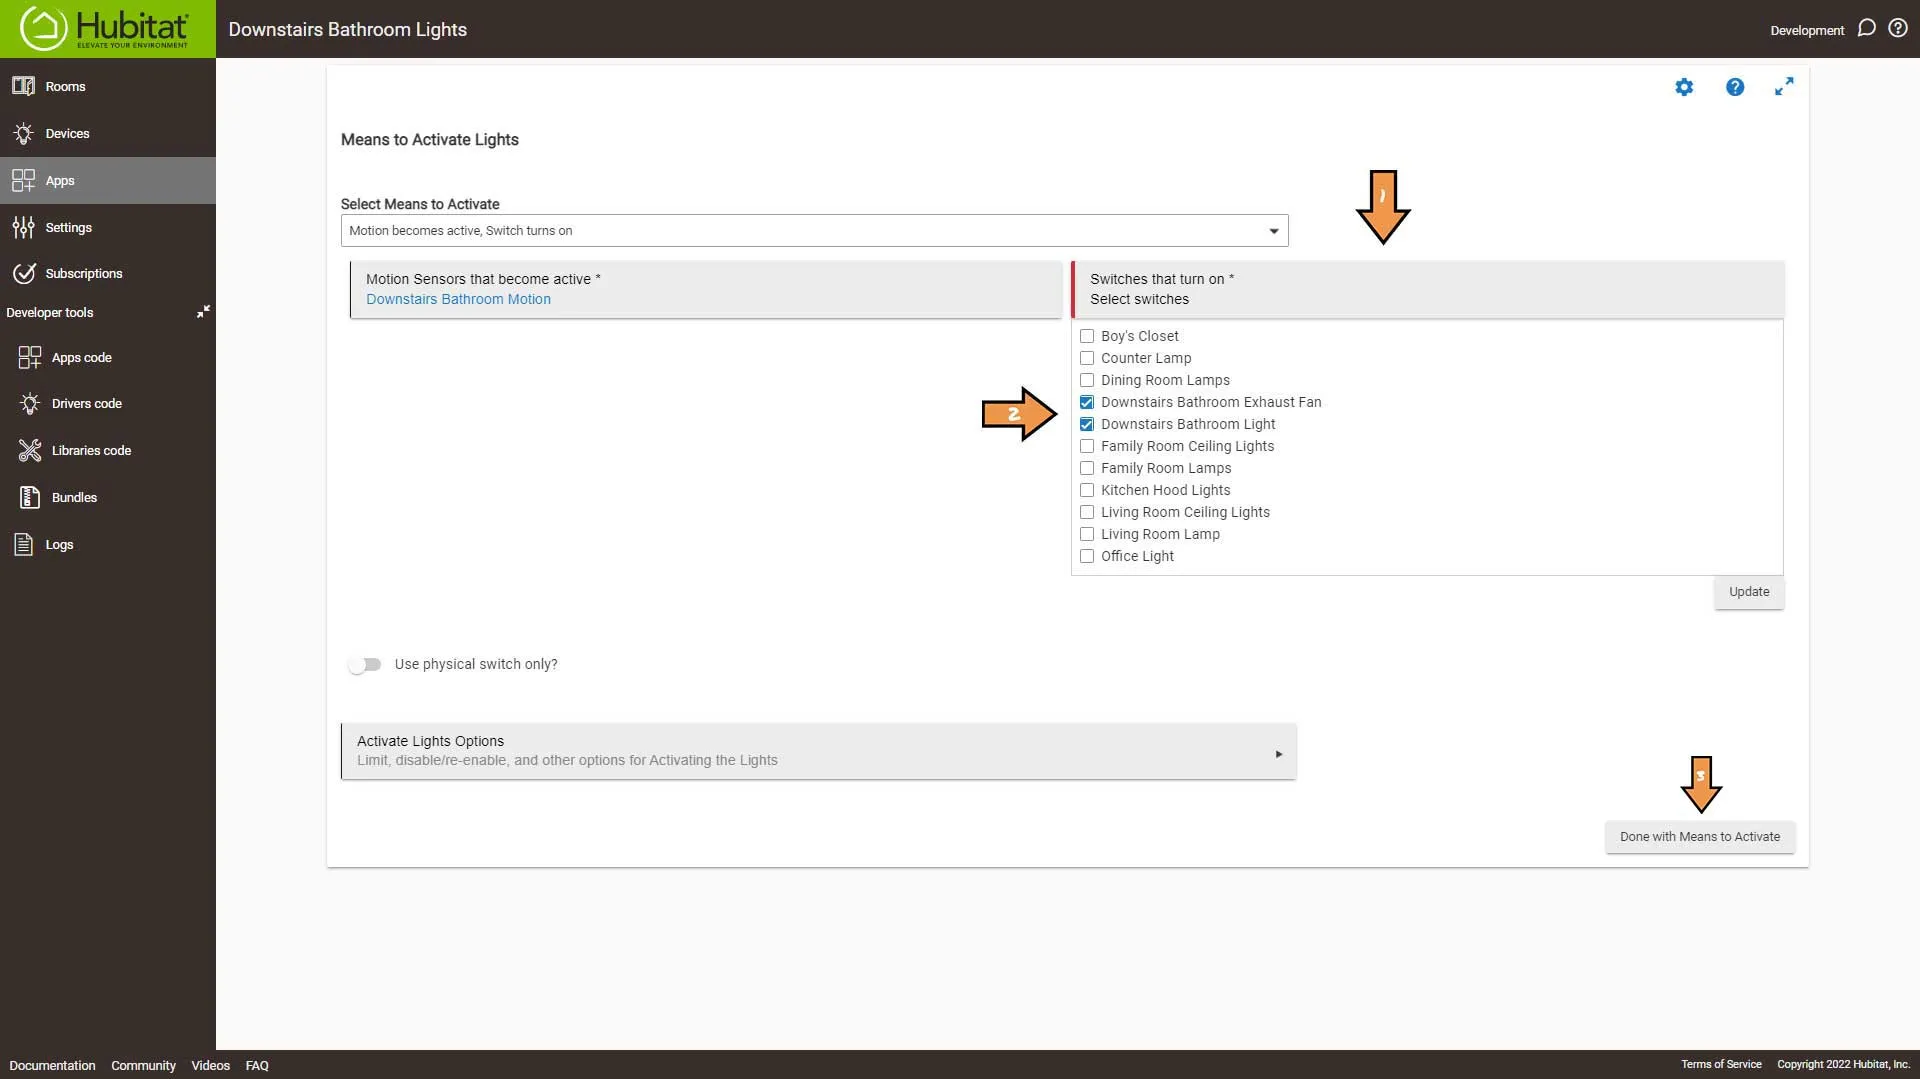
Next, go into the Means to Turn Off Lights section.
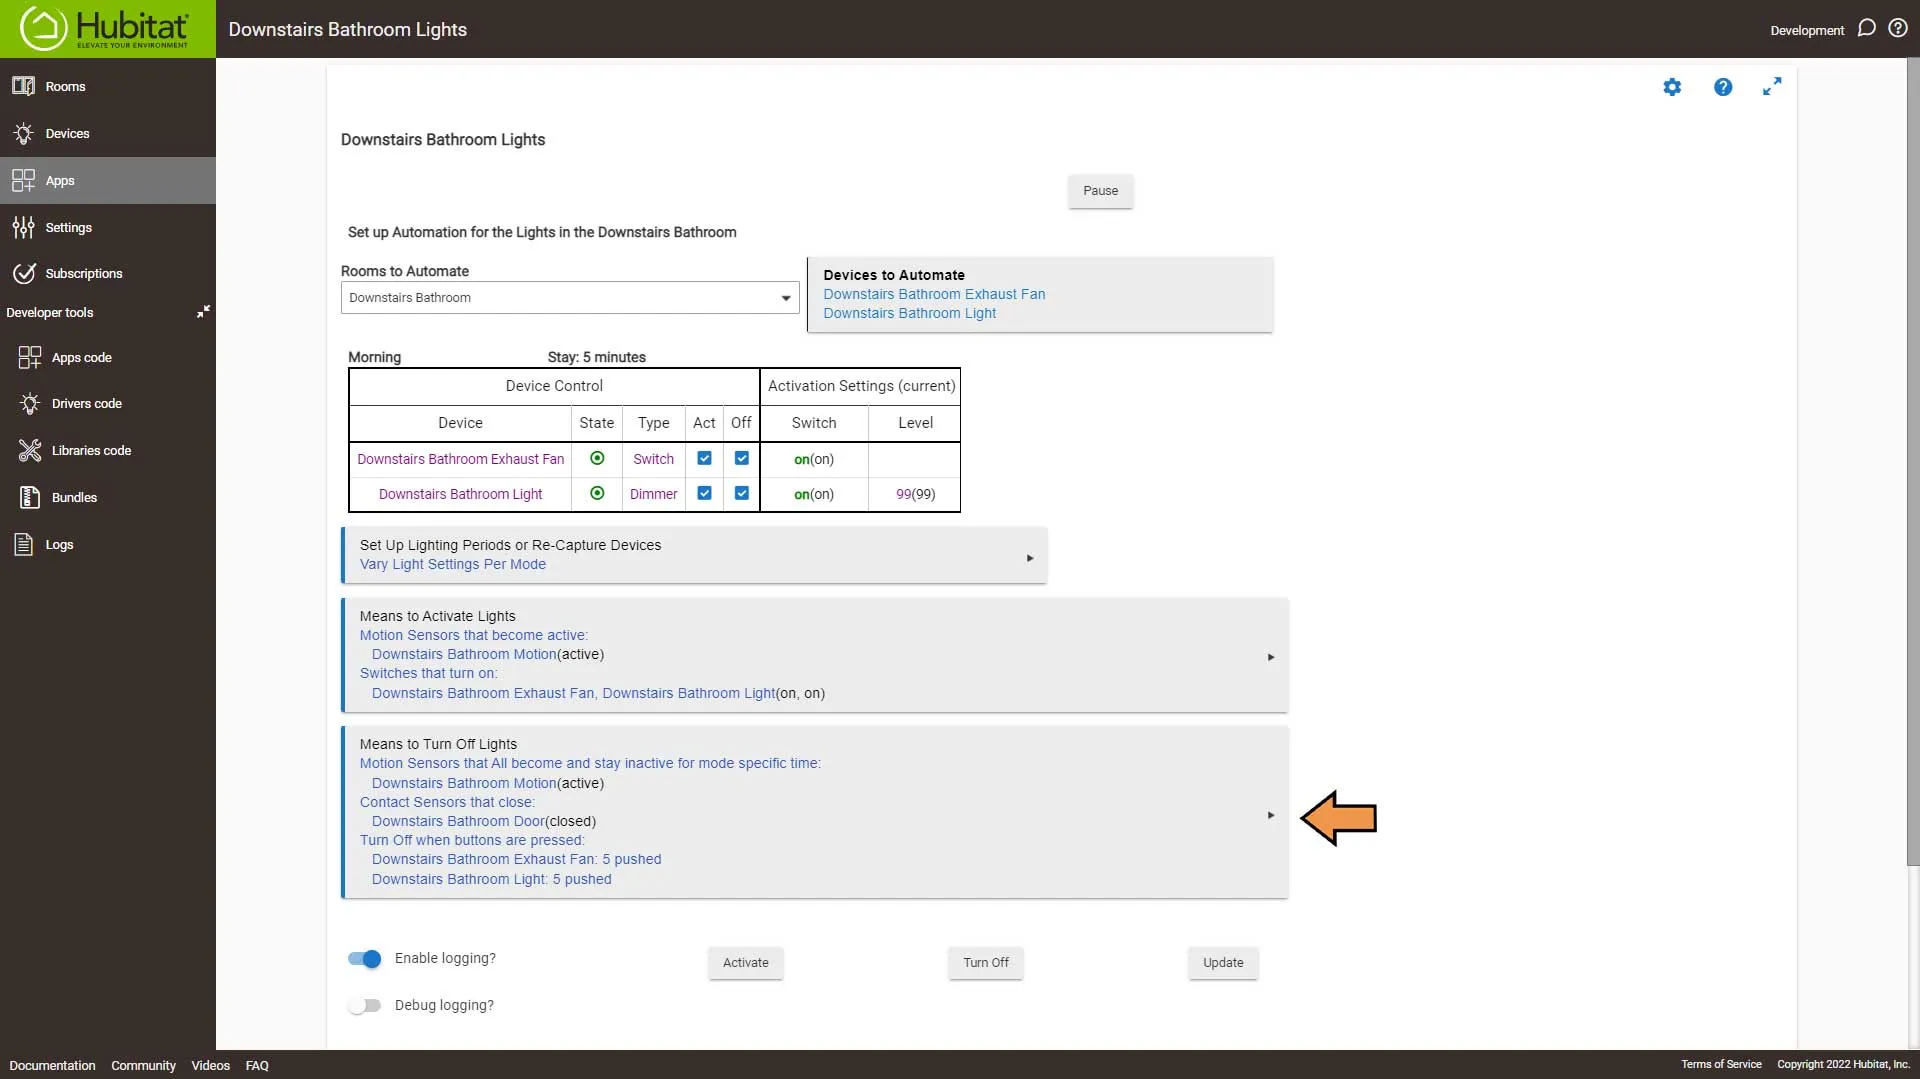
Select Means to Turn Off drop-down.
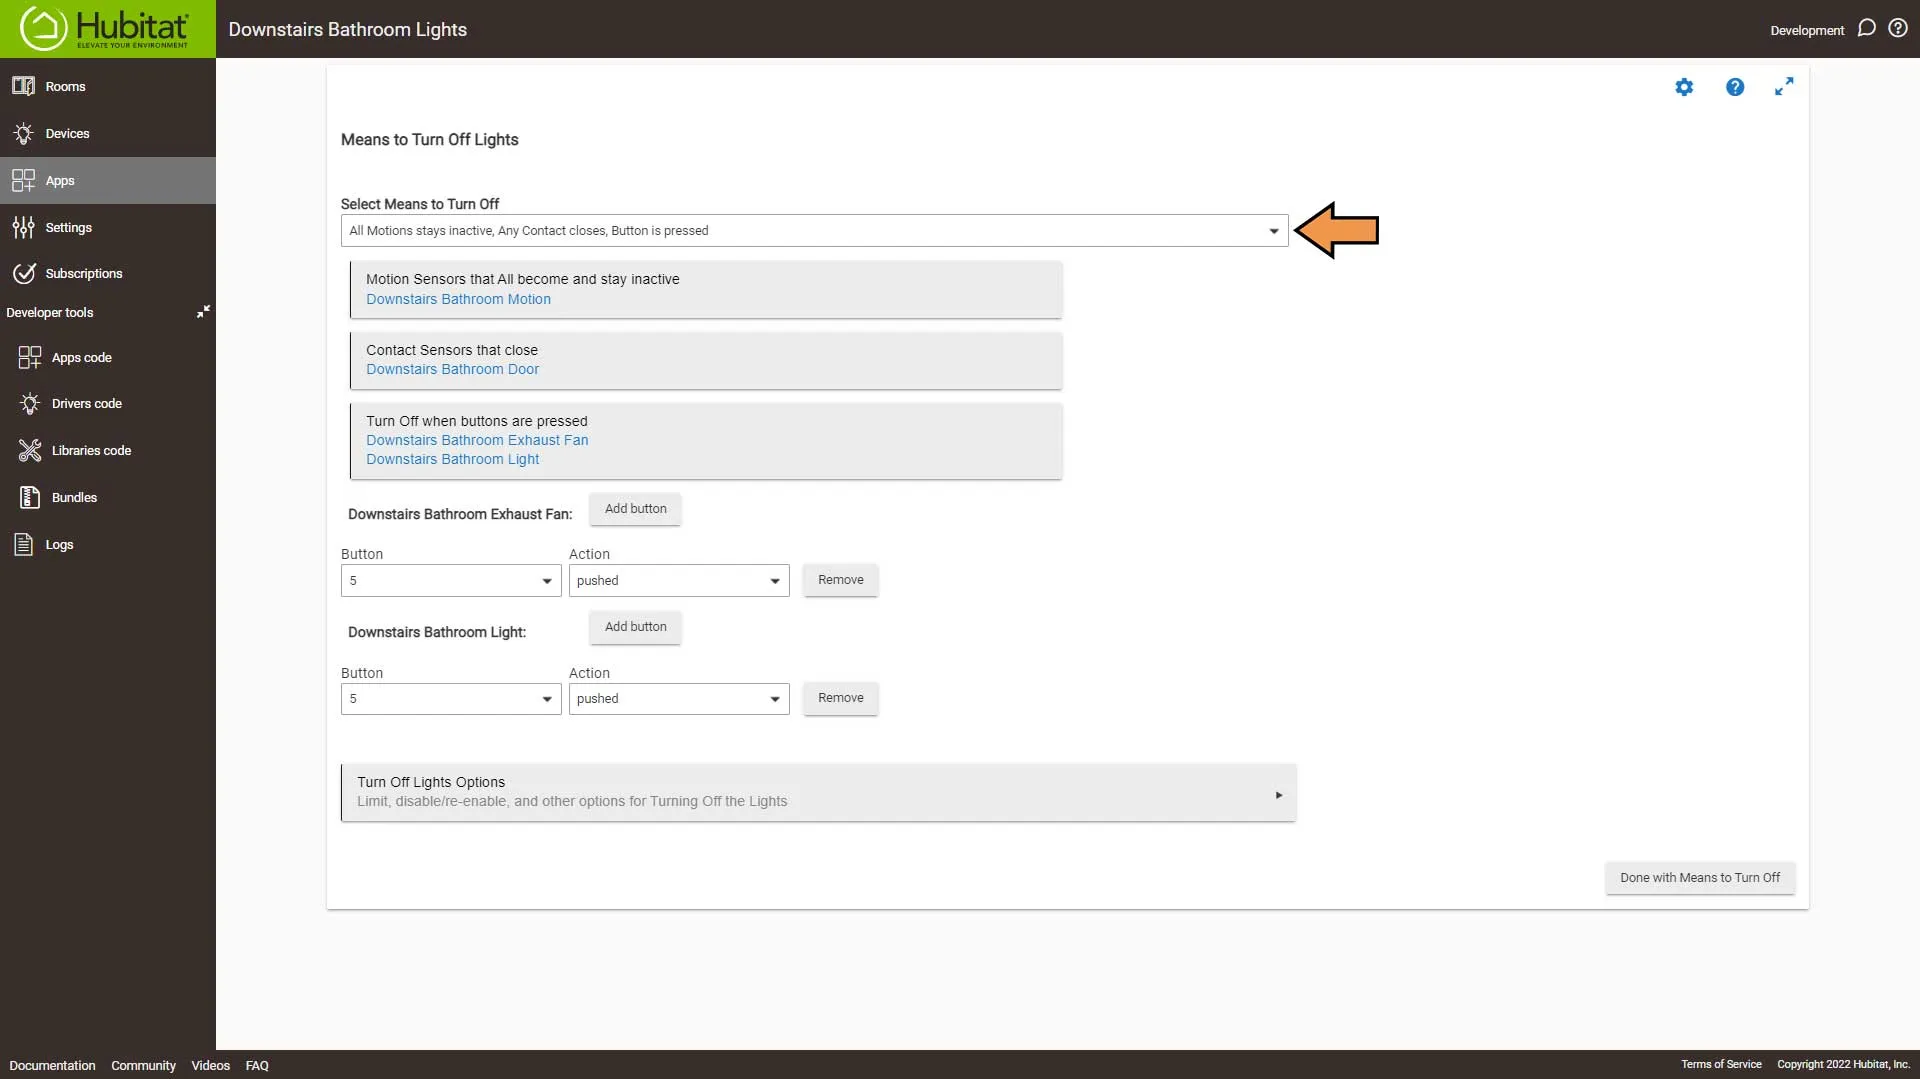
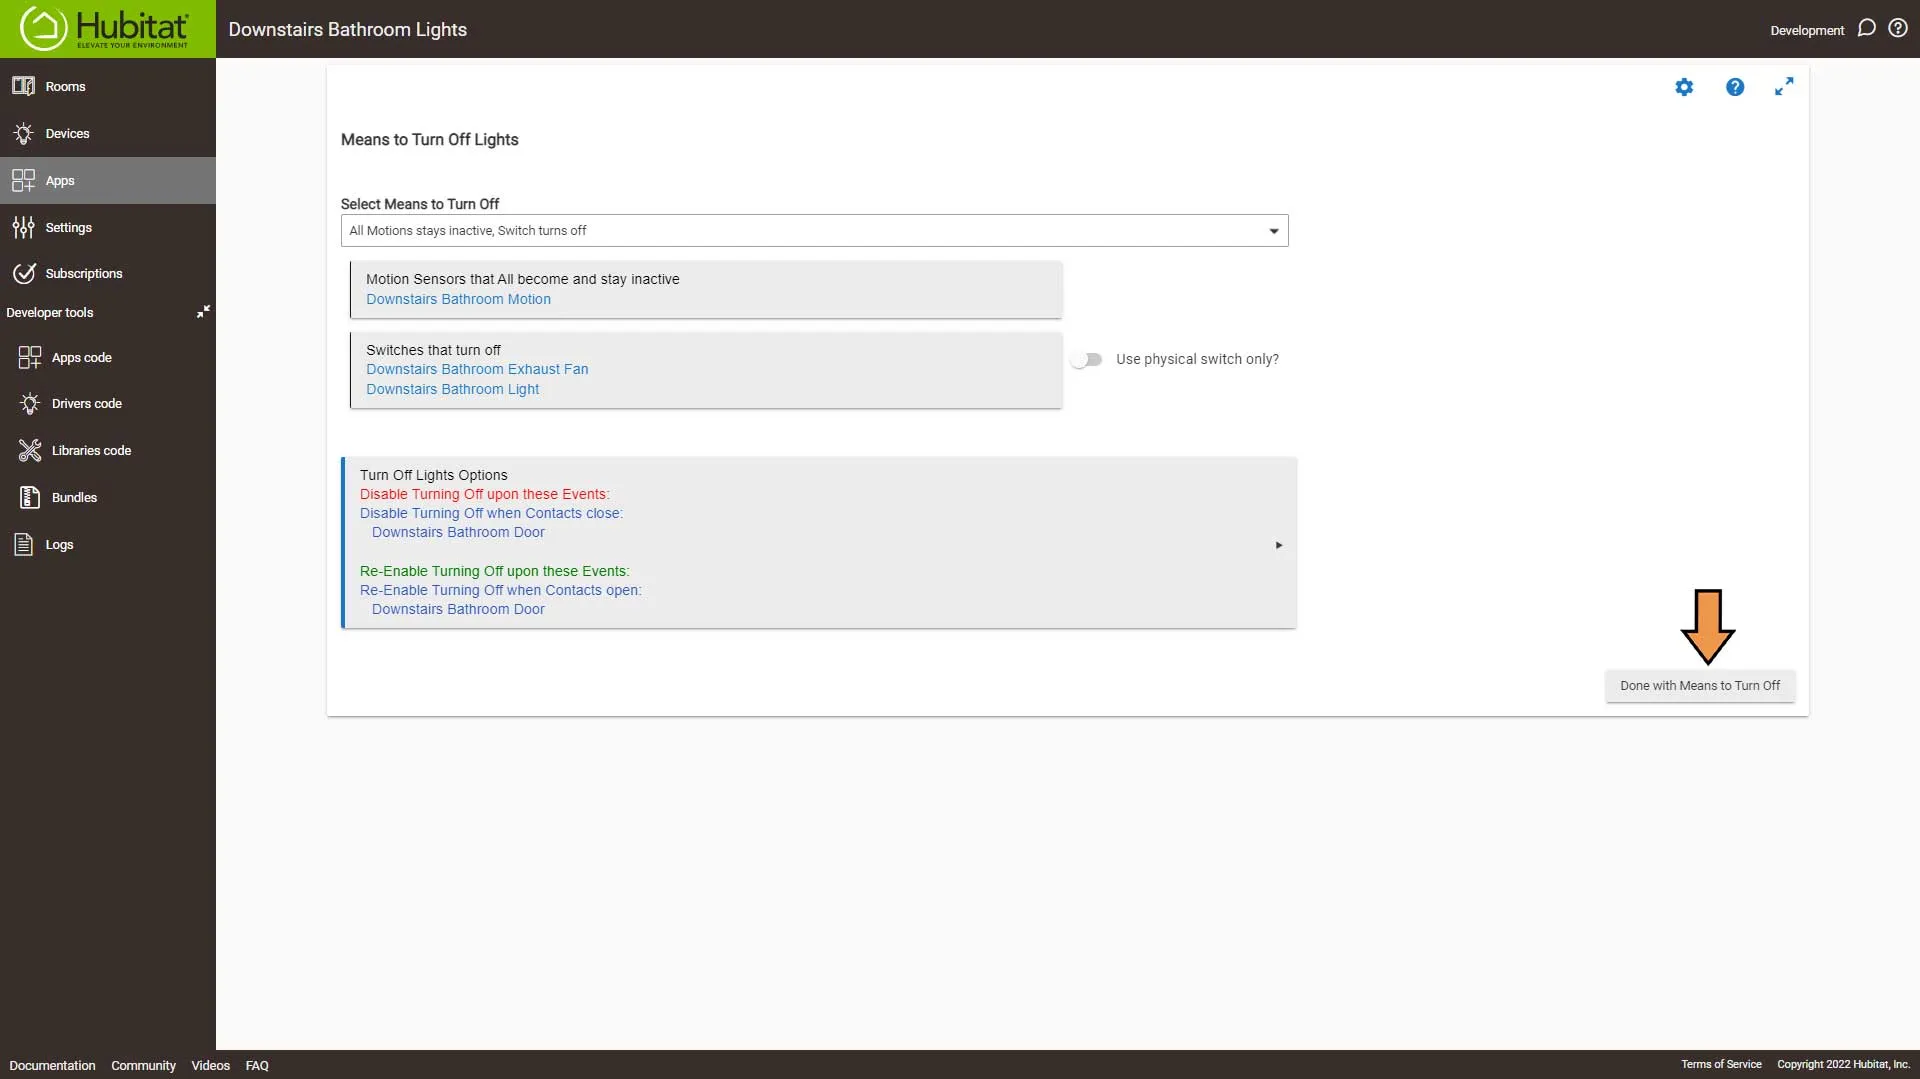
The only ones we want here are All Motions Stays inactive and Switch turns off.
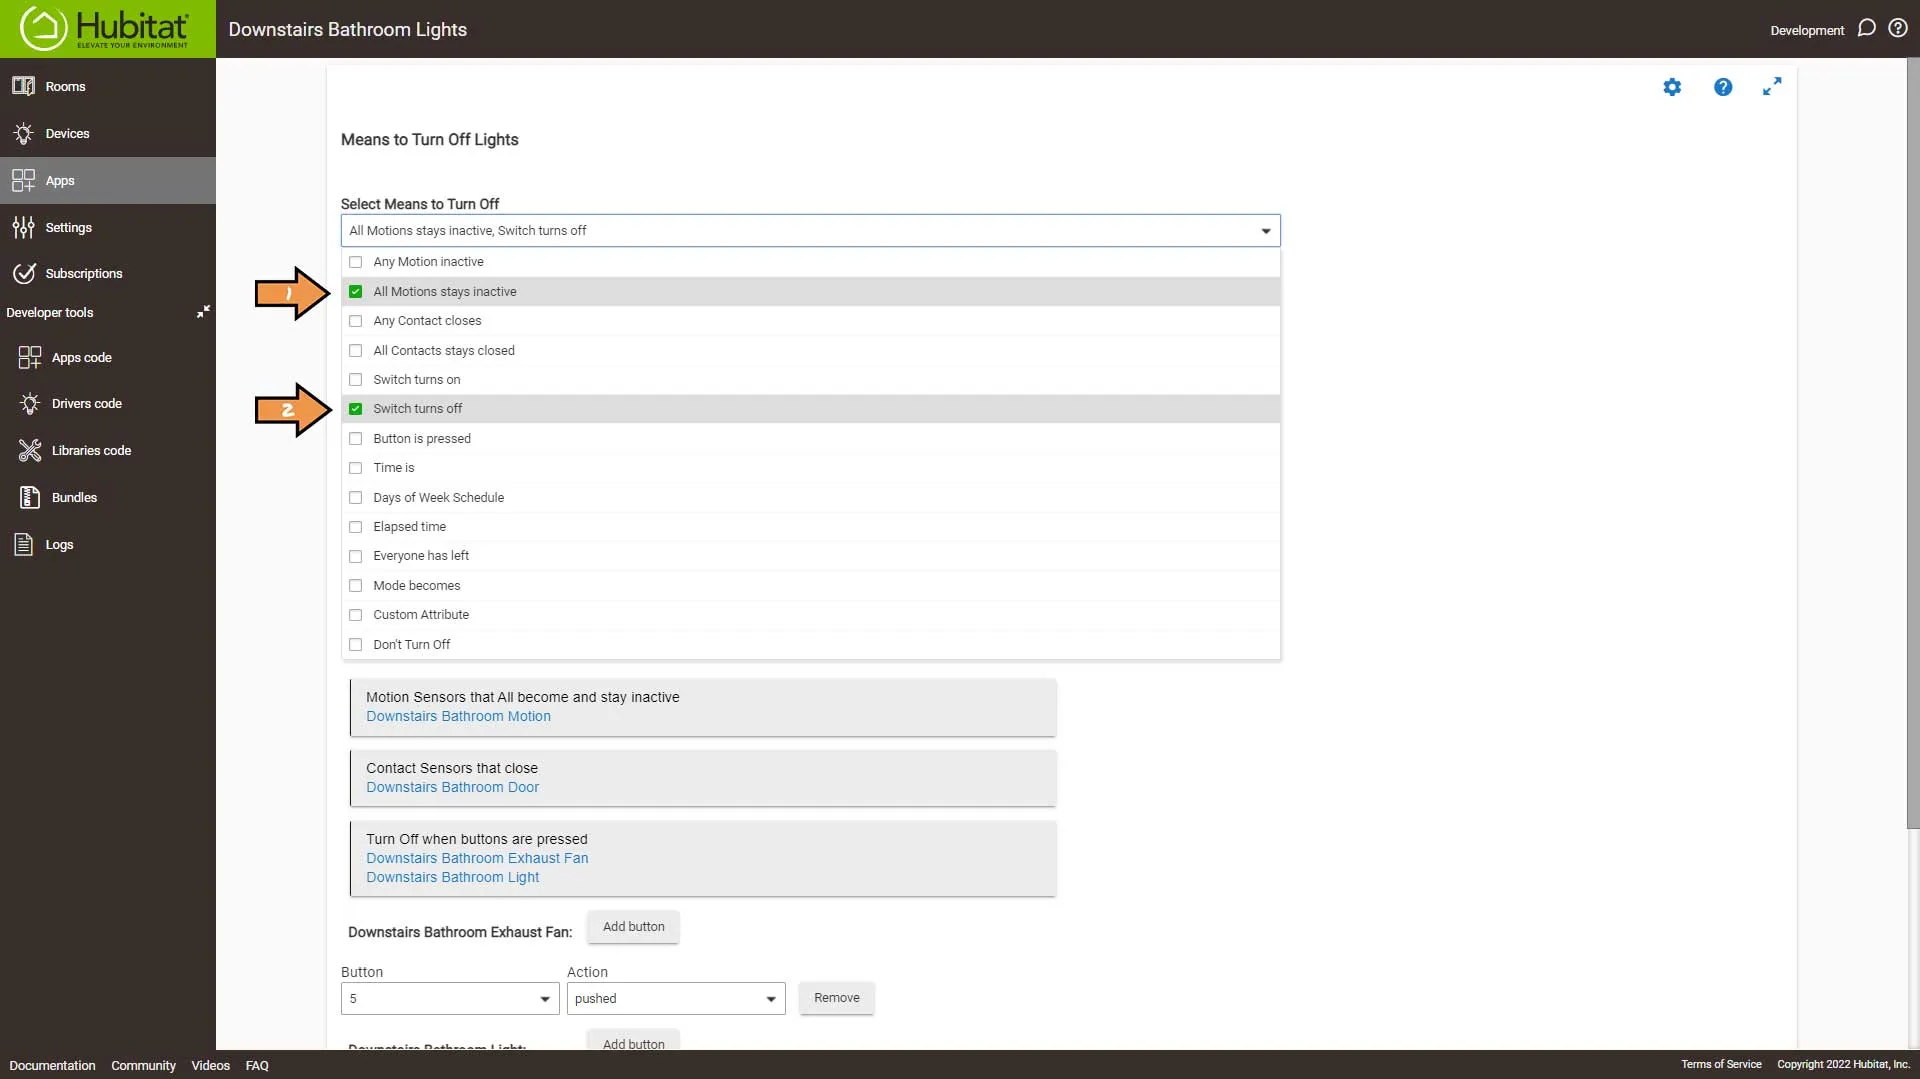
Make sure switches that turn off is populated with your switches. Then click Turn Off Lights Options.
On the Options page in the Disable Turning Off Upon These Events drop-down and select Contact is closed.
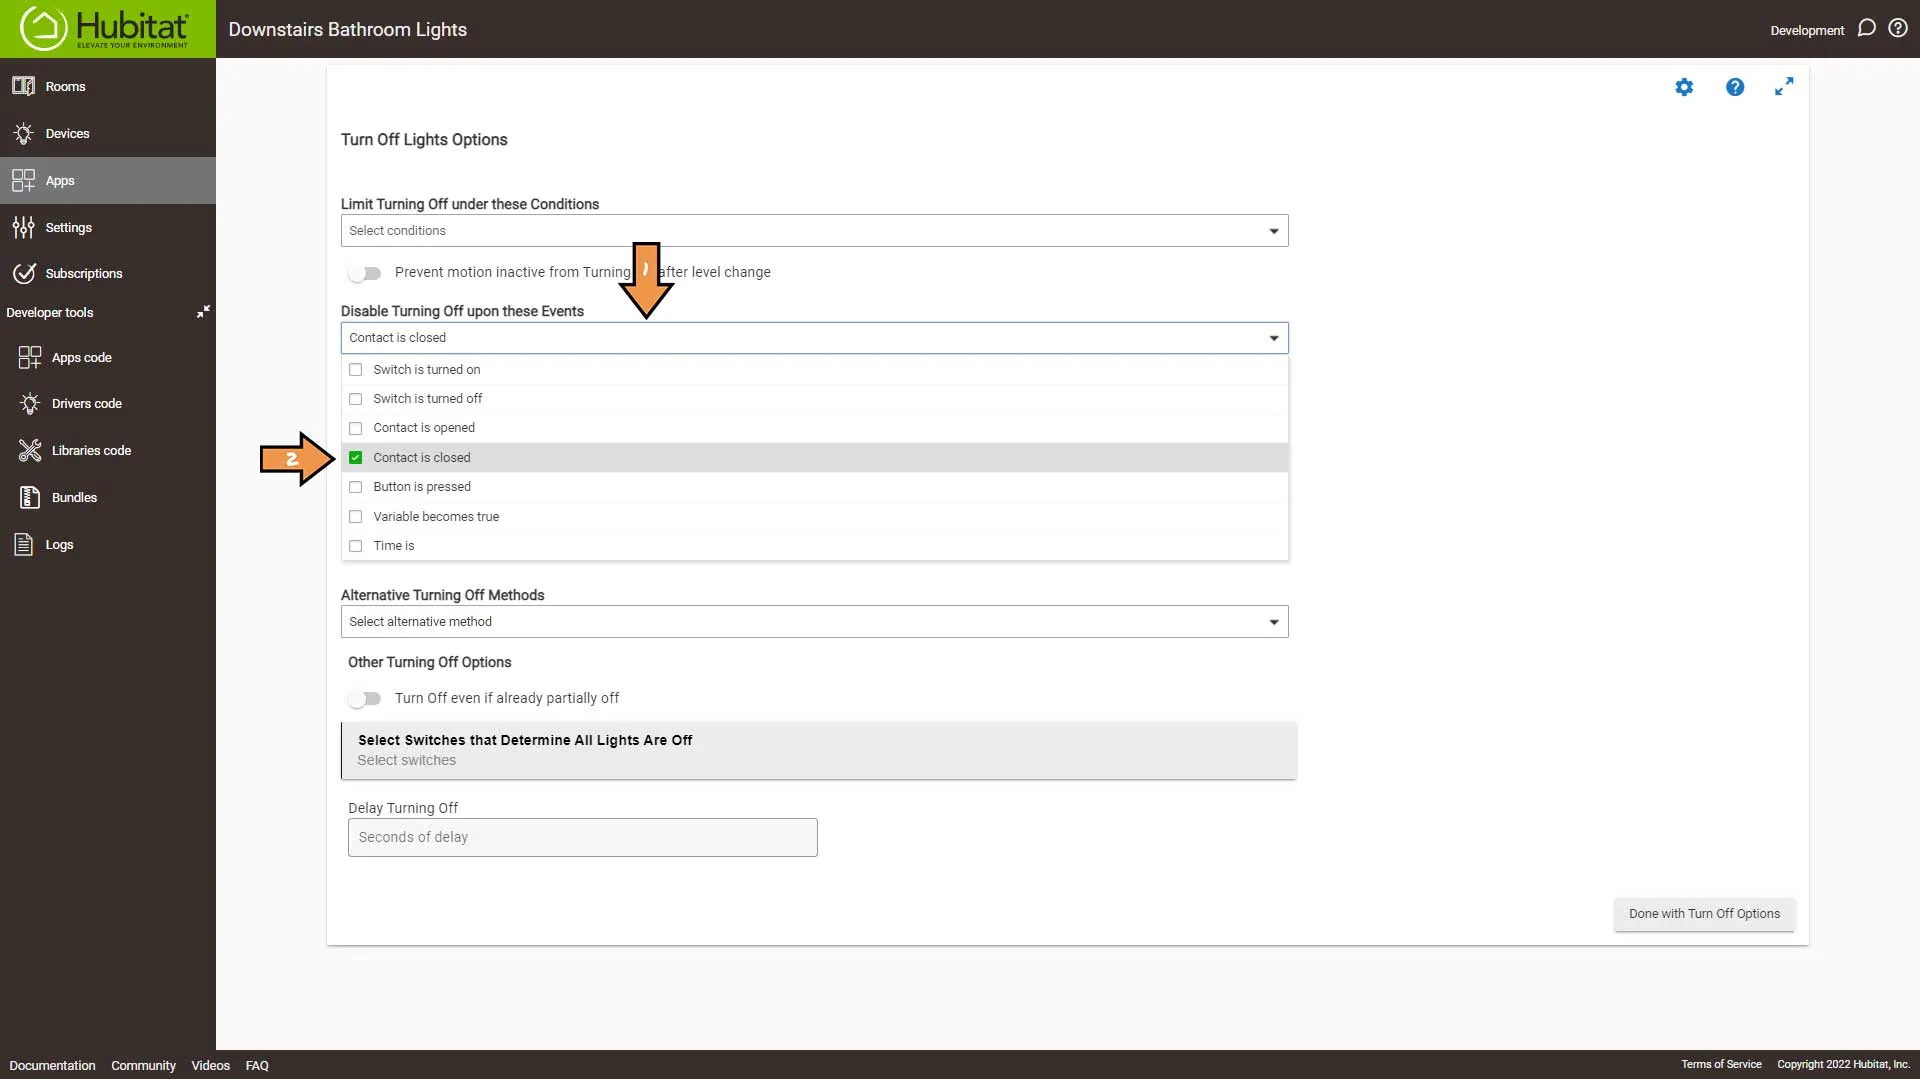
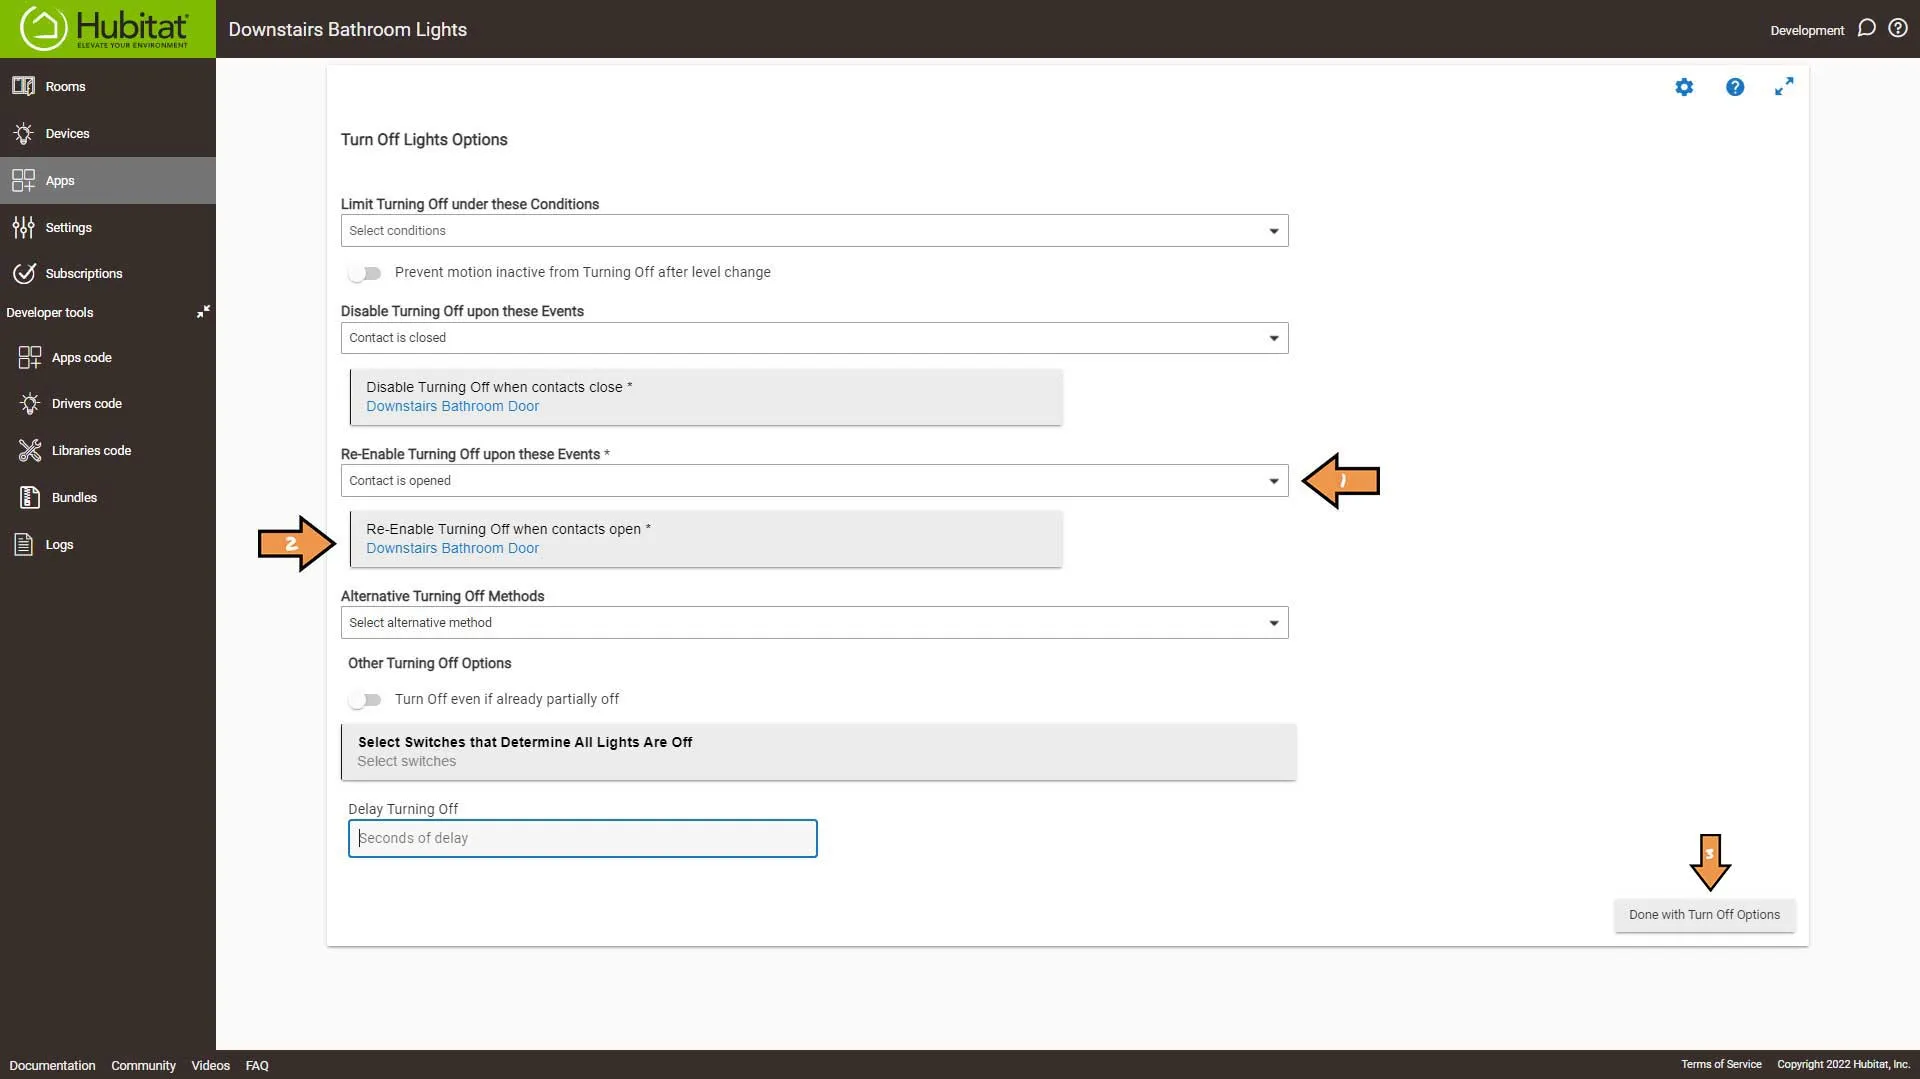
Select your contact sensor and in the Re-Enable Turning Off upon these Events drop down select Contact is opened. Then make sure you select your contact sensor again. Then Click the Done with Turn Off Options button.
Then click the Done with Means to Turn Off button.
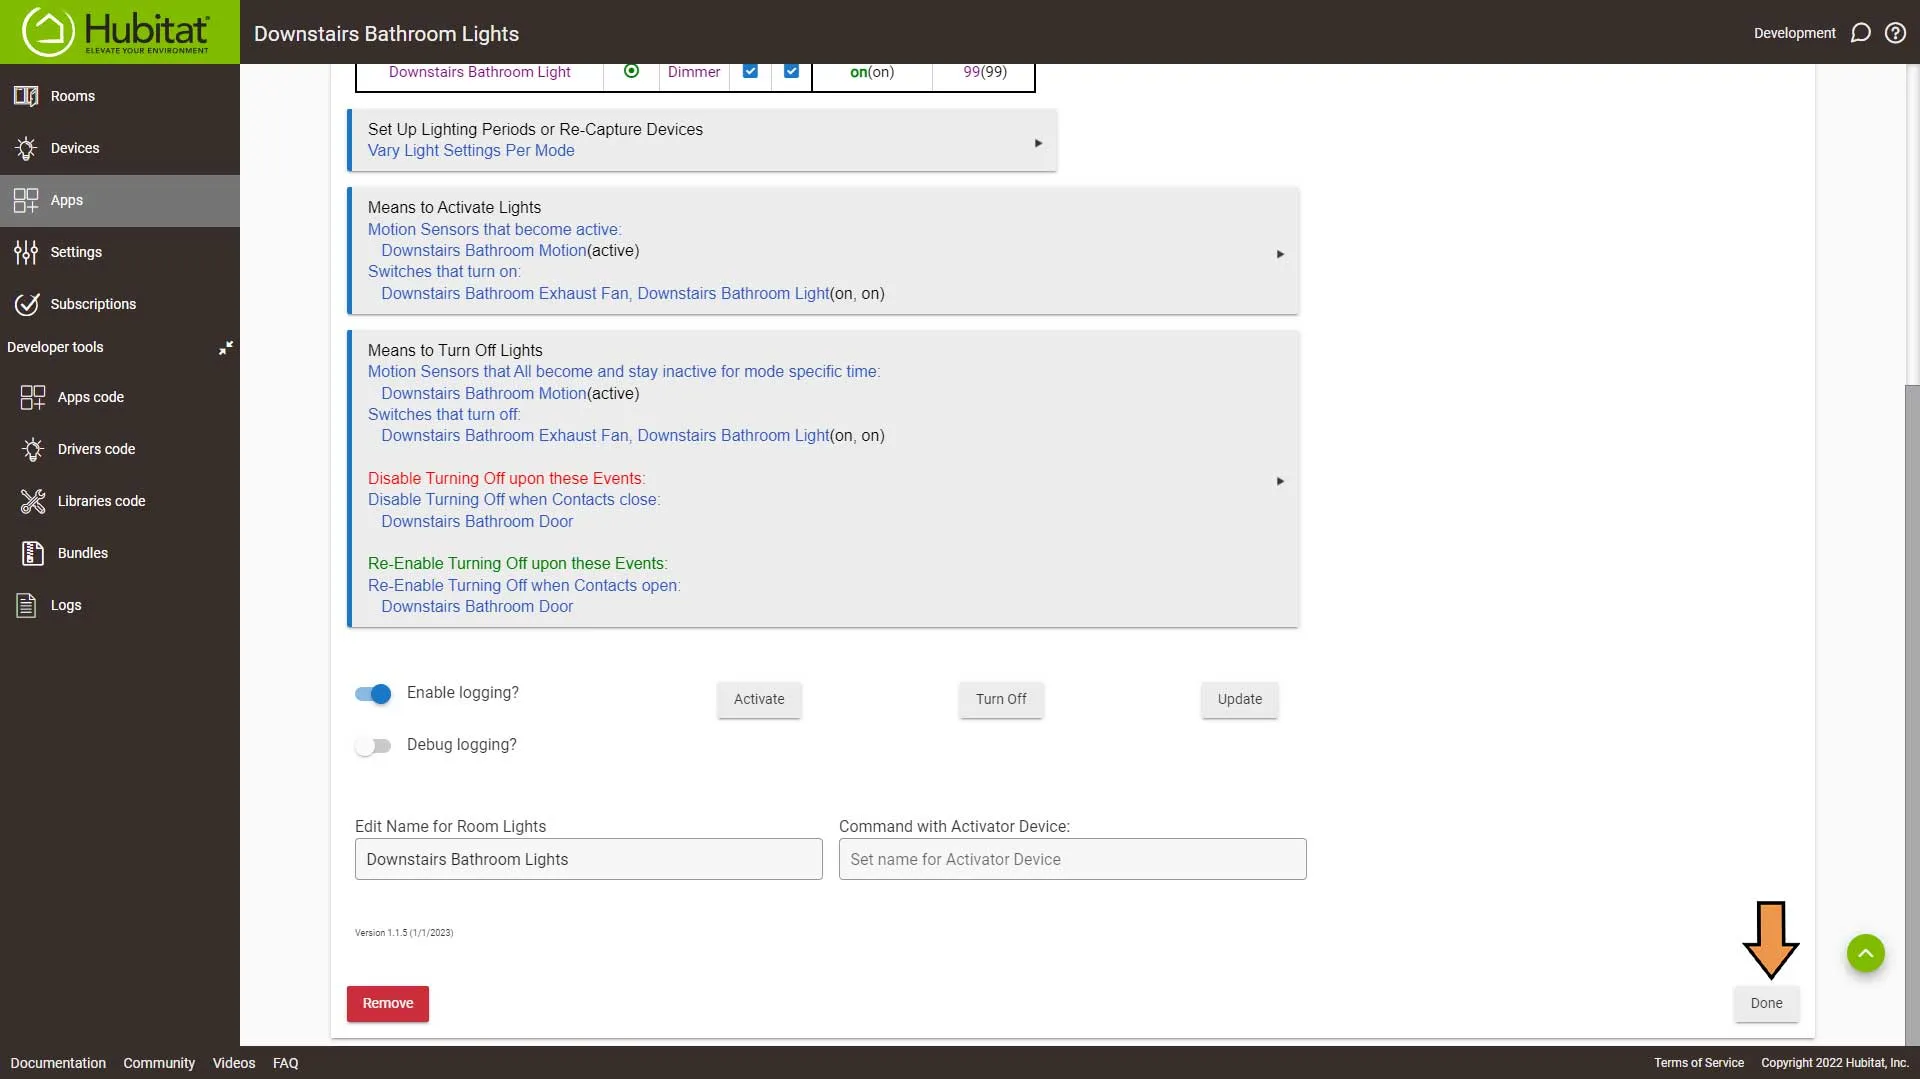
Next Click the Done button to finish the automation.
Finally, click the Done Creating Room Lights button.
Home Assistant
Bathroom Lighting Automation
The Official Documentation for Automation editor
Setting Up the Automation
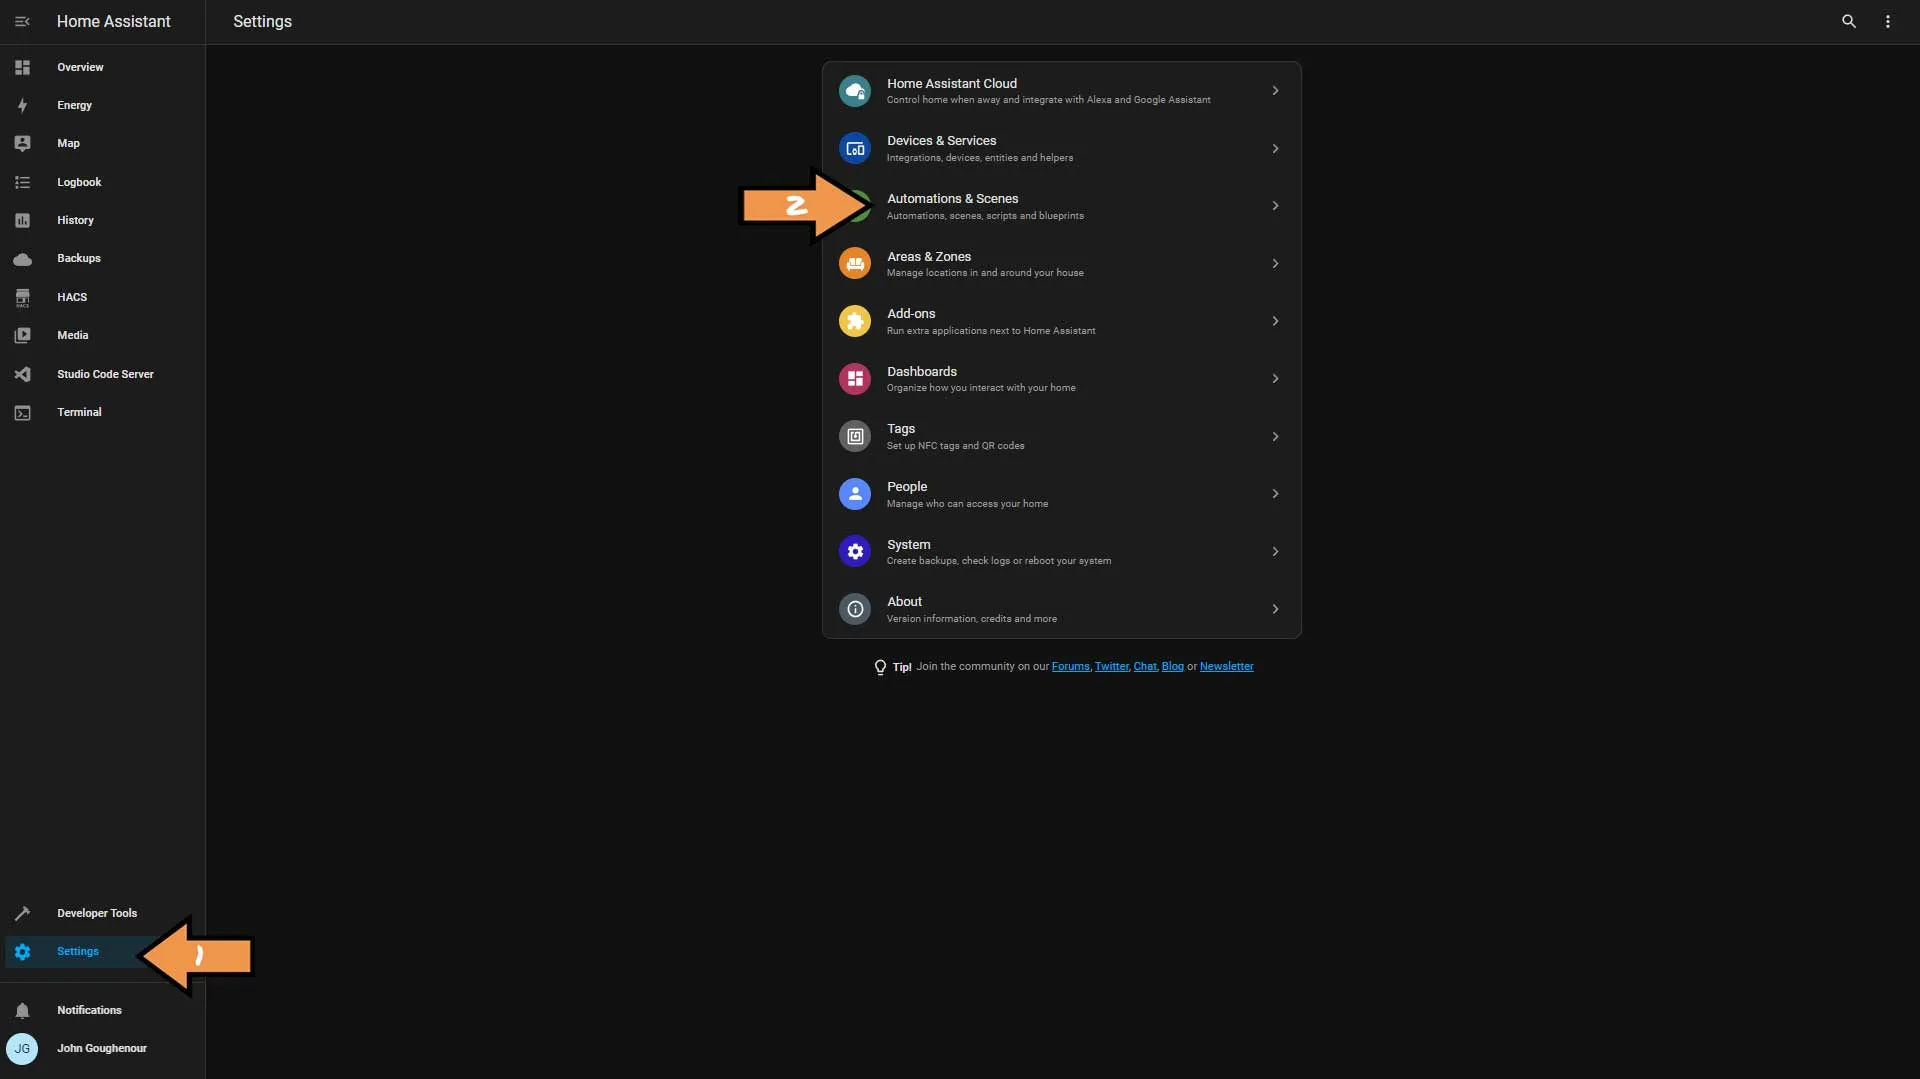
First, we need to go to Settings and Automations & Scenes.
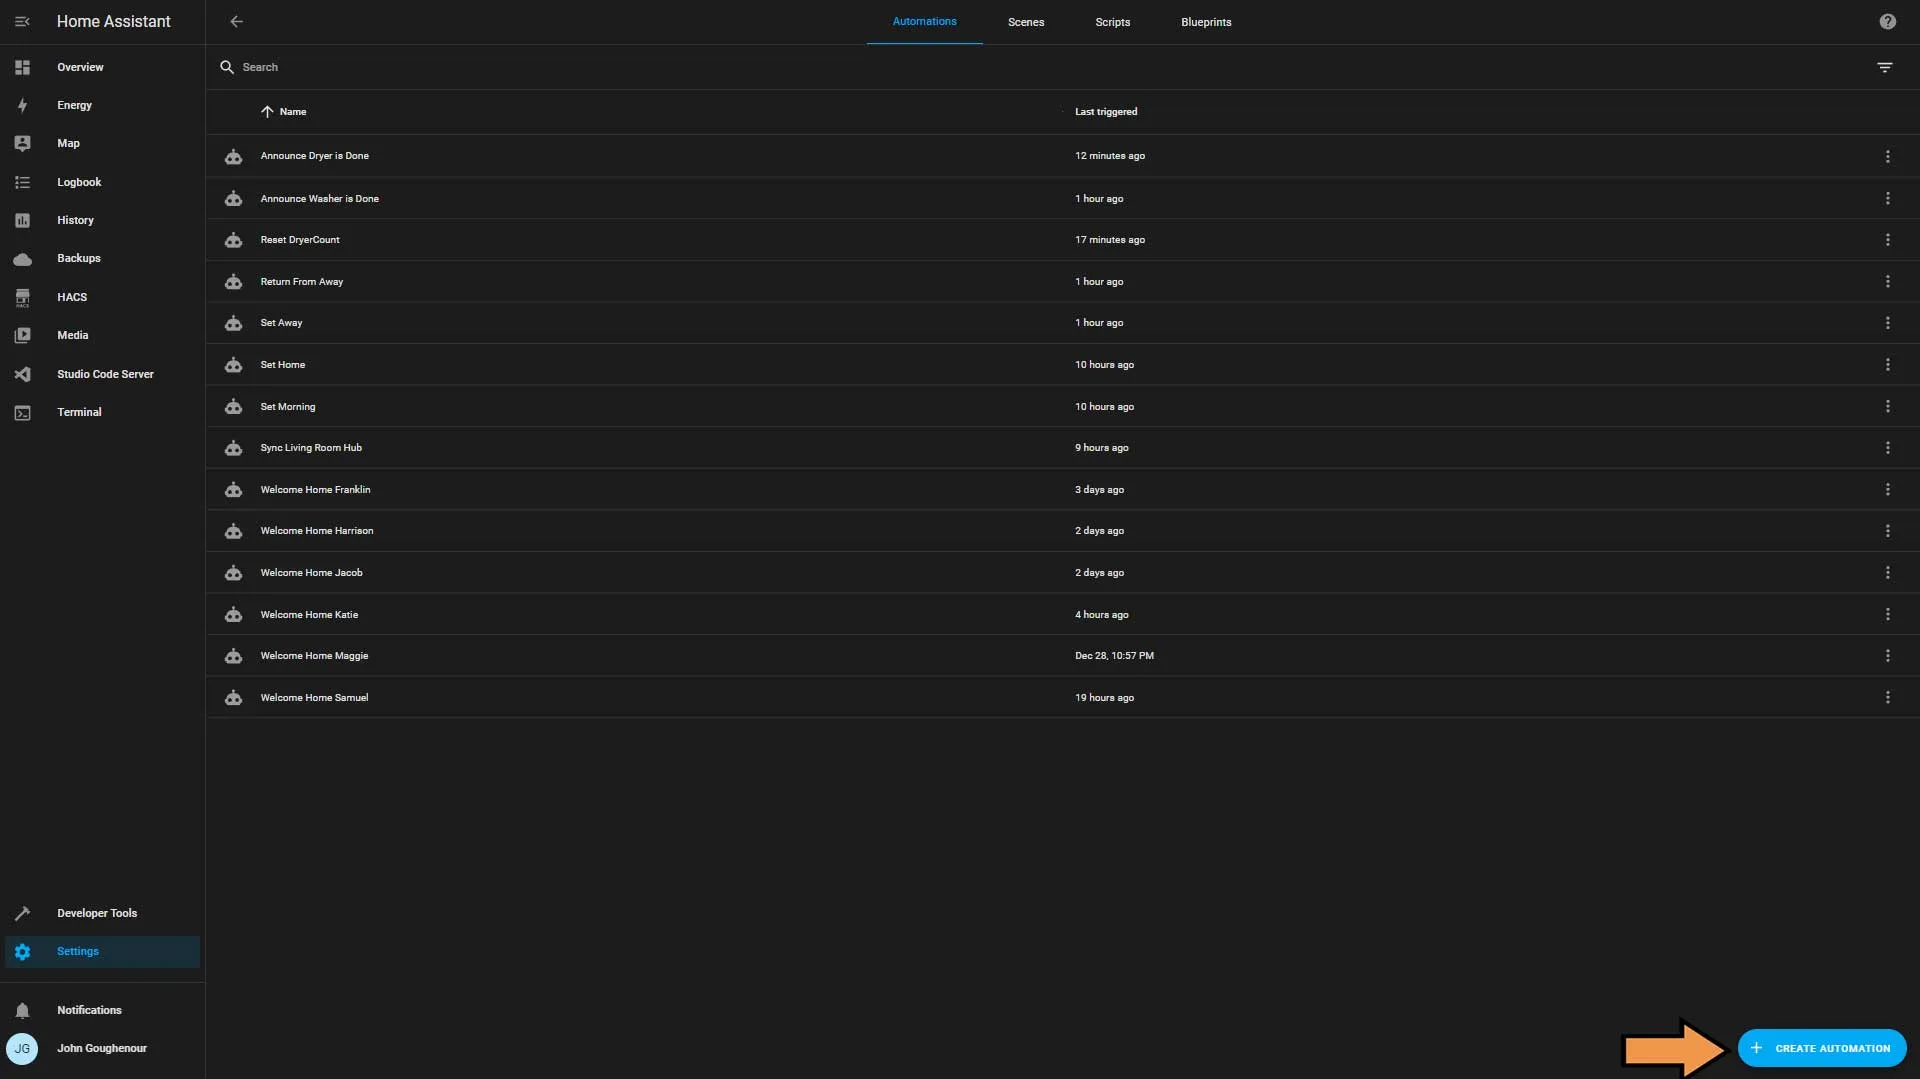
Click the blue Create Automation button.
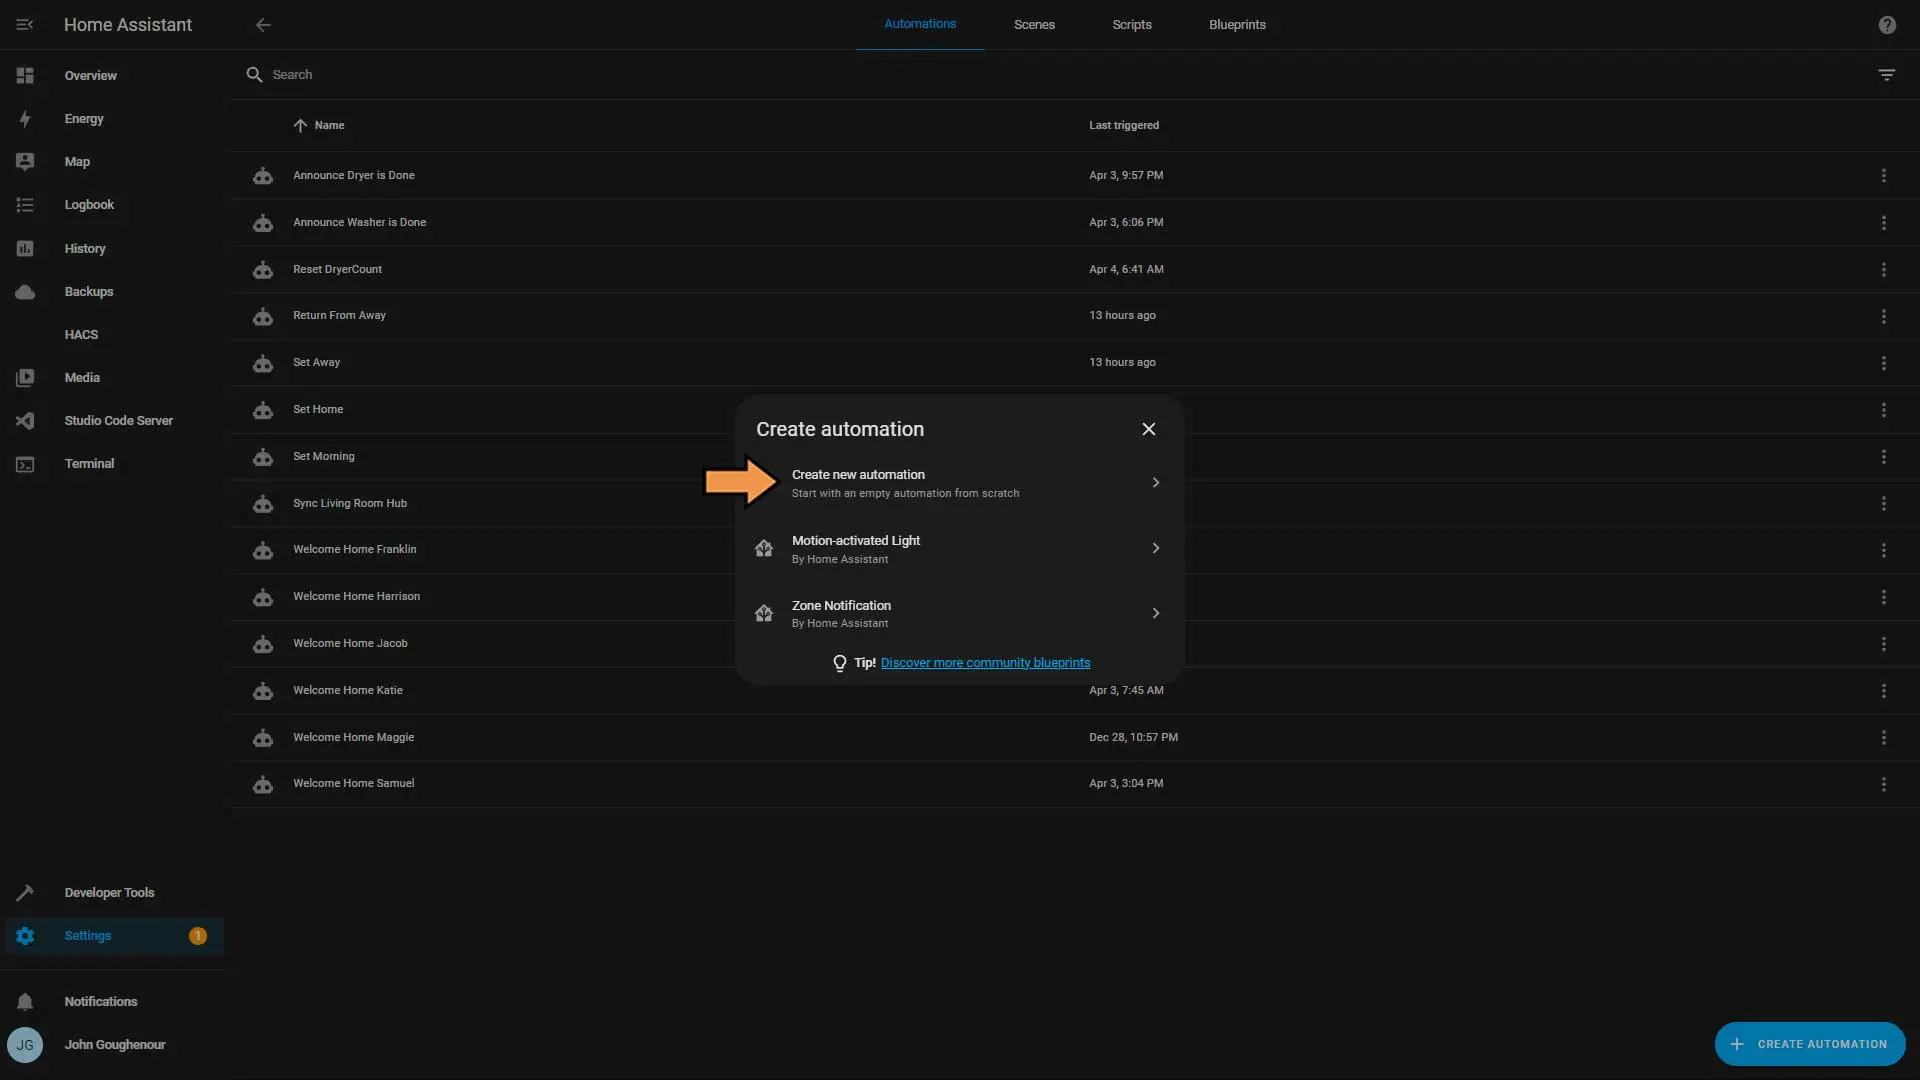
Choose Create new automation.
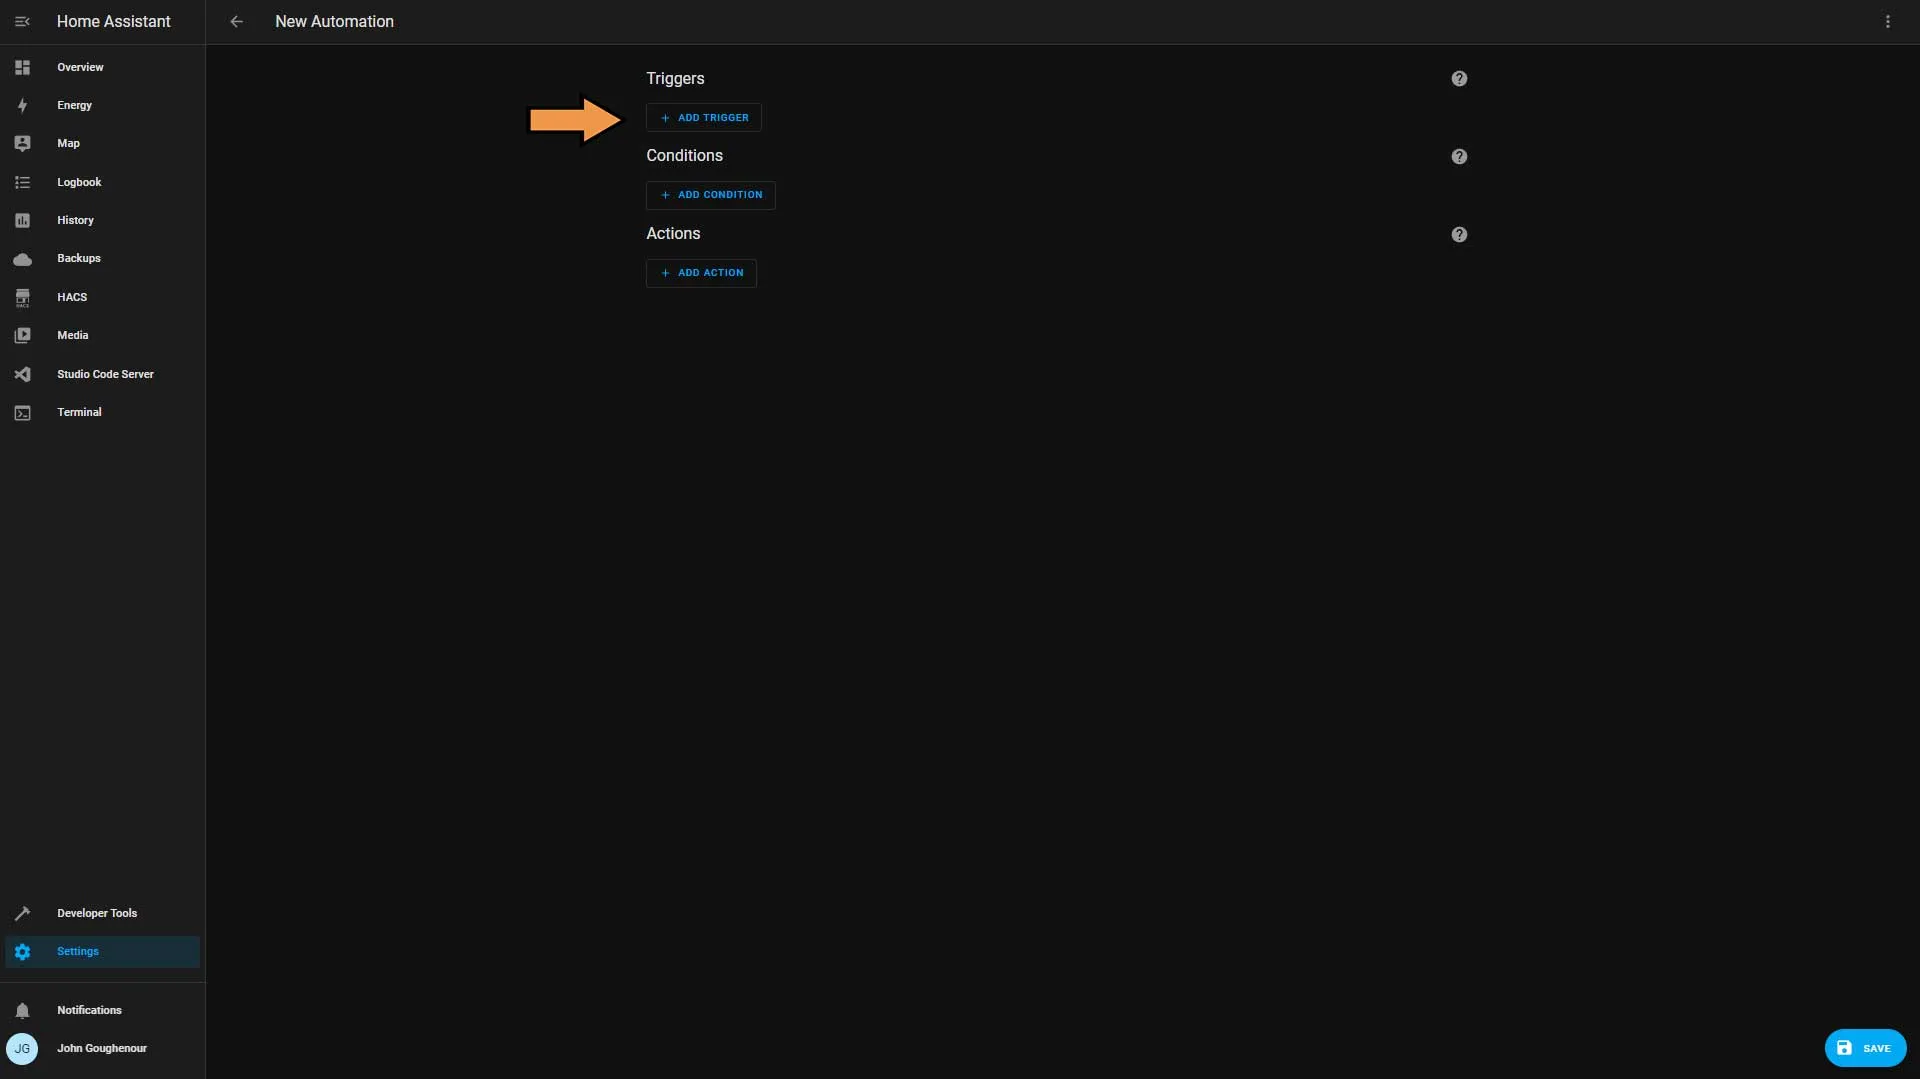
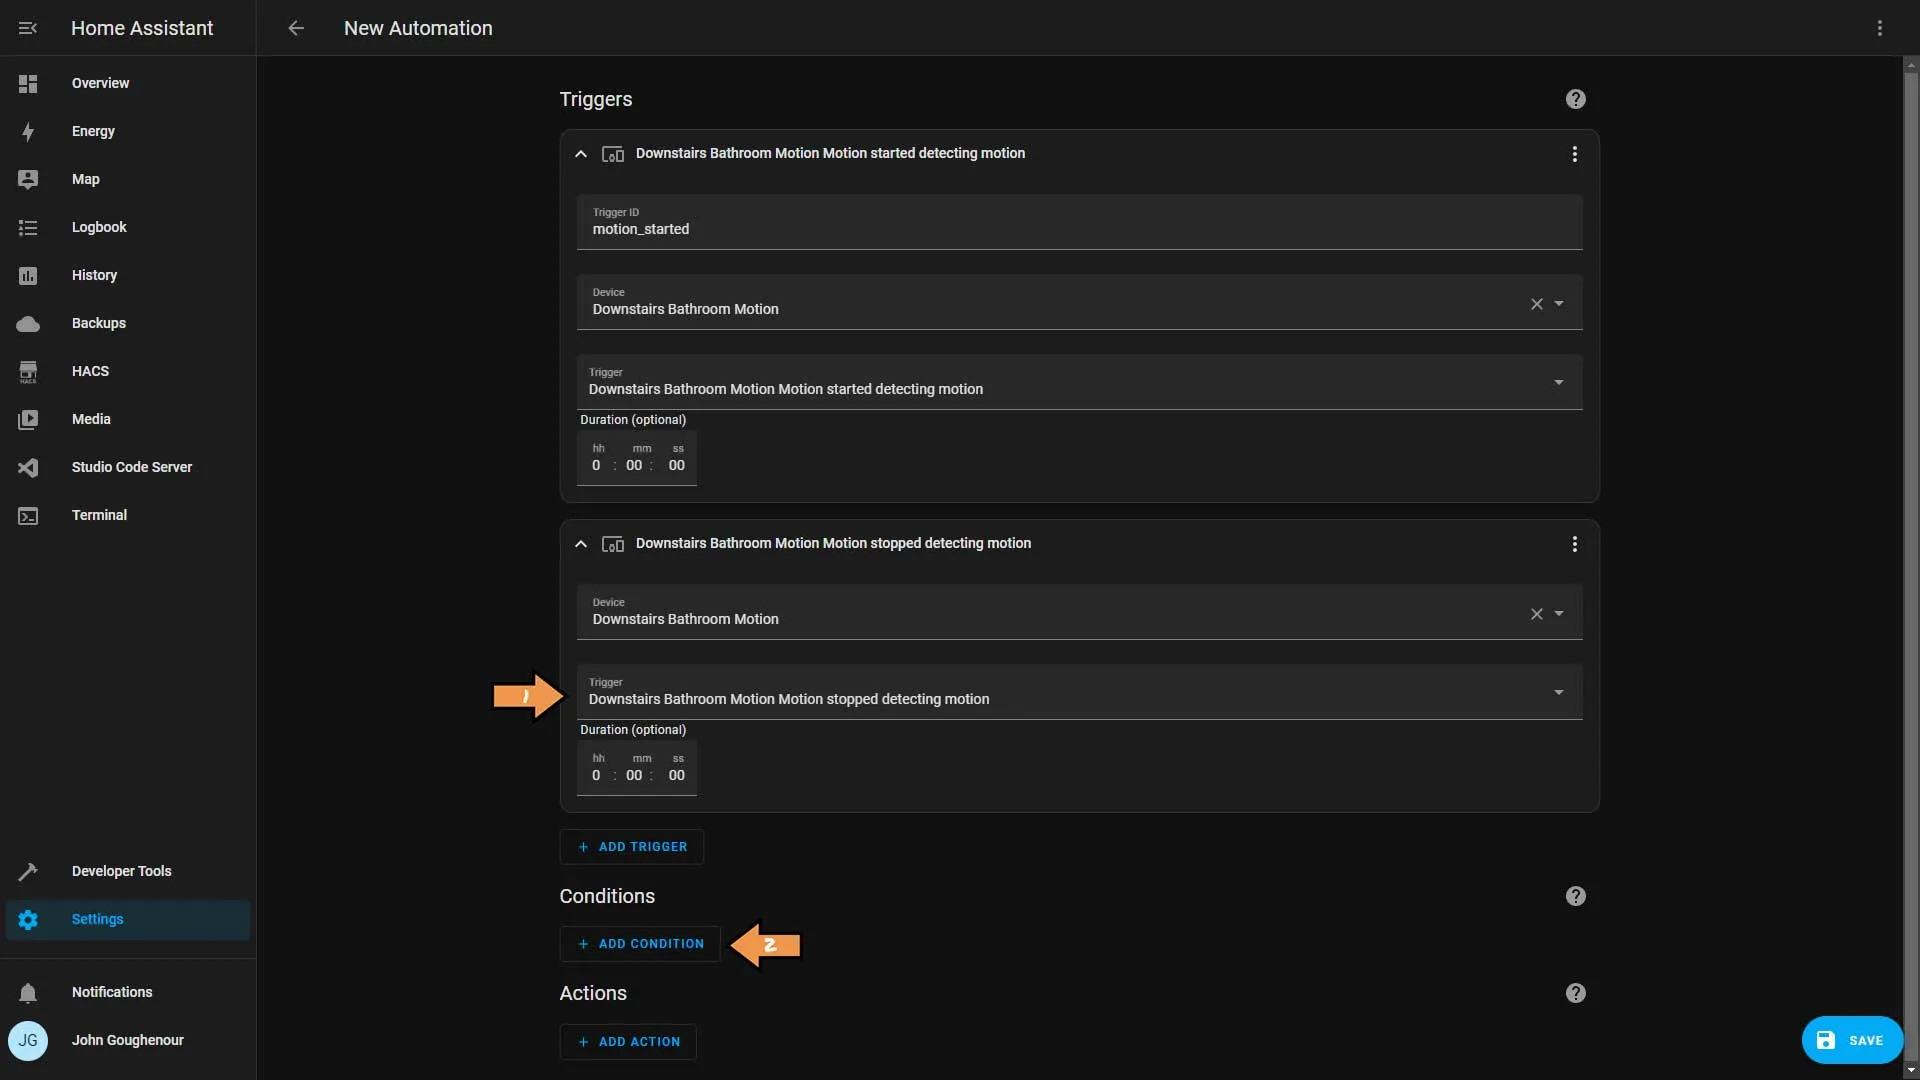
Click Add Trigger.
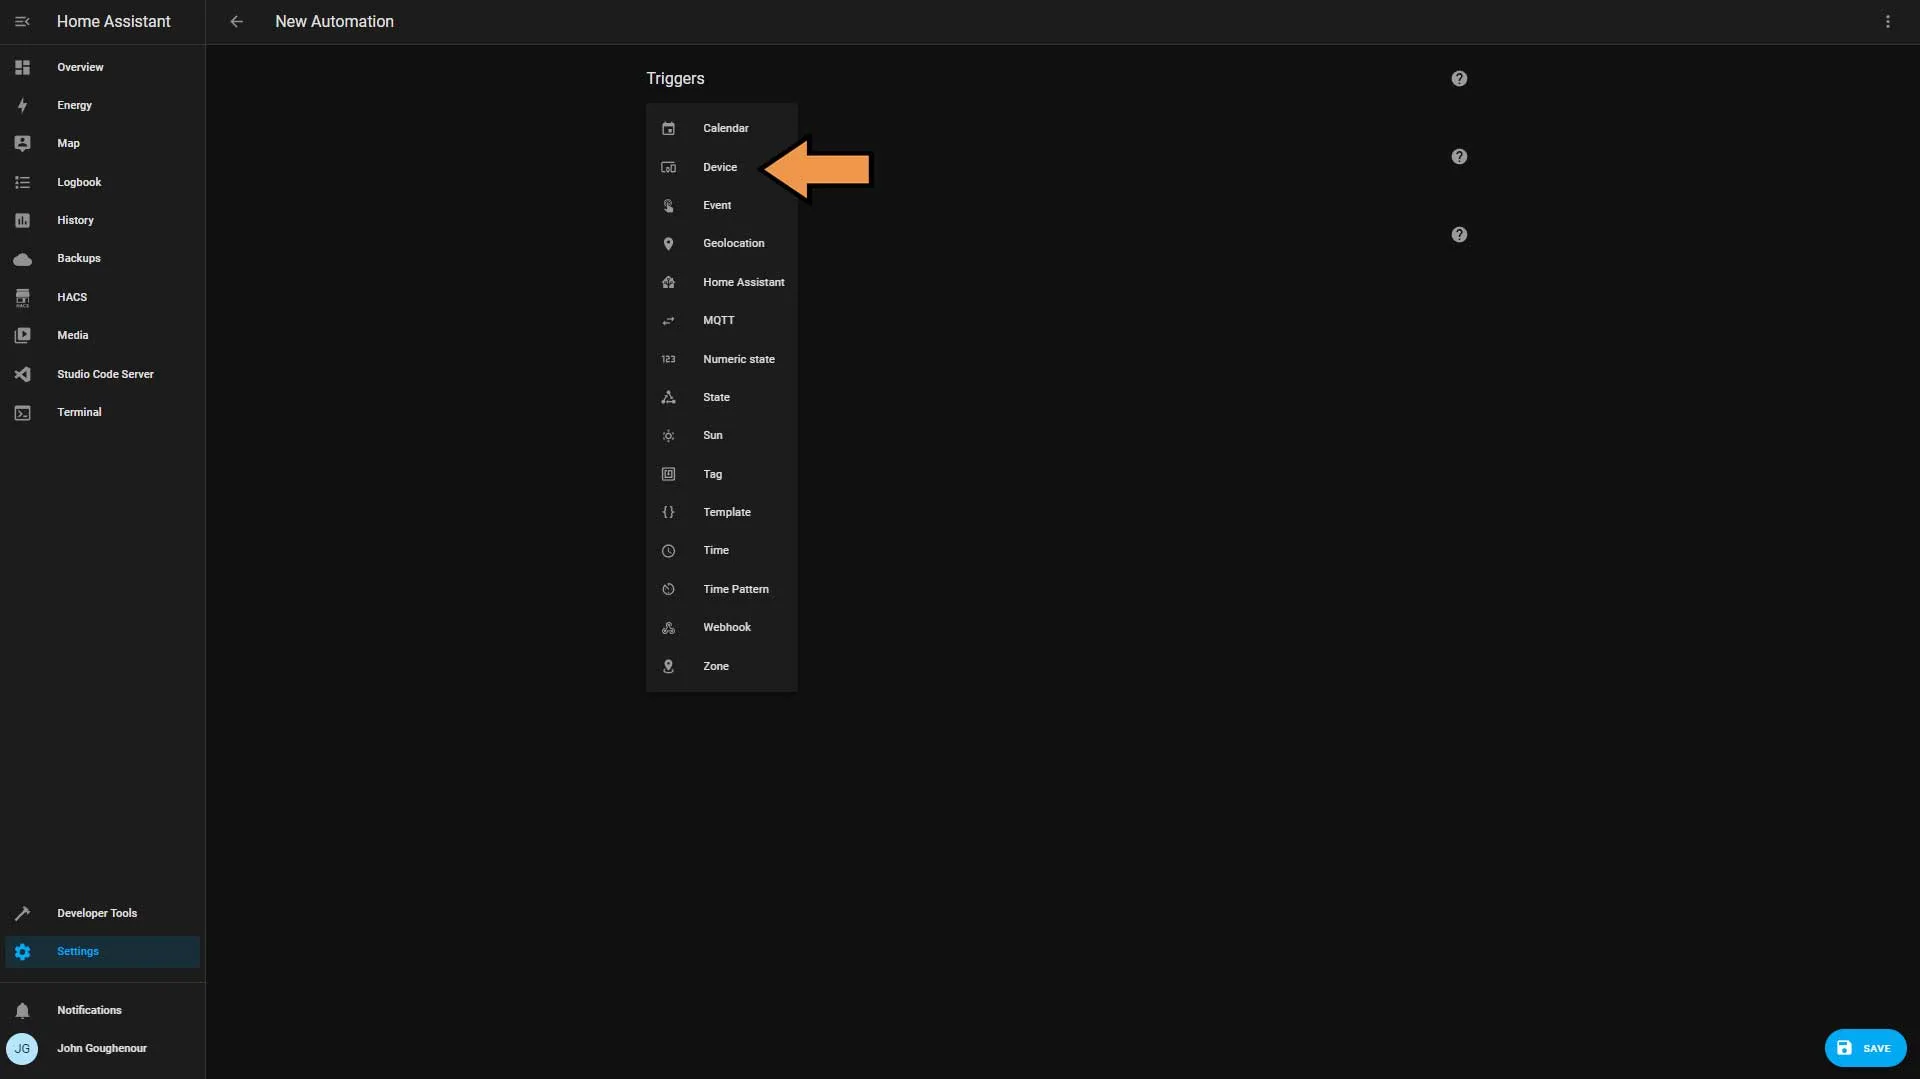
From the list, select Device.
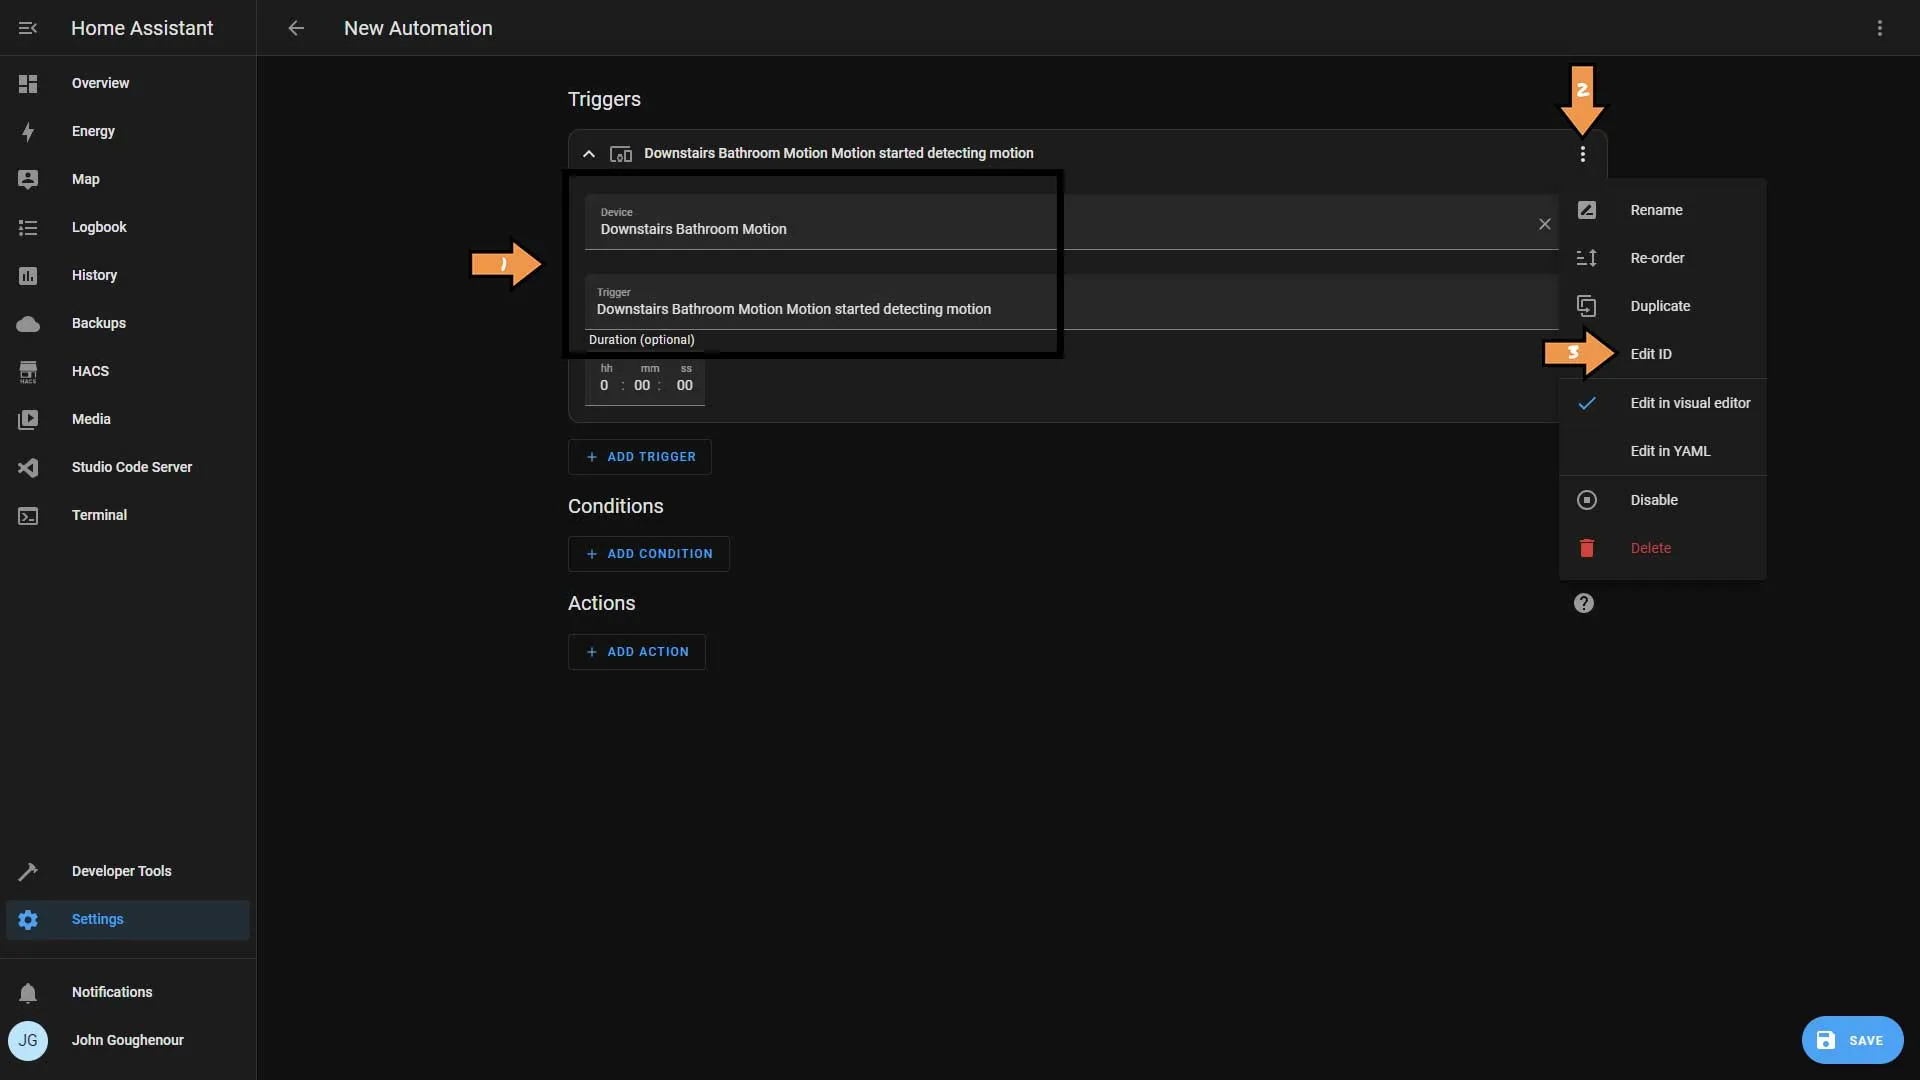
In the Device section, choose our motion sensor, and for the Trigger drop-down, select Started detecting motion. Then click the vertical ellipse in the upper right-hand corner and select Edit ID.
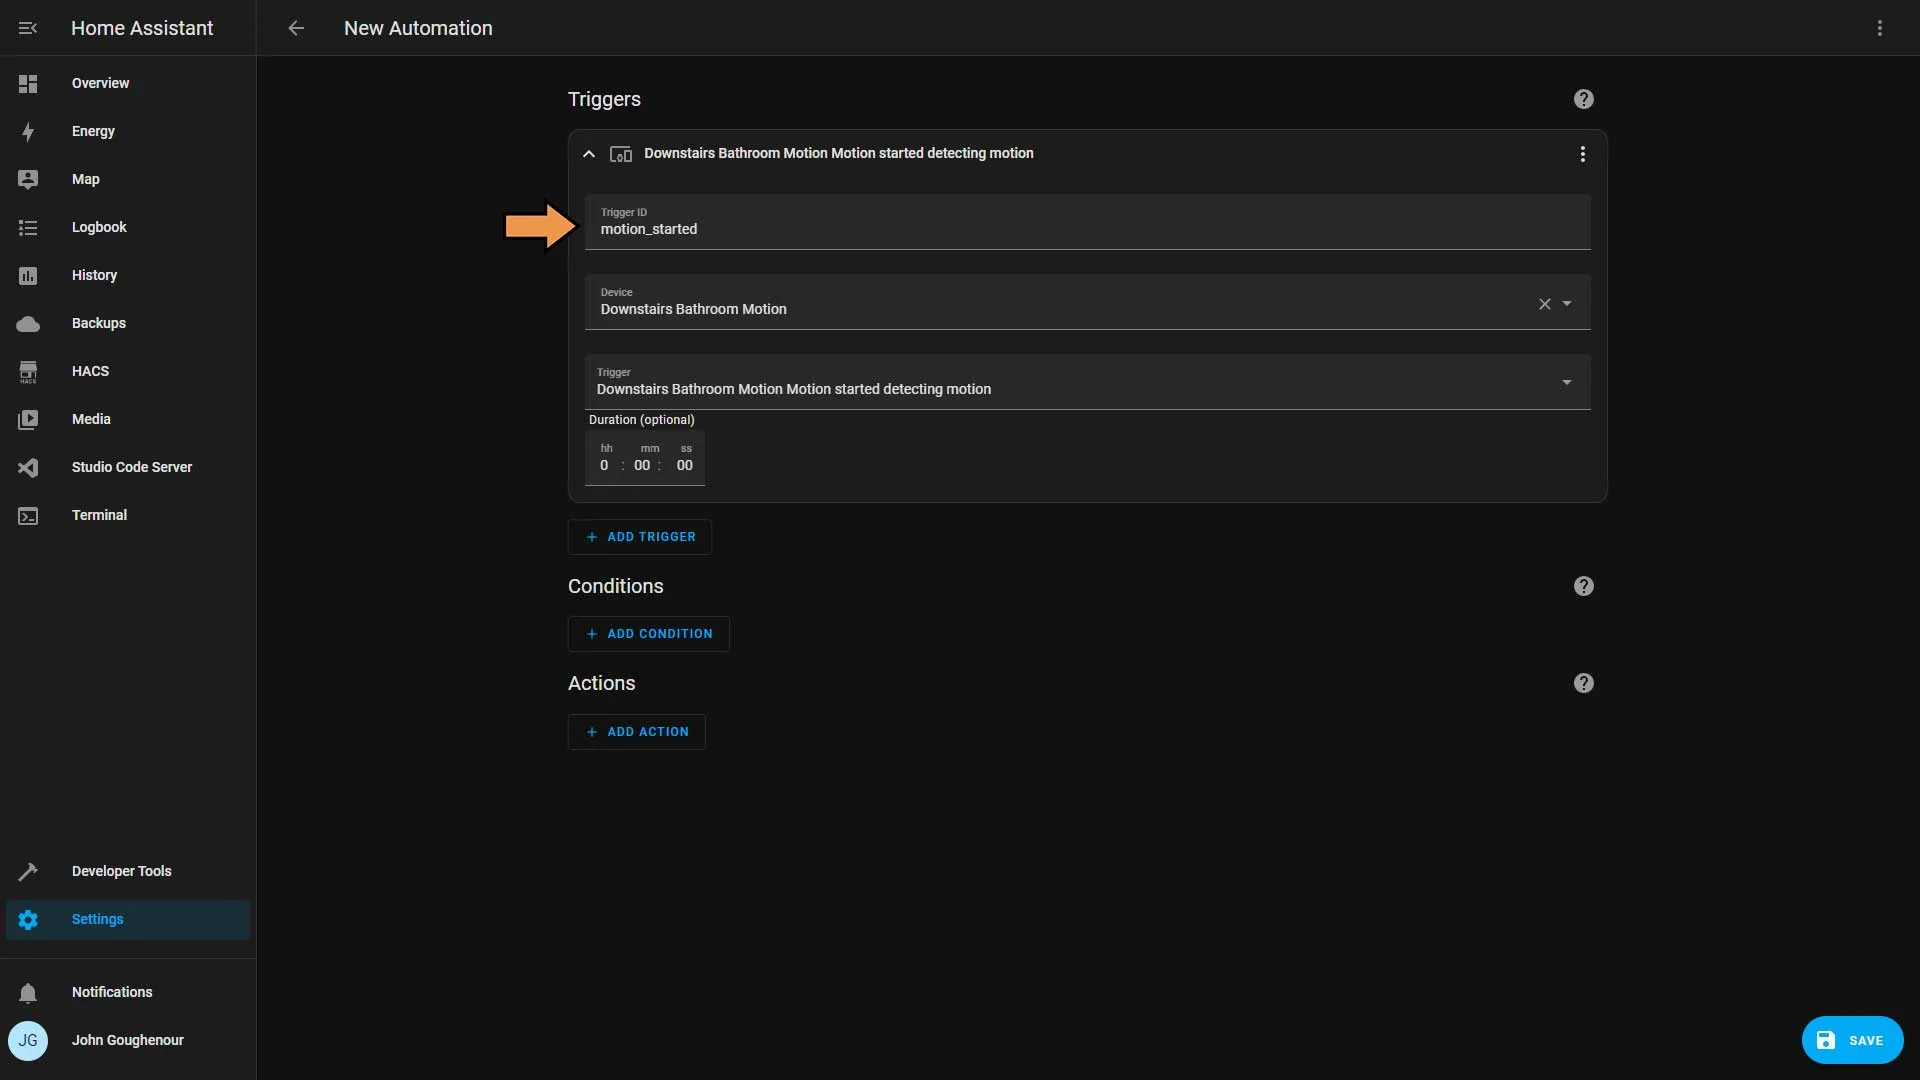
Add a Trigger ID. You can call it anything you like, but we’ll use motion_started.
Now add a second trigger using the same motion sensor but using the Stopped detecting motion Trigger. Then click the Add Condition button.
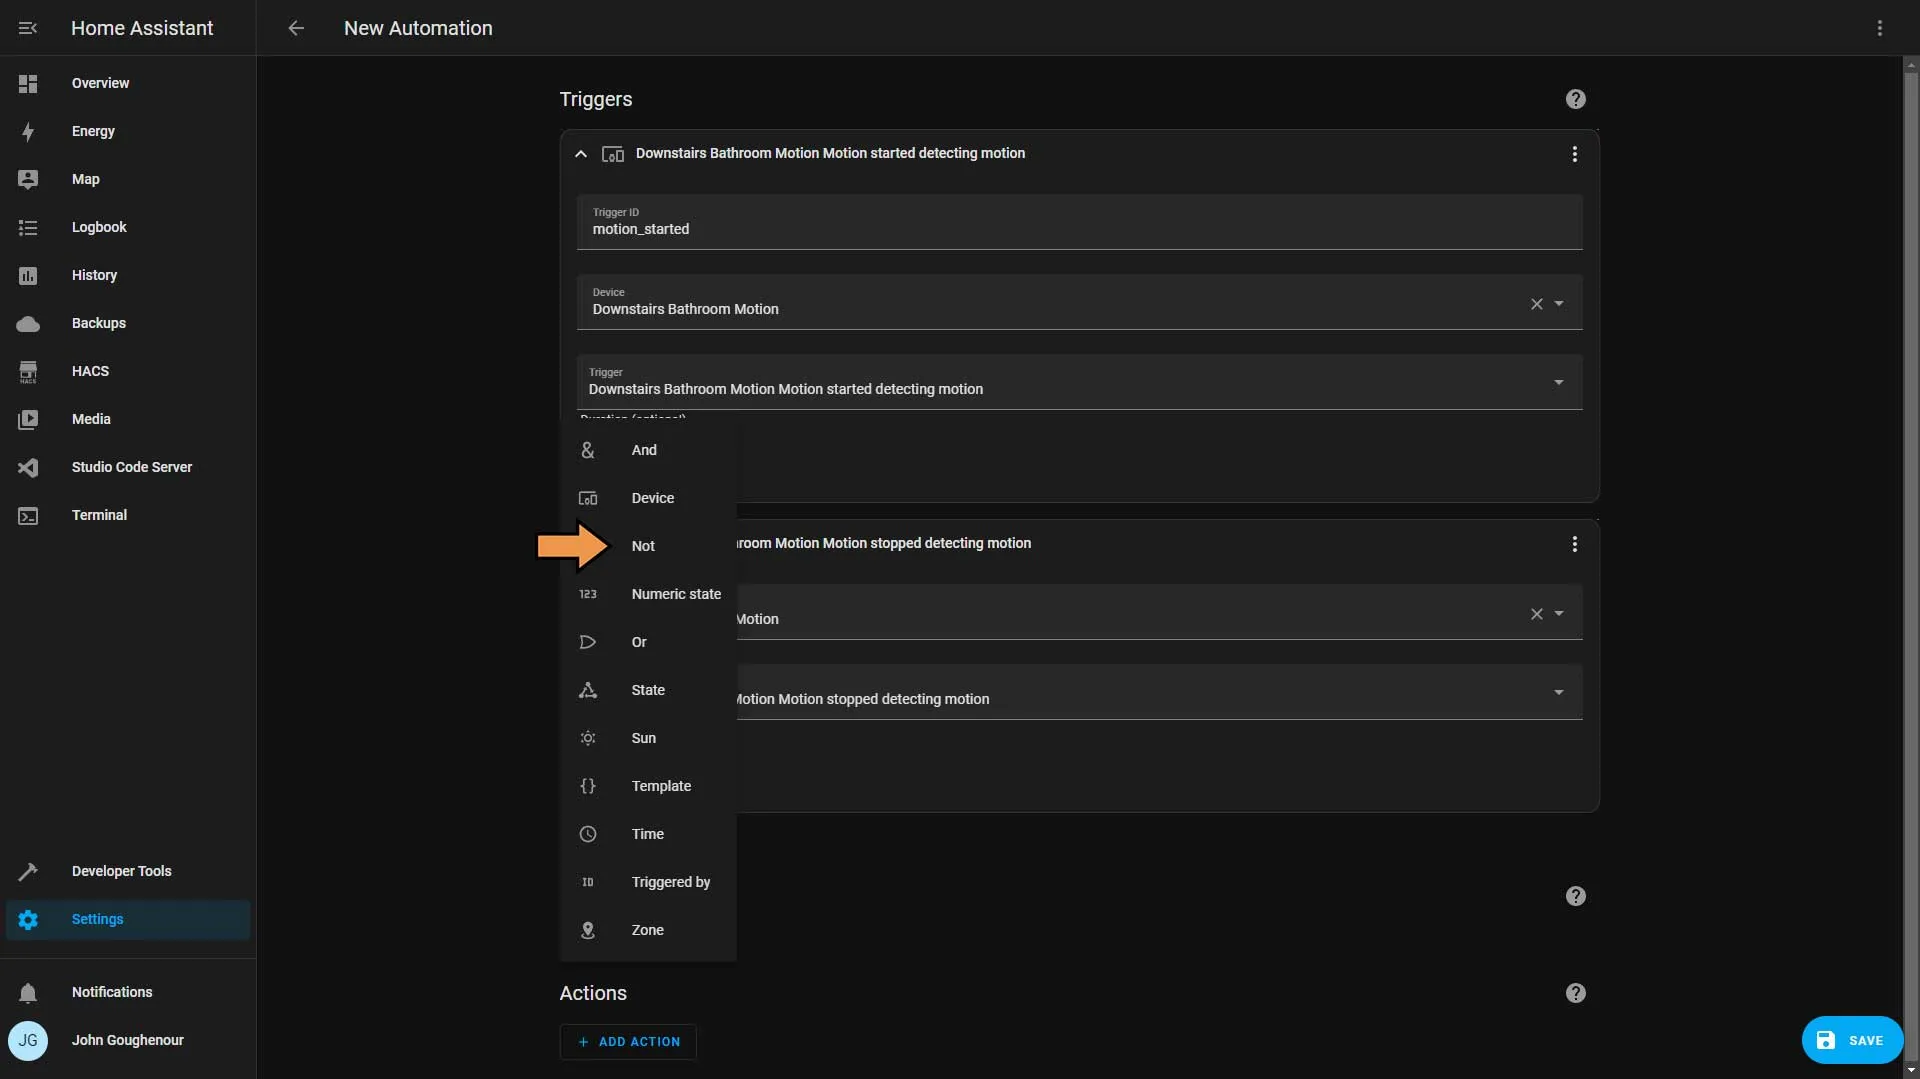
Select Not from the list.
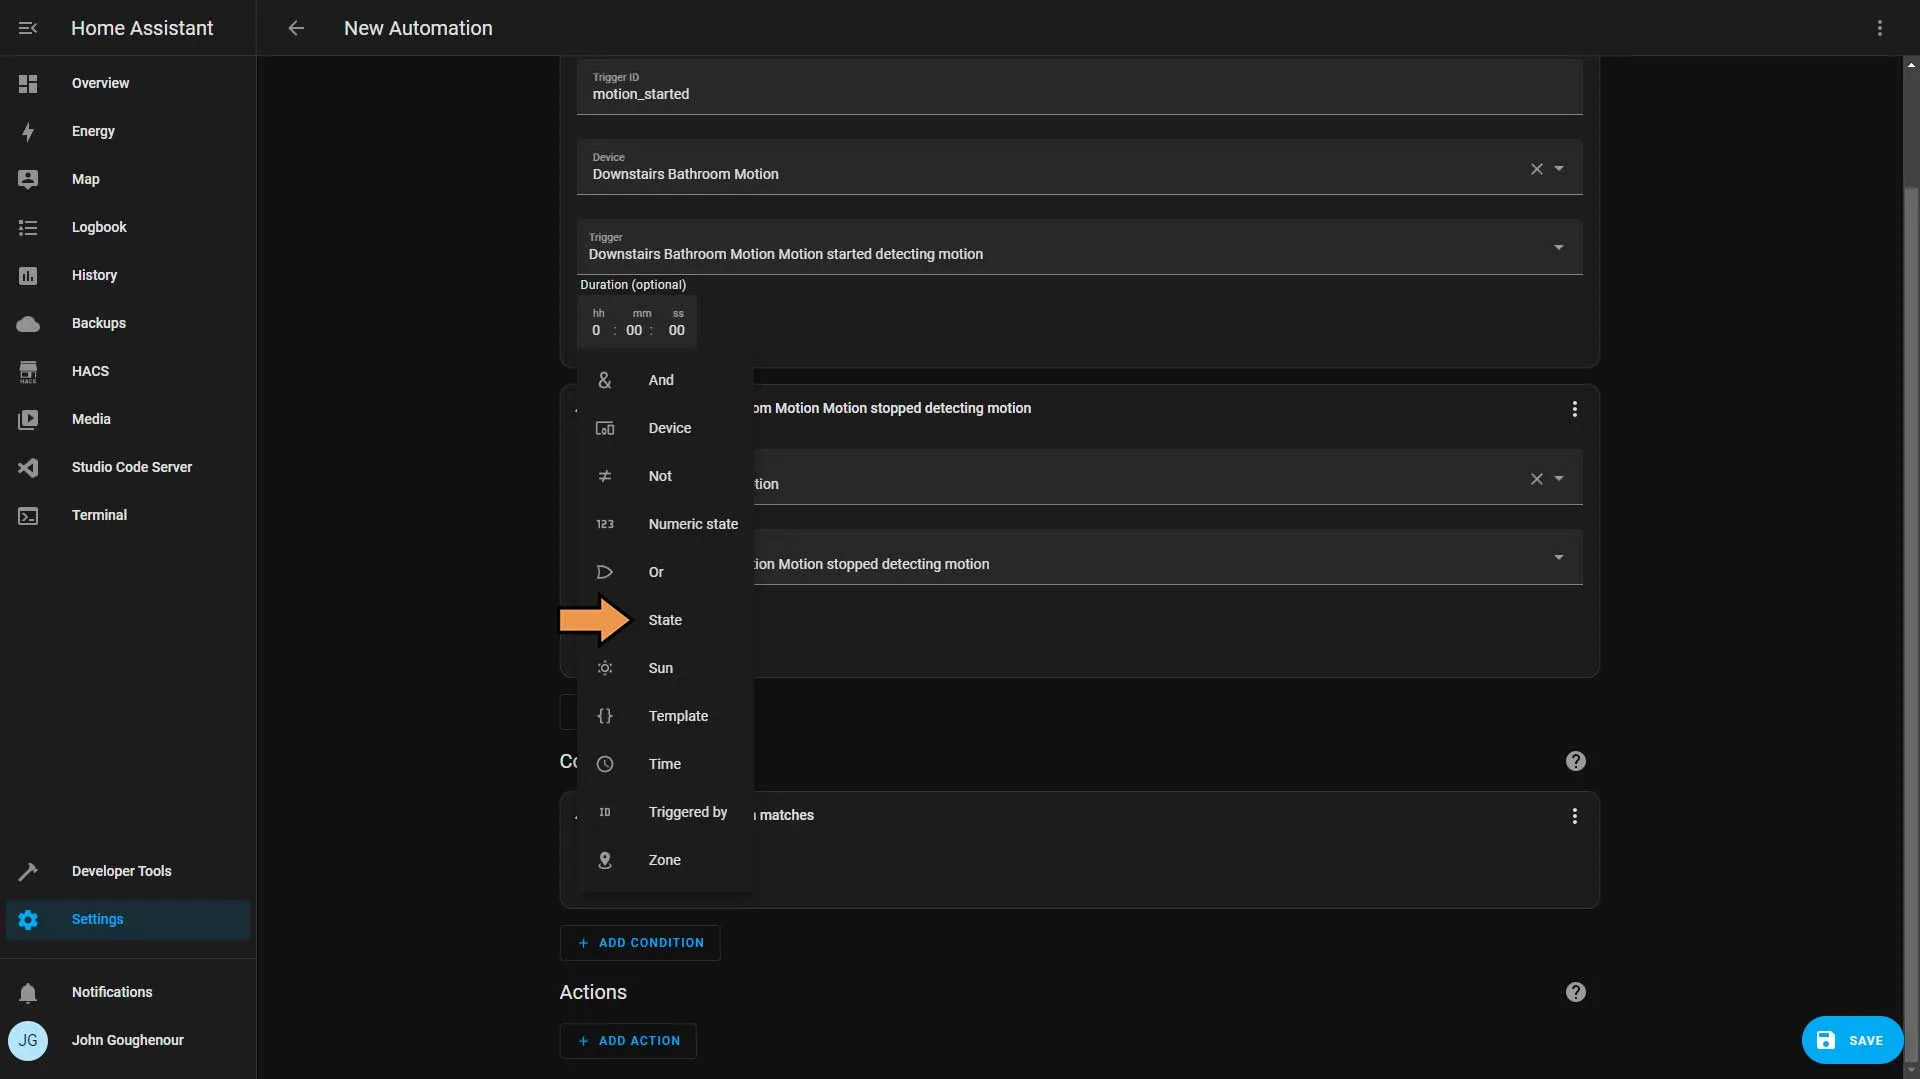
Click the Add Condition button and select State from the list.
In the Entity drop-down, select Mode, and then in the State drop-down, select Away. Then click the Add Condition button.
† Home Assistant doesn’t have any native way of handling Hub Modes, but you can read Hub Modes to learn how to set it up.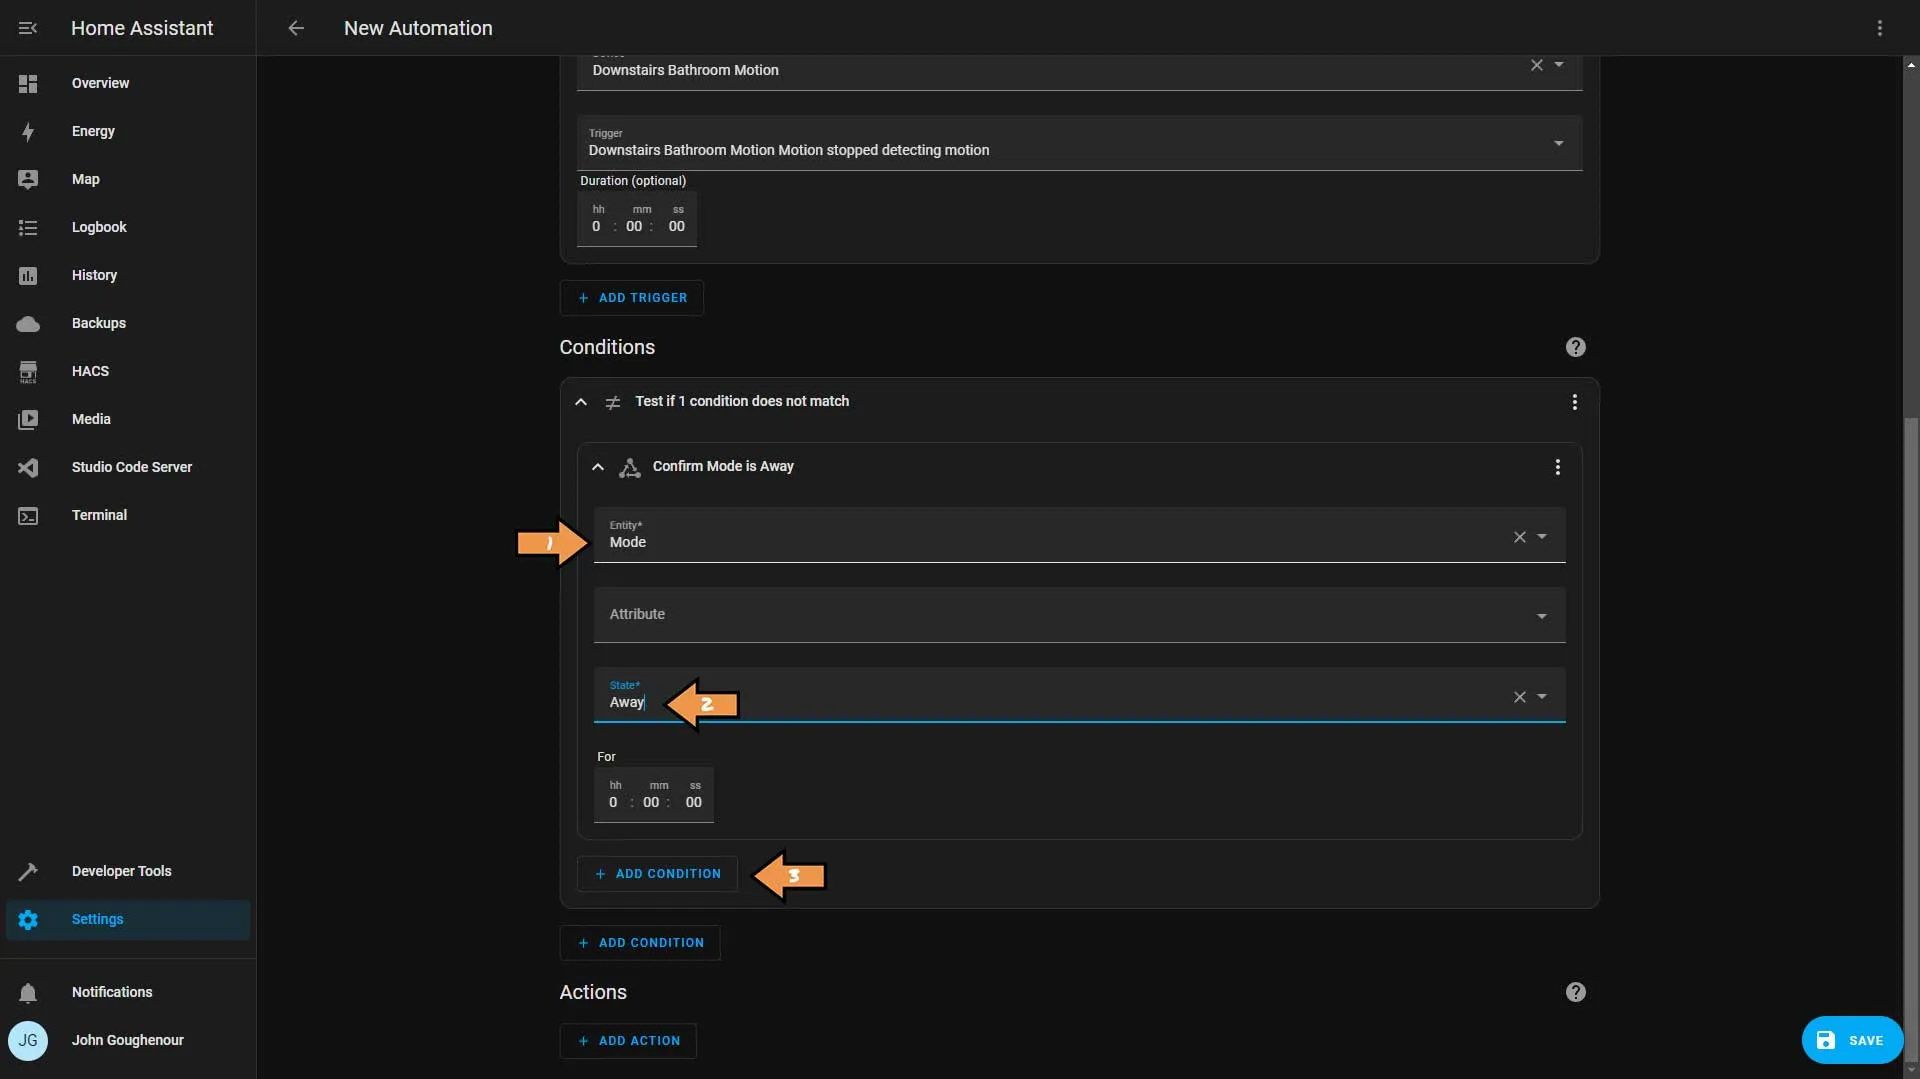
Then select Device from the conditions list.
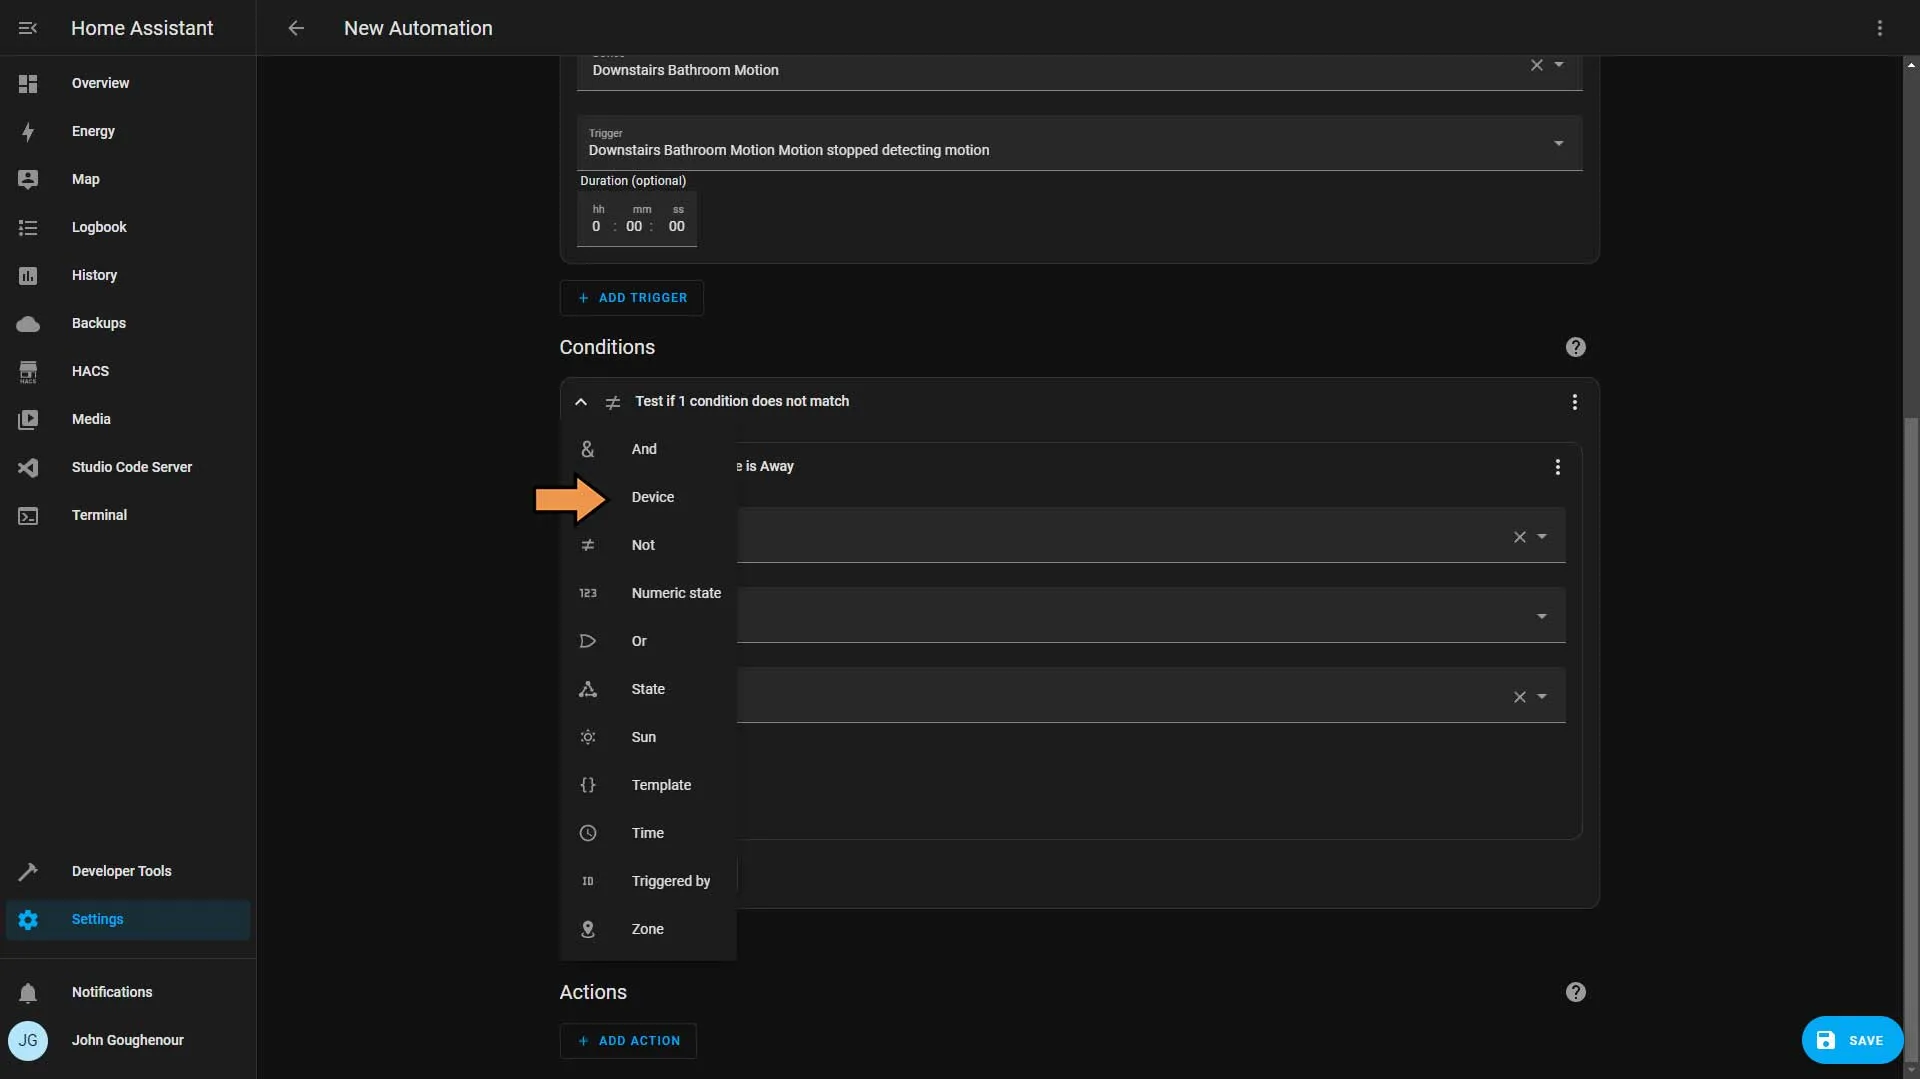
In the Device drop-down select our contact sensor and set the Condition to Contact is open. Then click the Add Action button.
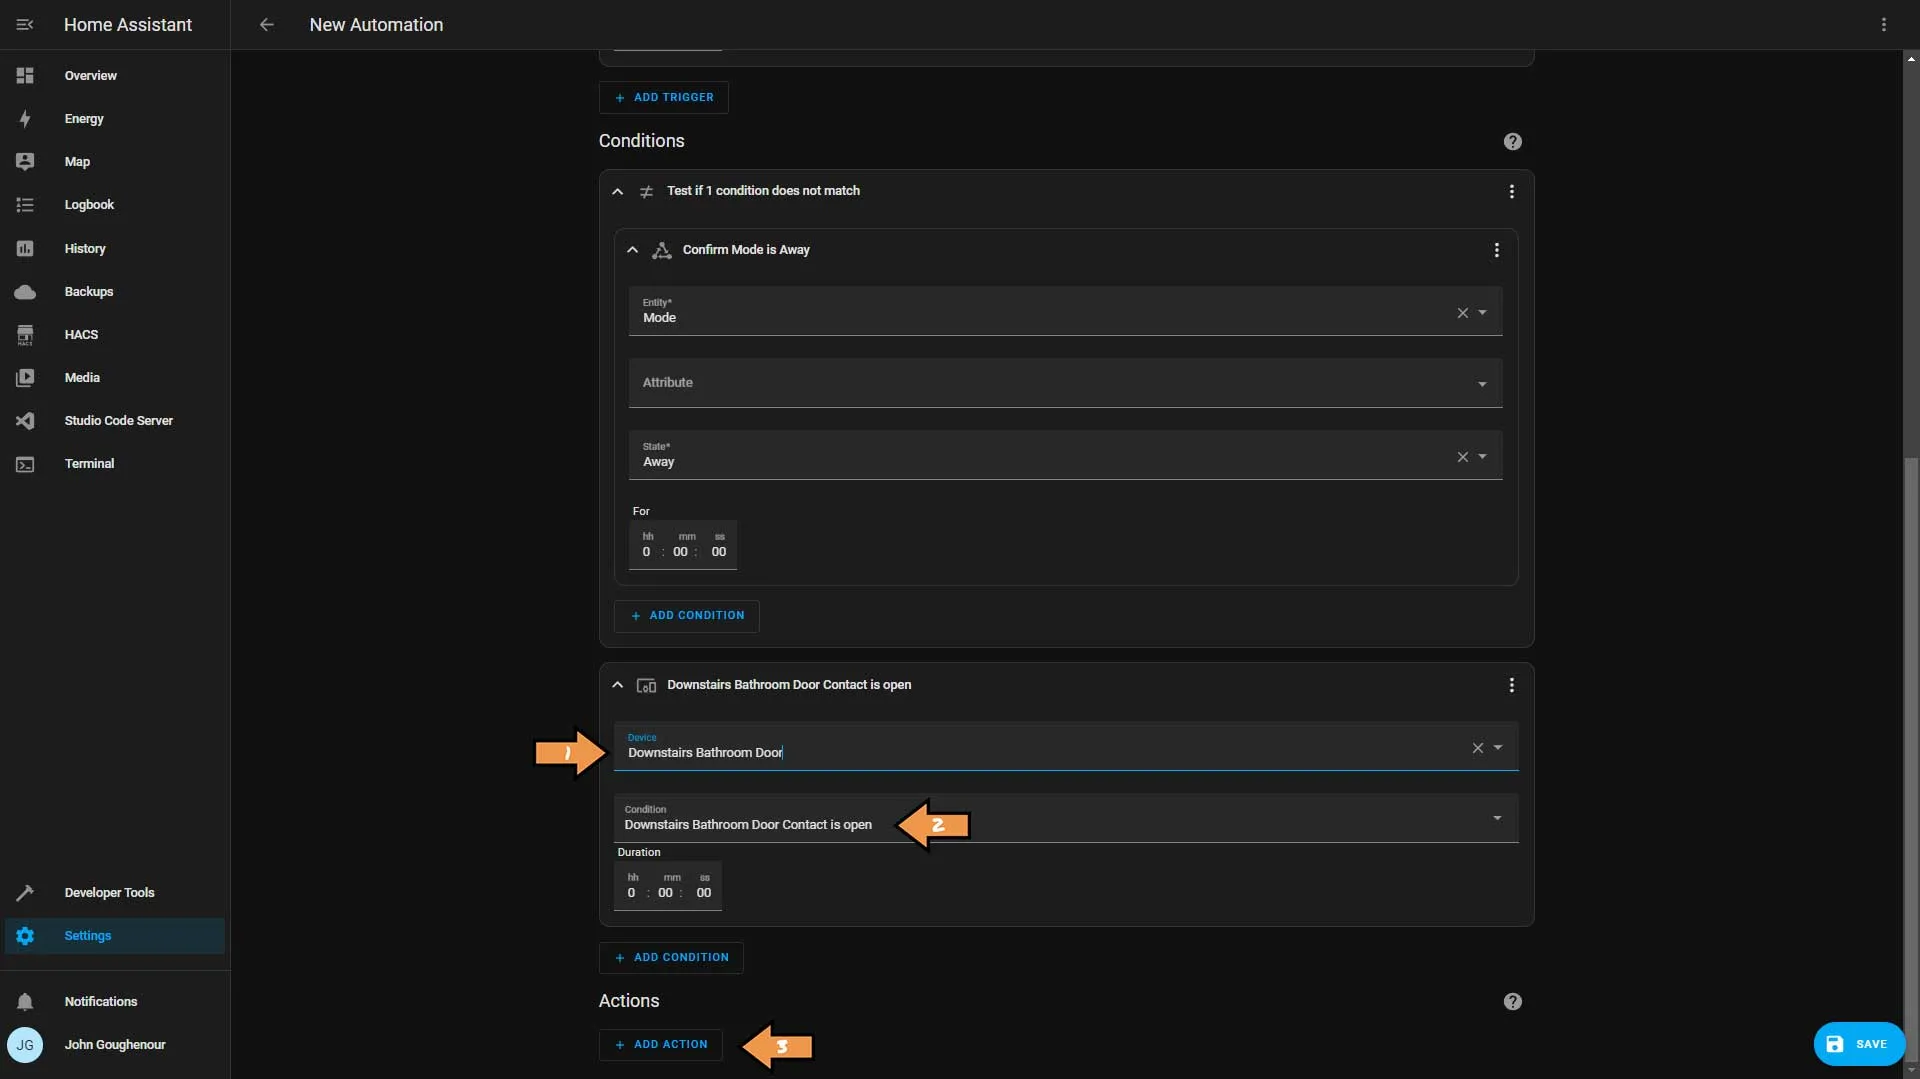
Select If-then from the list.
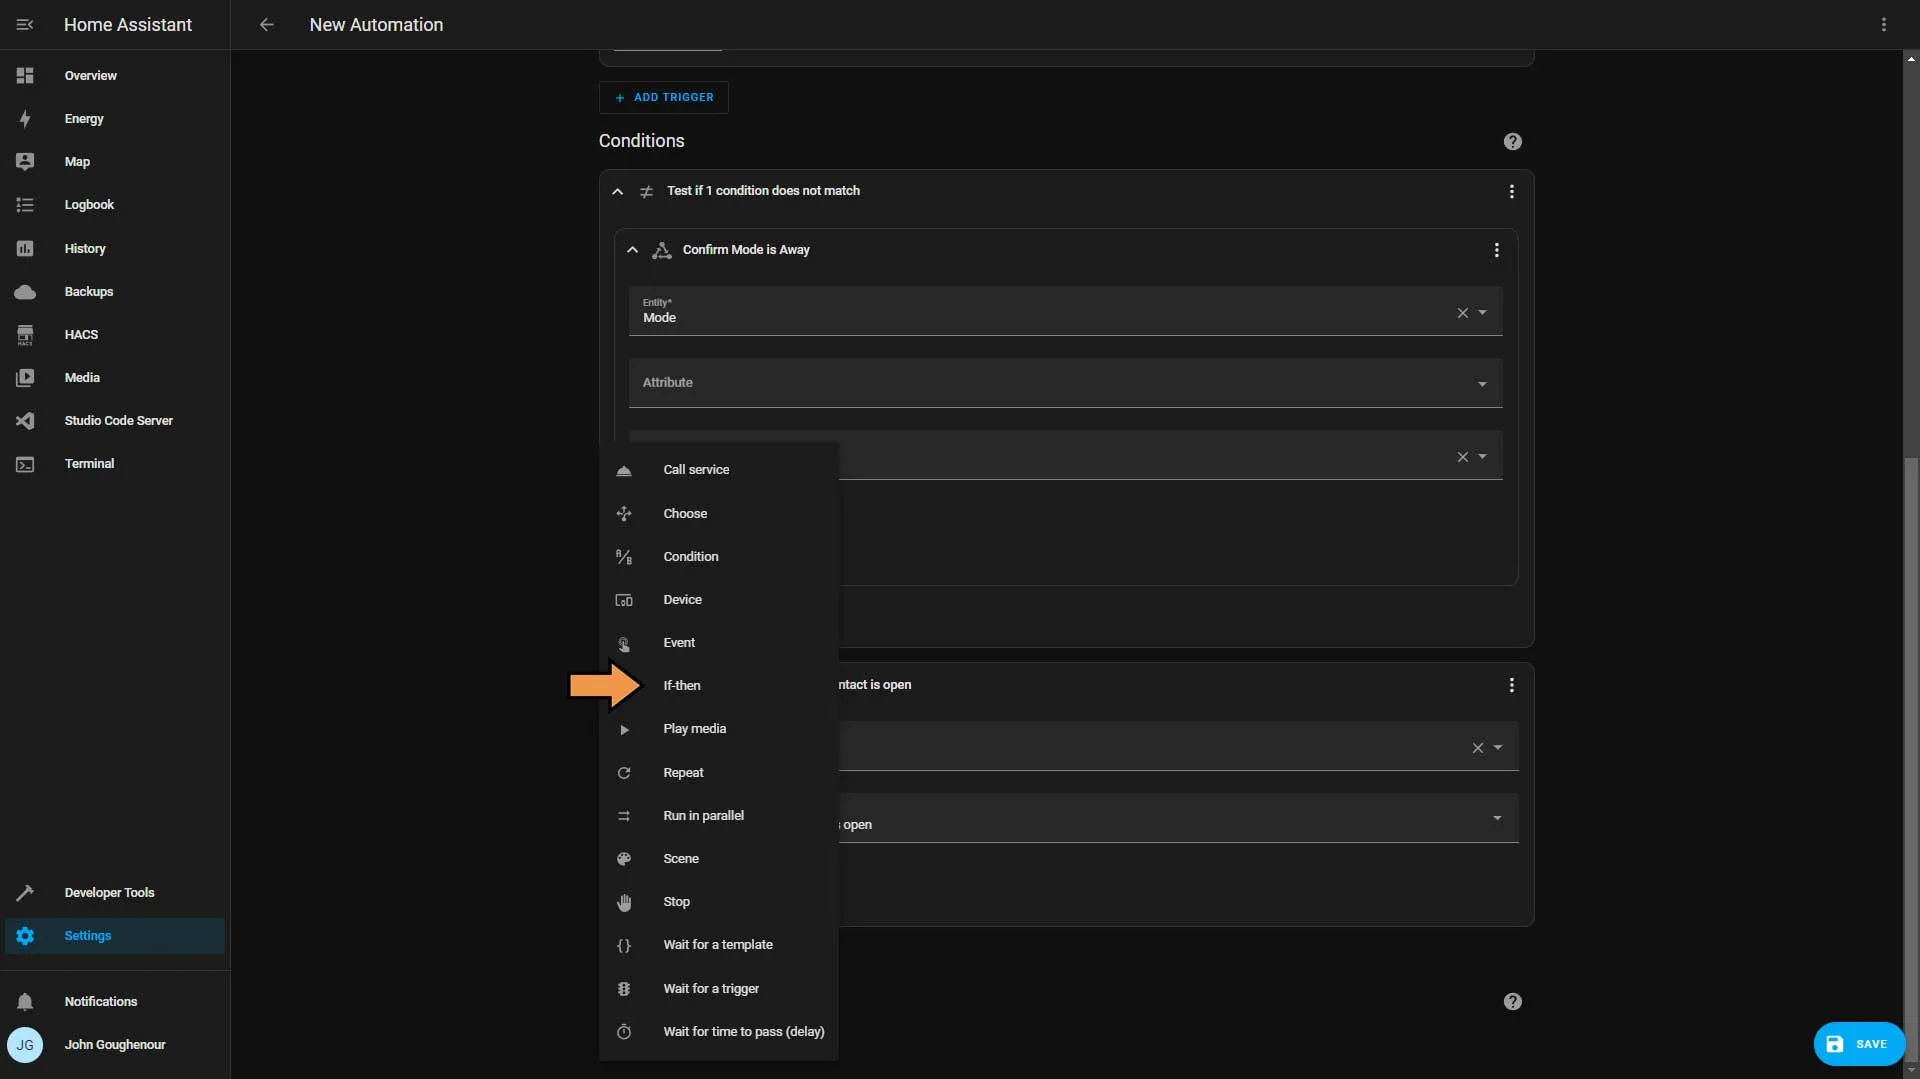
Click the Add Condition button within the if statement and select Triggered by from the list.
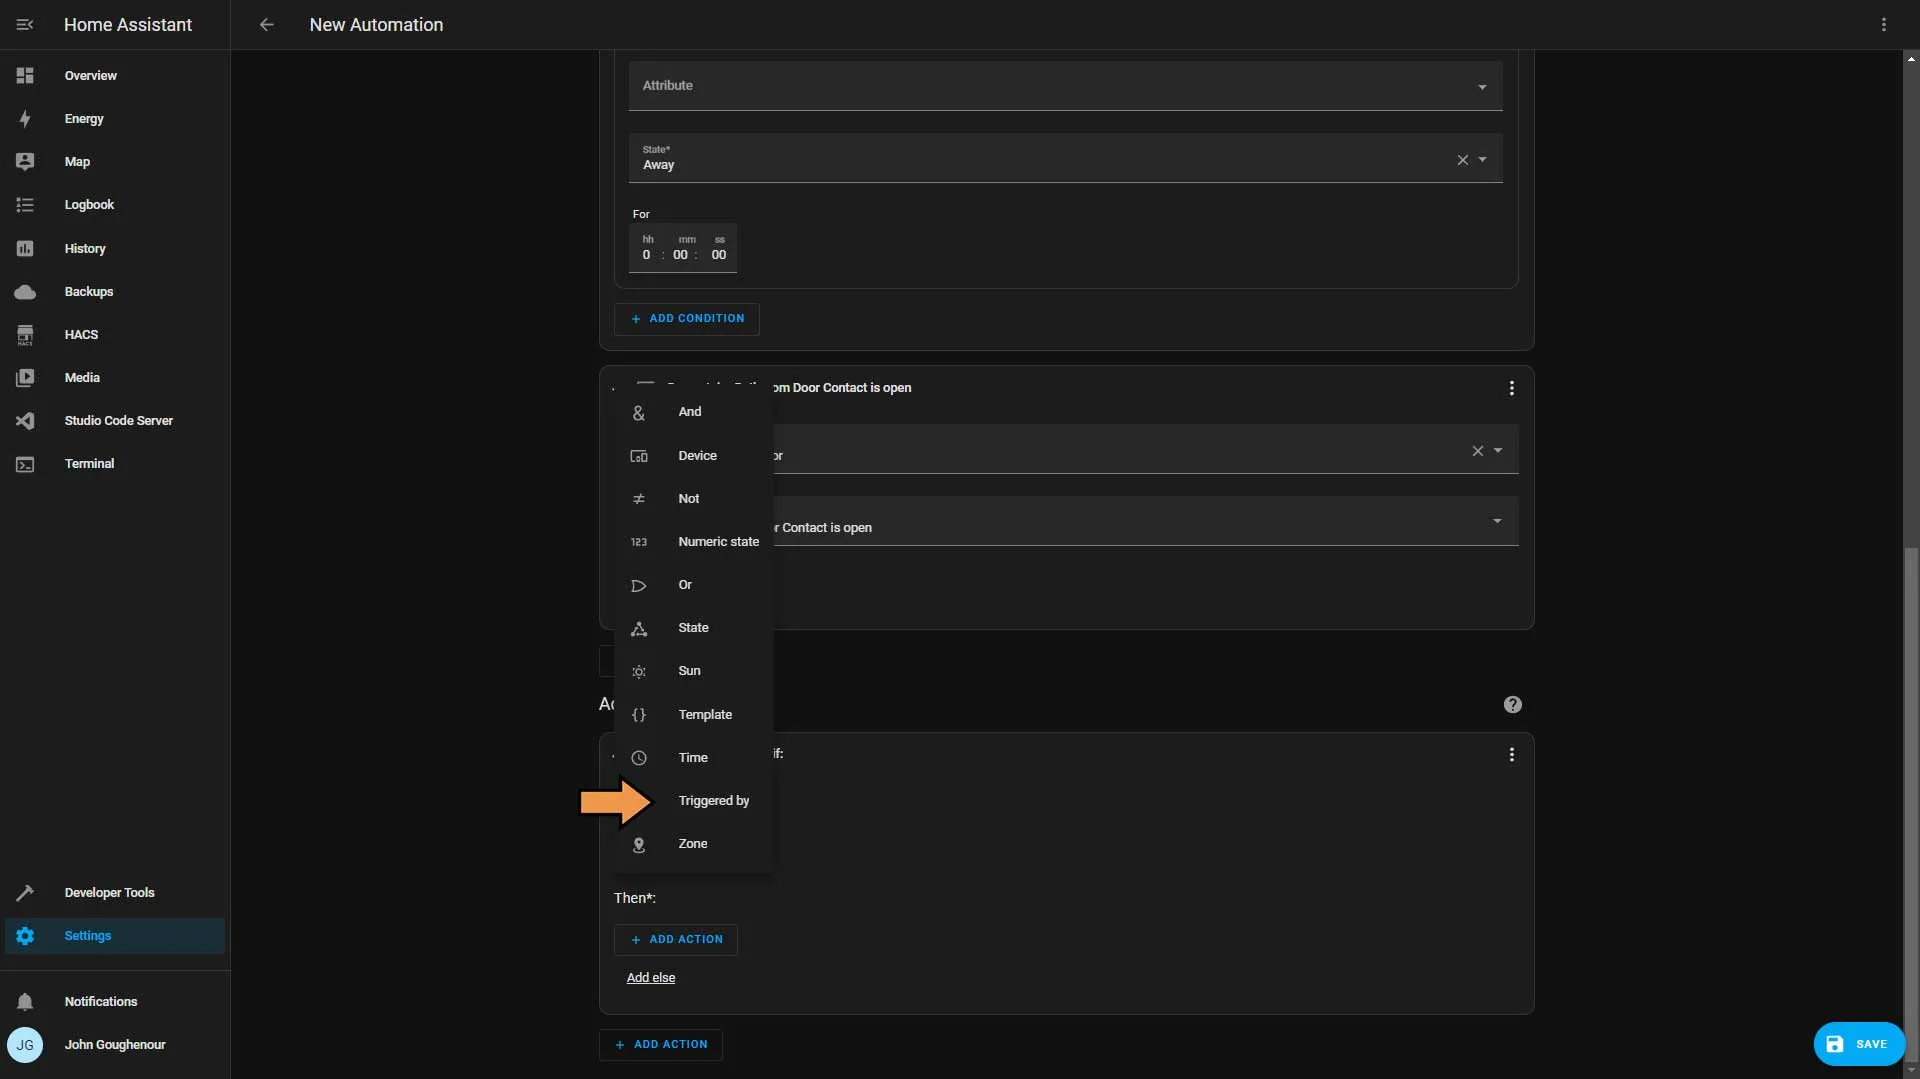
Select the ID we created earlier and then click the Add Action button.
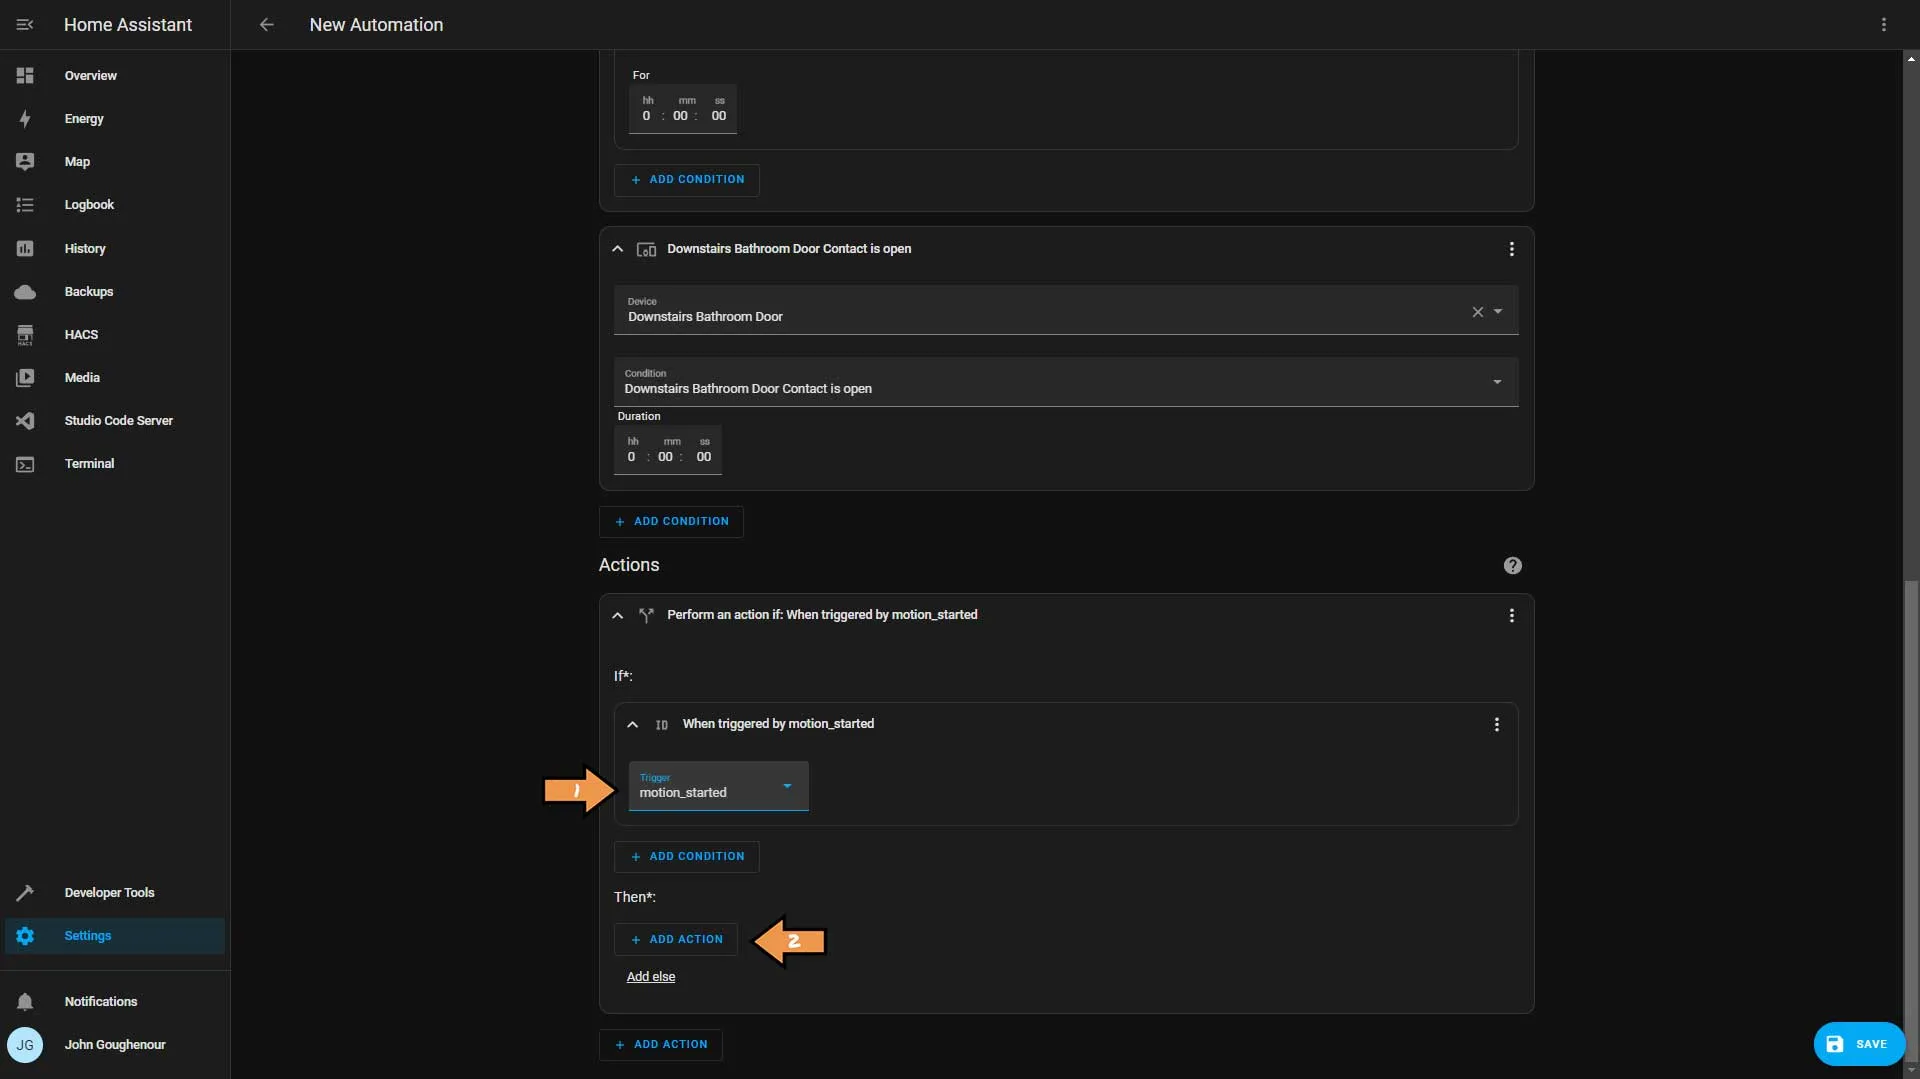
From the list, select the If-then option. Click the Add Condition button within the if statement and select Or. Then, click the Add Condition button and select State from the list.
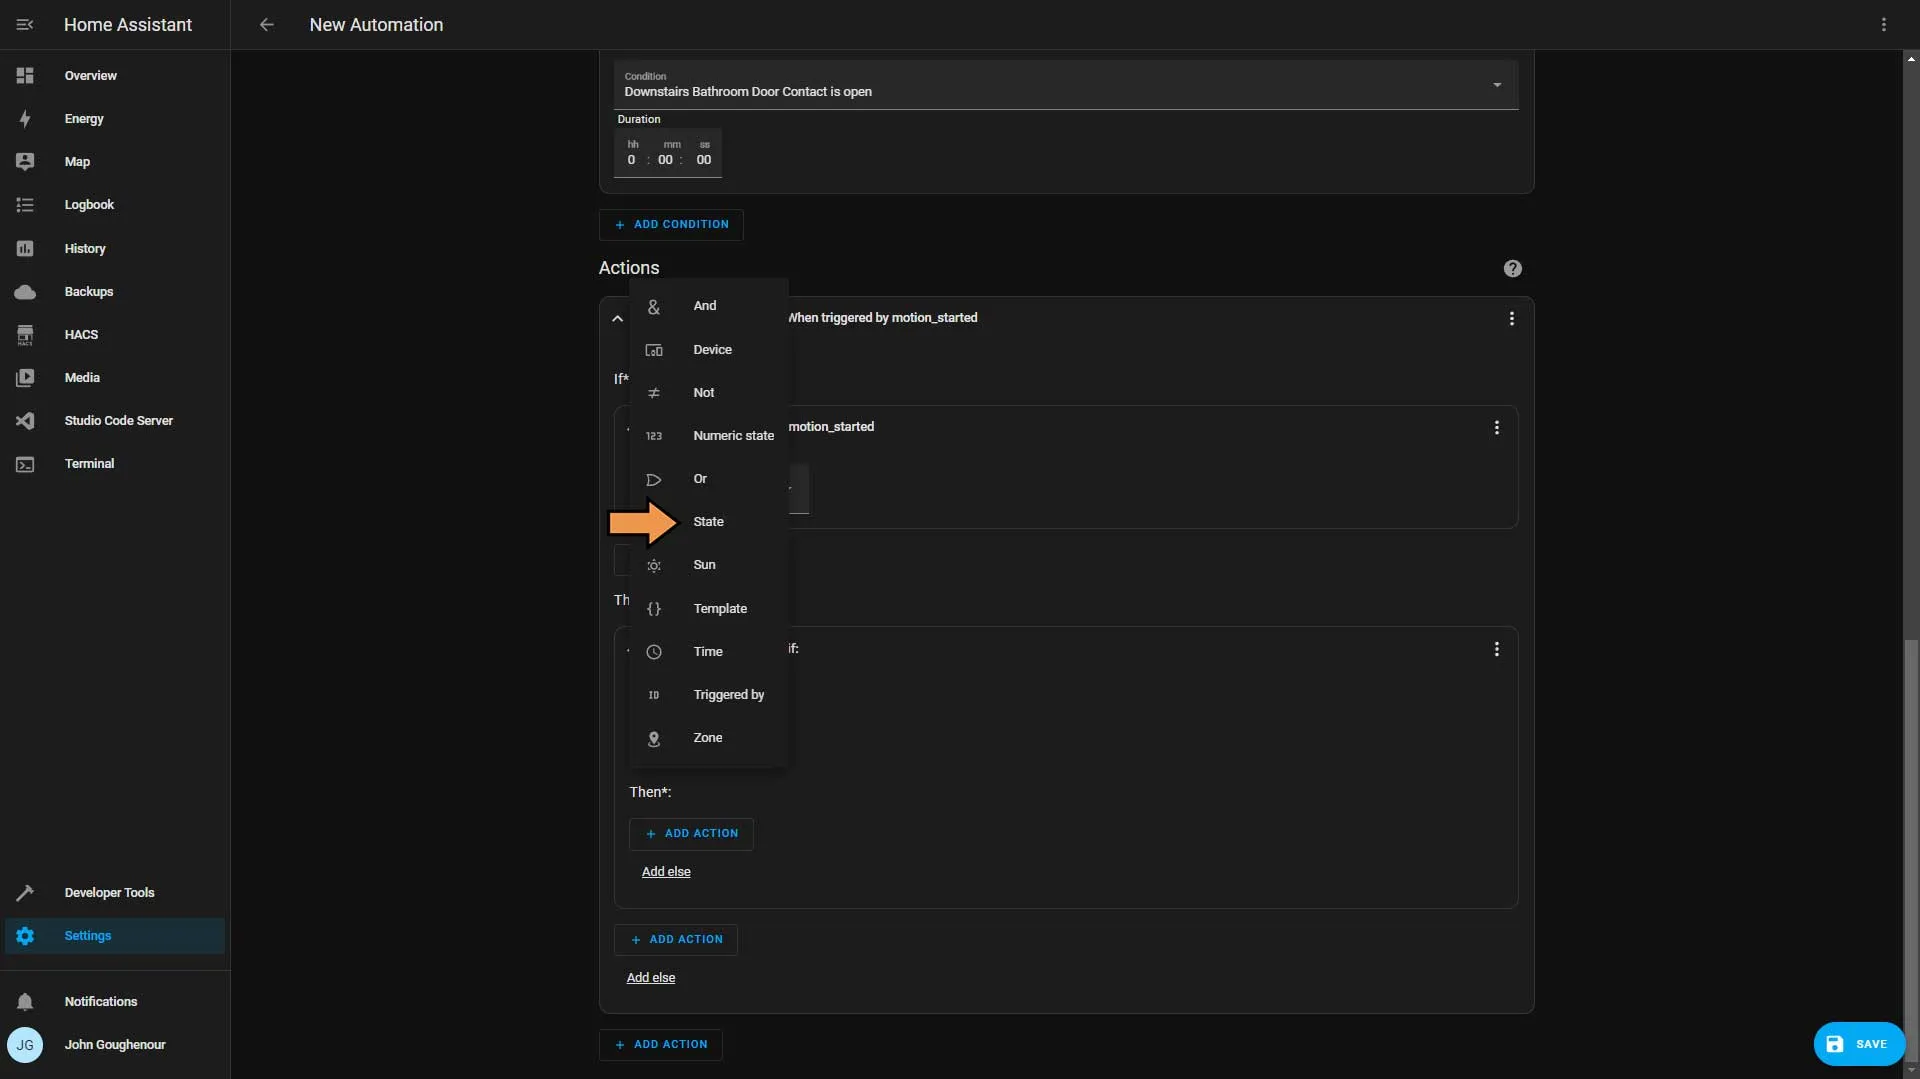
We will create two conditions, both being type State. One is for mode-morning, and the other is for mode-home. Then click the Add Action button.
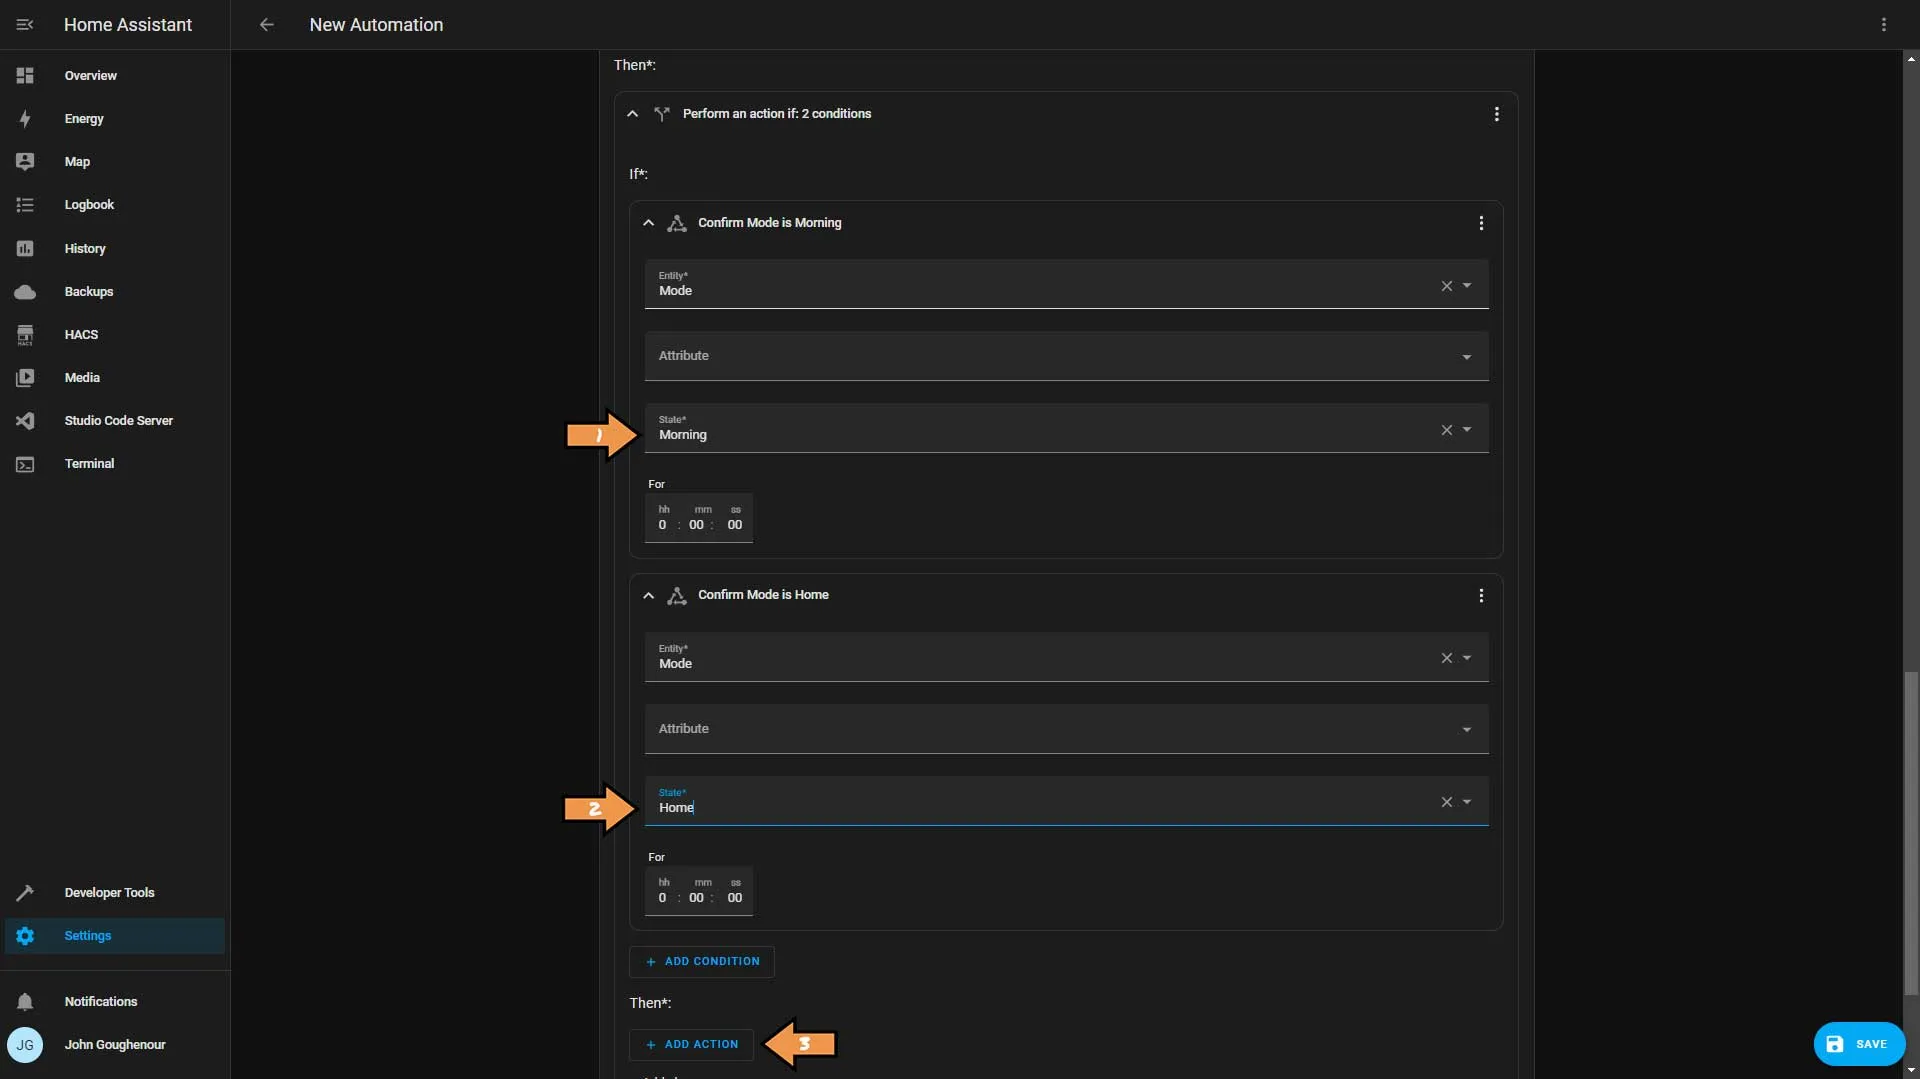
Select the Device option from the list.
In the Device box, choose the light we want to control, set the Action to Turn on, and set the brightness to 100%. Then click the Add else link.
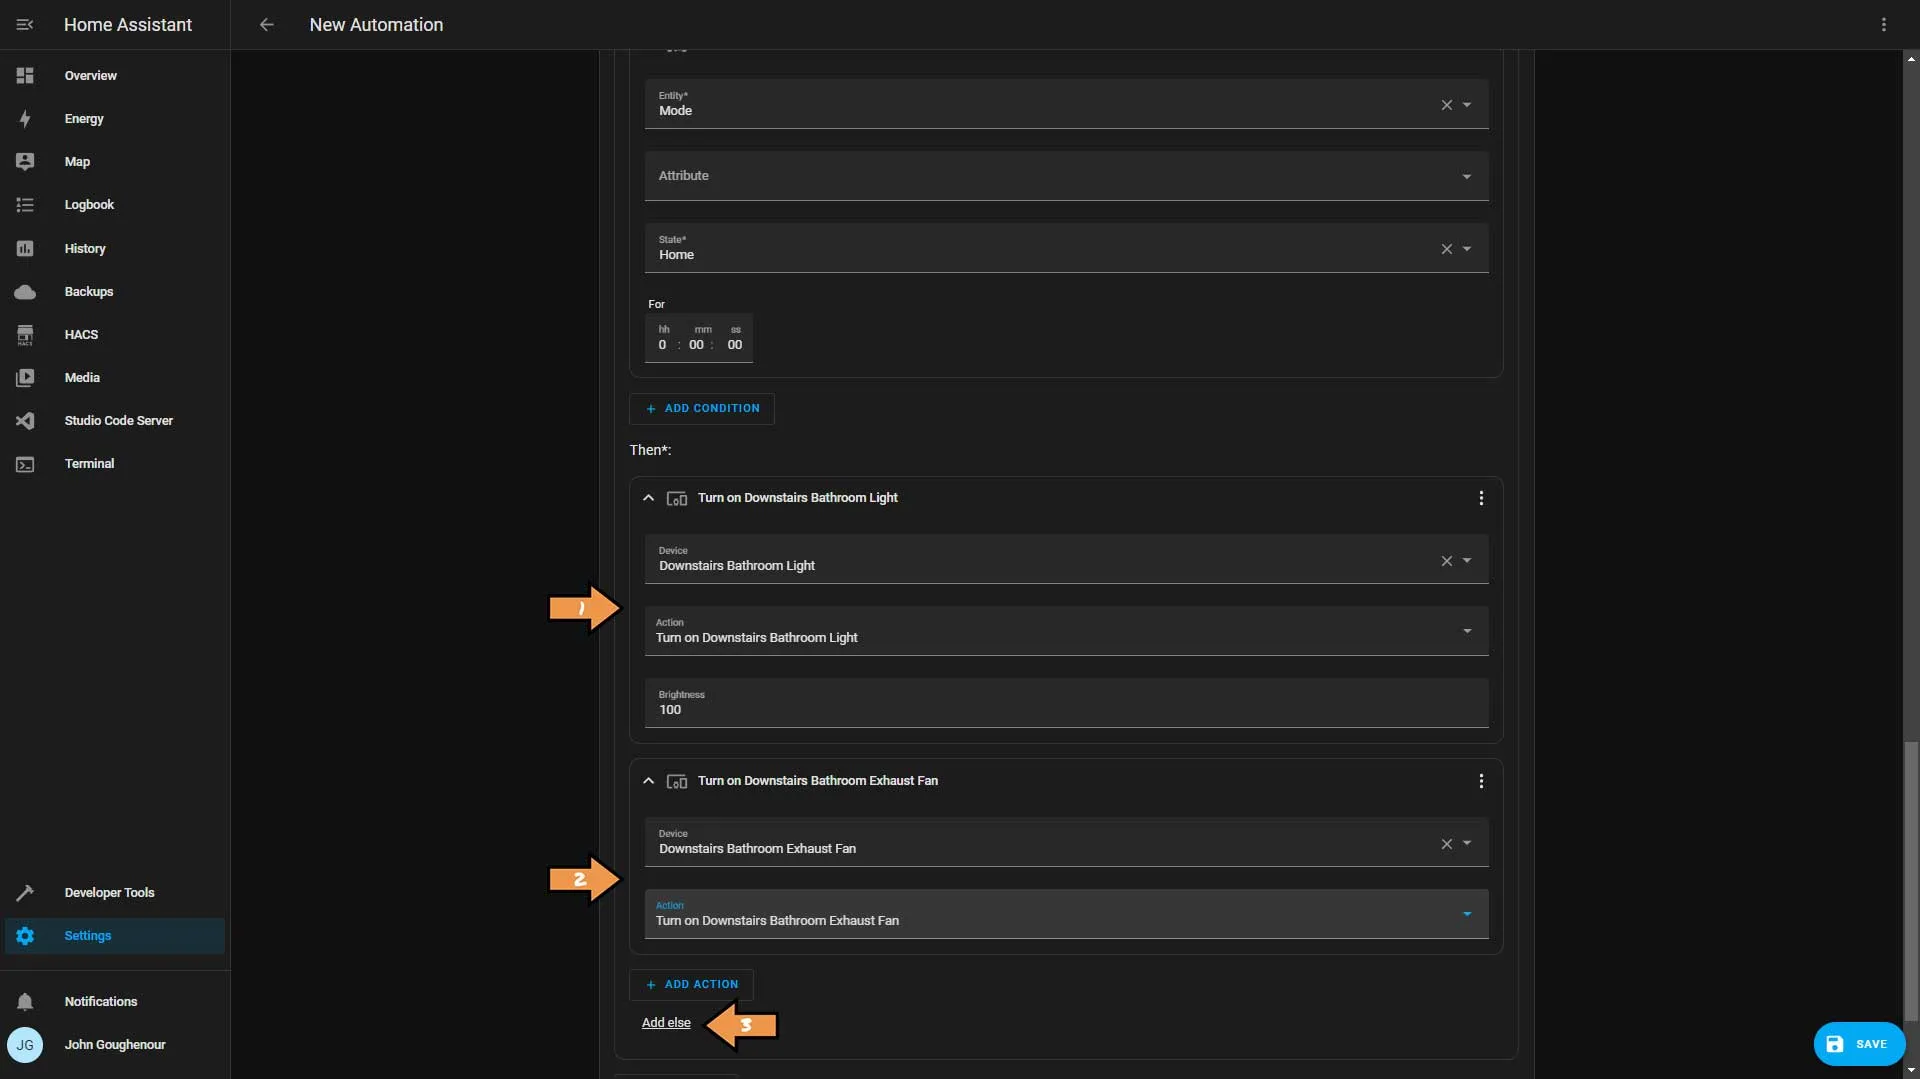
Click the Add Action button within the else statement and select Device. Then choose our light again, and set the Action to Turn on, but this time we’ll set the brightness to 50%. This finishes up the actions if the automation is triggered by motion starting. Next, we will work on the action if the automation was triggered by the motion stopped. Finally, in the last Else section, click Add Action.
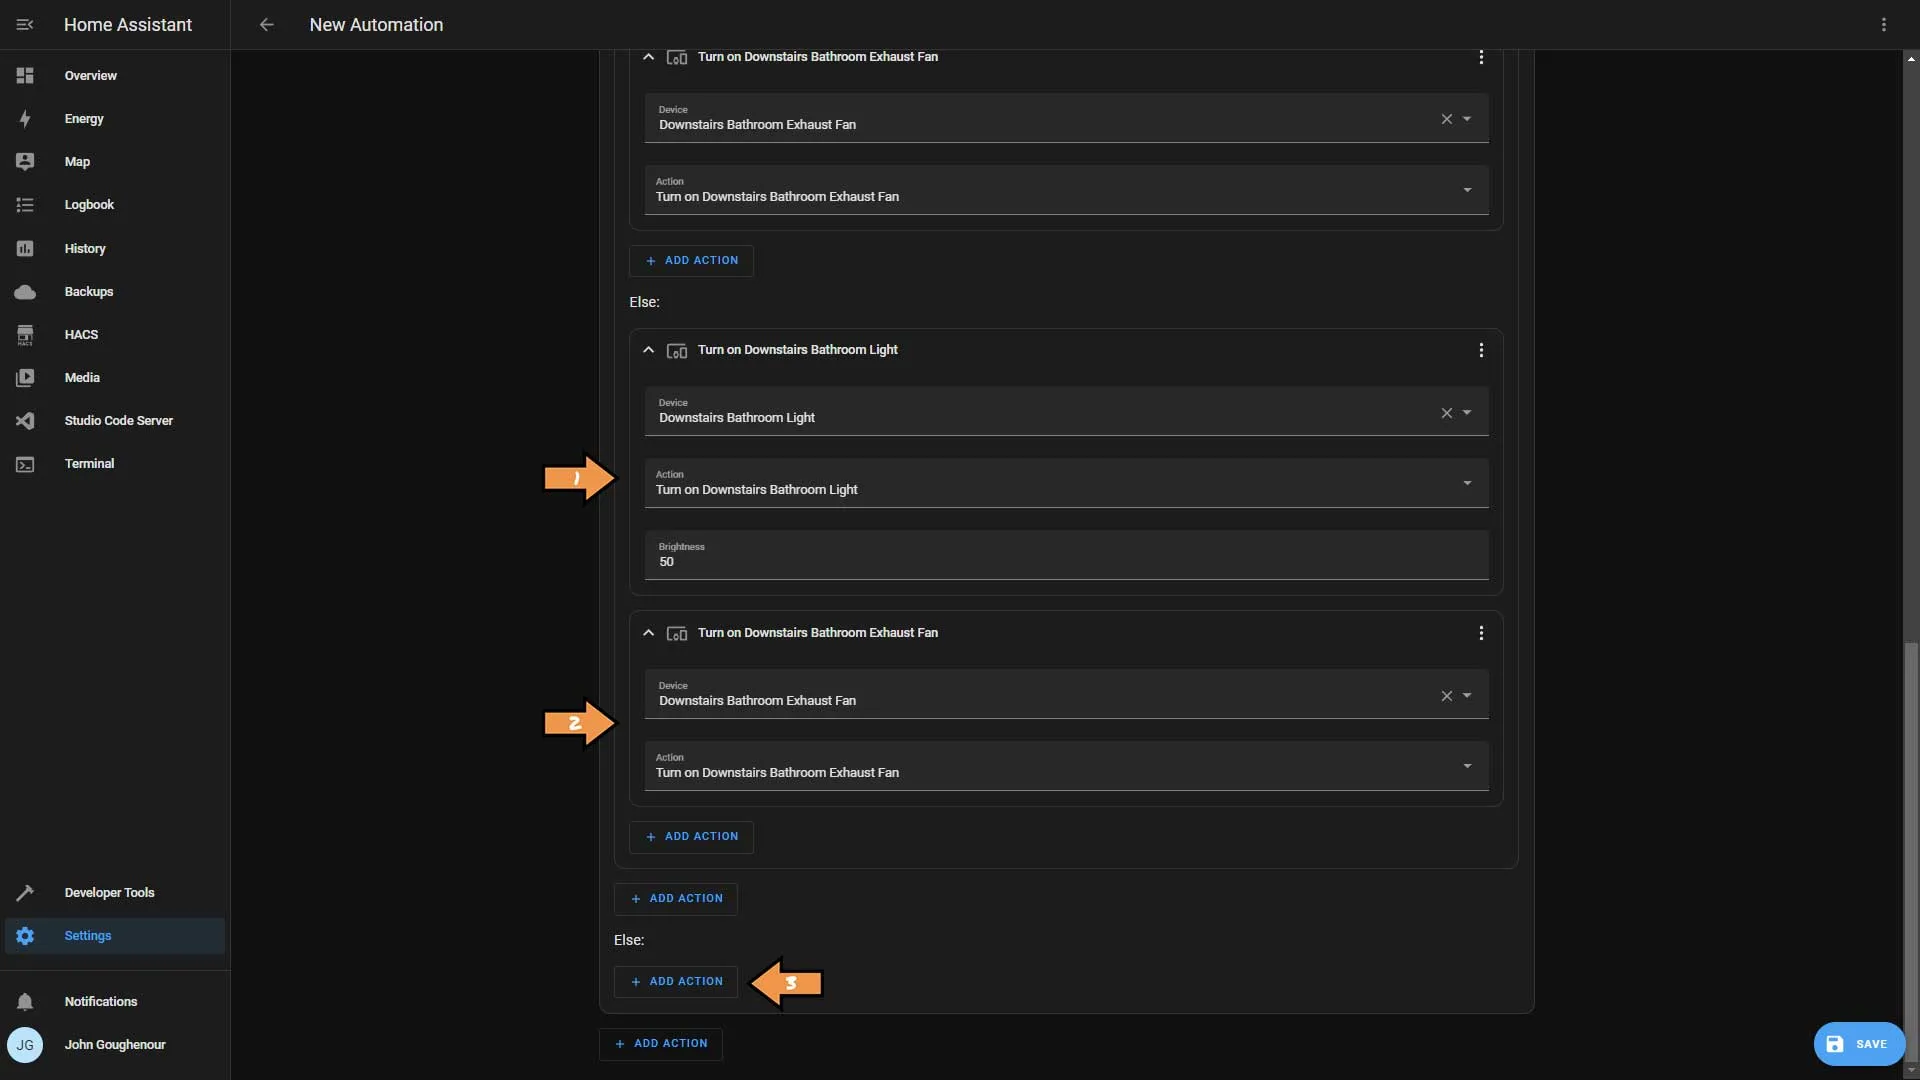
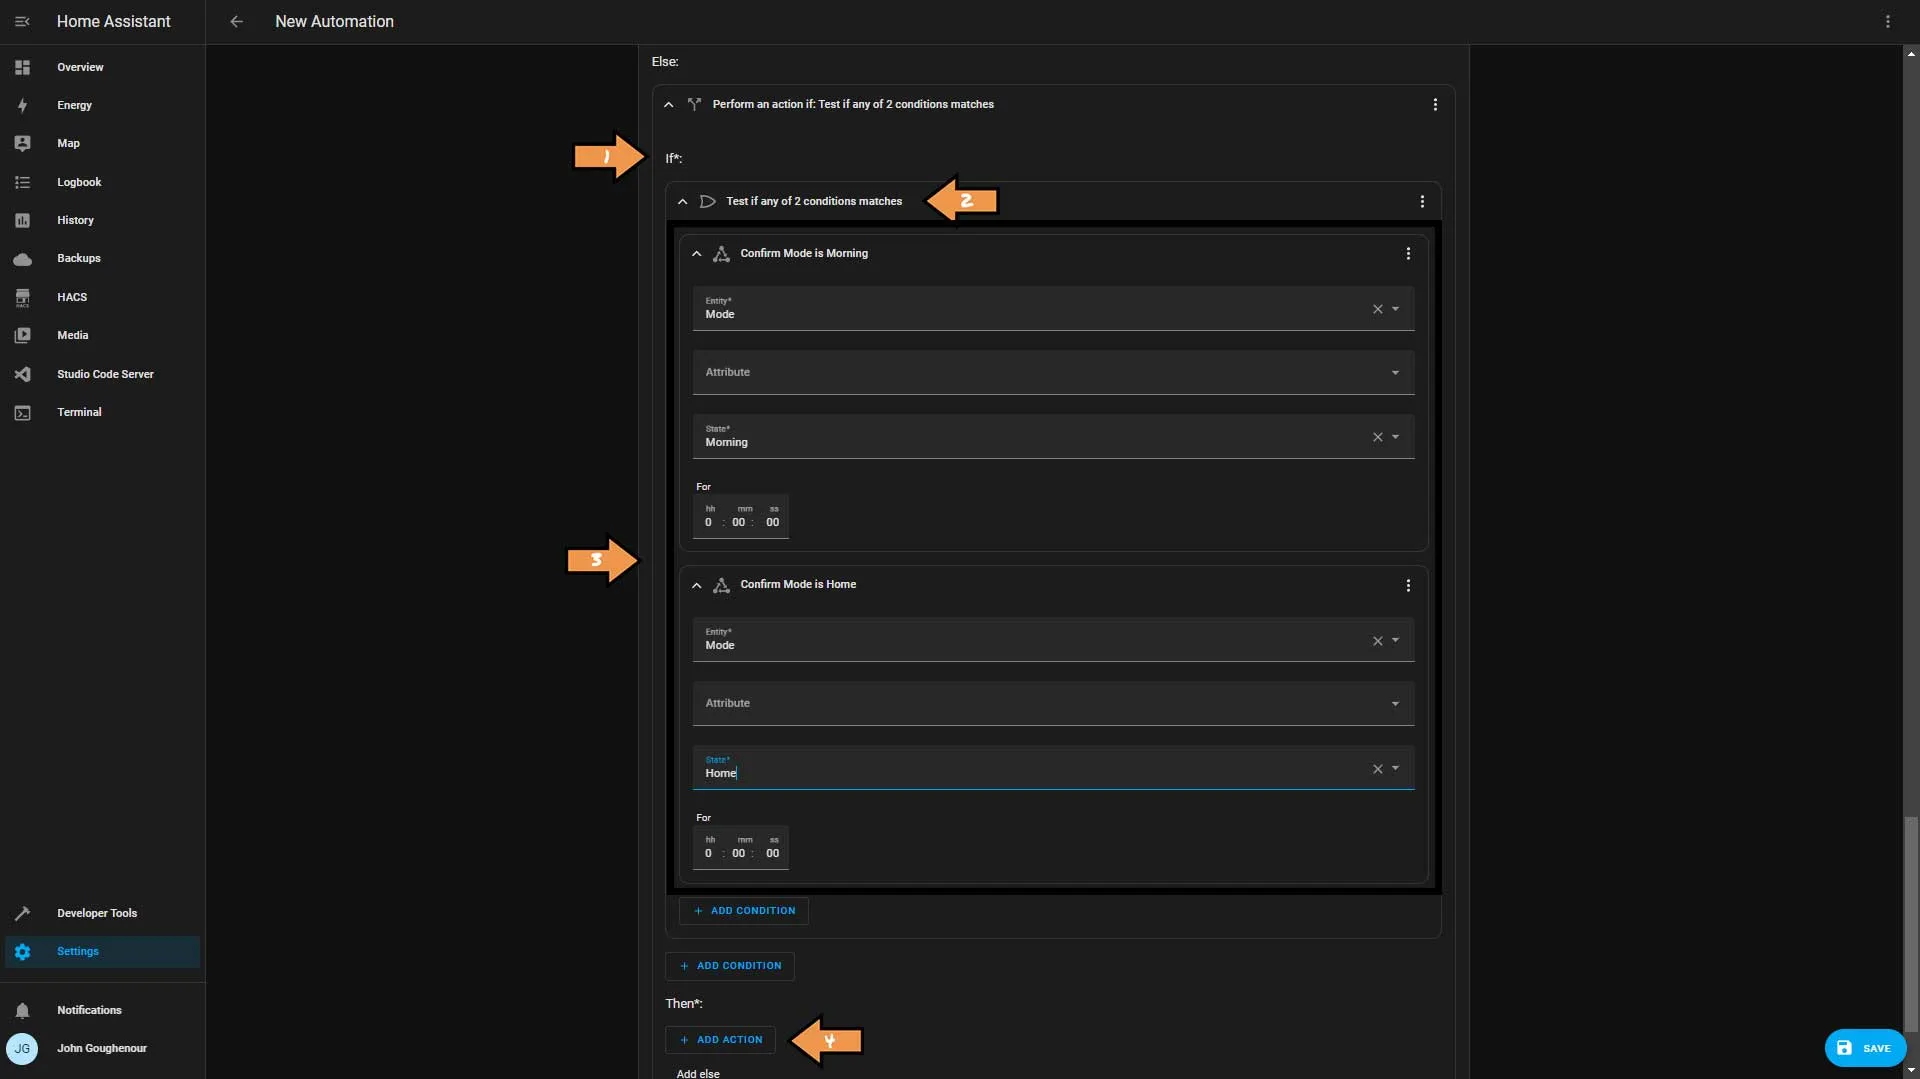
We are going to do the same thing we did before.
- From the Action’s list, select the If-then option.
- Click the Add Condition button within the if statement and select Or.
- We will create two conditions, both being type State. One is for mode-morning, and the other is for mode-home.
- Then click the Add Action button.
From the list select Wait for time to pass (delay).
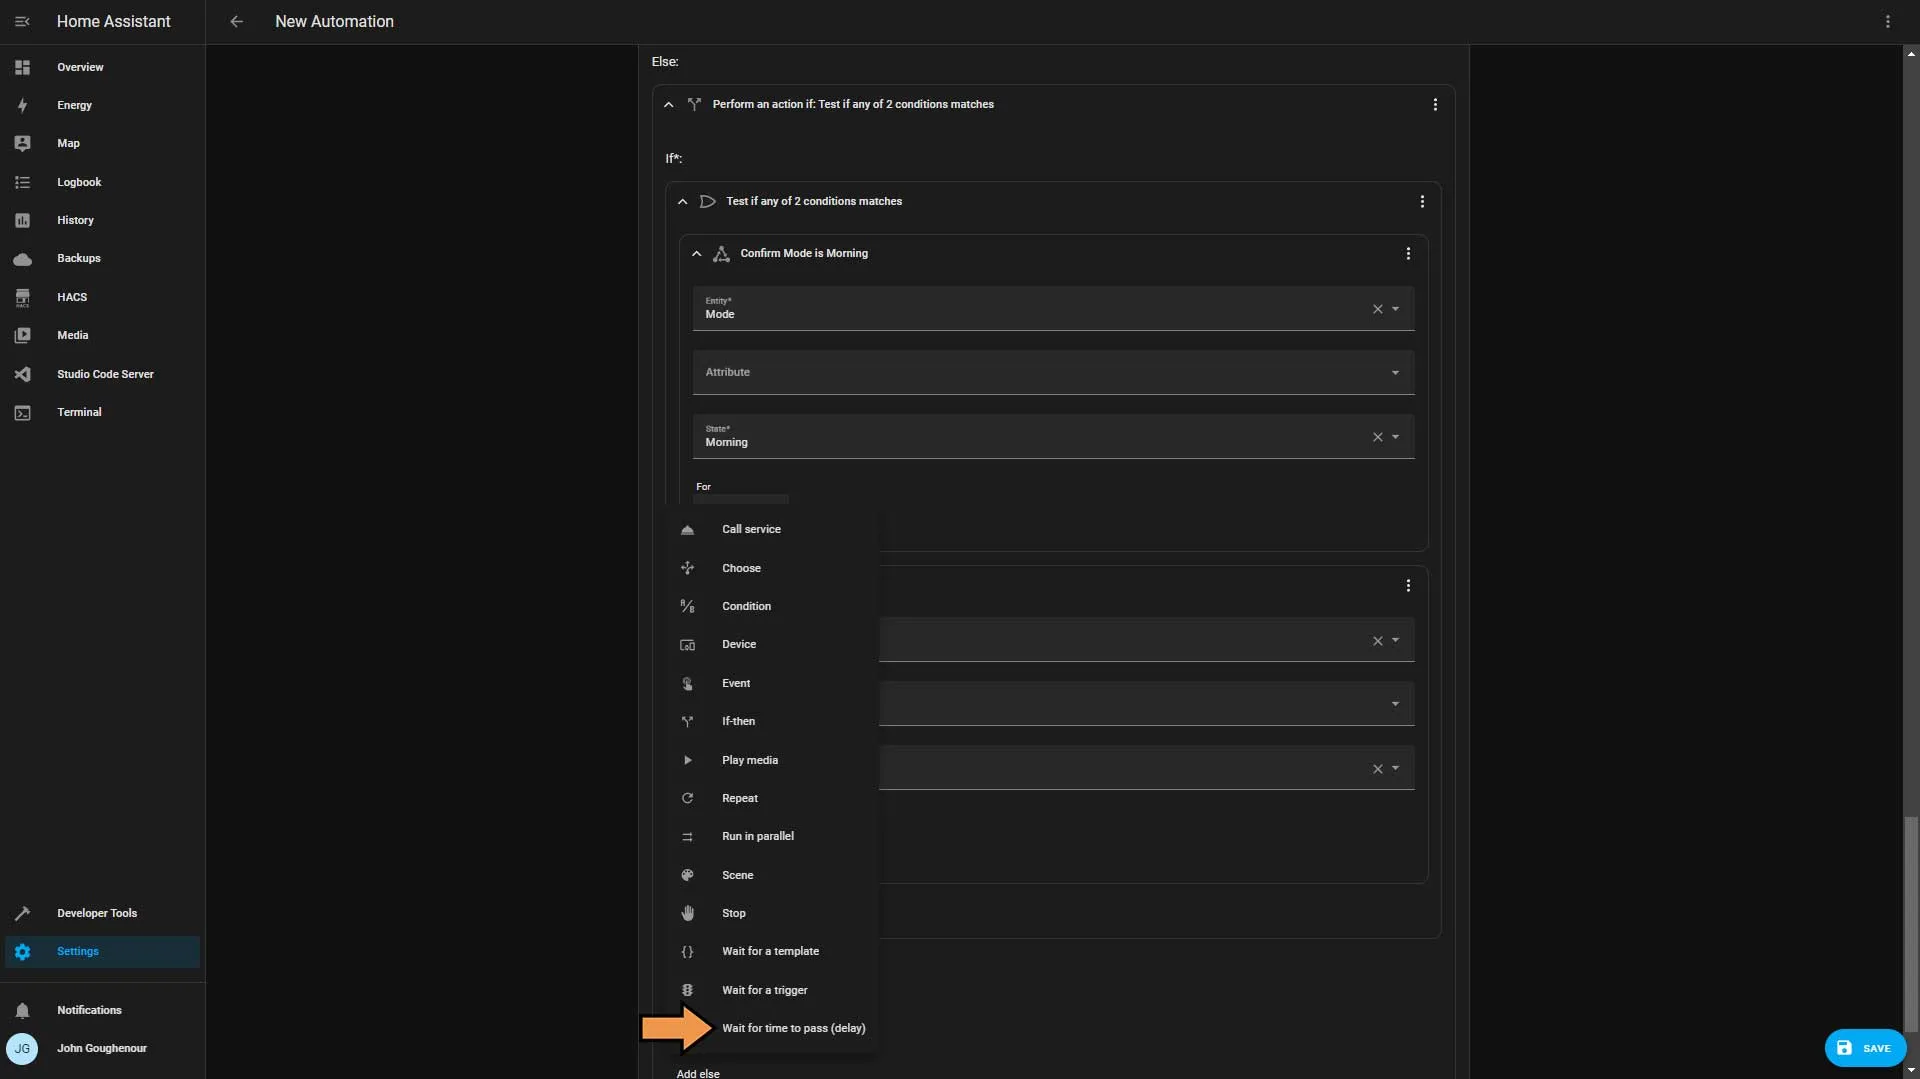
Set the delay for 5 minutes and click the Add Action button and select Device. In the Device drop-down select our light and set the action to Turn off. Do this for each light. Then click the Add else link.
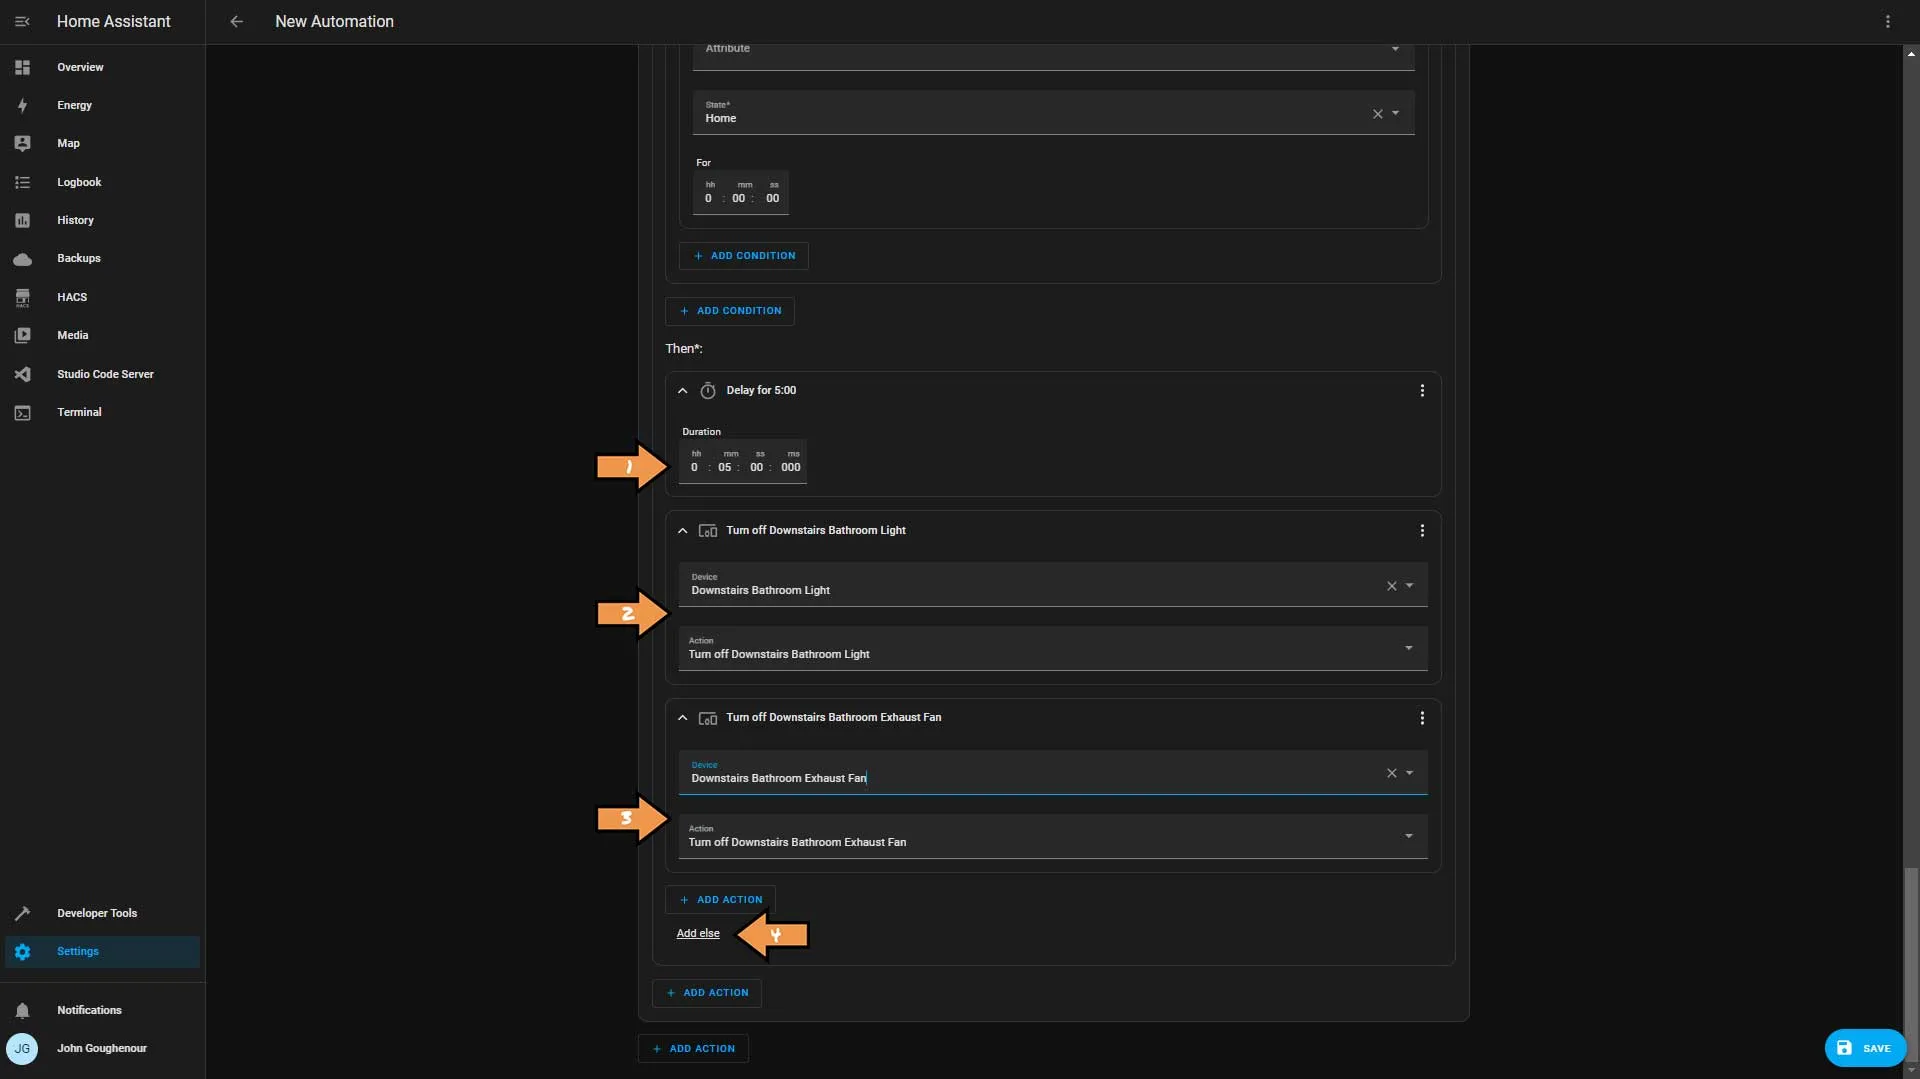
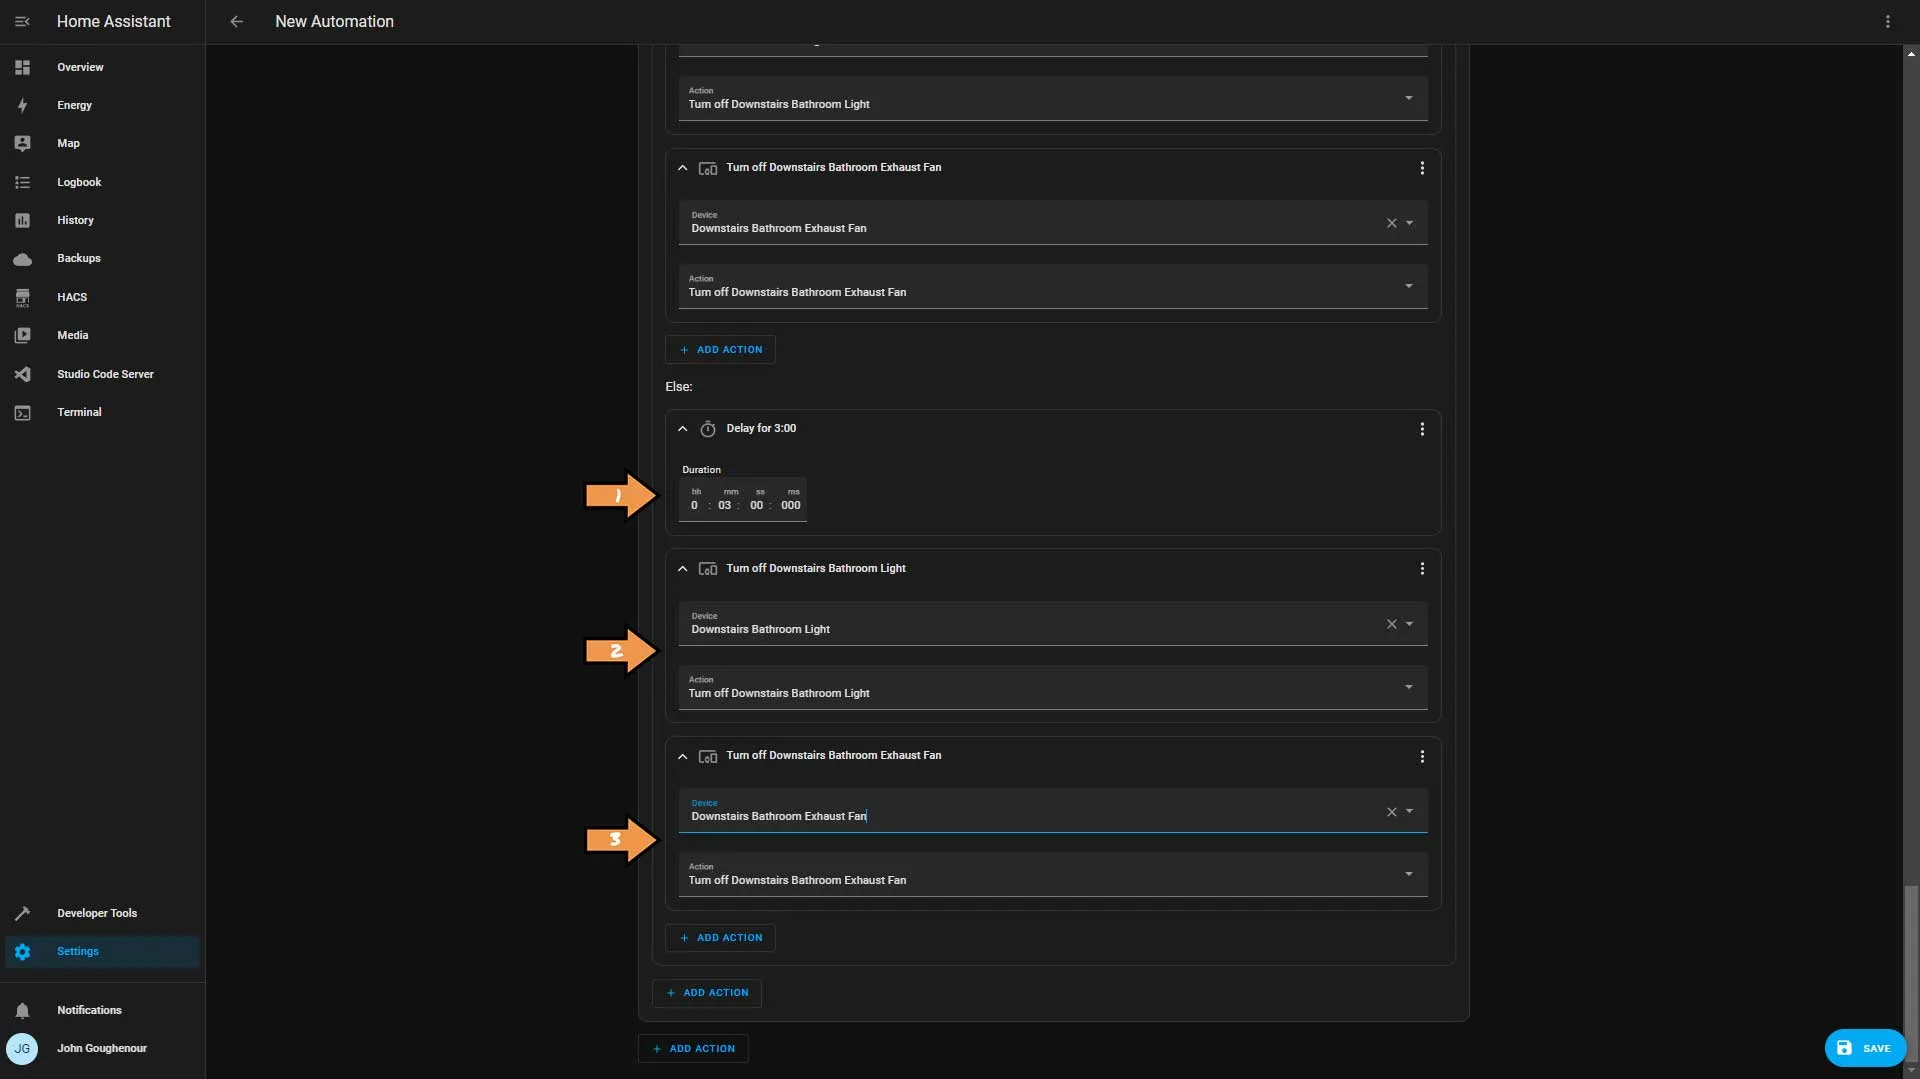
We will set up the same actions, but this time we’ll set the delay for 3 minutes.
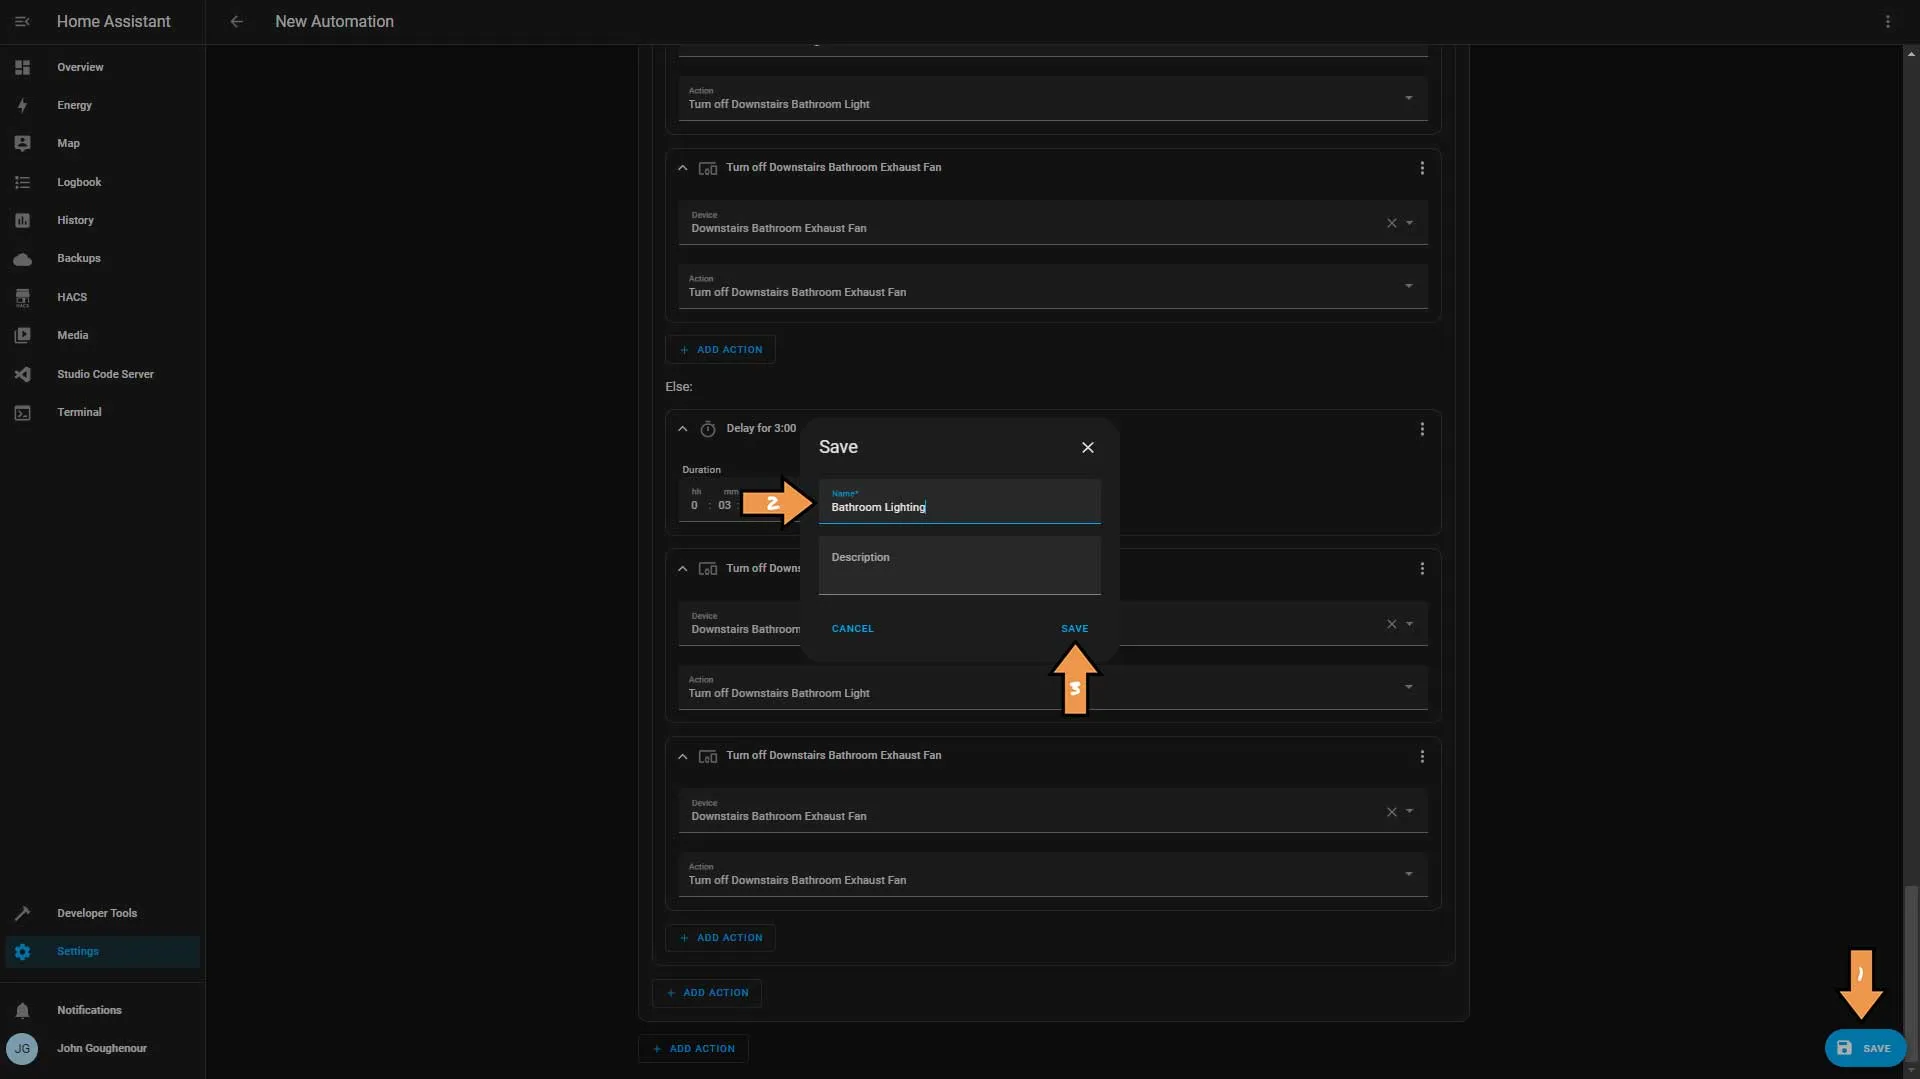
At the bottom right corner, click the blue Save button. Name the automation and click save again.
Success: That’s It! You have successfully automated your bathroom lights.
