The Ultimate Smart Home Automation Cookbook
Motion Lighting Automation is indeed a cornerstone in the realm of smart home technology. Its fundamental nature belies its significance, and achieving the perfect setup requires attention to detail. Fine-tuning is key in Motion Lighting Automation, especially when it comes to adjusting the duration for which lights remain active after motion is detected. This ‘stay time’ can vary significantly depending on the specific motion sensor and the layout of the room. For my home, a stay time between 5-8 minutes hits the mark perfectly.
In areas like an office, where Motion Lighting Automation is particularly useful, a shorter stay time of about 5 minutes is often adequate. This is a simple yet effective implementation of Motion Lighting Automation, demonstrating how it can be adapted to different spaces and needs. It’s important to remember that Motion Lighting Automation isn’t a one-size-fits-all solution; it requires customization to each unique space for optimal functionality.
As we delve deeper into the world of Motion Lighting Automation, we encounter more complex scenarios that go beyond basic setups. These advanced applications of Motion Lighting Automation can transform not just a single room but the entire home, offering a level of convenience and energy efficiency that’s truly remarkable. Whether it’s creating ambiance, enhancing security, or simply adding a touch of automated luxury, the possibilities with Motion Lighting Automation are virtually limitless, making it a key feature in the modern, connected home.
Automation Details
Required Devices
- Motion Sensors
- Smart Lighting
Triggers:
- When Motion is Detected
- When Motion Stops
Conditions:
- Don't Run While Away
- Moring and Home Modes Stay for 5 Minutes and Stay 3 Minutes During Night Mode
- Morning and Home Full Brightness and 50% Brightness at Night
Actions:
- Turn On Lights
- Turn Off Lights
Stay Time is the amount of time after motion stops before turning off lights.

Hubitat
Motion Lighting Automation
The Official Documentation for Room Lighting
Setting Up the Automation
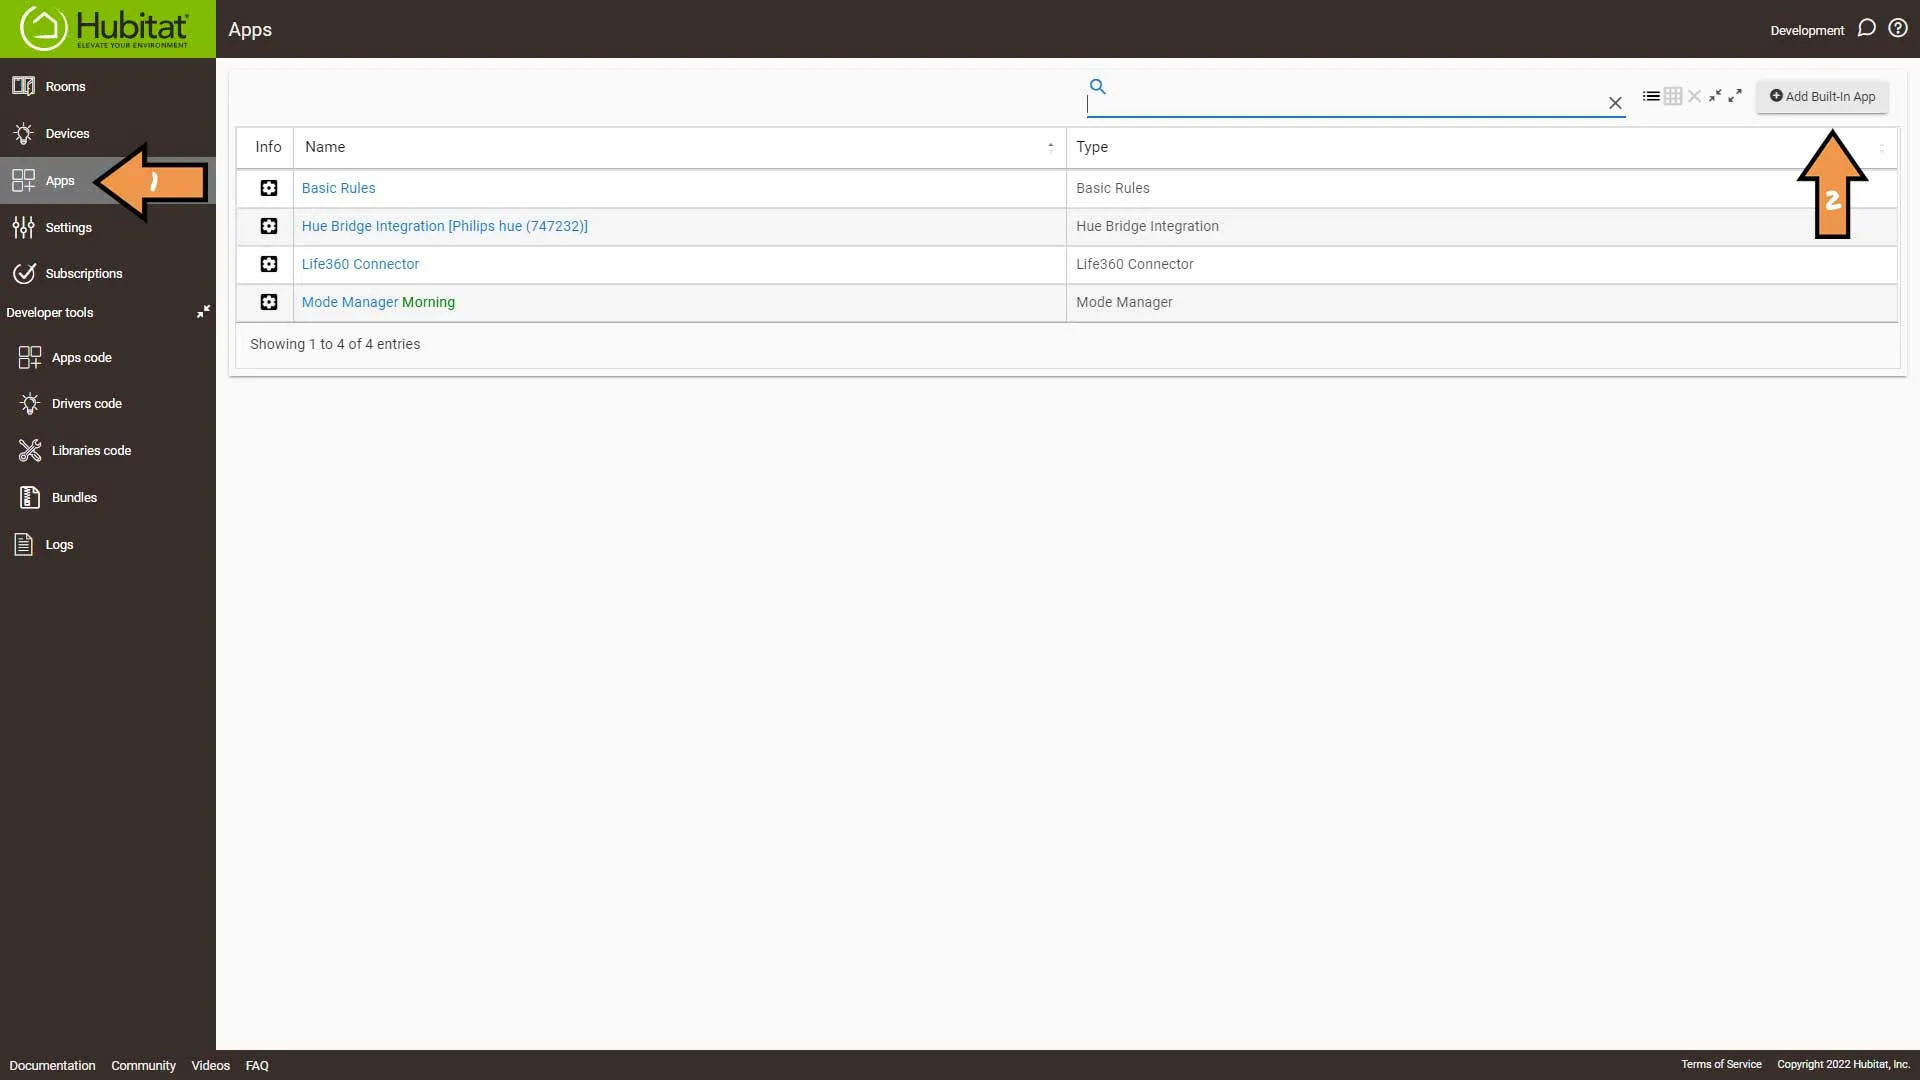
First, go to Apps and press Add Built-in App button.
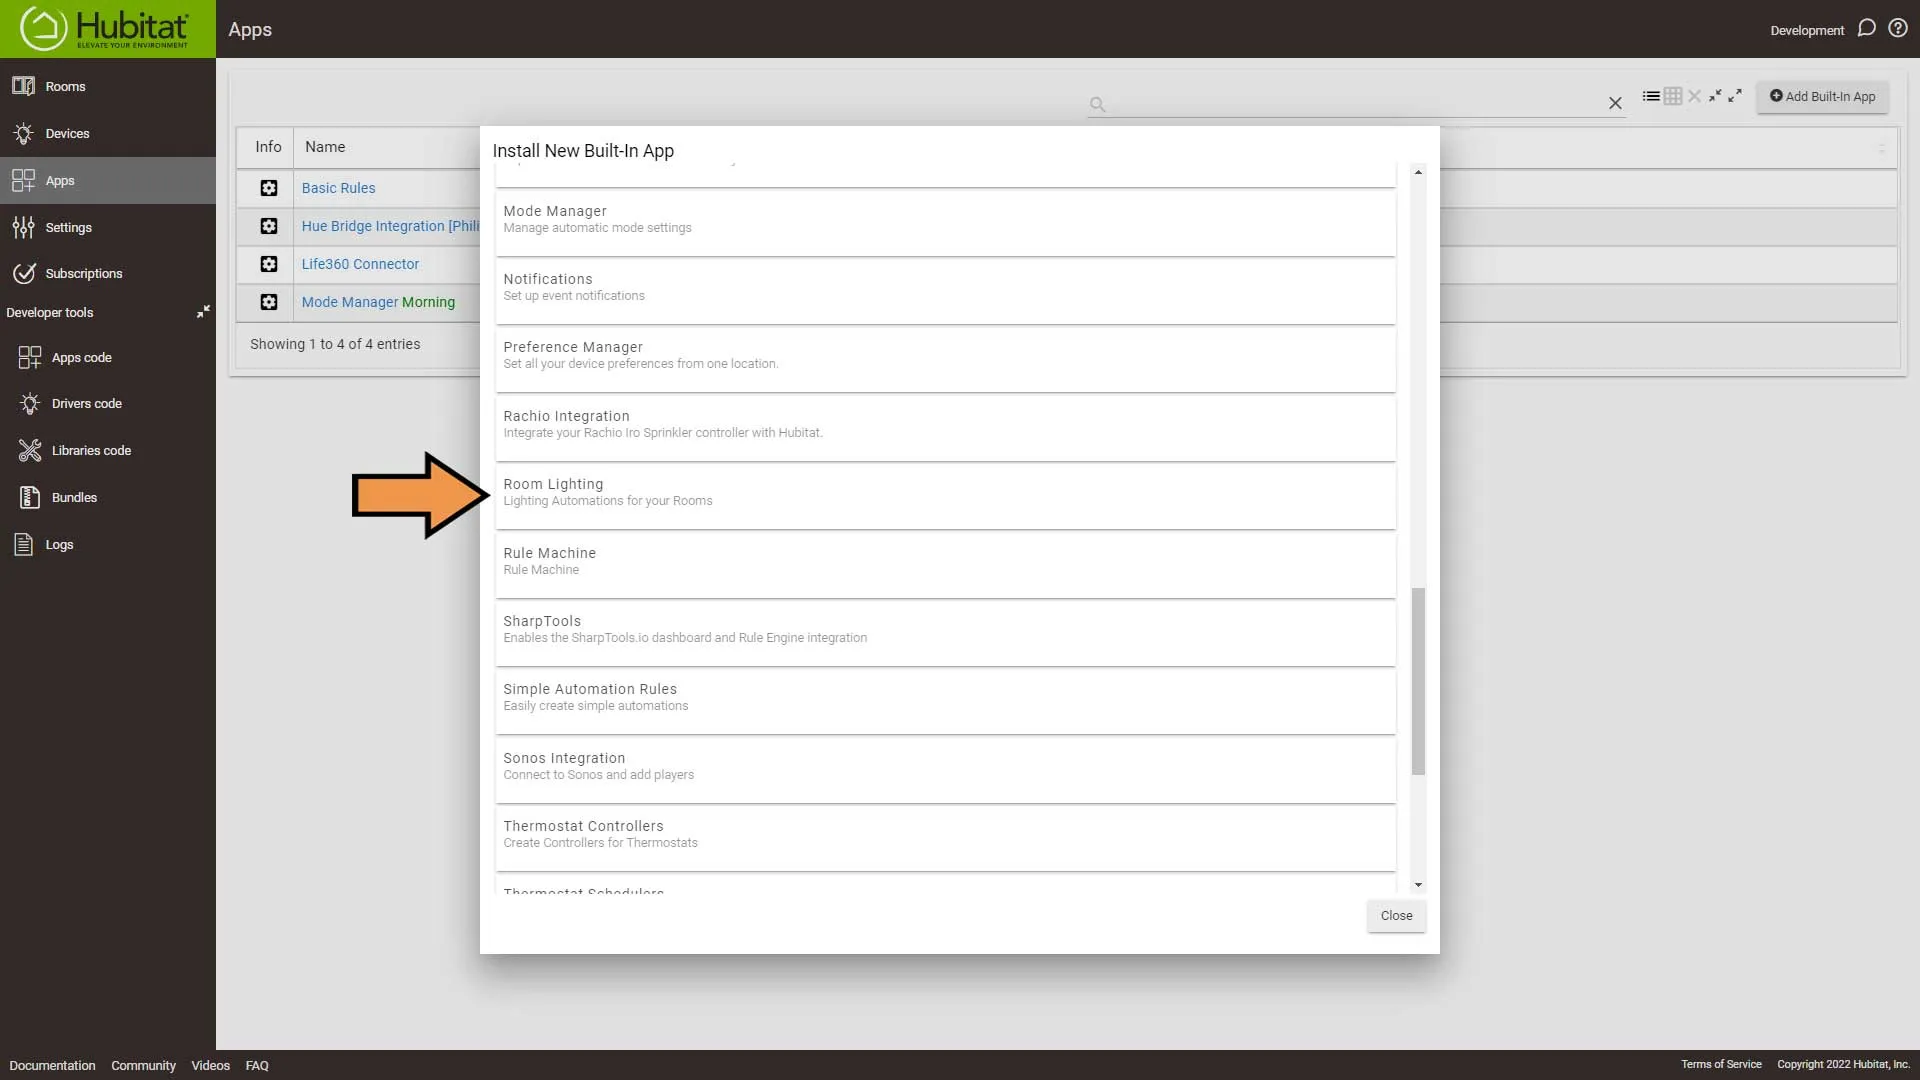
Please scroll down to you see Room Lighting and select it.
Select Create New Room Lights Automation…
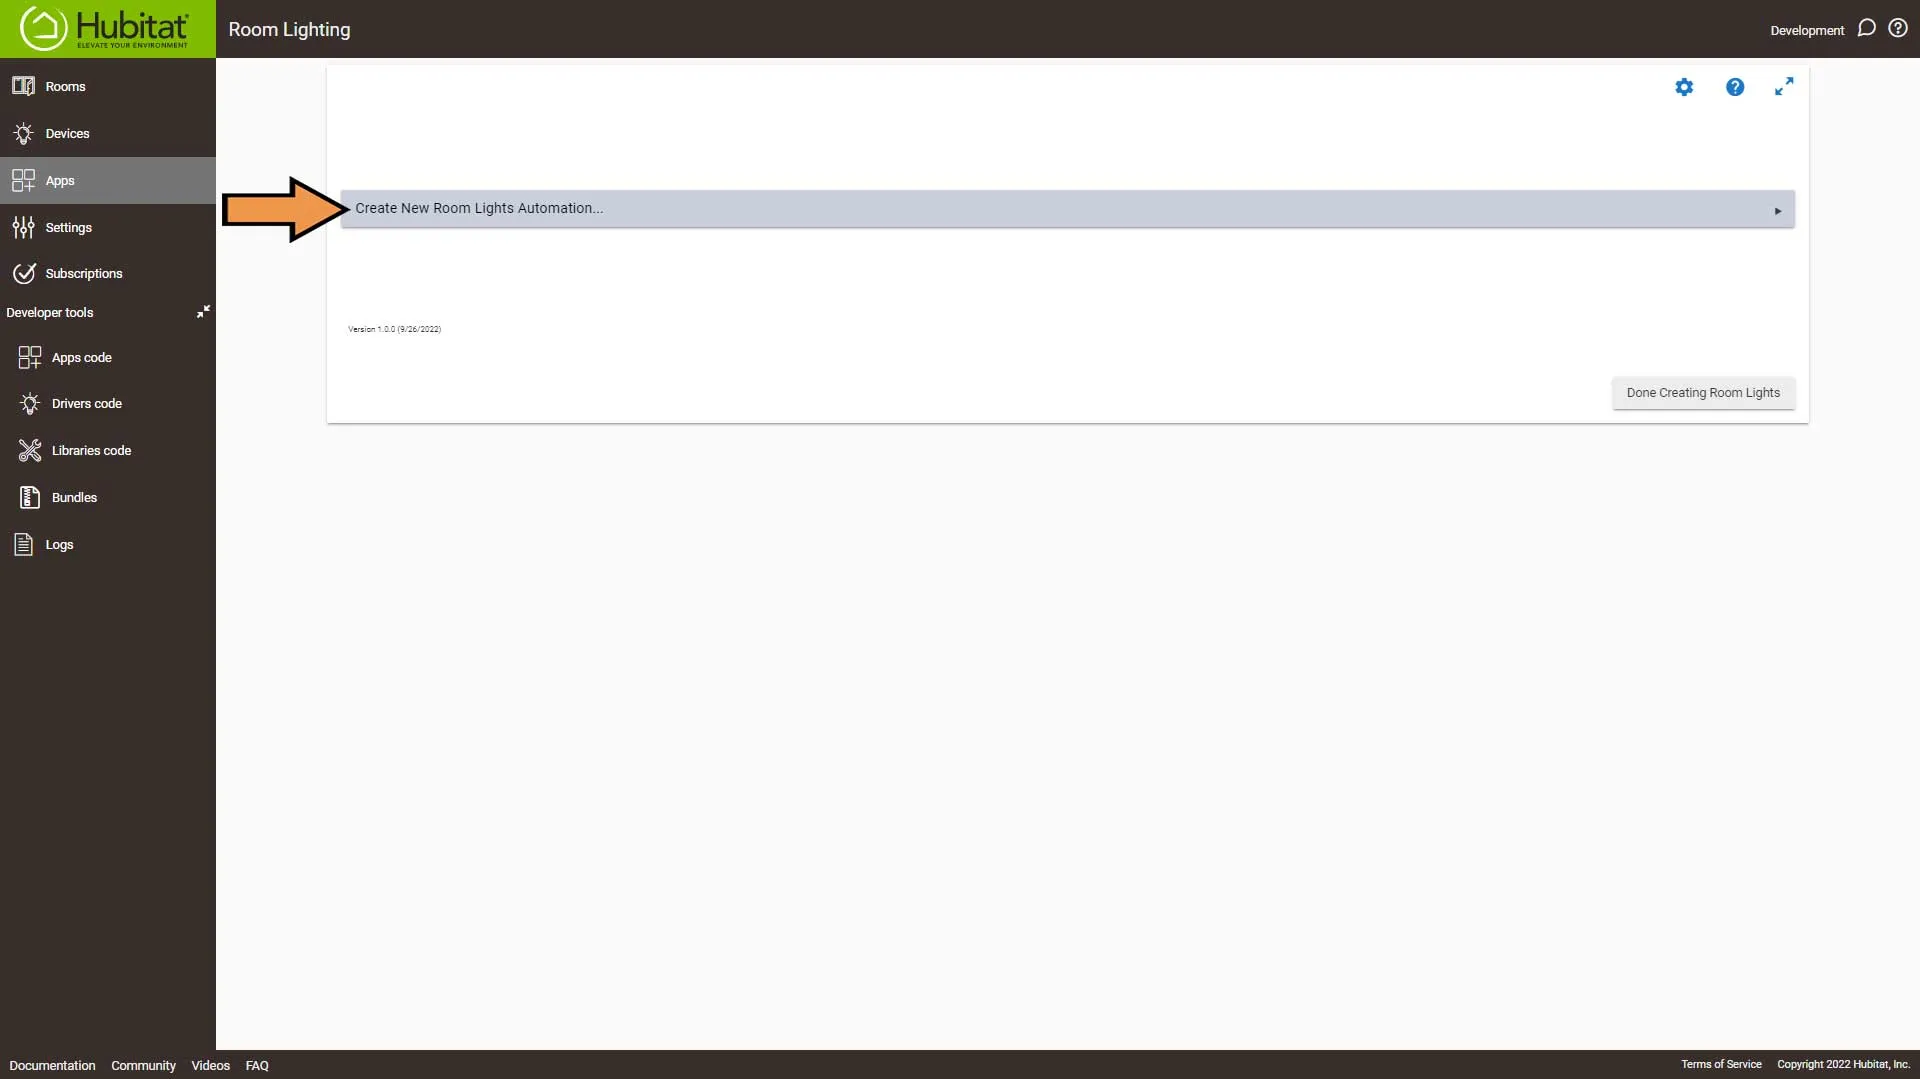
From the Rooms to Automate dropdown, select your room. Mine is office.
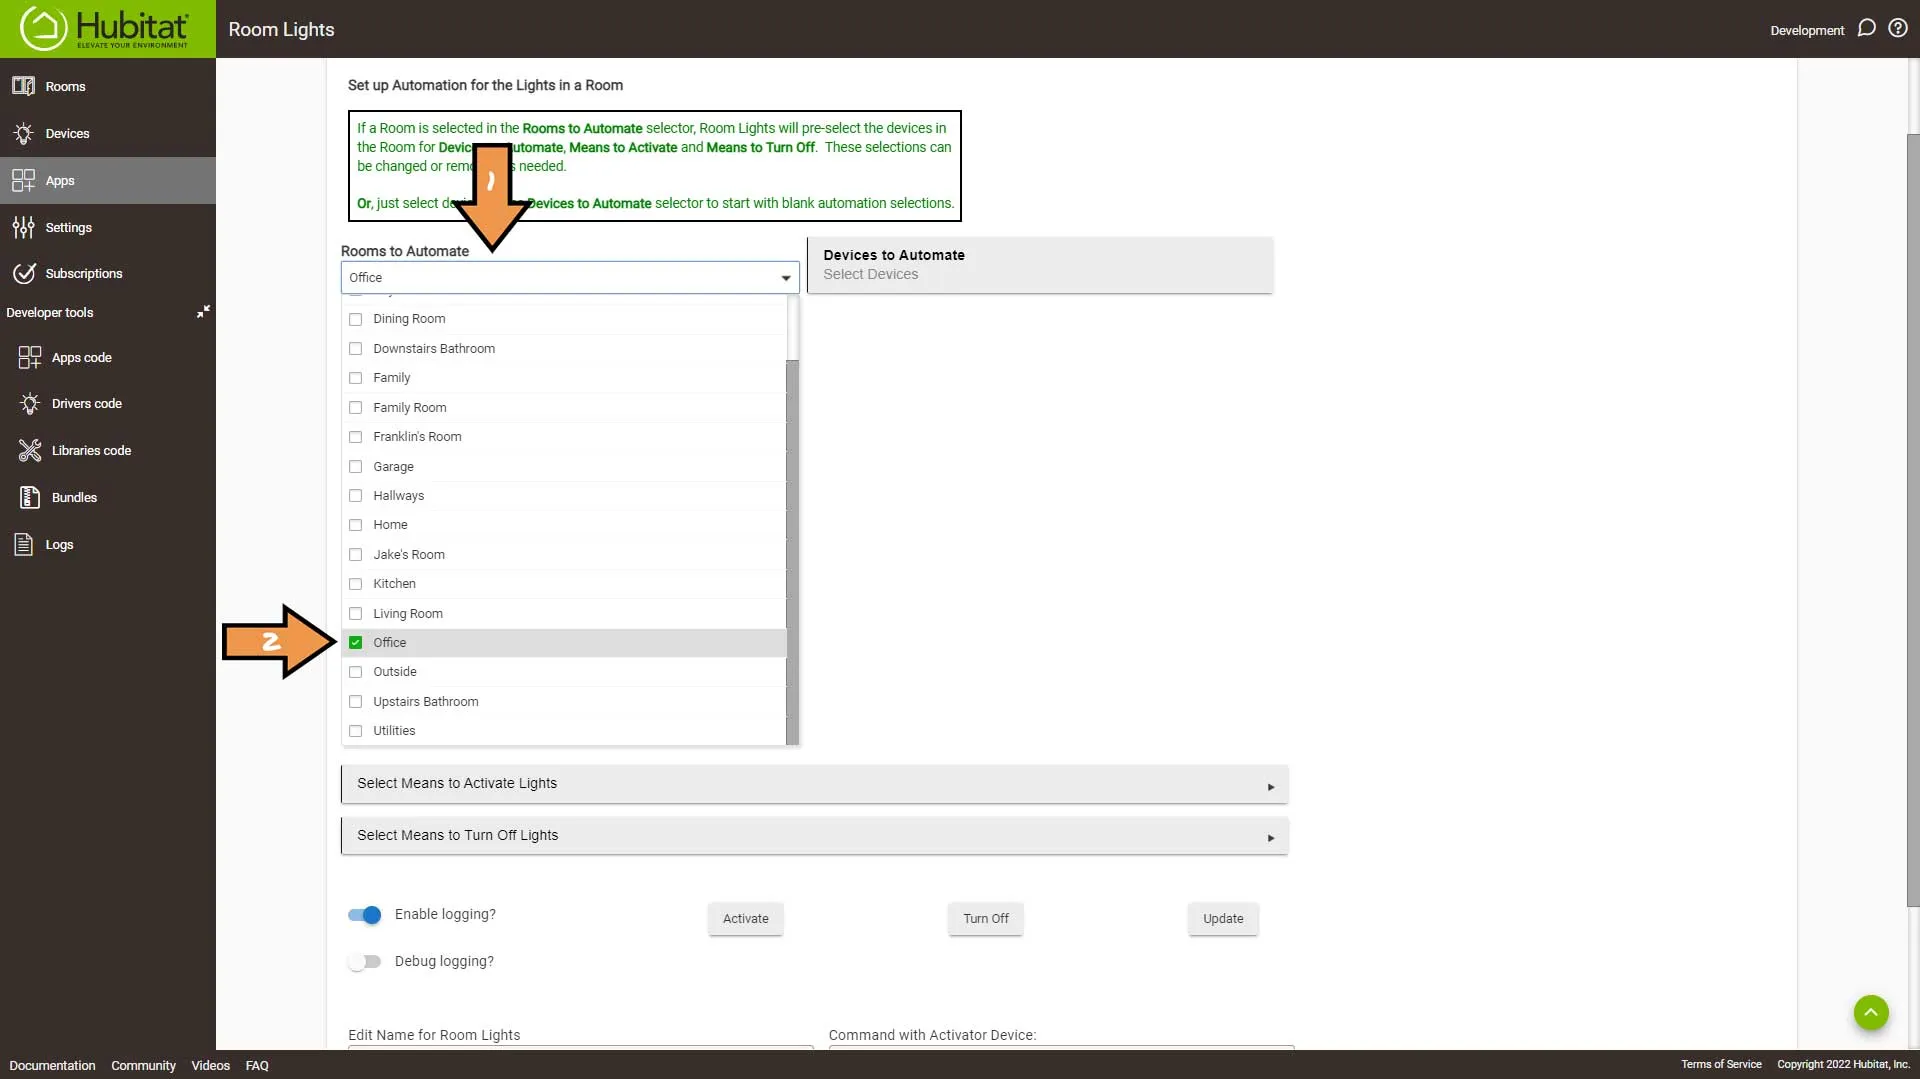
Hubitat will look at your devices in that room and select them accordingly. Next, we are going to go into Set Up Lighting Periods.
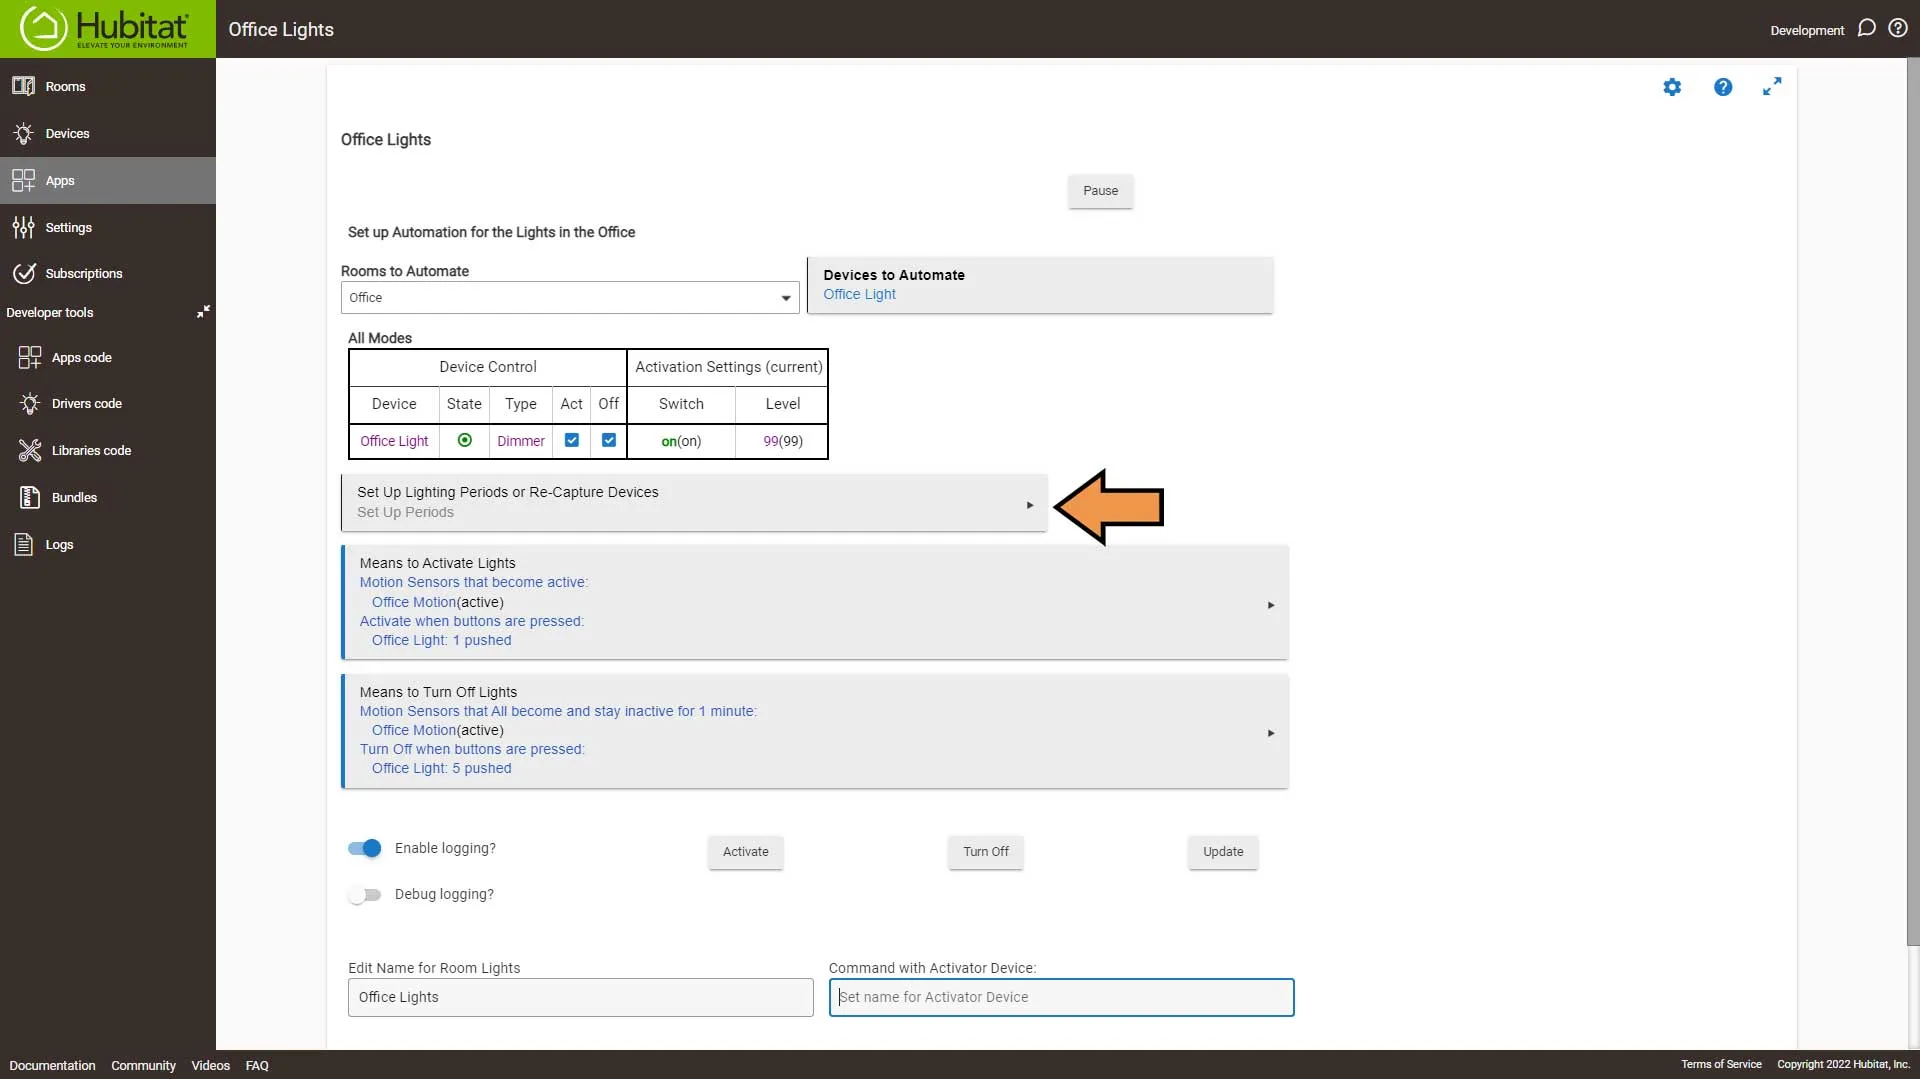
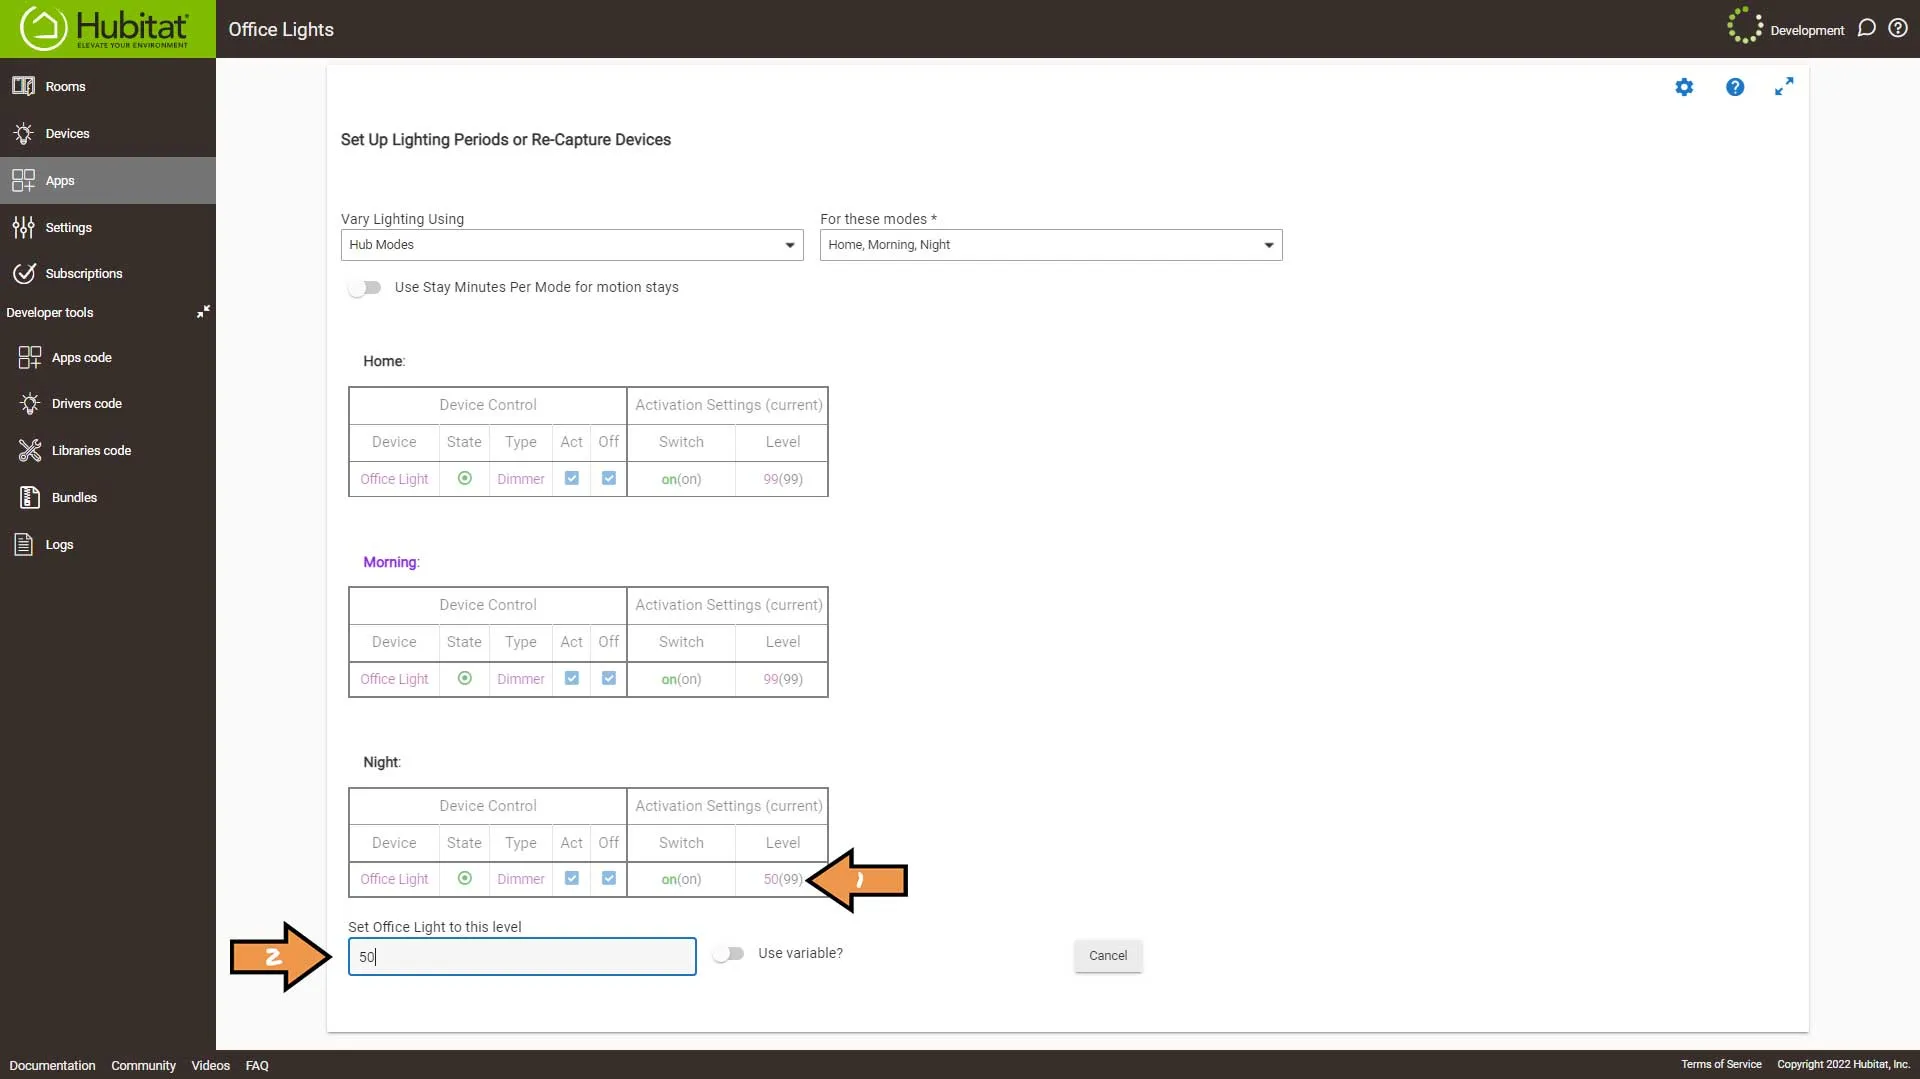
Select Hub Modes from the Vary Lighting Using drop-down and select your modes from the new drop-down. We are not setting Away since we don’t want our automation running while Away.
For morning and home, I am OK with them coming on full brightness, but for Night I want to change the brightness to 50%.
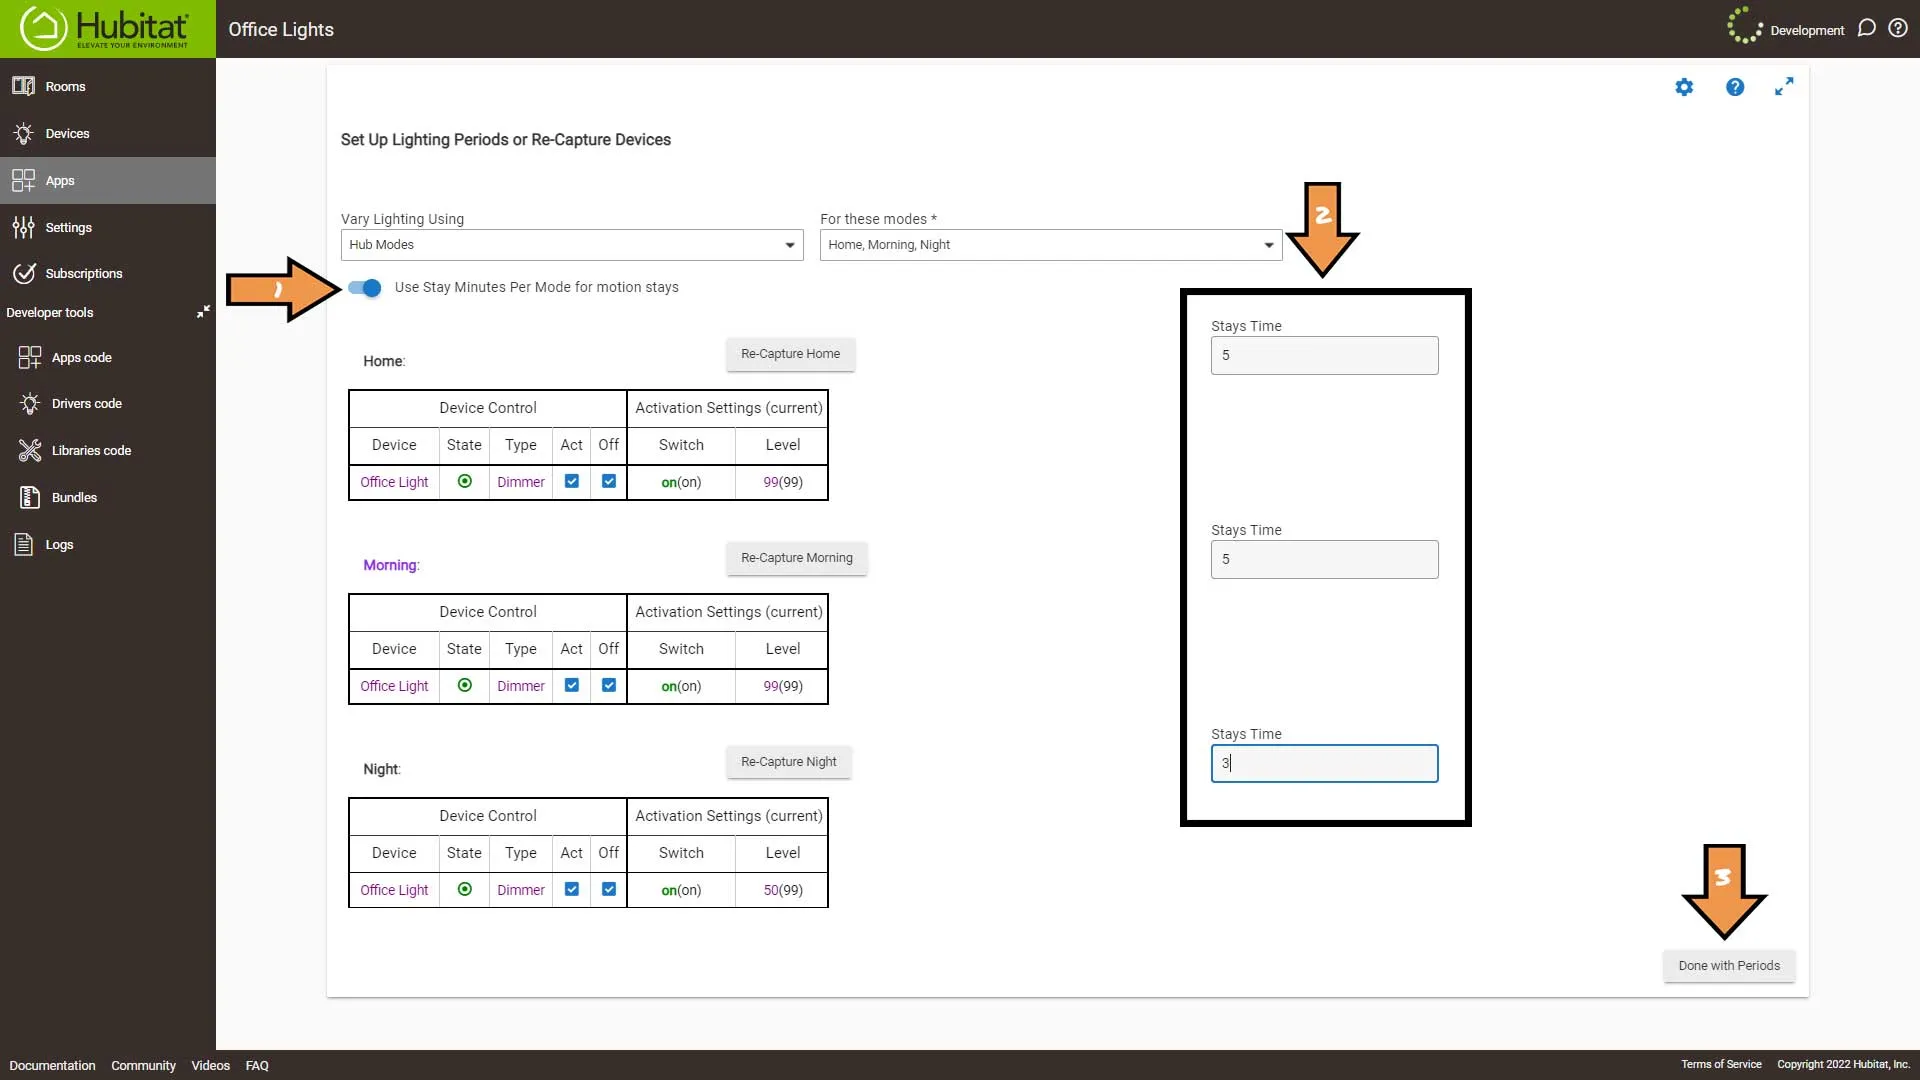
We want different motion stay times, so we’ll turn on Use Stay Minutes Per Mode. Then we’ll set the stay times for Morning and Home to 5 minutes and 3 minutes for Night. Then can click the Done With Periods button.
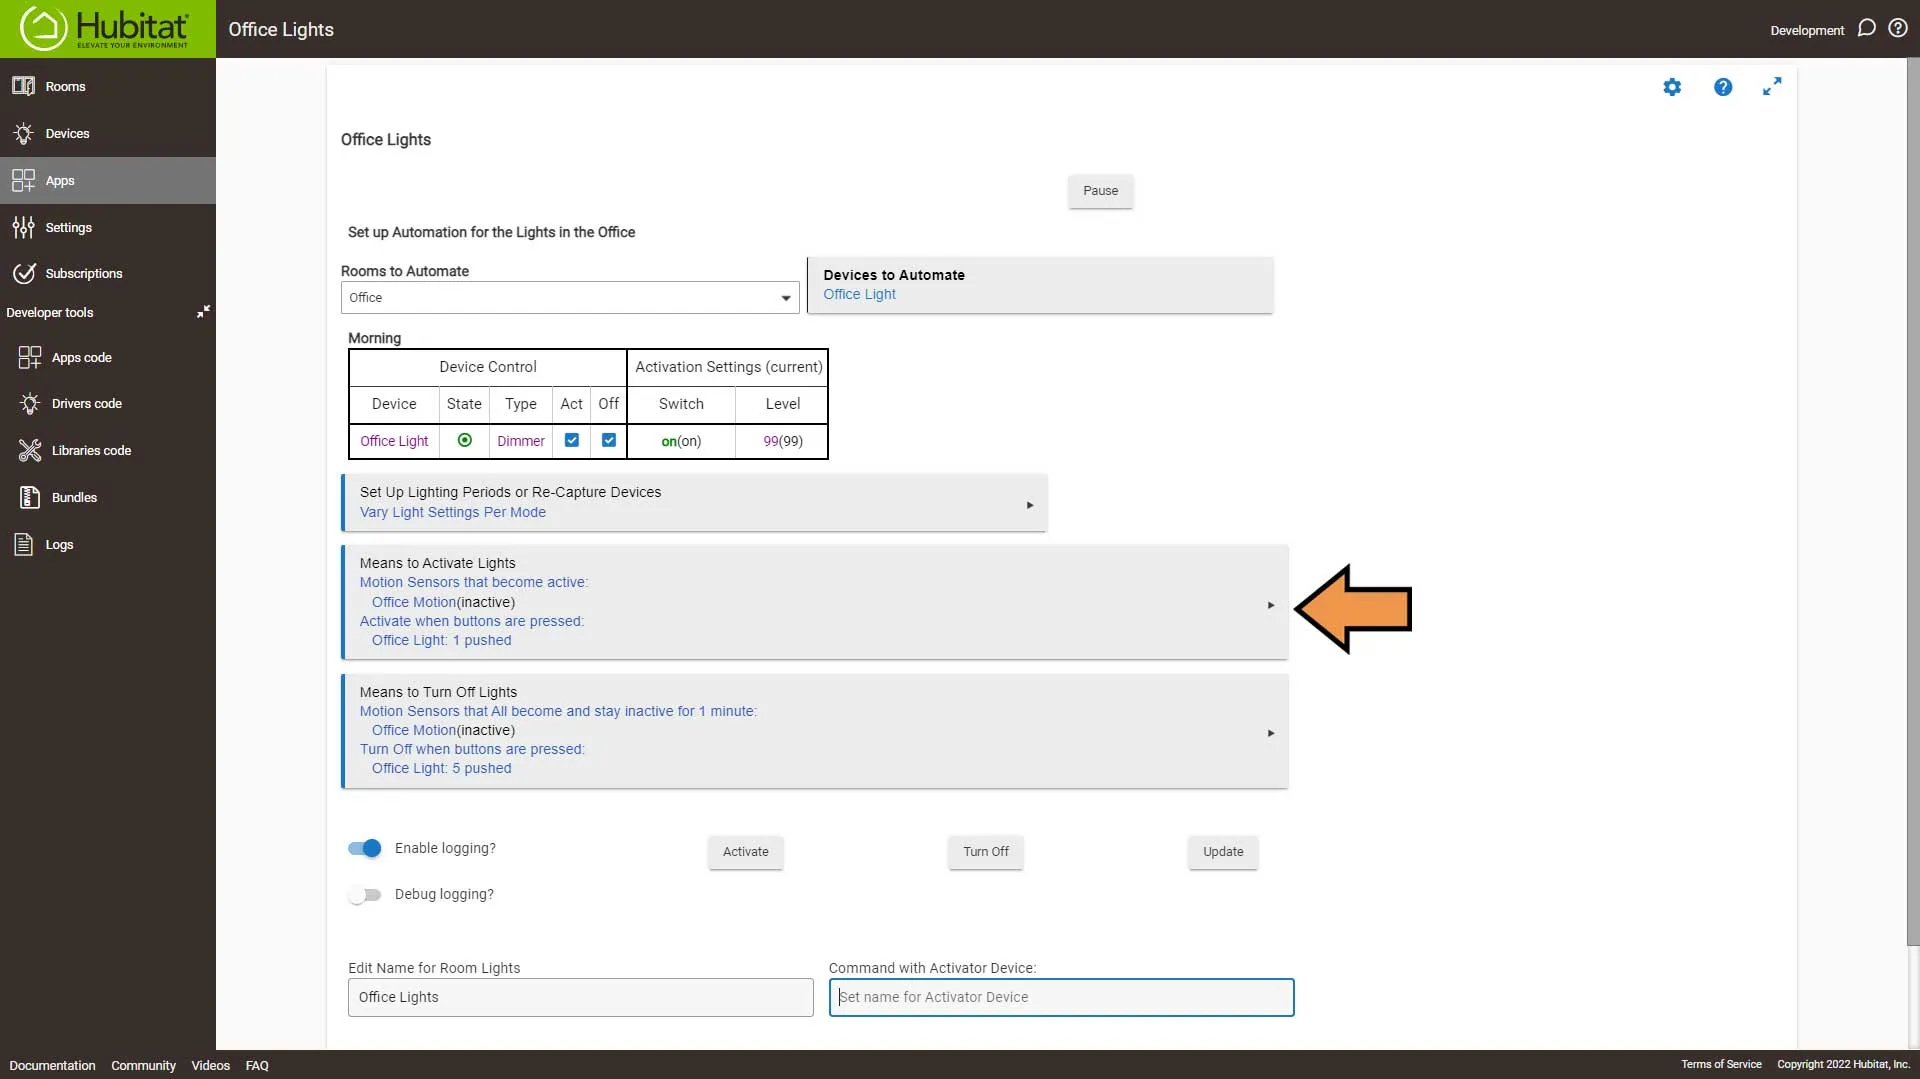
Next, we go into Means to Activate Lights section.
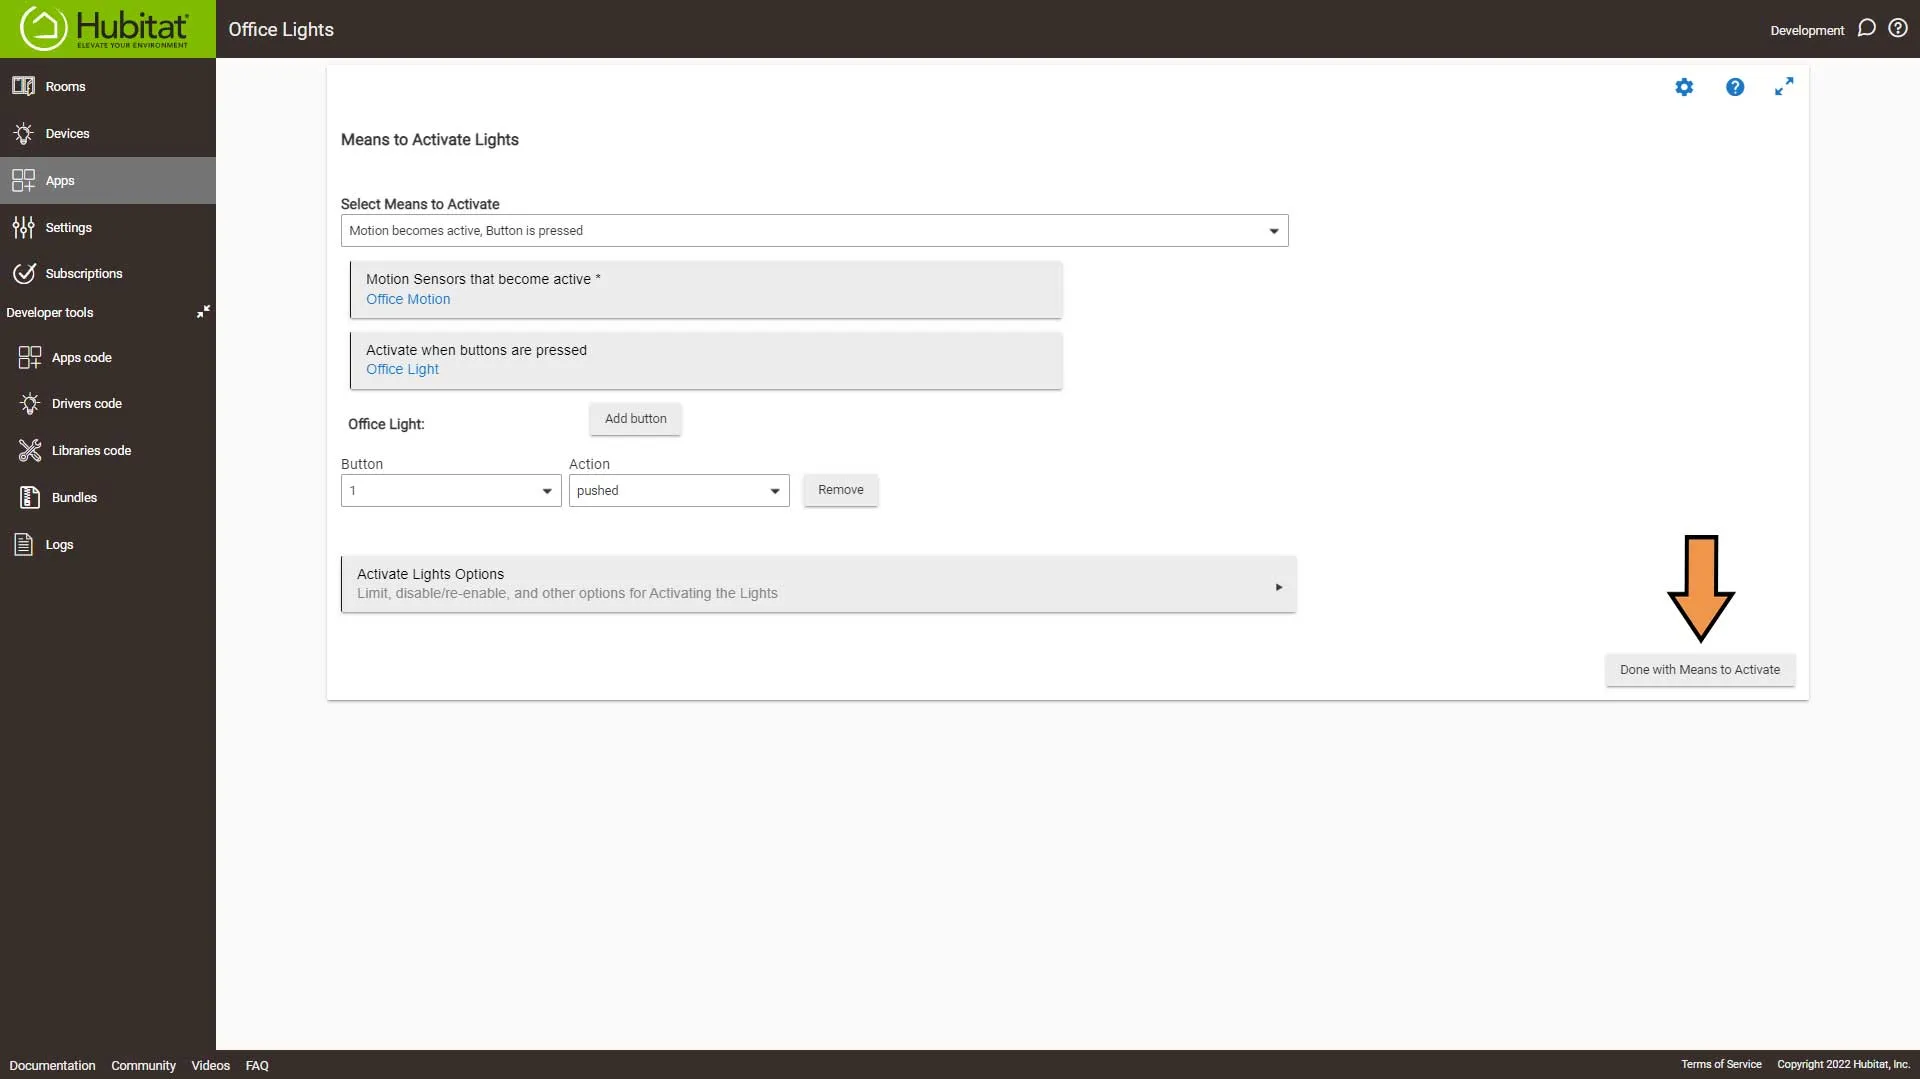
Hubitat does an excellent job of picking the devices. I have Inovelli lights switches all over my home, and they have a button controller built-in. Hubitat sees them and selects them. Button 1 Pushed is the light switch on, so we don’t have to do anything here. Click the Done with Means to Activate button.
Next, go into the Means to Turn Off Lights section.
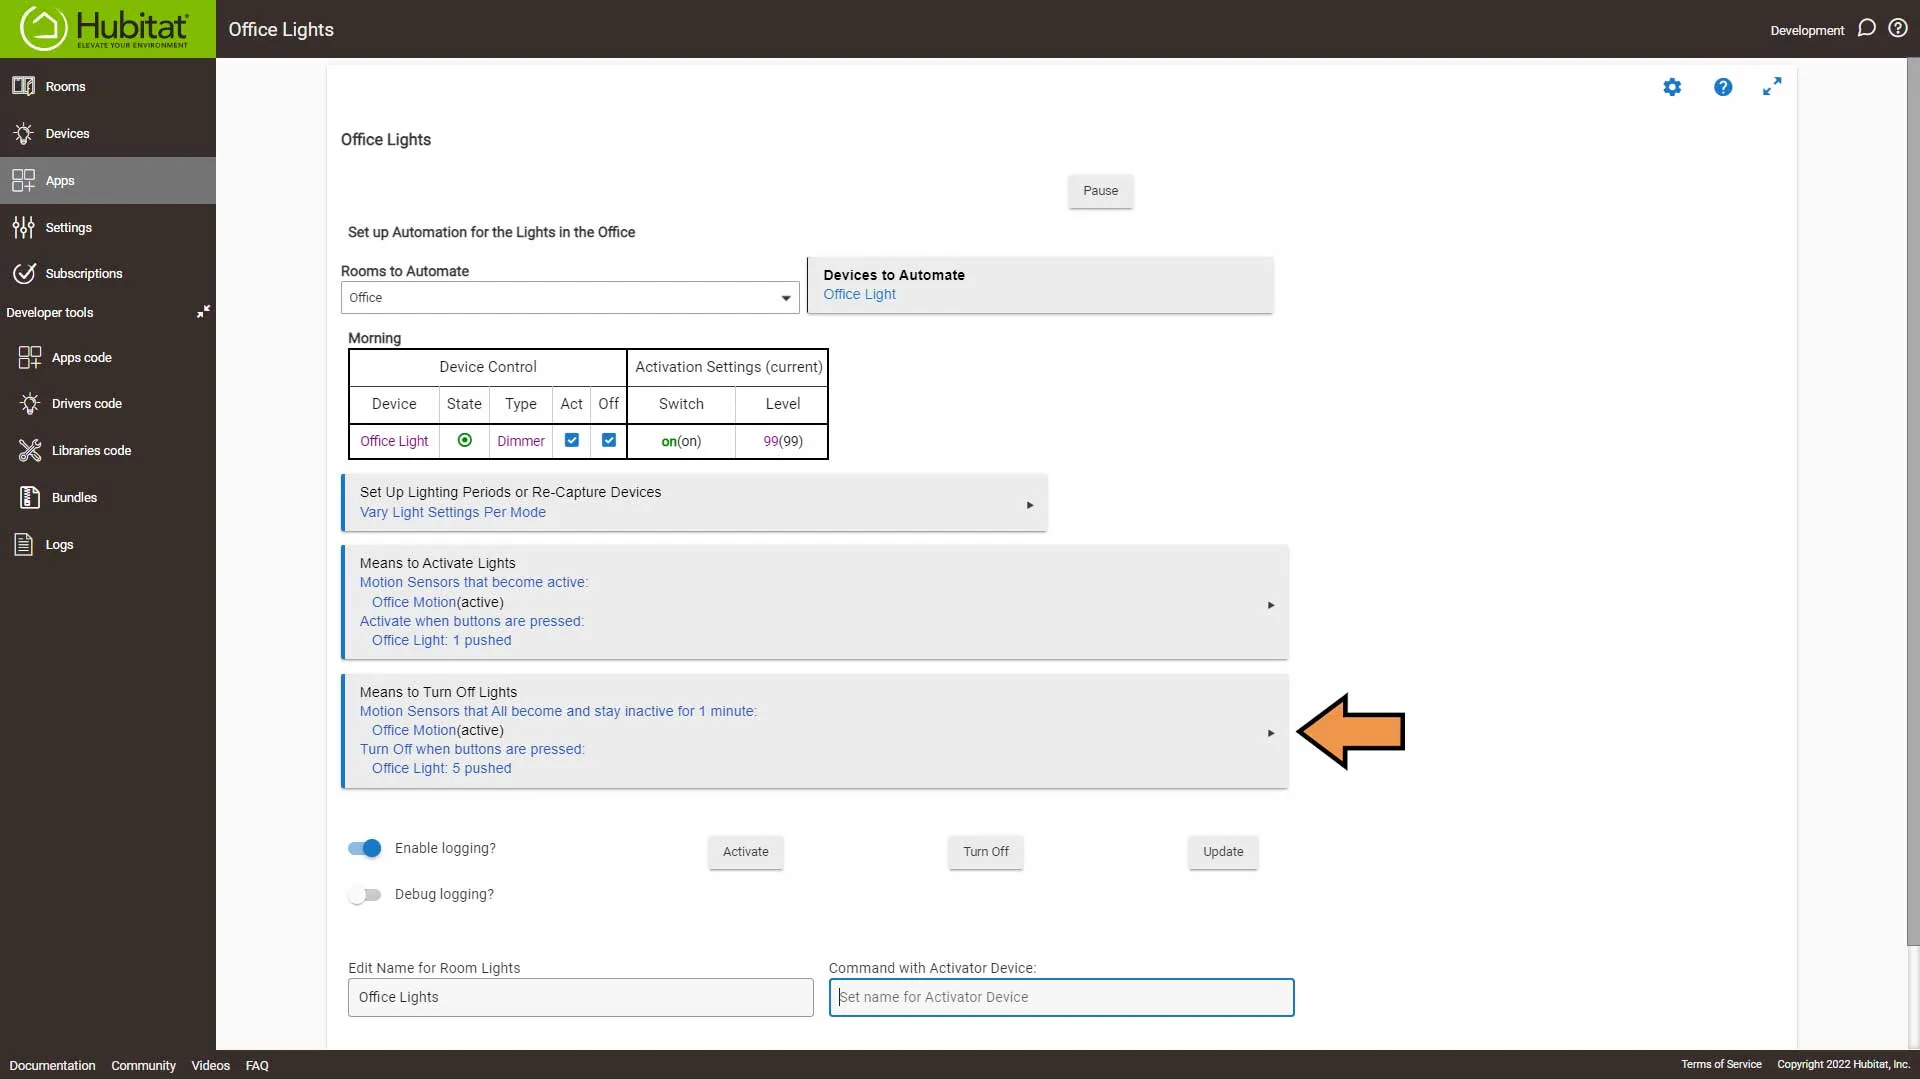
Hubitat picked button 5 pushed, but my switch for off is button 1 held. If you don’t have a button controller on your switch, it’s crucial that you select Switch turns off from the drop-down and select your light(s) for the room. If not, the automation is still active when you leave the room and turn your light off. This way, Hubitat knows to turn off the automation.
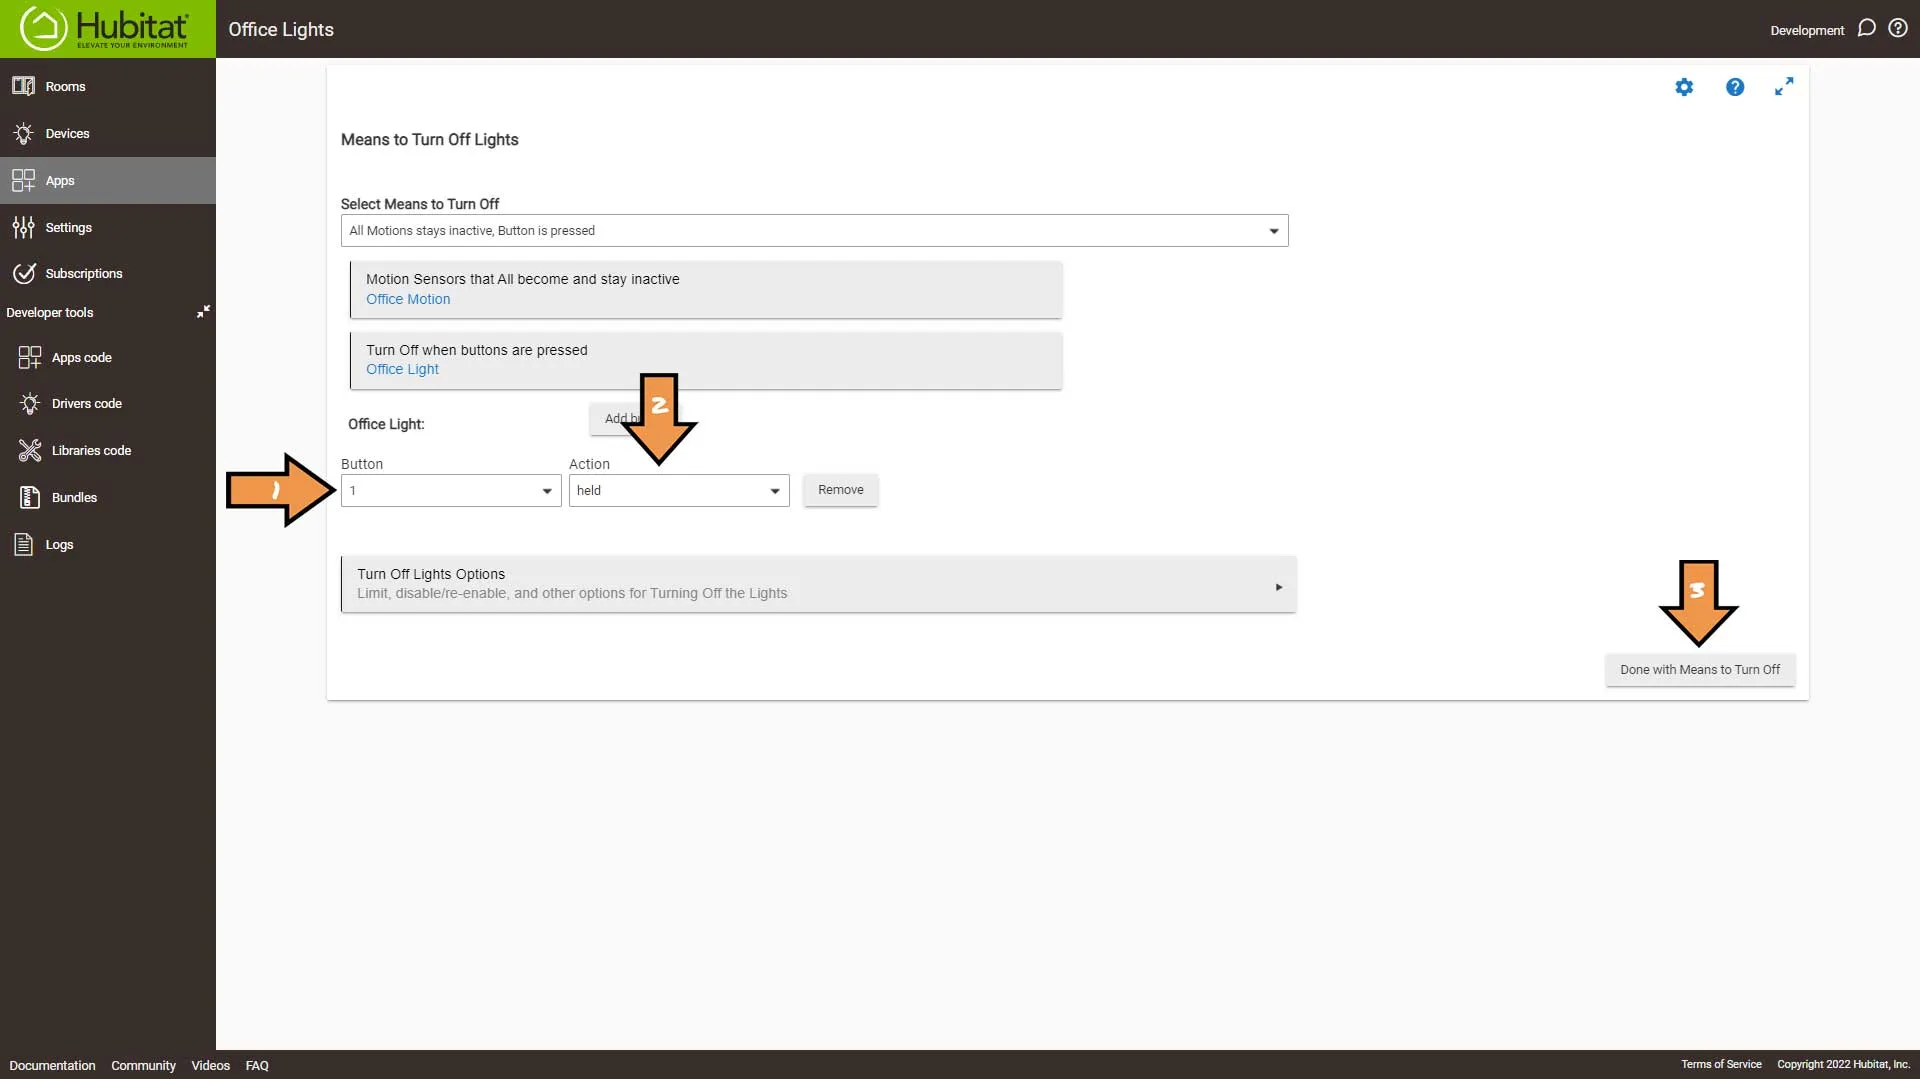
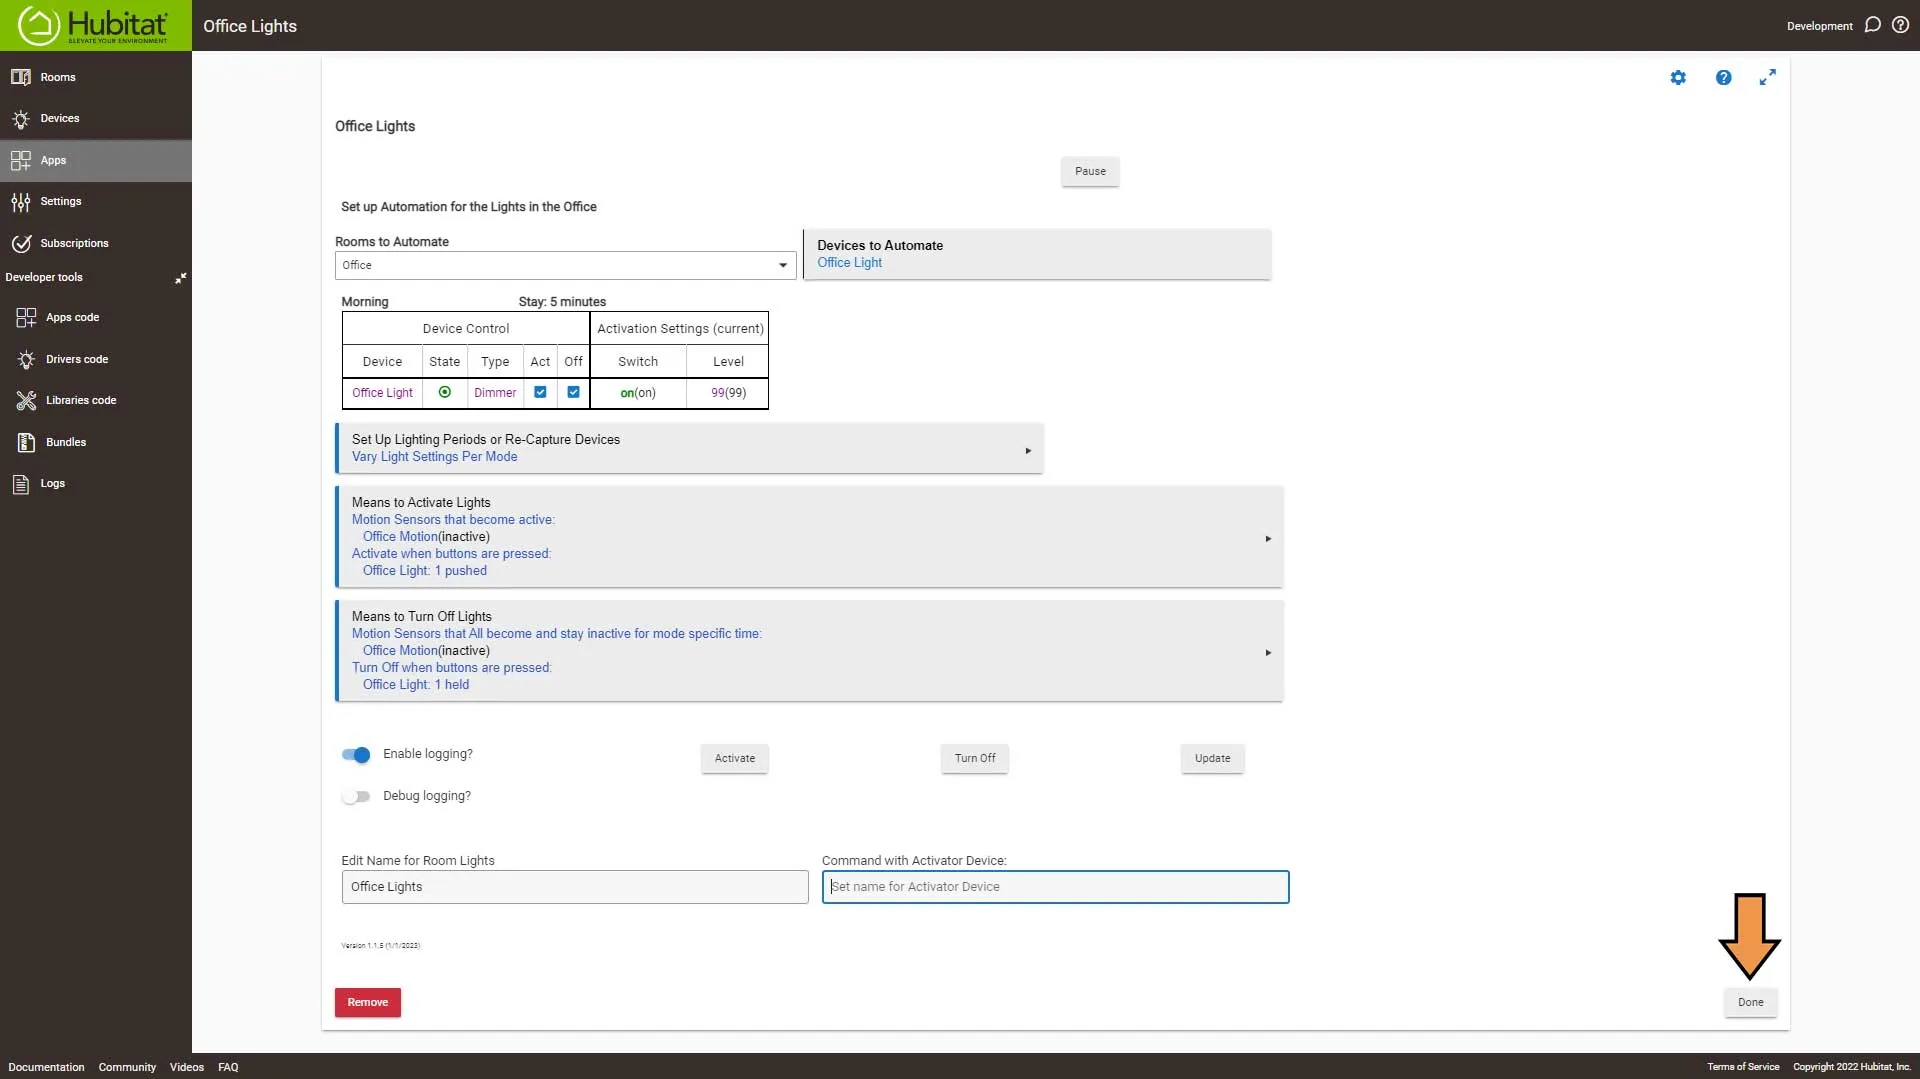
That’s it; click the Done button to complete the automation.
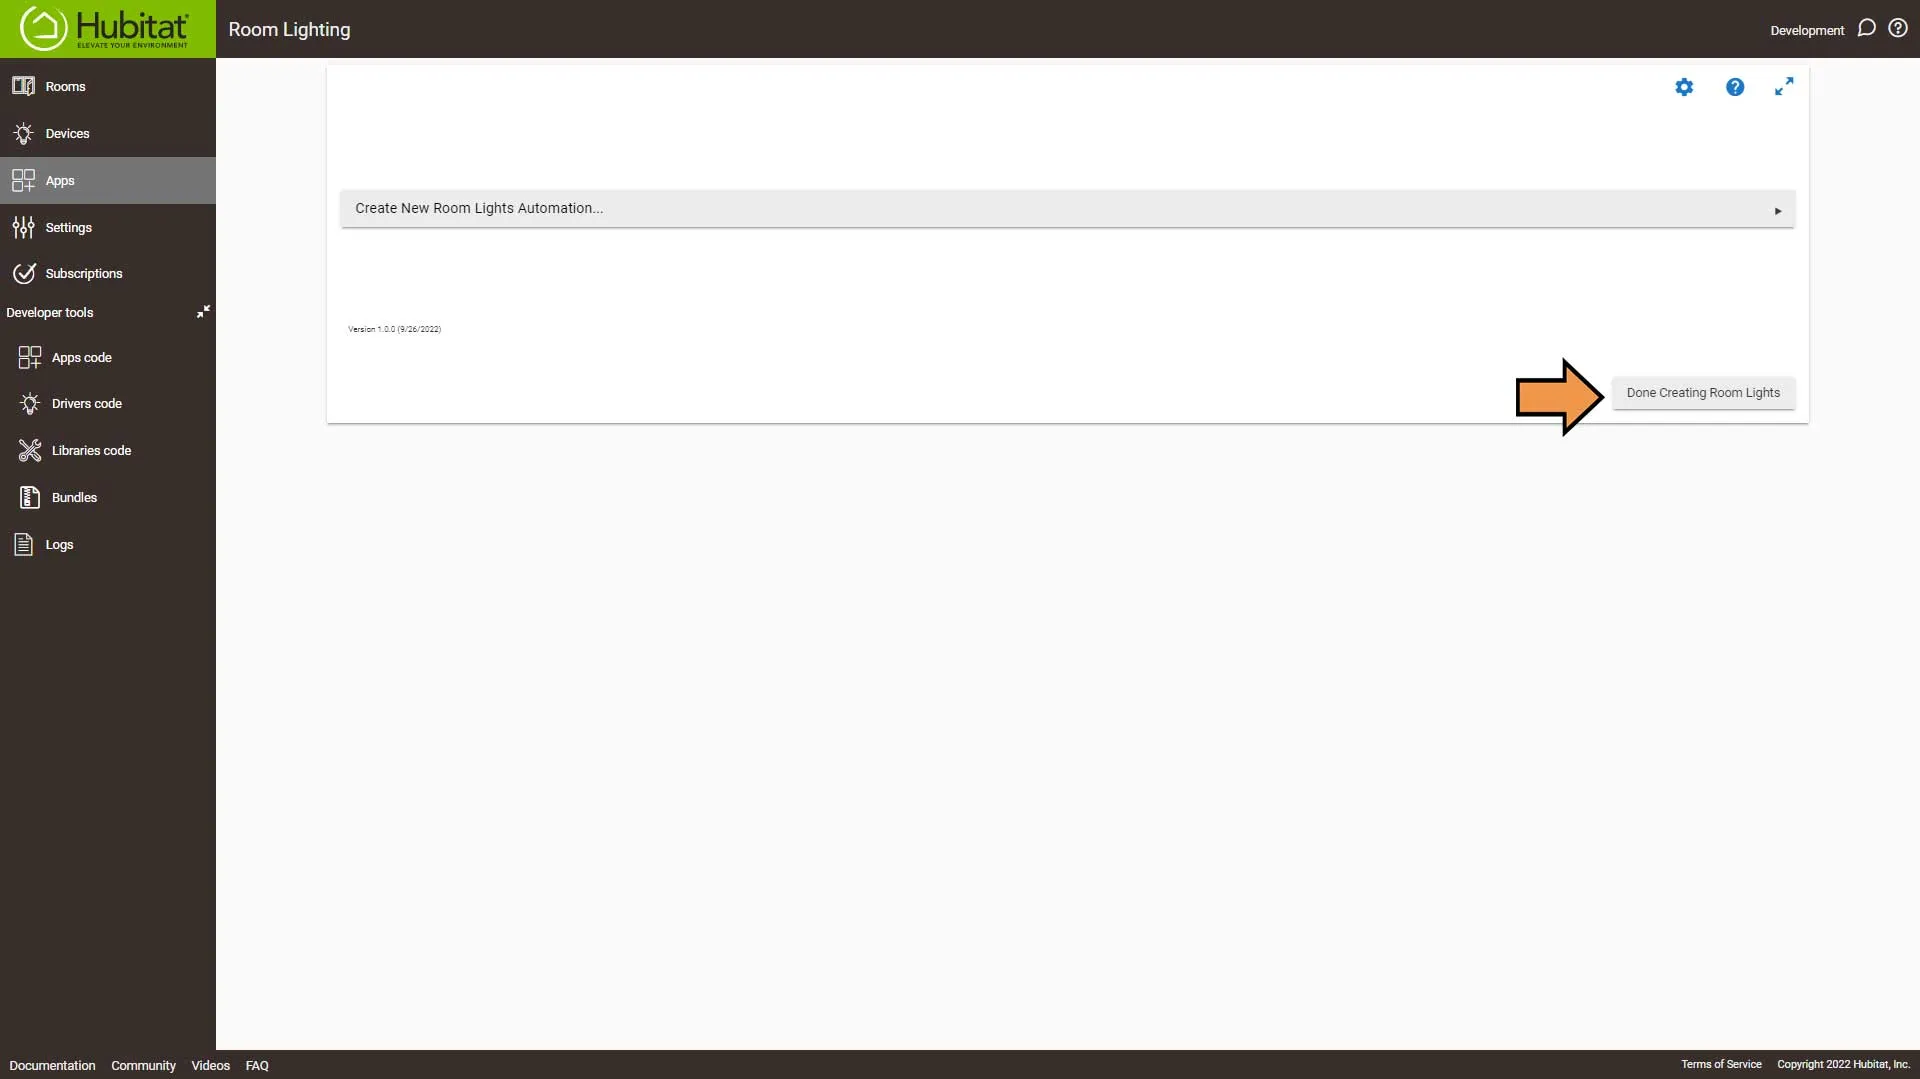
Finally, click the Done Creating Room Lights button.
Home Assistant
Motion Lighting Automation
The Official Documentation for Automation editor
Setting Up the Automation
First, we need to go to Settings and Automations & Scenes.
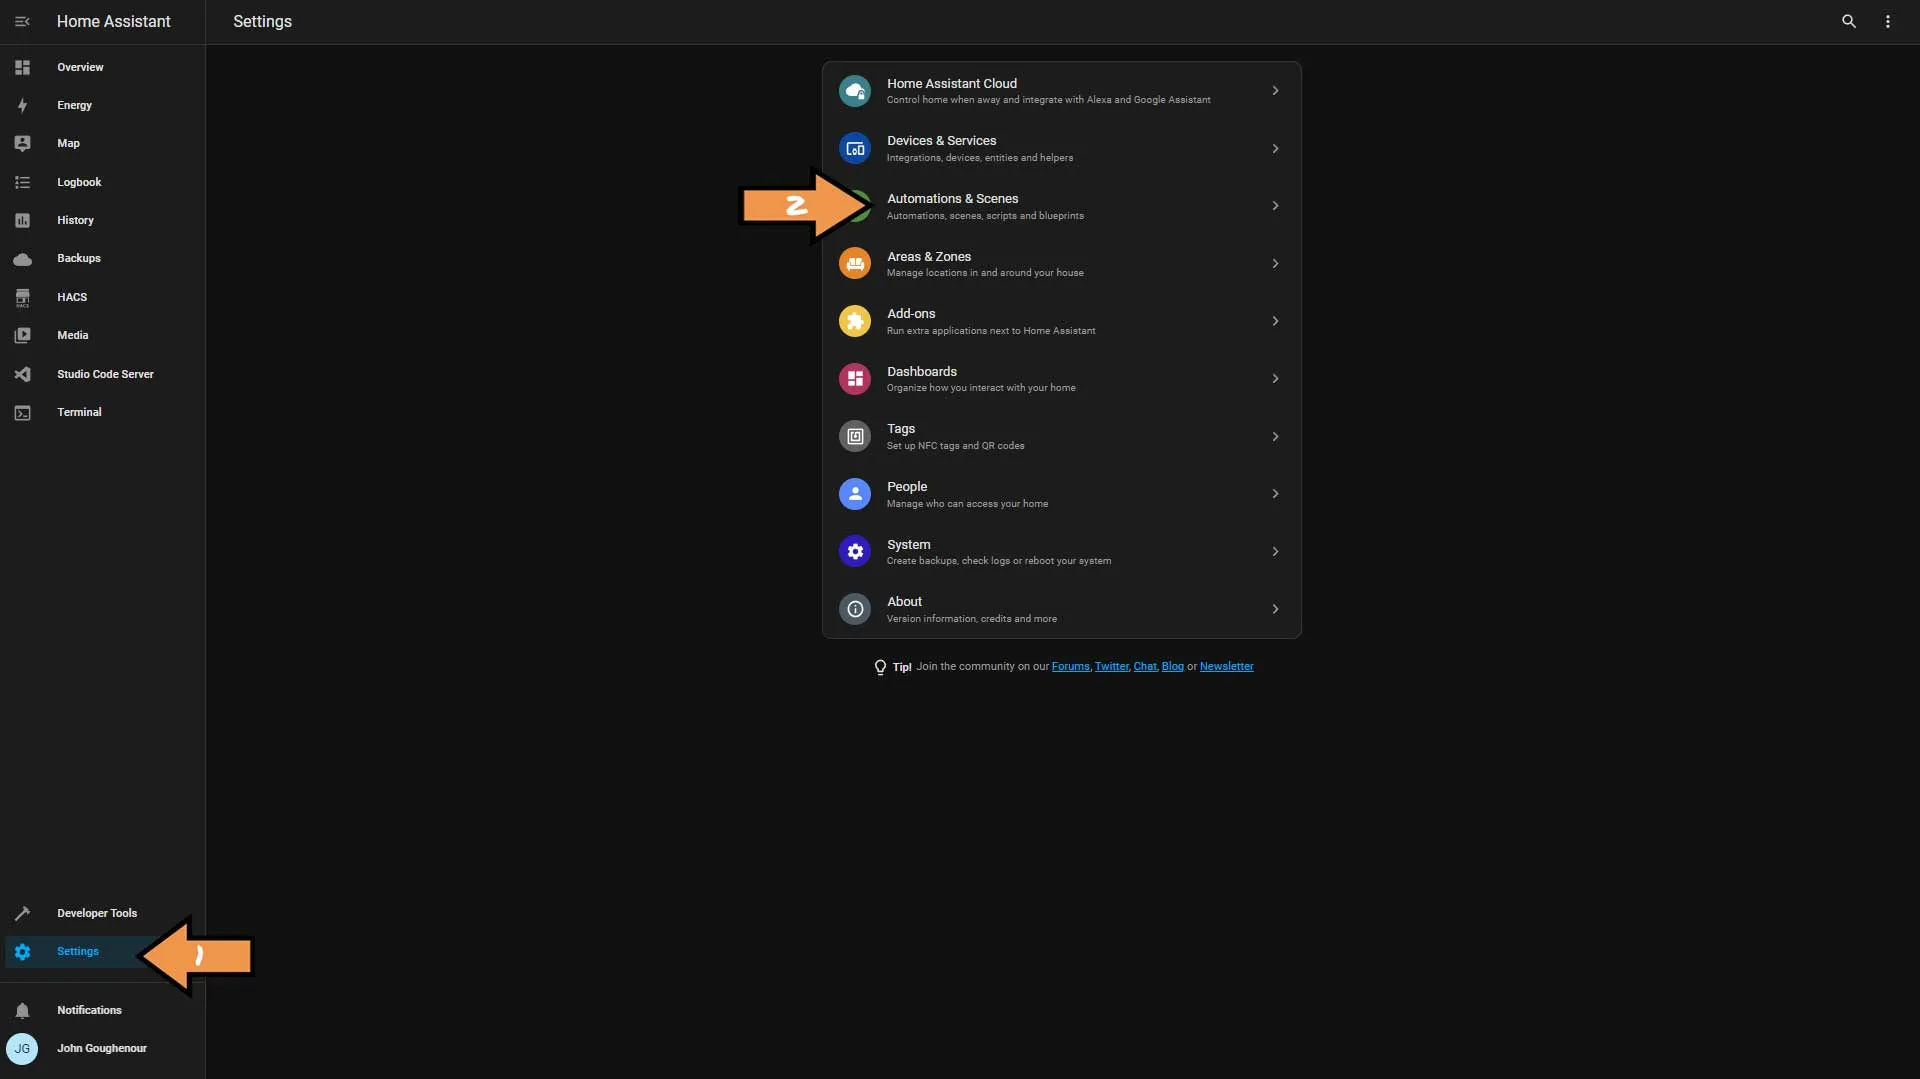
Click the blue Create Automation button.
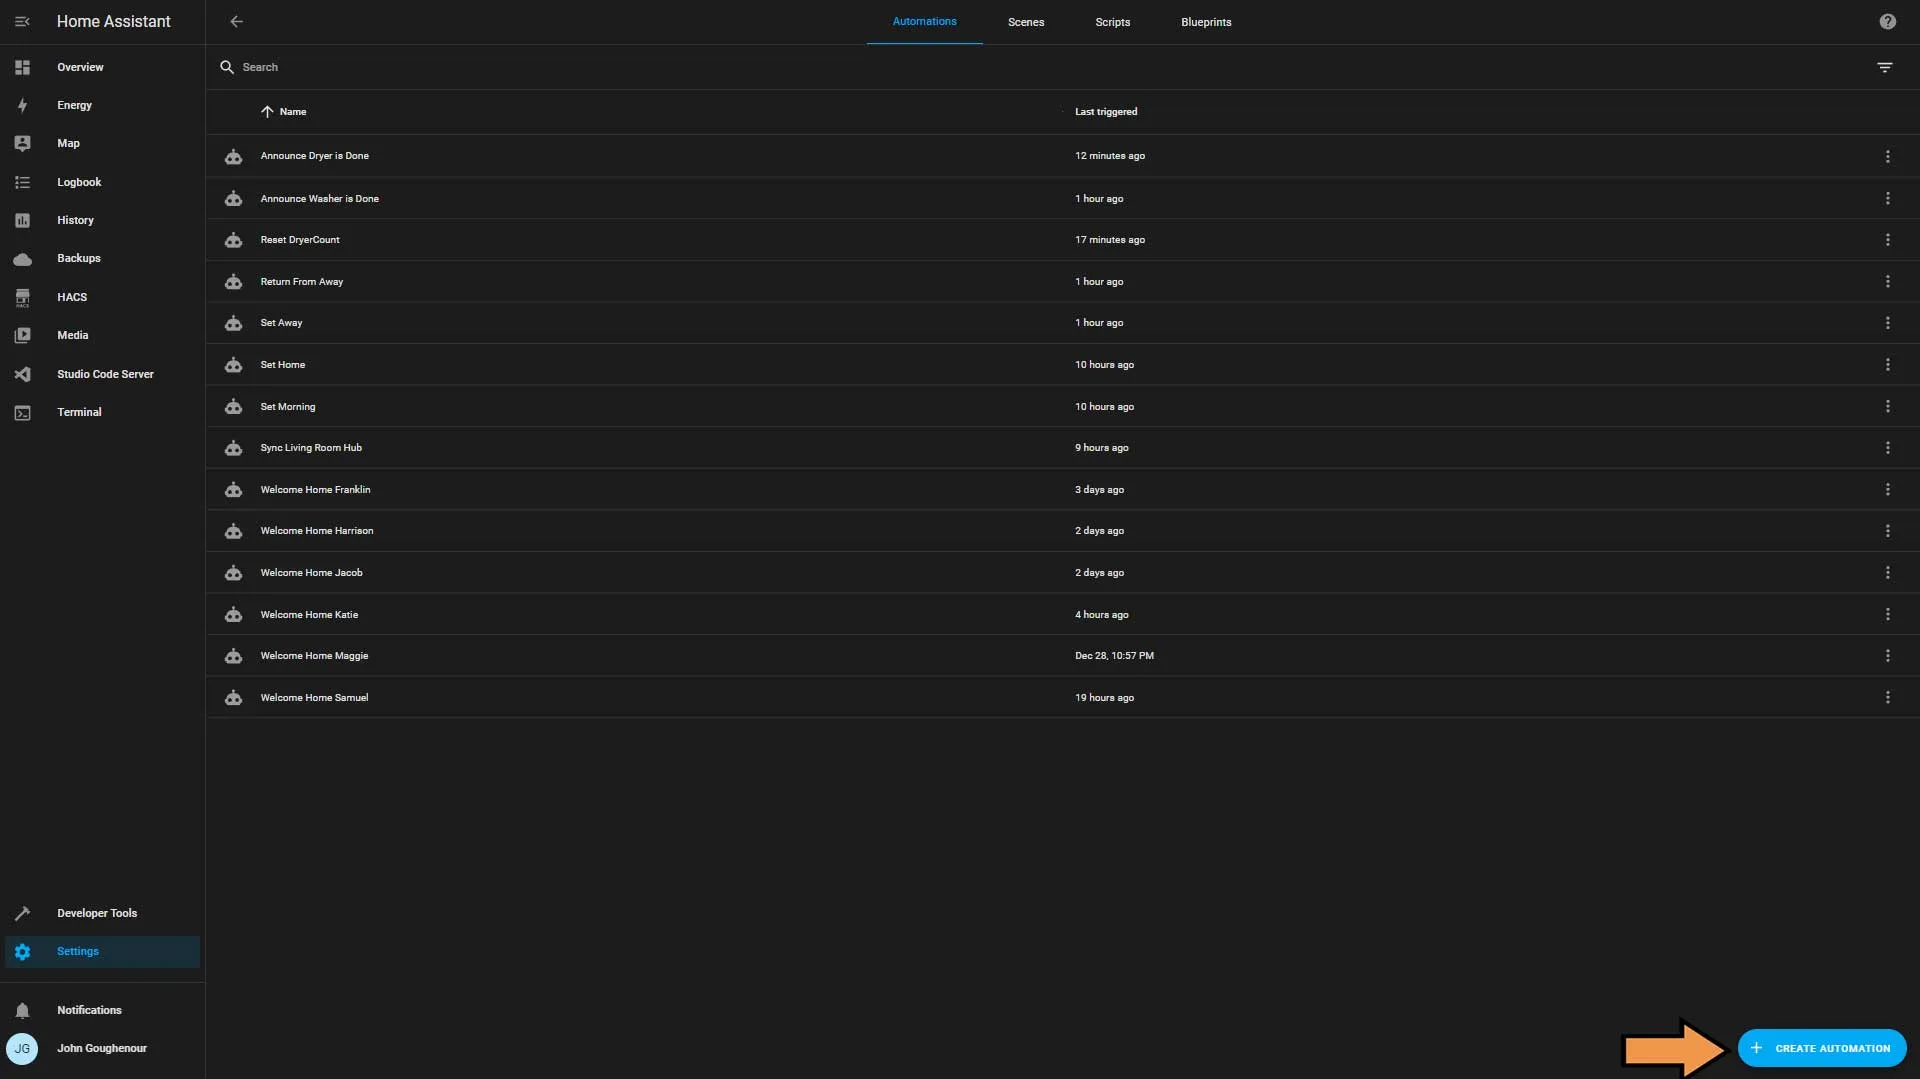
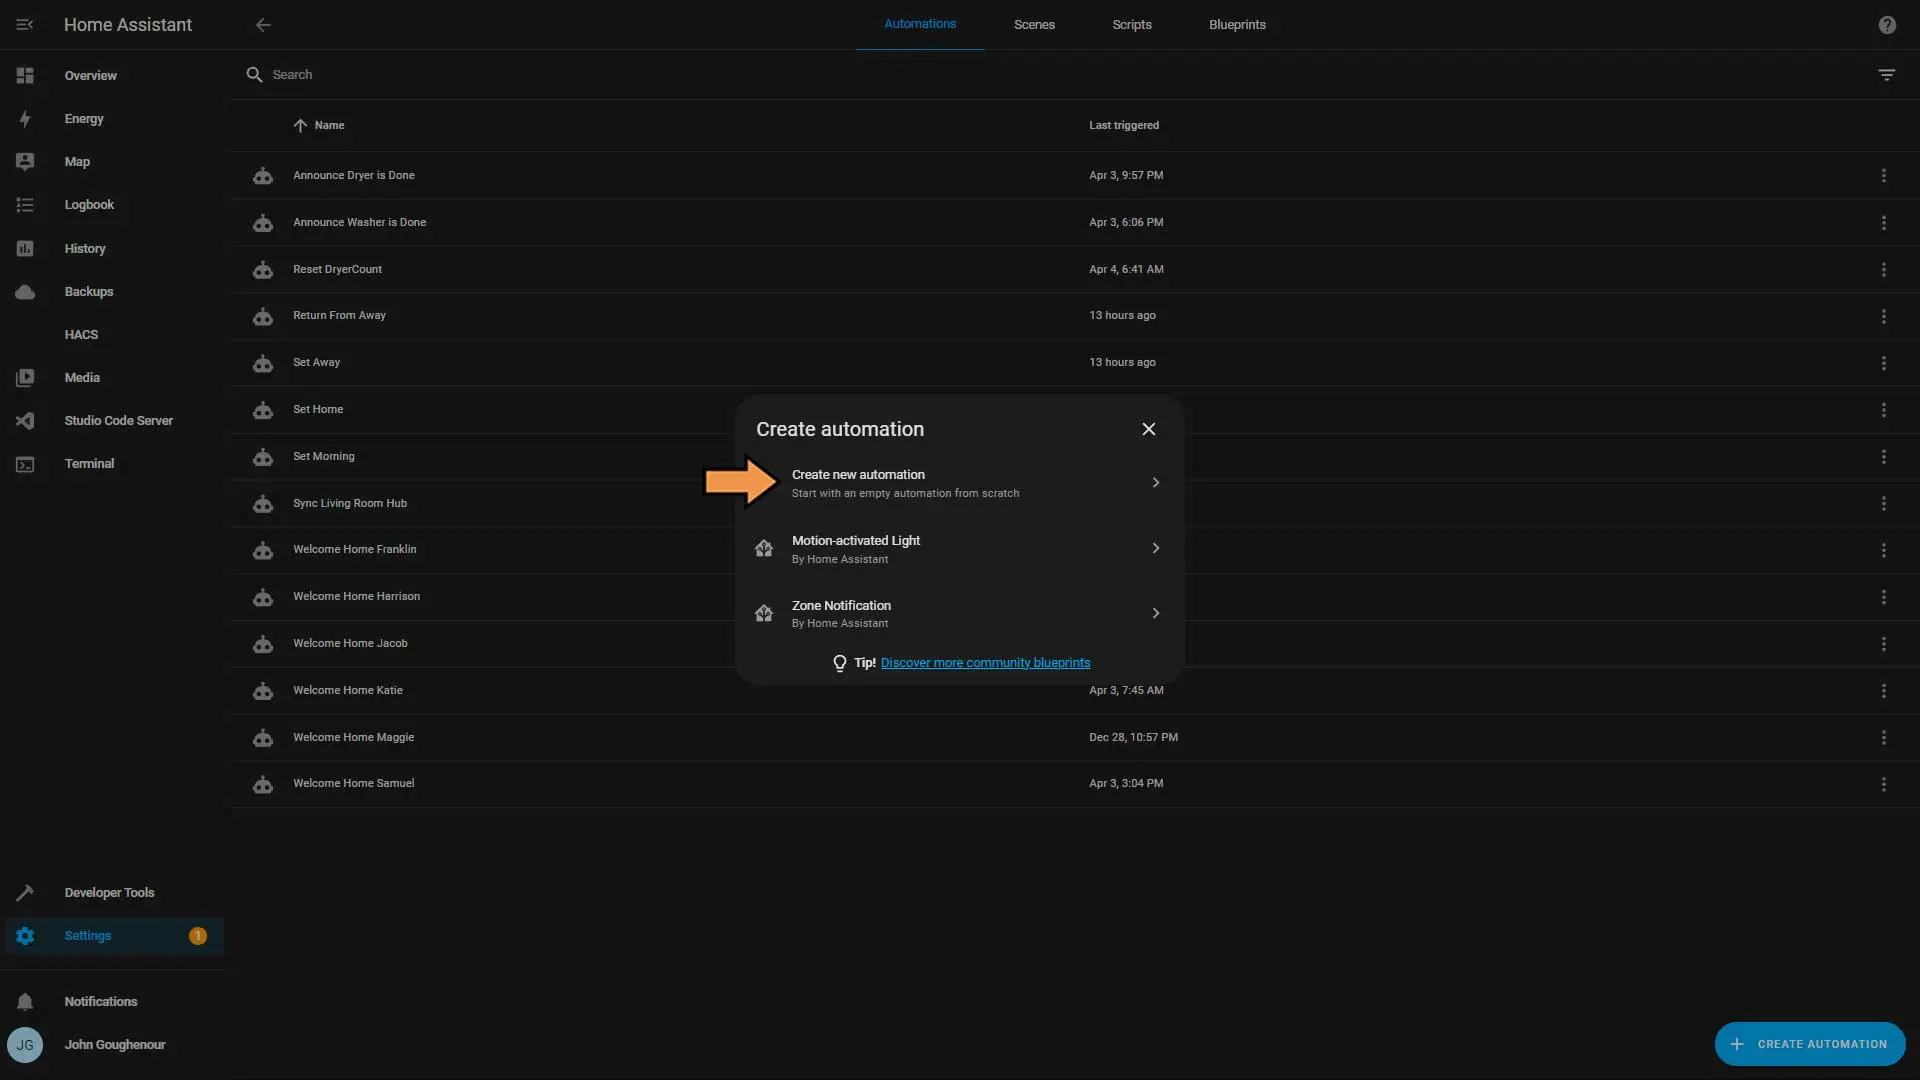
Choose Create new automation.
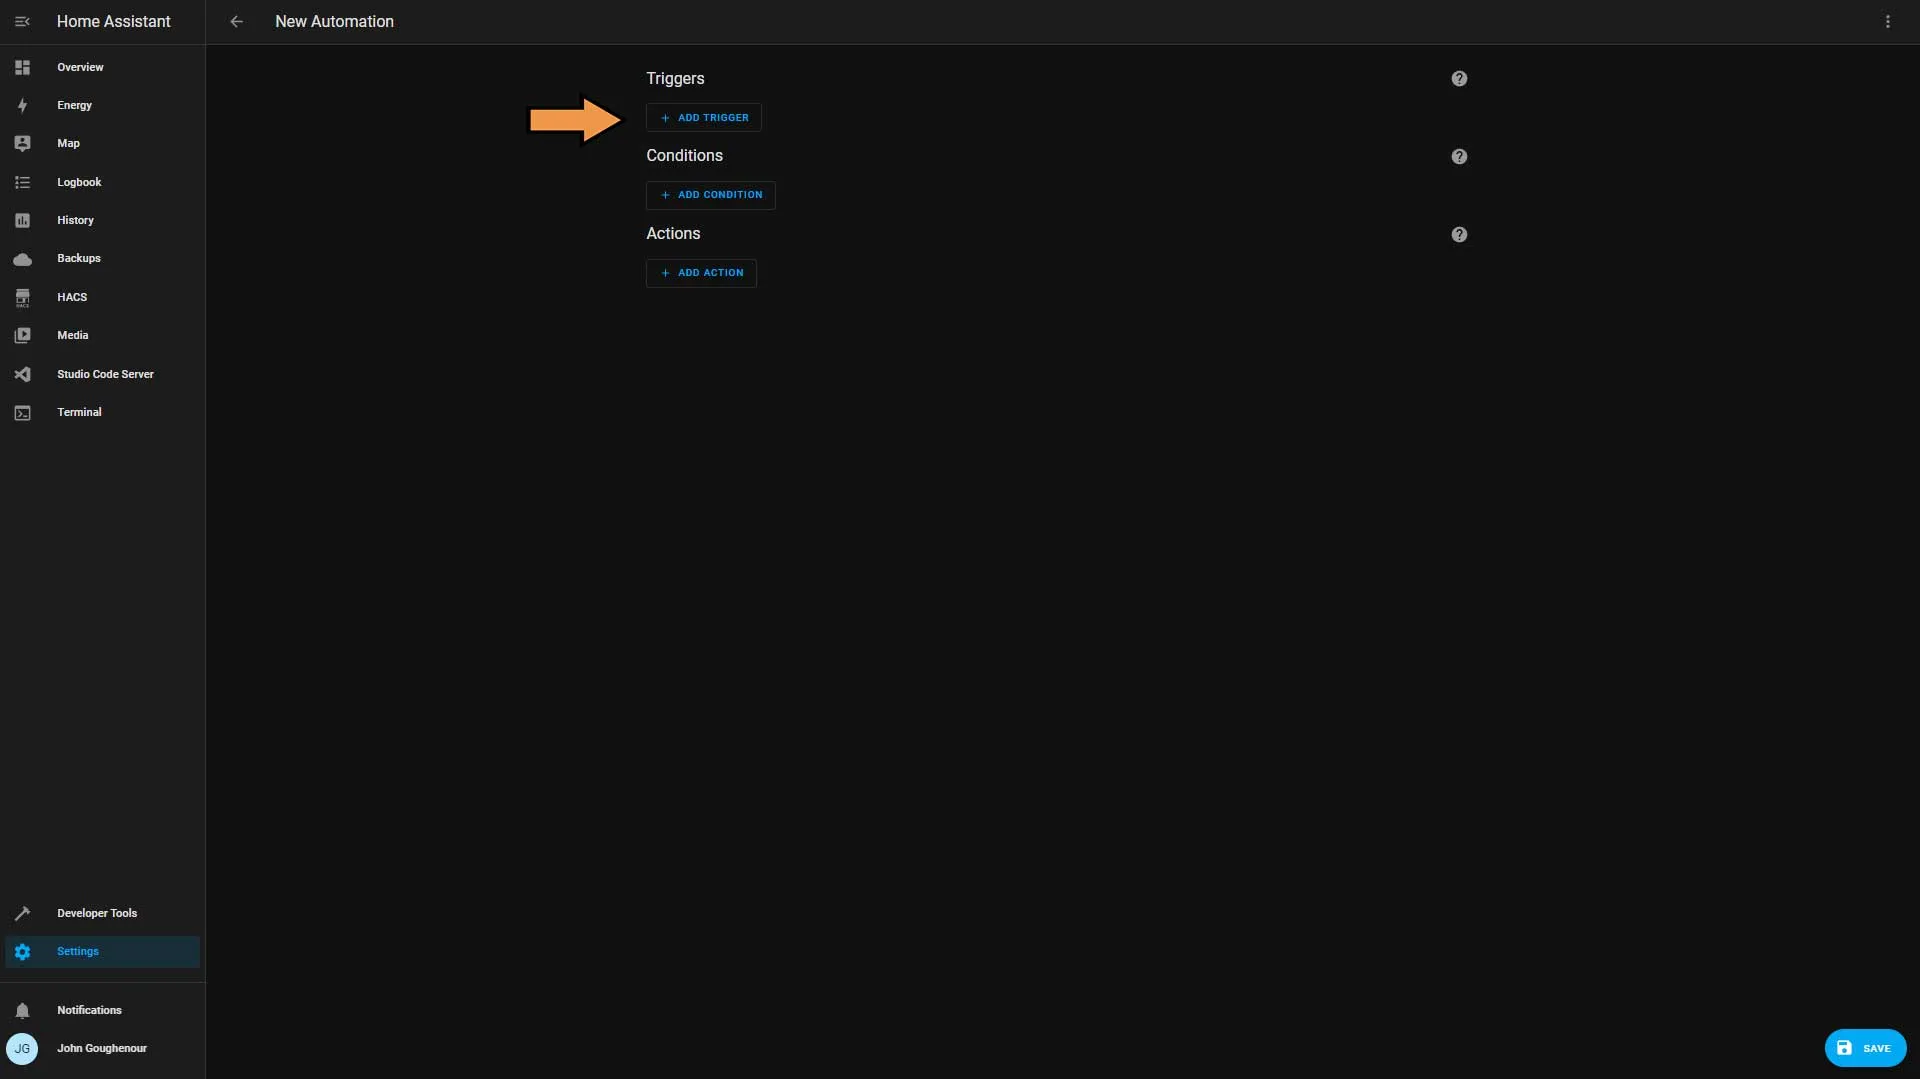
Click Add Trigger.
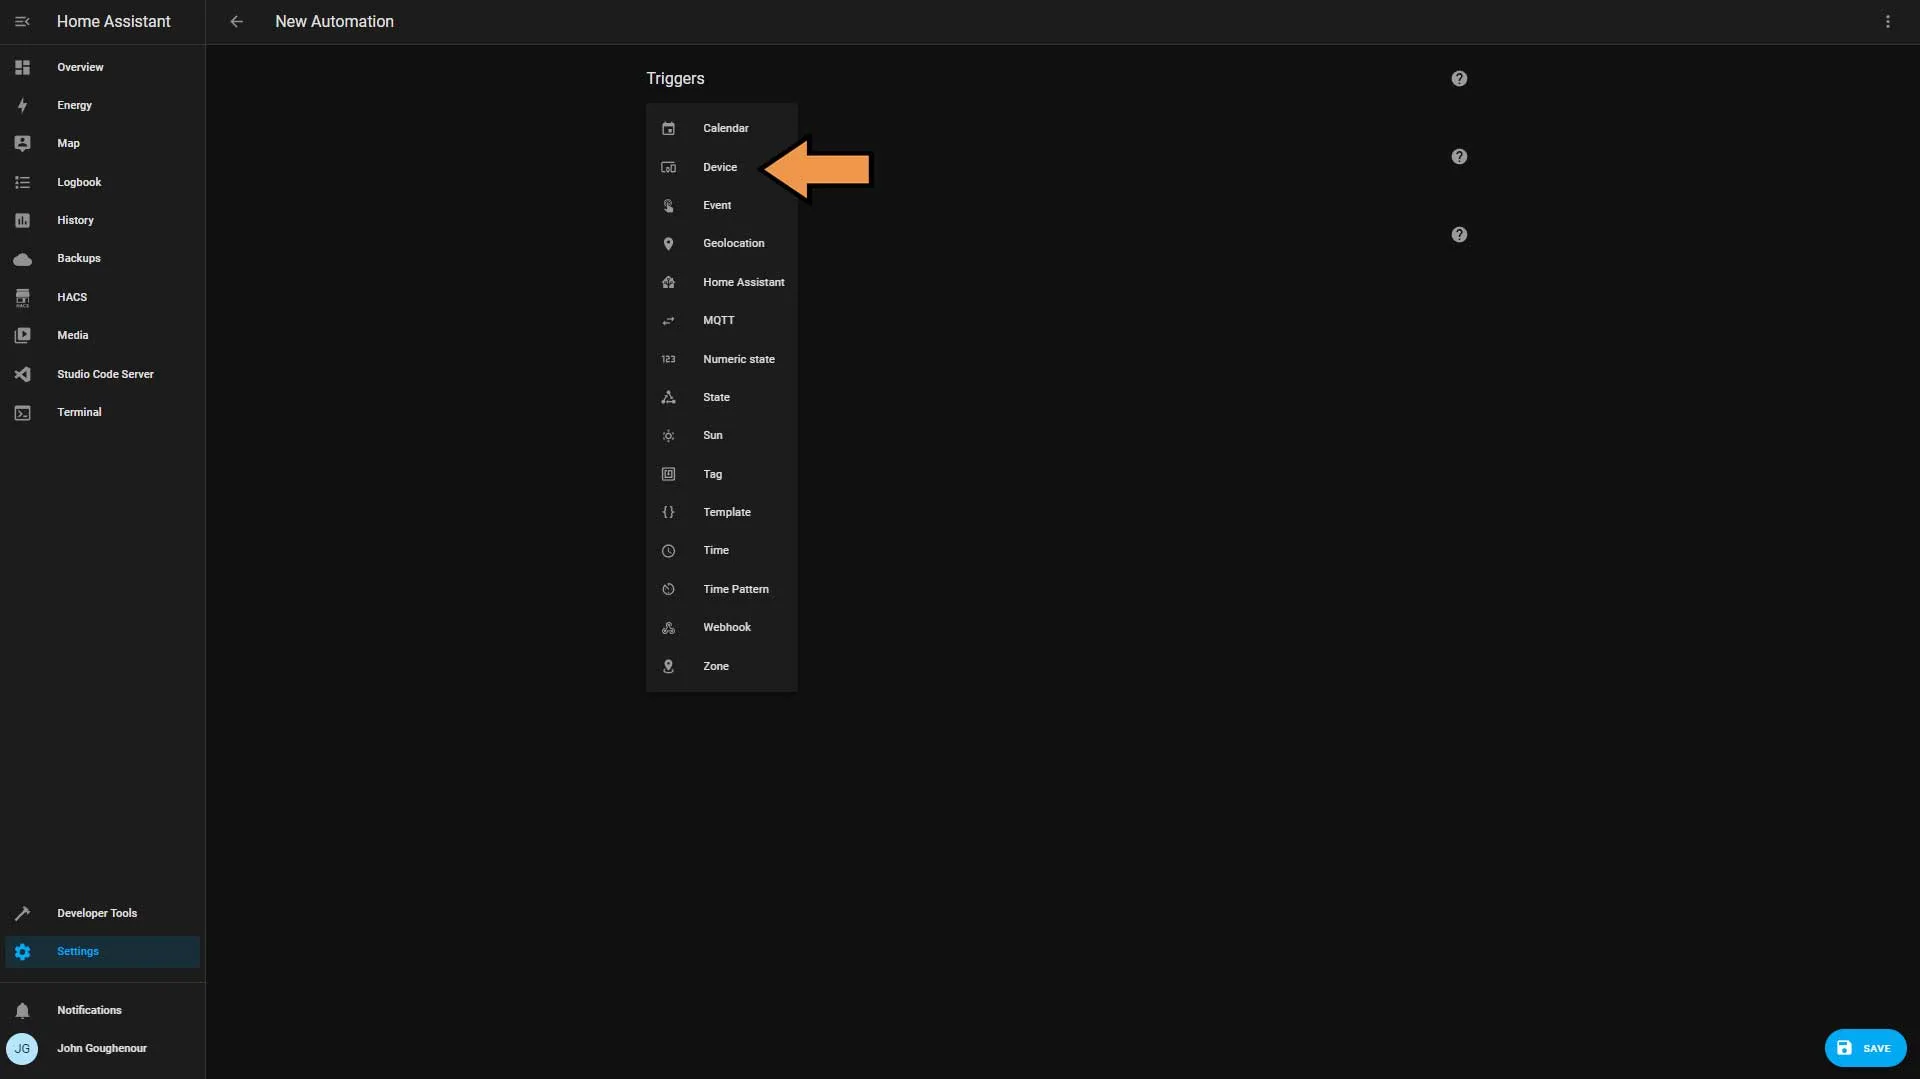
From the list, select Device.
In the Device section, choose our motion sensor, and for the Trigger drop-down, select Started detecting motion.

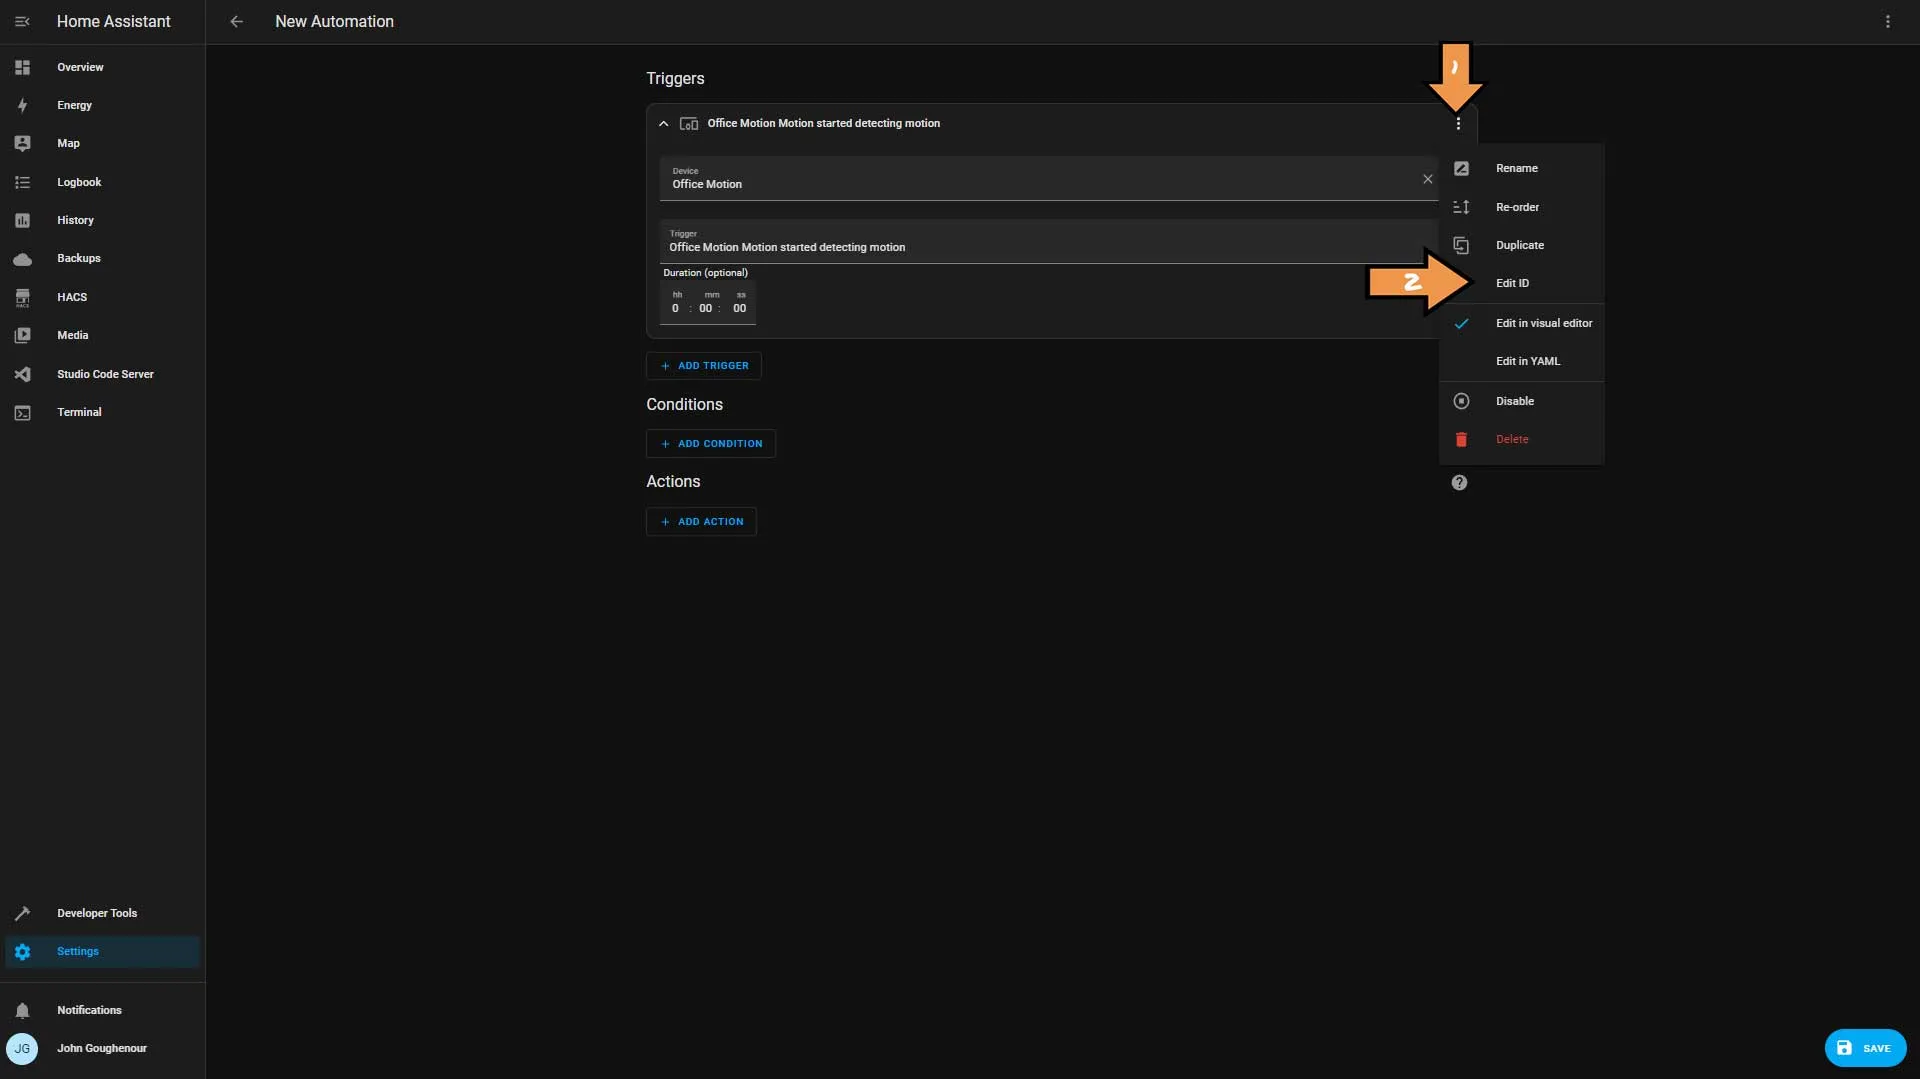
Click the vertical ellipse in the upper right-hand corner and select Edit ID.
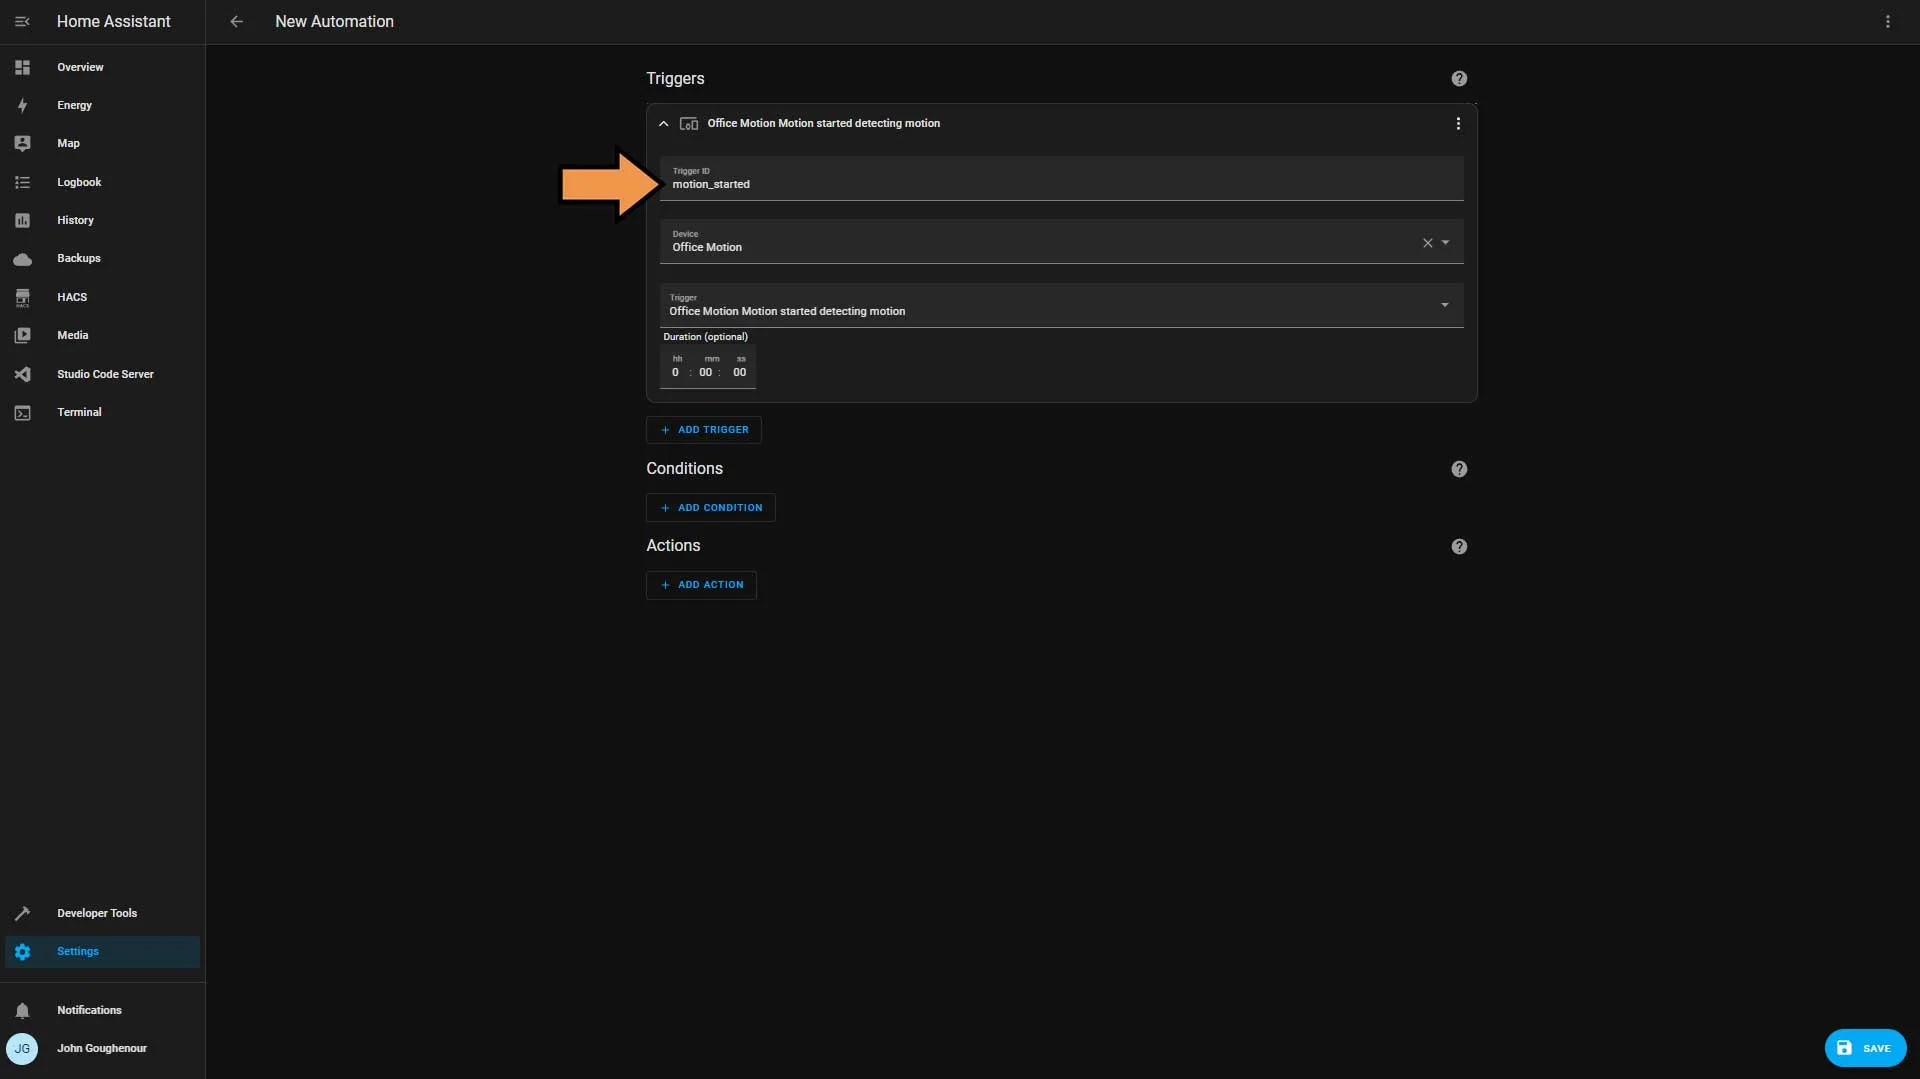
Add a Trigger ID. You can call it anything you like, but we’ll use motion_started.
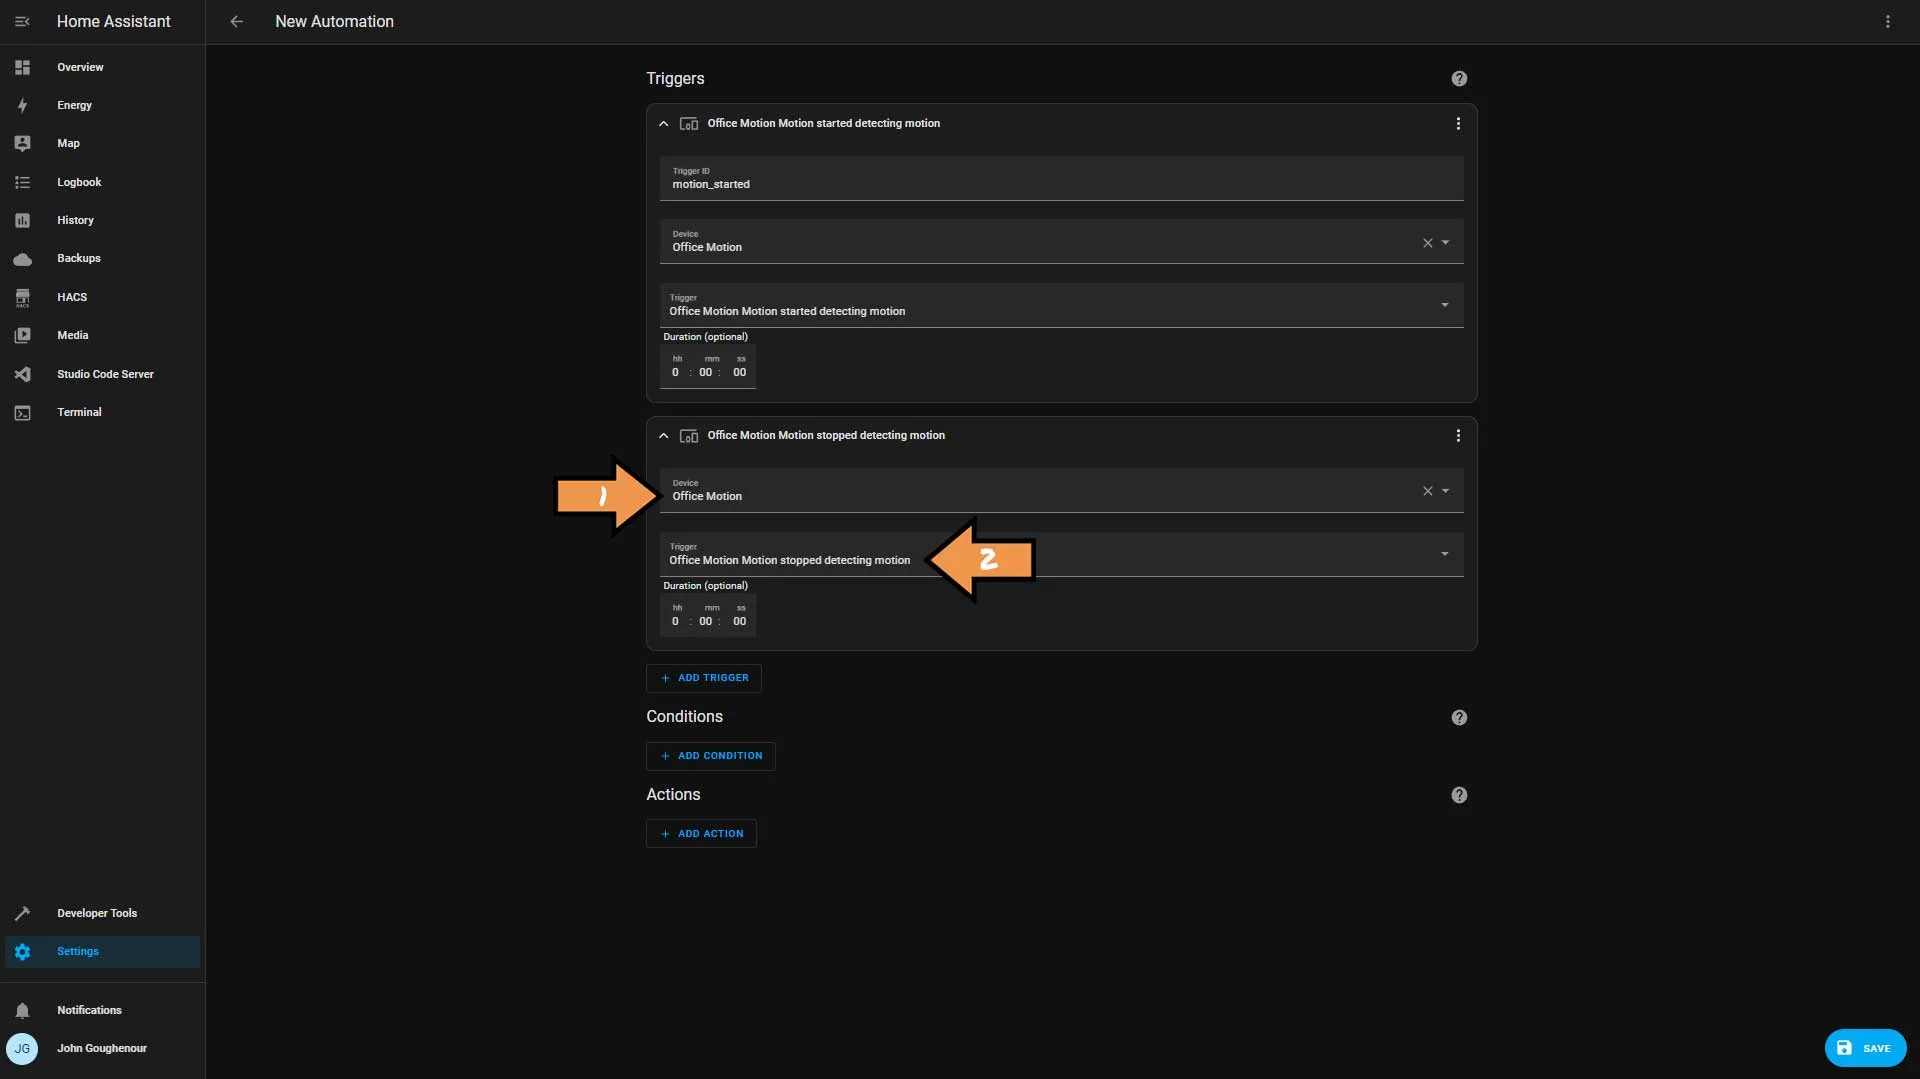
Now add a second trigger using the same motion sensor but using the Stopped detecting motion Trigger.
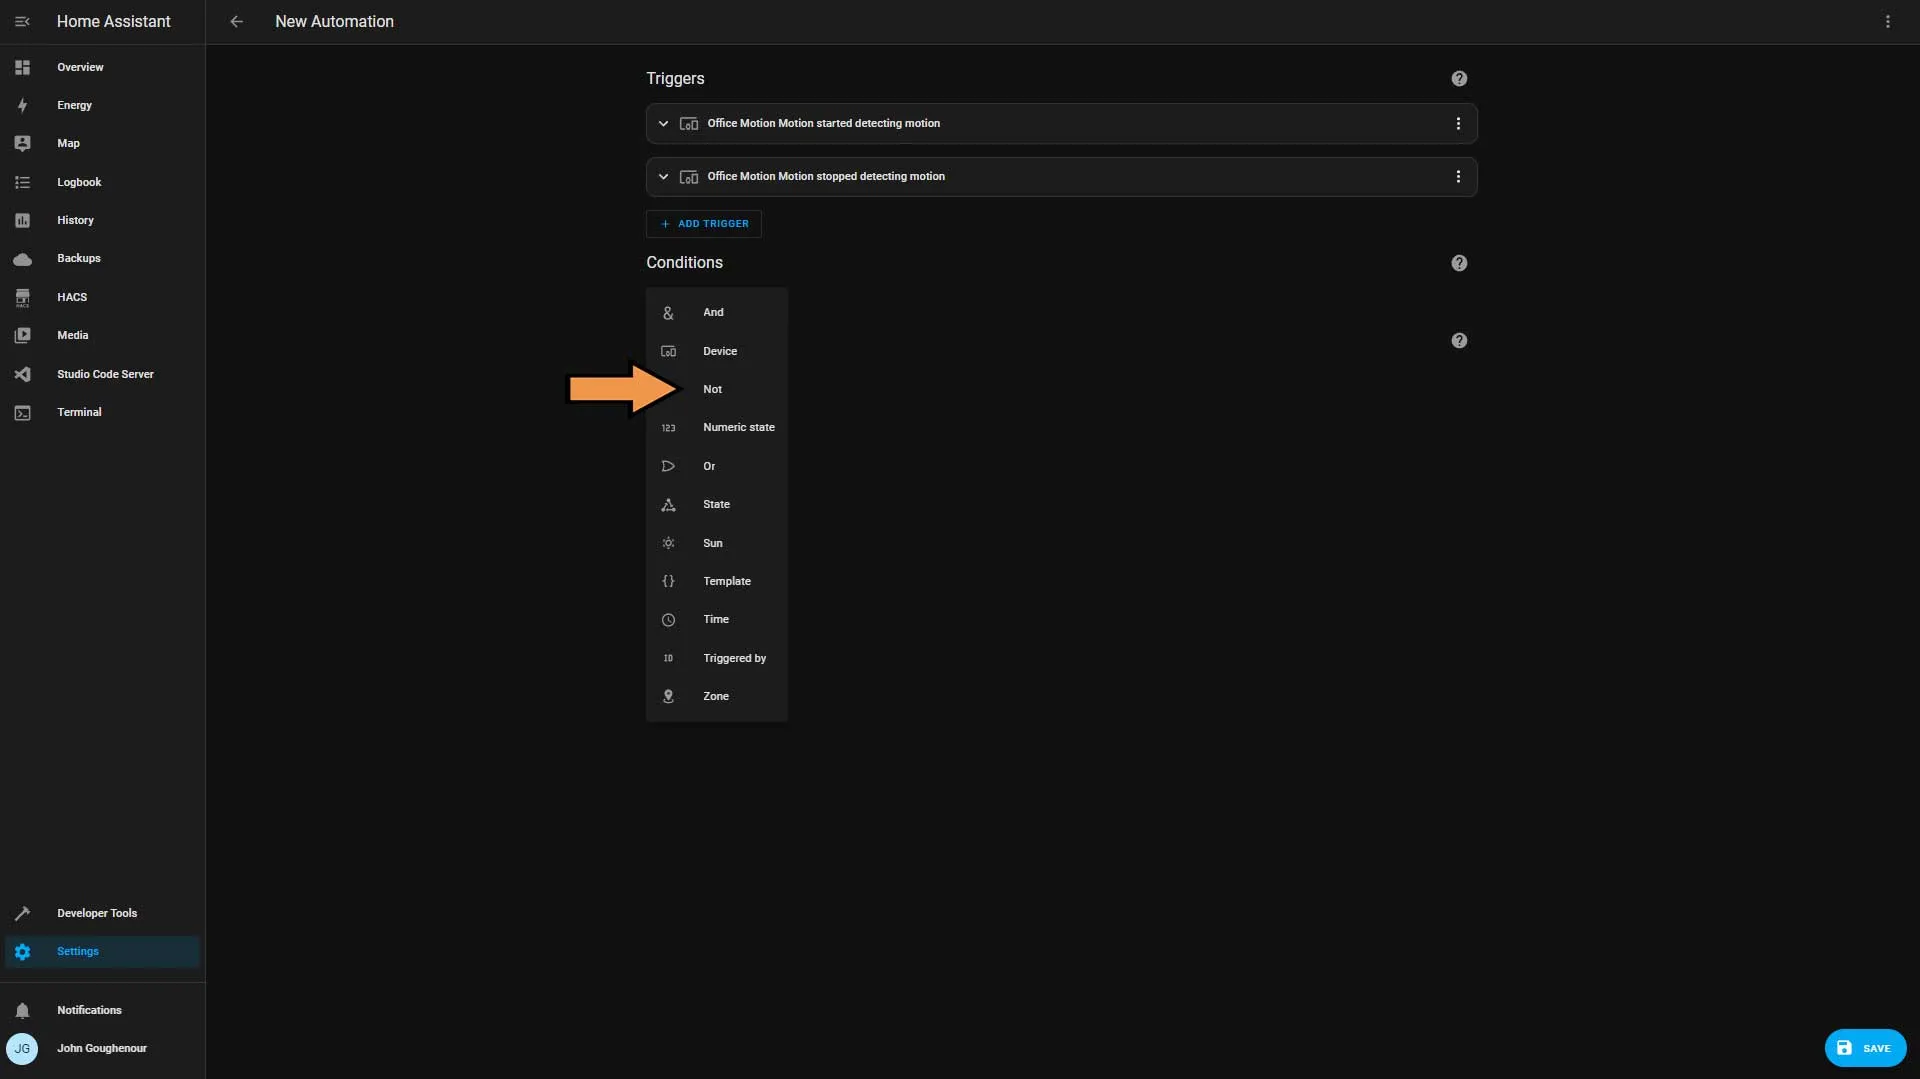
Click the Add Condition button and select Not from the list.
Click the Add Condition button and select State from the list.
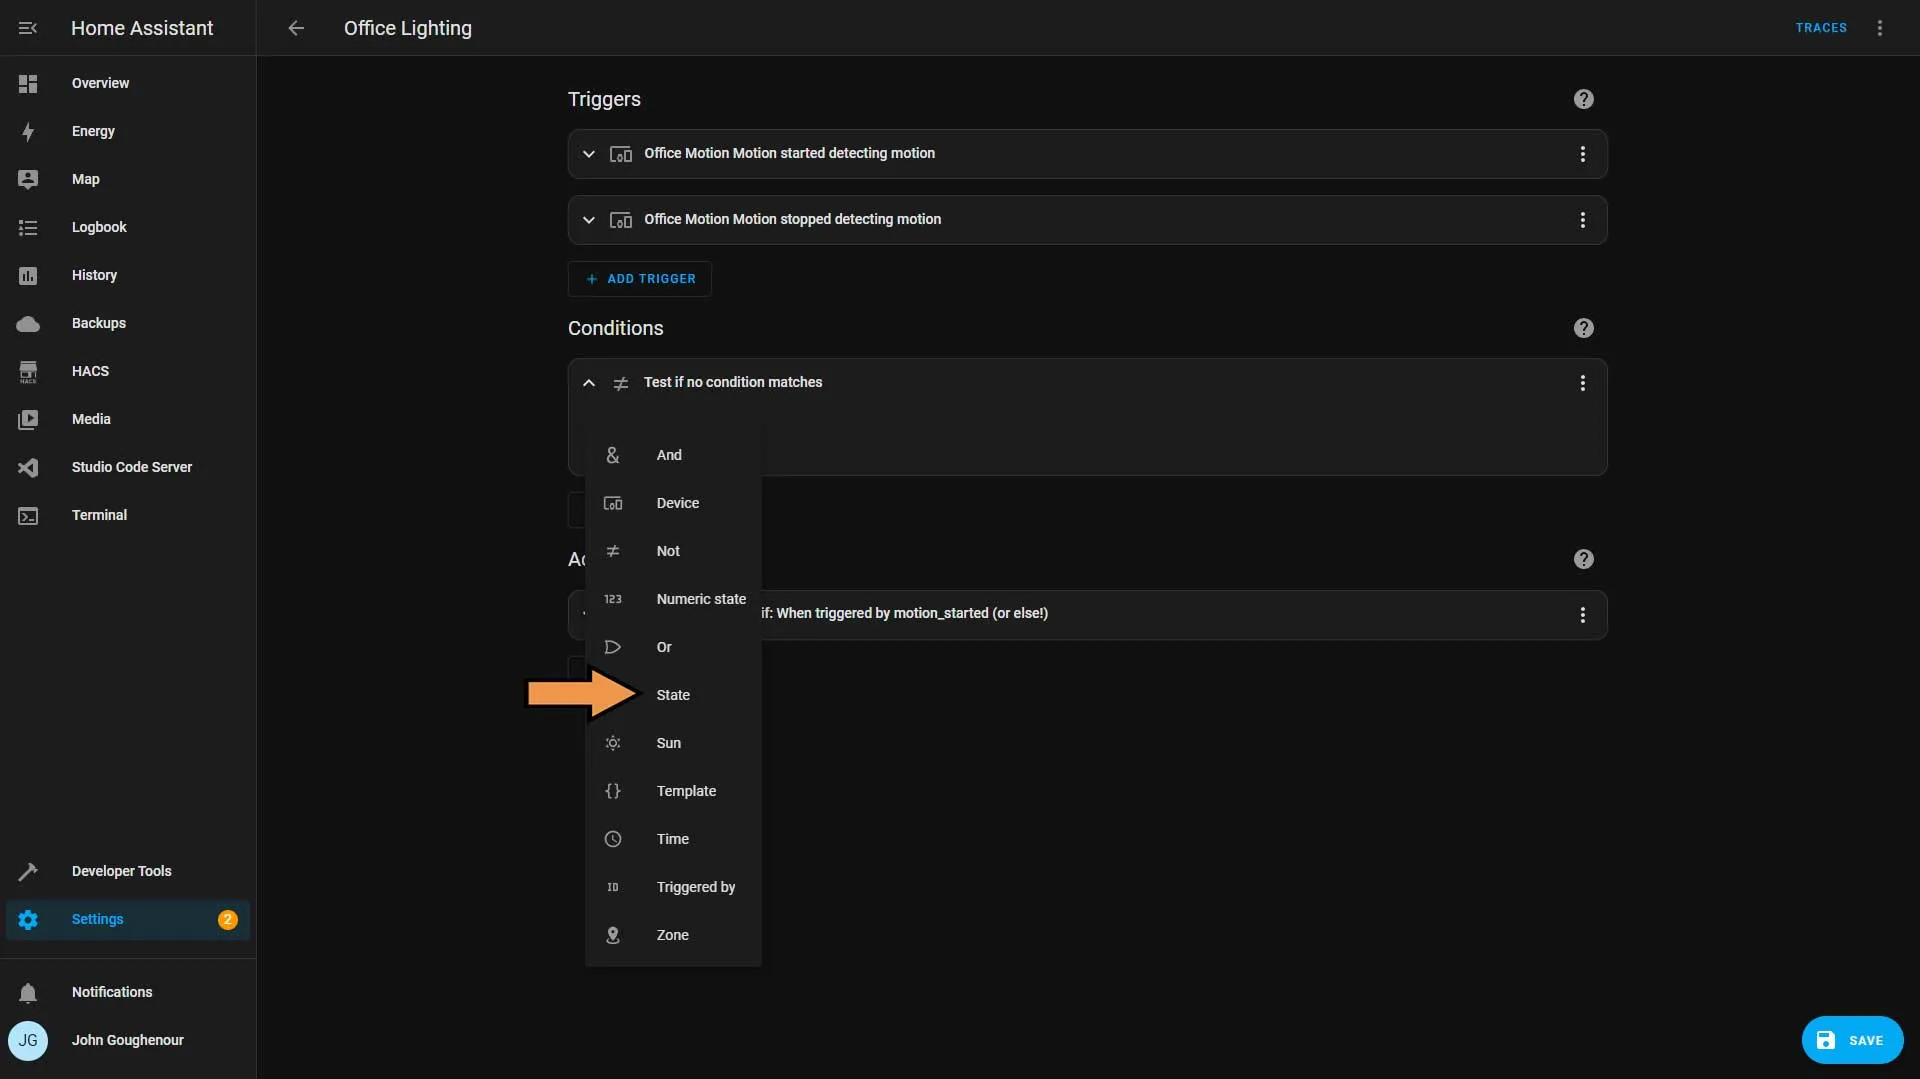
In the Entity drop-down, select Mode, and then in the State drop-down, select Away.
† Home Assistant doesn’t have any native way of handling Hub Modes, but you can read Hub Modes to learn how to set it up.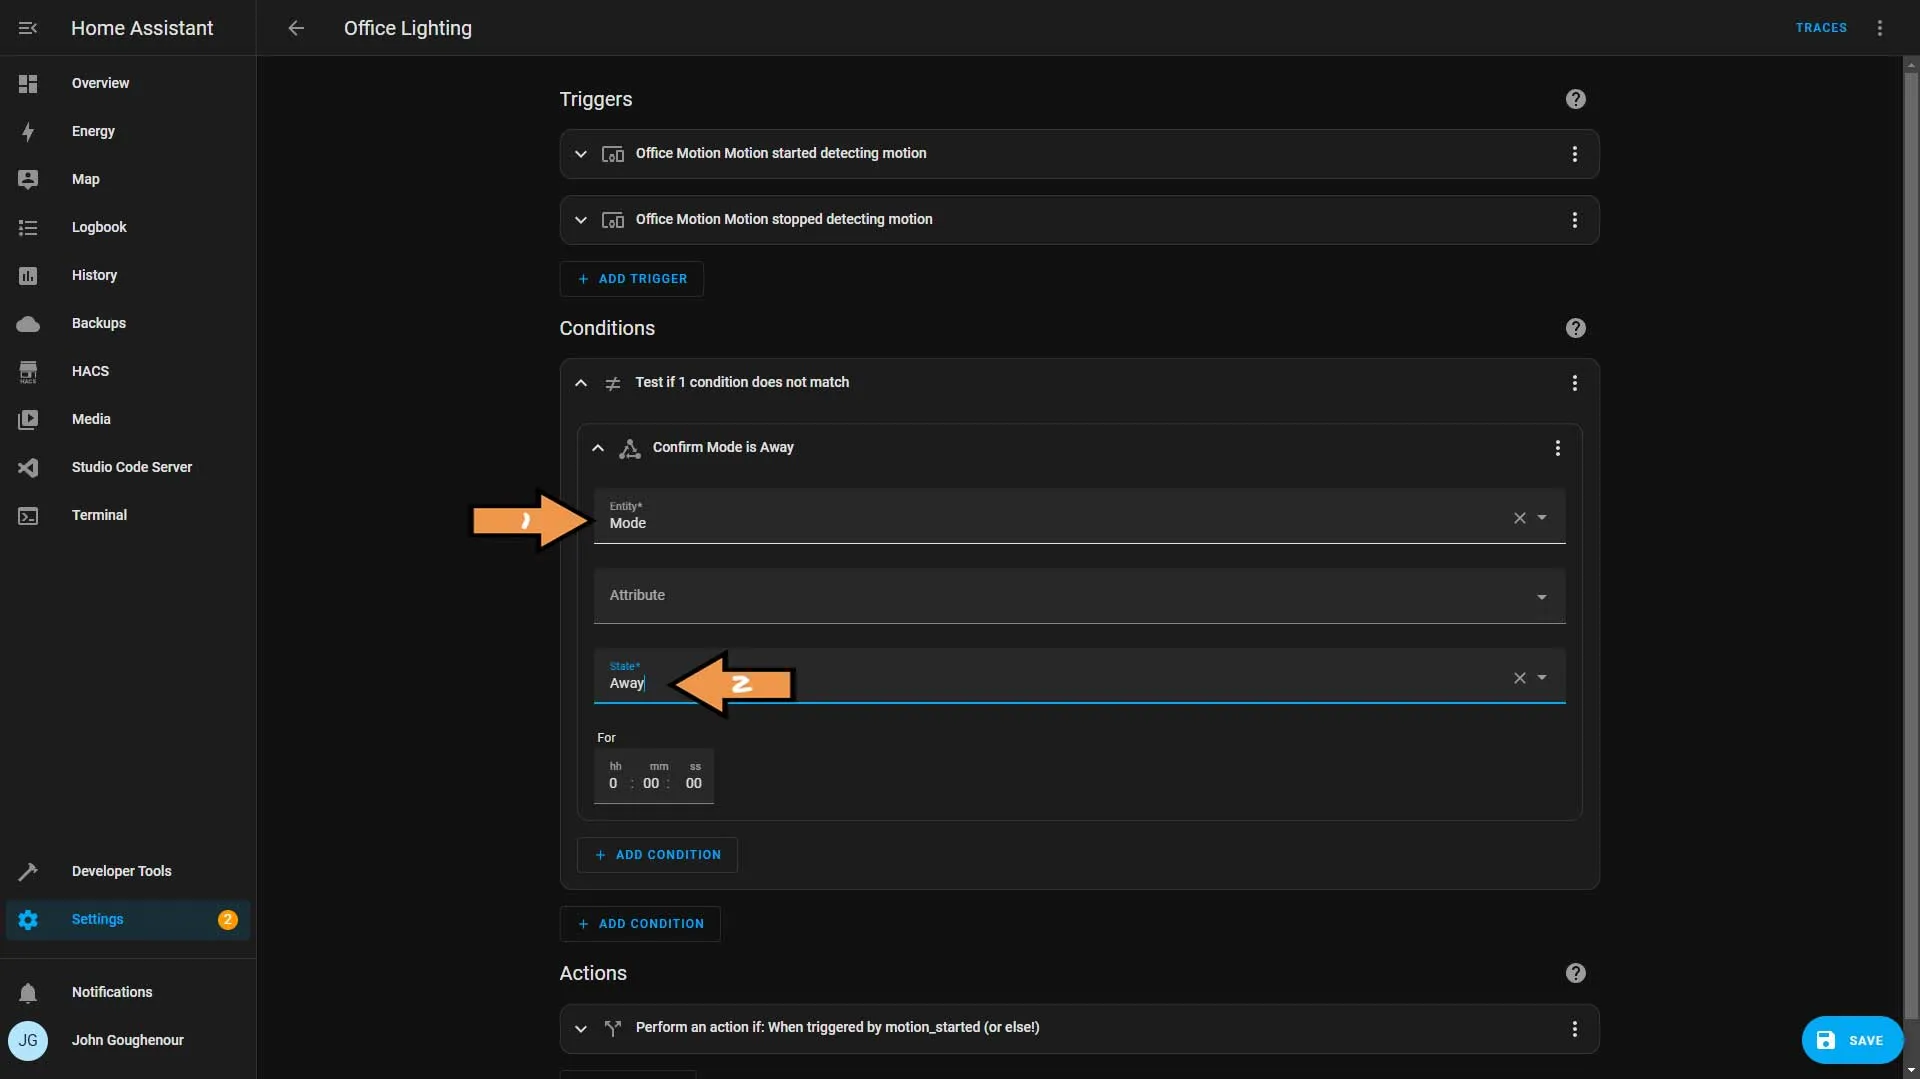
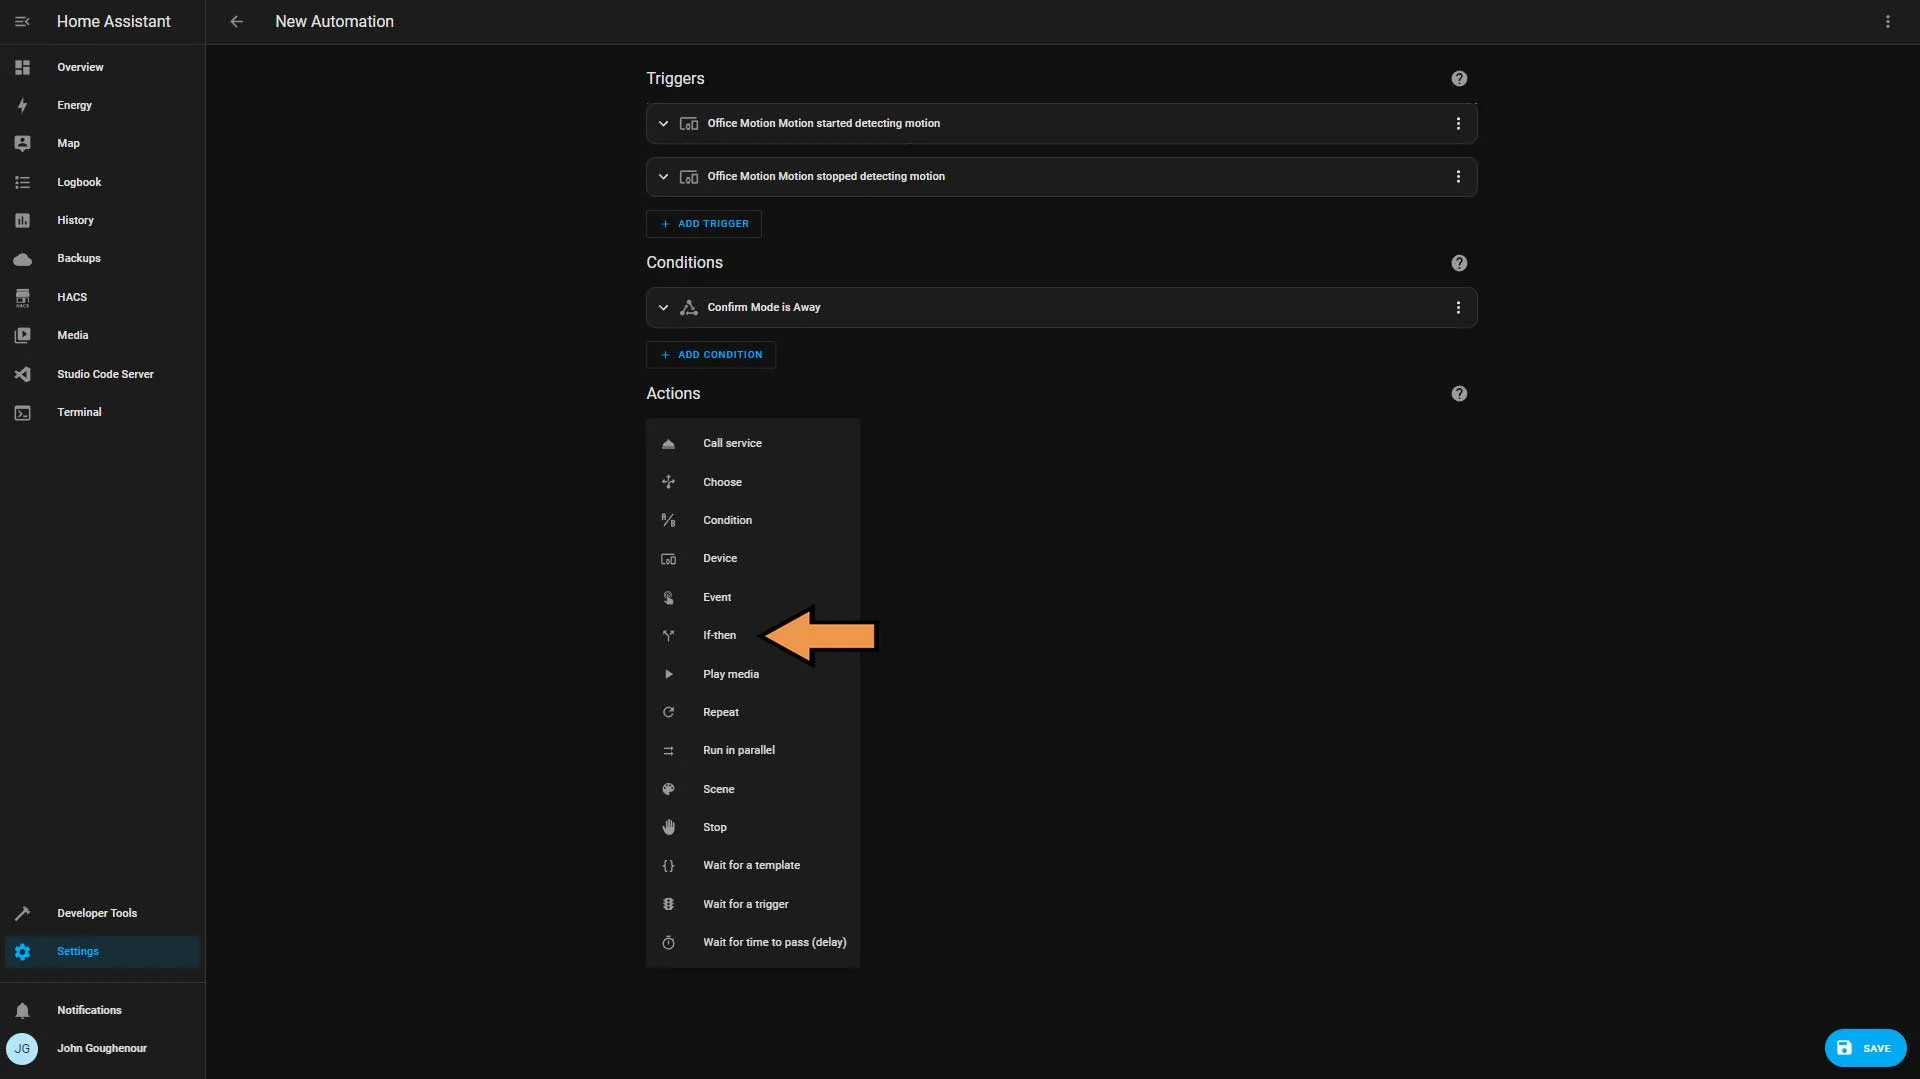
Next, click the Add Action Button and select If-then from the list.
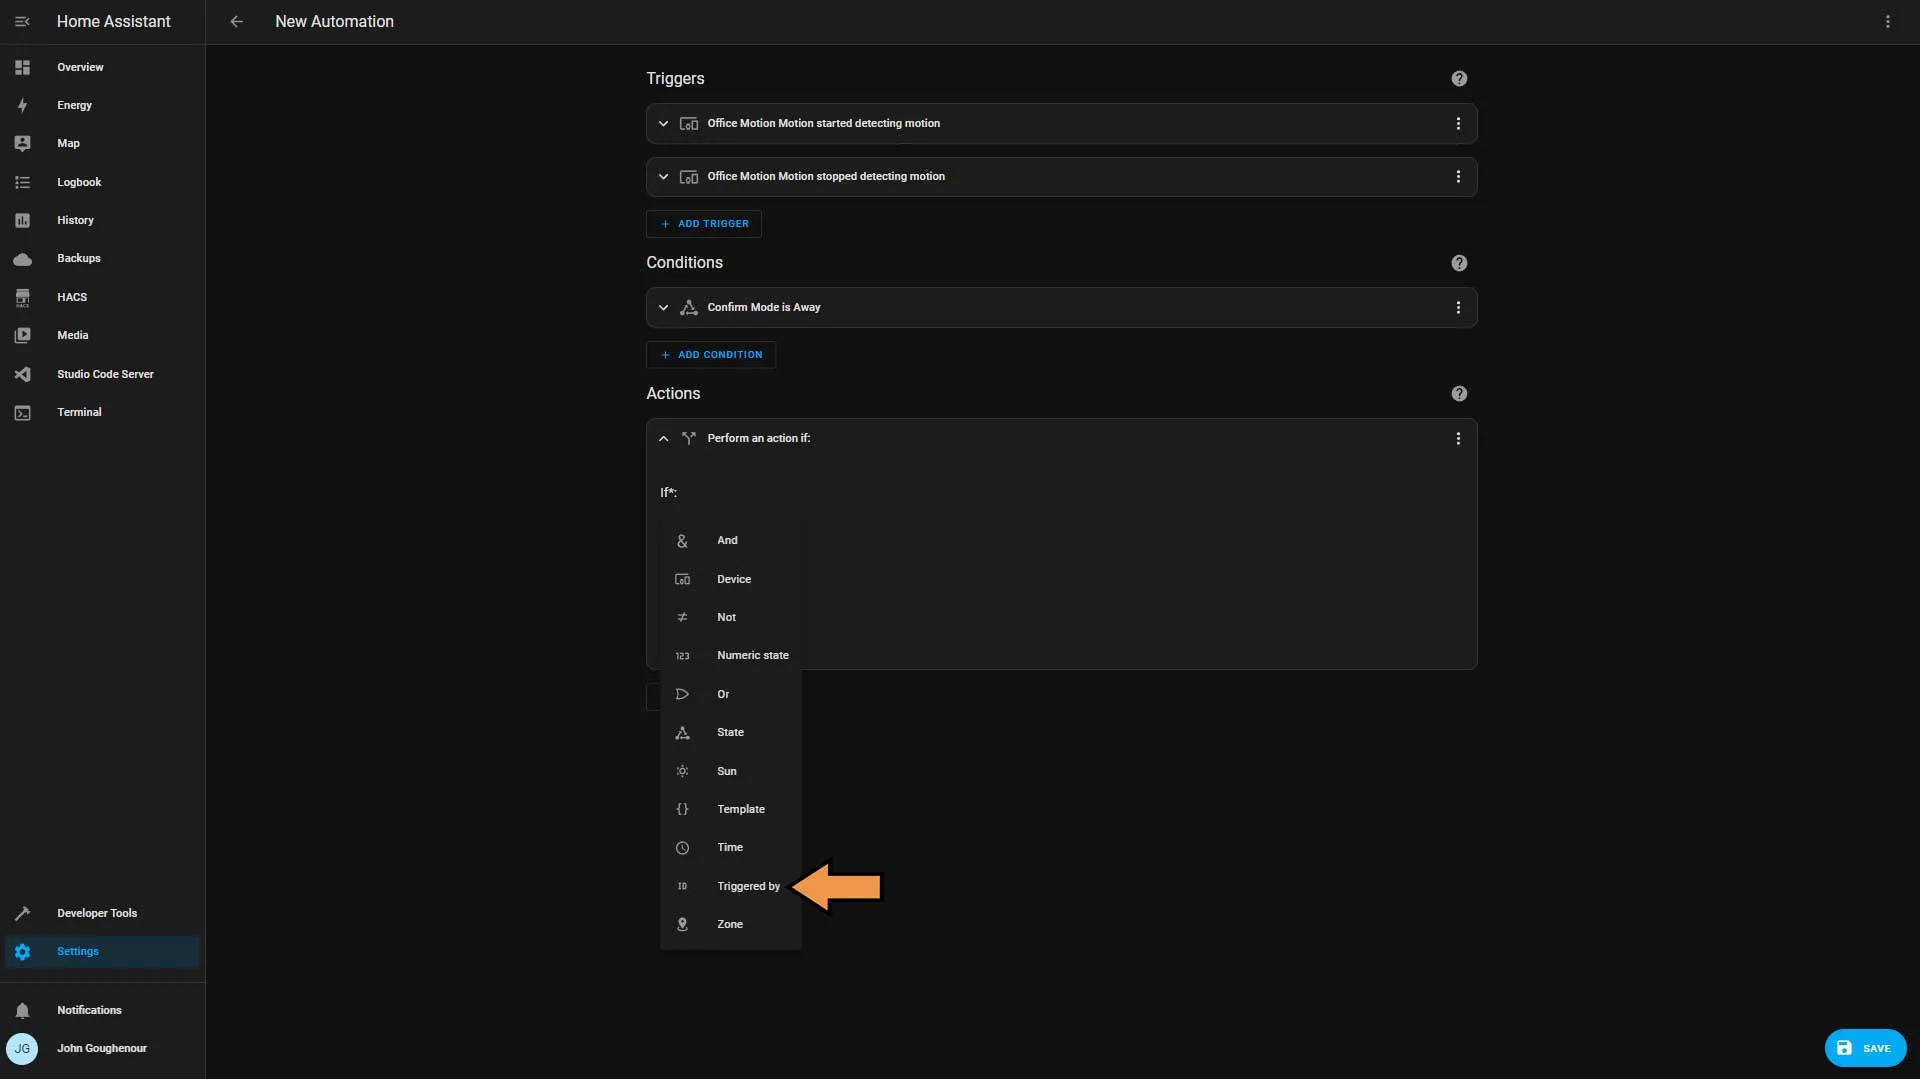
Click the Add Condition button within the if statement and select Triggered by from the list.
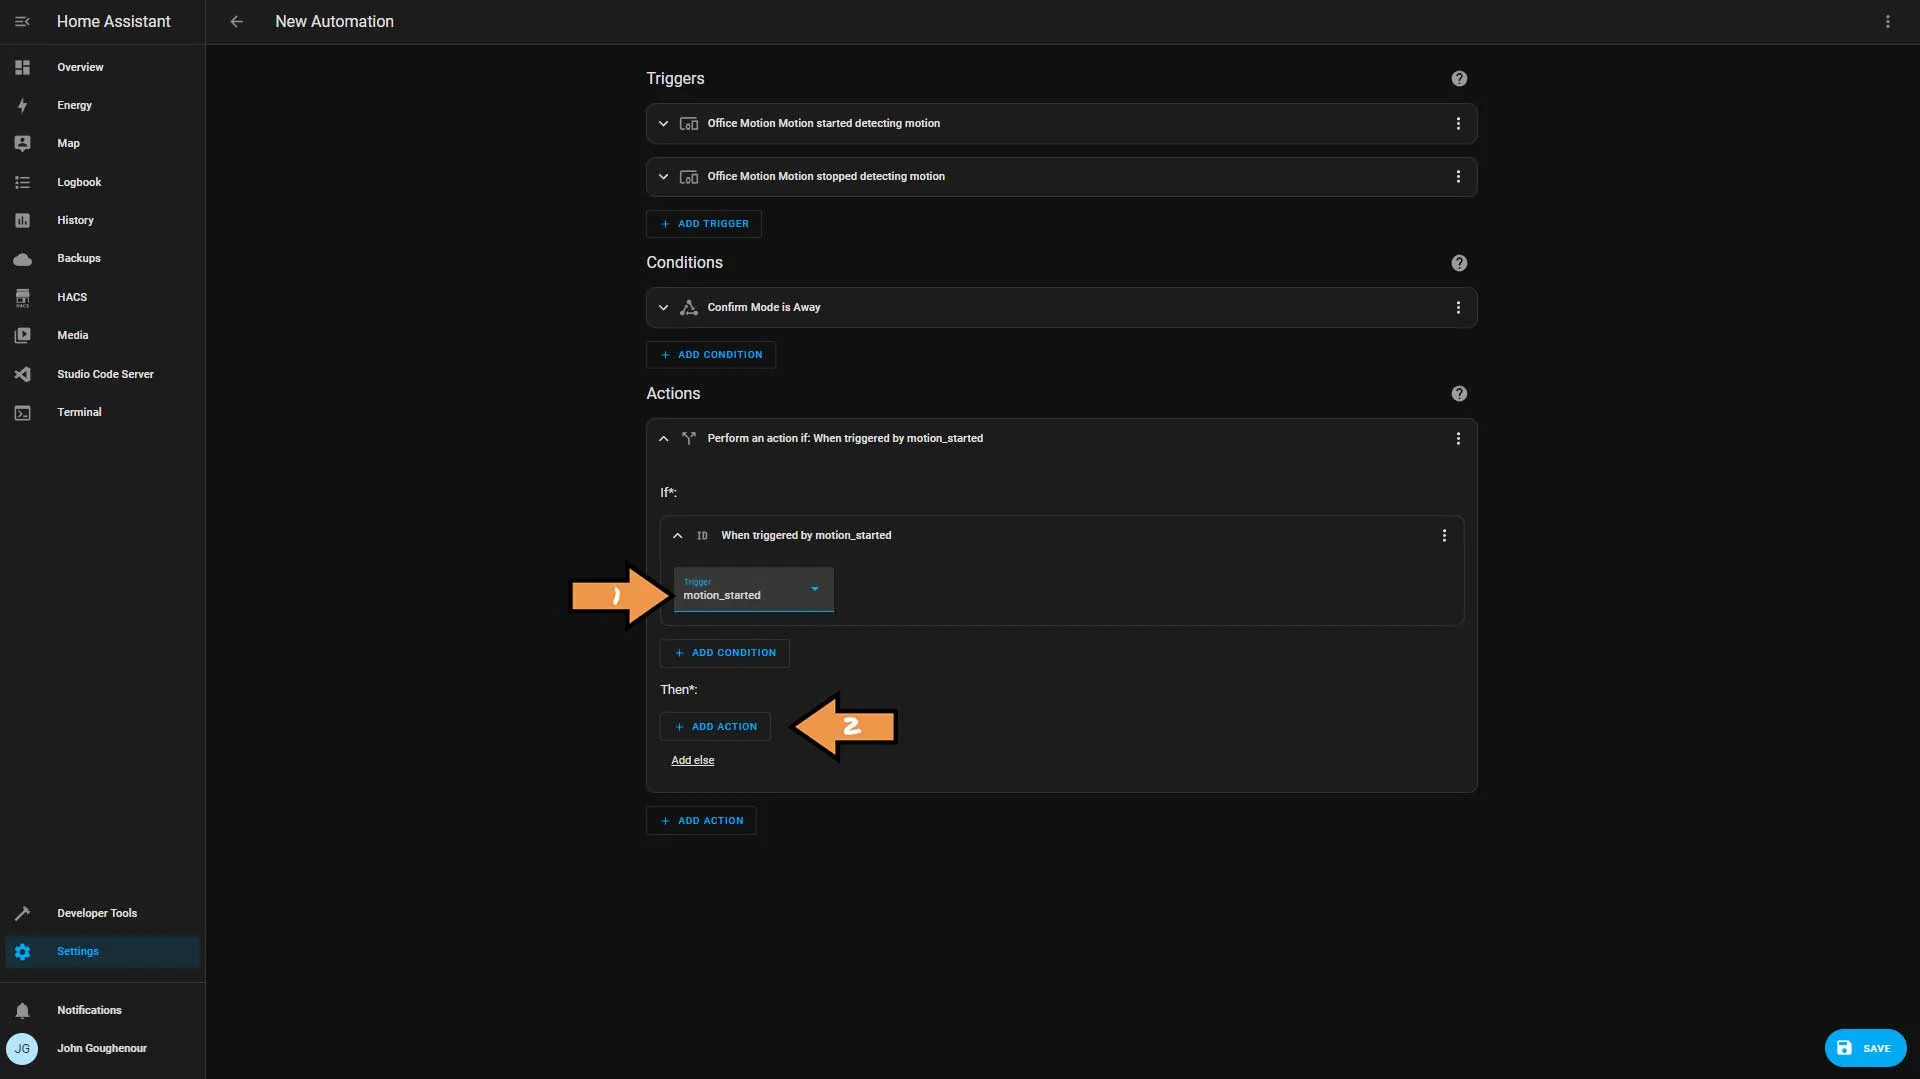
Select the ID we created earlier and then click the Add Action button.
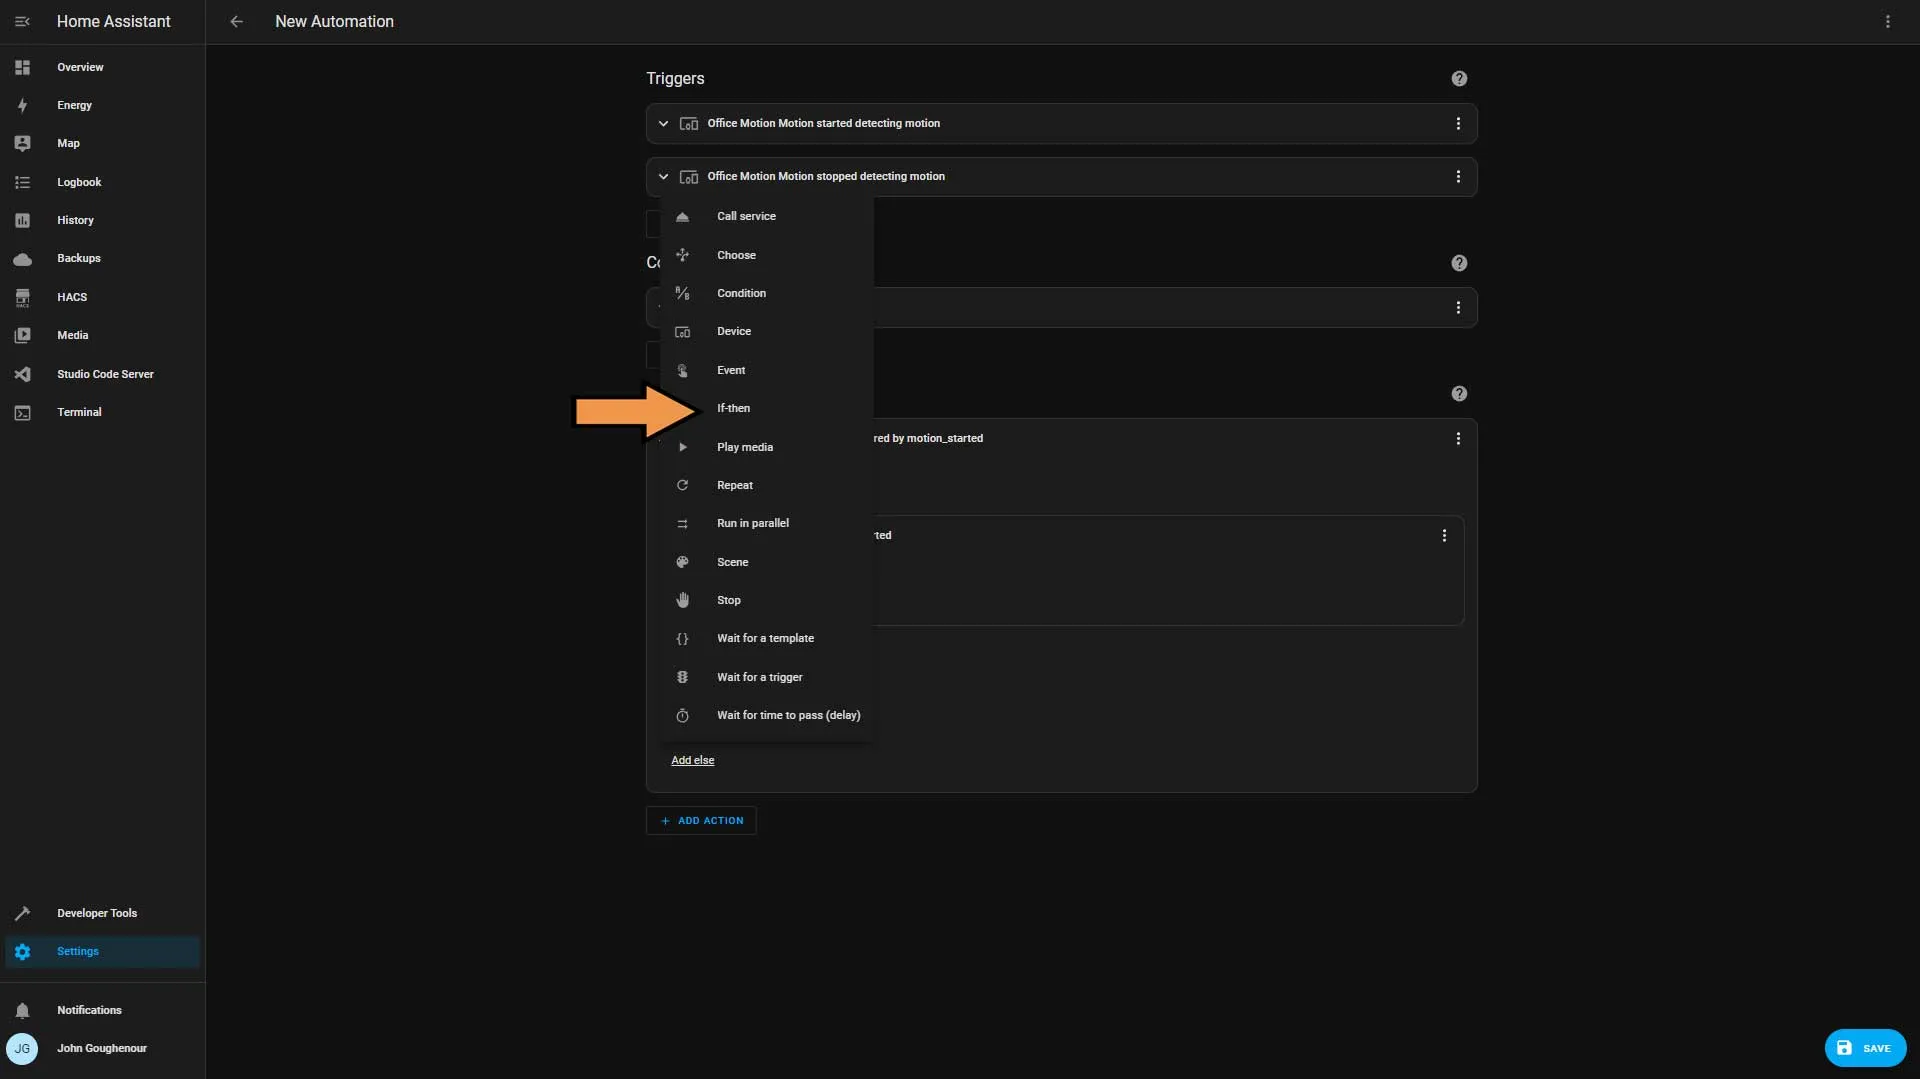
From the list, select the If-then option.
Click the Add Condition button within the if statement and select Or.
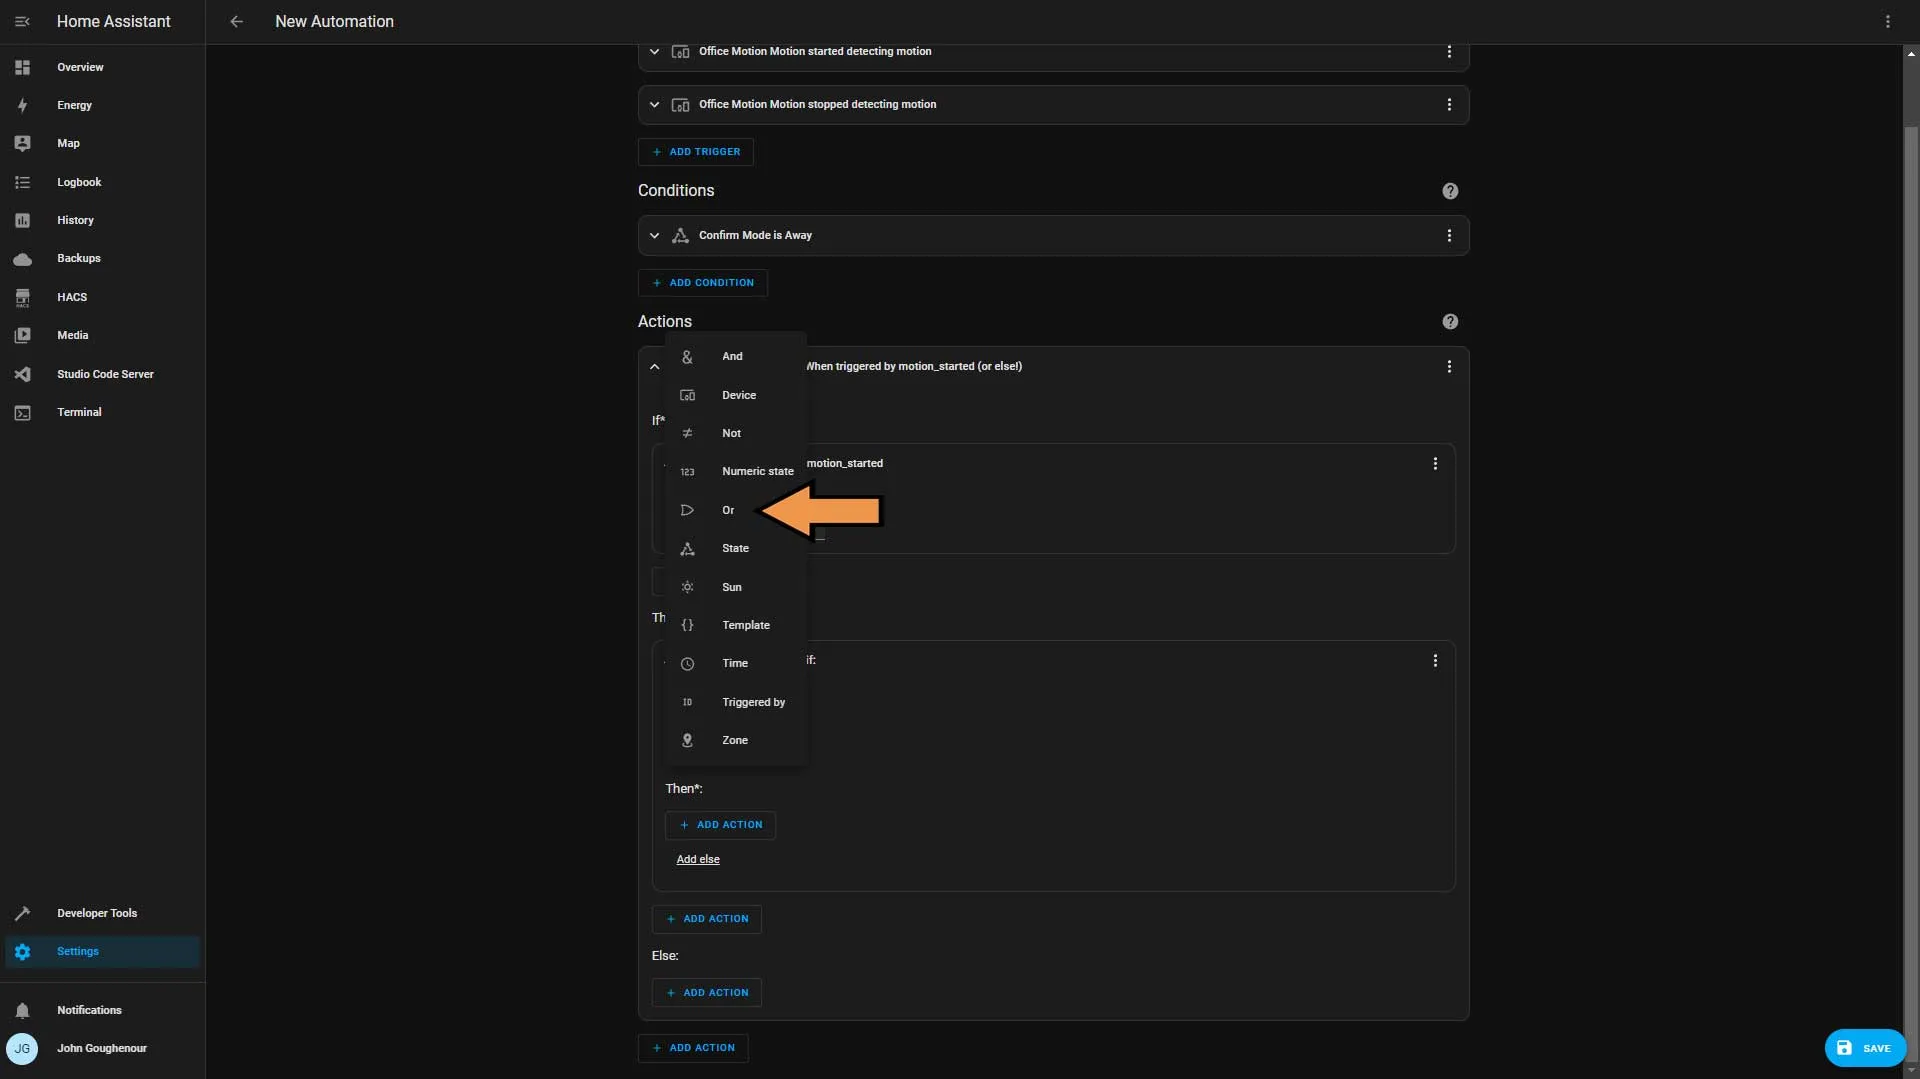
We will create two conditions, both being type State. One is for mode-morning, and the other is for mode-home. Then click the Add Action button.
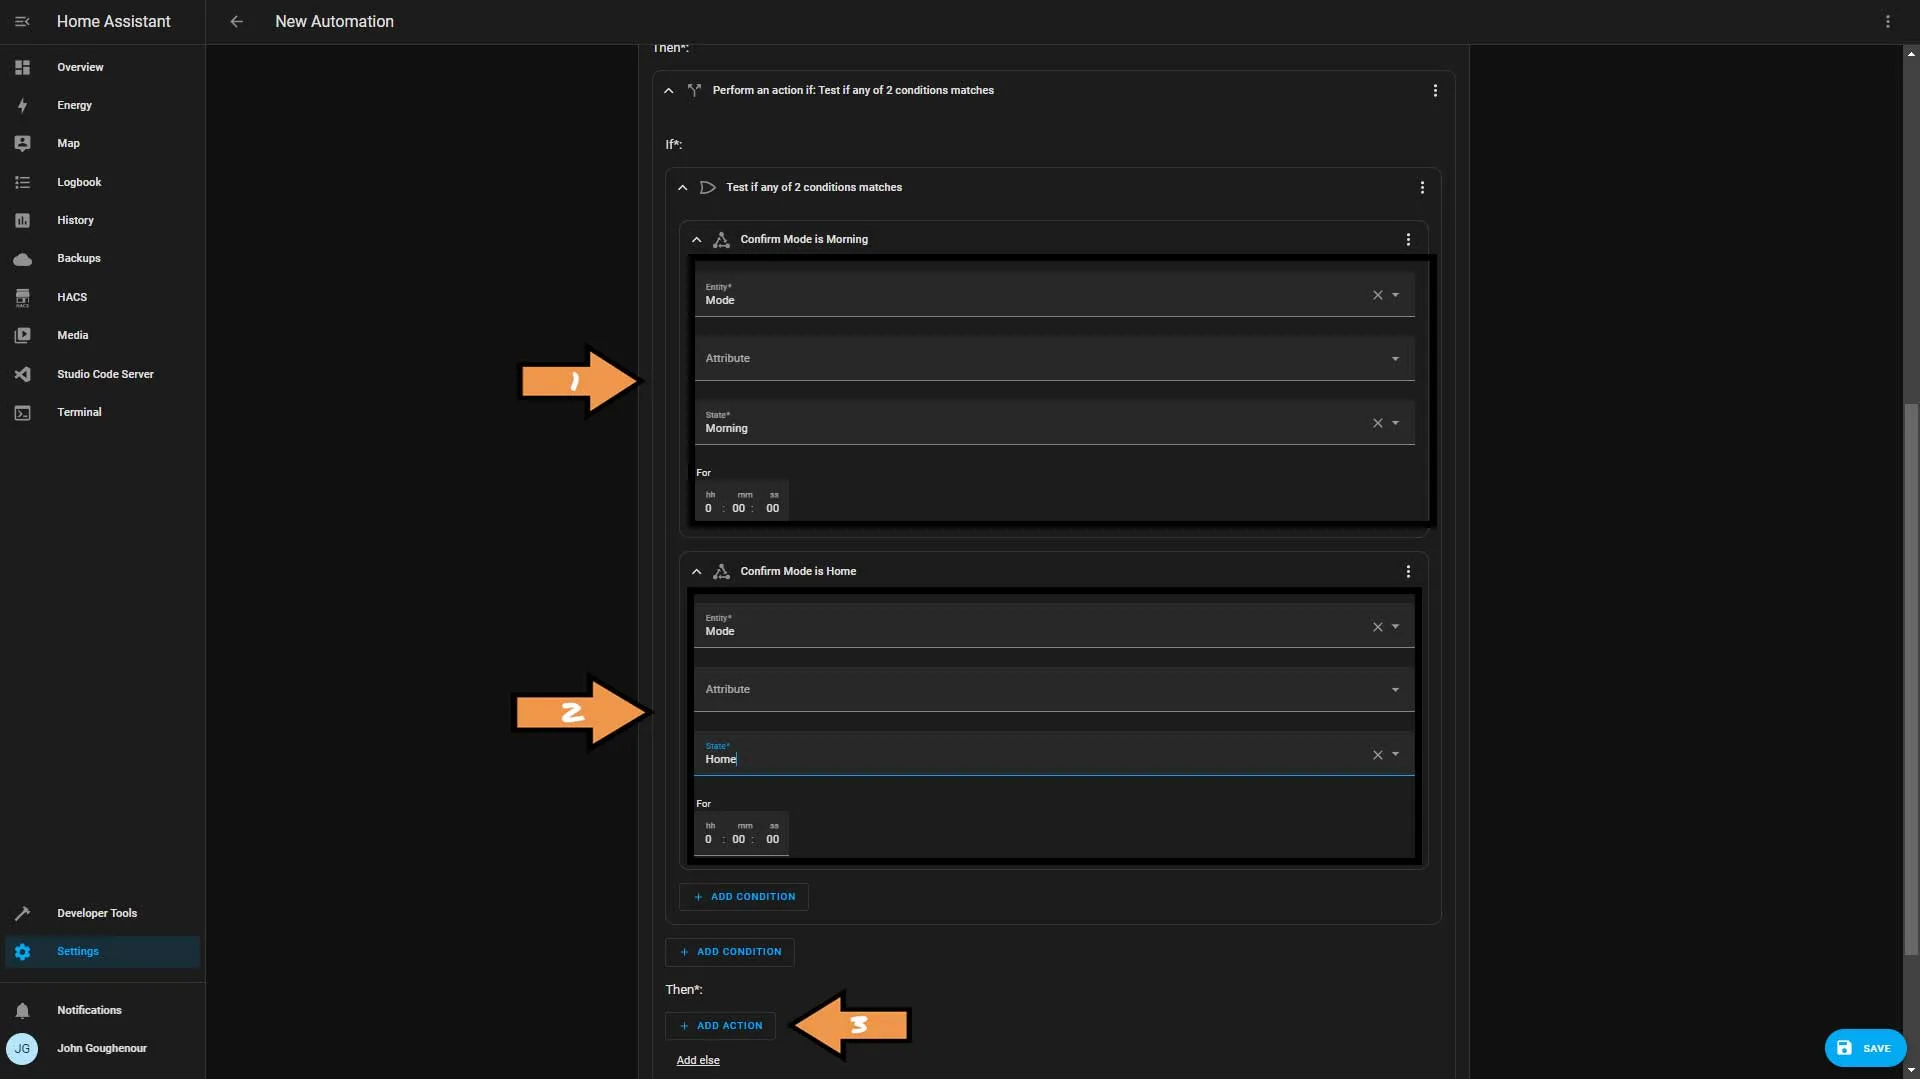
Select the Device option from the list.
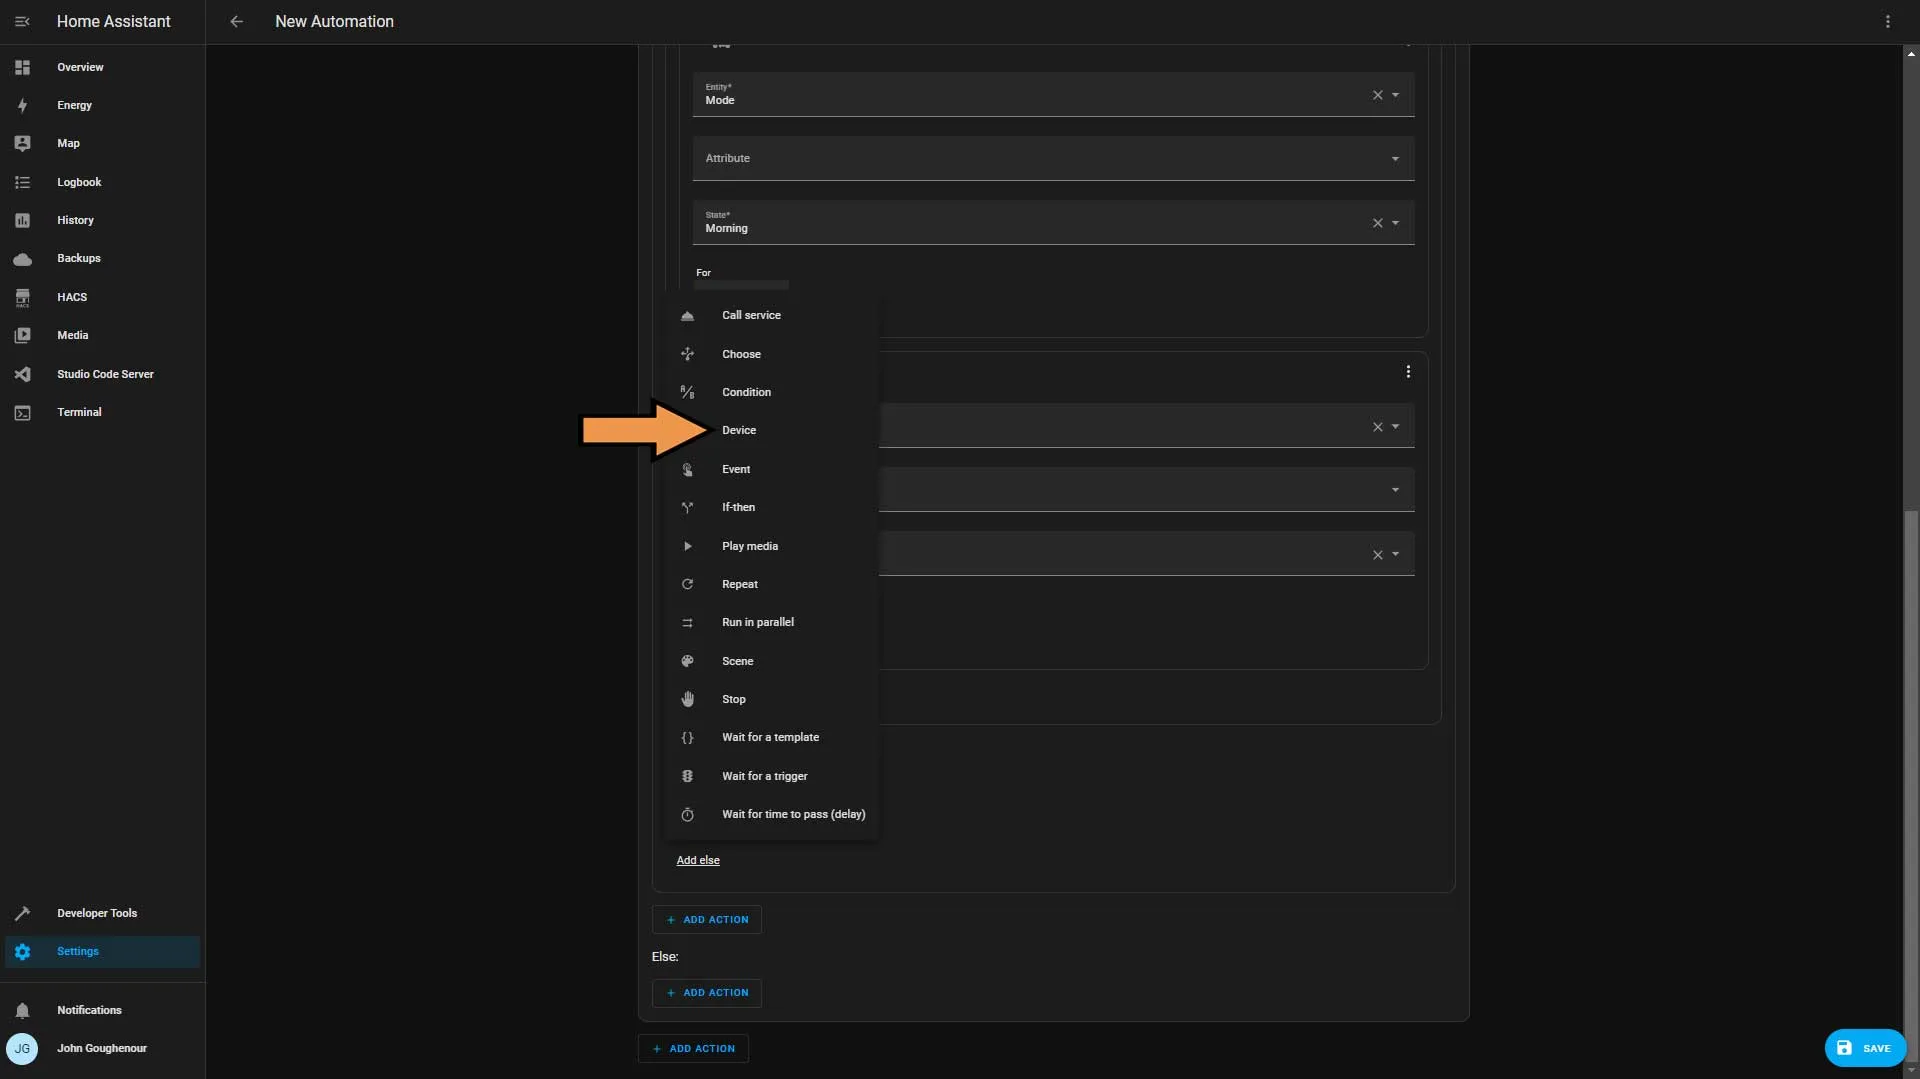
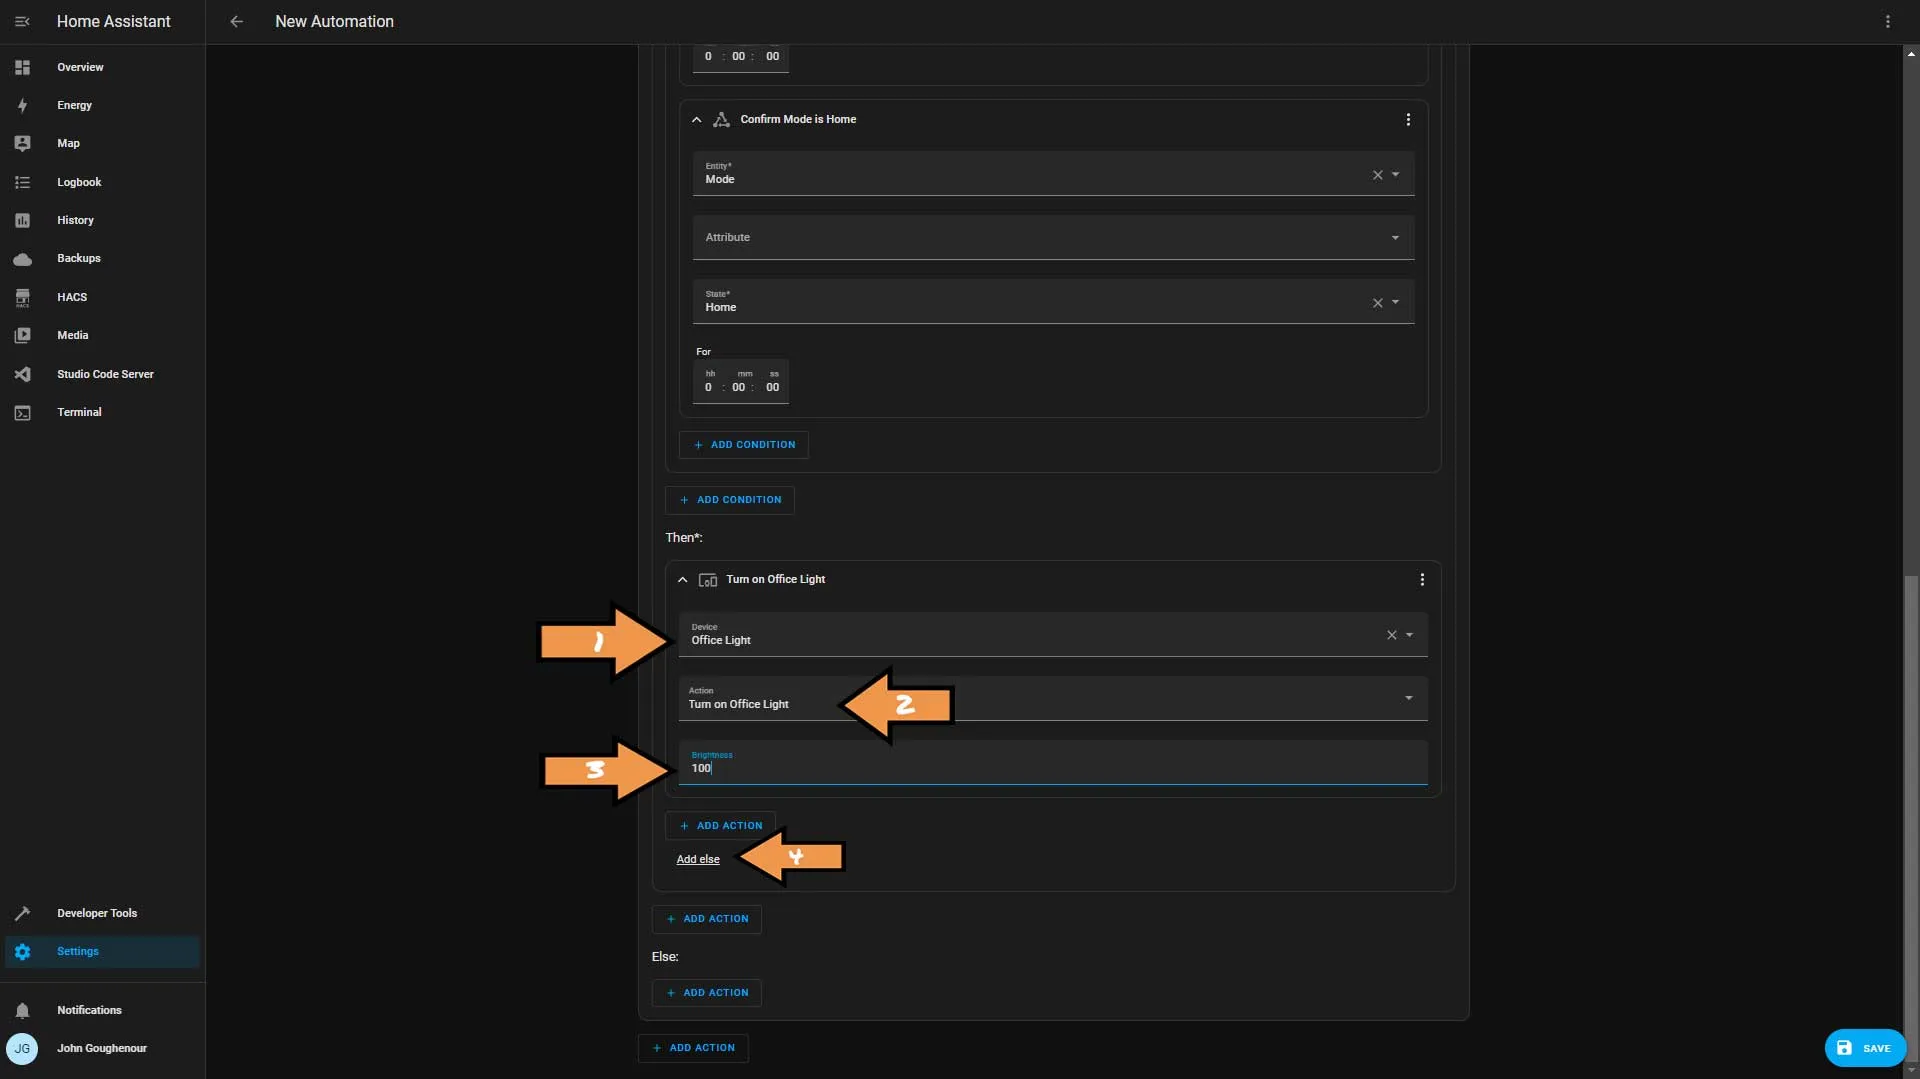
In the Device box, choose the light we want to control, set the Action to Turn on, and set the brightness to 100%. Then click the Add else link.
Click the Add Action button within the else statement and select Device. Then choose our light again, and set the Action to Turn on, but this time we’ll set the brightness to 50%. This finishes up the actions if the automation is triggered by motion starting. Next, we will work on the action if the automation was triggered by the motion stopped. Finally, in the last Else section, click Add Action.
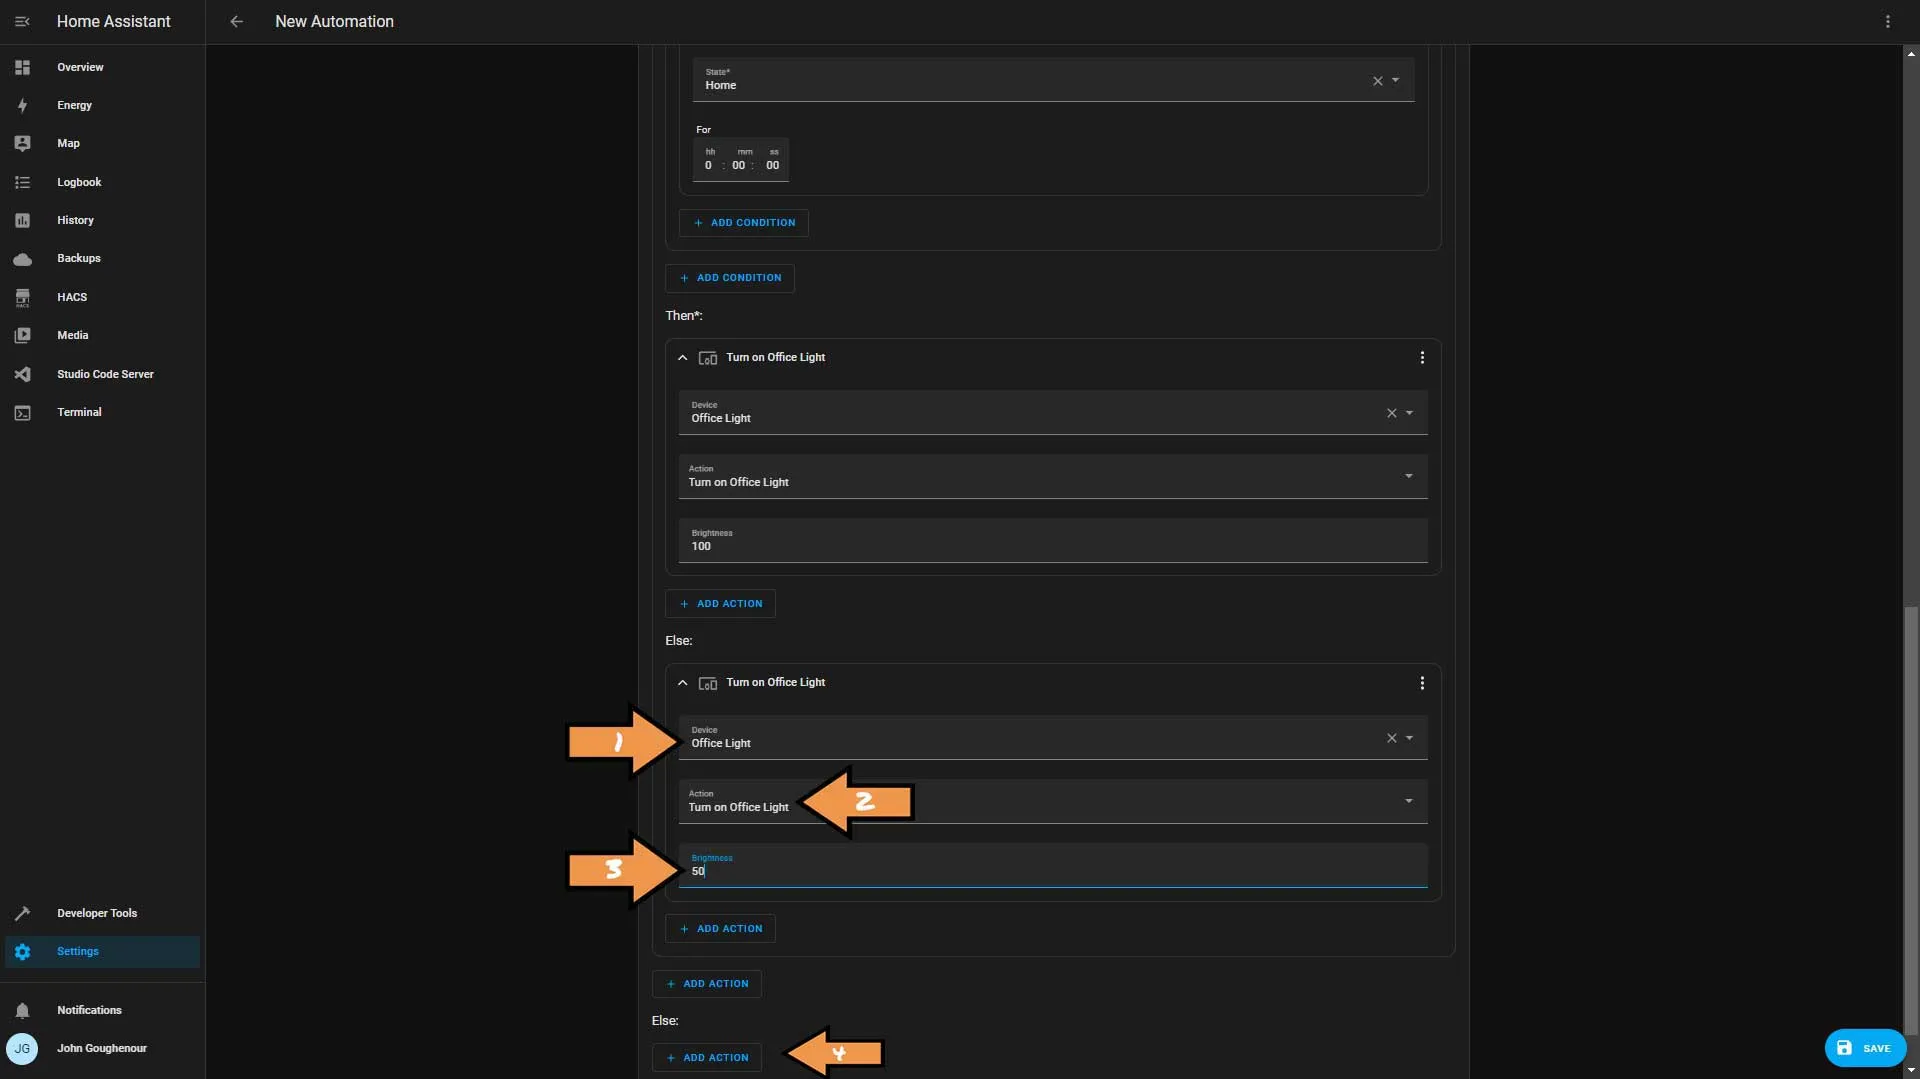
We are going to do the same thing we did before.
- From the Action’s list, select the If-then option.
- Click the Add Condition button within the if statement and select Or.
- We will create two conditions, both being type State. One is for mode-morning, and the other is for mode-home.
- Then click the Add Action button.
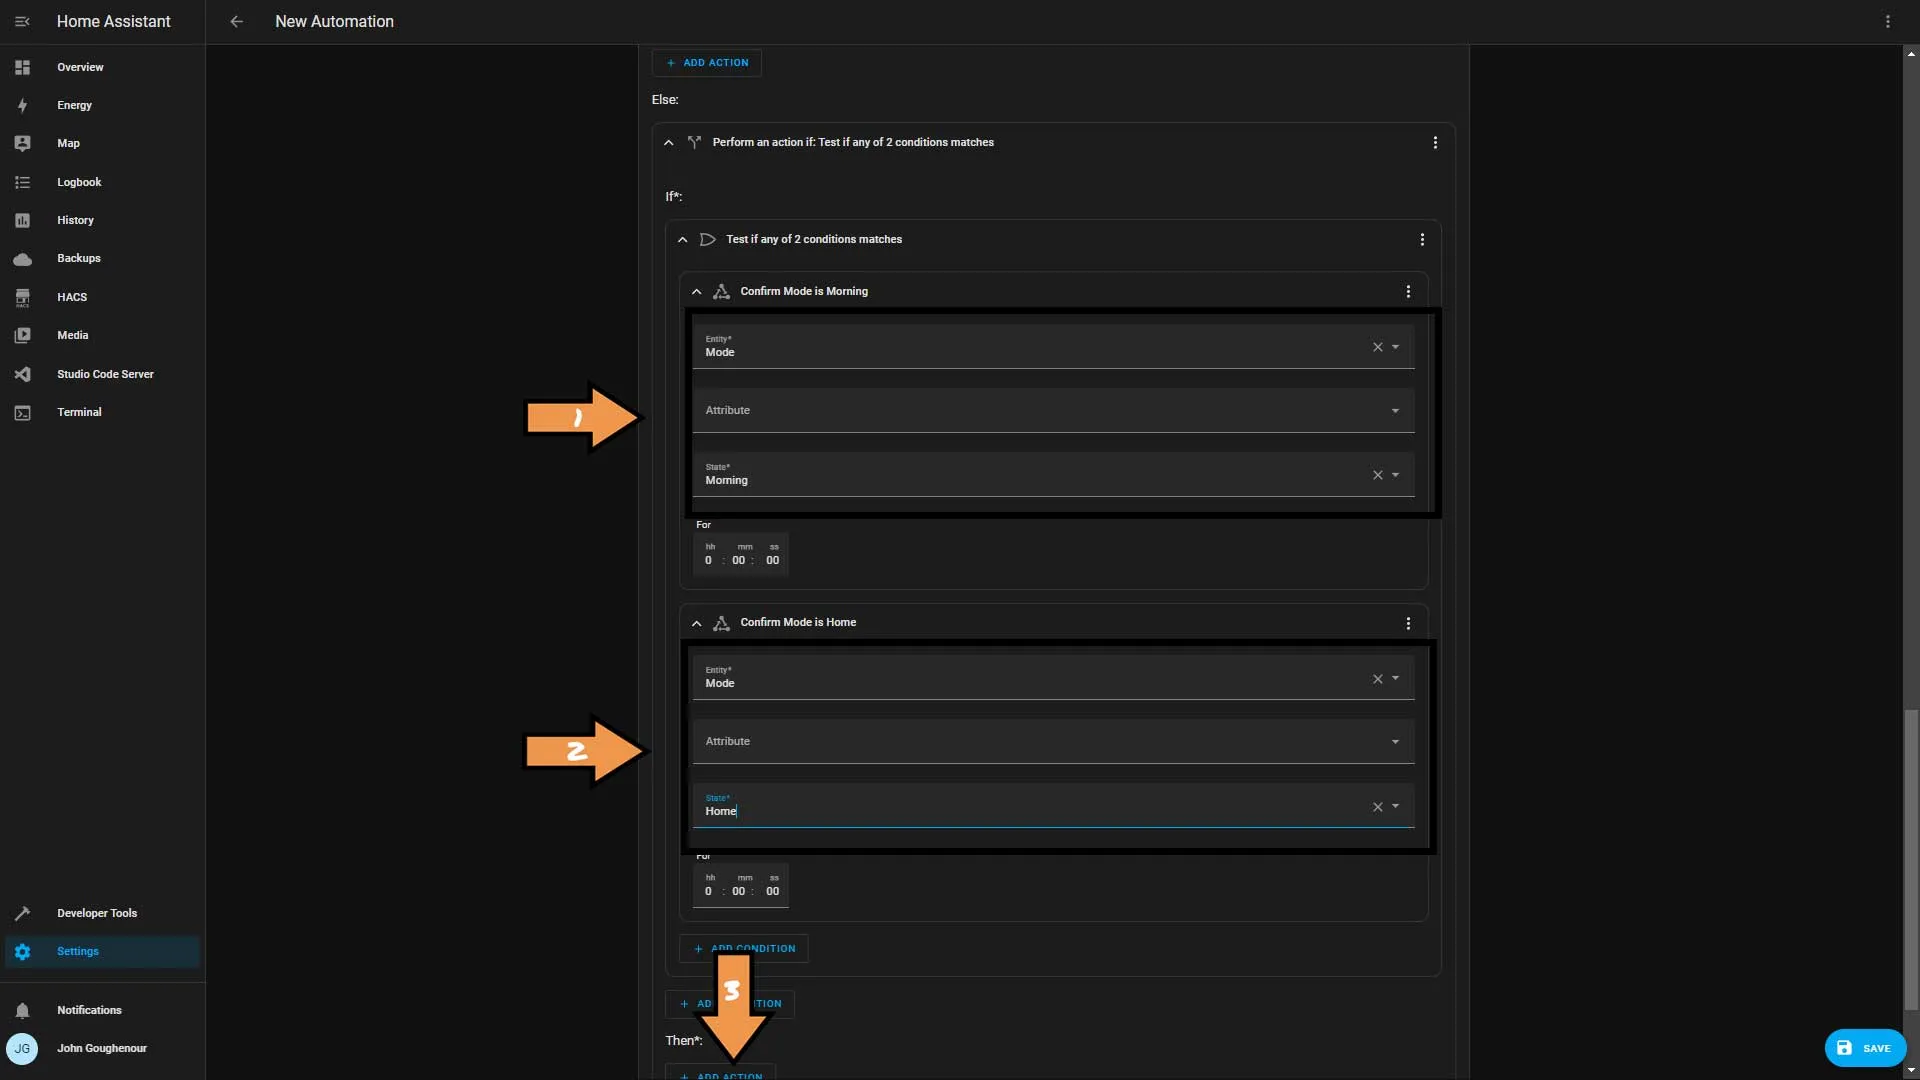
From the list select Wait for time to pass (delay).
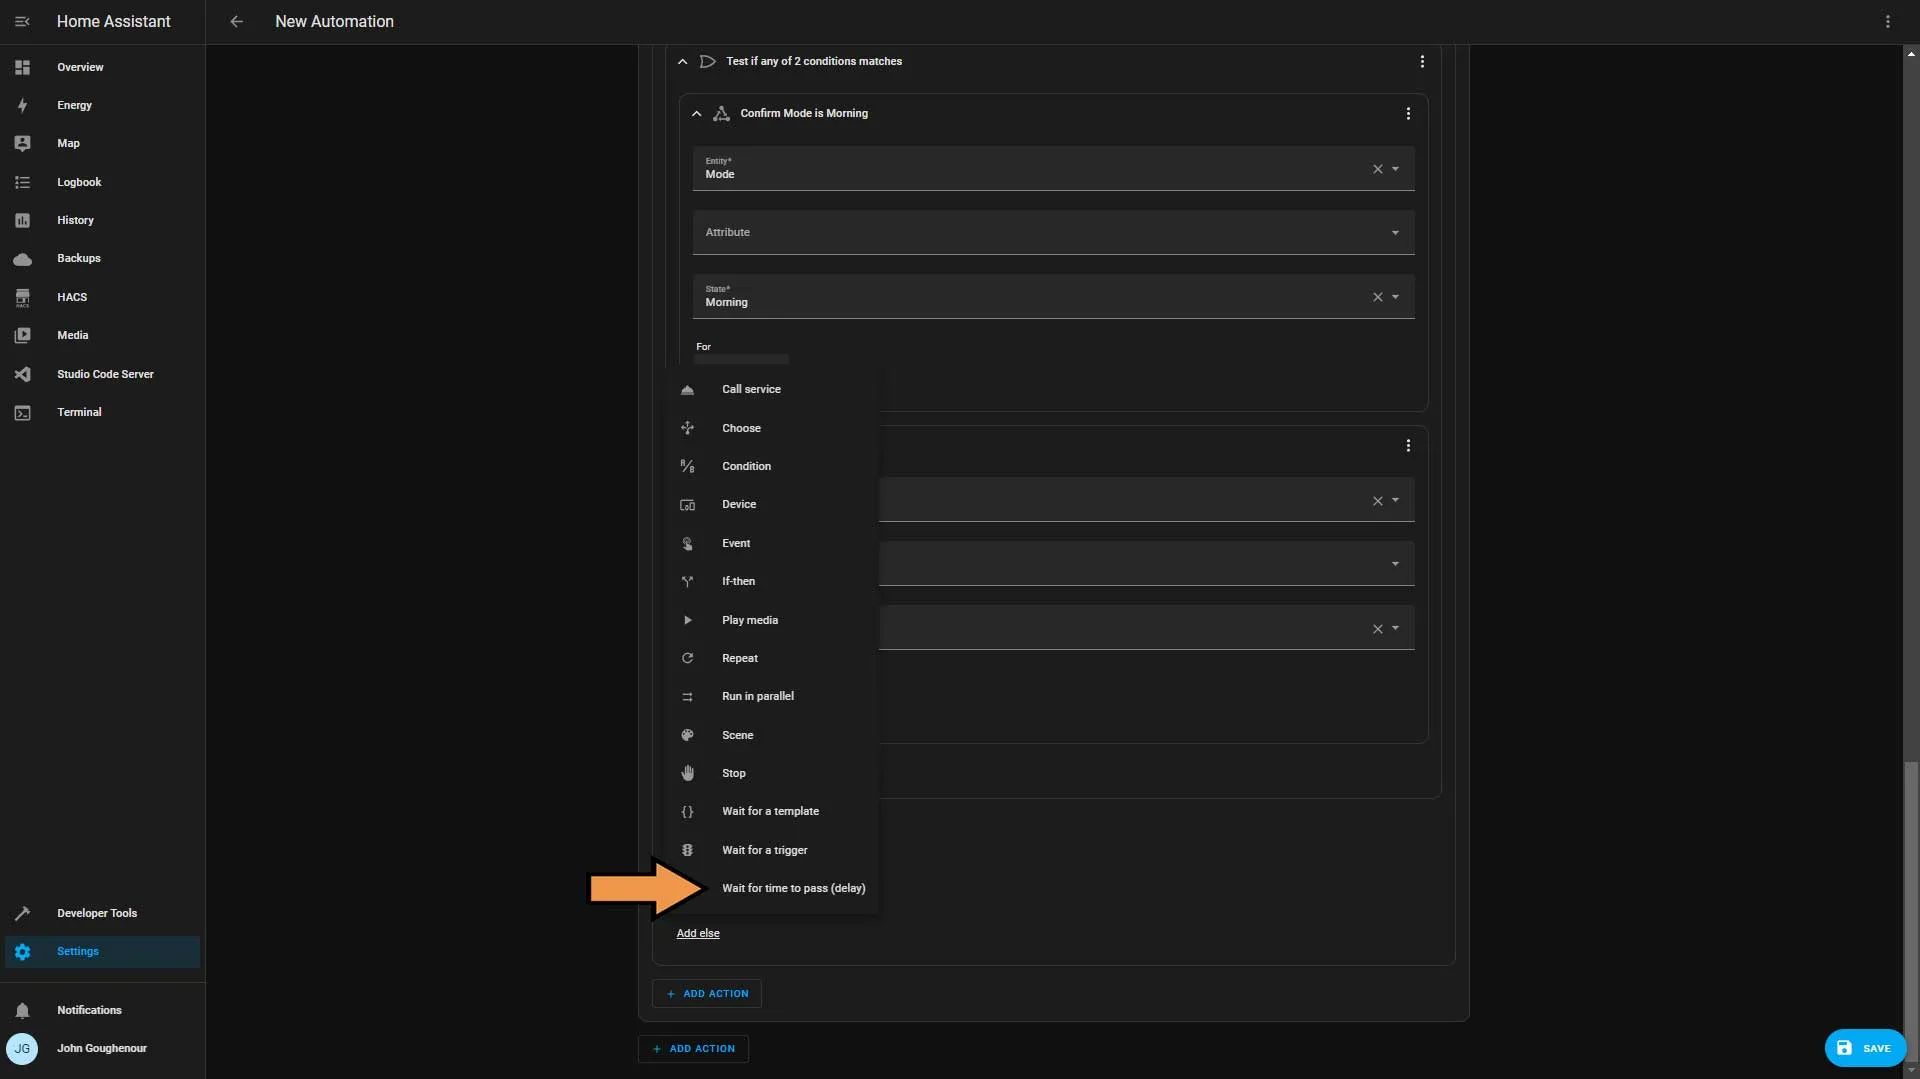
Set the delay for 5 minutes and click the Add Action button and select Device.
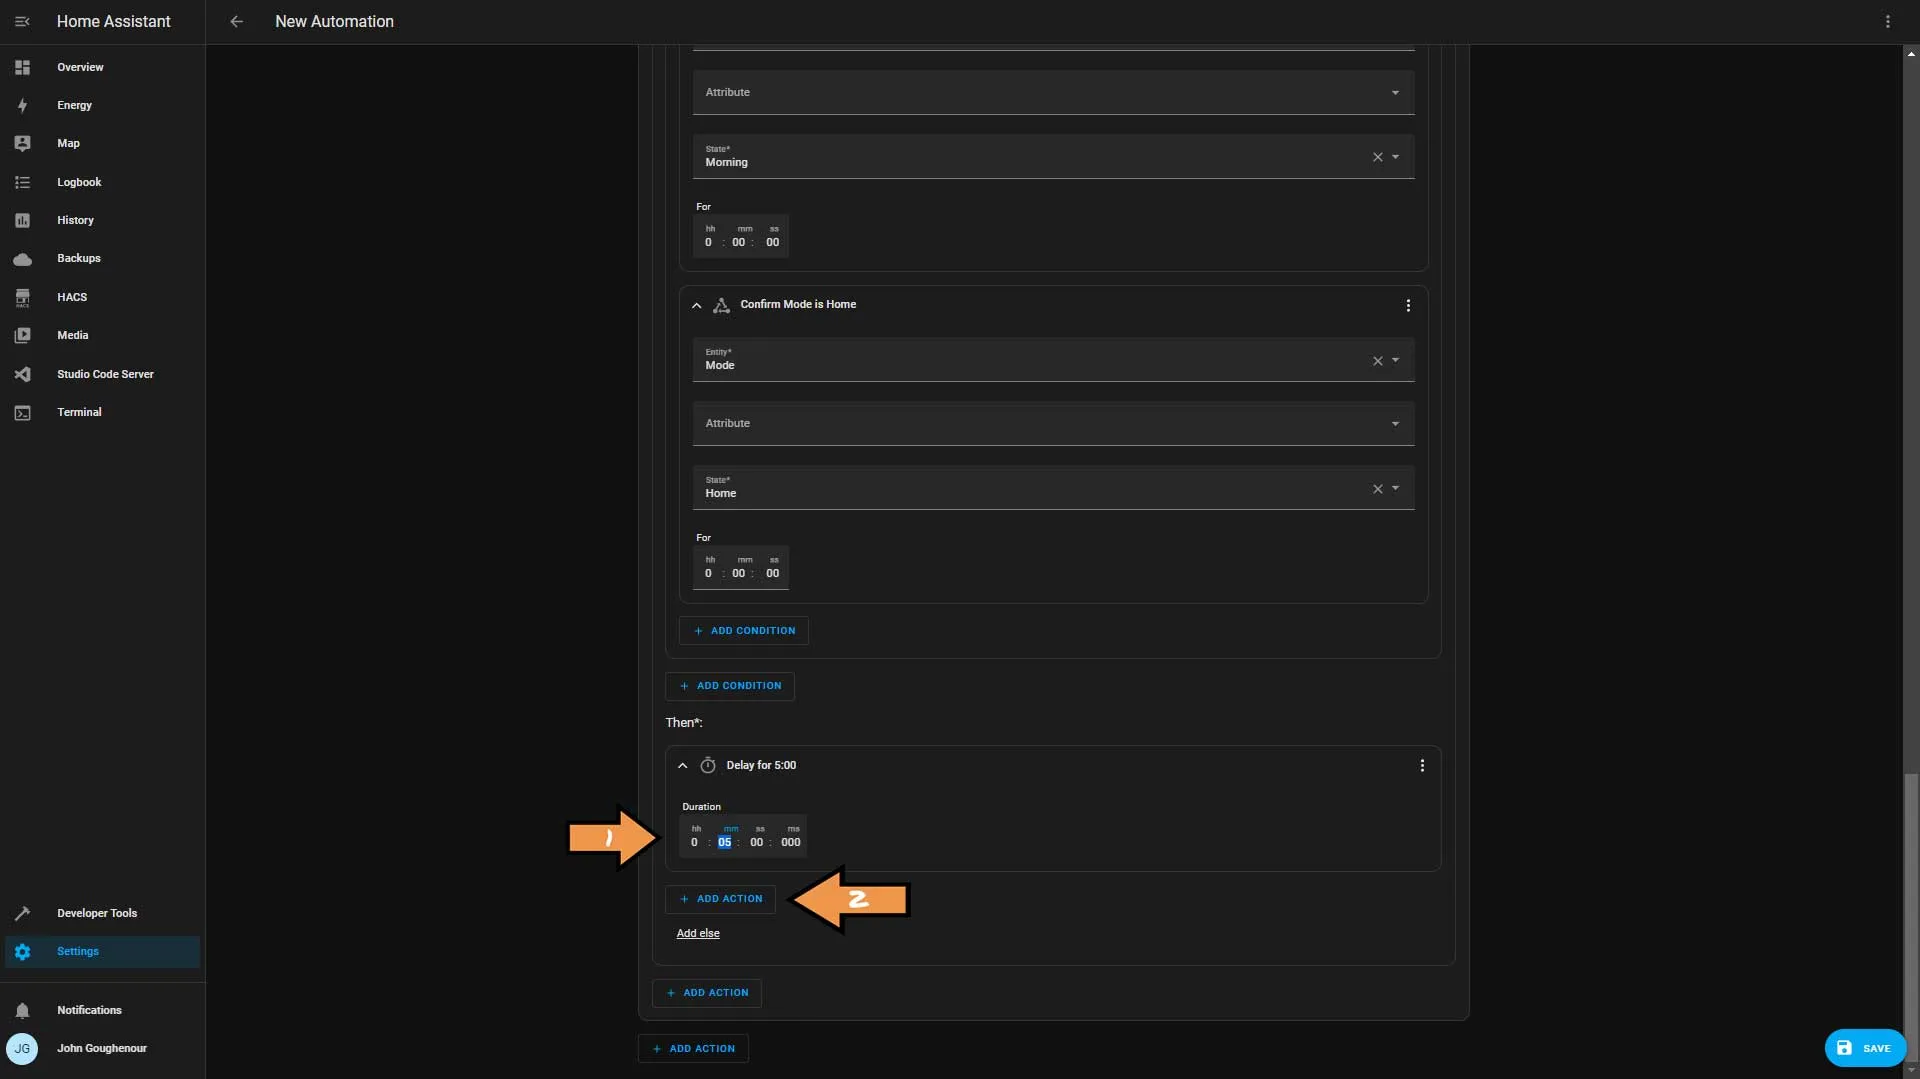
In the Device drop-down select our light and set the action to Turn off. Then click the Add else link.
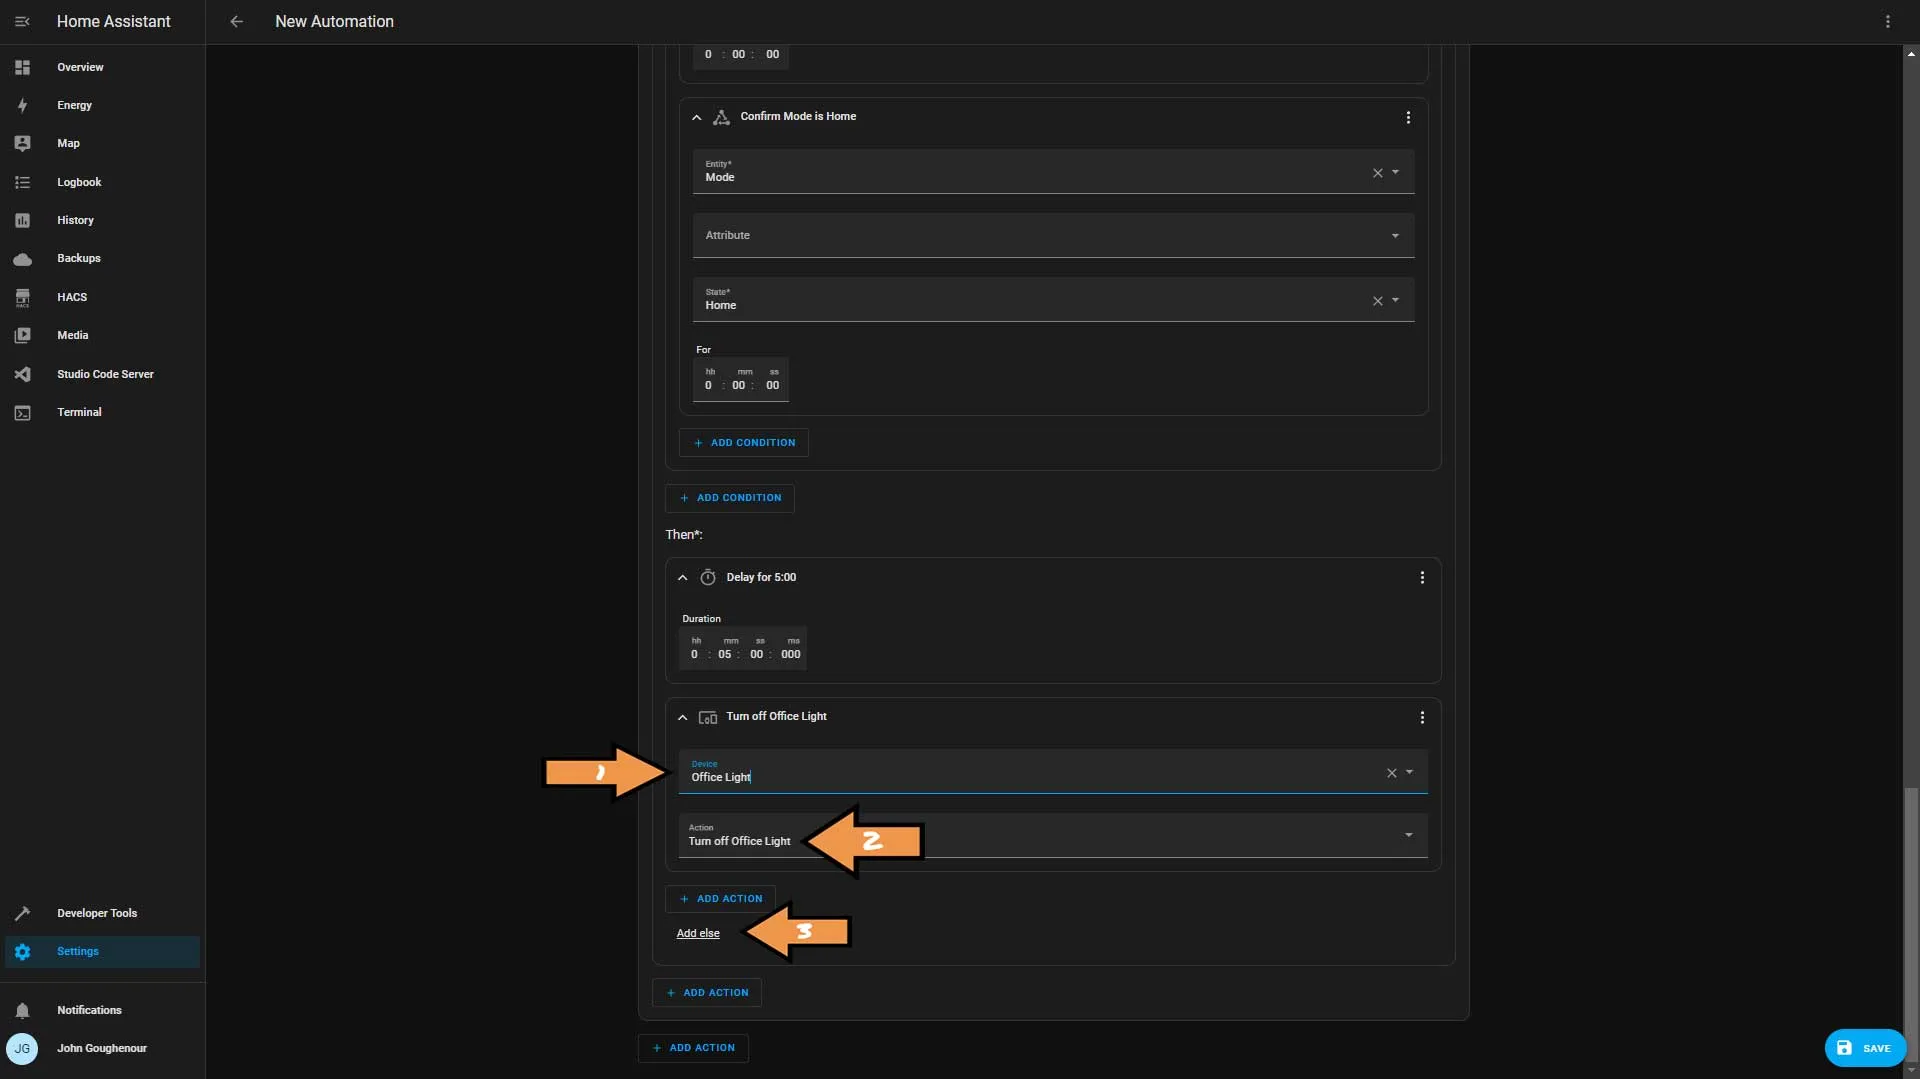
We will set up the same two actions, but this time we’ll set the delay for 3 minutes.
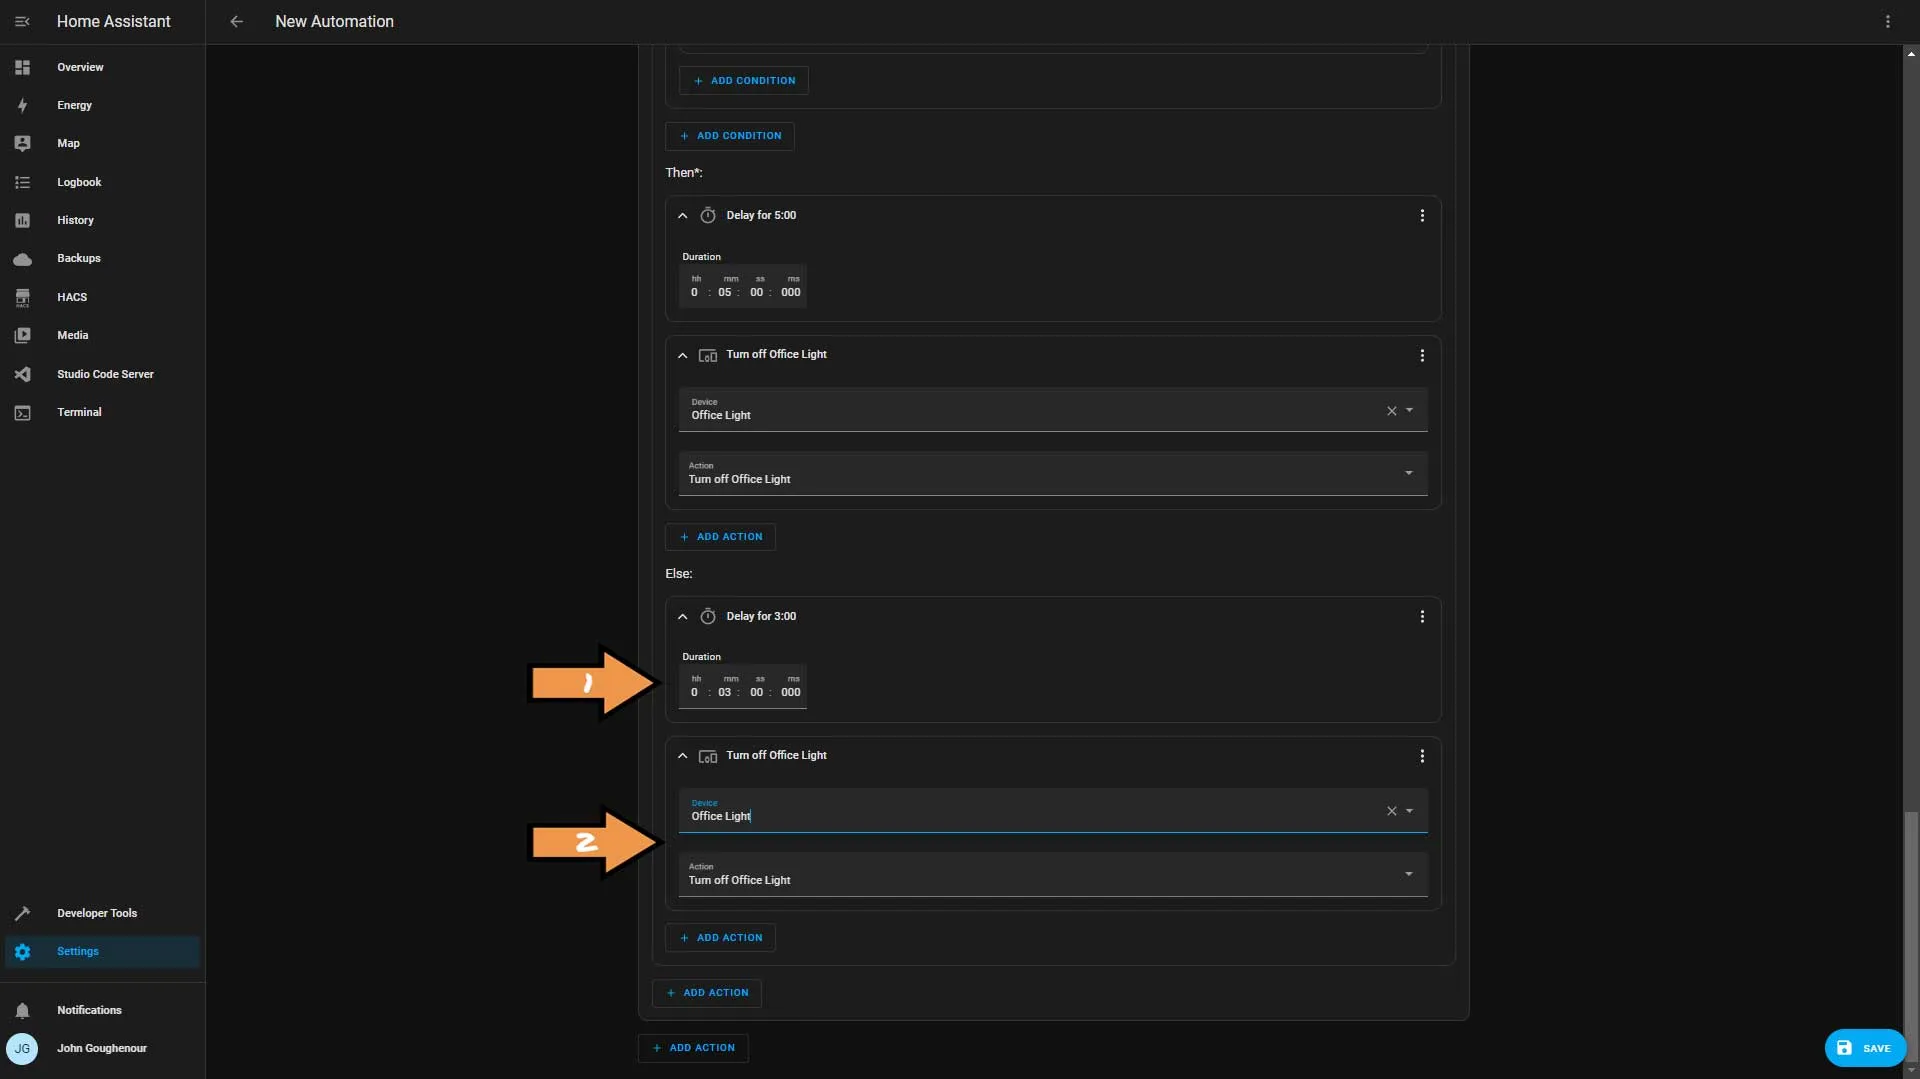
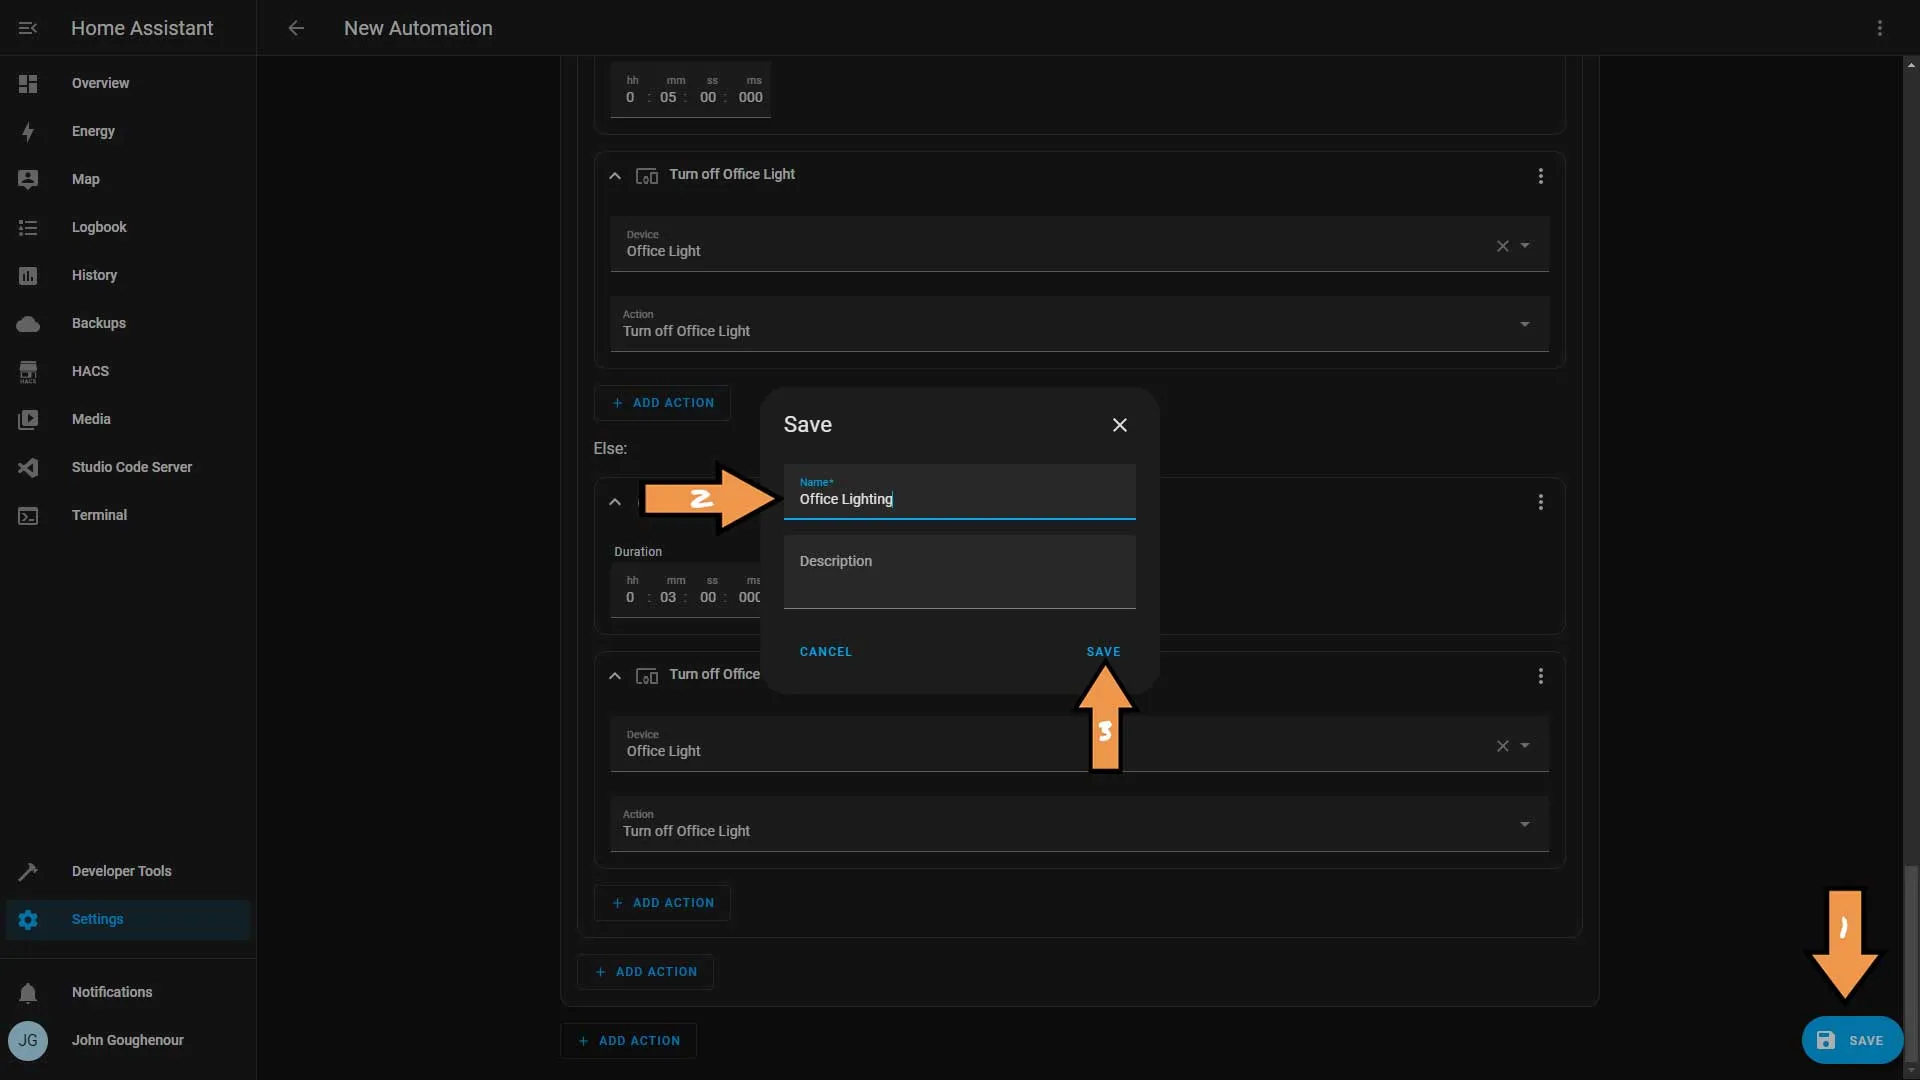
At the bottom right corner click the blue Save button. Name the automation and click save again.
Success: That’s It! You have successfully setup motion lighting.
