The Ultimate Smart Home Integration Cookbook
Integration: It enables the smart home hub to communicate and work with various smart devices or services.
MQTT Integration
MQTT (Message Queuing Telemetry Transport) is a lightweight and efficient messaging protocol that provides a publish-subscribe communication model. The MQTT broker can be installed on all most any hardware, but Home Assistant has a plugin that we can use to set one up quickly. MQTT is popular with the DIY community because it’s great for devices with limited resources and unreliable networks. Some popular projects are ESPHome and Tasmota, to name a few. MQTT is also perfect for communicating between hubs without additional bulky add-ons.
Automation Details
Requirements
- Custom Integrations
Actions:
- Install MQTT Broker

Hubitat
Hubitat MQTT Integration
The Official Documentation for Hubitat MQTT Interface
Hubitat supports MQTT right out of the box, but only within drivers and doesn't have a broker.
Important: We still need an MQTT broker so we will be using the Home Assistant integration.
Home Assistant
Home Assistant MQTT Integration
The Official Documentation for Home Assistant MQTT Broker
Setting Up the Automation
Important: The MQTT Broker service requires a user account. It’s best security practice to create a new service account that only will be used for this service and has minimal privileges.
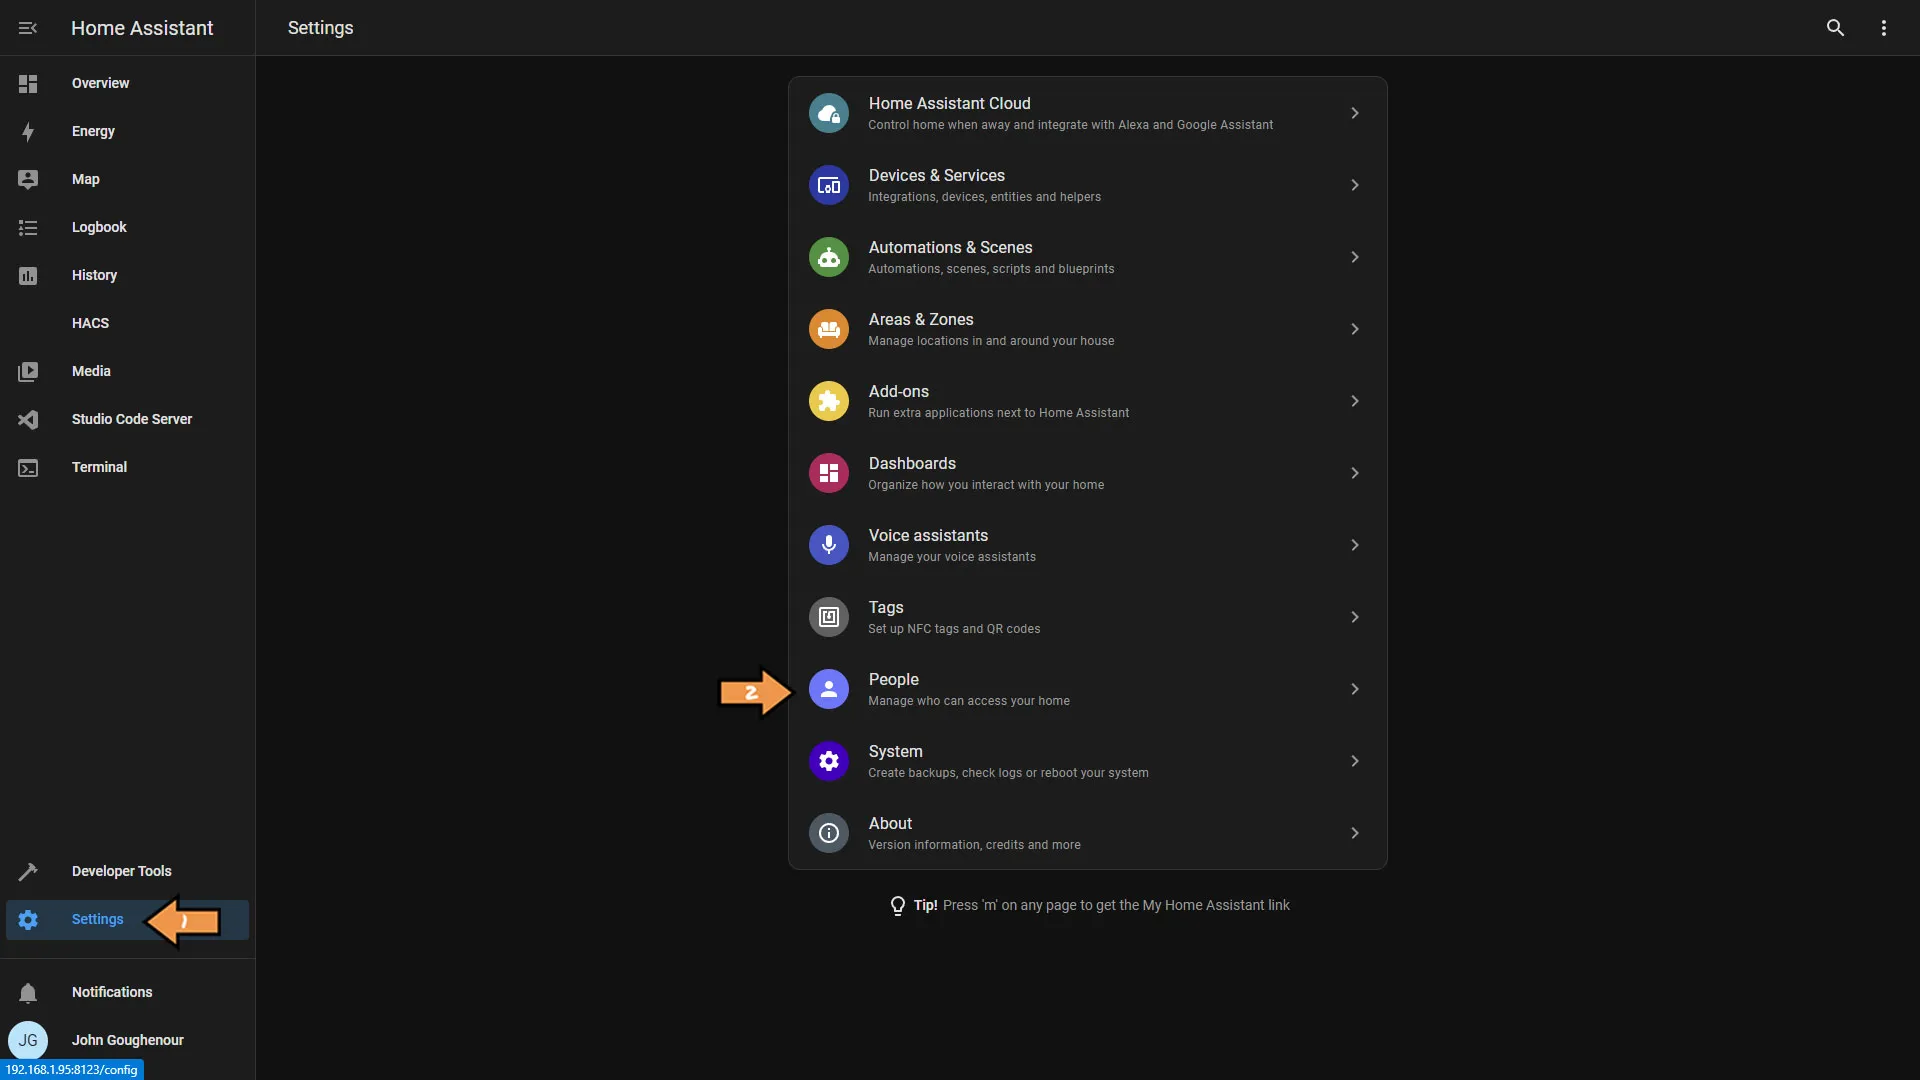
First click Settings, then select People.
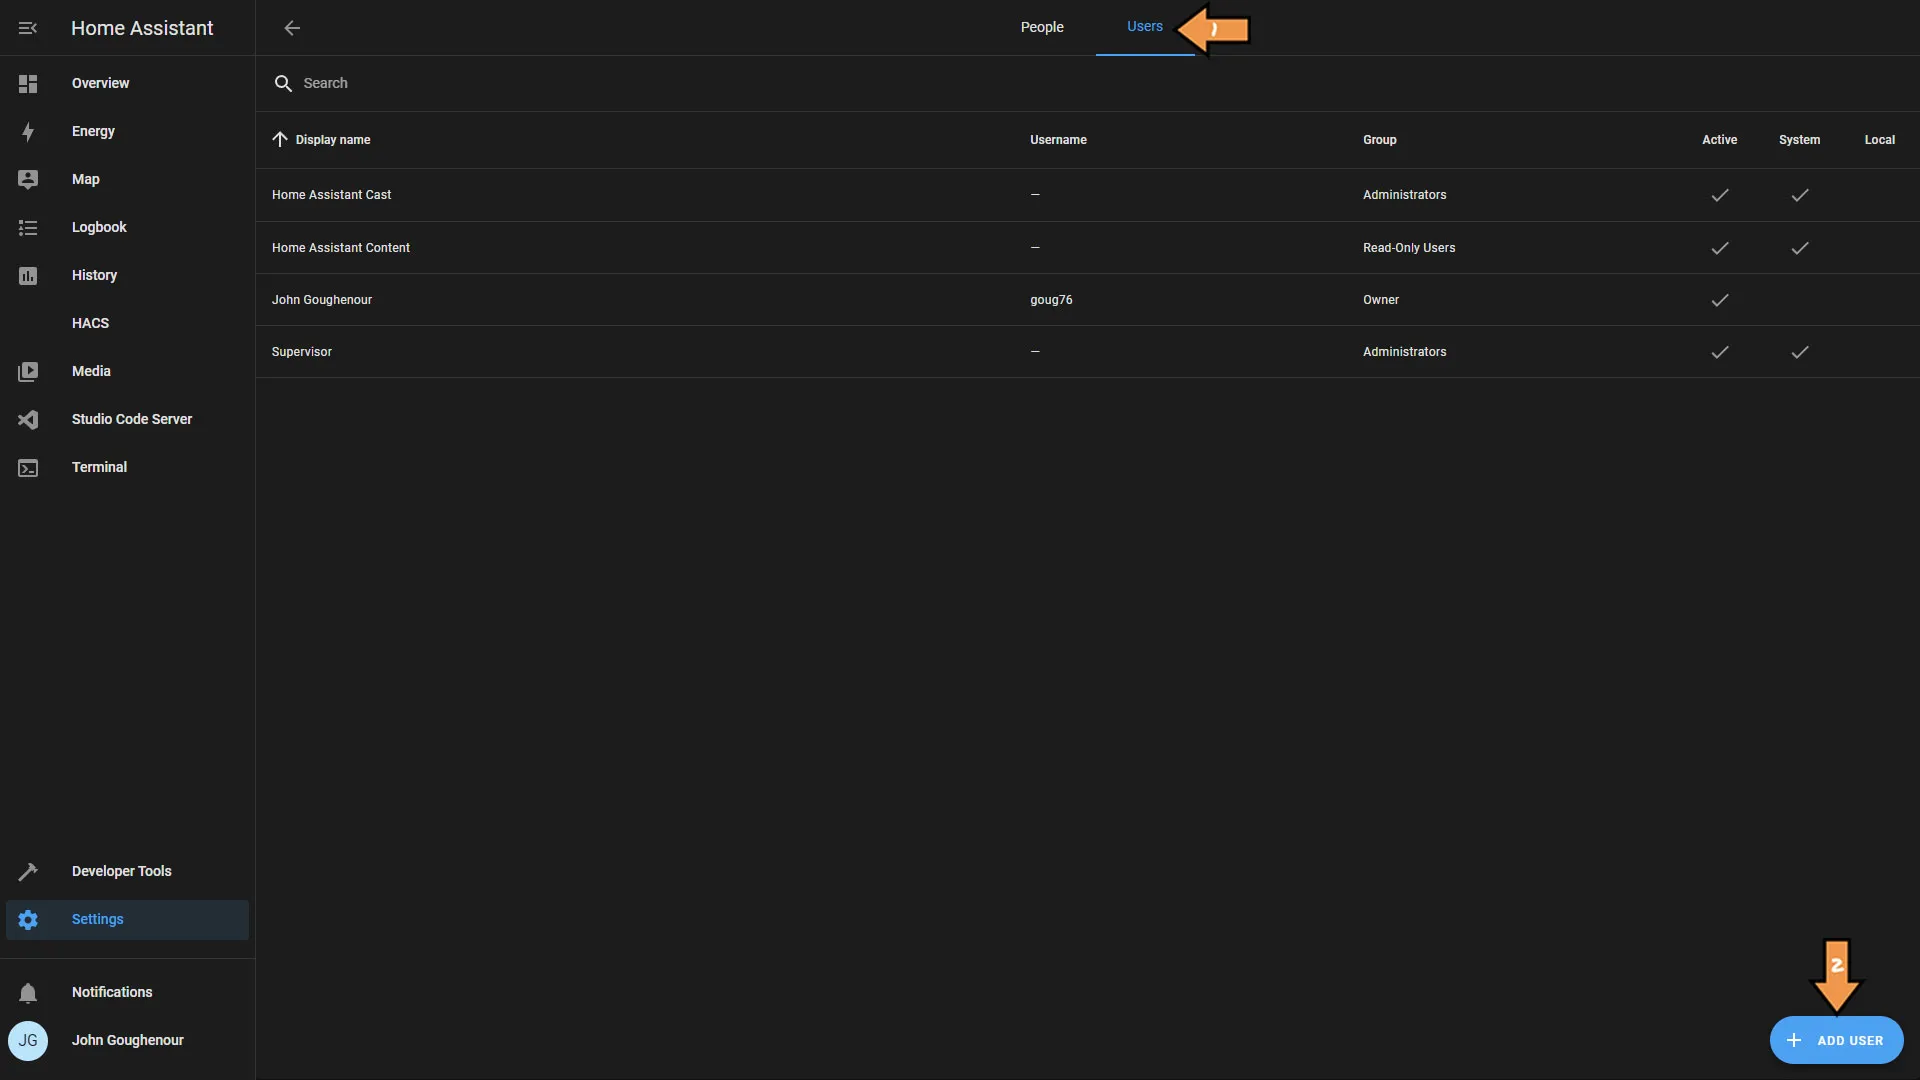
Select the Users tab from the top of the screen, then click Add User.
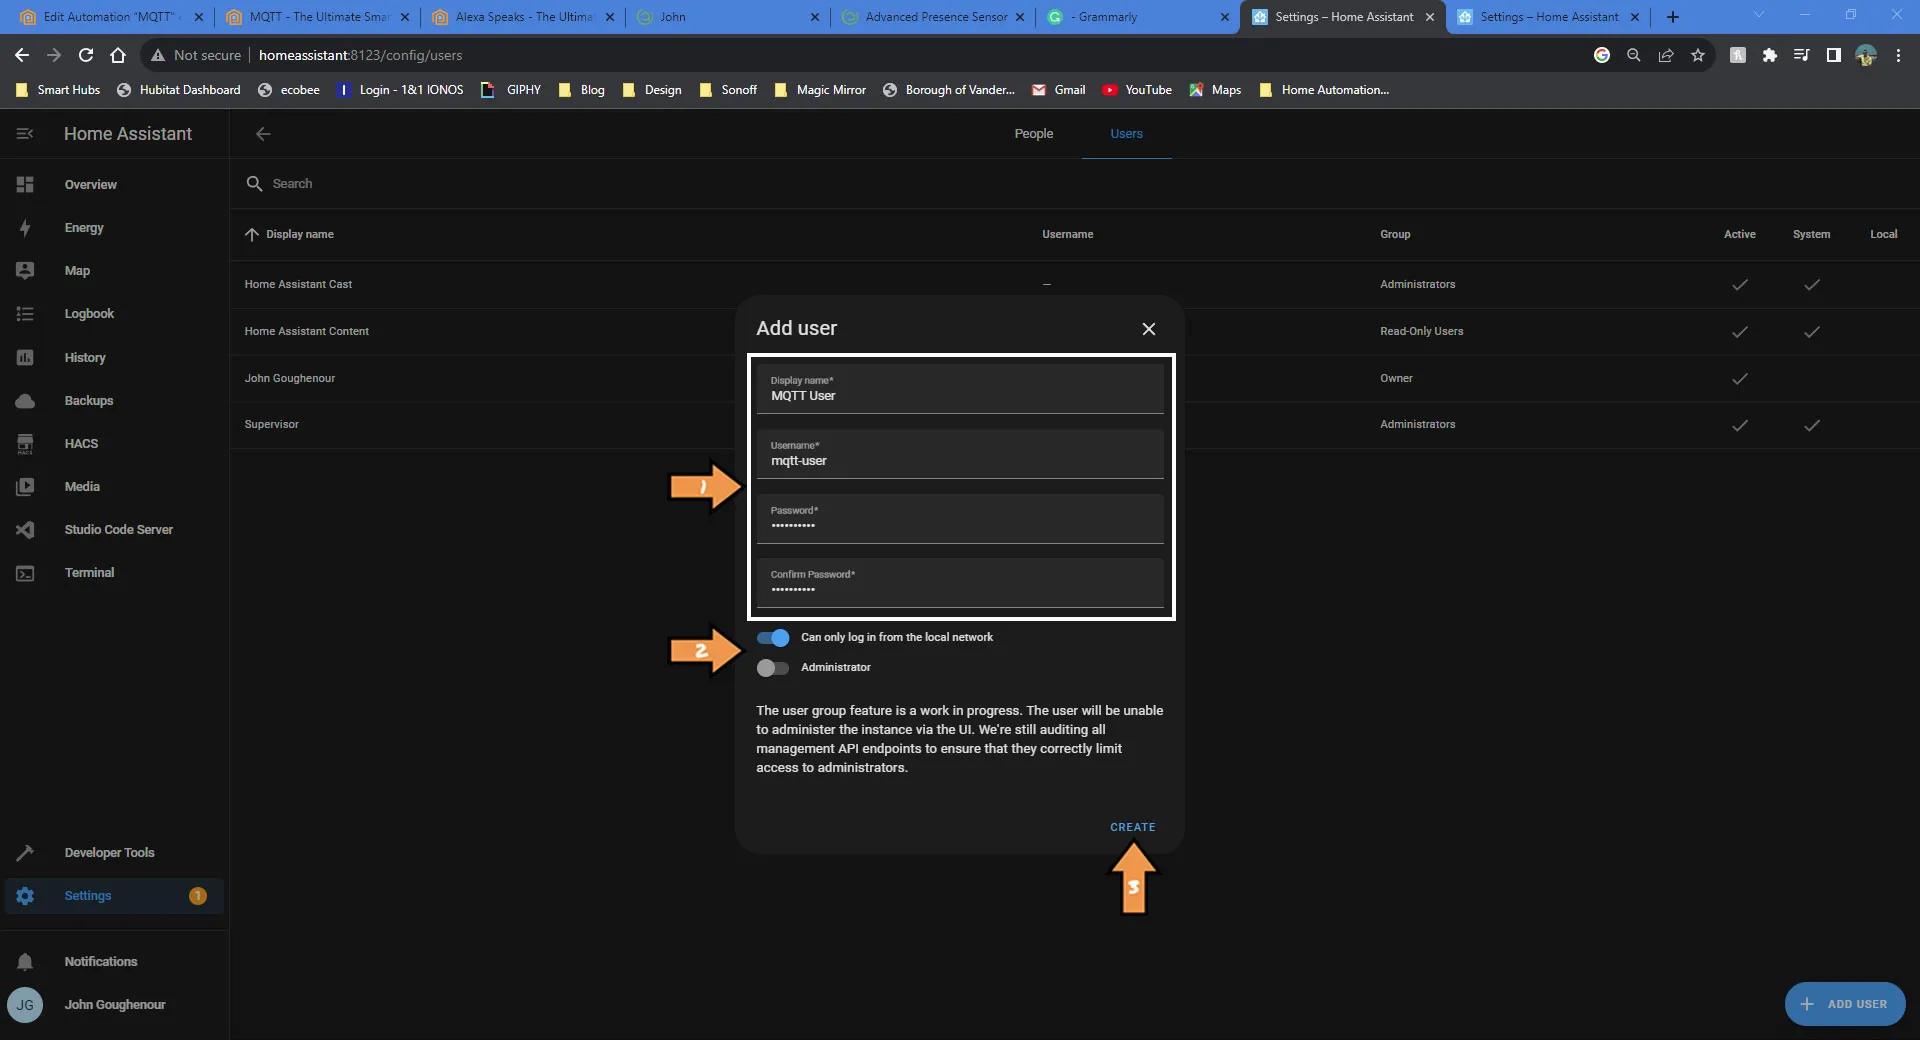
Next, fill in the new service account information. Then for security reasons, only allow the account to log in from the local network and is NOT an administrator. Finally, click the Create button.
Click the Settings tab, then select Add-ons.
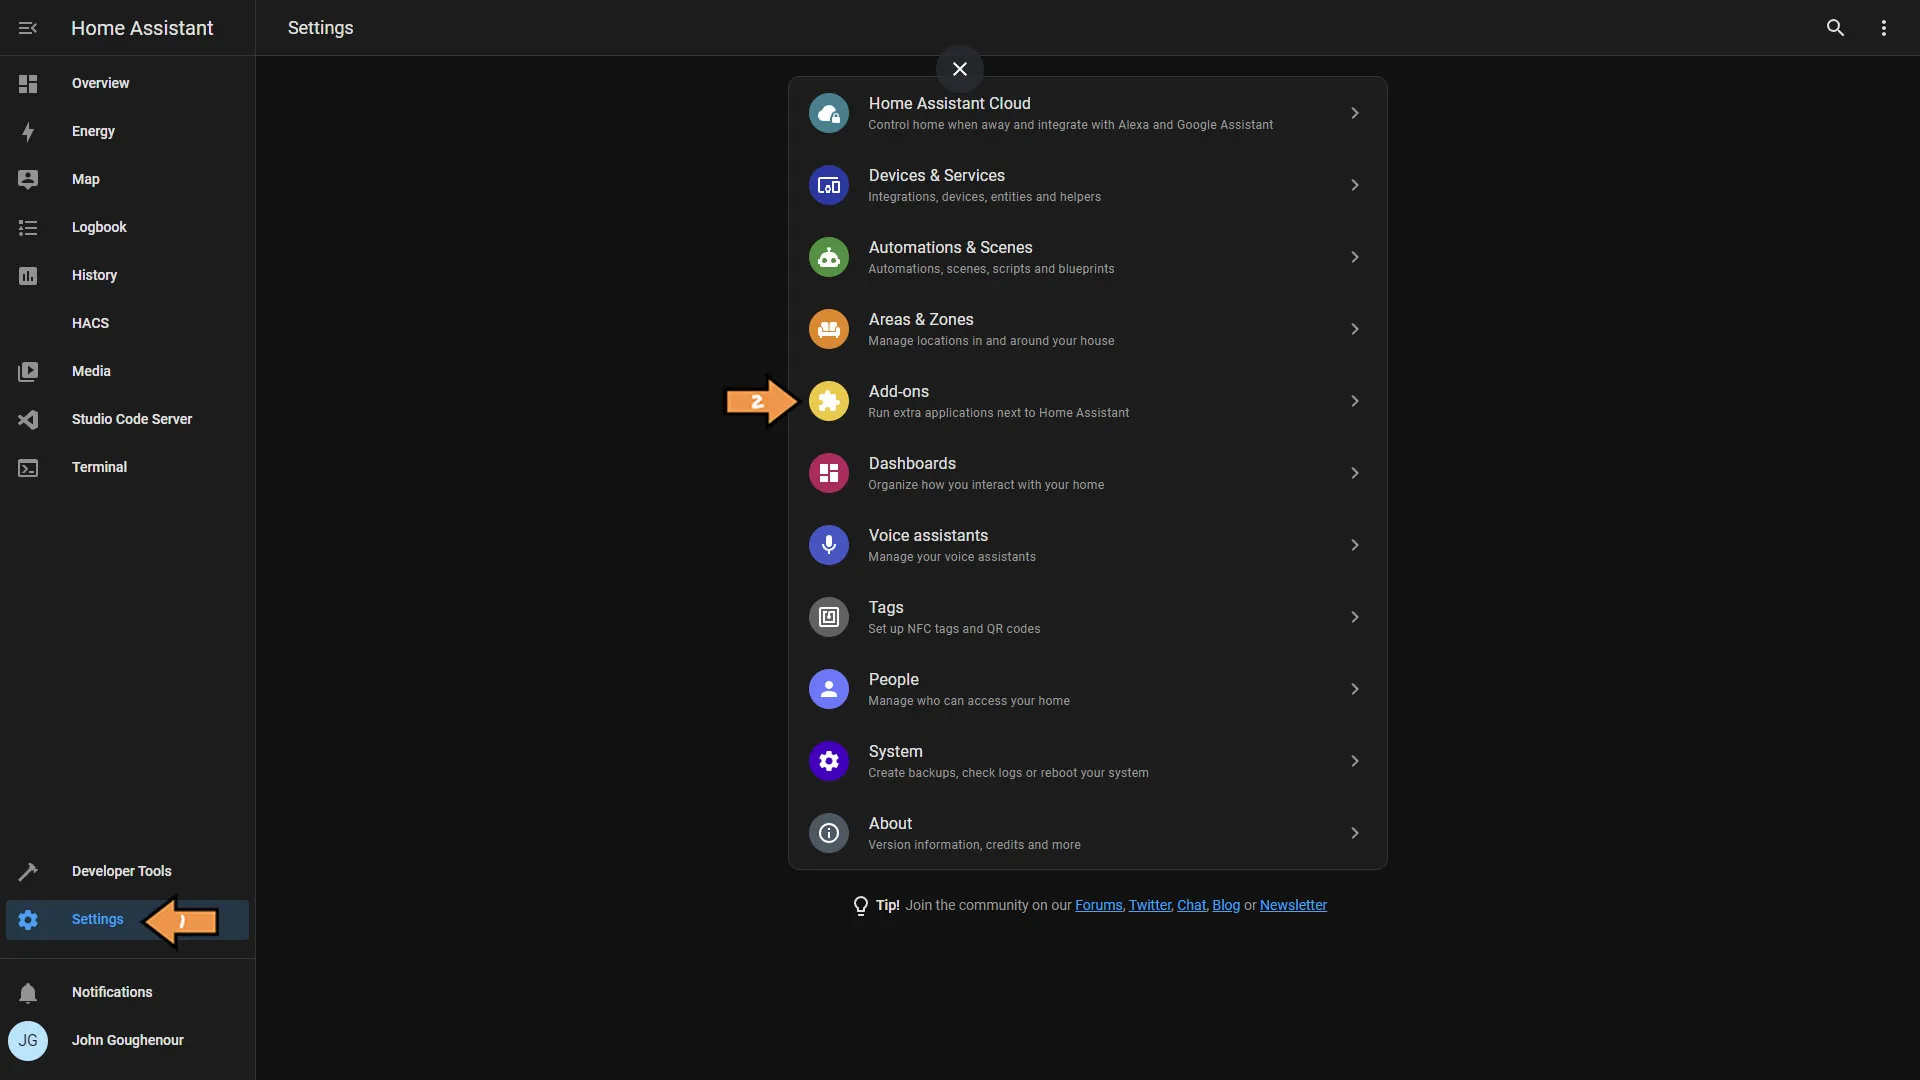
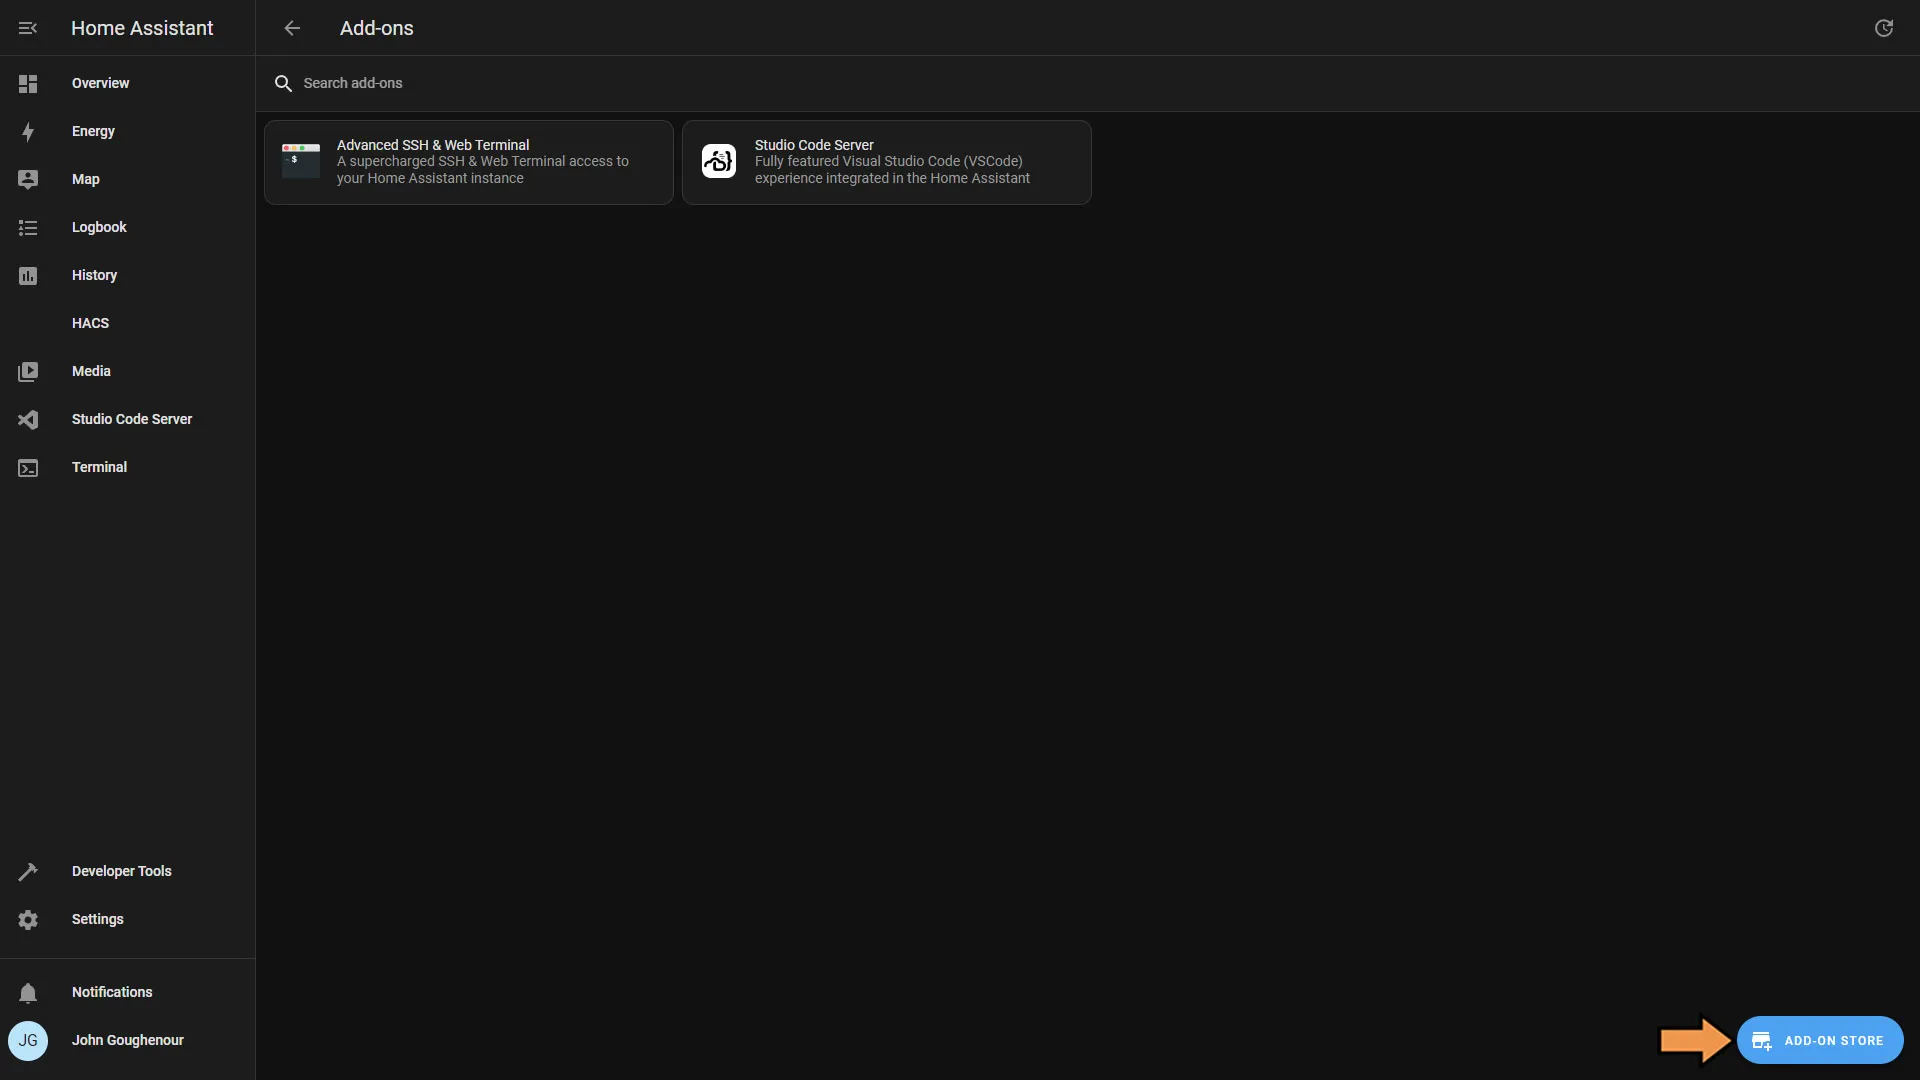
Click the Add-on Store button.
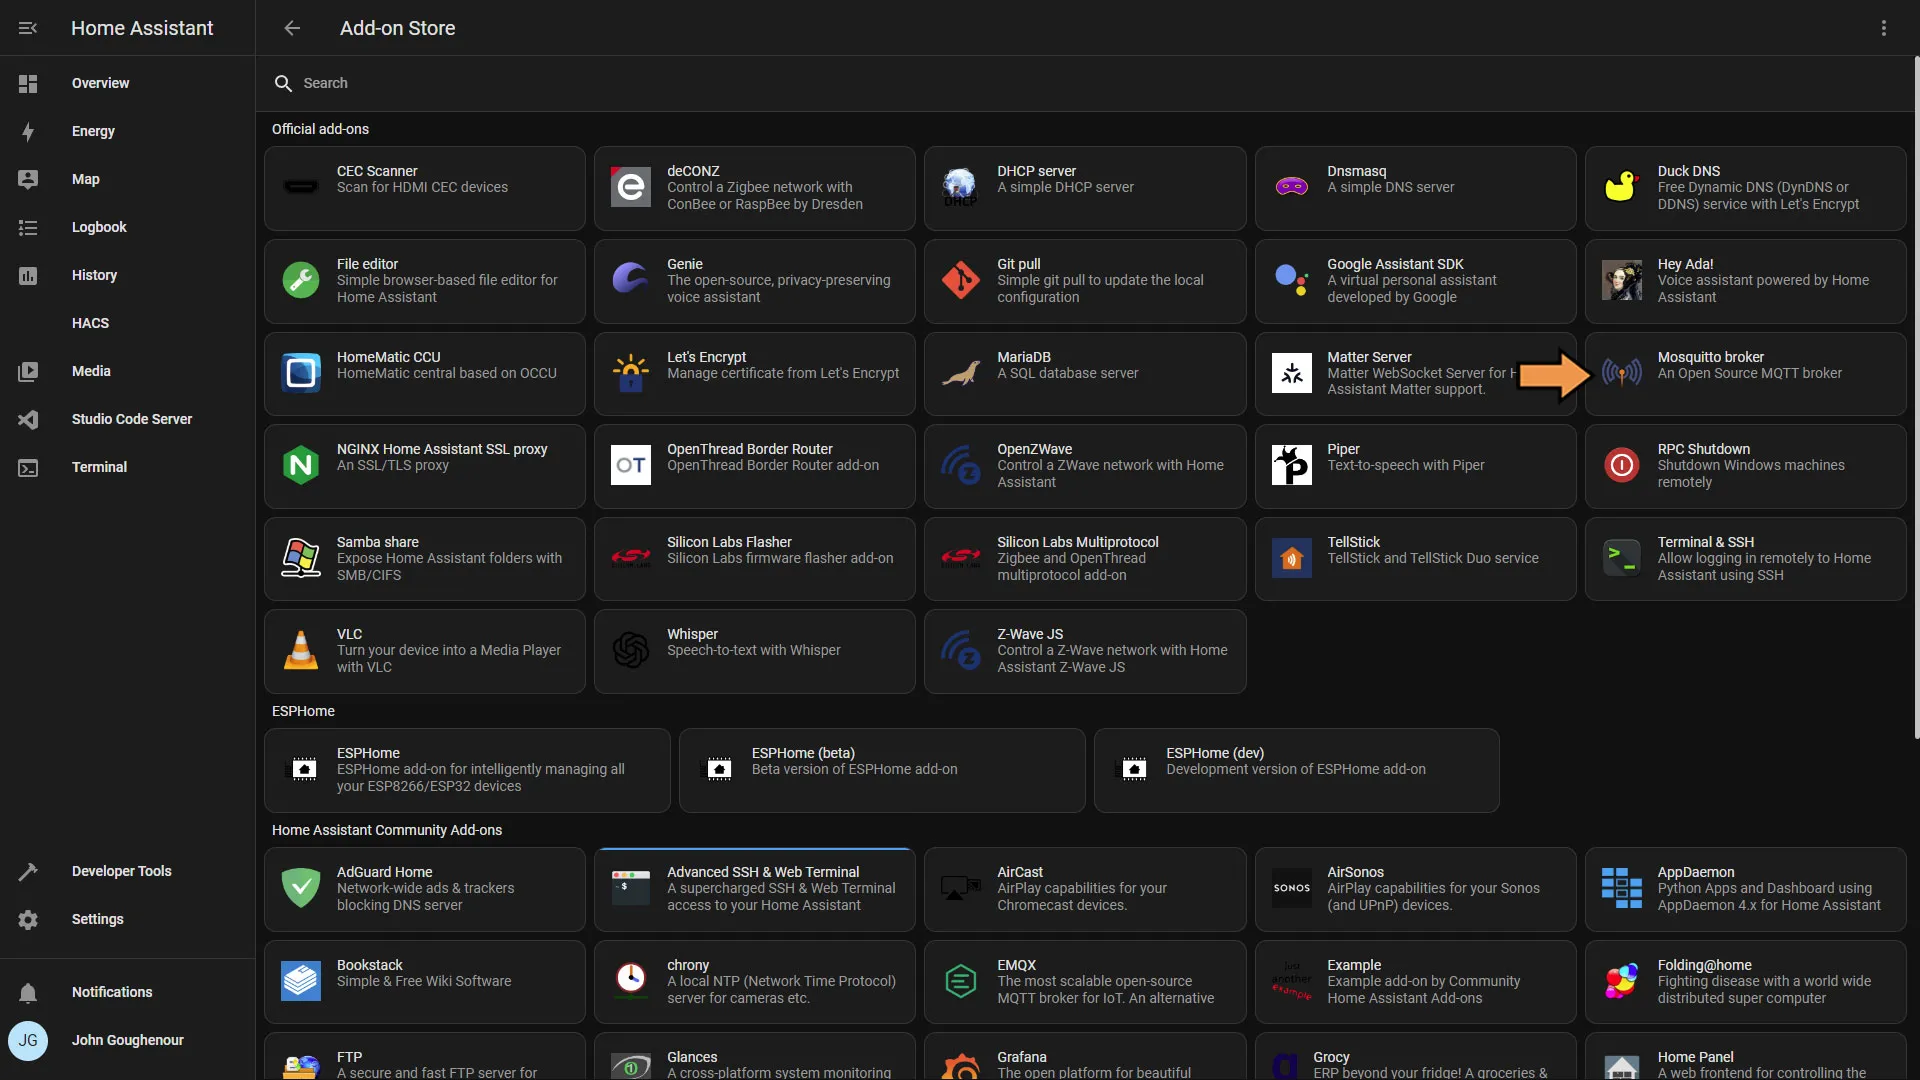
Select the Mosquitto broker from the official add-ons list.
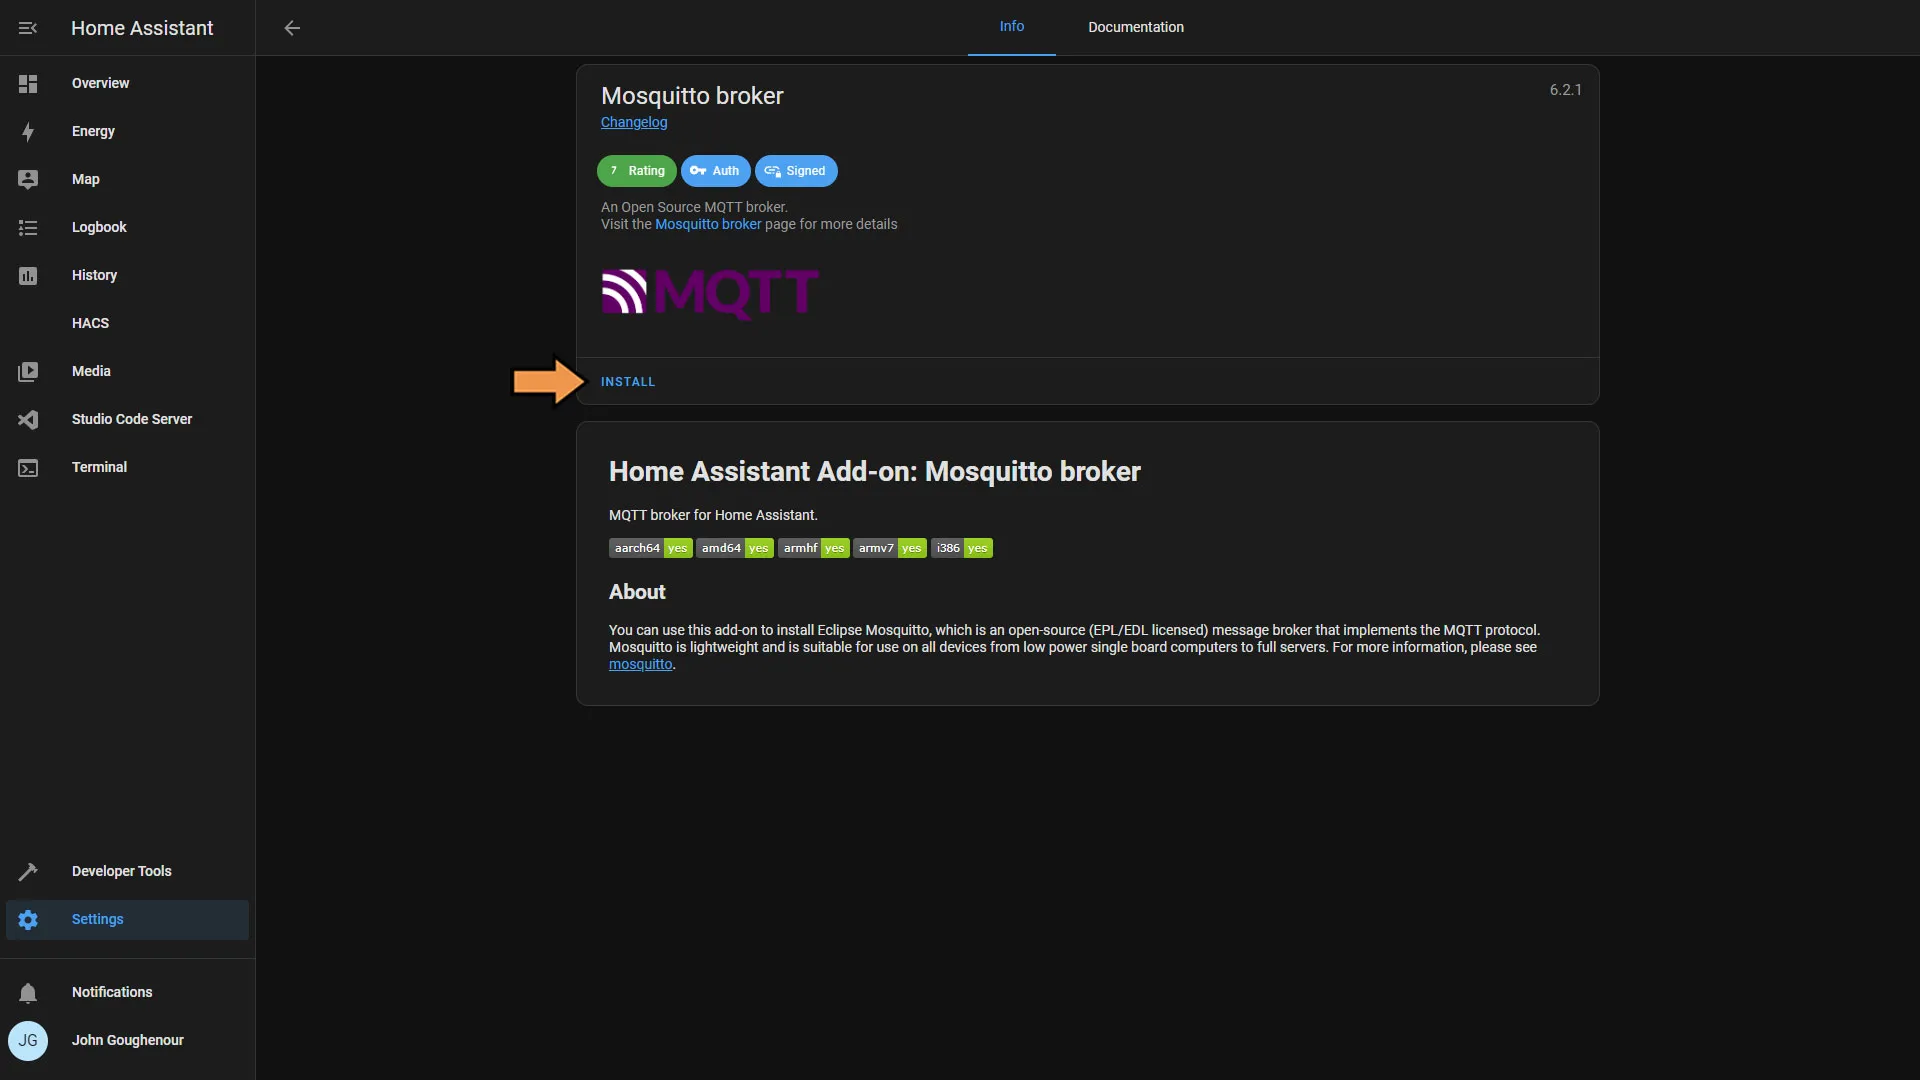
Next click Install.
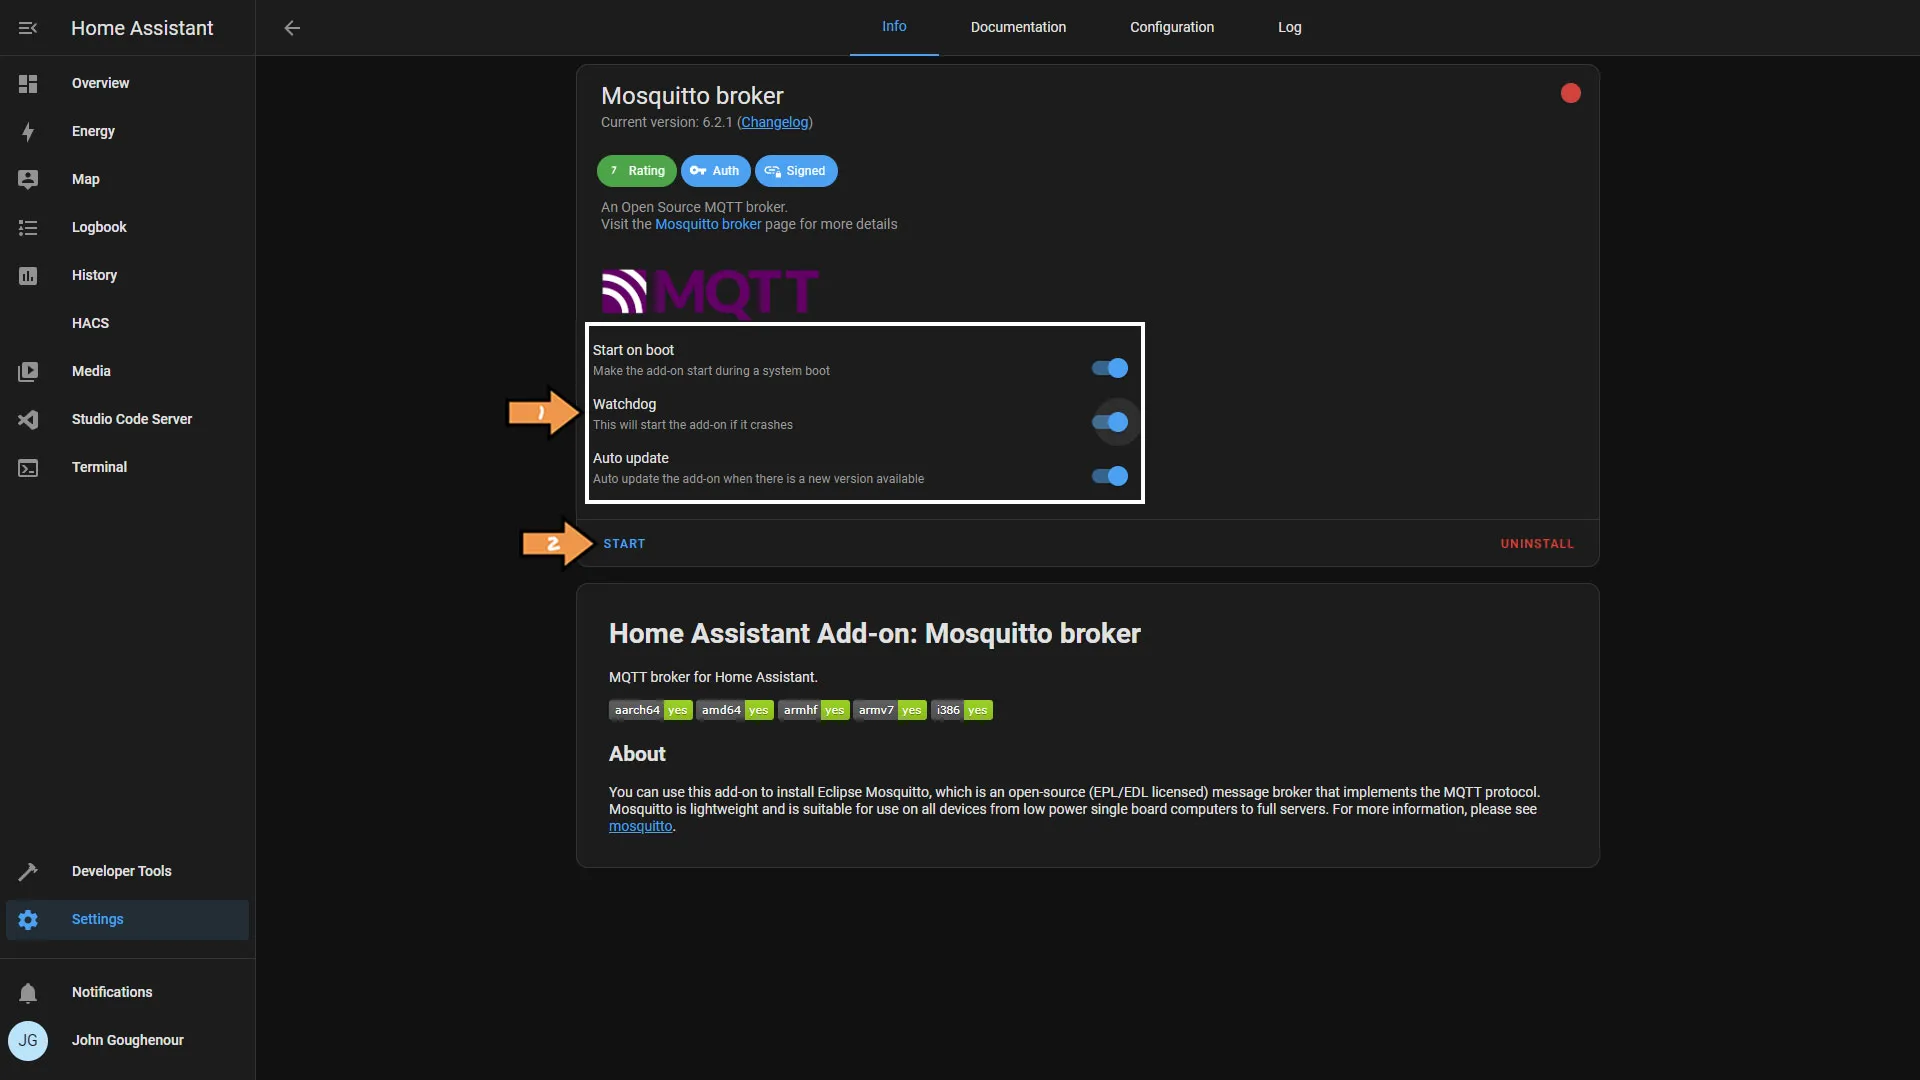
Once the broker is installed, make sure that the service starts on boot and any other setting you want. Then click Start.
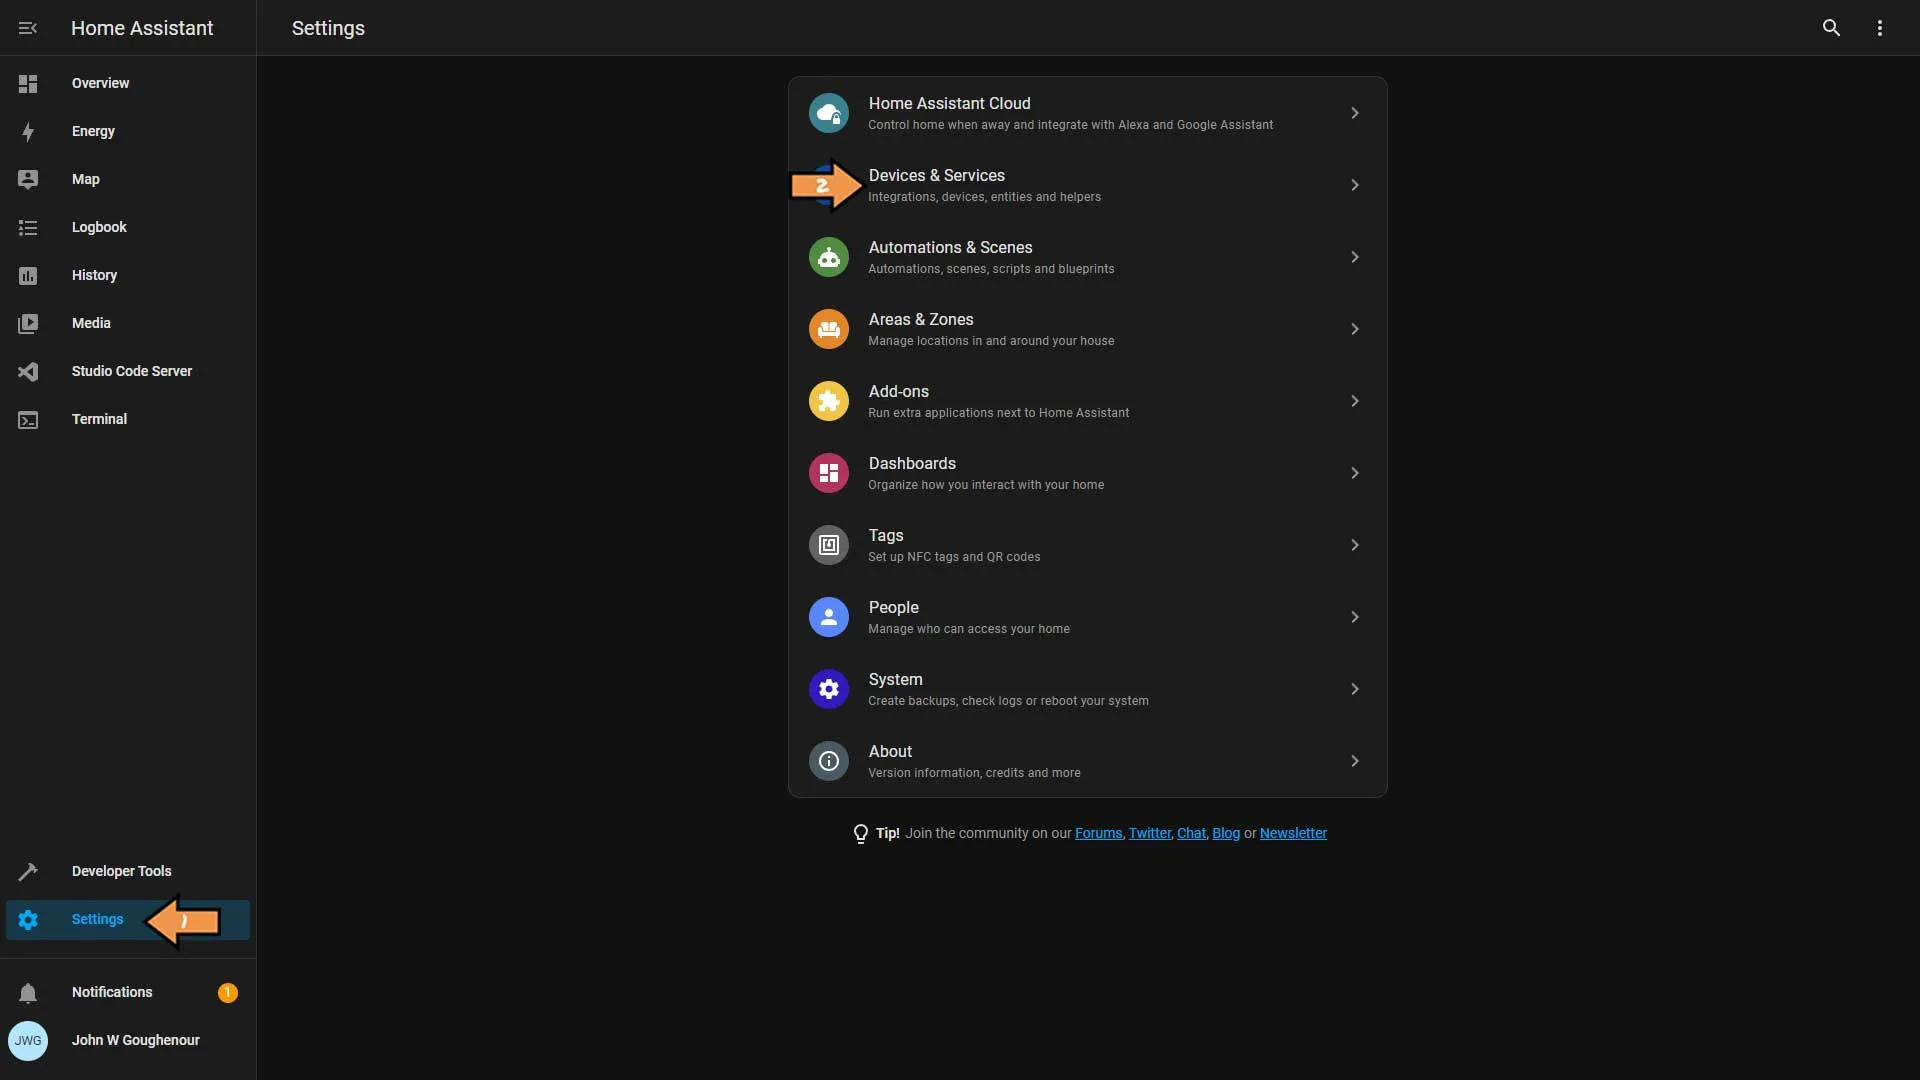
Next, go to Settings and Devices & Services.
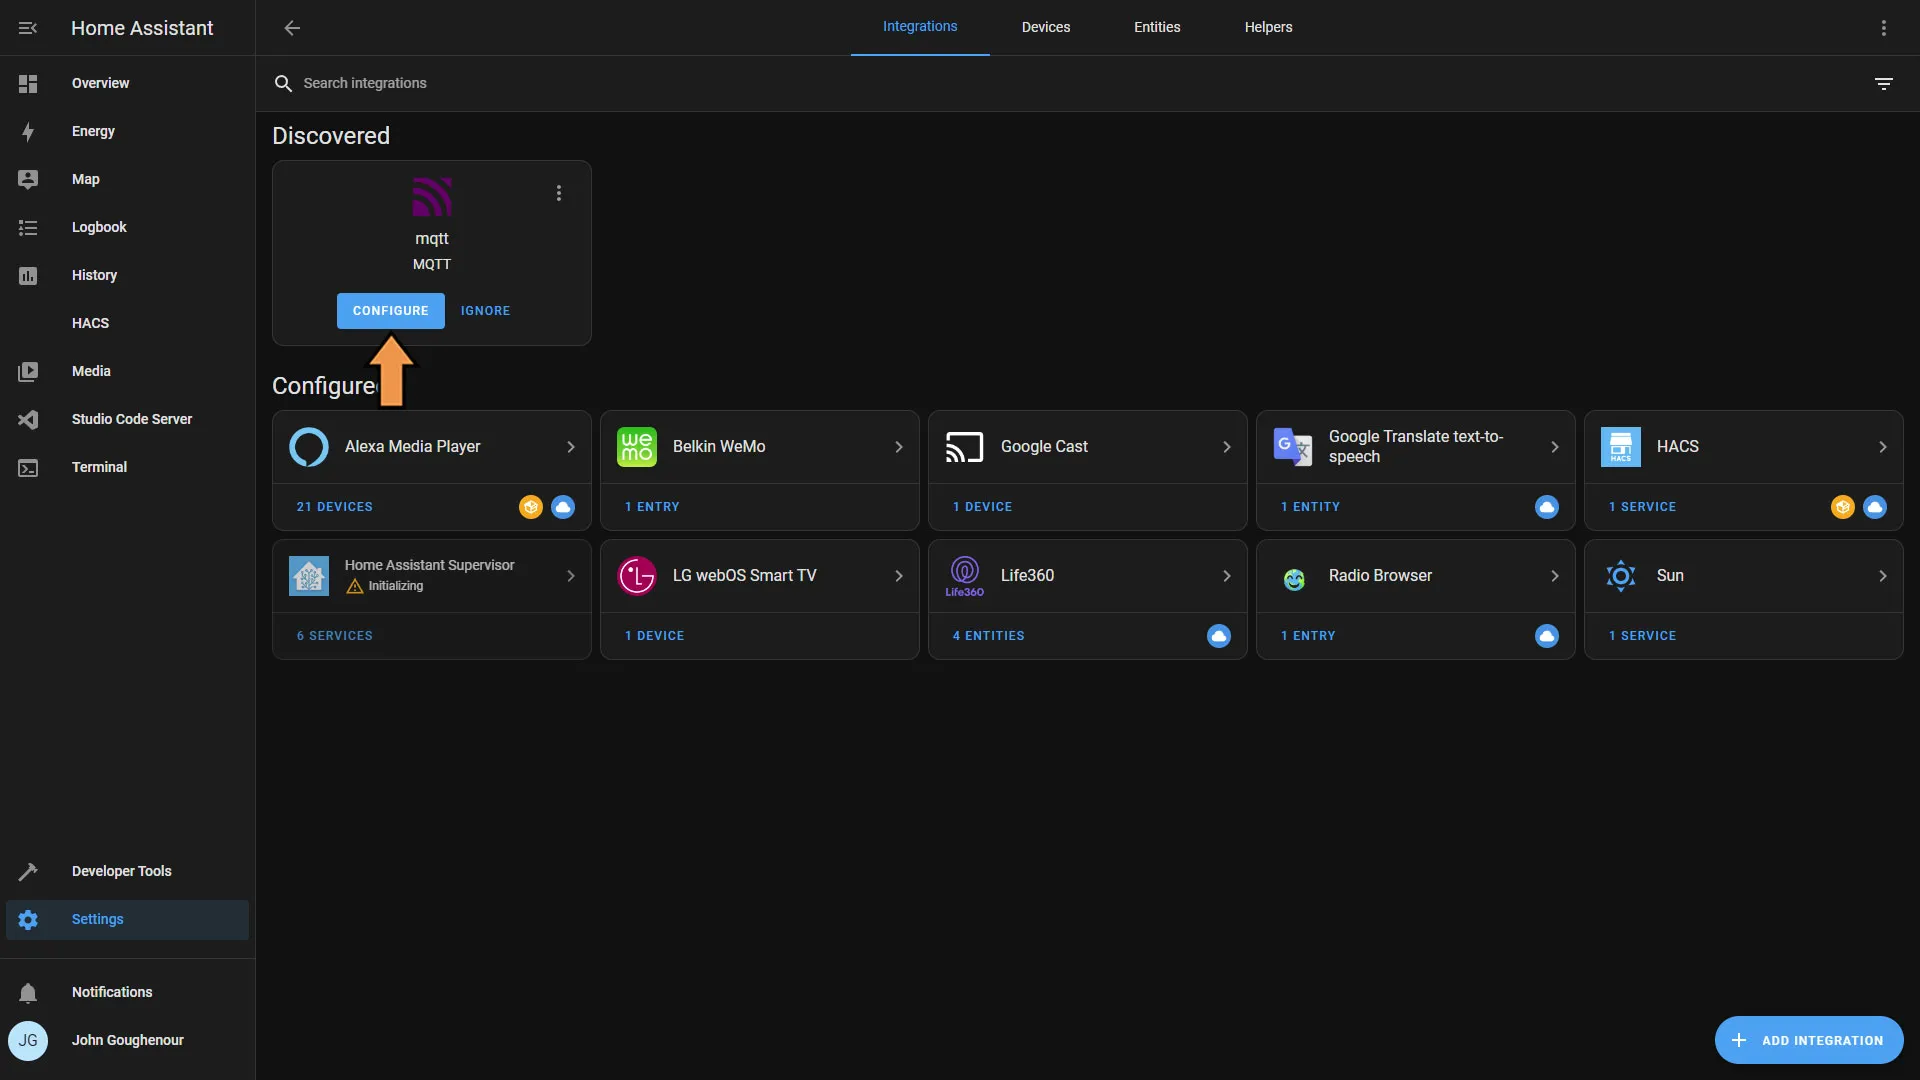
You should see the MQTT under Discovered, click the Configure button.
If you don’t see it you will have to click the Add Integrations and search for it.
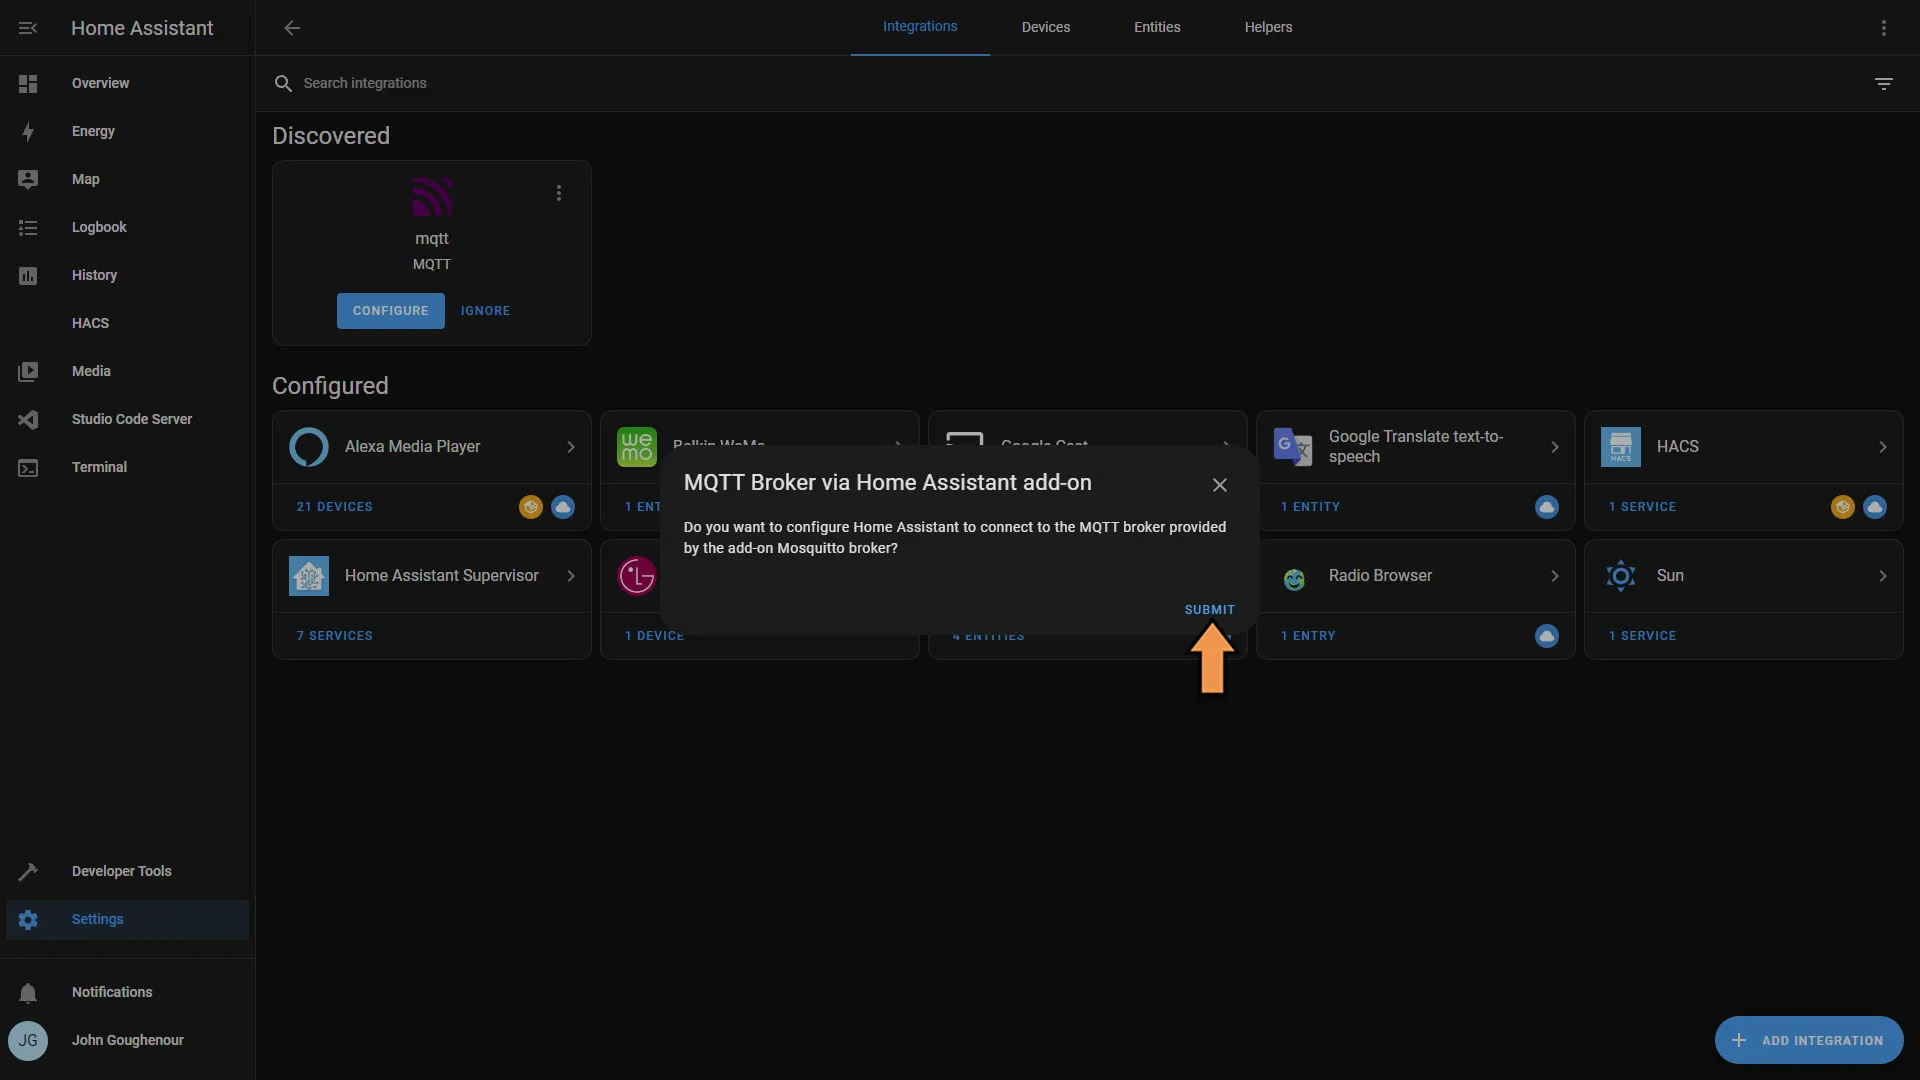
Click the Submit button.
Finally, click Finish.
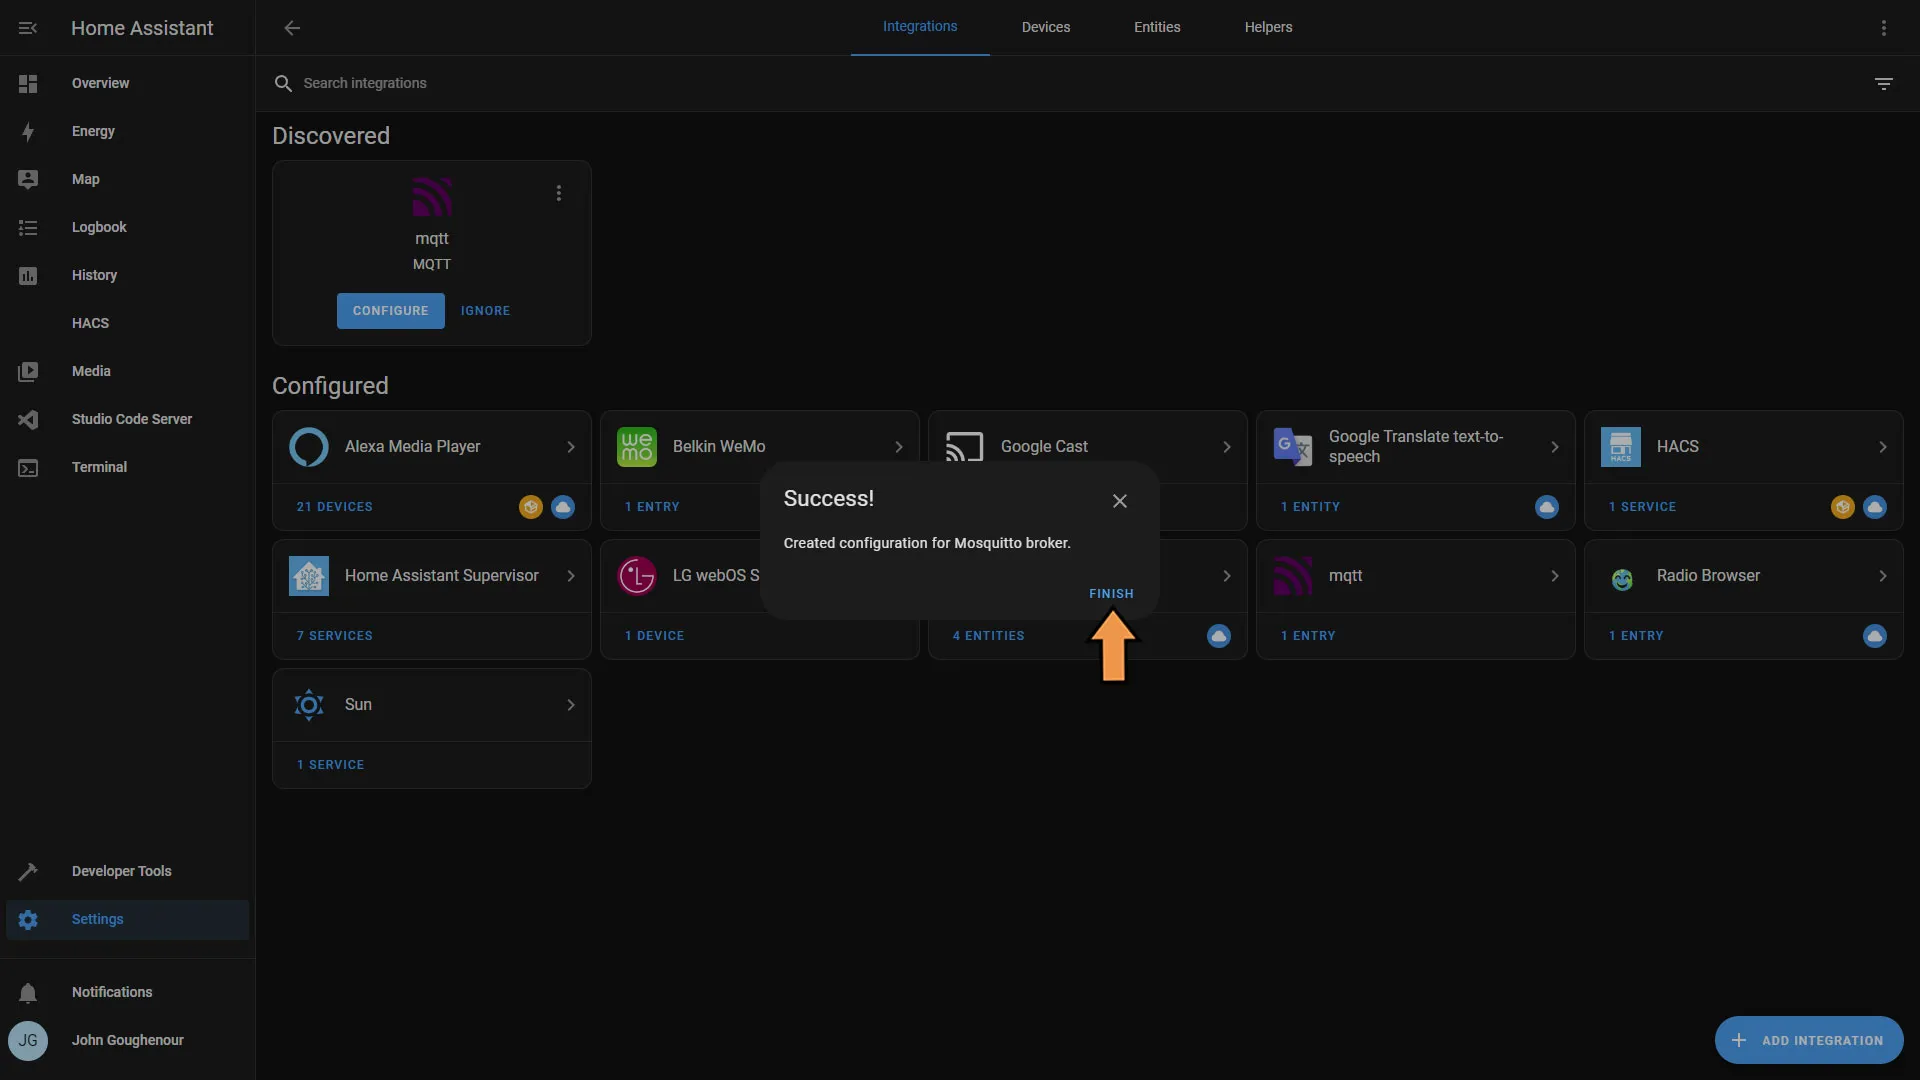
Then click the MQTT from the list of Integrations.
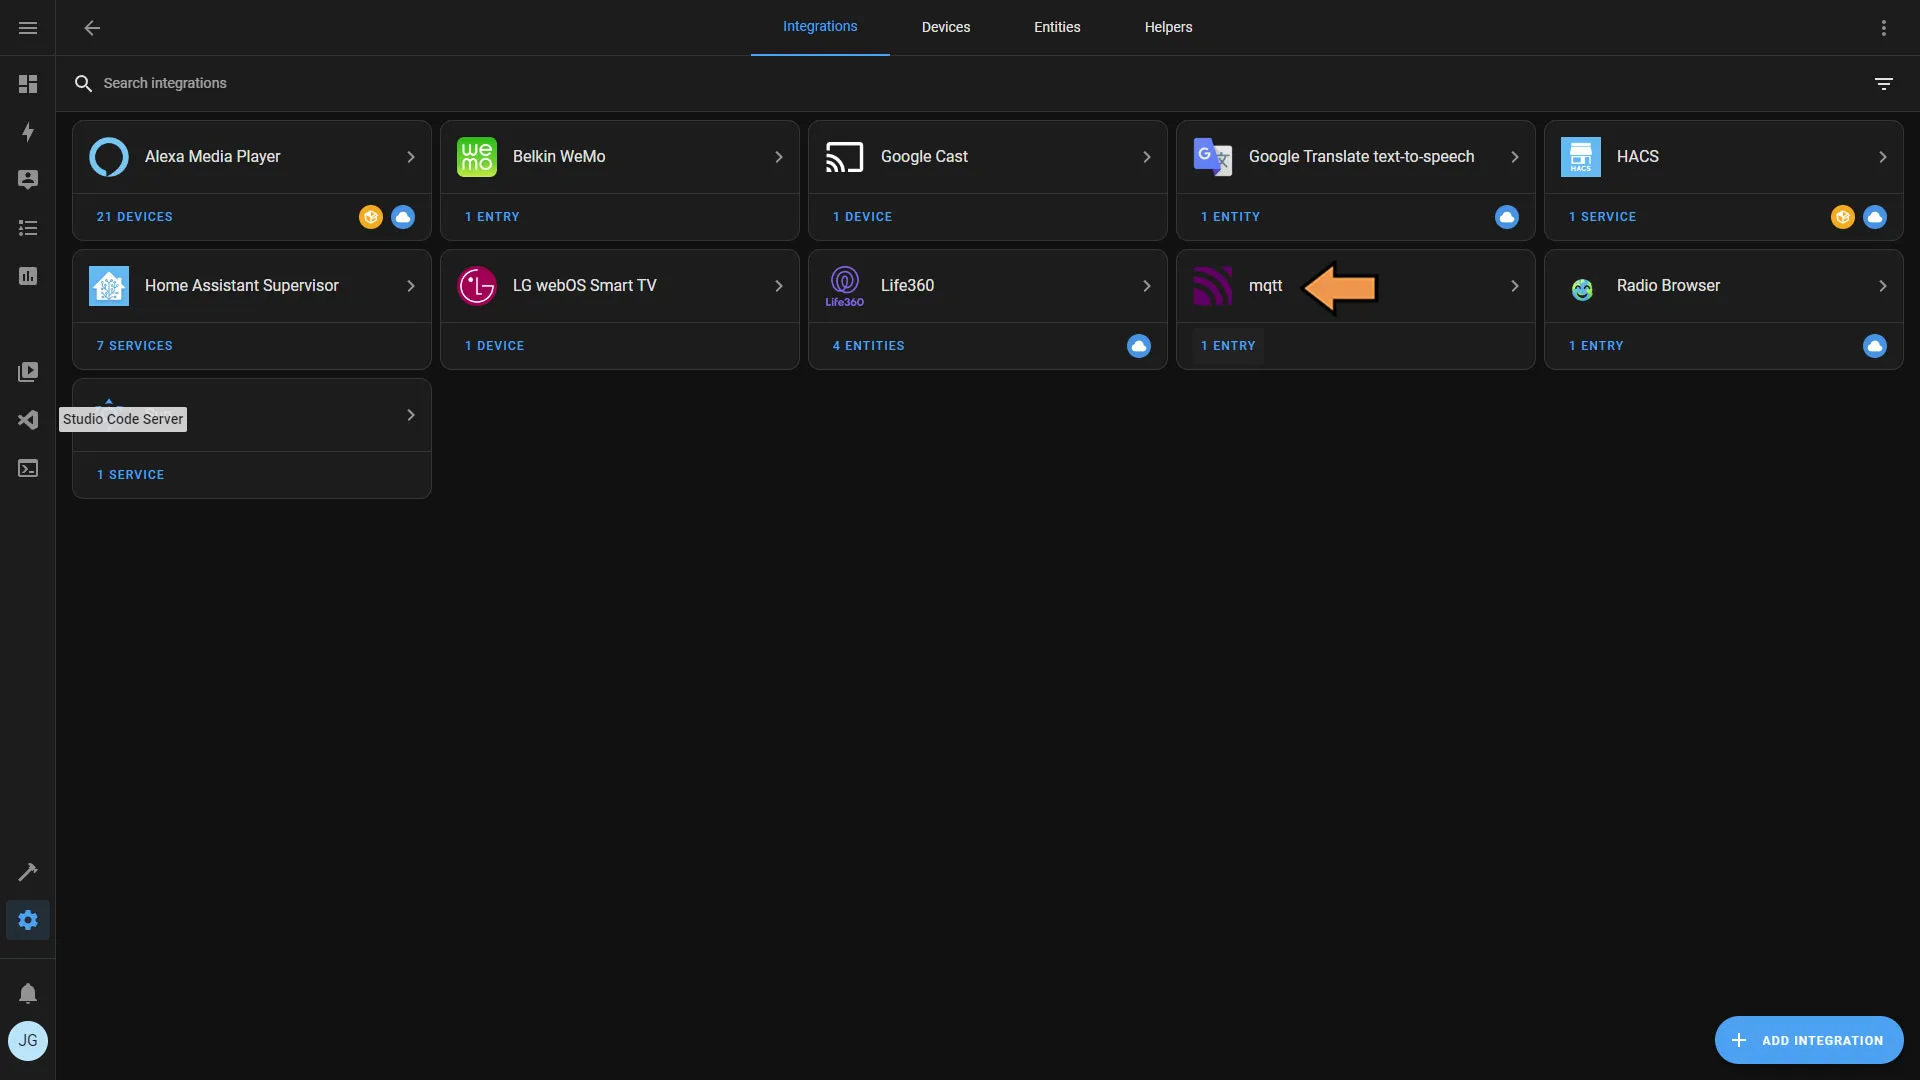
In the MQTT integration, select configure next to the Mosquitto broker.
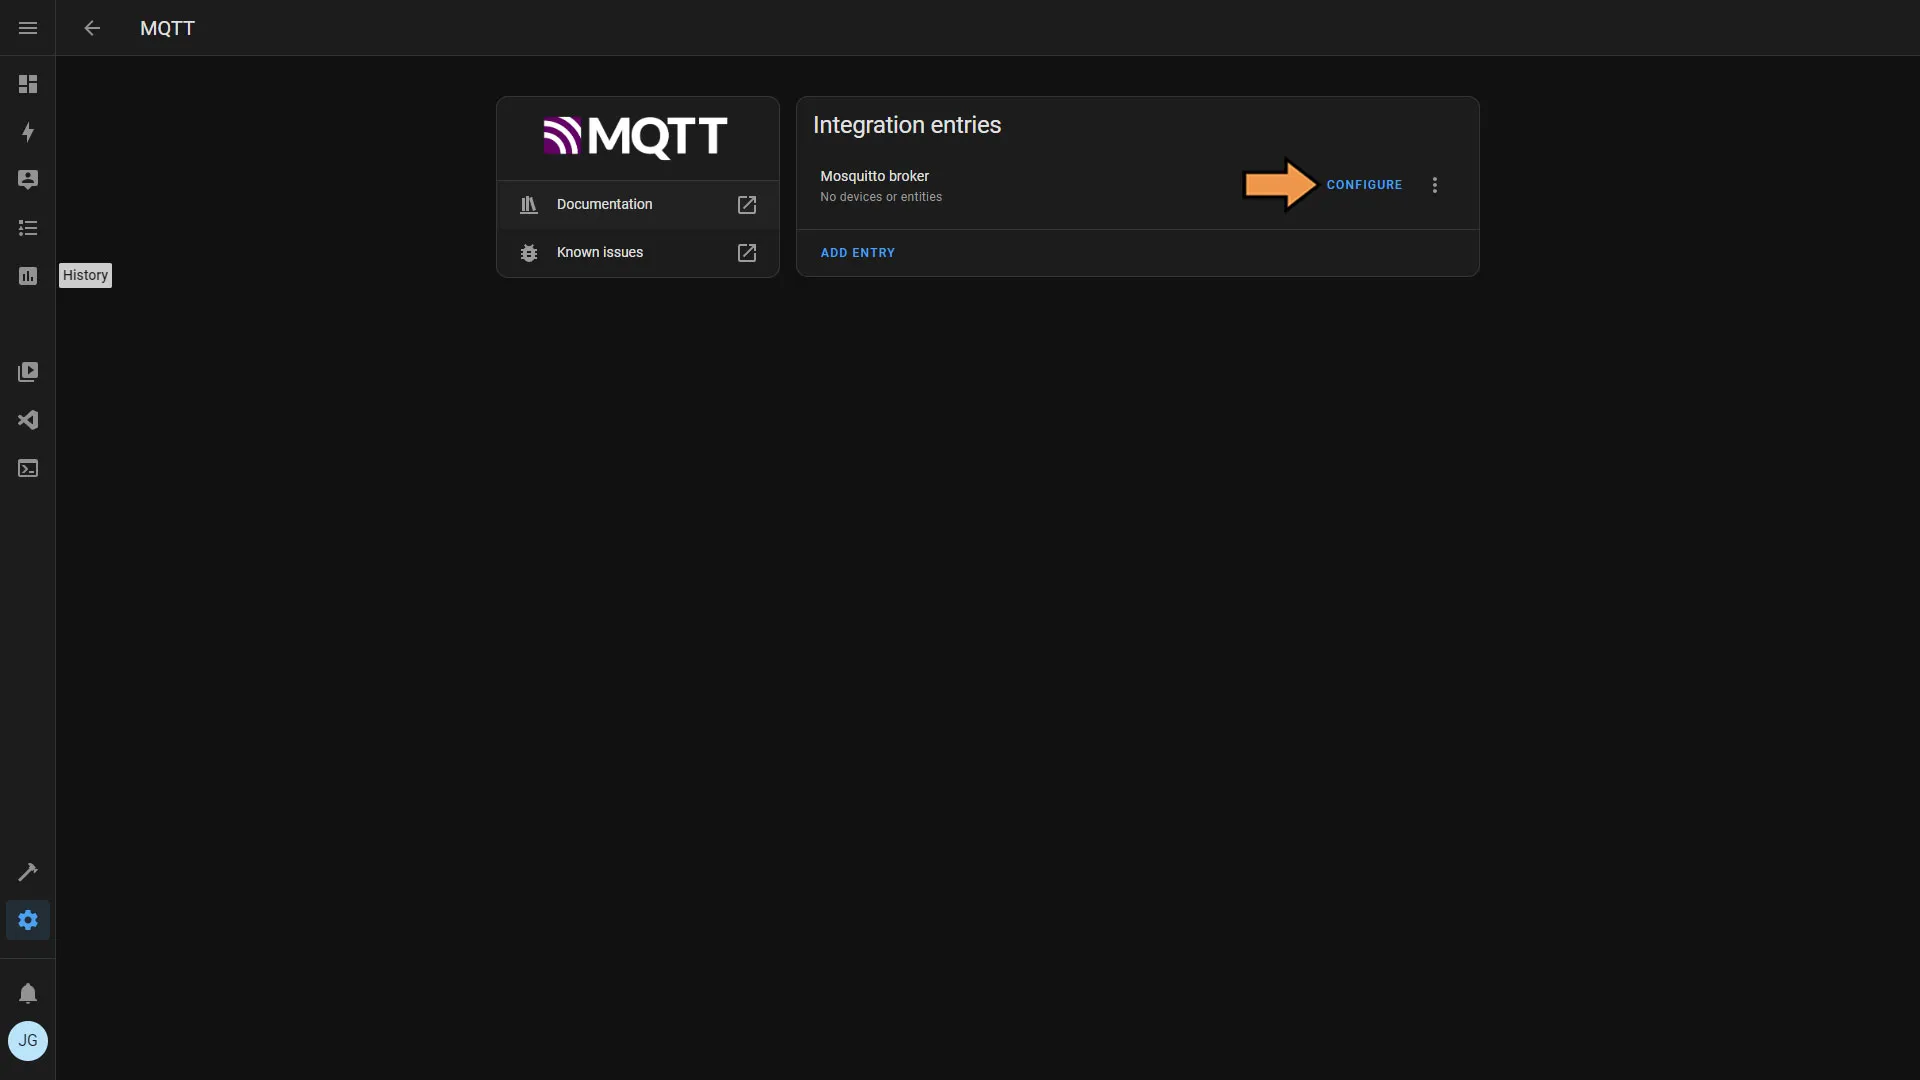
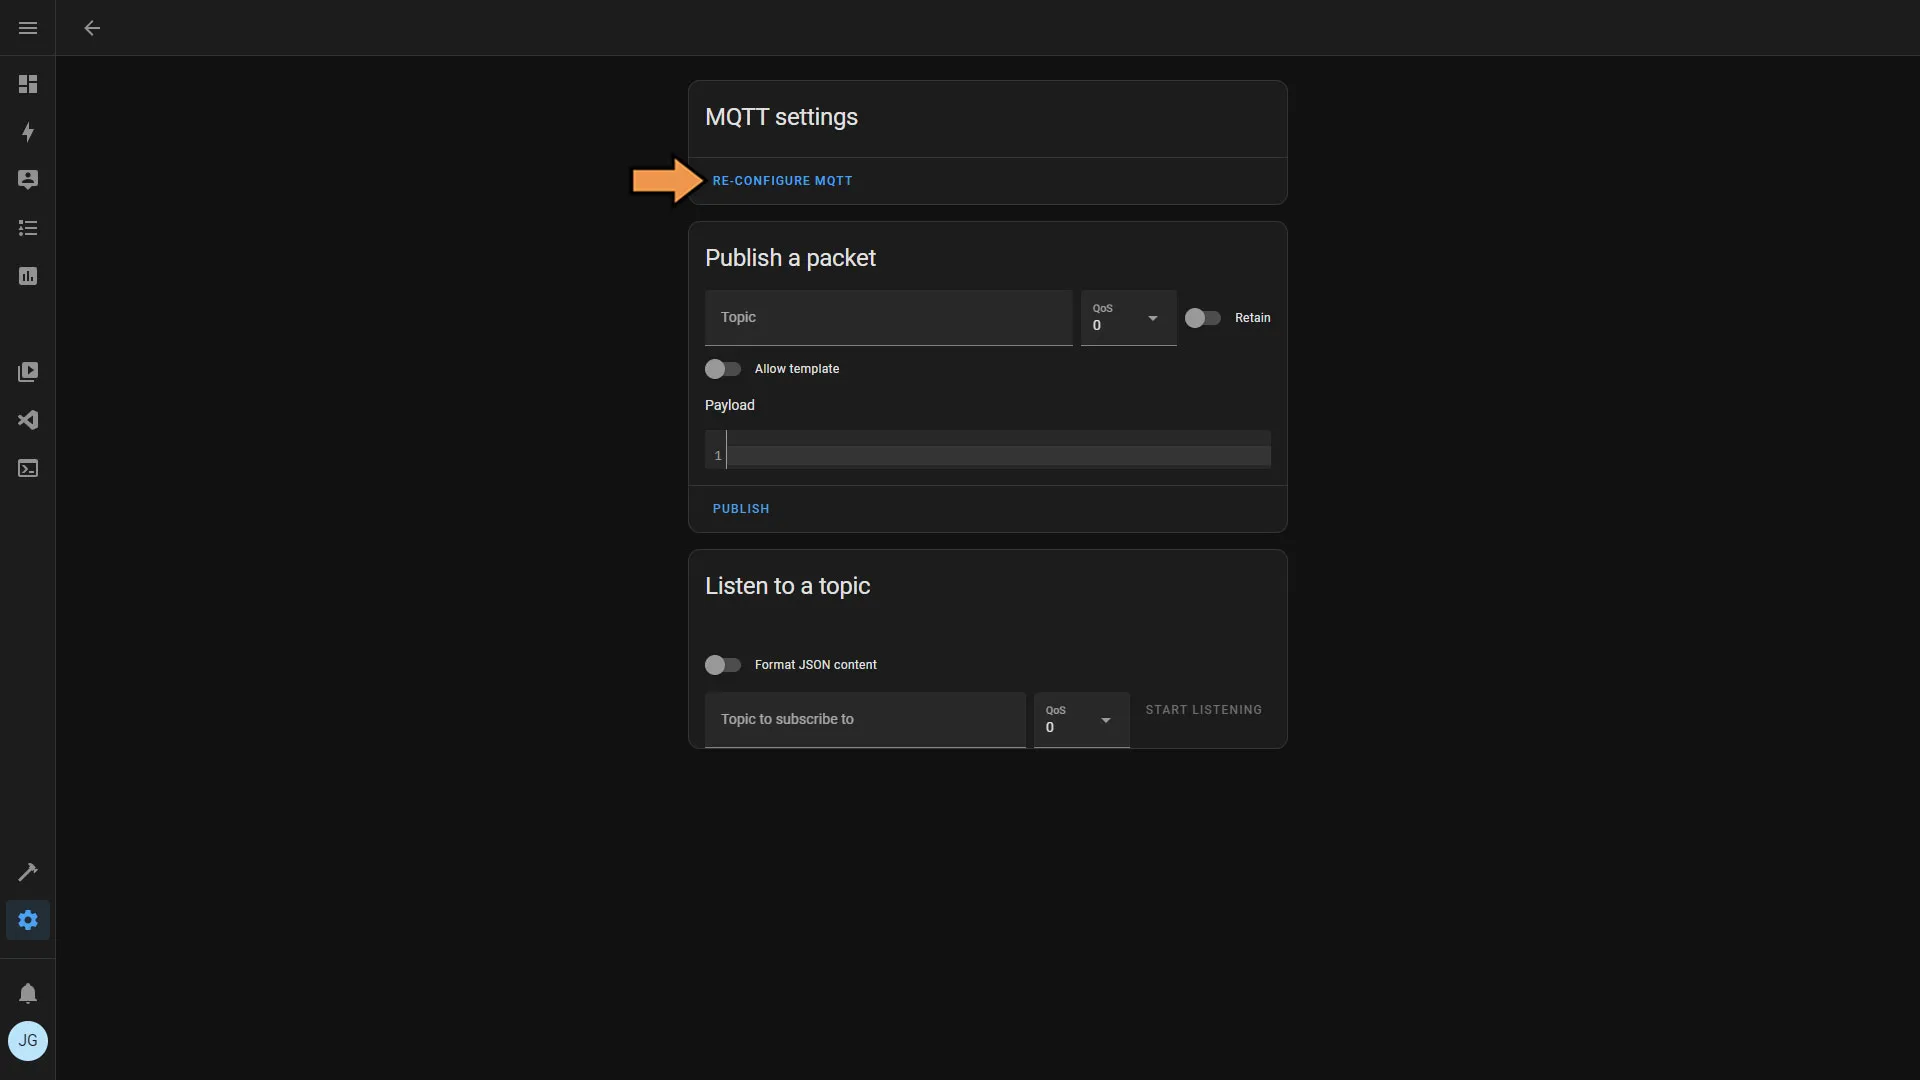
Under MQTT Settings, click Re-Configure MQTT.
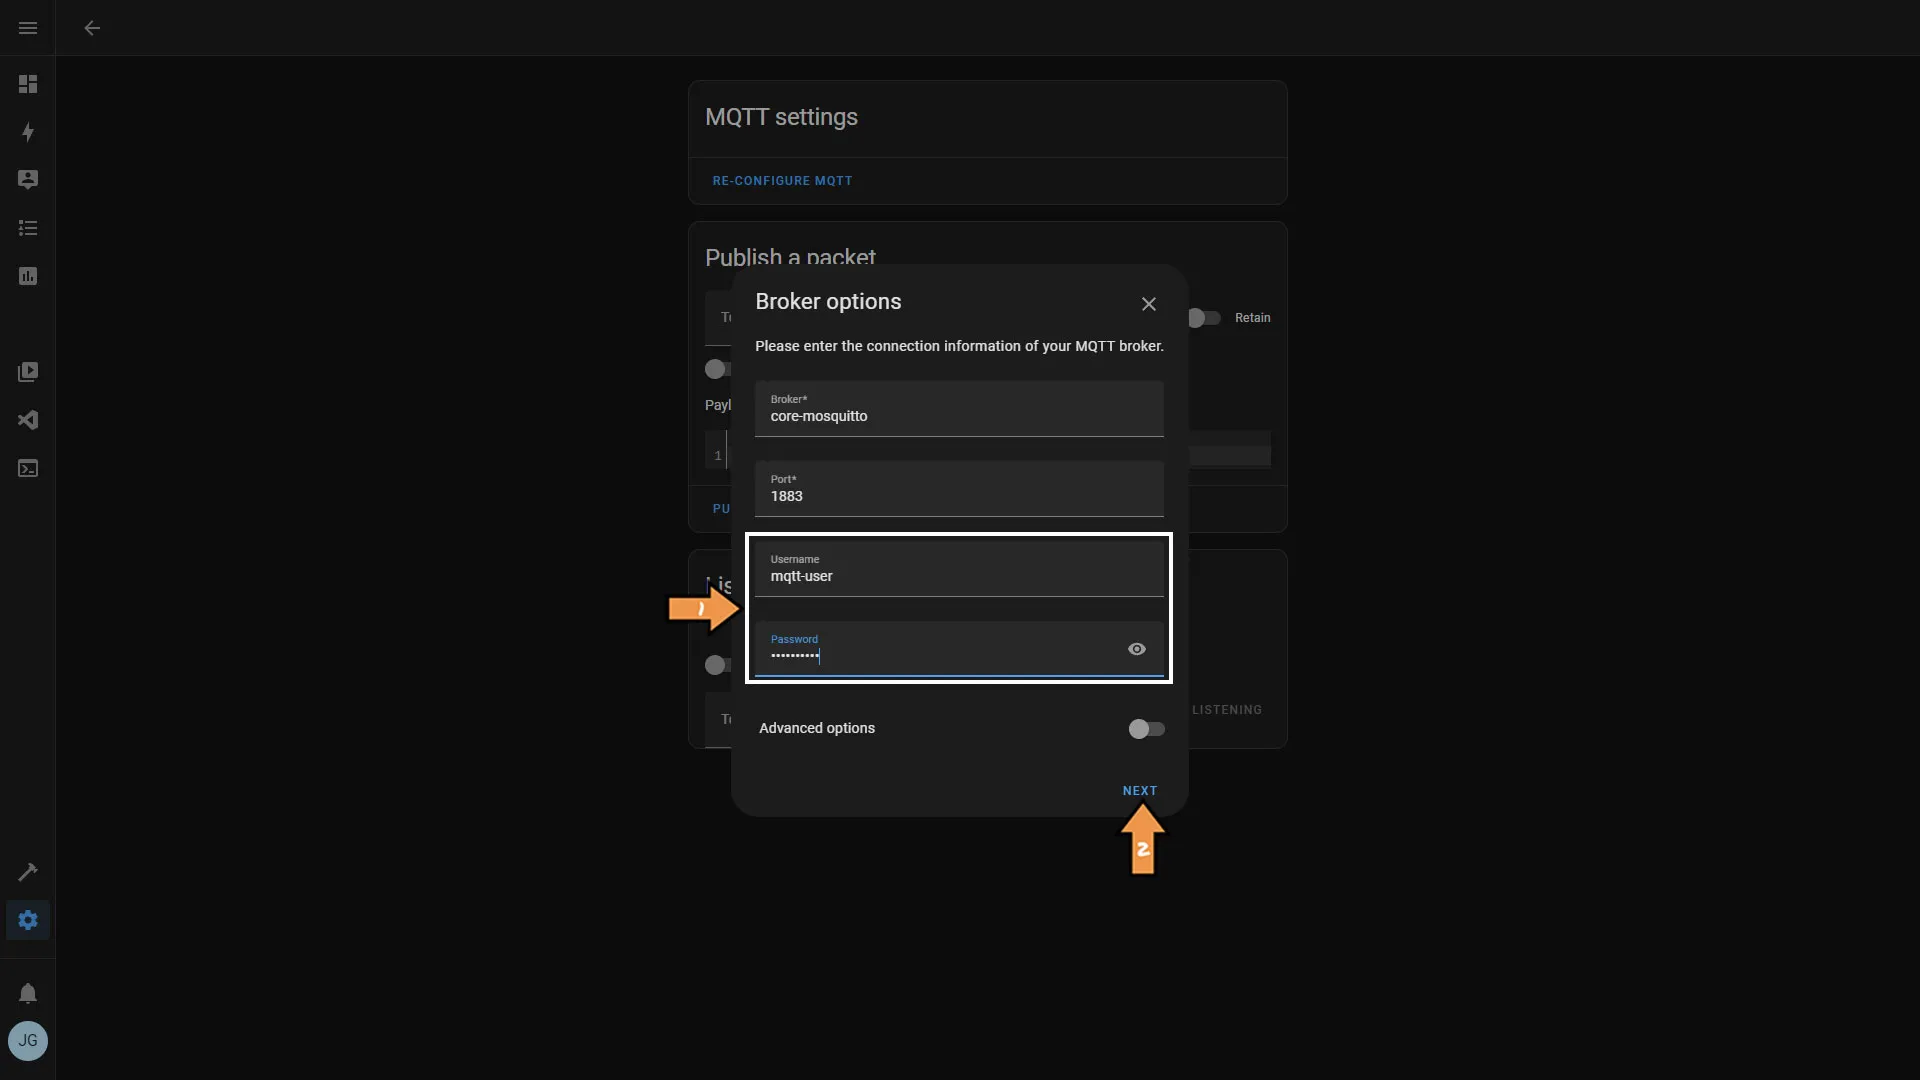
On the Broker Options screen, enter your MQTT service account we created earlier. Then click Next.
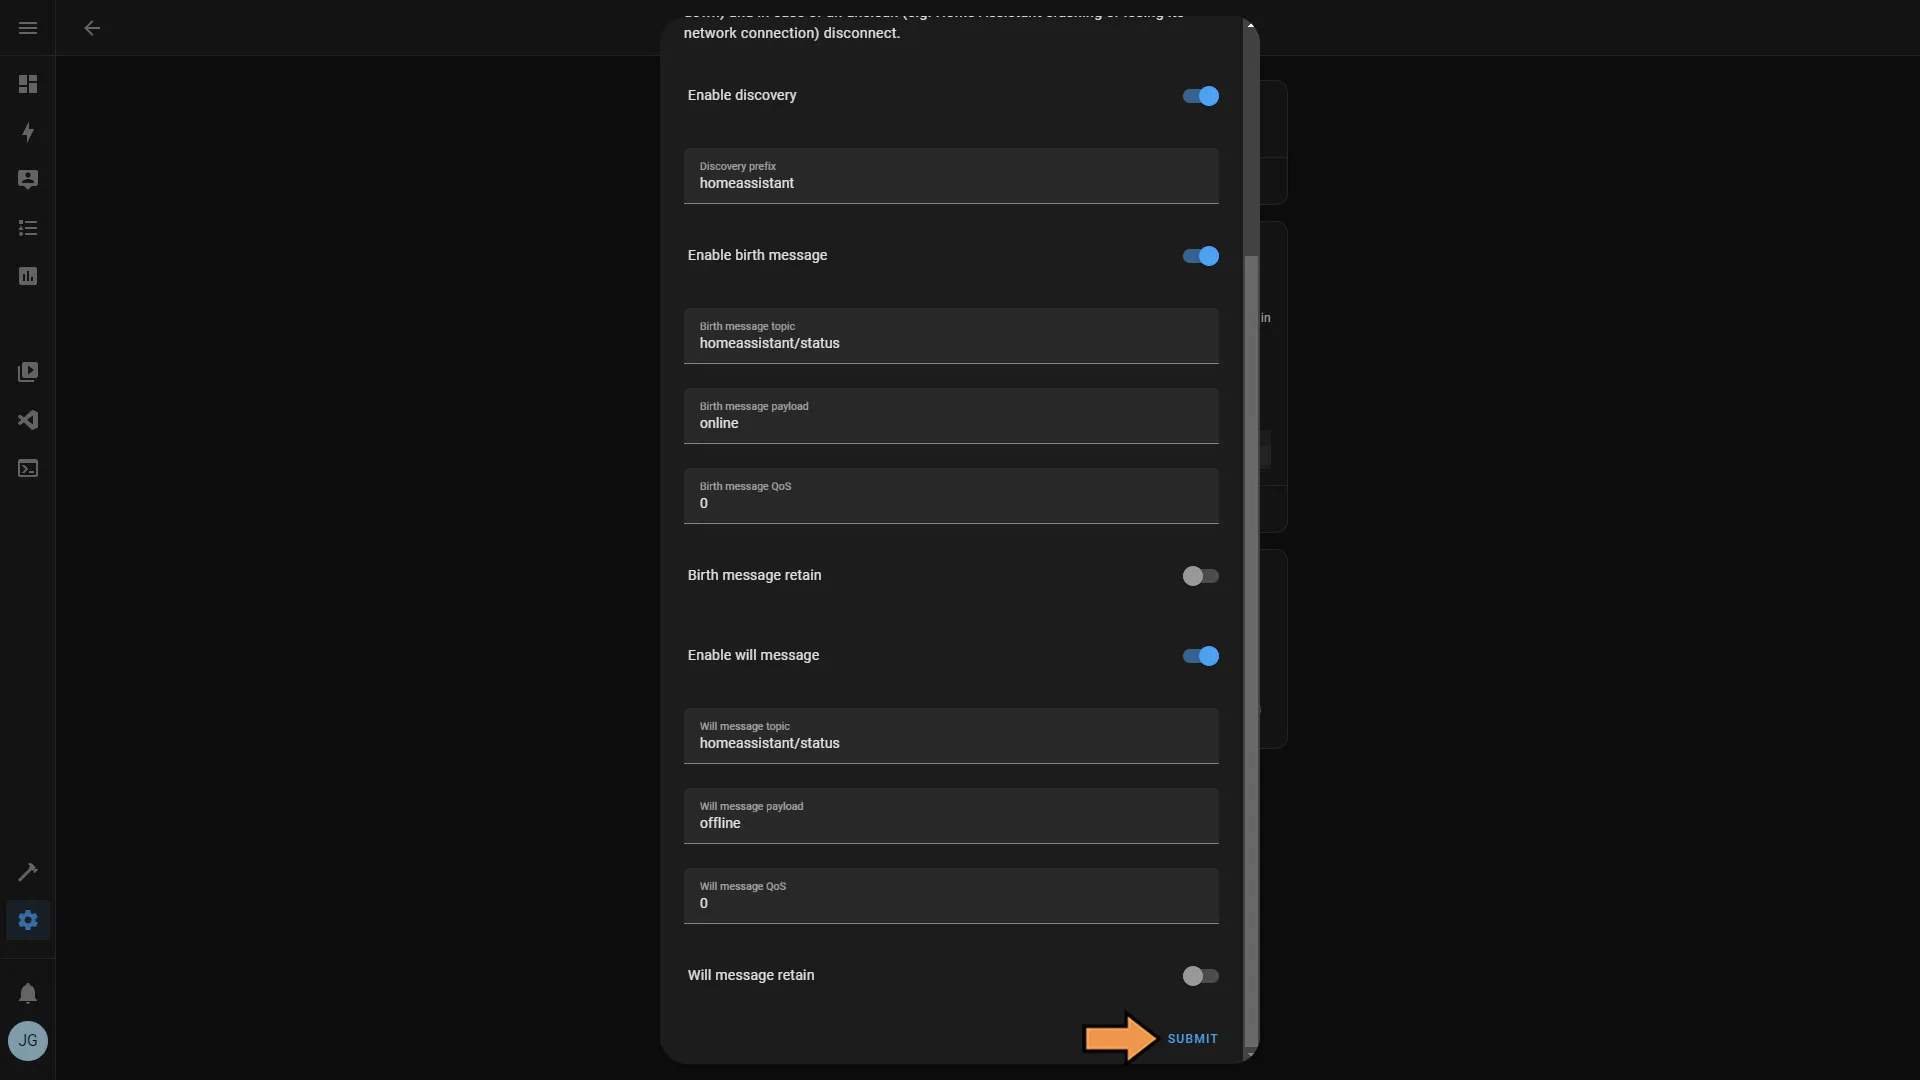
Next, click Submit.
Success: That’s it, the Mosquitto Broker is installed and configured.
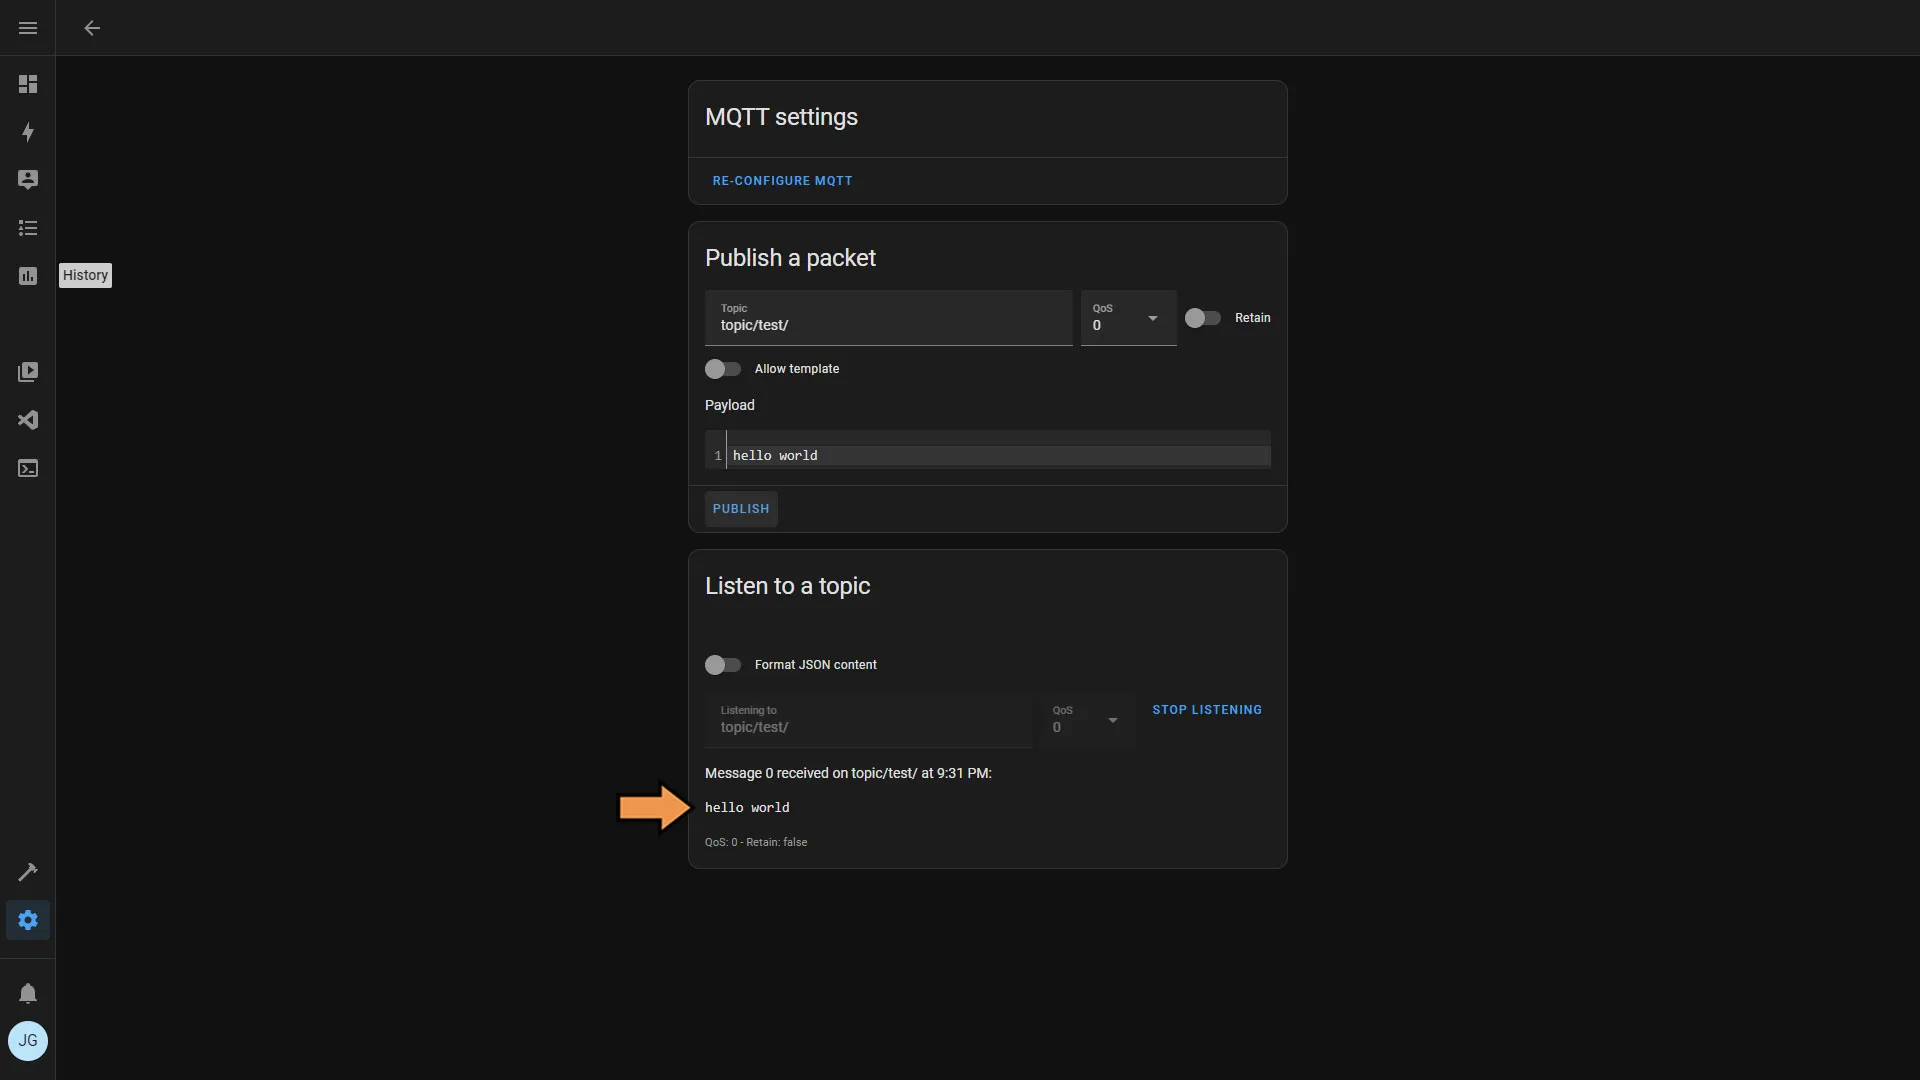
Now we will perform a quick test to ensure everything is working correctly.
- Under the Listen to a Topic section, enter a topic. This can be anything you like.
- Then click Start Listening.
- Under the Publish a packet section, enter the exact same topic we entered earlier.
- Then, for the Payload, enter some text.
- Finally, click Publish.
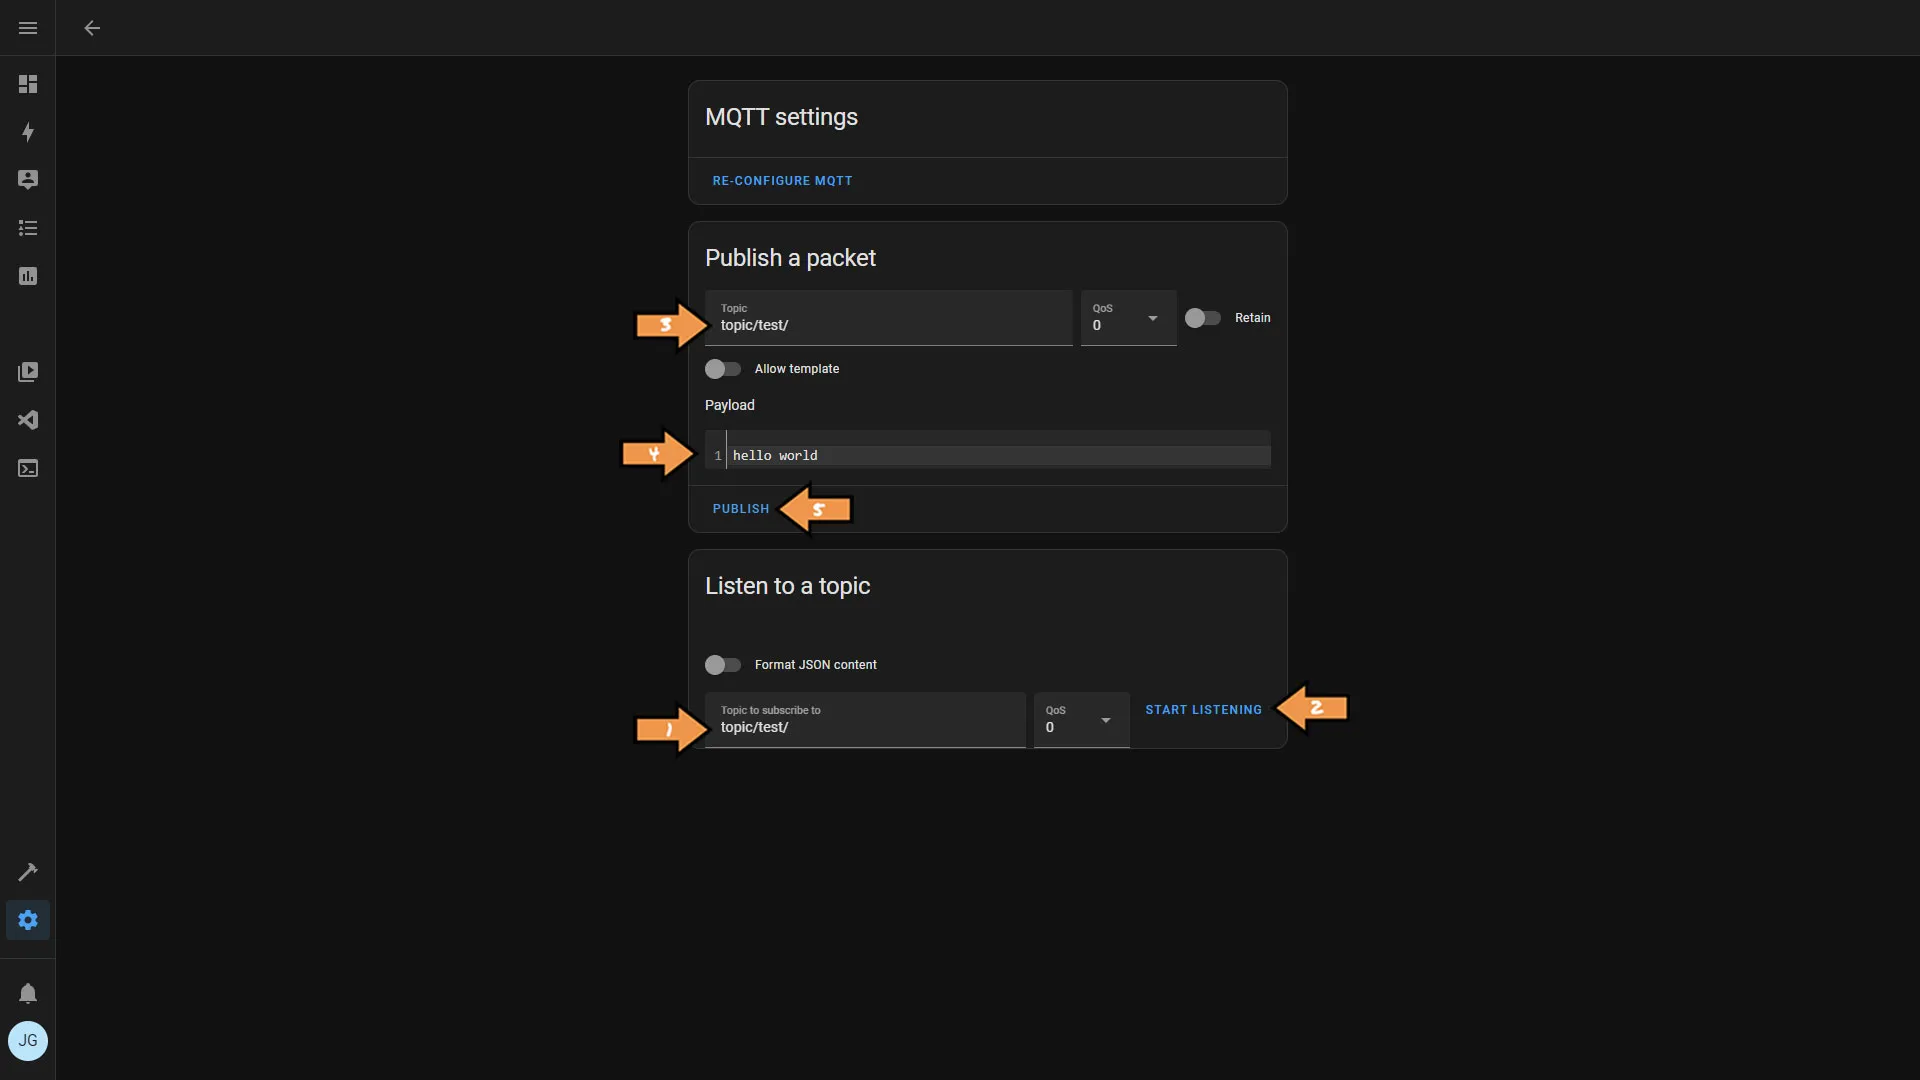
You should see your topic’s payload under the Listen to a Topic section.
