The Ultimate Smart Home Automation Cookbook
“Welcome Home Automation” is more than just a fun gadget; it’s an experience that adds a personal touch to your smart home. This delightful automation works seamlessly with your smart lock. When the lock is activated with a code, it prompts Alexa to issue a warm welcome, making every entry into your home feel special and personalized. The charm of “Welcome Home Automation” lies in its ability to transform a regular day into something extraordinary.
Moreover, “Welcome Home Automation” isn’t just about the initial greeting; it’s about setting the tone for your time at home. This automation can be customized further to trigger other smart home actions, like turning on lights or playing your favorite music, enhancing the welcoming ambiance. It’s a fantastic way to impress guests and provide a comforting sense of arrival for family members.
Incorporating “Welcome Home Automation” into your home is a step towards making your living space more responsive and interactive. It’s not just about functionality; it’s about creating an environment that acknowledges and reacts to your presence, making you feel truly at home. “Welcome Home Automation” is a testament to how small details can significantly impact our daily living, turning a house into a more welcoming and personalized home.
Automation Details
Required Devices
- Smart Locks
- Voice Assistant
Triggers:
- Door Unlocked with Code
Conditions:
- Mode is NOT Night
Actions:
- Announce Welcome Home [NAME]
Hubitat
Welcome Home Automation
The Official Documentation for Rule Machine
Option One
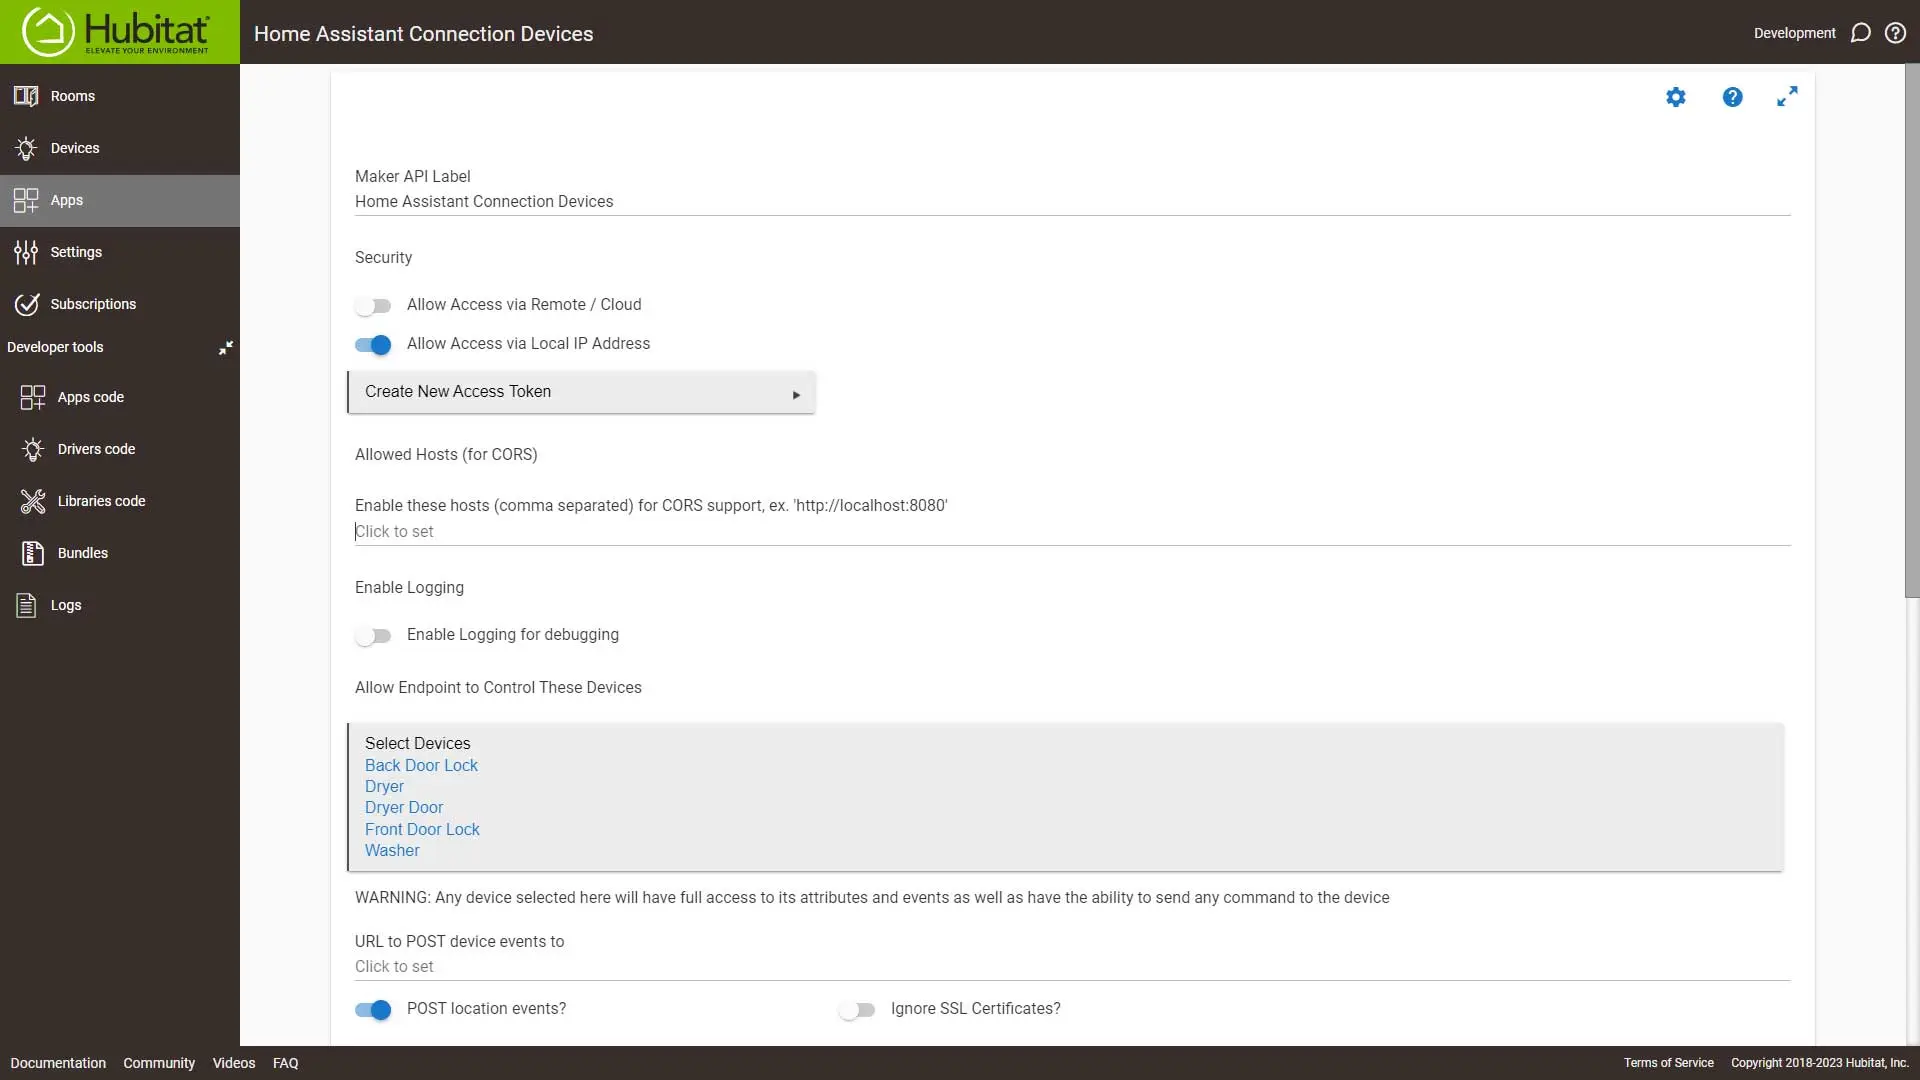
Share your devices with Home Assistant using Hubitat Connect. Then create an automation in Home Assistant using the Alexa Speaks integration outlined under the Home Assistant tab.
- Share your smart locks with Home Assistant.
Option Two
Create and share a virtual switch with Alexa using Alexa Speaks: Shared Devices. Then create an automation as outlined in Option Three.
Option Three
We’ll use an MQTT Notification device using Alexa Speaks integration.
Setting Up the Automation
First, go to Apps and click Rule Machine.
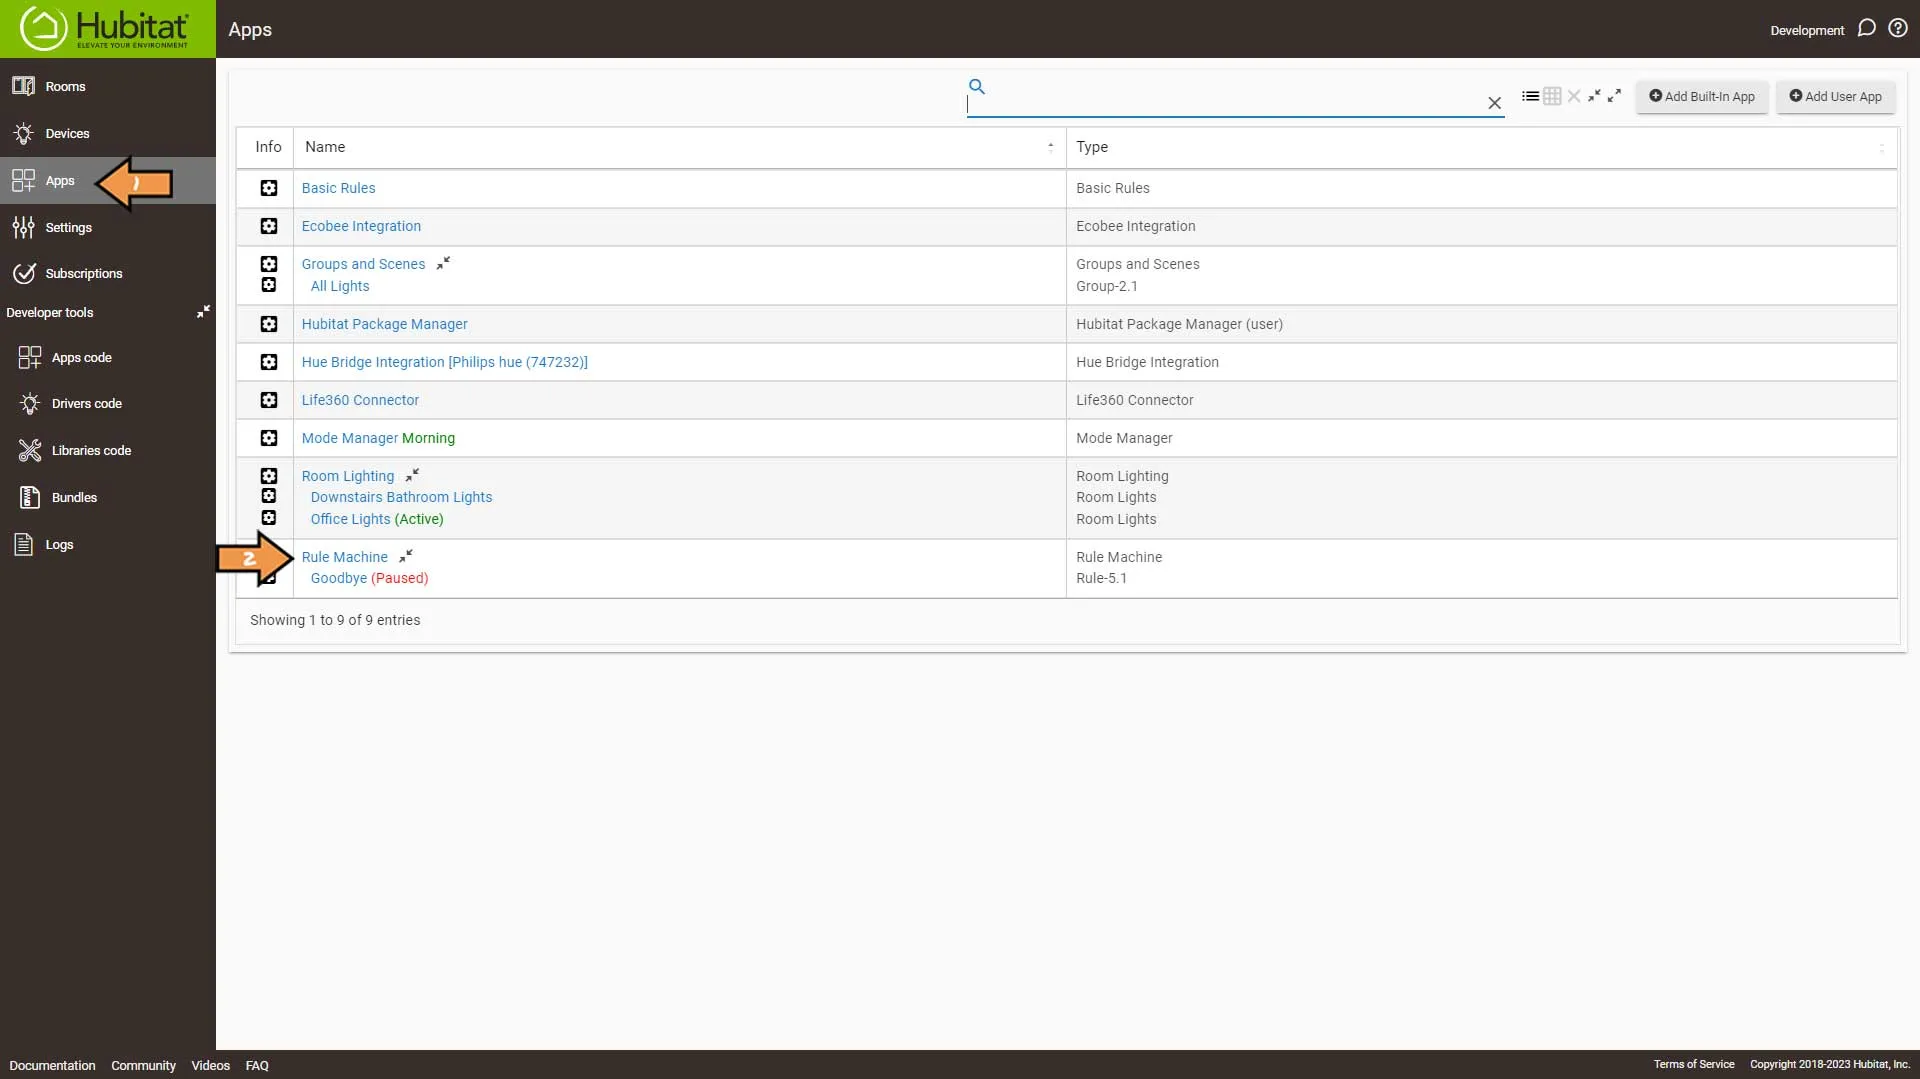
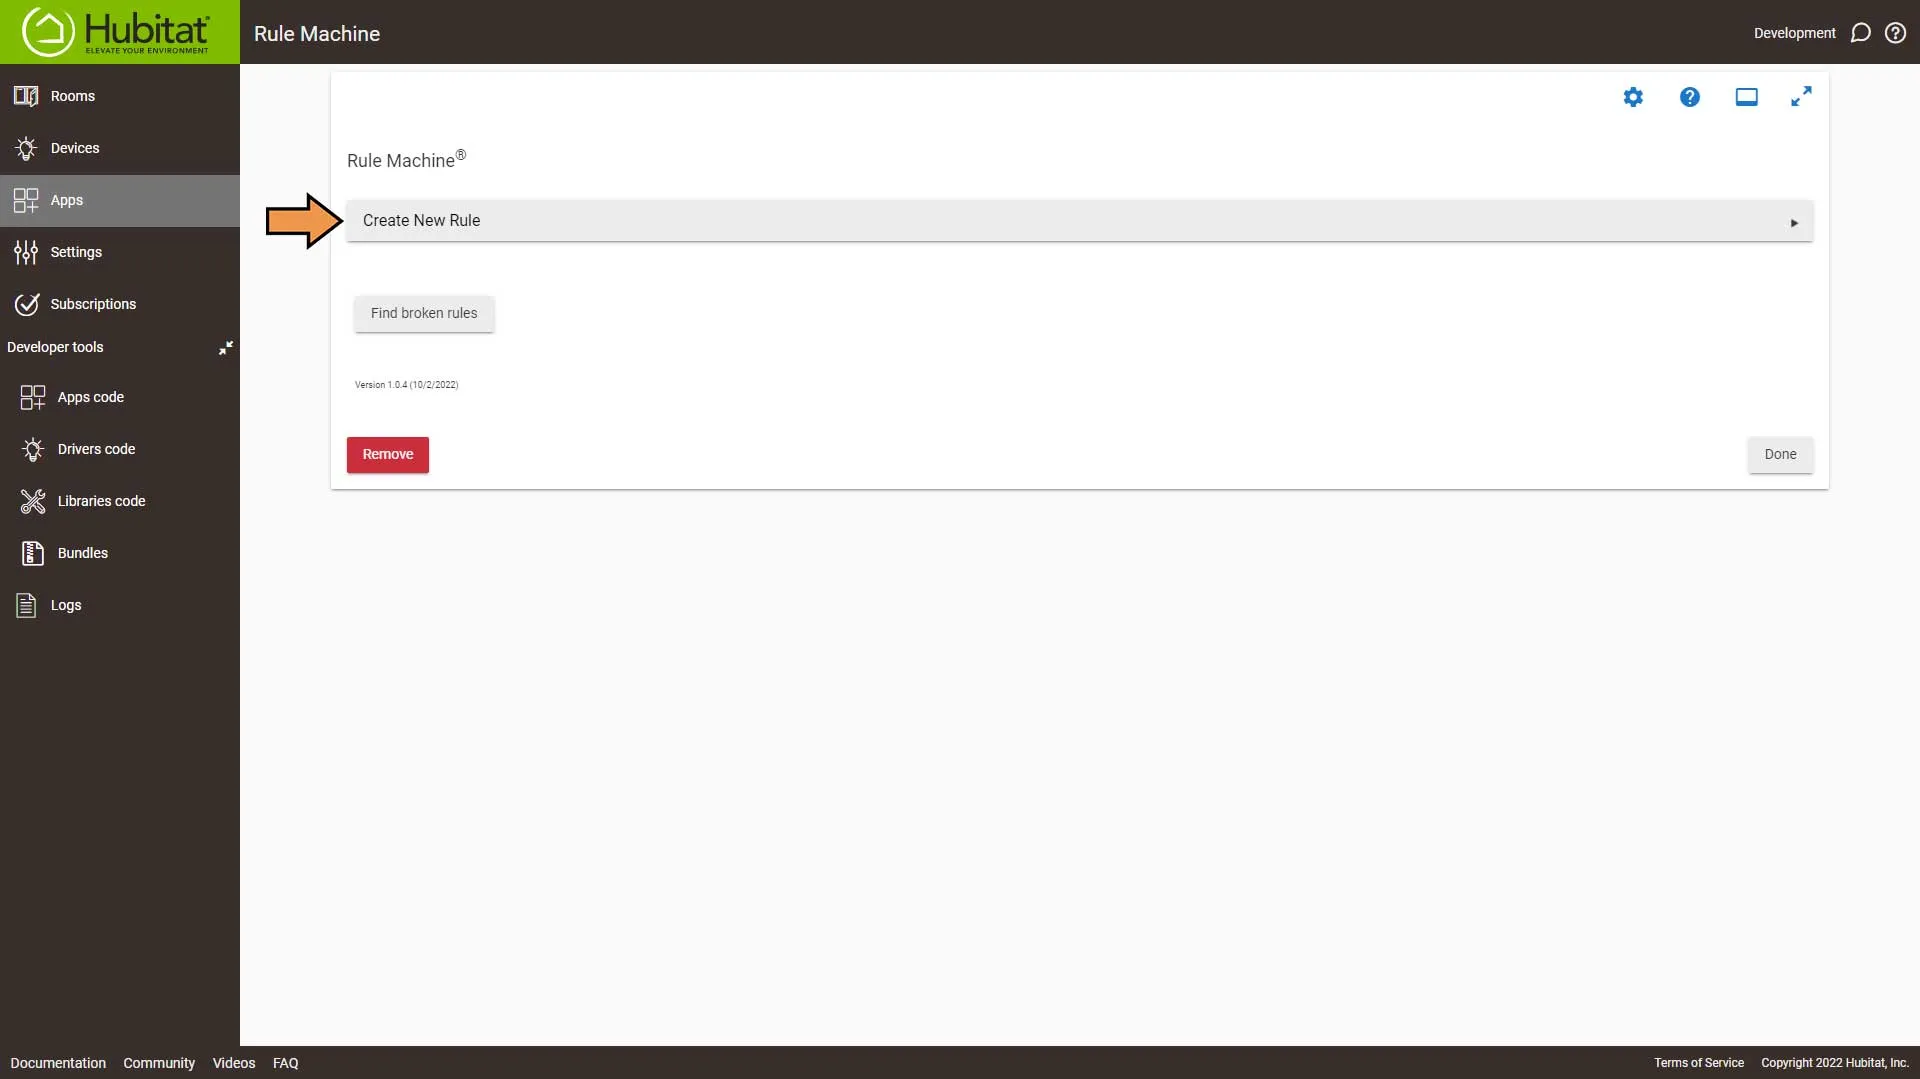
Select Create New Rule.
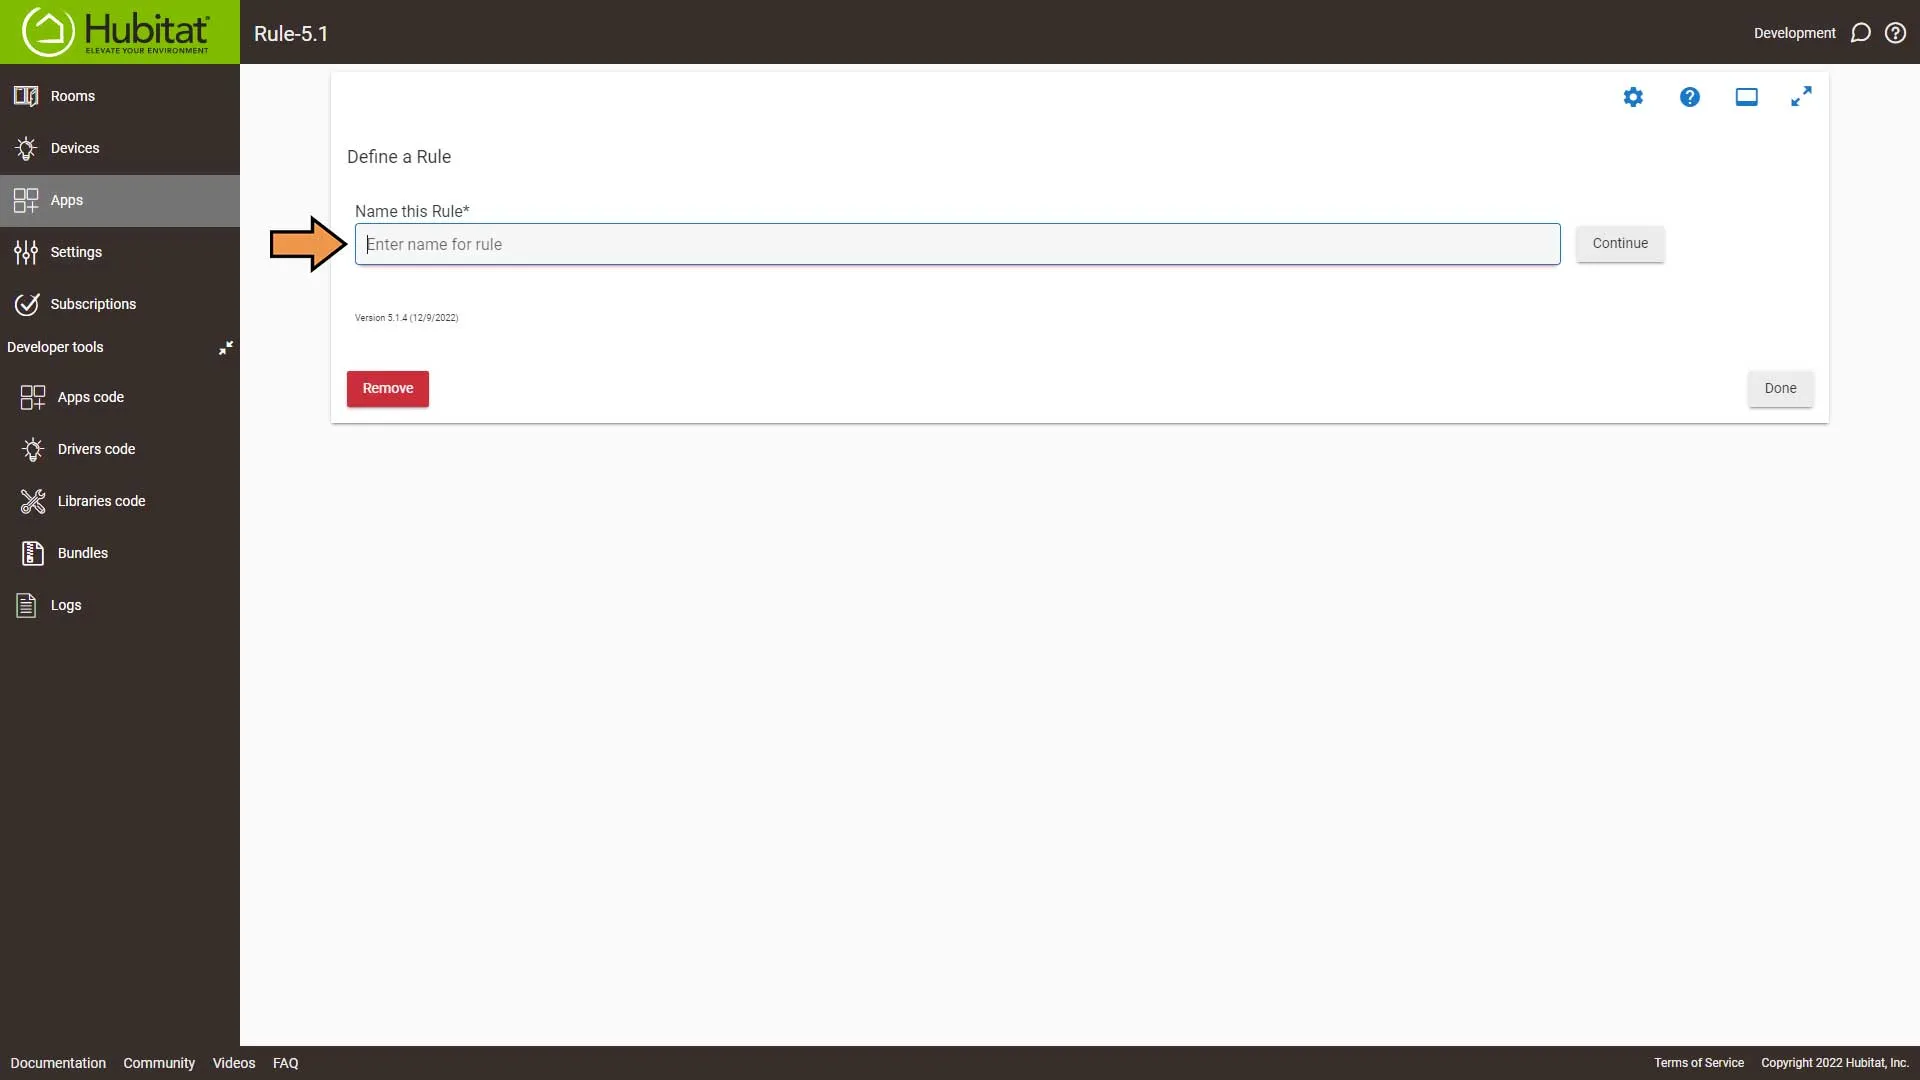
Enter a name for the Rule and hit Enter.
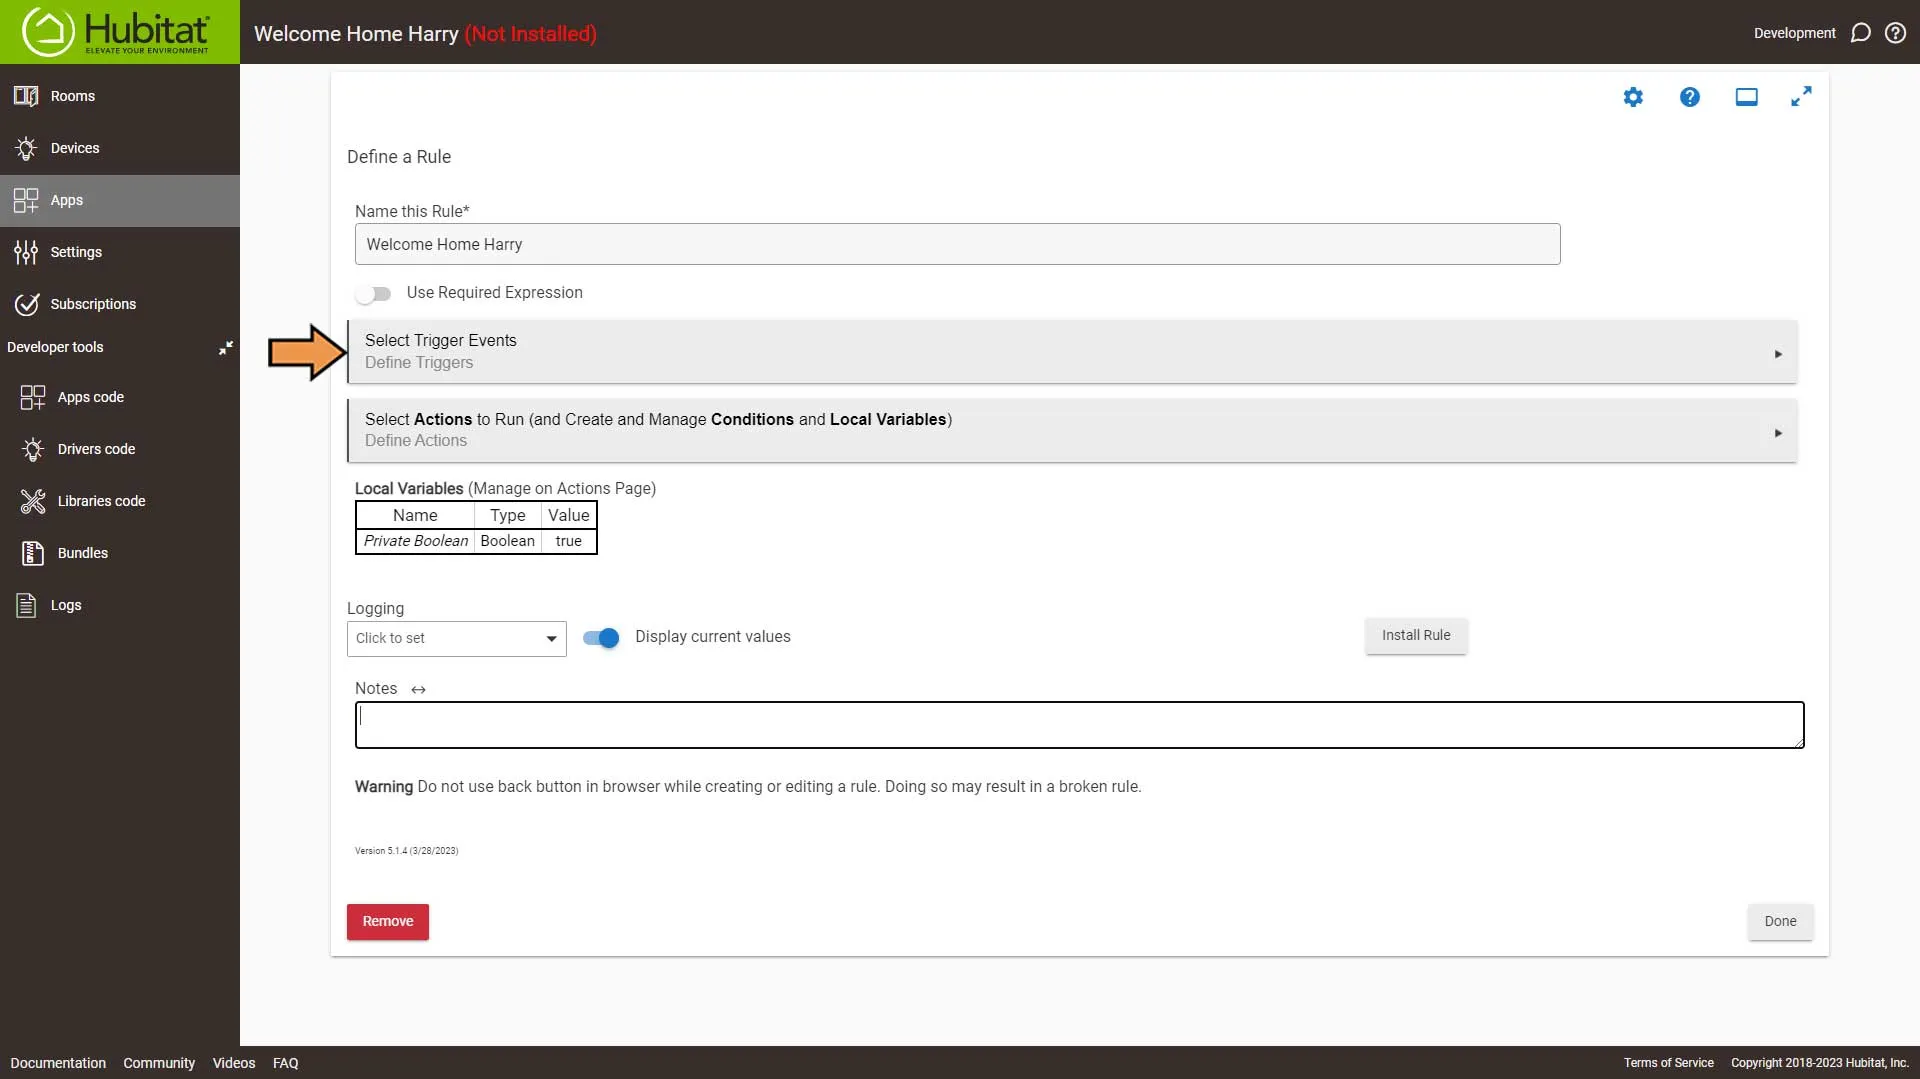
Select Trigger Event.
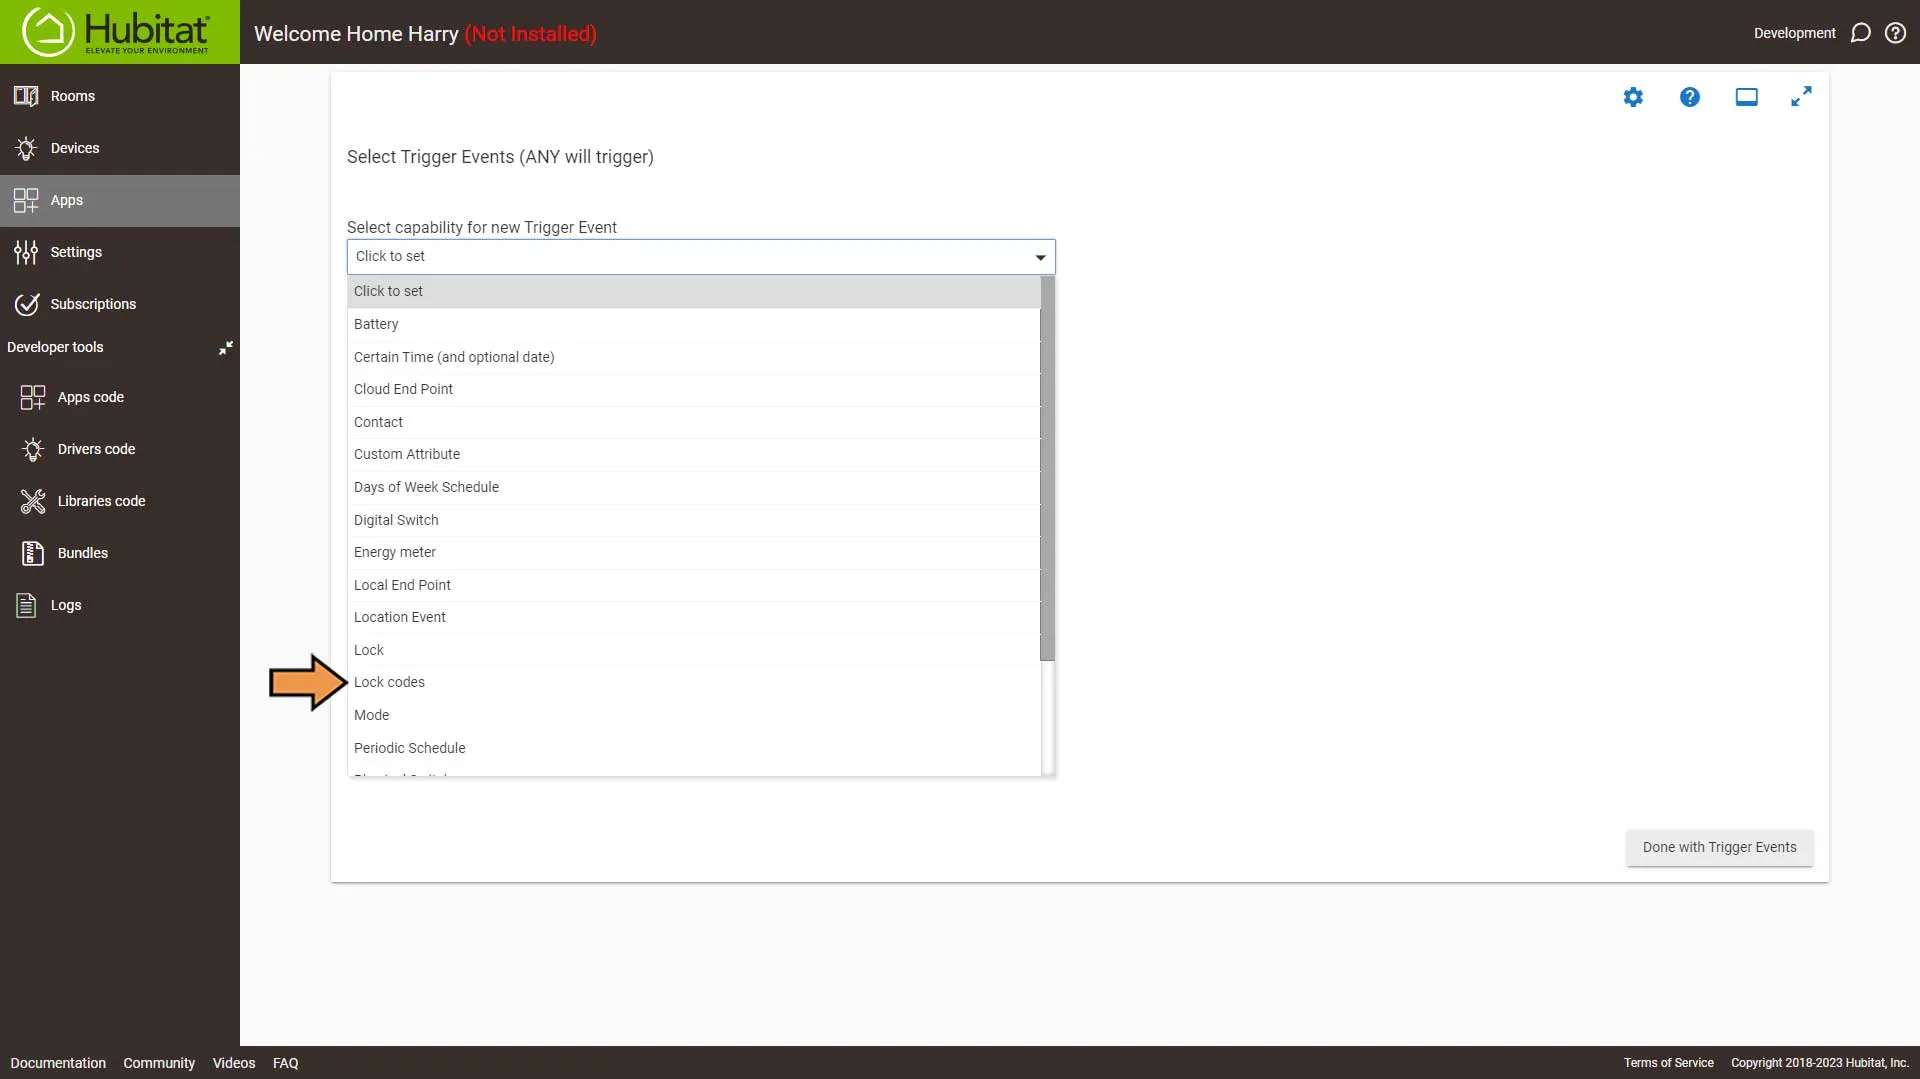
From the Capability drop-down, select Lock Codes.
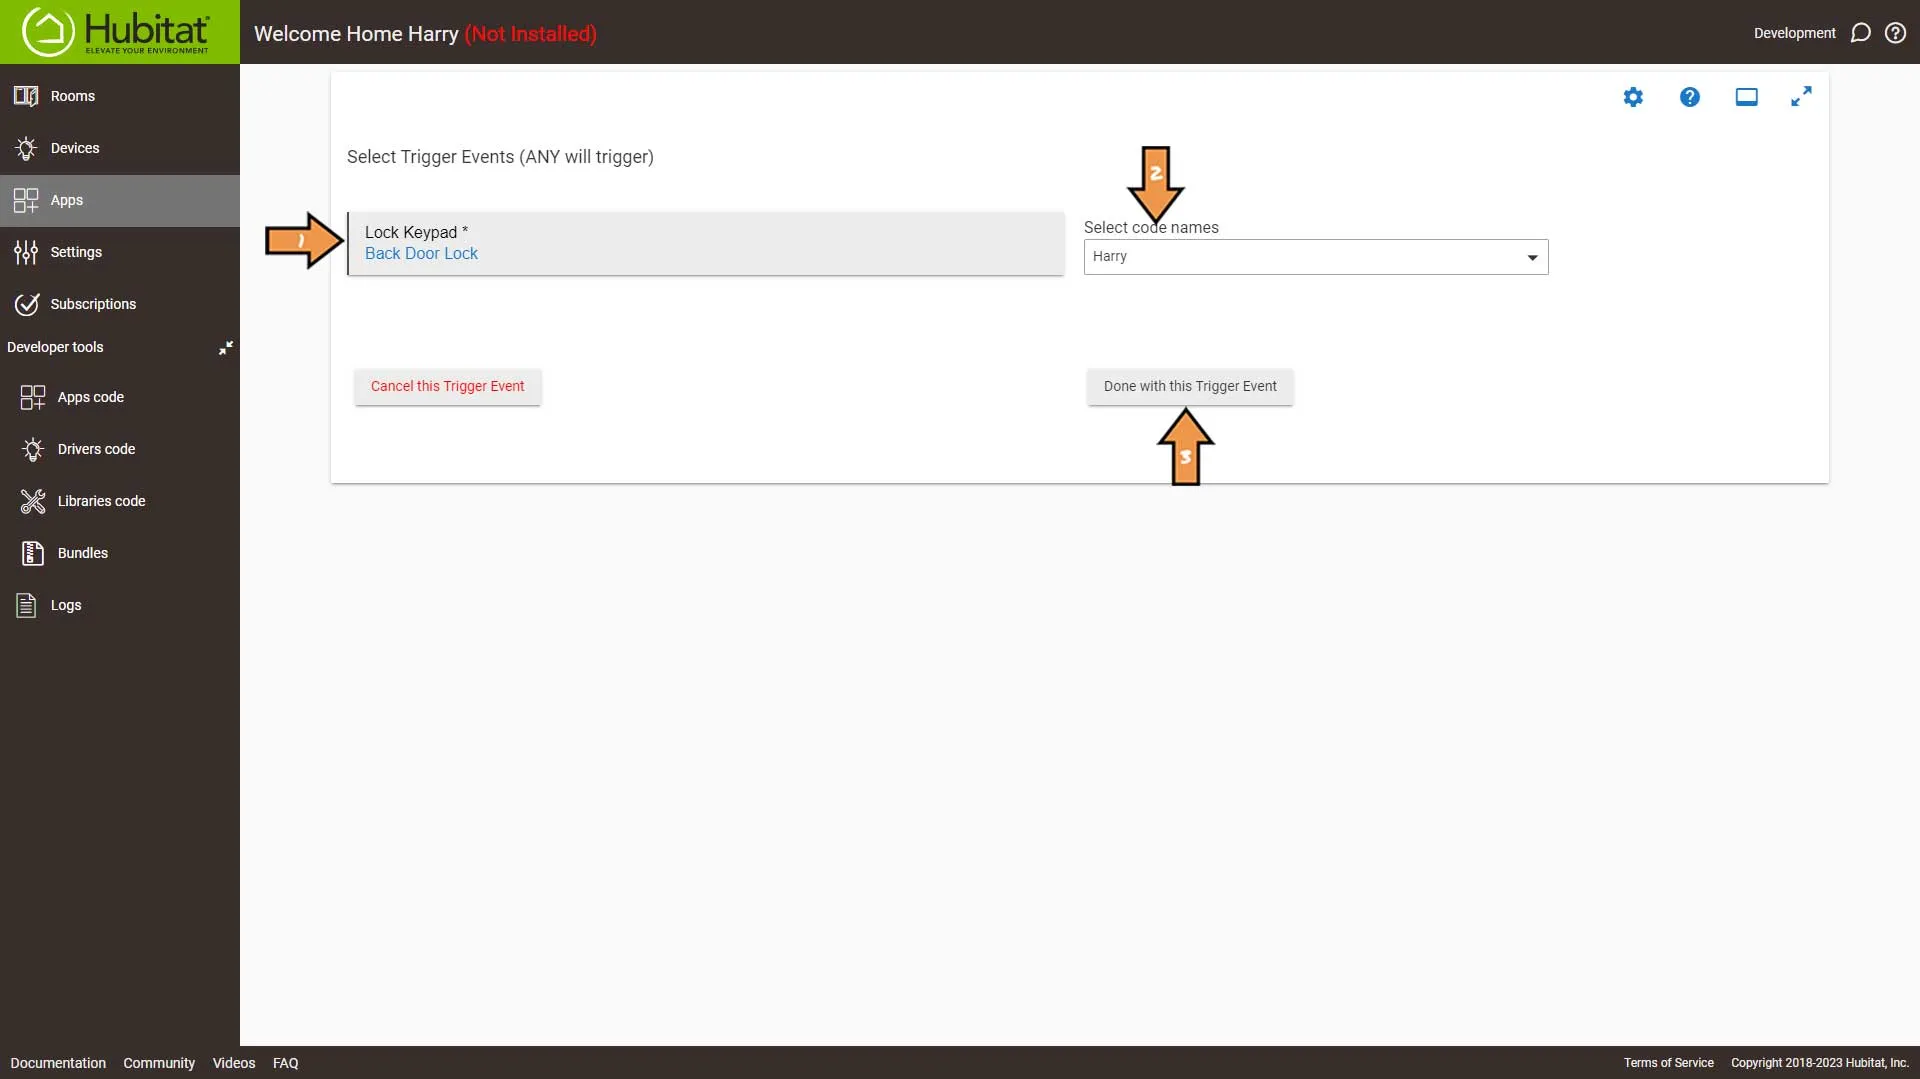
Select your first lock from the Lock Keypad dropdown, set the code Name, and click Done with this Trigger Event.
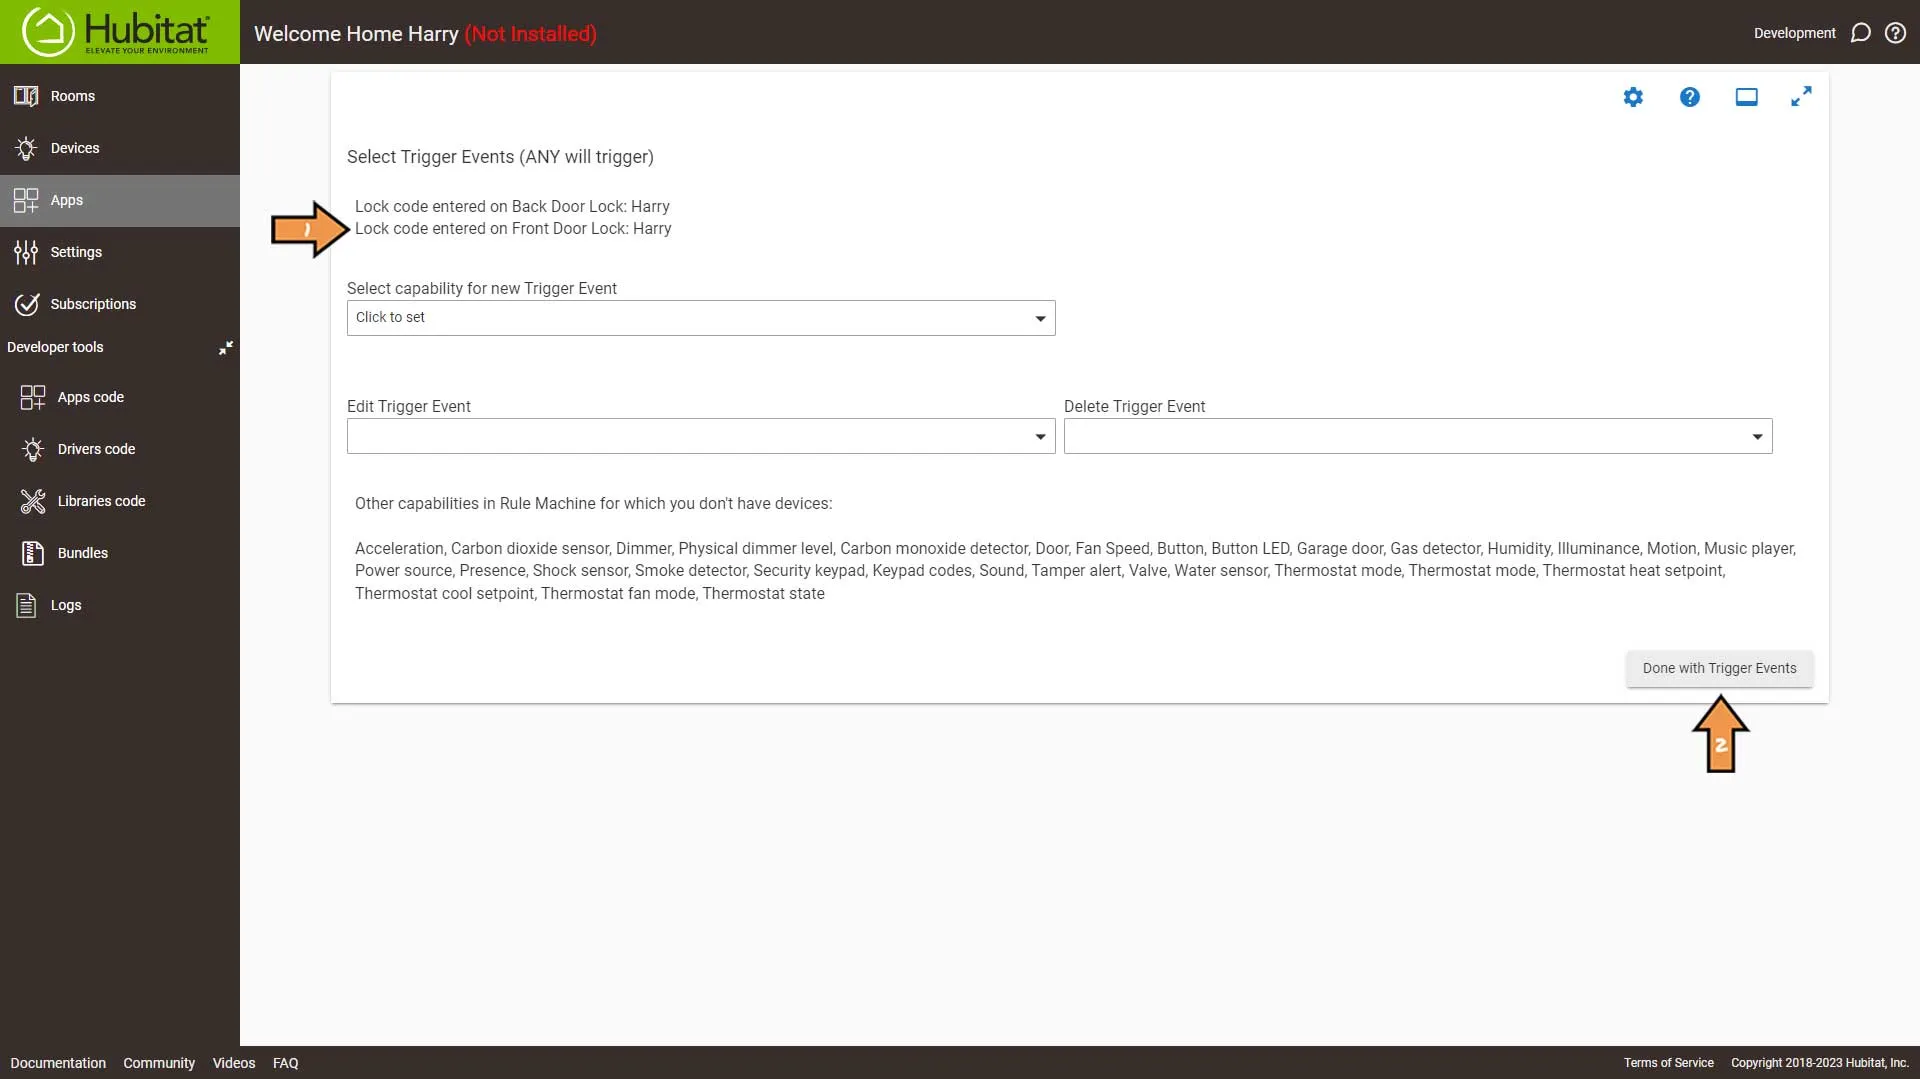
Add any additional locks and click the Done with Trigger Events button.
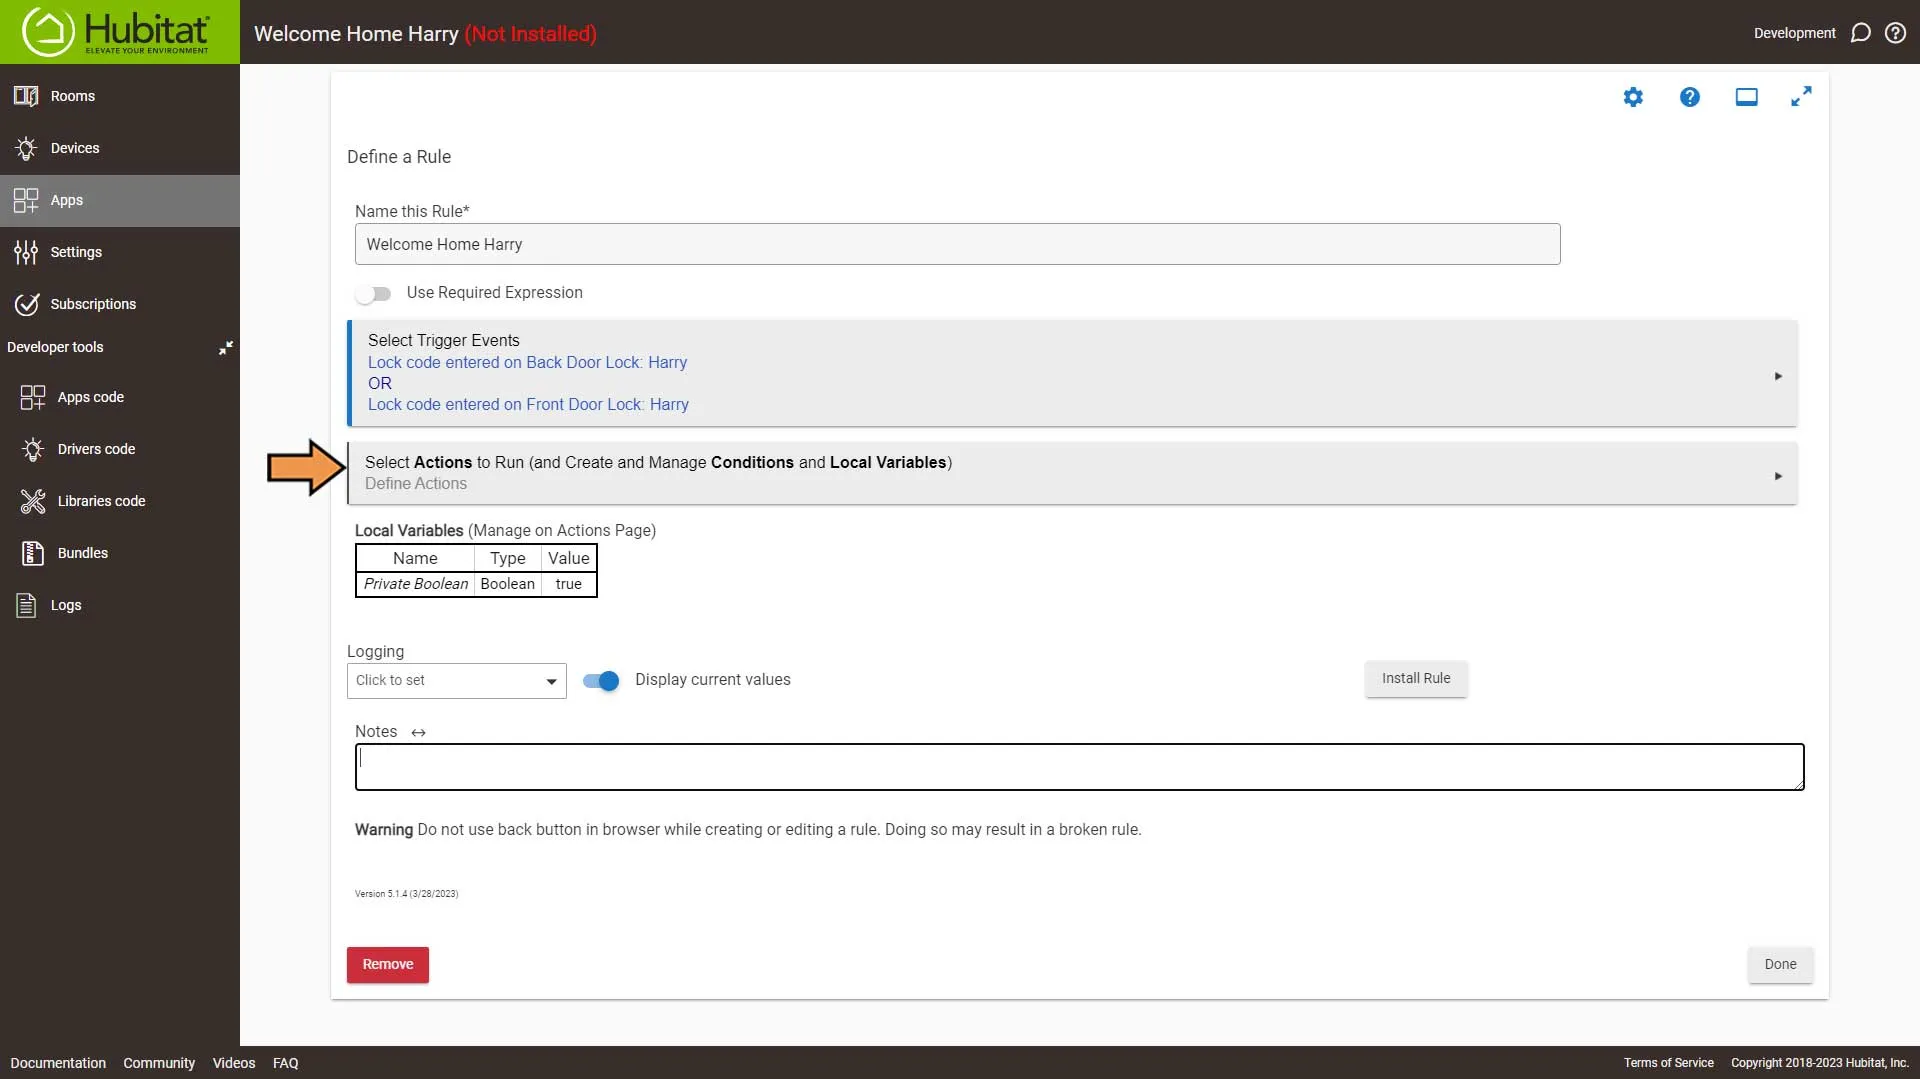
Select Actions to Run.
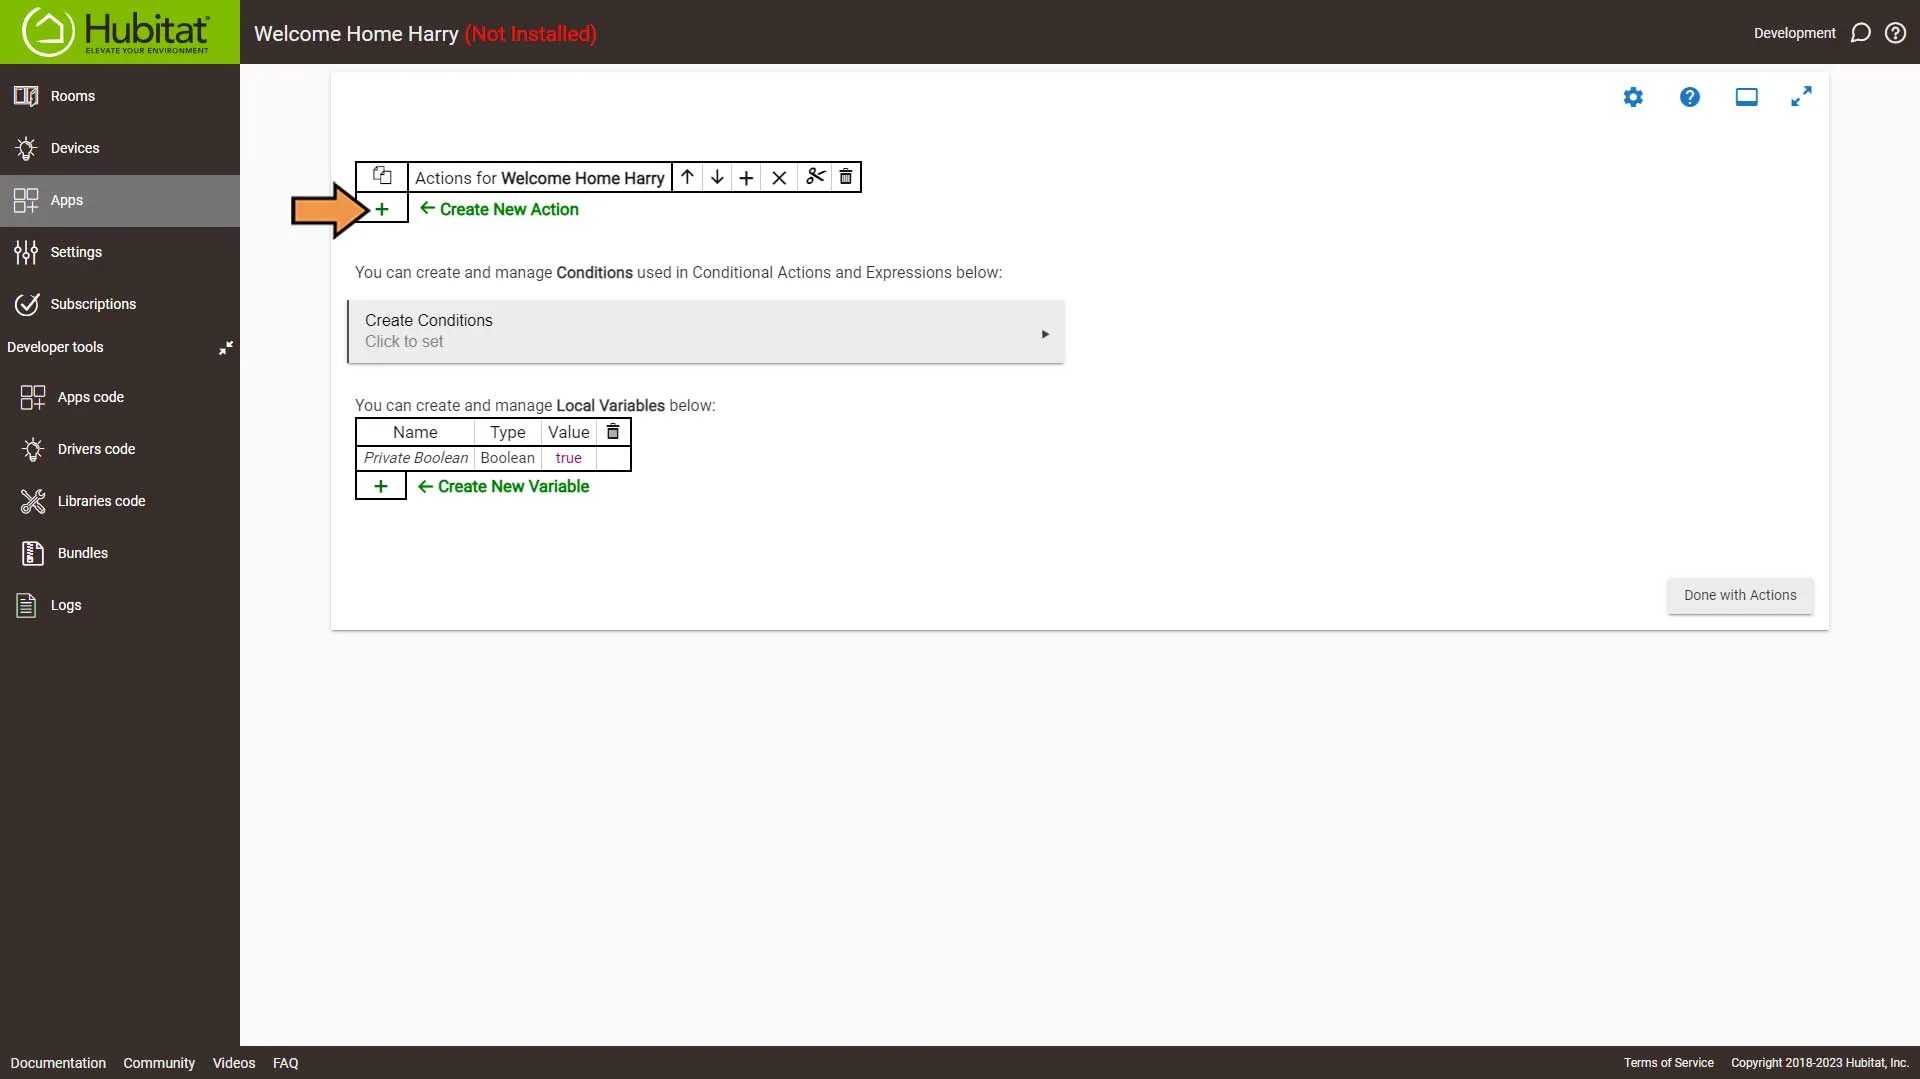
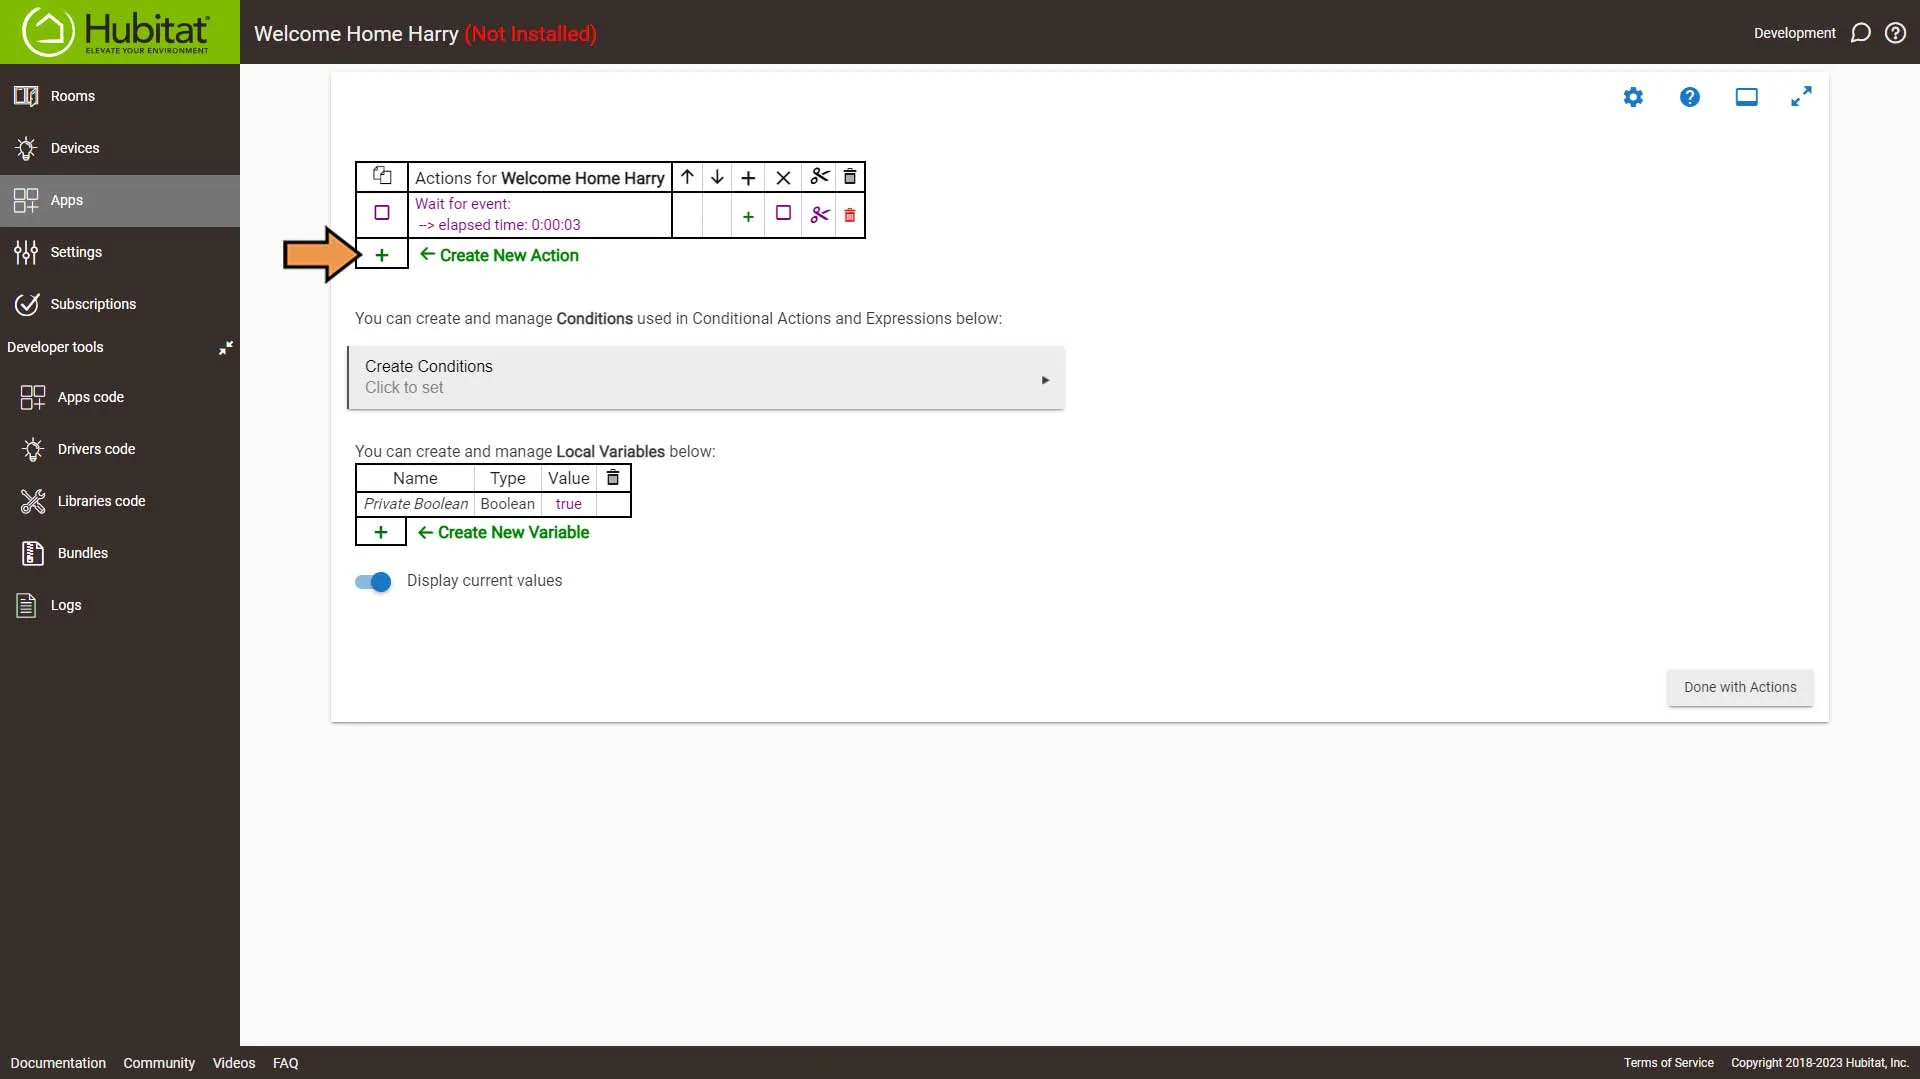
Select the Green Plus Sign to Add New Action.
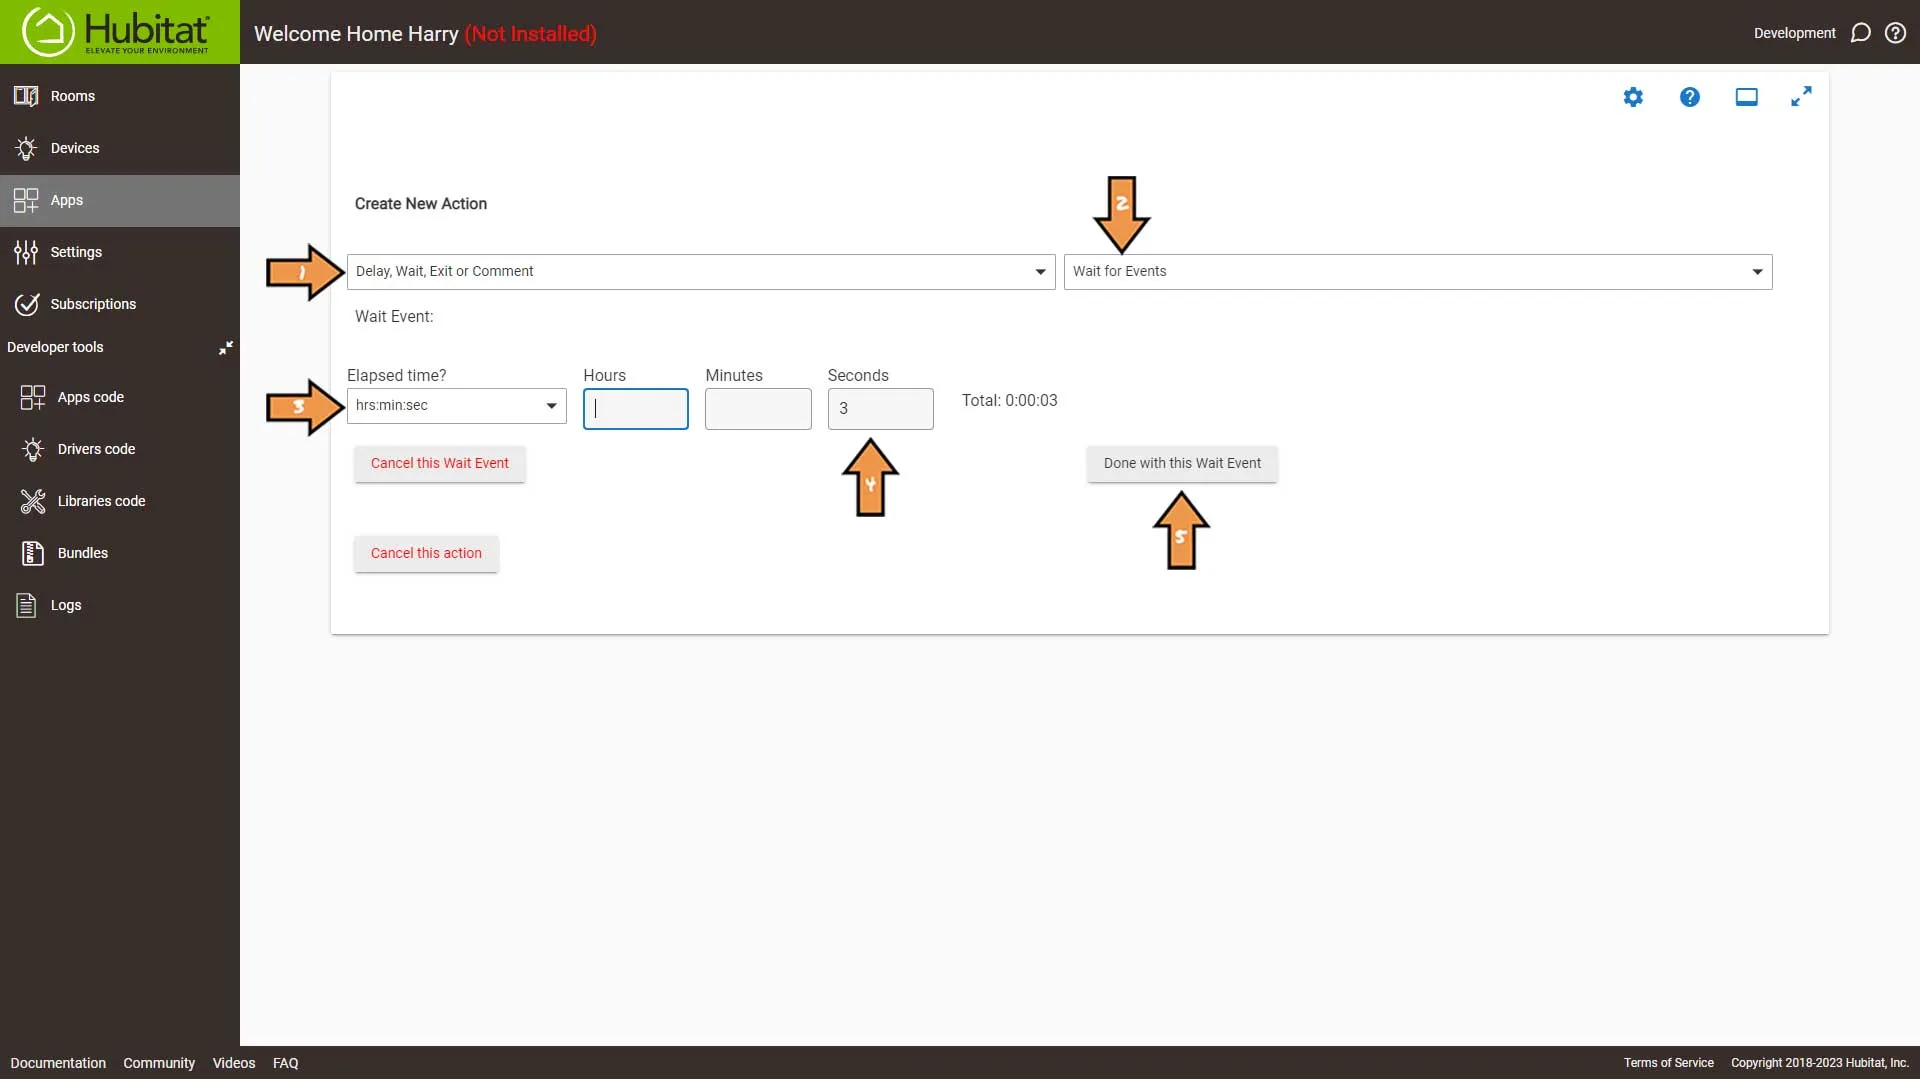
On the Create New Action screen, fill in as follows:
- Select Delay, Wait, Exit or Comment from the list for the first dropdown.
- Then Select Wait for Events
- Select Elapsed time and select the time format.
- Set the delay for 3 seconds
- Then click the Done with this Wait Event button.
Select the Green Plus Sign to Add New Action.
On the Create New Action screen we have a decision to make.
Option two:
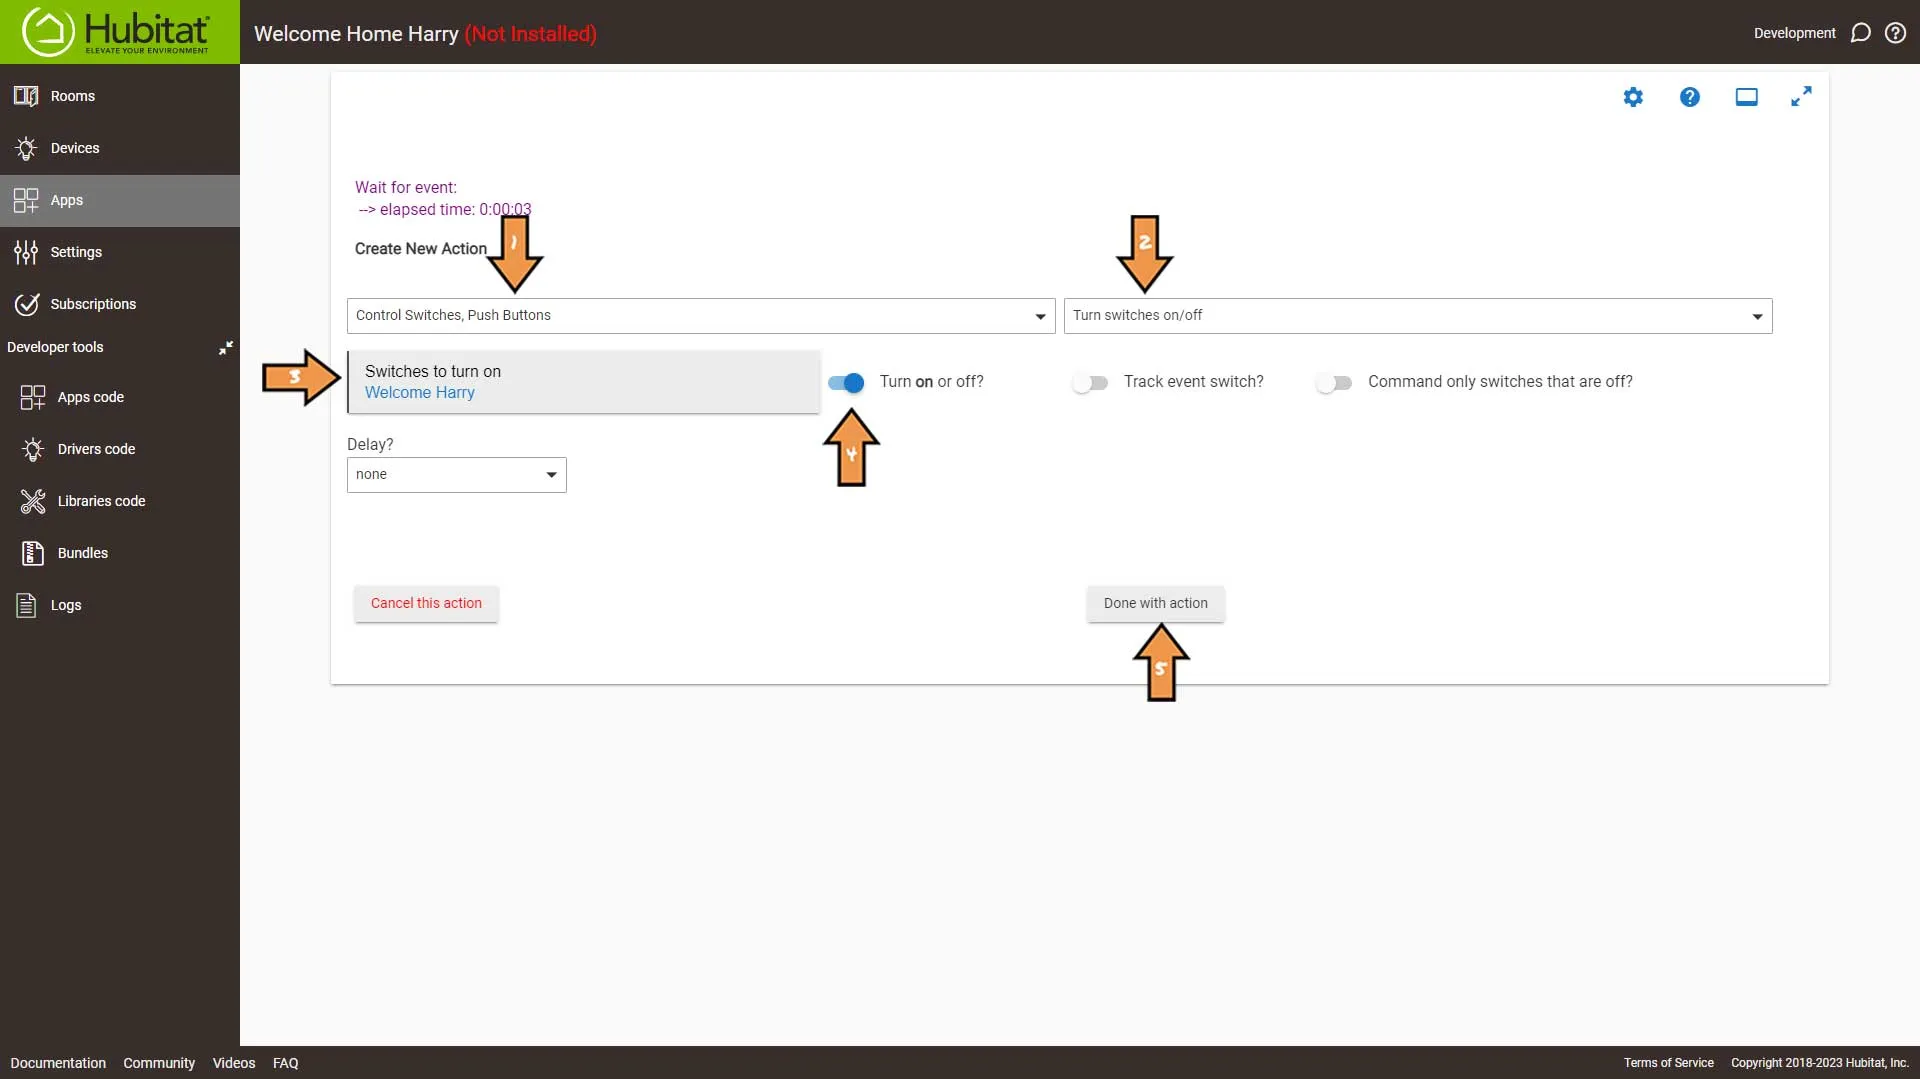
fill in as follows:
- Select Control Switches, Push Buttons from the list for the first dropdown.
- Then Select Turn switches on/off.
- Select the virtual switch we created earlier.
- Make sure it’s set to on.
- Then click the Done with action button.
Option Three:
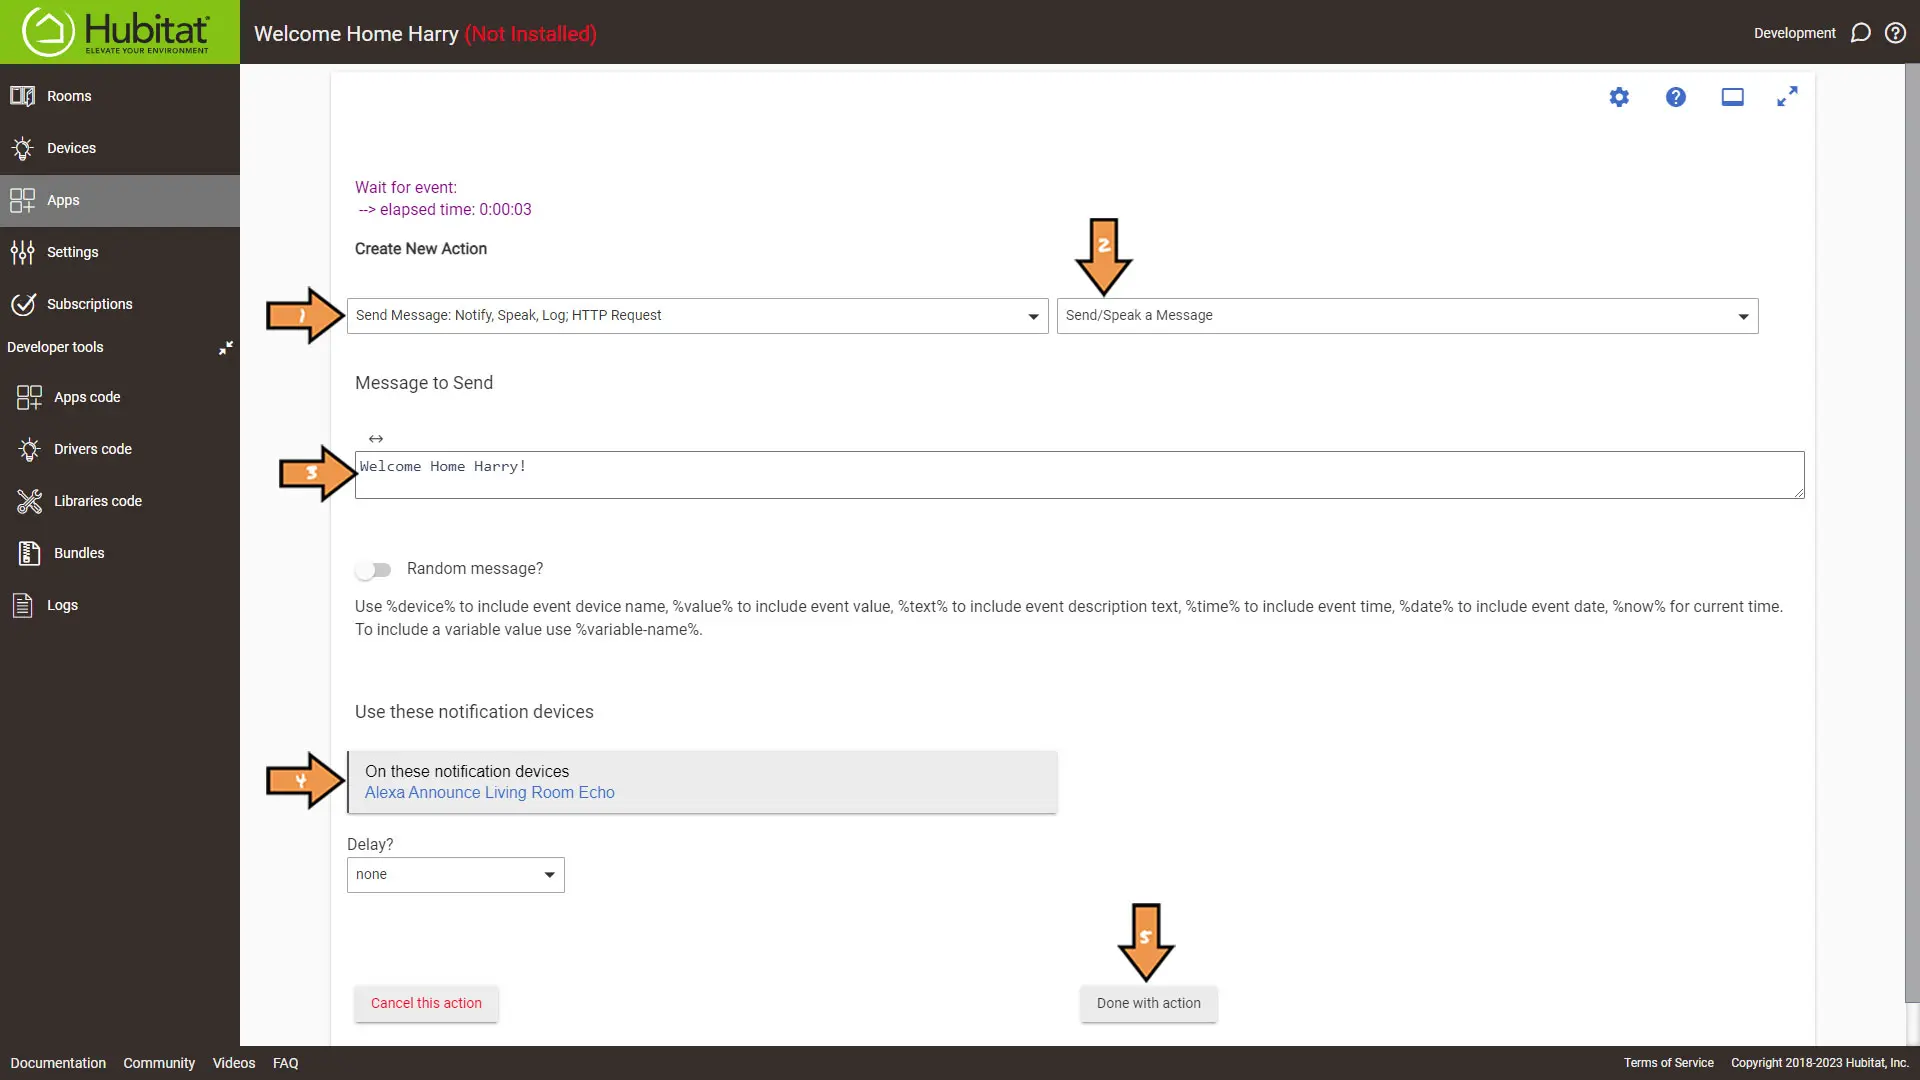
fill in as follows
- Select Send Message: Notify, Speak, Log, HTTP Request from the list for the first dropdown.
- Then Select Send/Speak a message.
- Type your message.
- Select your MQTT Notification device.
- Then click the Done with action button.
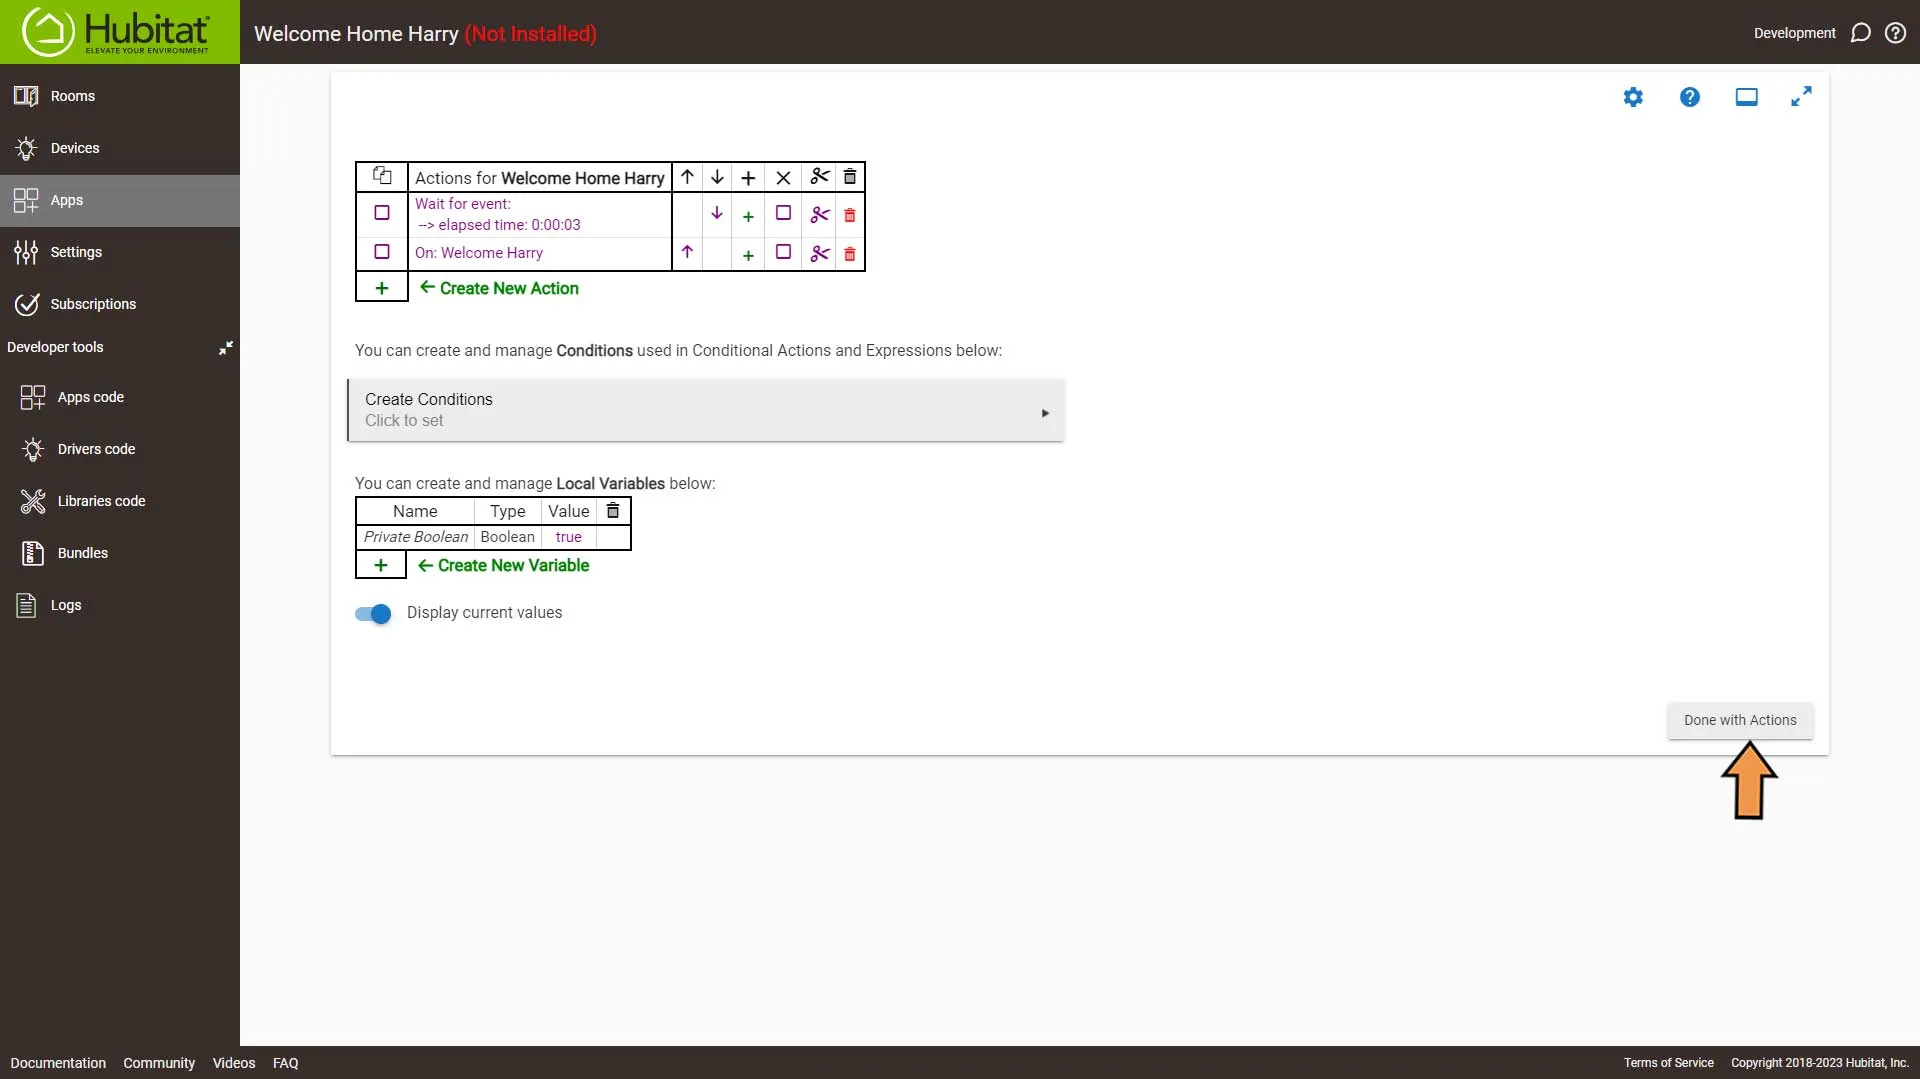
Click the Done with Actions button.
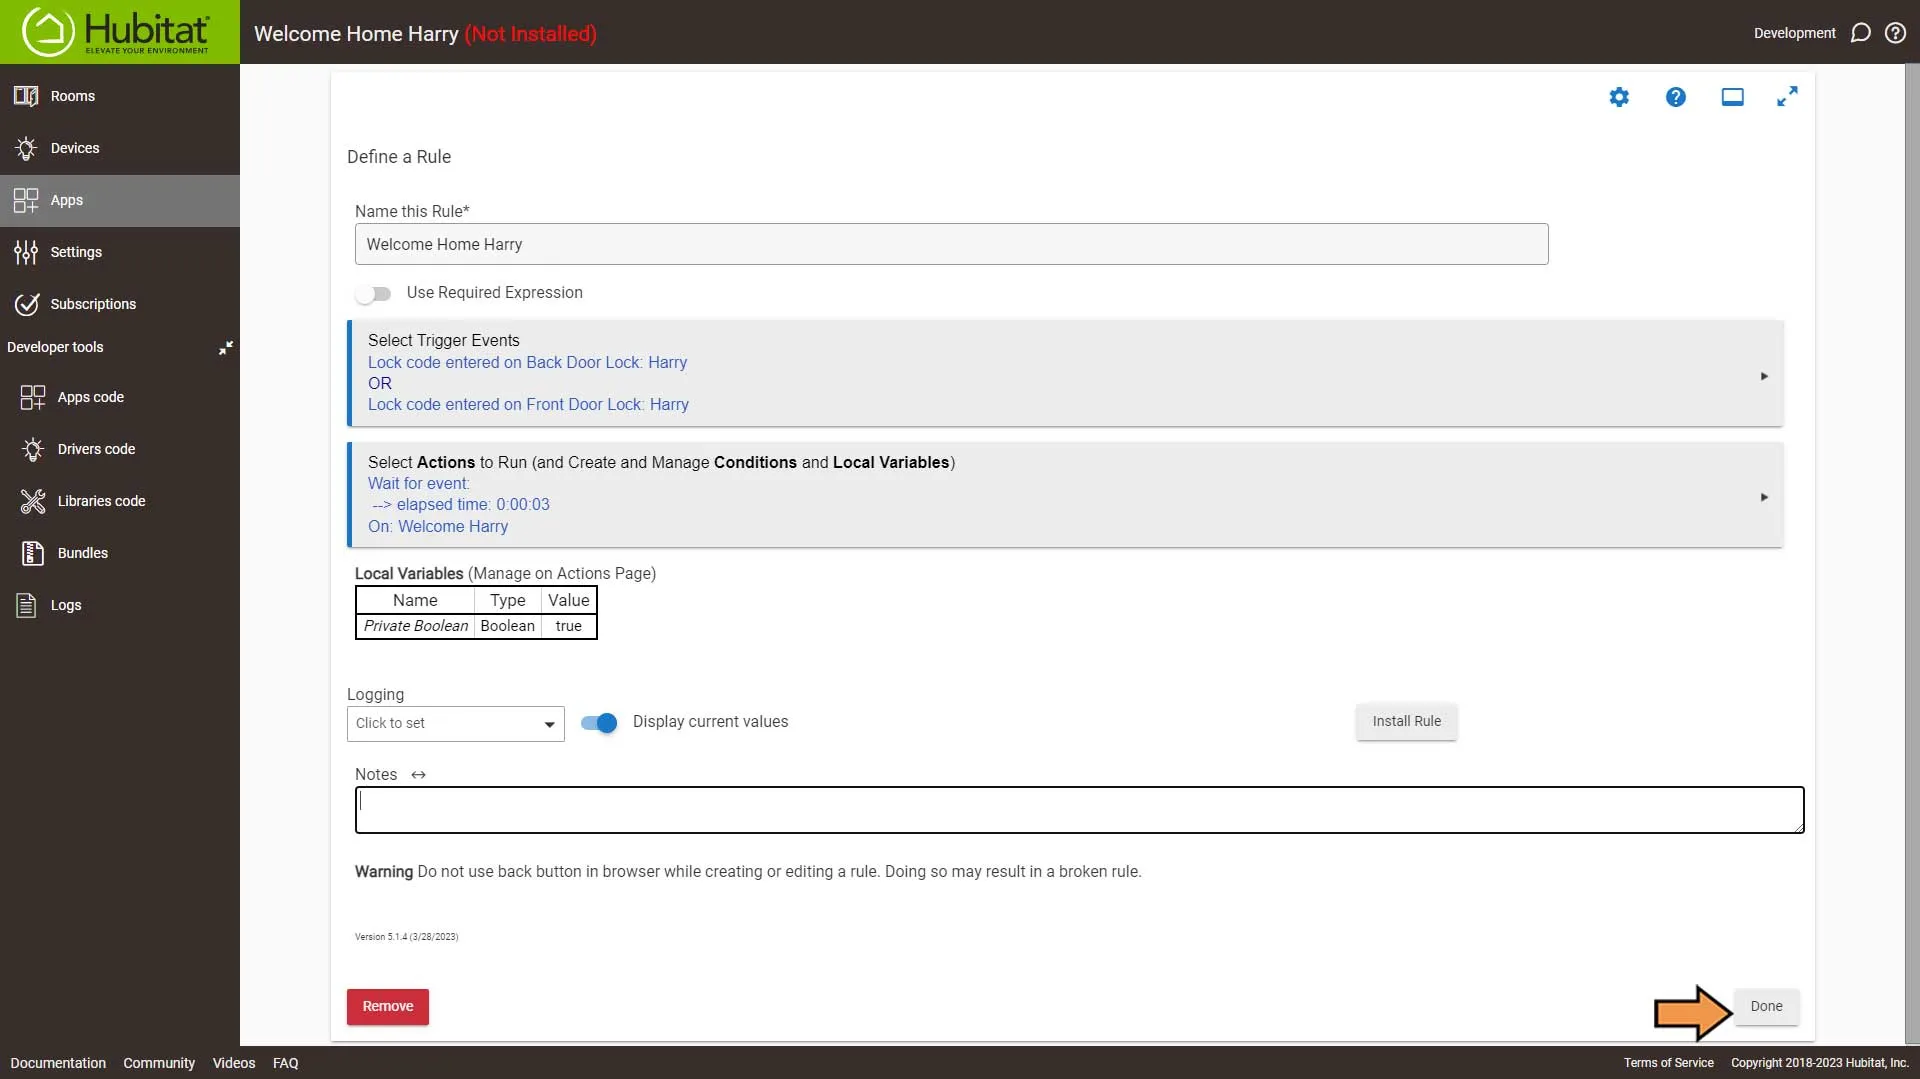
Click the Done button to complete the automation.
Success: That’s It! Rinse and repeat for each family member. Now move on to the Amazon Alexa Tab if you are using Option Two
Home Assistant
Important: This automation requires Alexa Speaks Integration.
Setting Up the Automation
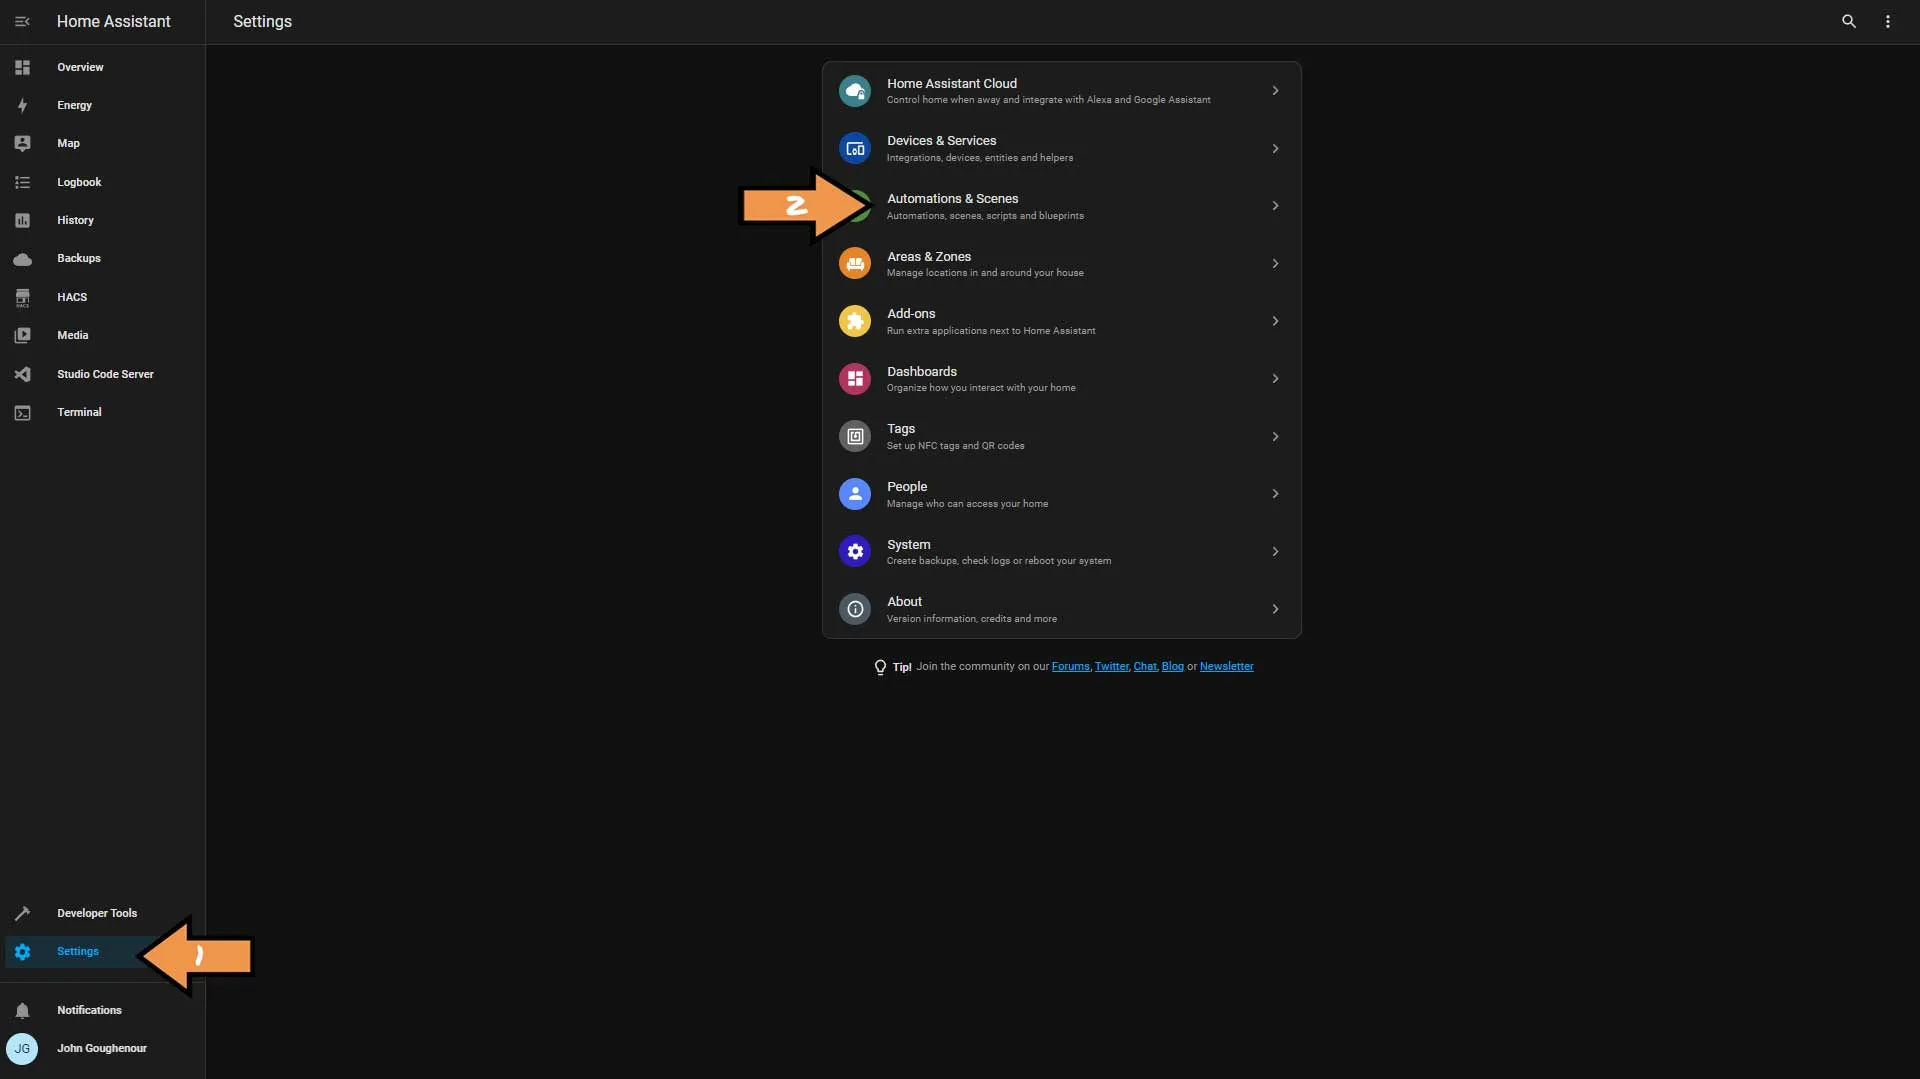
First, we need to go to Settings and Automations & Scenes.
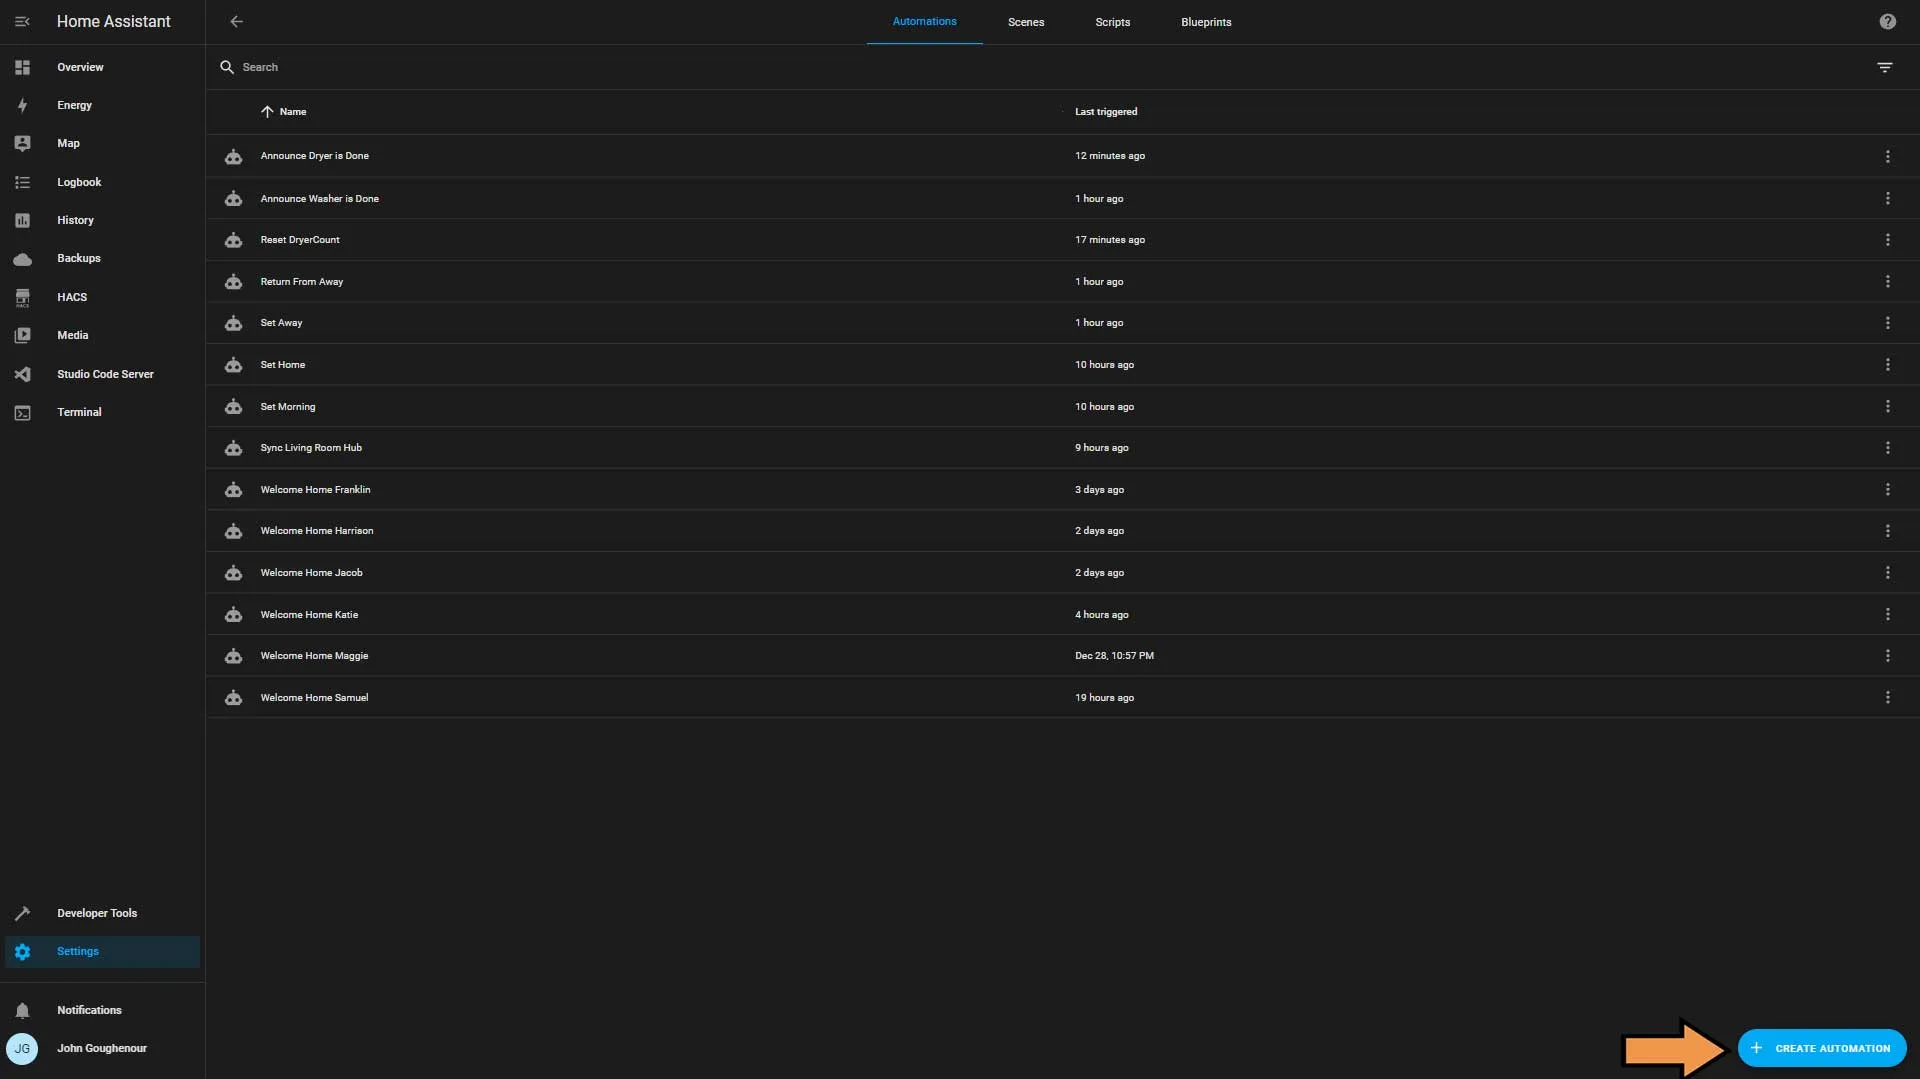
Click the blue Create Automation button.
Choose Create new automation.
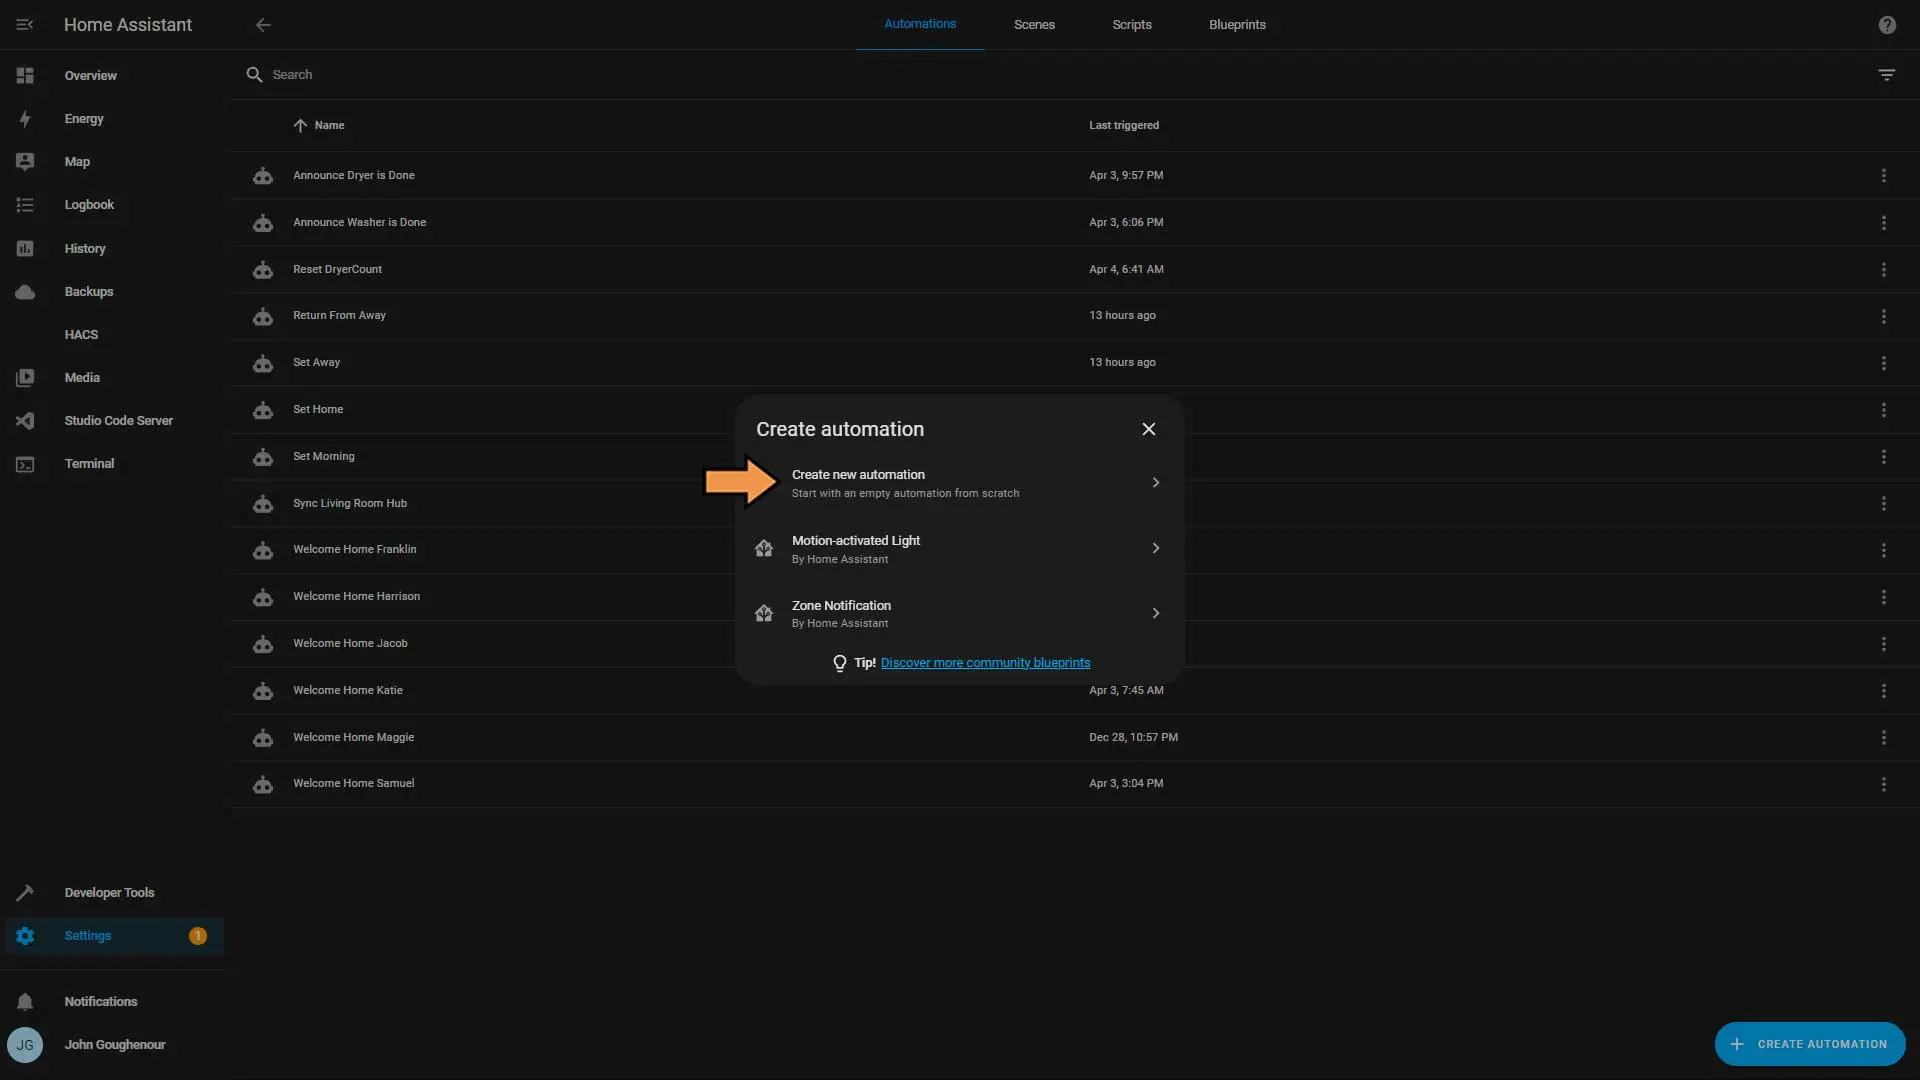
Click Add Trigger.
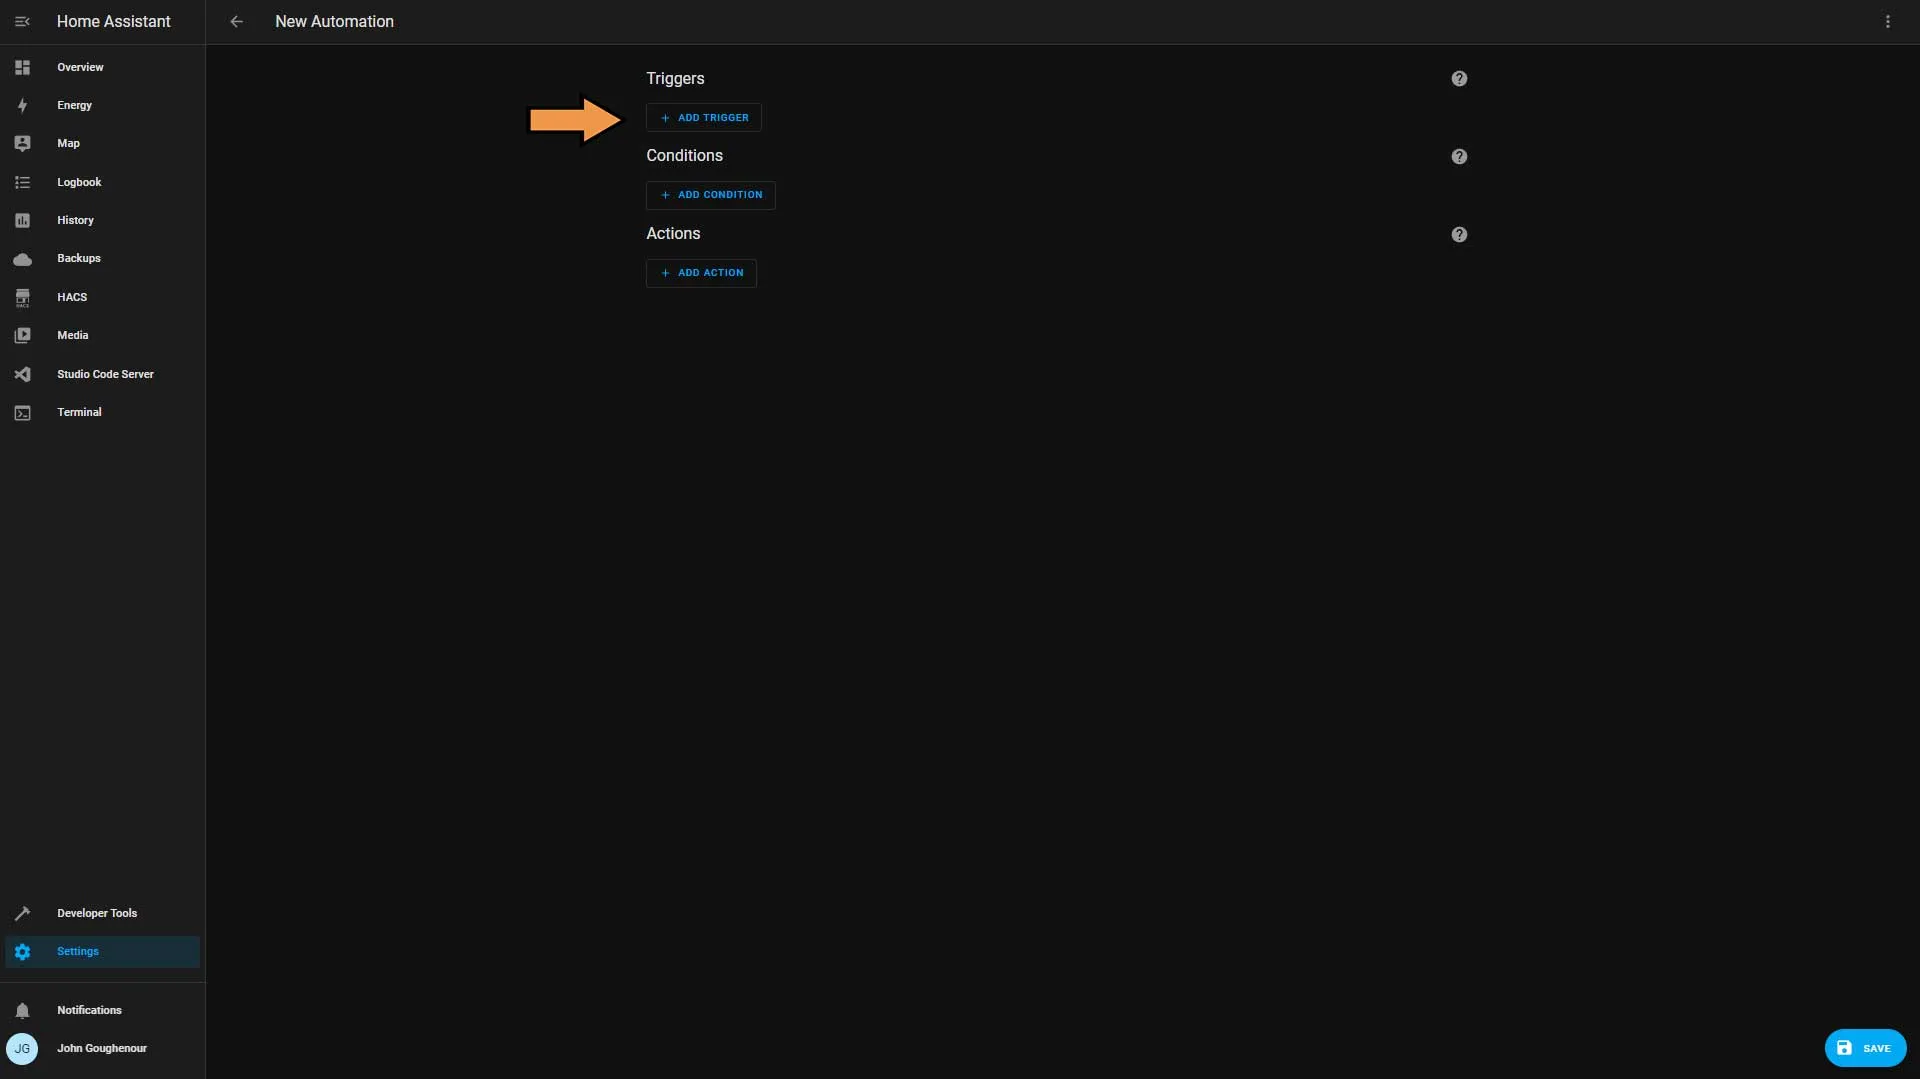
From the list, select Device.
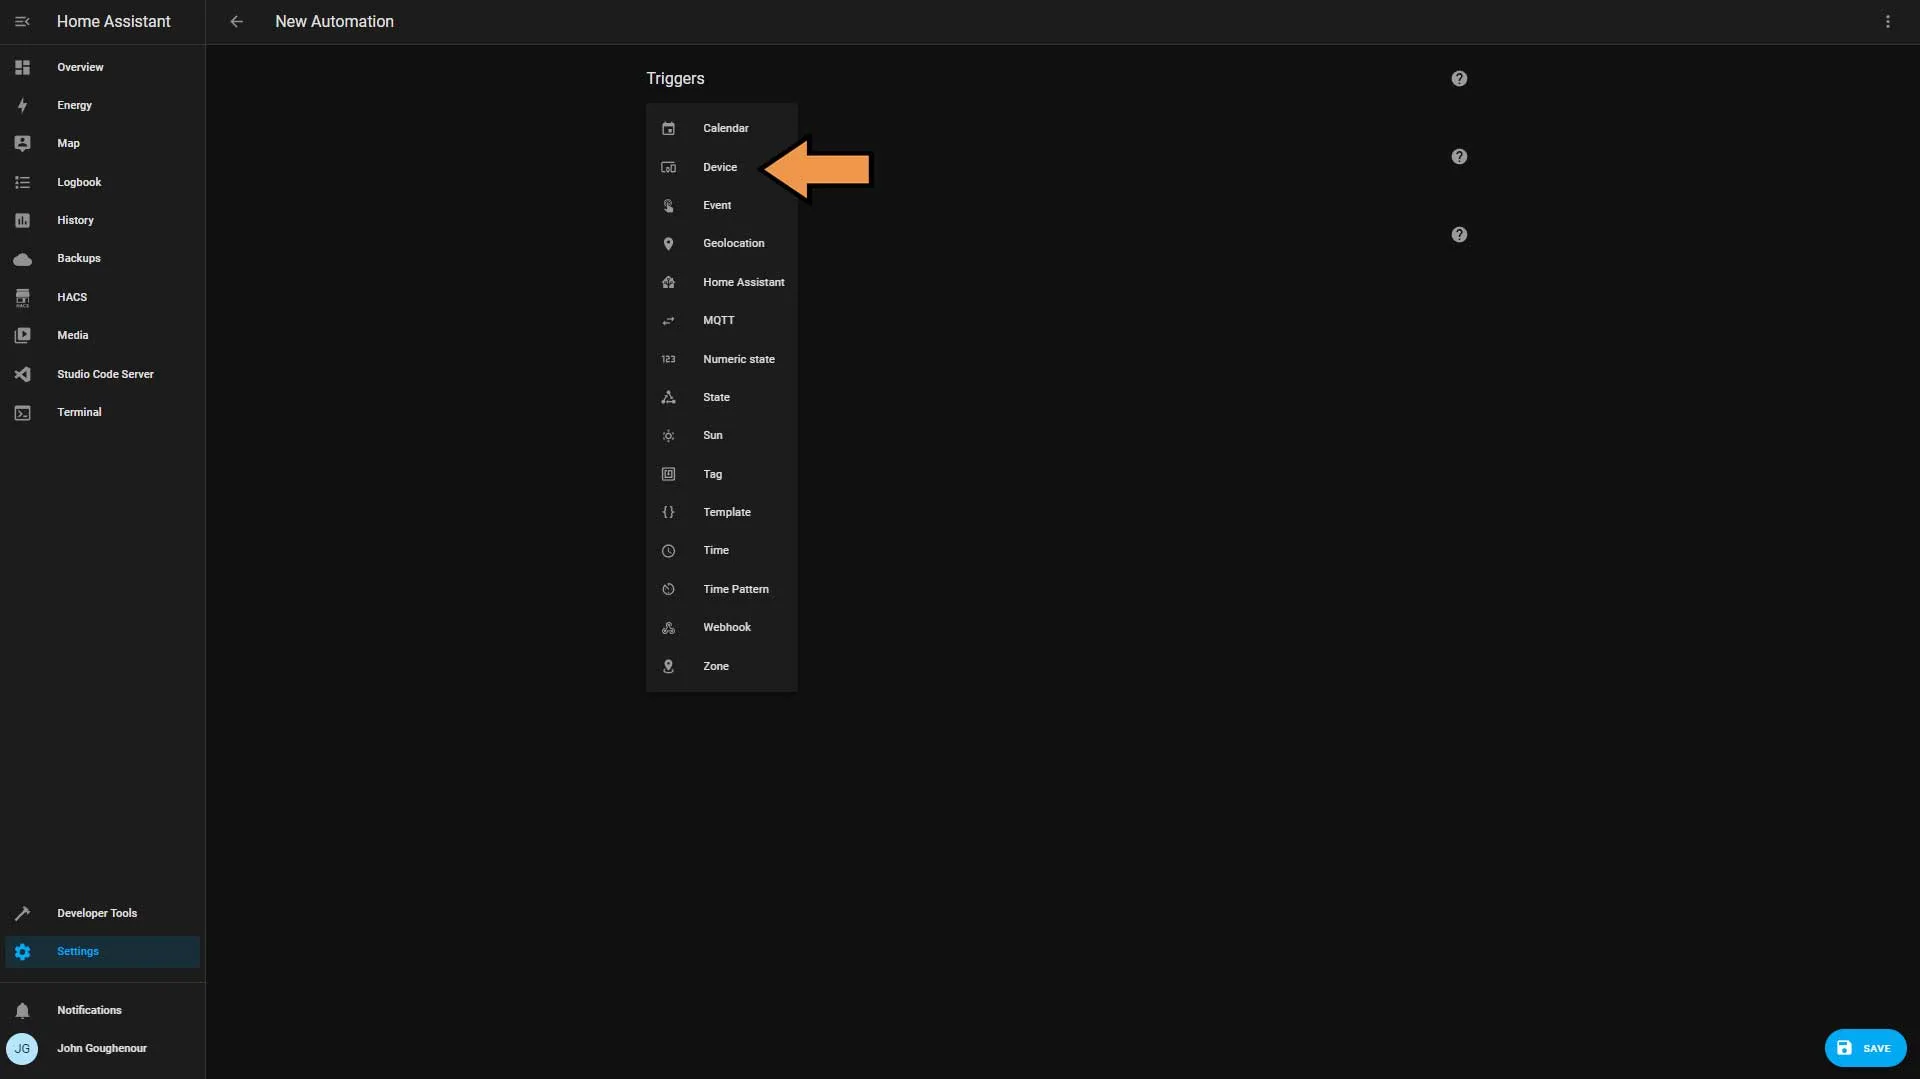
Select your lock and unlock code.
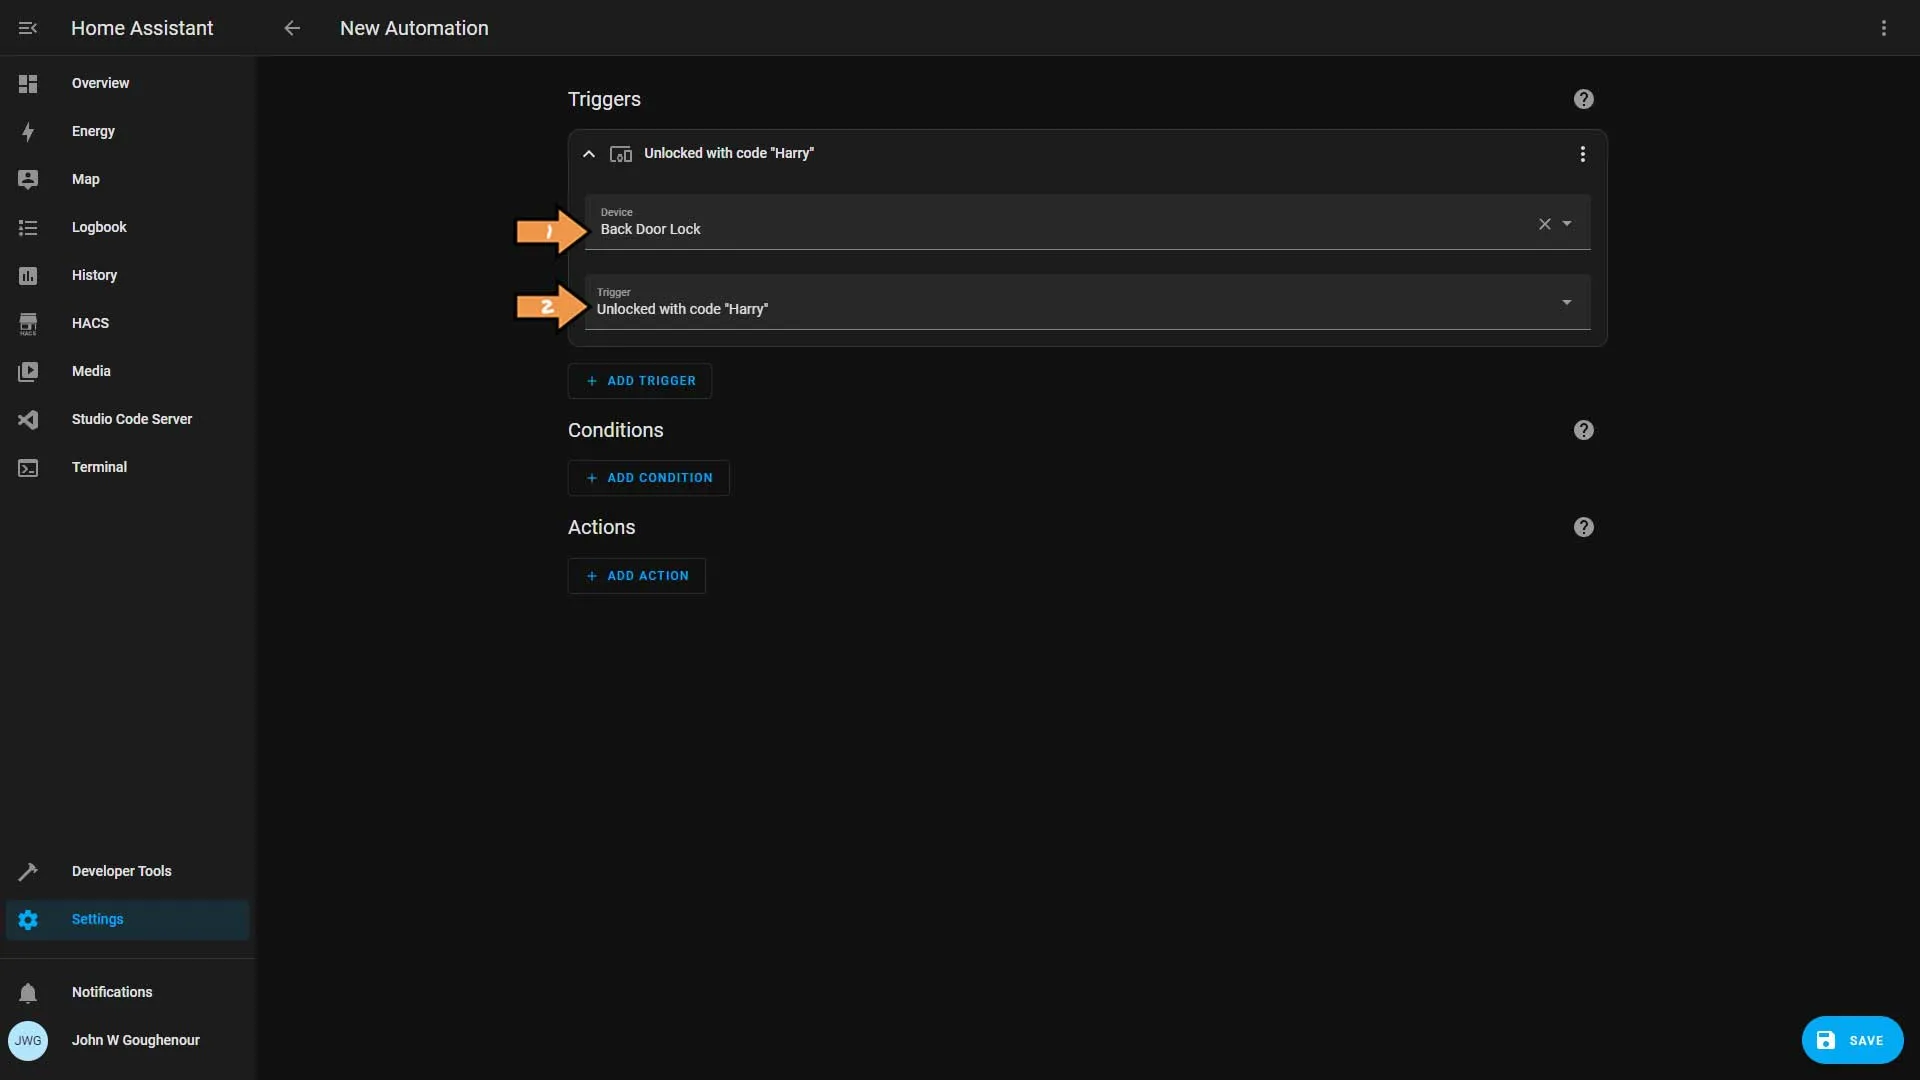
Click the vertical ellipse in the upper right-hand corner and select Edit ID.
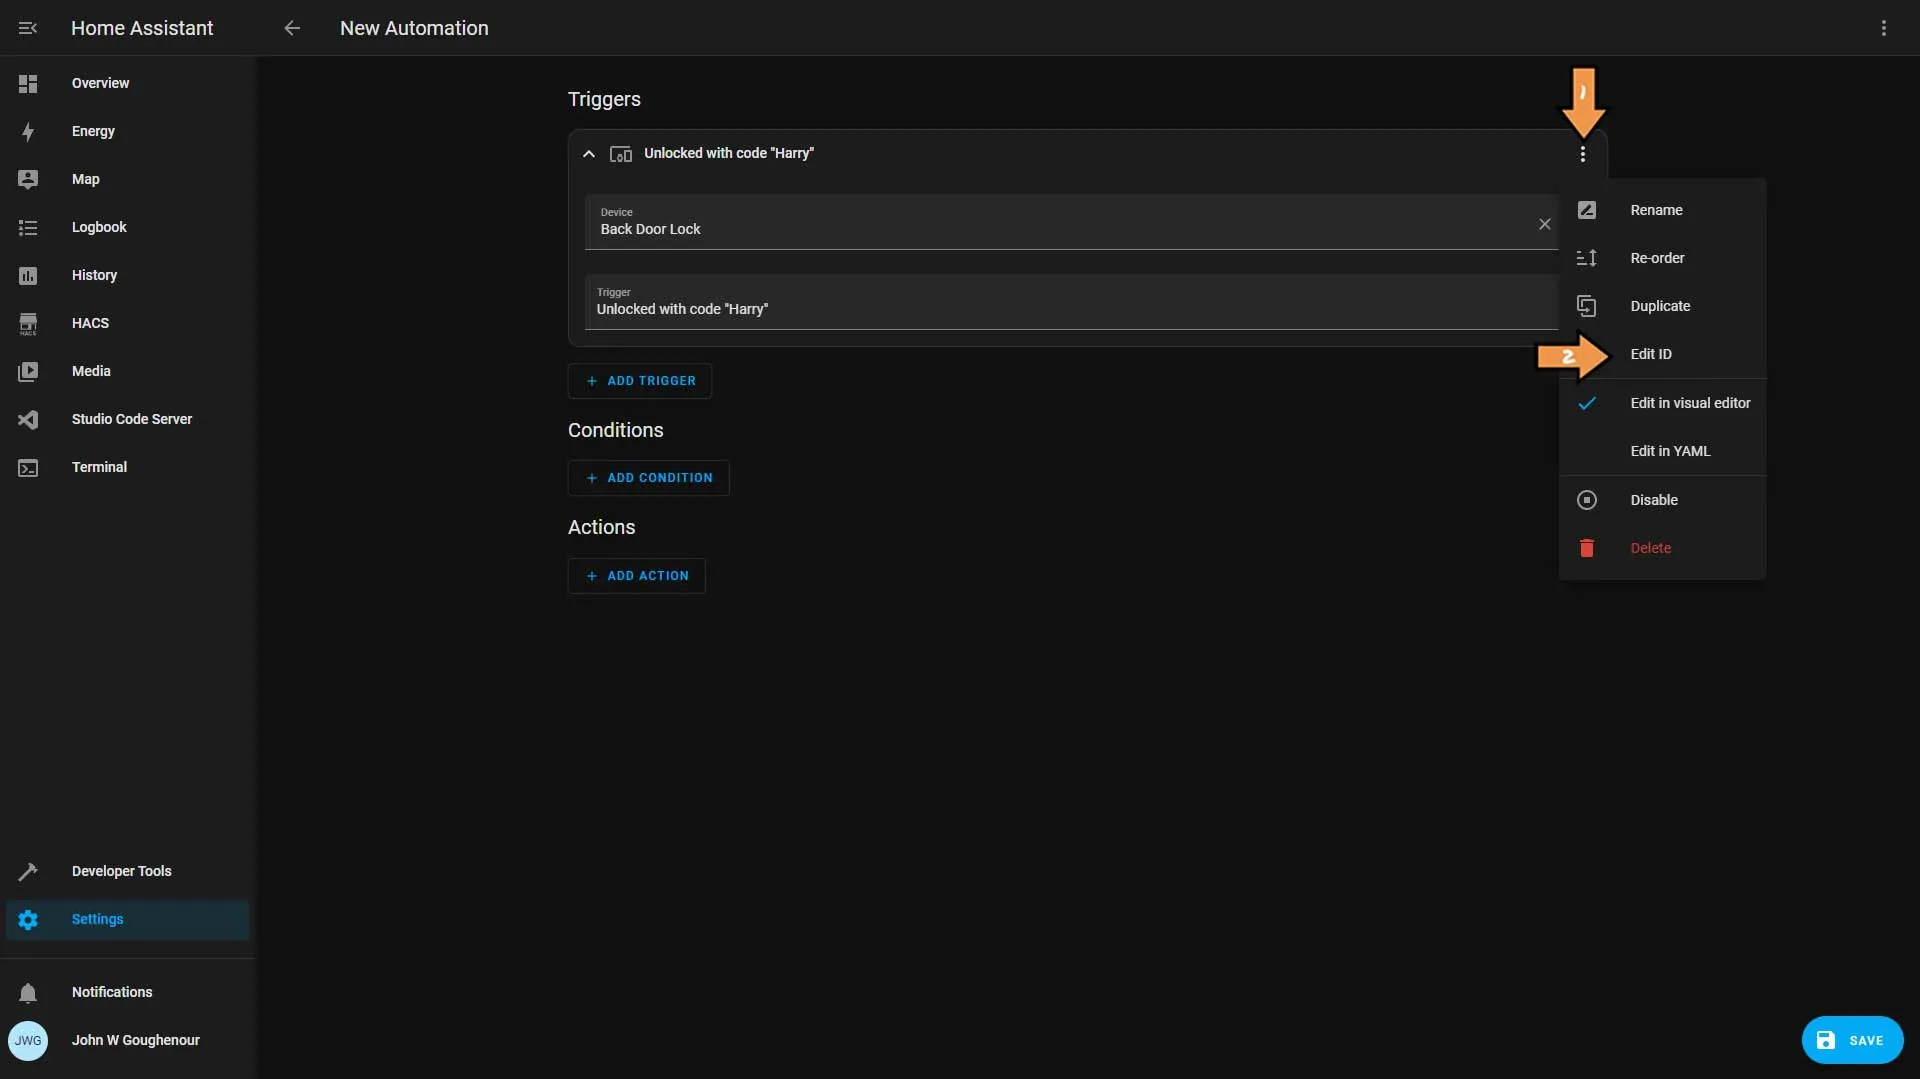
Add a Trigger ID. You can call it anything you like, but we’ll use back. Then click the Add Trigger button.
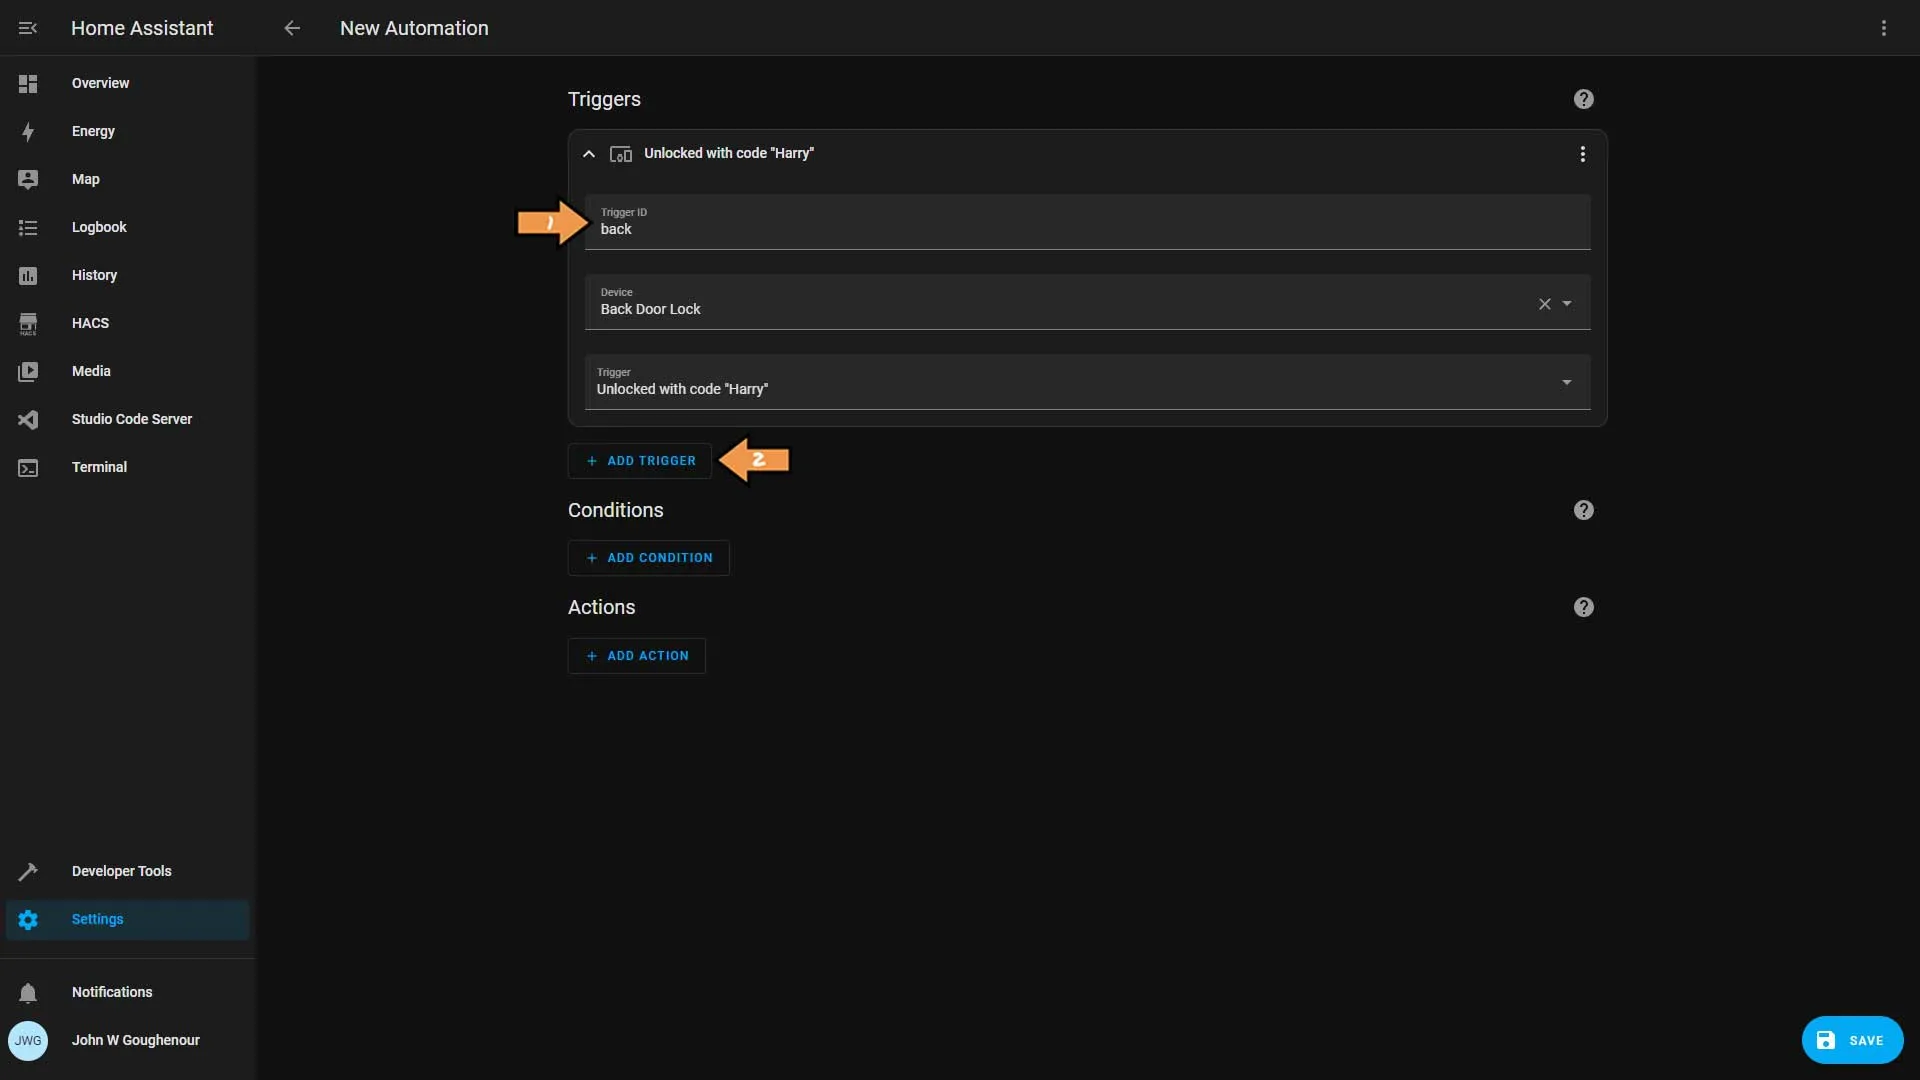
Now add your second lock and the unlock code. Then click the Add Action button.
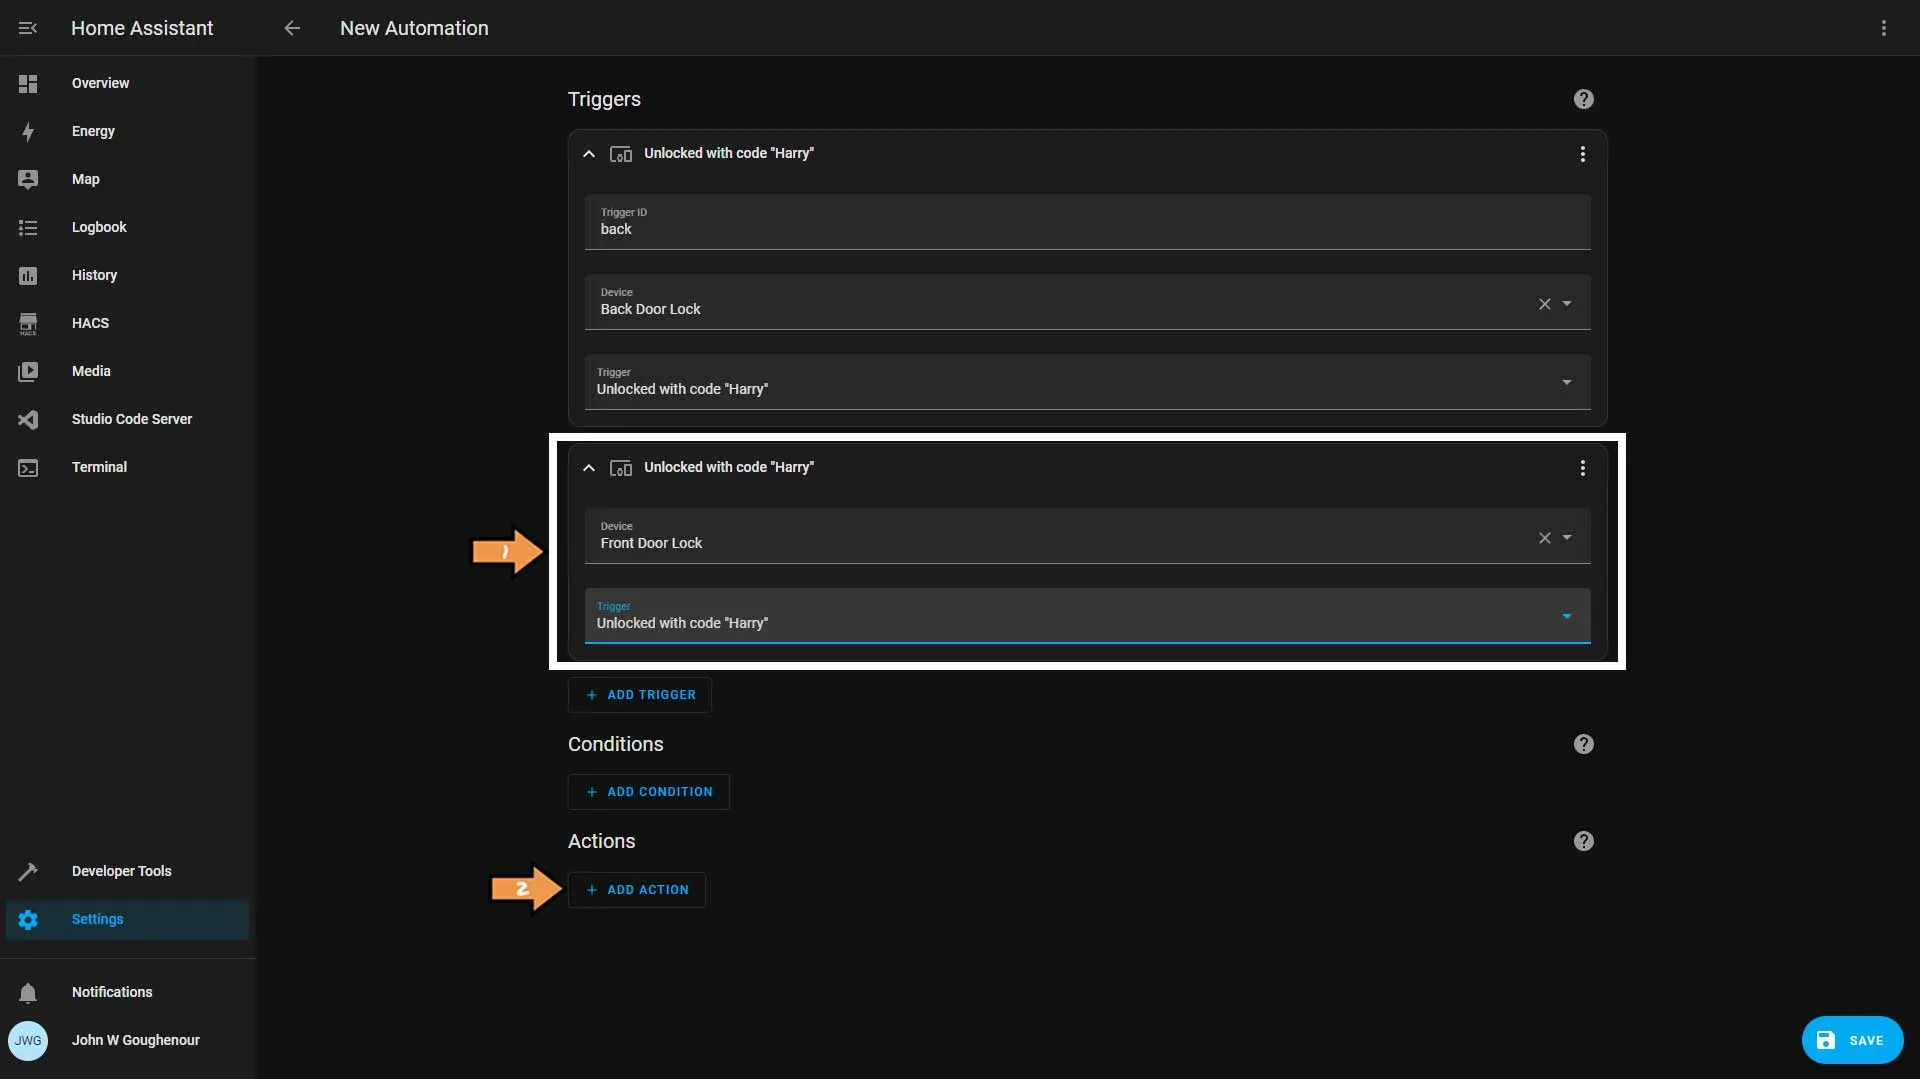
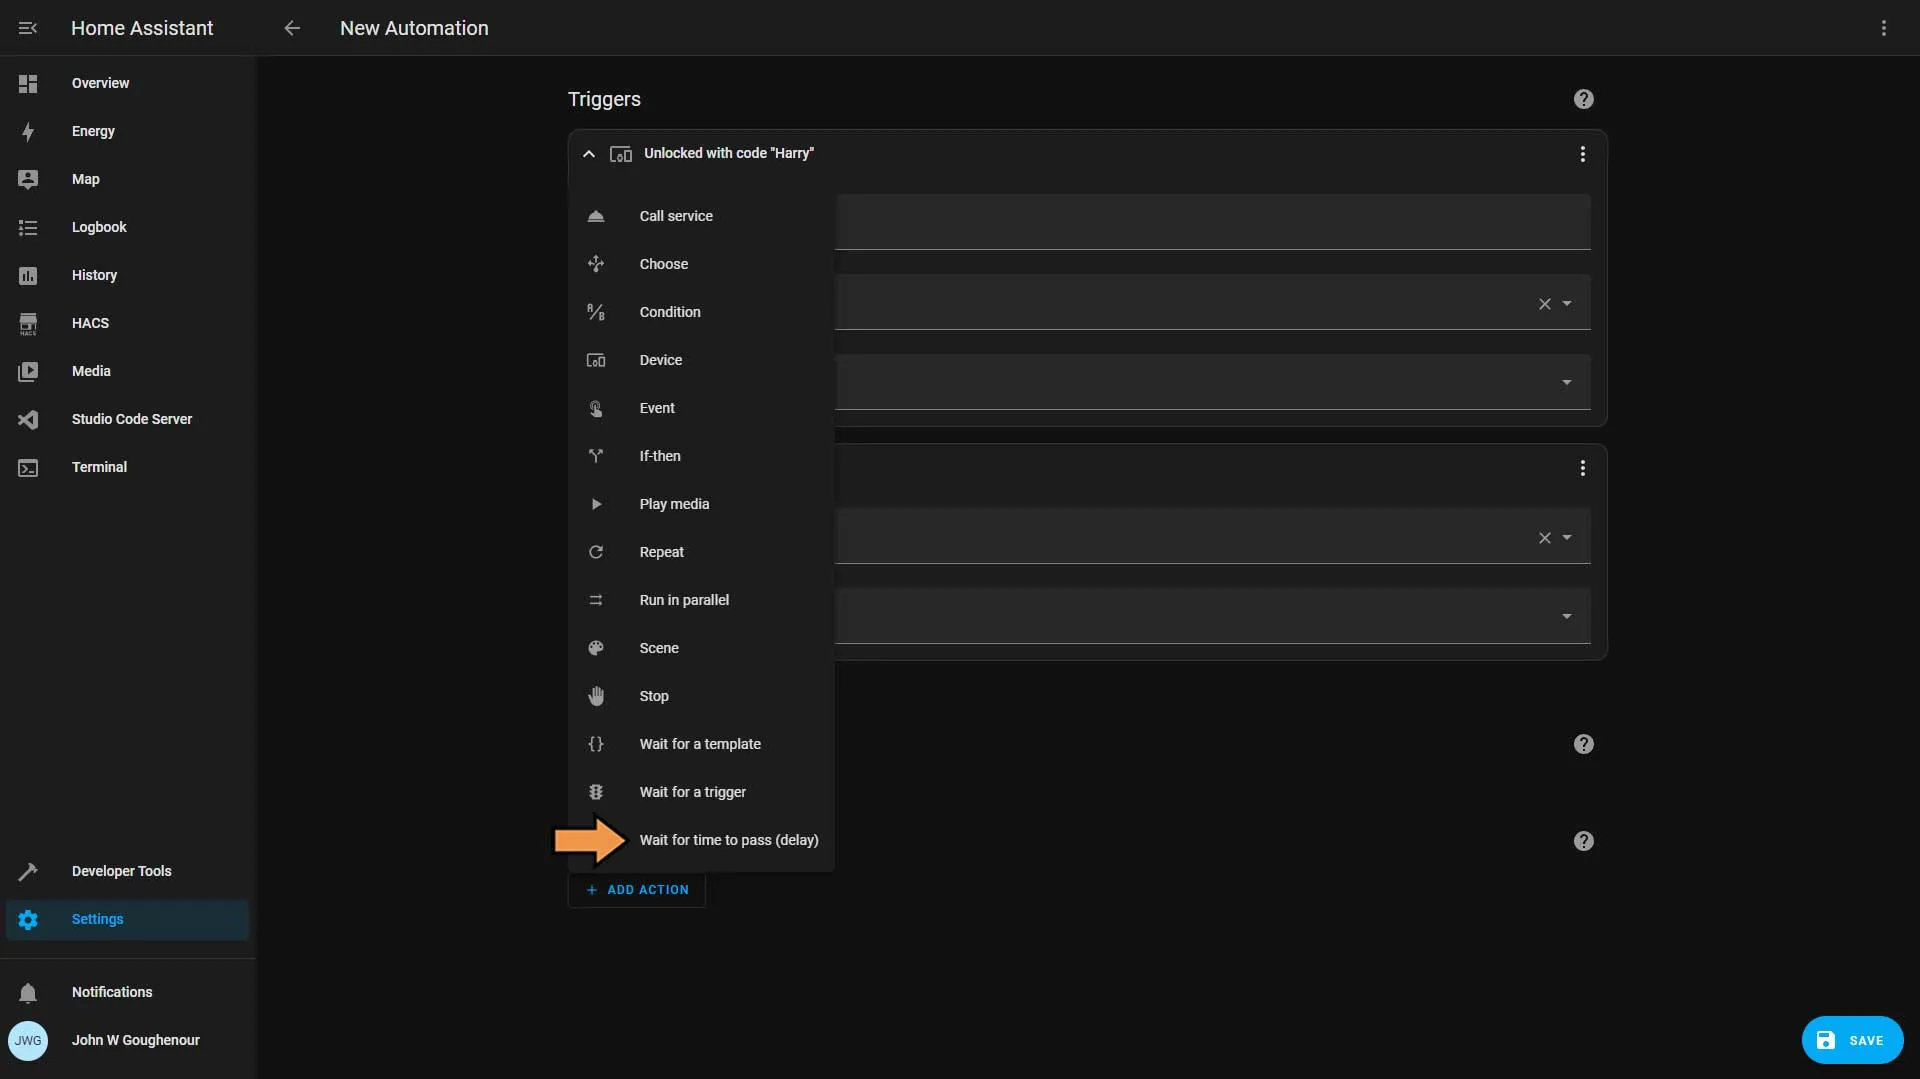
Choose Wait for time to pass (delay) from the add action list.
Set the delay for three seconds.
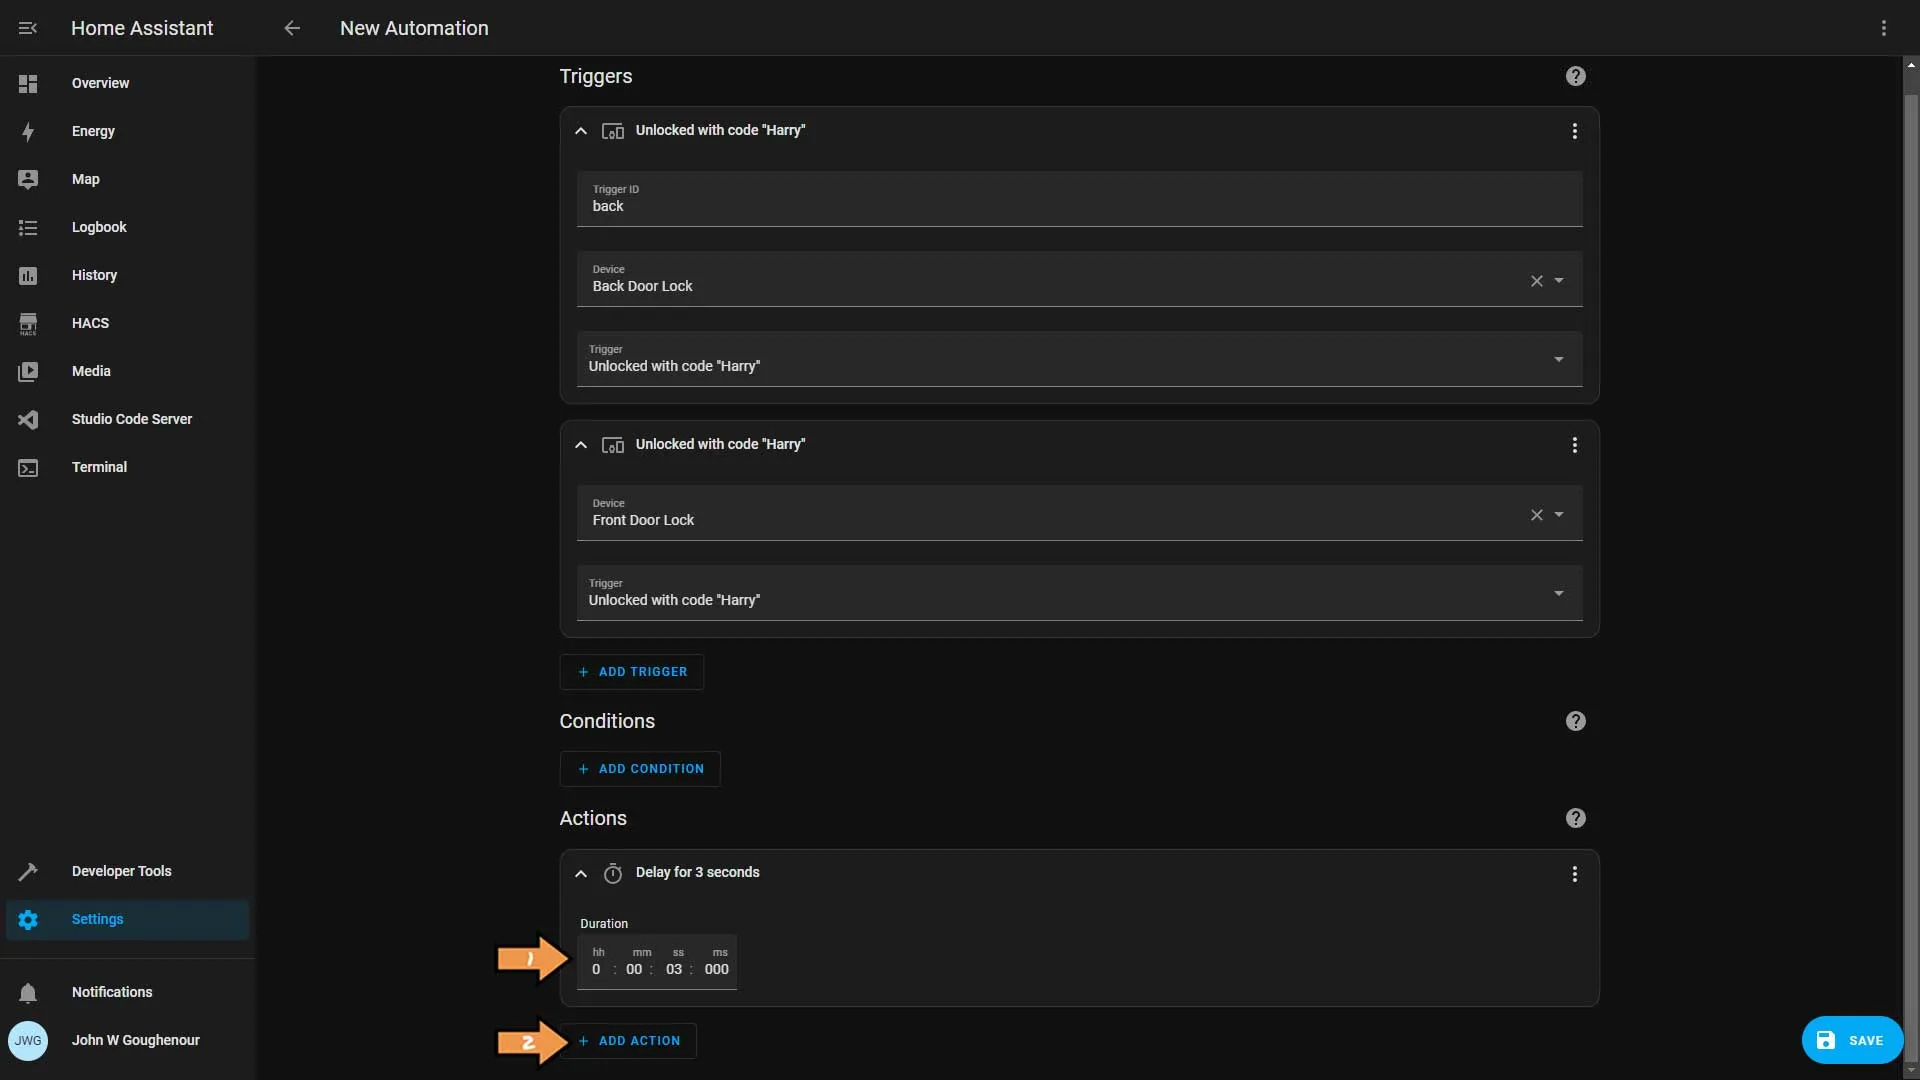
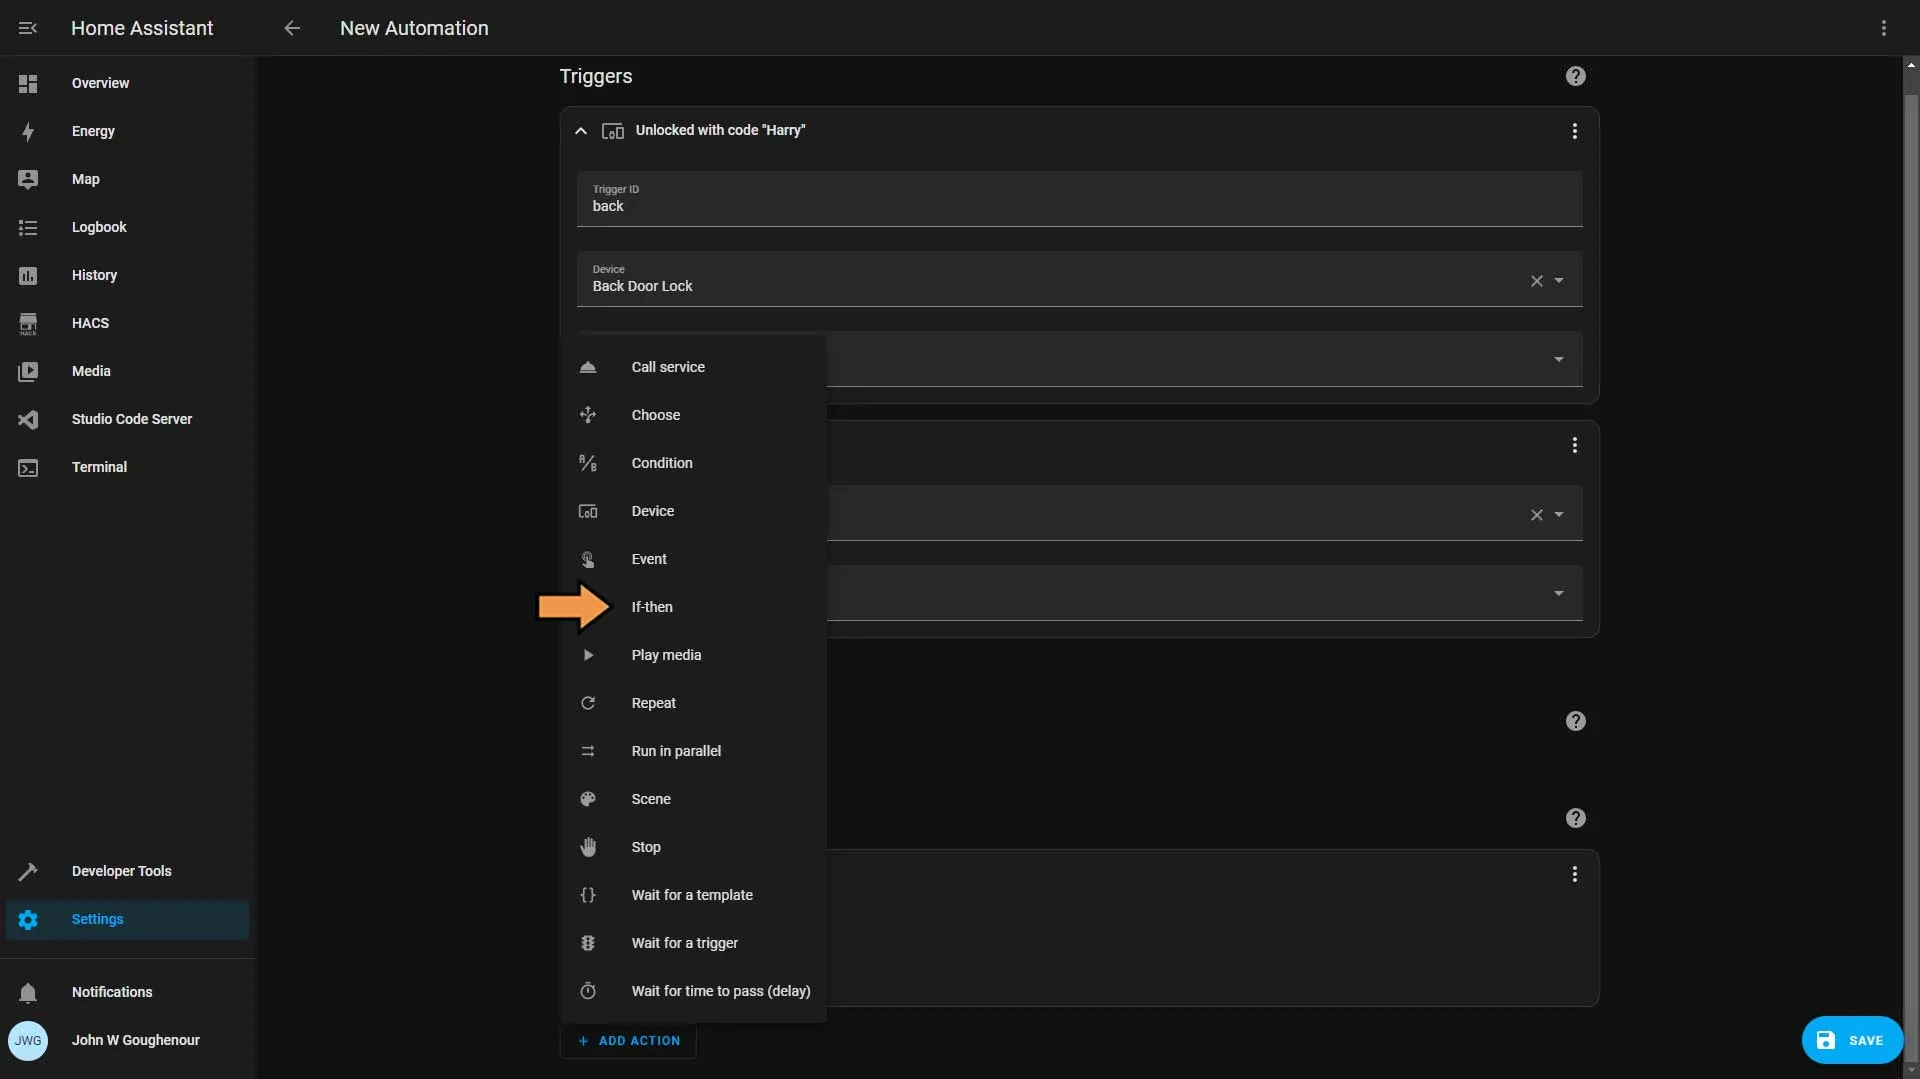
Select If-then from the add action list.
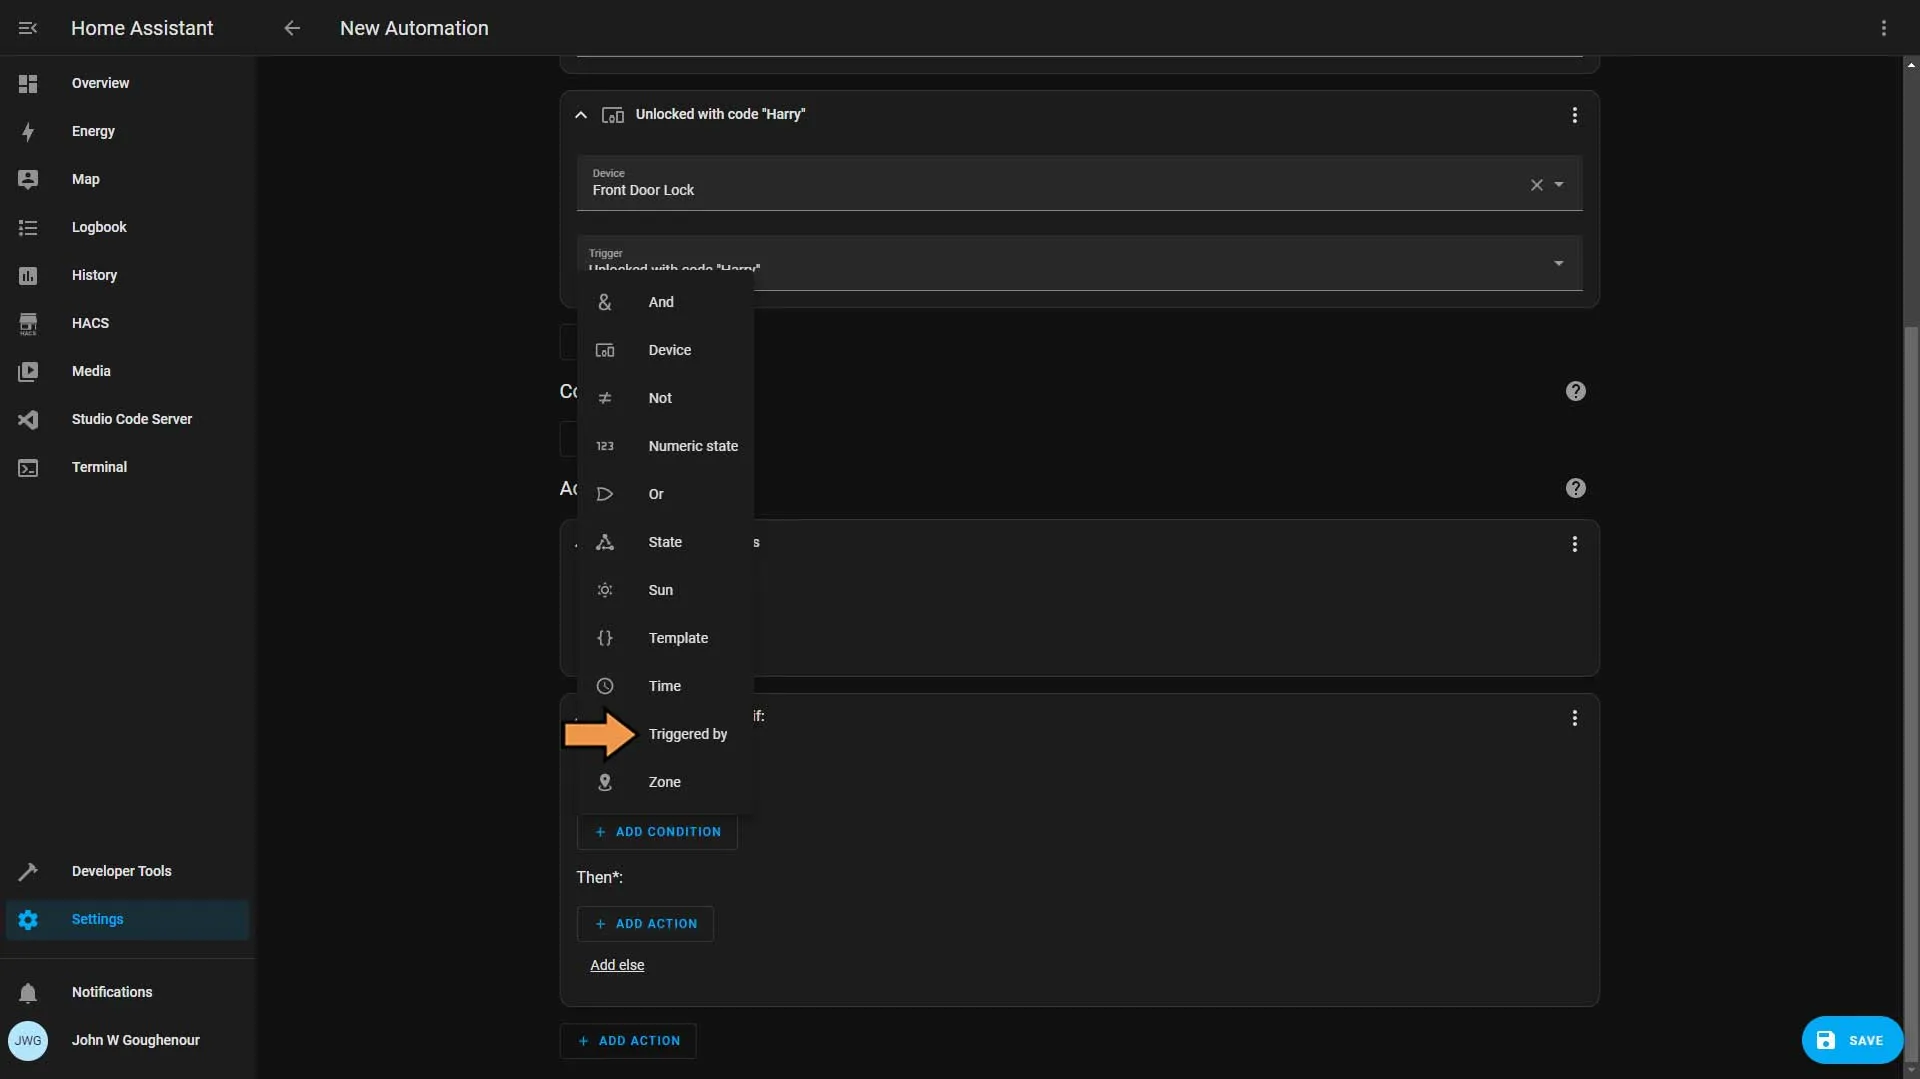
Click the Add Condition button and select Triggered by from the list.
Select the trigger id we created earlier, then click the Add Action button.
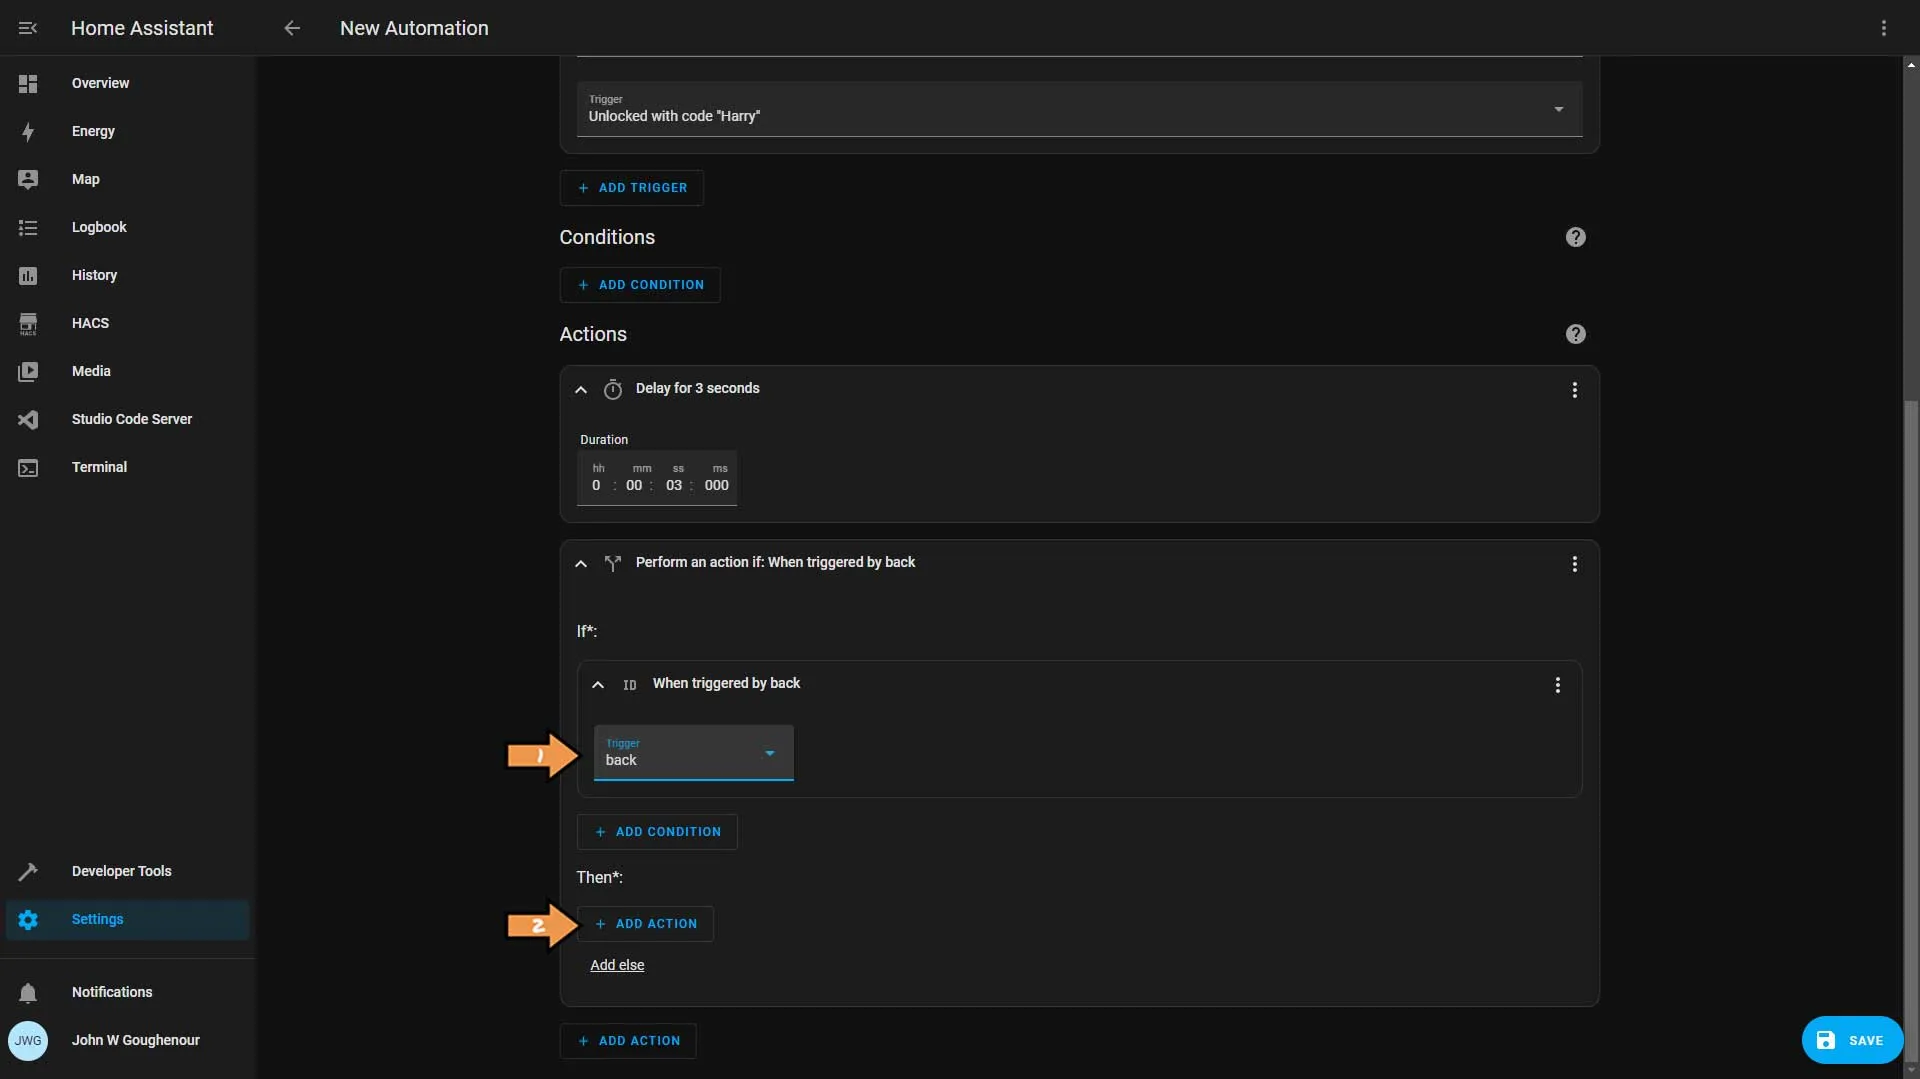
Select Call service from the add action list.
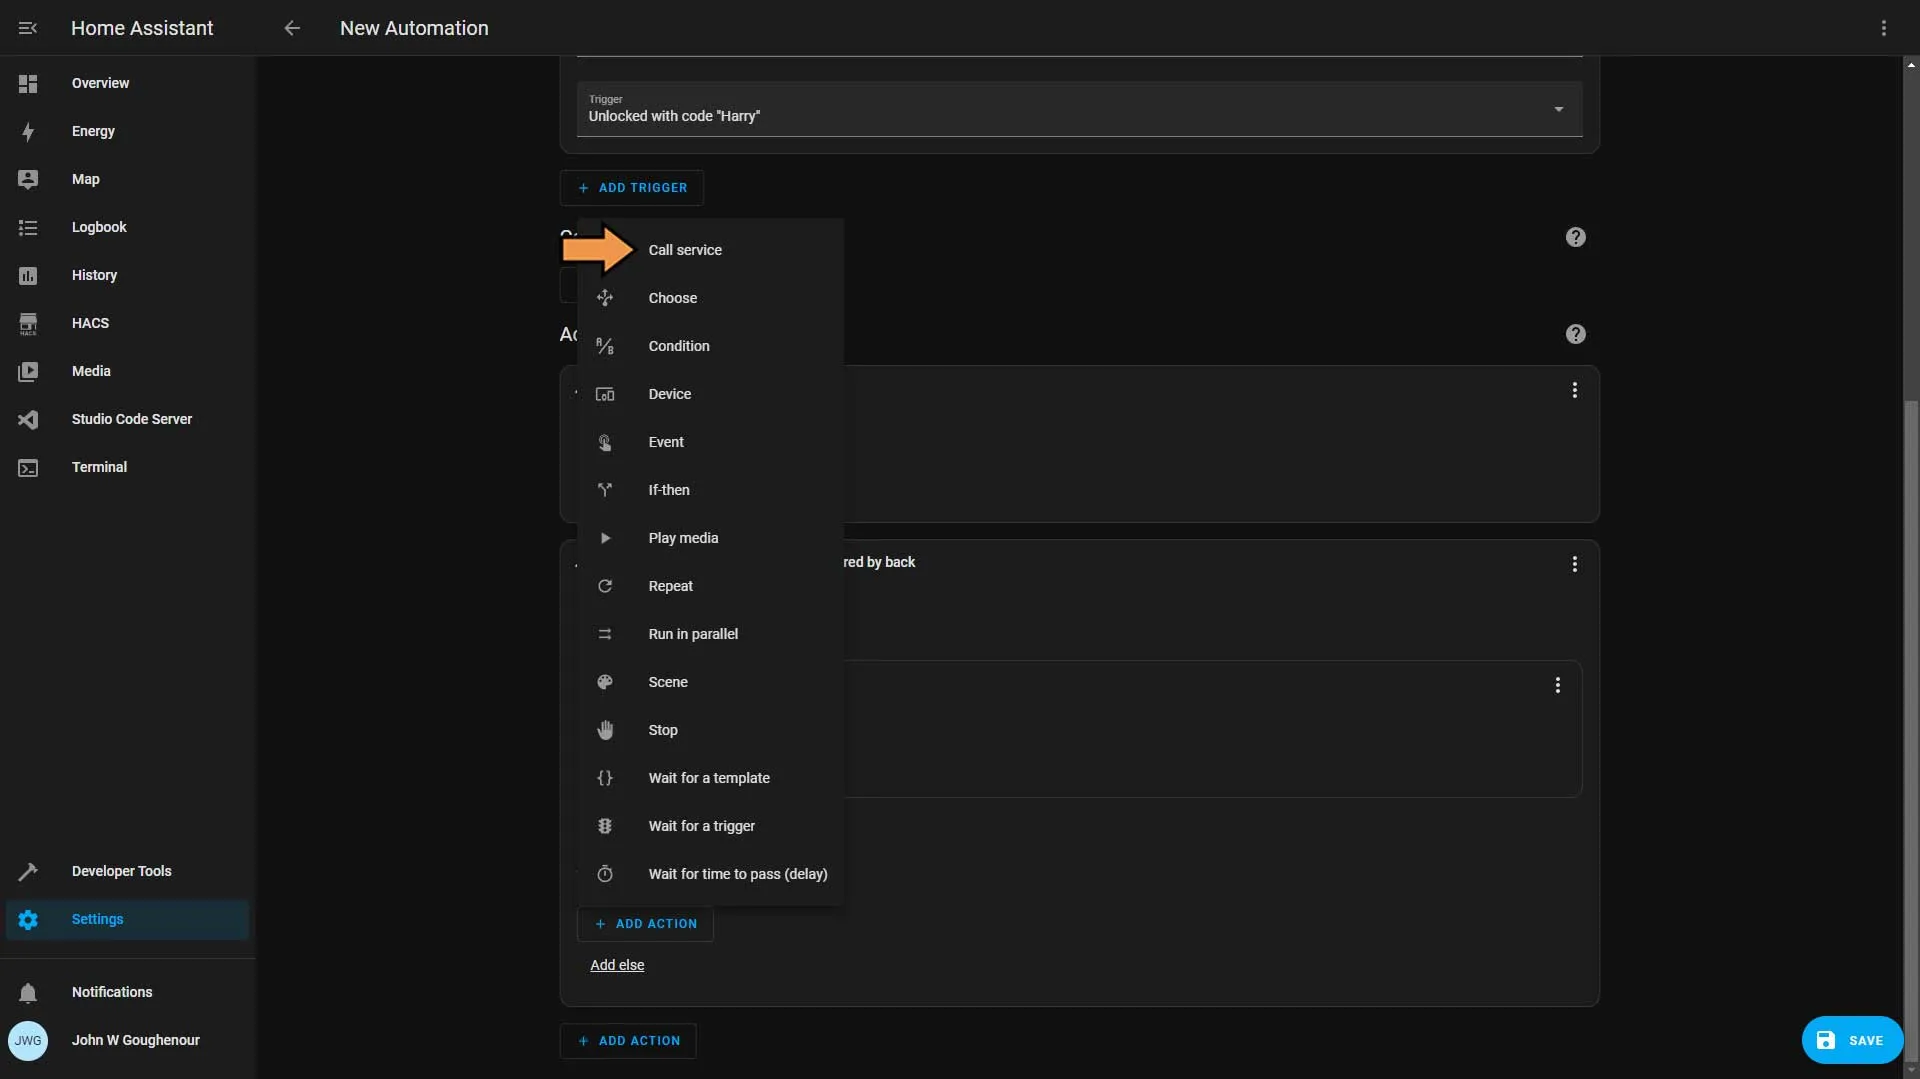
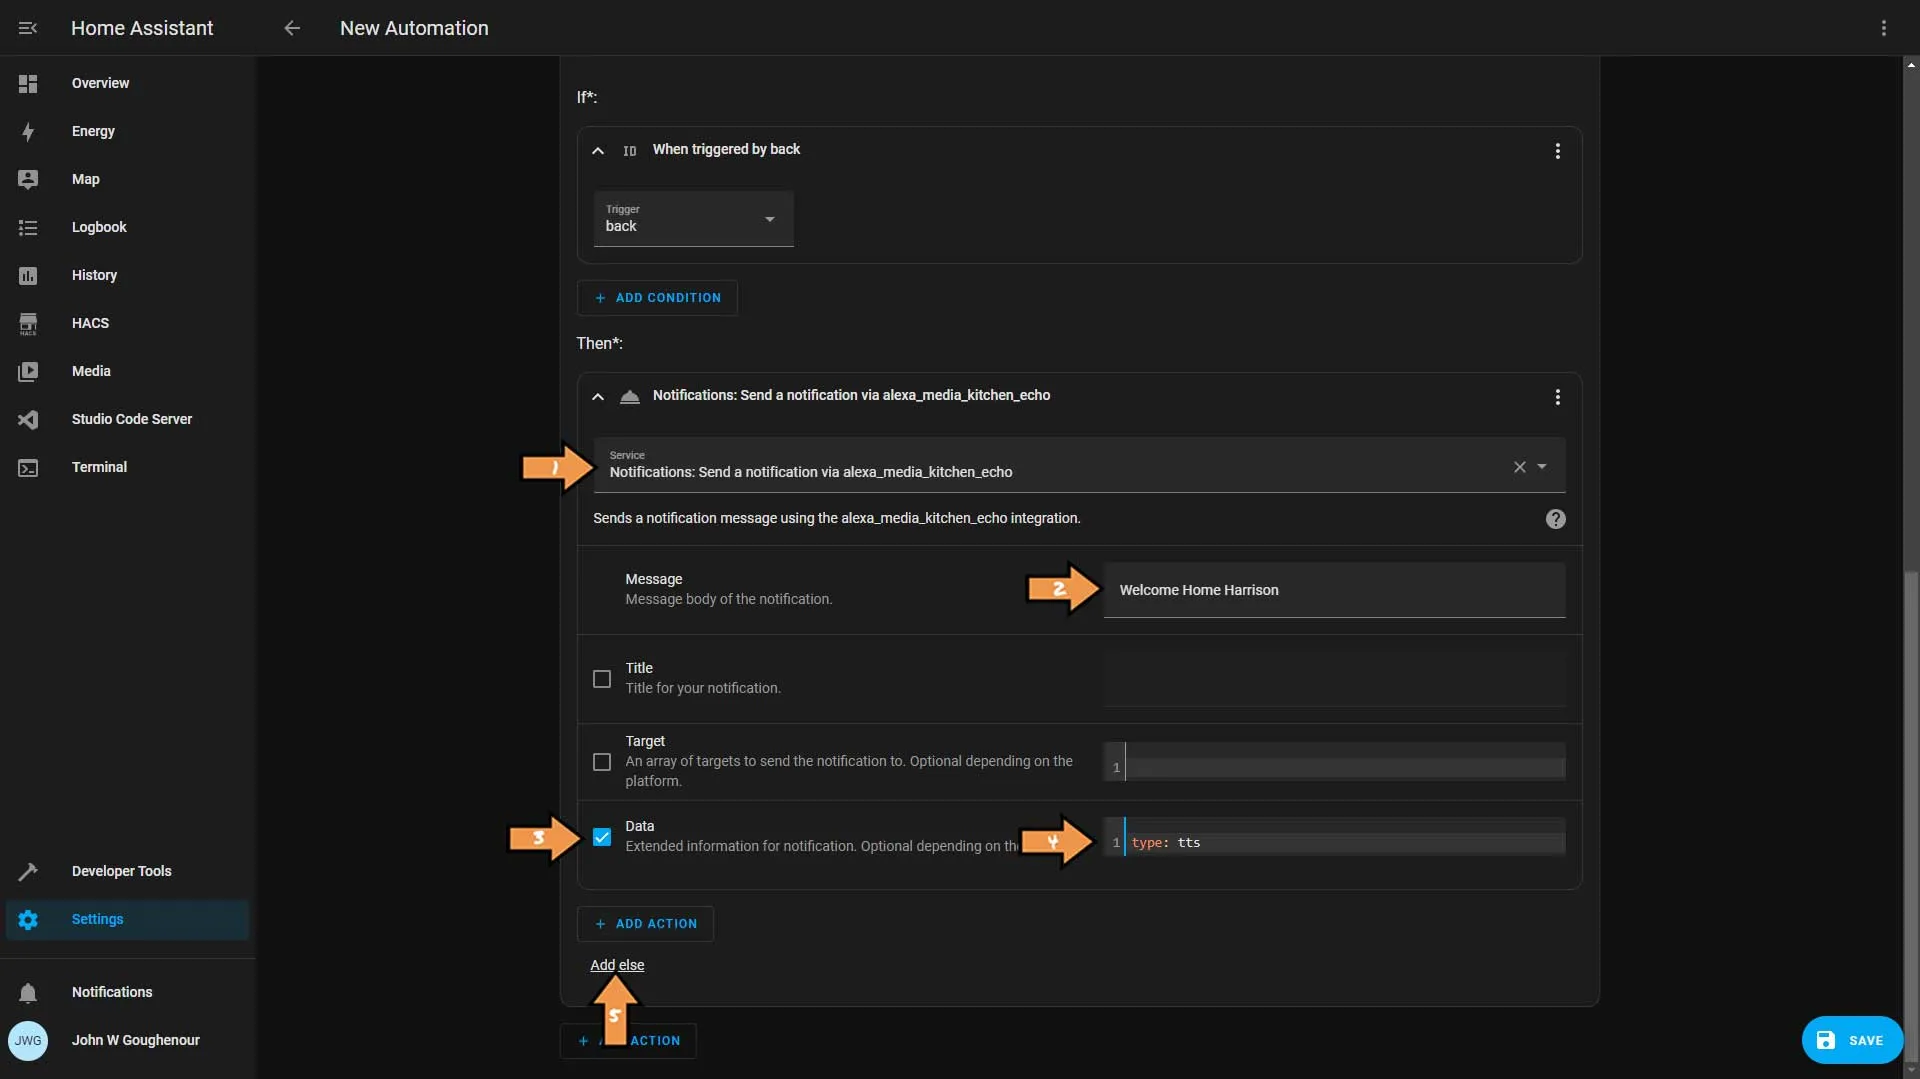
On the call service screen:
- Search for Notifications in the Service drop down and select the Alexa device closest to the first lock.
- Add a message for that unlock code.
- Add a check to the Data checkbox.
- Then type
type: ttsThis tells HA that the message is Text To Speech. - Finally click Add Else.
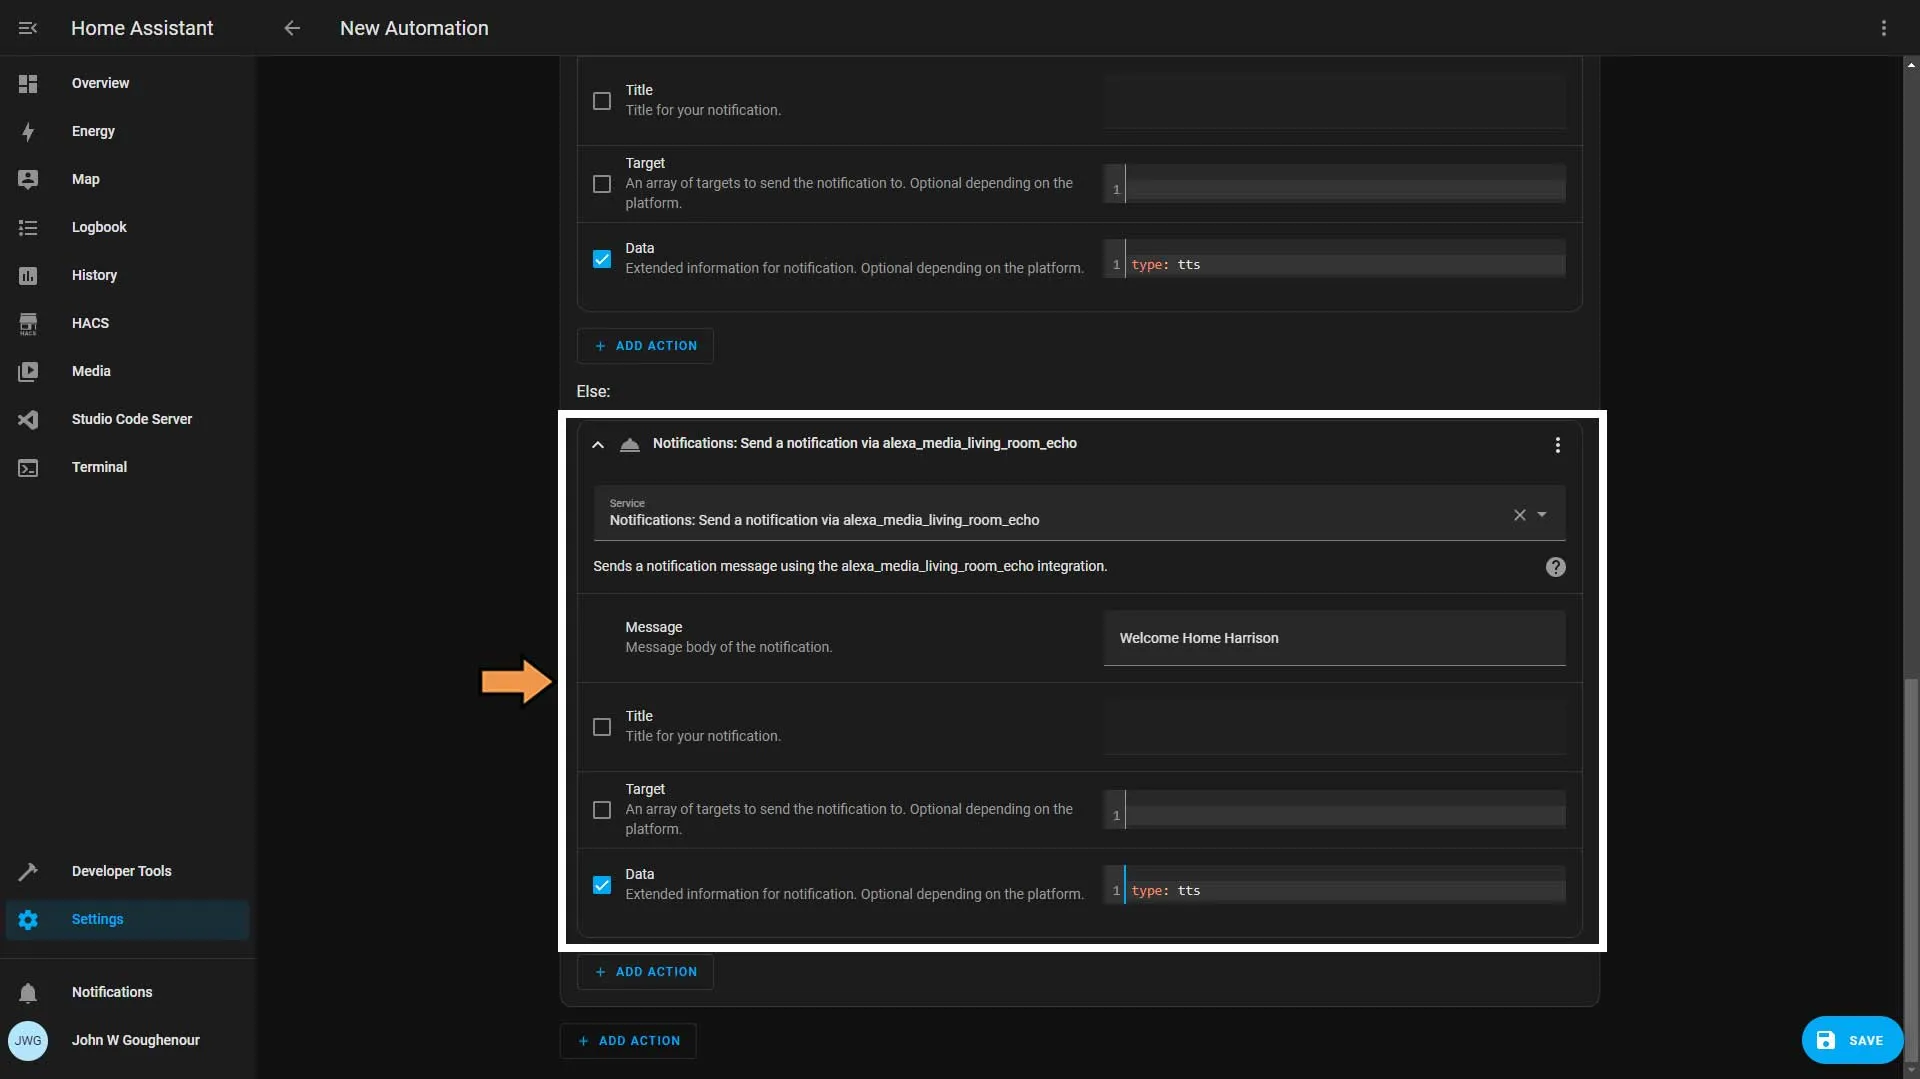
Do the same thing for your second lock if you have one.
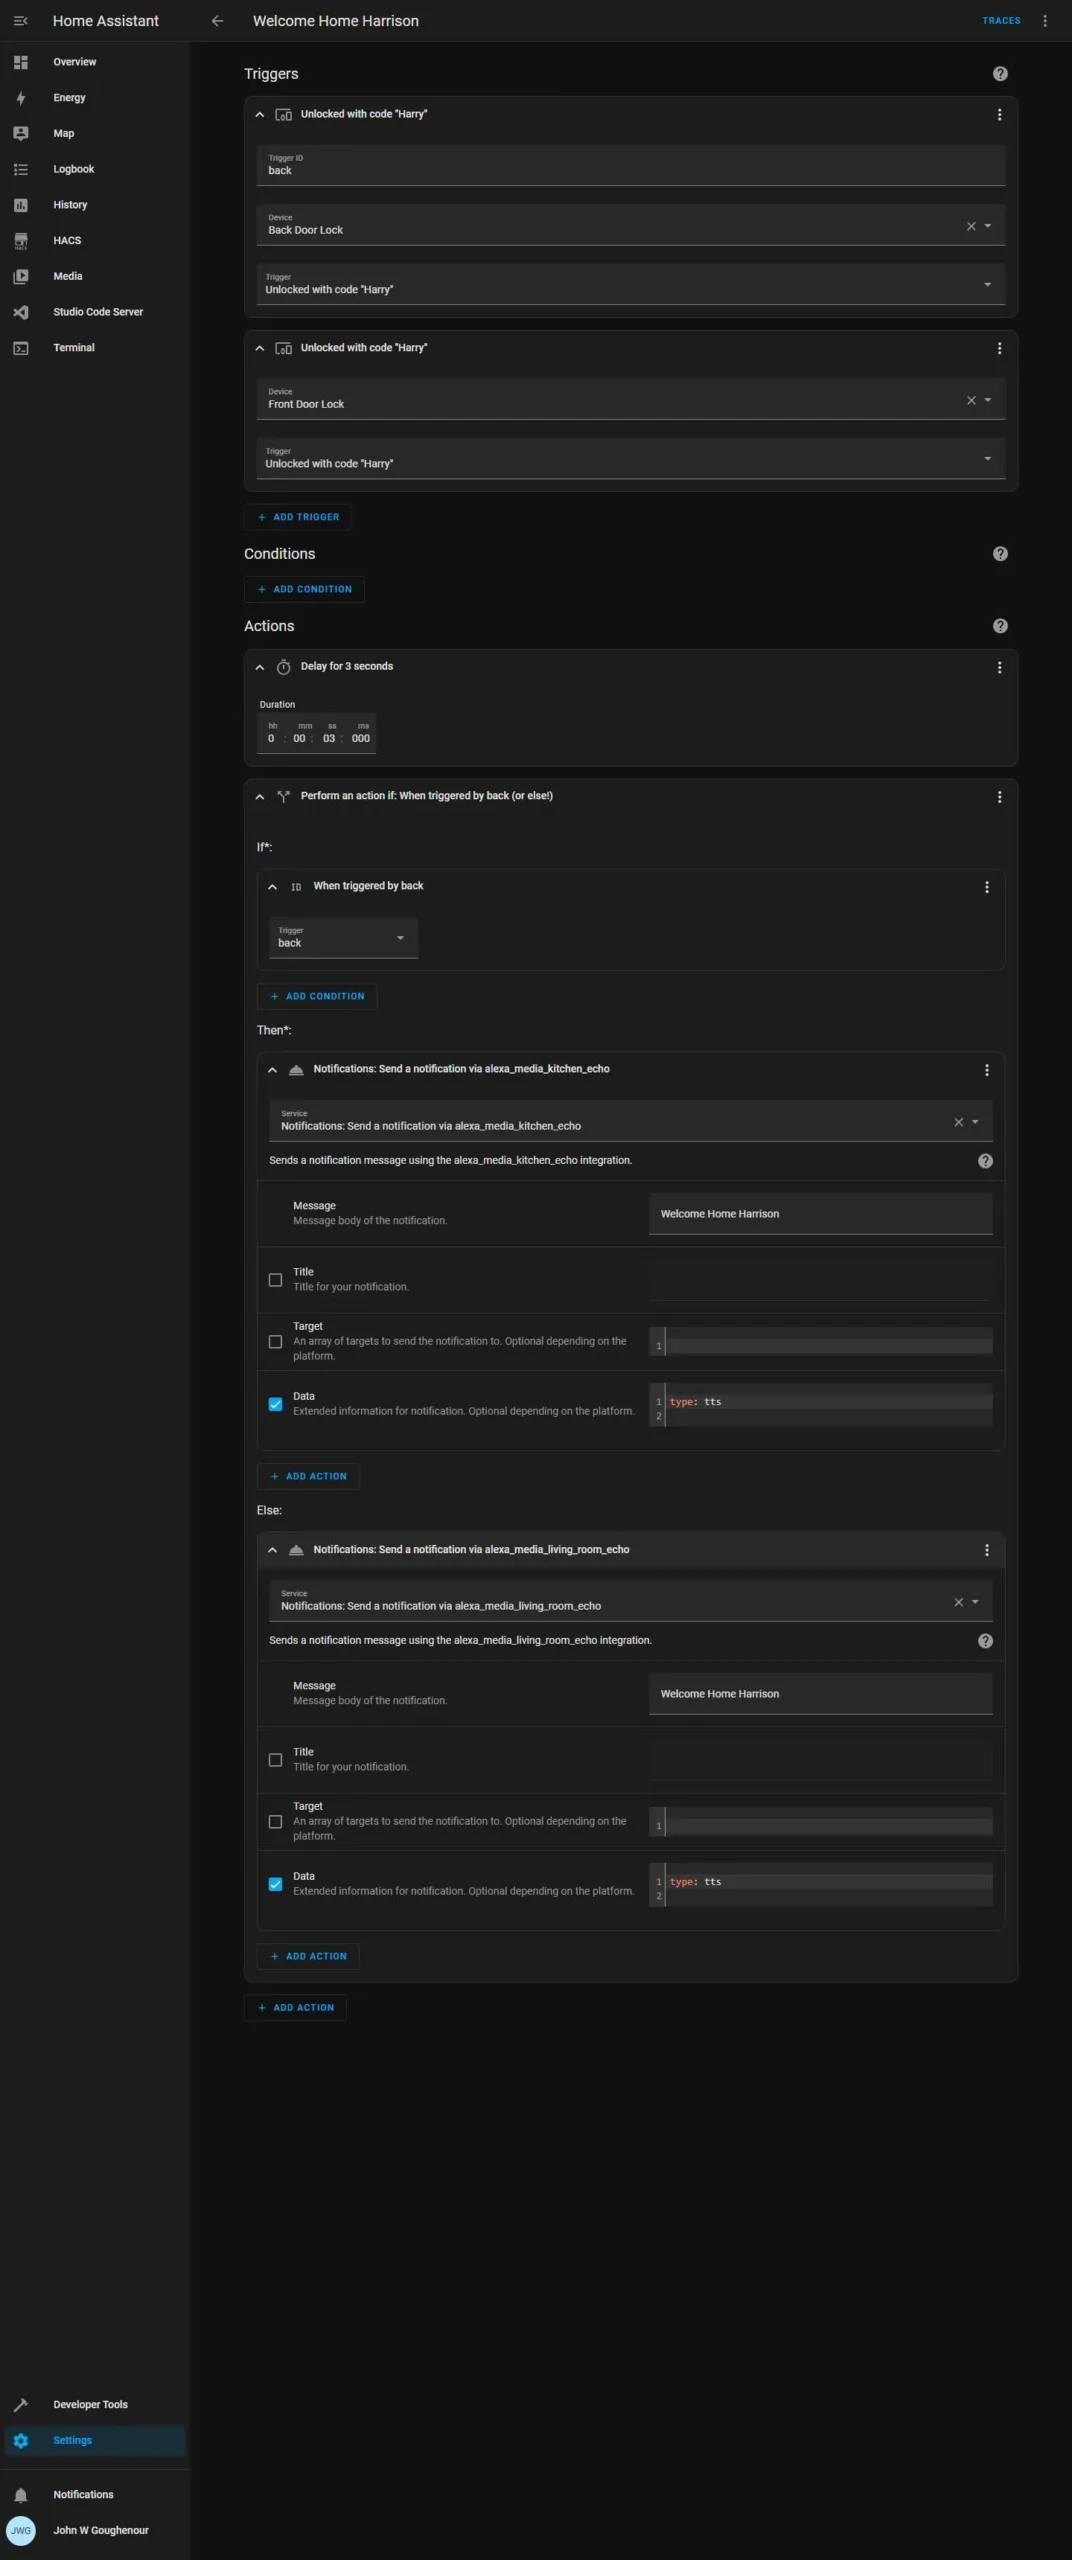
Your complete automation should look something like this.
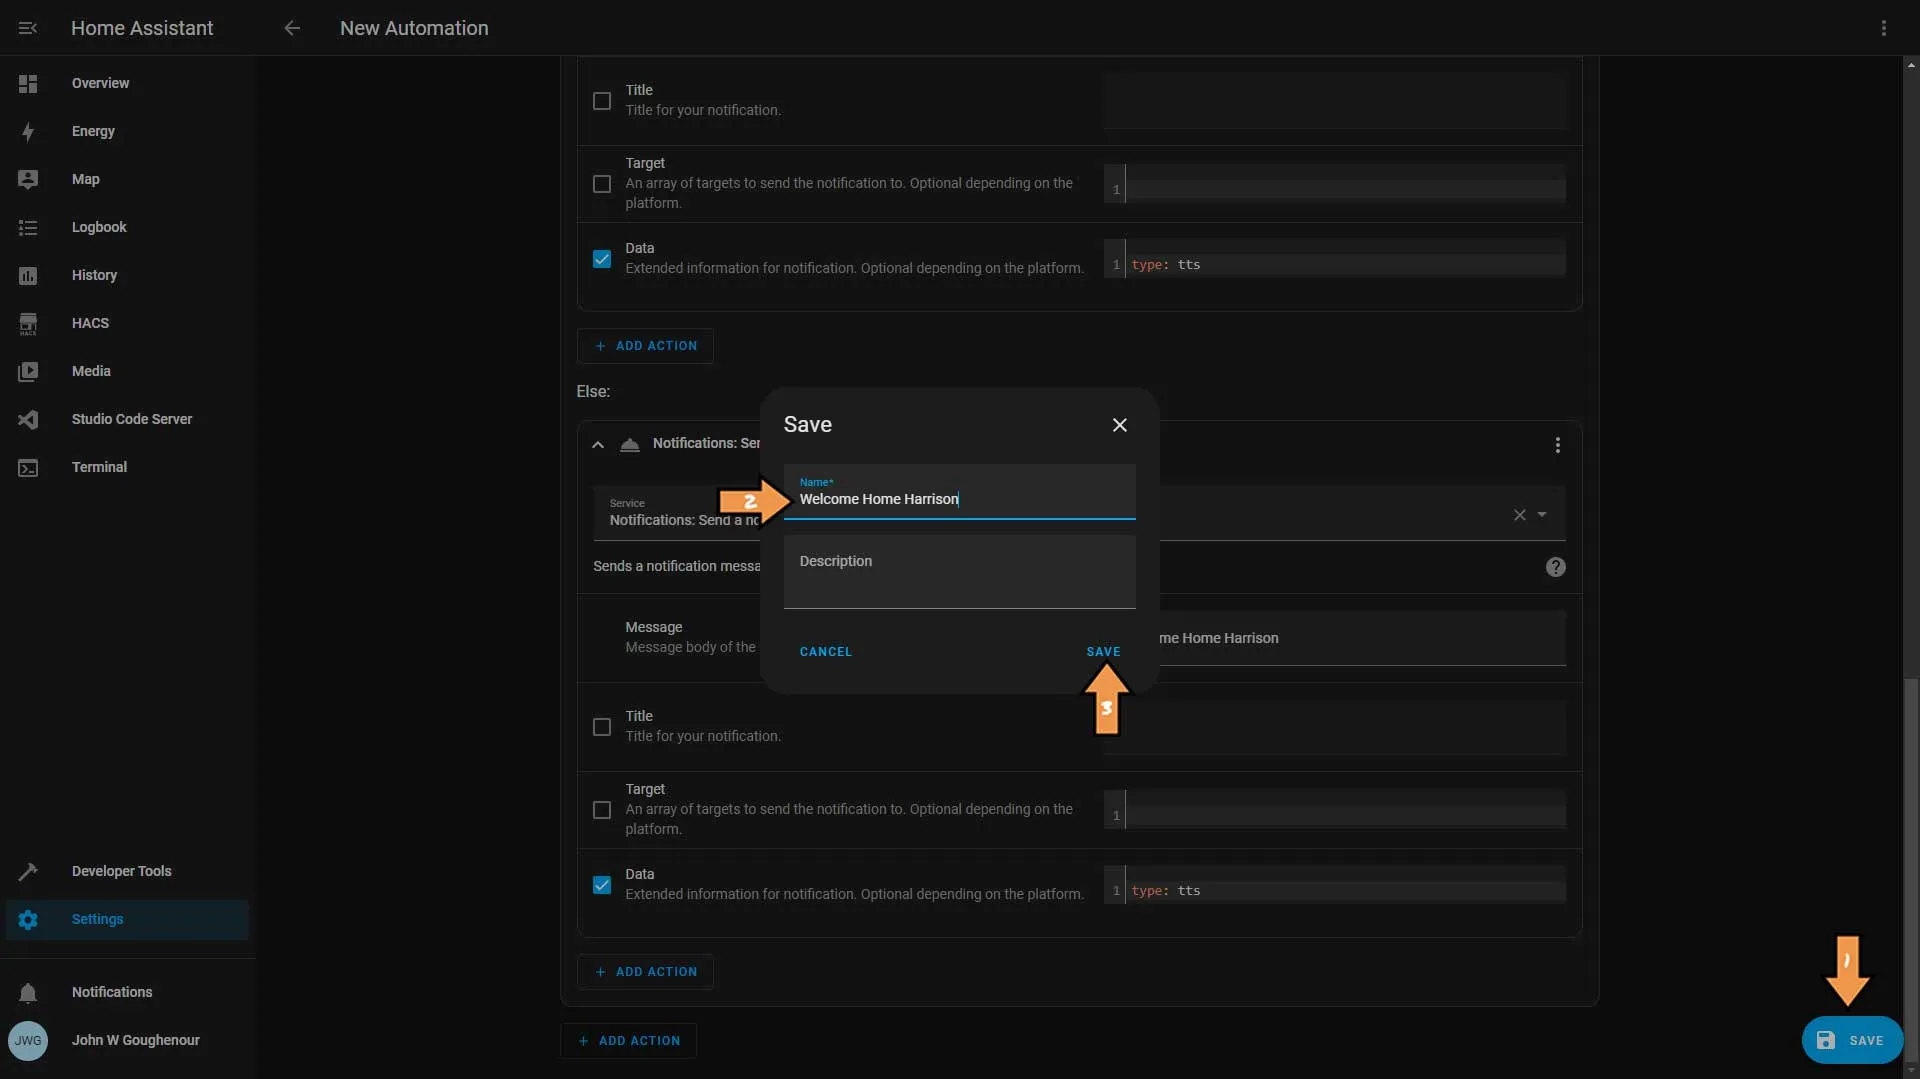
In the bottom right-hand corner, click the blue Save button. Next, name the automation and click save again.
Success: That’s It! Rinse and repeat for each family member
Amazon Alexa
Welcome Home Automation
The Official Documentation for Alexa Routines
Option Two
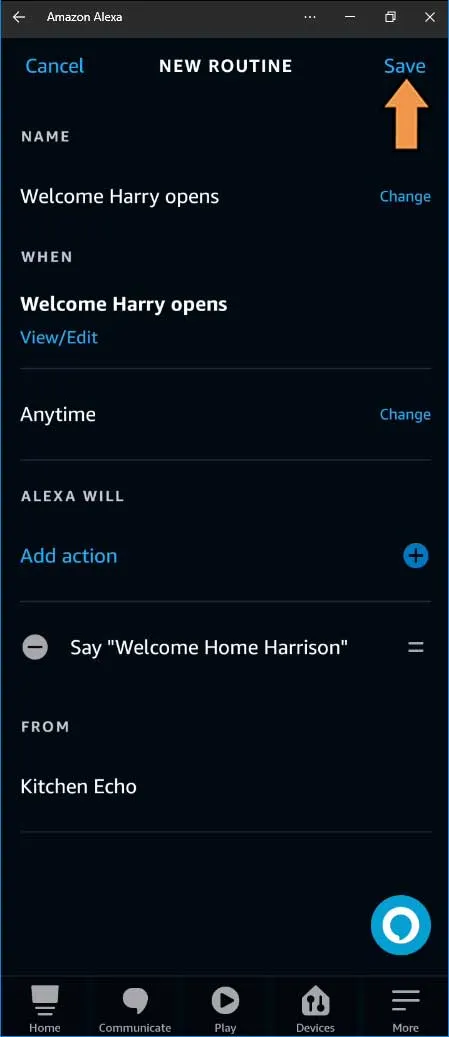
Share a virtual switch with Alexa and use that as a trigger in the app.
Setting Up the Automation
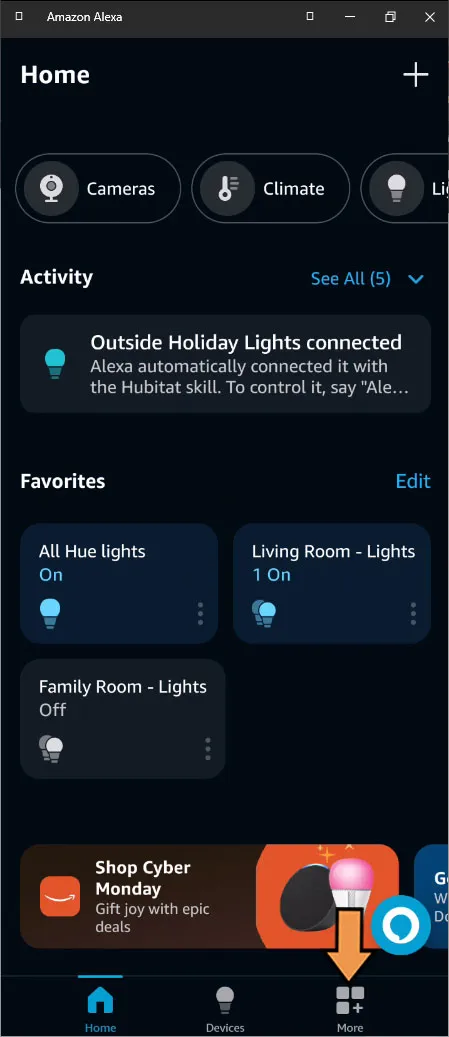
First, Click the More button at the bottom right of the screen.
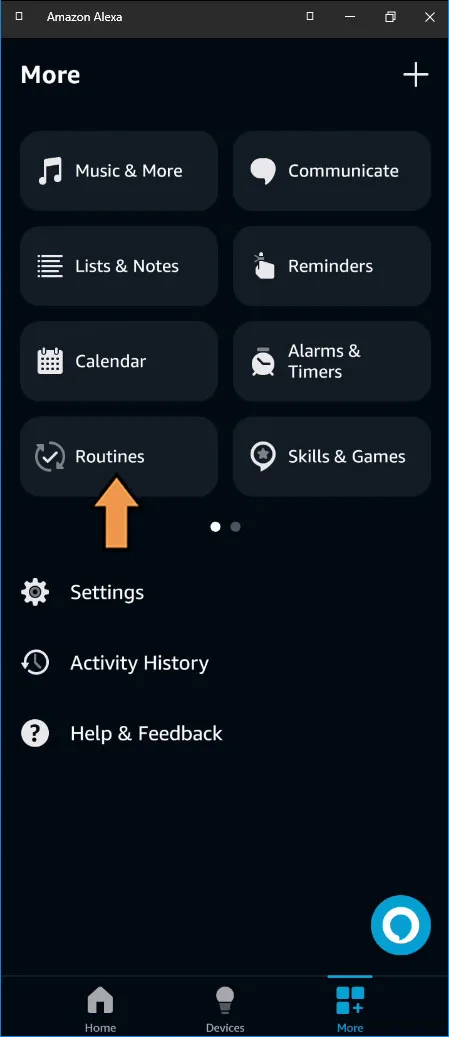
Click the Routines button.
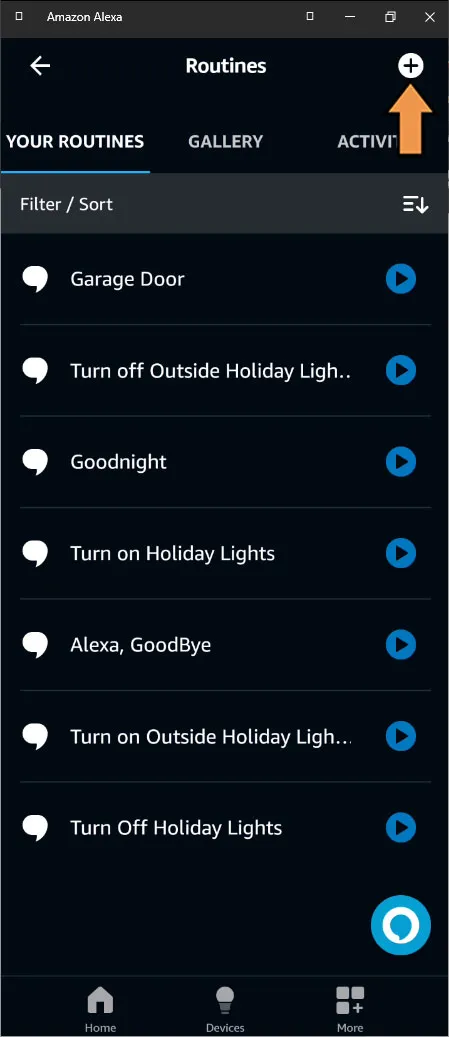
Click the plus sign to add a new routine.
Click the plus sign by Enter routine name.
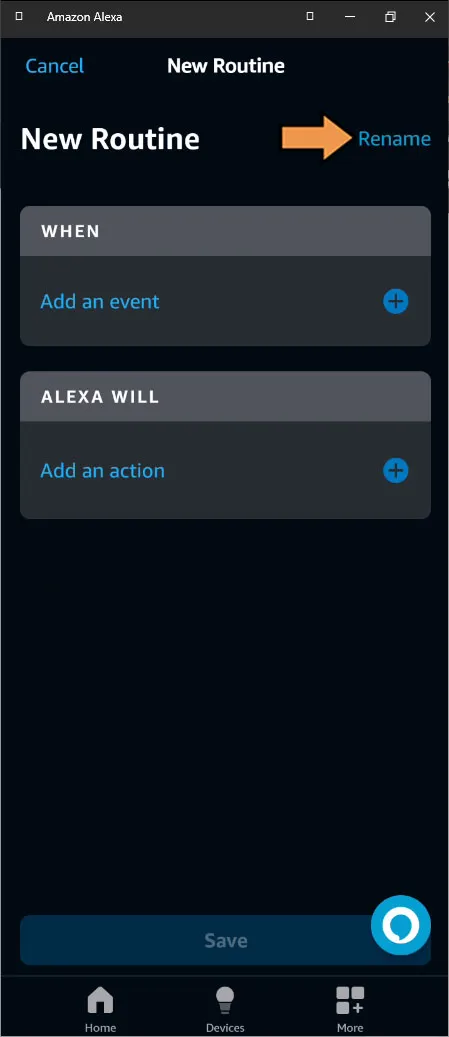
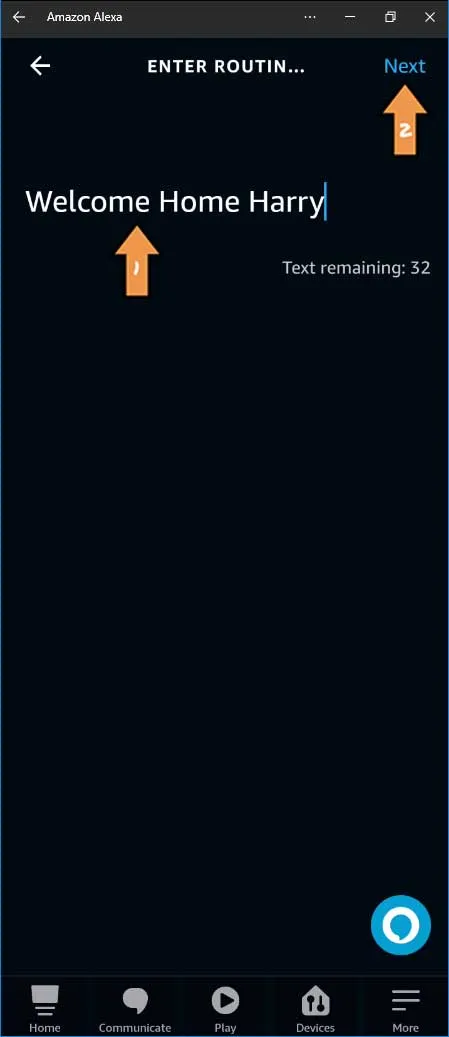
Enter a Name for the Routine, then click Next.
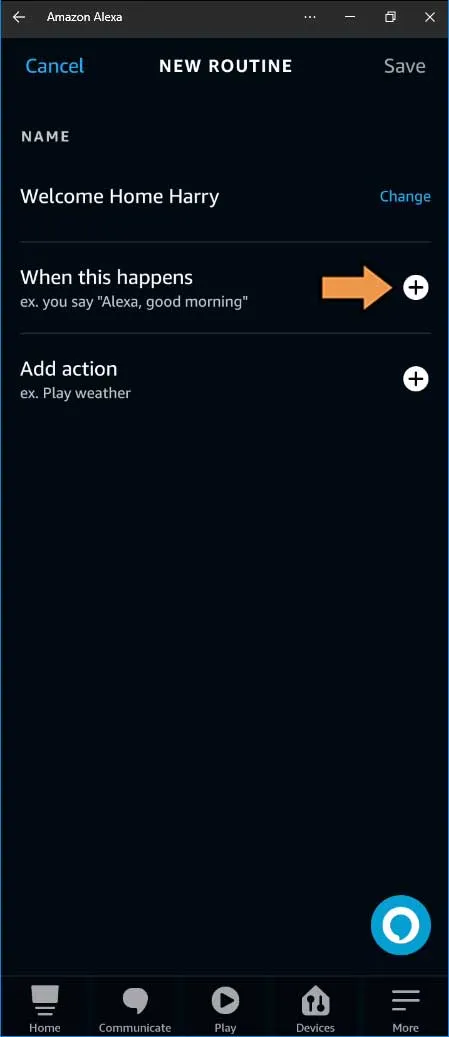
Click the plus sign by When this happens.
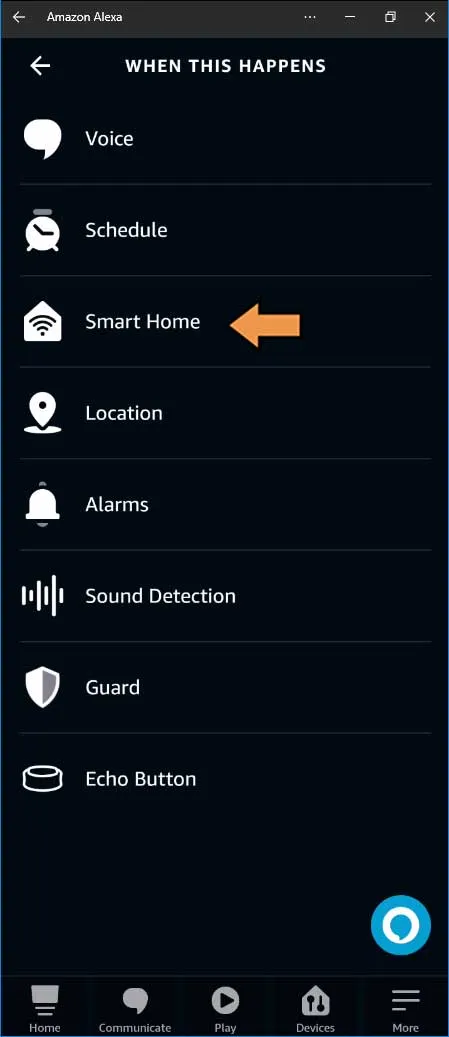
On the When This Happens screen, click Smart Home.
Select the virtual sensor/switch we shared with Alexa.
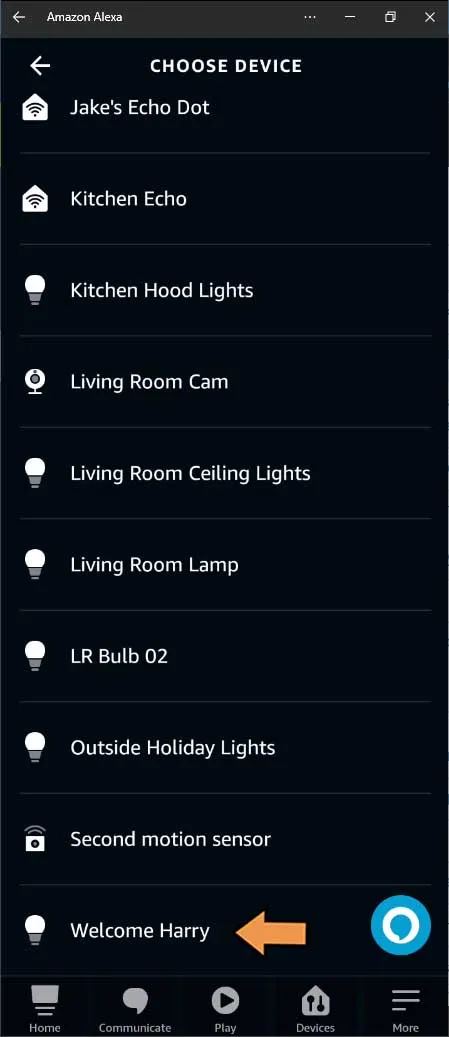
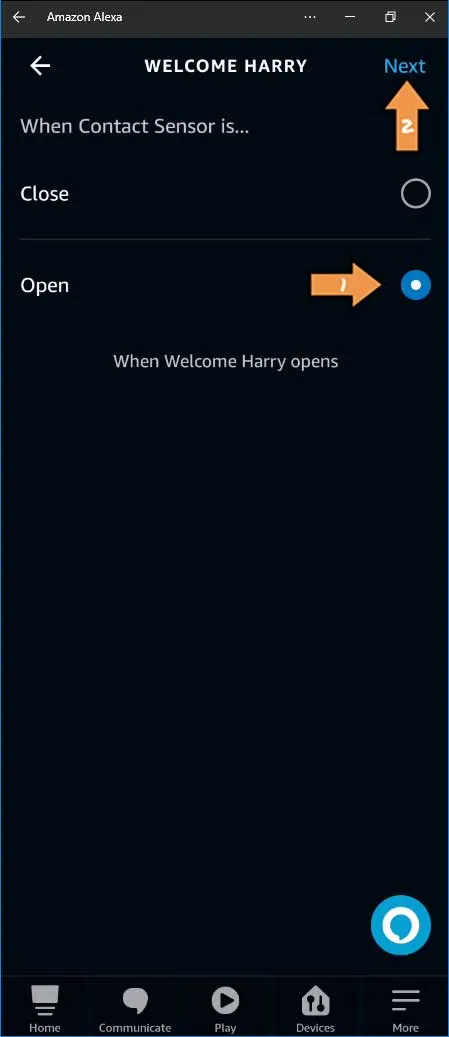
When Contact Sensor is… select open and click Next.
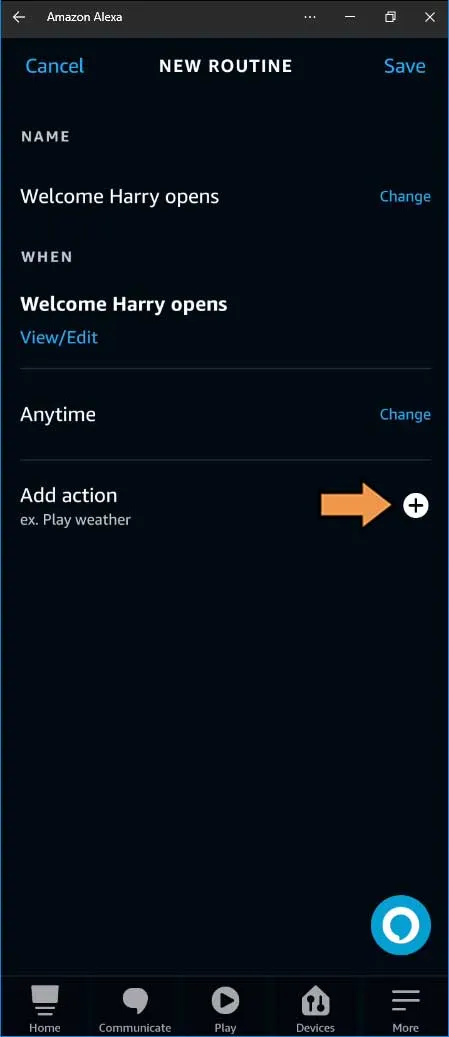
Click the plus sign by Add action.
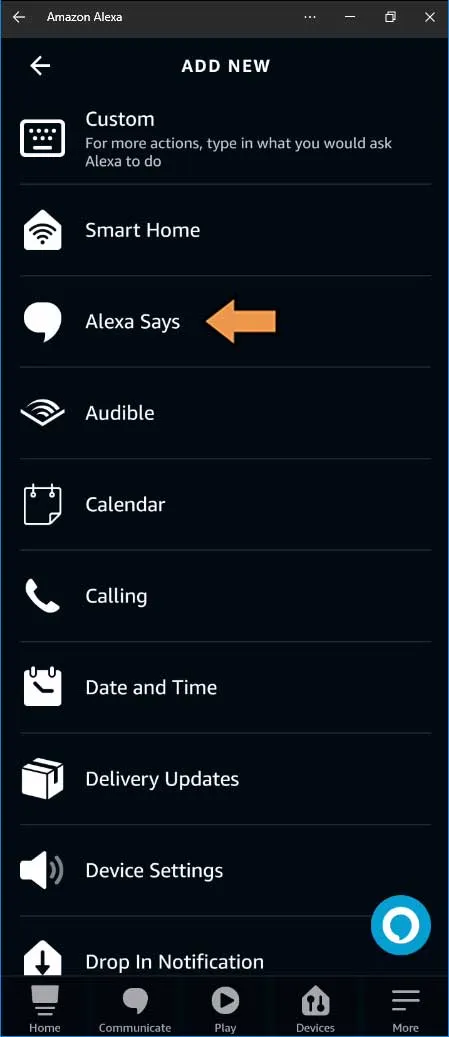
On the Add New screen, select Alexa Says.
Select Customized.
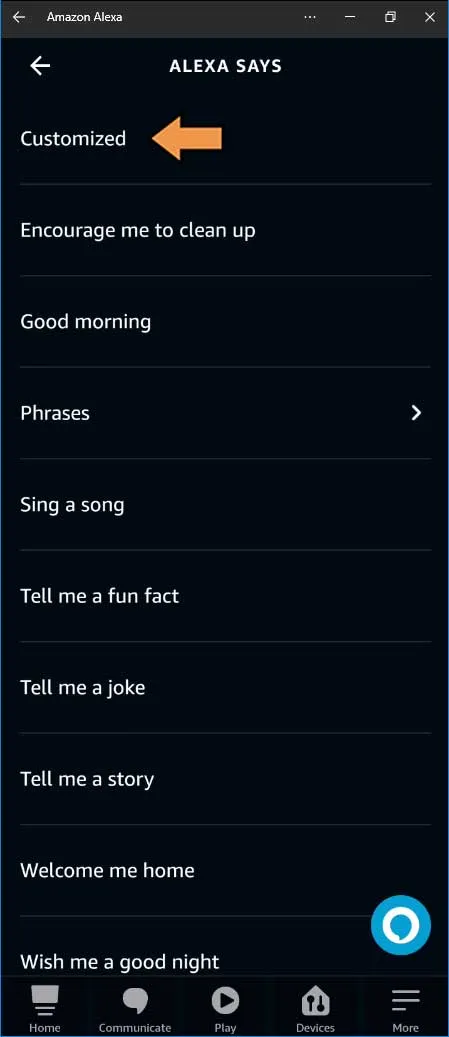
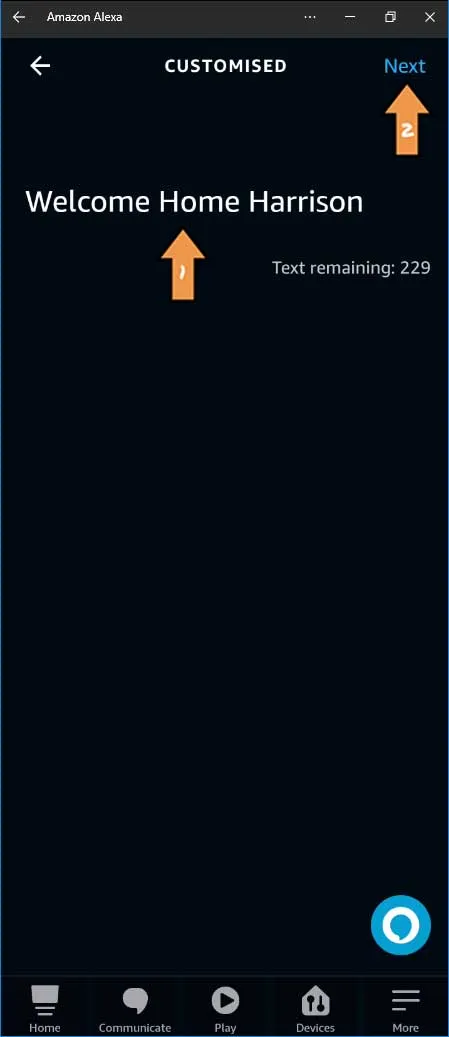
Type your message and click Next.
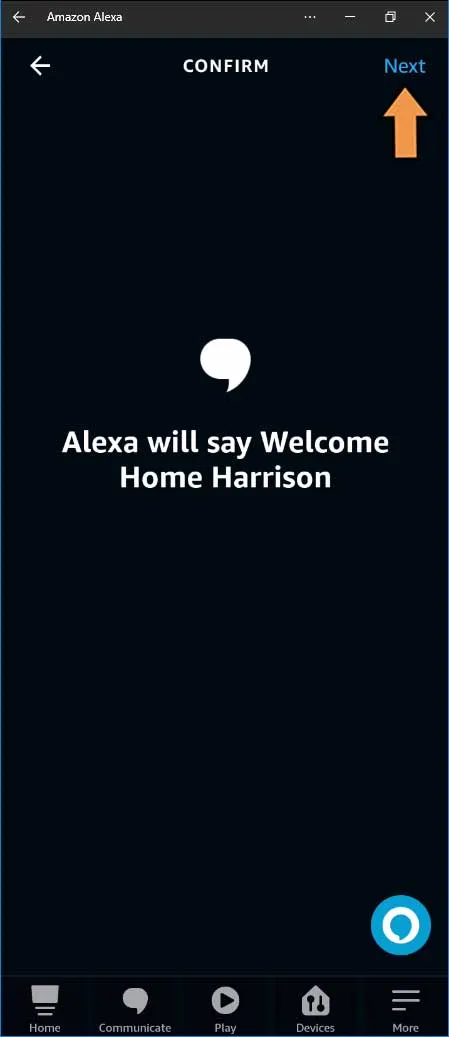
Confirm the message by clicking Next.
Click Choose Device.
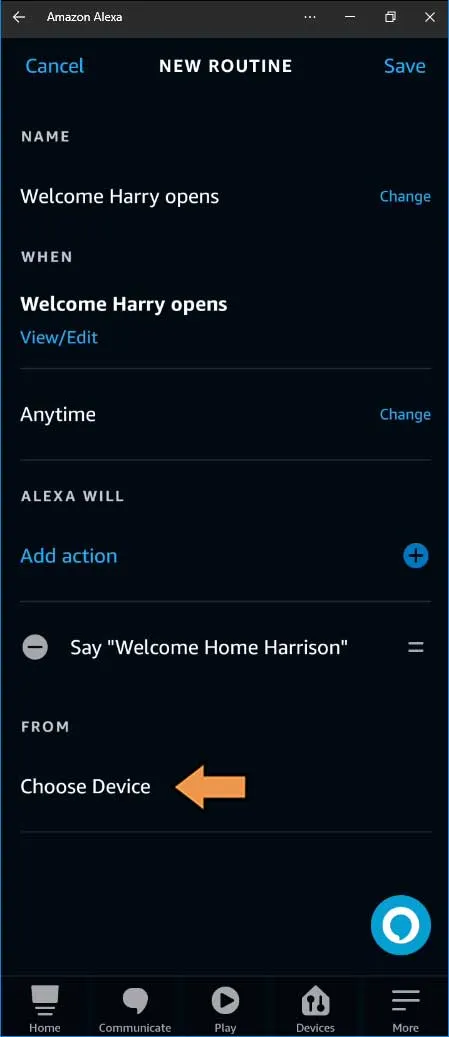
If you want to add another Alexa device you will have to add another action. Hopefully Amazon will allow you to choose a speaker group in the future.
Click Save to complete the Routine.
Success: That’s It! Rinse and repeat for each family member
