The Ultimate Smart Home Integration Cookbook
Integration: It enables the smart home hub to communicate and work with various smart devices or services.
Hubitat Connect is how we can share our Hubitat devices with other smart home hubs. Sharing our Hubitat devices with other hubs gives us unparallel flexibility in our smart homes. In addition, Hubitat not only connects to other smart home hubs but also has a built-in ability to connect multiple Hubitat hubs, making Hubitat one of the most flexible smart home hubs on the market.
Automation Details
Requirements
- Hubitat Hub
Actions:
- Connect to Hubitat Smart Home Hub

Hubitat
Hub Mesh
The Official Documentation for Hub Mesh
Setting Up the Automation
Enable Hub Mesh
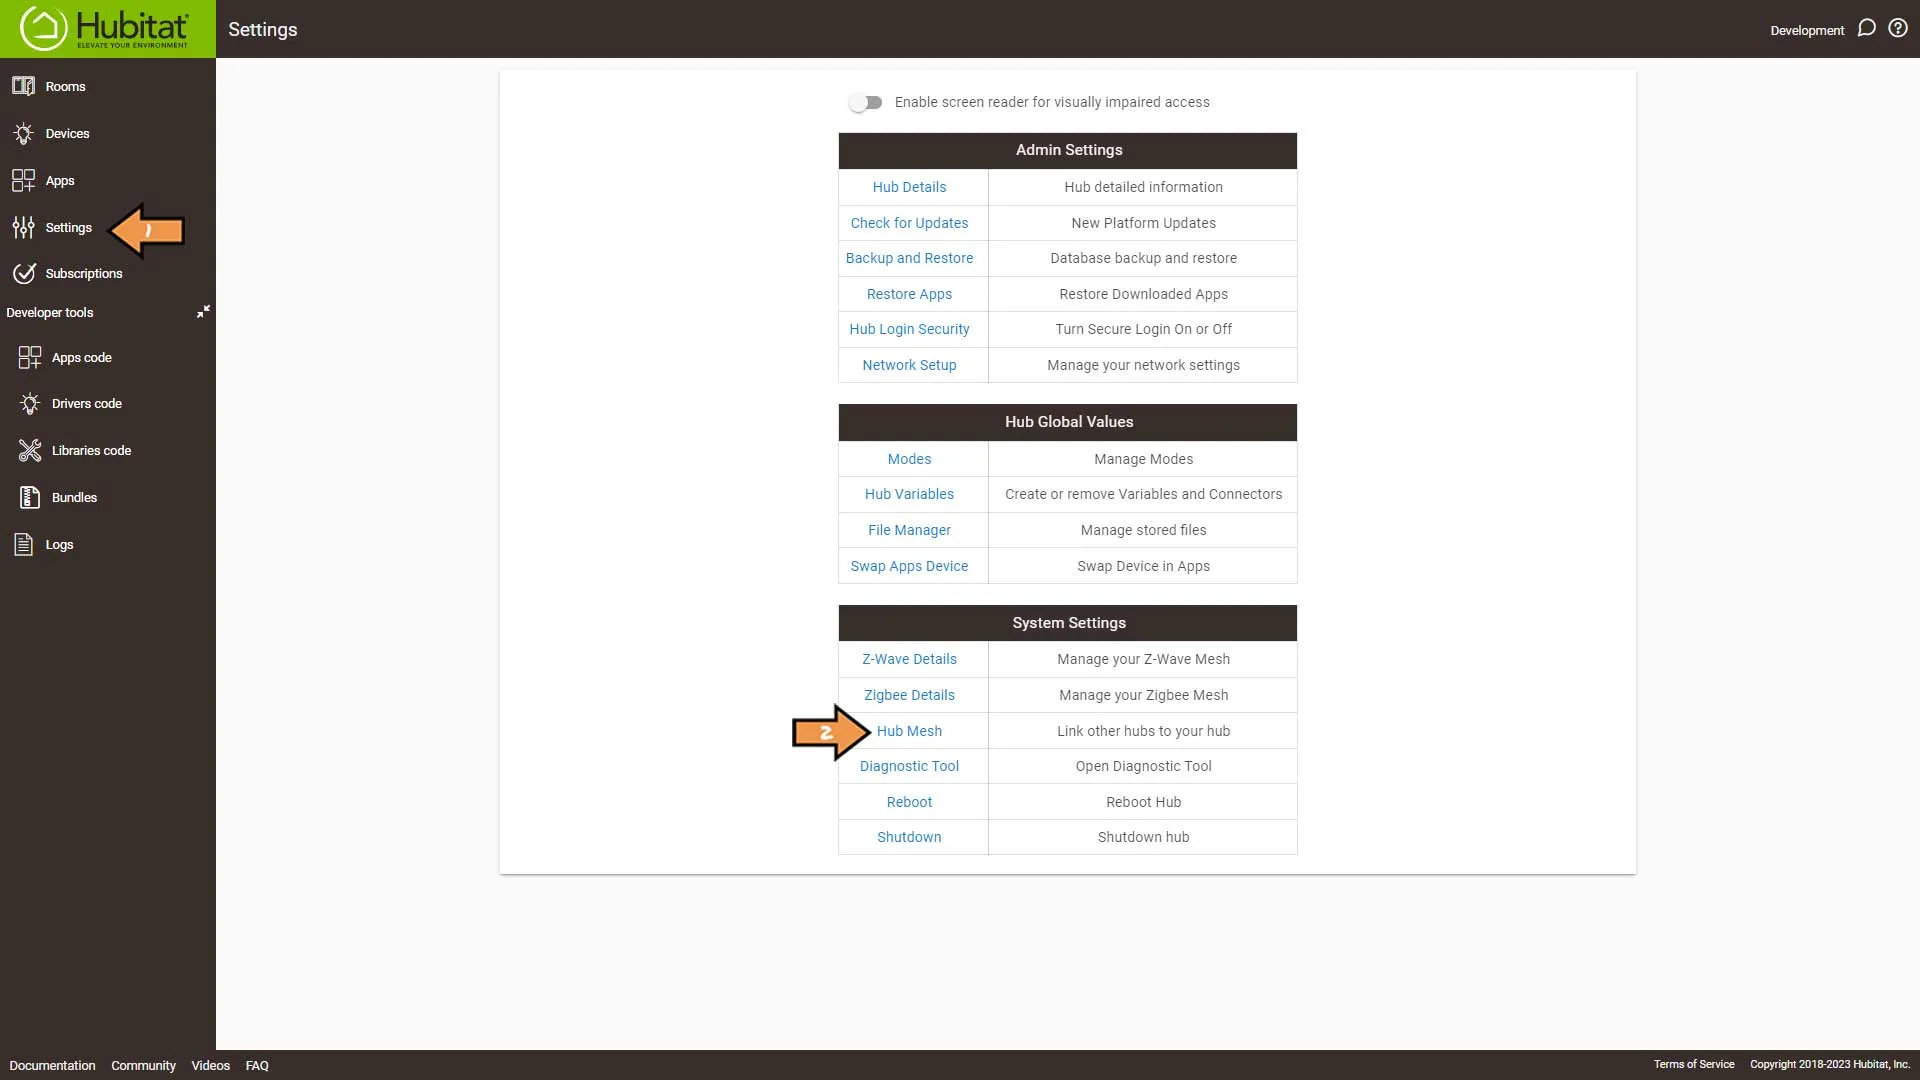
First, go to Settings, then click Hub Mesh.
On the Hub Mesh Screen, click the Enable button.
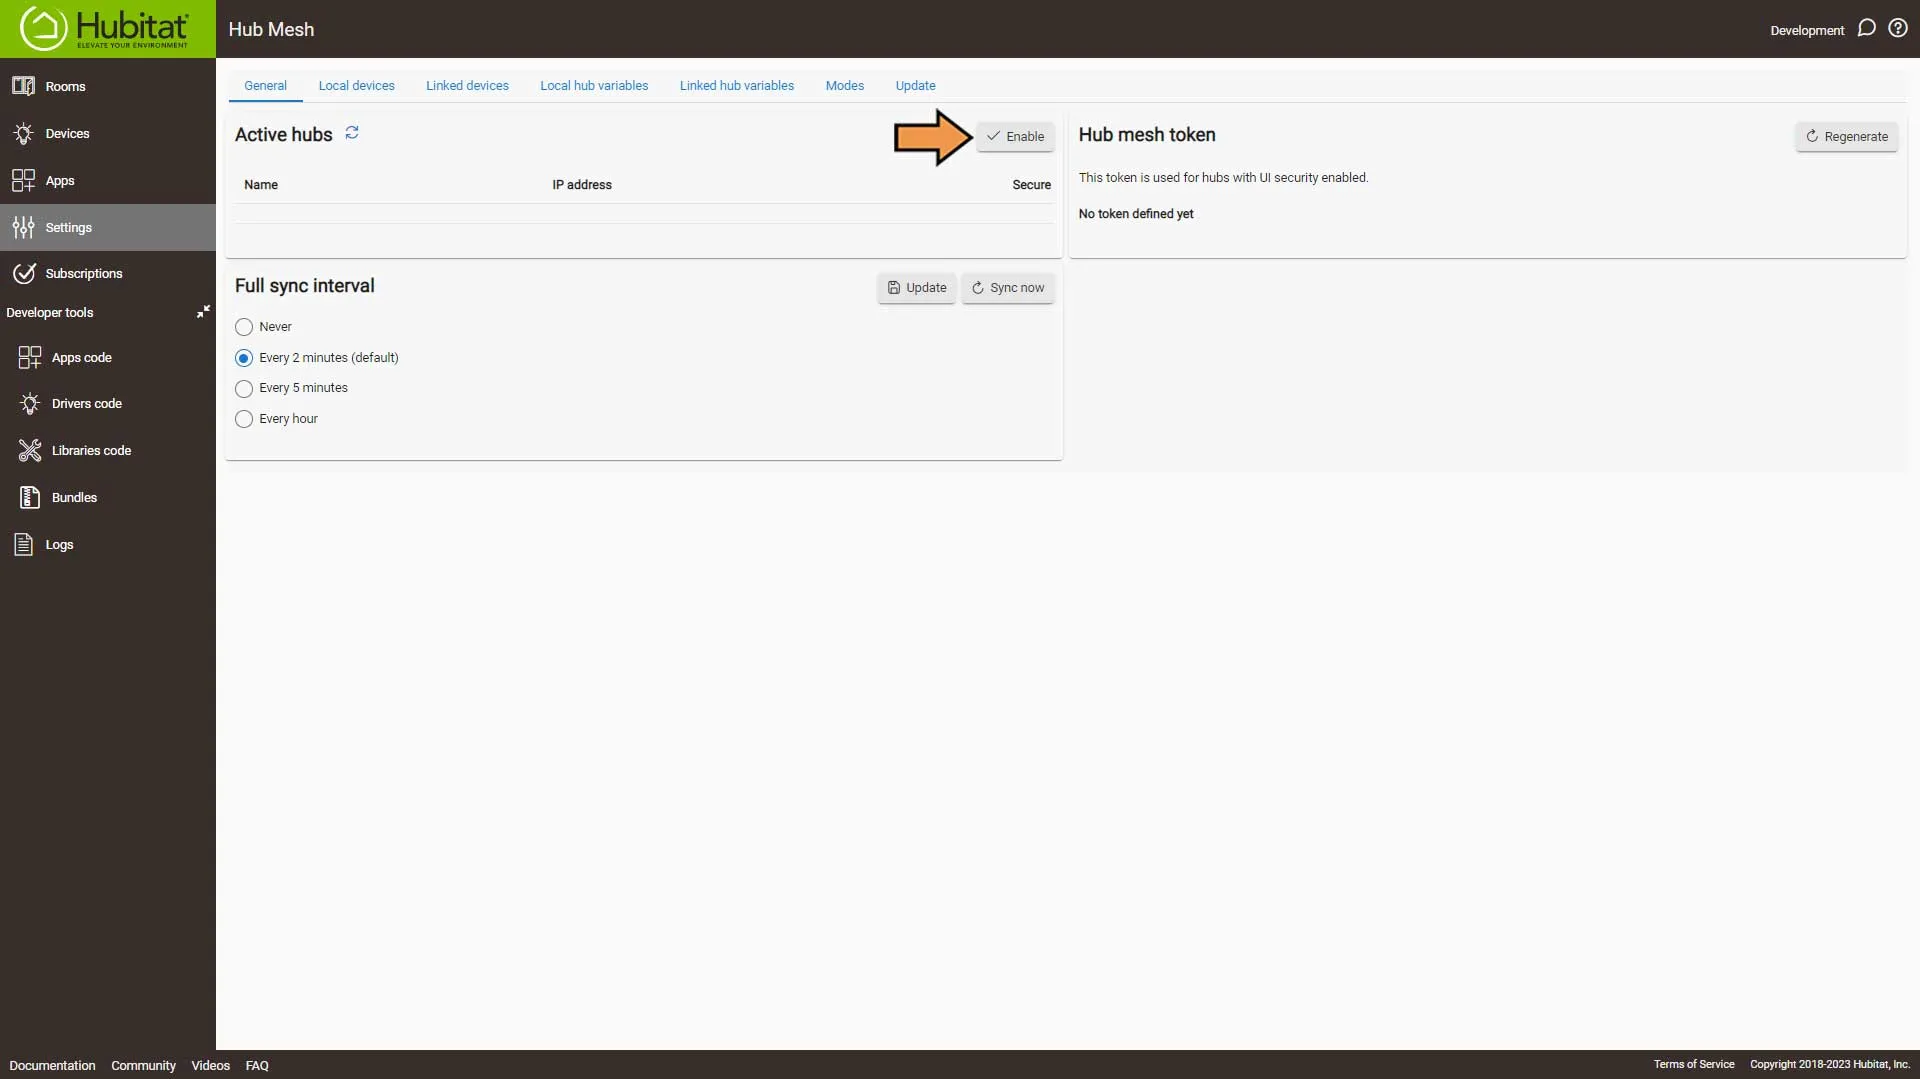
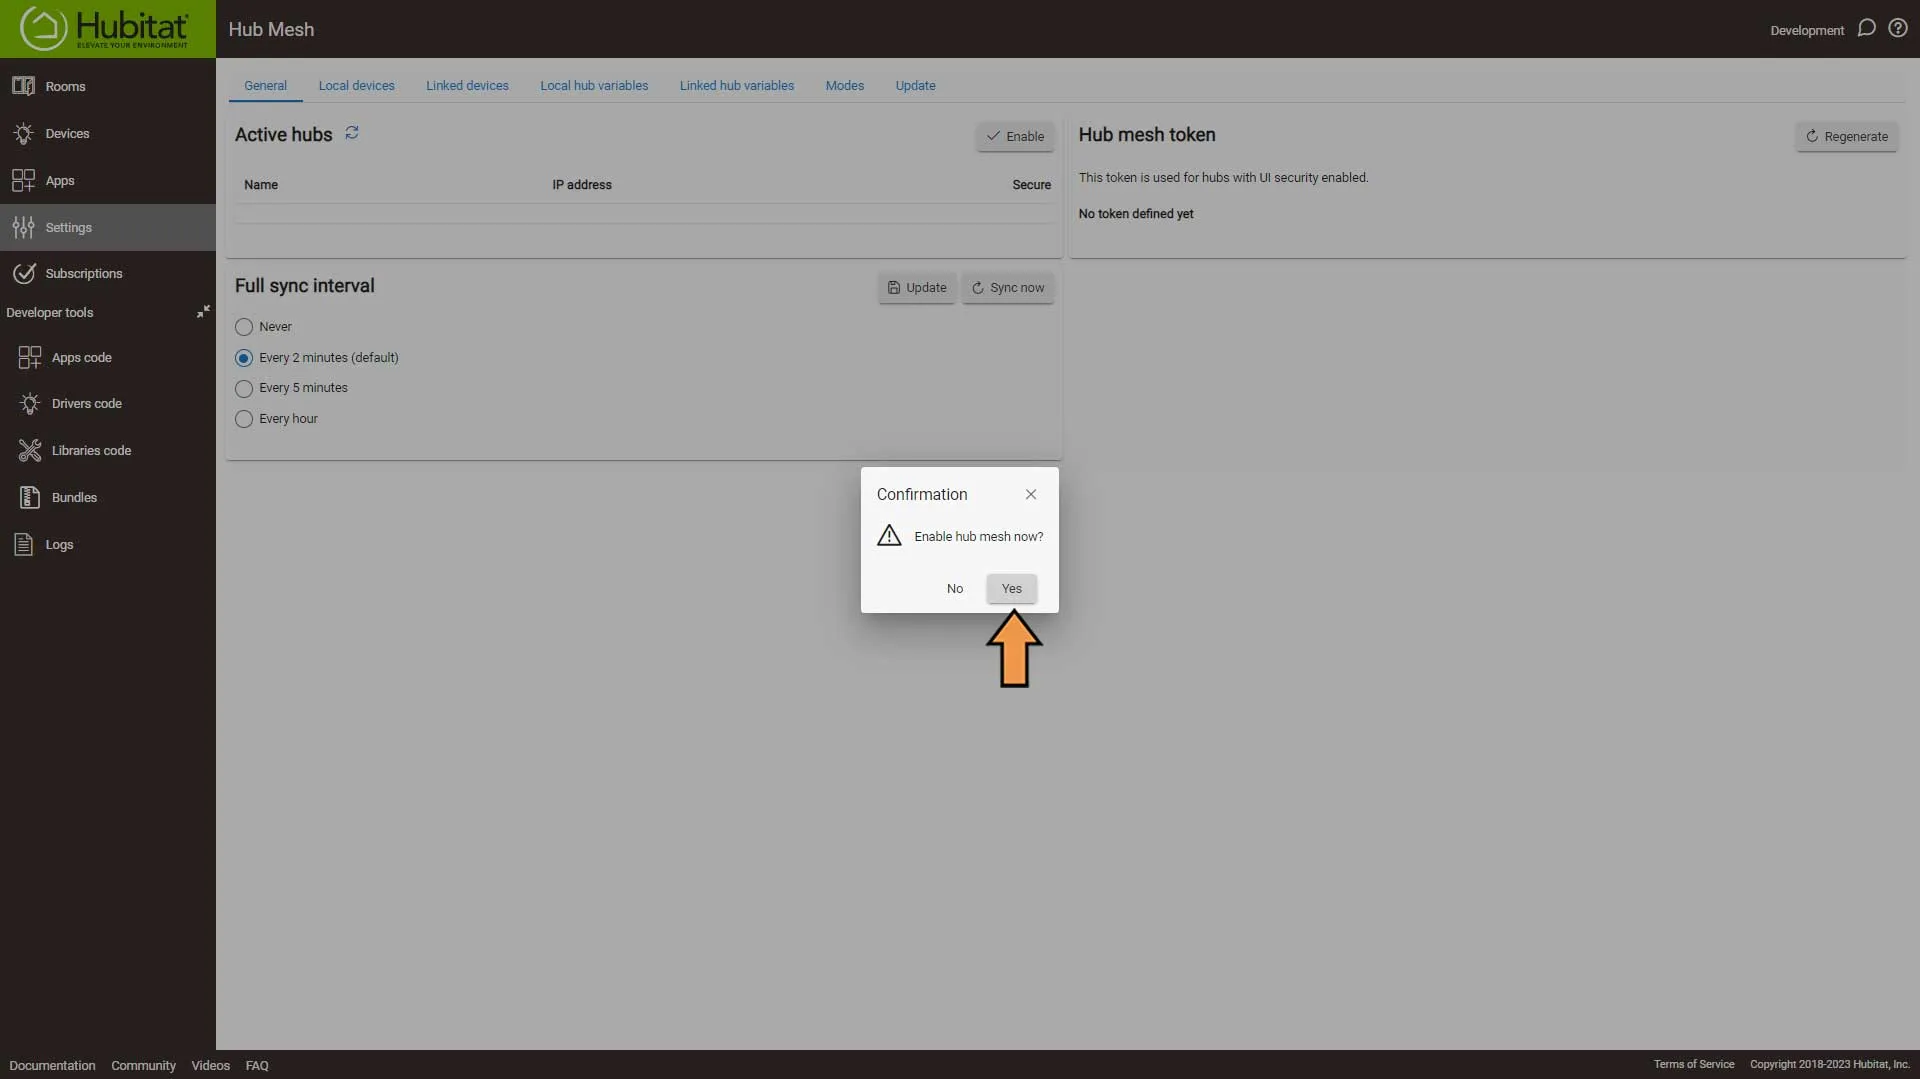
Confirm Enable Hub Mesh.
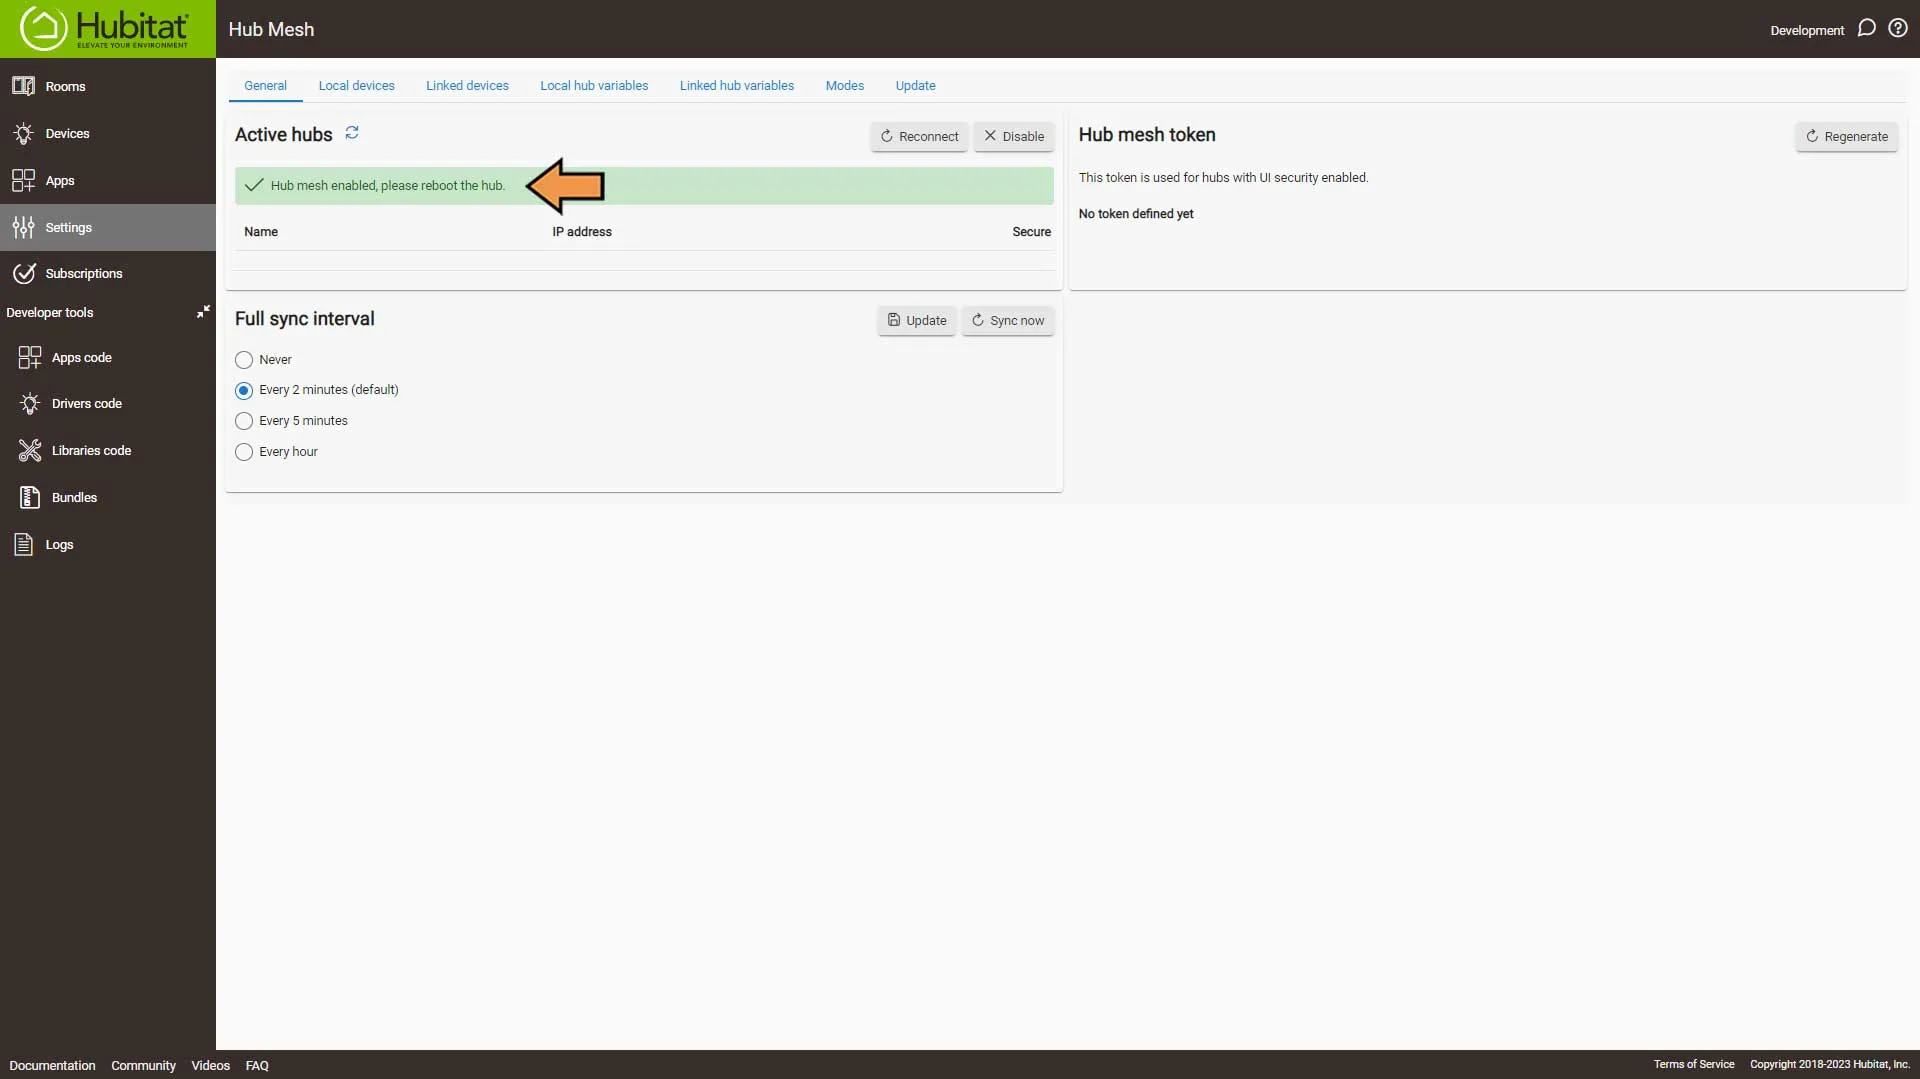
You will be prompted to reboot your hub.
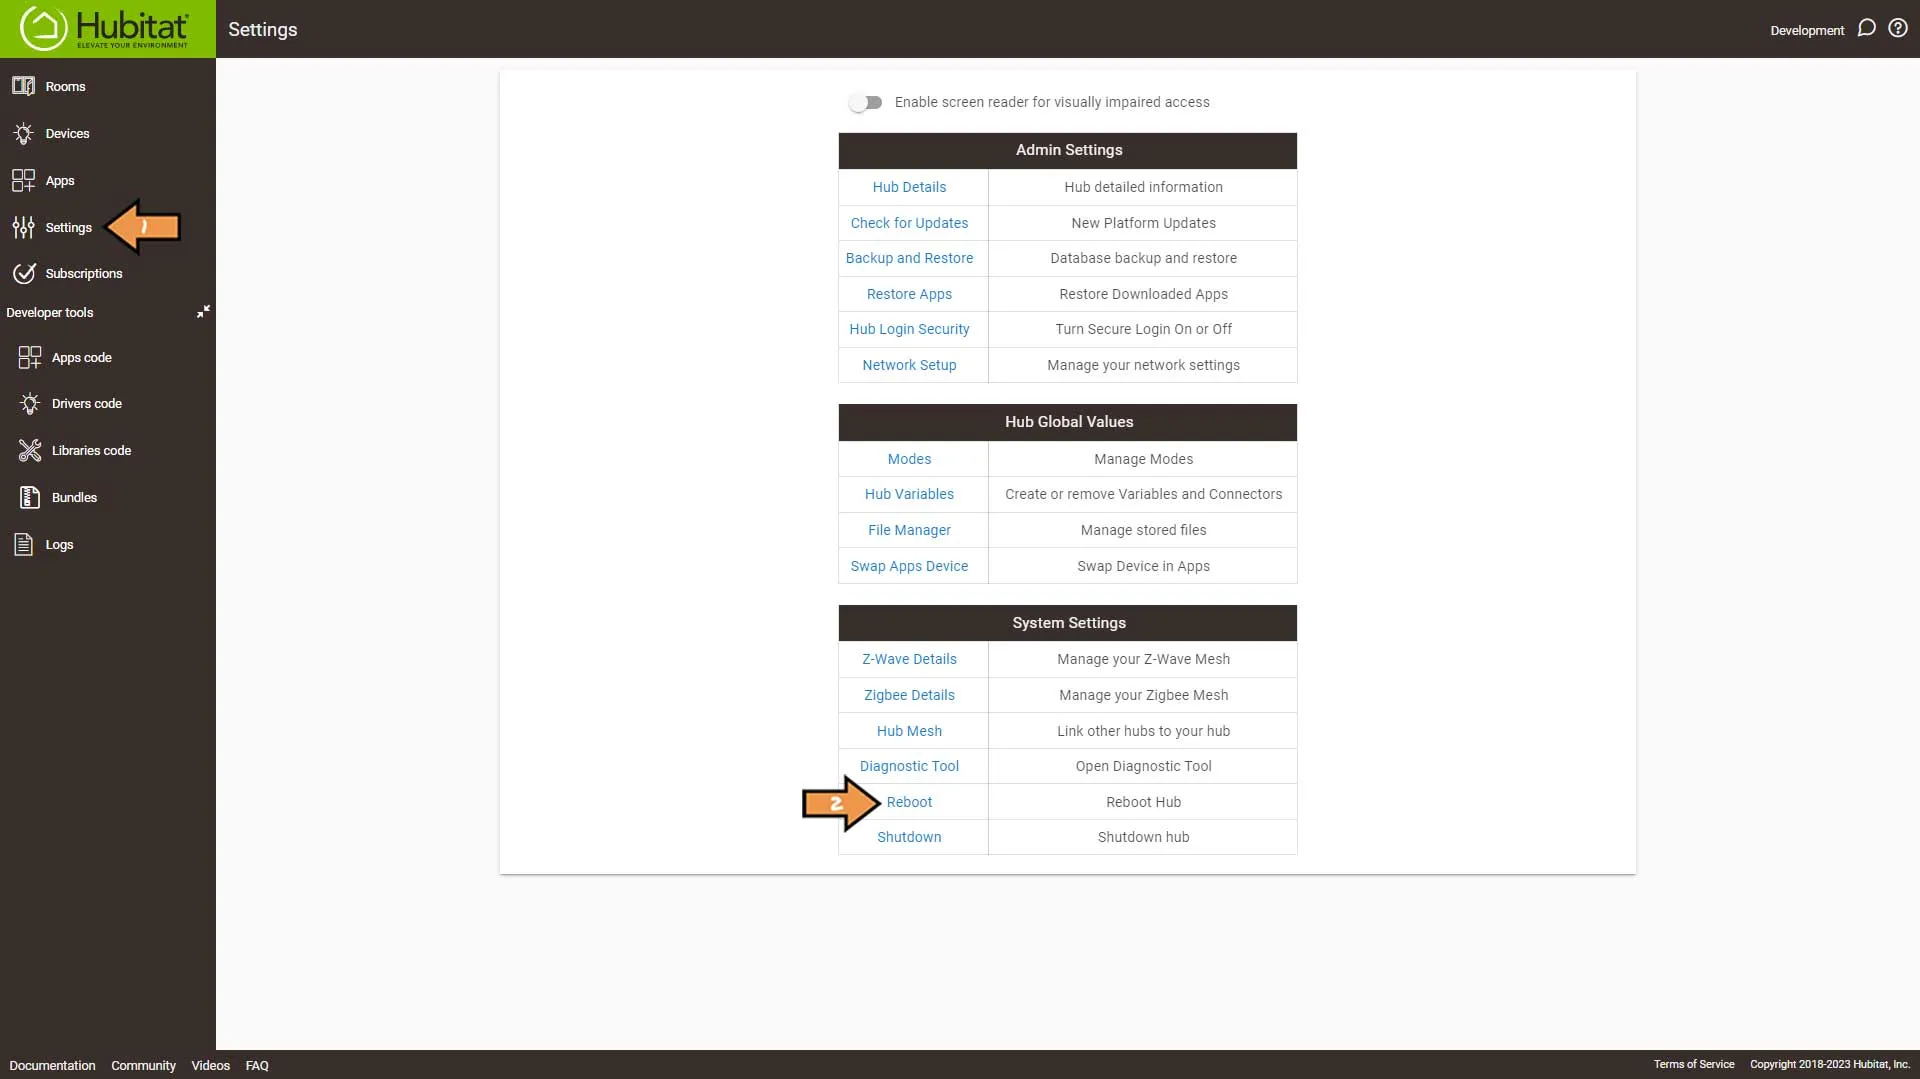
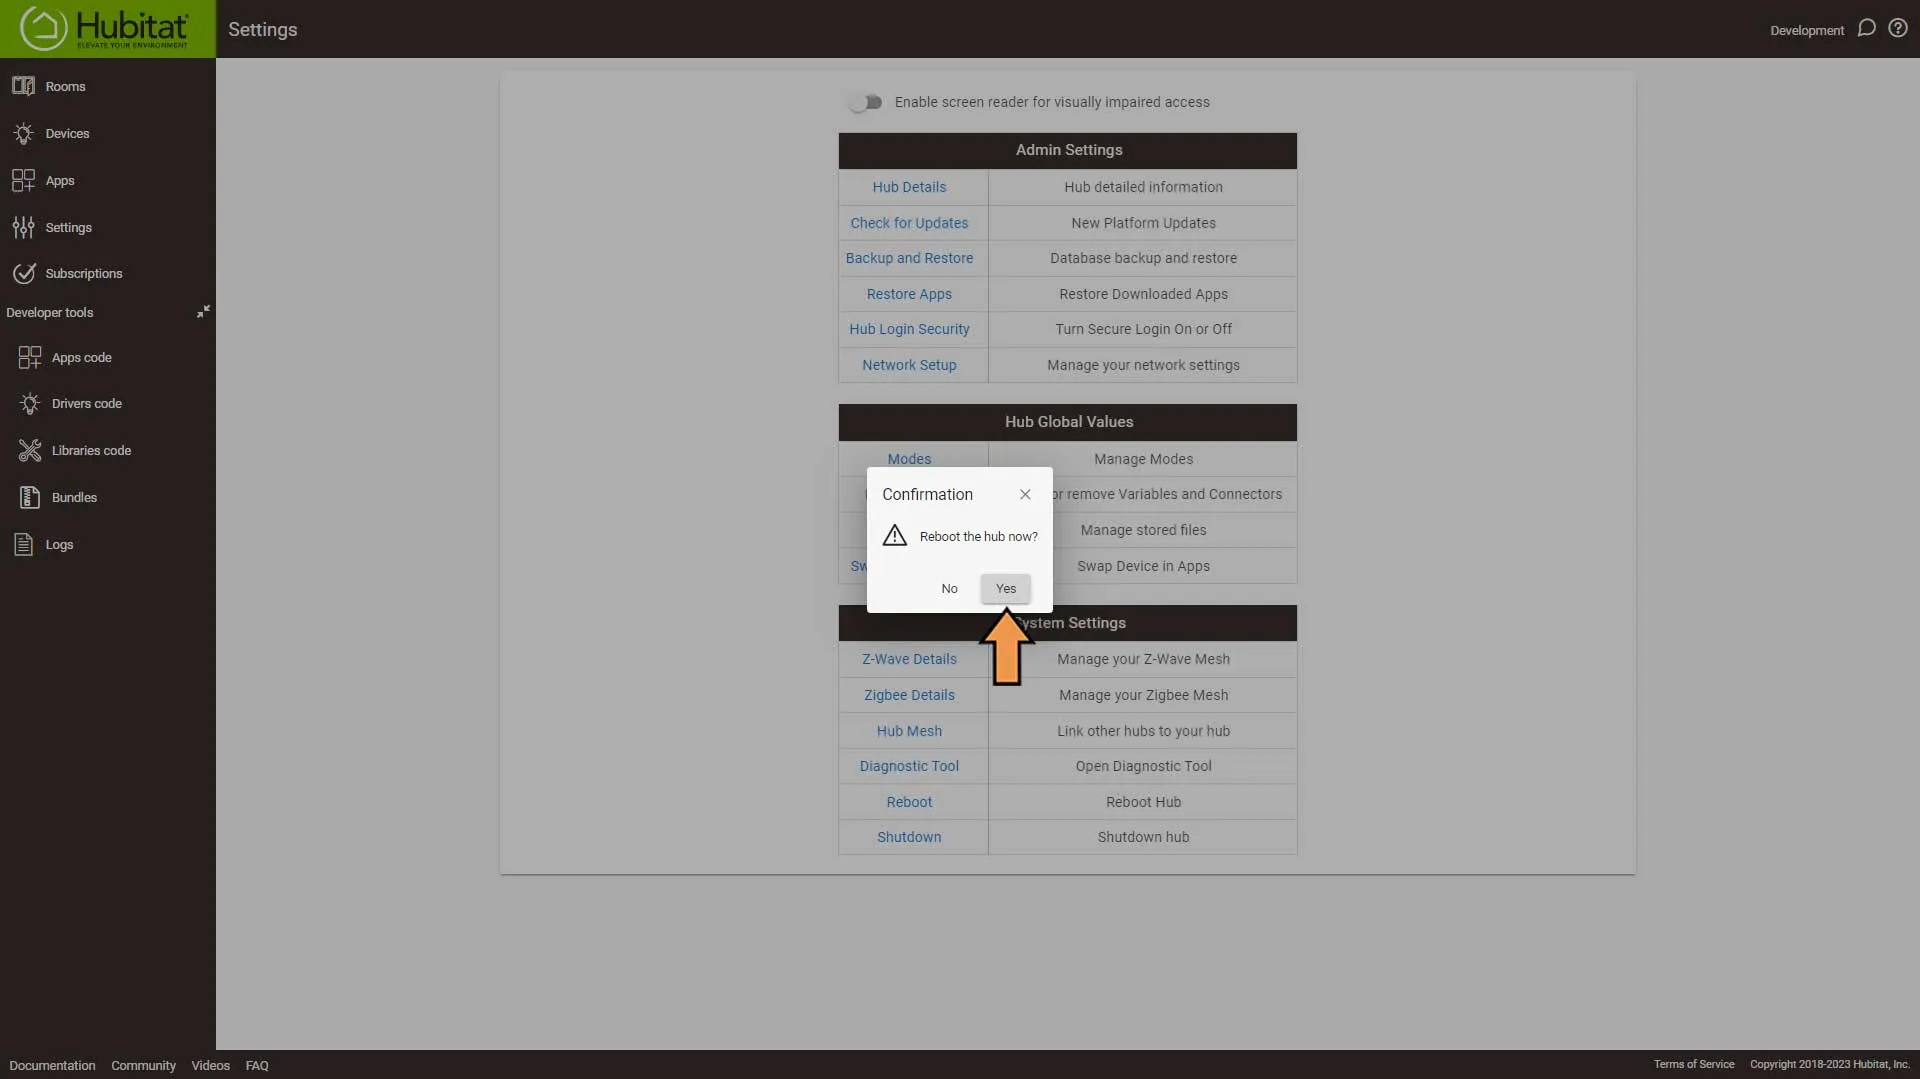
Click Settings, then Reboot.
Confirm Reboot.
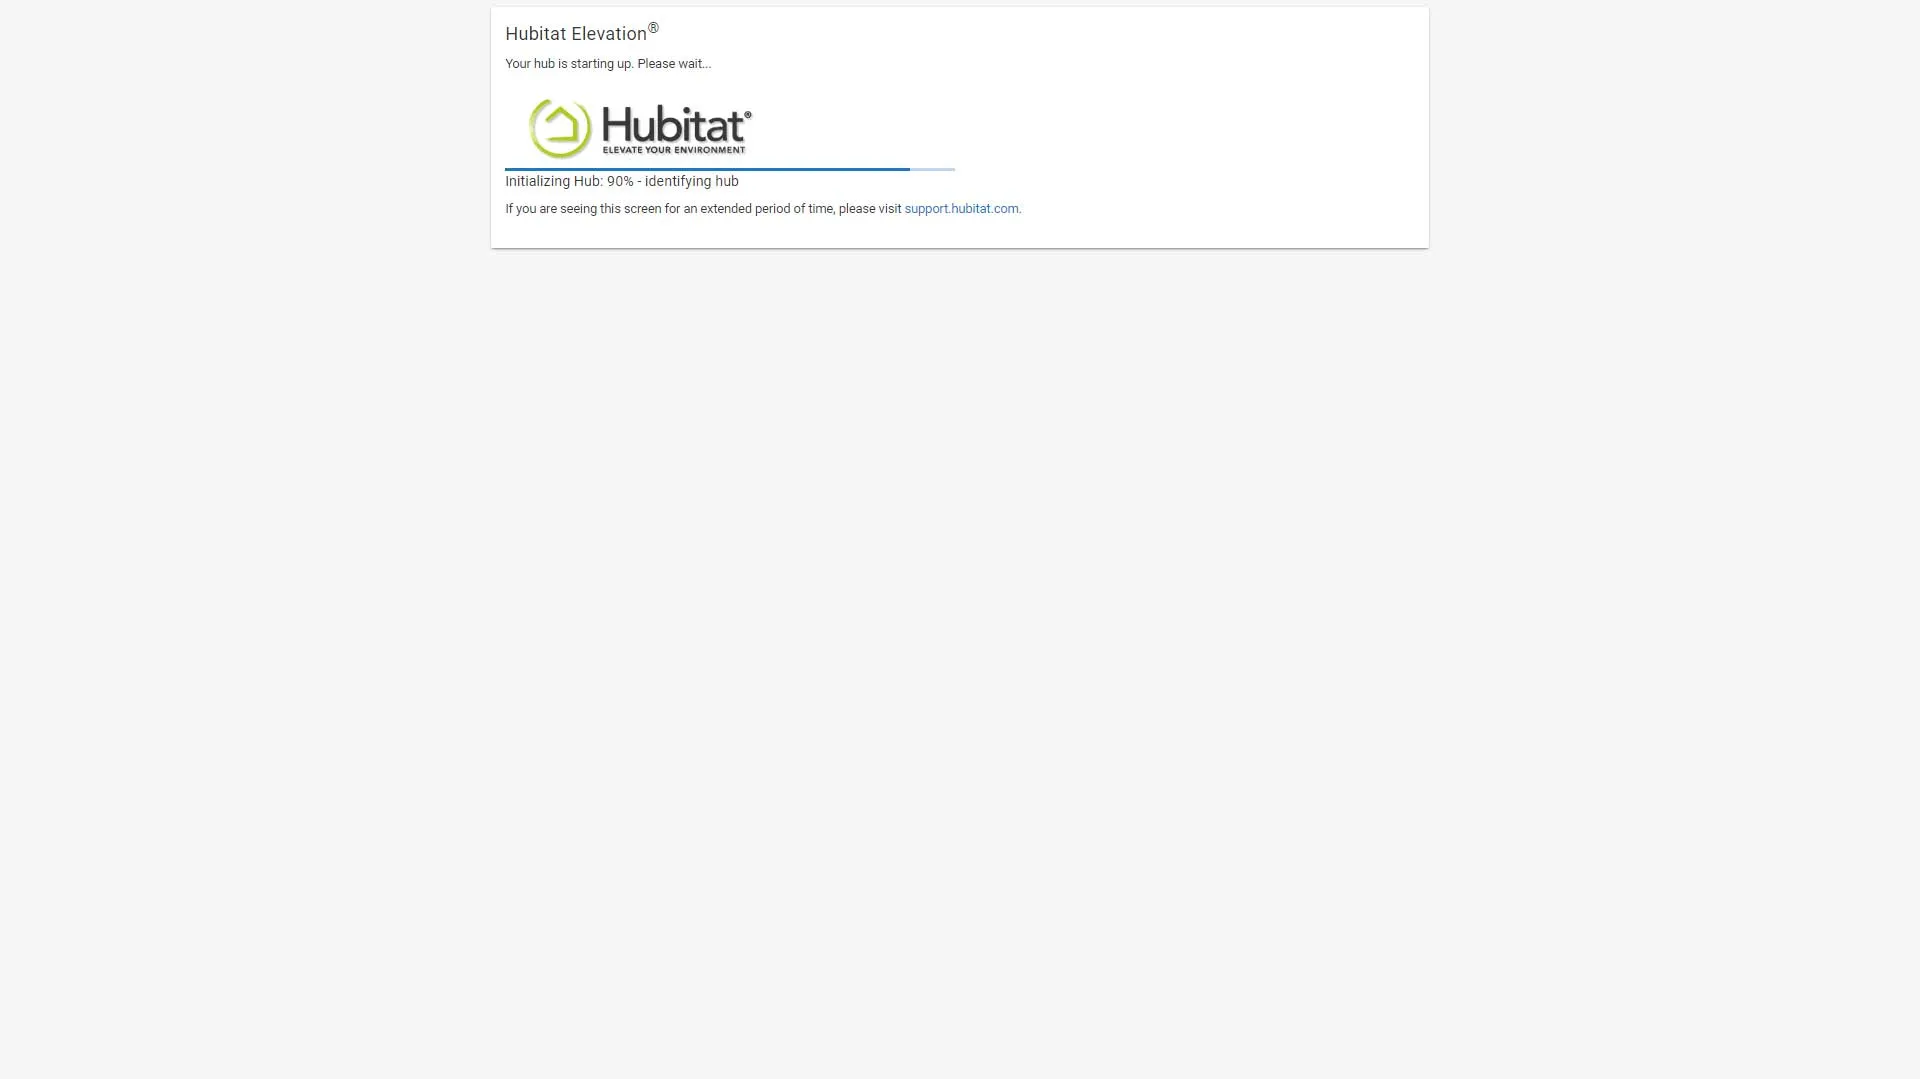
Hub Rebooting
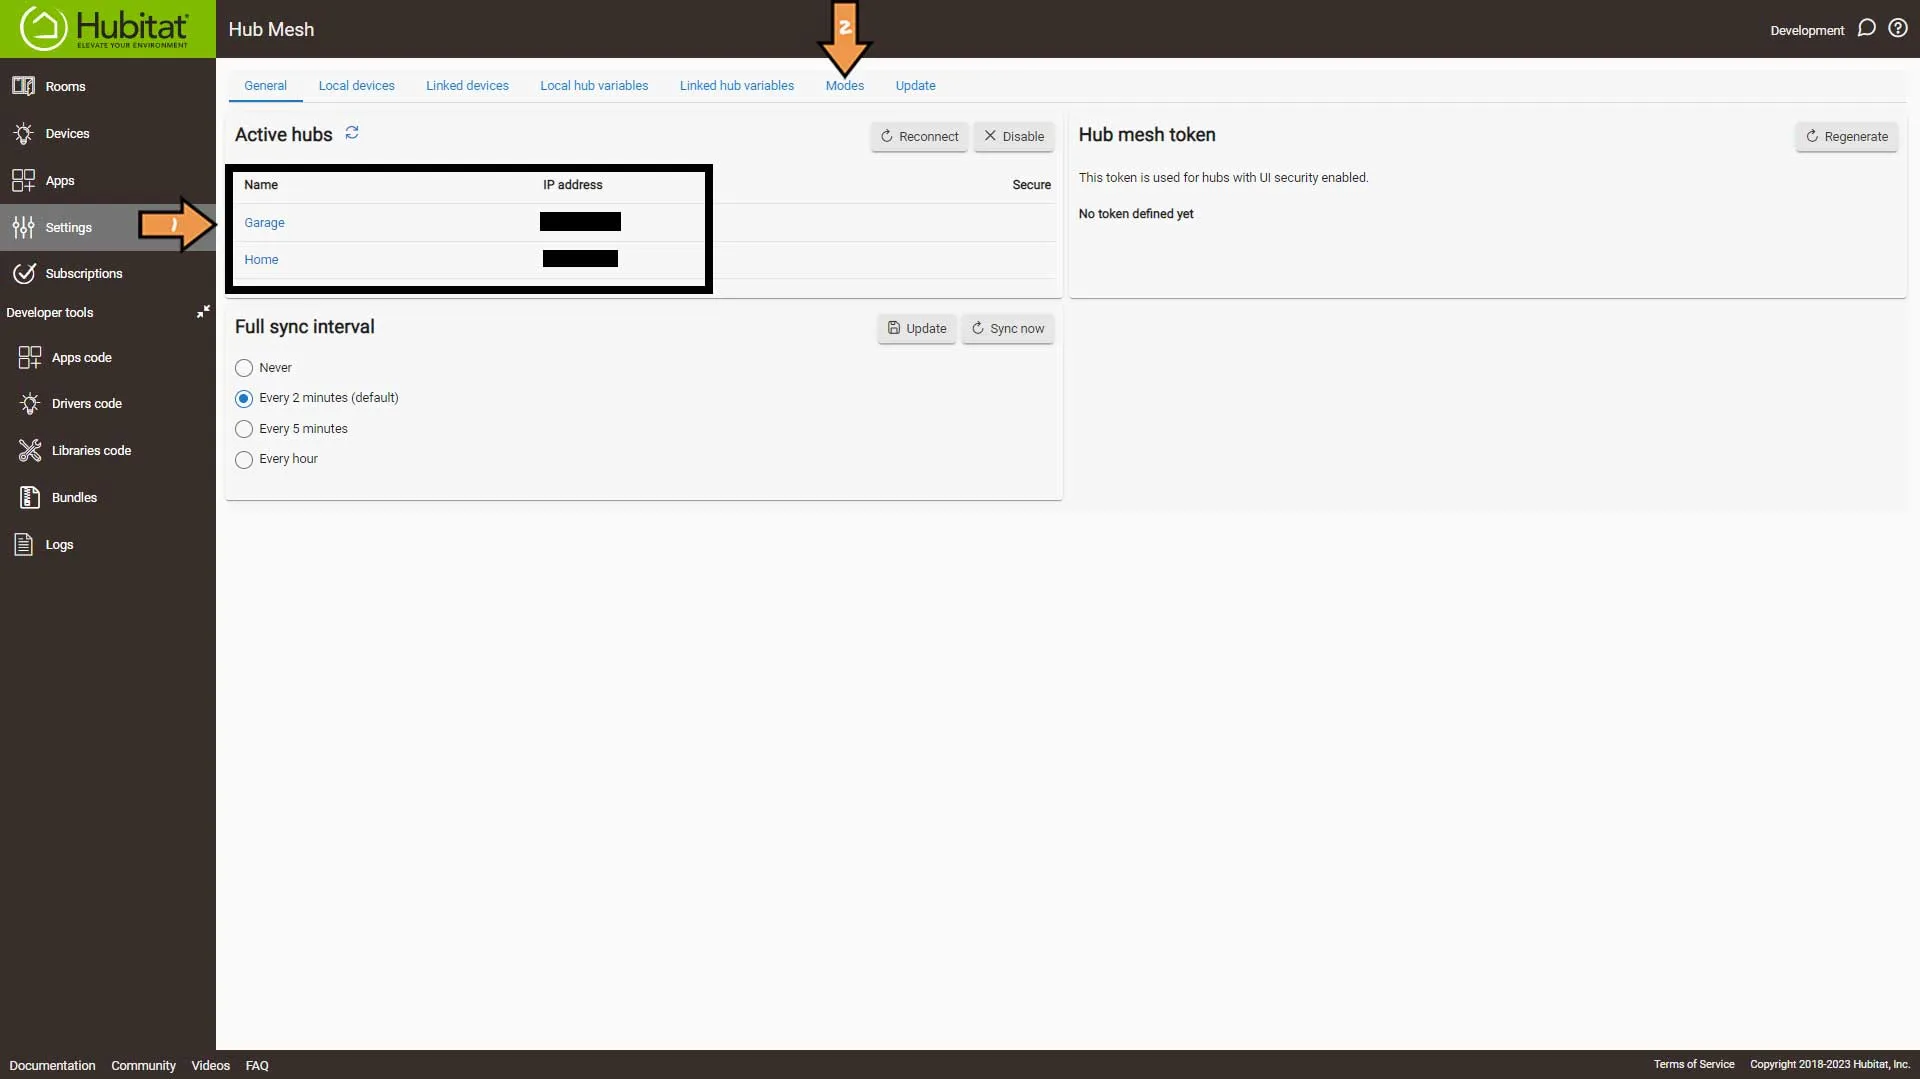
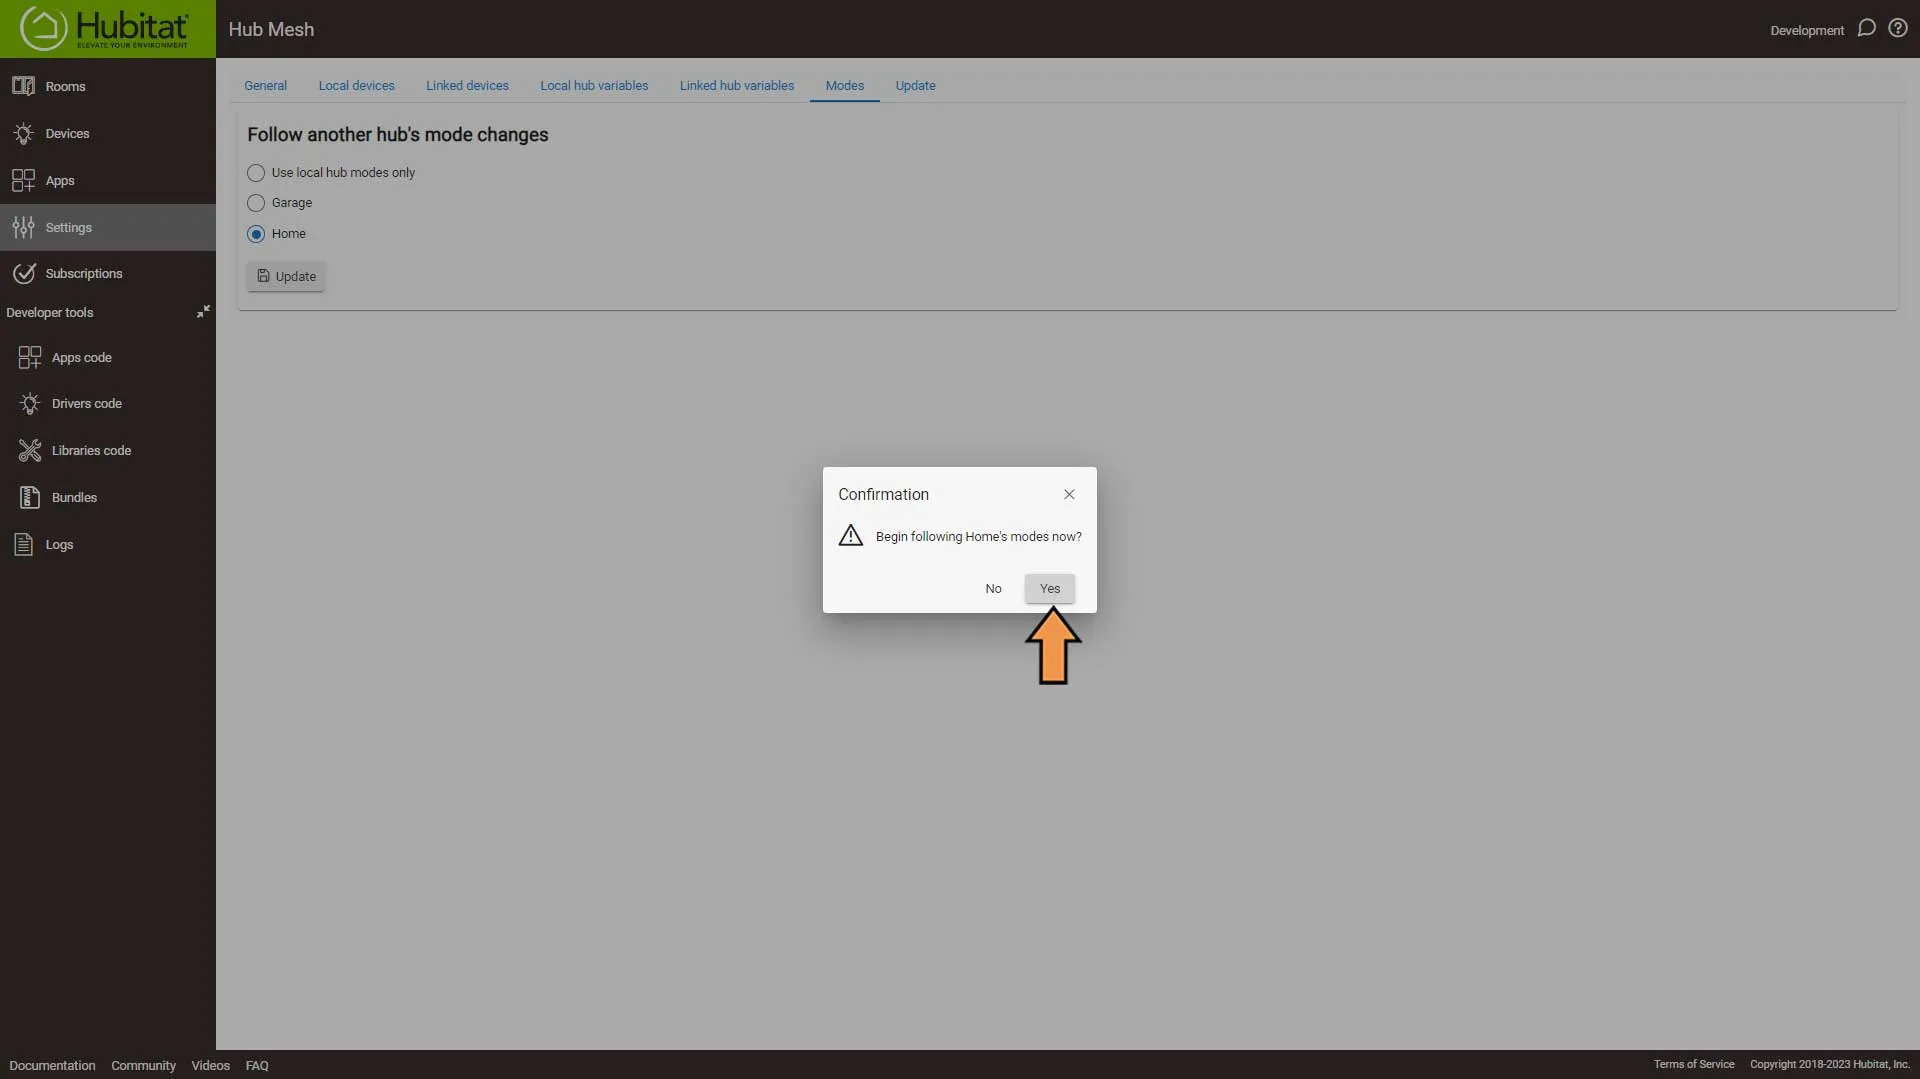
Once the reboot is complete, return to Settings, Hub Mesh, and click Modes from the top of the screen.
On the Hub Mesh Modes screen, select the hub you want to follow and click the Update button.
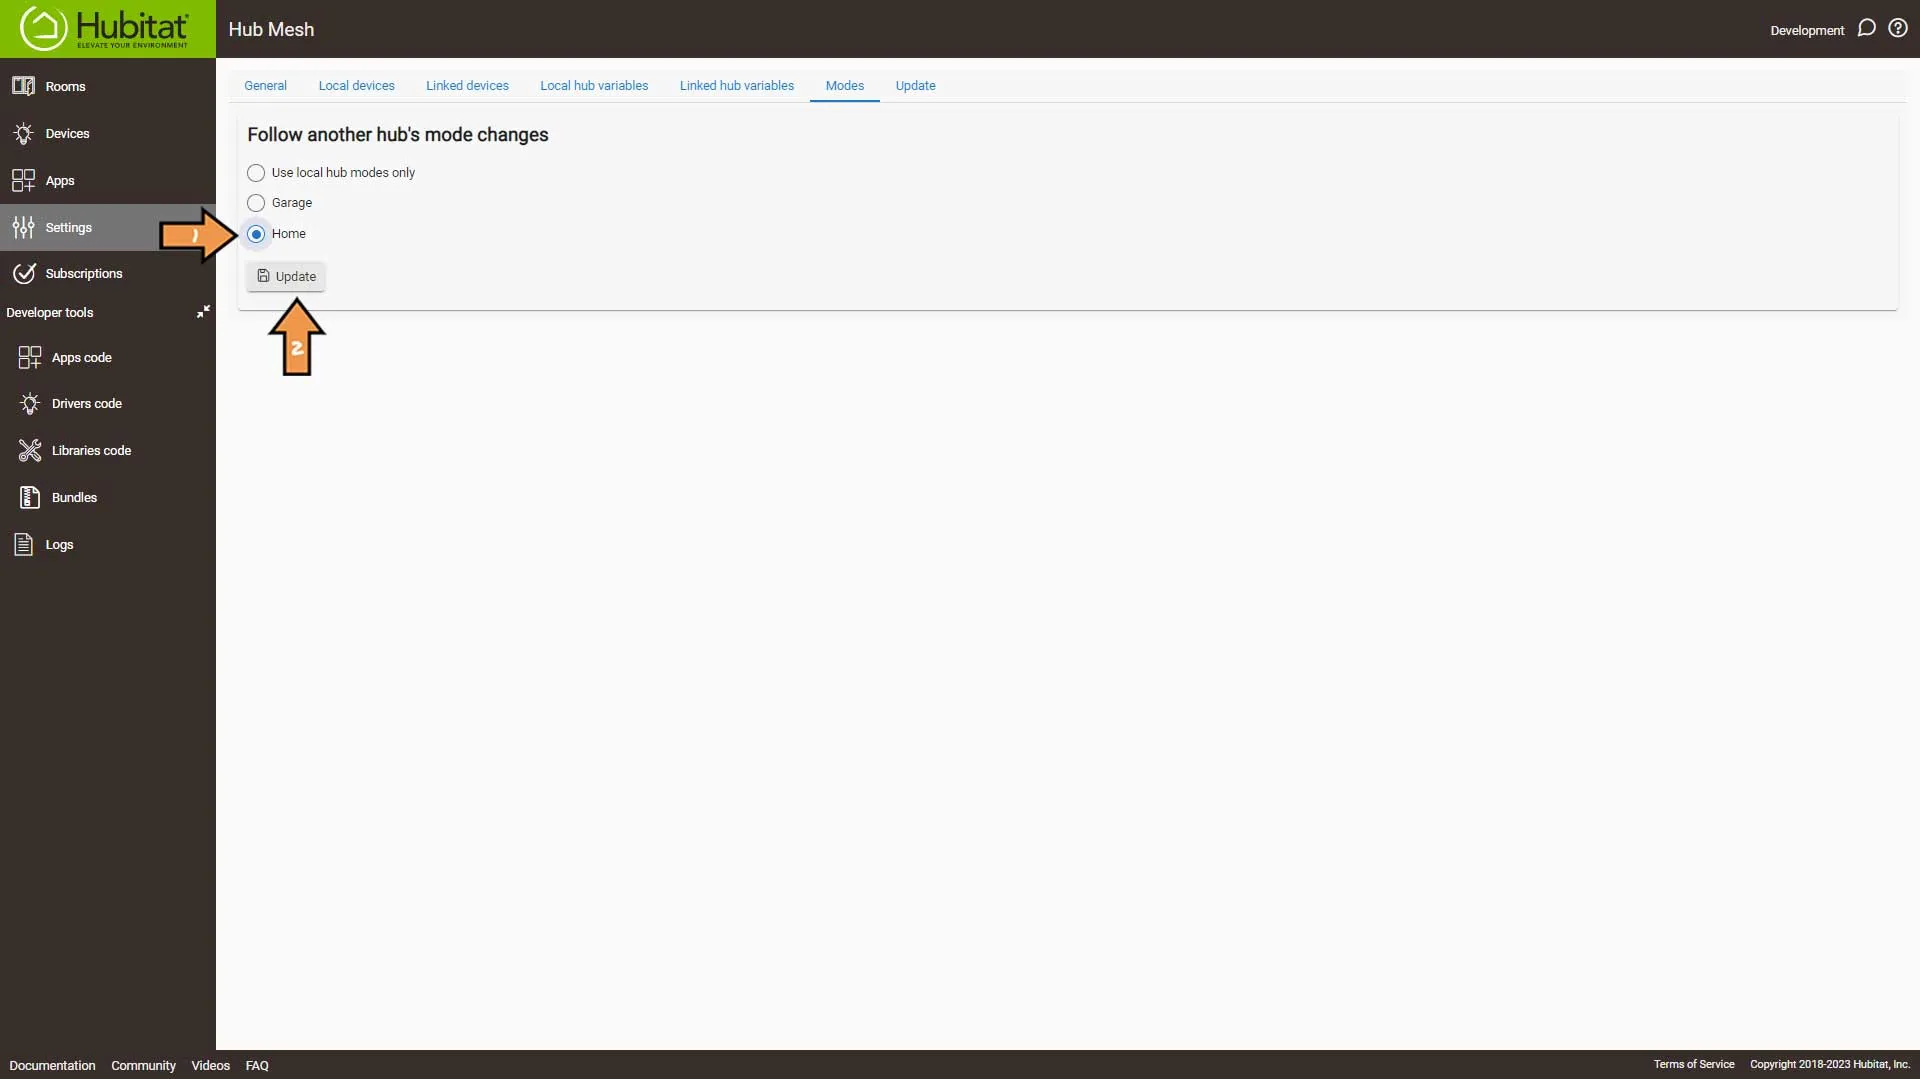
Confirm follow Hub Mode.
Important: You will need to repeat these steps for each Hubitat Hub you want to link together.
Sharing Devices
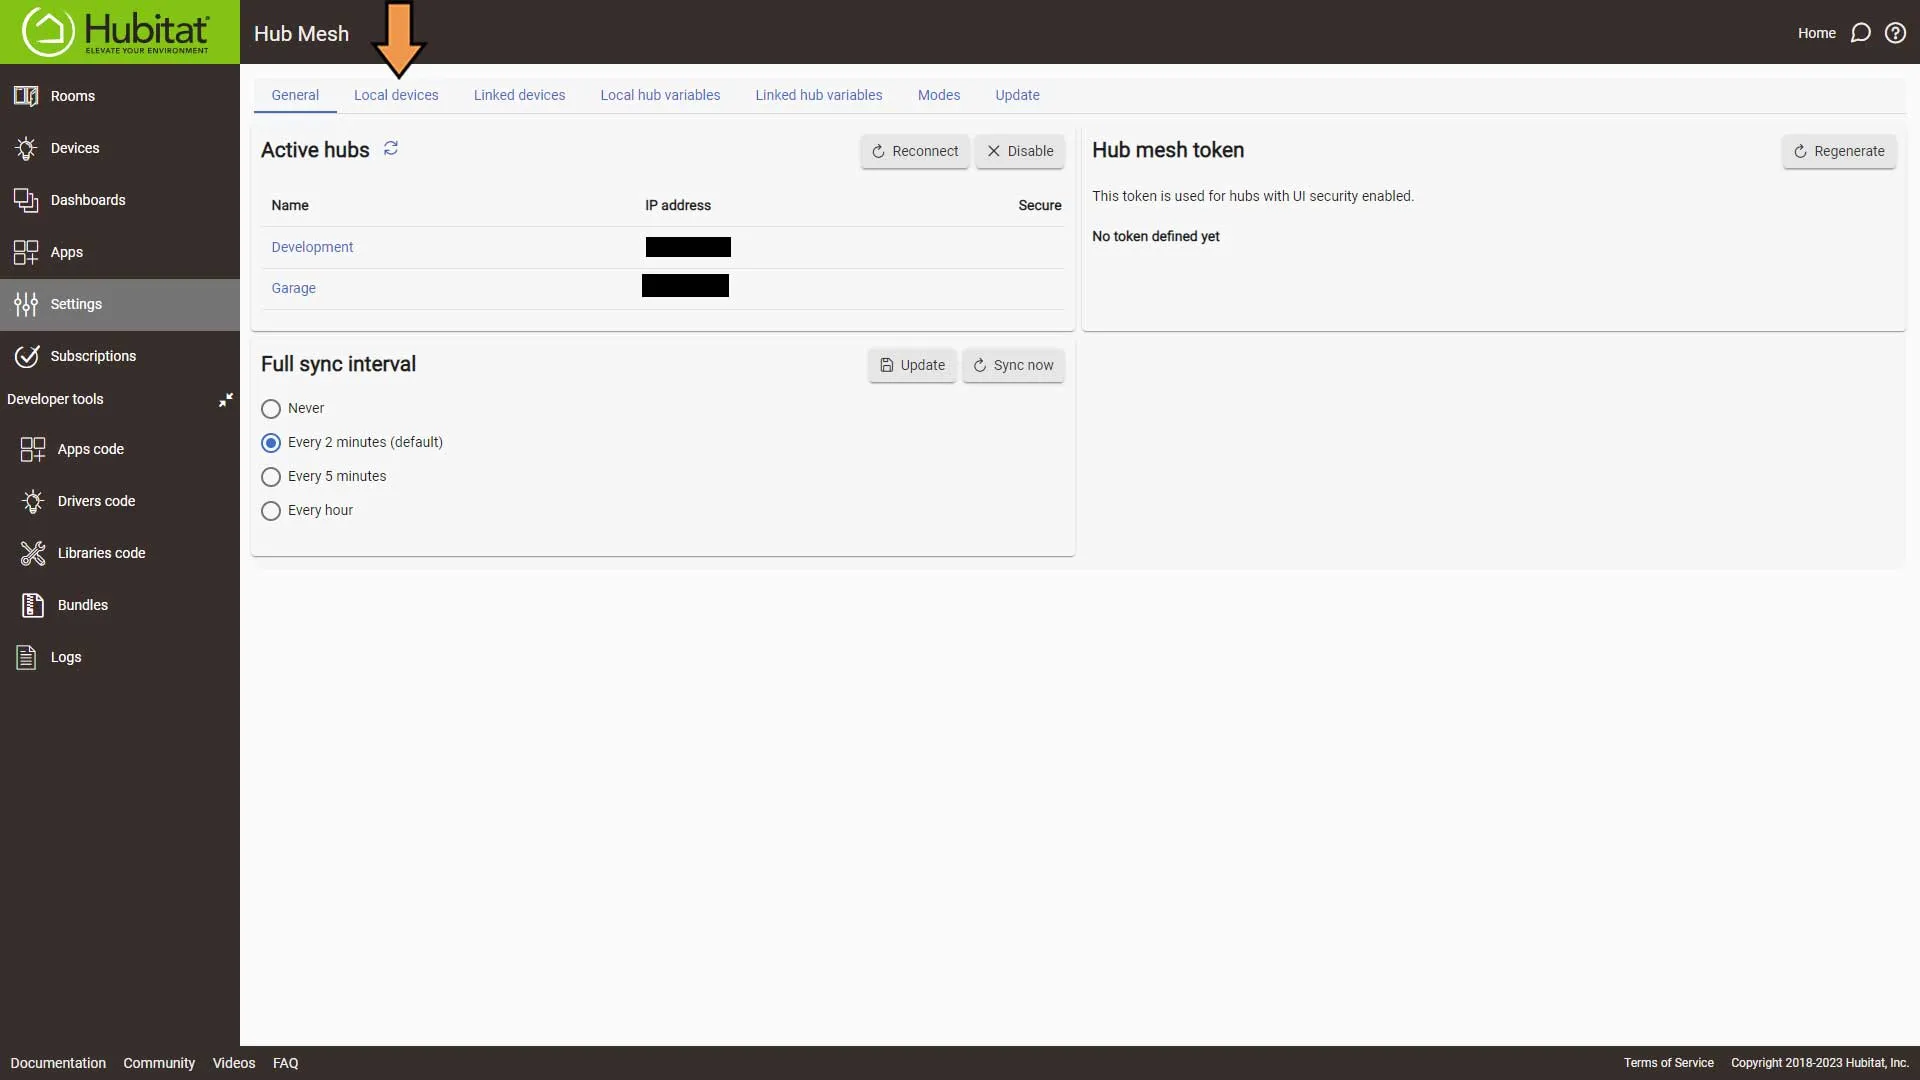
On the host hub where you want to share devices, go to your Hub Mesh settings and click Local devices from the top of the screen.
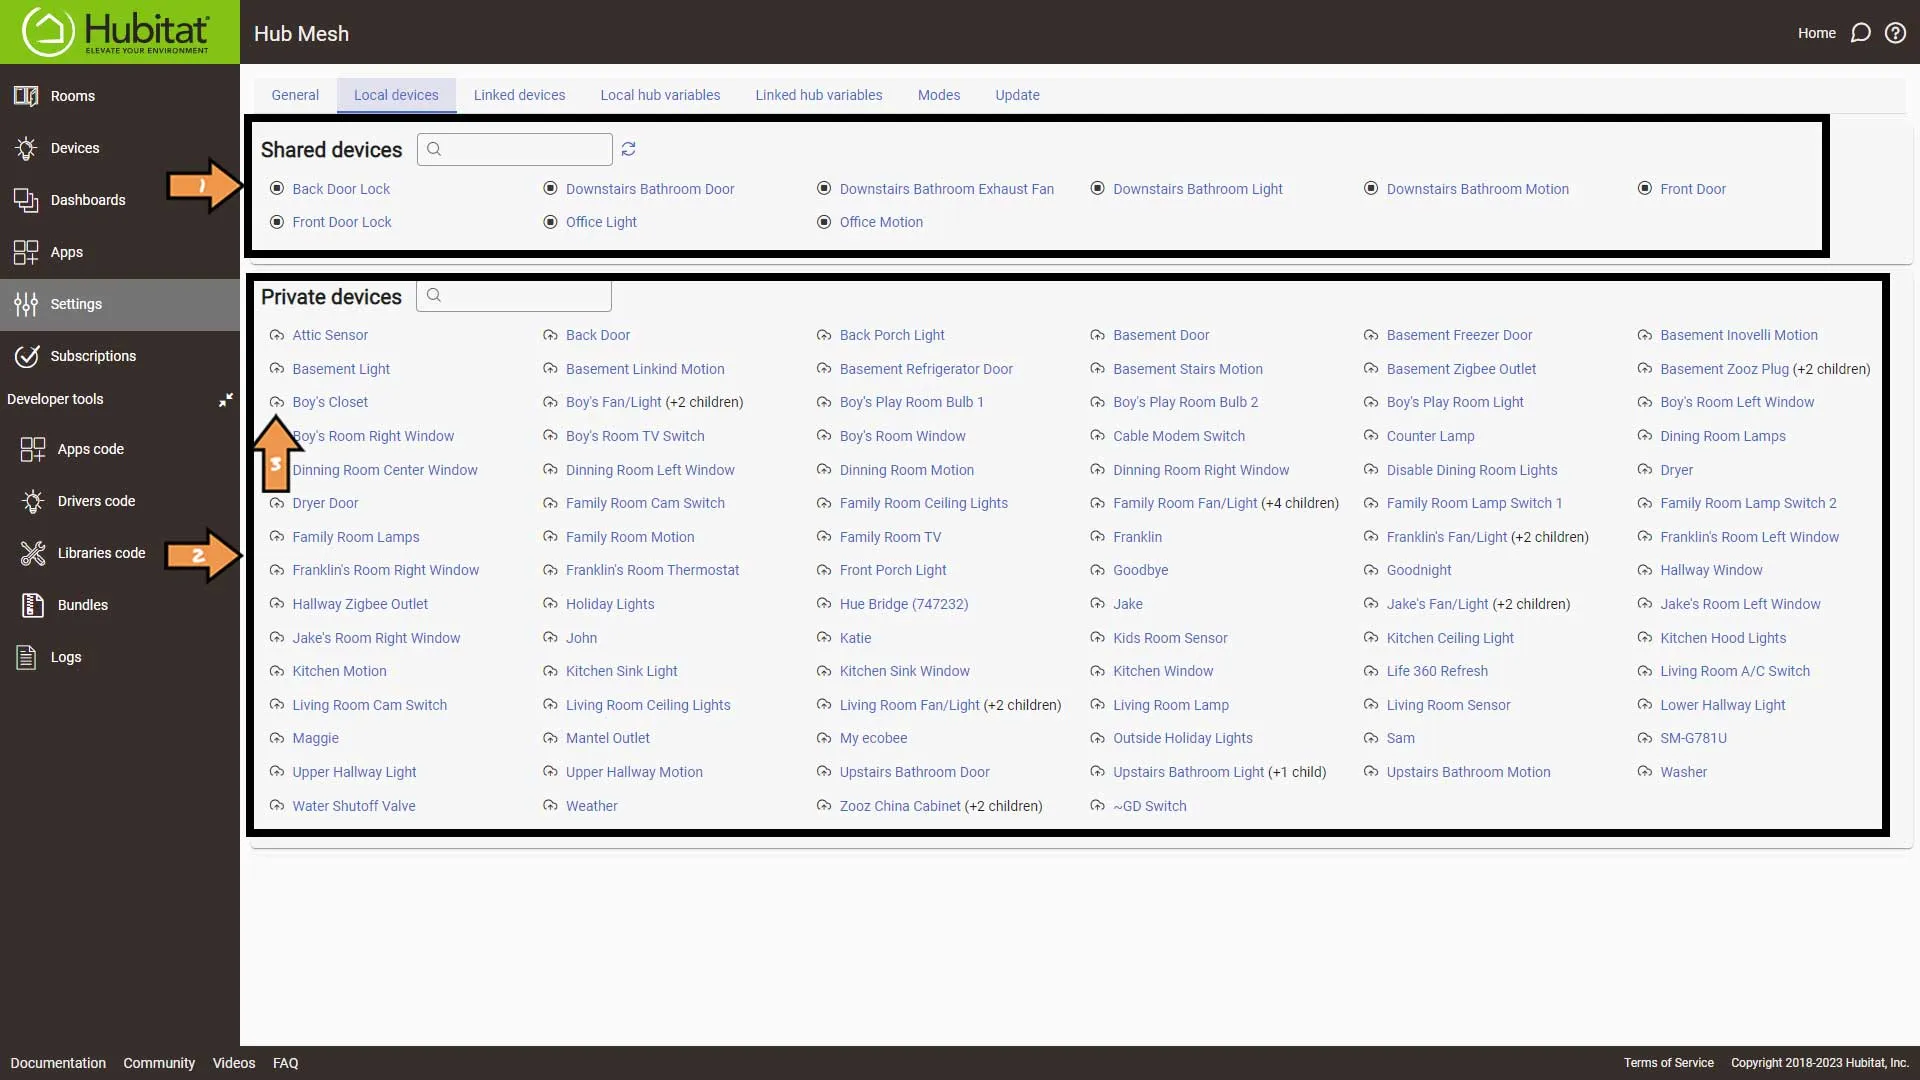
On the Hub Mesh Local Devices screen,
- Share Devices are devices you have shared from this hub.
- Private Devices are devices not yet shared but are available to share.
- To share a device click the share icon next to the device and confirm sharing.
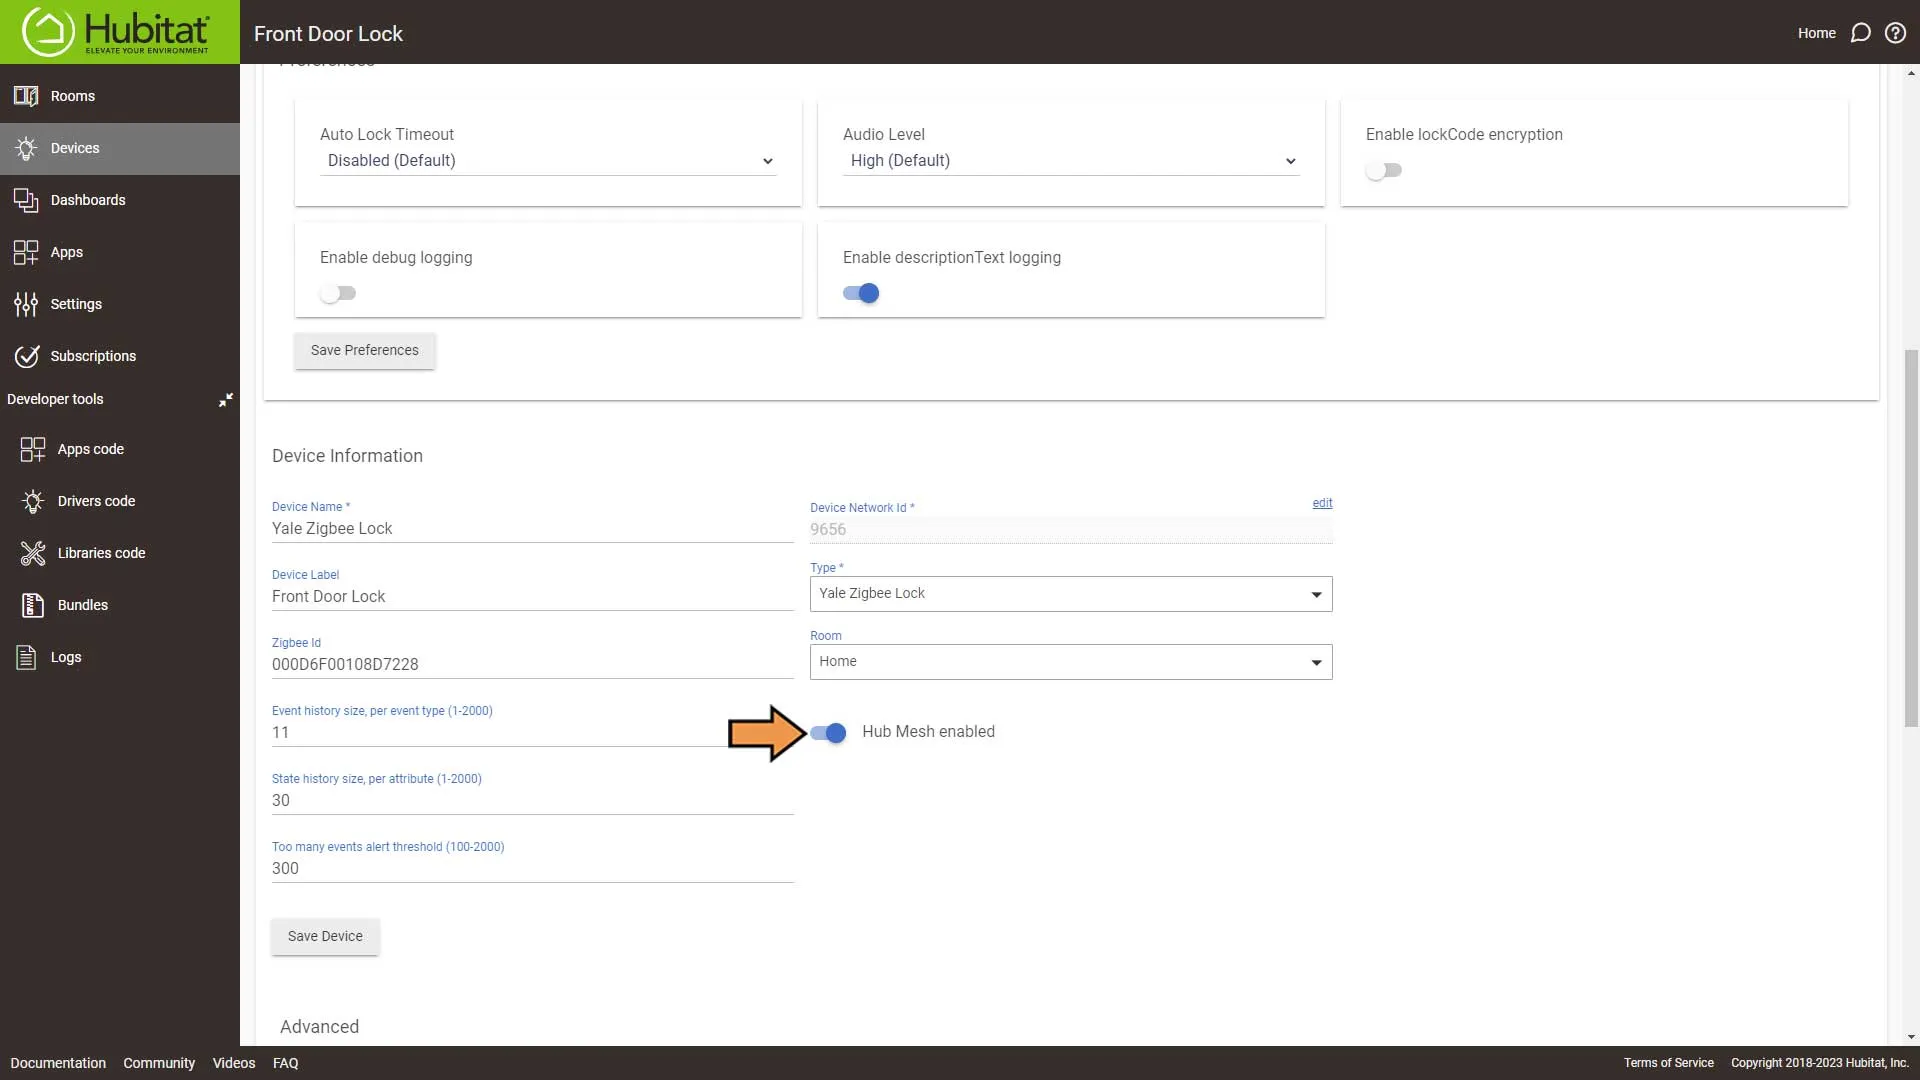
Alternatively, you can add a device to Hub Mesh from the device settings page by selecting Hub Mesh enabled switch under the Device Information section.
Next, on the hub where you want to link the shared devices, return to Settings, Hub Mesh, and click Linked Devices from the top of the screen.

On the Hub Mesh Linked Devices screen, you will see all the shared devices from the different hubs.
To link a device, click the Plus Sign next to the device and confirm adding the linked device.
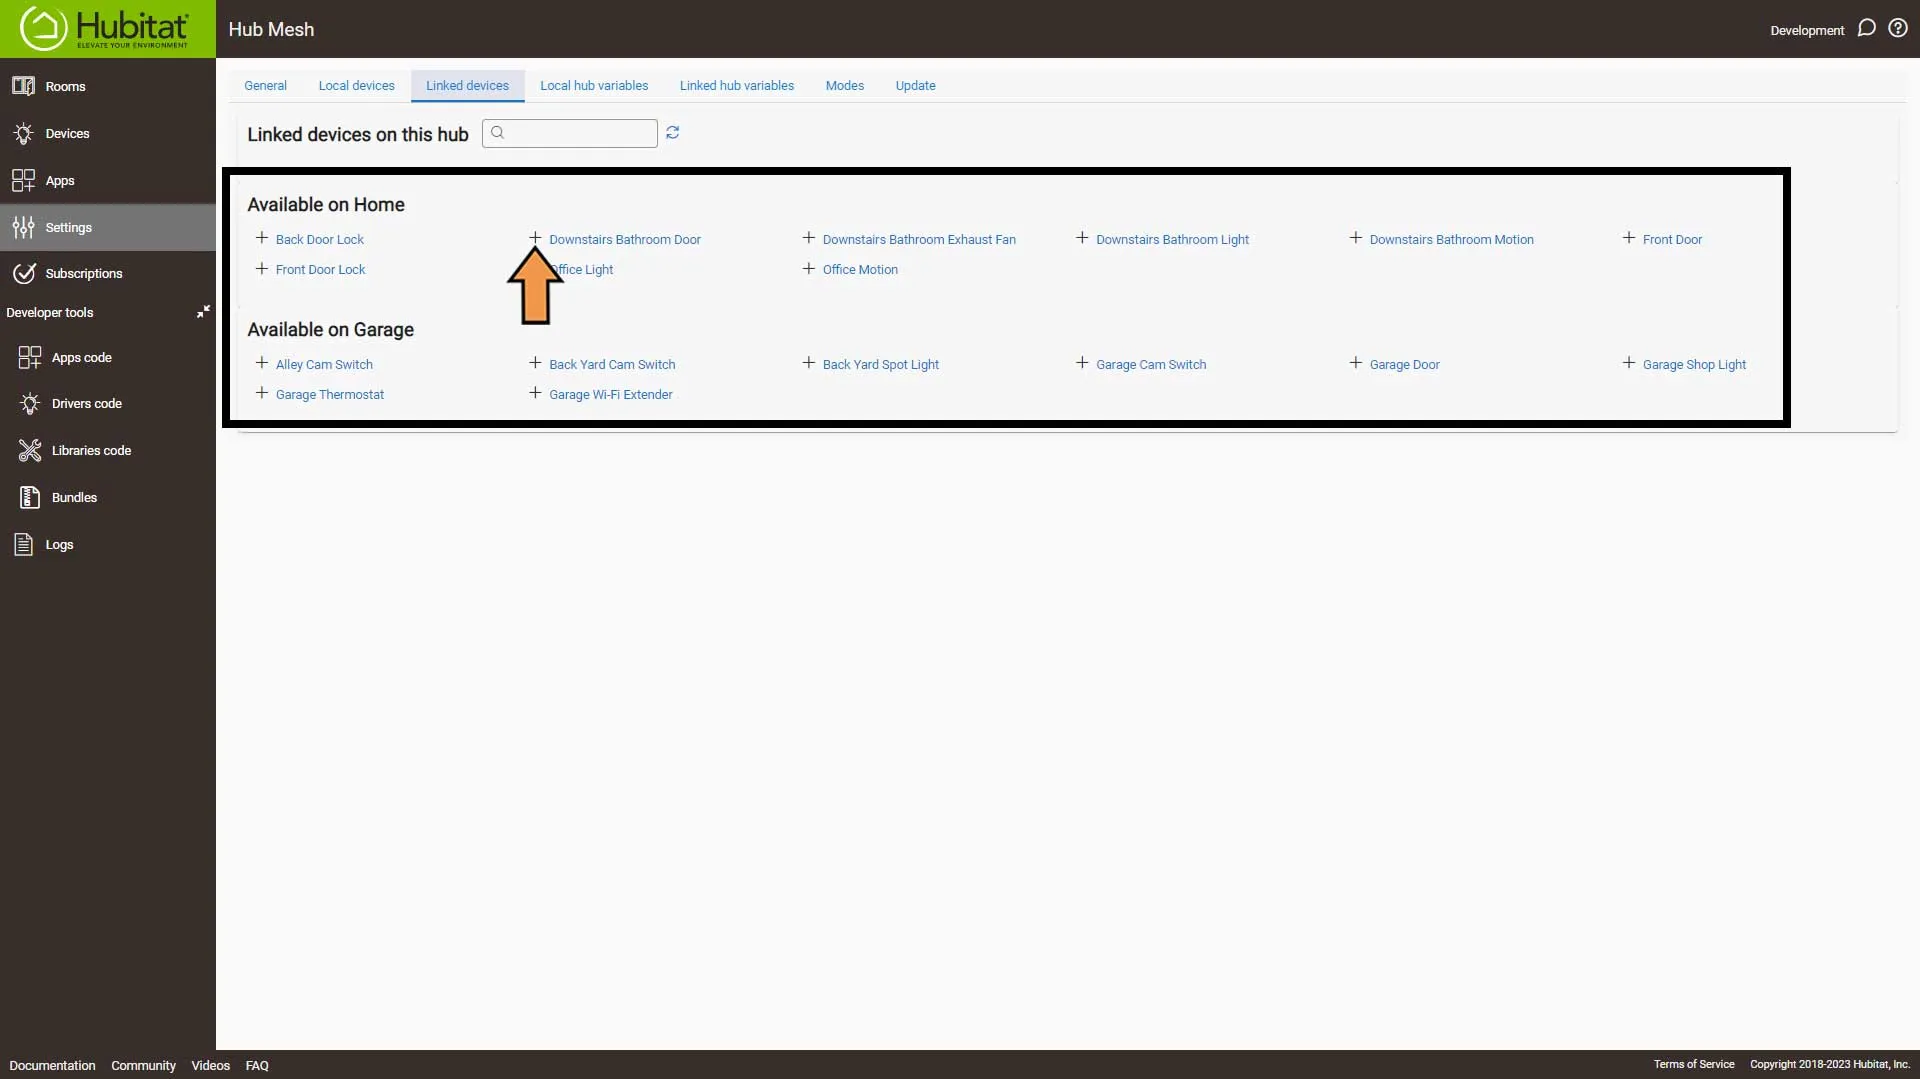
Once you link all your devices, click the Devices tab.
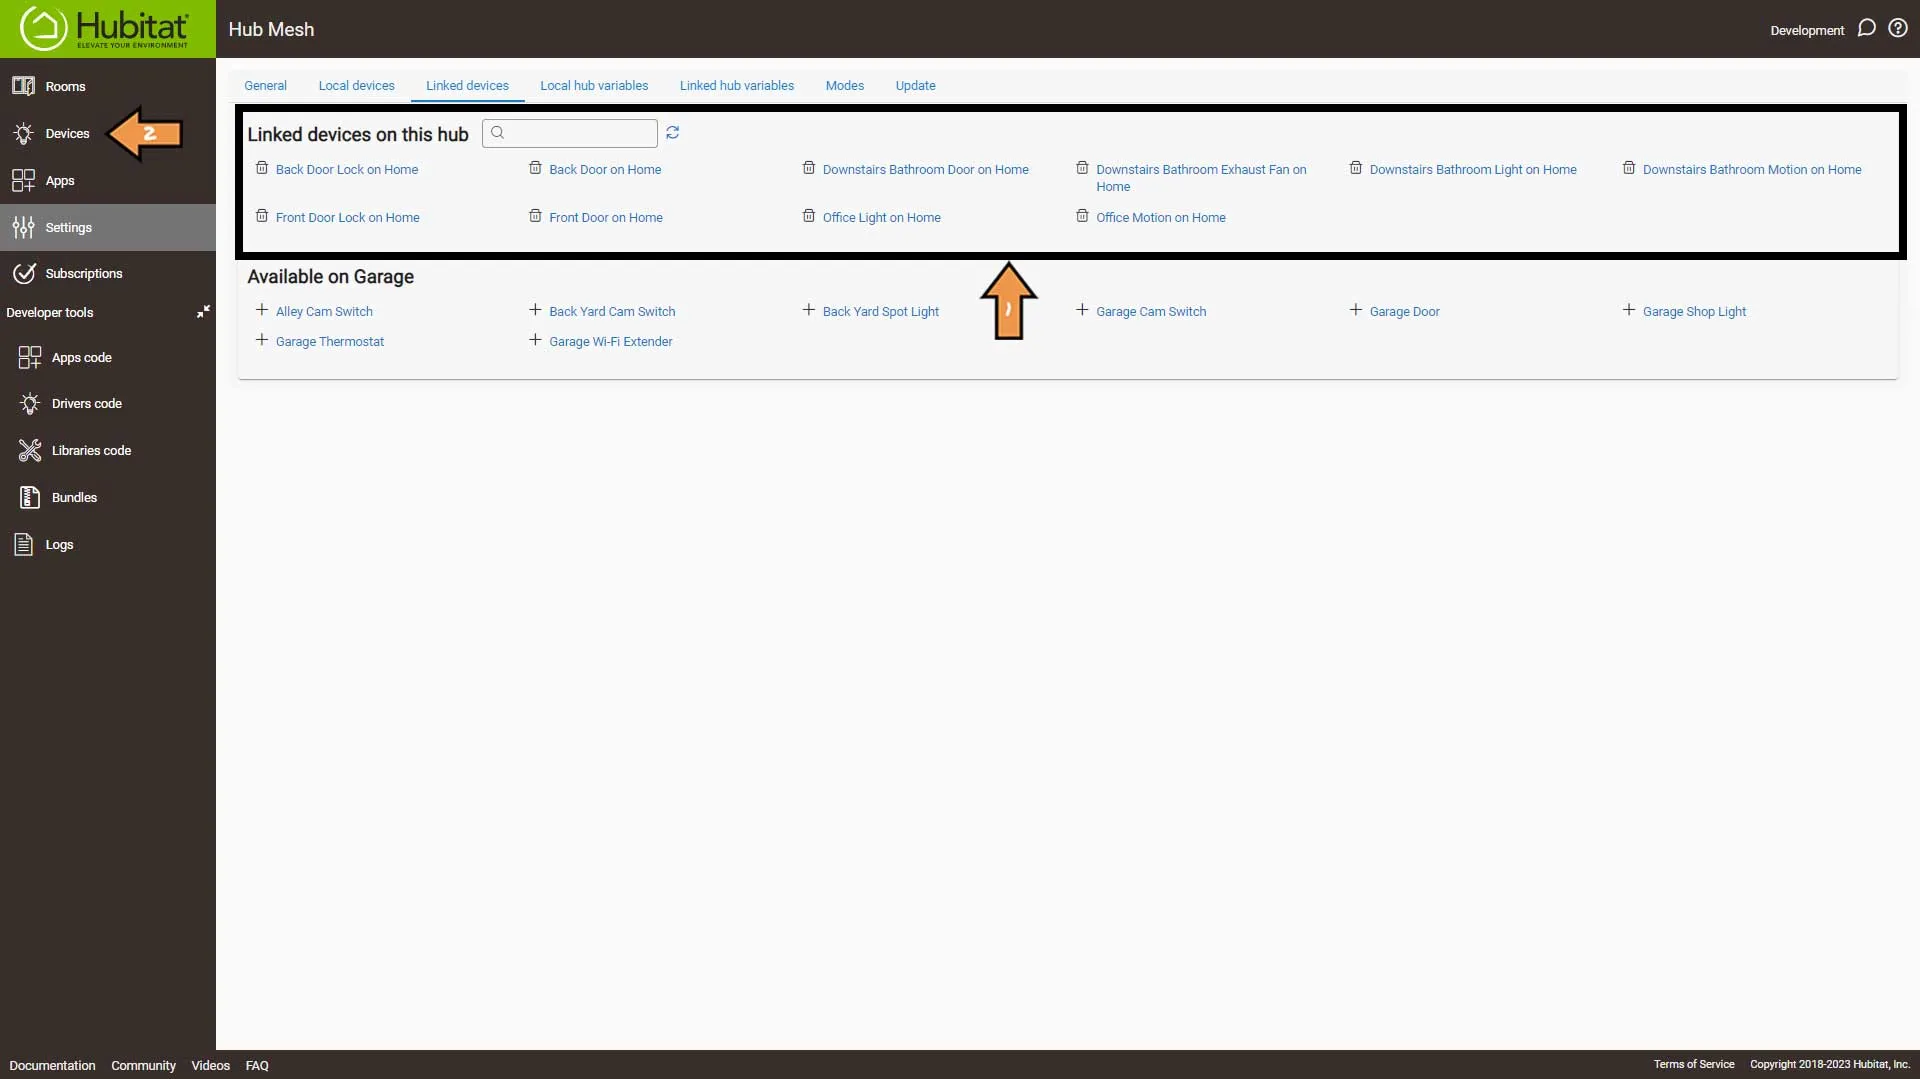
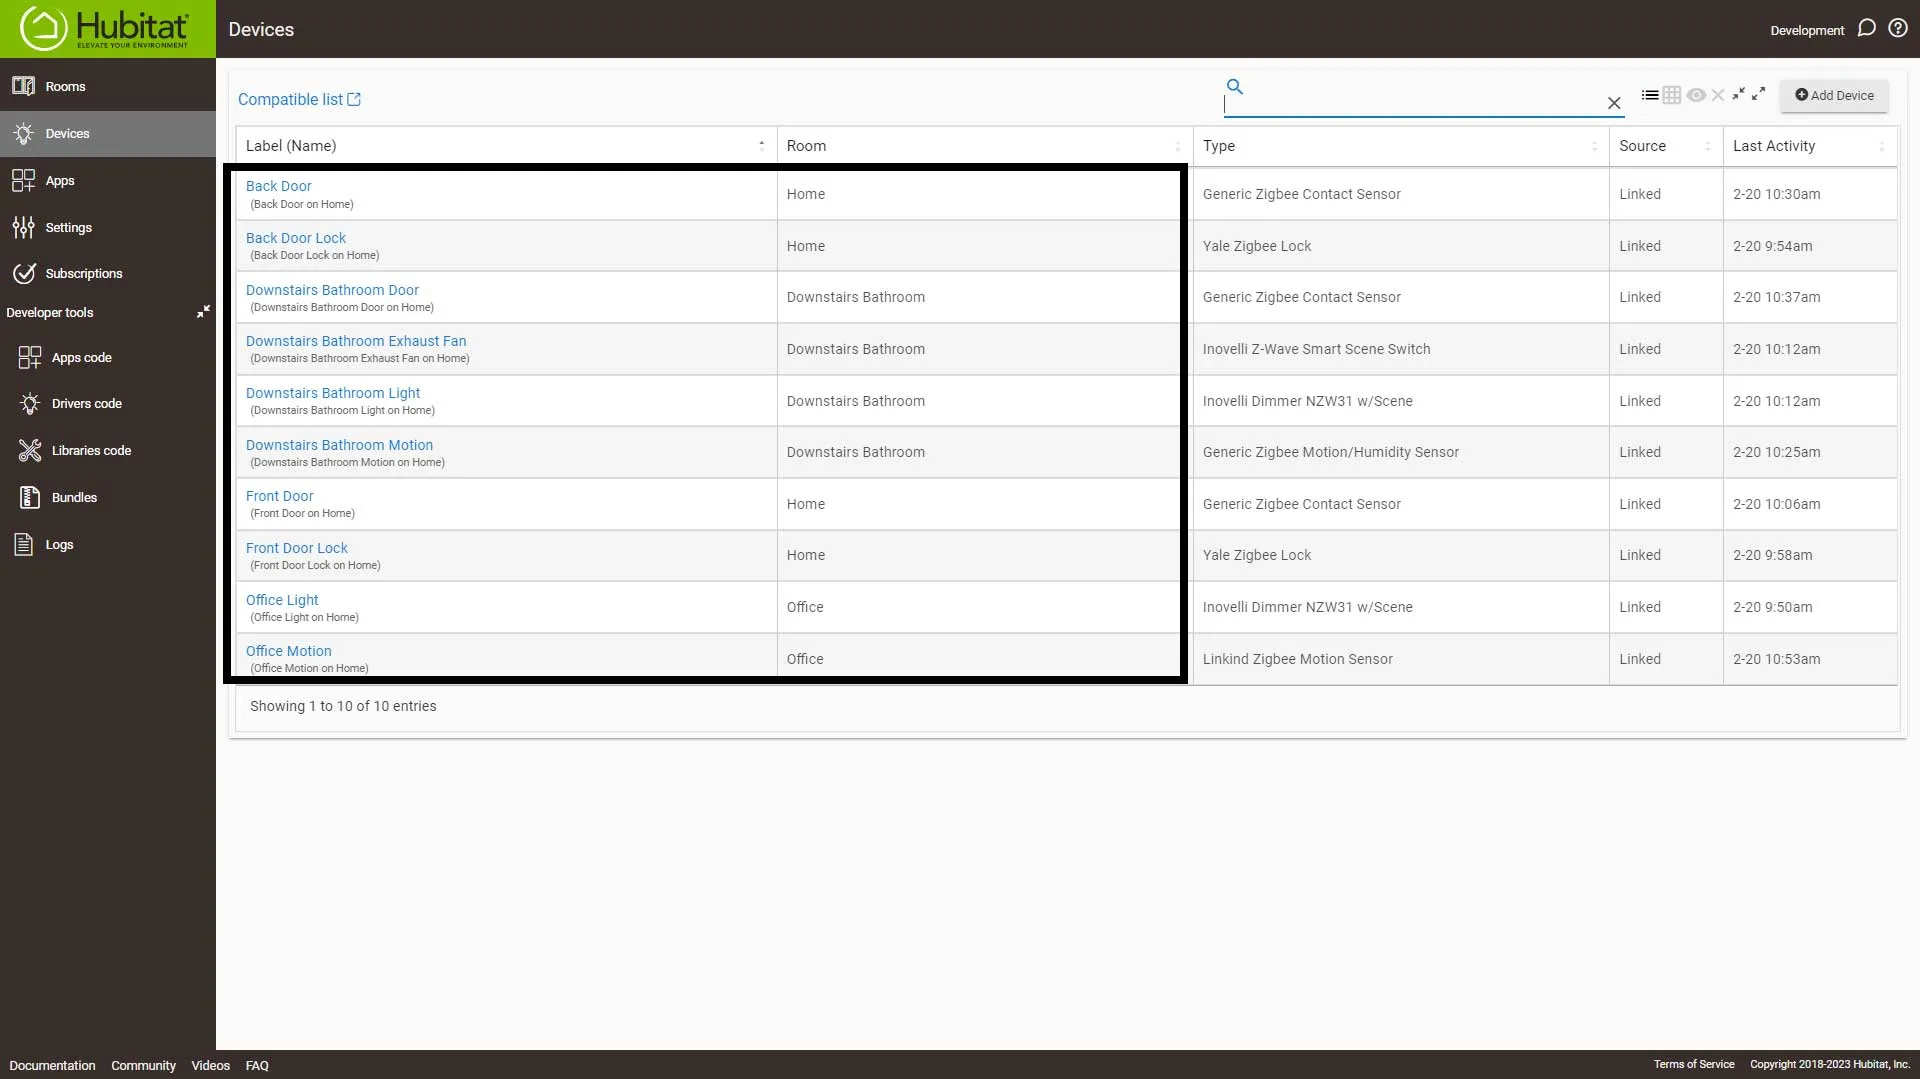
On the Devices list screen, you will see all your linked devices. Notice that each device is suffixed with “on [Hub Name]”. To change this click into a device.
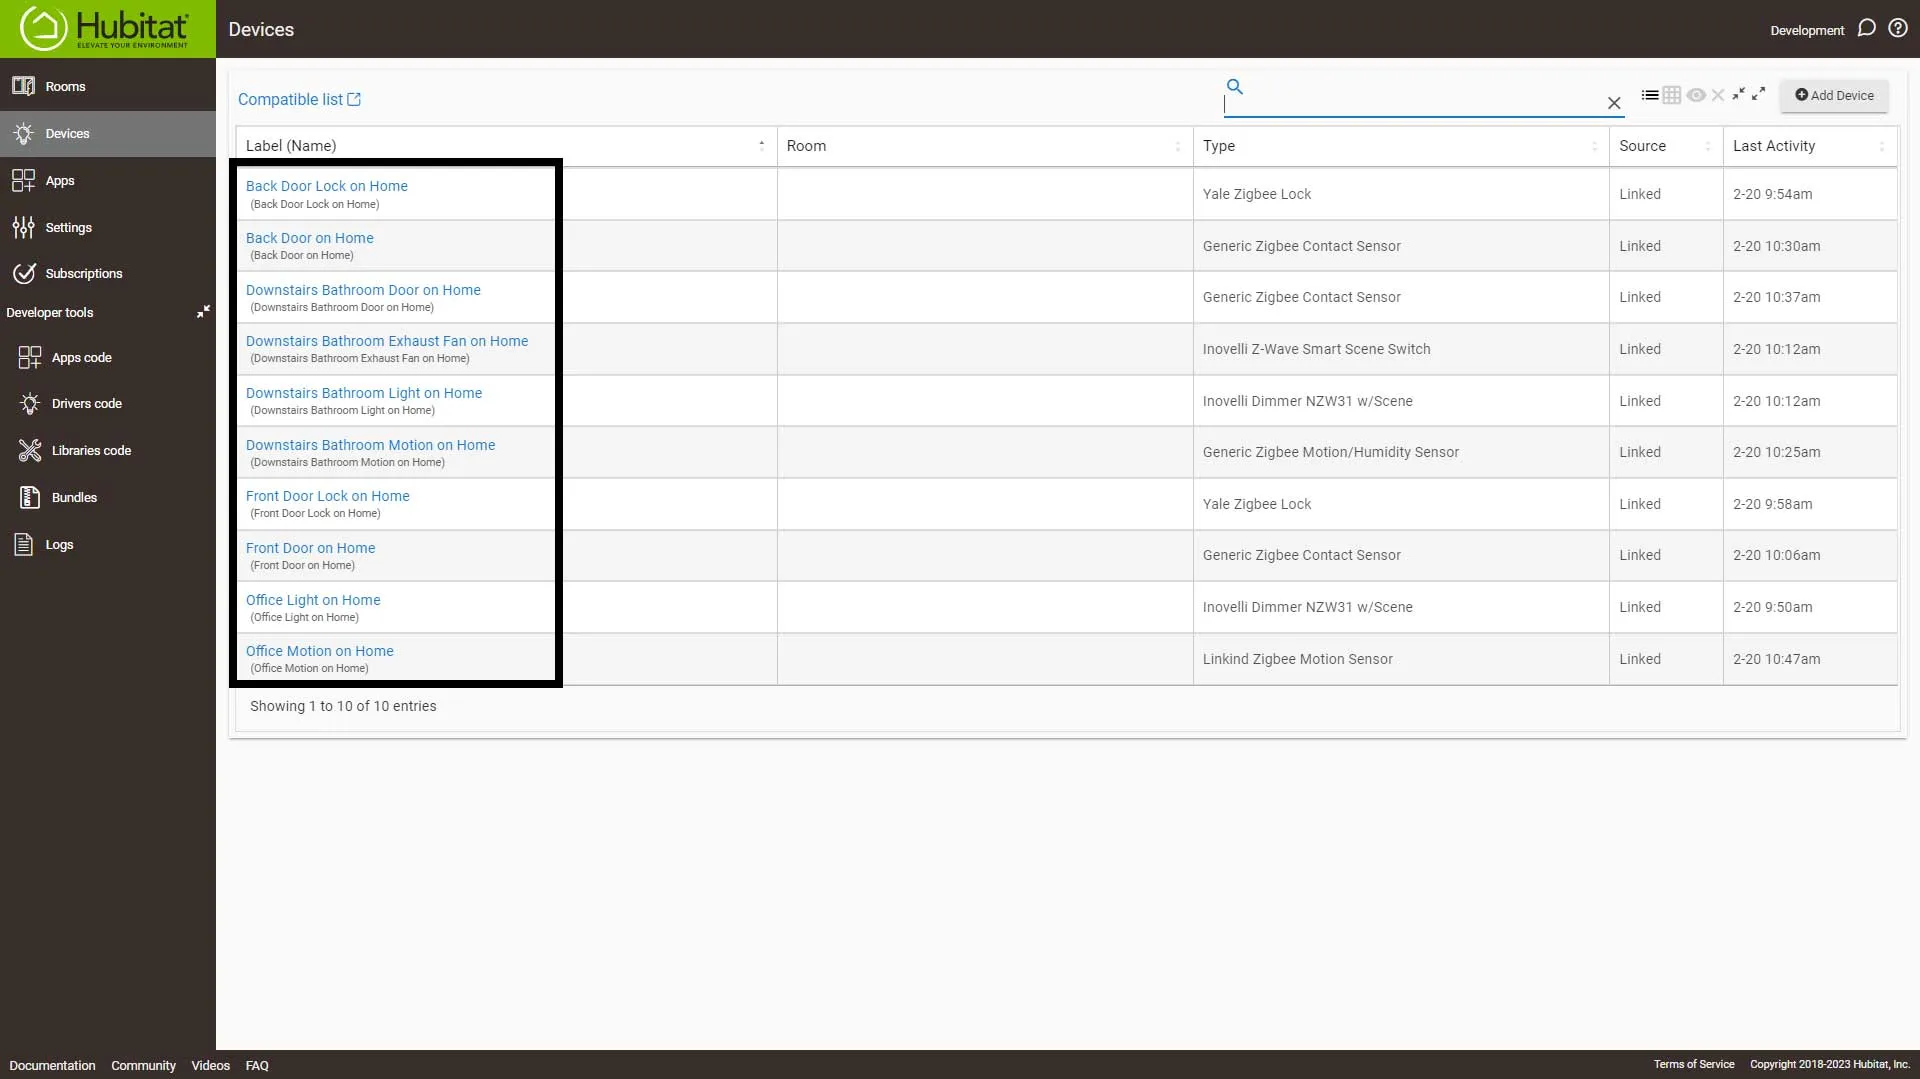
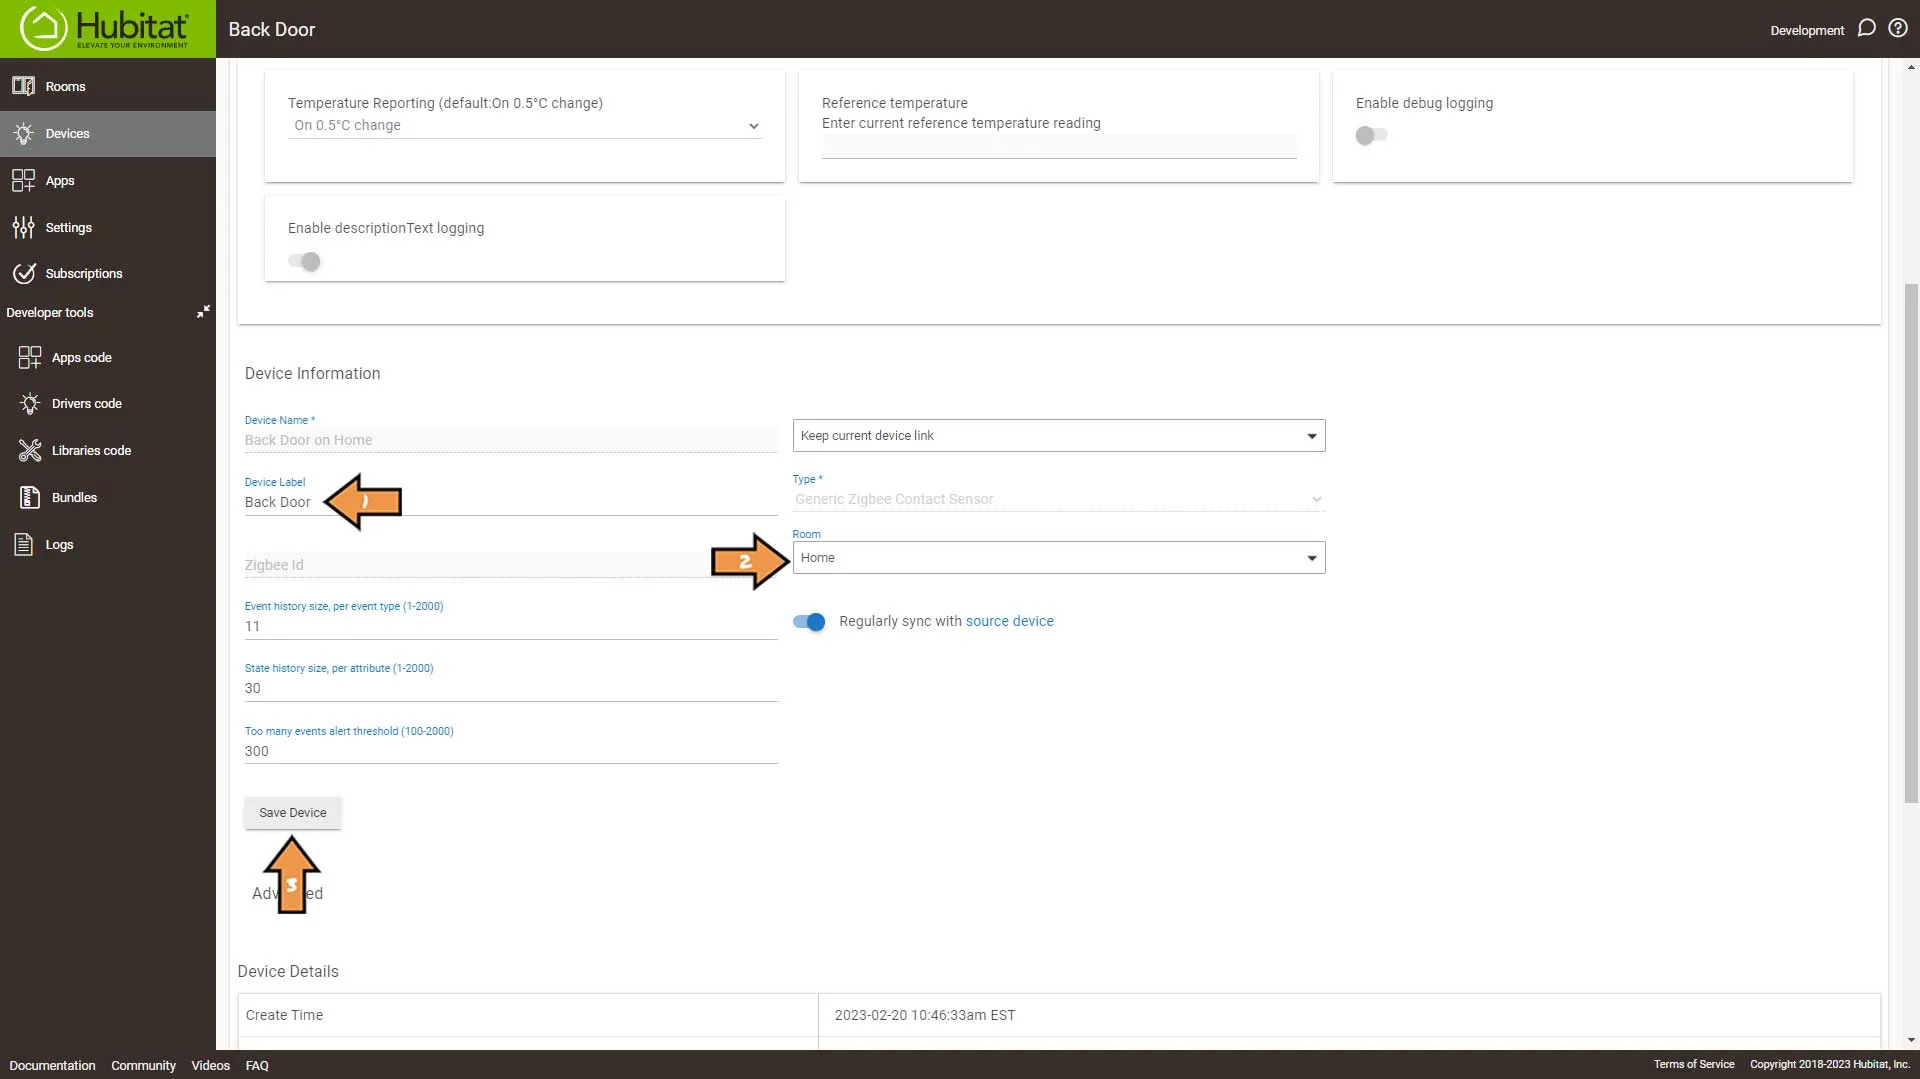
Scroll down to the Device Information Section,
- You can add a label to display the name you prefer.
- You can add the device to a room.
- Then, click the Save Device button.
Important: Do this for each of the devices you have linked.
Success: That’s it. You should see all of your renamed devices.
PRO TIP: If all of the devices for an automation are on the same hub, you should put the automation on that hub. Otherwise, you will introduce latency.
Home Assistant
Hubitat Integration for Home Assistant
The Official Documentation for Hubitat Integration for Home Assistant
The Official Documentation for Maker API
Important: This integration requires the Community Store.
Setting Up the Automation
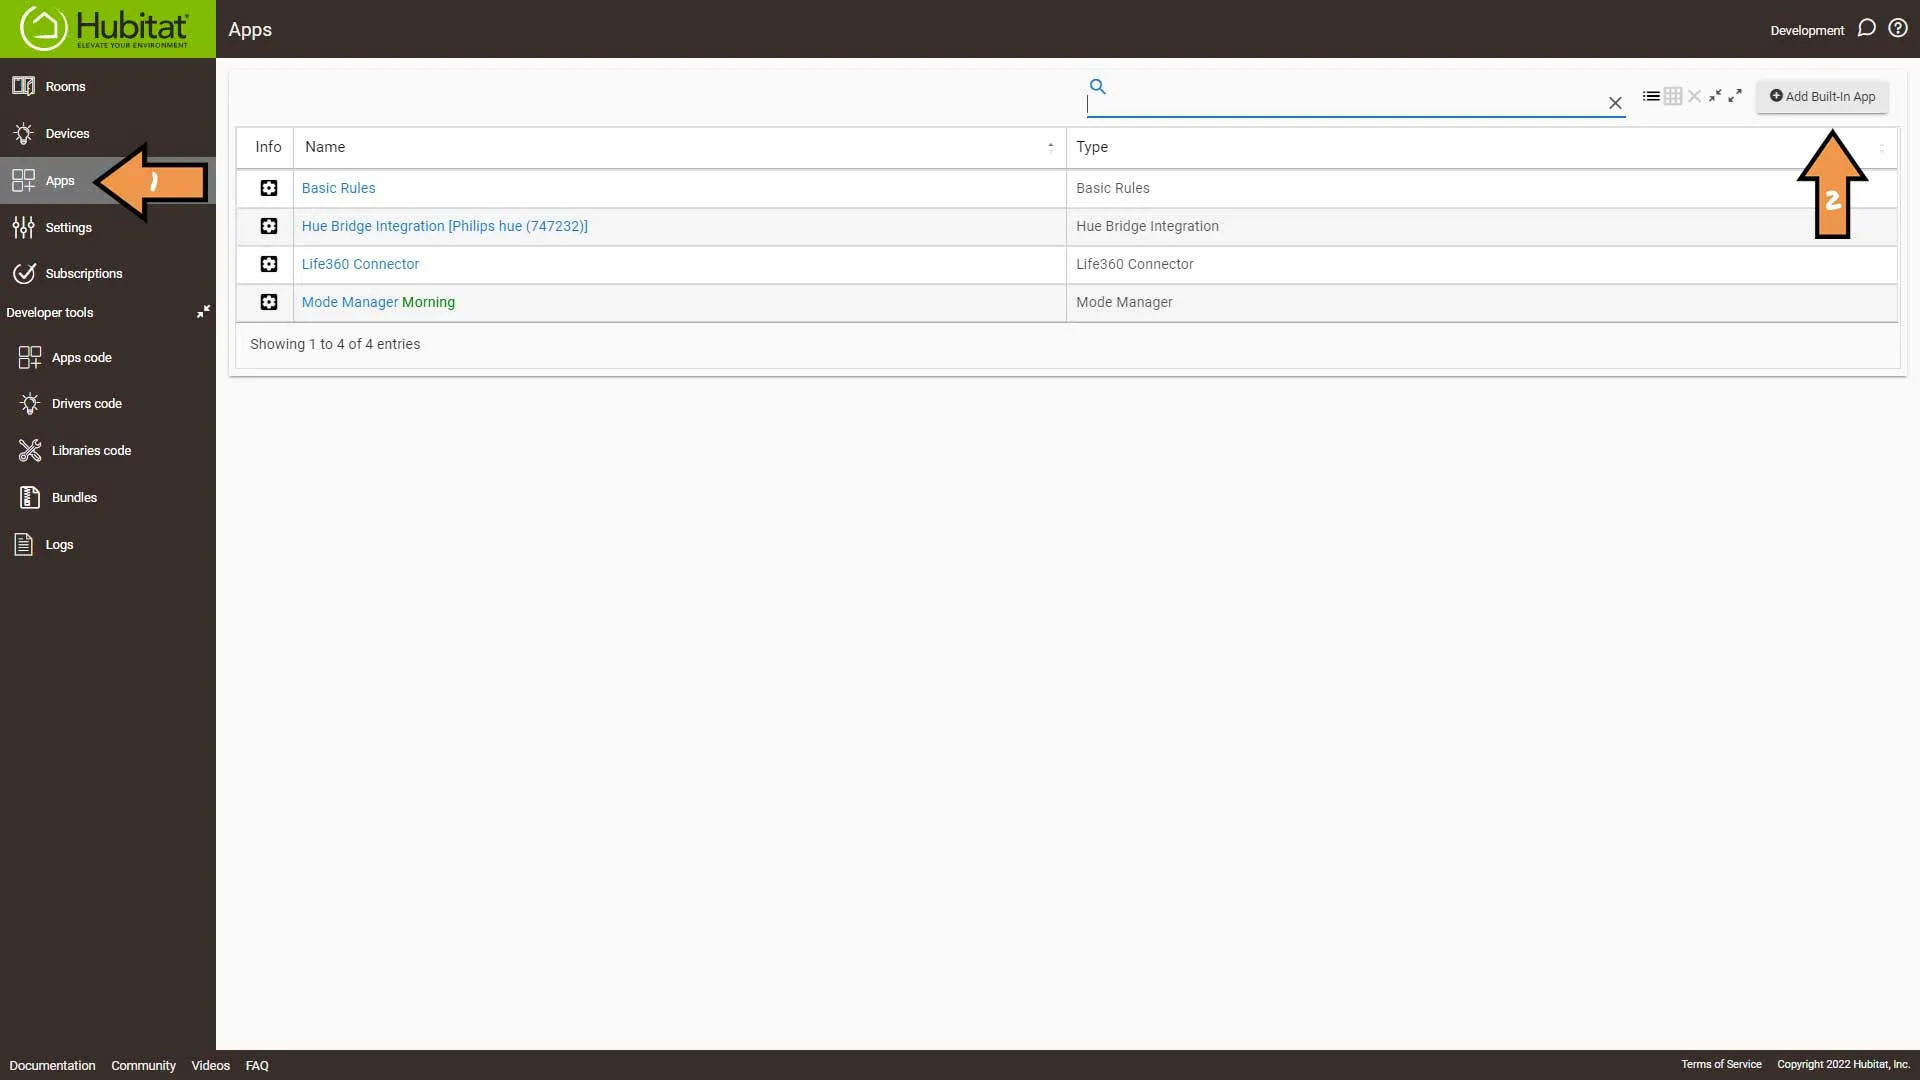
First, go to Apps and press Add Built-in App button.
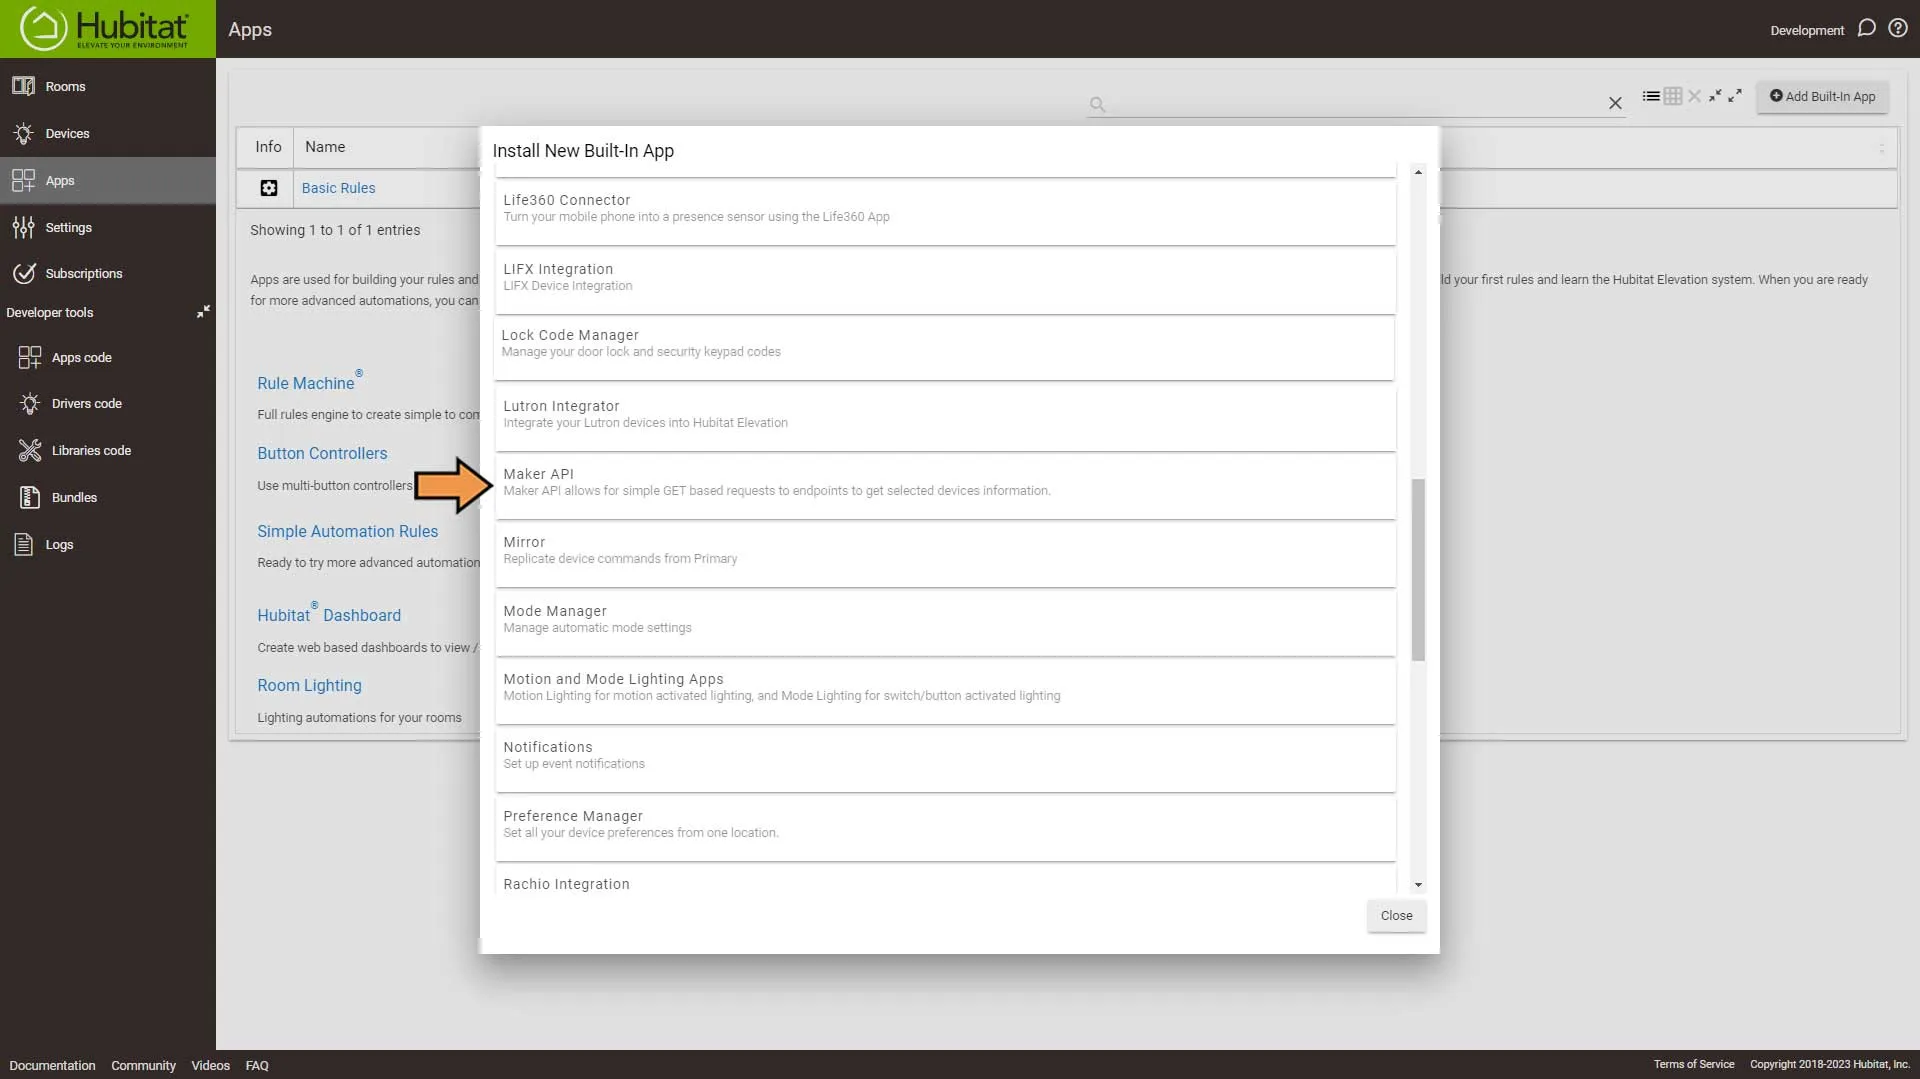
Please scroll down to you see Maker API and select it.
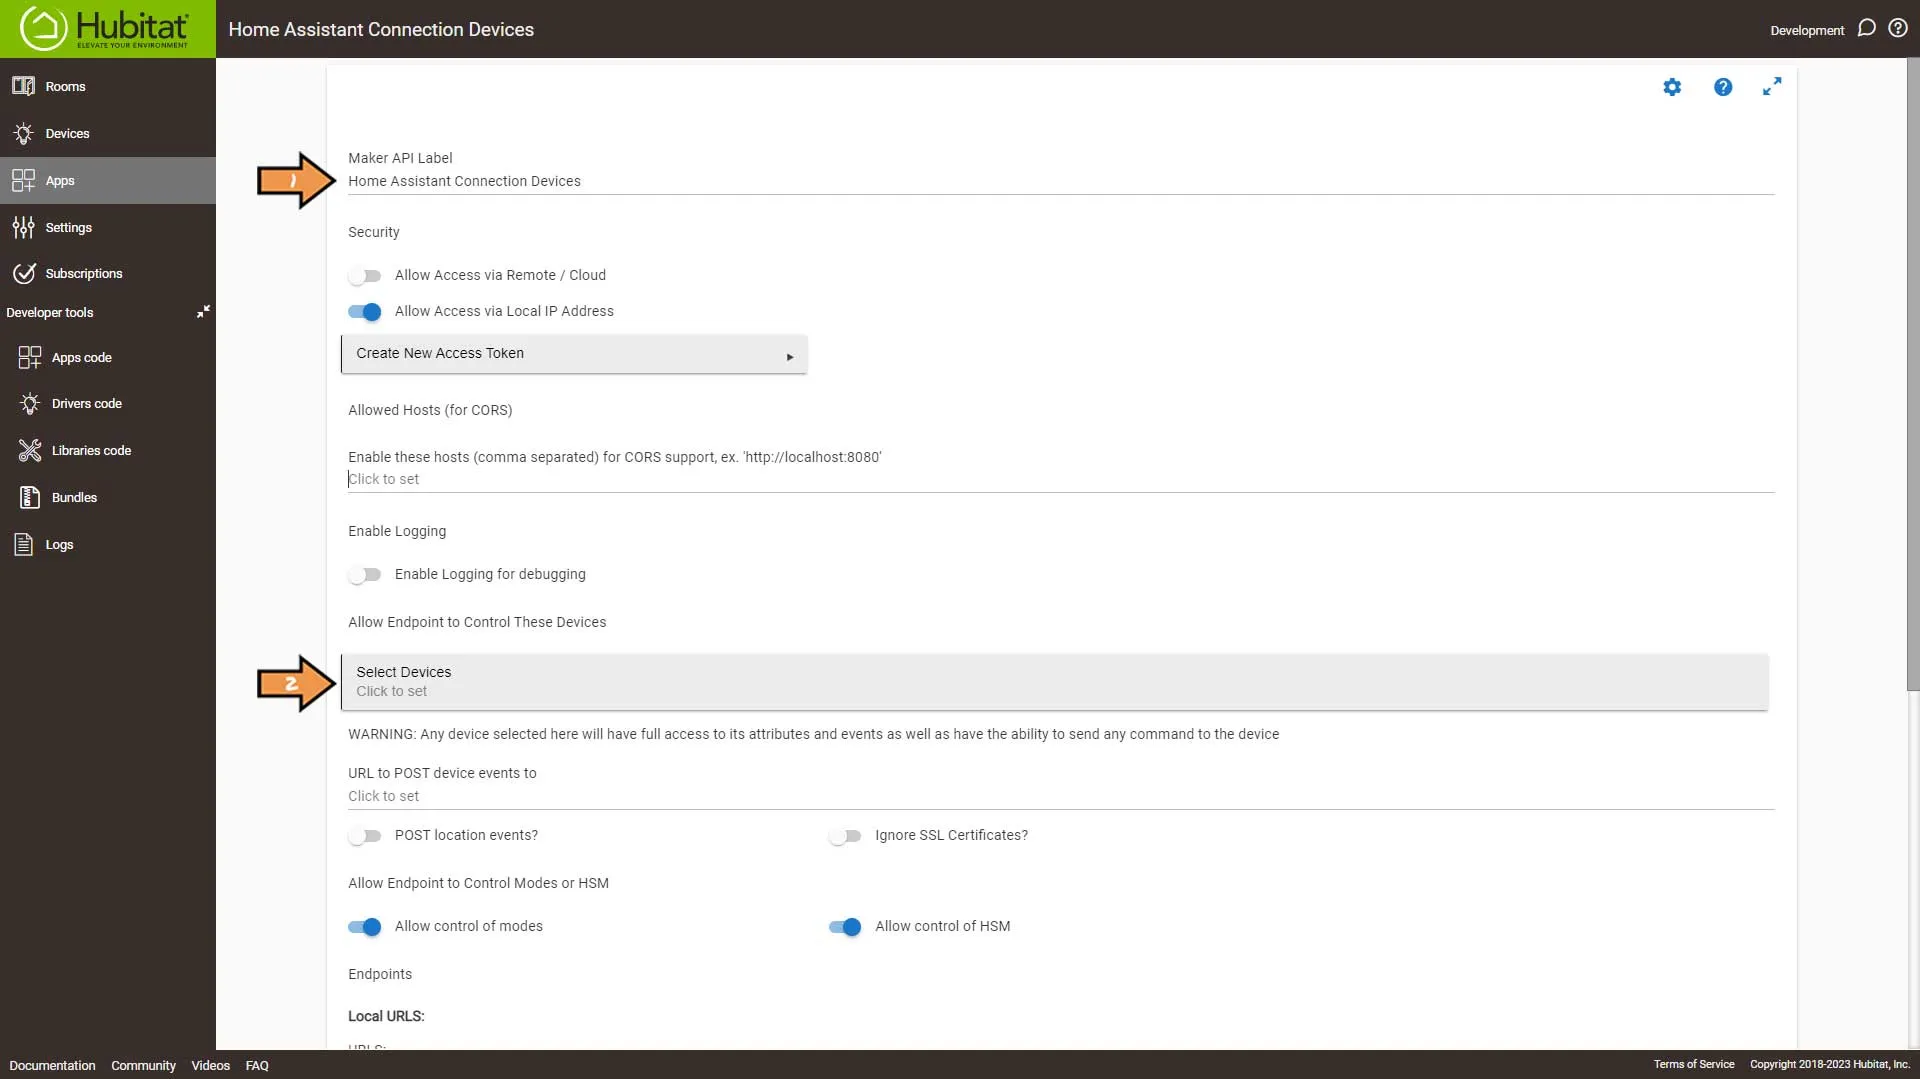
Rename the Maker API Label to something meaningful and click the Select Devices box.
Select the devices you want to share with Home Assistant and click Update.
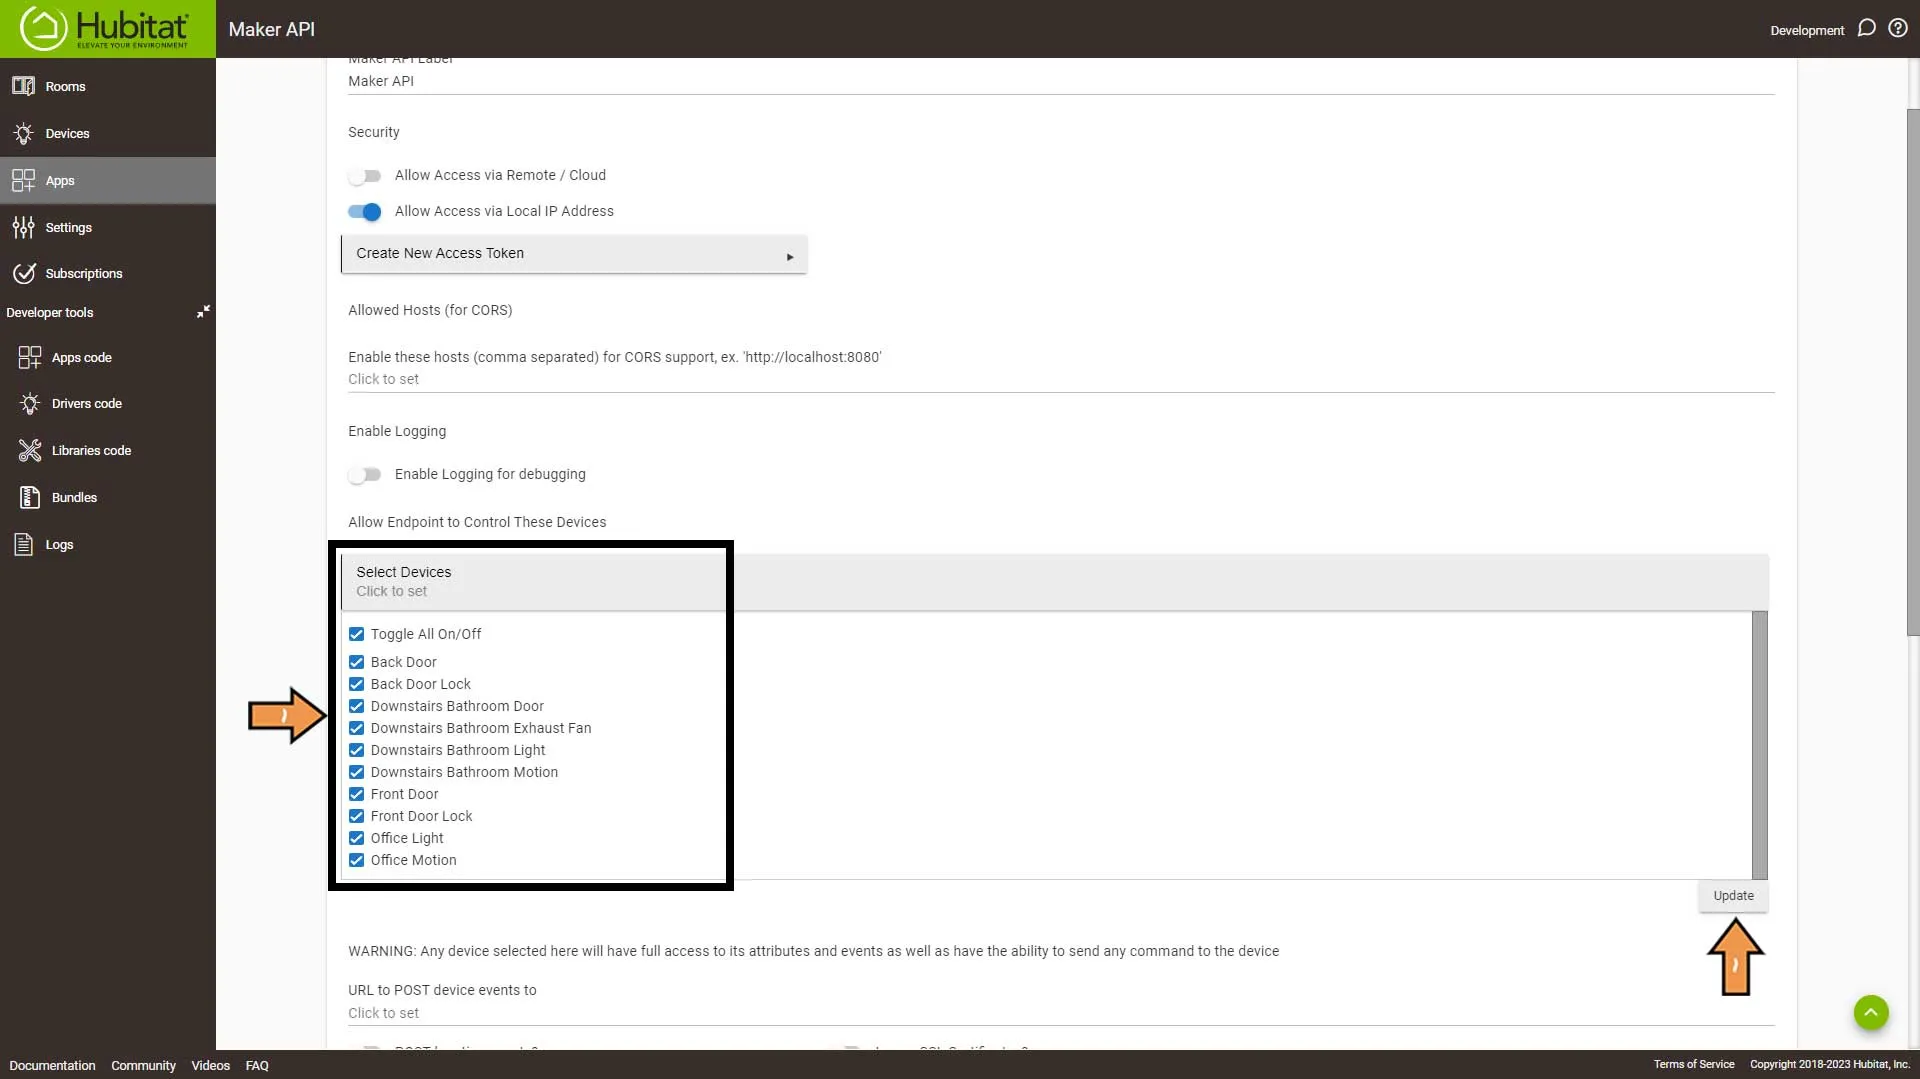
Make sure to enable POST location events and click Done.
Turning On POST Location Events allow Home Assistant to follow Hubitat’s Modes
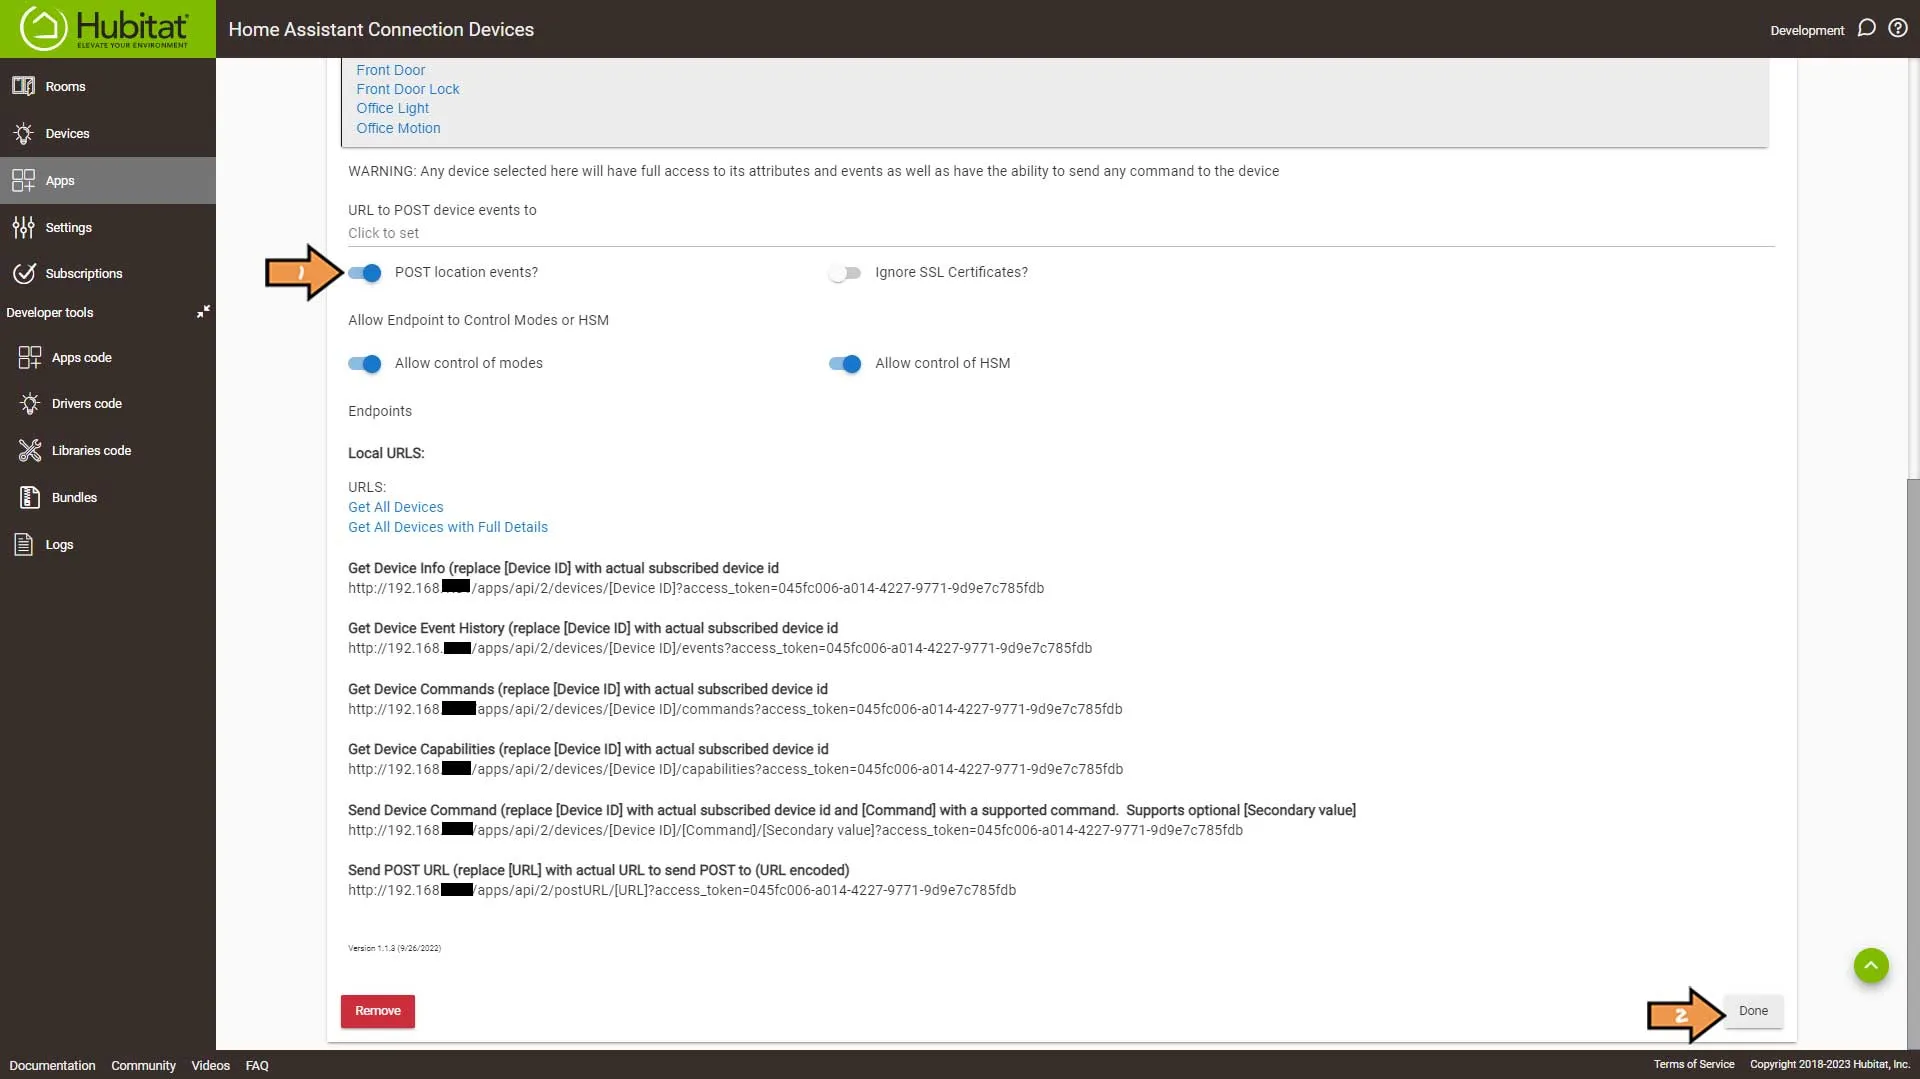
Next, go to HACS, then Integrations.
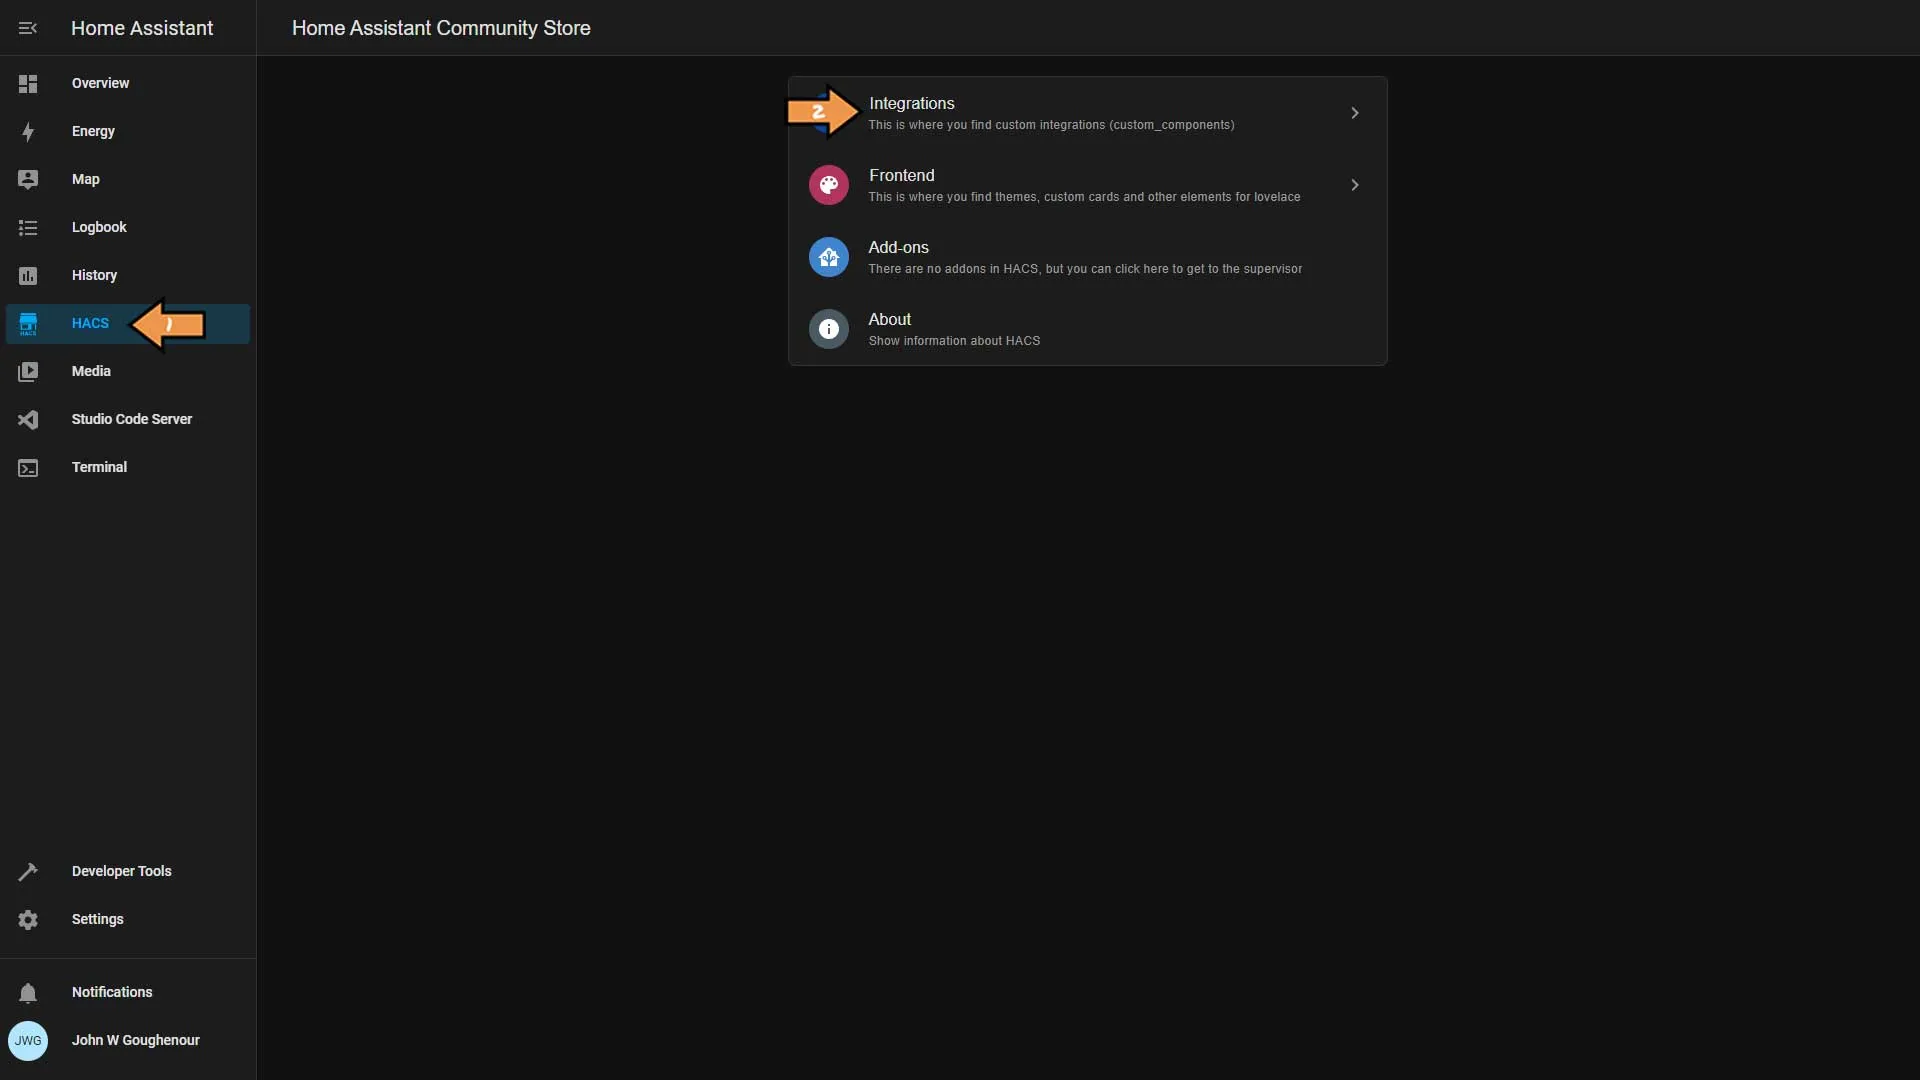
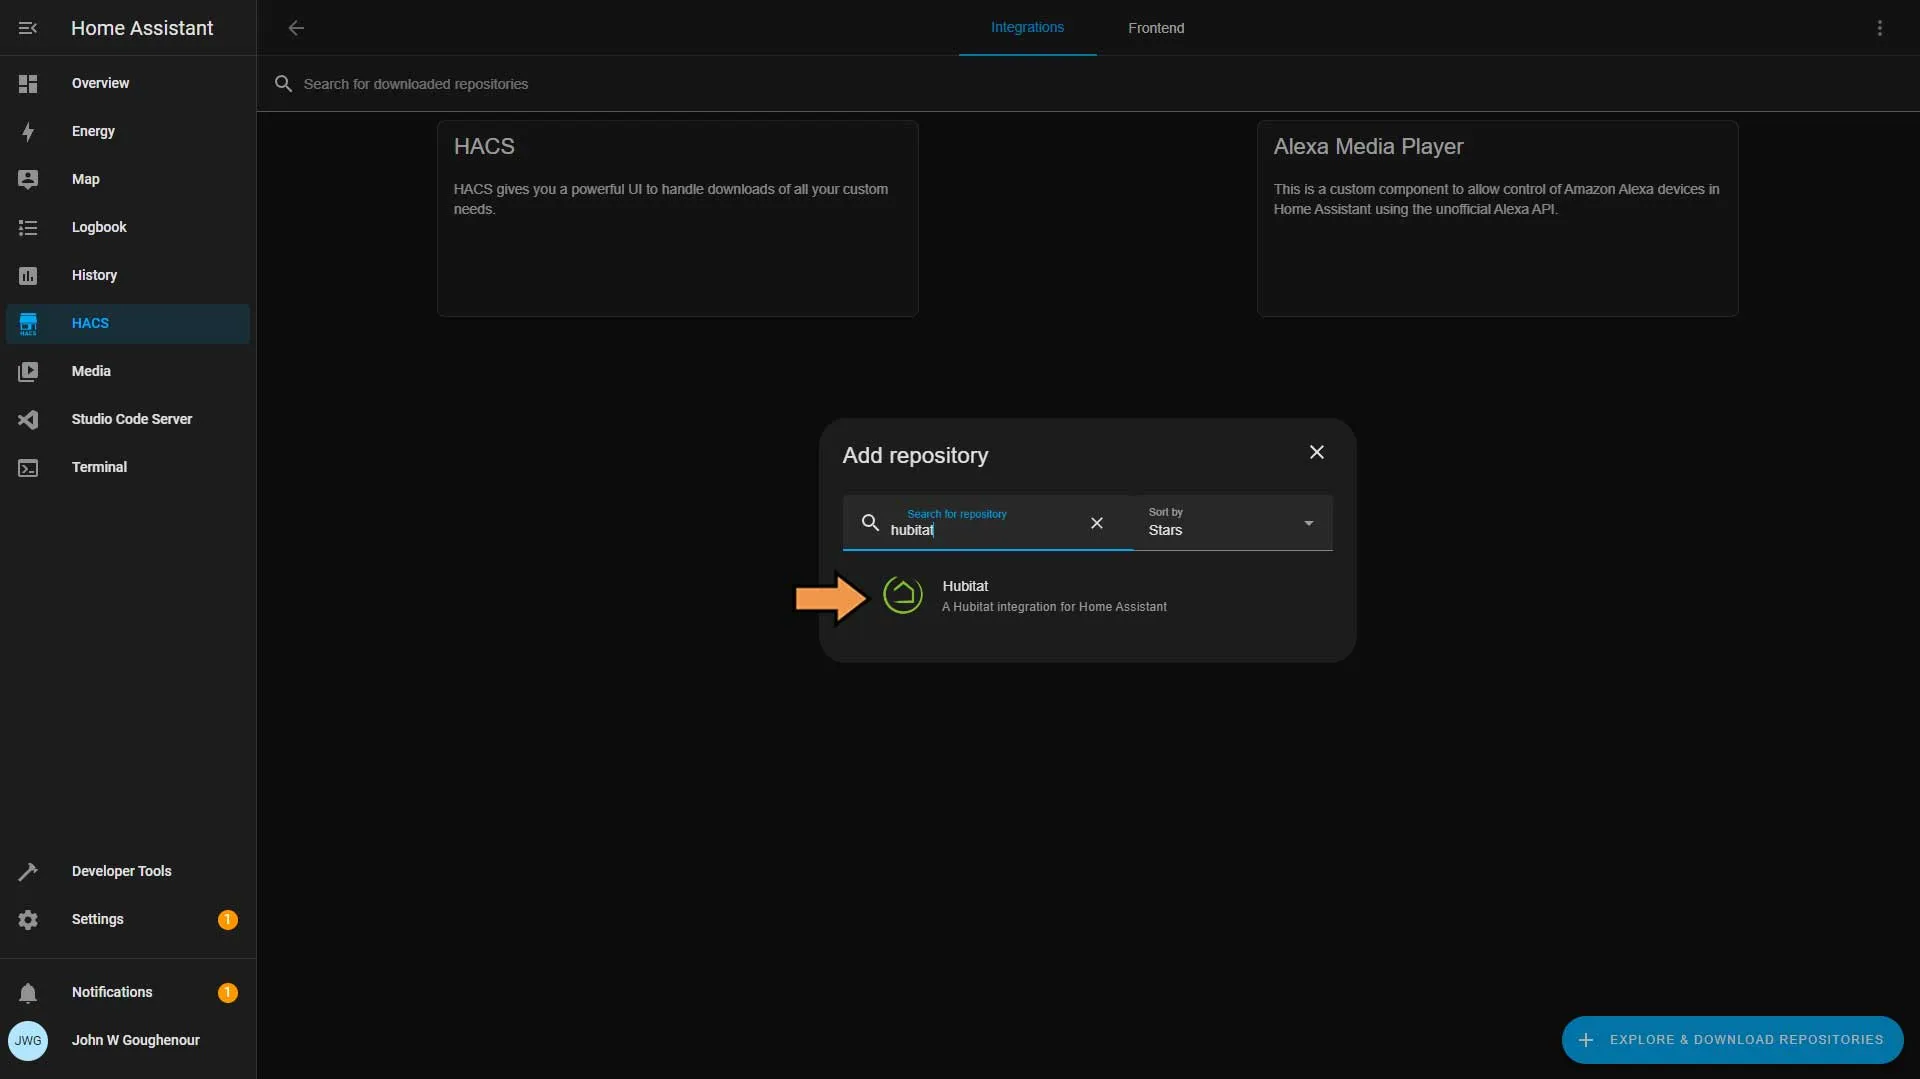
Click the Explore & Download Repositories button.
Search for Hubitat and select Hubitat from the list.
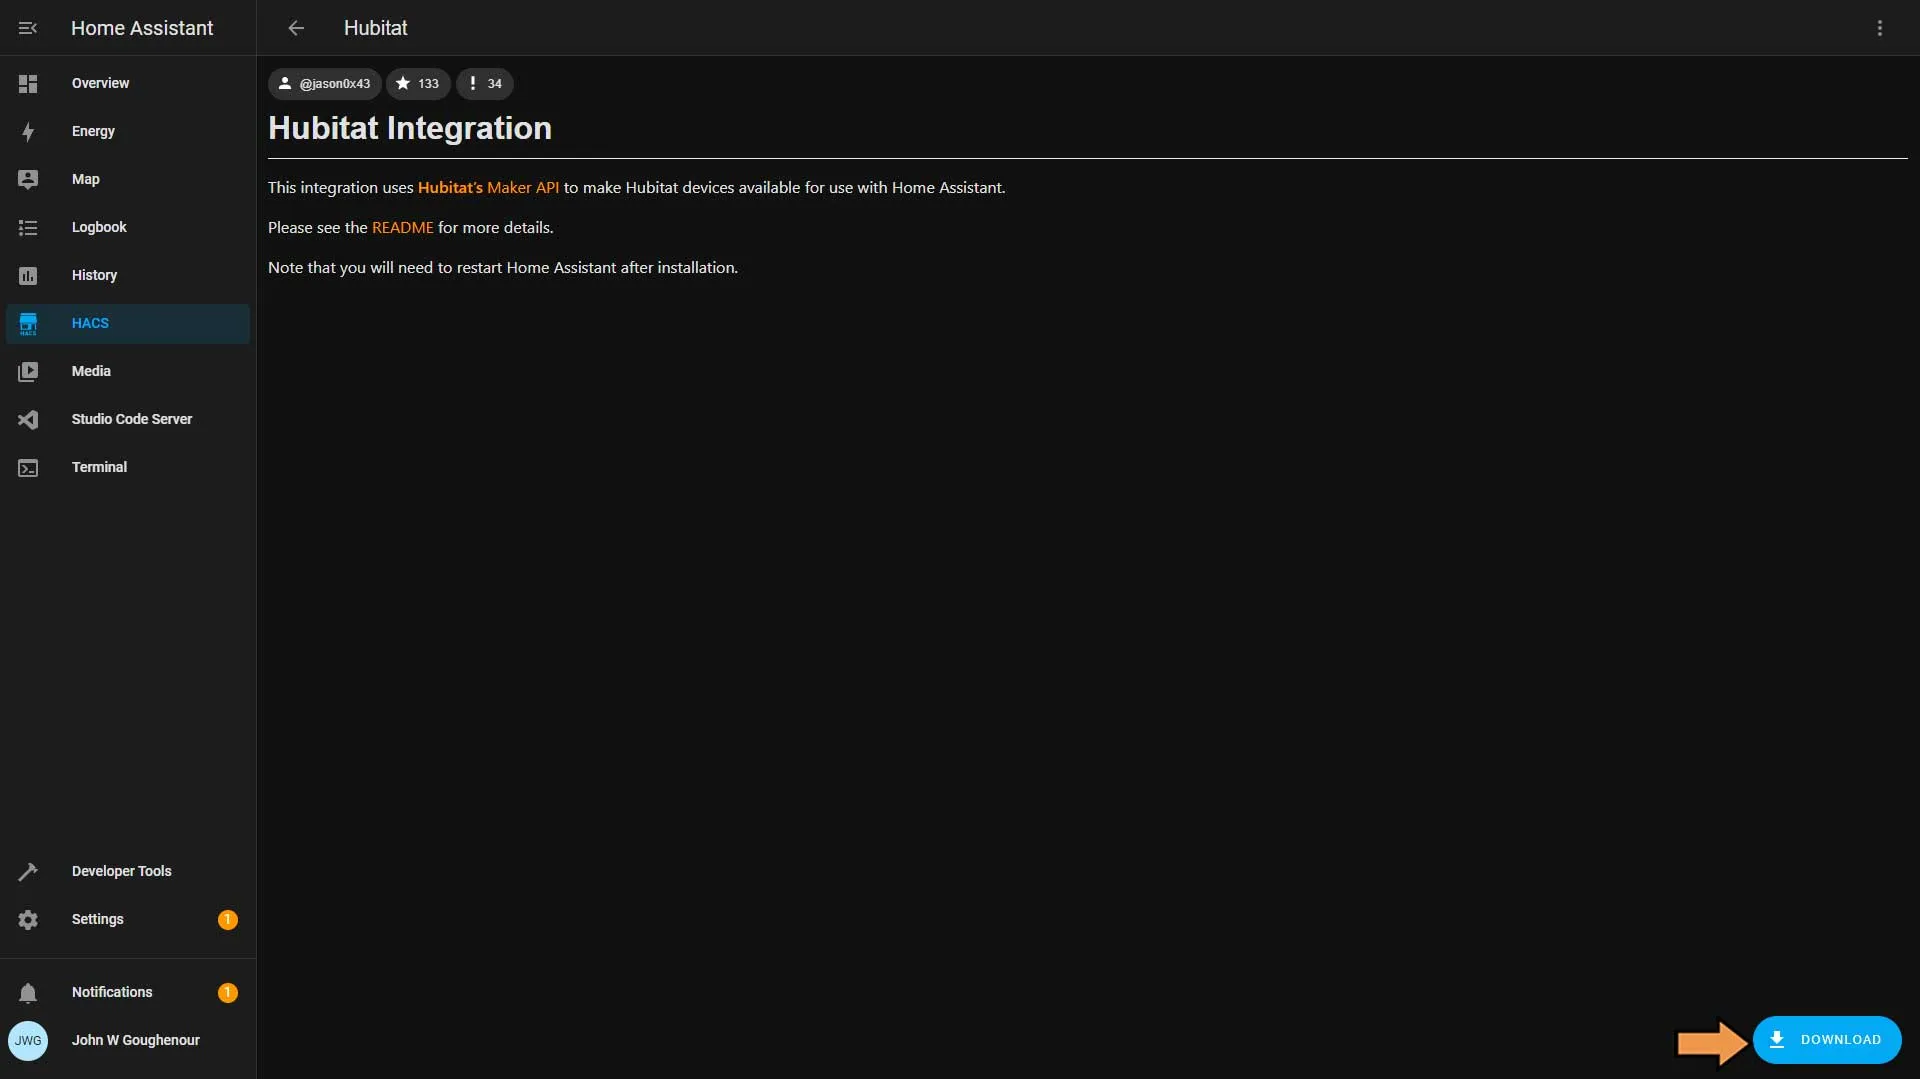
At the bottom of the screen, click the Download button.
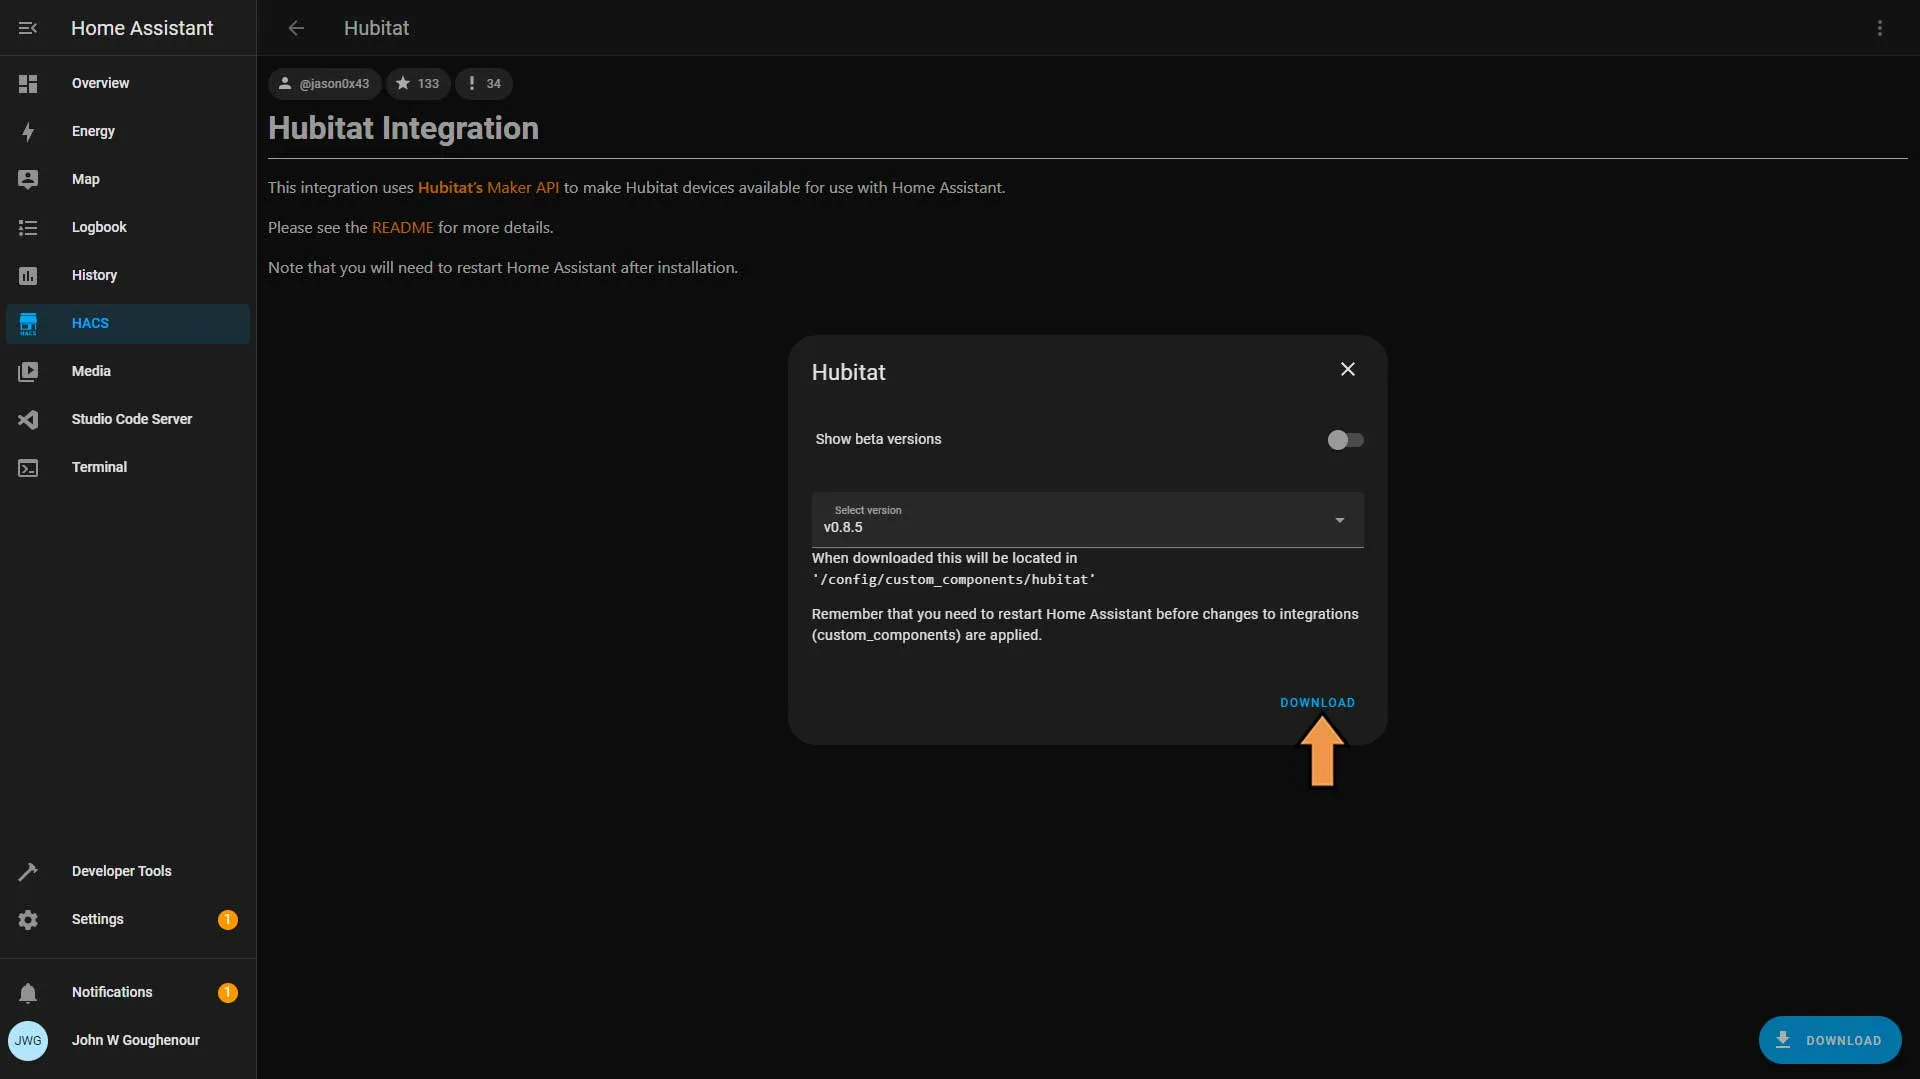
In the pop-up window, click Download. Once done, click the back arrow at the top of the screen.
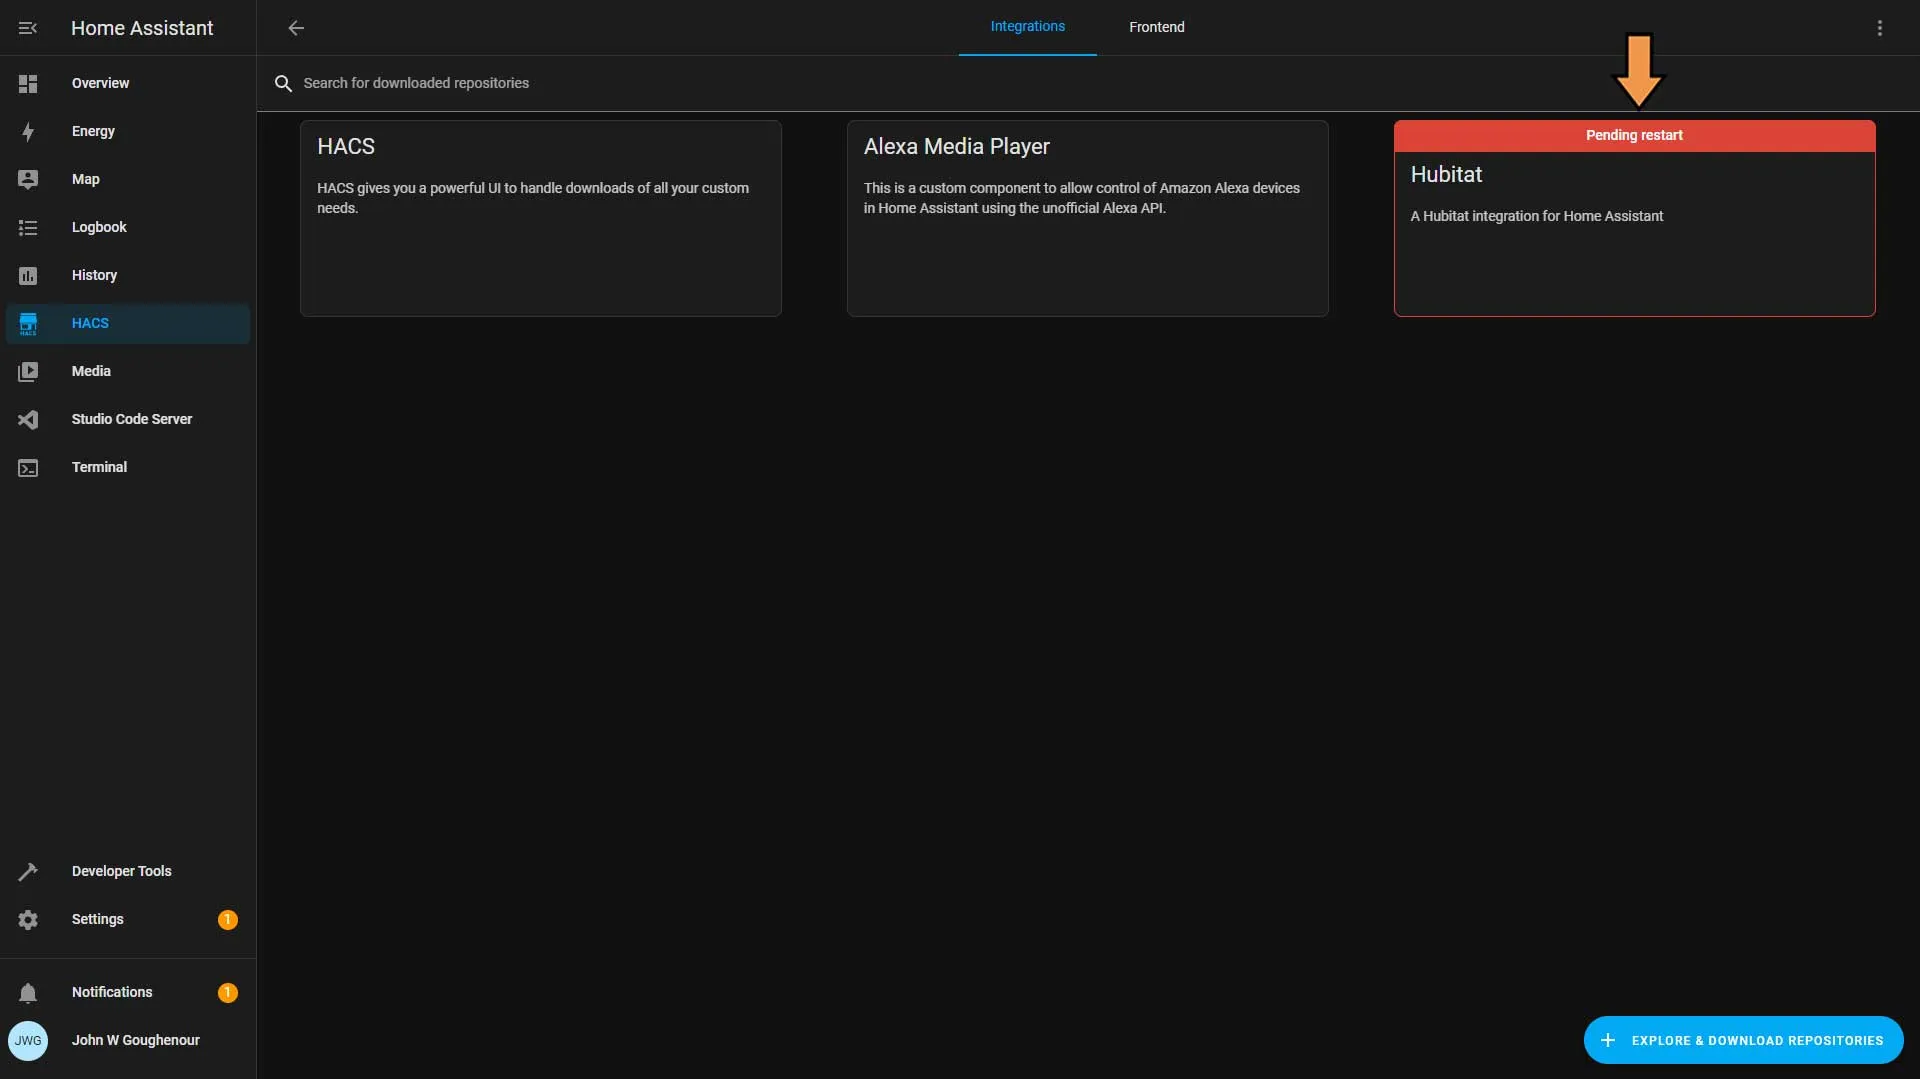
Hubitat is pending a restart.
Go to Developer Tools and click Check Configuration, and if everything is alright, click Restart.
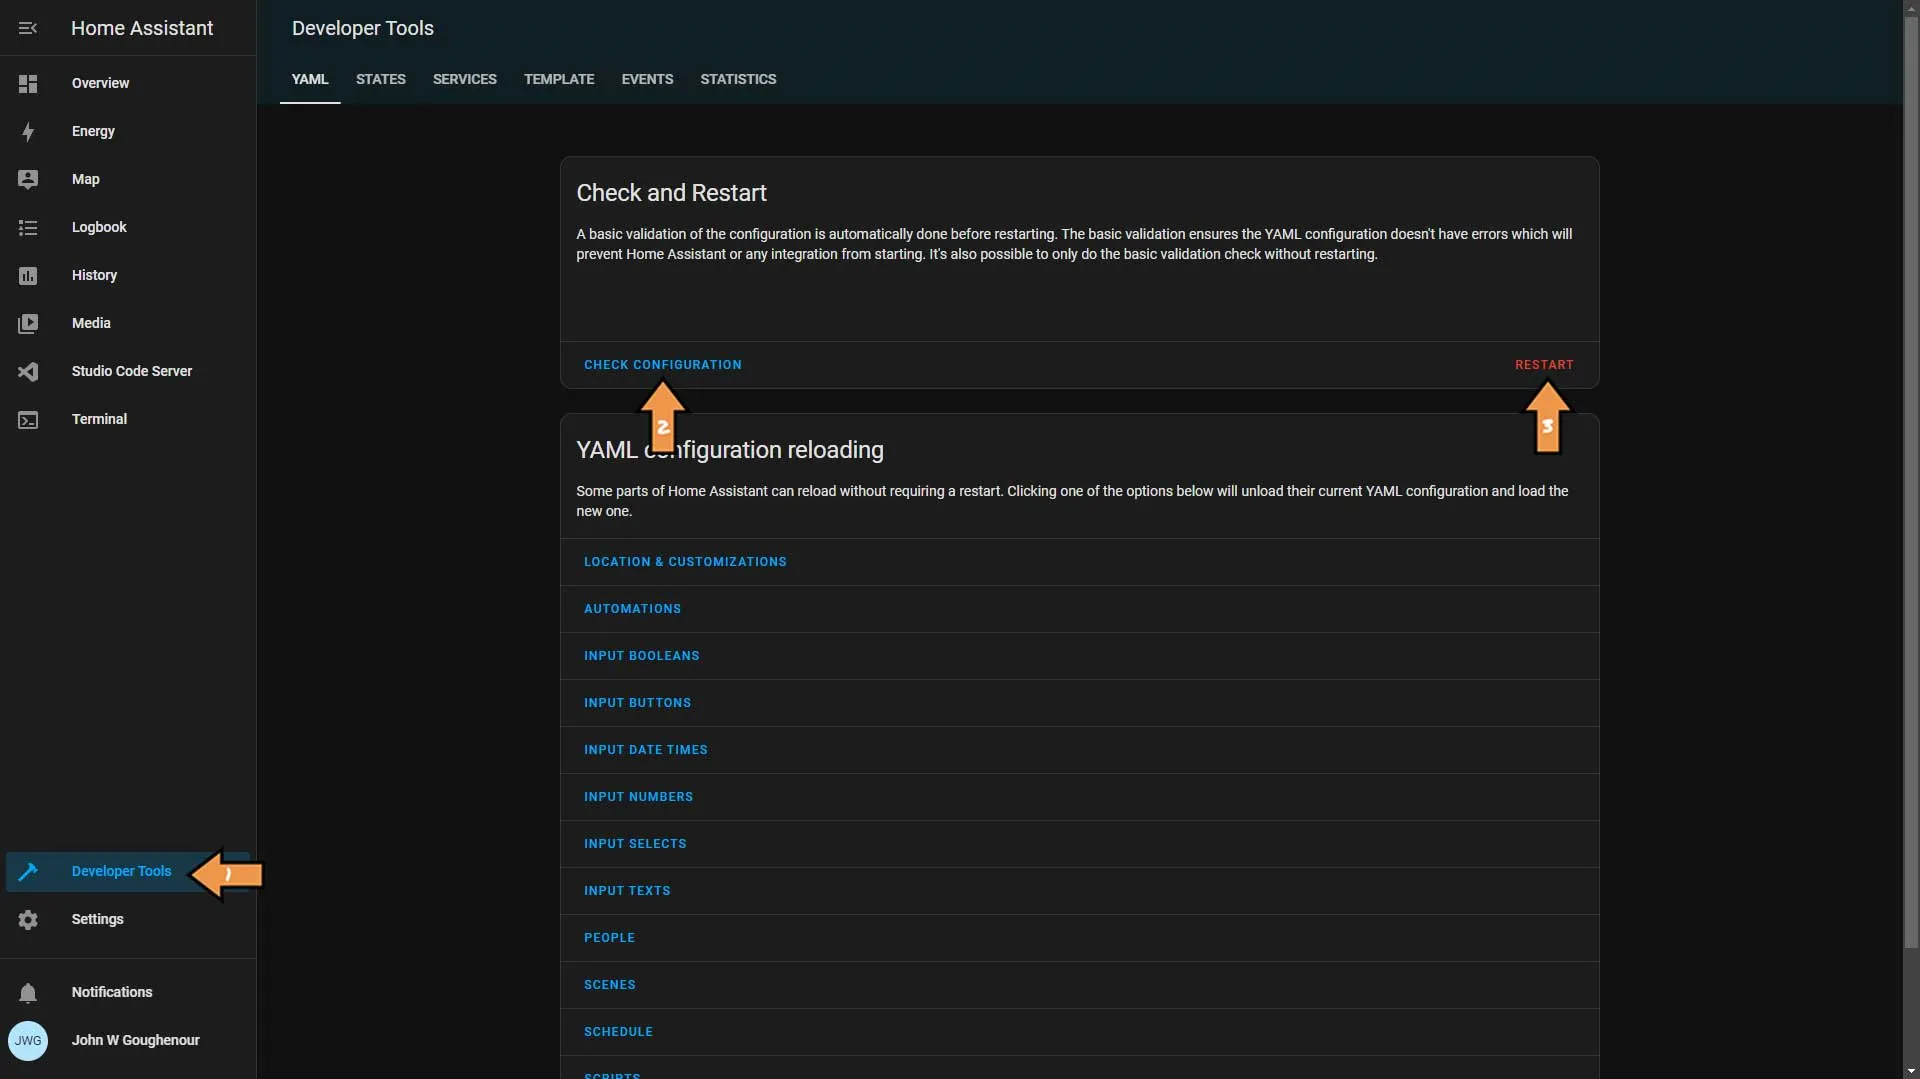
Confirm Restart.

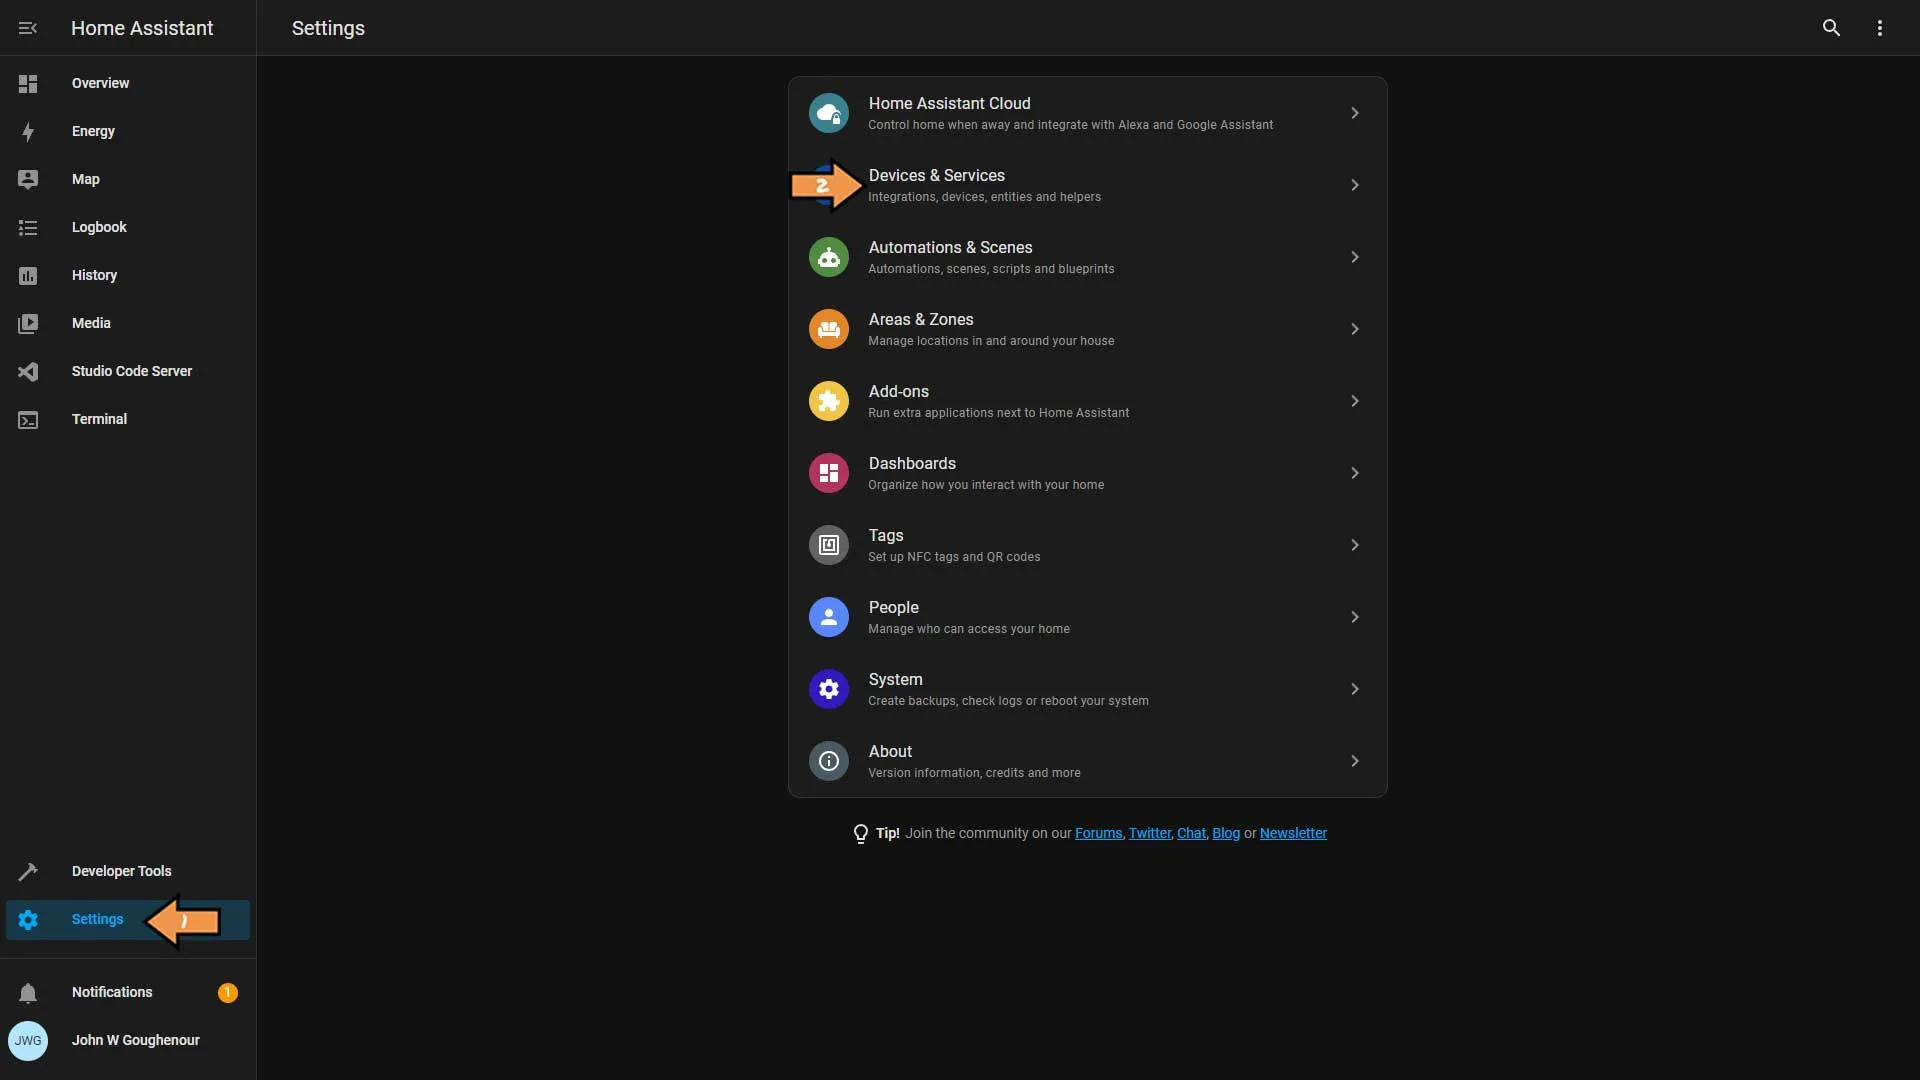
Next, go to Settings and Devices & Services.
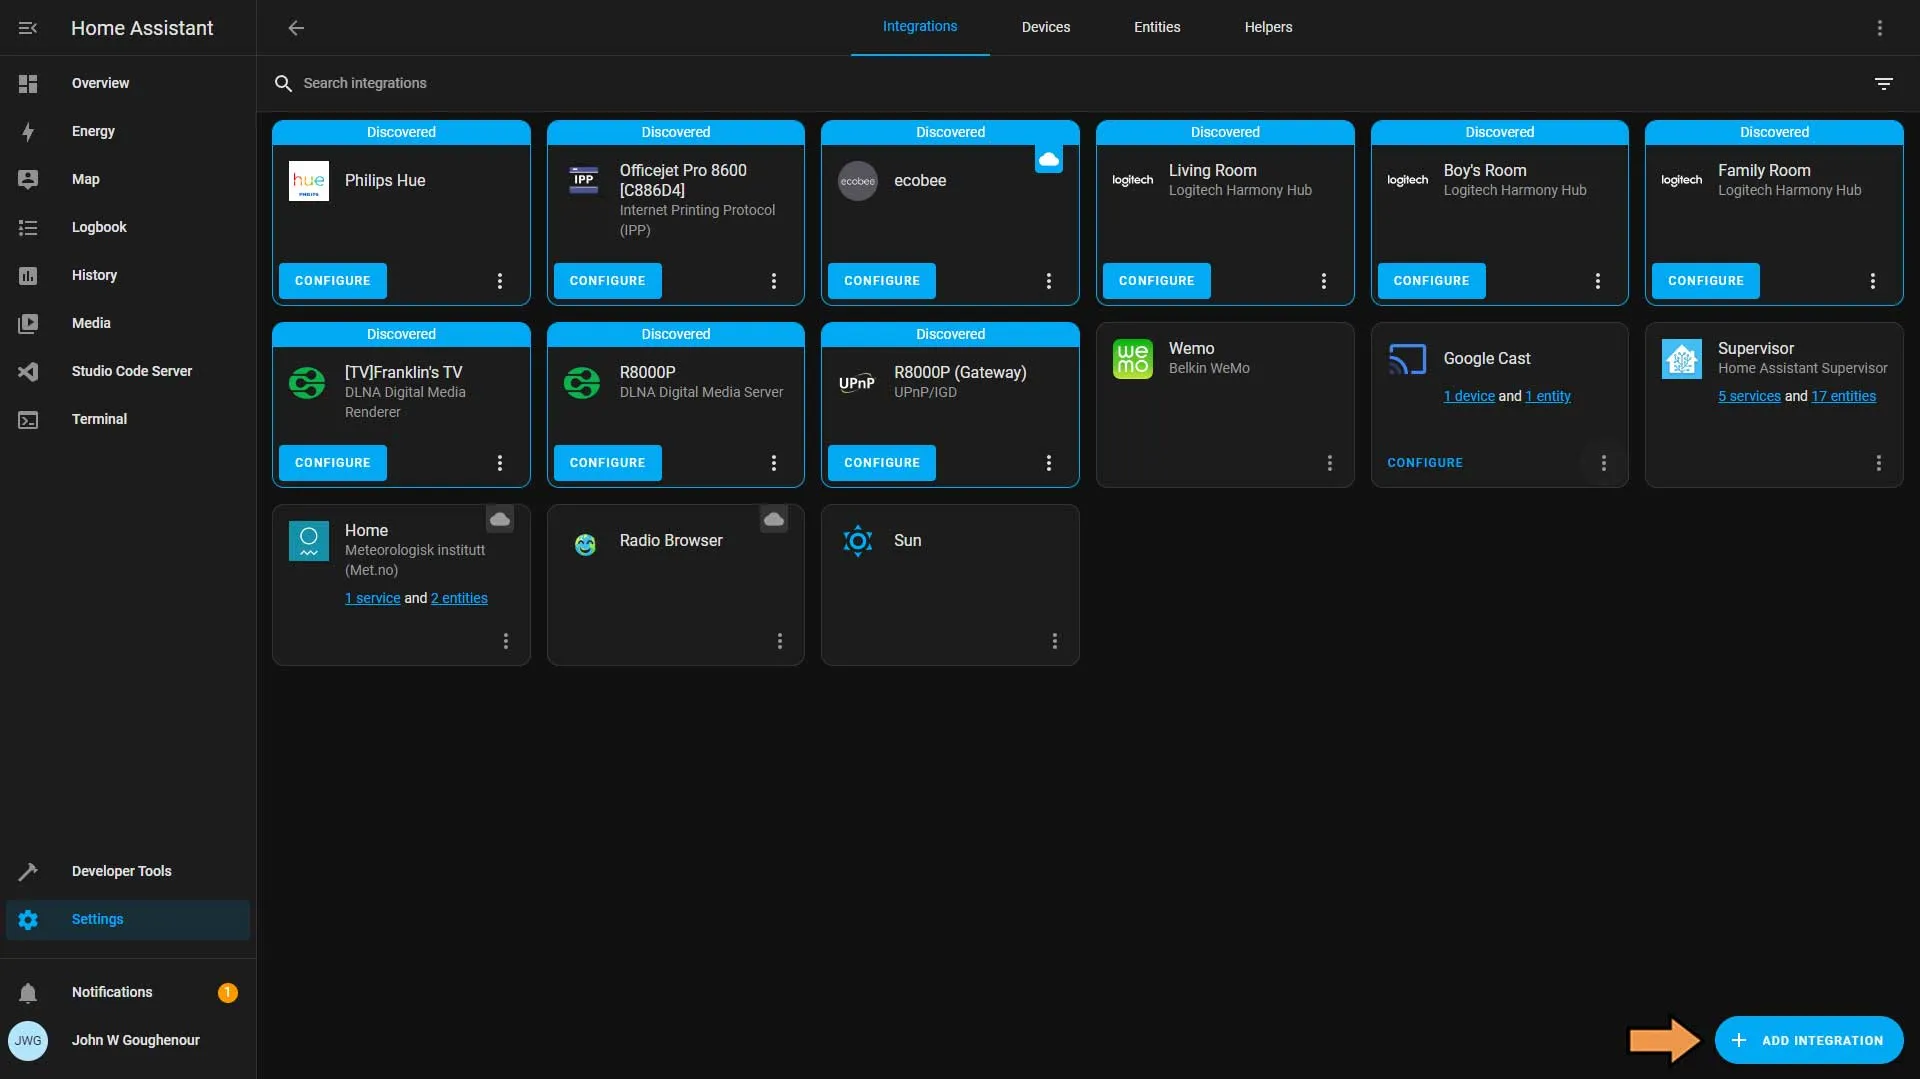
On the Integrations tab Press the Shift Key + F5 to perform a hard refresh on the browser. Then click the Blue Add Integration button at the bottom of the screen.
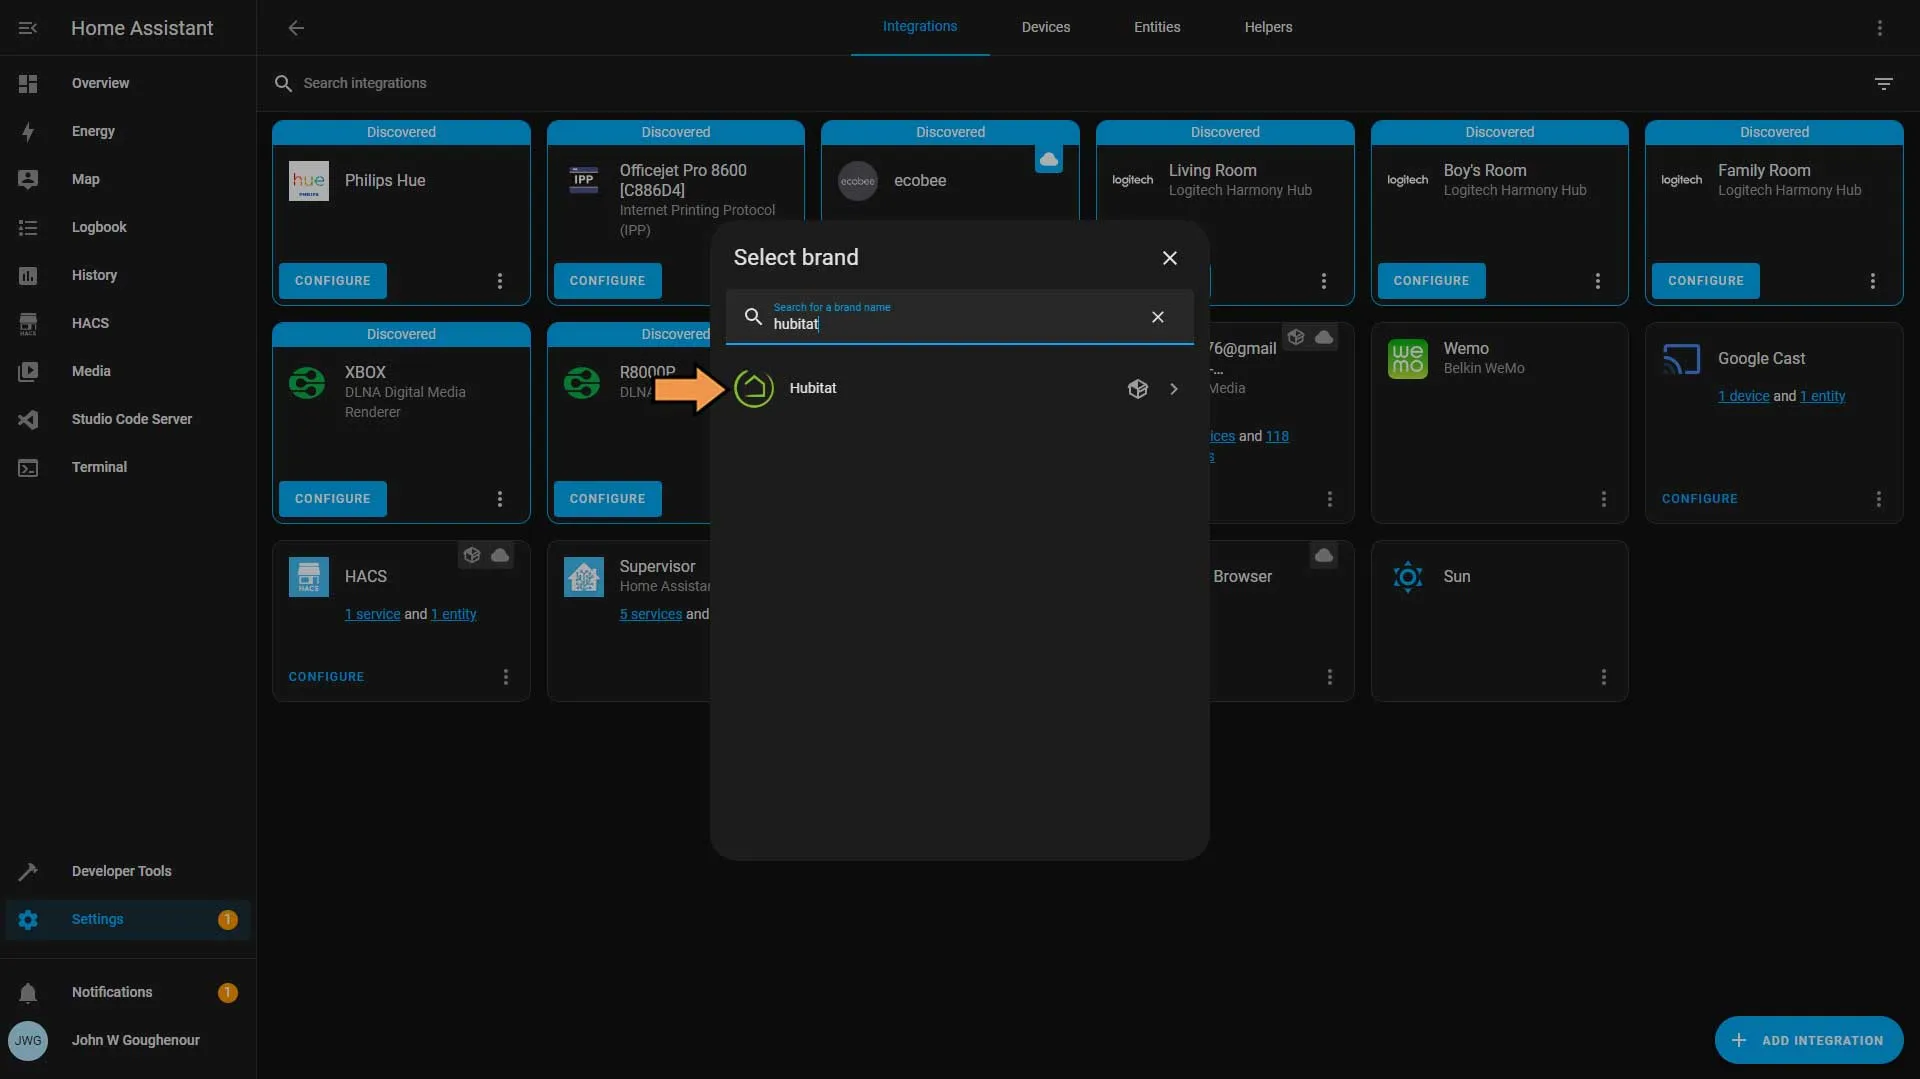
You can just search for Hubitat and select it from the list.
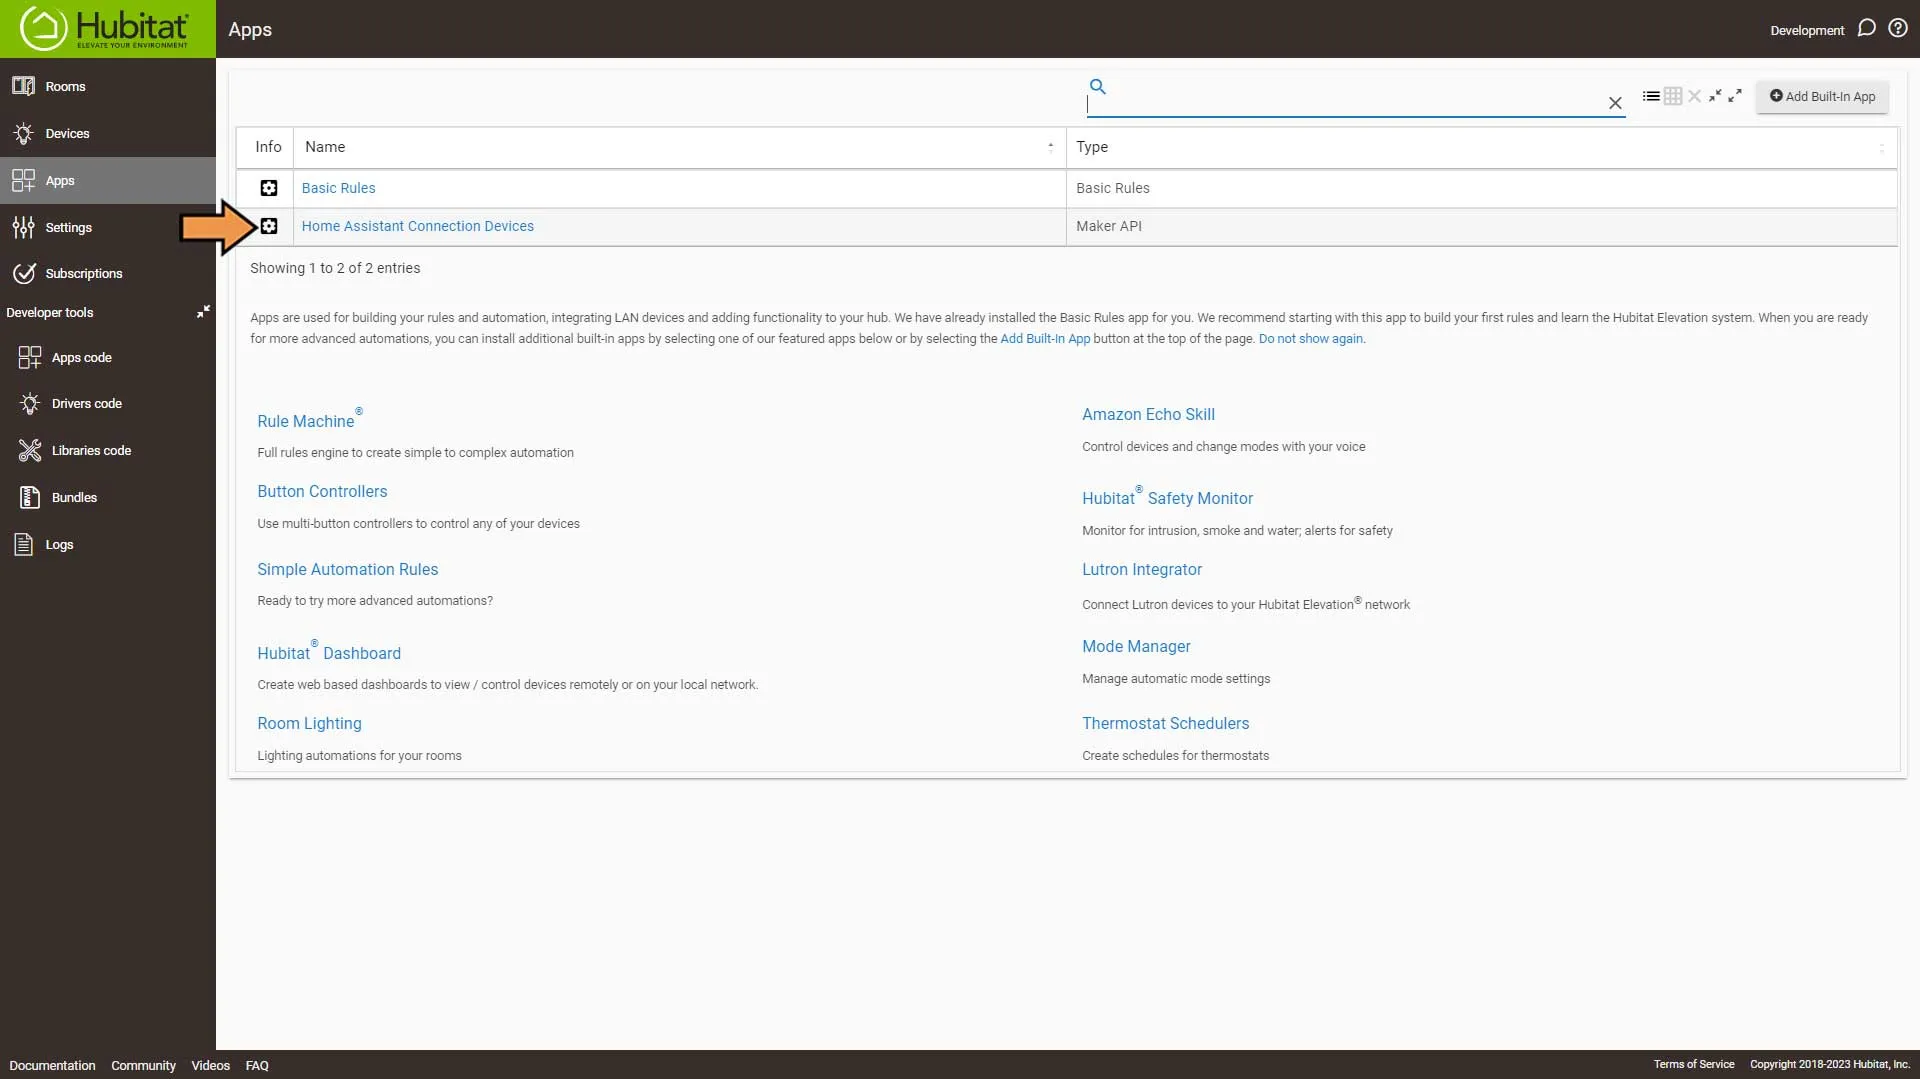
Back in the Hubitat Apps screen, click the gear icon next to the Maker API app we created earlier.
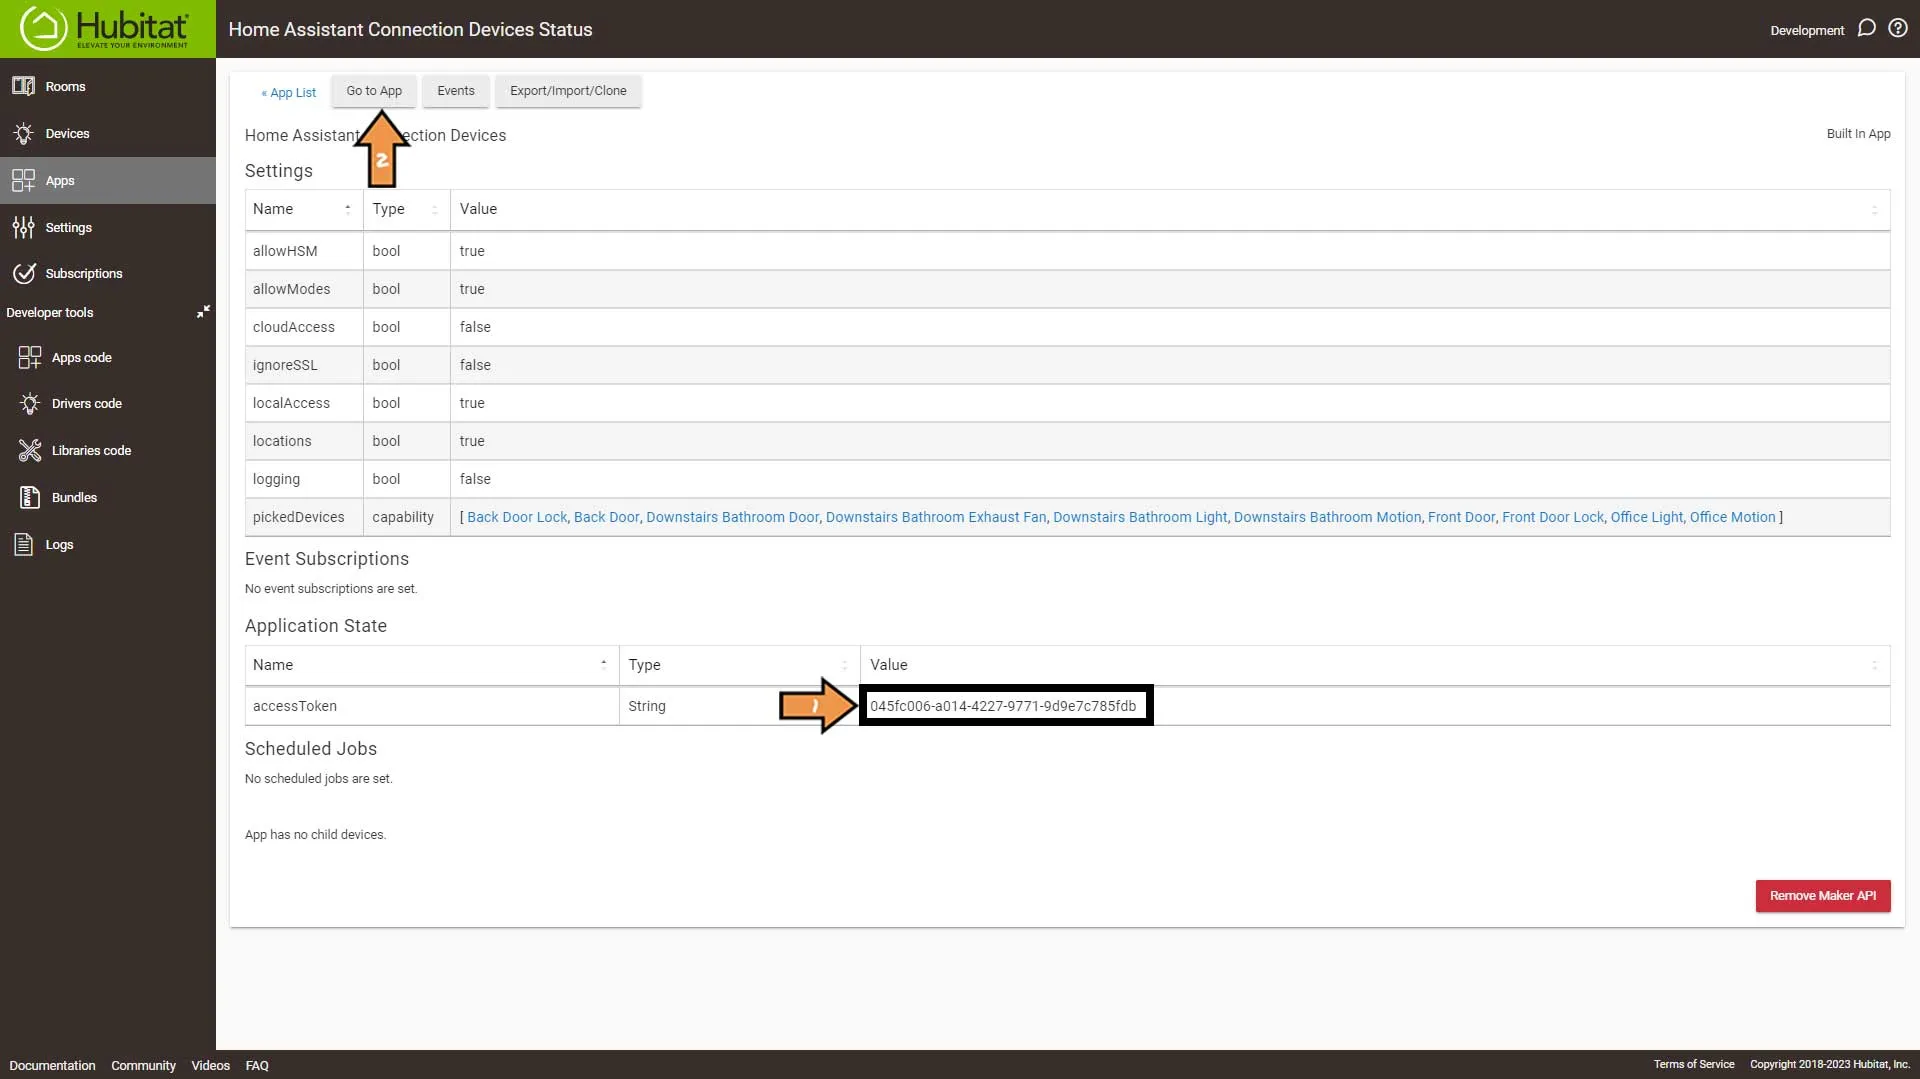
Copy the Access Token code on the App Settings page and click the Go to App button.
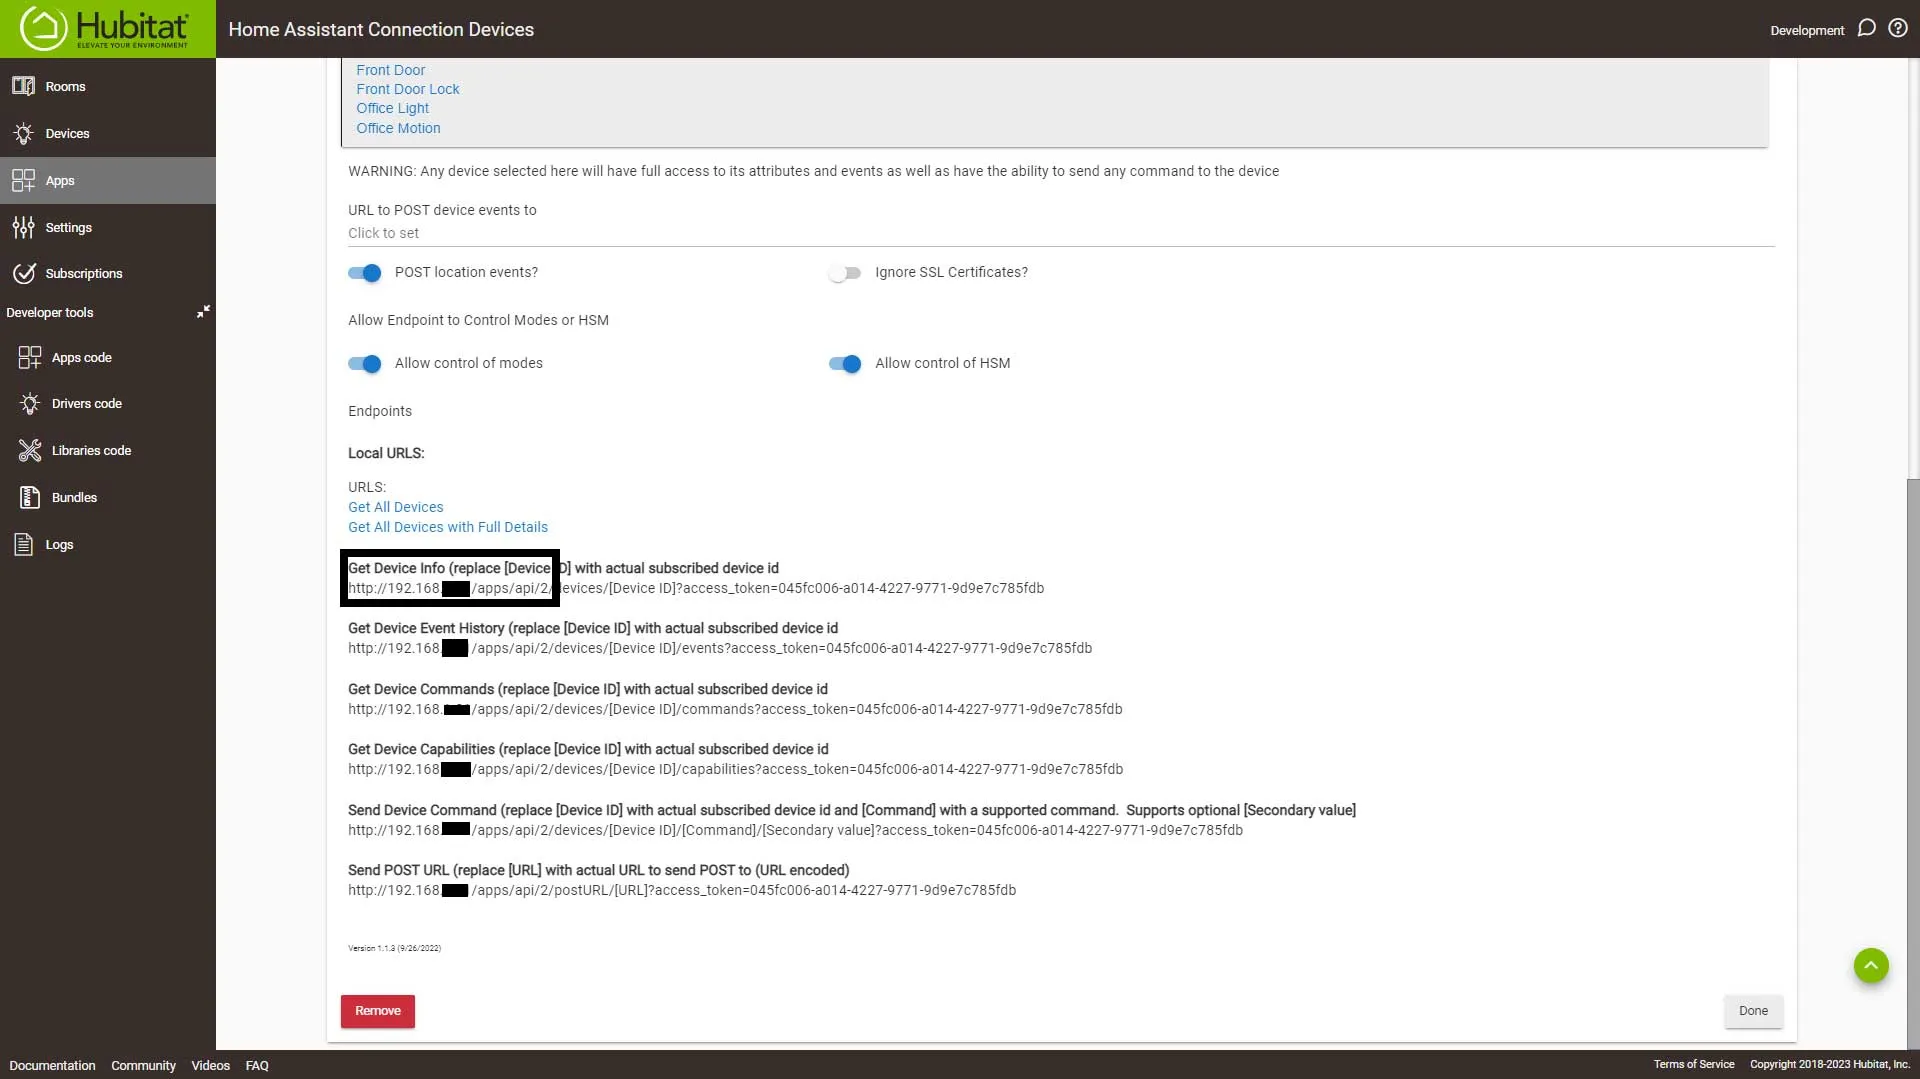
Take note of the IP address and the /apps/api/number. We’ll need these for the next step.
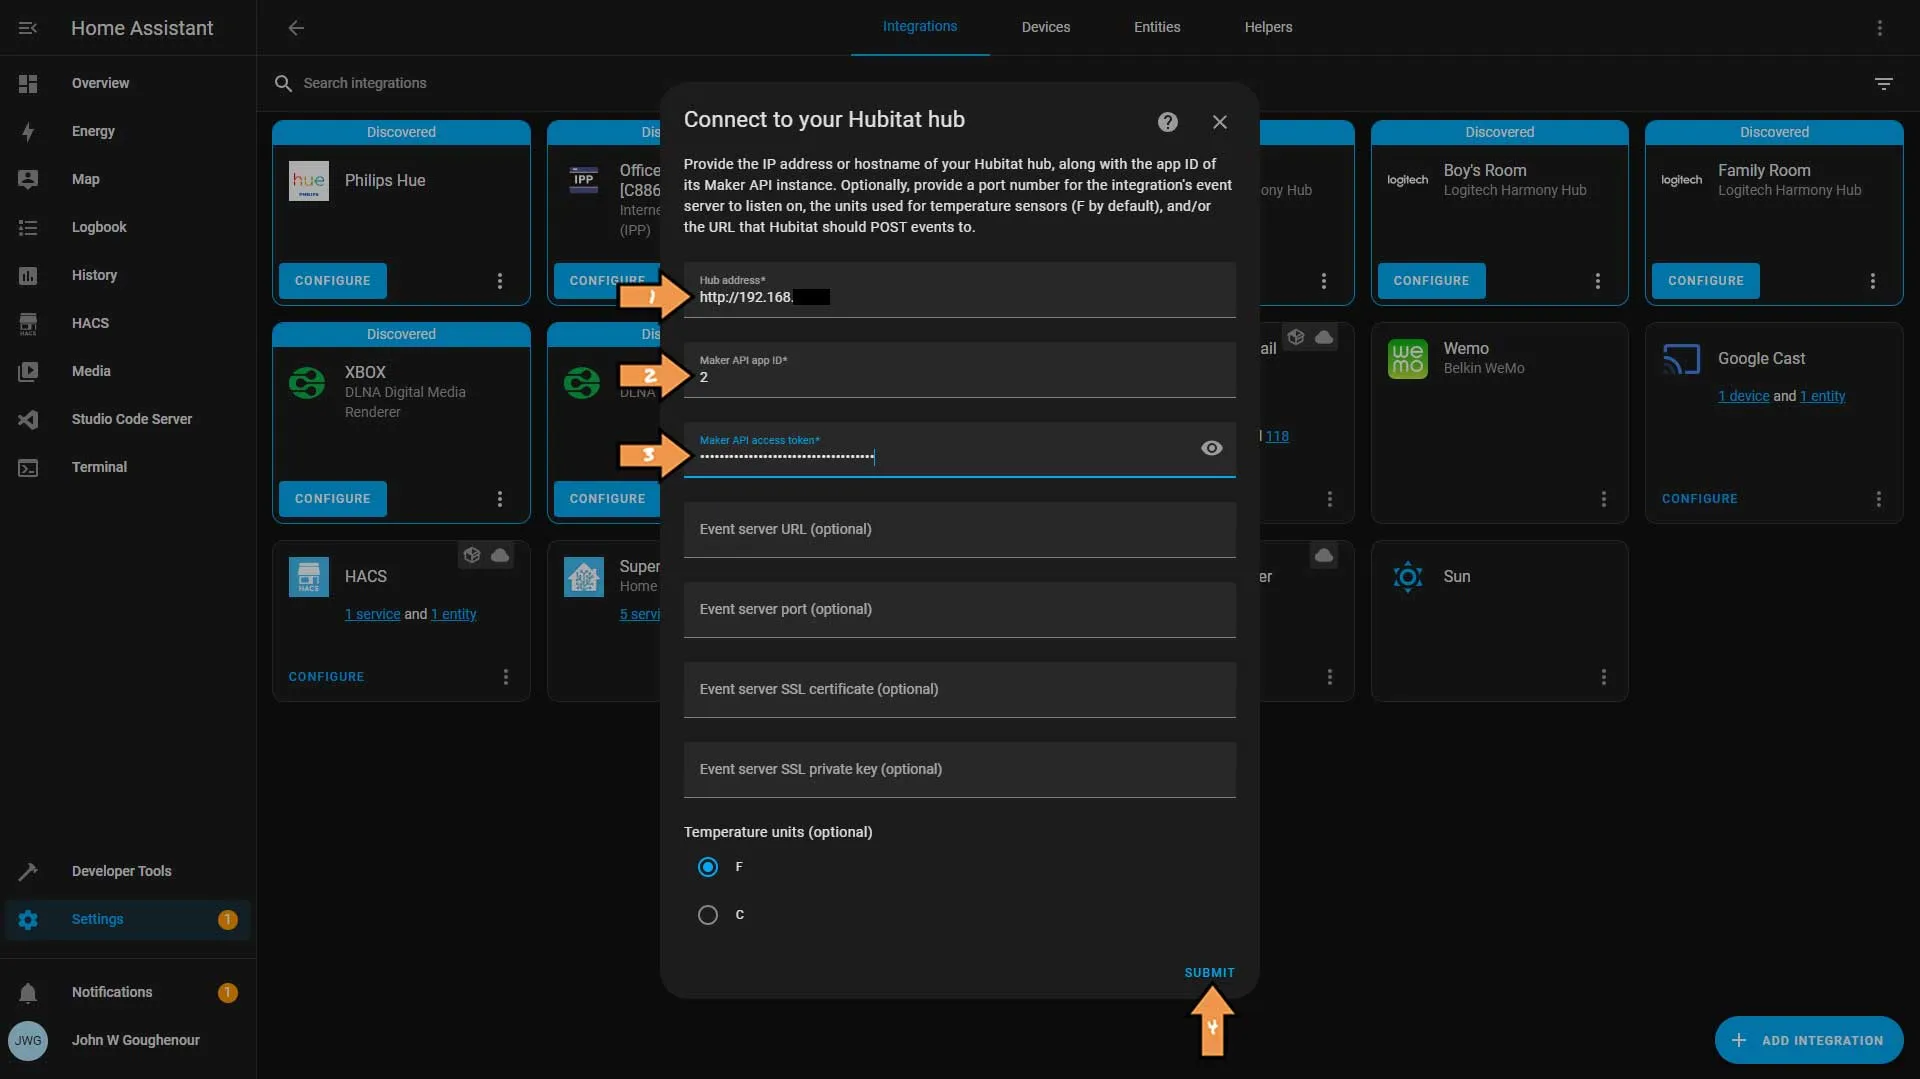
Back in Home Assistant on the Connect to your Hubitat Hub pop-up window,
- Enter the IP address of your Hubitat Hub.
- Enter the App ID number from the previous step.
- Paste the Maker API Access Token we copied earlier.
- Finally, click Submit.
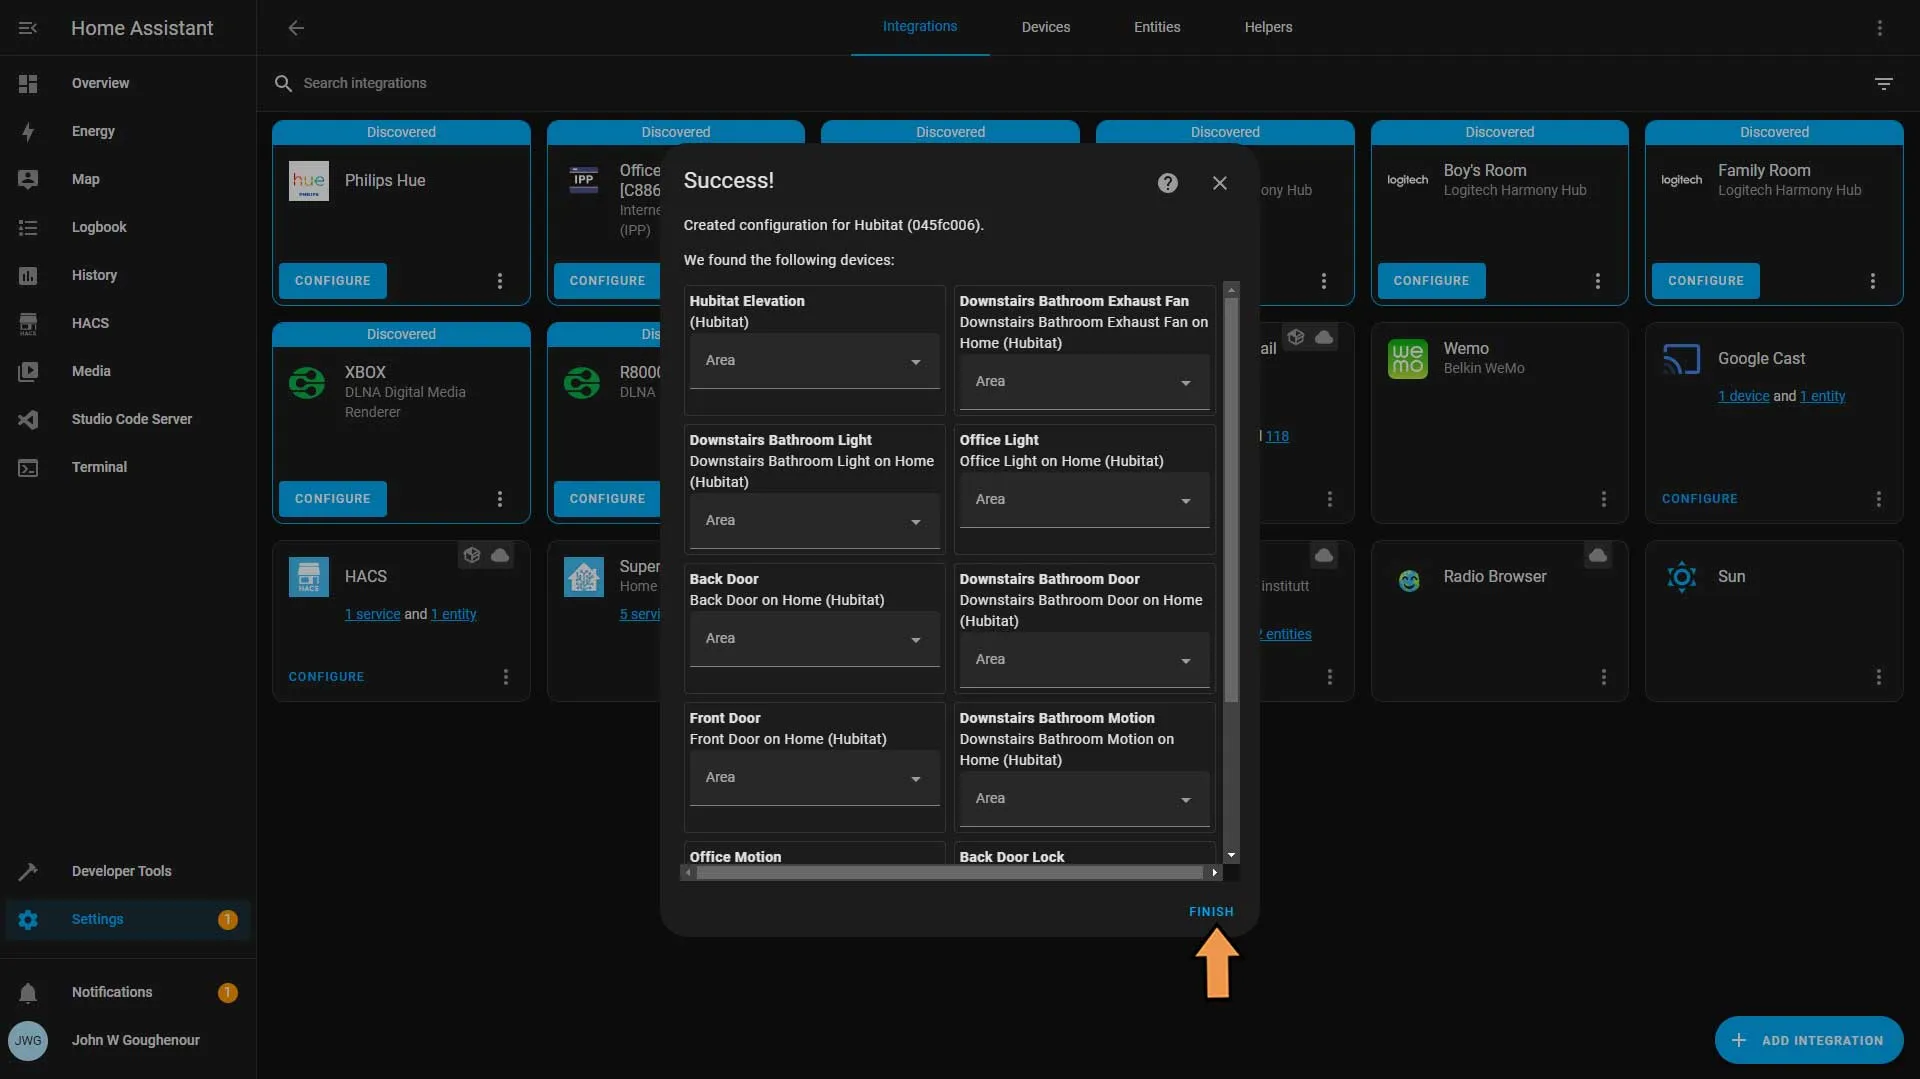
Success: You should get a Success message with all your Hubitat devices. You can add your devices to areas, then click the Finished button.
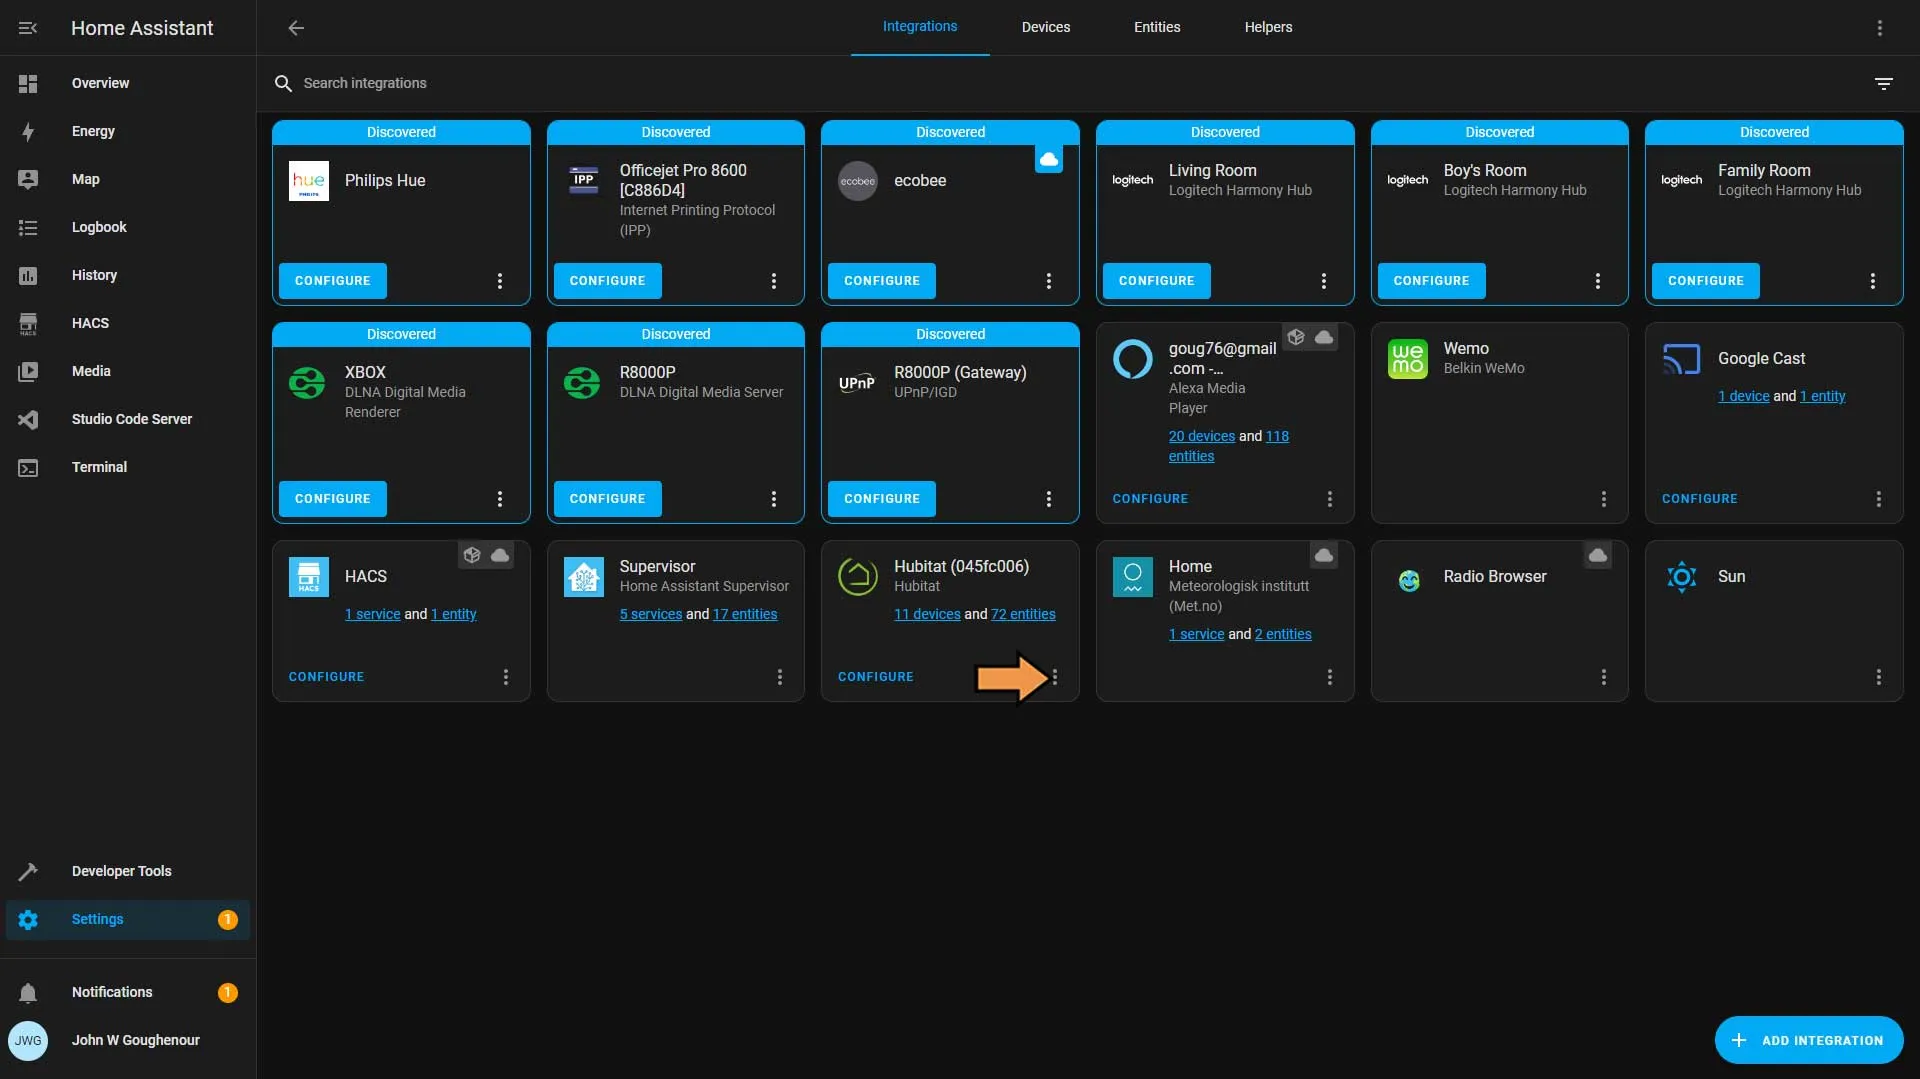
Click the vertical ellipse on the Hubitat integration.
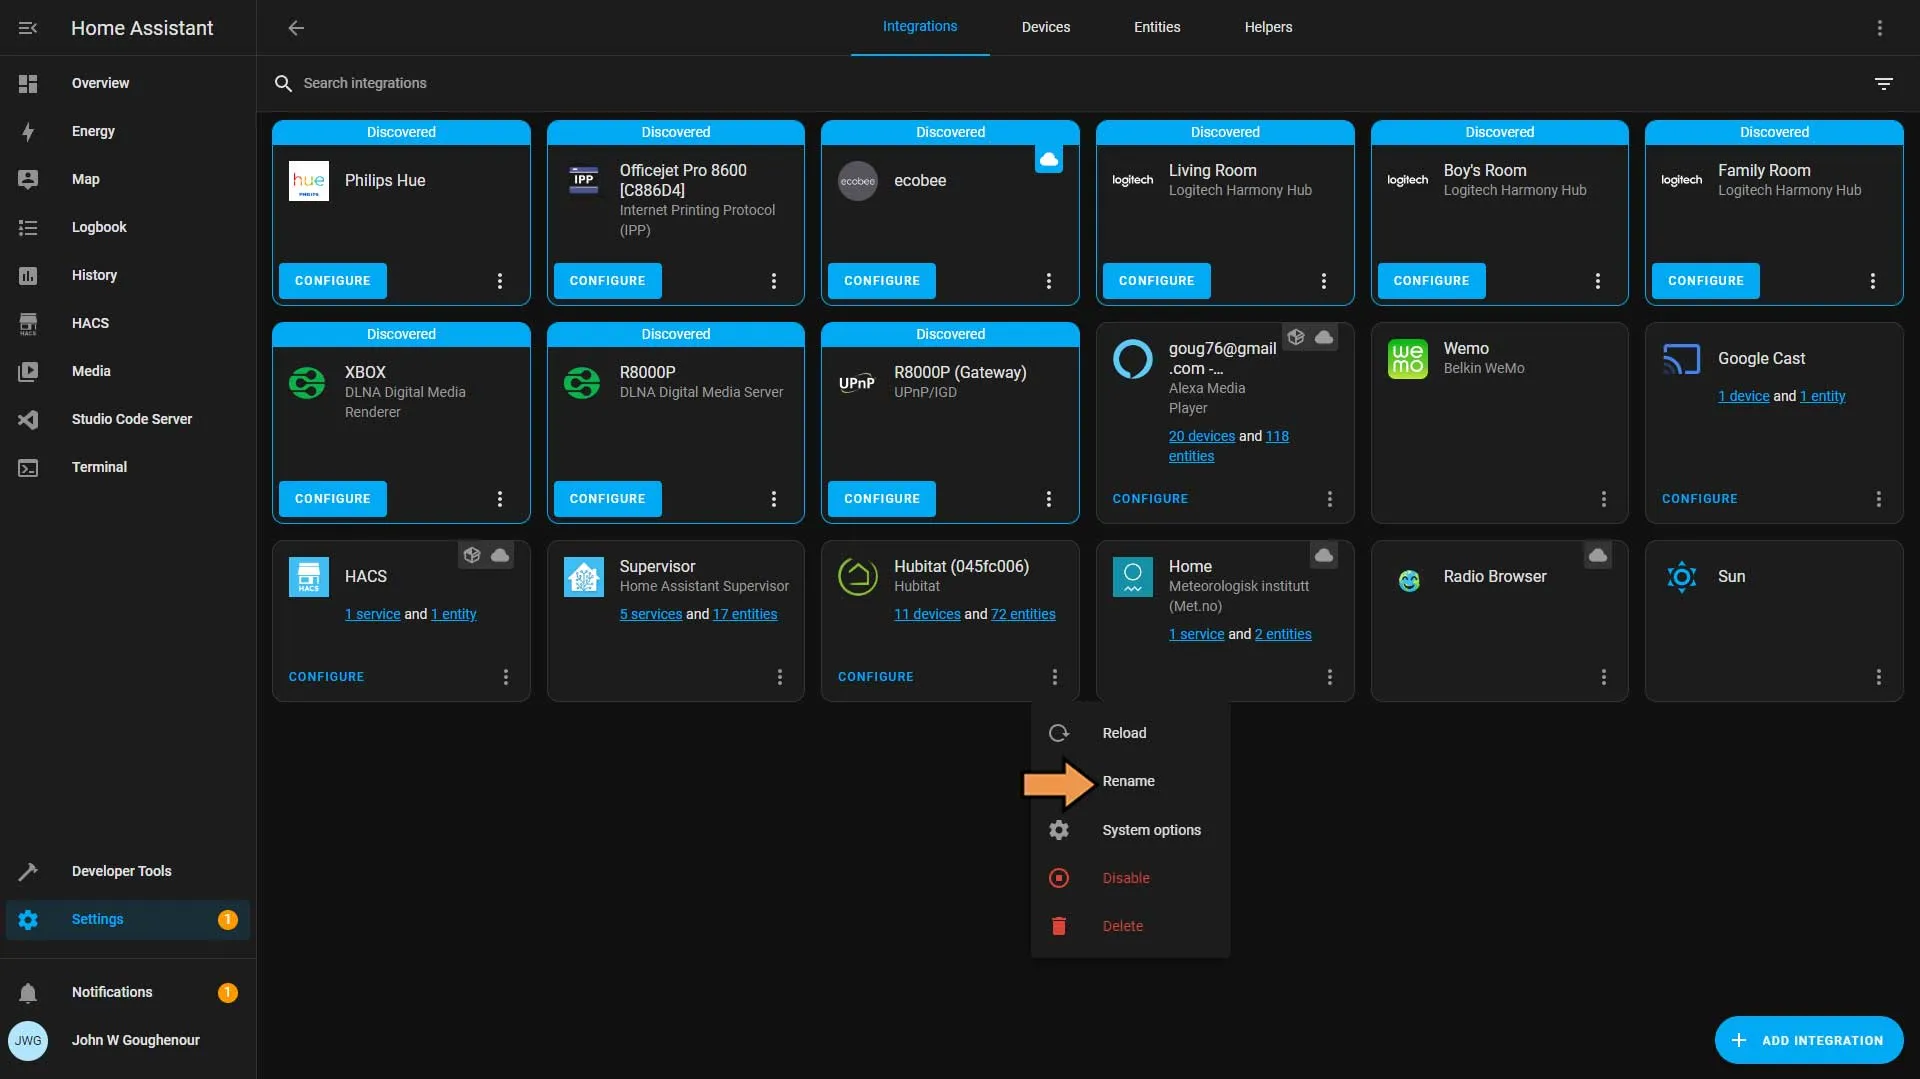
Select Rename.
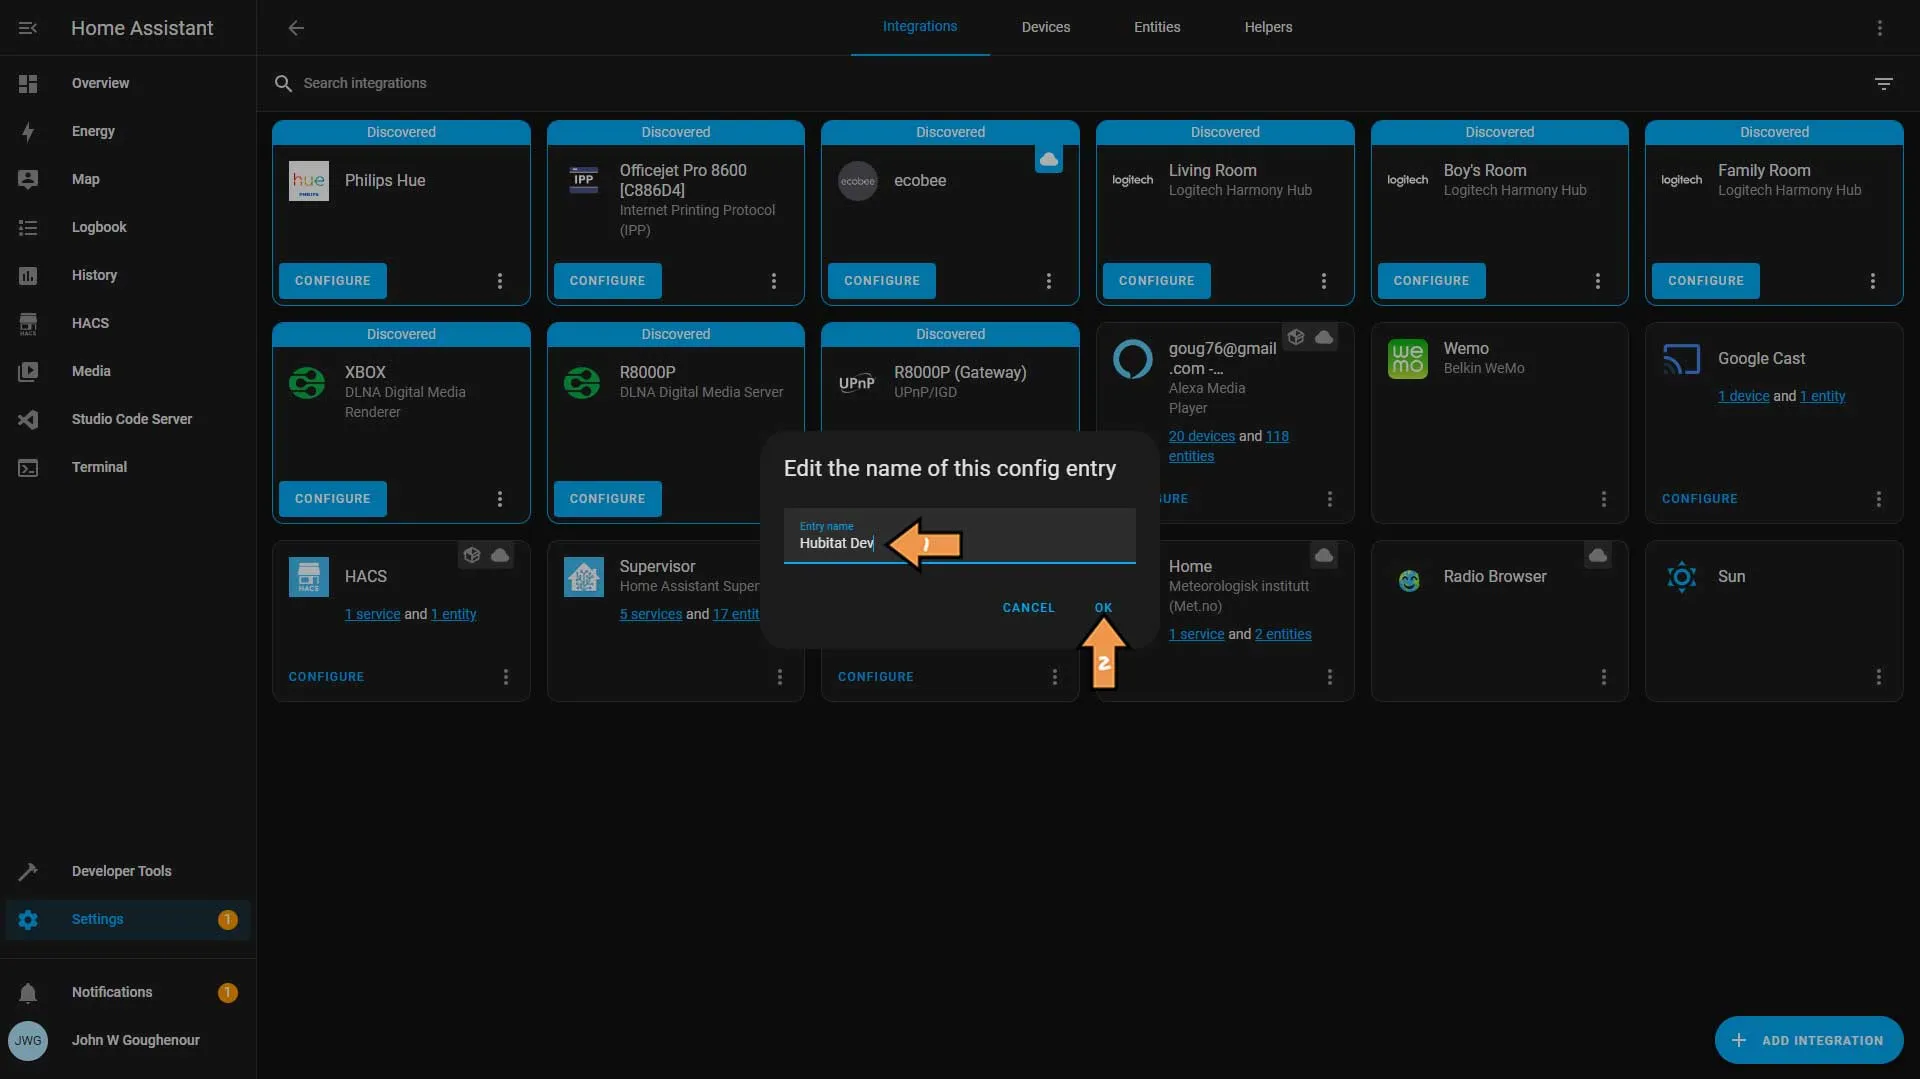
Rename the instance to something more meaningful and click OK.
If you have multiple Hubitat Hubs, repeat all these steps for each hub you want to share from.
PRO TIP: You don’t want to share a Linked device. You should ALWAYS share from the Host Hub.
Amazon Alexa
Amazon Echo Skill
The Official Documentation for Amazon Echo Skill
Setting Up the Automation
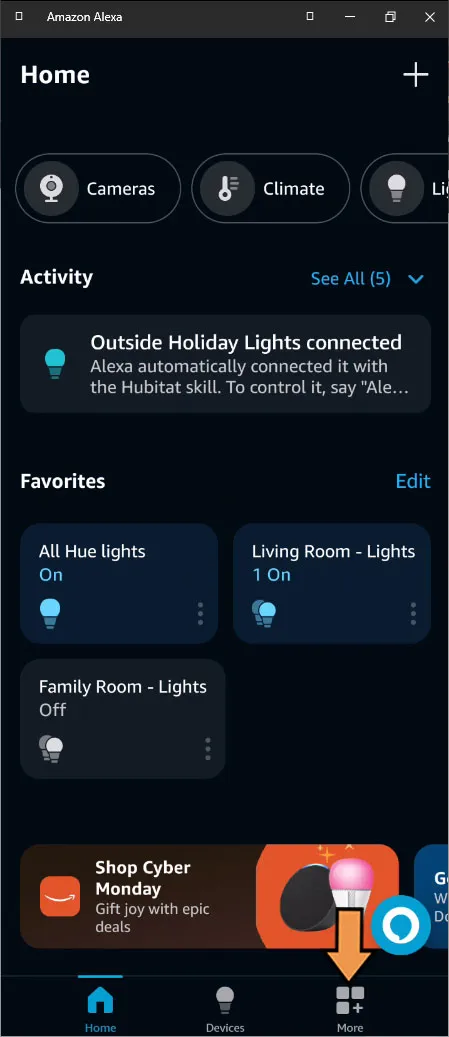
First, Click the More button at the bottom right of the screen.
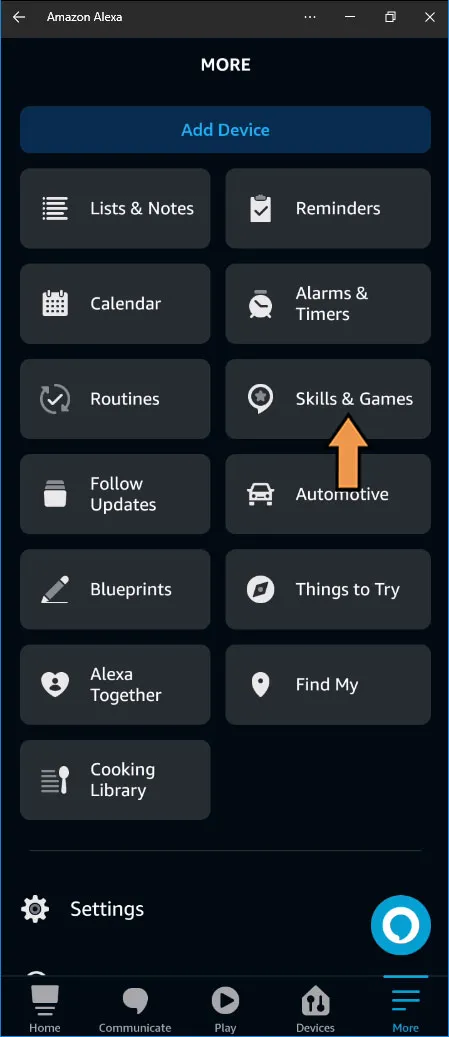
From the More screen, select Skills & Games.
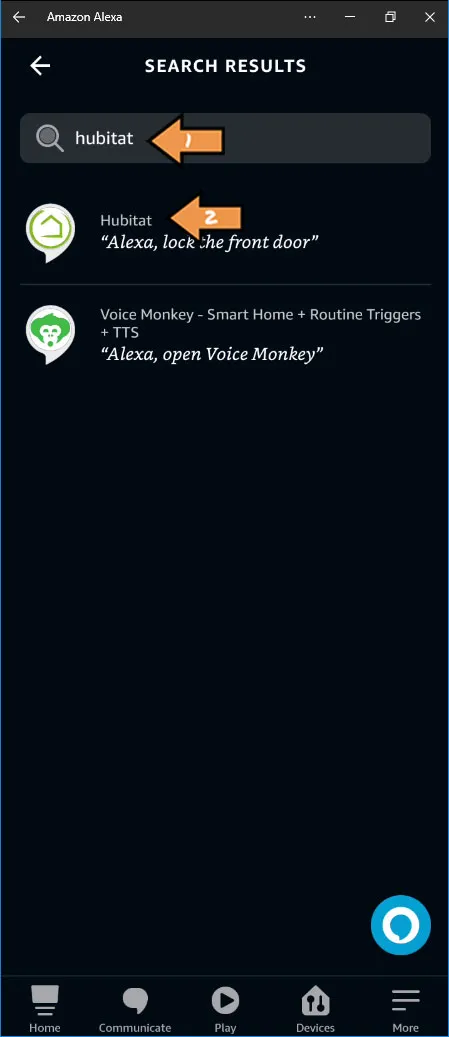
Search for Hubitat and select it when found.
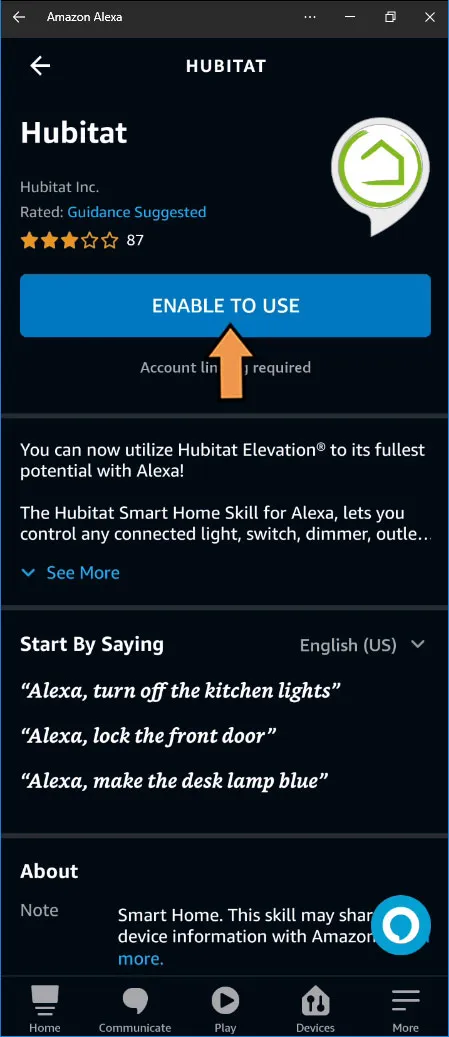
Click the Enable to use button.
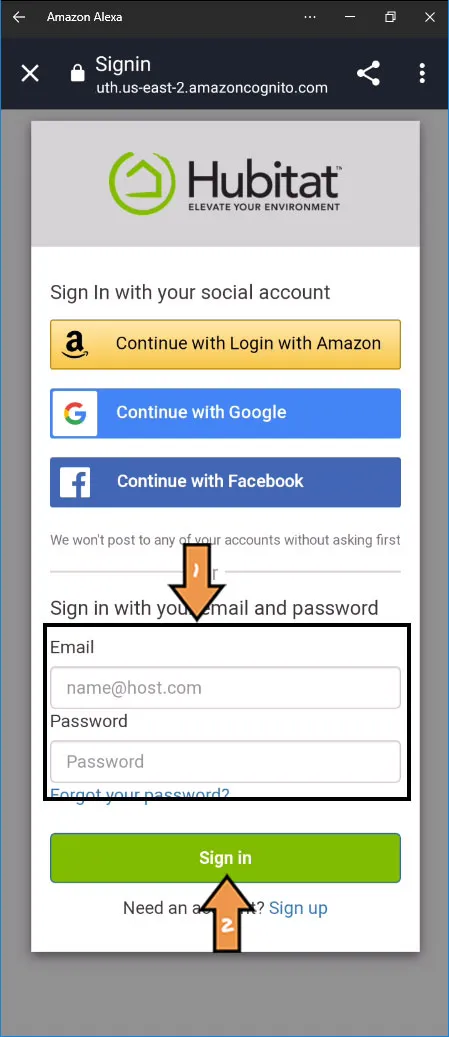
Enter your credentials for your Hubitat cloud account.
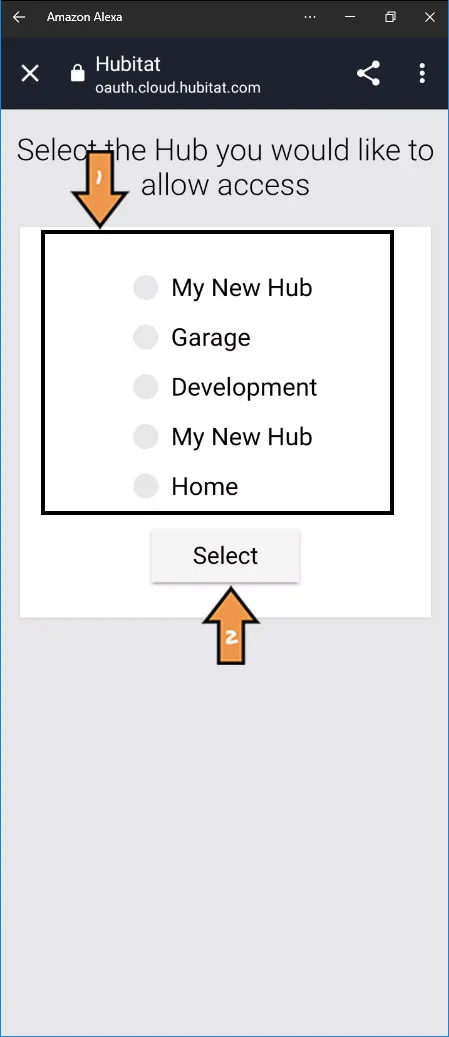
Choose your hub, then click the Select button.
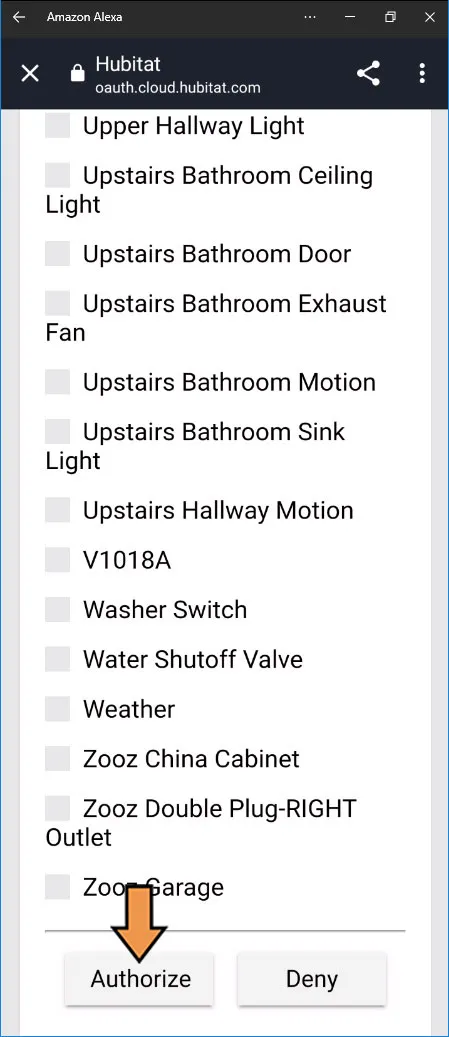
Select the devices you want, then scroll to the bottom and click Authorize.
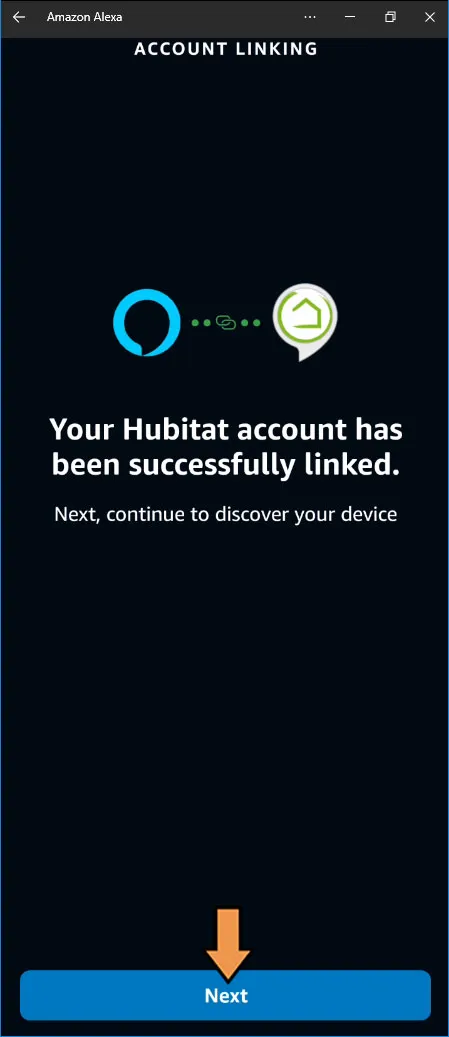
Once you get the successful linked message, click Next.
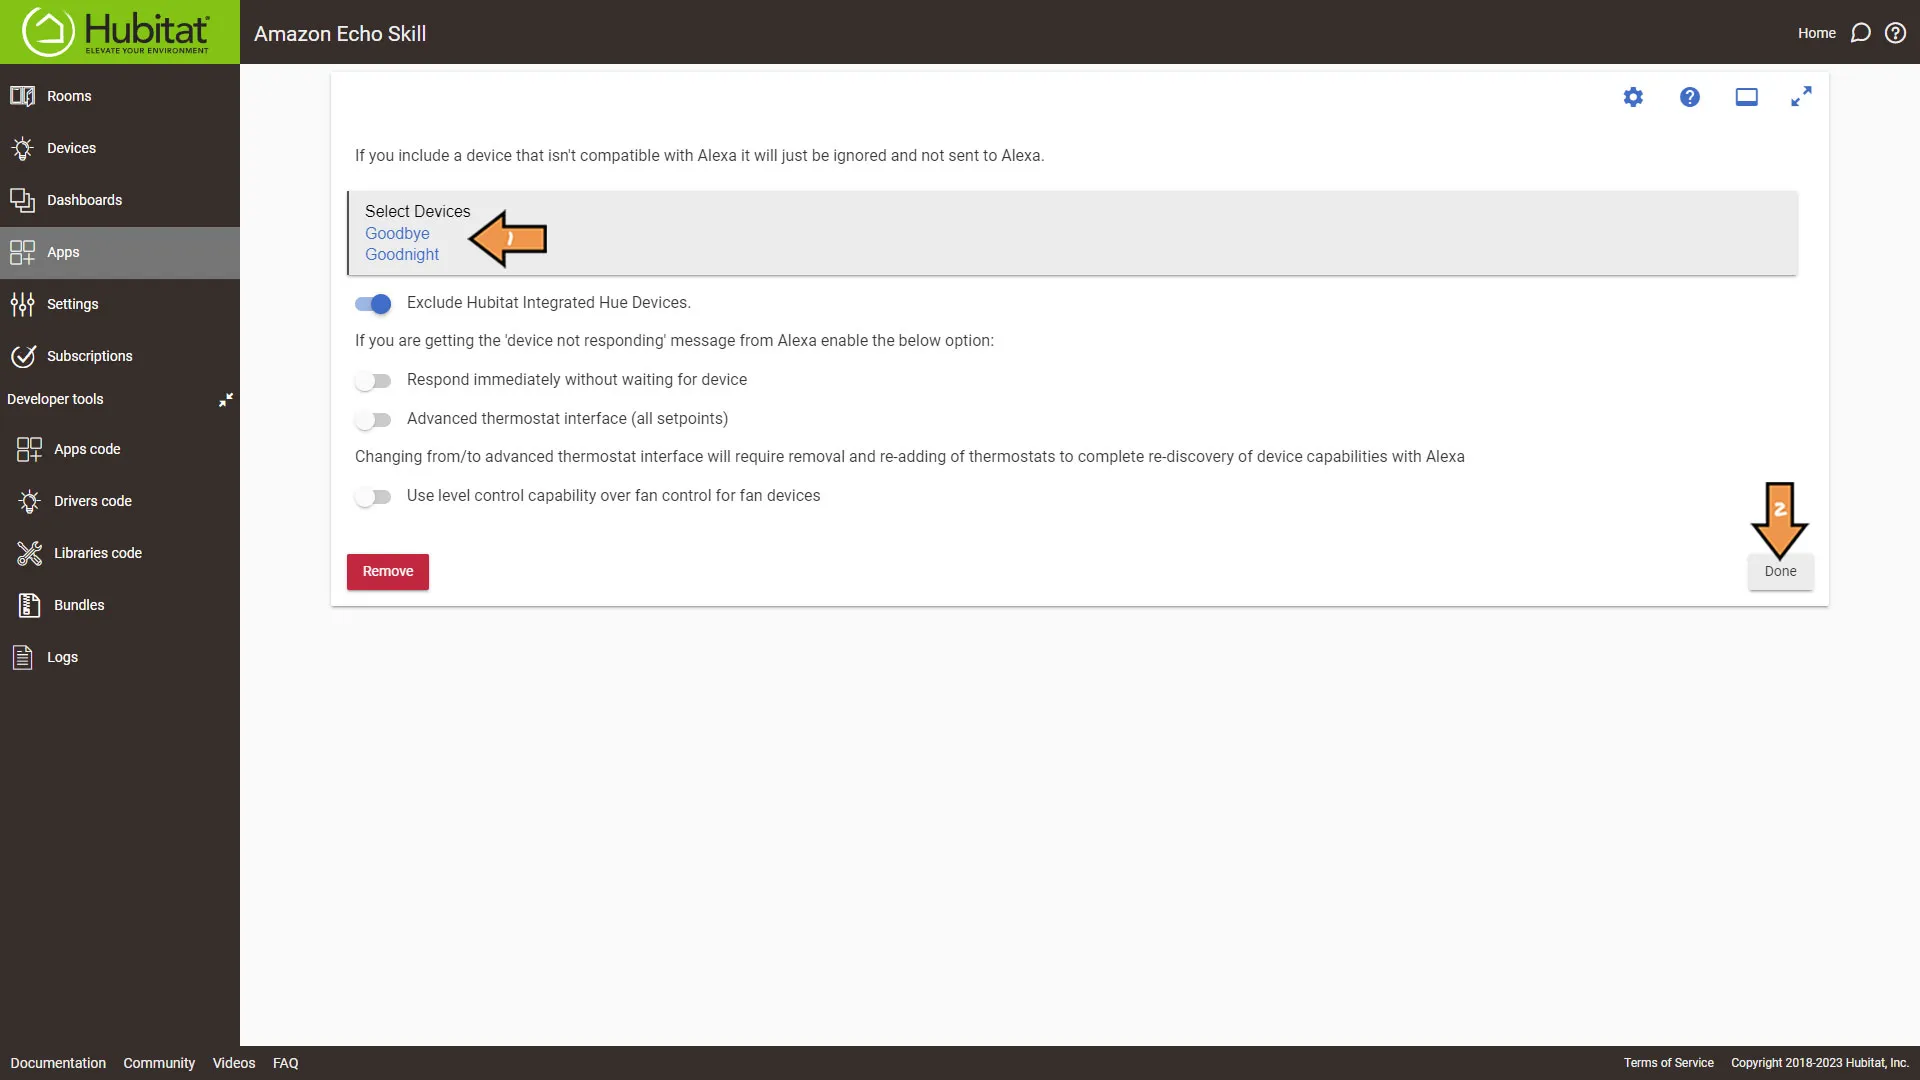
Head over to your Hubitat instance and select Apps. You should see the Amazon Echo Skill now enabled. Next, click the Amazon Echo Skill app.
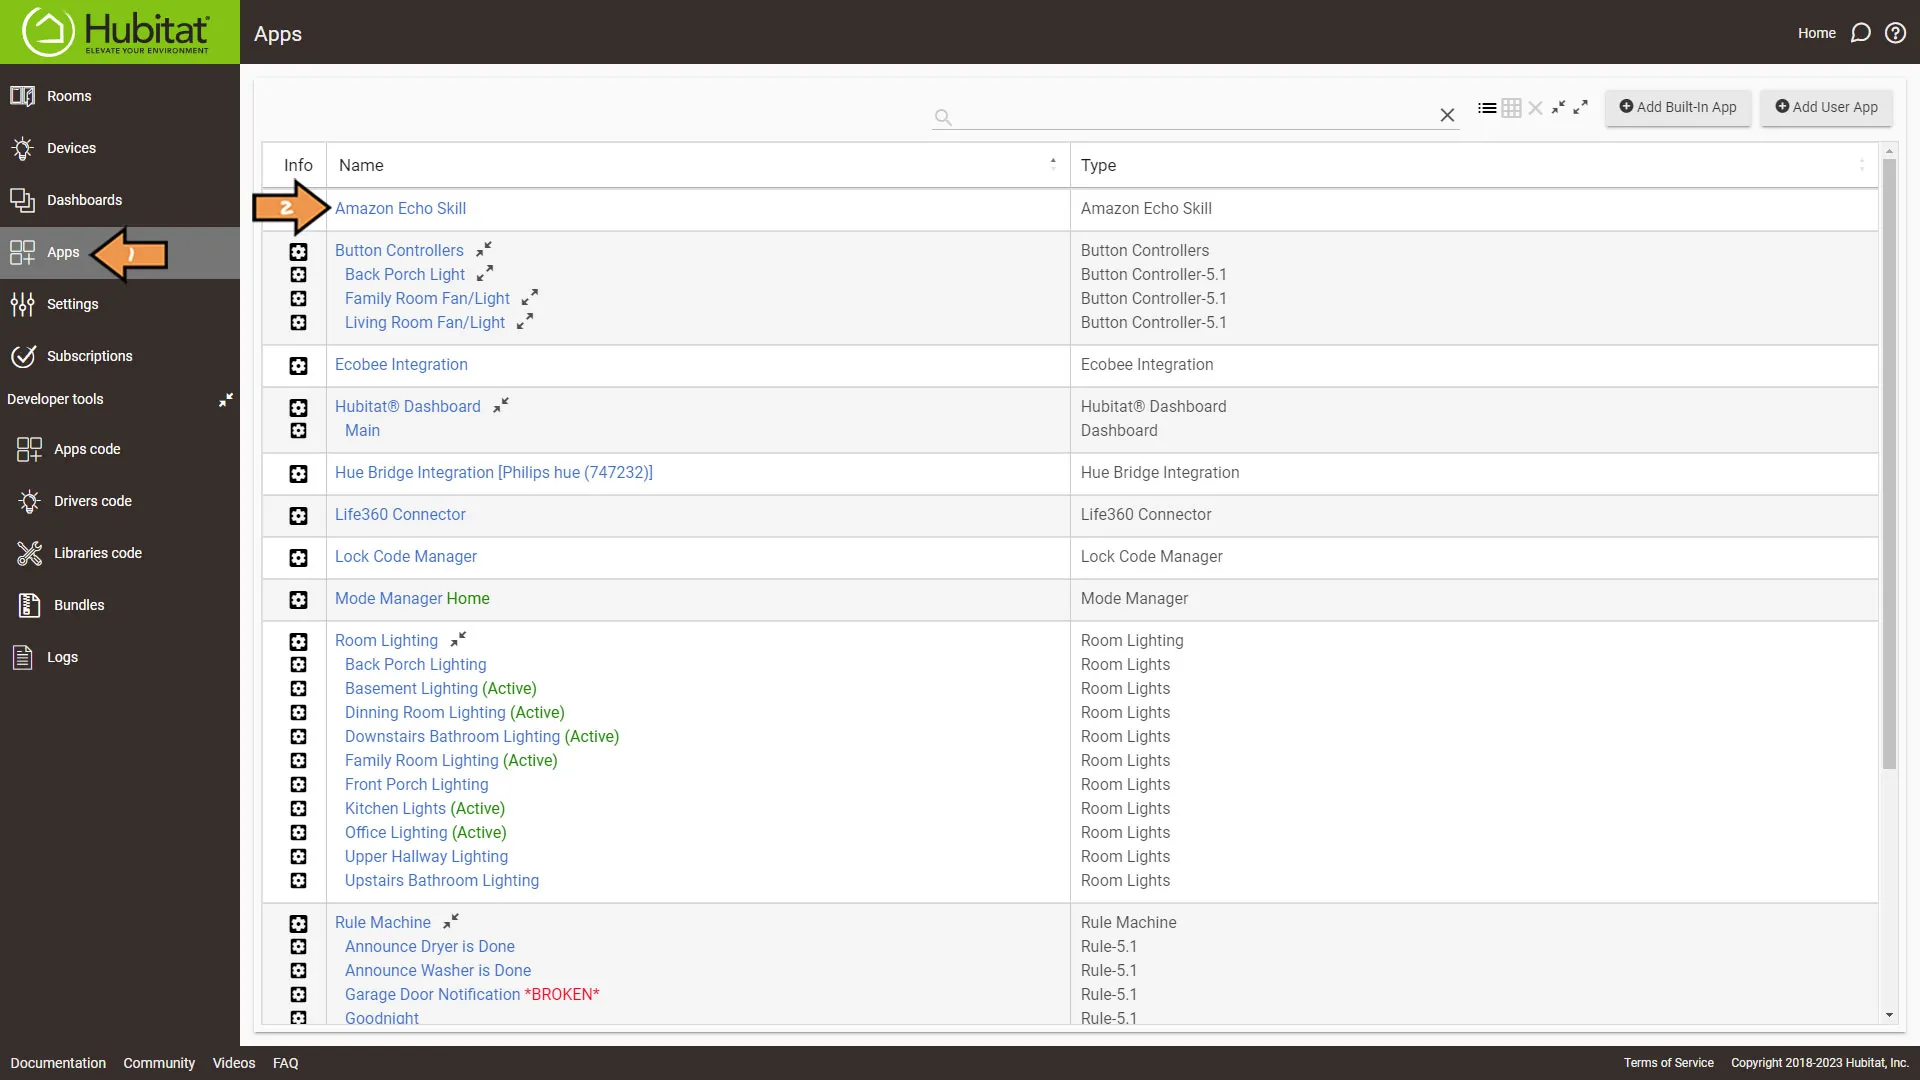
Success: That’s It! This is where you will manage what devices you share with Alexa. Once you select your devices you want to share click done.
